
I fitted a new bonnet / hood insulation this summer - the old original insulation was crumbling and dropping off bit by bit with every bonnet close.
I know loads of you have already tackled this but hopefully these few pictures might possibly help or encourage anyone to do this fairly simple/worthwhile but potentially very messy job.
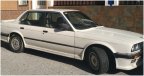
Like many of the other 30yr old E30 engine bays it looked like this before I started.
I never really considered removing the bonnet as my garage is very tight and didn't want to risk any accidental dents or paint scratches.
One of my concerns was stopping the dust and bits getting into the engine bay and creating further work.
I covered the engine bay ( wing to wing ) with cling film and then an old dust sheet on top of that. A bit of basic health and safety seemed sensible with so much dust.
Some of it came away easy but most of the remaining area needed the help of a scraper - used gently to avoid scratches to paint - no real force needed.
Once all the loose and flakey was removed I tackled a small area with a solvent to remove glue residue. After an hour of this on one small section I decided life was too short and resorted to rubbing any high spots off with a bit of sand paper.
The surface soon become smooth enough and stable enough to stick on the new replacement pieces of foam. These were self adhesive and the perfect fit. I looked at some on Ebay but decided to use Cotswold and get the genuine article.
It went on really easy but make sure you line it up carefully and start by removing backing in one corner only first ( obvious really ) because the adhesive is very strong and i don't think there is any possibility to " re position "
Worth it in the end though. After 9 months of extreme heat and cold there doesn't appear to be any difference where I stuck it onto the painted surface or onto the thin layer of old glue residue.
Makes all the difference to the appearance of the engine bay and hopefully is sorted for the next 30yrs!
Replacing Bonnet / hood insulation
Moderator: martauto
-
ocde30

- E30 Zone Newbie

- Posts: 244
- Joined: Thu Feb 07, 2019 4:54 pm
- Location: Yorkshire
You do not have the required permissions to view the files attached to this post.
-
ah

- E30 Zone Addict

- Posts: 2518
- Joined: Mon Mar 10, 2008 11:00 pm
- Location: surrey
Been there done that.
Born on the 23 April 1990 320i Alpinweiss ll kabriolett! (SOLD BUT NOT FORGOTTEN !)
-
boiliebasher

- E30 Zone Regular

- Posts: 269
- Joined: Mon Nov 17, 2014 11:00 pm
Great right up, thanks for sharing! 
-
miniblob
- E30 Zone Addict
- Posts: 3153
- Joined: Thu Jan 05, 2006 11:00 pm
- Location: Croydon/Uckfield
Nice!
I will get that done, one day, eventually!!!
I will get that done, one day, eventually!!!
327 Touring with bass!!!
>>> WWW.DNRVINYL.CO.UK >>> UK GARAGE SPECIALIST >>>
>>> WWW.DNRVINYL.COM >>> FREE MIX DOWNLOADS!!! >>>
>>> WWW.DNRVINYL.CO.UK >>> UK GARAGE SPECIALIST >>>
>>> WWW.DNRVINYL.COM >>> FREE MIX DOWNLOADS!!! >>>
-
martauto

- E30 Zone Team Member

- Posts: 6207
- Joined: Wed Aug 31, 2005 11:00 pm
- Location: leeds
As above mate
Mart.
Only the E46 cab left now.
Just got too old.
Just got too old.
-
Foe

- E30 Zone Regular
- Posts: 615
- Joined: Fri Sep 25, 2009 11:00 pm
- Location: South Wales
Another thing on my list of to dos'
Nice work
Nice work
-
Moz
- E30 Zone Regular
- Posts: 494
- Joined: Sun Jun 10, 2007 11:00 pm
- Location: Hemel Hempstead, Hertfordshire
A small job but makes a massive difference!
Great write up!
Great write up!
Everytime you idiot proof something, the world will just give you a bigger idiot.
-
JGG1
- Back in an E30 !
- Posts: 952
- Joined: Mon Dec 31, 2007 11:00 pm
- Location: Brixham
Great write up, convinced me to do mine. How much are the pads?

-
ocde30
- E30 Zone Newbie
- Posts: 244
- Joined: Thu Feb 07, 2019 4:54 pm
- Location: Yorkshire
Hi, I think mine was about £47 from Cotswold.
-
minesapint
- E30 Zone Regular
- Posts: 510
- Joined: Sat Sep 08, 2012 11:00 pm
- Location: Lancashire/Yorkshire border.
A job I need to tackle soon, but don’t fancy the sanding technique.
I’m sure I read quite some time ago, a guy on here found a solvent which brought the old adhesive off easily, it was something like Toyota brake cleaning fluid. Can anyone confirm this?
Cheers
I’m sure I read quite some time ago, a guy on here found a solvent which brought the old adhesive off easily, it was something like Toyota brake cleaning fluid. Can anyone confirm this?
Cheers
-
coopman
- E30 Zone Regular
- Posts: 267
- Joined: Tue Feb 25, 2020 10:19 am
- Location: Sydney
It's a job I'm planning too, so I've read a few recommendations. I've heard about brake cleaning fluid (not specifically Toyota), also lots of people suggest petrol. Surely white spirit would do the job?minesapint wrote: ↑Thu May 14, 2020 12:53 amA job I need to tackle soon, but don’t fancy the sanding technique.
I’m sure I read quite some time ago, a guy on here found a solvent which brought the old adhesive off easily, it was something like Toyota brake cleaning fluid. Can anyone confirm this?
Cheers
-
Moz
- E30 Zone Regular
- Posts: 494
- Joined: Sun Jun 10, 2007 11:00 pm
- Location: Hemel Hempstead, Hertfordshire
I used this:
https://www.ebay.co.uk/itm/311623978389
Spray on and then scrape off with a plastic scraper. It is still a pain to remove it all though so I've always removed the bulk then cleaned with IPA before applying the new insulation.
Thanks
https://www.ebay.co.uk/itm/311623978389
Spray on and then scrape off with a plastic scraper. It is still a pain to remove it all though so I've always removed the bulk then cleaned with IPA before applying the new insulation.
Thanks
Everytime you idiot proof something, the world will just give you a bigger idiot.
-
Ukhozi
- E30 Zone Newbie
- Posts: 135
- Joined: Thu May 02, 2019 9:13 pm
I am in the middle of doing one as I replaced the bonnet following the 'bit of a praang' I used the big workshop vacuum cleaner and sucked the crap off, removed any loose glue but as OP I just made sure the remaining stuff was solid, so now ready to fit new stuff once the underside is white.
Everyone has the right to reach the level of their own incompetence.
-
BenHar
- E30 Zone Addict
- Posts: 3081
- Joined: Sun Jul 11, 2010 11:00 pm
- Location: Reigate, Surrey
Barry said Toyota brake cleaner does the job well.
Ben
Ben
-
JungleGus
- Old Skooler

- Posts: 985
- Joined: Thu Mar 17, 2005 11:00 pm
- Location: London
I have found that a bit of spray adhesive may be needed as the stickiness of the new foam isn't 100%. May be less of an issue if you go to bare metal though.
Makes a big difference and nice to not have bits of 30 year old foam falling on you when working in the engine bay...
Makes a big difference and nice to not have bits of 30 year old foam falling on you when working in the engine bay...

-
brutus
- E30 Zone Squatter

- Posts: 1620
- Joined: Thu Mar 26, 2015 11:00 pm
- Location: east london
yep done it !
and all will say it makes a massive difference !
ive a spare if any wanting ?
and all will say it makes a massive difference !
ive a spare if any wanting ?
MANY e30 PARTS FOR SALE.
( all models available )
& parts /glass for e21, e28, e34, e36,e39,e46
318i baur 1986 auto.
( all models available )
& parts /glass for e21, e28, e34, e36,e39,e46
318i baur 1986 auto.
-
Ukhozi
- E30 Zone Newbie
- Posts: 135
- Joined: Thu May 02, 2019 9:13 pm
I tried some 15mm foam that 'looked' the same from a friend who builds custom van interiors but it shrunk, went soft and fell off, so now I have an OEM set to fit after painting. Always use OEM.
Everyone has the right to reach the level of their own incompetence.
-
kdevitt
- E30 Zone Regular
- Posts: 581
- Joined: Sun Feb 05, 2006 11:00 pm
- Location: Dublin
I used the partworks one recently. To be honest I found it superior to the OEM one I previously used - doesn't have the square cutout, and stuck perfectly first time. The OEM one just never wanted to stay in place until I ended up using some stronger glue on it.
-
Moz
- E30 Zone Regular
- Posts: 494
- Joined: Sun Jun 10, 2007 11:00 pm
- Location: Hemel Hempstead, Hertfordshire
I've never used the parts work one but have had no issues with the OEM one. Maybe just a bad batch?
Thanks
Thanks
Everytime you idiot proof something, the world will just give you a bigger idiot.
-
tha881
- E30 Zone Regular
- Posts: 780
- Joined: Thu Apr 15, 2010 11:00 pm
- Location: Kent
I used Oem foam, if you cant get the bonnet back to bare paint then it wont stick, especially the middle section. I used a bit of spray adhesive from screwfix and it done the trick

-
Cloggy Saint
- Old Skooler
- Posts: 8027
- Joined: Sun Jan 09, 2005 11:00 pm
- Location: zummerzet
I just removed the dry crumbling foam and couldn't be arsed to scrape all the old adhesive off. Ten years later it's still firmly attached.

E30 zone - promoting adult illiteracy since 2004
-
kdevitt
- E30 Zone Regular
- Posts: 581
- Joined: Sun Feb 05, 2006 11:00 pm
- Location: Dublin
Not sure - recently bought the Evo bonnet seals, and from reading online everyone said the adhesive was ultra strong. Same issue - barely stuck at all. Maybe they've switched to a weaker adhesive or something, back to metal and degreased both times.
-
Cloggy Saint
- Old Skooler
- Posts: 8027
- Joined: Sun Jan 09, 2005 11:00 pm
- Location: zummerzet
I had the same problem with my bonnet seals. I ended up using some 3M double sided tape in the end which worked ok, how did you deal with it?
E30 zone - promoting adult illiteracy since 2004
-
kdevitt
- E30 Zone Regular
- Posts: 581
- Joined: Sun Feb 05, 2006 11:00 pm
- Location: Dublin
I haven't fixed it yet - have some 3M bodytape as well which I planned on using, although I'm slightly concerned it will leave it sitting slightly off the wing.Cloggy Saint wrote: ↑Fri May 22, 2020 10:04 pmI had the same problem with my bonnet seals. I ended up using some 3M double sided tape in the end which worked ok, how did you deal with it?
-
Cloggy Saint
- Old Skooler
- Posts: 8027
- Joined: Sun Jan 09, 2005 11:00 pm
- Location: zummerzet
The stuff I used is extremely thin but strong and so far it's held, although even with bonnet catch adjustment it still pulls it away from the wing just a little bit. A good tip is don't cut the excess off at the front as the adhesive will be straining against the steep curve of the wing. Tuck it back between the grill and the wing.
E30 zone - promoting adult illiteracy since 2004