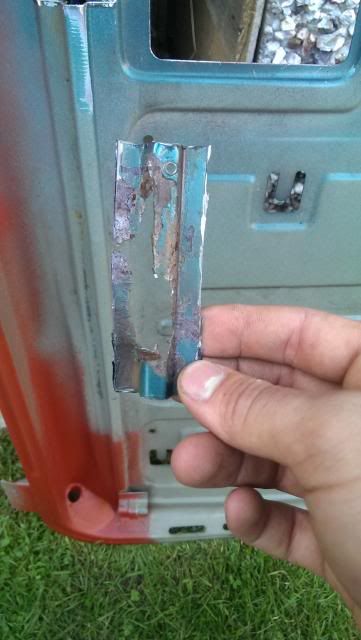
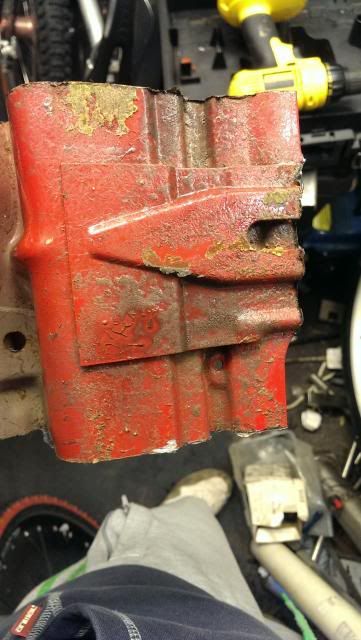
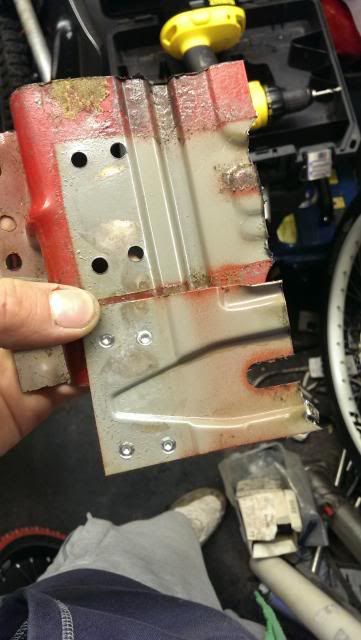
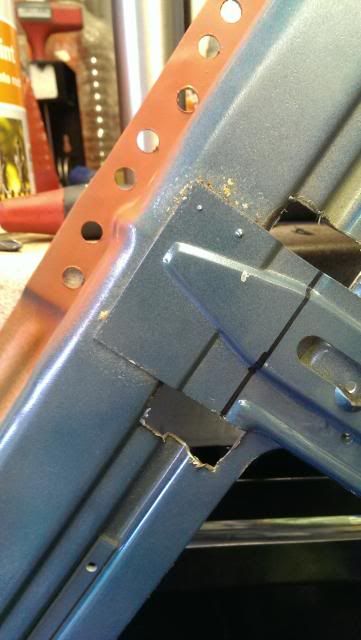
Non sunroof roof skin swap - Back on the road!

Show off your pride and joy here

Moderator: martauto

appletree
E30 Zone Addict
E30 Zone Addict
Posts: 3482
Joined: Fri Jan 20, 2006 11:00 pm
Location: Retford

Thu Oct 03, 2013 7:02 pm

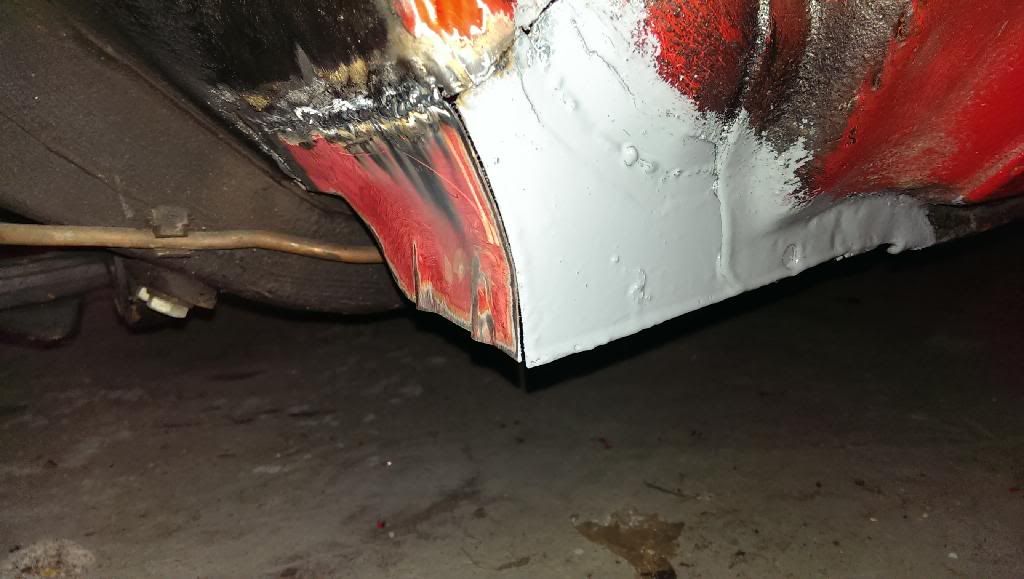
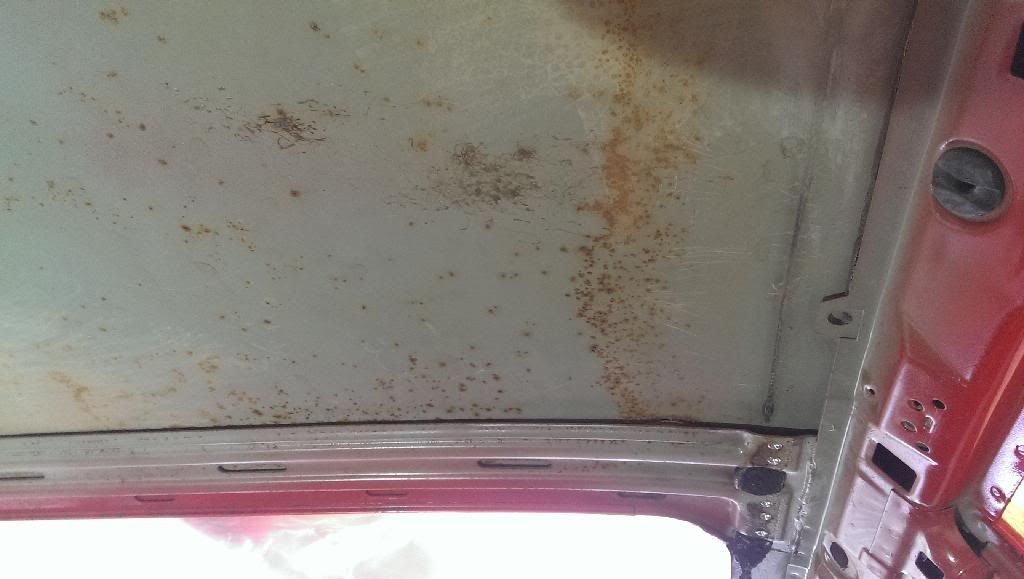
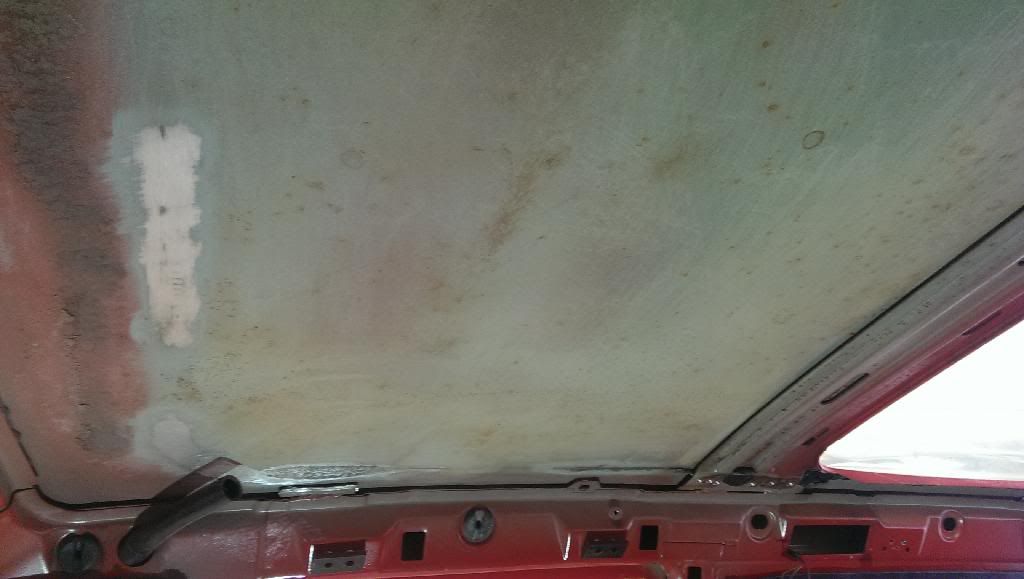
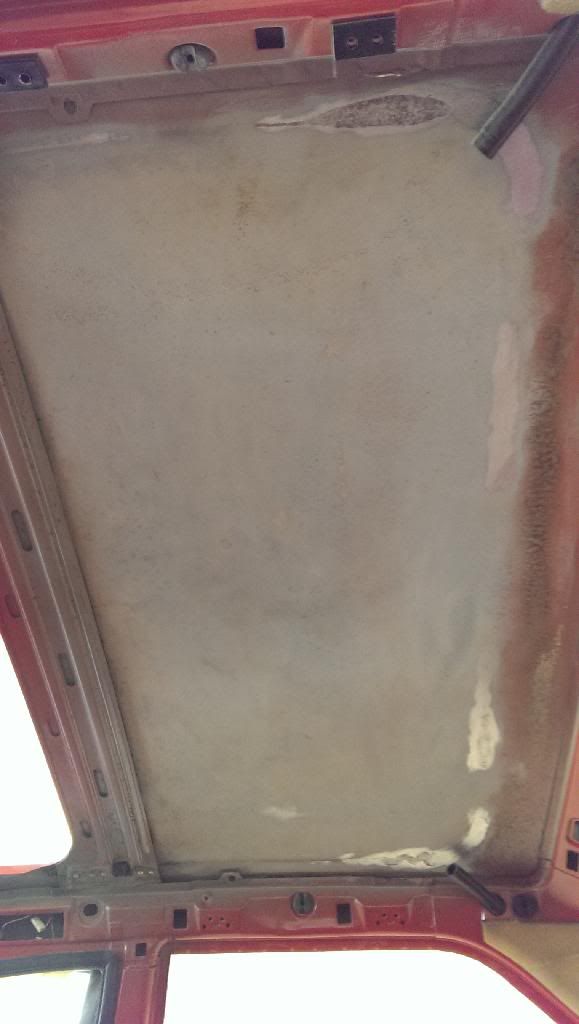
Thought I'd change the title of this thread as its no longer just about the sunroof tray and roof and has turned into more of a mini resto type thing.


Thought I would start a thread on my project to replace my sunroof tray due to a small amount of rust just above the drivers head.
The rust isn’t that bad on the tray but it is too bad to repair the tray on the car.

After a chat with the dealer it would appear that there are still two new trays available from BMW but there were two problems A. They were both in Germany B. They were £500+ +VAT
So I went on the lookout for a good sunroof tray to refurbish to fit to mine.

After a visit to Sweeps yard I ended up Stihl sawing the roof off a late touring as the trays are the same.
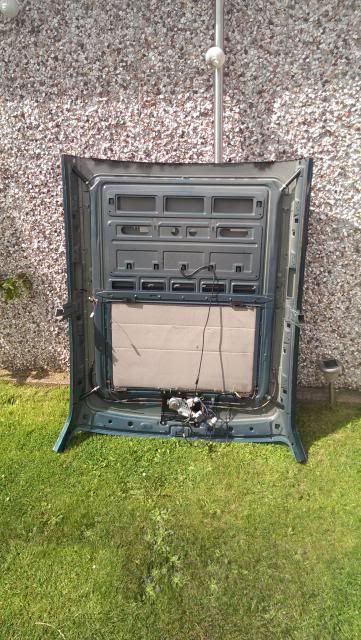
With the tray back at my house you can see the problem with the original design of the trays and the way they are mounted. Image

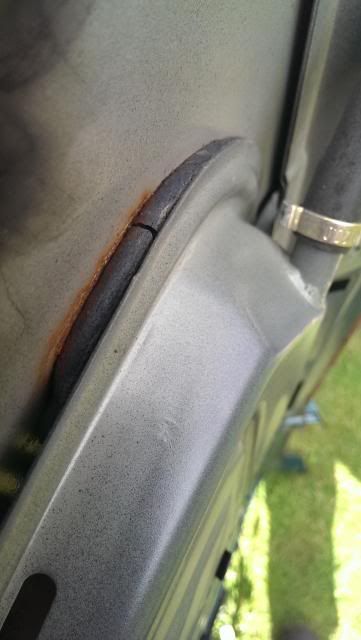
The bonding hardens and cracks and as it does it makes a nice little space for water to gather and rot your roof as can be seen below.

Image

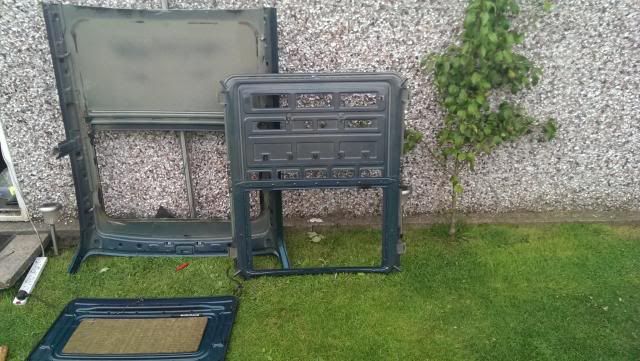
All stripped
Image
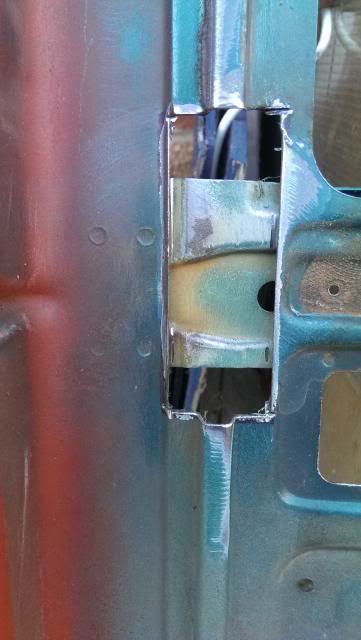
Unfortunately there was some rust hiding under one of the chrome guide strips so I had to cut it out and try and repair it, luckily I had another tray from an IS someone was breaking a while back which was rusted where it met the roof but mint in the bottom.

The rusty bit chopped out.
Image
Image

Chopped the required piece out of the other tray
Image
Image

Noticed on the good tray that there was bit of rust just sitting between the bracing in the tray which would make sense as the other rusty hole would have let water run down here.

Image

So i drilled out the spot welds and cut it off to see if there was rust between the sheets. There was.
Image

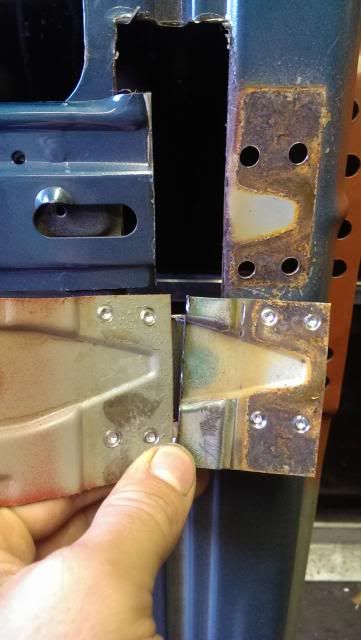
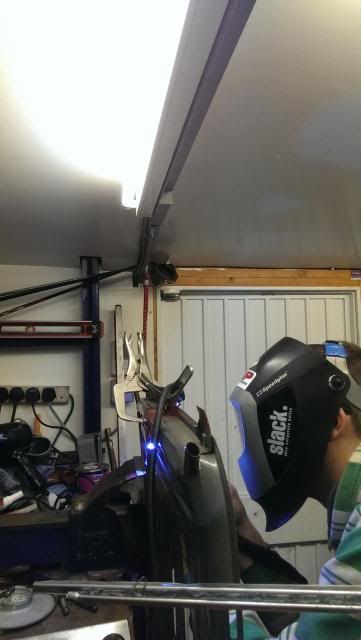
With all the bits now cut to size I started TIG welding it all up as carefully as i could and without putting too much heat in to it.
Image

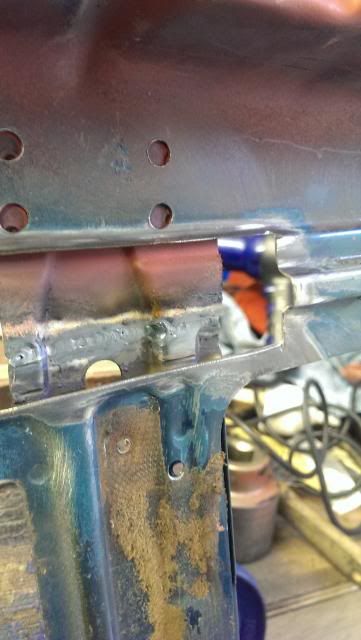
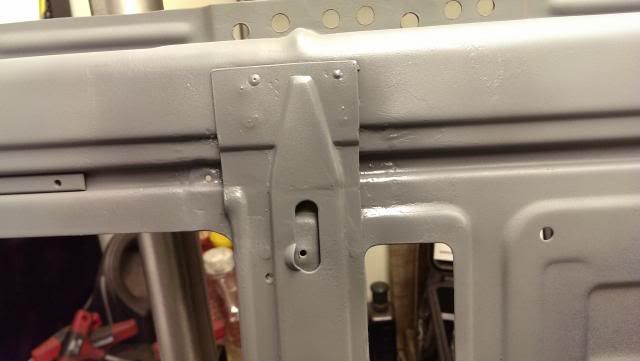
Welded and primed the brace on the back.
Image
Image

Welded in the other section.
Image
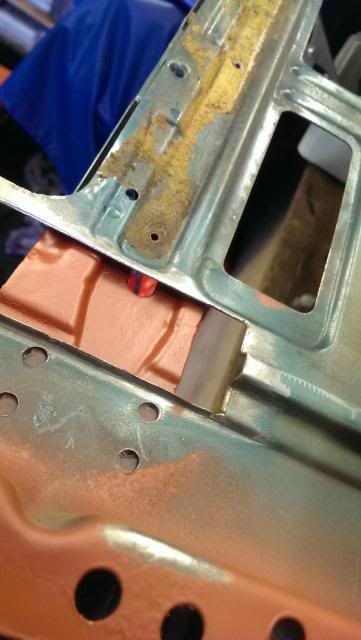
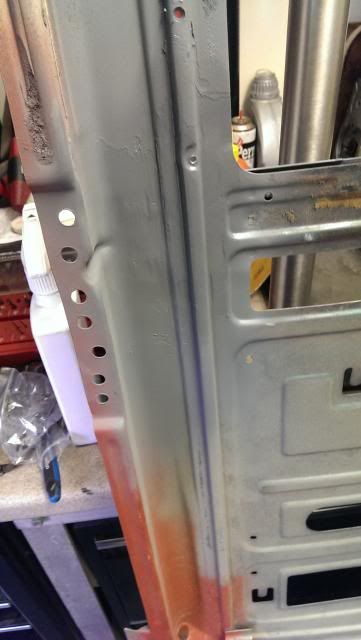
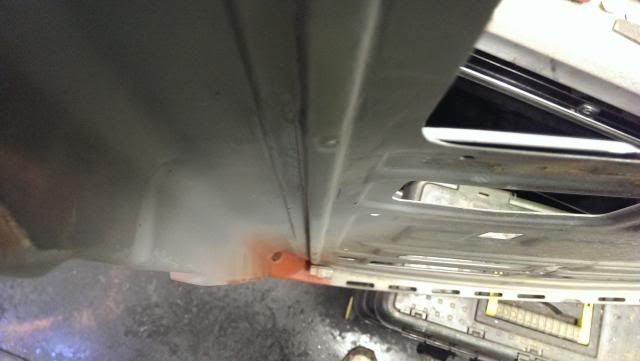
Bit of primer
Image
Image
Image

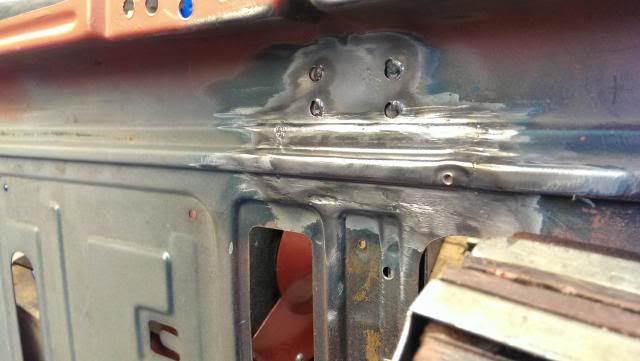
Next job is to do something with the holes down either side which were from were i drilled the spot welds out which held it to the beam which runs across the shell[code
    [/code]
    Last edited by appletree on Thu Apr 16, 2015 10:34 pm, edited 23 times in total.
    Image

    You should never underestimate the predictability of stupidity

    M42 Supercharged 285bhp + M3 6speed box
    goosiegander
    Zonegoose
    Posts: 2544
    Joined: Sun Nov 19, 2006 11:00 pm
    Location: East Anglia

    Thu Oct 03, 2013 7:45 pm

    Fun and games!

    Good effort there sir!

    :D
    bab-91
    Married to the E30 Zone
    Married to the E30 Zone
    Posts: 7177
    Joined: Thu Jan 06, 2011 11:00 pm
    Location: Northern Ireland

    Thu Oct 03, 2013 7:50 pm

    :puke:

    I have this on the to-do-list.


    Good work!
    The Internet - It has proven to be worthless, and is nothing but a repository for perverts.

    IG - bab91
    Automaton
    E30 Zone Regular
    E30 Zone Regular
    Posts: 448
    Joined: Wed Apr 03, 2013 11:00 pm
    Location: India

    Thu Oct 03, 2013 7:51 pm

    Thanks. Going to follow this closely.
    :D
    Maneesh

    1986 E30 M10 316 Manual Schwarz Chromie
    1982 E28 M20 520i Henna Rot - Project
    1988 E32 M70 750iL Schwarz - MASSIVE Project

    1991 W201 190e Automatic Schwarz - Sold
    1991 W201 190e Automatic Silver AMG Tribute - Sold
    1993 E36 M40 316i Manual Brillantrot (RIP: rotting in peace)

    Join other Carb Fanatics: E30 316 Carb - The Faithfuls https://www.facebook.com/groups/444263742439145/
    appletree
    E30 Zone Addict
    E30 Zone Addict
    Posts: 3482
    Joined: Fri Jan 20, 2006 11:00 pm
    Location: Retford

    Sun Oct 13, 2013 1:40 pm

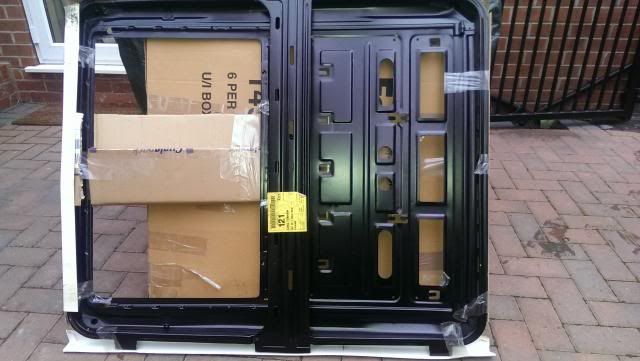
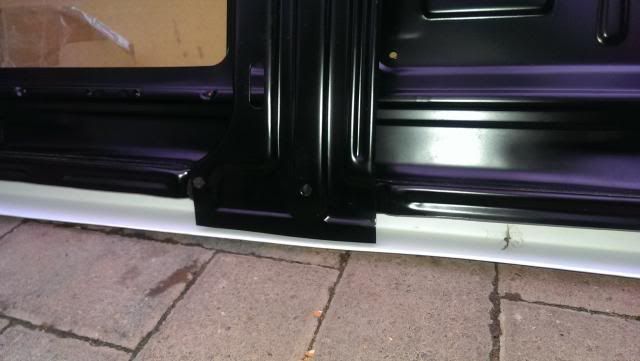
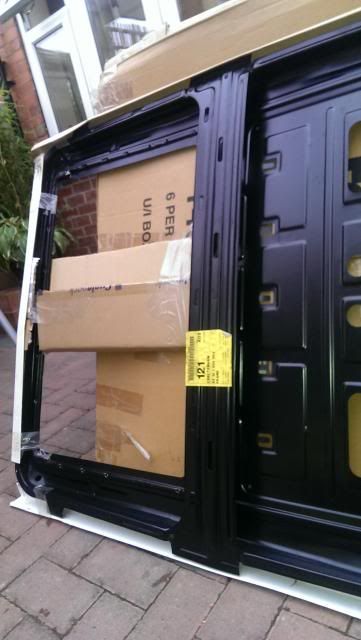
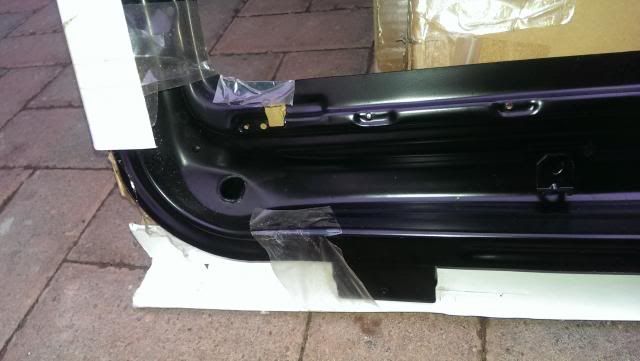
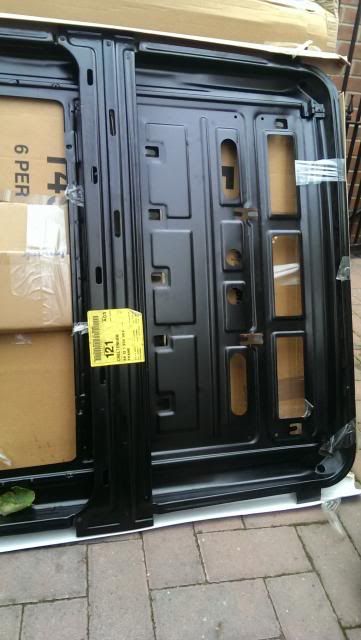
    Have a bit of an update on this one, luckily BMWSport with the white Hartge happens to live opposite my house and also has a brand new sunroof tray which he bought off Ratch when Ratch ordered a new roof and a sunroof tray without relising the tray came in with the new roof.

    The above makes sence after me and Adam had a look at the new tray it would appear that when BMW build the cars they weld the sunroof tray in place to the inner roof skin and then add the roof skin on top of that. This would also make sence as this is how Ratch's roof came.

    You can also see in the pictures below that a new roof tray comes with the roof brace attached which I though was welded in place and then the tray welded to that which is how i removed it as did Jozi on his touring build to leave the brace in place and drill the spot welds out.

    Image

    Image

    Image

    Image

    Image

    The trouble with this is the only way to fit a new one from BMW without removing the skin will be to slide the tabs in on one side and then slide the whole lot towards the tabs that are in and then slide it back to the middle after hooking the other tabs in.

    Three problems with this are A. their might not be enough room to slide the tabs in doing the left right slide thing B. Once you weld the tabs to the roof inner skin there is a good chance you will burn the paint above it which will be hard to clean off and repaint. C. The lip around the sunroof hole might also stop the tray sliding in.

    luckily I have two spare roofs which I will try and slide the tray in and see if sliding it in will work.
    Image

    You should never underestimate the predictability of stupidity

    M42 Supercharged 285bhp + M3 6speed box
    appletree
    E30 Zone Addict
    E30 Zone Addict
    Posts: 3482
    Joined: Fri Jan 20, 2006 11:00 pm
    Location: Retford

    Sat Mar 01, 2014 6:32 pm

    So my hand has been forced a bit with this one.

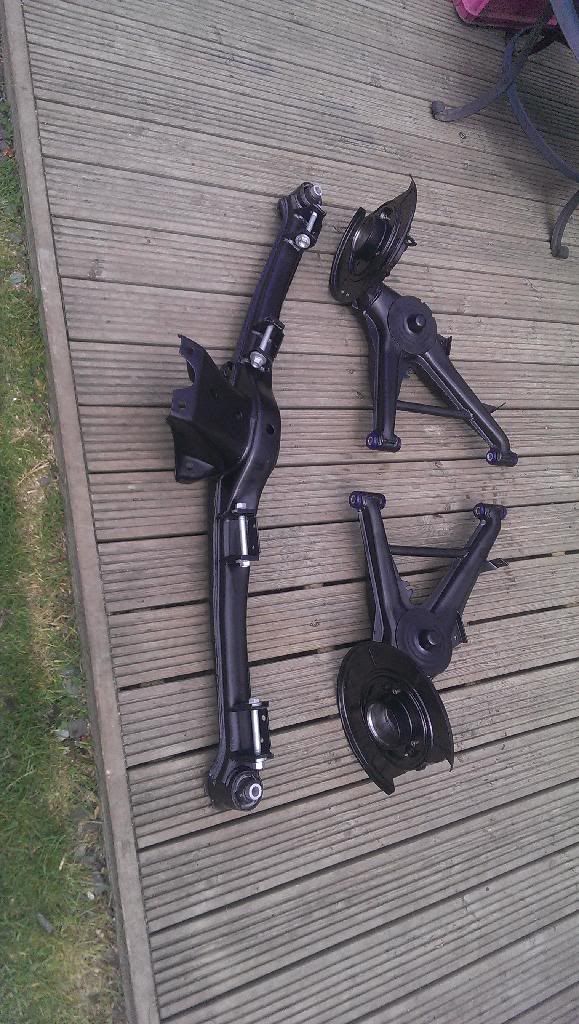
    Had some spare time the other week so thought I would start and drop the rear subframe with a view to fitting my nice shiny new one with camber and toe adjustment.
    Image

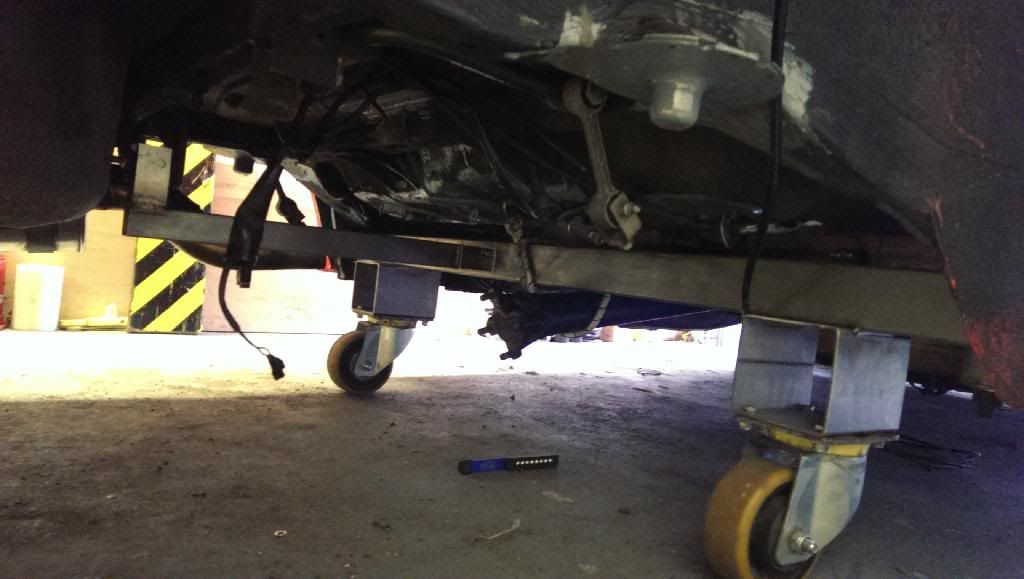
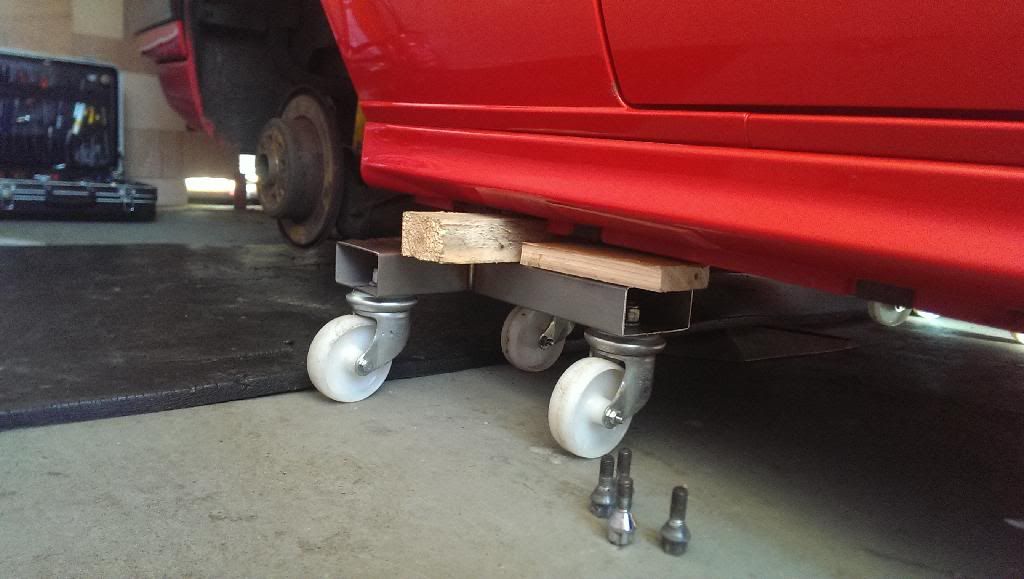
    So I made some skates so I could move the car around while I’m doing the work, there a little lightweight as we didn’t have any thick wall box section at work.
    Image

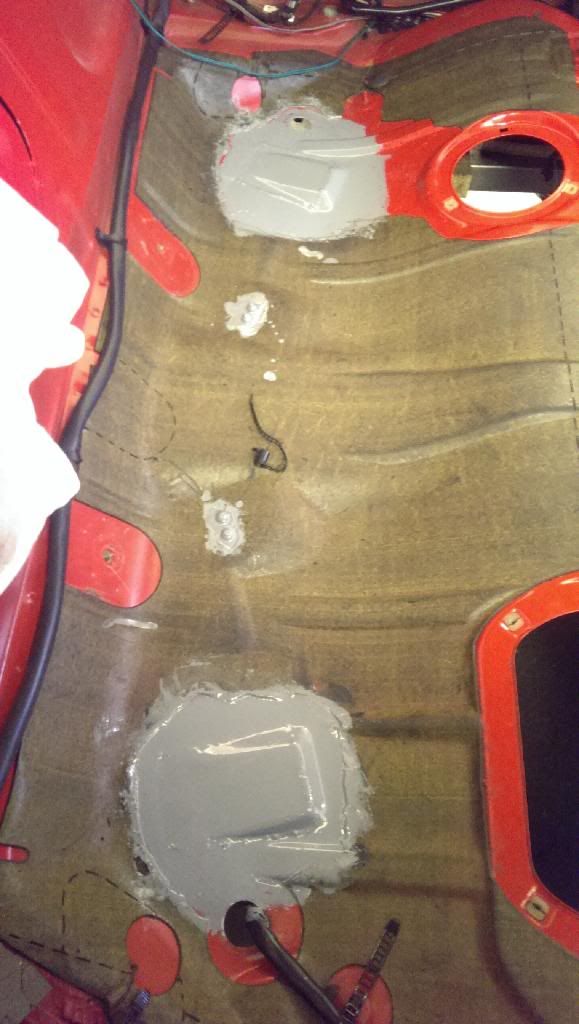
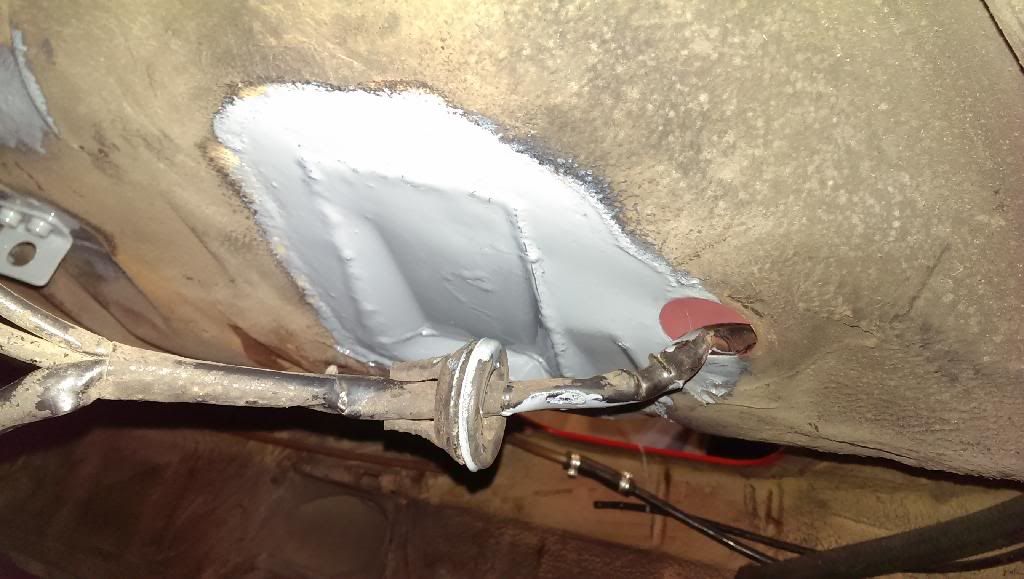
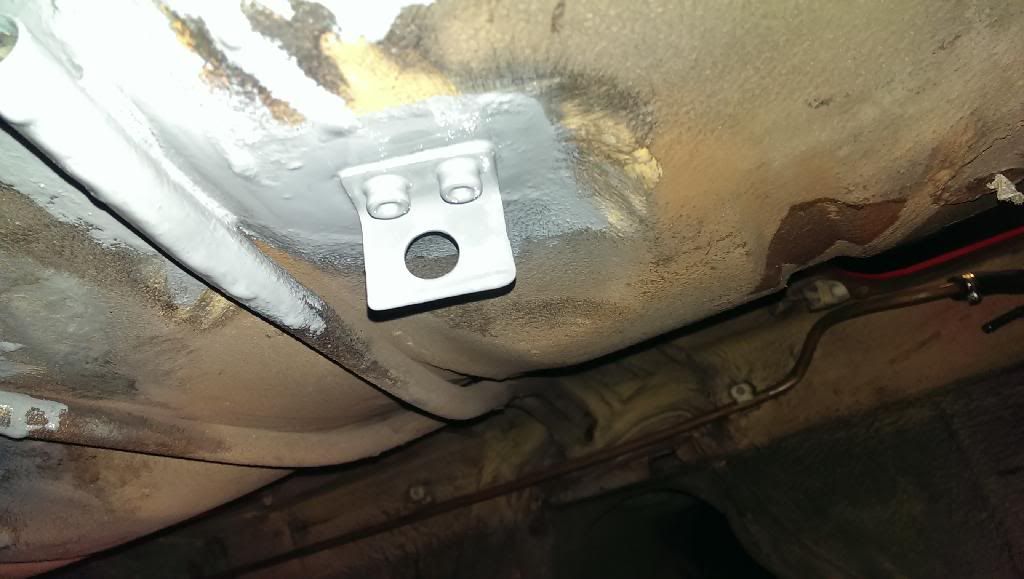
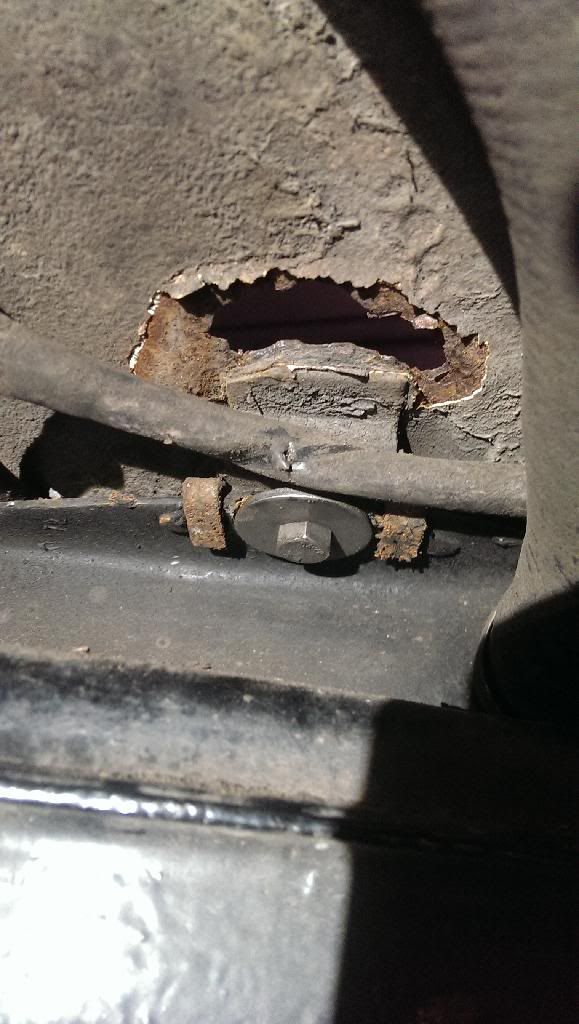
    It was all going well until from looking underneath I saw a tiny bubble on the bracket for the tank, so as there’s no point being shy, a gave it a good poke with a screw driver and made a hole....
    Image[/URL]

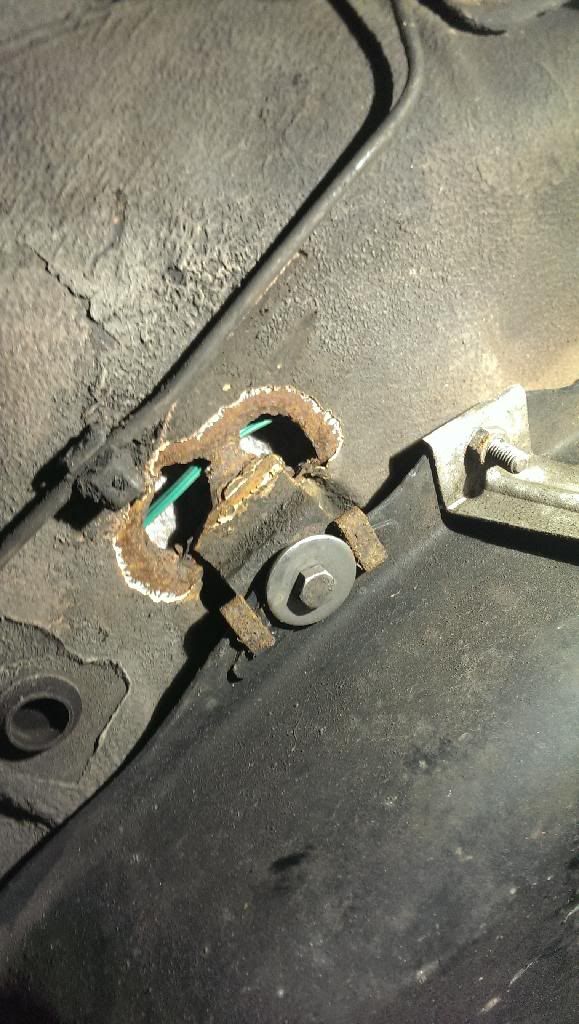
    Checked the other side, although there was no bubble, but after a poke again....
    Image[/URL]

    So after some thought I decided that as to fix the holes I would have to grind inside the car I would be best to pull the interior and as I had gone that far why not pull the carpet and die it black.
    So pulled the carpet out and took it to work and steam cleaned it with truck wash, it came up really well and as it was a sunny day left it to dry in the sun.
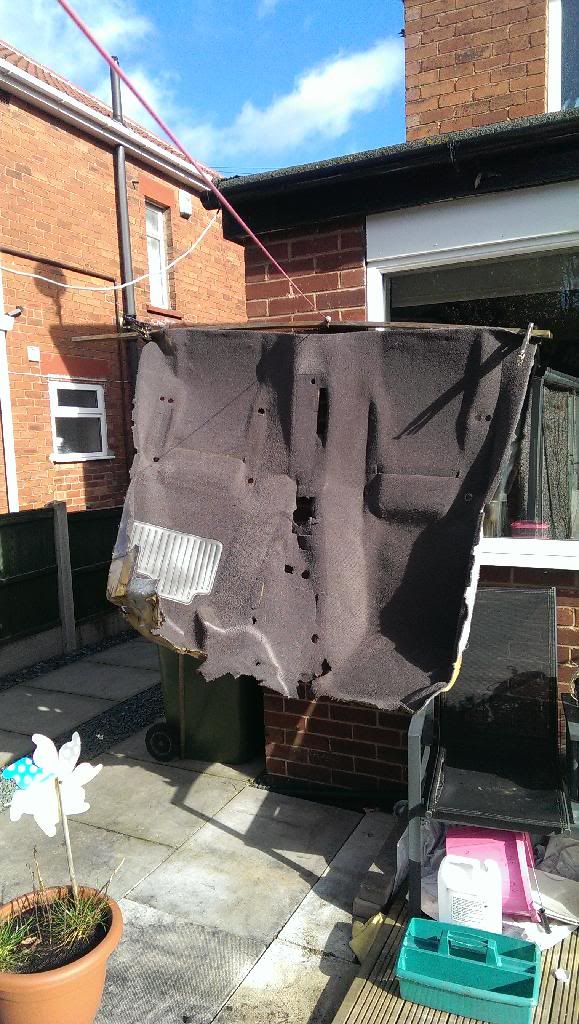
    Image

    After a day in the sun and a few nights in the garage with the dehumidifier on it was dry enough to die, I used the valitors pride the same as X-works used and it did a really good job, very pleased with the outcome.
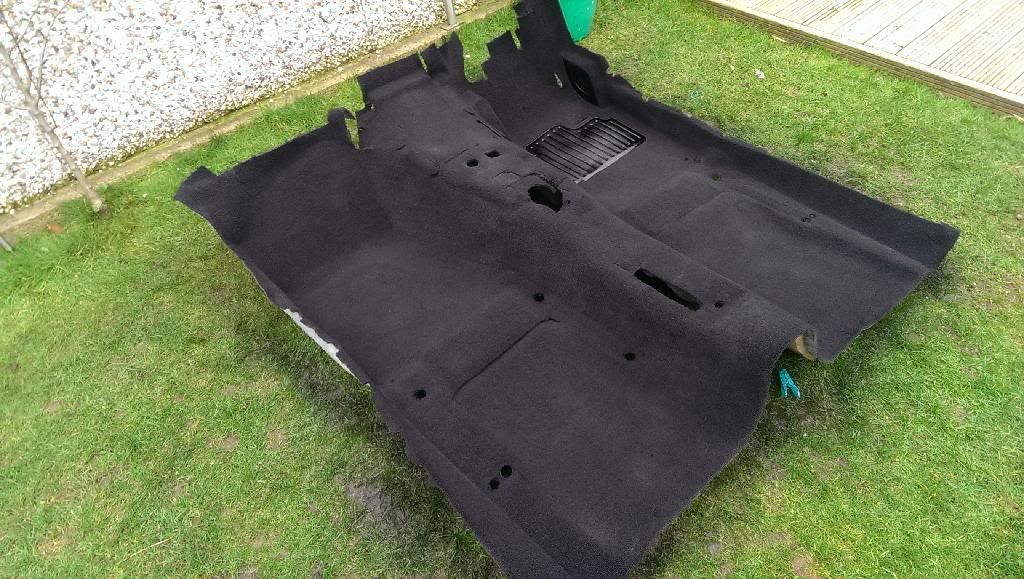
    Image

    Now with the carpet out the decision was made that it was pointless removing the full interior again in the future to do the sunroof tray so why not just do it now.

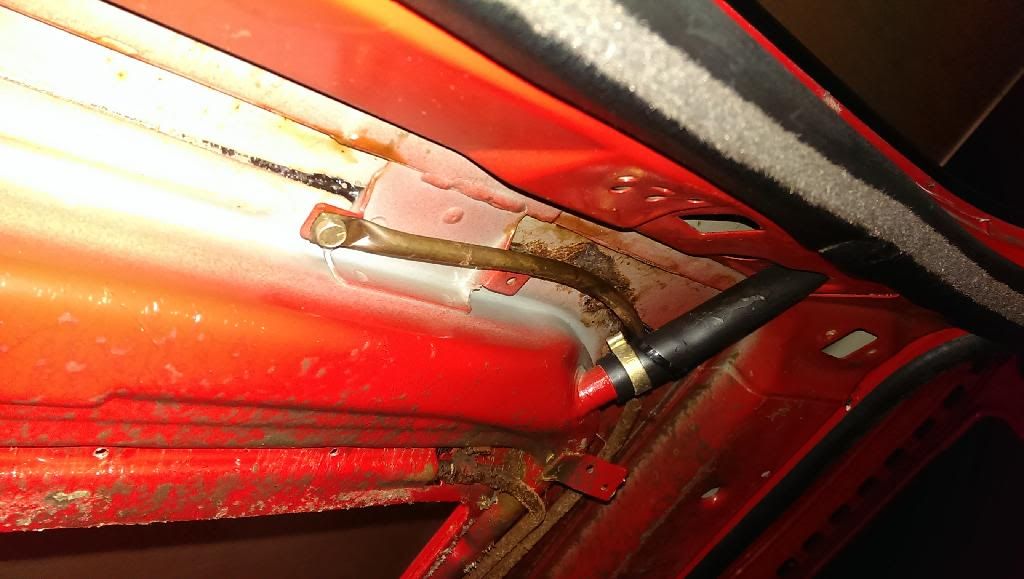
    This the problem I’ve known about for a while.
    Slight bubbling on the outside....
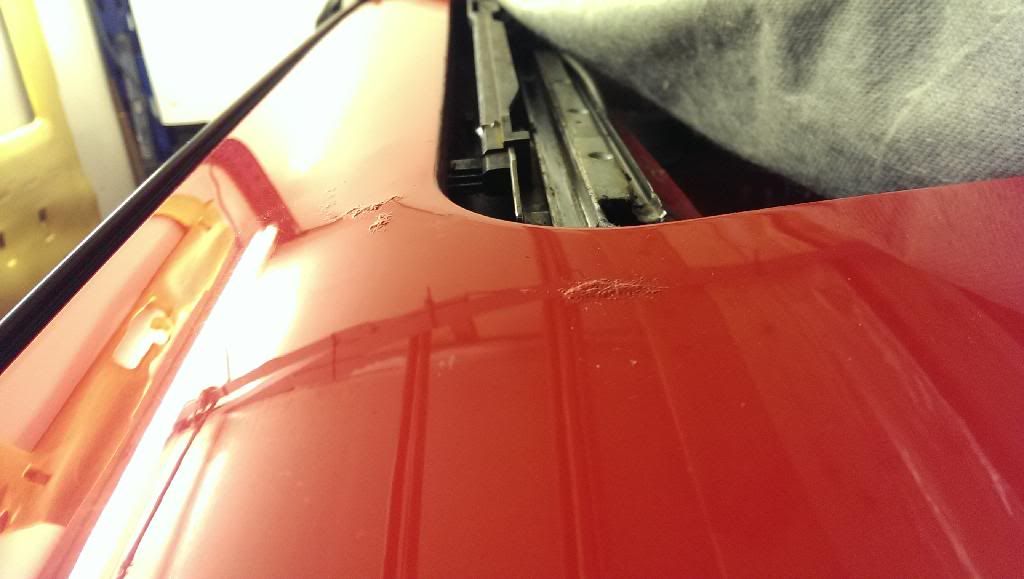
    Image

    Nasty on the inside though...

    Image

    Removing the sunroof panel liner was a absolute 8astard of a job for some reason it would not slide back and fought all the way!

    After this panel was removed it was easy enough to remove the metal panel and drop the head lining down.

    Today was a nice day so stripped out all the sunroof mechanism and masked up the car with old bed sheets.
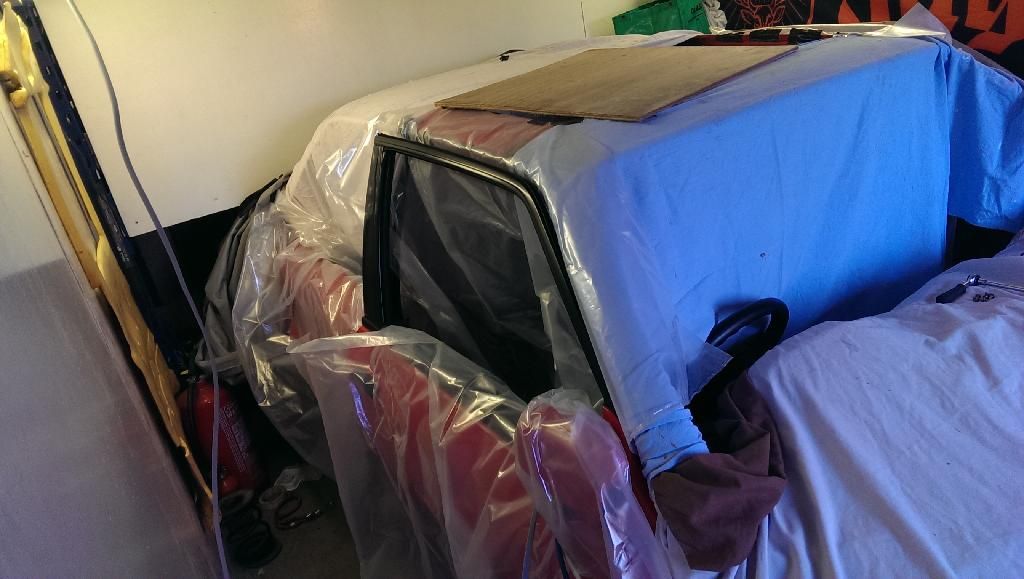
    Image

    Inside.... let the cutting commence 1mm slitting discs are the dogs 8ollocks for this job!
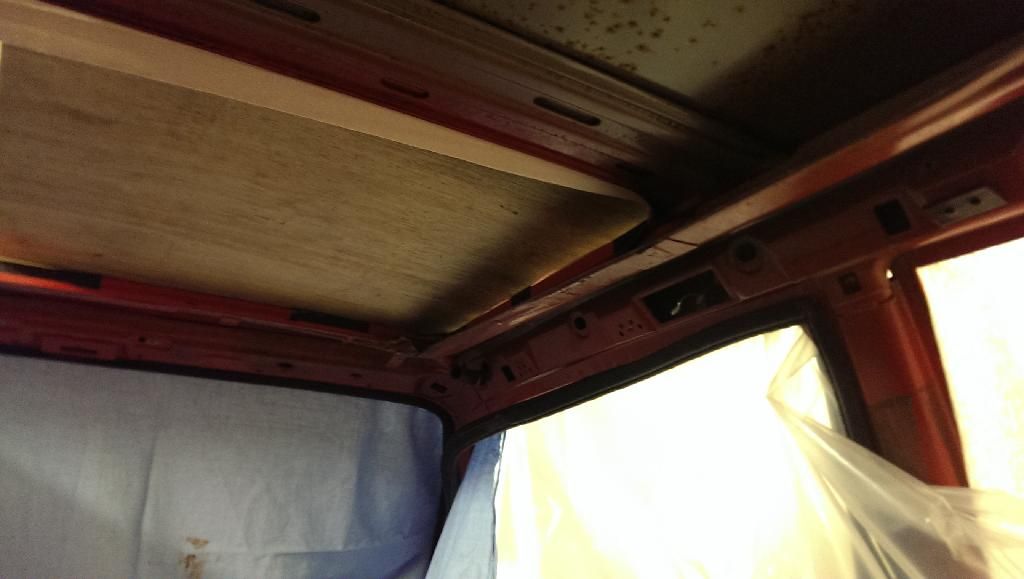
    Image

    Started by cutting the centre section out of the tray to make access easier.
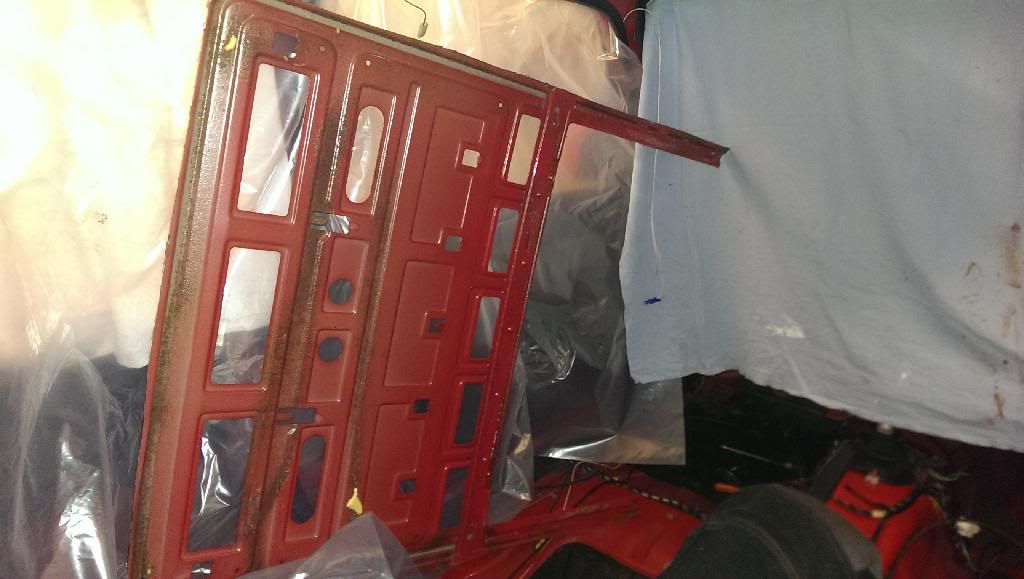
    Image

    Then cut the tabs which hold the tray to the roof rails, I put a hacksaw blade behind the tab so as soon as the disc went through it moved the blade along and I knew not to go in any further and mark the roof.
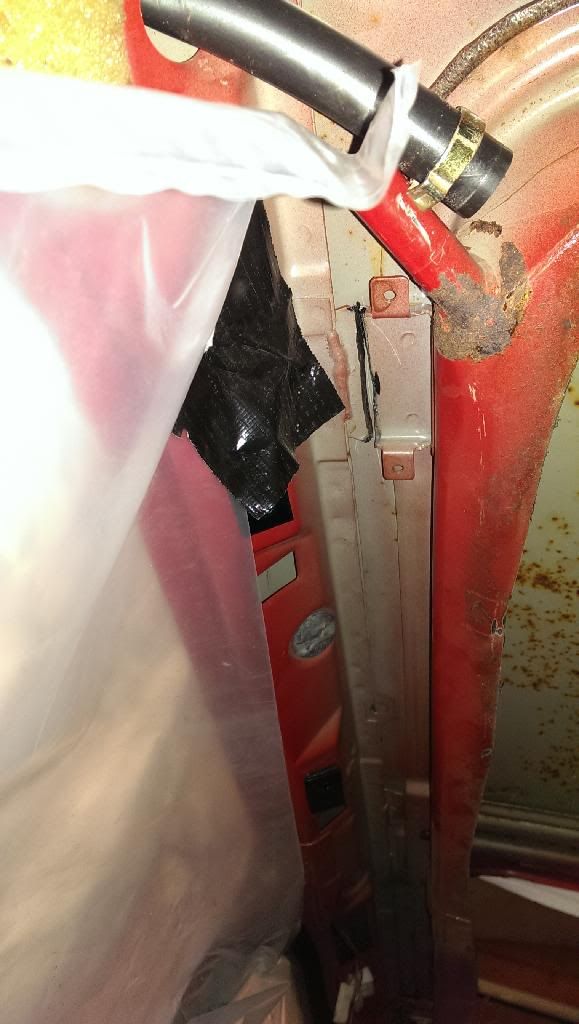
    Image

    Next using a spot weld drill, drill out the spot welds on the centre brace.
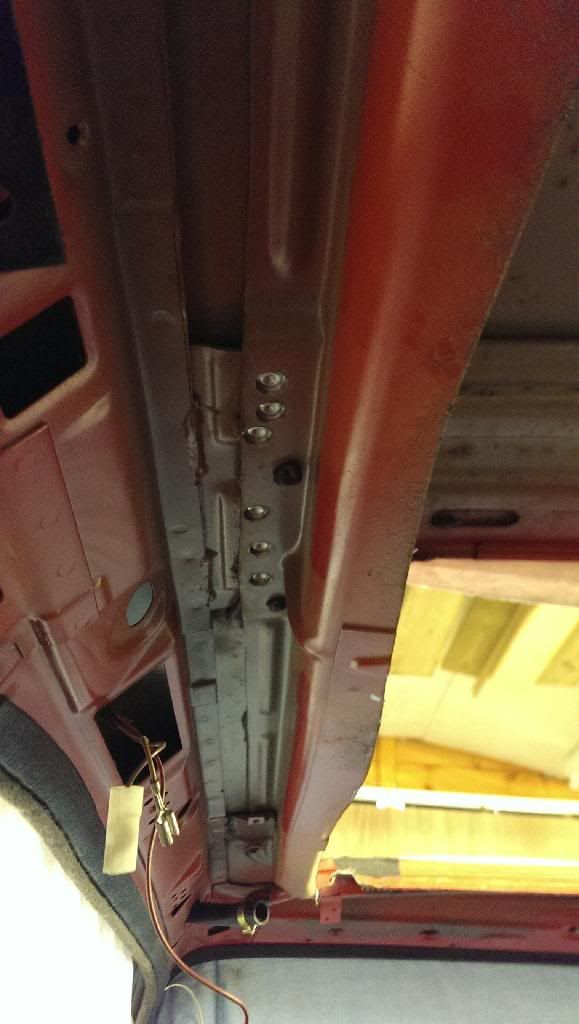
    Image

    As I want to keep the roof in as good a condition as possible I ground through the spot welds around the sunroof hatch from the tray side.
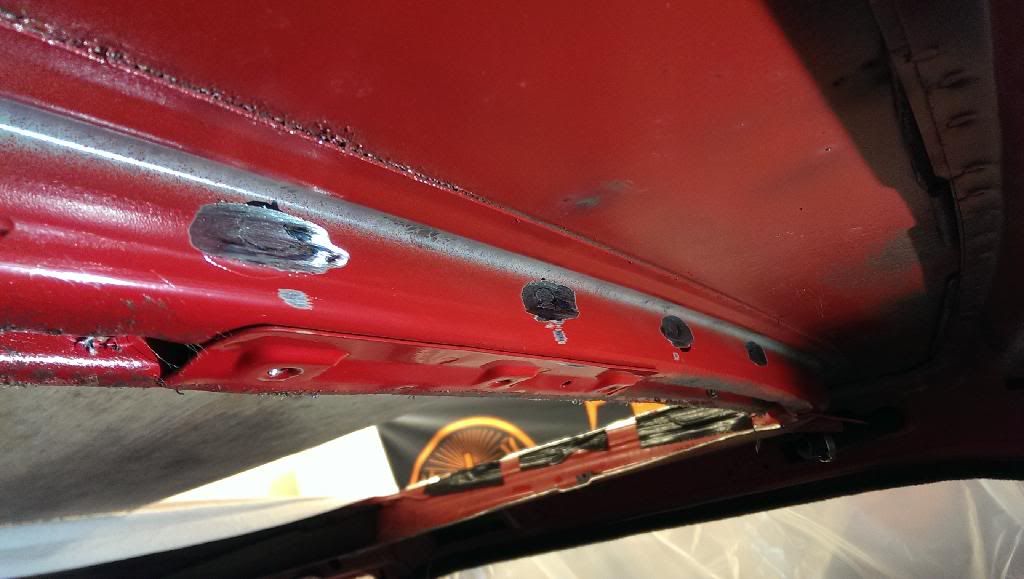
    Image

    With a hacksaw blade between the roof skin and the tray work it around to cut through all the bonding.
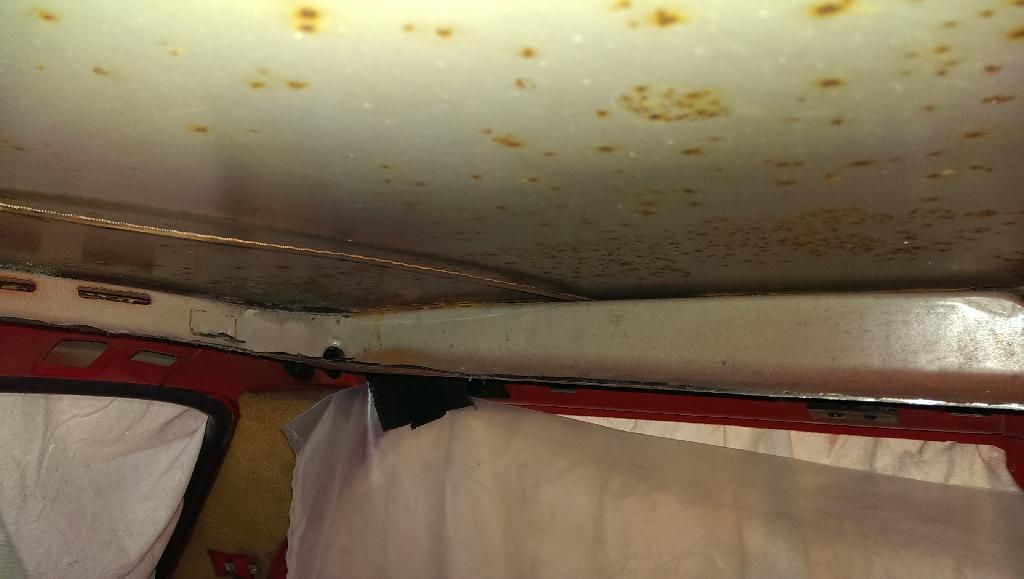
    Image

    Lastly I used Stanley knife to cut the seam sealer around the sunroof hatch along the front and sides then used a blow torch on the front section and the job lot just fell down.

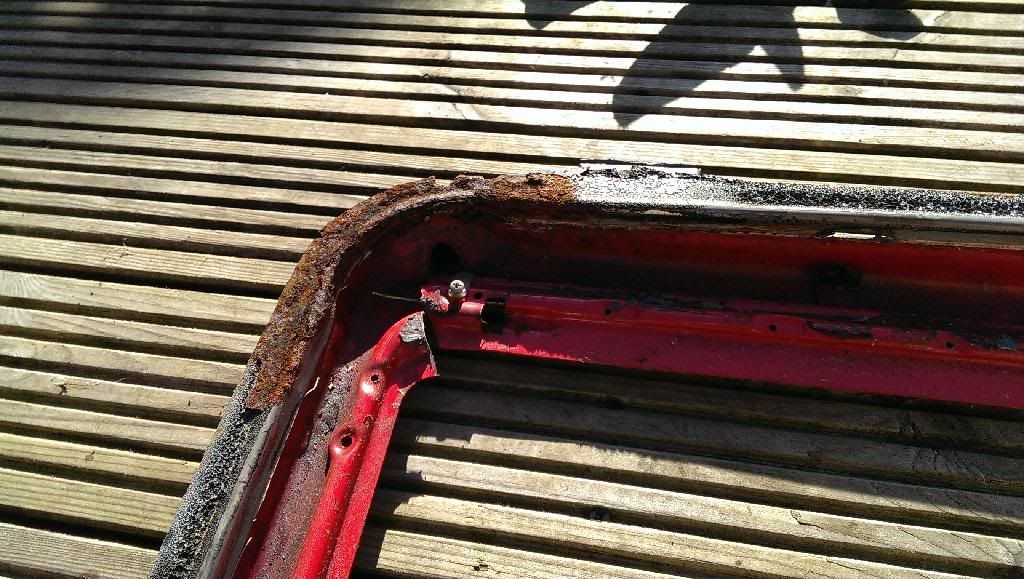
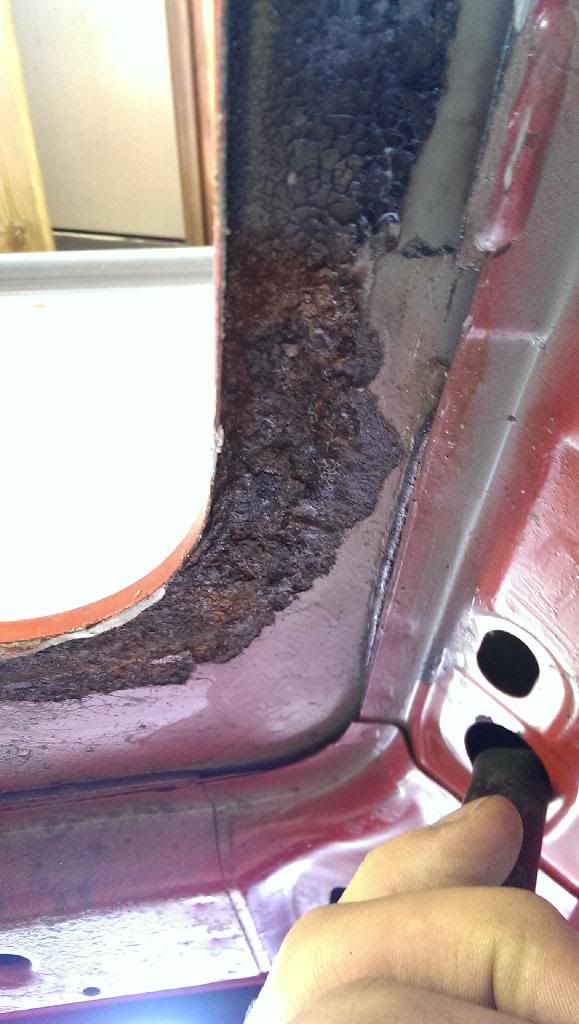
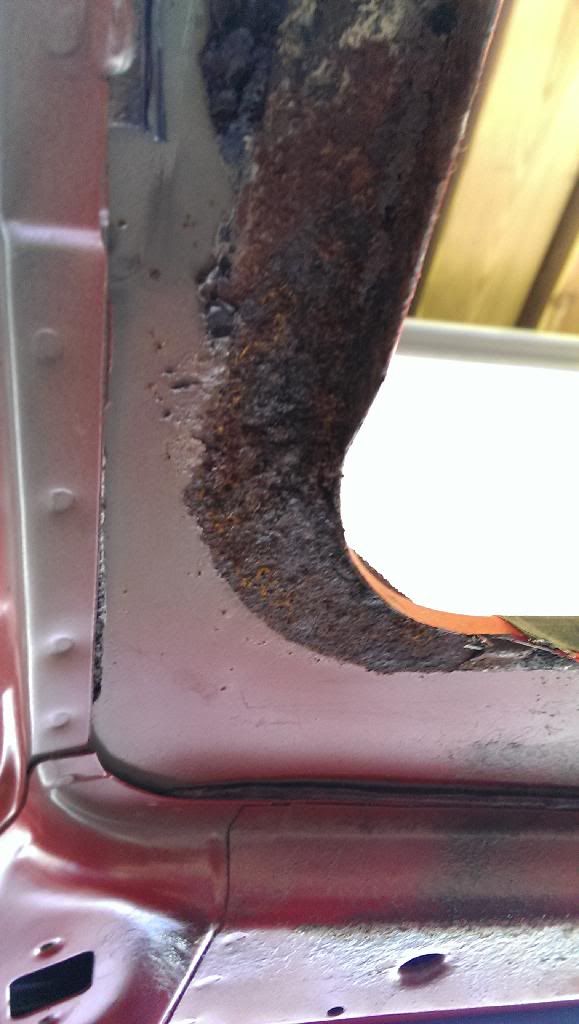
    Now it’s all removed and the dog can see the rabbit there’s some rust on the other side and also in the rear section but the majority of the roof is saveable.
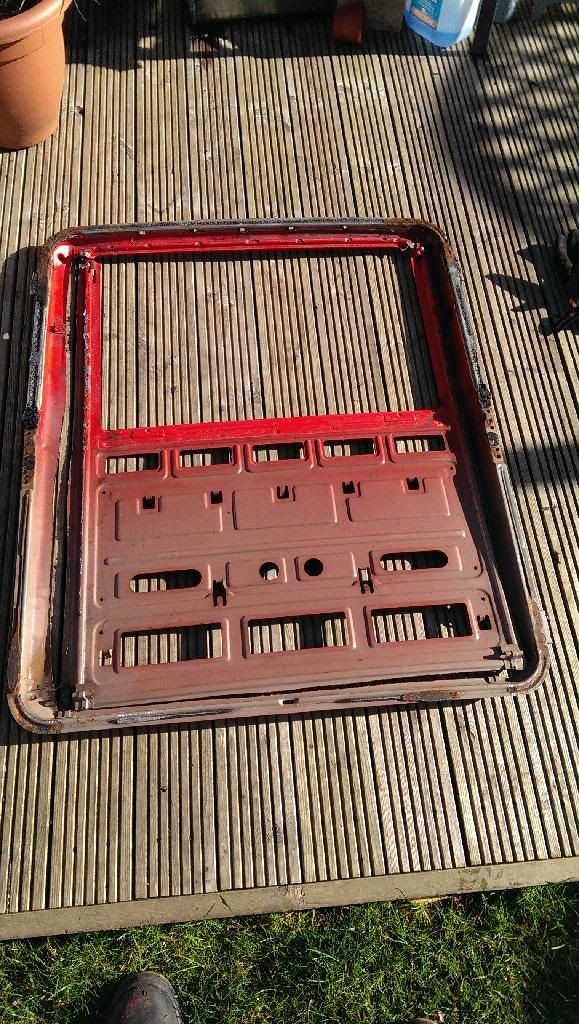
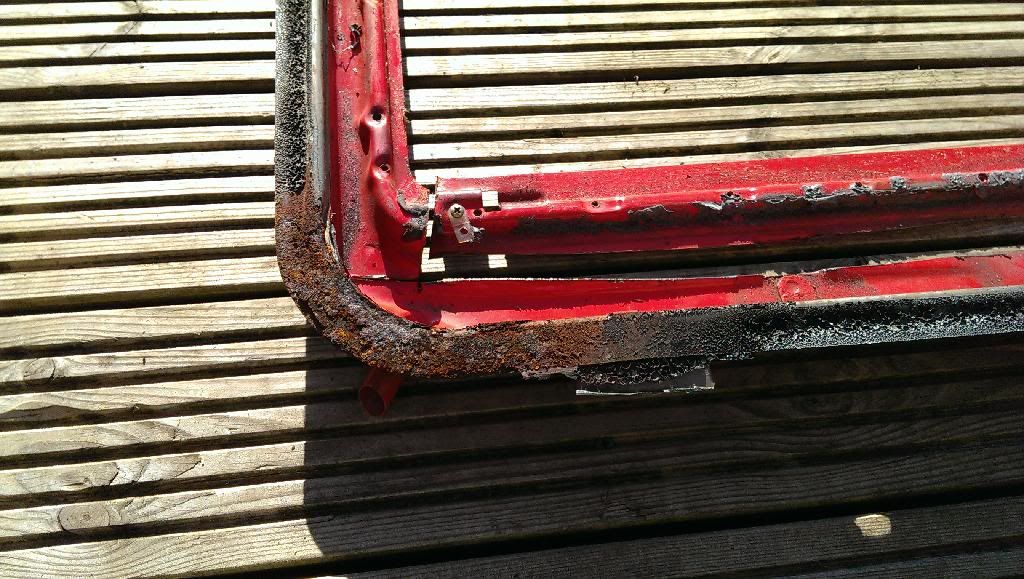
    Image

    Image

    Image

    Image

    Image

    The rust Isn't as band as it looks in the pictures although the drivers side will need a section replacing, the pics just show it as I dropped the tray down so some of the uneven nasty looking rust is the bonding that's still attached. Think I'm going to get some Deox gel on it like Jozi used on his and see what it comes up like

    As for re placing the tray I’ve been thinking that rather than weld the new tray in I’m going to make a clamping arrangement as, as far as I can see there is no way of rust proofing the area above the weld once it’s in place as it is almost touching the roof skin.
    So a good bit of work done but a bit sad at what I’ve found, shame really as the car is in really good shape in all the other areas , especially the back arches, I’m never going to sell this car so it will be getting sorted properly.

    luckily enough the internet was there to cheer me up! winkeye

    Image
    Last edited by appletree on Sat Mar 01, 2014 7:35 pm, edited 2 times in total.
    Image

    You should never underestimate the predictability of stupidity

    M42 Supercharged 285bhp + M3 6speed box
    sweep
    Married to the E30 Zone
    Married to the E30 Zone
    Posts: 10112
    Joined: Sat Mar 15, 2008 11:00 pm
    Location: spares & repairs in sheffield

    Sat Mar 01, 2014 7:14 pm

    As we discuss there's nothing that cant be done on these cars...however that non sunroof roof i have.... :)
    appletree
    E30 Zone Addict
    E30 Zone Addict
    Posts: 3482
    Joined: Fri Jan 20, 2006 11:00 pm
    Location: Retford

    Sat Mar 01, 2014 7:25 pm

    I know mate, was chatting to my dad about it, going to clean this lot up first and let the body shop have a look.

    Its still in my mind, its just doing a full roof skin that would be huge job and I'd loose the sunroof which isn't a major problem but finding a black non sunroof head lining might be... :?
    Image

    You should never underestimate the predictability of stupidity

    M42 Supercharged 285bhp + M3 6speed box
    sweep
    Married to the E30 Zone
    Married to the E30 Zone
    Posts: 10112
    Joined: Sat Mar 15, 2008 11:00 pm
    Location: spares & repairs in sheffield

    Sat Mar 01, 2014 7:28 pm

    yes i understand as you know.
    appletree
    E30 Zone Addict
    E30 Zone Addict
    Posts: 3482
    Joined: Fri Jan 20, 2006 11:00 pm
    Location: Retford

    Sat Mar 01, 2014 7:39 pm

    I'll get them pictures over to you tomorrow, I actually had 3 freshly painted IS spoilers when I checked. :mad:
    Image

    You should never underestimate the predictability of stupidity

    M42 Supercharged 285bhp + M3 6speed box
    appletree
    E30 Zone Addict
    E30 Zone Addict
    Posts: 3482
    Joined: Fri Jan 20, 2006 11:00 pm
    Location: Retford

    Wed Mar 12, 2014 8:54 pm

    Had a few hours spare last week so decided to start with the rust in the rear seat well, first I drilled out the spot welds as the bracket wasn't bad atall and I was abit unsure how to attach the job


    Spot welds drilled out.


    Image[/URL]


    The bit above the bracket was still mint so thought about trying to save it to keep the shape.


    Image[/URL]


    But thought better of it and cut the job lot out.


    Image[/URL]

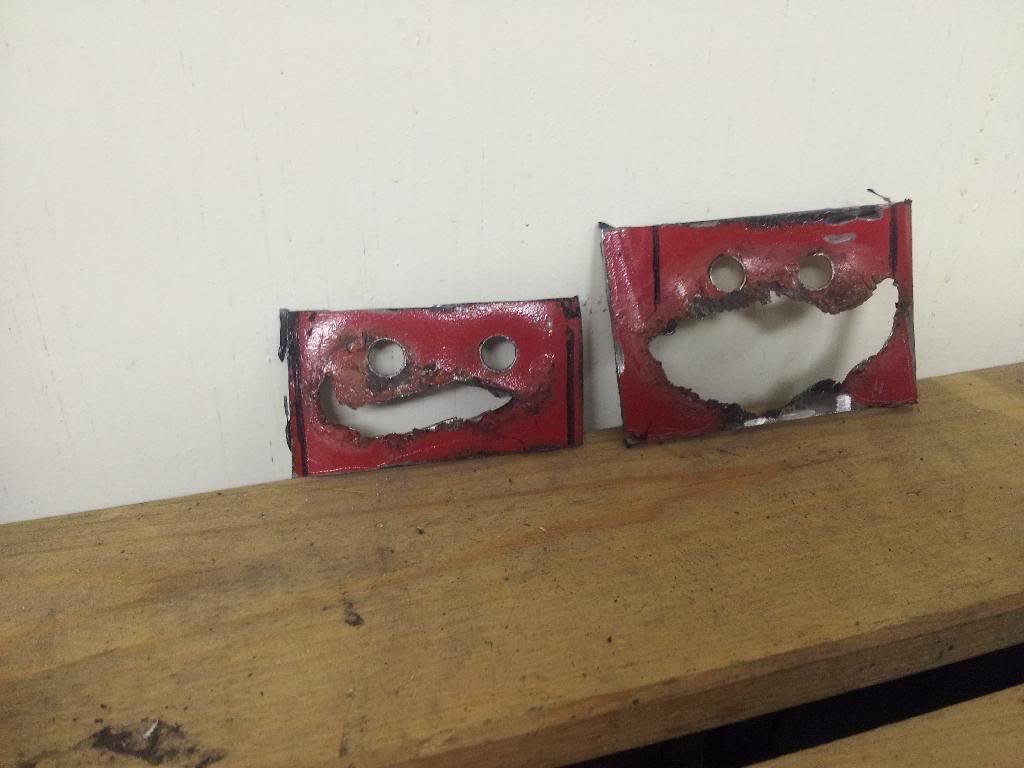
    Smiley rust!


    Image[/URL]

    Then cut some sheet metal out of a spare roof I have and started to make up a plate, found that a 1/2" drive long extension clamped in the vice made a brilliant former for bending the sheet round.


    Finished plate ready to weld in.


    Image[/URL]

    Image[/URL]

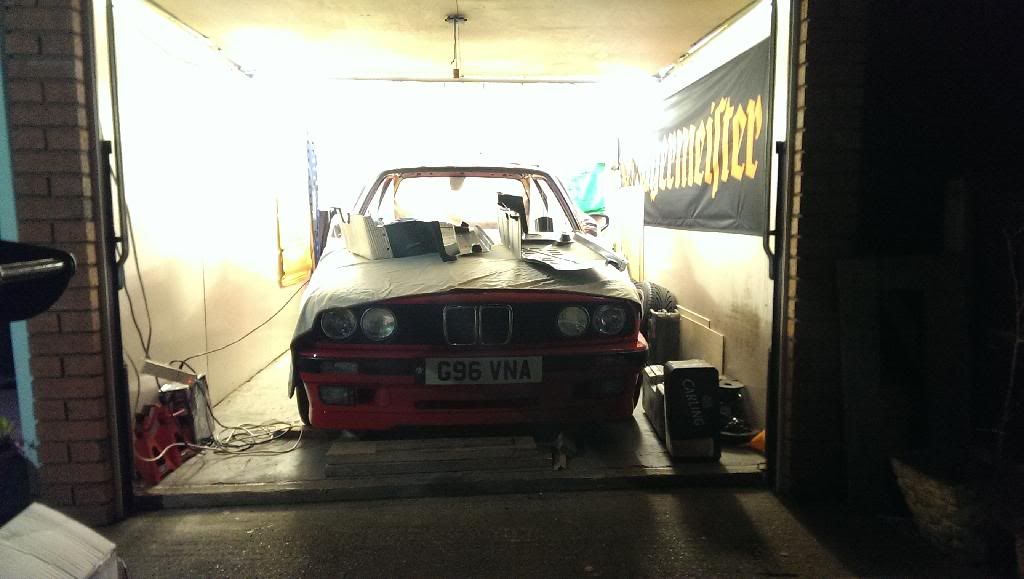
    And the garage in work in progress state.


    Image[/URL]
    Last edited by appletree on Wed Mar 12, 2014 9:41 pm, edited 1 time in total.
    Image

    You should never underestimate the predictability of stupidity

    M42 Supercharged 285bhp + M3 6speed box
    DanThe
    E30 Zone Team Member
    E30 Zone Team Member
    Posts: 28641
    Joined: Sat Sep 10, 2005 11:00 pm
    Location: Staffs
    Contact:

    Wed Mar 12, 2014 9:21 pm

    Big job on here, good to see you going about it the right way as per usual :D
    appletree
    E30 Zone Addict
    E30 Zone Addict
    Posts: 3482
    Joined: Fri Jan 20, 2006 11:00 pm
    Location: Retford

    Wed Mar 12, 2014 9:59 pm

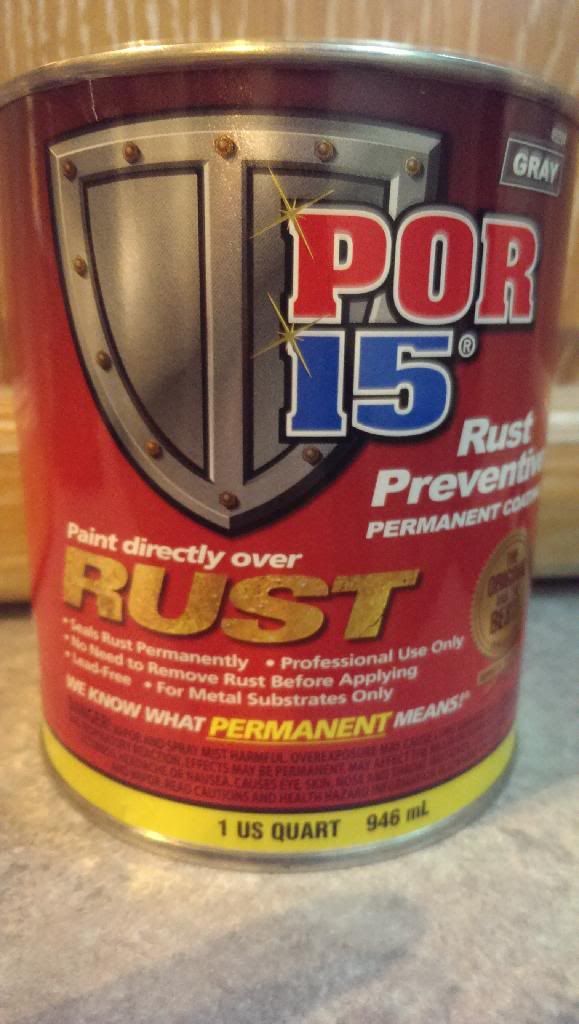
    Cheers Dan hoping to have it done for summer but who knows. Just took delivery of a £39 1litre can of paint that turns steel into gold.

    No... No .... That's wrong, it stops steel turning to rust.


    Image

    Plan is to sand the roof skin and use the Bilt hammer Deox gel I have on any rusty bits, cut the really bad bit out and weld in a section from the roof I cut off the touring at Sweeps and then coat the job lot with the POR-15 before an over coat in red and then coat the job lot in clear wax oil, but not to thick as I don't want it dripping down on the first nice day I have.

    Does anyone have any advice for what to use to bond the tray to the skin? I was thinking of using tiger seal but I don't know what BMW used , if you can buy it from them or if there's an alternative.
    Image

    You should never underestimate the predictability of stupidity

    M42 Supercharged 285bhp + M3 6speed box
    DanThe
    E30 Zone Team Member
    E30 Zone Team Member
    Posts: 28641
    Joined: Sat Sep 10, 2005 11:00 pm
    Location: Staffs
    Contact:

    Wed Mar 12, 2014 10:24 pm

    Use a heat gun on the waxoil after applying it, helps it to run into the gaps and dries it out a lot quicker, any overspill will be gone before you refit the headlining too
    User avatar
    dave525
    E30 Zone Regular
    E30 Zone Regular
    Posts: 427
    Joined: Mon Feb 21, 2005 11:00 pm

    Thu Mar 13, 2014 7:32 am

    most new cars have some bonded joints in them due to alloy panels etc.See if you can get someone from a body shop to let you know what they use,How about if bss something on here can have a word in their bodyshop as he works for a bmw dealer.
    User avatar
    dave525
    E30 Zone Regular
    E30 Zone Regular
    Posts: 427
    Joined: Mon Feb 21, 2005 11:00 pm

    Thu Mar 13, 2014 7:37 am

    Sorry,his name is Bss325i
    appletree
    E30 Zone Addict
    E30 Zone Addict
    Posts: 3482
    Joined: Fri Jan 20, 2006 11:00 pm
    Location: Retford

    Thu Mar 13, 2014 10:00 am

    I know Barry had the sunroof tray done on his sport, I forgot about that, but yes, he must have used something to do the same job
    Image

    You should never underestimate the predictability of stupidity

    M42 Supercharged 285bhp + M3 6speed box
    appletree
    E30 Zone Addict
    E30 Zone Addict
    Posts: 3482
    Joined: Fri Jan 20, 2006 11:00 pm
    Location: Retford

    Sun Mar 16, 2014 7:32 pm

    Got some time in the garage last night and made the plate for the other side of the rear seat base and welded the in, lookily my dad dropped up a set of magnets he had which are for holding plates in place like the ones I made.

    They worked a treat and as I only have a TIG or stick welding set so using magnets left me with two hands for welding and feeding in the wire.


    Image

    Image

    Both brackets after 3 coats of the POR-15 it really does dry rock sold and appesrs as though it has made a very good seal.

    Image

    Image

    Shot from underneath

    Image

    Decided that as I dont have a spot welder and although I could have welded it some how I would instead make a new bracket out of stainless and then nut and bolt it to the chassis, this way the paint between the bracket and chassic then also doesnt get burnt when it's welded to.

    Image

    As a side note as good as the POR-15 is the can it comes in is sh1t I had to peel the lid off with a number lf screwdriver and it would appear from the reviews on the website iv any drys on the lip you will never get the lid lff again. Top tip is to empty it into some morrisons resealable soup pot thn use it a bit at a time.
    Image

    You should never underestimate the predictability of stupidity

    M42 Supercharged 285bhp + M3 6speed box
    appletree
    E30 Zone Addict
    E30 Zone Addict
    Posts: 3482
    Joined: Fri Jan 20, 2006 11:00 pm
    Location: Retford

    Thu Apr 10, 2014 9:11 pm

    I've been busy again, with the body work over the last few weeks and have made some progress.

    Firstly the skates I made worked well, but they were a little small wheeled and some time slipped on the sill, so as the car falling off would be the worst thing possible I made a new skate with bigger wheels which bolts up to the rear beam mounting point a and the braces to the rear diff mount to stop it twisting with the off set wheels, its so much smoother now it wheels in around really easily.

    Image

    The rear bench / petrol tank brackets are all fixed with the new brackets bolted on and sealed with seam sealer and underseal so I moved on to the next thing.

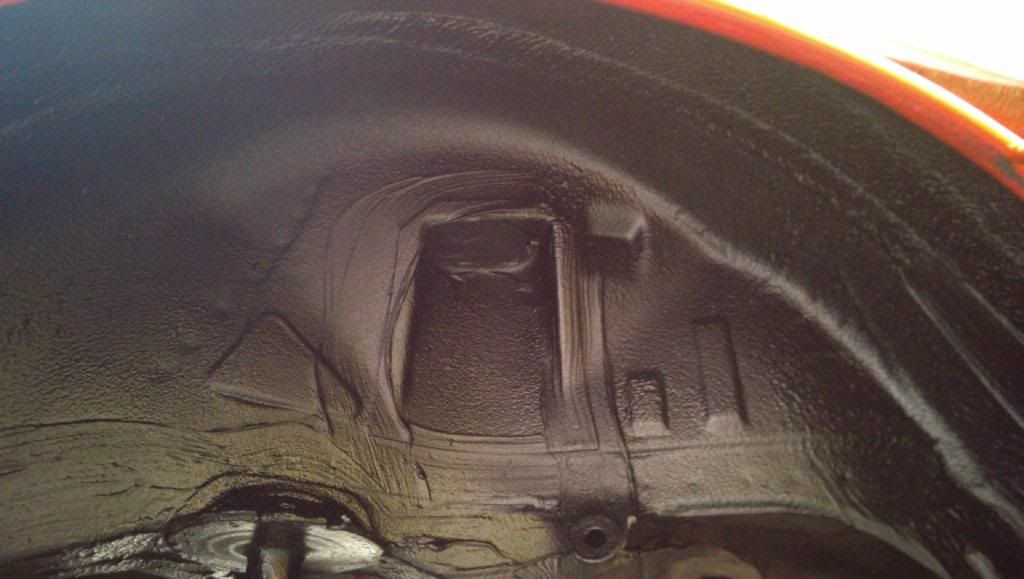
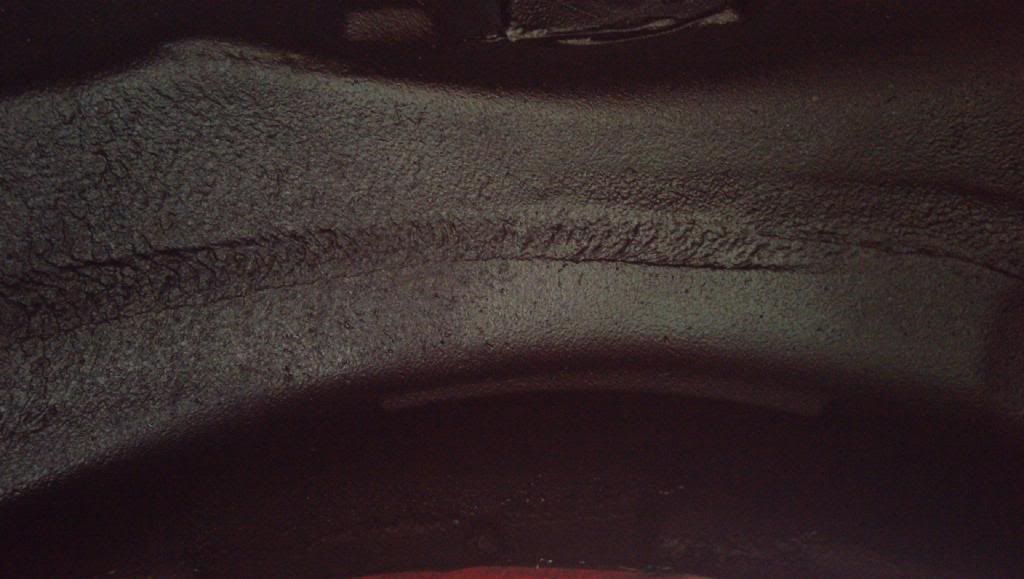
    The inner arches, first the pas side, after a good scrub down with TFR and hot water it came up like a new except for a bit were the underseal had started to crack so pleased I caught this early and scraped off the underseal to find only a minor amount of surface rust so polished this back POR-15'd it and undersealed the whole thing with the my new Shultz gun and 3M underseal, ***Top tip*** cover your hair with a hat or something because its a fooker to get out you hair!

    Image

    Image

    All the work underneath has been undersealed too.

    Back to the driver side arch later.... :(

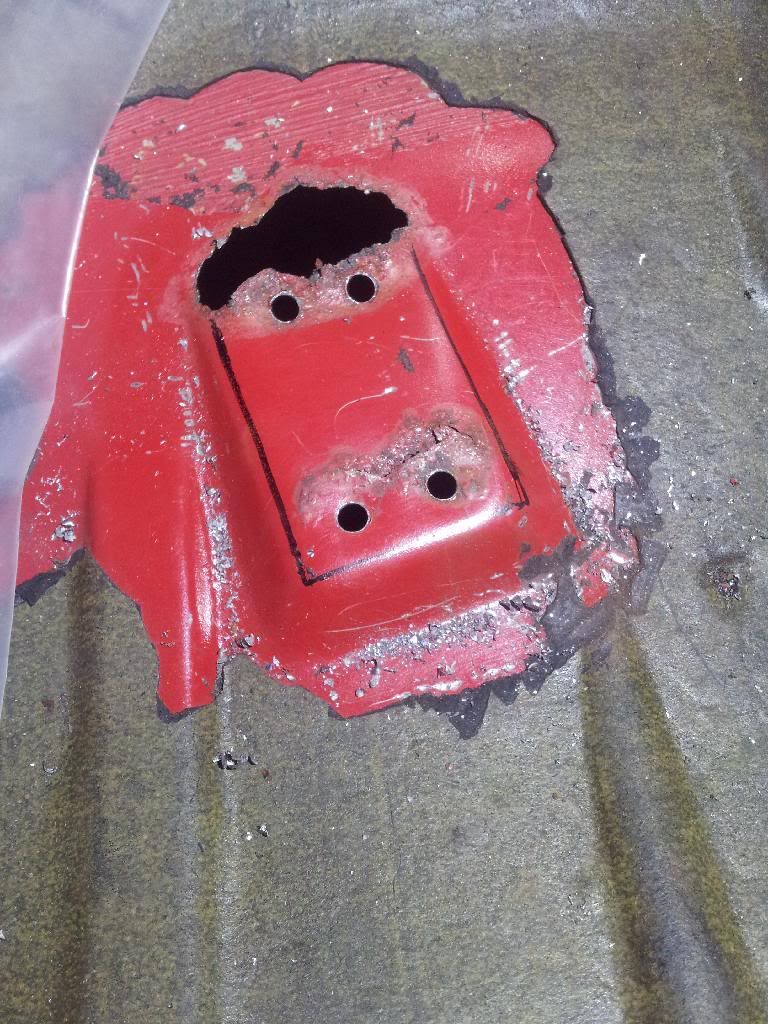
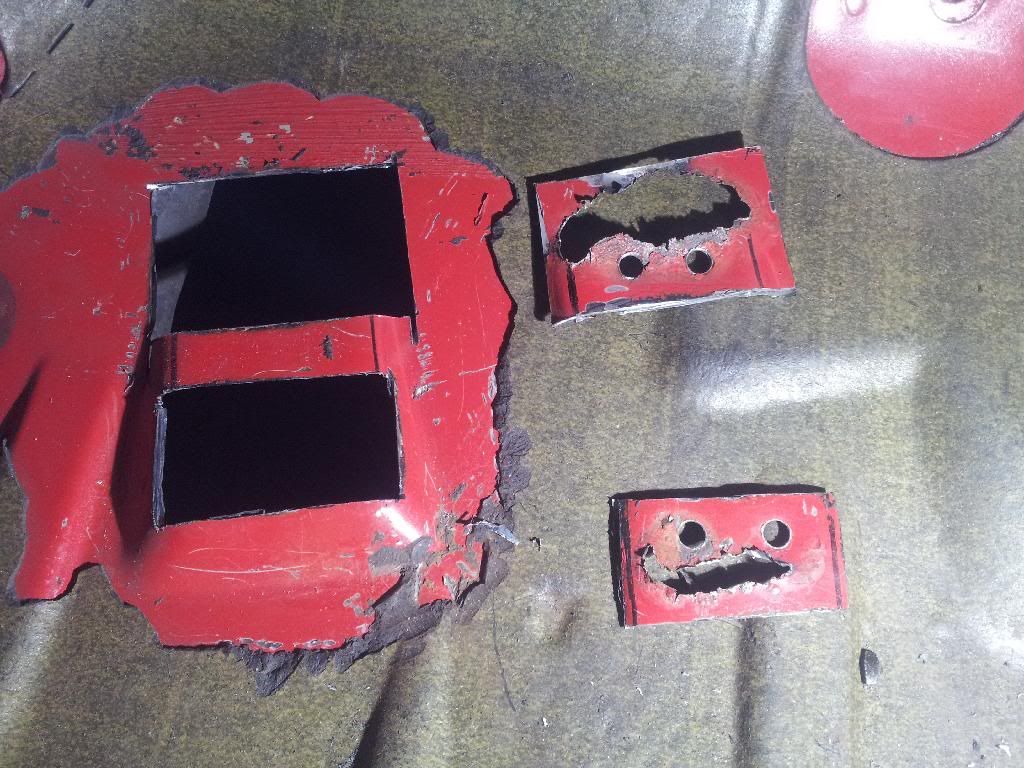
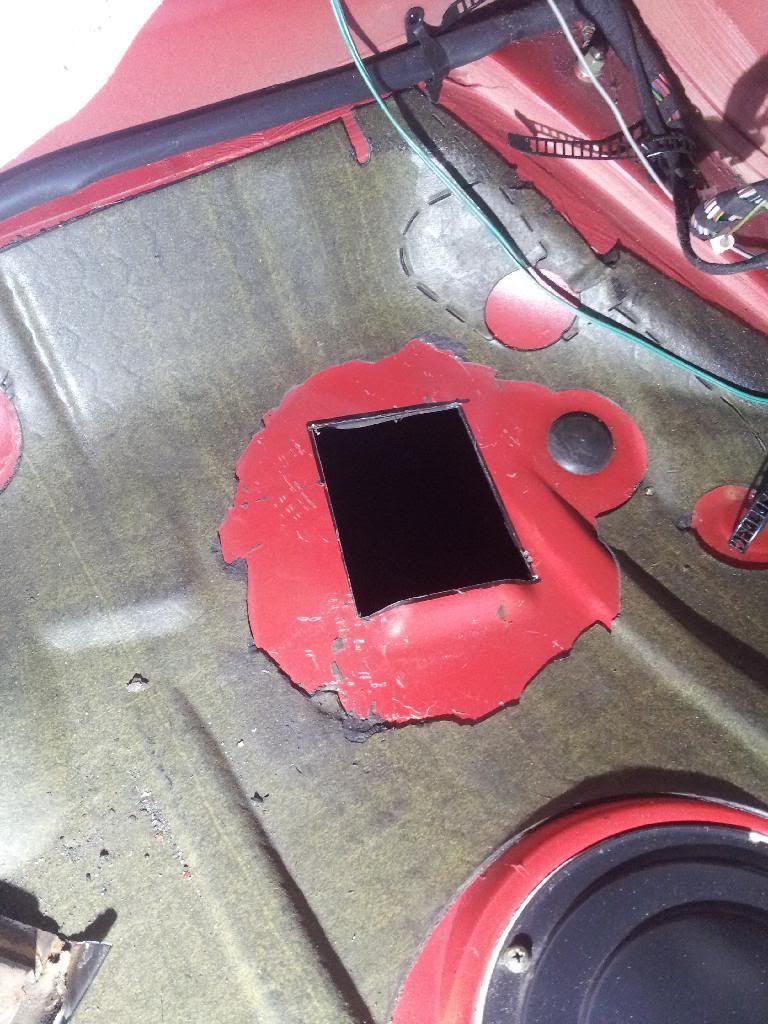
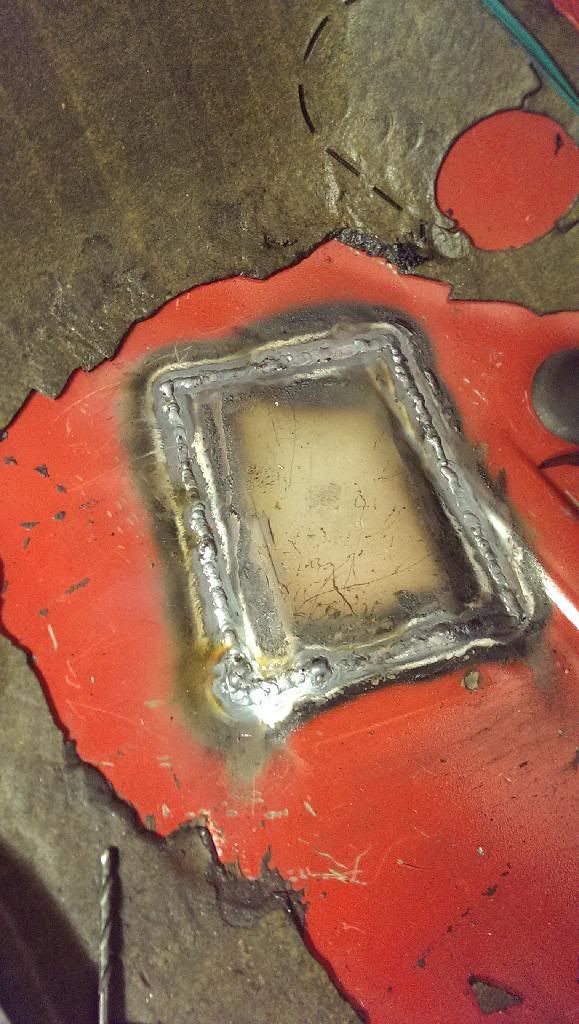
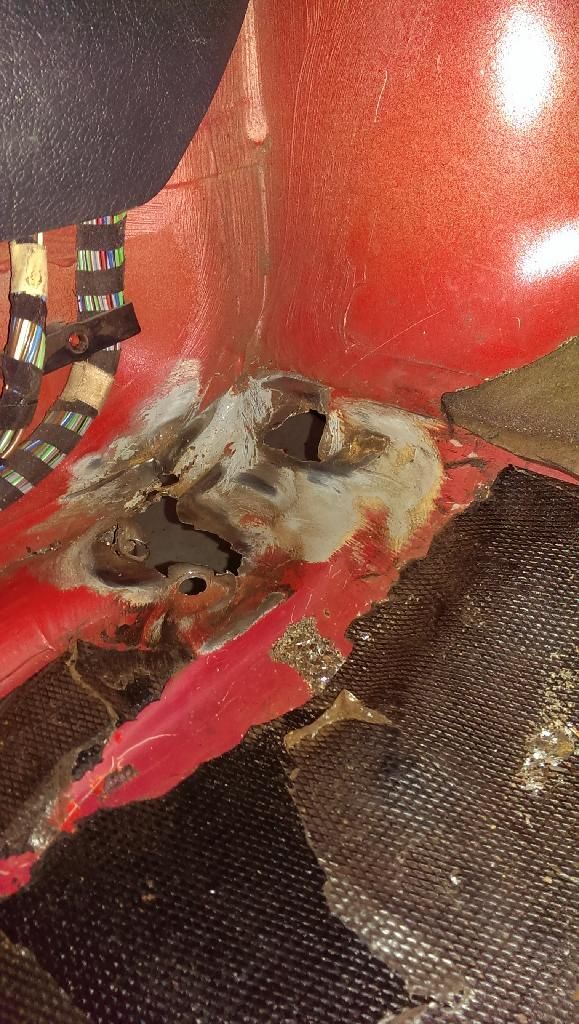
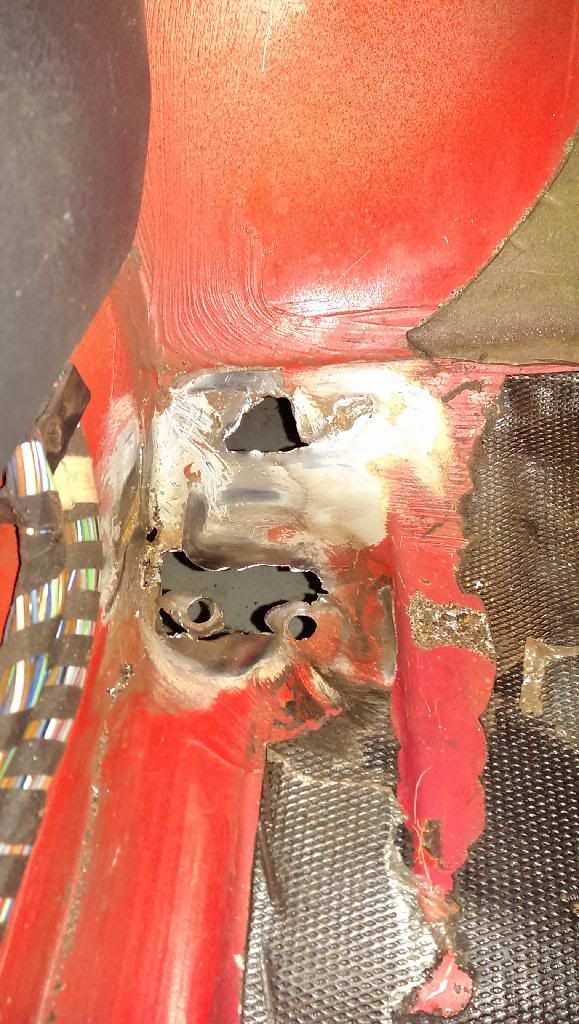
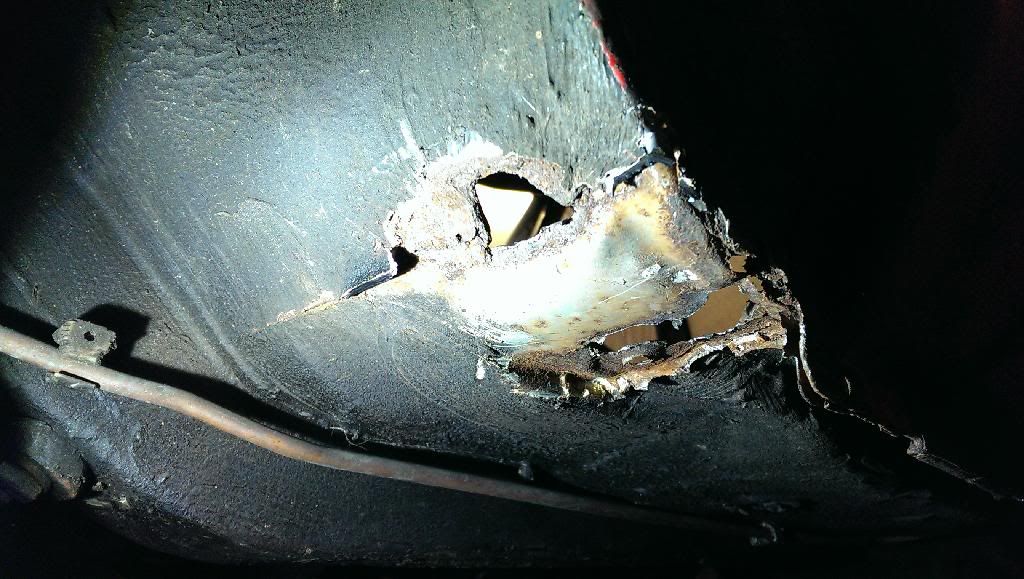
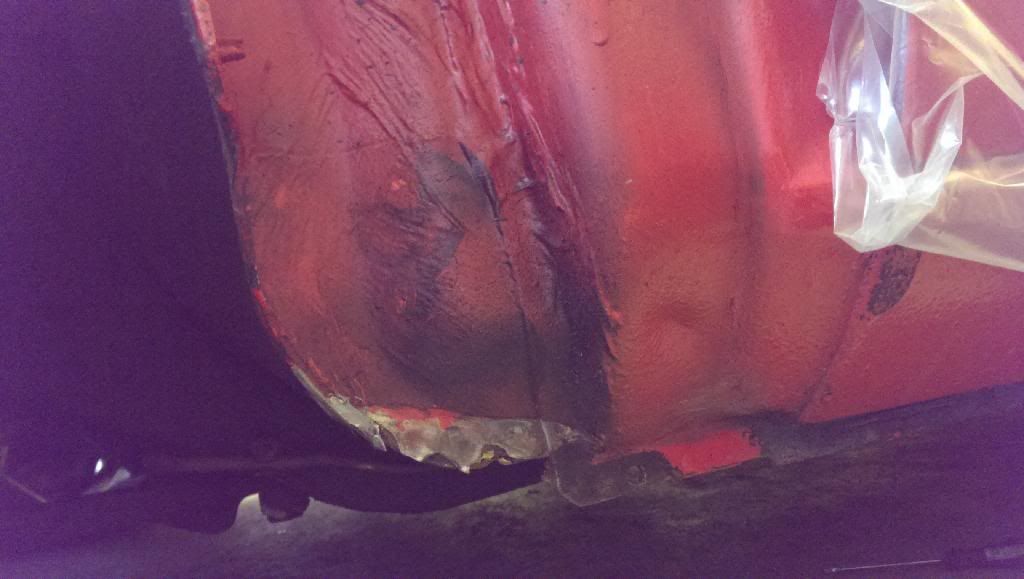
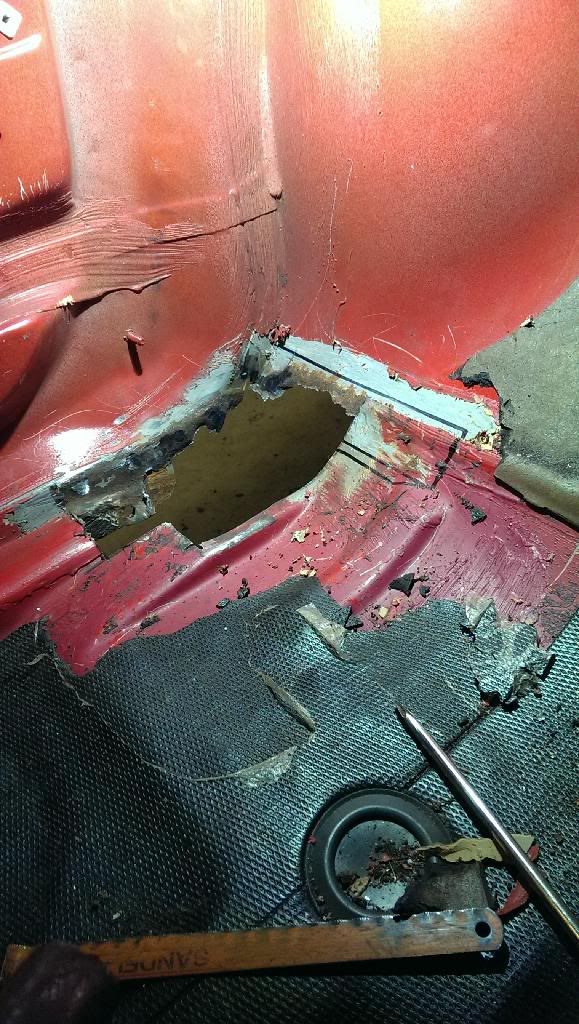
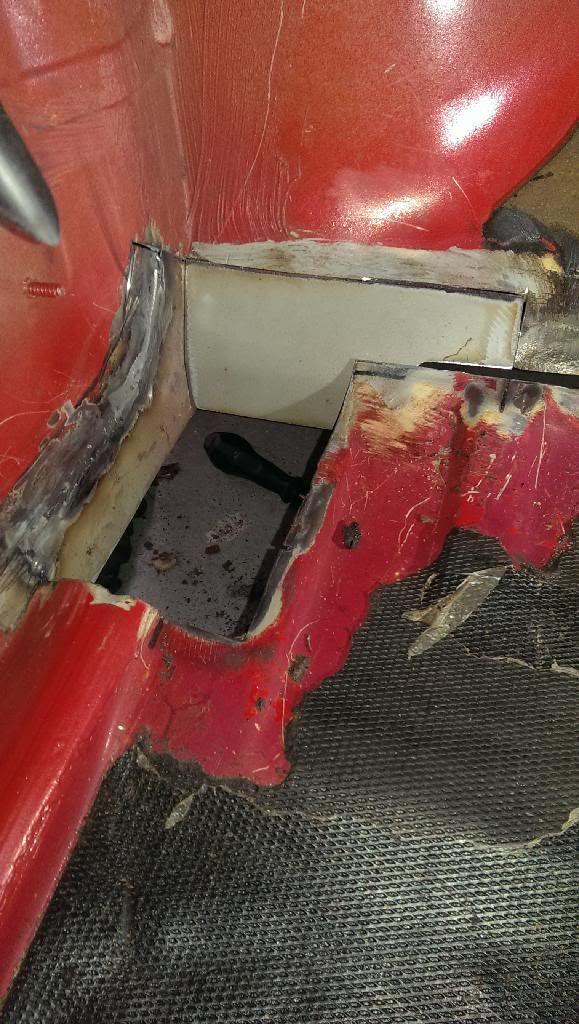
    Next on to the little scab on in the pas footwell, only noticed it when I removed the carpet so once again gave it a good whack with a sturdy screwdriver and managed to make a smallish hole, wobbled it about a bit and managed to make it a bit bigger, this seamed odd as from underneath the jacking point was solid even around the edges.. after abit of further bashing and wobbling around I worked out how the jacking pad is built up and as far as I can see is that there wasn't any underseal on one of the sides of the pad so water could get in and had been sitting on top of the pad and had oddly rotted the floor upward rather than the pad downward.

    I drilled out the spot welds on the pad I could see and levered the pad off.

    With the knotted bush in the grinder the floor soon broke up to leave two holes, luckily my dad has just bought a stretcher/shrinking tool so I will be able to make up a nice repair patch, plan is to rebuild the jacking point and make it as factory.

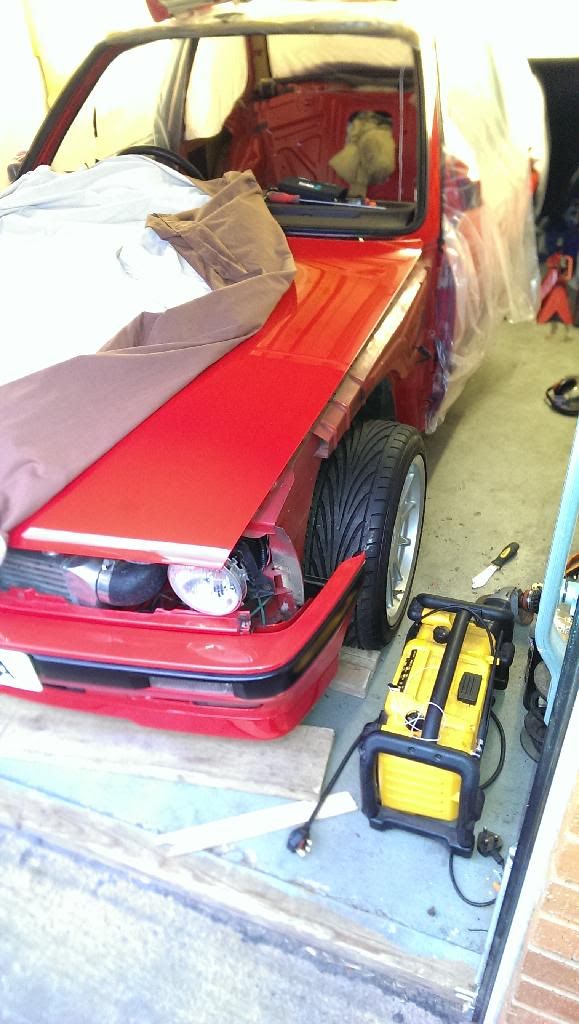
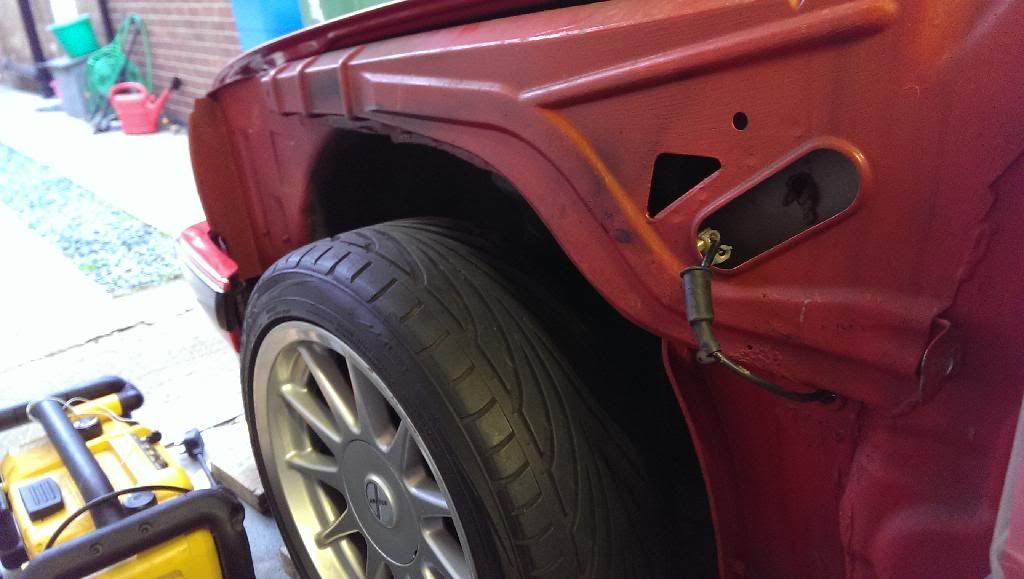
    Car with wing and skirt removed to allow access

    Image

    Under the wings was happy as I had already treated this area a few years ago when I got the car, is was zinc coated, body colour painted and wax oiled.

    Image

    Few pics of the footwell from the inside

    Image

    Image

    Few pics of the footwell from the outside

    Image

    Image

    Image

    Quite looking forward to tackling this one as I seam to be getting my hand in with the body work side of things.


    So on to the driver side rear inner arch, this side wasn't so happy firstly stripped out the filler hose and breather hose and covers, nothing major hear so gave it all a good clean up with the TFR and hot water and the majority of it came up well, there was a bit of surface rust on the arch near the breather tank where the underseal was thin and the tank must have rubbed against the body so this was polishd with the knotted brush in the drill treated with the Deox gel, POR-15'd and undersealed all tickety boo.

    There was a small scab around the mounting bracket for the arch liner and the breather so decided to cut the lot out this was easy to cut out but a absolute fooker to weld with sparks raining down on me and not enough room to fit the welding screen in the arch and welding at full arms length, but still its welded and treated now.

    Image

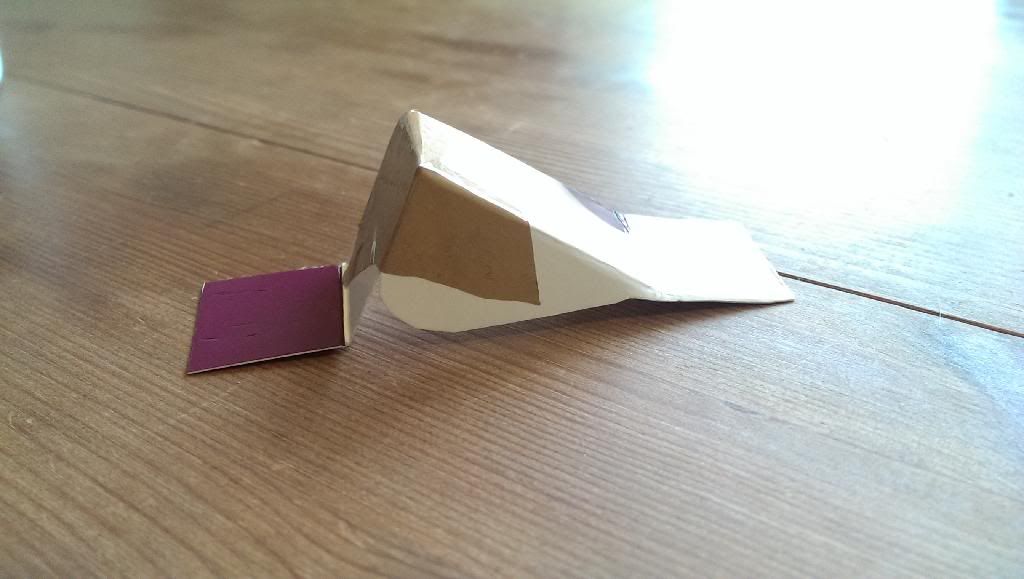
    Time to make a new bracket.

    Template

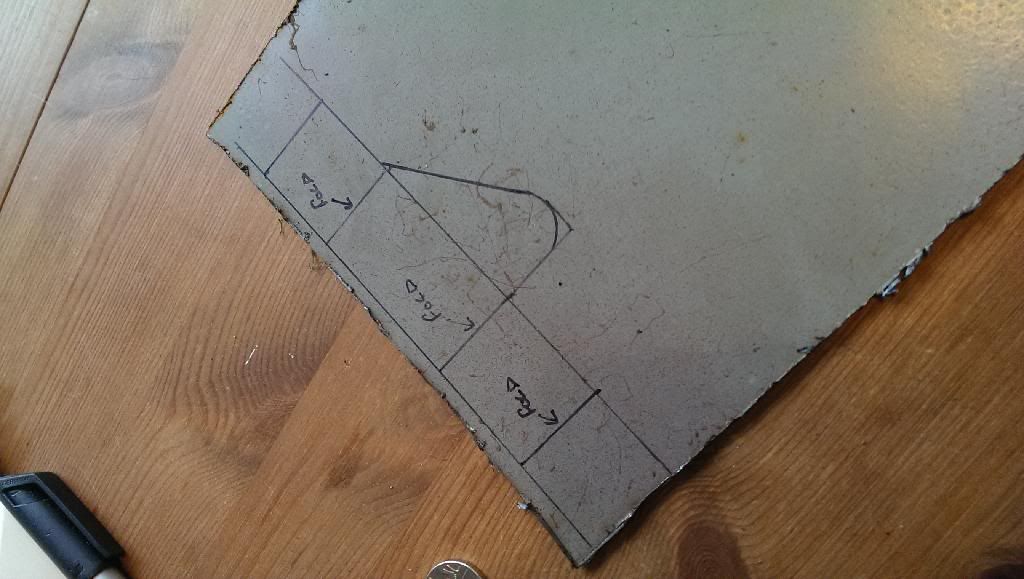
    Image

    Marked out on plate

    Image

    This was then cut folded and bolted in place again and treated to the same process as the other areas and few thick coats of the POR-15.

    Image

    The last bit I found was a bit more awkward but will update about that later.

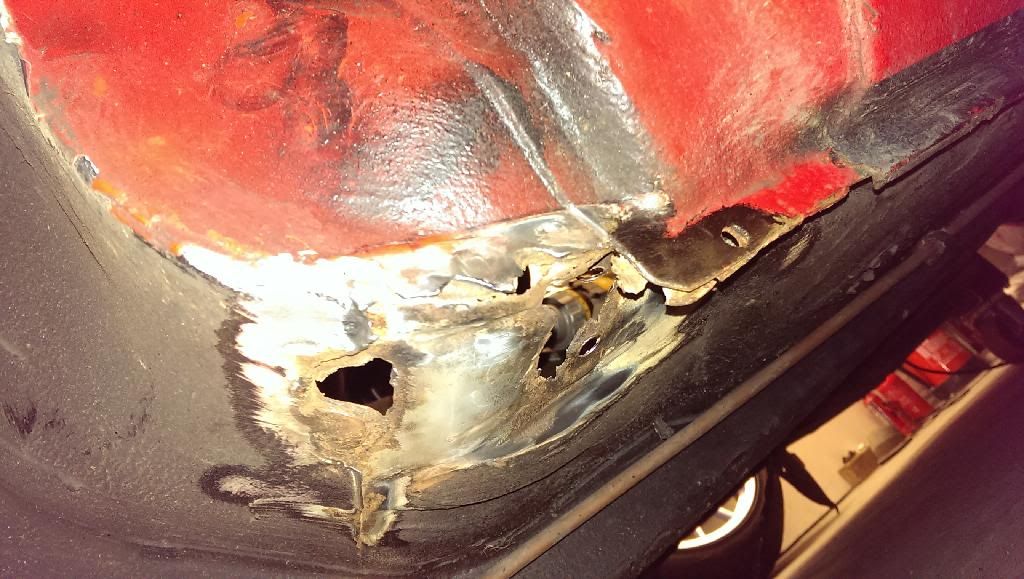
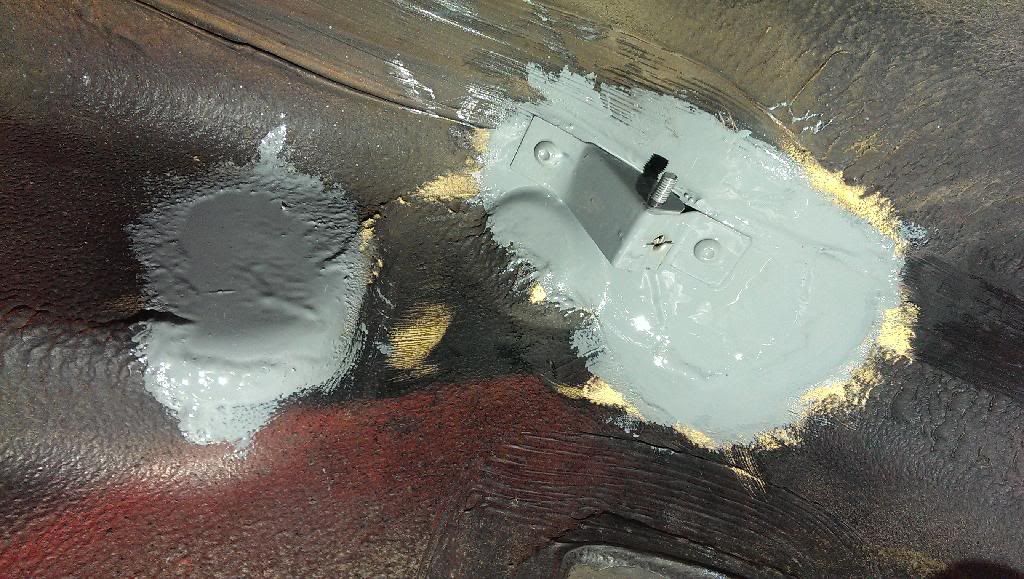
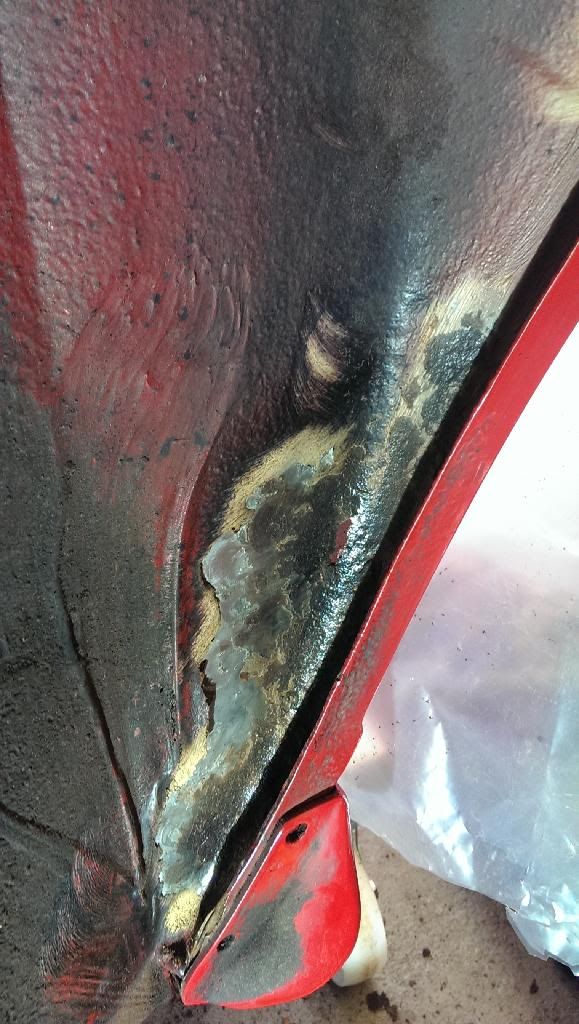
    the hole is the only issue, the bit that looks a bit crusty between the outer and inner arch isn't rust its just where I have disturbed the wax oil layer.

    Image

    Image
    Last edited by appletree on Thu Apr 10, 2014 9:52 pm, edited 1 time in total.
    Image

    You should never underestimate the predictability of stupidity

    M42 Supercharged 285bhp + M3 6speed box
    appletree
    E30 Zone Addict
    E30 Zone Addict
    Posts: 3482
    Joined: Fri Jan 20, 2006 11:00 pm
    Location: Retford

    Thu Apr 10, 2014 9:49 pm

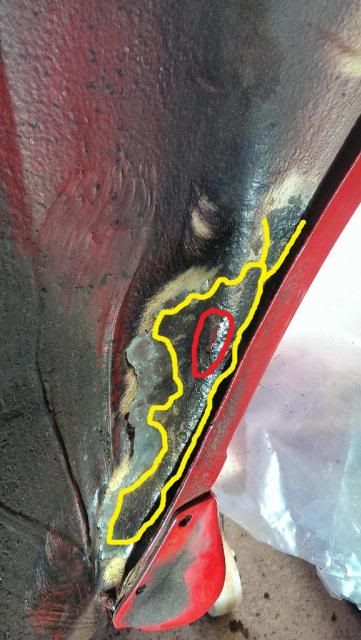
    The annoying thing about the hole is that what started out as minor split in the under seal only appeared once I used the knotted wheel on the the area.

    If you look at the coloured area on the below pic obviously the hole is in the red and the hole may get bigger if it gave it some abuse wit hte knotted wheel but i have gone over it with some good pressure already at this stage which is why I found the hole in the first place.

    Image

    The area in yellow is just surface rust and is solid as a rock, the thing is the rust started from a crack in the underseal not from the lip so lip is still "as new" as such its just the area between.

    what's peoples thoughts on cutting out the bad area and welding in a new bit without touching the outer arch? I know it will be close to the outer arch but I think it would be doable with some care, just welding it will be a mission but I may ask a friend to help who is a welder by trade so should blaze it up as treat :D
    Image

    You should never underestimate the predictability of stupidity

    M42 Supercharged 285bhp + M3 6speed box
    appletree
    E30 Zone Addict
    E30 Zone Addict
    Posts: 3482
    Joined: Fri Jan 20, 2006 11:00 pm
    Location: Retford

    Sat Apr 12, 2014 8:19 pm

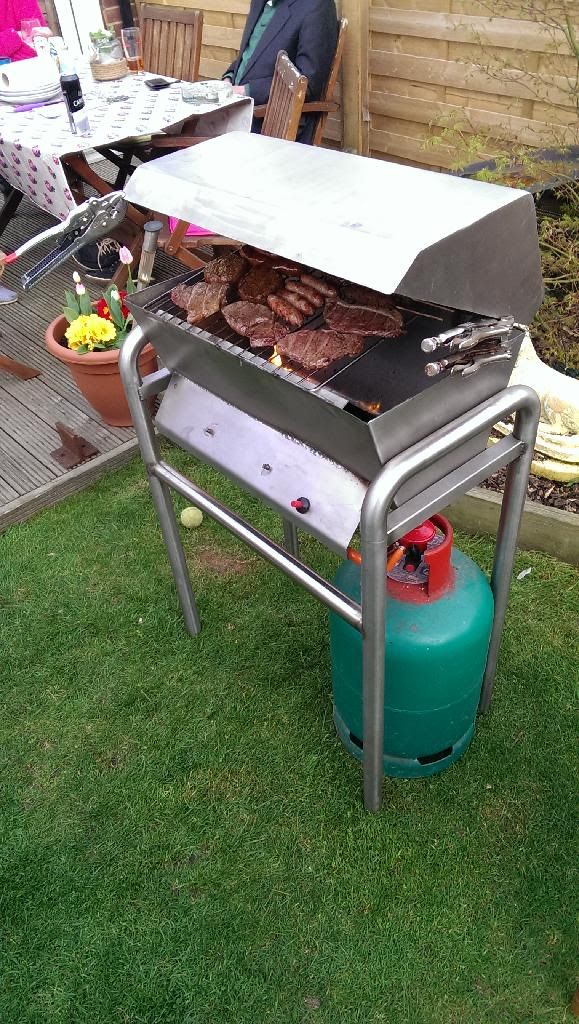
    Had my mum and dad over for a BBQ yesterday evening so didnt get chance to work on the car but did get chance to try out my home made BBQ, still a work in progress hence the mole grips but still worked a treat.

    Stainless as I'm fed up of the pressed tin ones rusting out...

    Image

    Bit late up today but had a good day.

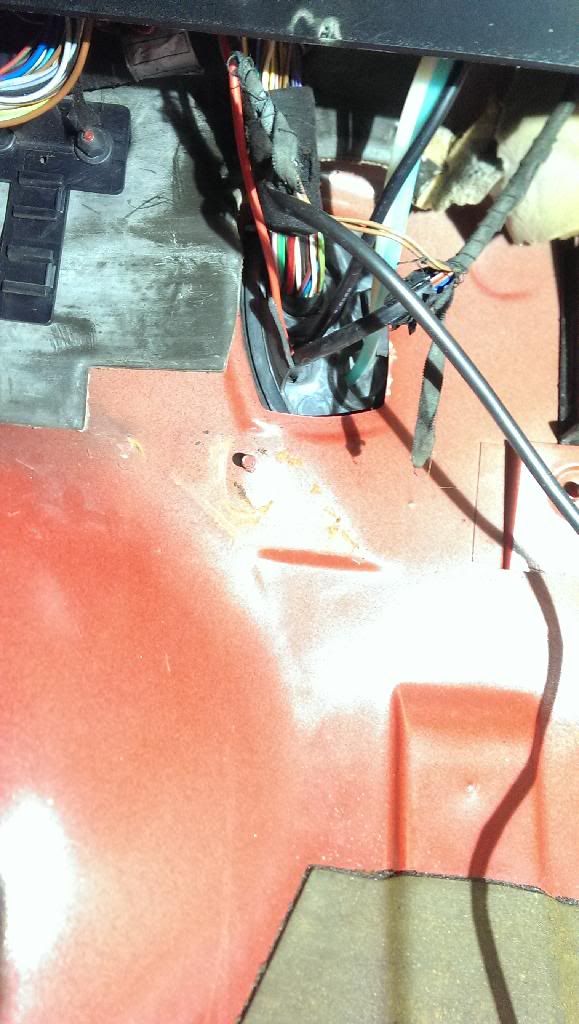
    When I removed the carpet there was a small damp patch on the carpet, think I found the cause today when I removed the glove box.

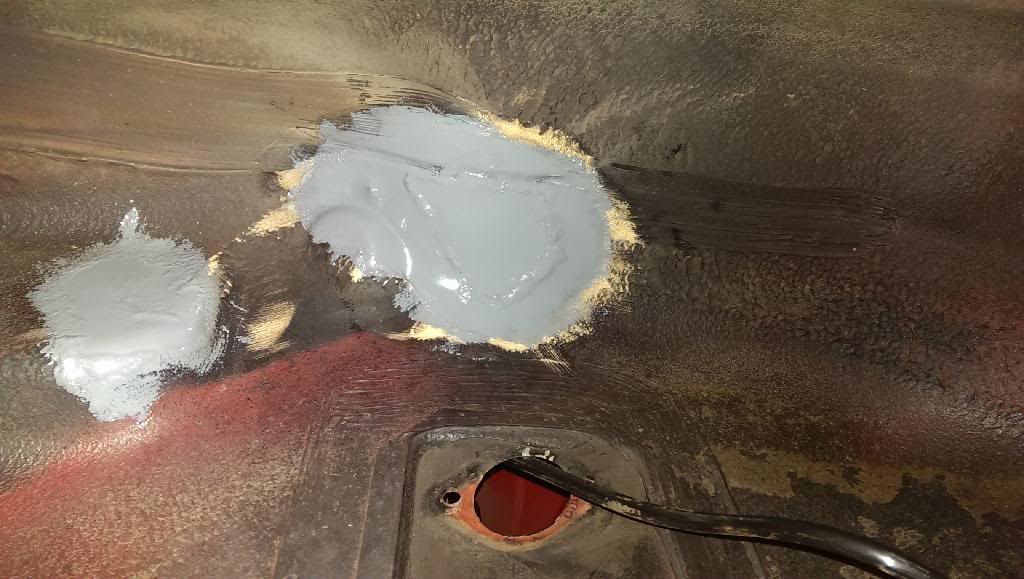
    This gromet had pulled its self out of the hole so would have been letting in the odd drop of water when I washed the car.

    Image

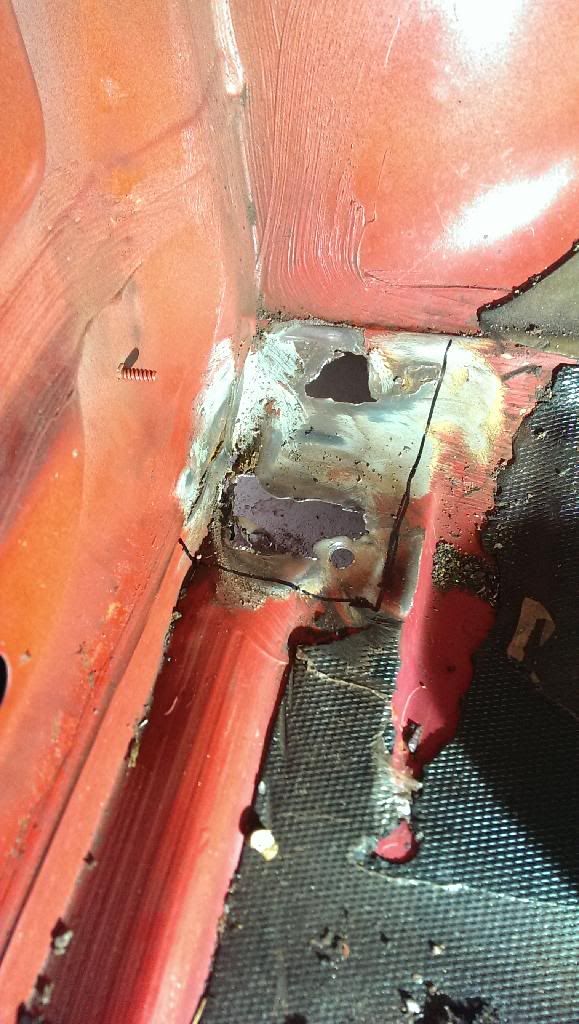
    Started out like this

    Image

    Started marking out and cutting
    Image

    Image

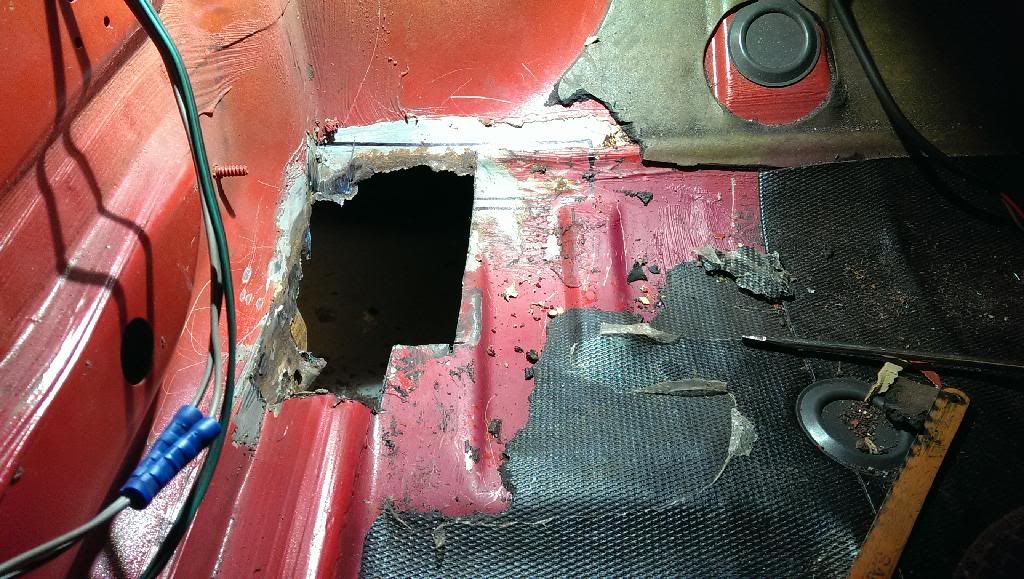
    Kept cutting until I got to new metal

    Ended up taking it all right back until I could see inside the sill to make sure it was Ok, which it was, then started the job of making patches to fill in the gaps.

    I did think about just making one patch but then changed my mind and decided to do it as BMW did it with 3 layers all coming together.

    Sill cover bit welded in and mocking up the front section

    Image

    Front section nearly welded in after pressing in the drain grooves for the jacking point, just got a few bits to finish off tomorrow and weld along the edge.

    Image

    Image

    view from the outside

    Image :D
    Last edited by appletree on Sat Apr 12, 2014 10:09 pm, edited 1 time in total.
    Image

    You should never underestimate the predictability of stupidity

    M42 Supercharged 285bhp + M3 6speed box
    jimbom30cab
    Tech 1 freak
    Posts: 7634
    Joined: Mon Oct 12, 2009 11:00 pm
    Location: in the garage

    Sat Apr 12, 2014 9:56 pm

    best thread on the zone at present, keep the updates coming, very nice work also
    appletree
    E30 Zone Addict
    E30 Zone Addict
    Posts: 3482
    Joined: Fri Jan 20, 2006 11:00 pm
    Location: Retford

    Sat Apr 12, 2014 10:00 pm

    Thanks, didn't think anyone was interested, if anyone has any advise feel free to add it as I've not done body work before so learning as I go. :D
    Image

    You should never underestimate the predictability of stupidity

    M42 Supercharged 285bhp + M3 6speed box
    jimbom30cab
    Tech 1 freak
    Posts: 7634
    Joined: Mon Oct 12, 2009 11:00 pm
    Location: in the garage

    Sat Apr 12, 2014 10:03 pm

    you're doing a great job, keep it up

    :D
    User avatar
    Neilios
    E30 Zone Regular
    E30 Zone Regular
    Posts: 302
    Joined: Sat Feb 23, 2013 11:00 pm
    Location: Consett Co. Durham

    Sun Apr 13, 2014 9:07 pm

    jimbom30cab wrote:you're doing a great job, keep it up

    :D
    Agreed, well done. Looking forward to seeing it finished.
    User avatar
    Fastroad
    E30 Zone Addict
    E30 Zone Addict
    Posts: 2405
    Joined: Mon Oct 22, 2007 11:00 pm

    Sun Apr 13, 2014 10:31 pm

    Doing a good job there. a‘a
    appletree
    E30 Zone Addict
    E30 Zone Addict
    Posts: 3482
    Joined: Fri Jan 20, 2006 11:00 pm
    Location: Retford

    Sun Apr 13, 2014 10:38 pm

    Thanks guys, got more done today but you'll have to wait till tomorrow for the update.
    Image

    You should never underestimate the predictability of stupidity

    M42 Supercharged 285bhp + M3 6speed box
    Rav335uk
    E30 Zone Meets/Events Team
    E30 Zone Meets/Events Team
    Posts: 27985
    Joined: Wed Jan 19, 2005 11:00 pm
    Location: Mad mad mad
    Contact:

    Sun Apr 13, 2014 10:42 pm

    That'll certainly keep you busy.. 8O
    Image
    If you Got "Haters",Then your doing something Right!
    CR24v??? Where's it all gone?? LOL
    appletree
    E30 Zone Addict
    E30 Zone Addict
    Posts: 3482
    Joined: Fri Jan 20, 2006 11:00 pm
    Location: Retford

    Tue Apr 15, 2014 9:15 pm

    Update,

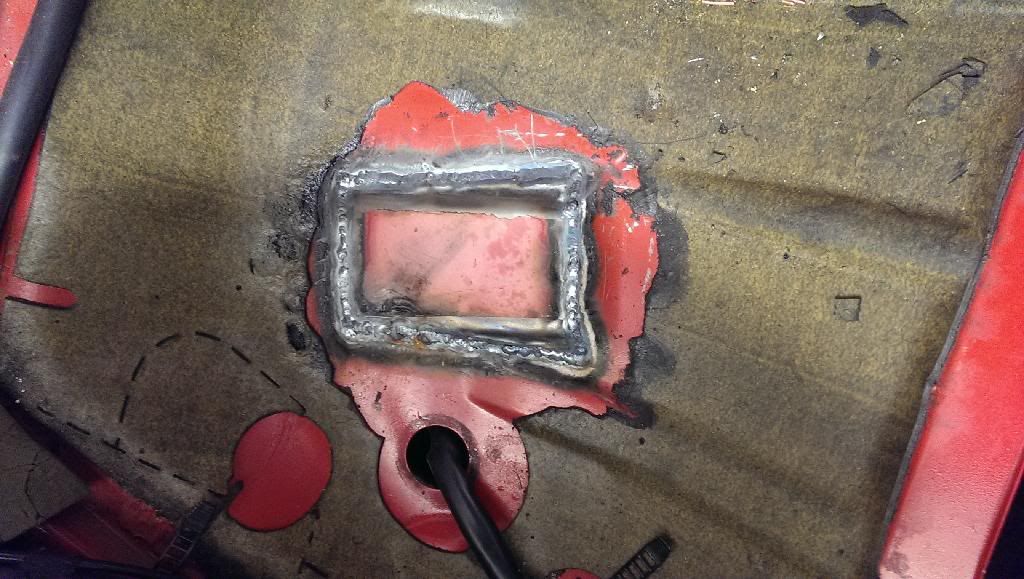
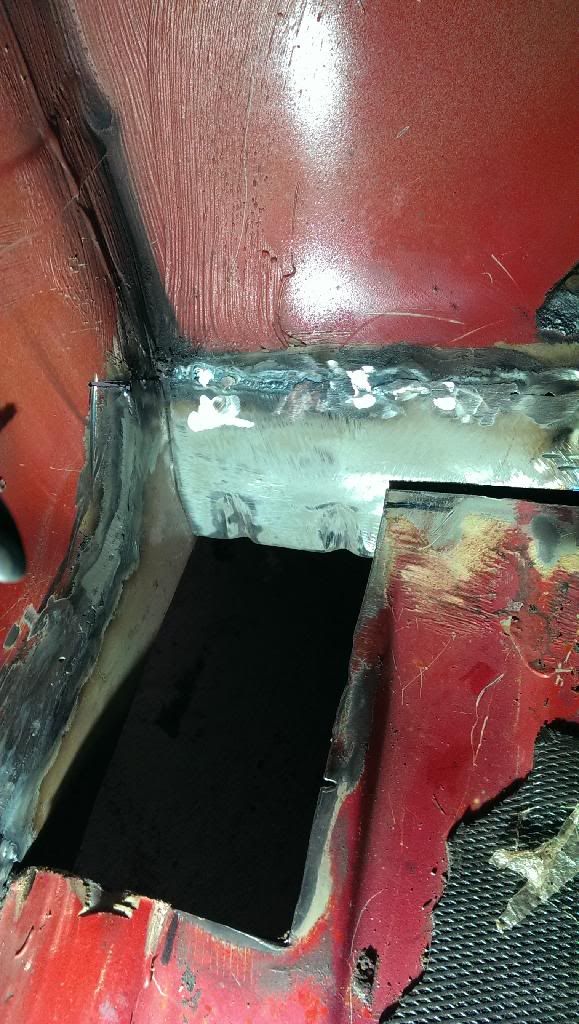
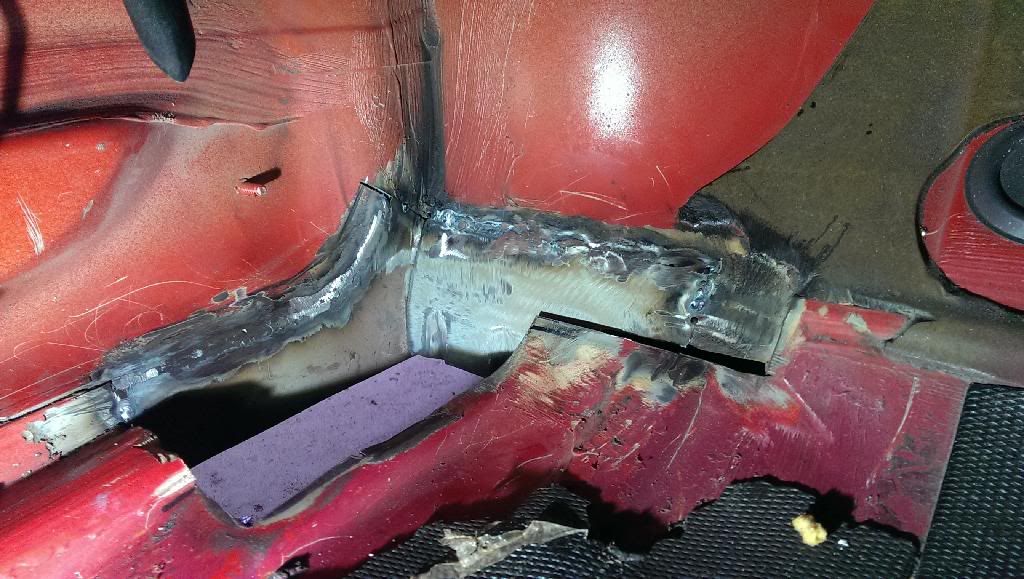
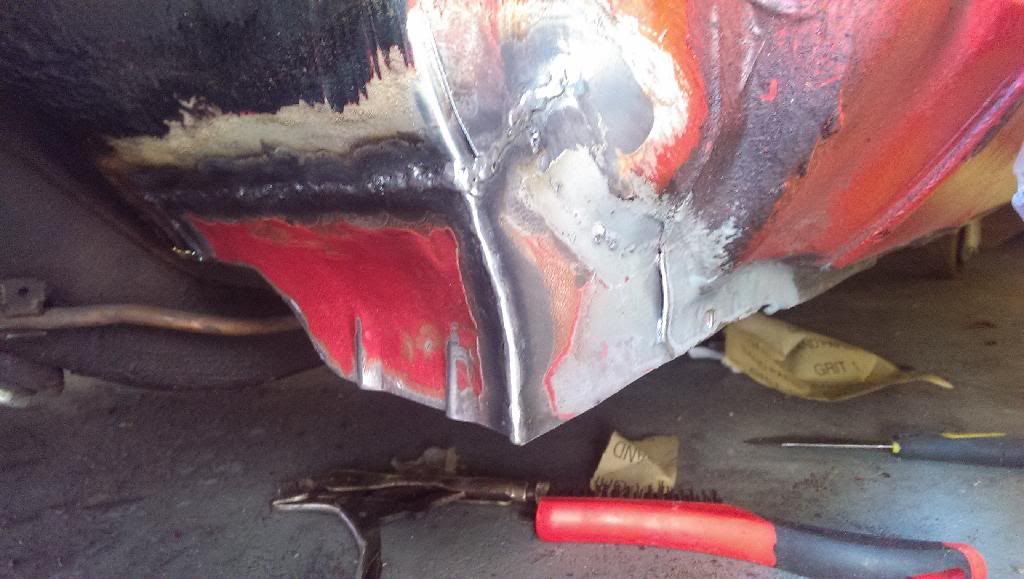
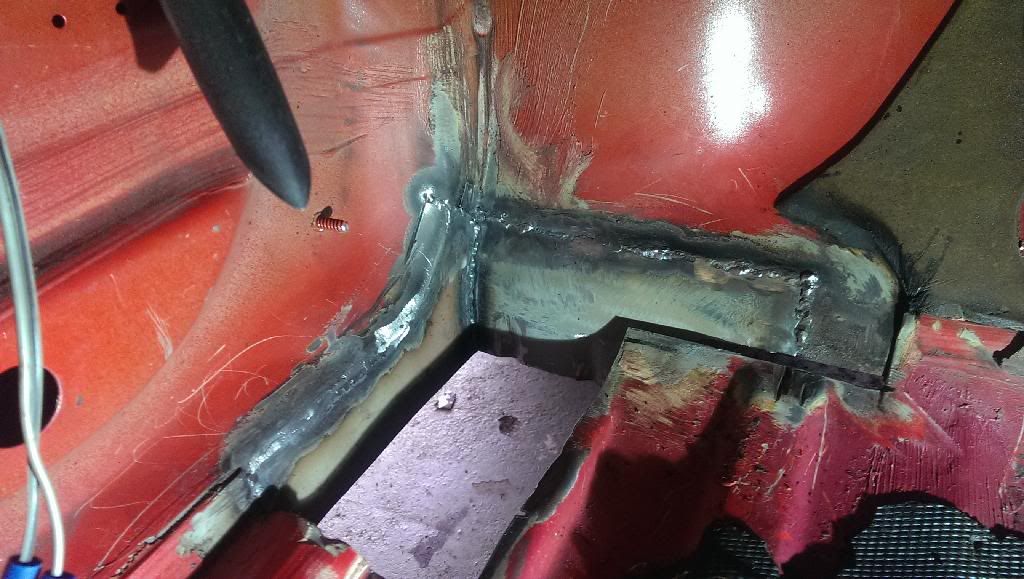
    Finished the welding on two parts of the footwell.

    Outside
    Image

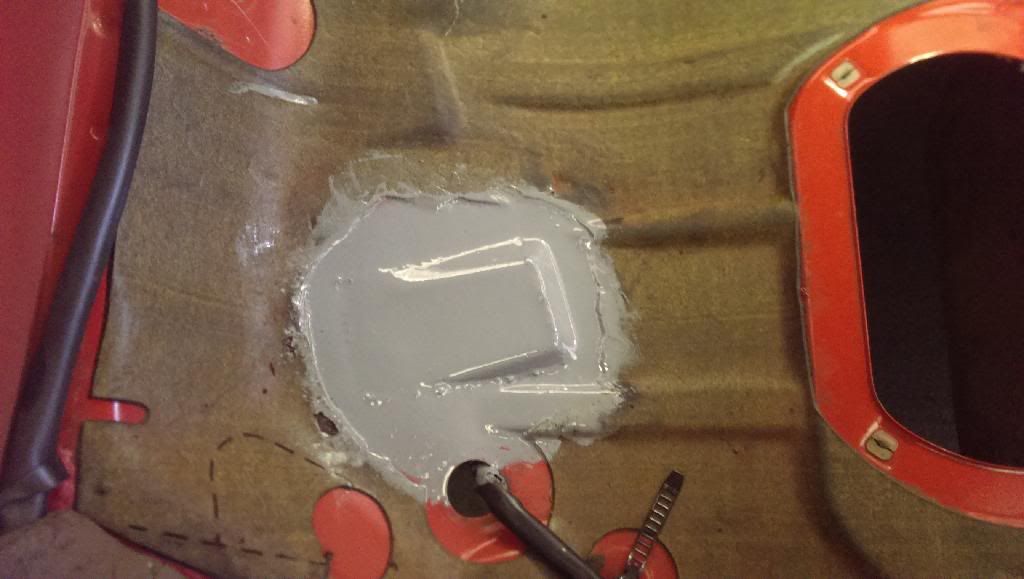
    Inside
    Image

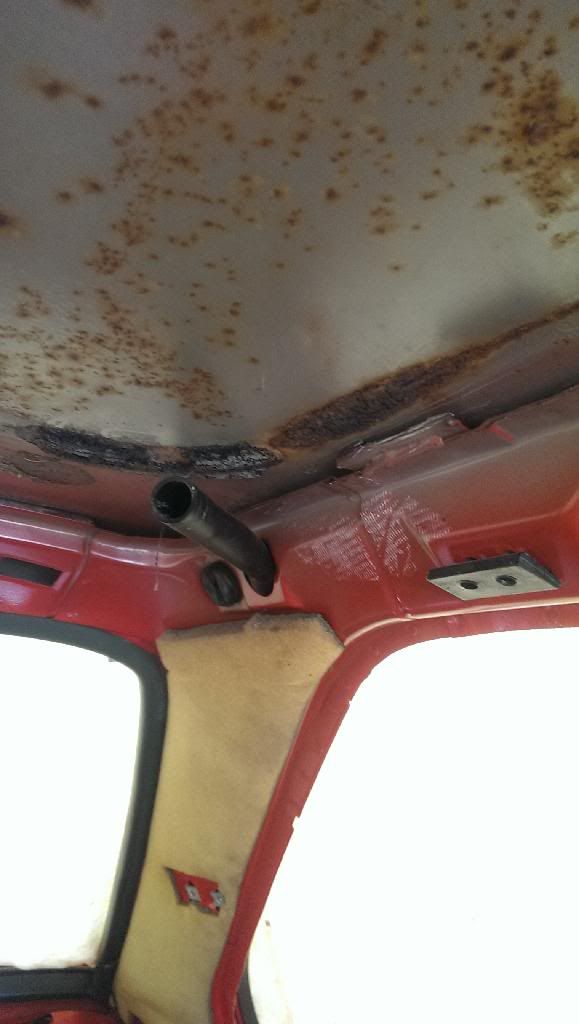
    Got fed up with laying in the footwell so made a start on the roof at the back.

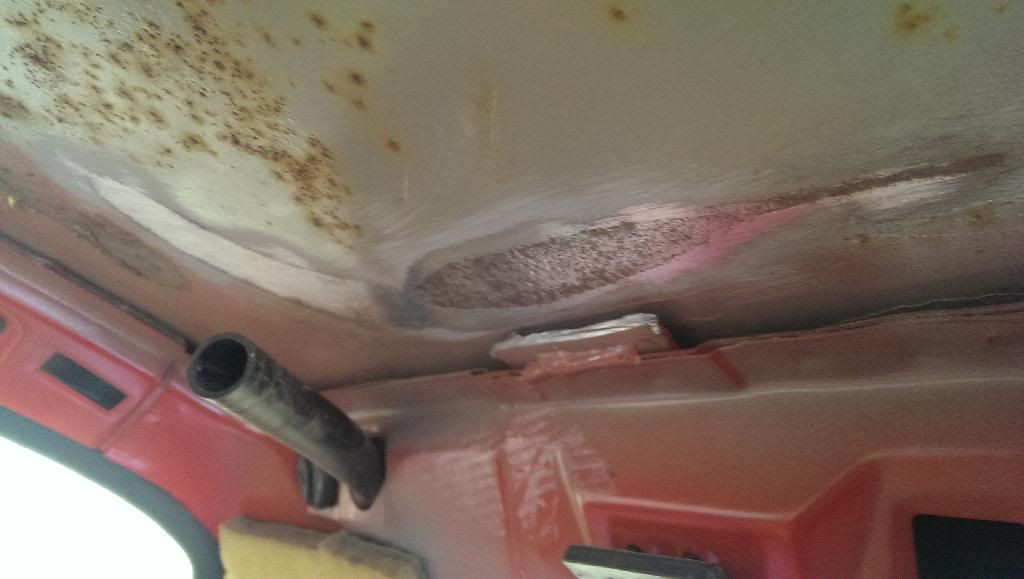
    All the rust was really dry and came off well with a 3m polishing wheel, don't know what they are called but our welders use them for polishing TIG welds up and they do a lovely job on paint as they dont block up.


    Back corner before
    Image

    Back corner, just a quick pass
    Image

    Started sanding down the rest of the roof with a orbital sander which did a good job of removing the rest of the specs of rust.

    Before
    Image

    After a sand, plan is it take it back to metal with the 3m wheel and then etch and POR 15 all the back.

    Image

    Image

    I've not polished right to the back were all the brown is, ( this is actually glue from the head lining but the paint and metal work is mint so just going to paint up to it.

    Hopefully get chance to do some work on it over bank holiday
    Image

    You should never underestimate the predictability of stupidity

    M42 Supercharged 285bhp + M3 6speed box
    Kedge
    Old Skooler
    Old Skooler
    Posts: 7702
    Joined: Thu Jan 13, 2005 11:00 pm
    Location: Leicestershire

    Wed Apr 16, 2014 3:37 pm

    Awesome work as always Matt! :cool:

    So glad I've got a car without a sunroof to avoid these dramas.
    Image
    '86 Polaris 316 M20B28 Rebuild
    Instagram - Kedge85
    appletree
    E30 Zone Addict
    E30 Zone Addict
    Posts: 3482
    Joined: Fri Jan 20, 2006 11:00 pm
    Location: Retford

    Wed Apr 16, 2014 10:28 pm

    I have thought about doing a roof swap to a non sunroof skin but then there's finding a black sport, non sunroof head lining and the cost of doing the job correctly.

    Thing is I would still say that, bar the bit of rust above the drivers head which I've known about for along time, my shell is a good one, certainly on face value as with all the rust I've found (bar the bit on the drivers side roof) I've had to go digging to find it and have taken it back till I got to new metal, while it is demoralizing finding rust on your pride and joy there are shells out there in much worse condition than mine ant a glace, even before you pick up a big screwdriver and start poking about.
    Image

    You should never underestimate the predictability of stupidity

    M42 Supercharged 285bhp + M3 6speed box
    Kedge
    Old Skooler
    Old Skooler
    Posts: 7702
    Joined: Thu Jan 13, 2005 11:00 pm
    Location: Leicestershire

    Wed Apr 16, 2014 11:04 pm

    Certainly worth doing what you're doing when you have the skills.

    Truth be told, I'd like a sunroof, just don't want this hassle. I actually found two black non-sunroof headlinings quite easily 8O still thinking of getting a new one trimmed up further down the line.
    Image
    '86 Polaris 316 M20B28 Rebuild
    Instagram - Kedge85
    jimbom30cab
    Tech 1 freak
    Posts: 7634
    Joined: Mon Oct 12, 2009 11:00 pm
    Location: in the garage

    Thu Apr 17, 2014 5:21 pm

    I would have thought that any decent trimmers should be able to make a decent non-sunroof headlining. I've had a look at one recently and its only a piece of fabric with poles. Shouldn't cost too much i would have thought. A flick through the ads in "pratical classics" might give some leads.
    appletree
    E30 Zone Addict
    E30 Zone Addict
    Posts: 3482
    Joined: Fri Jan 20, 2006 11:00 pm
    Location: Retford

    Fri Apr 18, 2014 8:22 am

    Do non sunroof skins still have the brace in that's behind the sun roof?
    Image

    You should never underestimate the predictability of stupidity

    M42 Supercharged 285bhp + M3 6speed box
    DanThe
    E30 Zone Team Member
    E30 Zone Team Member
    Posts: 28641
    Joined: Sat Sep 10, 2005 11:00 pm
    Location: Staffs
    Contact:

    Fri Apr 18, 2014 8:41 pm

    appletree wrote:Do non sunroof skins still have the brace in that's behind the sun roof?
    Yes they do
    Post Reply