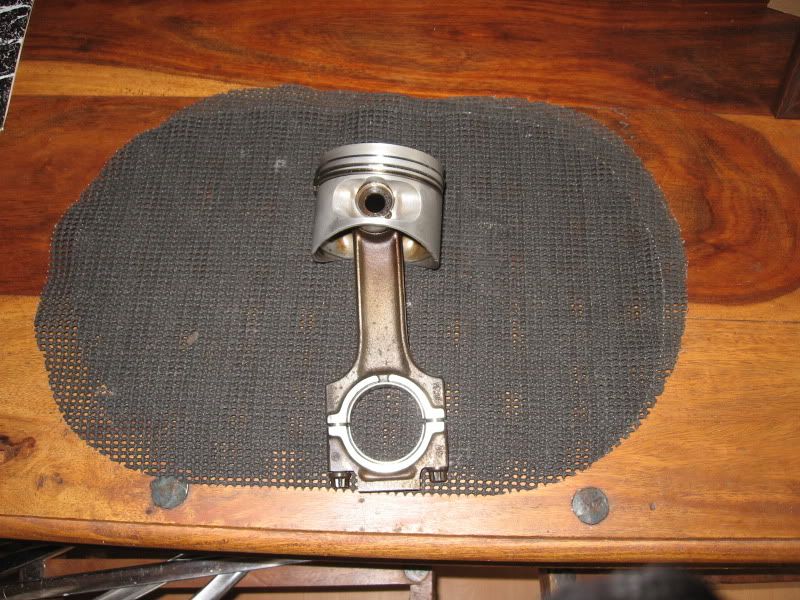
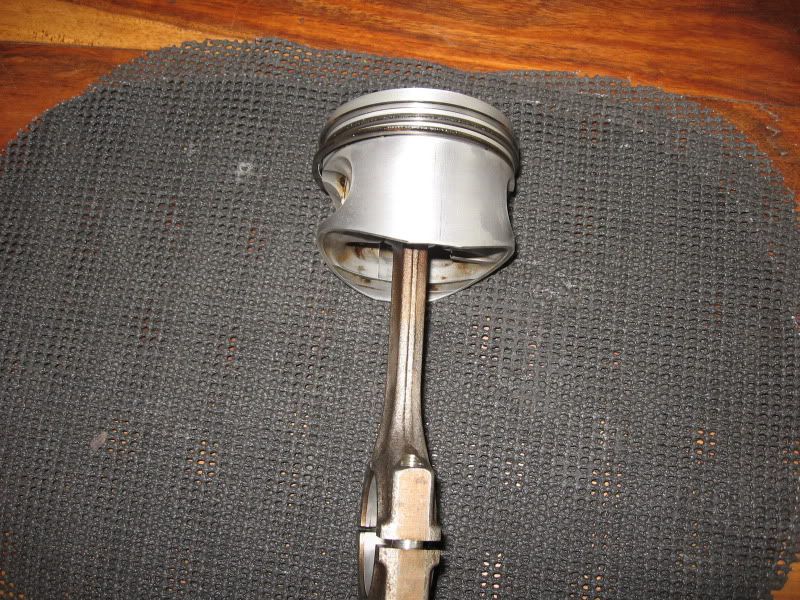
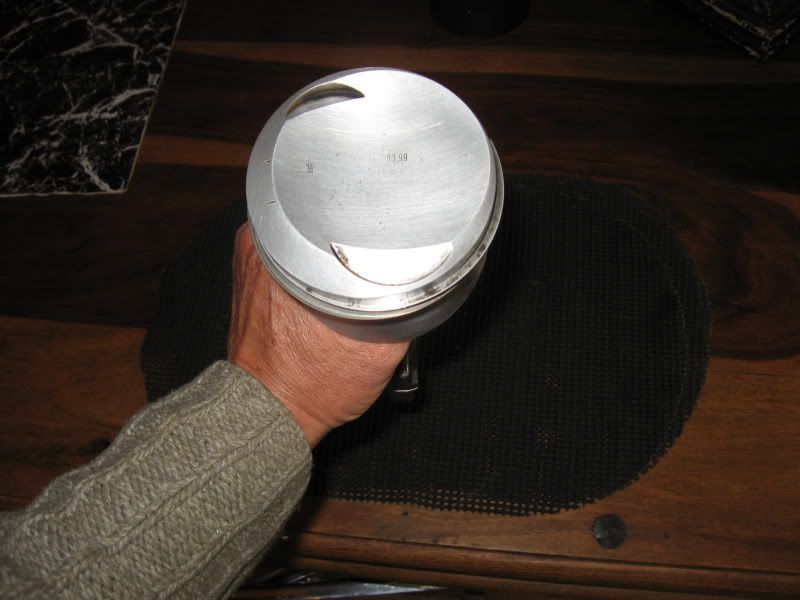
Cylinder Head Stripdown & possible 2.8 Stroker Build.

Need technical Q/A then you're in the right place

Moderator: martauto

e30topless
E30 Zone Team Member
Posts: 13595
Joined: Wed Aug 23, 2006 11:00 pm
Location: surrounded by scrap

Post Sun May 15, 2011 4:58 pm

I have always replaced the mains and rod shells not expensive rob,
find a nearby engine grinders/ engineers place, get them to measure up and order whats needed,

as for removing the crank nut it's easy, I have one of these but a bit more substantial to lock up the flywheel..

http://cgi.ebay.co.uk/Flywheel-locking- ... 3a64d723ff

failing that a bolt through the flywheel using one of the clutch coverplate holes and using a piece of flat bar to bolt the other end to the block it won't go nowhere,

you need a fat coont to stand/hold the block down whilst a big strong northerner swings on the bolt :D
User avatar
gooner1
Out humping Reindeer
Posts: 13280
Joined: Fri Apr 14, 2006 11:00 pm
Location: Northampton.For my sins.

Post Sun May 15, 2011 5:32 pm

you need a fat coont to stand/hold the block down whilst a big strong northerner swings on the bolt Very Happy

That'll be two Northeners then. :wink:

Soon as I've stripped everything i can from the block, which isn't
much more tbh, I'll remove it from the stand and tackle the crankbolt.
The place that has my cylinder head, still, will probably be able to
measure up and order what i need Steve. :thumb:
Image
User avatar
gooner1
Out humping Reindeer
Posts: 13280
Joined: Fri Apr 14, 2006 11:00 pm
Location: Northampton.For my sins.

Post Mon May 16, 2011 5:04 pm

Trying to remove the shaft that holds the Oil pump drive Cog, and the smaller cog.

Image

Image

Not sure how well you can see them in the above, the smaller one looks like it needs removing
before i can withdraw the bigger cog and shaft through the front of the block, is it held in
by what looks to be a female grub screw :?:

Also this part , Image

is it the Relief valve, is it case of undoing the large nut :?: Didn't want to get too heavy handed with it as it seems to be made of some kind of alloy.
Image
User avatar
gooner1
Out humping Reindeer
Posts: 13280
Joined: Fri Apr 14, 2006 11:00 pm
Location: Northampton.For my sins.

Post Tue May 17, 2011 12:59 pm

Anyone out there :?:
Image
B7
E30 Zone Team Member
Posts: 15841
Joined: Tue Feb 13, 2007 11:00 pm
Location: Surrey / West Sussex

Post Tue May 17, 2011 9:20 pm

You have PM mate but heres my thoughts on here in case it jogs a few memories?

"the relief valve unscrews from the block. Use a deep socket if you can as the protruding pin does actually retract. But a well fitting spanner does the trick. Nothing untowards really just a bit of balls to tackle it.

The aux drive to the pump. I remember having problems with that myself and it's held in with a pair countersunk set screws? Am I right. If I remember correctly, once they've been removed and the plate put to one side, the drive removes through the front of the block and then you can manouver the secondary one out from there. That grub screw I think(?) sets the pre load between the two.

Sorry but I'm racking my brains now."
B7's Motto. "If it's French, BURN IT!!!!!!"
B7
E30 Zone Team Member
Posts: 15841
Joined: Tue Feb 13, 2007 11:00 pm
Location: Surrey / West Sussex

Post Tue May 17, 2011 10:22 pm

Whoa! Just remembered something. Does one of the drive cogs not come out through the old distributor blanking plate? The set screw IIRC sets the height that dog cog runs at?
B7's Motto. "If it's French, BURN IT!!!!!!"
User avatar
gooner1
Out humping Reindeer
Posts: 13280
Joined: Fri Apr 14, 2006 11:00 pm
Location: Northampton.For my sins.

Post Wed May 18, 2011 6:28 am

B7 wrote:Whoa! Just remembered something. Does one of the drive cogs not come out through the old distributor blanking plate? The set screw IIRC sets the height that dog cog runs at?
That sounds like it Trev, have removed a metal plate directly
above the smaller of the cogs on the outside of the block.
Think i need to get this off the stand and get the Crank removed
before i can withdraw either of the cogs.
Image
User avatar
gooner1
Out humping Reindeer
Posts: 13280
Joined: Fri Apr 14, 2006 11:00 pm
Location: Northampton.For my sins.

Post Wed May 18, 2011 5:42 pm

Crankshaft bolt is off!!!!. A plea to anyone selling an Engine, please loosen the bolt before
you remove the lump from the car :eek: My method involved using half the Family, put two end
caps back in to hold Crank down, length of Alli rod between 3rd and 4th Crank webs to
lock it up, Mrs and Daughter sat on block to hold it down while i stood on the end of the Torque
wrench, viola!!!!!

My last question for a while, think i can manage to clean it all unaided, how do i remove part 11
in the diagram below :?:

http://www.realoem.com/bmw/showparts.do ... g=11&fg=20
Image
daimlerman
**BANNED**
Posts: 15968
Joined: Mon Feb 27, 2006 11:00 pm
Location: Grumpy Old Man

Post Wed May 18, 2011 5:46 pm

That bit slides on the woodruff key,IIRC.

Well done with the crank bolt,BTW!...I destroyed a door frame trying to wedge the block..... :mad:
Youth is wasted on the young.
User avatar
Brianmoooore
E30 Zone Team Member
Posts: 49360
Joined: Mon Jan 10, 2005 11:00 pm

Post Wed May 18, 2011 5:50 pm

gooner1 wrote:
My last question for a while, think i can manage to clean it all unaided, how do i remove part 11
in the diagram below
Part 11 is what the crank bolt holds on.
It just slides off, but might need a puller to help it on its way.
User avatar
gooner1
Out humping Reindeer
Posts: 13280
Joined: Fri Apr 14, 2006 11:00 pm
Location: Northampton.For my sins.

Post Wed May 18, 2011 5:57 pm

Thanks Brian, could a few gentle,ish, taps with hammer loosen it :?:
Seems to be a fairly solid part.
Image
B7
E30 Zone Team Member
Posts: 15841
Joined: Tue Feb 13, 2007 11:00 pm
Location: Surrey / West Sussex

Post Wed May 18, 2011 7:17 pm

three prong puller would be best. They are a tight slide fir so it's not like it'll shock loose.
B7's Motto. "If it's French, BURN IT!!!!!!"
User avatar
gooner1
Out humping Reindeer
Posts: 13280
Joined: Fri Apr 14, 2006 11:00 pm
Location: Northampton.For my sins.

Post Thu May 19, 2011 6:26 am

Would a Flywheel puller be ok, don"t have one but neighbour does.
Image
B7
E30 Zone Team Member
Posts: 15841
Joined: Tue Feb 13, 2007 11:00 pm
Location: Surrey / West Sussex

Post Thu May 19, 2011 6:30 am

Yeah as long as it pulls it off square.
B7's Motto. "If it's French, BURN IT!!!!!!"
User avatar
gooner1
Out humping Reindeer
Posts: 13280
Joined: Fri Apr 14, 2006 11:00 pm
Location: Northampton.For my sins.

Post Thu May 19, 2011 12:54 pm

B7 wrote:Yeah as long as it pulls it off square.
Well it might if i could get 3 legs on it, going to cut a bit out of timing case cover so i can. Not happy doing that but i can't remove the cover before moving the Gear wheel hub off, and i can't get 3 legs on with the cover on. :mad:

Just had a thought, the gear hub part i'm trying to remove
has what appears to be a timing mark line on it.
Should i be making sure this goes back in exactly the same position?
Image
daimlerman
**BANNED**
Posts: 15968
Joined: Mon Feb 27, 2006 11:00 pm
Location: Grumpy Old Man

Post Thu May 19, 2011 2:16 pm

Can only go back in the correct place,it's held by the woodruff key..... :D
Youth is wasted on the young.
Simon13
The longest resto in the world !
Posts: 22697
Joined: Mon Jan 10, 2005 11:00 pm
Location: Camberley, Surrey don't u know

Post Thu May 19, 2011 6:24 pm

if theres a tiny bit of rust there it can be difficult. When its all clean they slide on and off easy. But its 20 years old.

Bolt the damper wheel back on it and hit that with the mallet or something soft you can beat it with!
User avatar
gooner1
Out humping Reindeer
Posts: 13280
Joined: Fri Apr 14, 2006 11:00 pm
Location: Northampton.For my sins.

Post Thu May 19, 2011 8:19 pm

Well that didn't go quite as planned, and as a result i am now in need of
a prefacelift lower timing cover. :o:
Tried several times, with a newly bought puller, very slight initial movement, then puller
kept slipping off after being wound up. On the last go one of the puller legs decided to
disintergrate, the whole thing shot off and smacked me on the chin. In temper i hit the
timing case with the ratchet i was holding..... and the bloody gear wheel came free enough
to remove.

Block now totally stripped, apart from the Oil pump drive.

Image

Image

Image

Another Tool bites the dust, same make as the Valve removing tool that broke, Laser .

Image

Image
Shots of bores from 6 to 1.

Image

Image
Image
Image
Image
Image

Finally, for today, shots of the Crankshaft.
Image
Image.
Image
User avatar
gooner1
Out humping Reindeer
Posts: 13280
Joined: Fri Apr 14, 2006 11:00 pm
Location: Northampton.For my sins.

Post Sat May 21, 2011 4:22 pm

Just a bit of cleaning for today.

Image
Used a degreaser used on the Railways.


Then dried it off and used a brass brush on a drill.

Image

Image

Image

Found the 25 6E I mark, which confirms it's a HC Block
Image :D

Also found the shell ID colour hiding under all that oil.

Image

The hidden screw location that gave me all that trouble with the lower timing cover. You were correct Trev, but i was looking in the wrong place. :o:

Image
Oh well, it's all a learning curve. Will fill all the waterways up with path cleaner tomorrow
and let it stand for a while, before a final rub down and paint.
Would really like to check the Bores, Crankshaft, etc, but there is no way i can afford, justify
buying that kind of equipment, and unfortunately i can't find anywhere that hires the Gauges etc.
So will have to go to Machineshop sometime next week, then i can start ordering the shells, bolts
seals,etc,etc.
Last edited by gooner1 on Sat May 21, 2011 6:22 pm, edited 1 time in total.
Image
B7
E30 Zone Team Member
Posts: 15841
Joined: Tue Feb 13, 2007 11:00 pm
Location: Surrey / West Sussex

Post Sat May 21, 2011 4:51 pm

Good job that man. It's all going swimmingly. I'd recommend Halford Engine Laquer in brush on form. Go for Satin finish and it's damn near factory. I've used it on 2 m20 blocks with no issues. :D
B7's Motto. "If it's French, BURN IT!!!!!!"
daimlerman
**BANNED**
Posts: 15968
Joined: Mon Feb 27, 2006 11:00 pm
Location: Grumpy Old Man

Post Sat May 21, 2011 5:27 pm

Find yourself a long,thin rod,I am sure the railway will use something suitable....
And prod all the cooling system holes from the top of the block,have a really good poke about,then turn the block upside down on that posh engine stand and capture all the crud that has reduced the capacity of the cooling jacket.

Saw this done once at a 'workshop' meeting when I was a member of DLOC,the demo block was out of a '50's DB14,at the rear of the block(lowest point)there was almost 2" of accumulated crud.Guy who showed us this was David Beales,he is Leeds based and specializes in '30's stuff such as Daimler,Aston Martin,RR etc...from that Daimler block,he took two pint bottles full of debri in about ten minutes poking! As he pointed out,no wonder older engines overheat...
Youth is wasted on the young.
User avatar
gooner1
Out humping Reindeer
Posts: 13280
Joined: Fri Apr 14, 2006 11:00 pm
Location: Northampton.For my sins.

Post Sun May 22, 2011 7:11 pm

Been comparing the Crank removed from this block, with one given to me
when I bought a Cylinder head some while back.
Notice on the nose of the Crank ,given to me, that there is a rubber seal of sorts on the nose.
The crank I removed had no such item on it.

Removed crank.

Image

Both cranks together.

Image

Now apart from wondering why to the above, I'm also wondering if there would be any issues
with using the Crank given to me in place of the recently removed one along with the original
Main Bearings and Conrod/Pistons. I'm guessing not as all the Shells are being replaced anyway,
but better safe than sorry.

Pics of both cranks together.

Image

Image
Image
Simon13
The longest resto in the world !
Posts: 22697
Joined: Mon Jan 10, 2005 11:00 pm
Location: Camberley, Surrey don't u know

Post Sun May 22, 2011 9:15 pm

Have you considered using a 2.5 M52 crank? I only say this as they are way lighter than a stock M20 2.5 crank, would help a stock engine rev cleaner
User avatar
gooner1
Out humping Reindeer
Posts: 13280
Joined: Fri Apr 14, 2006 11:00 pm
Location: Northampton.For my sins.

Post Mon May 23, 2011 2:56 pm

Tbh Si, i'd never even heard of a 2.5 M52 crank being used in an E3O Would have
considered it but i'm a bit pushed for time on this. My Cab MOT runs out soon and i have no
where to park it up even if I Sorn it. Thanks for the tip though :thumb:
Anyone got any idea, re the rubber bit on the Crankshaft :?:
Image
User avatar
gooner1
Out humping Reindeer
Posts: 13280
Joined: Fri Apr 14, 2006 11:00 pm
Location: Northampton.For my sins.

Post Thu May 26, 2011 1:58 pm

What's the best way to remove the main bearing, crankcase shells :?:
They seem pretty tight and i don't want to damage anything.
The Machine shop/engineers have asked me to bring in 1X Piston with it's shells, 1 X Main bearing
cap and it's shells and 1x main bearing, crankcase shell so they can identify and order the relevant
shells. They still haven't carried out the bloody cylinder head work though.
Image
User avatar
Brianmoooore
E30 Zone Team Member
Posts: 49360
Joined: Mon Jan 10, 2005 11:00 pm

Post Thu May 26, 2011 9:03 pm

gooner1 wrote:What's the best way to remove the main bearing, crankcase shells :?:
Tap them down on the side opposite the locating tab, and the side with the tab will slide up so that you can get behind it.
User avatar
gooner1
Out humping Reindeer
Posts: 13280
Joined: Fri Apr 14, 2006 11:00 pm
Location: Northampton.For my sins.

Post Fri May 27, 2011 11:05 am

Thanks Brian. :thumb:
Image
daimlerman
**BANNED**
Posts: 15968
Joined: Mon Feb 27, 2006 11:00 pm
Location: Grumpy Old Man

Post Fri May 27, 2011 11:32 am

Just wondering,as you do,if that black ring on the lower crank in your piccie is part of it's old front oil seal?
Youth is wasted on the young.
User avatar
gooner1
Out humping Reindeer
Posts: 13280
Joined: Fri Apr 14, 2006 11:00 pm
Location: Northampton.For my sins.

Post Fri May 27, 2011 11:44 am

That thought crossed my mind Malc, but it looks as if it belongs there.
Image
User avatar
gooner1
Out humping Reindeer
Posts: 13280
Joined: Fri Apr 14, 2006 11:00 pm
Location: Northampton.For my sins.

Post Sat May 28, 2011 9:20 am

I knew I'd seen a Crankshaft with a similar piece of rubber on it.


Image


From Hairyscreech;s 2.8 development thread.
The bottom Crank is a 2.5 one.
Image
User avatar
gooner1
Out humping Reindeer
Posts: 13280
Joined: Fri Apr 14, 2006 11:00 pm
Location: Northampton.For my sins.

Post Sat May 28, 2011 6:18 pm

Spent a little time cleaning a Piston today.
Soaked overnight in Paraffin, then a Scothchbrite pad.
Not completely finished but happy enough.

Image

Image

Image
Image
User avatar
gooner1
Out humping Reindeer
Posts: 13280
Joined: Fri Apr 14, 2006 11:00 pm
Location: Northampton.For my sins.

Post Wed Jun 01, 2011 6:40 pm

Just got the below from another thread.

Stock M20B25 deck height is 206.7mm.
So went and measured the one I've stripped down, comes in at 206.6.
Now i know it's impossible to be sure with a 20 + year old engine, especially
with no history, but it sure didn't look like it had been taken apart before.
I assume the stock height stated is for both H/C and all others, yes :?:
Image
daimlerman
**BANNED**
Posts: 15968
Joined: Mon Feb 27, 2006 11:00 pm
Location: Grumpy Old Man

Post Wed Jun 01, 2011 7:08 pm

Production tolerance,perhaps?

Doing well to measure to a tenth of a mm!
Youth is wasted on the young.
User avatar
gooner1
Out humping Reindeer
Posts: 13280
Joined: Fri Apr 14, 2006 11:00 pm
Location: Northampton.For my sins.

Post Wed Jun 01, 2011 7:33 pm

My bad, misread the tape. :o:

I'm fast becoming the Brittney Spears of the Zone ala, Ooops I've done it again.
Image
User avatar
gooner1
Out humping Reindeer
Posts: 13280
Joined: Fri Apr 14, 2006 11:00 pm
Location: Northampton.For my sins.

Post Wed Jun 08, 2011 10:16 pm

If i was to use the M52 2.8 Crankshaft in this block, would i still use the E30 Crankcase
shells/bearings :?:
Image