
E30 M3 minor rust repair (few finished pic's)
Moderator: martauto
-
scottidog
- E30 Zone Regular

- Posts: 575
- Joined: Thu Jun 26, 2008 11:00 pm
- Location: bradford, west yorkshire
Love this thread and love the work, IMO definately black, maybe you could play with the laquer to make it your own, a very very fine metallic flake perhaps? OMG i want that shell 
-
Theo
- Old Skooler

- Posts: 10735
- Joined: Wed Jun 01, 2005 11:00 pm
- Location: Kent
Why do you only want to paint it a sport evo colour? (jet black or brilliant red)
I would go for Alpine White II personally, but I know white isn't to everyones taste.
I would go for Alpine White II personally, but I know white isn't to everyones taste.
-
Rav335uk
- E30 Zone Meets/Events Team

- Posts: 27978
- Joined: Wed Jan 19, 2005 11:00 pm
- Location: Mad mad mad
wish i had the time to do something like that to my cab 

If you Got "Haters",Then your doing something Right!
CR24v??? Where's it all gone?? LOL
-
ChemicalAl

- E30 Zone Regular
- Posts: 565
- Joined: Mon Sep 22, 2008 11:00 pm
- Location: Sydney
I too have been stuck in Holyhead for more than 6 hours........Self harm wasn't a million miles away!
Alpine White (but then i'm biased)!
Amazing work.......can't wait for the next update!
Alpine White (but then i'm biased)!
Amazing work.......can't wait for the next update!
1987 E28 528i Diamond Black 74k
1986 E28 525e Saturn Blau 72k
1988 E28 525i 56k
1987 E28 525e 51k
1991 E32 730i SE Granite Silber 75k
1988 E30 316 Black 81k
1992 E30 318i Touring Diamond Black 43k
1990 E30 325i Touring Alpine White 2 65k
1986 E30
1986 E28 525e Saturn Blau 72k
1988 E28 525i 56k
1987 E28 525e 51k
1991 E32 730i SE Granite Silber 75k
1988 E30 316 Black 81k
1992 E30 318i Touring Diamond Black 43k
1990 E30 325i Touring Alpine White 2 65k
1986 E30
-
Returnof318i
- E30 Zone Regular
- Posts: 277
- Joined: Sun Jan 23, 2005 11:00 pm
This thread is fantastic,
"fabricate.... (like that word?, sounds real fancy for beating the shit out
of a piece of steel till it roughly resembles the bit you hacked off) "
PMSL
Only thing i will say is, You have too much money.
"fabricate.... (like that word?, sounds real fancy for beating the shit out
of a piece of steel till it roughly resembles the bit you hacked off) "
PMSL
Only thing i will say is, You have too much money.
-
iDreamBeemer
- E30 Zone Camper

- Posts: 1177
- Joined: Mon Feb 14, 2005 11:00 pm
- Location: Camberley
No such thing as too much money!! Only people that don't know how to spend it properly!Only thing i will say is, You have too much money.
-
Rich_W
- E30 Zone Addict

- Posts: 2932
- Joined: Mon Jan 10, 2005 11:00 pm
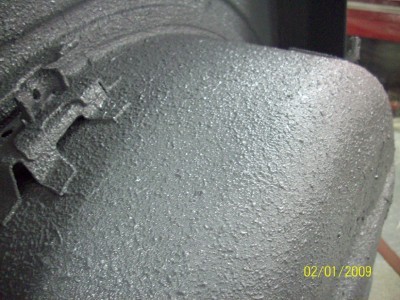
Regarding "damage" when dipping. I've heard that's relatively common. Not wonderful when the dipping is several hundred pounds.
Obviously you're doing this as and when time allows. How much do you estimate something like this would cost a customer? Curious mainly, not about to send you a shell.
Obviously you're doing this as and when time allows. How much do you estimate something like this would cost a customer? Curious mainly, not about to send you a shell.
-
tomson
- E30 Zone Addict
- Posts: 3598
- Joined: Sun Nov 06, 2005 11:00 pm
- Location: Bristol
Epic, one of the best threads ever.....
-
Returnof318i
- E30 Zone Regular
- Posts: 277
- Joined: Sun Jan 23, 2005 11:00 pm
Dont get me wrong, if i had enough money and the equipment he has, an rb26 powered capri, a jag v8 supercharged capri, and a 325 built especially for drifting would be well and truly mine!
-
stu_316i
- E30 Zone Newbie

- Posts: 90
- Joined: Wed Jan 09, 2008 11:00 pm
continuously amazing  love it!
My e30 has some rust in the same place on the rear tail light pannel, should really get something done about it, but im utterly skill-less lol
My e30 has some rust in the same place on the rear tail light pannel, should really get something done about it, but im utterly skill-less lol
-
x-works
- E30 Zone Regular
- Posts: 332
- Joined: Thu Mar 10, 2005 11:00 pm
- Location: Ireland
Thanks one and all for your kind words.
Jon_Bmw
Can the dents be pushed out as you must have reasonable access.
Theres only 2 real dents as such, the one you see in the
pic and another on the sill, the other 3 are more dings than dents.
Yep, they should push out ok, but they will leave a mark in the metal
work requiring more effort to totally repair them. Not the end of the world
but is just a little frustrating after grafting the new roof on without putting
a dent in it. To dwell on it would raise one's stress, of which I need no more of.
One thing I have always been keen to find out, is how do you chop the metal so neatly, especially curved sections? Also what thickness is the metal you are replacing?
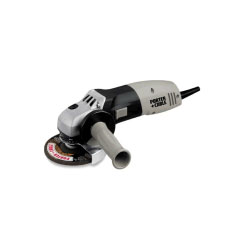
To hack bits off the shell we use...
and

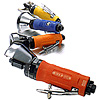
and for cutting the sheet steel to go back on, a left hand curved, a right
hand curved and a straight cut, metal snips.

The sheet of steel used for repairs is 0.8 mm and is identical to the thickness of the oem metal coming out, except for the shock towers metal
photo'ed earlier on, that was closer to 2mm thick.
Morat
Wow, how much does it cost to have a shell dipped?
£930 for acid dipping and £1050 for primer dipping is what
Visa say I need to find.
Theo325
Why do you only want to paint it a sport evo colour?
No complicated reason, just like them two.
Returnof 318i
Only thing i will say is, You have too much money.
and my bank manager says I have too much debt, bless him.
Rich_W
Regarding "damage" when dipping. I've heard that's relatively common. Not wonderful when the dipping is several hundred pounds.
I had read that too, so wasn't shocked.
How much do you estimate something like this would cost a customer?
To be honest I haven't been counting the hours on this and I haven't
a clue what the bill would add up to. What I can say is I'm almost sure I
wouldn't take on to do this much work on a shell for someone else, money
would be nice but the time spent on it can't be repayed.
Jon_Bmw
Can the dents be pushed out as you must have reasonable access.
Theres only 2 real dents as such, the one you see in the
pic and another on the sill, the other 3 are more dings than dents.
Yep, they should push out ok, but they will leave a mark in the metal
work requiring more effort to totally repair them. Not the end of the world
but is just a little frustrating after grafting the new roof on without putting
a dent in it. To dwell on it would raise one's stress, of which I need no more of.
One thing I have always been keen to find out, is how do you chop the metal so neatly, especially curved sections? Also what thickness is the metal you are replacing?
To hack bits off the shell we use...
and
and for cutting the sheet steel to go back on, a left hand curved, a right
hand curved and a straight cut, metal snips.
The sheet of steel used for repairs is 0.8 mm and is identical to the thickness of the oem metal coming out, except for the shock towers metal
photo'ed earlier on, that was closer to 2mm thick.
Morat
Wow, how much does it cost to have a shell dipped?
£930 for acid dipping and £1050 for primer dipping is what
Visa say I need to find.
Theo325
Why do you only want to paint it a sport evo colour?
No complicated reason, just like them two.
Returnof 318i
Only thing i will say is, You have too much money.
and my bank manager says I have too much debt, bless him.
Rich_W
Regarding "damage" when dipping. I've heard that's relatively common. Not wonderful when the dipping is several hundred pounds.
I had read that too, so wasn't shocked.
How much do you estimate something like this would cost a customer?
To be honest I haven't been counting the hours on this and I haven't
a clue what the bill would add up to. What I can say is I'm almost sure I
wouldn't take on to do this much work on a shell for someone else, money
would be nice but the time spent on it can't be repayed.
Last edited by x-works on Mon Jan 26, 2009 10:00 pm, edited 1 time in total.
-
stevesingo
- E30 Zone Newbie
- Posts: 77
- Joined: Mon May 15, 2006 11:00 pm
- Location: Cumbria
I can't believe they damaged your shell. After our conversation I'm sure you spoke to them regarding damage, and still they can't prevent it.
You are a hero, though. Is the race on for finished cars?
When do you expect to be finished?
Best of luck
Steve
You are a hero, though. Is the race on for finished cars?
When do you expect to be finished?
Best of luck
Steve
-
x-works
- E30 Zone Regular
- Posts: 332
- Joined: Thu Mar 10, 2005 11:00 pm
- Location: Ireland
Howya Steve,
Yeah I got the complementary dents too , still it's not like my panels
were mirrior finish to start with, a few more hours on the paint prep end should
have them sorted though.
As for the race for the finish I'm fairly certain you got me on that one,
I'm up to final demand notices on the credit cards now, it'll not take
them much longer to find me I'd like to have it finished for the
summer, we'll see what happens.
Hopefully you'll stay ahead so I can see how it should be done.
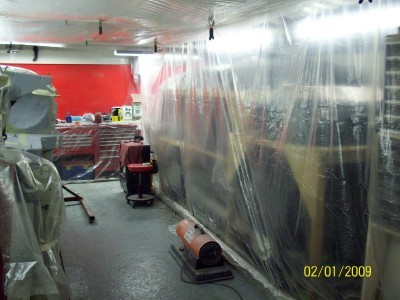
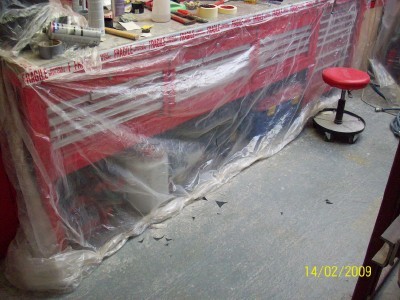
(For anyone that doesn't know Steve, he's also doing a full
restoration on an M3 at the moment, only better. The first 2 pictures
in the shell dipping sequence above are of his car.)
Yeah I got the complementary dents too
were mirrior finish to start with, a few more hours on the paint prep end should
have them sorted though.
As for the race for the finish I'm fairly certain you got me on that one,
I'm up to final demand notices on the credit cards now, it'll not take
them much longer to find me
summer, we'll see what happens.
Hopefully you'll stay ahead so I can see how it should be done.
(For anyone that doesn't know Steve, he's also doing a full
restoration on an M3 at the moment, only better. The first 2 pictures
in the shell dipping sequence above are of his car.)
Last edited by x-works on Mon Jan 26, 2009 9:55 pm, edited 1 time in total.
-
Jon_Bmw
- Dangerous when thinking
- Posts: 7604
- Joined: Tue Jan 11, 2005 11:00 pm
- Location: Salisbury
Thanks for the reply, I'm suprised snips actually cut 0.8mm of metal, impressed actually. Just don't get your fingers caught! 
Steve, you best be getting some photos of yours up then! Or at least a link to some.
Steve, you best be getting some photos of yours up then! Or at least a link to some.
-
stevesingo
- E30 Zone Newbie
- Posts: 77
- Joined: Mon May 15, 2006 11:00 pm
- Location: Cumbria
To save me the hassle of posting it all up again, here is the link to the thread on s14power.com...
http://board.s14power.com/showthread.php?t=2508
Registration is required unfortunately.
Steve
http://board.s14power.com/showthread.php?t=2508
Registration is required unfortunately.
Steve
-
E30Gheko
- E30 Zone Addict
- Posts: 3789
- Joined: Sun Sep 28, 2008 11:00 pm
- Location: Wirral
By far the best thread I've read on here yet!! Was mega impressed with the roof work, then the fabrication of all those small bits..... Then seeing it back from being dipped?? OMG that's ace. U must have the patience of a saint! Amazin stuff.
-
magpie
- Old Skooler
- Posts: 28035
- Joined: Sun Jun 29, 2008 11:00 pm
- Location: Consett,Durham.
should be due an update soon hopefully

m52 b30 stroker 6-speed 318is Galvanizer
m42 touring
+ a yard full of scrap turds
-
scottidog
- E30 Zone Regular
- Posts: 575
- Joined: Thu Jun 26, 2008 11:00 pm
- Location: bradford, west yorkshire
i know its been said twice already! but i just cant beleive they handed that car back over to you with them dents in the shell. The F*£CKING cheek of it. They surely have some sort of resposibility for handing a shell back to the customer the same shape as it was presented. Afterall they do specialise in this sh1t. OMG 
-
hoshy
- E30 Zone Wiki Guru
- Posts: 4118
- Joined: Tue Jan 18, 2005 11:00 pm
- Location: Munich
Very nice work!
E46 M3 CSL but dreaming of another E30.
-
x-works
- E30 Zone Regular
- Posts: 332
- Joined: Thu Mar 10, 2005 11:00 pm
- Location: Ireland
Evening all,
Sorry for the delay in updates but unfortunately we had a tough decision
to make. With the current recession and global economic
downturn we had to do some long hard thinking and in the end both
came to the same regrettable decision...
It's too f**kin cold to be working out in the garage during december.
Alas by mid January the temperature was picking up and the snow had melted away.
Before I go any further I'd like to explain that it wasn't to cold for us in the garage,
we were concerned that the low temperatures would play havoc with the paints and
sealers going on the car next and afraid that the metalwork underneath might be
damp and the underbody shultz going on might trap dampness in to the shell.
Thats our story and we're sticking with it.
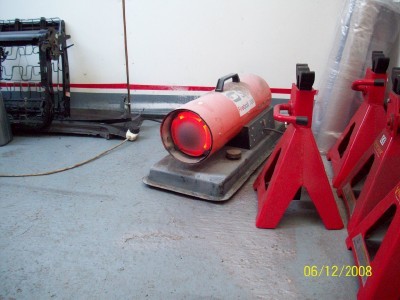
So back to the work, first things first, heat...
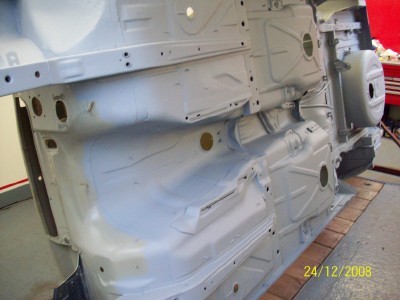
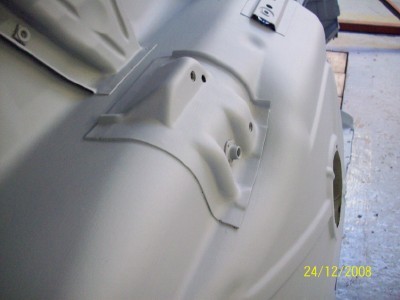
and then back to where we left off last time, the underneath of
the shell was sanded and ready for a good coat of primer.
We have used this primer in the past and have found it good. Its
Upol P88 and can either be hand painted or thinned out and sprayed.
For under the car we went with a good heavy hand painted coat....

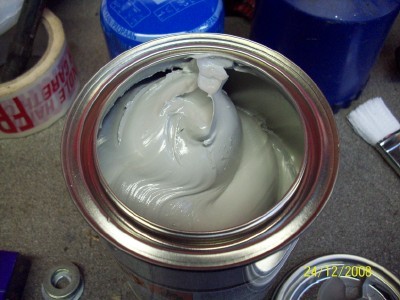
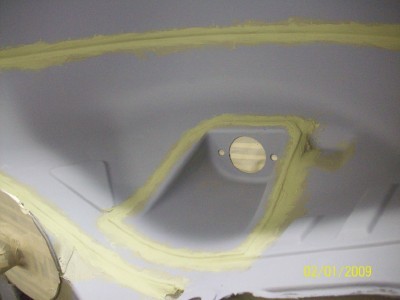
after this it was time for seam sealer. We used two types of sealer for this,
I had 3 quarters of a can of Upol sealer left over from another job which
was still good to go and also bought another 2 cans of 3m to finish the job off....
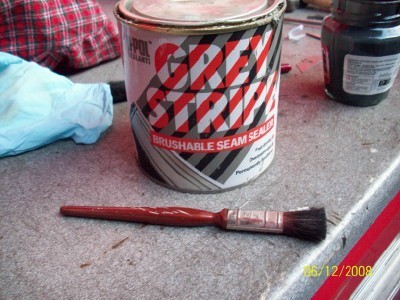

in the second picture above you can see the special brush that seam sealer
comes with to reproduce factory finish effect. I don't like using that brush
so instead you can see in the 1st pic the brush I prefer to use. It's a normal
half inch brush with about 1cm cut off the end of the bristles.
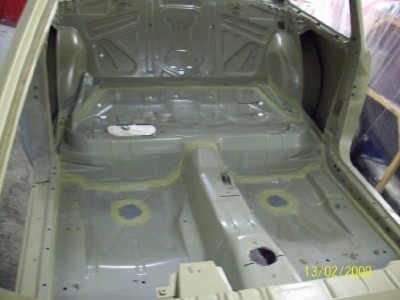
On the application itself basically you apply the sealer to any panel gap on the
underside of the car where water can creep in
to where you don't want it....
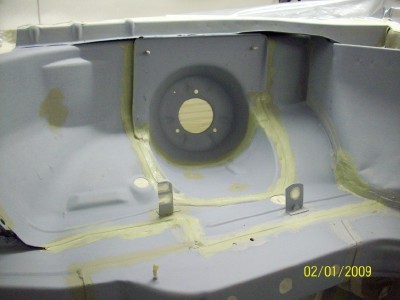
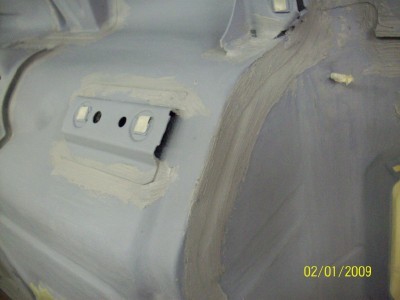
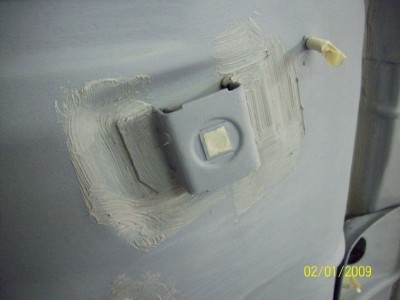
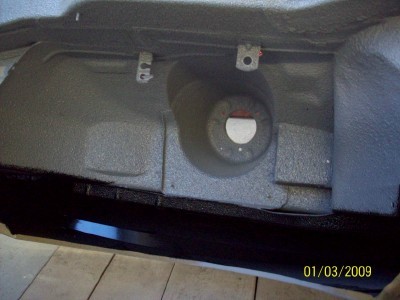
as well as any brackets on the underside of the car, although water
getting in to the car isn't a concern here what does happen
is water seeps in between the bracket and the floorpan of the car and stays there
slowly but surely rotting the surrounding metalwork....
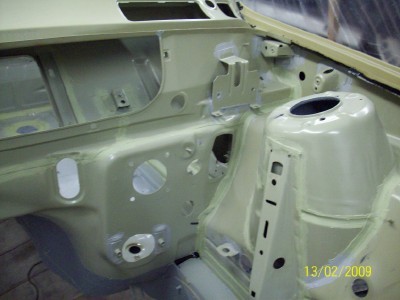
with the underneath done it was time to move on and do the inside,
the boot and the engine bay.....
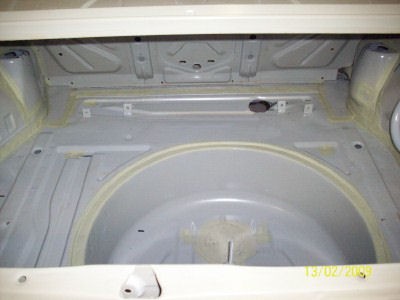
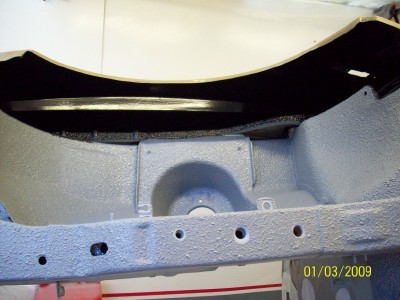
on the whole the seam sealer was fairly straight forward to put on,
if a little time consuming, there was however one b**tard of
an area to get to, the compartment underneath the front scuttle panel....
I'm pretty sure I got more on me than in there.
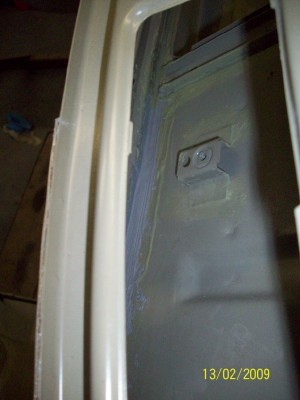
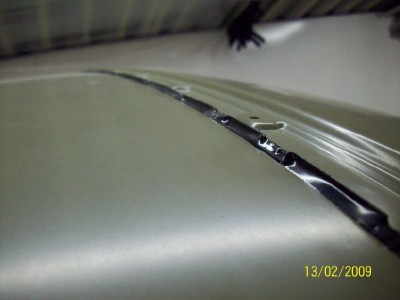
The next area that needed sealing was along the roof gutters and
rear windscreen clip. This will be visible under the final spray job
so it needs to be a little neater...
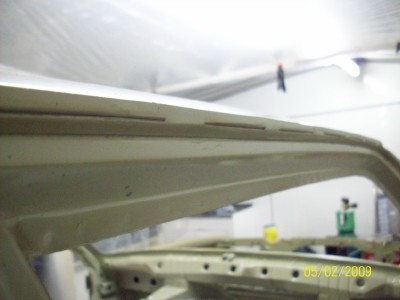
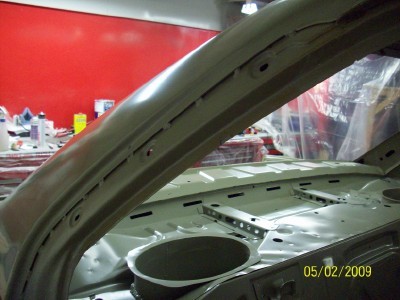
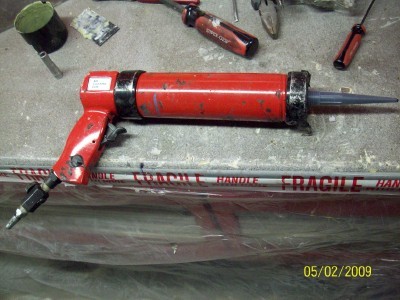
so we use this stuff, same principle, it's a seam sealer but instead of brush on
it's in a tube and can be squirted a little neater....
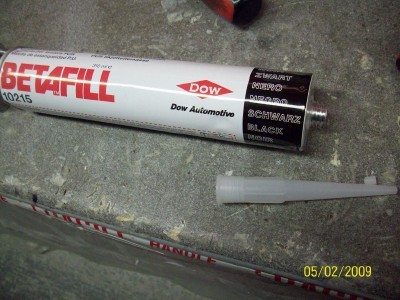
it can be put on using a normal silicone gun but with the temperatures
still a little low the stuff is fairly stubborn in the tube so we used an air gun to apply it.....
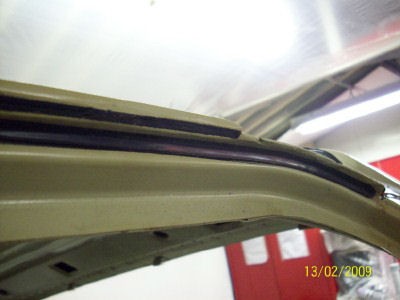
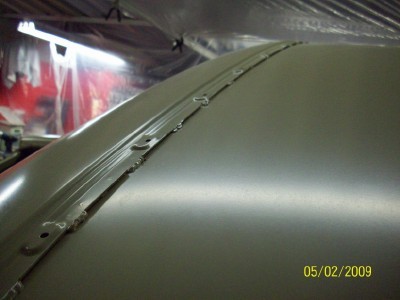
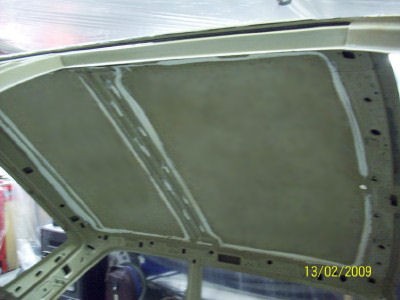
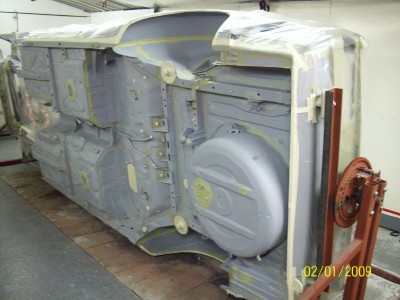
next job after that was to rebond the roof. When the shell was dipped
all sealer and bonder was disolved so it didn't make much sense to bond
the roof before dipping, so we done it now....
With all that done we could move on to Shultzing the underneath of the shell.
Before this started we "masked" off the section off the garage the car was in.
This was not so much to stop the Shultz getting on everything, it's a reasonably
tidy application, but instead to stop the dust from the sanding which was
coming next from getting everywhere. The car itself was masked of for
shultzing....
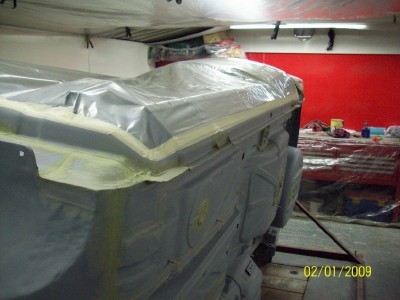
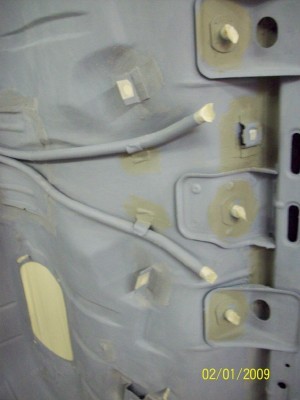
and as you may have noticed from some of the earlier pic's all
the little threaded nuts and brackets where you don't want the
stone gaurd to get were masked up.
For the underseal itself we decided to go with the 3m gear
thanks to some advice from a member on here RJB6 (thanks Roy).
The stuff comes in foil packets and cost 18euro a pack....
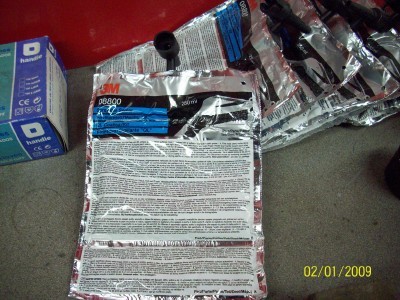
The other thing needed was the special gun used to apply the stuff, it cost 60 euro....
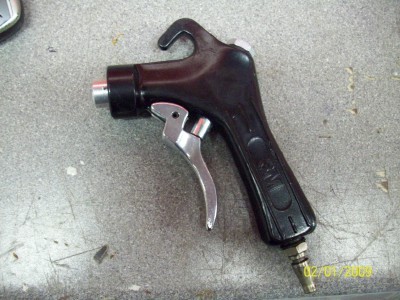
the gun is a little on the expensive side compared to other products guns
but the one upside, unlike others, is that the sealer doesn't run through
this style of gun so you don't have to clean it out after or worry about it clogging up.
The air pressure comes out of the gun and siphons the gue
up out of the packet and splatters it on to the shell....
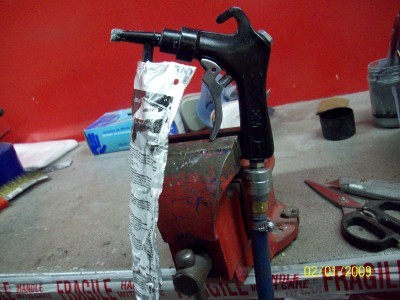
Having not used this stuff before I made some "complicated calculations" on how much
exactly I would need to do the whole underside and came to the conclusion
that 6 packs would be sufficient.....
and the result....
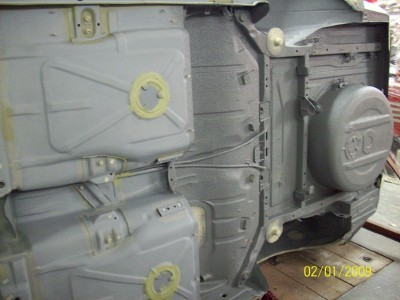
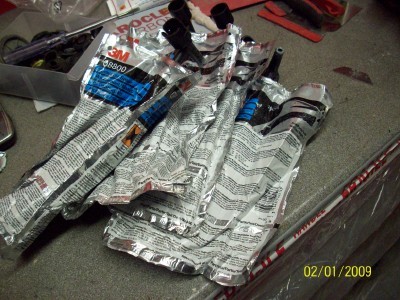
yeah, 6 packs covered one third of the underneath, f**kin egit
so back to the motorfactors again.
12 packs later....
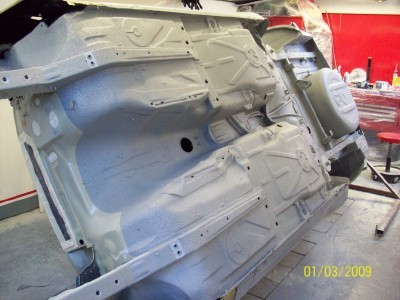
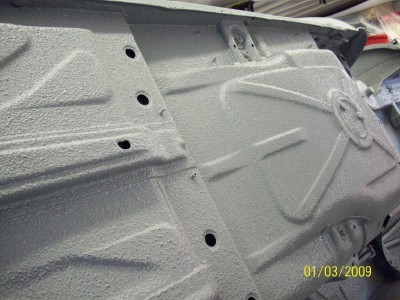
the finish is sweet, looks more or less identical to the factory stuff....

Thats about it for tonight. Have a load more pics online and hope
to get them up here tomorrow evening. Heads melted from
typing all this crap now, so, till tomorrow.....
Sorry for the delay in updates but unfortunately we had a tough decision
to make. With the current recession and global economic
downturn we had to do some long hard thinking and in the end both
came to the same regrettable decision...
It's too f**kin cold to be working out in the garage during december.
Alas by mid January the temperature was picking up and the snow had melted away.
Before I go any further I'd like to explain that it wasn't to cold for us in the garage,
we were concerned that the low temperatures would play havoc with the paints and
sealers going on the car next and afraid that the metalwork underneath might be
damp and the underbody shultz going on might trap dampness in to the shell.
Thats our story and we're sticking with it.
So back to the work, first things first, heat...
and then back to where we left off last time, the underneath of
the shell was sanded and ready for a good coat of primer.
We have used this primer in the past and have found it good. Its
Upol P88 and can either be hand painted or thinned out and sprayed.
For under the car we went with a good heavy hand painted coat....
after this it was time for seam sealer. We used two types of sealer for this,
I had 3 quarters of a can of Upol sealer left over from another job which
was still good to go and also bought another 2 cans of 3m to finish the job off....
in the second picture above you can see the special brush that seam sealer
comes with to reproduce factory finish effect. I don't like using that brush
so instead you can see in the 1st pic the brush I prefer to use. It's a normal
half inch brush with about 1cm cut off the end of the bristles.
On the application itself basically you apply the sealer to any panel gap on the
underside of the car where water can creep in
to where you don't want it....
as well as any brackets on the underside of the car, although water
getting in to the car isn't a concern here what does happen
is water seeps in between the bracket and the floorpan of the car and stays there
slowly but surely rotting the surrounding metalwork....
with the underneath done it was time to move on and do the inside,
the boot and the engine bay.....
on the whole the seam sealer was fairly straight forward to put on,
if a little time consuming, there was however one b**tard of
an area to get to, the compartment underneath the front scuttle panel....
I'm pretty sure I got more on me than in there.
The next area that needed sealing was along the roof gutters and
rear windscreen clip. This will be visible under the final spray job
so it needs to be a little neater...
so we use this stuff, same principle, it's a seam sealer but instead of brush on
it's in a tube and can be squirted a little neater....
it can be put on using a normal silicone gun but with the temperatures
still a little low the stuff is fairly stubborn in the tube so we used an air gun to apply it.....
next job after that was to rebond the roof. When the shell was dipped
all sealer and bonder was disolved so it didn't make much sense to bond
the roof before dipping, so we done it now....
With all that done we could move on to Shultzing the underneath of the shell.
Before this started we "masked" off the section off the garage the car was in.
This was not so much to stop the Shultz getting on everything, it's a reasonably
tidy application, but instead to stop the dust from the sanding which was
coming next from getting everywhere. The car itself was masked of for
shultzing....
and as you may have noticed from some of the earlier pic's all
the little threaded nuts and brackets where you don't want the
stone gaurd to get were masked up.
For the underseal itself we decided to go with the 3m gear
thanks to some advice from a member on here RJB6 (thanks Roy).
The stuff comes in foil packets and cost 18euro a pack....
The other thing needed was the special gun used to apply the stuff, it cost 60 euro....
the gun is a little on the expensive side compared to other products guns
but the one upside, unlike others, is that the sealer doesn't run through
this style of gun so you don't have to clean it out after or worry about it clogging up.
The air pressure comes out of the gun and siphons the gue
up out of the packet and splatters it on to the shell....
Having not used this stuff before I made some "complicated calculations" on how much
exactly I would need to do the whole underside and came to the conclusion
that 6 packs would be sufficient.....
and the result....
yeah, 6 packs covered one third of the underneath, f**kin egit
so back to the motorfactors again.
12 packs later....
the finish is sweet, looks more or less identical to the factory stuff....
Thats about it for tonight. Have a load more pics online and hope
to get them up here tomorrow evening. Heads melted from
typing all this crap now, so, till tomorrow.....
Last edited by x-works on Fri Mar 04, 2016 10:38 pm, edited 1 time in total.
-
ROC

- E30 Zone Regular
- Posts: 615
- Joined: Mon Aug 29, 2005 11:00 pm
- Location: Northants
Fantastic work, great write up 
-
hoshy
- E30 Zone Wiki Guru
- Posts: 4118
- Joined: Tue Jan 18, 2005 11:00 pm
- Location: Munich
This thread makes me drool. Pure E30 porn.
E46 M3 CSL but dreaming of another E30.
-
Jhonno
- Homo Hair
- Posts: 20362
- Joined: Mon Jan 10, 2005 11:00 pm
- Location: FLAT, FLAT, FLAT!!
Wow!

-
m666w
- E30 Zone Newbie
- Posts: 183
- Joined: Sat Nov 05, 2005 11:00 pm
- Location: wolves
only joking ... pure crafts man , very few left
-
E30Gheko
- E30 Zone Addict
- Posts: 3789
- Joined: Sun Sep 28, 2008 11:00 pm
- Location: Wirral
-
Morat
- E30 Zone Team Member

- Posts: 8943
- Joined: Thu Feb 09, 2006 11:00 pm
- Location: The Peoples Republic of Yorkshire
If that car rusts, it'll not be any time within the next century!!
E30 Touring 0.35 cD - more slippery than prison soap
Praise the Lard... and pass the dripping!
Praise the Lard... and pass the dripping!
-
Rich_W
- E30 Zone Addict
- Posts: 2932
- Joined: Mon Jan 10, 2005 11:00 pm
Damnit!
Every time you do a update I wish I had the money to buy a Sport Evo and send it to you with a blank cheque!
Every time you do a update I wish I had the money to buy a Sport Evo and send it to you with a blank cheque!
-
dano0
- E30 Zone Regular
- Posts: 708
- Joined: Sun May 13, 2007 11:00 pm
- Location: swindon
What a hero top job top wright up cant wait for more
-
Aubs
- Aka Mr_Gerbic_iS
- Posts: 247
- Joined: Sat Sep 08, 2007 11:00 pm
- Location: Nr Cambridge
I've said it before in this thread but i'll say it again: Your attention to detail is superb. The precision, skill and patience involved in this rebuild is staggering.
Plus it makes excellent reading!
Have you set any kind of timescale for completion, or is it more of a case of 'it's done when it's done'?
Plus it makes excellent reading!
Have you set any kind of timescale for completion, or is it more of a case of 'it's done when it's done'?
-
beardymat
- E30 Zone Squatter

- Posts: 1979
- Joined: Tue Jun 14, 2005 11:00 pm
- Location: sheffield, city of steel, and rust apparently
aaahhh! good old sh!t in a bag... havnt seen that in a while mostly due to the cost and the fact it doesnt go far but its good stuff and as hard as a b@st@rd.
i cant tell you how much i want to pull my car apart and get it dipped, proper blank canvas stuff and just about the only way to end up with a rust free shell.
i cant tell you how much i want to pull my car apart and get it dipped, proper blank canvas stuff and just about the only way to end up with a rust free shell.
No longer self employed but still available for welding duties.
-
Gortour
- E30 Zone Team Member
- Posts: 9025
- Joined: Sat Sep 23, 2006 11:00 pm
- Location: Poole, Dorset
Jeez, pull that lovely Sport of yours apart again Matt?
Currently slumming it in an E46 Touring
-
Simon13
- The longest resto in the world !
- Posts: 22697
- Joined: Mon Jan 10, 2005 11:00 pm
- Location: Camberley, Surrey don't u know
Heroic! you've covered more areas underneath with seam sealer and underseal than the factory. Alot of the brackets on the rear and along the transmission tunnel are not protected like you guys have done
Thats a better job than factory! but i expect cost for them was an issue
Thats a better job than factory! but i expect cost for them was an issue
-
bmwe30mtech
- Engaged to the E30 Zone
- Posts: 5288
- Joined: Thu Feb 03, 2005 11:00 pm
Amazing work! Im glad to see this car being done properly, I havent seen anybody else use that proper factory look underseal yet. It looks brand new, well done.
Do you find that when your using grey stripe it starts to dry on the brush after about 10 minutes of working with it? I find it also partly dissolves the primer and mixes in with it a bit, perhaps its meant to.
I would love to do this sort of resto one day to an M3 or M3 cab.
Once again, great work
Do you find that when your using grey stripe it starts to dry on the brush after about 10 minutes of working with it? I find it also partly dissolves the primer and mixes in with it a bit, perhaps its meant to.
I would love to do this sort of resto one day to an M3 or M3 cab.
Once again, great work
1988 M3 EvoII, Macau Blue/EvoII trim
1989 325i Sport M Tech II, Diamond Black/Black leather
1989 325i Sport M Tech II, Diamond Black/Black leather
-
Simon13
- The longest resto in the world !
- Posts: 22697
- Joined: Mon Jan 10, 2005 11:00 pm
- Location: Camberley, Surrey don't u know
My 2 door has this in the repaired sections of the car!bmwe30mtech wrote:Amazing work! Im glad to see this car being done properly, I havent seen anybody else use that proper factory look underseal yet. It looks brand new, well done.
Do you find that when your using grey stripe it starts to dry on the brush after about 10 minutes of working with it? I find it also partly dissolves the primer and mixes in with it a bit, perhaps its meant to.
I would love to do this sort of resto one day to an M3 or M3 cab.
Once again, great work
-
bmwe30mtech
- Engaged to the E30 Zone
- Posts: 5288
- Joined: Thu Feb 03, 2005 11:00 pm
Oh right I didnt realise, to be honest mine had similar stuff used also (I think, Matt will know!)
Talking of your 2 door...any progress? Pm me rather than spam this.
Talking of your 2 door...any progress? Pm me rather than spam this.
1988 M3 EvoII, Macau Blue/EvoII trim
1989 325i Sport M Tech II, Diamond Black/Black leather
1989 325i Sport M Tech II, Diamond Black/Black leather