Fitting Tech2 front and rear bumpers
The ultra-desirable 325i Sport came fitted with a special M-Tech body kit as standard. Part of the M-Tech package, it wasn't exclusive to that model; lesser E30 models could be fitted with the same kit... if the owner had the cash. The kits were specific to pre- and post-facelift, with the M-Tech 2 kit being fitted to models after 1987.
If you've got your grubby mitts on one of these kits, here's how to bolt it onto your E30.
NOTE: It is not worth attempting to fit a Tech 2 kit to a car from 1987 or earlier. Significant cutting and welding is needed, and the result always looks butchered.
Overview
The official BMW fitting guide is available here
Seems to be a lot of confusion about fitting the M-Tech 2 bumpers and valances to a standard facelift car. It is actually relatively easy to do and requires only some minor drilling and purchasing of clips. All face lift cars can accept the Tech 2 front and rear bumpers including 4 door, touring, coupe and cabriolets. Pre facelift cars require fairly extensive modifications to the metal valance, tow eye, front and rear bumper mounts, rear bumper/wheel arch mating location etc. There are separate sites describing this job, a PM to mrLEE30 and I will send the link. I am not a fan of the M-Tech side skirts so I did not fit them, however the fitting guide is available here.
Note that the Tech 2 sill/door covers are specific to each body style; Saloon, Touring and Cabriolet. This article does not cover any of this, only the bumpers and valances.
Read the whole article first before you star. For the drilling there is a template available for this (51712239841), I didn’t have one so I shall explain how I did it.
Tools and parts
M-Tech 2 front bumper, front M-Tech valance, rear M-Tech bumper. Try if possible to ensure the tow eye/fitting hardware covers are with it (2 on the rear, 2 on the front) and the front left and right brake air ducts are included as they are Tech 2 specific items too, and if you don’t already have front fog lights you will need these to finish the look off.
Tools
- Screwdrivers
- 8mm,10mm, 13mm socket set/spanners
- T-55 Torx socket
- Ratchet drive (1/2 inch or bigger)
- Ruler/tape measure
- punch and hammer
- Drill
- 4mm and 8mm metal drill bits
- WD40 or similar
- red oxide paint
- paint for priming (grey)
- Black silicone
- Axle stands or an inspection pit
- A mate
Rear Bumper and Valance
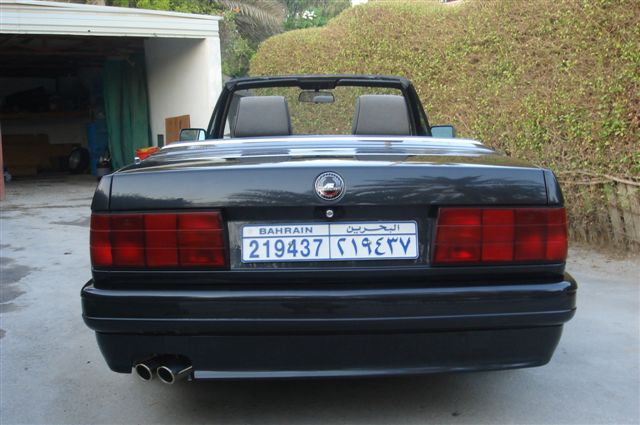
The M-Tech 2 rear bumper is a one piece part with bumper and valance as one. If someone has this as a two piece it is a Tech1 item. Below you can see the rear bumper/valance in the foreground, and in the background you can see the tech 2 bumper and lower valance.
Start easy! Look underneath the rear bumper approximately inline with the edge of the number plate, you will see two holes, inside there are Torx bolts, remove these completely.
With the help of a mate pull the rear bumper backwards, its best to pull it straight and may require a good smack with the palm of your hand near where the bumper meets the rear wheel arch. Remove and store the bumper. Keep the fittings.
Clean and lightly grease or oil the two side mountings (visible just below the fuel cap and in front of the boot air release flap on the picture above)
With a mate slide the tech 2 rear bumper and valance in to position, ensure the side mountings go into their counterpart and push into place so that the holes for the Torx bolts line up. Again keep it straight and push from both sides to prevent the side clips from jamming, a bit of persuasion with your palm or a soft mallet may be required. Once in position inspect the bumper to ensure it is straight with the body work and aligned with the rear wheel arches. If not: the two side mountings can be adjusted up, down, left ,and right. Decide which side needs adjusting and in which direction, then remove the bumper and loosen the 8mm bolts that clamp the side mountings, adjust and tighten as required and refit. This may take several attempts to get just right, but worth spending time on at this stage. Once the fit is correct re-fit the Torx bolts and tighten.
There are clips to be fitted to hold the rear valance to the side of the car (parts D in the list above) I did not fit mine as I didn’t want to drill the car there, so instead I used black silicone applied from the inside where the valance meets the body work, its been over a year and I have had no problems, its also easy to remove it required. If you must fit the clips then mock them up before you tighten the Torx bolts but after you have aligned the bumper, mark the hole, remove the bumper and drill, fit the grommet, and clip and re fit the bumper, tighten the Torx bolts and insert the rivet and fix.
Front Bumper and Valance
The M-Tech front bumper and valance are two separate pieces. The bumper mounts on the existing mountings and the valance requires some clips to be fitted to the existing metal valance. Where I mention valance in the article I mean the tech 2 fibre glass valance, if I say metal valance I mean the one on your car.
Depending on which car you have you may have a slightly different lower lip in your existing metal valance. Most will have the small 1 inch wide plastic lip spoiler, some may have the iS lip. Either way remove the lip, and remove the clips which hold it on. Below you can see the plastic clips below, remove them with a screwdriver (they may break but you don’t need them!)
Now remove the fog lights and brake cooling ducts if you have them, remove the plastic covers that close the lower central air intake. Fog lights are removed by prising off the small rubber grommet visible from the front of the light, there are two, one will adjust the angle of the beam, the other (I think the lower one) will unscrew completely and the unit will come out, don’t forget to disconnect the wires.
Look underneath the front bumper and you will see the two Torx bolts that hold it in place, remove these completely, keep the bolts.
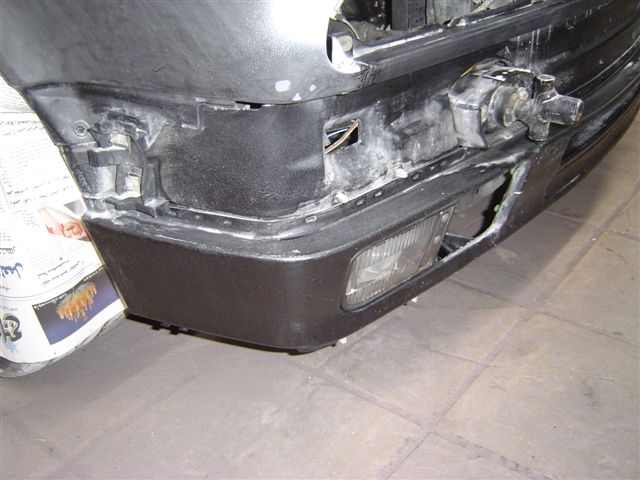
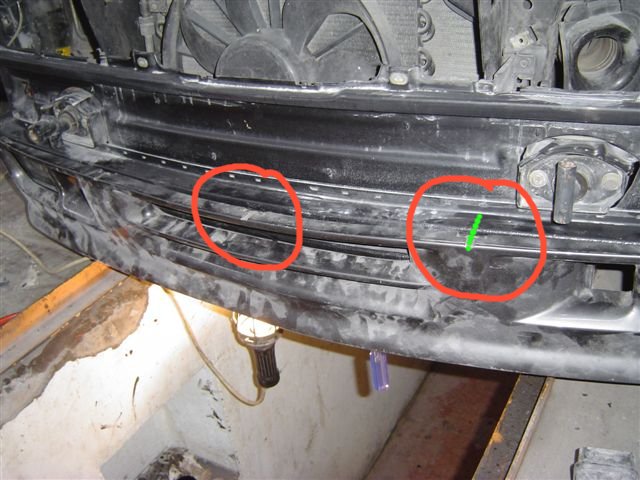
With a mate remove the bumper by pulling it straight forward, as with the rear bumper try to pull evenly from each side to avoid the side mountings jamming up. Pull the bumper half off and remove the indicator supply wires from behind the indicators, remove the bumper and store. You should have something like below, you can see the side mountings and lower metal valance sticking out about 4/5cm just above my fog lights. One of the centre bumper mounts which I shall refer to later can be seen above the hole for the brake cooling ducts.
On the inside of the lower valance there are three mounting parts, and note what I call them. 1. the upper clips which fit into the recesses on the top of the valance, the recesses are visible below on the top edge of the valance above the fog light opening, 2. the lower brackets one is clearly seen at the bottom of the valance below 3. the side fixings (top left corner of the valance).
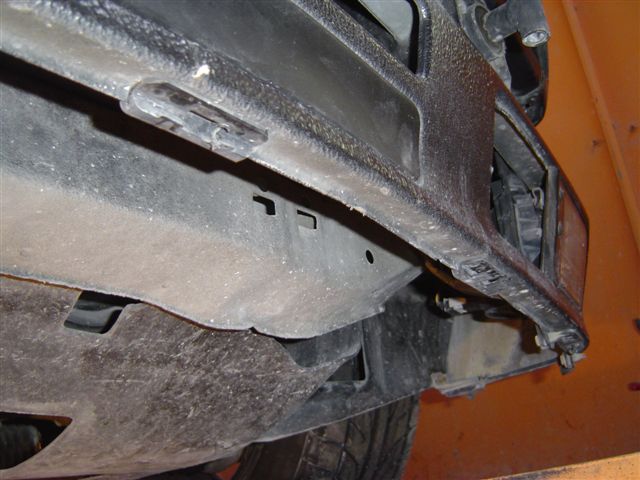
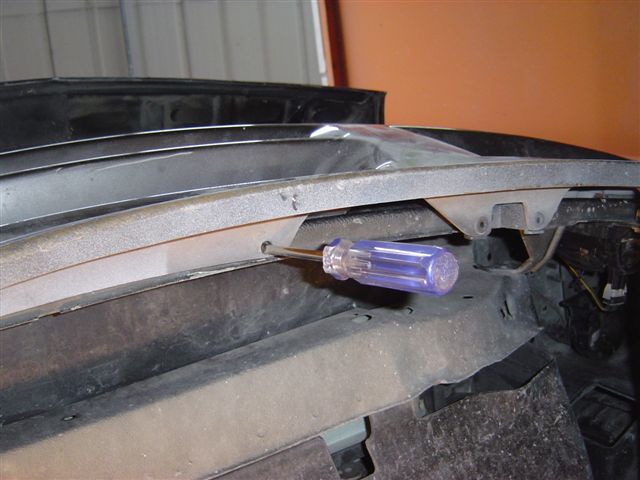
Now the tricky part….. Fit the valance in place on the car as best as possible, use a screwdriver or similar (nut and bolt ok) to align the lower brackets with the existing holes in the metal valance (see below, the picture is from underneath the car looking upwards), it certainly helps to have a pit or lift the front of the car and support on axle stands (never get under a car lifted with a jack only, be sensible people).
Now get the valance as straight as possible and mark the centre of the recesses for the upper clips on your metal valance. Get them right as these will be your marking for drilling holes to fit the clips in the metal valance.
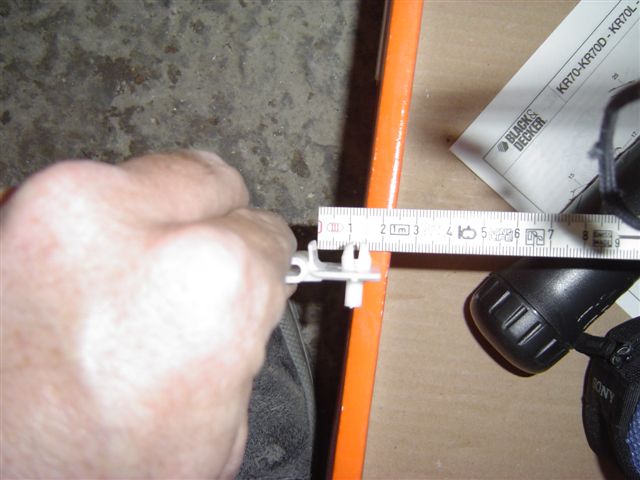
Here comes the drill!!! Remove the valance after you have marked all 7 recesses. Now take your clips and notice the measurement from the edge of the clip to the centre fixing rivet, its about 13mm…
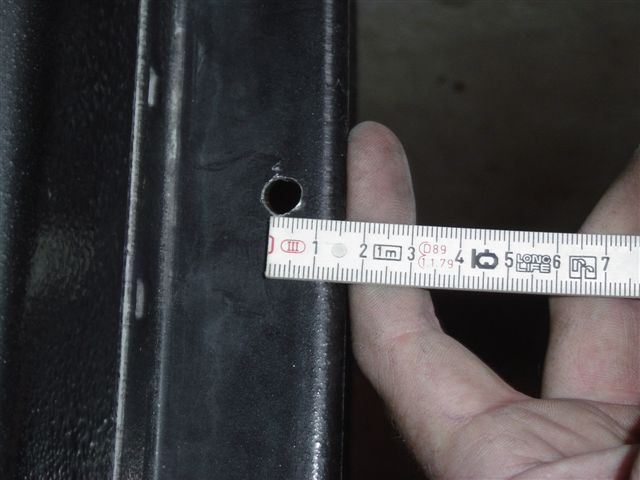
Using you ruler measure 13mm from the edge of the metal valance (don’t forget its curved a bit so the picture below is actually a few mm too much) mark the point, punch a guide and drill the seven holes with the 4mm metal drill bit. Recheck by mocking up the valance again to make sure all is good, then drill out the holes with the 8mm drill bit. Remember the motto: check twice, drill once!!!
That the hard bit over. Mask the painted bits of the car, and spray the new holes with red oxide paint, and a few coats of primer, don’t worry about the colour as you will not see it once all the bits are re-fitted, you do not want the tin worm in there!! Let it dry. Now fit the clips to the metal valance and push the valance in to place as a test fitting. You may notice I only drilled the centre five holes and didn’t bother with the two clips on the side I think I could not get the clips to mate up with the valance so I left them out.
The side clips…on my tech2 valance the brackets that hold these clips were broken so I could not fit them without a load of messing about, I used black silicone applied from the inside to hold this part to the metal valance. If your brackets are ok then I would recommend fitting these, the technique is the same, mock up the lower valance with the clip and fixing bolt in place, measure where the holes are required for each side, drill, paint and check its right, do not fix it at this point.
Now fit the front bumper, clean and oil the side mountings, use a mate and fit the bumper as a trial first keeping it straight. Check for alignment. The front bumper has 4 adjustable mounting points, the two side mounting can be moved up, down, left and right, to get to the fixing bolts/screws you must get up underneath the front wing, it may be necessary to remove the horn on one side to get access. Adjust these as required and re tighten. The front two centre bumper mounts can also be adjusted. They are held on with two 13mm bolts, which can be loosened from the front and the mounts can be adjusted as required. My suggestion would be to leave these and try to adjust from the side mountings first, if that fails then try the centre mounts. Once happy refit the bumper, plug in the indicator supply and refit the Torx bolts and tighten.
Now fit the valance, There are some gaskets that must be refitted around the centre air intakes and brake duct intakes before you refit the valance, if you don’t have them don’t worry, I cannot really think what use they serve. The fitting step can be a bit tricky to get the recesses to mate up with the upper clips, I used some knifes (much to my wife’s appreciation) to open the clips and get the valance to clip in, you will know what I mean when you get to this stage, it just takes some fiddling, once the upper clips are in place, get underneath and fit the expanding rivets in to the holes and brackets and if you fitted the side fixings now fit the plastic nut. (or stick the sides of the valance in place with black silicone applied from the inside if you are like me)
Now refit the fog lights and M-Tech2 brake cooling ducts, and if you want to the plastic central air intake cover.
That it, job done!!
Written by Mrlee


