And again about the locks... I already wrote about the fact that it was not easy to find an entire driver's lock. The new lock was also rejected - they are no longer available. Therefore, I continued to search at flea markets and junkyards, and I still managed to find the cylinder of the driver's lock for the central lock. On the fourth try... Almost intact... The locking shank was cracked, but the main thing is that the lever is intact!
I wanted to simply rearrange the entire lever on my already-picked lock, but it turned out that not everything is so simple. Both of my broken locks had a roller bearing on the lever and the one I found had a ball bearing. So, they are at least of two types.
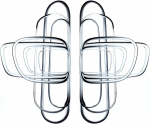
Accordingly, other details of the lock are also different. It can be seen in the photo.
The bearing washer is on the left for the ball bearing, on the right for the roller bearing.
The washer with a spring also has minor differences in the retainers.
And most importantly - different grooves on the lock cylinder itself! Left for ball bearing, right for roller bearing.
So, simply repositioning the lever will not work - all the details of the locks are different.
In addition to the locking shank and springs - here I was lucky, they are the same. So I had to change this lock under my own key, and rearrange the entire shank from my lock on it. I already have experience, so I did it quickly and without problems.
But, apparently, someone has already tried to open this lock with a screwdriver - that's why I had to change the decorative cover as well. I did not remove it on other locks. It is fixed with a core, and under it there is a curtain of slots for a key and a microscopic spring on the axis. Therefore, you need to remove it very carefully so that the spring does not fly out. I only miraculously did not lose her.
And installing it was even more difficult. Although, in fact, everything is simple - we insert the axis with the spring exactly like this:
We insert the curtain into the grooves, pressing the spring with it and hold it with a screwdriver. Now you need to somehow put the cover on the cylinder, and at the same time, so that the spring does not fly out together with the curtain! I struggled for probably 20 minutes... Then I found a working option - we insert the key into the cover (in the background of the photo):
Then we insert the key with the cover into the cylinder, and press the curtain with the spring with it. Now you can lower the cover on the key and fix it with the core. You need to turn not on the old marks, but in other places. There are no photos, because all hands were busy.
After several attempts, everything worked out - the cover is in place, and the blind moves normally with the key.
Next, simply assemble the lock with your own key, I already wrote about it - it is not worth repeating. The castle is ready.
The lock is assembled with heating.
We install a lock with a bracket, fix it with a heated bracket. Then we install the end of the key, connect it to the door wiring and fix the wiring in clips. Doing this is not very convenient, but in fact, everything is similar to what I previously described for the right door.
The driver's lock for the central lock is installed.
It remains to install the magnetic alarm lock, but I will write about this later in a separate topic.
So, now all the locks are installed, but the driver's lock works VERY tight and hard... If the passenger door lock opens and closes with a slight movement of the key, it takes a lot of effort to turn the key in the driver's door, after which it clicks loudly... That's probably why they're all already broken...and I think this lock won't last that long either... I don't know what can be done about it, and should it be...? I may have to return the modern alarm unit with remote control locks...
P.S.
An addition to the previous addition
I did manage to find the correct 85-87 lower engine bay shield.
Already washed it completely, it needs to be repaired a little more.
Now everything will be there as it should be.
I will continue about the wiring. So, the main wiring, the wiring of the "electric package" and the wiring of additional options have been laid, now you need to connect it all.
I will write about the wiring of each option separately. But, since the interior has not yet been assembled, I will add about the installation of some blocks and buttons later in separate entries.
I'll start with the seat heating wiring.
This is the last subdivision of the large ETK section Seats
For the E30, heating was available only for the front seats. Kits are different for regular and sports seats. They also differ in the type of seat upholstery - fabric or leather.
Part No. 1 - seat cushion heating element - 2 pcs.
Detail #2 - seat back heating element - 2 pcs.
Both elements differ in the type of seat and its upholstery. I have installed elements for the leather sports seats of the convertible (64 11 1 380 687, 64 11 1 380 688) - I managed to buy them new once.
Part No. 3 - seat heating switch (61 31 1 366 464) - 2 pcs. - on the left in the photo. On earlier machines, buttons with a green backlight were installed - in the photo in the center. On the right is the E32/E34 button.
Part No. 4 - relay (61 31 1 373 588) - 1 pc. I already wrote about the relay earlier, but I will clarify - it is a K5 relay. It is also necessary to install fuse No. 16 with a rating of 15A.
Part No. 5 - seat heating wiring (61 12 1 380 484) - 1 pc. Of course, I checked all the wiring and rewound it.
1 - the power connector, connects to the connector of additional options C302 on pins T and U. Actually, only one pin U is used. The wire from adjusting the brightness of the backlight of the devices comes to pin T, but it is not used. I still did not understand why it is there... By the way, I updated my table on pinout C302.
2 - "ground" wire, screwed at point G200.
3, 4 - connectors for heating elements, left and right seats.
5, 6 - connectors for heating buttons, left and right seats.
Part No. 6 - bracket (52 10 1 916 175) - 2 pcs. It is installed under the seats on the springs of the frame to fix the connectors of the heating elements.
Part #7 - terminal D=9/B=4 (61 13 1 351 045) - 1 pc. To fix the wiring, but in which place, I didn't understand... that's why I didn't put it...
Part #8 - screed L=292MM/B=4.8MM (61 13 1 377 134) - 4 pcs. For additional fixation of the wiring to the main harnesses.
I made the wiring for heating the rear seats myself. It was based on a universal set of seat heating and modified according to the ETM scheme and E32/E34 buttons.
1 - power connector, connects to the additional options connector C302 on pin P. This pin is unused and empty from the factory. I added it in parallel with the U pin for the heated front seats. You still need to pick up a plastic case with the necessary "code" for it
2 - "mass" wire, screwed at point G300.
3.1, 3.2 - connectors for heating elements of the pillow and the back of the left rear seat.
4.1, 4.2 - connectors for heating elements of the pillow and the back of the right rear seat.
5, 6 - connectors for heating buttons, left and right rear seats.
7 - button illumination power connector, connected to the rear ashtray illumination lamp.
8 - the "ground" wire of the backlight of the buttons, screwed to the pin of the console.
So, the wiring is laid along the left threshold, to the gearbox tunnel and under the back seat. We connect the power connectors in C302. The front ones are on the T and U pins, and the rear ones are on the P pin.
The button connectors are placed on the gearbox tunnel, and the heating element connectors are placed under the left and right front seats.
Then they will come out through special slots in the carpet, connected to the seats and fixed in special brackets (#6). These are my old photos. It is probably here that you will need to add a terminal and tie rods (#7 and #8), but so that it does not interfere with adjusting the position of the seat.
Connectors for heating the rear seats are placed under the rear seat. Then the cushion and the back of the seat will be connected to them.
The connectors for the buttons and their illumination are brought out to the gearbox tunnel and connected to the lamp of the rear ashtray. For this, I made a special connector there, I will show it later.
After the interior is fully assembled, the heated seats will look like this (for now, this is my old photo):
I won't be driving this car in the winter, but all seats are heated! ;)
P.S.
In fact, a lot has already been done - I will somehow write about it little by little...
The next option, quite rare for the E30, is a standard alarm system.
In ETK, this unit is in the general section Audio, navigation, information systems
More modern alarm systems with remote control from the remote control were already available on cars of the last years of production.
But I have the earliest version of it, with a magnetic key - S301 Anti-theft alarm. Security alarm system
I will say in advance that I also plan to install a standard immobilizer - S900 Recognized immobilizer by AZT/TÜV. But this will probably be the last thing.
Therefore, the alarm system can be installed separately or together with the on-board computer - they have a common part of the wiring under the hood and the ECU. What's more, the signaling ECU is also suitable for BC, but the BC ECU is not suitable for signaling. Therefore, in this topic I will partially describe the installation of the on-board computer, at least its wiring. And later there will be a separate entry about him.
Standard alarm set (#1):
The photo is missing several parts that are already installed on the car - the main wiring (#13), diode wiring (#9). Also, the wiring of BC (#15) is not shown - there will be a separate entry about it later.
Part #2 - signaling ECU (65 75 1 386 605) - it is also used for BC.
Part No. 3 - plastic nut (61 13 1 372 722) - 1 pc.
Part No. 4 - self-tapping screw ST6,3X25-C-Z2 (07 11 9 916 973) - 1 pc. Parts #3 and #4 for attaching the ECU to the body. But for some reason I had no holes or pins there at all. Perhaps it depends on the year of manufacture of the car. So, I made a mount for the restyling bracket, and attached the ECU to it with two self-tapping screws (#4).
Part No. 5 - magnetic lock with locking bracket (65 75 1 368 904) - 1 pc. Installed on the driver's door.
Part No. 6 - cover of the lock with an LED (65 75 1 368 903) - 1 pc.
Part No. 7 - rubber gasket (65 75 1 368 912) - 1 pc.
Part #8 - magnetic key (65 75 1 380 684) - comes in two types, but the principle of operation and its coding are similar.
Part No. 9 - control lamp (65 75 1 369 412) - a duplicate LED, which is placed under the rear license plate.
I have already mentioned it before, when installing the overlay under the number. By the way, for some reason there is no place for its installation in the overlay - I had to mark and drill it myself.
Part No. 10 - sound signal with two mounting plates (61 33 1 367 358) - 1 pc. It is installed near the fuse block. After restyling, it is installed behind the left fog lamp. I have exactly such an option.
Part #26 - horn bracket (61 33 1 380 019), or (65 75 1 385 783) after restyling.
Part #11 is a plastic (65 81 1 373 714) or metal (65 75 1 385 907) shield after restyling.
Part No. 12 - self-tapping screw ST6,3X16-C-Z2 (07 11 9 916 966) - 1 pc. For attaching a sound signal. Perhaps this is a mistake, or it is for restyling. My bracket (#26) has a bolt-on mount.
Part No. 13 - main alarm wiring (61 12 1 375 608). I already installed it on the car along with the other wiring.
1 - connector of the alarm ECU
2 - connector for wiring #16 (or BC wiring)
3.1, 3.2 - corresponding connectors to the door stop
4 - connector for wiring "electric package"
5 - "mass" G300 under the rear seat
6.1, 6.2 - corresponding connectors for heating the rear glass
7.1, 7.2 - corresponding connectors to the end of the trunk
8 - connector to the rear LED
Part No. 14 - magnetic lock cable (61 12 1 380 488) - is inserted into the door connector of the driver's door.
1 - connector of the alarm ECU
2 - into the door connector C405
Part No. 15 - alarm wiring (61 12 1 375 606) - to the engine ECU (or BC wiring). In the photo, it is marked with the letter A.
Part No. 16 - underhood signaling wiring (61 12 1 375 606), similar to BC. In the photo, it is marked with the letter B.
Connection of two wires.
A1 - connector for underhood wiring #16 B1
A2 - connector for underhood wiring #16 B2
A3 - connector to the alarm ECU
A9, A10 - corresponding connectors for the Motronic engine wiring ECU
It is likely that in the case of an alarm installation without an on-board computer, this wiring had only these connectors. Other connectors of this wiring are used only for the on-board computer. I will write about them in the relevant topic.
B1 - connector for wiring #15 A1
B2 - connector for wiring #15 A2
B3 - connector to the alarm ECU
B4 - connector C302 pin H
B5 - "mass" G200 under the steering column
B6 - connector for alarm wiring No. 13, connector 2
B7 - connector to the end of the hood
B8 - connector to the external temperature sensor
B9.1, B9.2 - audio signal connector
Part No. 17 - hood end cap (65 75 1 370 492) - 1 pc.
Part No. 18 - hood end bracket (65 71 1 378 069) - 1 pc. It is placed on the left bracket of the hood, I already mentioned it earlier in the topic about the hood.
Part No. 19 - driver's door central lock drive (51 26 1 375 111) - 1 pc. I don't know how it differs from a regular drive, but everything worked for me on a regular drive as well.
Part No. 20 - drive mounting bolt (51 26 1 375 979) - 2 pcs.
Part No. 21 - bracket D = 13MM (61 13 1 371 074) - 1 pc. For fixing the external temperature sensor connector.
Part No. 22 - clip D=16.8MM (12 52 1 276 147) - 1 pc. To fix the sound signal wire.
Part No. 23 - terminal D=15/B=4 (61 13 1 353 866) - 1 pc. For fixing the wire of the external temperature sensor.
Part No. 24 is a clamp for a microswitch (65 81 1 377 861). I'm not sure, but it's probably the same part as #18.
So, we begin to install the alarm system.
The main wiring (#13) is already laid along the left door sill, under the rear seat, and in the trunk to the rear license plate. It is also wound along the rib in the trunk lid, and connected to the terminal with a 7.1 connector. The main wiring of the terminator is connected to the corresponding connector 7.2.
In the body, the factory does not provide a hole for the installation of an alarm control lamp under the rear license plate. But in the original EBA instructions, there is a diagram for marking the hole, according to which it is necessary to drill it yourself. We mark and drill. This is my old photo:
Insert the LED into the hole and connect it to connector 8.
It has everything in the trunk. Let's go to the front part. We pass wiring No. 16 through a special hole in the rubber insert of the motor shield.
Next, we lead the wiring to the fuse block and lay it along the left wing behind the left fog lamp. From the bottom of the platform, we screw the sound signal into the provided holes. Pre-connect connectors B9.1 and B9.2 to it, and fix the wire with clip #22.
The sound signal is closed by a protective shield, which is attached to a pin on the spar with a plastic nut and two bolts in the holes in the platform.
The connector of the external temperature sensor B8 with the sensor is brought out under the left fog lamp and we fix the wire to the shield with clip #23.
By default, it is inserted into a special hole in the front spoiler (or into the air duct after restyling). But I will have a BBS apron installed instead of the standard spoiler, which does not have this hole. Therefore, I will then look around the place, how it is better to fix it there.
Places of attachment of the sound signal and shield on the site - top view:
Near the fuse block, connect the terminal of the hood No. 17 to connector B7. With the help of bracket No. 18 (and/or No. 24), we fix the end piece on the left bracket of the hood locks.
We fasten the bracket with the terminal.
The stop is set. This is everything under the hood.
Let's go to the salon.
We connect connector 1 of wiring #13, connector 1 of cable #14, connector A3 of wiring #15, connector B3 of wiring #16 to ECU signaling #2. We connect black connector B6 of wiring #16 and black connector 2 of alarm wiring #13.
Connector B4 of wiring No. 16 is connected to the connector of additional options C302 on pin H.
We fasten the ECU block with two self-tapping screws to the plastic bracket installed behind the instrument panel.
We fasten the "mass" terminal B5 of wiring No. 16 at point G200 under the steering column.
Signal wiring connectors No. 13 3.1, 3.2 and 4 are brought out to the niche of the left speaker. We connect connector 3.1 to the terminal of the driver's door, and connect the main wiring of the terminal to the corresponding connector 3.2.
Connector 4 is connected to the corresponding wiring connector of the "electric package" in the speaker niche.
We connect the corresponding wiring connectors No. 15 and No. 16 - A1 with B1, and A2 with B2.
Wire No. 15 is laid to the right, connectors A9 and A10 are connected in a gap to the corresponding connectors of the ECU Motronic engine wiring. I haven't installed the motor wiring yet, so I will do that later.
These connectors are used to disconnect power from the Motronic ECU. If for some reason you will not have wiring #15 connected to wiring #16 (A1 from B1, and A2 from B2.), or there will be no underhood wiring at all, then these connectors do not need to be connected - otherwise the engine will not start.
We go to the back of the salon.
We fasten the "mass" terminal 5 of wiring No. 13 at point G300 under the rear seat.
It remains to connect a connector that is not entirely clear to me - to the heating of the rear window. Why is it - I don't understand... Maybe the alarm will work when the heating filaments are broken, if you break the rear window... I won't experiment.
So, we connect connector 6.2 of wiring No. 13 to the left contact of the rear window heating (the glass has not yet been installed).
And to the corresponding connector 6.1, we connect the glass heating connector from the main wiring.
That's all for the cabin.
All that remains is to install the magnetic lock in the driver's door and connect it.
We lay cable No. 14 to the niche of the left speaker.
We insert its connector 2 into a special hole in the door connector C405 and fix it with latches.
We install the connector and connect the corresponding door wiring connector to it. It is not very convenient to do this, but in the end, I did it.
Of course, the factory does not provide a hole for installing a magnetic alarm lock in the door. But in the original EBA instructions, there is a diagram for marking the hole, according to which it is necessary to drill it yourself. We mark and drill. This is my old photo:
We get such a neat opening (this is also my old photo):
Since all the doors were replaced during the body work, it was necessary to re-drill such a hole in the other doors. I decided that it would be easier if the craftsmen made the hole immediately on site - I gave them the same diagram with dimensions from the EBA. I did so in vain... this is what came out of it...
...*??%№№"""**??:%%; I had no other words when I saw it....well HOW SO??? A vivid example of folk wisdom - "do you want to do something good - do it yourself!" (c)
Fortunately for me, the new rubber gasket covers this shame - although that is a little comforting...
In the same way, we lead the connector of the door wiring cable to the magnetic lock into this hole (call it a hole - the tongue does not turn).
We insert the lock into the hole from the middle, put a rubber gasket and an overlay with an LED on the outside. Then we fix everything in the assembly from the middle with a locking clip in a special groove in the lock. I haven't installed the lock yet, as I forgot to paint its cover matte black. Will paint later, with other parts together.
The LED connector and the door wiring cable connector connect to the lock. It will look like this (my old photo again):
So that there is no doubt that the key is magnetic! ;)
So, as promised, we will talk about the on-board computer.
In ETK, this section is in the general section Instruments
BC sets are slightly different for cars before restyling and after restyling. The main differences are in the wiring and location of the siren.
I have a combined option Interior wiring before restyling, and underhood wiring after restyling. Moreover, this kit was removed from one car in the USA. Perhaps this is a feature of the configuration for this market, because on European cars, these wirings are not very compatible, without additional modifications. And I connected everything without problems. On-board computer
So, I remind you that I already have a factory alarm system installed. In this case, the BC is an "appendix" to it - they share the underhood part of the wiring and the ECU. What's more, the signaling ECU is also suitable for BC, but the BC ECU is not suitable for signaling. Therefore, in this topic I will describe only the installation of on-board computer parts that do not relate to signaling (the left part of the diagram):
On-board computer:
The photo is missing several parts that are already installed on the car - interior wiring (No. 13), underhood wiring (No. 14). The ECU (#7), steering wheel switch (#12), and siren (#20...#25) are also not shown.
Part #1 - on-board computer unit (65 81 1 374 917) - for the US market, with inscriptions in English.
Part #2 - encoder (65 81 1 373 698) - is mainly responsible for the accuracy of fuel consumption indicators.
According to the table - this is 3-8 Typ - for 325e. Not exactly what you need for a 325i, but okay
The photo also shows the timer switch for controlling the autonomous heater (Webasto).
Part No. 3 - button illumination lamp 1.2W (62 11 1 368 299) - 1 pc.
Part No. 4 - screen illumination unit (65 81 1 375 461) - white case with two soldered lamps. To replace the lamps, the BC is simply pulled out of the housing.
Part No. 5 - plug (65 81 1 374 938)
Part #6 - screw M3X10 (07 11 9 907 605) - 4 pcs.
Part No. 7 - signaling ECU (65 75 1 386 605) - it is also used for BC. In the version without alarm, the ECU (65 81 1 373 726) is used - without a connector for the cable of the magnetic lock.
Part No. 8 - self-tapping screw ST6,3X25-C-Z2 (07 11 9 916 973) - 1 pc.
Part No. 9 - plastic nut (61 13 1 372 722) - 1 pc. Parts No. 8 and No. 9 for attaching the ECU to the body. But for some reason I had no holes or pins there at all. Perhaps it depends on the year of manufacture of the car. So, I made a mount for the restyling bracket, and attached the ECU to it with two self-tapping screws (#8).
Part #10 - gong (65 81 1 376 047) - for the US market, with two connectors. One for BC, the other for the driver's seat belt warning light. European machines have only one connector for BC.
Part No. 11 - bracket (62 13 1 373 572) - gong holder, which is placed in the steering panel.
Part No. 12 - turn signal switch (61 31 1 375 186) - for BC has an additional button on the end, which cyclically duplicates the pressing of buttons on the BC
Part No. 13 - interior wiring of the on-board computer (61 12 1 373 727). In the photo, it is marked with the letter A.
Part No. 14 - underhood wiring of the on-board computer (61 12 1 373 729), similar to the alarm system. In the photo, it is marked with the letter B.
Connection of two wires.
A1 - connector for underhood wiring No. 14 B1
A2 - connector for underhood wiring #14 B2
A3 - connector to the signaling ECU (or BC)
A4 - gong connector
A5 - connector to the turn signal switch
A6 - connector to the yellow connector C3 of the instrument panel
A7 - connector to the on-board computer unit
A8 - connector for an autonomous heater (Webasto)
A9, A10 - corresponding connectors for the Motronic engine wiring ECU
B1 - connector for wiring #13 A1
B2 - connector for wiring #13 A2
B3 - connector to the signaling ECU (or BC)
B4 - connector C302 pin H
B5 - "mass" G200 under the steering column
B6 - connector for alarm wiring
B7 - connector to the end of the hood
B8 - connector to the external temperature sensor
B9.1, B9.2 - siren connector
Part No. 15 - external temperature sensor (65 81 1 385 337). In my case, the sensor is different - restyling. Therefore, the details of its fastening No. 16...No. 19 and No. 22, No. 24 are not used. The fastening described above, in the section on signaling, is used.
All details of the siren and its fastening are also similar to the alarm system.
Part No. 20 - sound signal with two mounting plates (61 33 1 367 358) - 1 pc. It is installed near the fuse block. After restyling, it is installed behind the left fog lamp. I have exactly such an option.
Part No. 21 - a plastic (65 81 1 373 714) or metal (65 75 1 385 907) shield after restyling.
Part No. 23 - self-tapping screw ST6,3X16-C-Z2 (07 11 9 916 966) - 1 pc. For attaching a sound signal. Perhaps this is a mistake, or it is for restyling. My bracket (No. 25) has a bolt-on attachment.
Part #25 - horn bracket (61 33 1 380 019), or (65 75 1 385 783) after restyling.
So, we start installing the on-board computer.
Since the underhood part is similar to the alarm system, I will simply repeat everything:
We pass wiring No. 14 through a special hole in the rubber insert of the motor shield.
We lead the wiring to the fuse block and lay it along the left wing behind the left fog lamp. From the bottom of the platform, we screw the sound signal into the provided holes. Pre-connect connectors B9.1 and B9.2 to it, and fix the wire with a clip.
The sound signal is closed by a protective shield, which is attached to a pin on the spar with a plastic nut and two bolts in the holes in the platform.
The connector of the external temperature sensor B8 with the sensor is brought out under the left fog lamp and we fix the wire to the shield with a clip.
By default, it is inserted into a special hole in the front spoiler (or into the air duct after restyling). But I will have a BBS apron installed instead of the standard spoiler, which does not have this hole. Therefore, I will then look around the place, how it is better to fix it there.
Places of attachment of the sound signal and shield on the site - top view:
Near the fuse block, connect the terminal of the hood to connector B7. The end of the hood is used only for signaling. When installing the on-board computer separately, it is not used. With the help of the bracket, we fix the terminal on the left bracket of the hood locks.
We fasten the bracket with the terminal.
The stop is set. This is everything under the hood.
Let's go to the salon.
We connect the alarm wiring connector, magnetic lock cable connector, A3 wiring connector #13, B3 wiring connector #14 to the alarm ECU. We connect the black connector B6 of wiring No. 14 and the black connector of the alarm wiring.
Connector B4 of wiring No. 14 is connected to the connector of additional options C302 on pin H.
We fasten the ECU block with two self-tapping screws to the plastic bracket installed behind the instrument panel.
We fasten the "mass" terminal B5 of wiring No. 14 at point G200 under the steering column.
We connect the corresponding wiring connectors #13 and #14 - A1 with B1, and A2 with B2.
The photo also shows the gong and turn signal connectors.
We connect the gong to connector A4.
We install the turn switch
But we connect the blue A5 connector to it.
The turn signal switch for the US market does not have a connector for parking marker lights - this option was not available in the US. Therefore, this white 2-pin connector of the main wiring remained unused. Maybe later I will find a European turn signal switch for BC, then I will also connect the parking marker lights.
Connect the yellow connector A6 to the yellow connector C3 of the instrument panel when it is installed.
We screw the BC block directly to the frame - without an adapter, which is used only for the clock.
In the assembly, we install the frame in the torpedo. It is probably almost impossible to fix the BC unit without removing the entire frame.
We lay the wiring No. 13 on the right, connect the green connector A7 to the unit of the on-board computer.
The white small connector A8 is the connector for the autonomous heater (Webasto). I don't have it yet, so it remains inactive.
Connectors A9 and A10 are connected in a gap to the corresponding connectors of the Motronic ECU of the motor wiring. I haven't installed the motor wiring yet, so I will do that later.
These connectors are used to disconnect power to the Motronic ECU using the on-board computer's CODE function. If for some reason you will not have wiring #13 connected to wiring #14 (A1 from B1, and A2 from B2.), or there will be no underhood wiring at all, then these connectors do not need to be connected - otherwise the engine will not start.
Now I will briefly write only about the top E30 audio wiring "Soundsystem" (detail #4 on the diagram), and I will write about the whole set after the interior is assembled. I managed to find the "Soundsystem" wiring for the Touring - it differs from the sedan in the connectors and wire lengths for the rear speakers and the "ground" terminal. Therefore, you will have to connect the rear speakers through home-made adapters, but more on that later. These are the connectors for which it turned out to be very difficult to find the corresponding "folders".
The wiring was in very good condition....but with the effects of early 2000s mp3 audio tuning. - with a cut-off connector for the standard radio... I had to take it from the donor audio wiring E46 and install it on my own wiring.
I also unfoamed the connectors of the radio and the "Soundsystem" amplifier - maybe someone will need it too.
I added two wires to the wiring related to the operation of the telephone - TEL MUTE, muting the sound during an incoming call to a standard telephone, and the I-BUS bus. I don't know if the last one will be useful or not, but just in case! ;) I will write more about this in the corresponding entry about the phone.
So, as a result, I have the following "Soundsystem" wiring:
1 - 16-pin radio connector (for later models, after restyling)
2 - electrical antenna (and audio amplifier) power management connector
3 - speed signal connector for volume control (any of the three identical pins in the green connector on the instrument panel C6 (Tempo)
4.1 - connector BATT+ constant power supply of the amplifier from the battery - C302 (H)
4.2 - connector corresponding to 4.1, for parallel connection of on-board computer wiring - C302 (H)
4.3 - radio power connector:
BATT+ constant power from the battery - C302 (V)
Backlight - C302 (W)
ACC+ power supply from ignition - C302 (X)
GND mass - C302 (Y)
5.1, 5.2, 5.3 - front left speaker and tweeter connectors
6.1, 6.2, 6.3 - connectors for the front right speaker and tweeter
7 - connector for connecting a telephone (TEL MUTE and I-BUS) - added independently.
8 - rear left speaker connector
9 - rear right speaker connector
10 - ground terminal
11 - audio amplifier connector
We connect the power connector of the radio 4.3 to the connector of additional equipment C302 (pins V, W, X, Y), and the power connector of the amplifier 4.1 (pin H).
But the on-board computer is already connected to pin H. Therefore, we remove it, connect the amplifier 4.1 in its place, and connect the on-board computer connector to the parallel corresponding connector of the amplifier 4.2.
The speed signal connector 3 is connected to the green connector of the instrument panel.
Connector 1 of the radio and connector of power control of the electric antenna 2 are brought to the radio.
We lay the connectors of the front speakers to the niches and connect the blue connectors 5.3 and 6.3 to the door wiring to the tweeters. The other two connectors are connected to the speakers.
Similarly on the right side.
Connector 7 is output to the central console, to the phone - I will write about this in a separate topic.
We lay the wiring along the left threshold to the rear part, and bring out the connectors of the rear speakers 8 and 9. As I already said, I have wiring from the Touring, so I will have to install adapters-extensions. At least on the left side for sure.
We pull the wiring into the trunk. Apparently, the Touring has a special contact for "mass", which the sedan does not have. Therefore, in order not to extend the wire to the G300 terminal, I had to screw terminal 10 into the factory hole on the body bracket.
Audio amplifier jack 11 is taken out for the left loop of the trunk - the amplifier will be installed there.
I will write about the installation of speakers, radio and amplifier in the second part, when the interior is already assembled.
The next entry will be about an electric antenna or a telephone.
I'm already tired of writing about that wiring... I'd rather show off the toys I've bought lately!
For a long time I wanted to install an equal-length collector - not so much for "sport" as for beauty! And recently a friend was selling a new set at a good price, so I decided to buy it. Everything, the entire production system will have to be done practically from scratch. Unless, only the old double stronger can be left... we'll see...
So, the Turbo Works manifold is a Polish manifold, most likely made in China! )) People say that this is a copy of Supersprint, but I don't know how true that is...
The set includes front and rear collectors, X-pipe, gaskets and screeds for thermal insulation. By the way, is thermal insulation mandatory or can it be installed without it? It's more beautiful without her! )))
In appearance, the quality of the pipes and welds is good, all flanges are flat on the plane.
I tried it on - it seems to be normal... Although one pin does not go through a bit... By the way, should you unscrew the old pins, or is it better not to touch them so as not to break them? Six pieces came out, and six more remained.
But replacing the oil filter will probably be a "special pleasure" now!
But beauty needs sacrifices! (with)
The "bonus" to the collector was actually a new, original short link from Z3M. Before that, I had its analogue, now it will be the original. I also started making a wooden pen with backlight.
I bought a couple more cassette decks - with vertical cassettes - I have one idea about them, but more on that later.
And some other little things - a friend printed some useful plastics on a 3D printer. By the way, I didn't take photos of all of them.
But a little electroplating - something I forgot last time.
For some reason, the ETK for E30 does not have a section on a regular phone, although this option was available, and in several variants. Installation of the telephone in the E30 is described in the EBA factory instructions and shown in the company booklets. I already wrote about this in detail before, so I won't repeat myself. I installed the GSM phone kit taken off the E38, so the setup is not exactly factory, but not by much. Now I will write only about the installation of the wiring, and after the assembly of the cabin I will write about the installation of the phone itself and the speaker system (hands-free).
So, the set includes power wiring for the telephone unit, direct telephone wiring, speaker system wiring and an antenna cable.
The power wiring of the telephone unit looks like this:
1 - power connector. By default, the phone's power supply is connected to the C103 connector, but I thought it would be more convenient to duplicate it from the radio's power supply to a separate connector:
BATT+ constant power from the battery - C302 (V)
ACC+ power supply from ignition - C302 (X)
2 - speed signal connector for volume control (any of the three identical pins in the green connector on the instrument panel C6 (Tempo)
3 - the connector of the front left speaker for the speaker system (hands-free) - the second pair of contacts
4 - the connector of the front right speaker for the speaker system (hands-free) - the second pair of contacts
5 - connector for connecting the phone to the radio (TEL MUTE and I-BUS). Muting the sound of music during an incoming call TEL MUTE also works on most standard E30 radios, and in order to display the number of an incoming call on the radio screen, you probably need to install newer models of radios that support I-BUS.
6 - connector for backlighting the phone buttons. I connected it to the backlight of the rear ashtray, with a separate connector, together with the backlight of the buttons for heating the rear seats.
7 - "mass" terminal G300
8 - phone ECU power connector
9 - phone ECU connector for hands-free system
10 - speakerphone microphone connector (hands-free)
Telephone wiring:
1 - phone ECU connector
2 - connector of the telephone ECU for the speakerphone system (hands-free). Connects to connector 9 of the previous wiring.
3 - phone ECU power connector. Connects to connector 8 of the previous wiring.
4, 5 - base and handset connectors
In addition, an antenna cable is connected to the ECU. Without an antenna, the phone may fail.
Phone ECU on a bracket with E38
The SIM card is inserted as a whole.
The ECU is normally installed on a special bracket on the rear left wing trim. But I installed it under the rear shelf because this ECU is much more compact than the older models. He became very good, as if he was there!
We connect the wiring and antenna cable.
By the way, about the antenna. A separate GSM antenna is used for the phone. But you can install an adapter to use one antenna for radio and phone. I don't know what it is called, but I found two such units and several telephone antennas. Even one more Soviet-made on a magnet!
There was also an idea to make a spaced antenna using the filaments of the rear window heating, as in the newer BMW models, but for this the heating would have to be physically separated into separate parts. Well, this idea was shelved, and the remote antenna block remained unused
But I did install the block for the radio antenna so as not to install a separate antenna for the phone. The VIMAR unit had a less attractive appearance, so I chose the KATHREIN unit, especially since the GSM antenna was also from this manufacturer.
Made a short antenna cable to it.
Installed and fixed together with the rear lamp control unit.
I connected the antenna cable of the phone and the radio. I will write about wiring the radio antenna separately.
In the cabin, I laid the power wiring along the left threshold and connected it to the separate connector from C302
I laid the telephone wiring under the back seat and through the checkpoint tunnel.
I fixed the wiring on the tunnel with tape. The connectors of the base and the tube were brought to the back of the console, and the microphone to the front. I will install them after assembling the interior.
Connectors of the speaker system (hands-free) are connected to the front speakers on the left and right. Speakers have two pairs of contacts - separately for music and phone. I will install them later as well.
For now, here's an old photo of my installed phone
But the video of his work
Next time I will write about the electric antenna.
So, about the antenna. There were several types of them - mechanical or electric, with different cables and connectors, different fasteners, with a chrome or black rod. I have already written about the installation of an electric antenna before, so I will write briefly, without unnecessary details and numbers.
Until 1985, antennas were with threaded connectors. Antenna accessories
Detail #1 - mechanical antenna. We do not consider its details.
Item #3 - Hirschmann Auta 6000 powered antenna.
Detail No. 5 - chrome or black (shadow line) telescopic element.
Detail #7 - wiring and antenna cable. It can be with a threaded or plug-in connector for the antenna.
Item No. 8 - antenna connector adapter
Item No. 10 is a special key for attaching the antenna
Part No. 11 - the antenna fastening nut
Item No. 12 - antenna repair kit
Basically, everything is the same, but there are two types of antenna cable - with different connectors to the radio - "father" or "mother", for different radios.
Part No. 13 is a cable "father", for later models of radios.
Part No. 14 - "mother" cable, for earlier radio models (top left in the photo).
Adapters for both types of cable were also provided.
Part No. 8 - adapter "mom-dad" (65 12 1 394 202)
Original adapters cost 18-20 Euro - unreasonably expensive, in my opinion. That's why I bought analogues at a price of 0.5 Euro. In addition, analogs are made in one housing, without additional cable connections - this is even better for the quality of reception.
The antenna itself is not in the photo - I could not find the Hirschmann Auta 6000. But kits were available for equipping in the accessories section.
It could be a set of mechanical antenna - we do not consider it. Mechanical antenna
Hirschmann Auta 6000 electric antenna kit. In principle, the same as shown above. Automatic antenna
Electric antenna set Hirschmann Hit Auta 5091. This is a more universal model that was installed on different brands and models of cars. Automatic antenna
I managed to find just such an antenna, although not a complete set, and in a non-working condition. The antenna was repaired, cleaned, equipped with the original relay and wiring with a cable, a hose for drainage, made a bracket for its attachment instead of a universal mounting plate.
Briefly about the repair. Most likely, the telescopic element was replaced in the antenna, but it is a little shorter, so the extreme positions of the element did not coincide with the position of the limit switches, and the fuse constantly blew. We disassemble the case, remove the plastic covers, remove the gear from the engine so that the telescopic element can be moved freely by hand.
On the other hand, remove the rubber gasket and the limit switch cover.
The point is to choose the size of the sector that breaks the contacts in the extreme positions of the telescopic element. In words it is difficult, but in fact everything is simple - you move the telescope, count the revolutions of the gears, and mark the extreme positions. To increase the contact gap sector, I pasted a piece of black oracle - it works fine.
Next, for the antenna to work, you need a relay to reverse the polarity of the contacts, which was not included in the kit. On later models, it is already built into the antenna, and on this model, it is taken out separately. First, I made it from two standard relays according to the following scheme:
In theory, everything should work. But often, especially at the moment of starting the engine with the radio on, both relays did not work synchronously, but one with a delay of a fraction of a second. This was enough to cause a short circuit and blow the fuse. And when I ran out of original fuses, I stupidly installed a Chinese fuse - all the wiring of those two relays burned out, it's good that the car didn't burn down. I do not recommend this option.
I bought an original polarity reversal relay in a radio store and assembled it according to the manufacturer's original scheme.
Relay
unpinning
Scheme of work
In the wiring, I replaced the antenna cable for earlier radio models with a "mother" connector.
1 - connector of the antenna cable to the radio ("mother")
2.1 - antenna power control connector (turns on and off when the radio is turned on and off)
2.2 - parallel connector suitable for 2.1 (for powering the audio amplifier)
3 - connector for constant power supply of electric antenna C302 pin Z
4 - electrical antenna connector
5 - connector of the antenna cable to the electric antenna
I didn't have a regular antenna at all, so I had to make a hole in the wing to install it. The dimensions of the opening are specified in the EBA factory instructions.
By default, this antenna is attached with a universal mounting plate. I made a bracket for it - it is more reliable and neater in appearance. I am attaching the drawing, maybe someone will need it too.
The bracket is screwed to the antenna body in the hole provided there.
We connect the wiring and antenna cable to the antenna. By the way, in the previous topic I wrote about the antenna adapter. So in this case, we connect the antenna cable from the radio to the upper connector of the adapter, and connect the cable from the middle connector of the adapter to the antenna. The telephone antenna cable is connected to the lower connector.
We insert the antenna into the hole, put all the washers, spacers, rubber gasket, and decorative overlays shown in the photo and fasten with a nut. At the bottom, we screw the bracket into the hole on the edge of the wheel arch together with the "mass" terminal. I fixed the relay to the antenna body with a tie. We put a hose on the lower drain fitting of the body and lead it outside, through the ventilation grill in the rear wing. The hose was fixed with a tie to the water drain hose from the hatch.
I also made a sticker on the antenna body, because the old one was completely worn off.
We pull the wiring and cable into the cabin and along the left threshold. The red wire connects to connector C302 on the Z pin.
But the ESP comfort relay is already connected there. Therefore, connect the antenna connector to the corresponding relay connector with a red-yellow wire.
We connect the white wire to the corresponding connector of the audio wiring near the radio. We lead the connector of the antenna cable to the radio.
The antenna is installed.
P.S.
Maybe later, after assembling the car, I will buy a new antenna with a black telescopic element, if it is still available.
There are also analogues from other manufacturers.
A long time ago, I installed restyling headlights with lenses and with actuators for adjusting their angle. I also installed a steering wheel cover with a regulator handle. But the tubes on the actuators and on the regulator were barbarically cut off. I recently bought a regulator with whole tubes - now I have a complete set, but of course it doesn't work. After assembling the machine, I will try to fill the tubes with antifreeze, seal the entire system and pump it. There is a description of this procedure on the Internet, although, as practice shows, its effect is not long-lasting and it needs to be repeated periodically. Or I'll buy a new set if it's still available. And for now, this option will remain "decorative" for me
Part No. 1 - headlight adjustment hydraulic drive (63 12 1 370 959). The set includes two actuators, two tubes with a rubber seal and a regulator handle. In the photo, the actuators are missing, as they are installed on the headlights. I will connect them after installing the headlights.
Part No. 2 - regulator backlight cover (63 12 1 370 950)
Part No. 3 - regulator housing (63 12 1 370 961)
Part No. 4 - mounting bracket (63 12 1 372 619)
Part No. 5 - fastening bolt (63 13 1 370 849) - 2 pcs.
Part No. 6 - regulator mounting screw (07 11 9 902 236) - 2 pcs.
Part No. 7 - wiring of the backlight of the regulator handle (61 12 1 372 743)
Part #8 - backlight lamp 0.36 WATT (61 13 8 360 844) - 2 pcs.
Part No. 9 - headlight angle adjustment kit (63 12 9 060 602).
Housing No. 3 is inserted into a special hole in the casing, and is screwed from the middle with bracket No. 4 and bolts No. 5. The backlight cover with lamp holder No. 2 simply snaps into the housing.
We pass the tubes through a special hole in the rubber insert on the motor shield, and fix the rubber seal. We lay the tubes together with other wiring along the left wing to the headlights.
The tubes for something have different colors - the left is blue-green, and the right is white. We stretch them to the headlights. After installing the headlights, I will connect their fittings to the drives on the dipped beam headlights.
Wiring of the backlight of the regulator handle:
1 - connector C302 pin E, power from the backlight of the devices.
2 - terminal "mass" G200.
3.1, 3.2 - illumination lamps of the regulator handle
We connect the wiring to connector C302 on pin E, and screw the "mass" terminal at point G200 under the steering wheel.
It remains to screw the regulator to the housing, insert the lamps into the cover and install the steering wheel cover. But it will be after the assembly of the cabin.
I don't know why, but this is still duplicated in a similar section for restyling: Cruise Control System
This option was also available as a kit for equipping: Cruise Control
Systems for before restyling and after restyling have not significant differences. There are also differences between manual transmission and automatic transmission.
I have a kit for restyling for a manual transmission. But with a servo attachment for restyling.
Part #1 - ECU (65 71 1 386 189). It is installed in the torpedo, above the box for small things.
Part #2 - ECU bracket (65 71 1 373 332)
Part No. 3 - self-tapping screw 4.2x13 (07 11 9 904 310) - 2 pcs.
Part No. 4 - servo drive (65 71 1 373 681)
Part No. 5 - servo drive bracket (41 14 1 902 591). In my case, a restyling bracket (65 71 1 386 226) is used.
Details No. 6...10 - mounting bracket
Detail 11 - steering wheel cruise control switch. There are several types, with inscriptions in different languages. It also differs before restyling and after restyling. After the restyling, a gradual change in speed is available in steps of 1 km/h. I have an option before restyling, with inscriptions in English.
Part No. 12 - screw M5x16 (07 11 9 906 415) - 1 pc. For fixing the switch.
Part No. 13 - cruise control wiring (61 12 1 372 793)
1 - steering wheel switch connector
2 - clutch pedal limit switch connector
3 - "mass" terminal G200
4 - servo drive connector
5 - connector C302 foam R and S
6 - not used (for automatic transmission)
7 - speed signal connector - any of the three identical pins in the green connector on the instrument panel C6 (Tempo)
8 - cruise control ECU connector
Part No. 14 - servo drive cable (65 71 1 371 394)
Part #15 - not used
Part No. 16 - servo cable support (13 54 1 747 519)
Part No. 17 - plastic cable nut (35 41 1 156 139)
Detail #18, 19 - not used
Part No. 20 - limit switch of the clutch pedal (61 31 1 362 809)
Part No. 21 - clutch pedal switch bracket (65 71 1 370 487)
Part No. 22 - bolt M6x12 (07 11 9 915 033) - 1 pc.
Part No. 23 - green connector of the instrument panel (62 11 1 372 218)
Part No. 24 - cable ties L=292MM/B=4.8MM (61 13 1 377 134) - 5 pcs.
We start by installing the servo. Before restyling, for its installation, you need to drill three holes in the body, behind the left headlight. I had just such a bracket, but I didn't want to drill holes. That's why I bought a new restyling bracket that screws near the air filter housing - it's more convenient and easier, in my opinion. We fasten the servo drive, pull its cable to the throttle. After installing the motor, I will connect it to the throttle lever. The cable is attached to the body support with a bracket (35 41 1 120 354) under the support bearing nut. For some reason, the bracket in ETK is indicated only on the scheme for restyling (part #19). It is no longer available, so I made it myself. There is a place for this bracket on the cable - a white pad.
We lay the wiring from the servo drive along the left wing and through the rubber insert in the engine shield we bring it into the cabin. We connect it to connector 4 of the cabin wiring of the cruise control No. 13.
We connect connector 5 to C302 to pins R and S. This is the power supply and signal of the brake lights on. We screw the "mass" terminal 3 to point G200 under the steering wheel.
We install the cruise control switch on the steering column. To do this, you need to cut a hole in the plastic overlay according to the factory markings.
We connect it to connector 1 - in the photo, the upper connector on the steering column.
In the photo of the kit, the clutch pedal limit switch and its bracket are missing. This is because I installed it on the pedal assembly earlier when I assembled the pedals. This was more convenient than screwing it in place. So, connect connector 2 to the switch. On cars with an automatic transmission, a jumper is used instead.
We connect the speed signal connector 7 to any of the three identical pins in the green connector on the instrument panel C6 (Tempo). Now all three parallel pins are busy - cruise control, radio and phone. On cars with an automatic transmission with electronic control, the automatic transmission wiring is also connected here. Then this connector is inserted into the dashboard.
We lay the wiring to the right and connect it to connector 8 of the cruise control ECU. The computer unit will be fixed in the torpedo, above the box for small things after the interior is assembled.
Cruise control is set.
Therefore, all standard pins of the C302 connector are used, even one additional pin (P). But I "pro-upgraded" C302, so I will connect a few more connectors to it. ;)
About that next time.
Is there ANYTHING you can not do ??
You MUST write a book mate !!!
Fascinating.
Mart.
Of course there is! )
For example, I myself have never disassembled a motor... and I probably never will... Because my knowledge in this is only theoretical and superficial
Many good books about the E30 have been written for a long time and without me It's a pity that few people read them... at least here, in our country... The young generation doesn't read books at all - they ask the same thing 100 times every day in social networks and messengers...
That's why I write only on club forums.
Although, once upon a time, a teammate made a pdf book from my writing ;) About E30 body drainage. Probably, there is little point here without a translation from her, but maybe someone will need it... https://issuu.com/igels/docs/__________ ... 1/11388092
So, the wiring of all standard options connected to the connector of additional equipment C302 is laid and connected. The first test - she is alive!!!
Burnt only one fuse! There was a short circuit in the rear lamp. Replaced the lamp - everything is OK. I also replaced a couple of lamps in the buttons of the rear ESP. Only the central lock does not work... we need to figure it out... But later.
For now, I will tell you about one of the rarest options for the E30 - the rear electric curtain. It was of two types - with a central guide (up to the year 87) and with side levers (from the year 88). Both are very rare. The curtain could be of several colors. There were similar curtains on E23 and E28 - they differed, apparently, in size. A teammate had such an E28 curtain.
I even considered buying it, but I don't really like the look of it, especially its center rail. The appearance is not very aesthetic, even a little archaic... Similar curtain for E30 (photo from the Internet):
Factory numbers of all model variants and colors (although for some reason they are not all in ETK)
Since 1988, the design of the blind has been changed - instead of the central guide, a mechanism with side levers was installed, as on all modern electric blinds. Such an option is even more difficult to find. I saw her only on the Internet in this video:
Her number is 82 11 9 430 230 - thanks to the author for this information.
Judging by the EBA factory instructions, both curtains are installed on top of the standard rear shelf, and are connected to the cigarette lighter wires.
So, why am I writing all this - I had the opportunity to buy the first option, but it is with E28 and I don't really like it visually, and the second option looks better, but it is practically impossible to find it. Well, I decided to make an electric curtain myself! Analogous to more modern electric curtains E32 and E34. Maybe it's a "kolkhoz", but I hope it will look good! ;)
For this, I bought a donor shelf with a mechanical curtain - I will experiment on it so as not to spoil mine.
I am still thinking about choosing an electric curtain... In fact, we need a curtain from any BMW model that will fit in size... we'll see...
I also bought an E32/E34 electric curtain button, an E34 donor audio wiring, and an E34 electric sunroof donor wiring.
The wiring diagram for the E32 seemed optimal to me - I started making the wiring harness for the E30 based on it.
From the audio wiring, I only needed the power wiring - we remove everything unnecessary.
We also remove everything unnecessary from the wiring of the electric sunroof, leaving only the button connector and the necessary wires according to the ETM scheme. We weave all this into a harness of the right length, and we get such a "custom" electric curtain wiring for the E30.
1 - DC power connector C302 pin A (I added this pin myself)
2 - ignition on power connector RUN C302 pin P (I added this pin myself)
3 - electric curtain button connector
4.1 - connector for illumination of the electric curtain button
4.2 - the corresponding parallel connector for lighting the button of the electric curtain
5 - "mass" terminal G300
6 - electric curtain connector
So, as for the connection, I believe that my option is even better than the factory connection to the cigarette lighter. I already wrote earlier that I added pin P for heating the rear seats, parallel to the standard pin U for heating the front seats. This power does not go directly, but through the unloading relay K5, as well as for electric windows. Pin A was added for DC power, in parallel with the radio's stock V DC power pin. On the wiring of the electric blind, I added connector housings that correspond to the "code" in terms of their shape even later. Brown-white for the rear heating (corresponding to the color of the wire for the front heating), and the corresponding parallel black connector from it, for connecting the electric curtain. Black-blue and black on the electric curtain.
We connect the black connectors together, and connect the colored ones to the corresponding C302 pins.
We lay the wiring along the left threshold, and under the driver's seat we bring out the button on the console.
In the same place, we connect the backlight to the connector for the backlight of the rear heating buttons and the phone, which comes from the backlight of the rear ashtray.
We screw the mass terminal under the rear seat at point G300.
Next, we lead the wiring to the back shelf, where the electric curtain will be connected (for now, only the appropriate connector is there).
The wiring is connected, it remains only to choose and install the curtain. ;)
P.S.
In the C302 connector, pin F was normally present, to which, judging by the EBA, the power supply of the standard immobilizer for the M40 engine is connected. Since my engine is not M40, this pin was not used. The power on it is only in the RUN position, so I decided to connect a video recorder to it. Now, during martial law, it is forbidden to use them, but one day this war will end... and I hope that I will live to that time and collect my "thirty"... So then it will come in handy.
I connected it through the universal socket of the cigarette lighter.
Then I will fix it somewhere under the torpedo, and I will lay the wire along the left pillar to the interior mirror, together with the electric sunroof wiring.
Pins B, C and G were left unused in the C302 connector. I added them myself, but I haven't figured out what to connect there yet! It was possible to connect a phone to the BC, but I didn't think about it right away, and made a separate connector for it. I didn't want to remake it. So maybe someday they will be needed for something...
I will write about IKLMNO foams next time.
Assembly_82. ETK_65_Electrical parts of NPB (part 1 wiring)
A long time ago, somewhere on the Internet, I read that on early E30 models, the airbag was connected to the C302 accessory connector on IKLMNO foams. But I never found documentary confirmation of this information either in ETM or in EBA. Apparently, it was not written about the E30, or it is a mistake. In fact, a separate orange C240 connector is used for this. I didn't have such a connector, so I still led this wiring to C302 on the IKLMNO pins - these connectors are similar in shape. Why did I do that? I don't know... probably just "for beauty" I perfectly understand that in order to fully install the driver's airbag, you need to completely replace the entire steering control - from the steering wheel to the steering rack, including the steering column and its switches. In addition, weld a special metal overlay-amplifier to the tunnel for fastening the steering column spacer, and install a bunch of other specific little things. Doubt I'll ever do that... Especially since I don't like the airbag steering wheel design, especially the early years, and I'll be installing either a wooden momo steering wheel or a BBS steering wheel.
So, for me, this option will be exclusively "decorative" - orange on blue looks beautiful!
And only the electrical part will be installed. I bought it from a friend, nearby and not expensive ;) Electric parts of the airbag
Part No. 1 - airbag ECU
Part #2 - airbag capacitor. I don't know what it is, I probably don't have it. Or maybe it's that rectangular "insert" in the ECU...?
Detail No. 3 - wiring of the front sensors of the airbag
Part No. 4 - shock sensors - 2 pcs.
Part No. 5 - airbag safety switch. Never seen it on cars, not even in a photo. Perhaps it was installed additionally, or only in certain years of production.
Part No. 6 - fastening of the left front sensor. Apparently, it is used only together with detail #5.
Part No. 7 - fastening of the right front sensor.
Part No. 8 - special sensor mounting bolts - 4 pcs.
Part No. 9 - bracket for the sensor connector - 2 pcs.
Part No. 10 - safety switch mounting screw - 2 pcs.
Part No. 11 - bracket. I'm not sure, but it could be the metal body bracket that the shock sensors bolt to.
Parts No. 12...No. 18 are not used.
For some reason, the diagram does not show the wiring to the pillow itself in the steering wheel. I have it.
1 - power connector C240 (in my case - C302 foam IKLMNO)
2.1, 2.2 - wiring connectors to the steering wheel
3.1, 3.2 - wiring connectors for shock sensors
4 - airbag connector in the steering wheel
5.1, 5.2 - shock sensor connectors
So, if you don't have the wiring for the airbag, but you want to install it, then you need to connect the power for it to the C240 connector. It's just.
It is necessary, according to the ETM, to add three power wires from the ignition switch connector (C200), one "ground" wire to the airbag control lamp on the BSK panel, and one wire to the diagnostic connector.
[TABLE]
[TR]
[TD]1[/TD]
[TD]BR/BK Brown-Black[/TD]
[TD]0.5mm2[/TD]
[TD] mass of counter. lamps on BSK (7)[/TD]
[/TR]
[TR]
[TD]2[/TD]
[TD][/TD]
[TD][/TD]
[TD]Not used[/TD]
[/TR]
[TR]
[TD]3[/TD]
[TD]RD Red[/TD]
[TD]0.5mm2[/TD]
[TD]BAT+ constant power from C200 (9)[/TD]
[/TR]
[TR]
[TD]4[/TD]
[TD]VI Purple[/TD]
[TD]0.5mm2[/TD]
[TD]ACC power from C200 (4)[/TD]
[/TR]
[TR]
[TD]5[/TD]
[TD]BK/YL black-yellow[/TD]
[TD]0.5mm2[/TD]
[TD]RUN power from C200 (10)[/TD]
[/TR]
[TR]
[TD]6[/TD]
[TD]WT/BK white-black[/TD]
[TD]0.5mm2[/TD]
[TD]С101 (16), diagnostics (6)[/TD]
[/TR]
[/TABLE]
I routed these wires to the C302 accessory connector on the IKLMNO pins, which are not normally used.
The airbag ECU will be connected here. But without the pillow itself, the indicator light on the BSK panel will probably be on all the time, so I guess I won't connect it We'll see...
We pass the wiring of the sensors through the rubber insert in the motor shield - now all its holes are used. We fix it with a sealant. After installing the ECU, connect this wiring to it.
We lead the connector of the left sensor to the left wing.
By the way, I am not sure that it will be possible to install it in the right place - another additional option will be installed there... Maybe I will think of something...
The connector of the right sensor is brought out through the motor shield to the right wing.
Airbag wiring is installed.
I will install the ECU and sensors a little later.
That's it, I came up with a silly and decorative option!
Next time I will write about useful small electrical options that will work. ;)
Some E30s were equipped with an on-board control system BSK (Active check control). They were mainly cars with 6-cylinder engines. There were different versions of this system, but I have its top version, which was only available for the US and Japanese market. It is distinguished by additional four lamps on a red field, which are absent in the basic version, and inscriptions in English.
For the European market, the top variant was only for diesel E28. It looks like this:
Additional functions could be in various combinations, depending on the configuration of the machine. I also have the simplest option.
There are four additional lamps on the board.
But the implementation of contacts is rather strange...
I installed it a long time ago, but only now did the wiring. My old photo.
So, additional BSK (Active check control) options in order:
1. Driver's seat belt and ignition key control lamp - for the US and Japanese market
2. The driver's airbag control lamp
3. Oxygen sensor control lamp (lambda probe) - for the US market
4. Catalyst overheating control lamp - for the Japanese market
Since these options were not available for the European market, we had to implement them on our own. First, you need to add the necessary wires to the BSK block connector. To do this, I made a defoamer. Additional option wires are highlighted in color.
Next, in order.
1. Driver's seat belt control lamp.
The complete set looks like this (photo from the Internet):
Of all this, I only had the on-board computer gong with two connectors (for the USA) and the BSK unit itself. I did the wiring myself, in accordance with the ETM scheme.
With the exception of the ignition switch control terminal. It is obvious that a European castle is not suitable for this. Maybe one day I will find an American one...
The BSK panel has not yet been installed, as the ceiling cladding has not been installed.
I haven't found the timer relay yet, I'll probably order a new one while it's still available.
The connector for it is installed under connector C302, to the right of the window comfort relay.
The driver's seat belt lock with the limiter will probably also have to be ordered new, or bought in the USA.
Or do it yourself - I bought a lock from newer models, I'll try to rearrange the end cap from it to my lock.
And so far, only the wiring connector is connected to it.
We connect the wiring to the second gong connector of the on-board computer.
As if everything is simple and should work ;)
2. Driver's airbag control lamp
I wrote about the safety pillow last time - I will not repeat it.
3. Oxygen sensor control lamp (lambda probe)
An interesting option for the US market. I found information about it on the Internet, so I don't know how reliable it is People write that a special fuse is installed in the speedometer, which trips every 30 thousand miles, and turns on this lamp. This signals that it is time to check the operation of the lambda probe. This lamp has no electrical connection with the lambda probe itself.
The fuse is placed here.
To implement this option, you need to add one wire to the BSK connector (pin 5), and connect it to the green connector of the instrument panel C6 to the O2S pin, according to the ETM diagram.
I already mentioned the green connector earlier. This is an additional connector that can be installed on any E30 dashboard. It looks like this:
All his pins are signed on the board.
There are only 5 "tracks" on the board with contacts for connecting to the speedometer:
1) Track V - this pin goes on the green case on the left to two identical parallel 1-pin connectors (V), which are not found anywhere in the ETM schematics. Therefore, I have not yet managed to find out what is connected there.
2) Track Tempo - speed signal from the speedometer, this contact goes to the green housing on the right to three identical parallel 1-pin connectors (A).
Additional options were connected to these connectors:
- cruise control;
- automatic transmission with electronic control;
- standard audio system with automatic volume level adjustment, depending on the speed of movement;
- standard telephone with automatic volume level adjustment, depending on the speed of movement;
All three connectors are parallel, so it is not important which option to connect to which of the three connectors.
3) Track 31 - usually marked as "ground", this pin goes to the green case on the right, to the same three connectors as the Tempo track. But judging by the board - this track is not used at all, because there are no pins on it either on the side of the speedometer or on the side of the connectors - they are all "muted" on the board.
4) Track O2S - mileage signal from the speedometer, this contact goes to the green housing on top of the first pin of two identical parallel 2-pin connectors (O2S).
5) Track 15 - this is usually how the +12V power supply is marked, this pin goes to the green case from above, to the second pin of the same two connectors as the O2S track.
But judging by the board - the right 2-pin connector is not used at all, because there are no pins on the side of the connectors - they are "muted" on the board on both tracks, respectively. An additional BSK option is connected to the left 2-pin connector - lambda-probe control. But this option was only available on machines for the US and Japanese market.
Connecting the green C6 connector to the speedometer looks like this:
It can be seen that, in fact, only one pin out of four is connected to an ordinary speedometer for the European market - Tempo(A). There are no corresponding contacts for all other pins on the speedometer board.
That is, they are not used in the European version. Apparently, for their use, at least, a speedometer from the "American" instrument panel is required.
And the European version only uses three 1-pin connectors (A) to the right of the Tempo track.
But I plugged it in!
All that remains is to find an American dashboard to make it work...
4. Catalyst overheating control lamp
This option was only available for the Japanese market. It controls the temperature of the catalyst. Information and all photos are taken from the Internet.
A sticker with a warning - do not park on dry grass when the catalytic converter is overheated, so as not to cause a fire.
Temperature sensor in the catalyst
Thermal relay
I did not find an electrical diagram for this option. But I don't need it, since I removed the catalyst a long time ago. I plan to use this lamp for other purposes - to control motor overheating. I will connect it to the air conditioner fan temperature sensor. But more on that later in the air conditioner entry.
So, the wiring is done for all four lights, but none of them will work yet... But eventually, I'll find the right parts, install them, and everything will work! ;)
Collection_83. Check Engine option and additional lamps in the instrument panel
We continue to "Americanize" the E30! I already added this option a long time ago, so I'll just copy my old text from the forum.
Since 1987, a self-diagnostic function - Check Engine - has been available on BMW E30 with the M20B25 engine intended for the US market.
For this, a special DME Motronic 1.3 contact was used, the information from which was output to the orange "CHECK ENGINE" control lamp on the instrument panel. This lamp is located on the lower left of the instrument panel, in one of the reserve cells.
Do not confuse it with the orange "CHECK" lamp for BSK, which is located between the speedometer and the tachometer - they are completely different things.
Original operating instructions for the CHECK ENGINE function:
Control and signal lamps
1 - Engine operation indicator
The lamp should go out after starting the engine.
If the Check Engine light comes on or flashes, the engine can still be operated, but its electronics must be checked.
This function works as follows:
BMW MOTRONIC "PEDAL" fault codes
(models 1989-94)
All 1989-94 BMW cars are equipped with a self-diagnosis diagnostic system to detect a malfunction of the injection system. When a malfunction is detected, it is recorded by the electronic control unit (ECU) system and the code corresponding to the malfunction is recorded in the ECU memory until:
1) Car battery or ECU shuts down.
2) The engine starts 60 times without repeating the malfunction.
3) ECU memory is cleared using Bosch KTS300, BMW CARSOFT software or CS1000 BMW hand scanner,
To view fault codes from the ECU memory, use the following procedure:
1) Turn the ignition key to the "Ignition On" position.
2) Press the gas pedal five times in a row.
The CHECK ENGINE light will flash displaying the trouble codes starting with the lowest number. These CODES
consist of 4 digits separated from each other by a short pause (ie flash, pause, flash flash, pause, flash, pause, flash, translates as 1 2 1 1).
In the absence of errors, the code 1 4 4 4 will flash.
A useful feature, but it was not available on European BMW E30s.
But, if you look at the ETM scheme, you can see that it can be implemented quite easily - by adding only a few wires. Although it is not a fact that it will work on all machines, since it works only on DME Motronic 1.3. Therefore, it is better to immediately check the DME number and Motronic version according to this table http://forum.e30club.com.ua/index.php/topic,89.0.html
The DME Motronic unit is located behind the top lining of the small box.
In my case, it is a DME Motronic 1.3 unit with the number 0 261 200 173.
ETM wiring diagram for E30 with M20V25 1987 for the US market:
As you can see, two wires go to the CHECK ENGINE lamp:
1) green-white - power when the ignition is on from fuse #10 7.5A through twisting S212
2) brown (1988 - gray with diode, from 1989 - gray) - control signal from pin 15 of DME Motronic, through pin 12 of the underhood connector C101.
Everything is quite simple, but we start by checking the C101 underhood connector for a contact and a 12-pin wire.
Pinout of connector C101:
We remove the rubber band from the connector and look for the desired wire (indicated by the red arrow):
If there is a brown (or gray) wire on pin 12 of C101, you need to "ring" it to pin 15 of the DME Motronic1.3 connector (circled in the picture and the tester probe is installed in it):
If it "rings", then the task is simplified and there are chances that it will work
If not, then it is more difficult - you still need to pull the wire yourself from pin 15 of the ECU to pin 12 of C101. But it is better to immediately connect a light bulb to pin 15 of the ECU and to any "plus", turn on the ignition and quickly and sharply press the gas pedal to the floor 5 times, as described in the instructions above. If the lamp does not blink, then there will be no point in tidying up the wires - most likely, the problem is in an inappropriate ECU.
Next, you need to install a 12-pin "mother" contact with a brown-black wire, cross-section 0.5 mm, in the corresponding part of the C101 connector (circled in red in the photo):
12 pin "Papa" - factory brown (or gray)
12 pin "mother" - installed brown and black
We connect the connector, pull the brown-black wire through the rubber insert in the motor shield, and lead it to the instrument panel with a small margin in length.
Next, you need to pass the power cord. Power when the ignition is on comes from fuse #10. Scroll S212, judging by the ETM, is located in the scythe that runs along the door, next to the driver's seat. We lead the green-white wire to the instrument panel with a small margin in length. I immediately fed these wires into the main wiring harness. We connect a lamp to the wires, the same as in the ABS control lamp or torpedo illumination. Just in case, I wrapped the wires in the original insulation.
There are three orange and green reserve cells (used on diesel engines and automatic transmissions) on the instrument panel. We insert the lamp cartridge into one of them, where it holds better, because they are of different shapes:
We collect everything and check the work:
The CHECK ENGINE function worked immediately and code 1444 flashes clearly - no errors!
Who did not understand - a long flash at first and then is a "pause", and short flashes between "pauses" are error codes. All codes will flash in a circle until the ignition is turned off. In my case, 1444 flashes in a circle - no errors.
It would seem - everything is fine! ) But, as you can see in the video, the lamp lights up after turning on the ignition and does not go out after starting the engine, but begins to flicker. During the day it is not so noticeable, but in the evening this constant flickering is stressful. As I said above, the ETM schematic for 1988 has a diode in the lamp circuit on the gray wire, going from the lamp to the DME Motronic 1.3.
A note on the schematic reads: "Diode installed as part of service information."
The idea arose that it is probably needed in order to avoid this flickering during engine operation. Although, looking at the diagram for its installation, there were doubts that this would help... But anyway, I took a diode from an old alarm and installed it according to the ETM diagram for 1988.
It did not help - the lamp also flickered with the engine running. If you put the diode upside down, naturally, the lamp does not light at all.
How to avoid this annoying flickering of the lamp, except to put a button in its circuit and turn it off - I do not know. Unless you get used to it and don't pay attention to it!
After a few days of tests, the CHECK ENGINE started flashing a different code - just 1.
In the decryption file, in another table, it is there, 1 is an error when diagnosing DME. In the first table, there is a similar code for the same error - 1211. Most likely, it is the same thing, but its meaning is not completely clear, because there are no changes in the operation of the engine, in dynamics, in fuel consumption. Judging by the information on the Internet, this error appears occasionally in many people, and the reason for its appearance is not reliably known and it does not have any consequences. This error can be reset by running the check test and while the CHECK ENGINE light is flashing, fully depress the gas pedal and hold it for approximately 10 seconds. After that, the lamp will stop flashing and just burn. We turn off the ignition and repeat the test - now the lamp will flash 1444 - no errors. If this error is not reset, then, judging by its description in the tables, the DME unit needs to be replaced.
To make sure that this feature is fully functional, I ran another test with a known bug. I disconnected the connector from the air flow meter, started the engine and waited until Motronic "understood" this and "suspected" something was wrong The idle started to jump, the engine to shake. Turned off and started the test:
As you can see in the video, CHECK ENGINE detected an air flow meter error and code 1215 – Air Mass/Volume Sensor – is clearly flashing.
This error cannot be reset by holding down the gas pedal. To reset, you need to disconnect the battery or reset it with a special tester or wait until it resets itself after 60 engine starts without this error. I chose the first option After resetting, code 1444 appeared again - no errors.
That is, the option is fully functional.
While I was connecting the power to the lamp, I noticed that from the same coil S212, the power goes to both the reversing lamps and the seat belt lamp, which I wrote about above.
So now, I decided to add another reverse control lamp to the instrument panel ;) This is the second lamp in the photo above.
Ran another green-white wire and a blue-white wire from reverse light switch connector C301 to the dash. These wires also immediately feed into the main wiring harness.
It will be necessary to make appropriate icons for these lamps.
And one more lamp - a control lamp for the trailer's turn indicators. I already wrote that I bought an original towbar, even two - a regular one and one with a removable hook. I will probably write about this in detail later. But I will definitely not cut the rear apron of the BBS for the sake of installing a towbar. I also installed only a relay and a lamp It is necessary to use all the connectors to the maximum!
A relay with an additional contact is installed instead of the usual turn signal relay, one pin is added to its connector, and the "ground" terminal of the lamp is screwed at point G200. The lamp is inserted into the provided place in the instrument panel under the speedometer.
There is one more empty space left in the dashboard for a lamp, but I haven't figured out what to plug in there yet!
Judging by the application, it was available for all E30, E32 (M30) and E34 (M40, M20, M21, M30, S38)
But, despite this, there is almost no information on it on the Internet, and it is extremely rare on the E32 and E34, and even less often on the E30. I managed to find only one photo of it and the EBA instructions:
In the original EBA manual, the page scans are somehow confused, which makes it not very convenient to read. So I cut everything from there that only applies to the E30.
The gong beeps when you open the driver's door with the side lights or parking lights on - so you don't forget to turn them off - sometimes it's very useful.
The connection scheme is very simple.
The black wire connects to the driver's door limit switch.
The green wire connects to pin X of the C302 connector - this is power to the radio from the ignition on.
The blue and yellow wires are connected to the left and right side lights, respectively.
That is, to pins 7 and 9 of connector C103 (after restyling).
Or to 1 and 4 pins of connector C103 (before restyling).
The gong is installed on the steering panel, according to the template in the instructions.
So:
blue - left marker light in connector C103
yellow – right side light in connector C103
green - power for the radio in the connector of additional equipment C302 (X)
black - limit switch of the driver's door
As practice has shown, it is almost impossible to find such a gong. Therefore, in desperation, I bought an ordinary gong from the E34, which was also applied to many other BMW models. But I decided to connect it according to the original scheme for the E30, given above in the instructions. Since the gong connection scheme in the E34 differs from the E30 scheme, it was necessary to add diodes to the power supply wiring so that the different power sources (left and right dimensions, and the radio) are not paralleled.
So, in my case, the circuit for an E30 with a gong from an E34 looks like this:
The defoaming of the E34 gong connector looks like this:
"+" - blue - left marker light in connector C103 pin 1
"+" - yellow - right side light in connector C103 pin 4
"+" - green - power for the radio in the connector of additional equipment C302 pin X
T2 (long horns) - black - on the driver's door "mass" terminal
T1 (solid beep) - not used
T3 (short beeps) - not used
"-" - brown - "mass"
We twist the blue, yellow and green wires together (having previously installed diodes in them).
There is nothing complicated about the connection, except that it is physically very inconvenient to do it all under the torpedo. So while my wiring was off the car, I connected the gong wires to the appropriate factory twists, and routed them into the overall wiring harness. But I "got it wrong"... I mistakenly connected the power supply to pin W, instead of pin X... Therefore, now it also works in parallel with the backlight of the devices - a "bonus". And I forgot to lay the "mass" wire at all... It also happens... But here the foam of the C302 connector, which I added myself, came in handy - just what I needed! Pin B is "ground" from Y and pin C is power from X. So picked up the right 2 pin connector and connected it to C302 on BC pins. By the way, now there is only one G pin left unused.
I will not cut a hole for it - I will suddenly find the original one for the E30 later! ;) I'll just attach it to the wiring harness under the shield.
P.S.
In this version, the gong beeps not only when the door is opened with the lighting on, but also when the door is opened with the ignition on - it is also useful.
Really great stuff as always mate
Have the best Christmas you can and lets hope them "Bastards" will be out and long gone very very soon !!!!!!!
Cheers Mart.
Thank you and Merry Christmas!
By the way, starting this year, Christmas in Ukraine is now also celebrated, as in Europe - on December 25, and not on January 7, as before.
About the Rashists - they will not leave themselves... they must be knocked out! But, if Europe and America will continue to think for a few more years whether to give Ukraine airplanes and long-range missiles, and whether to allow them to shoot at the racist territories, then by that time, we may not have anyone left to fight...
But here I am not writing about this - I want to squeeze in as much time as possible to assemble the car... Therefore, more has already been done, but there is no time to write.
Let's return again to the ETK section Body equipment.
In the subsection Interior rear view mirror there is another additional electric option, almost the last ;)
S562 Rear view mirror with lamps for reading maps
I dreamed about it for a long time, and now, finally, I installed it. But, in order.
Part No. 1 is a standard rear-view mirror (51 16 1 817 121), included in the basic configuration.
Part #2 is an additional mirror, but I did not find its number in ETK.
Part #3 - additional mirror (51 16 2 125 362), according to the EBA instructions, it was installed on the right, in front of the passenger seat, on the front ceiling panel. To do this, you need to make a cutout in it for the bracket according to the template. It is no longer available to order. Maybe someday, if there is nothing else to do, I will try to make a similar one from my standard one... although it probably won't look very good... we'll see... It's obvious that mirrors #2 and #3 were used in training, police or other special purpose vehicles.
Part #4 - Rear view mirror with lamps for reading maps (51 16 1 906 525), comes as an additional option or in the "M-Technic" retrofit kit.
Part #5, #6 - left (63 31 1 380 153) and right (63 31 1 380 154) individual lighting lamp.
Item No. 7 - lamp 12V 10W, 2 pcs.
Part No. 8 - base plate (51 16 1 801 085) - mirror mounting bracket on the body.
Part #9 - shield (51 44 1 900 133) - rubber insert in the ceiling panel. Accordingly, it is used only on machines with this panel.
In the E30, normal interior lighting in the front part of the interior is available only in convertibles - there is a standard lamp above the interior rear-view mirror. For some reason, German engineers did not install it on all other E30 models, but decided that two side lights would be enough. In fact, it is very inconvenient to use them - you have to turn back to reach it, and still there is not enough light from the front - more shadow from the driver and passenger Therefore, it is not surprising that many owners somehow try to solve this problem themselves . In my car, the previous owner installed a ceiling light from the light of the small box in the plug of the electric sunroof, but for some reason did not connect it. I connected it in parallel to the left side lamp - it became much better. Later, I replaced that lamp with a standard side lamp with a switch - it became very convenient. It fits perfectly in place of the power sunroof plug and looks like it came from the factory. I don't understand why they didn't do it right away at the factory.
However, German engineers then tried to "rehabilitate" and made several additional optional lamps that were connected to the cigarette lighter, and a mirror with lamps. I have not yet bought the lamp for the cigarette lighter, but I managed to find a mirror in excellent condition, although without a connector. But that's not a problem - he installed the necessary connector.
Power buttons and lights with adjustable lighting angle.
An important nuance. The mirror has a greater mass than the standard one, so it can wobble on the move on the base mount. To avoid this vibration, an adjustable stop in the windshield with a rubber pad is provided. It often gets lost... surprisingly, I had it... but it also got lost somewhere in the boxes with spare parts... Maybe later it will be found, but for now I found a great solution - a rubber plug that is placed in the door - 51 71 1 904 603.
As I already wrote in the relevant topic, not all doors have openings for them, so I have some left over. Here, one came in very handy - it became just perfect. Even with the inscription BMW
Another nuance - the rubber insert No. 9 is put on the leg of the mirror through its hinge. On a mirror with lamps, this is prevented by the same stop in the glass. I haven't figured out how to tighten that rubber band without tearing it yet... The photo shows the size of the hole and the thickness and shape of the mirror leg. According to ETK, it is the same for both mirrors. I bought a new one, but I don't understand how to install it there. I wonder what to cut... If anyone knows, I will be grateful for the information. Can it not be installed with such a mirror at all?
Installing the mirror is very simple. I had already laid the wiring - these are two wires, power and "mass", which go from the niche of the front speaker along the left pillar of the body to the mirror.
In the niche of the left front speaker, we find a black 2-pin connector, and connect the wiring to it.
We lay the wiring together with the wiring of the electric sunroof up the rack, and lead it to the mirror.
We insert the wiring into the hole of the body, and take it out of the hole of the mirror bracket.
We connect the mirror connector and snap it into the bracket. It becomes quite tight, with considerable effort. It is removed in the same way - just pull hard.
A rearview mirror with map reading lamps is installed.
The lamps work only when the ignition is on - it's not very convenient, but it's better than nothing Although, for this case, I already have a homemade lamp - now everything is fine with the light in the cabin ;)
After installing the front glass, it will be necessary to adjust the stop with a rubber pad along the thread so that the mirror does not have a backlash.
P.S.
Another "detail" for the mirror - handmade silver "BORBET A"! If someone noticed him on the mirror ;)
A friend once made such a souvenir. It needs to be polished and hung on the mirror, but I will probably write about it sometime in the topic about wheels ))
Assembly_85. ETK_64_Heating and air conditioning. (part 1) Grids and nozzles
So, I'm almost finished with the interior wiring - only the immobilizer and the air conditioner remain. I will connect the immobilizer when the car is running, but I will start recording the installation of the air conditioner now. There will be several parts, because there is a lot of information and photos.
Also, we start the big ETK section Heating and air conditioning
This time I'll start from the beginning of the chapter
Part No. 1 - left ventilation grill (64 22 1 381 149)
Part No. 2 - right ventilation grille (64 22 1 381 150)
Part No. 3 - middle ventilation grill (64 22 1 381 147)
The grids are kept on latches. But it seemed to me that it is more convenient to remove them not in the assembly, but to first remove the ribs of the nozzles of the grill. To do this, lower them as far as possible, then strongly, but carefully, press down to the click, and pull out the grille. Then we take out its case. Although, you can take out the entire assembly at once, and then disassemble the grilles. There was quite a lot of dirt on them. We wash, we clean.
We collect nozzle grids.
On the end, I glued strips of "anti-squeak" so that the nozzles are better kept in the installed position. I glued a new splenum seal to the middle grill.
We snap the nozzles into the housings. Grilles are ready for installation.
Part #1 - hot air channel of the rear part of the cabin, left (64 22 1 913 815)
Part #2 - hot air channel of the rear part of the cabin, right (64 22 1 913 816)
Part No. 3 - plastic nut (16 13 1 176 747) - 4 pcs.
Part No. 4 - connecting element (64 21 1 370 635) - 2 pcs.
From 1985, these parts came standard on 4-door sedans, or as an option on 2-door sedans.
They are screwed to special pins on the body with two plastic nuts on each side. Part #4 connects the heater nozzles to these channels.
Channels exit through special holes in the carpet under the front seats.
Now you can lay the floor noise insulation and the carpet - more on that later. And now we return again to the grids and nozzles of the torpedo.
Part No. 1 - left glass heating nozzle (51 45 1 888 231)
Part #2 - right glass heating nozzle (51 45 1 888 232)
Part No. 3 - glass heating nozzle (51 45 1 888 230) - 2 pcs.
Part No. 4 - left warm air channel (64 22 1 888 241)
Part No. 5 - right warm air channel (64 22 1 888 242)
Part No. 6 - medium cold air channel (64 22 1 888 243)
Part No. 7 - left cold air channel (64 22 1 888 237)
Part No. 8 - right cold air channel (64 22 1 888 238)
Part #9 - self-tapping screw ST4,2X13-Z2 (07 11 9 907 939) - 9 pcs.
Part No. 11 - bracket (51 45 1 857 745) - 2 pcs.
For some reason, ETK does not specify self-tapping screws for fastening parts No. 3 - black self-tapping screws ST2.9X16 (07 11 9 902 423) - 2 pcs. , similar to those used to fasten the instrument panel shield.
Clamps for fixing the wiring are also not specified. All of them are needed:
61 13 1 391 721 - 2 pcs.
61 13 1 370 660 - 7 pcs.
Another useful thing, which is also for some reason not indicated in the ETK at all, is the additional sound insulation of the torpedo. It was used only on the E30 with a diesel engine. I decided to also install it for better noise insulation of the cabin. It looks like this and includes six elements (one was missing, so I cut it by analogy myself from the same material).
Before gluing the noise insulation, I cleaned the embedded parts for installing clamps and other metal surfaces of the torpedo from rust.
Three collars to the right.
Three clamps on the left and one more one on the left side torpedo bracket.
A place for an embedded clip for fastening a torpedo.
We prime and paint all internal metal surfaces and side brackets.
We glue the noise insulation to the torpedo, and glue the edges of the torpedo cladding where necessary.
We install side nozzles.
I'm just curious - why are the places for the grills made in different colors? It's like a traffic light - red, yellow, green. Or similar to the position lights of an airplane - red on the left, and green on the right
Left
average
rights
Insert nozzles with grids, but do not snap them. This will make it more convenient to install internal nozzles.
We install clamps. I additionally glued the joints of the channels with "anti-squeak" strips - so the plastic will not creak, and the channels will be more airtight.
First, we fasten the central nozzle No. 6 with three self-tapping screws, and put two clamps for wiring in its holes. Then we collect all the channels. After that, screw nozzles #1 and #2 with three self-tapping screws each. Only after that do we fasten the bars. Additionally, we connect the middle (No. 6) and side (No. 1, No. 2) nozzles with metal brackets, one on each side.
I cut out the left part of the noise insulation according to the sample from the right.
All nozzles and channels are installed, everything is ready for gluing noise insulation on them.
We glue noise insulation on all nozzles.
The torpedo is ready for installation. Now she is "diesel"
But first you need to install the heater. And before that - noise insulation of the floor and carpet. I will write about this next time.
I wrote about the noise insulation of the body a long time ago, but in addition to the noise insulation of the floor, since at that time the wiring had not yet been laid.
So, I will continue this section. Sound insulation
Until 1985, the sound insulation of the bottom was separate from the decorative carpet.
In this section, it remains to establish these two details.
Part No. 5 - sound insulation of the front bottom (51 48 1 916 533)
Part No. 6 - soundproofing of the rear bottom (51 48 1 906 357)
It is no longer available for order, and it is very difficult to find it in good condition. So I restored mine as best I could.
The front one had many cracks on the driver's side.
The cracks on the right are much smaller.
The condition of the back part was pretty bad, but I couldn't find a better one.
Therefore, I simply pasted a new soundproofing made of the same material on top of it.
I have already tried to seal the cracks in the front part with reinforced tape, but it did not help much. Therefore, this time I decided to seal it with construction sealing tape - I even picked up a similar color in a hardware store
It turned out not bad enough, in my opinion. I heated it a little with a hair dryer in places - it stuck very well.
Through special holes we remove the nozzles of the heater - from the front and under the front seats.
So, it's time to lay the carpet and install interior details. And at this stage, out of nowhere, I suddenly had an idea - to assemble a blue interior - to match the color of the car! The idea seemed very good to me, and I began to look for parts of the original blue PACIFIC interior, which was installed on cars before 1985.
The carpet was found first. Although, in the photo, at first it seemed to me to be gray, not blue... and not by chance... I had to think better even then, but the idea of a blue interior won over common sense, and I bought it!
The carpet is not in perfect condition, but it is probably the best of the blue ones I have seen on sale. I compared it with my black ANTHRAZIT carpet - there is still a difference... it seems a bit like blue...
But, you need to wash and clean it well.
Now it looks more like blue! Although, in some places, spots remained... and under the pedals, it is simply already worn and worn.
Then there were 0212 PACIFIC blue door panels with houndstooth fabric inserts. Just what you need for a 1985 325i. In my opinion, houndstooth is one of the best fabric textures for the E30. The door trims are also not in perfect condition and have some blemishes, but I bought them as well. After cleaning, their appearance also became much better.
There is also an option to buy blue skins without fabric inserts. It will be easier to choose a seat with any fabric texture for them. ;)
An interesting nuance - all the blue door panels that I saw on sale here were sold with black pockets. Amazingly. But when I did find the blue pockets, I understood why it was so. Blue pockets, in contrast to black, gray, beige, brown and green, in 30-40 years almost completely lose their color and become almost white! Perhaps this is explained by the different quality of the dye for plastic... or I don't know what...
By the way, I also accidentally bought a blue door handle frame. Colored frames were on E23 and E28. And on the E30, there were only black ones, except for convertibles, which also had red and beige ones.
The inside of the pocket remained blue, as did the frame. And the outer side is very "burnt" in the sun.
And the door handles kept their color well. The difference is simply huge.
Later I bought another pair of blue pockets - they look a little better, but also almost completely discolored. Perhaps they need to be polished, or in extreme cases, painted.
Another interesting detail - in ETK, pockets of different colors have different numbers, but in fact, regardless of the color, the same number is indicated on the pockets! The upper one is black, the lower one is blue - 1 906 204. And there is no such number in ETK at all! Surprisingly!
And one more detail - some pockets are attached with self-tapping screws, and some with screws in threaded bushings. This is also not listed in ETK for some reason.
The most difficult part of the task remained - to find whole blue seats... And then I finally understood that the idea of assembling a blue interior is doomed to failure!
Everything I saw for sale looked something like this, or much worse:
In addition, I did not find blue "crow's-foot" seats at all. But I came to the conclusion that almost all colored E30 seats turn gray after 30-40 years of operation! I will definitely not install the seat in this condition in my car...
So, after comparing the assembled parts of the blue interior with my parts of the black interior...
...I've decided to shelve this crazy blue interior idea indefinitely and install my black interior!
Finally, it came to the interior assembly!
I already wrote about the not very successful idea with the blue interior
According to the factory configuration, my car had a green interior PINIENGRUEN (0149). Of all the colors available for the E30, it is my least favorite. It's also a good thing that the previous owner replaced it with an ANTHRAZIT (0211) black interior.
As I wrote before, before 1985 the carpet and soundproofing were separate parts, and after 1985 it was one unit. Therefore, the earlier version of the carpet is easier to clean and dry. There are many carpet numbers in ETK, depending on the year of production and color, but in terms of shape and size they are all the same and interchangeable for all 2 and 4 door sedans and touring cars. But of course, the early version should be installed only with appropriate sound insulation. And to install the late version instead of the early one, you need to remove it, since the noise insulation is combined with the carpet on the late version.
Accordingly, I have an early version of the carpet.
Detail #1 - lining of the bottom
Detail #2 - lining of the seat frame
The color is black ANTHRAZIT - in fact, it is dark gray. We will lay it on top of the installed sound insulation.
After buying the car, the back of the carpet was brown for some reason. I replaced it with a gray one a long time ago. But it turned out that the gray carpet can have a different shade, depending on the year of manufacture and model. The fabric itself also has a different texture and pile. After dry cleaning, the difference became more noticeable... Moreover, in the photo, the difference can be seen much better than in real life. Maybe later I'll find a backing that's the same texture as the main rug, but for now I'll leave it that way. In reality, the difference is not very noticeable ;)
Through special holes, we remove the front blower nozzles and the nozzles under the front seats. We also bring to the surface all the wiring for buttons and seat heating.
The carpet in the salon immediately became more comfortable
Part #1 - left bar (51 43 1 884 375) and right bar (51 43 1 884 376). It is used only if there is a ceiling panel. Without the ceiling panel, these slats have a different top shape. I used to have them different, but now I replaced the left one with the right one.
Upper ordinary, lower under the ceiling panel:
Part #2 - bracket (51 43 1 922 789) - 2 pcs. Insert plate for lower fastening of slats No. 1.
Part No. 3 - bracket (51 43 1 881 429) - 2 pcs. Clips for upper fastening of slats No. 1.
Insert plate No. 2 and clip No. 1 are inserted into the grooves on the bar. Often they are broken. The plate is inserted into the lower hole on the body strut and is clipped into the upper hole on the body strut.
By the way, it is not clear why there is a hole with a thread similar to the thread for seat belt bolts in the middle of the body strut. What can be attached there?
The edge of the slat covering is inserted under the door seal and pressed against it.
The bar is installed.
Detail No. 4 - window frame lining left (51 41 1 906 475) and right (51 41 1 906 476)
Part No. 5 - bracket (51 41 1 906 485) - 6 pcs.
Staples No. 5 are inserted into the front door rack, 3 pcs. on each side.
Pads No. 4 are tightly inserted into staples No. 5.
Detail No. 6 - cladding of the middle left (51 43 1 933 731) and right (51 43 1 933 732) rack. Usually black, but in the exclusive Edition configuration there were INDIGO blue or SILBER gray.
Part #7 - left (51 43 1 916 681) and right (51 43 1 916 682) cover
Part No. 8 - plug (51 44 1 854 624) - 4 pcs. Clip for lower attachment of part No. 6. Can be replaced by item #15.
Part No. 15 - rivet with spacer sleeve (51 47 1 919 209) - 4 pcs. Clip for lower attachment of part No. 6. Can be replaced by part #8.
Part No. 16 - bracket (51 47 1 933 985) - 2 pcs. For fixing the wiring under the cladding of the rack.
Part No. 17 - threaded plug (51 71 1 913 007) - 2 pcs. There are two threaded holes for fastening the seat belt on the body rack. By default, the belt is screwed into the upper hole. When replacing the belt in the lower hole, you need to cut an additional hole in the lining according to the factory markings. At the same time, the factory top hole is closed with this threaded plug. I'm not going to rearrange the belts, so I don't have this part. It looks like this (photo from the Internet):
To install the rack lining, you need to unscrew the upper fastening of the seat belt, and pull it through the hole in the overlay. Plastic hooks glued to it are used to fix the lining. They are often already broken, as in my case. You cannot order them separately, but you can print them on a 3D printer. You need 2 pcs. on each pad. In the photo, the old hook is broken, and the new ones.
We glue them in the right places, at the same time I also glued sound insulation on these overlays and the edges of the cladding. We insert the overlay with hooks into the holes in the body rack and move it up until it is fixed. At the bottom, we press the carpet with an overlay and insert two bottom clips #15 (or #8). We insert cover No. 7 into the hole for the seat belt and screw its upper fastening. The lining of the racks is installed.
Part No. 9 - threshold cover front inner (51 47 1 904 595) - 2 pcs.
Part No. 10 - front outer threshold cover (51 47 1 904 641) - 2 pcs.
Part No. 11 - threshold cover rear inner left 51 47 1 933 557) - 1 pc.
Part No. 11 - threshold cover rear inner right 51 47 1 933 558) - 1 pc
Part No. 12 - threshold cover, rear outer left (51 47 1 904 645) - 1 pc.
Part No. 12 - threshold cover, rear outer left (51 47 1 904 646) - 1 pc.
External door sill plates with the M TECHNIC logo were available as an option. They look very beautiful, they are very expensive, they are very rare
Part No. 10 - threshold cover front outer M TECHNIC (51 47 2 230 812) - 2 pcs.
Part No. 12 - threshold cover, rear outer left M TECHNIC (51 47 2 230 813) - 1 pc.
Part No. 12 - threshold cover rear outer right M TECHNIC (51 47 2 230 814) - 1 pc.
Photo from the Internet:
Part No. 13 - bracket (51 47 1 840 961) - 16 pcs. A clip for fastening the inner linings of the threshold. 5 pieces each on the front pads and 3 pcs. on the rear pads.
Part No. 14 - bracket (51 47 1 840 960) - 14 pcs. A clip for fastening the external linings of the threshold. 4 pieces each on the front pads and 3 pcs. on the rear pads.
Part No. 18 - bracket (51 47 1 840 961) Clip for fastening the inner linings of the threshold. Parts #13 and #18 have the same number, that is, they are one and the same part. I do not understand why it is indicated twice.
I cleaned and polished all the pads before installation.
Installation is very simple - we insert the clips into the groove of the lining and snap them into the holes in the body. The inner linings press the edge of the carpet and the door seal, and the outer ones have a decorative and protective function for thresholds.
The front pads are installed.
And there was a problem with the rear ones - on the left side of the body, they forgot to drill one hole for the clips of the outer lining... I had to fix it. The hole was primed with zinc primer and painted.
There is also a nuance with internal ones. As it turned out, they are of two types. I had different ones - one wider and the other narrower, with a different shape of the profile.
The wider one has holes for additional fastening at its rear end.
I had to look for a pair of the same ones. Narrow ones are probably earlier, because they are harder to find. Therefore, I bought wide ones. But on the body, I did not find holes for additional fastening of the rear end. They also do not coincide with the holes for fastening the back of the seat. Well, I didn't use them, they hold up so well. Apparently, those holes are on later cars.
Rear pads are installed.
So, the carpet is completely installed and fixed around the perimeter. The heater/air conditioner housing can now be installed.
Before installing the heater housing, I decided to install the wiper mechanism first. It will be much more convenient to do without a heater fan.
So, section General vehicle electrical equipment
For some reason, the ETK does not show the shims and retaining rings that fix the wiper axles.
There was no backlash in the hinges, so I did not disassemble them - I simply cleaned them well and replaced the grease in them. We also lubricate the axes and insert the mechanism into the housing. We put spacer washers on the axis to remove the axial backlash and fix the axis with retaining rings. The electric motor was working fine, so I just cleaned it. We fasten electric motor #2 to the windshield wiper housing #1 with three #7 bolts and cover it with plastic cover #3.
We insert rubber damper No. 17 and sleeve No. 16 into the hole of the case.
But it is better to screw the crank No. 4 to the motor axis with a nut No. 8 after installing the windshield wiper on the car. So it will be much more convenient to insert it into the niche of the body. Although, it is not very easy to do it anyway.
We insert rubber rings No. 14 into the holes on the body and deflect the wiring connector so that it does not interfere.
Insert rings No. 13, and install the wiper mechanism in the niche of the body.
Carefully push it to the holes. The procedure is quite difficult, there is little space, and it is not very convenient to do it. As I said, it is better to do this with the crank NOT screwed on - this way you can fold the levers more compactly so that they pass more easily through the niche. And good thing I did it BEFORE installing the heater and its fan. With him it would be much more difficult.
After the wiper axles are finally installed in their places, we put washers No. 12 on them, tighten nuts No. 11, and put on protective plastic caps No. 10. We screw in nuts No. 9, which will then be used to fix the levers of the brushes. But it will be after installing the glass.
After that, we screw the wiper body to the body with bolt #15, through the rubber damper #17 and sleeve #16.
I left the crank unfastened for now. We connect the wiring connector to the electric motor. After installing the glass, it will be necessary to turn on the windshield wiper so that its electric motor is in its extreme position. After that, screw the crank and brush levers.
Assembly_90. ETK_64_Heating and air conditioning. (part 2) Wiring connection, adapters
So, now everything is ready to install the air conditioner. Today will be, so to speak, the "introductory part".
The air conditioner in the E30 is probably the option that has been changed the most and most frequently throughout the E30's production period. Every year some changes were made to its wiring and design. Therefore, there are many combinations of wiring options, sensors, regulators, compressors, fans, radiators, heater housings and other air conditioner parts. And not all of them are compatible with each other. Now, as a rule, you don't have to choose, so I bought what I could find at the moment - an M20 air conditioning kit, which was then installed on the M42, with sad consequences for the compressor, due to its homemade mounting - I already mentioned this before .
In principle - a normal complete set, at a normal price.
Based on the wiring and ETM, I identified it as a variant of the 1989 model - that is, restyling. The main wiring in my 1986 model car is, accordingly, before restyling. Therefore, almost all the connectors are different, the circuits are different, the colors of the wires and pin numbers also do not match. But somehow it is necessary to combine all this! Having armed himself with the schemes of 86 and 89, he began to figure out how to do it. I decided not to "barbarically" cut anything in the wiring, but to make it on "transitional" adapters. For this, I bought donor pieces of wiring with the necessary connectors.
In fact, everything is not as difficult as it seems at first glance - you only need to connect a few wires correctly.
This time it will only be about connecting the underhood wiring of the air conditioner. If the wiring of the air conditioner corresponds to the main wiring, then the connection is very simple - you need to insert 5 terminals into the fuse block, and connect two connectors there (or one, for restyling). But this is not my case!
My case is a mix of '89 A/C wiring with '86 main wiring. It was for such an option that I made unfoamed adapters.
Please note - for other years of production, the pin numbers and the color of the wires may differ!
In practice, I only partially tested it - the heater fan works, the air conditioner fan works, the recirculation works. There is no way to check the operation of the compressor yet. Also, if you use this information, you do so at your own peril and risk! If there are any inaccuracies, I will make the appropriate changes after the air conditioner is fully launched.
Underhood wiring of the air conditioner of the 1989 model.
1 - fuse terminal #18 (30A), black-blue
2 - fuse terminal No. 3 (15A), black-green
3 - connector C413 for connection to the main wiring
4.1, 4.2 - connectors for connecting the diode
5 - terminal 86 of relay K1, black
6 - terminal 86 of relay K6, black-brown
7 - terminal 85 of relay K6, brown
8 - "ground" G104 (near the left headlight)
9 - connector of the additional air conditioner fan
10 - connector of the 2-pin radiator temperature sensor
11 - air conditioner compressor clutch connector
12 - high pressure sensor connector
13 - low pressure sensor connector
I haven't fully figured out the pressure sensors yet, so the blue connector 12 is temporary, and may be replaced later with the one needed for the corresponding sensor.
With the terminals, everything is simple and the same, regardless of the year of manufacture - empty places for relay contacts and fuses are visible on the board.
But the connectors are different. I have two white 2 pin connectors in my '86 fuse block to connect the A/C wiring.
They are compatible with each other in terms of shape, but you do NOT need to connect them to each other! They plug into the same matching 86 A/C wiring connectors.
But the connector corresponding to them (C413) on the wiring of 89 is completely different.
According to the expansion shown above, we make adapter No. 1 from the corresponding parts of the connectors - for underhood wiring of the air conditioner.
The cabin wiring for the '89 heater/air conditioner housing has the following C204 connector:
The cabin wiring of the 86 heater housing has the following C204 connector (three empty places for the air conditioner wires):
According to the expansion shown above, we make adapter No. 2 from the corresponding parts of the connectors - for the interior wiring of the air conditioner.
We add three additional wires for the air conditioner.
But we connect the corresponding foams according to the table above, according to the colors.
We get such an adapter (the length could be made twice as short).
According to the pinning shown above, we make adapter No. 3 from the corresponding parts of the connectors - for connecting the interior wiring of the air conditioner to the engine wiring (it could be made much shorter in length).
So, to connect the air conditioning wiring of the 89 model to the main and motor wiring of the 86 model, you need to make three such adapters:
As I already said, I made the length with a margin, I will shorten it in places, if necessary.
Therefore, we open the fuse block and connect adapter No. 1 to the corresponding connectors. These wires, in addition to black and green, go into the cabin to the C204 air conditioner connector. Black and green goes to fuse #19.
In the 86 version, the red-black wire does not go into the cabin with the other three, but is connected to the engine wiring under the hood. Therefore, this wire is brought out separately from the fuse block under the hood. It will be connected to the motor wiring later.
We break out the plastic plug in the fuse block housing, and tighten the underhood wiring of the air conditioner into it.
According to the ETM and EBA, insert the two fuse contact terminals (#3 and #18) and the three air conditioning fan relay contact terminals (K1 and K6) into the corresponding blanks on the board. This is given above in the description of wiring connectors. Connect the C413 connector to adapter #1. We put all these connectors in the fuse block and close it.
There is one nuance - judging by the EBA, there were simple configurations of cars, with no preparation for air conditioning at all. That is, - without these connectors in the fuse block. In this case, you need to buy the original additional wiring harness specified in the EBA. Don't know if it's still available.
Or just lay these wires yourself from the fuse block in the cabin to connector C204, according to the pinout table above.
Another small "upgrade" ;)
The previous owner installed an additional electric fan that was switched on by a button via a separate relay and fuse. I got used to it, so I decided to leave this button - suddenly I want to burn rubber on "donuts" or "barnauts", then it will not be superfluous to turn on the fan in advance, and not wait for the motor to overheat But I connected this button in parallel to temperature sensor, which turns on the maximum speed of the air conditioner fan - as if at the factory;)
This is the usual green button for heating the rear window.
The connection scheme is elementary - parallel to the sensor, to fuse No. 19 and to pin 86 of relay K6. Added a connector for adjusting the backlight of the button.
For convenience, I led the wires from the fuse block to the connector, and through the rubber insert in the engine shield, led it into the cabin.
I connected the backlight to the rear window heating button.
So, the underhood wiring of the air conditioner is connected, and together with other wiring is laid under the hood to the right headlight. I will connect its other connectors as the relevant parts of the air conditioner are installed.
Now you can install the heater/air conditioner housing and connect it using adapters #2 and #3. I will write about it next time.
Why can't I copy the text from Google Translate here again?
Server Error
403
Forbidden
You do not have permission to access this document.
I don't understand how to explain it, but the third part does not want to be inserted here from the translator - for those who are interested in it, you can read it here, having translated it yourself. http://forum.e30club.com.ua/index.php/t ... msg1011654
Last edited by The_Glory on Thu Jan 18, 2024 11:25 am, edited 1 time in total.
Collection_92. ETK_64_Heating and air conditioning. (part 4) Air conditioner details
So, I continue to assemble the air conditioner case. It remains to install the hinged parts. Air conditioning parts
Part No. 1 - the upper part of the body
Detail No. 2 - lower part of the body
Part #3 - fan bowl (64 11 1 372 507)
Part No. 4 - servo drive (64 11 1 372 511) - 2 pcs.
Part No. 5 - connecting rod (64 11 1 372 512) - 2 pcs. Again a mistake in ETK - the left and right thrusts are different and this is very important, I will show why later.
Part No. 6 - relay (61 36 1 388 911) - 2 pcs.
Part #7 - evaporator temperature regulator (64 50 8 390 158) On the diagram, this is part #20
Item No. 8 is not used. Used only for climate control
Part No. 9 - condensate drain hose (64 11 1 370 998) - 2 pcs.
Part No. 10 - condensate drain hose (64 11 1 370 995) - 1 pc.
Part #11 - bracket left (64 11 1 372 635) and right (64 11 1 372 636)
Part #12 - rubber gasket (64 11 1 372 637) Not available for ordering, but as I said, it is perfectly replaced by a regular "fishing" rubber.
Part No. 13 - bracket (64 11 1 372 638) - 2 pcs. This is a plastic bushing of the linkage
Part No. 14 - fan bowl (64 11 1 370 934)
Part No. 15...No. 18 is not used. Used only for climate control
Part No. 19 - resistor (64 11 6 912 633)
Part No. 20 - evaporator temperature regulator (64 50 8 390 158)
Part No. 21 - insert of the retainer (64 11 1 376 327). Fastener for attaching salon clips
We connect the internal and external recirculation flaps of the recirculation flaps.
We install the resistor in the grooves and snap it into the connector.
We connect the upper and lower parts of the case with staples, inserting a rubber seal around the perimeter. We lay the wiring and fix it with metal clips, install and connect the thermostat and the temperature sensor of the evaporator. Below is a place to install a radiator.
We install brackets with servo drives and connect them. We fix the connectors in the brackets of the brackets. We install relays and fix their connectors on special grooves on the case. The wiring is fixed on the left with a tie, on the right with a clamp.
We insert the rods into the corresponding holes in the case and snap them into the bushings (#13) on the servo drives. And now an important point. Traction must be properly adjusted. If this is not done, then soon the flaps will break, as it often happens, and as it was in my case. The fact is that the servo drives are constantly under power and "pull" the flaps so that they are tightly closed. That is why they break. To prevent this from happening, you need to manually move the servo with the thrust as far back as possible until the servo lever rests against the bracket.
Now manually press the flap so that it closes, and adjust the length of the rod along the thread, and in this position snap it into the hinge.
Now the servo will not excessively "pull" the flap, as its lever will rest against the bracket.
It is the same on the right, but there is a nuance. I don't understand why they didn't do the same. The difference is that the lever of the right servo goes past the bracket and does not rest against it. But the right pull (unlike the left) has a special bend, with which it rests against the lever itself.
Adjusting the length of the thrust is similar to the left side.
Lubricate the joints with Teflon grease. Done with flaps.
A place to install the vaporizer. By the way, this is where the interior filter can be installed in the version of a conventional heater.
For now, just put the lid on.
On the cover there is a special attachment for the retainer of salon clips No. 21. There should be a similar mount on the left side of the case, but it's broken off...
I asked a friend to print a "repair insert" for this fastener. He also printed a few more things I needed - mounting the instrument panel, ceiling panel and cover on bolts with a lock.
Collection_93. ETK_64_Heating and air conditioning. (part 5) Heating element/fan
So, the case is assembled, it remains to install the fan electric motor, radiator and evaporator. I'll start with the fan and radiator. I thoroughly washed the old radiator that was included with the air conditioner - it looks intact.
But he is already 35 years old and I don't know how he worked before that, and what to expect from him. Once I already had a heater radiator burst - I don't really want such "joy" again I ordered a new radiator. Along with it, there is also a dehumidifier and all sorts of small things for the air conditioner.
Chose the Mahle Behr (AH95000S) as it was from the factory, but of course now it is also "Made in China".
But the packaging and equipment are completely "branded" - a seal, instructions and an advertising booklet
The electric motor of the fan turned out to be working, even without the creak of its bushings, as is often the case. So I just washed and cleaned it well. And then the operation will show...
But all other details needed some attention and restoration.
I'll start with the recirculation flap cover.
Soldered the crack under the engine and the cracks on the landing holes of the flaps.
By the way, the "ear" above the flap is the place to install the temperature sensor for the climate control option. In my case it is not used.
Part of the rib against which the flap rests was broken. We restore it with plastic hot glue.
We clean
Putty and sand
Primer and matte paint for plastic.
It turned out not bad.
Now the aluminum tubes of the radiator - they often corrode under the clamps. After cleaning the pipes with sandblasting, there were even holes.
Soldering aluminum is not easy, but thanks to google I found a very easy way! I bought a special solder with flux Castolin 192 FBK. A simple gas burner is also needed.
The process is very simple - we heat the tube with a gas burner, then apply solder to the place of heating, it melts and evenly fills the holes. After that, we clean it lightly.
But we paint with zinc-aluminum paint.
Now it's the turn of the radiator valve. They are of two types, as I said before. The upper one is for the first type of heater, and the lower one is for the second type.
Their design is different, but the principle of operation is the same - the valve is usually open, and when power is applied to it, it closes with an audible click. My valve would not close even though it looks intact and has no signs of leaking. In this case, you need to disassemble and clean it without thinking for a long time. Most likely, it was simply stuck with dirt.
So we drill four brass rivets.
The expected result - everything is covered with mud!
The valve solenoid was disassembled without any problems.
But the cover of the valve membrane did not want to come off! I had to soak it all night in WD-40.
There was also a lot of dirt under her.
The channels in the cover are also clogged with dirt.
Fortunately, the membrane was intact, so we wash everything very carefully. Especially all the channels and grids in the case.
By the way, the arrow indicates the direction of movement of the liquid - I will write more about this below.
We also thoroughly clean the rubber membrane and channels in its cover. We wash the solenoid.
A diode is provided on the coil of the solenoid, but for some reason it burned out.
I'm not very good at electronics, so I don't really understand why it's there - the valve works without it - but I replaced it anyway.
All parts of the valve are ready for assembly.
The assembly is simple - we put the membrane in the tube and close it with a lid. We put a washer, a coil with a metal clip, an upper washer on the solenoid and cover it with a plastic cover. We put a rubber ring and a spring on the solenoid rod. Carefully squeeze and evenly twist with four M3x30 screws with washers and nuts.
Blow the valve - it should be open. We supply power - the contacts are signed on the cover.
The valve clicks when closing and does not blow out - fully operational.
I will repeat once again - all the details of this section are suitable only for the housing of the heater of the second type. And not interchangeable with similar parts for the case of the first type.
Part #1 - heating element (64 11 8 391 363). In my case it is Mahle Behr (AH95000S)
Part #2 - fan (64 11 1 370 930)
Part No. 3 - tightening tape (64 11 1 370 636) - 2 pcs. For fixing the fan cover.
Part No. 4 - tube (64 11 1 370 931)
Part No. 5 - tube (64 11 1 370 932)
Part No. 6 - fan bowl (64 11 1 372 507). Recirculation valve cover. According to this number, it comes together with two pairs of flaps. It is available to order, but I think the price of 300 euros is not adequate In my photo, there is only one pair of shutters. The other pair remained on the heater body. I didn't want to take them off again so as not to break them... especially considering their price ;)
Part #7 - fan bowl (64 11 1 370 934). Fan cover.
Part #8 - foot (64 11 1 370 935) Plate for fixing the fan.
Part #9 - square nut M5 (07 11 9 921 431) - 5 pcs.
Part No. 10 - bolt M5x20 (07 11 9 913 251) - 5 pcs.
Part No. 11 - spring washer (07 11 9 933 060) - 5 pcs.
Part No. 12 - sealing ring D=17.12MM (64 11 8 377 824) - 3 pcs.
Part No. 13 - rubber sleeve (64 11 1 370 809) Installed in the motor shield.
Part #14 - check valve (64 11 1 372 653) Rubber valve - I wrote about it last time when assembling the upper part of the heater body. It is installed above the electric motor of the fan.
It consists of a plastic frame and a rubber flap - in the center of the photo.
Part No. 15 - bracket (64 11 1 373 634) - 1 pc. For fixing radiator tubes.
Part No. 16 - water valve (64 11 1 386 707)
Part No. 17 - screw (64 11 1 370 949) - 1 pc.
Part No. 18 - repair kit for the temperature sensor (64 11 1 394 105) It is not entirely clear what it is.
We install a cover with flaps, press it with metal springs fixed on the body.
Installing the fan looks very simple - we put it in a niche and press it with a clamp (#8).
In fact, you need to get a little dizzy - so that the fan is in its place and does not cling to the heater body and cover with its blades. The buckle fastens with noticeable effort. We connect the power terminals and "masses" of the electric motor.
We snap the plastic collars (No. 3) into the body, install the cover (No. 7) and press it with plastic collars on the fasteners.
The fan is installed.
We proceed to the installation of the radiator. First, you need to screw the valve and aluminum tubes to it.
There are special grooves on the tubes, so they stand in only one position. The main thing is not to forget to put rubber rings (#12) on the joints. We insert square nuts into special grooves and evenly screw the tubes and the valve with bolts.
We glue the radiator with a sealant that was included with the radiator. We glue it diagonally on the back plane.
Although, I didn't have enough of it, so I glued the spleen on the front plane.
We insert the radiator into the niche of the heater housing and fasten it with two self-tapping screws.
We press the tubes with a bracket (No. 15) and fasten them with a self-tapping screw. We connect the valve. The rubber insert is still just hanging on the tubes. Also found my old engine shield sound insulation insert.
Finally, the left side duct for warm air can be installed. On one side it is placed on a latch, on the other side on one self-tapping screw.
Everything is established, but I still want to write about one nuance. Disputes often arise - where the valve is located - at the entrance to the radiator or at the exit from it. And in general, where is the entrance, and where is the exit.
So, according to ETK:
The upper tube is the exit from the radiator of the heater
The lower tube is the entrance to the radiator of the heater
As I already said, there is an arrow on the valves that indicates the direction of fluid movement. On my old heater of the first type, the valve is on the lower tube, and the arrow in the direction of the radiator is also indicated there.
That is, the valve is at the entrance to the radiator of the heater.
And here is the arrow on the valve of my new heater - from the radiator:
The valve is on the upper tube. That is, the valve is at the exit from the radiator of the heater.
So, both parties are right in disputes! It just depends on the type of heater - for the first type, the valve is at the inlet, and for the second type - at the outlet.
Next time I will write about the installation of the evaporator.
Part #1 - evaporator R12/R134A (64 51 8 391 780). According to ETK, the evaporator is the same for both types of freon.
Part #2 - safety valve R134A (64 51 8 391 209) And the valves are apparently different. We will have to deal with this freon later...
Part #3 - sealing ring D=11.1MM (64 50 8 390 602) - 1 pc.
Part No. 4 - sealing ring D=14MM (64 50 8 390 603) - 1 pc.
Part No. 5 - screw (64 11 1 370 949) - 4 pcs.
Part No. 6 - evaporator cover (64 11 1 376 851)
Part #7, #8 - not used
The evaporator is, in fact, a radiator "in reverse". Thanks to it, we get coolness in the cabin. The new one is not cheap, but people write that it rarely fails. That's why I left him. He looked like this.
By the way, I also did not unscrew the valve just to change the rubber rings - I don't see the point in this. But the tubes can be bent or broken at the same time.... I left it like that. Although, I bought a large set of rubber rings of all sizes for the air conditioner.
The insulation has completely crumbled.
A lot of dust and dirt.
I already said that together with the air conditioner donor housing, I also bought another dehumidifier with a valve. I cleaned them both - one of the two must be working! ;) The second one will be spare.
Aligned the bent plates of the ribs.
The difference in the holes for the temperature sensor is one hole on one, and two on the other. Perhaps it depends on the year of release or restyling.
The evaporator is installed in a niche on the right side. On the back wall, you can see the rod of the temperature sensor, which should fit into the hole on the evaporator. Therefore, it is better to remove and install the temperature sensor after installing the evaporator.
We glue the new thermal insulation, as it was from the factory.
And we insert the evaporator into the body of the air conditioner. The holes for the temperature sensor on the evaporator and on the case coincided.
Insert the temperature sensor into place.
On the other hand, we glue the tubes with thermal insulation, but so that it does not interfere with installing the cover.
We insert a thin rubber gasket (fishing gum) into the groove of the lid, close the evaporator and screw the lid.
Now you can install the right side channel for warm air.
All that remains is to connect the cables to the damper control panel.
P.S.
As I said earlier - in the version of a conventional heater, this niche remains empty, but a cabin microfilter could be installed in it. But for some reason it is very rare.
Although it is not available for the conditioner at all, but I will write about it - just for information.
Part No. 1 - microfilter (64 31 1 394 093). In ETK there is a note "For cars with air conditioning". This is a clear mistake - as you can see, there is an evaporator in the air conditioner, and there is physically no place for a filter. Perhaps this refers to the type two heater/air conditioner housing itself. The filter is available to order, but only in the original. I did not find analogues from other manufacturers. So, if desired, everyone who has a heater of the second type installed can order an original filter, or choose one of similar size and breathe cleaner air in the cabin ;)
It looks like this (all photos found on the Internet)
Sticker under the lid of the box for small things
Microfilter cover
Cabin microfilter
It seems that the filter is tightly inserted into the niche and pressed by the ribs of the cover.
It would be good and logical if there was such a filter for the air conditioner...but for some reason it was not provided
Part #1 - front panel (64 11 1 385 878) For cars with a clock or on-board computer (as in the photo). For the simplest configurations (64 11 1 385 877) - with a radio and buttons in the center of the panel (as in the diagram).
Part No. 2 - backlight panel (64 11 1 385 878) Depending on the year of production, there are different icons
Part No. 3 - bracket (64 11 1 368 948) For fastening the backlight panel
Part #4 - heater control panel (64 11 1 385 972)
Part No. 5 - support bracket (64 11 1 385 972)
Part No. 24 (No. 5...No. - temperature regulator (64 11 1 375 746)
Part #9 - screw M3X8 (07 11 9 907 602) - 3 pcs.
Part No. 10 - plug (64 11 1 368 498). Plug instead of buttons. In my case, it is not used, since all places for buttons are occupied.
Part No. 11 - cover of the radio receiver (64 11 1 368 515) Plug for simple configurations without a radio. In my case it is not used.
Part No. 12 - screw ST2.9X6.5 (07 11 9 907 701) - 2 pcs. For upper mounting of the panel.
Part No. 13 - screw ST3.9X16 (07 11 9 906 734) - 2 pcs. For lower panel mounting.
Part No. 22 - sheet nut ST3,9-5 (07 12 9 925 727) - 2 pcs. For lower panel mounting.
Part No. 14 - screw M4X8 (07 11 9 906 407) - 4 pcs. For fastening the control panel of the heater.
Part No. 15 - button (64 11 1 375 674) - 3 pcs. Illuminated handle for adjusting the shutters
Part No. 16 - overlay (64 11 1 370 629)
Part #17 - rotating handle (64 11 1 375 508)
Part No. 18 - temperature adjustment knob (64 11 1 375 673)
Part No. 19 - fan switch (61 31 1 381 201) Available in 3 or 4 speeds, depending on the year of manufacture.
Part No. 20 - the switch fastening nut
Part No. 21 - air conditioner switch (61 31 1 372 051). Air conditioning and recirculation button.
Part #23 - film (64 11 1 375 742) For climate control (64 11 1 375 743) - with a temperature scale in degrees. (in the photo above, both options)
Part No. 27 - lamp 2V 1.2W (63 21 7 167 000) - 2 pcs. To illuminate the heater control panel.
Part #25, #26 - not used. The temperature controller is only for climate control.
The temperature regulator (No. 24) activates the radiator valve of the heater. When the ignition is turned on, power is supplied to the contacts of the regulator and the valve closes.
When the regulator handle is turned by 15 degrees, the power contact breaks and the valve opens. Further, the regulator works mechanically - it simply pulls the damper cable when turning.
We clean the contacts, lubricate them, and screw the regulator to the heater control panel. In the photo, you can see the light guides of the backlight, they must be clean and standing in their seats.
We fix the backlight panel on the front panel with staples.
By the way, in the photo on the right panel, the clock frame is screwed. It is not needed for the on-board computer.
We install regulators and their handles. An overlay on the panel and a button. I installed a temperature scale with digital markings - for climate control. Maybe one day I will find climate control...
By the way, the round grille near the temperature regulator is the place for the cabin temperature sensor of the climate control. It is not used for air conditioning.
The panels are assembled, it remains to connect them with cables to the shutters.
Part No. 1 - air temperature control actuator cable ( 64 11 1 370 915)
Part No. 2 - the cable for the glass heating flap drive (64 11 1 370 916) Red label.
Part No. 3 - warm air damper drive cable (64 11 1 370 917)
Part No. 4 - cable for the drive of the air supply valve in the area of the legs (64 11 1 370 918) Green label.
Part No. 5 - bracket (64 11 1 367 615) - 4 pcs.
Part No. 6 - bracket (64 11 1 358 563) - 1 pc.
Part No. 7 - bracket (64 11 1 368 019) - 3 pcs.
Part No. 8 - spring (64 11 1 381 659) - 1 pc.
I connected three cables to the dampers while assembling the body.
They are fixed to the body with staples No. 5, one for each cable.
Cable #2 with a red label and cable #3 without a label.
Cable #4 with a green label.
Cable No. 1 is fixed with clamp No. 5 to the flap adjustment panel.
On the other hand, it is fixed to the body with spring No. 8 and clamp No. 6.
Cables No. 2, No. 3, No. 4 are fixed with clamps No. 7 on the damper adjustment panel, according to the color labels - upper red, middle black, lower green. Cable #1 to the temperature control lever.
When I connected all the cables, I finally understood what the red rubber band I mentioned earlier was for! Everything is simple and convenient!
But, unfortunately, it broke from old age. I replaced it with a similar new one from a sewing store
The cables need to be adjusted, so you should not fix them immediately with staples. We check whether the dampers are completely closed and opened in the extreme positions of the regulators. If necessary, move the cable in the right direction. Then we fix it with staples in this position.
Now, finally, the air conditioner can be installed on the car.