320i Cabriolet Restoration / Facelift Conversion - M50B28 Turbo

Doing a minor build / restoration or an epic one, post it here

Moderator: martauto

User avatar
AlexD911
E30 Zone Newbie
E30 Zone Newbie
Posts: 128
Joined: Thu Mar 11, 2021 4:21 pm

Wed Jan 05, 2022 12:44 pm

Insta: @e30_cab_uk

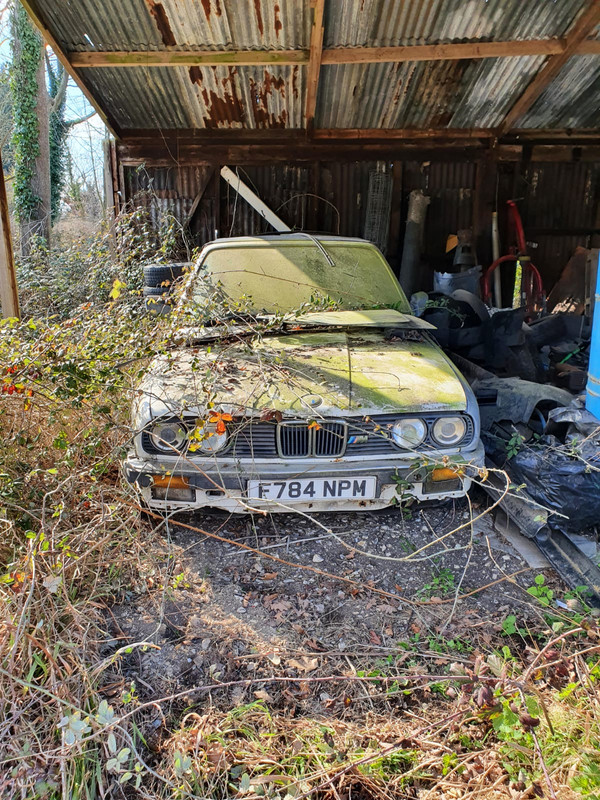
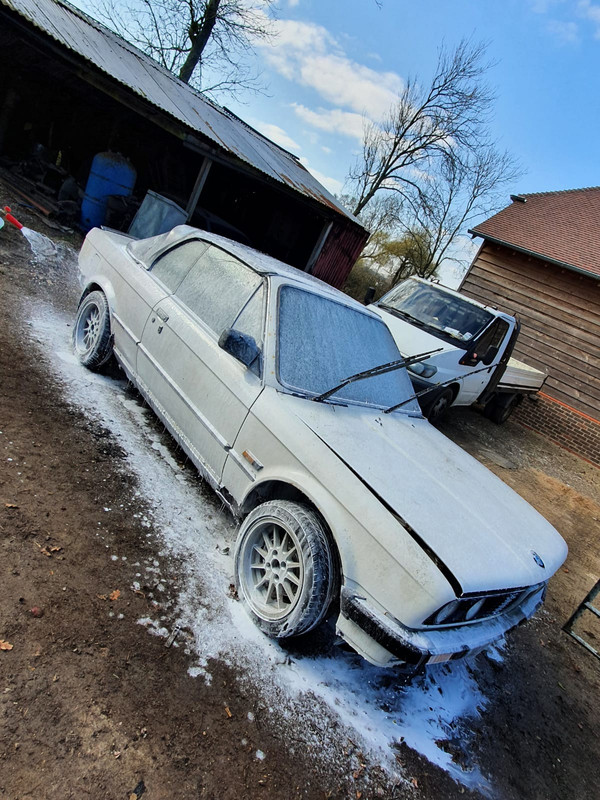
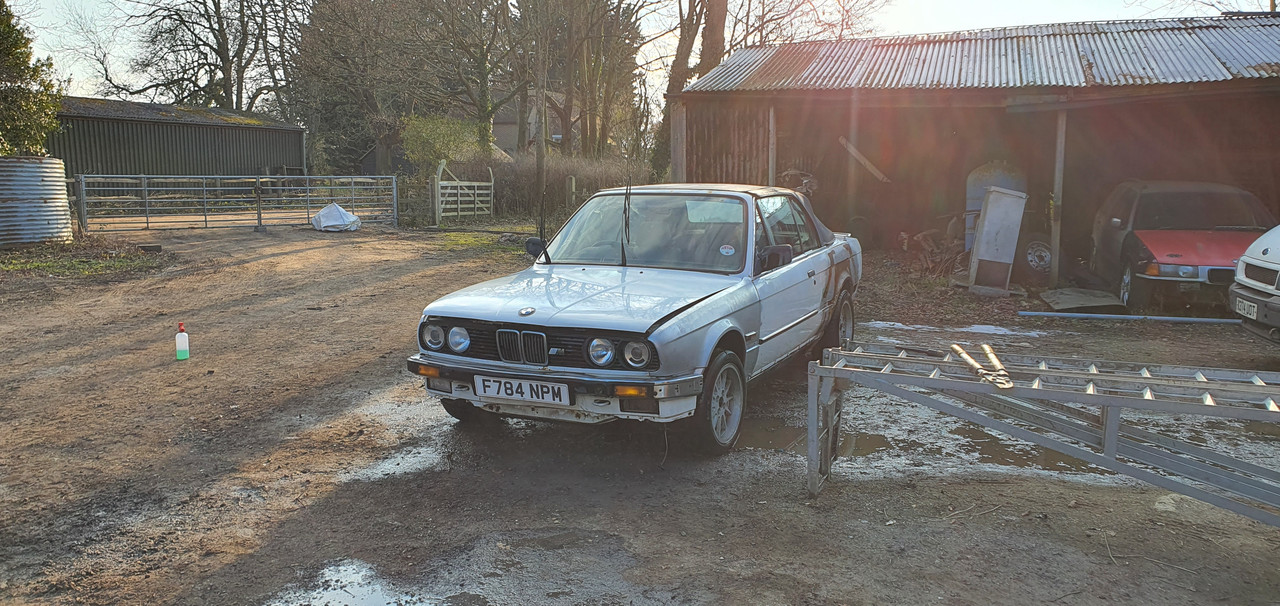
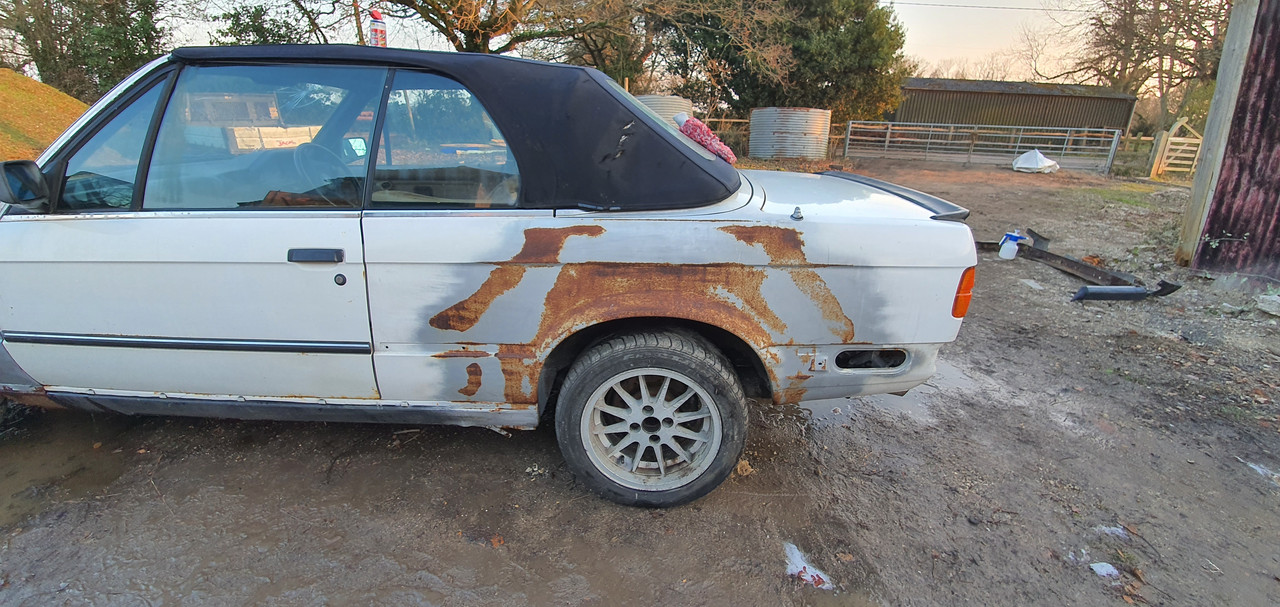
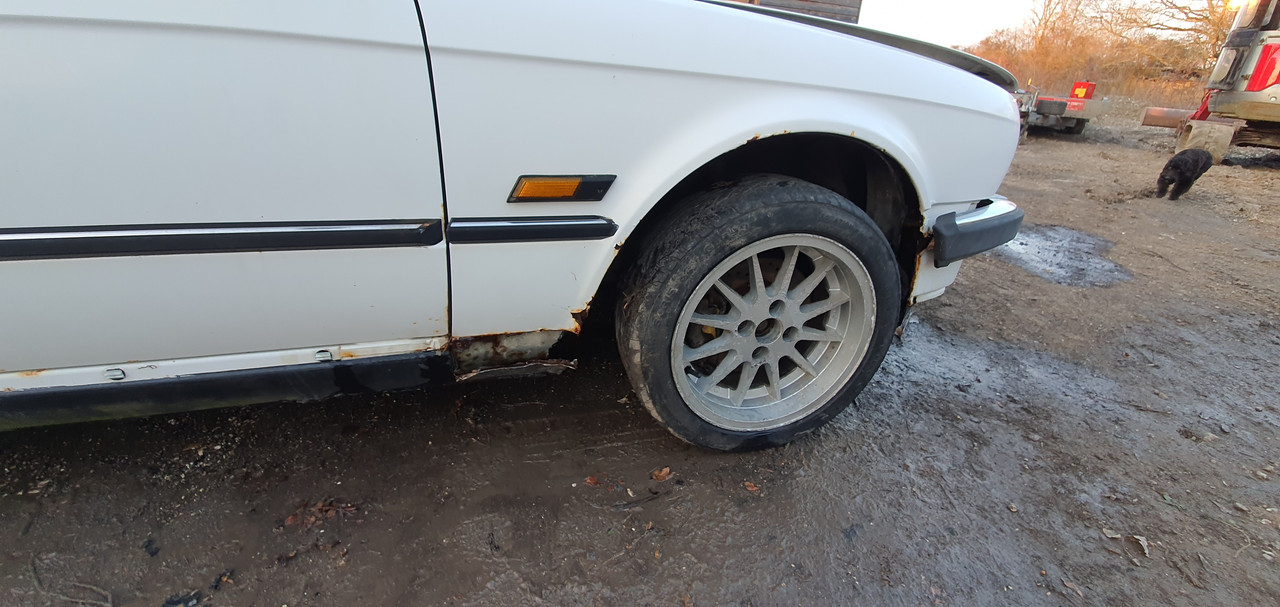
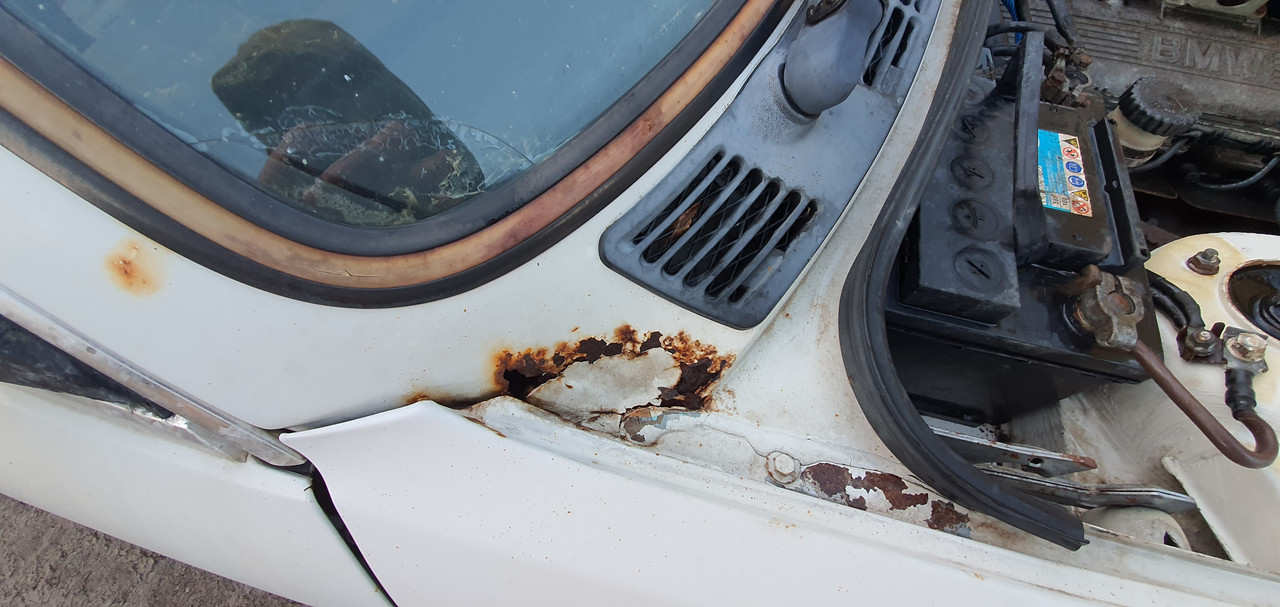
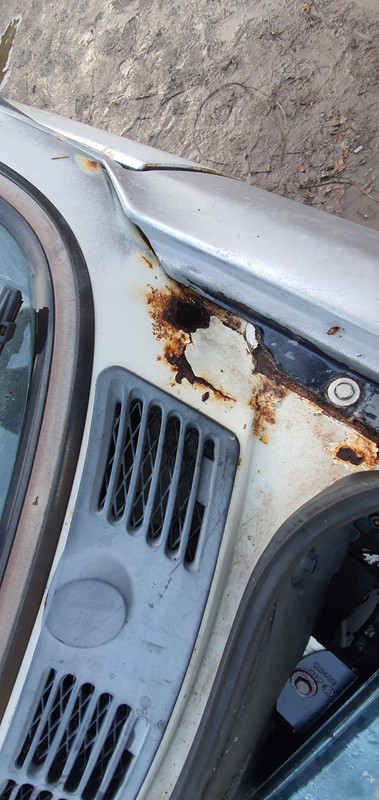
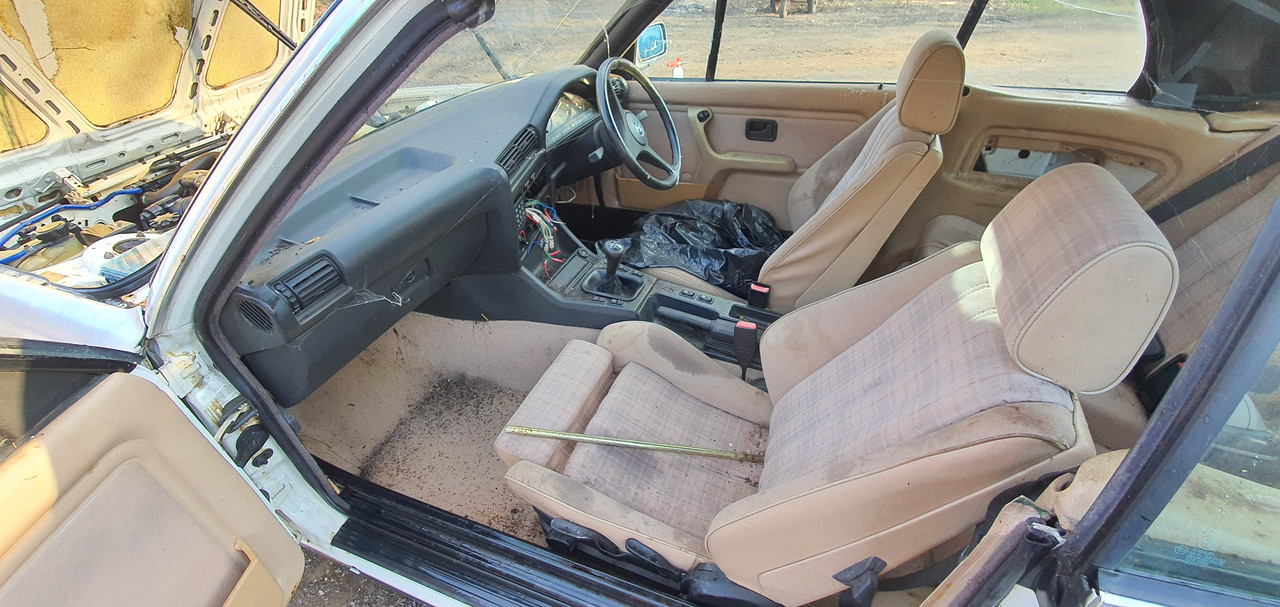
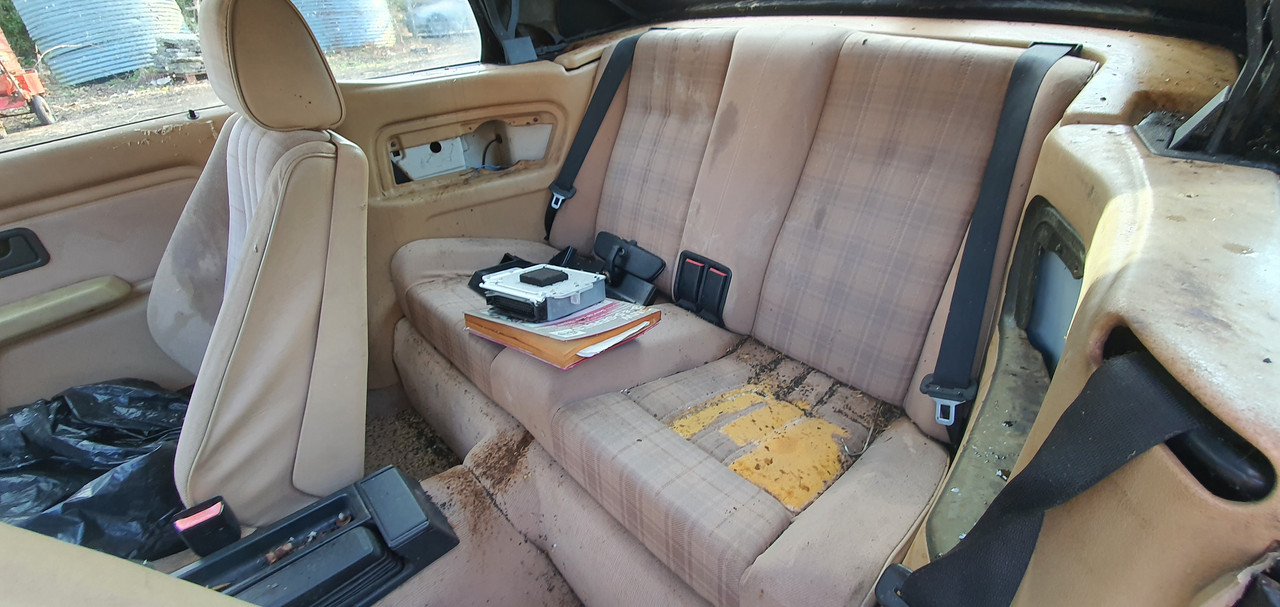
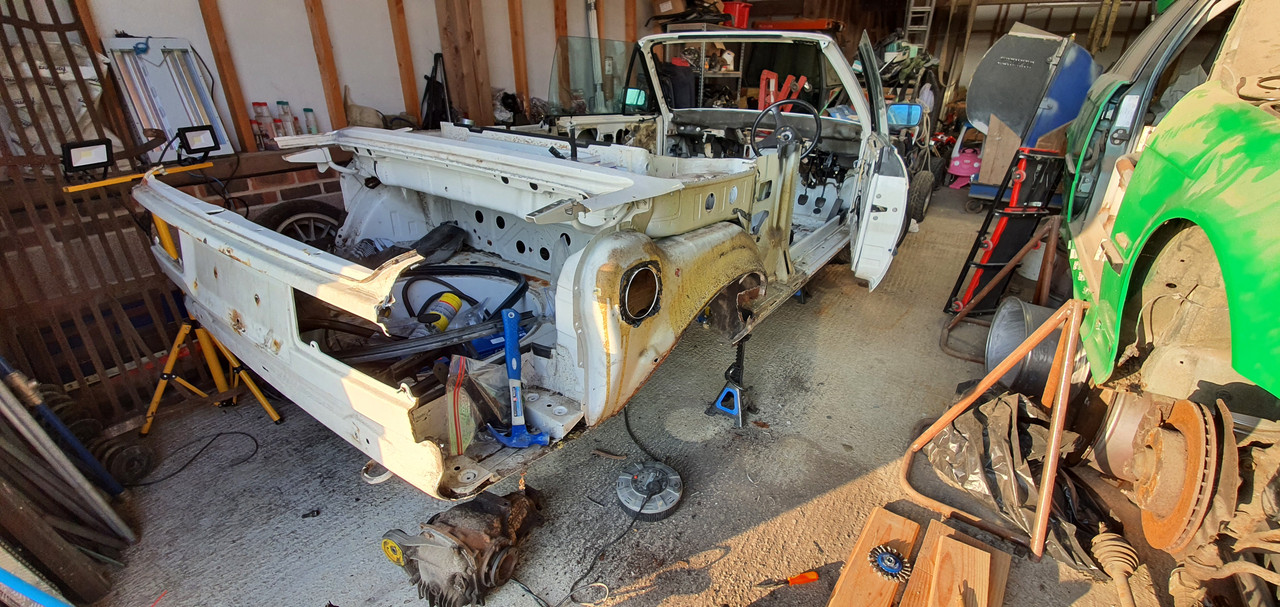
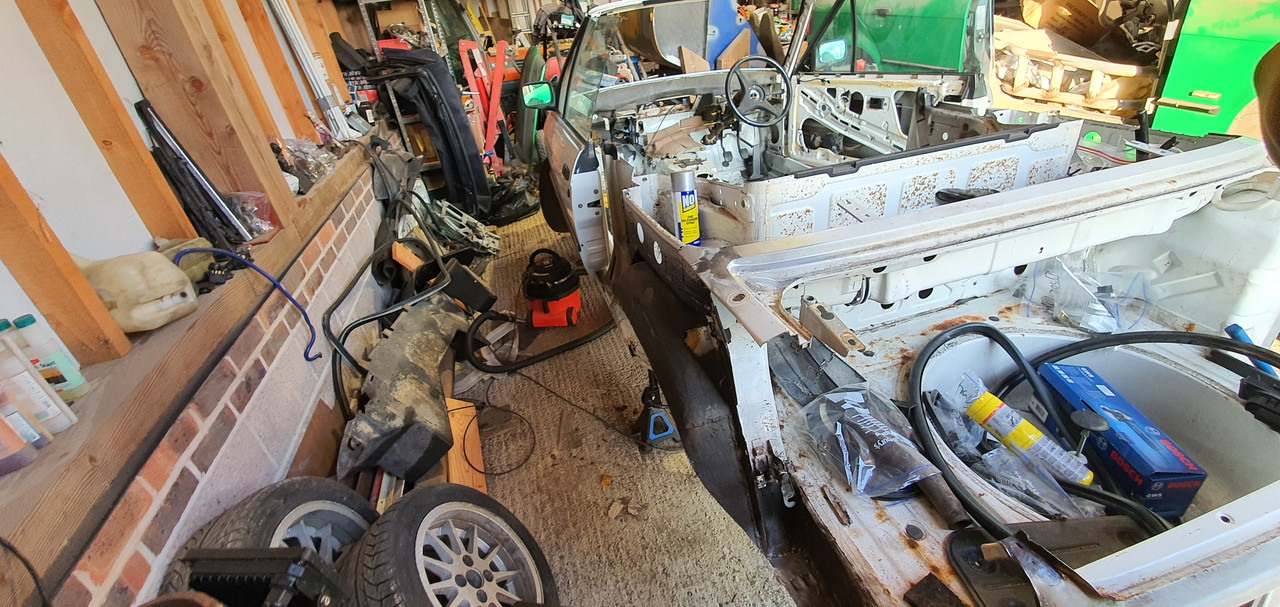
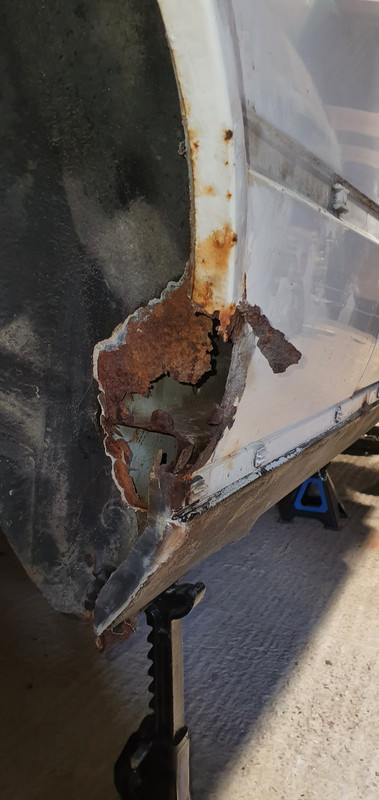
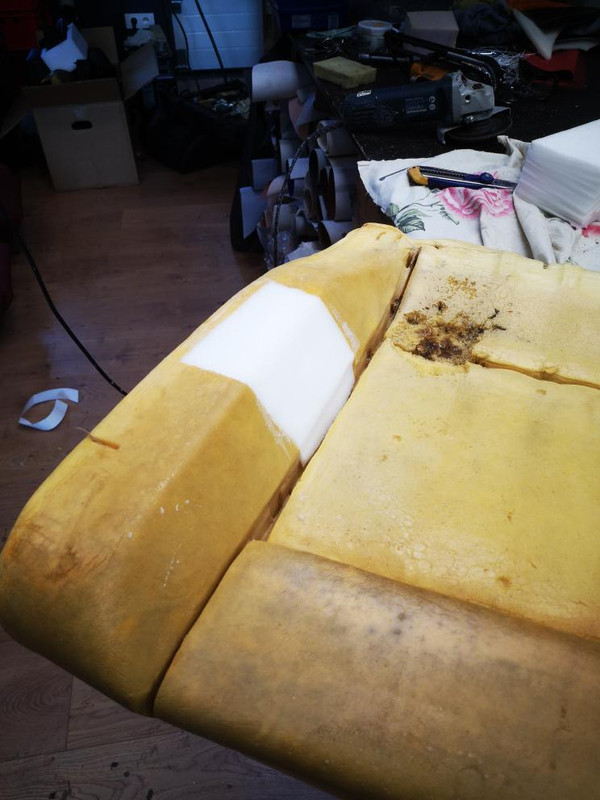
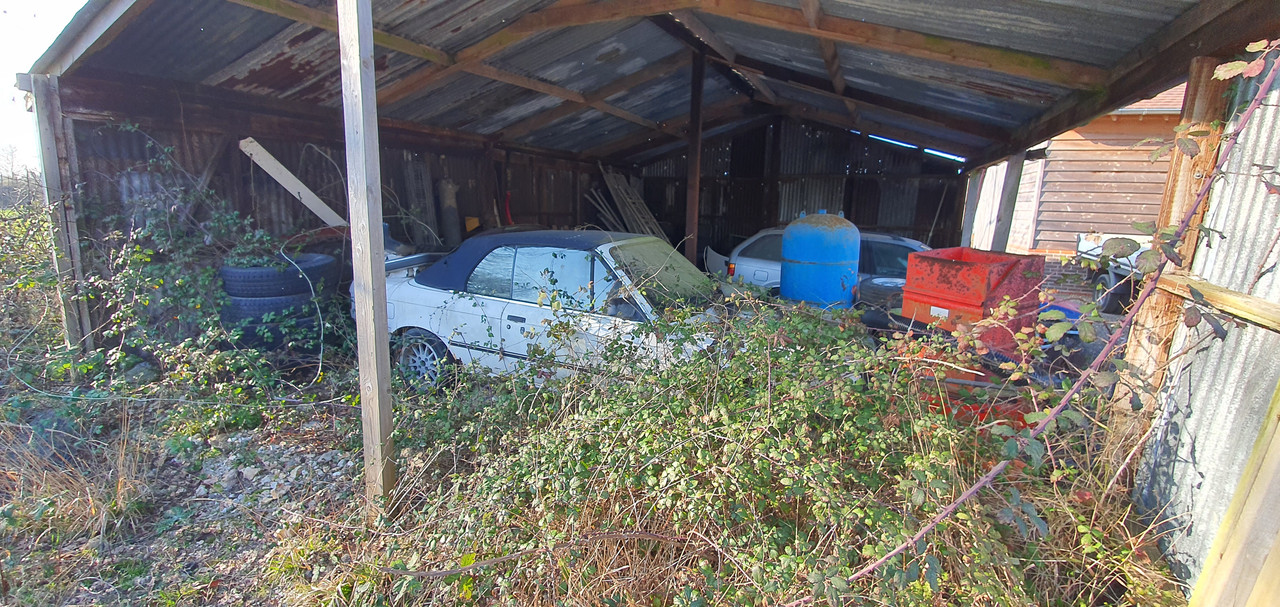
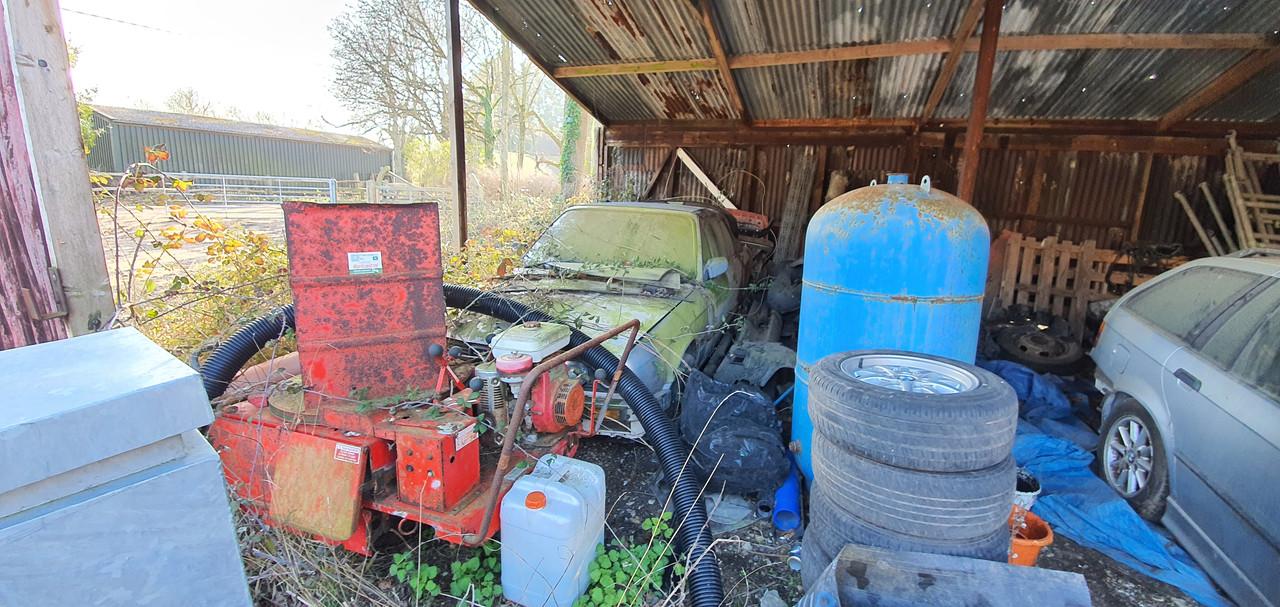
Hi guys, thought i'd get a thread up, i've been working on this Cab at the weekends since ~March 2021. It belonged to my dad but was sat for 12 / 13 years, i asked him what he was doing with it as i was interested in a project and he said i could have it. The rear arches and rear panel were one of the biggest concerns, the arches had been repaired previously and the passenger side had a Touring Arch fitted to it. The interior was also wrecked by mice, as well as rust in lots of other typical places, this is how the car was:
Image

Image

Image

Image


Image

Image

Image

Image

Image

Image

Image

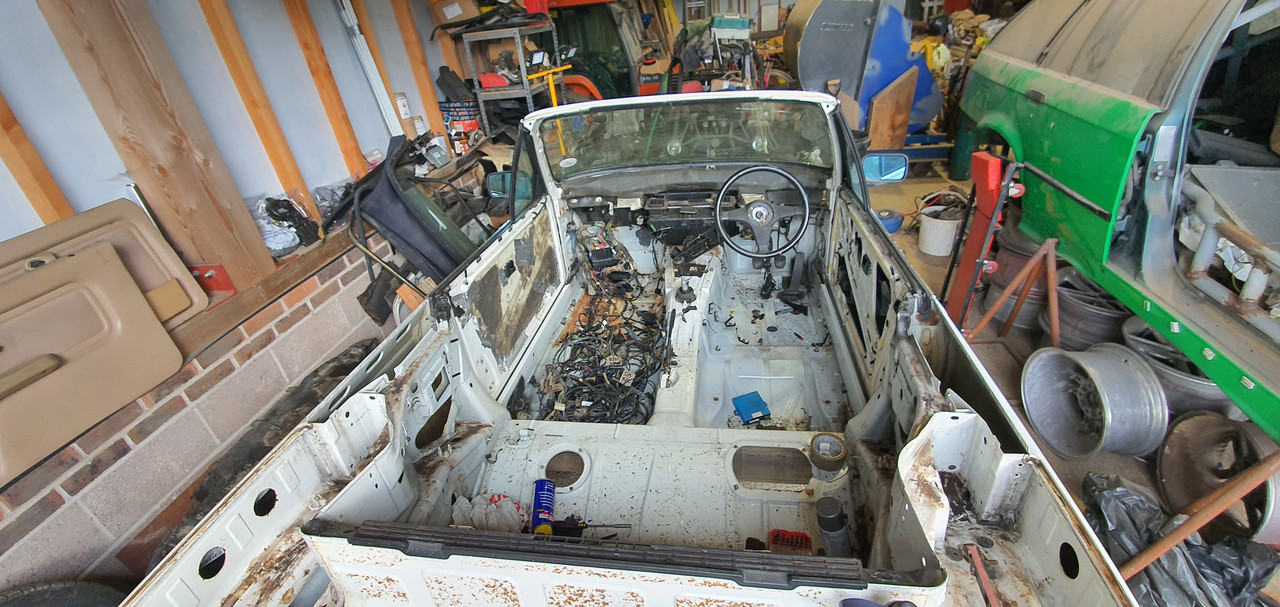
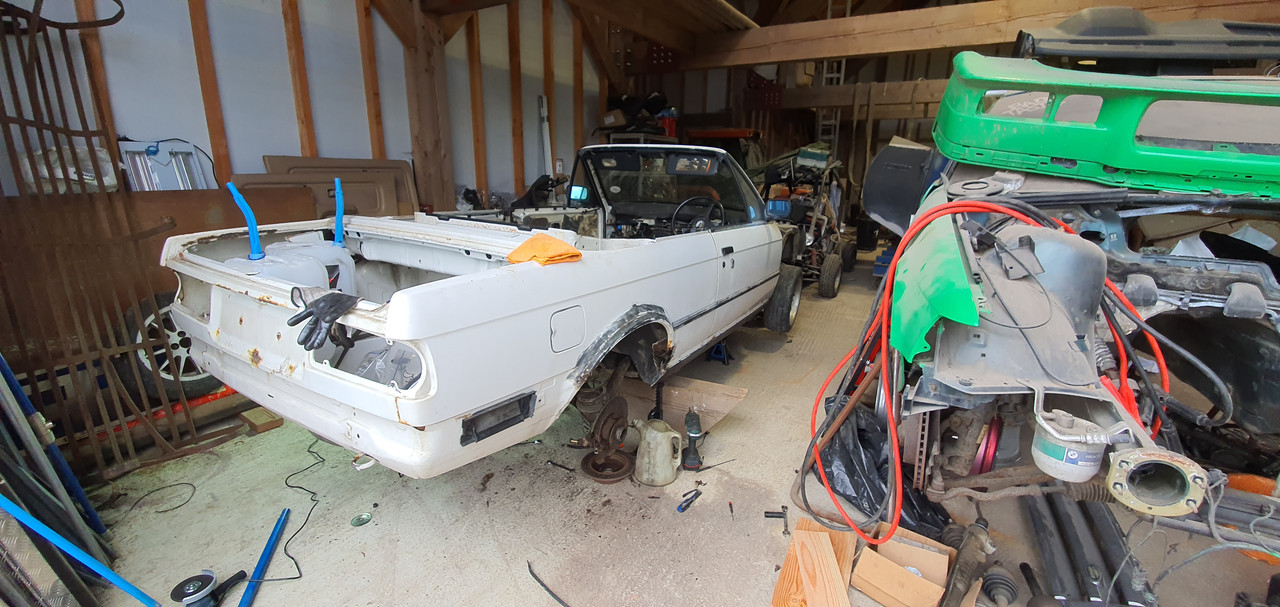
I got the car in the barn and begun the stripdown, i put in as much effort into labelling everything, jiffy bagging the bolts, taking lots of pictures etc.
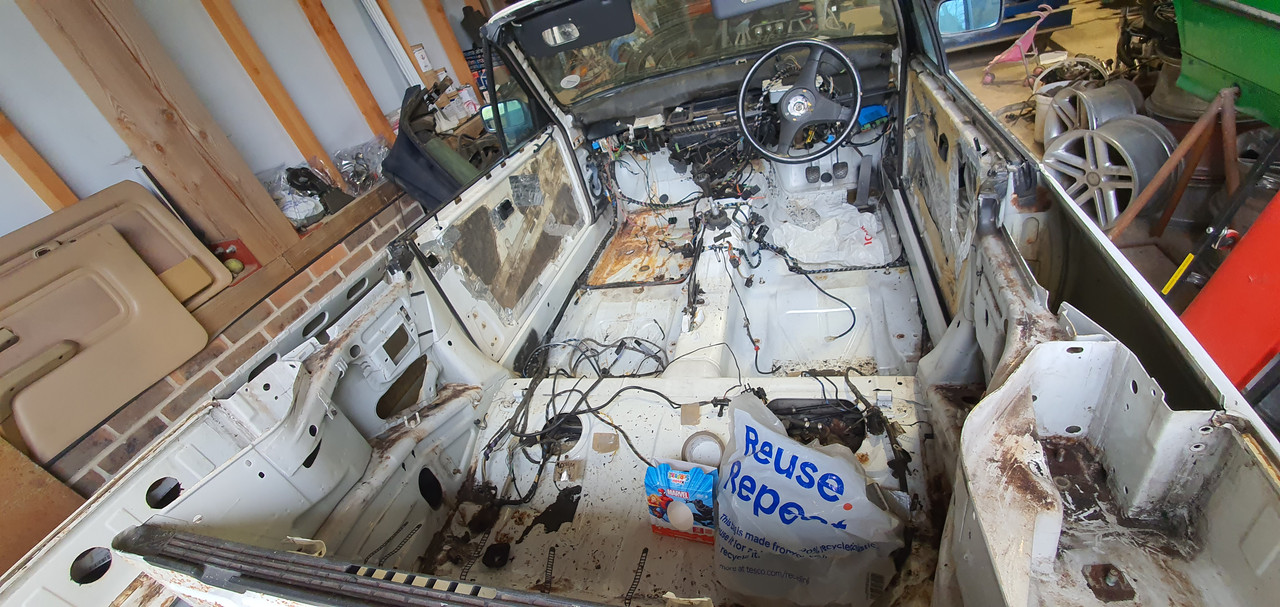
Image

Image

Image

Image

I removed the Radiator Support - it was pretty rotten and i had also planned to do the "removeable" mod to it when fitting the piece, i have the new piece but just have not worked my way round to it yet:
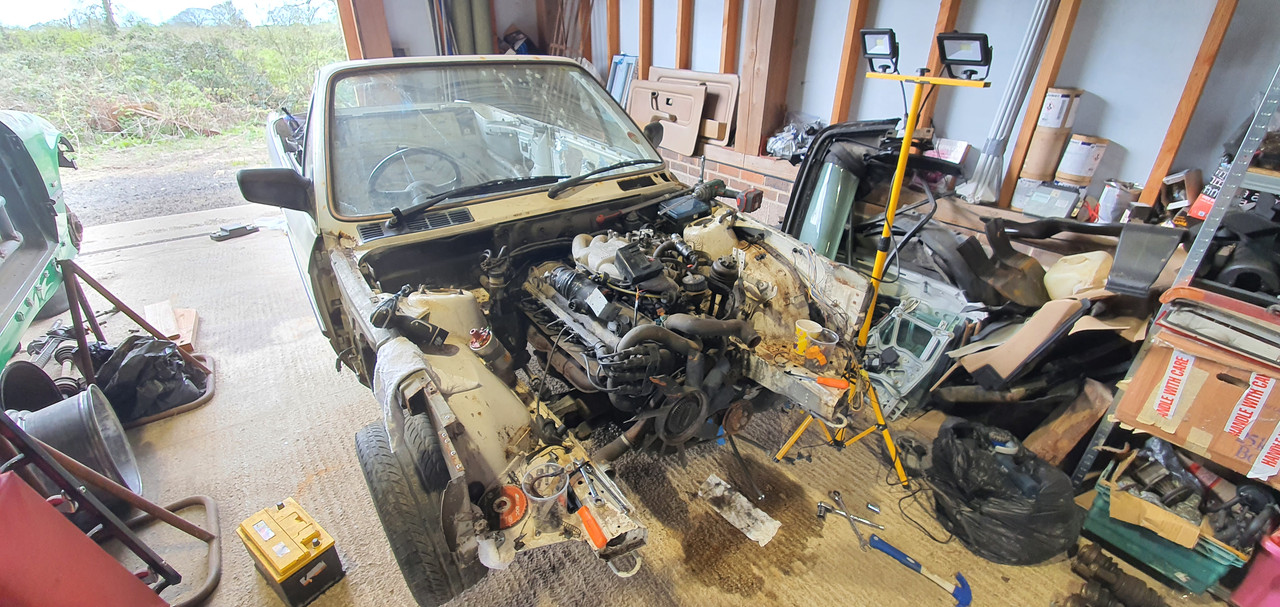
Image

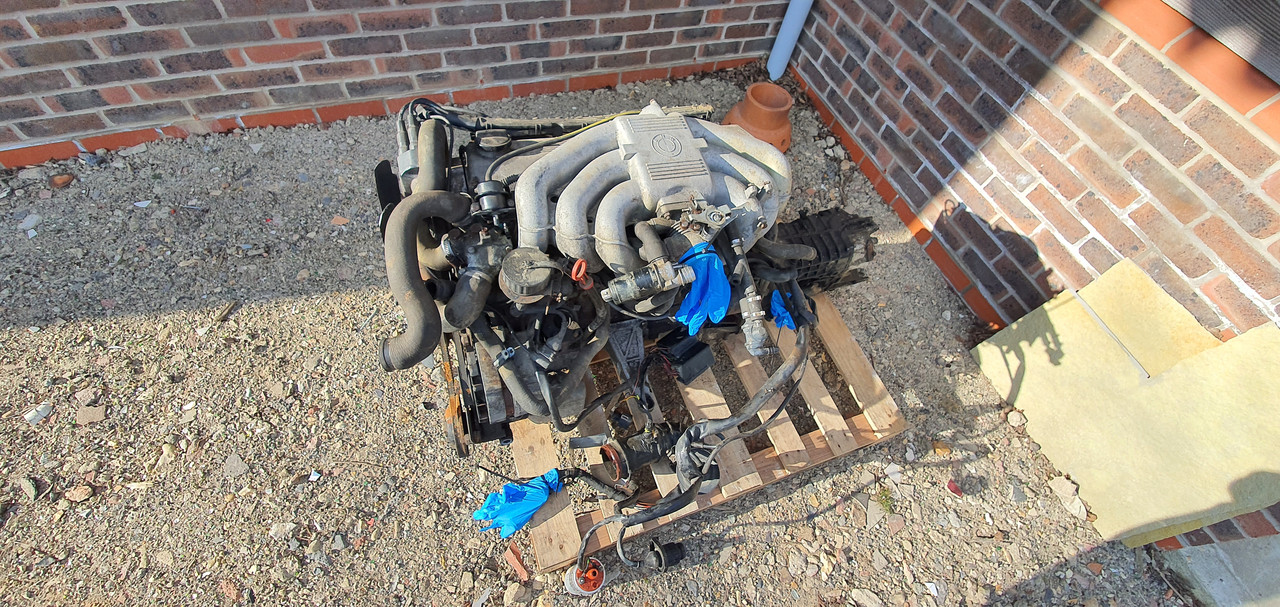
Engine out and later sold on ebay for ~£150. It ran fine and sounded good, with 73k Miles on it. My plan is to go M54B30 unless i can find a reasonably priced M52B28 (Doubtful).
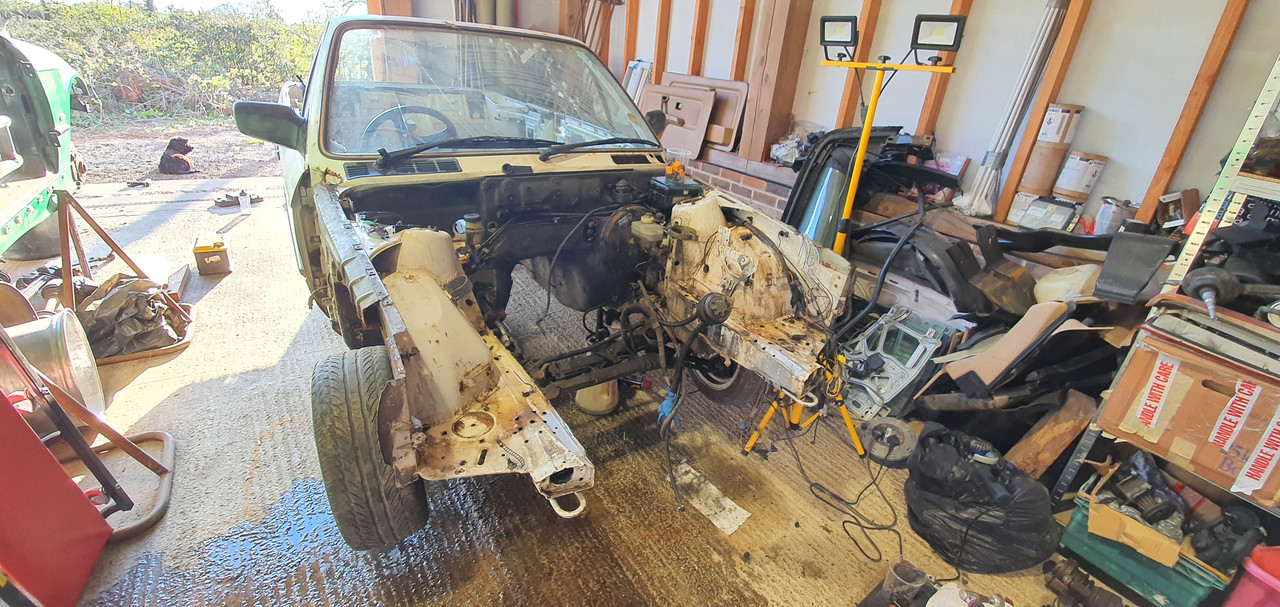
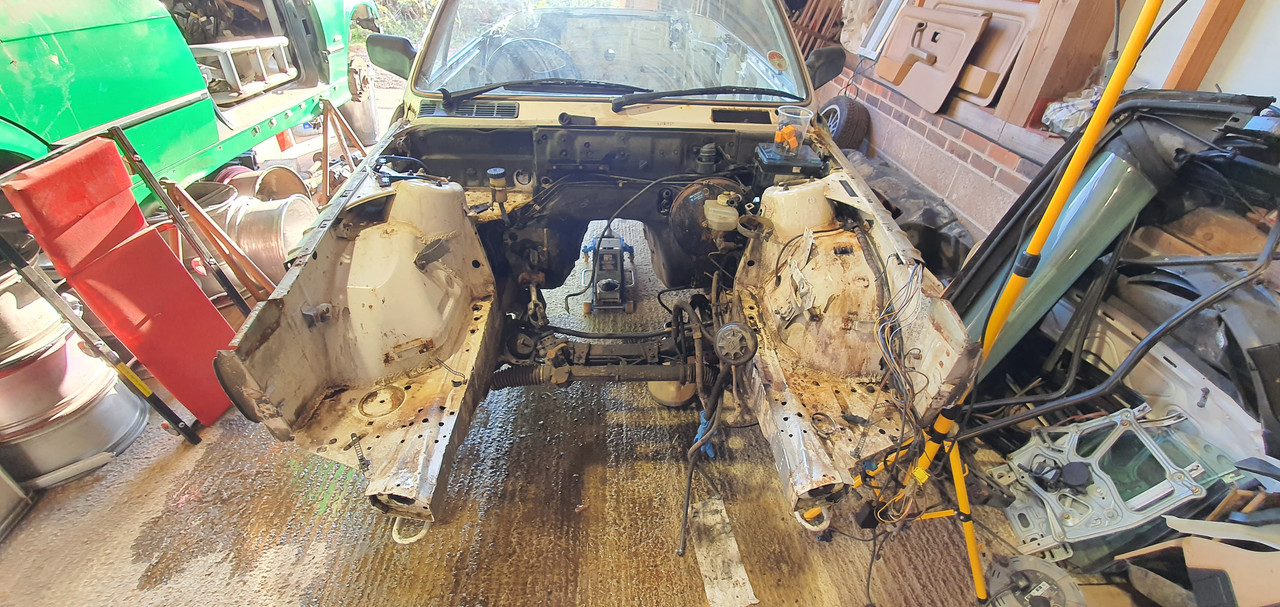
Image

Image

Image

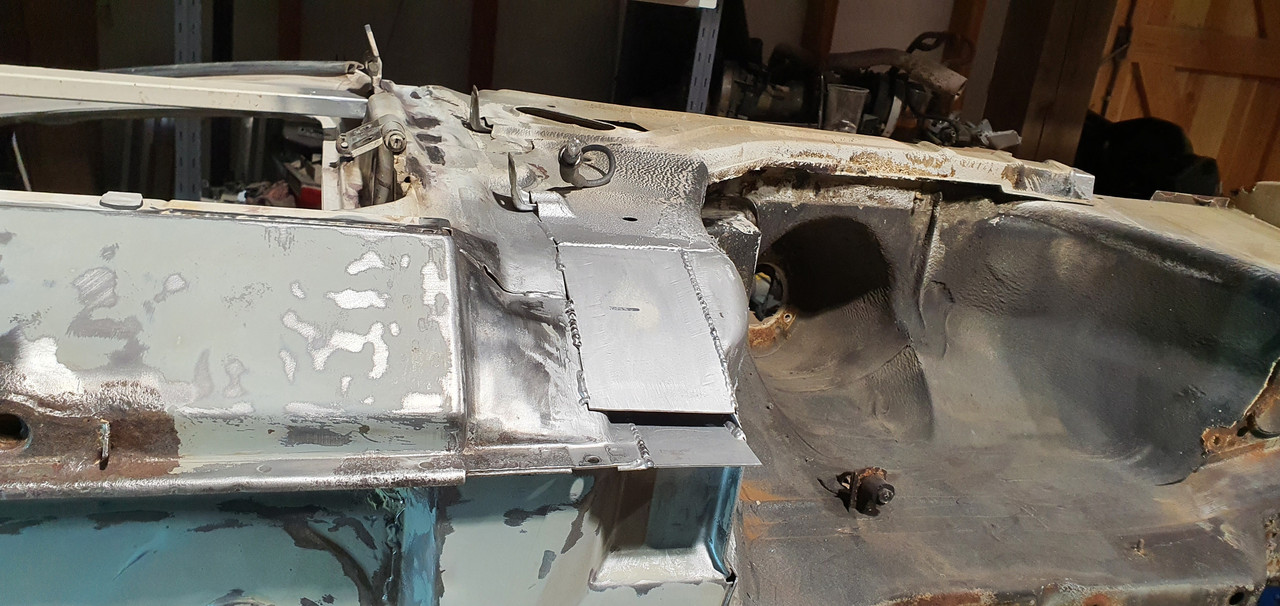
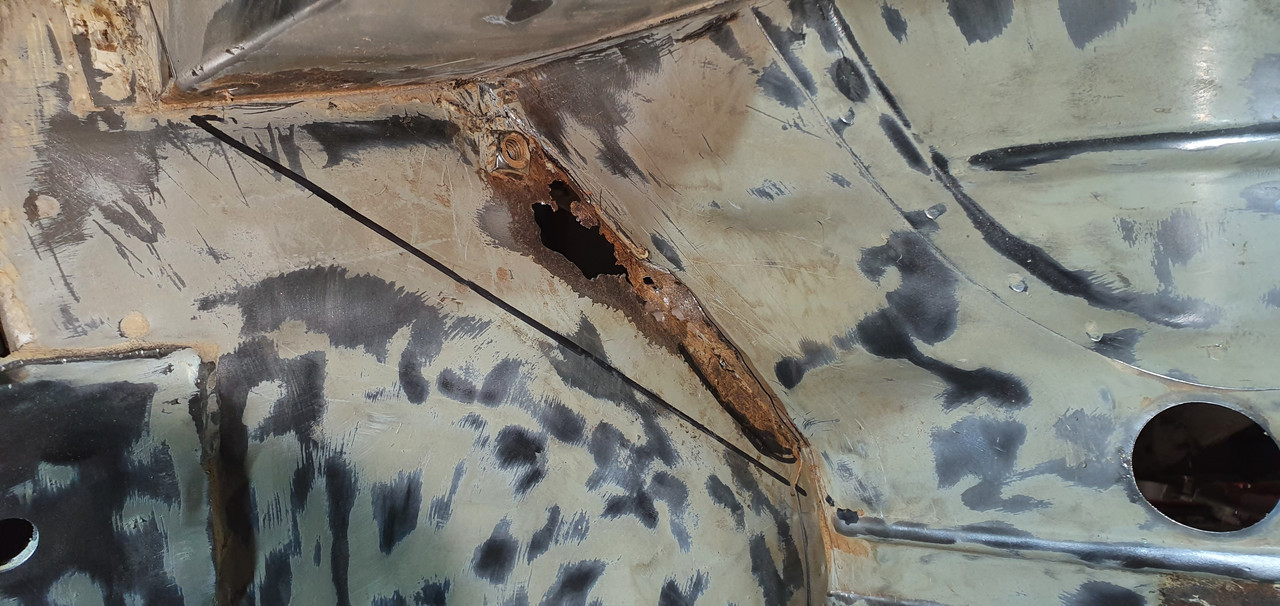
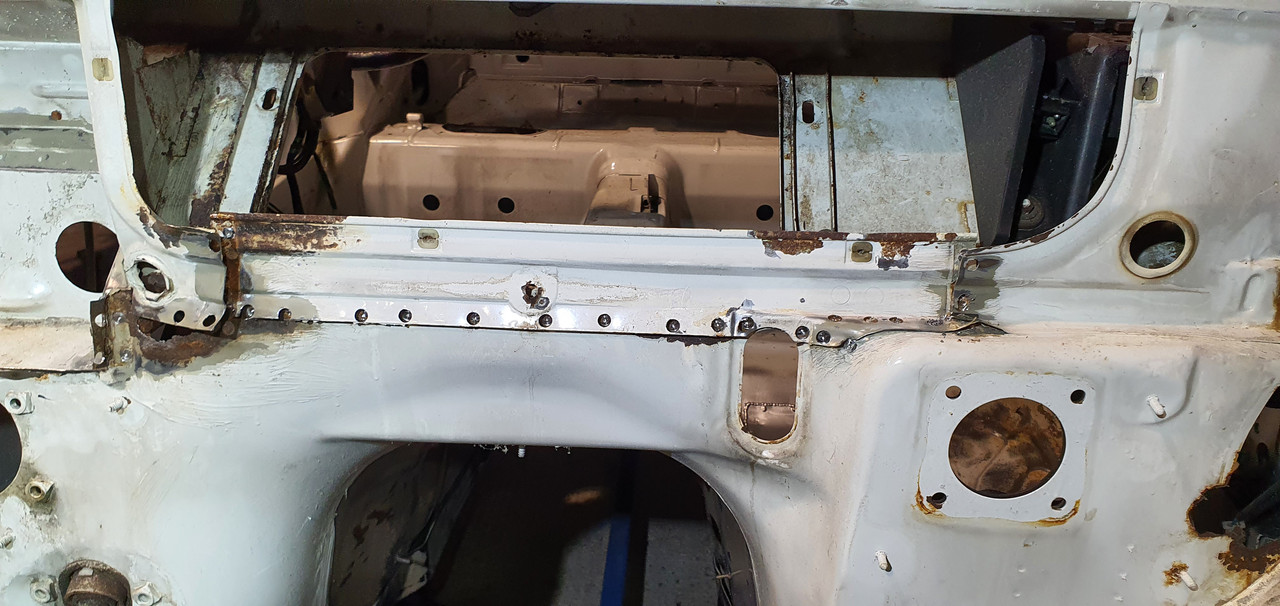
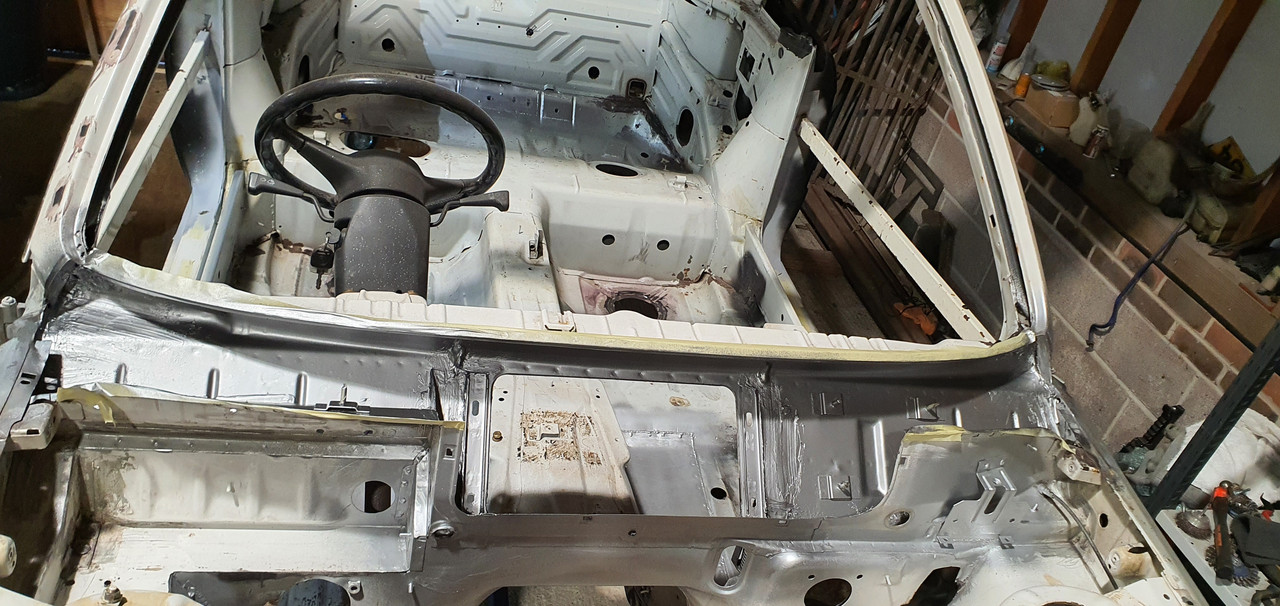
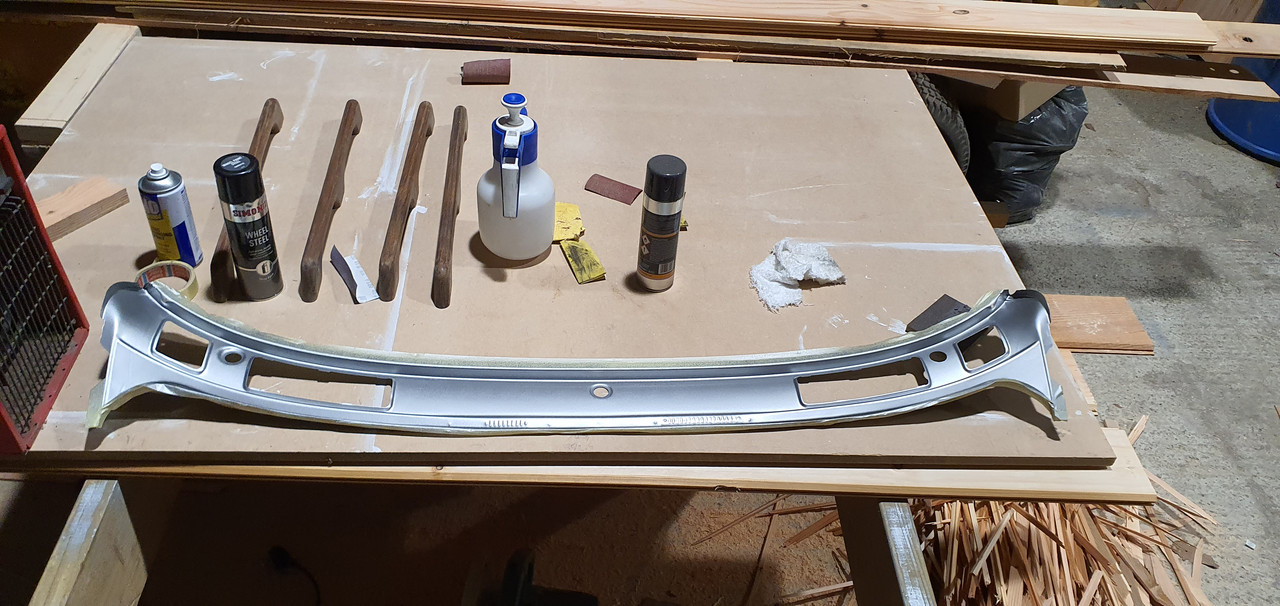
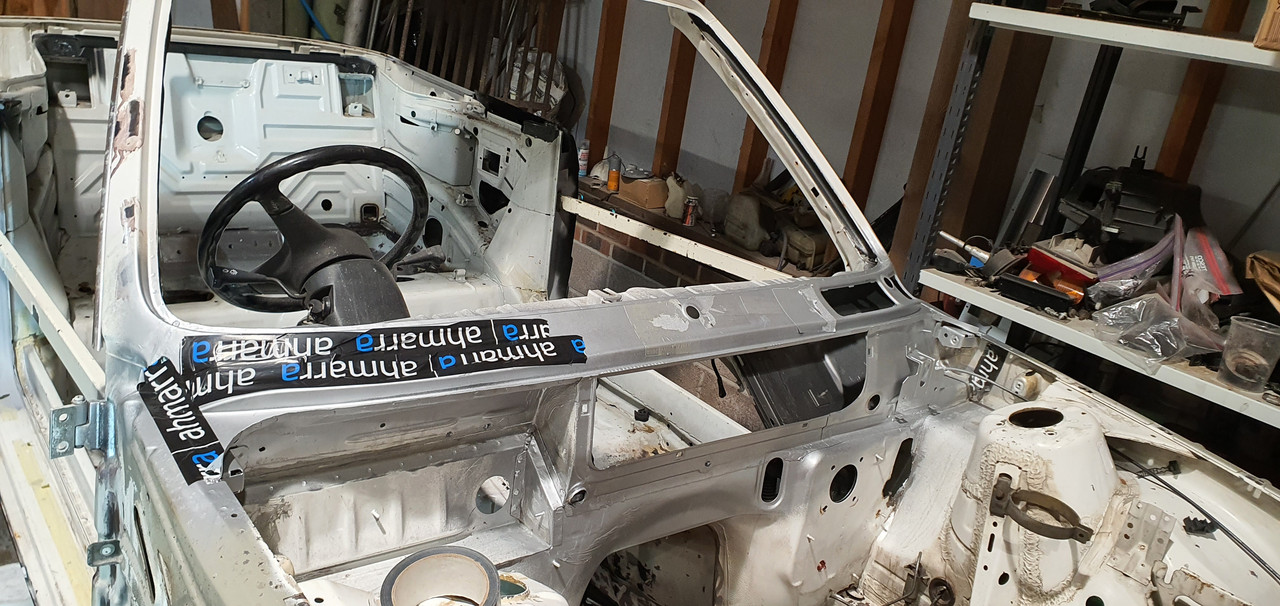
Once the engine was out i noticed that the Scuttle Drain was blocked and as a result the corrosion inside the void was quite bad, i have a whole new Scuttle Panel from Cotswold and this will be getting fitted shortly.

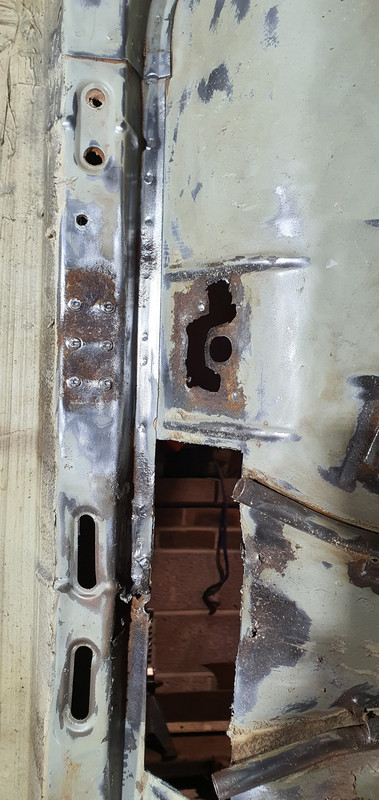
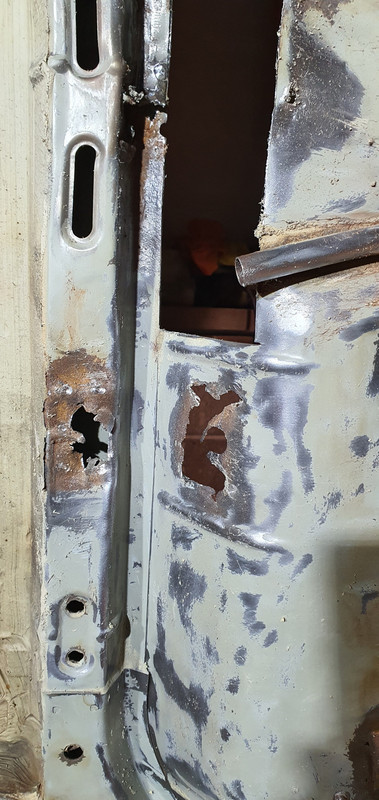
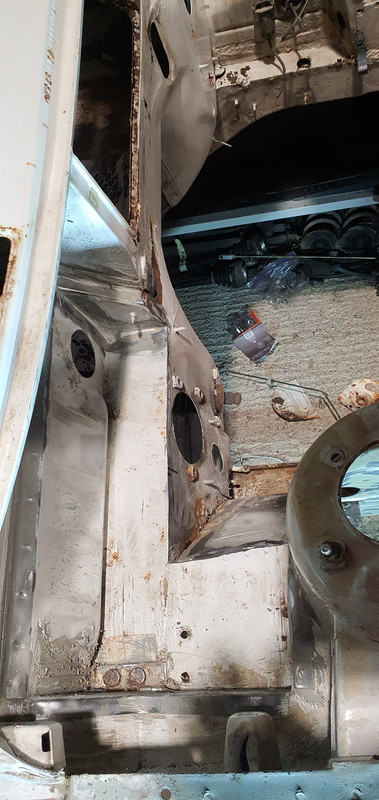
I also saw the corrosion around the Loom Grommet was quite bad, this was more apparent from inside the car, and as a result the passenger floor pan had a large amount of surface rust but also some bad rot in certain places.
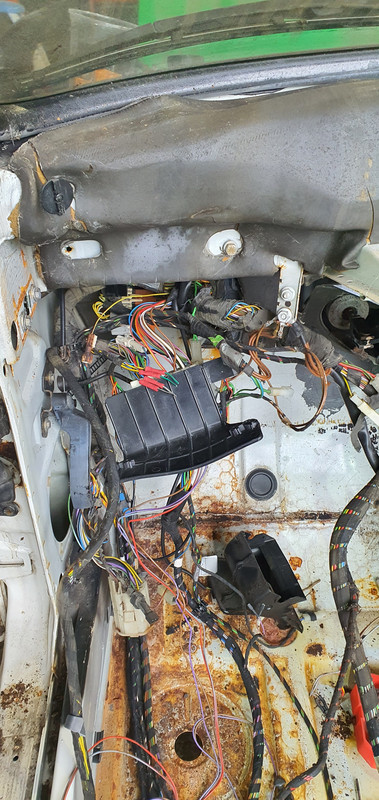
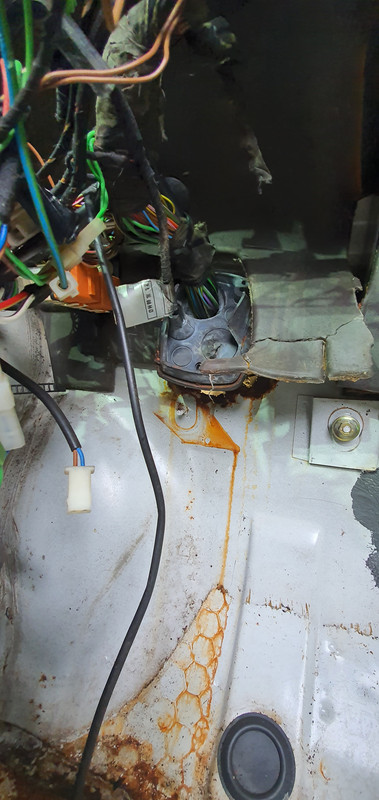
Image

Image

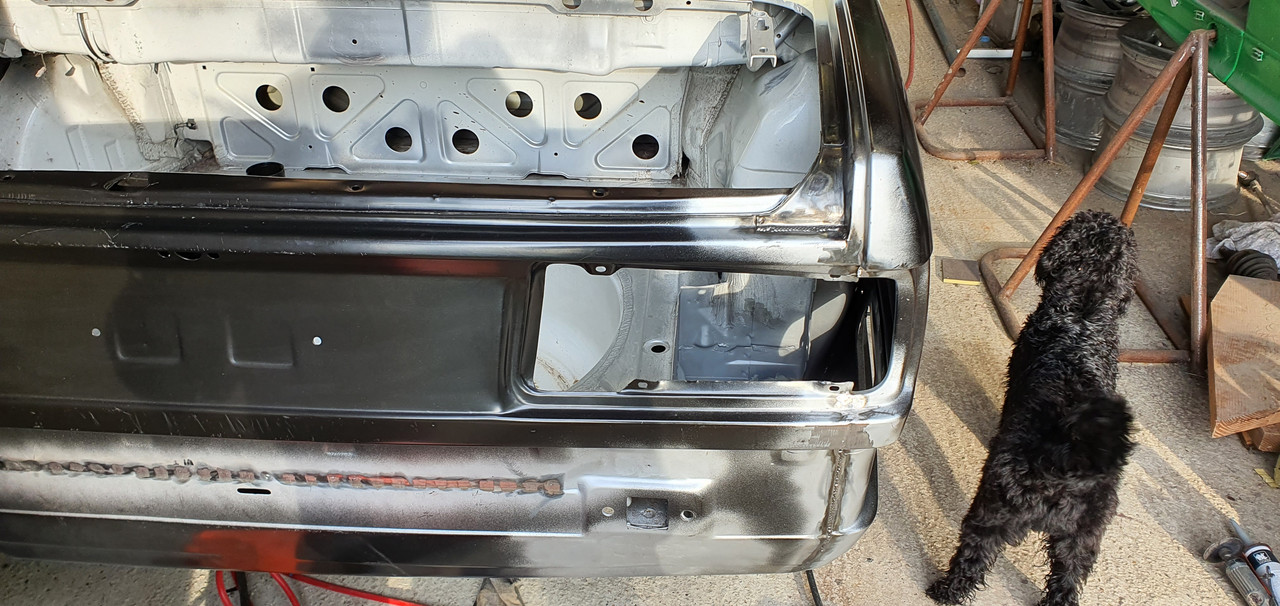
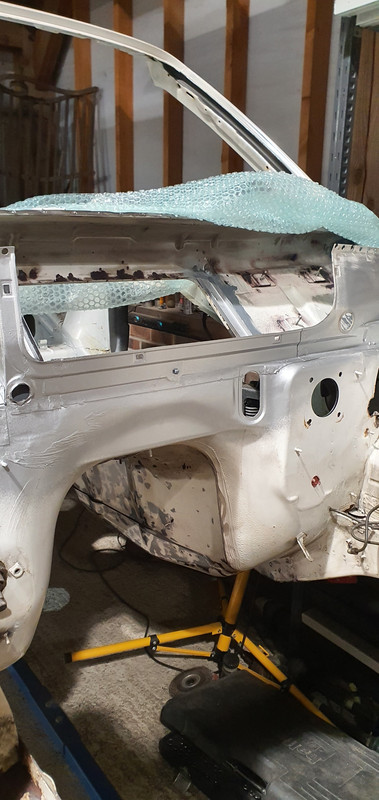
After the majority of the teardown was done i turned my attention to the rear of the car and its rust problem. I had always preferred Facelift cars and because of this i decided to do a Facelift conversion, i wanted to replace the entire Rear Quarters and Rear Panel. Cotswold had OEM Rear Quarters - Facelift Only (£839 for the Pair), so i ordered them and a new Facelift Rear Panel:
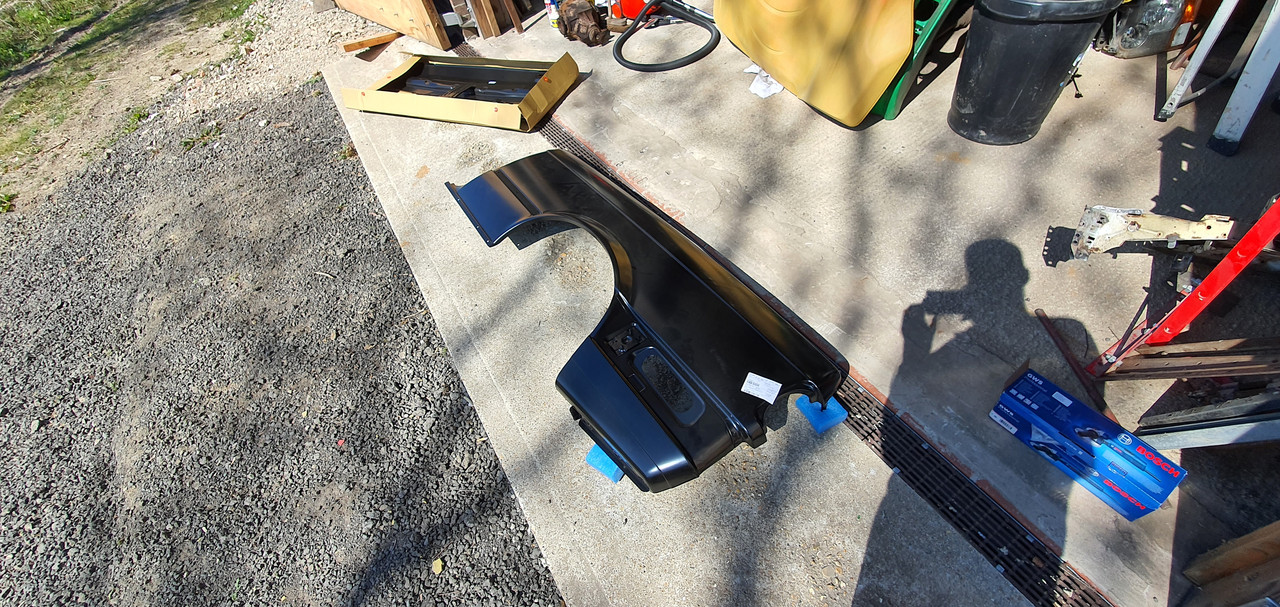
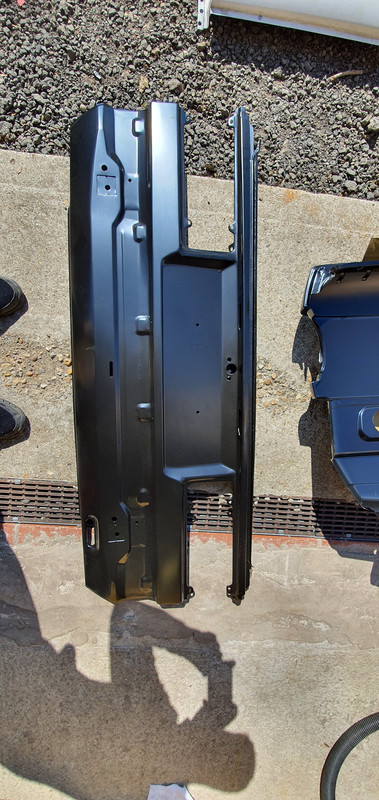
Image

Image

I then proceeded to start cutting:

Image

Image

Now a disclaimer, this is my first time doing any kind of Bodywork, Welding, Fabrication etc. I have always done mechanical work on my cars but never anything this deep, i had studied a lot of videos on do's and dont's etc. I decided to leave the Rear Panel on whilst i worked on the replacing the Inner Arch Lips and getting the Rear Quarters into place properly, so i had at least some kind of reference of where they should end up.

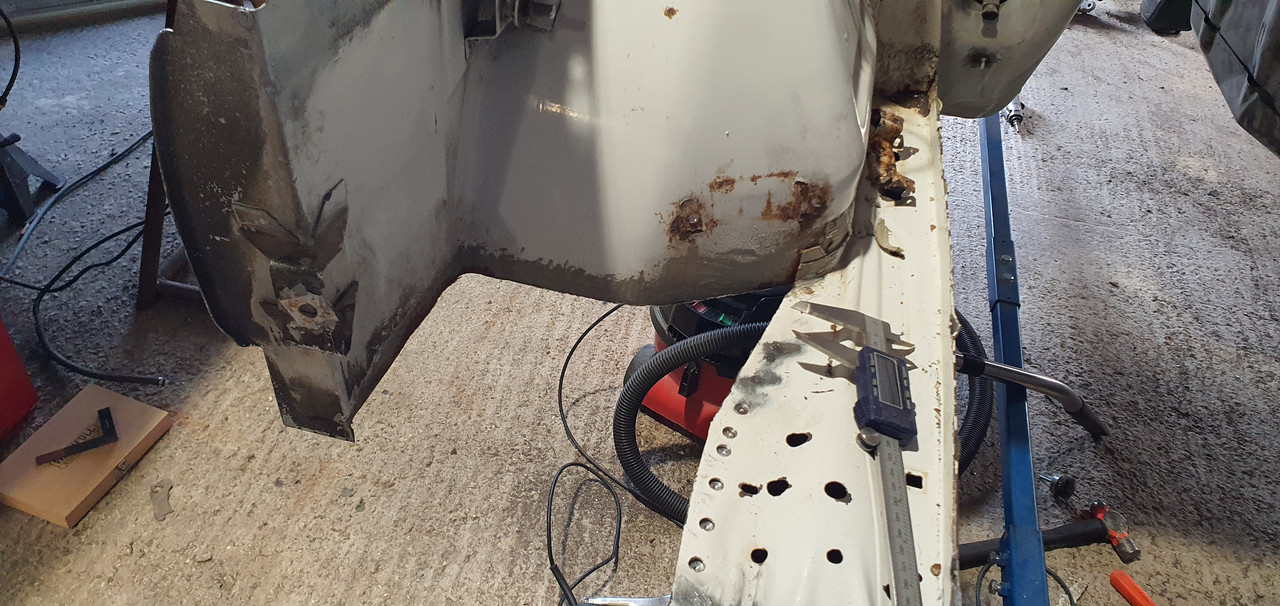
There was a lot of work cutting out small sections of Rust in the Wheel Wells and where they join the sills. The passenger side also had a large amount of the inner arch already replaced, which i needed to re-do.

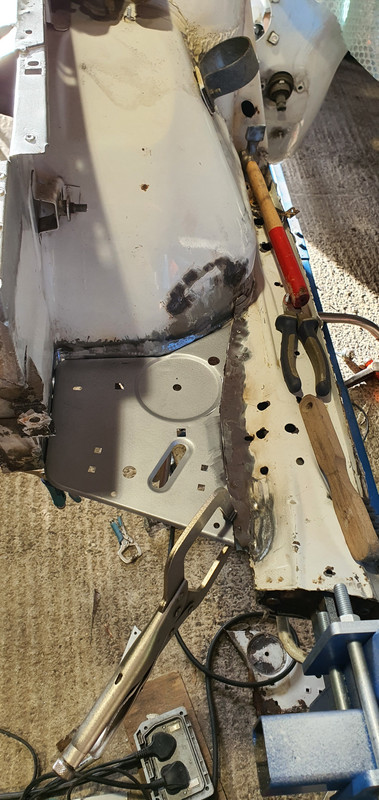
The process of re-working the inner arches and lips was something that took me many many weekends, a lot of double measuring, checking fitment etc. A steep learning curve but rewarding, if i were to re-do them now, then i would probably make a slightly better job of it, i am however still pleased with the outcome i got. Its also worth mentioning that its pretty much impossible to find any Cabriolet specific Body panels, the replacement inner arch lips were advertised as Cabriolet, but when i received them it was pretty clear that they were Coupe or Touring, so i had to cut and modify these to fit.

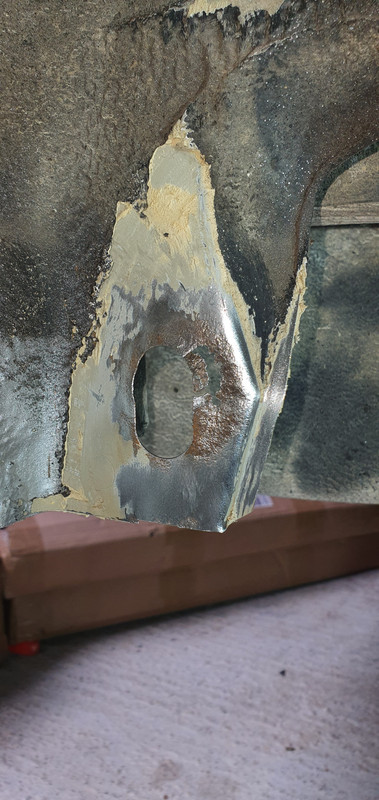
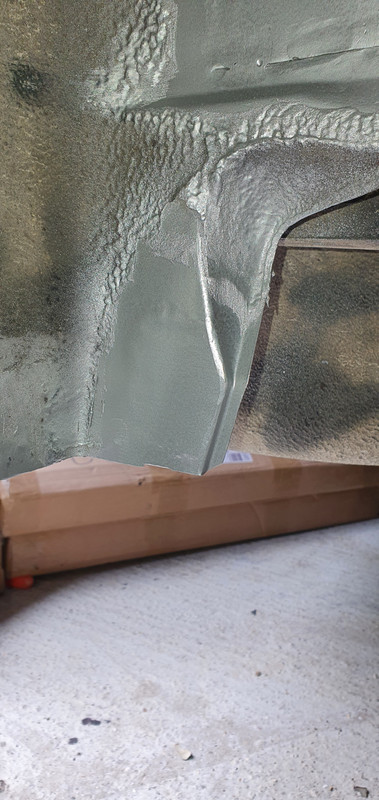
Unfortunately i did not get many pictures of this process as it was time consuming enough as it was, there was a lot of corrosion in the Drivers Side Inner Wheel Arch from the fuel Pipe Cover, Vapour Tank mounting points etc.
Image

Image

Image

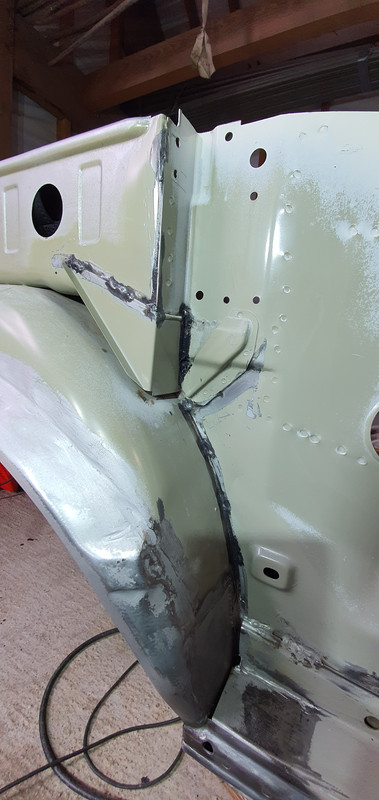
Drivers side inner Arch & Lip done (Really sorry for the terrible pictures, just using what i have).
Image

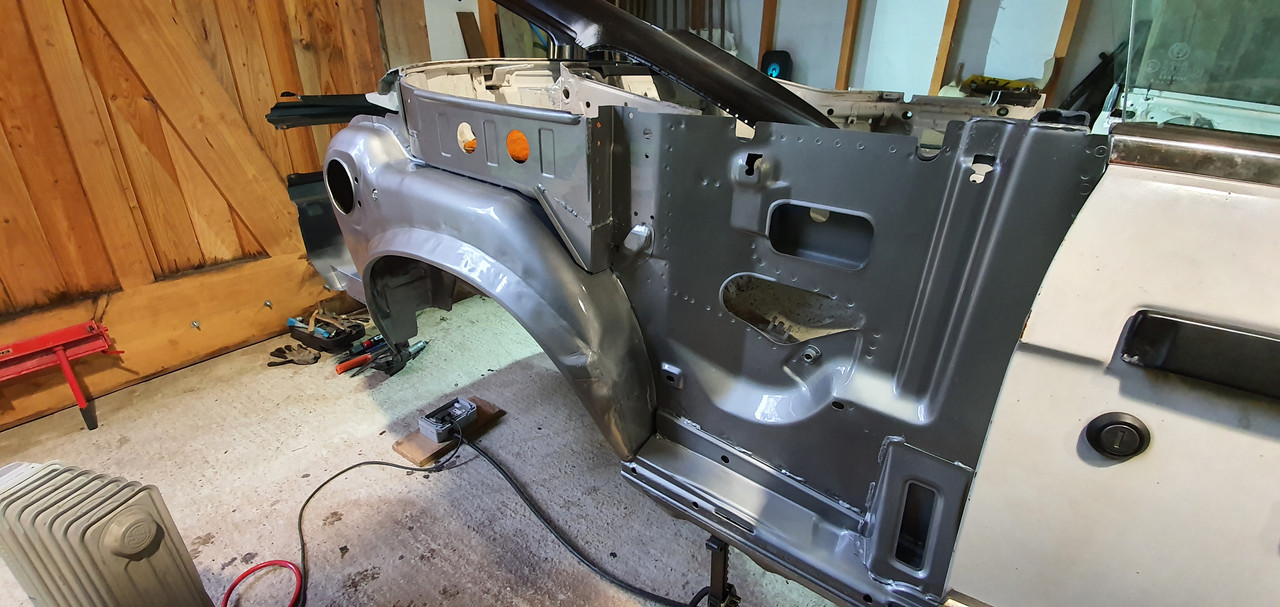
I then painted and sealed the Inner Arches in a generic gun metal grey (I will be painting the car Donnington Grey)
Image

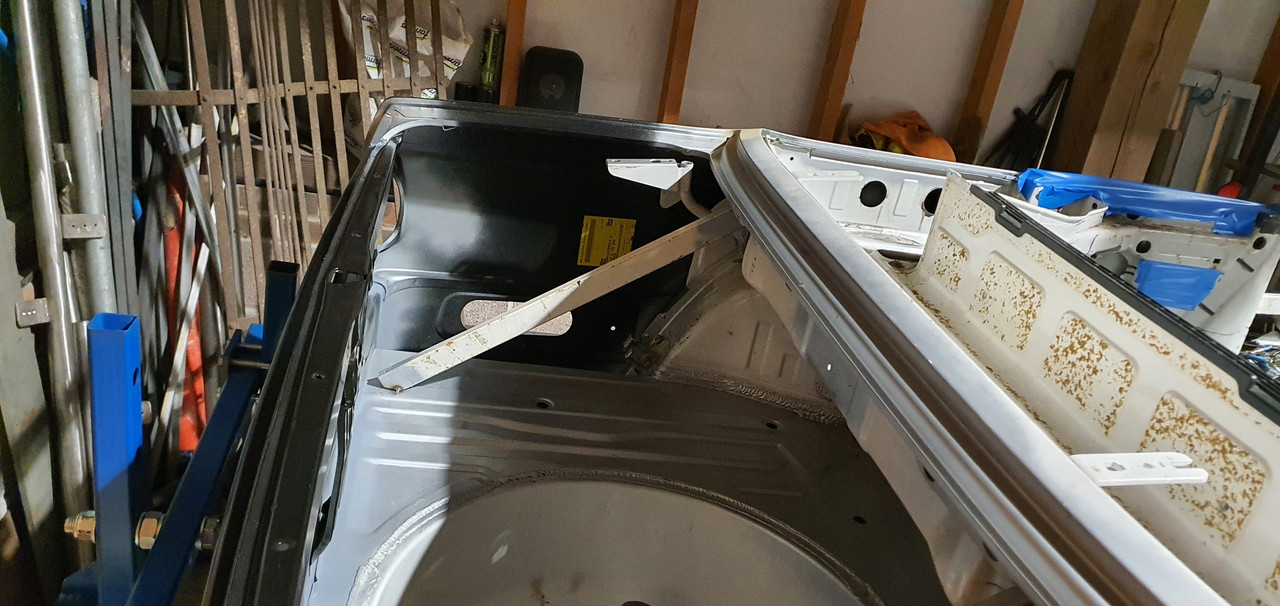
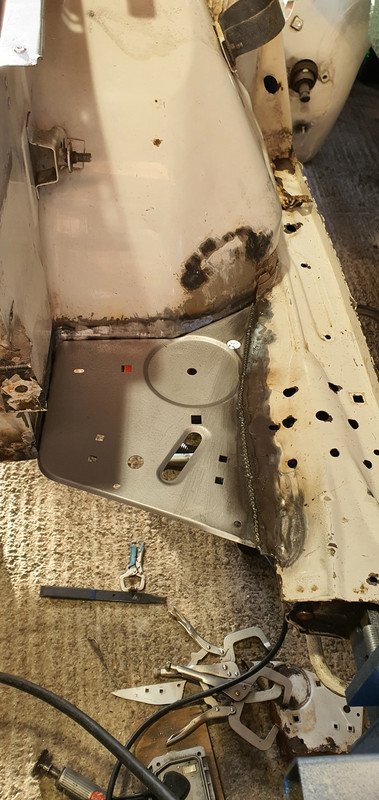
One of the unforeseen problems of doing an entire facelift conversion, was that the boot floor on a facelift must sit ~100mm Lower, because of this i had to create some extension pieces to bridge the gap. My welding has much improved since this.
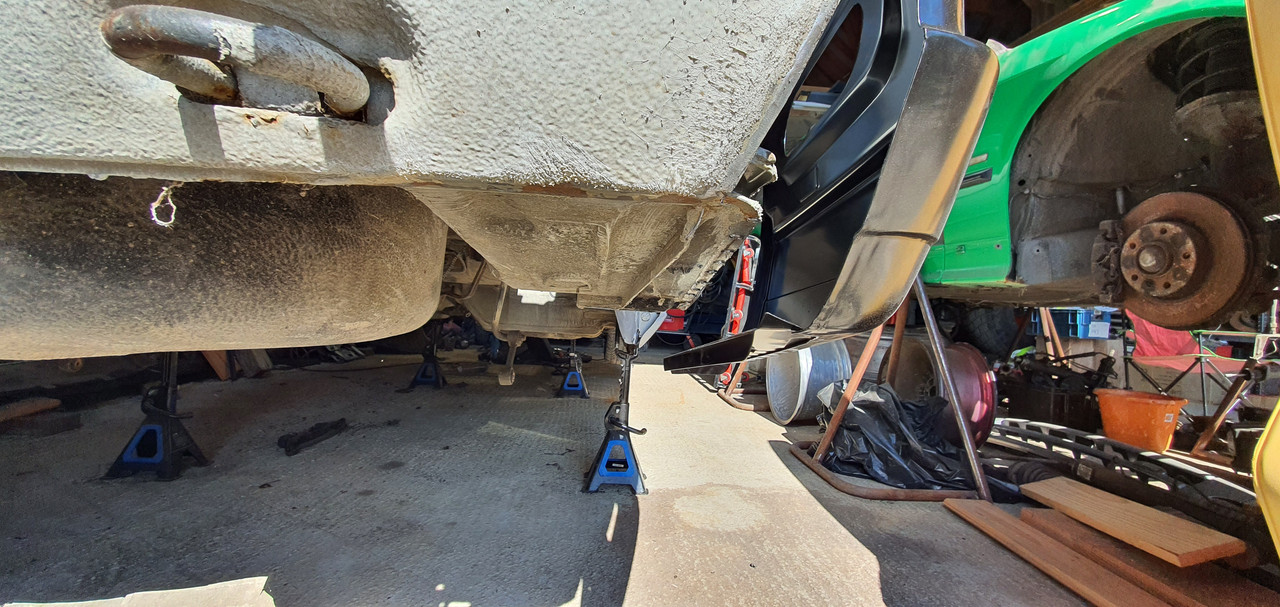
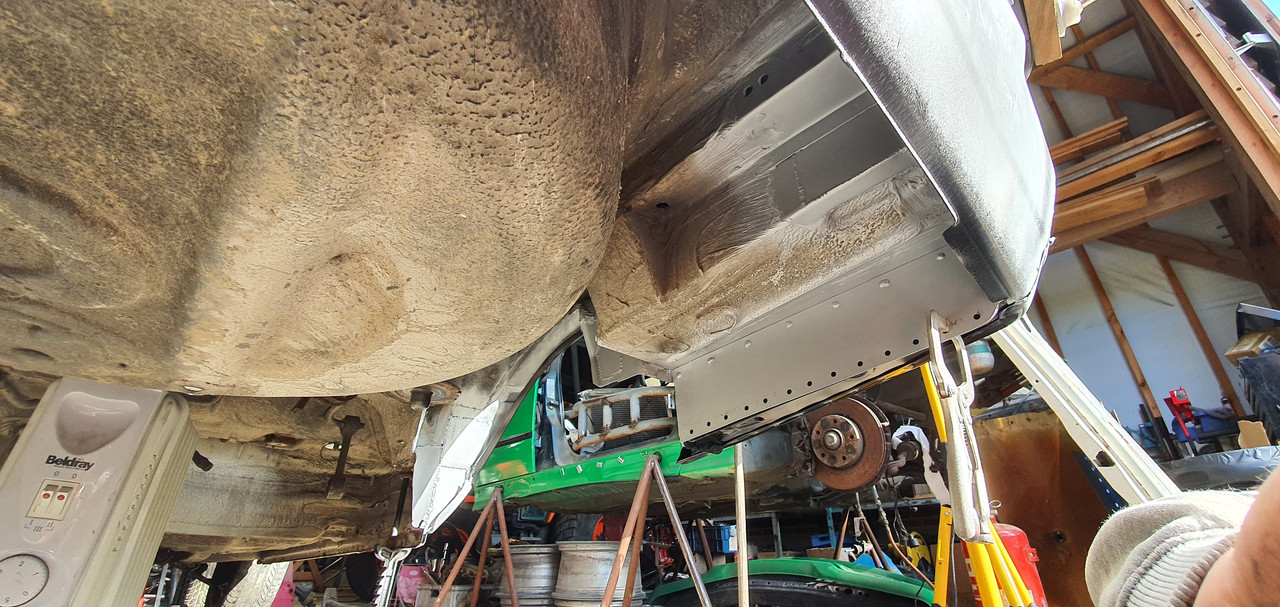
Image

Image

I began dry fitting the Rear Quarters properly and doing final / more precise cuts on the body where they would meet.
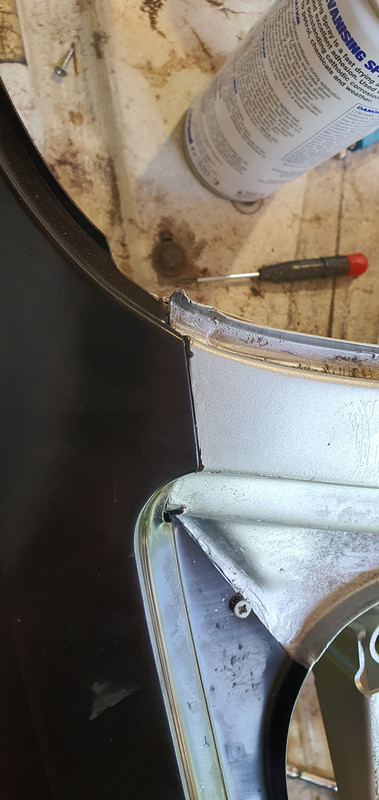
Image

This was quite a tedious process, especially on the end where the Quarter Panel meets with the doors, these (and most other joints) are braised from factory and it took a long time to remove the braise and tidy the joint enough so that it could be welded without contamination.

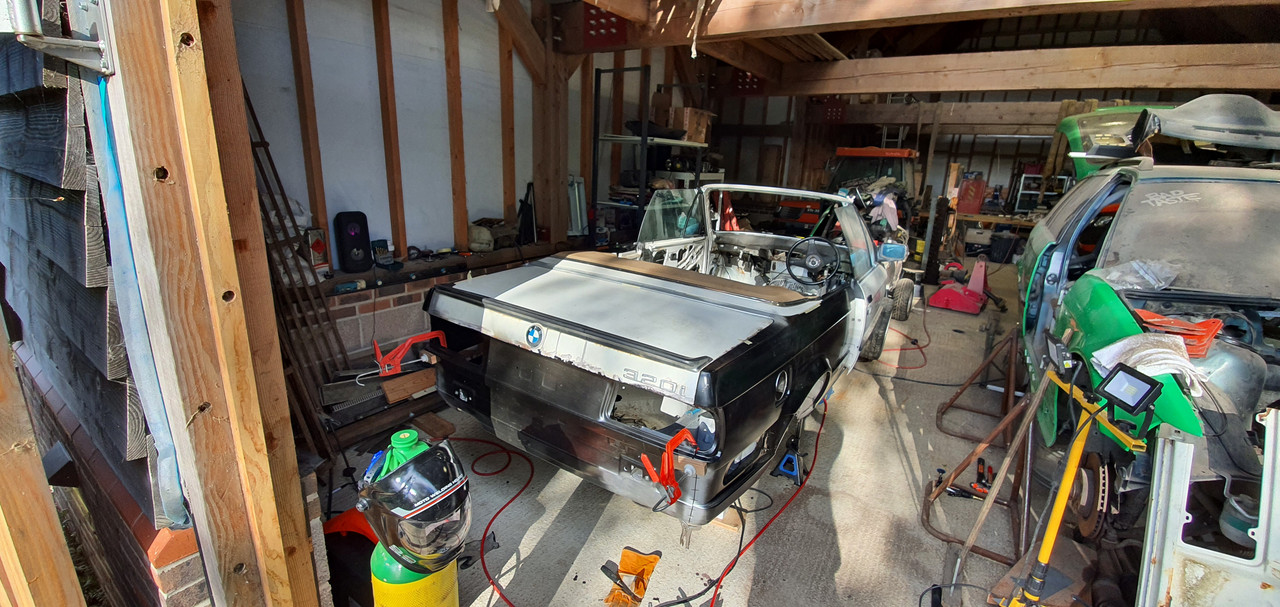
Once i was happy i removed the rear panel and dry assembled the rear end with the boot and also the roof cover / hatch so check all the gaps. An old guy across the road gave me a tip of using self tapping screws to lock in the panels in places, this gave you a fixed position to go back to and also really helped hold the panels in place. The Panels surprisingly did not need much tweaking, though i was disappointed with the quality of the rear panel from Schmiedmann, some of its contours did not match the OEM Rear Quarters particularly well around the rear lights and will require some work with filler to make it look perfect.
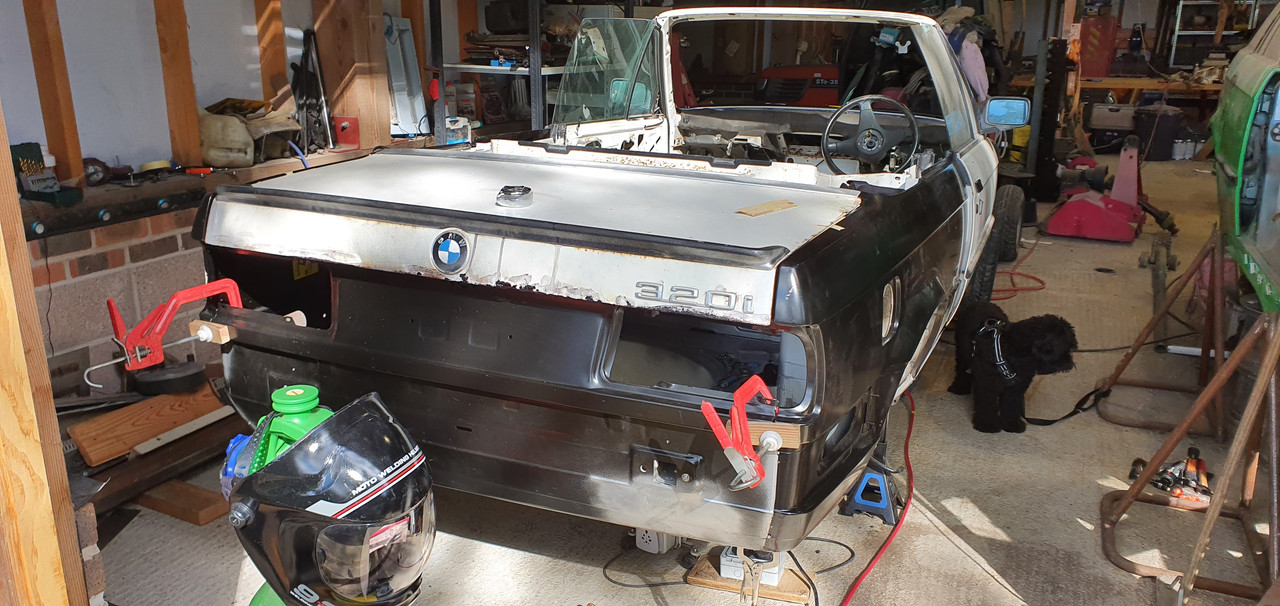
Image

Image

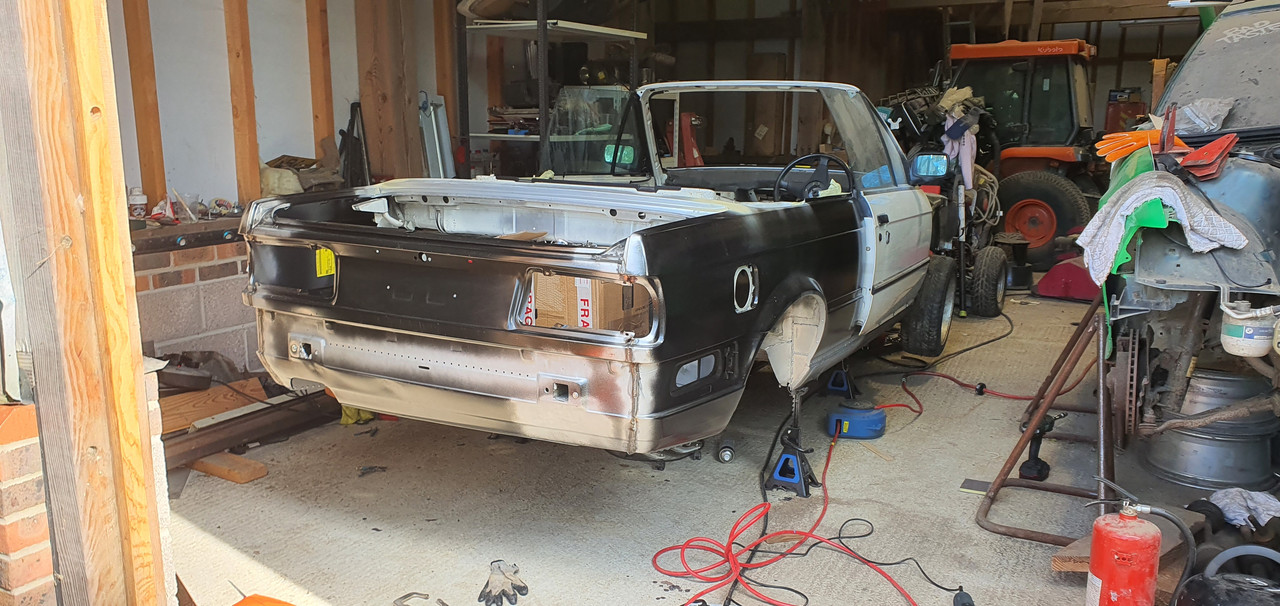
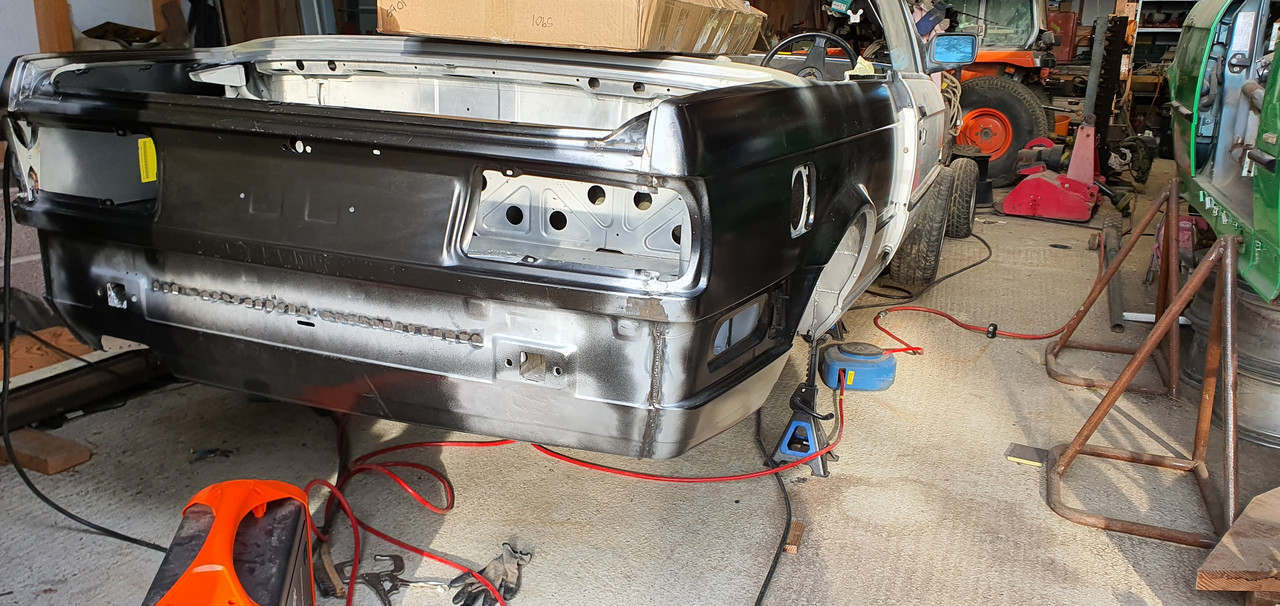
I then spent a LOT of weekends, triple checking everything, doing small bits of work i thought was easier with the panels off, before finally taking the plunge and welding the panels on - i did not braze them like from factory, i did seek advice on this and although it is not the original way of doing it, was told the risk of cracks etc were very low.
Image

Image

Image

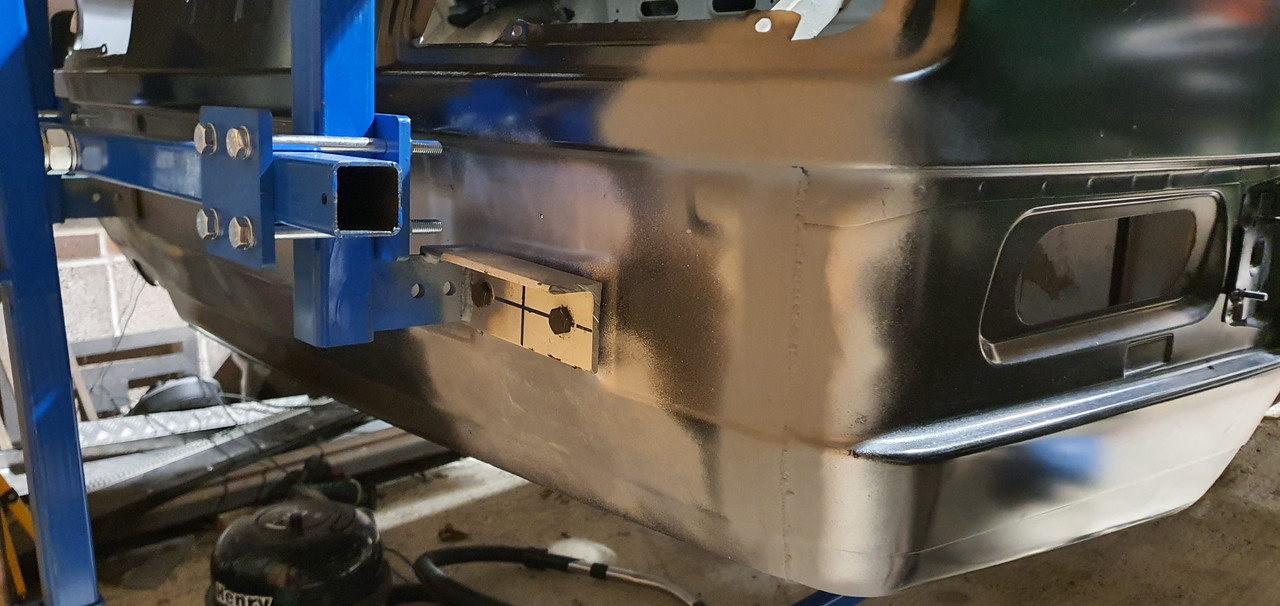
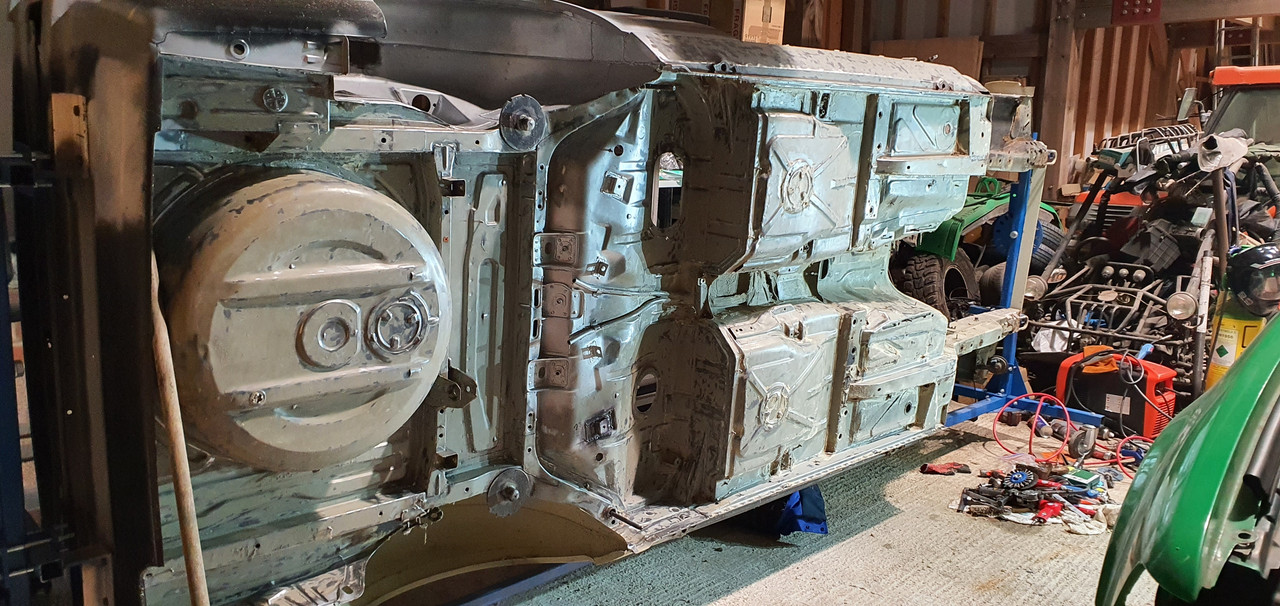
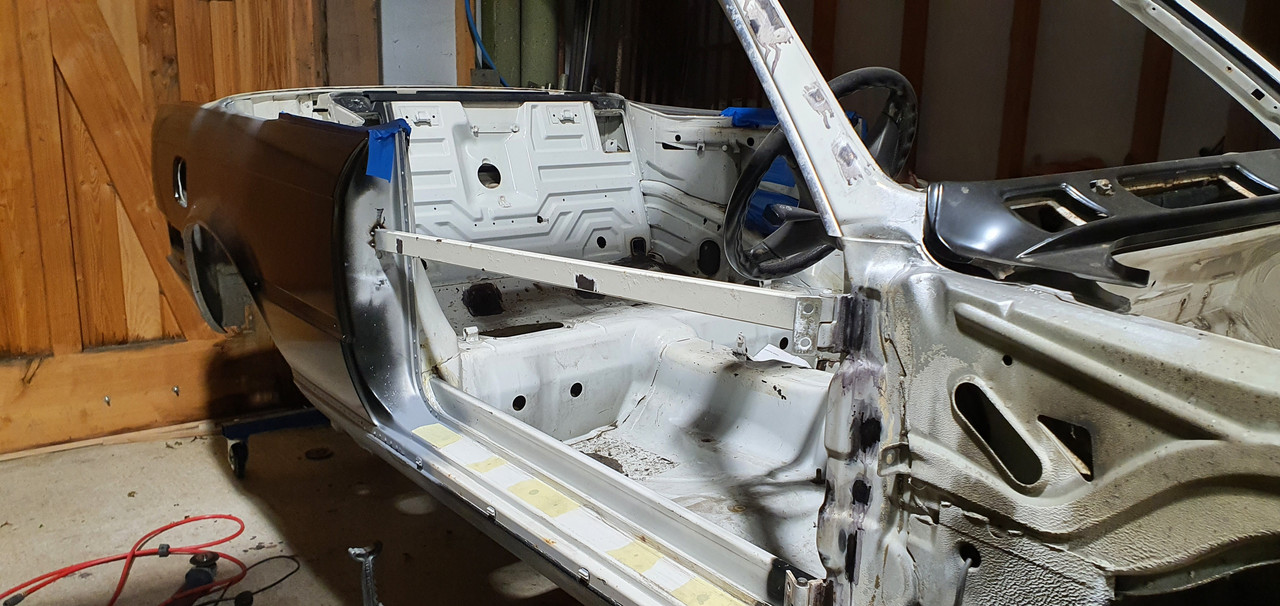
Now that i had the Rear End back on, i wanted to get the car on a Rotisserie i bought what felt like a very very long time ago. This was from a company called Ade Foreman Light engineering, its the heaviest duty one he offers on wheels rated for ~1300kg. I braced the door shuts, boot, and front where the crossmember would have been.

Image

Image

Image

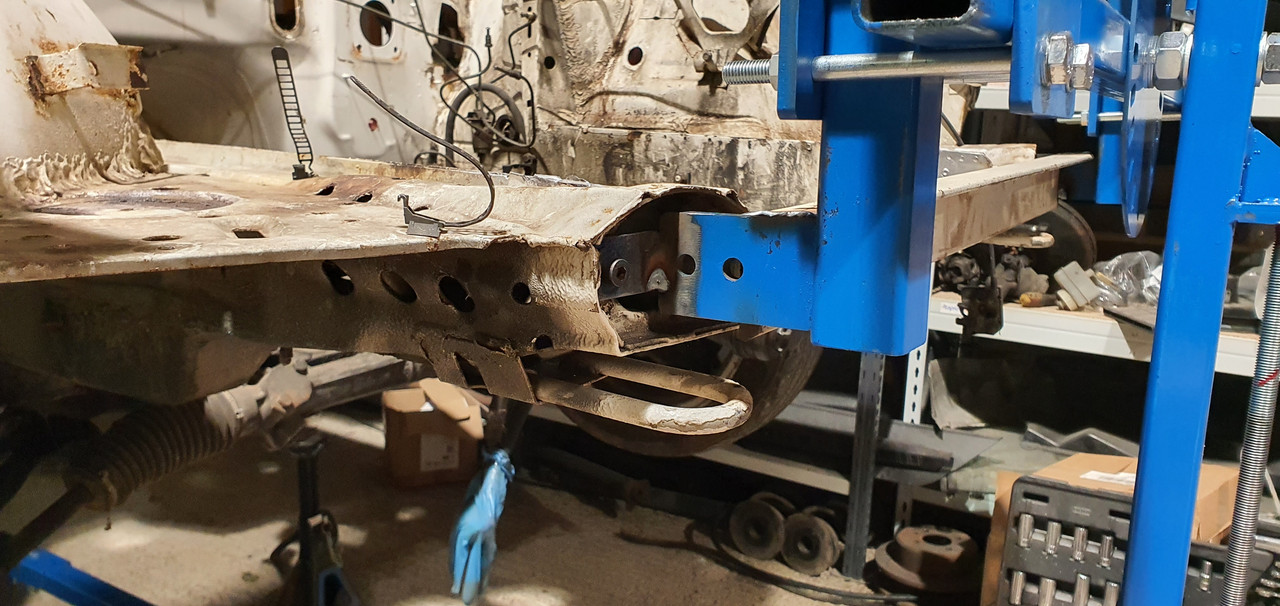
Mounted using the Bumper / Rail Positions:
Image

Image

Pretty happy with the Jig, from memory it was ~£375 delivered, it has some flex when moving it around or doing pretty hard work on the car, but worth its weight in gold.

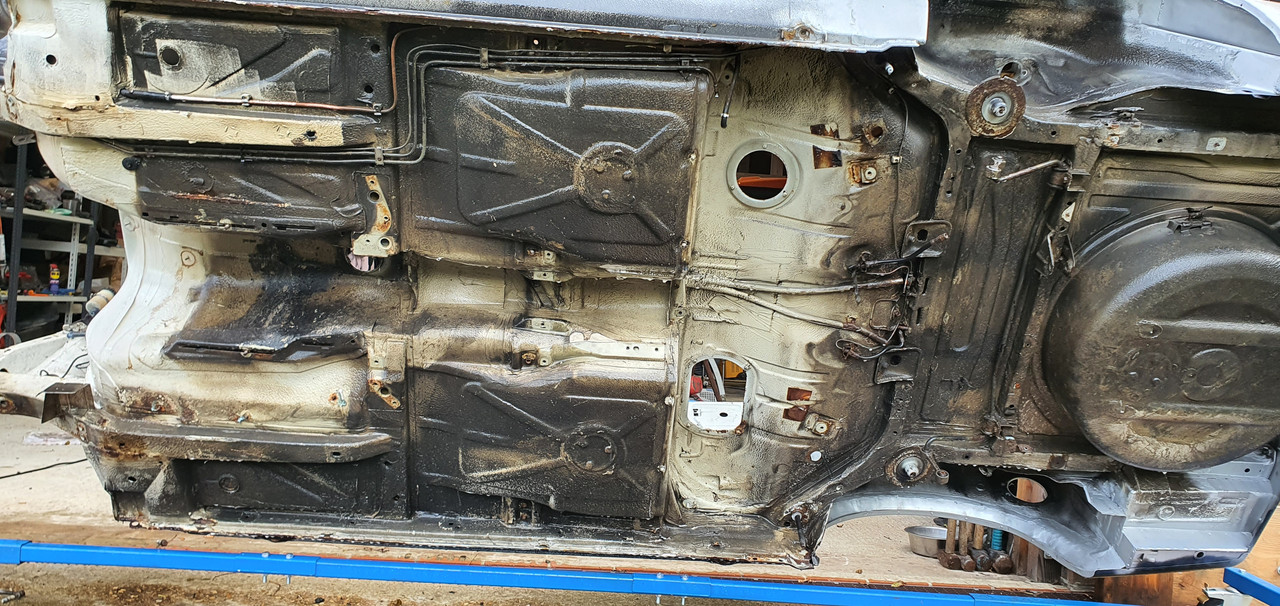
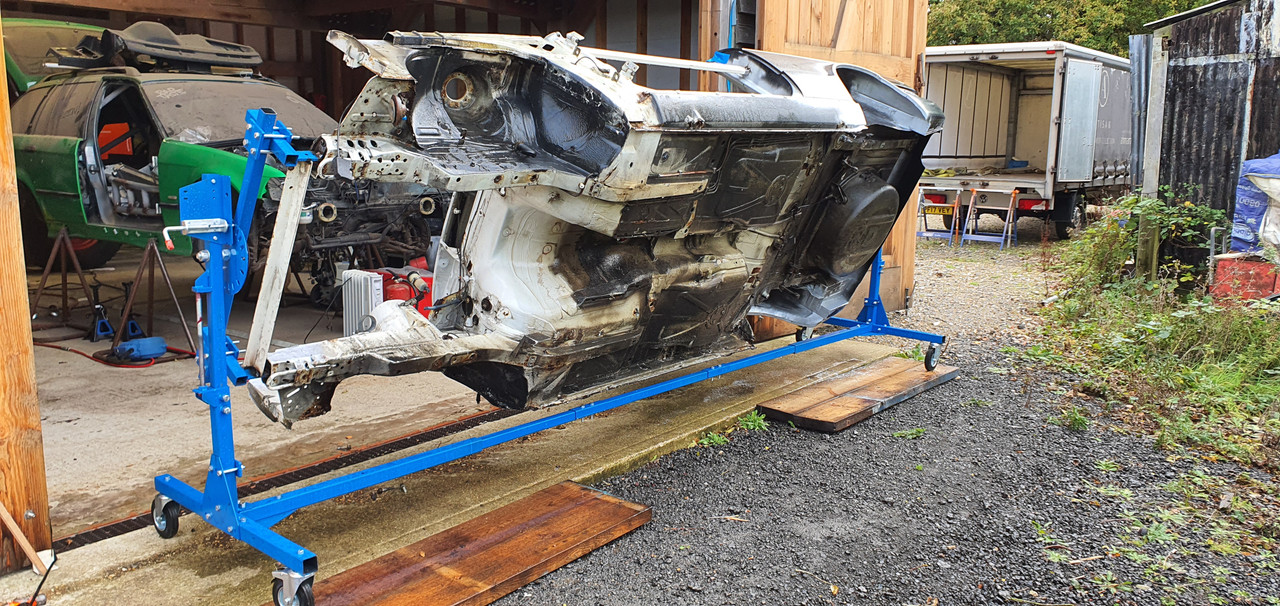
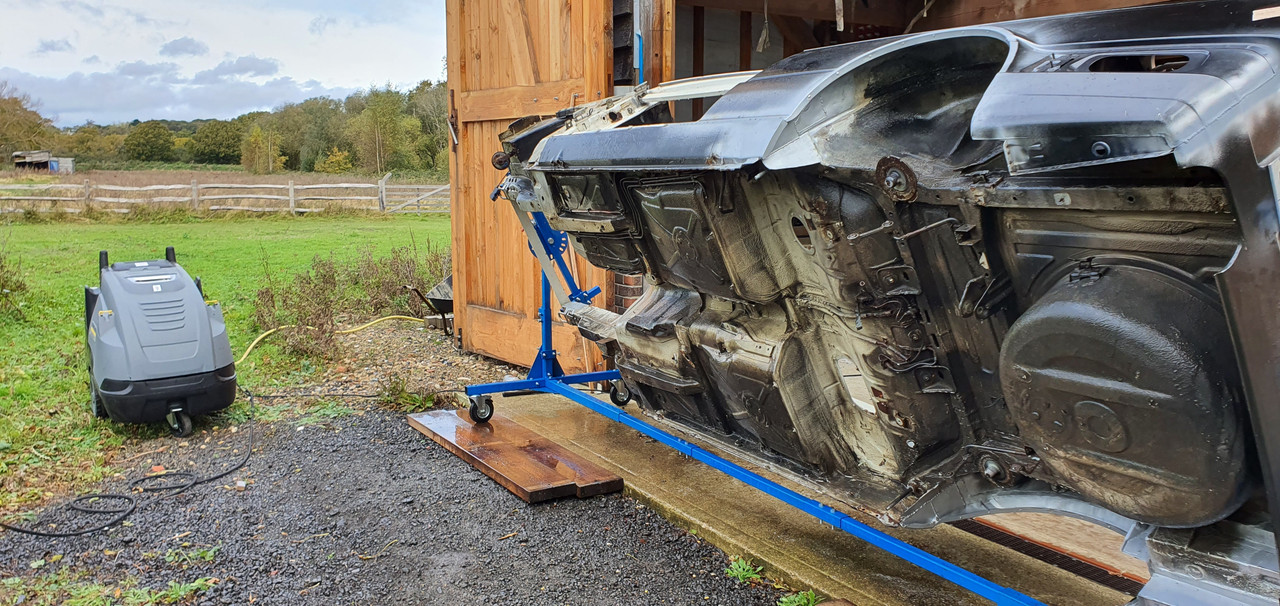
I then wheeled the car out to the doors and used our Karcher Steam Wash to totally remove any remaining Mice leftovers, and also strip of as much wax oil and other shit from the bottom of the car / engine bay as i could:
Image

Image

Image

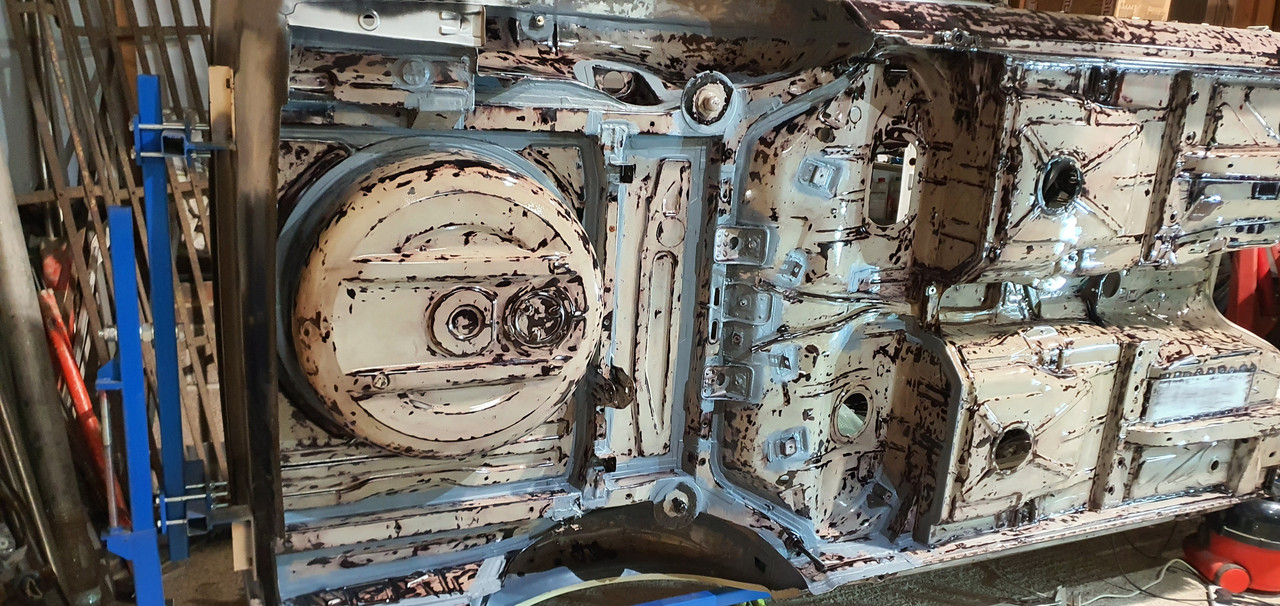
End Result:

Image

I then stripped off any of the remaining under car bits, fuel lines, brake lines etc.

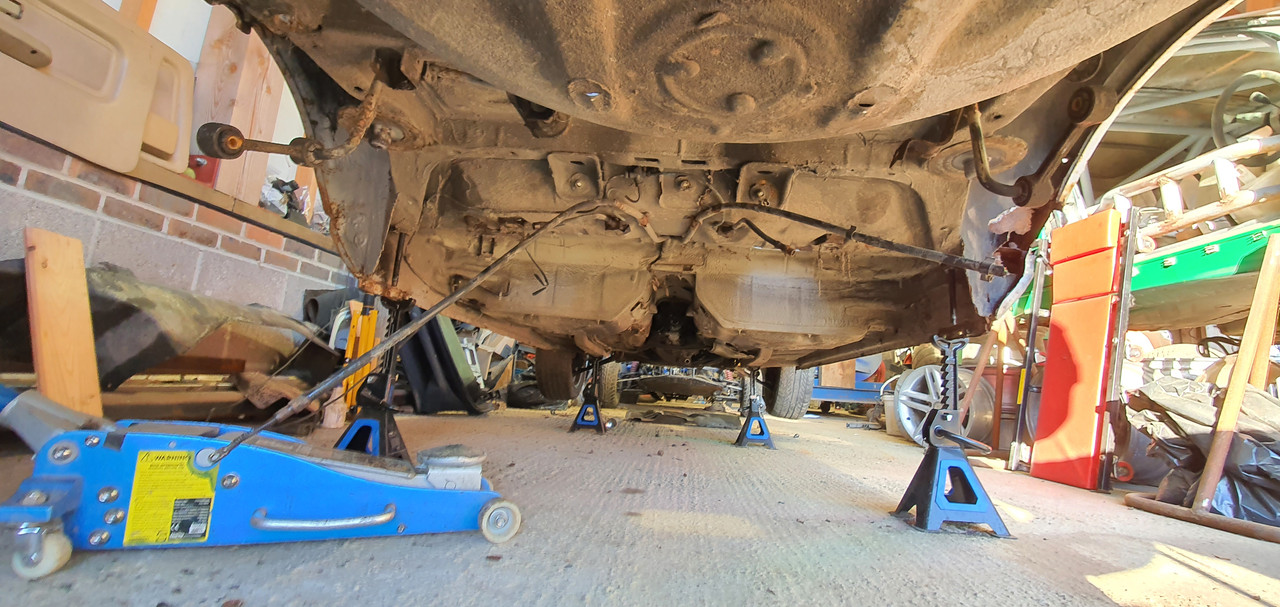
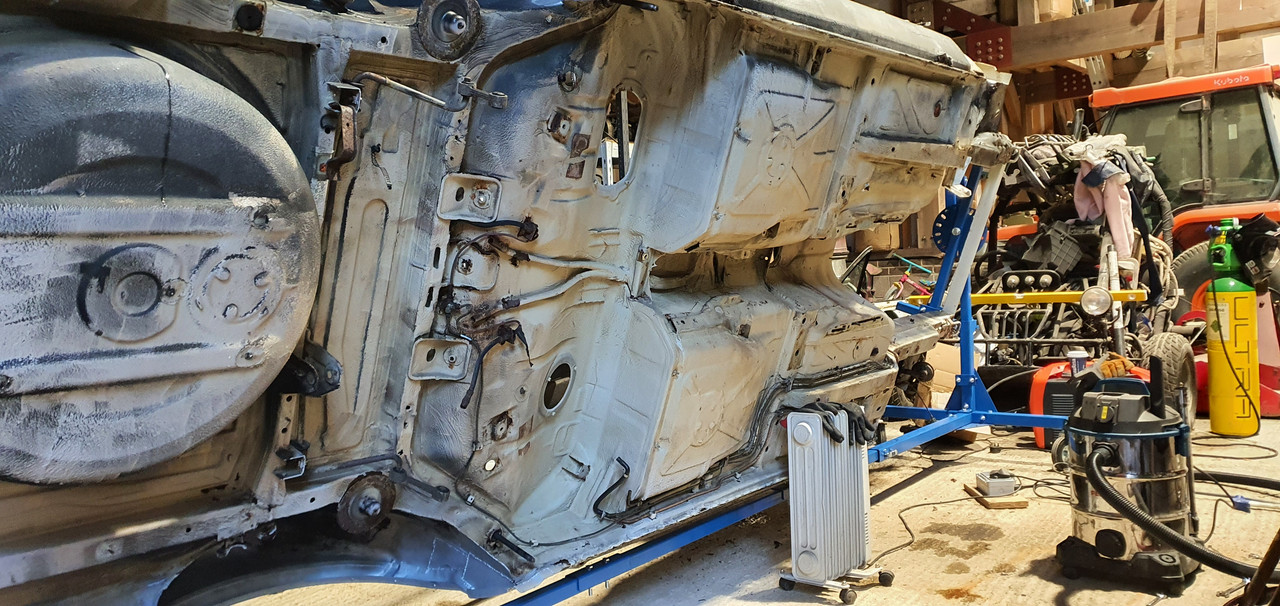
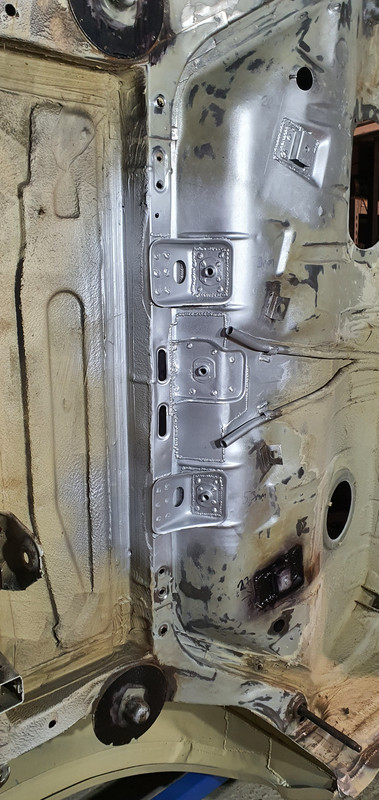
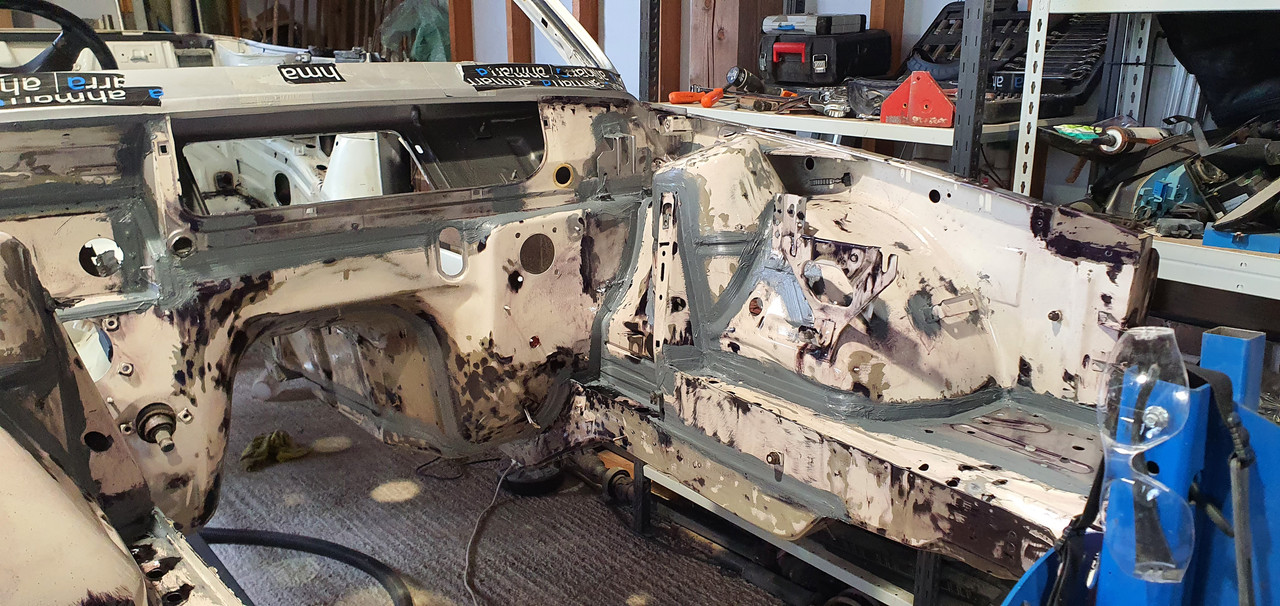
Now was the time to start the tedious process of removing all of the underseal, i got about 90% done in one day with a an angle grinder and large wire wheel, it then took about another day or two to remove all of the underseal from all the tight corners / areas. Originally i was not going to remove all of the underseal, however i am glad i did as it revealed many many places of corrosion that had not yet visibly come through the sealer. Some of these places had originated from inside the car where i can only assume heavy amounts of Mice Pee were and started corroding.

The worst areas of rust on the underside were:

- Rear Seat / Seatbelt Brackets.
- Rear Tank Brackets.
- Rear Brake Line Mounts.
- Tube that carries Fuel Tank hoses from Filler Cap.
- Passenger footwell areas.
- Drivers footwell areas (both footwells were bad behind where the sliding nuts are for the gearbox).
- Drivers side Footwell / Jacking Point / Front Arch Area where all 3 panels meet.

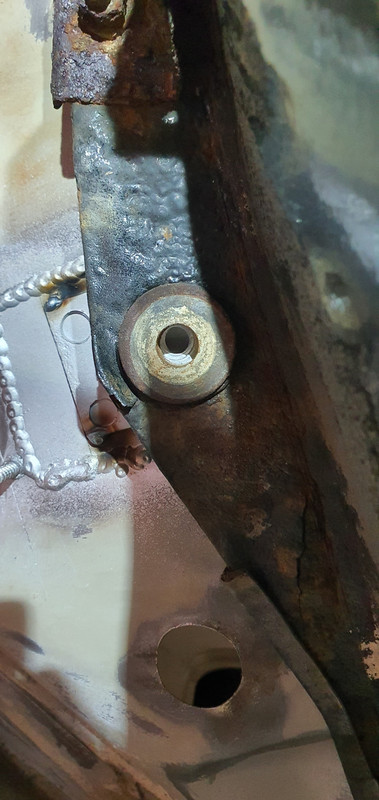
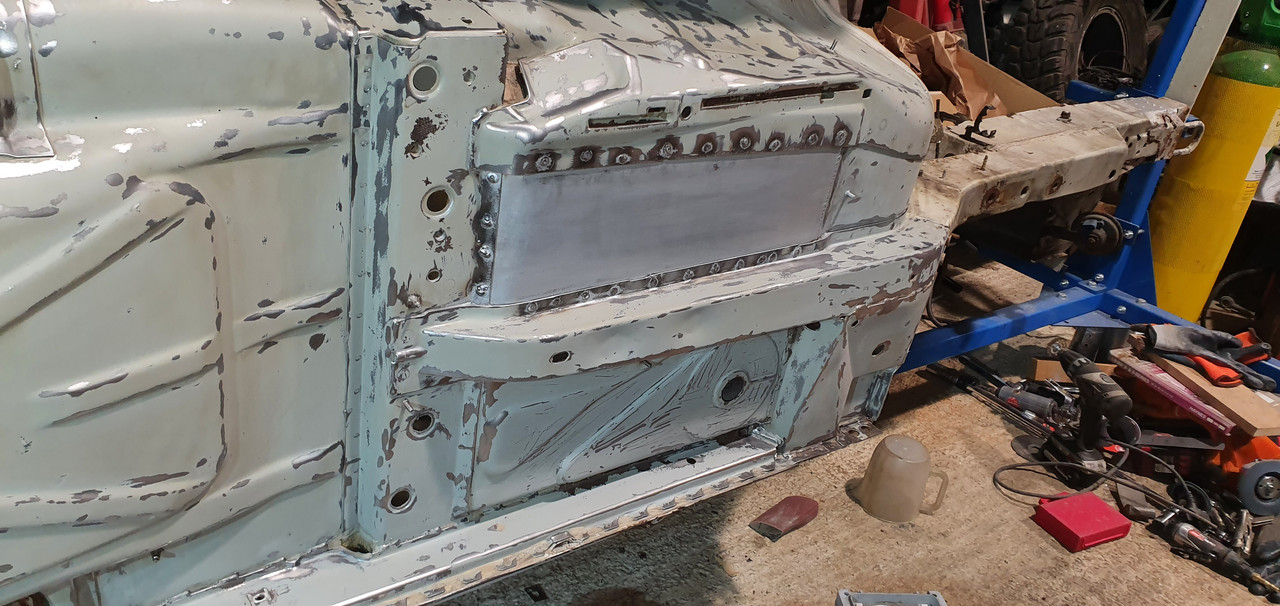
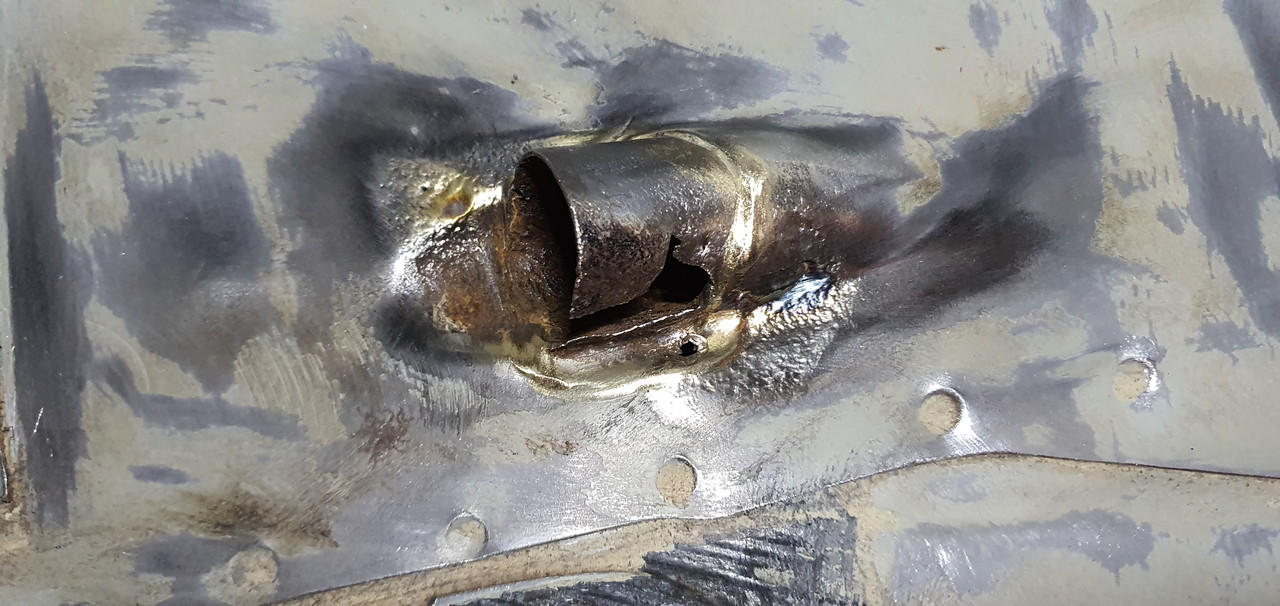
These were the areas i deemed necessary of cutting out and replacing, the rest was only surface rust and i concluded it was acceptable to let Dinnitrol RC900 deal with it. Pictures in no particular order of Rust Repairs to the bottom (Yes i know my welding does not look particularly great / perfectly penetrated):
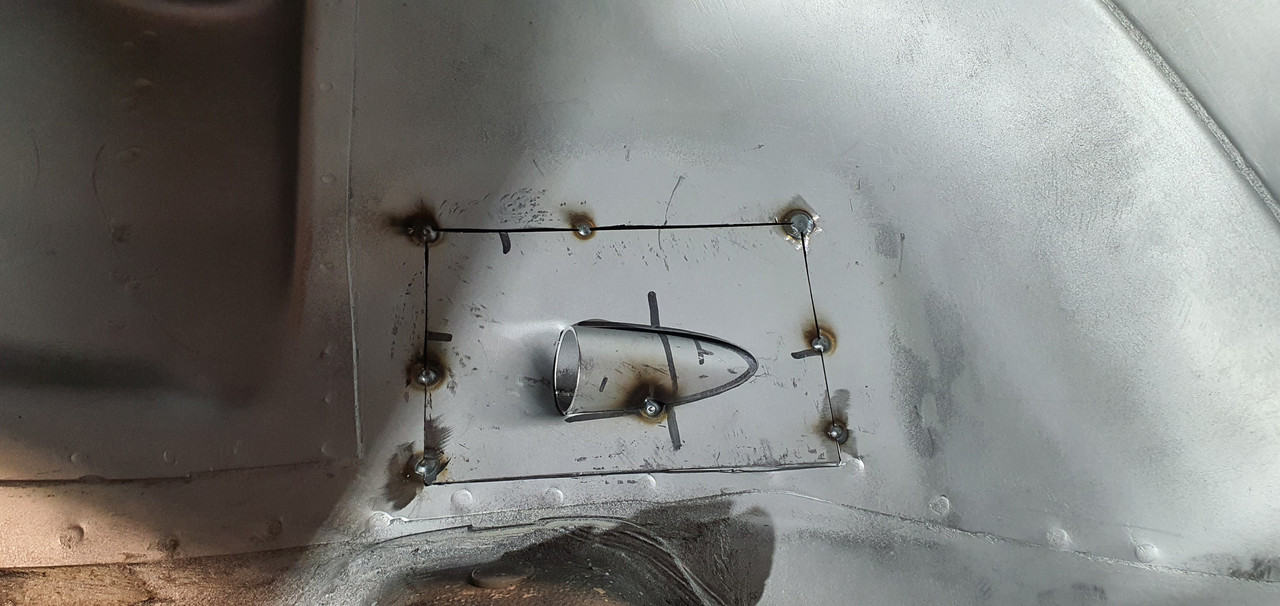
Image

Image

Image

Image

Image

Image

Image

Image

Image

Image

Image

Image

Image

Image

Image

Checking Fuel Tank Mount Positions:
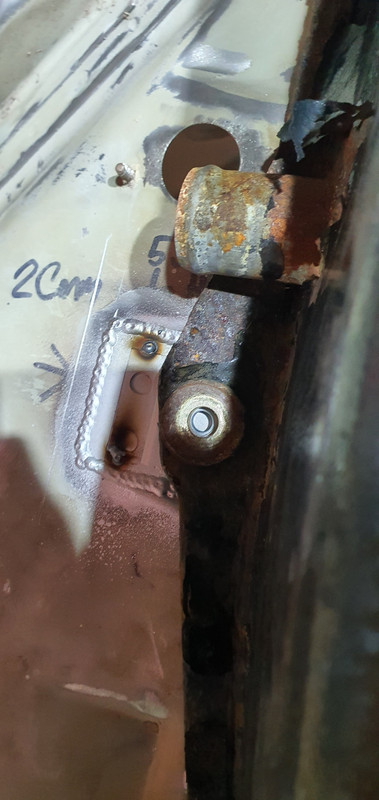
Image

Image

Image

Front Sections, I had a Passenger Panel from Valcas which in the end i decided not to use. This is for sale if anyone is interested £100
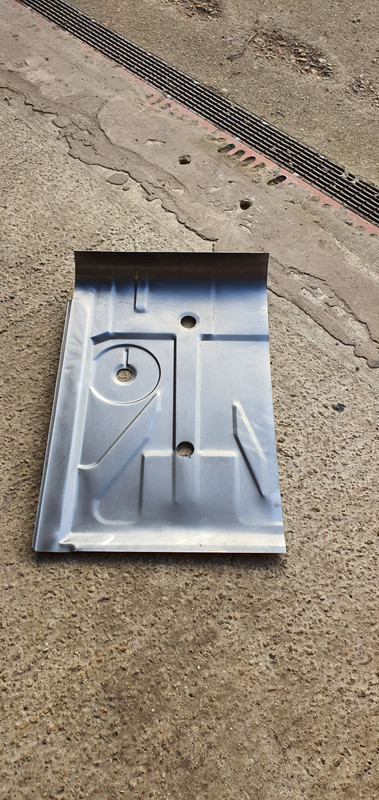
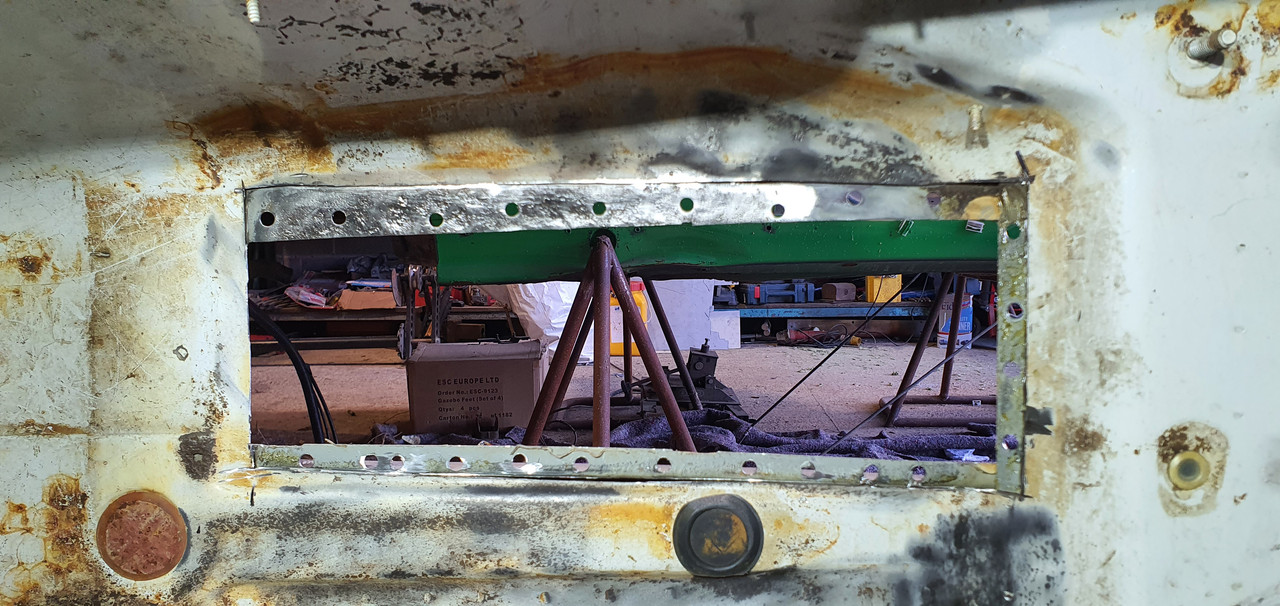
Image

Image

Image

Image

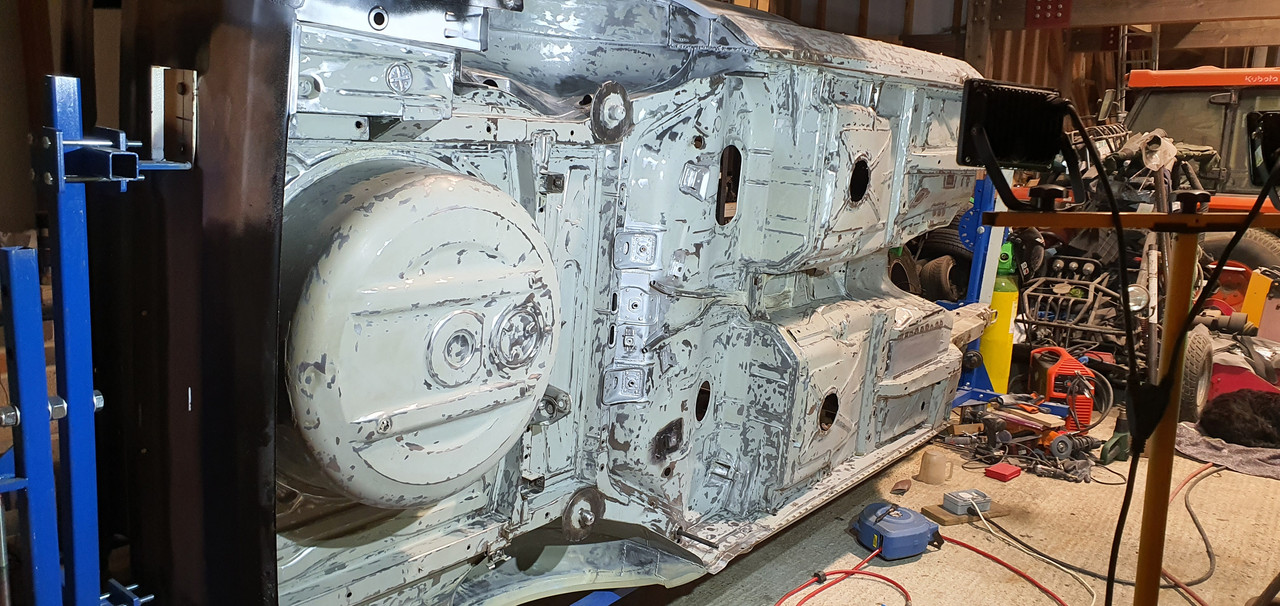
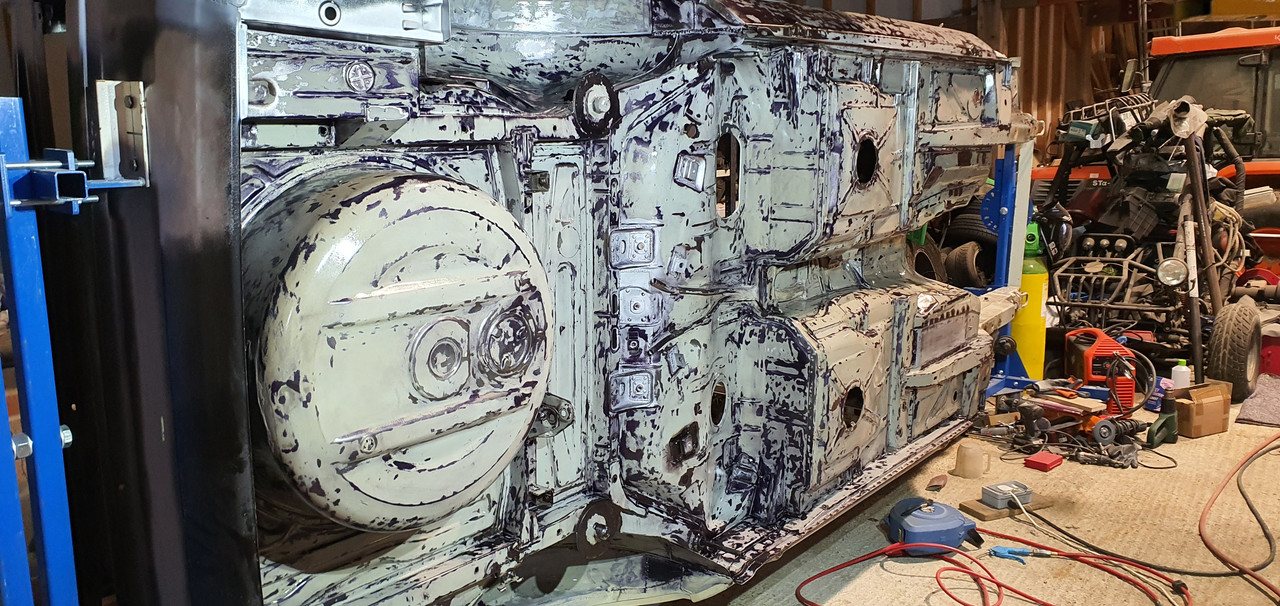
Various other bits were done and then i spent a long long time prepping the bottom to do a first coat of Dinitrol RC900, i first saw this product being used by Driftworks on their V10 E46 M3 restoration, i thought it looked really good and decided it was a good product to use in this situation.
Image

Image

This was only done last weekend, and i need to do another coat, it seems to have penetrated extremely well. Slightly counter intuitive to spray on, it doesnt feel right as visually it appears to be clear coat.

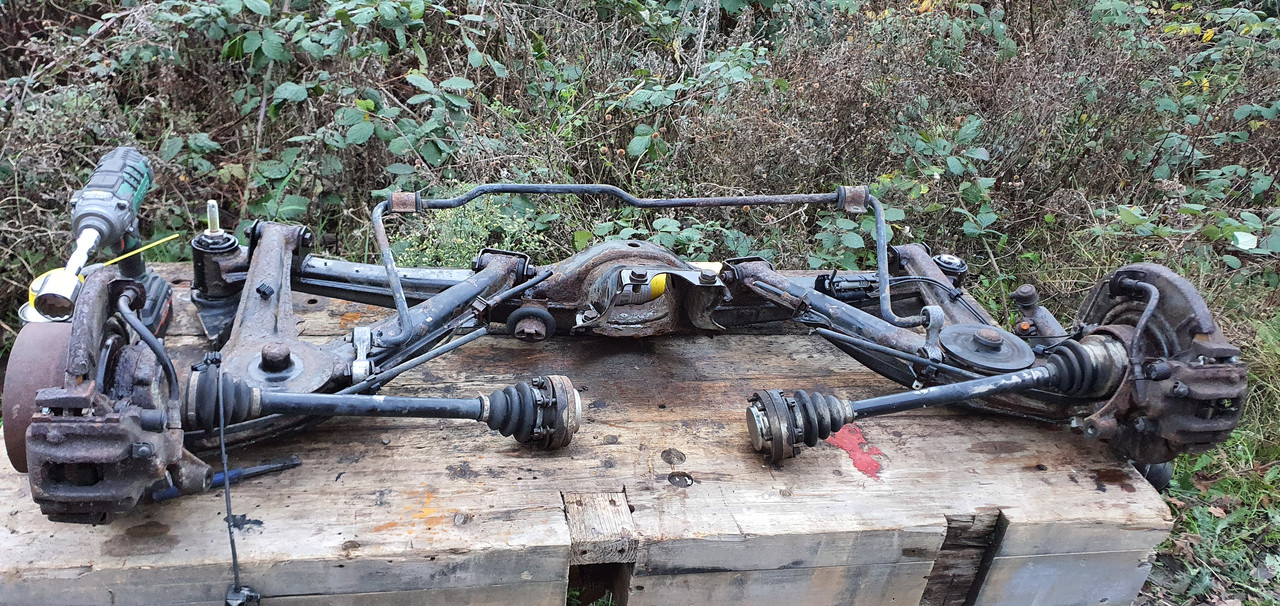
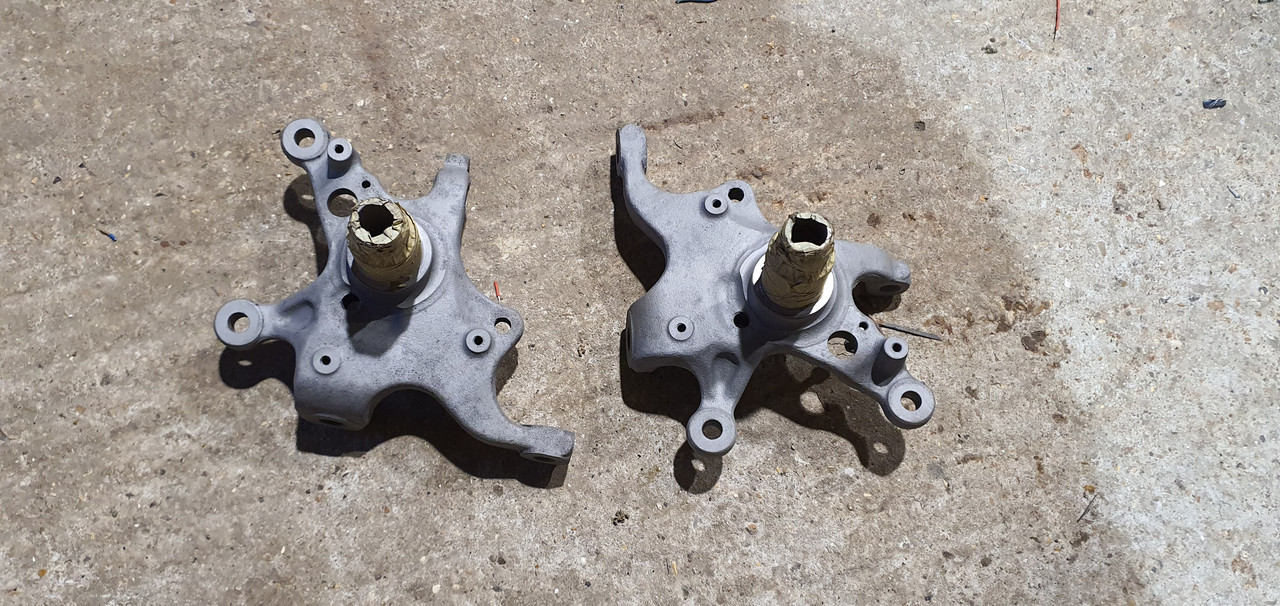
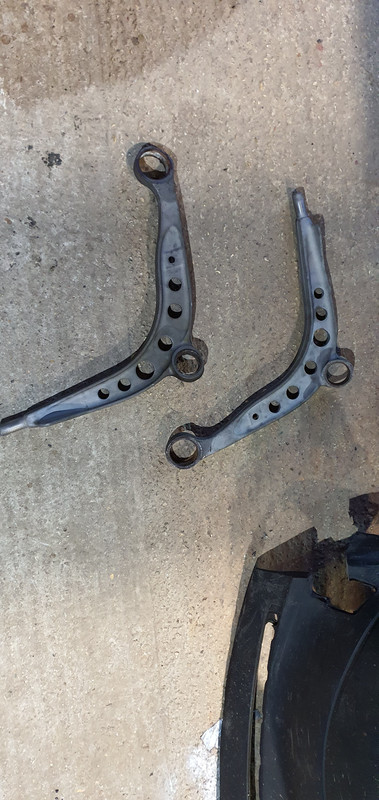
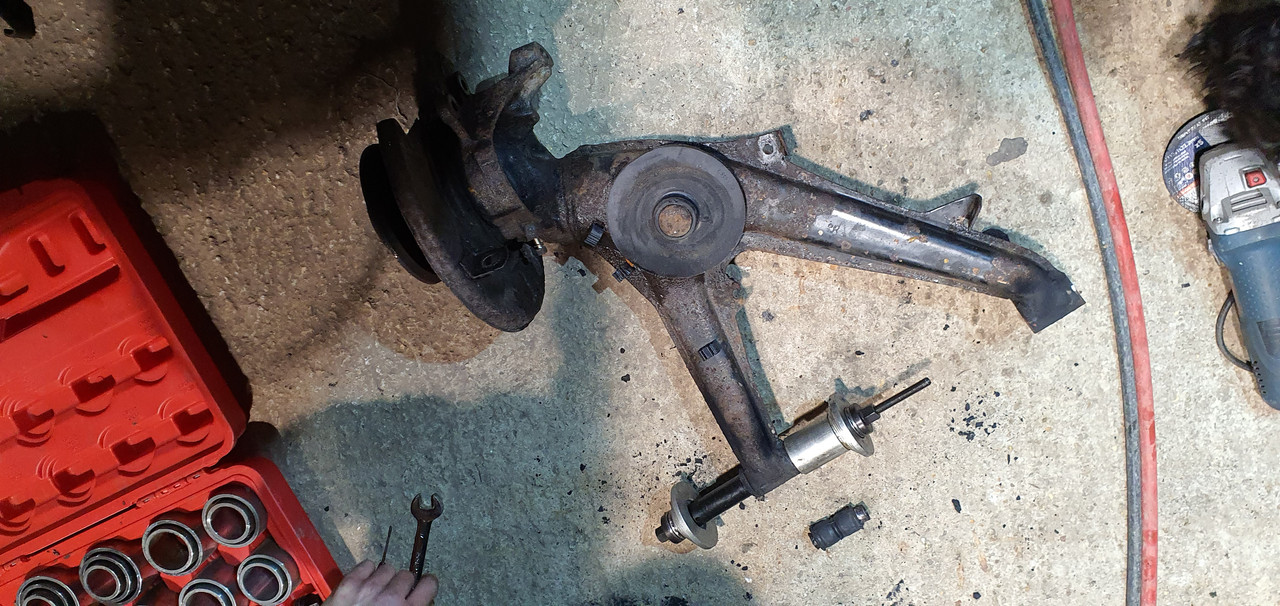
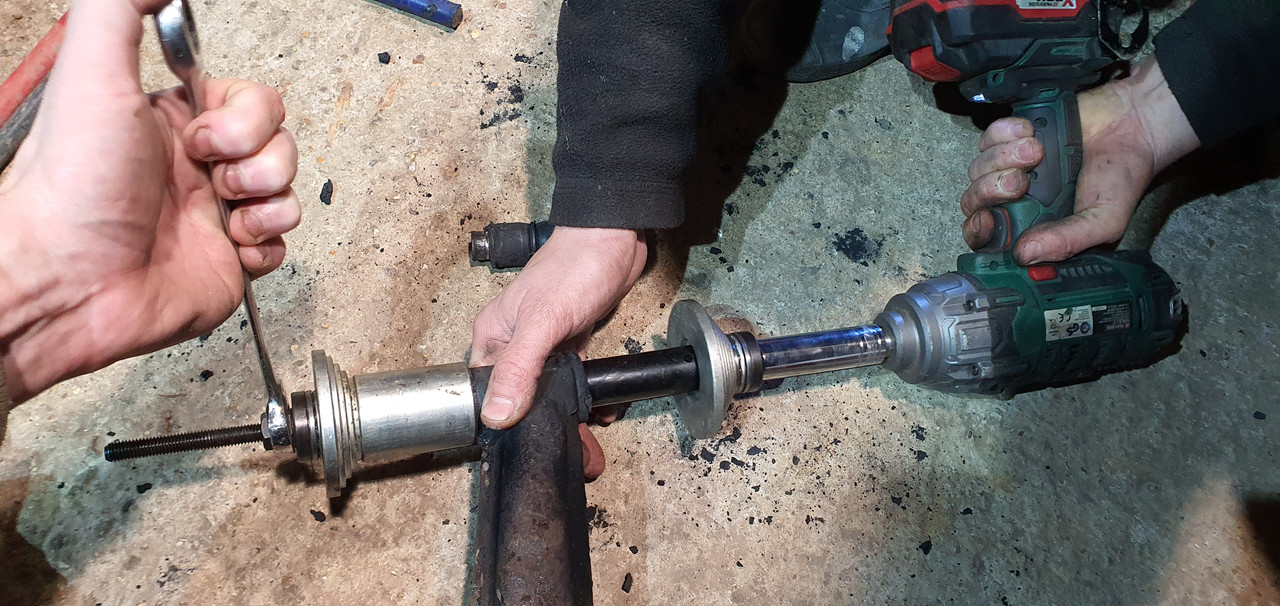
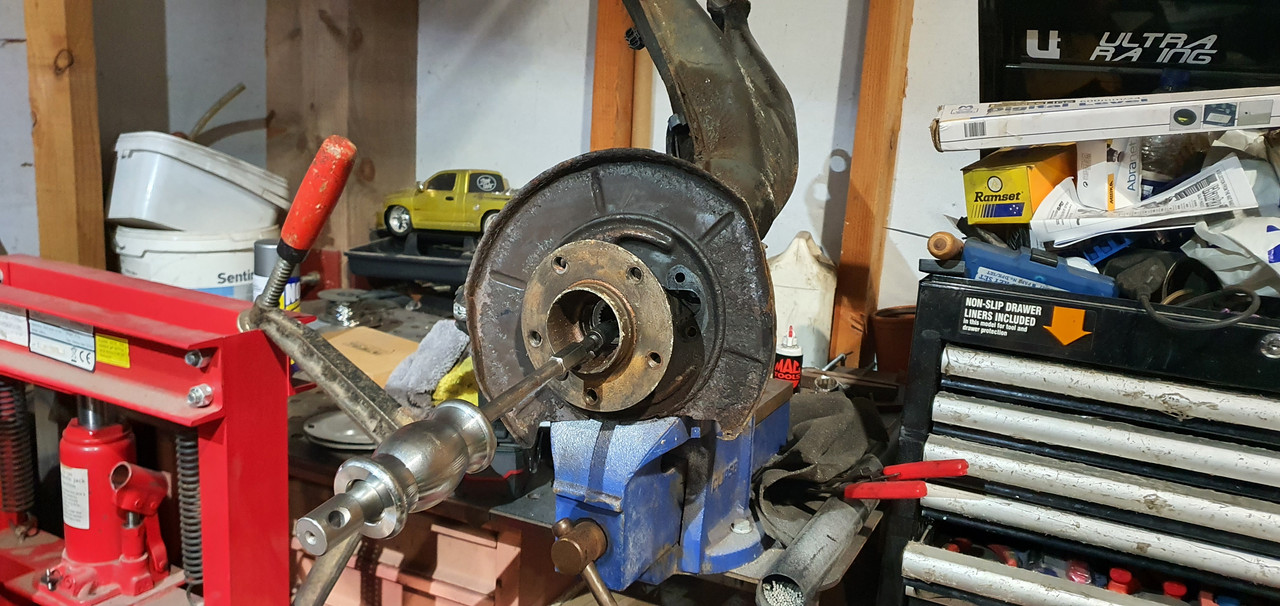
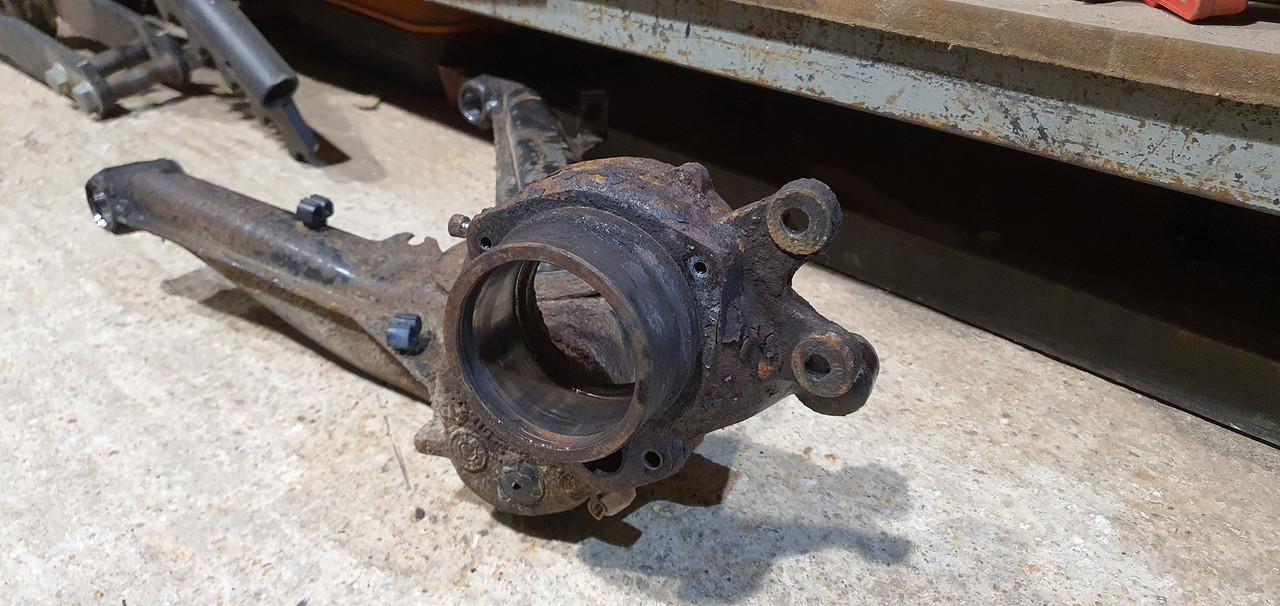
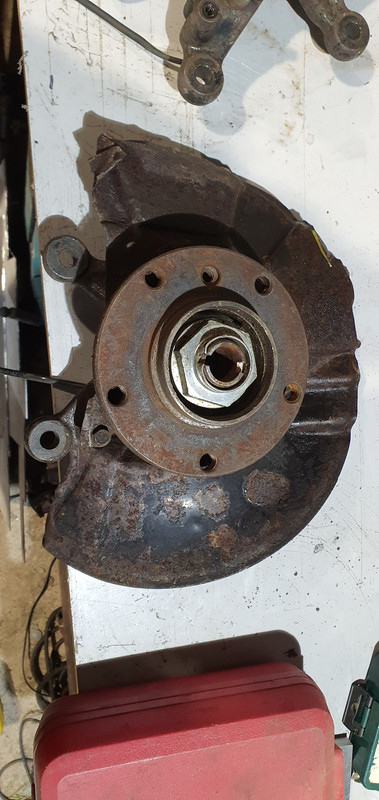
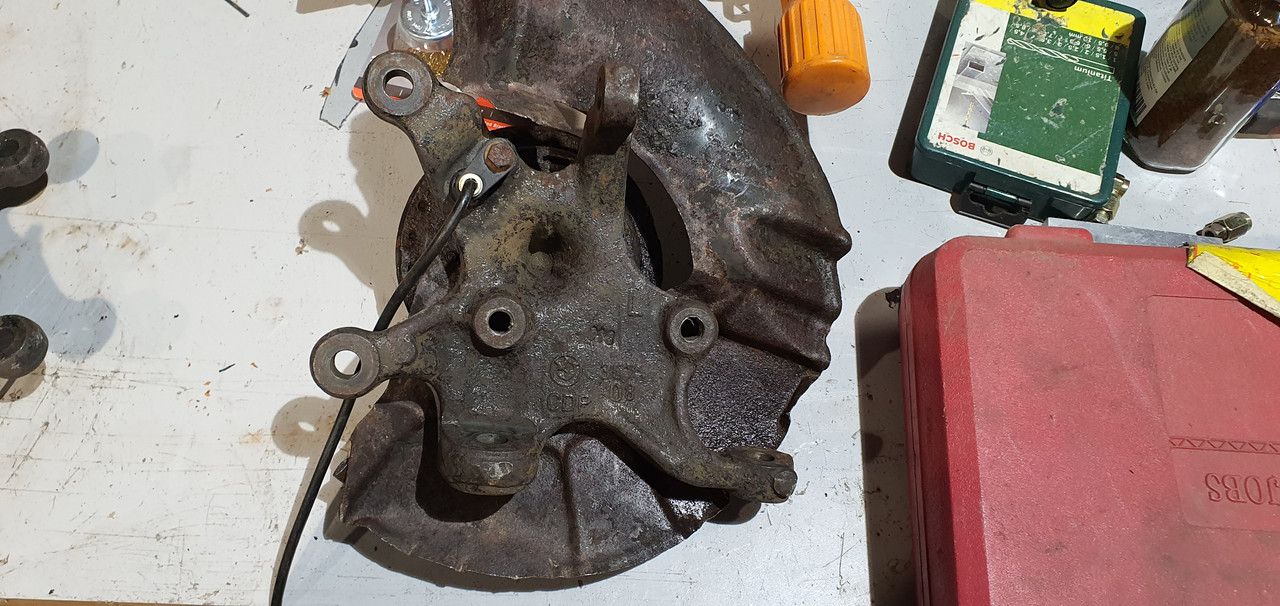
I managed to get a cheap set of E36 M3 Evo Hubs and LCA's, i also picked up a cheap Compact Rear beam, i began tearing these down and shot blasting them ready for new bearings & bushes. As of yet i am undecided on what brake setup to go with, i had done some light reading on it and though maybe i could use E46 330 brakes? Any advice on that would be great.

I had also held off buying Balljoints for the Front Arms, i had read online about people using E30 ones instead of E36? What is the reasoning for this? Does anyone have part numbers for ones which can be used? Also which offset bushes i need for the LCA Mounts.
Image

Image

Image

Image

Image

Image

Image

Image

Image

I have a few questions before i start widly buying new parts:

- Suspension bushes - this will be a road car, should i go with Powerflex "heritage" Range Poly Bushes? Or still with Lemforder bushes. I plan to use BC Coilovers with the car.
- I plan to use E46 330, is this a compatible setup with the 5 Stud Swap Parts i have?

I plan to buy the ~£1k ABS Mtech2 Kit posted in the General Chat section, i am pretty sure Front & Rear Bumpers will fit, as will the Door Pods, what is the recommended way to get Sideskirts on?

Any advice, recommendations, criticism is welcomed.

Thanks

Alex
Last edited by AlexD911 on Wed Aug 03, 2022 10:59 am, edited 2 times in total.
E30 M50B28 Turbo Cabriolet Restoration: Here
User avatar
TriggerFish
E30 Zone Regular
E30 Zone Regular
Posts: 507
Joined: Sat Jun 30, 2012 11:00 pm
Location: Aylesbury, Bucks

Wed Jan 05, 2022 1:11 pm

I can't answer the questions - but excellent progress! And especially for your first time doing anything like this too - well done! :)
Cloggy Saint
Old Skooler
Old Skooler
Posts: 8024
Joined: Sun Jan 09, 2005 11:00 pm
Location: zummerzet

Wed Jan 05, 2022 1:50 pm

You're a brave man, sooner you than me!
Image

E30 zone - promoting adult illiteracy since 2004
User avatar
AlexD911
E30 Zone Newbie
E30 Zone Newbie
Posts: 128
Joined: Thu Mar 11, 2021 4:21 pm

Wed Jan 05, 2022 2:03 pm

TriggerFish wrote:
Wed Jan 05, 2022 1:11 pm
I can't answer the questions - but excellent progress! And especially for your first time doing anything like this too - well done! :)
Thanks, after i replace the scuttle panel & repair where the loom comes into the interior, i will finally feel like i am re-assembling the car rather than cutting it to pieces!
Cloggy Saint wrote:
Wed Jan 05, 2022 1:50 pm
You're a brave man, sooner you than me!
I will pretty much try anything, i am believer of anyone can do anything you just have to actually do it :D

Thanks

Alex
E30 M50B28 Turbo Cabriolet Restoration: Here
User avatar
ah
E30 Zone Addict
E30 Zone Addict
Posts: 2518
Joined: Mon Mar 10, 2008 11:00 pm
Location: surrey

Wed Jan 05, 2022 4:57 pm

One word EPIC ! Shame about the interior,as it looks quite a rare colour for the seats.
Image
Born on the 23 April 1990 320i Alpinweiss ll kabriolett! (SOLD BUT NOT FORGOTTEN !) :cry:
User avatar
martauto
E30 Zone Team Member
Posts: 6186
Joined: Wed Aug 31, 2005 11:00 pm
Location: leeds

Wed Jan 05, 2022 4:58 pm

Thank you soooooooooooo much for posting the start of this truely epic saga :clap: :clap: :clap: :clap:
This is one of the best write ups I have ever come across and I must say that your work and especially your approach and attitude is brilliant :banana: :banana: :banana: :banana: :banana: :banana:
You MUST finish this at all costs !!!!

Cheers Mart.
( You can never have too much info/pics)
Only the E46 cab left now.
Just got too old.
User avatar
AlexD911
E30 Zone Newbie
E30 Zone Newbie
Posts: 128
Joined: Thu Mar 11, 2021 4:21 pm

Thu Jan 06, 2022 9:13 am

ah wrote:
Wed Jan 05, 2022 4:57 pm
One word EPIC ! Shame about the interior,as it looks quite a rare colour for the seats.
Thanks man, yes the interior is one of the things that even throwing money at doesn't appear like it will get me very far. The Passenger Rear Door Card has been cut too, so i need to either get someone who's good with fiberglassing to rebuild it based on the drivers side or try and find another one, or whole set. Typically people are only wanting to sell whole interiors though so not likely i can just replace it.

Im also finding it near on impossible to get a response from any local trimmers who would be interested in doing the whole lot in red leather for me. I found a guy on facebook who looks good and specialises in E30's but hes up North somewhere quite far away.
martauto wrote:
Wed Jan 05, 2022 4:58 pm
Thank you soooooooooooo much for posting the start of this truely epic saga :clap: :clap: :clap: :clap:
This is one of the best write ups I have ever come across and I must say that your work and especially your approach and attitude is brilliant :banana: :banana: :banana: :banana: :banana: :banana:
You MUST finish this at all costs !!!!

Cheers Mart.
( You can never have too much info/pics)
Thanks man i appreciate it, its good motivation to hear im not totally bodging the whole thing winkeye

I still have lots of bits to sort out.

One of my main troubles is finding a good engine swap for it. I was set on an M54B30 as they seemed reasonably priced and readily available when i was looking last year, now they seem to be much rarer and priced similar to the M50's / M52's. A M50B25 has come up with the right sump and he wants £1k for it. If im going Turbo that will be probably a perfect setup for it.

Thanks

Alex
E30 M50B28 Turbo Cabriolet Restoration: Here
User avatar
AlexD911
E30 Zone Newbie
E30 Zone Newbie
Posts: 128
Joined: Thu Mar 11, 2021 4:21 pm

Mon Jan 10, 2022 12:48 pm

Got a second coat of RC900 on at the weekend, dont think ill do anymore as it looks to have covered nicely:

Image

Then stripped the Drivers front Wheel Well, i repaired that hole in the bulkhead, forgot to take pictures of it after:

Image

I cut back the front batter tray as it was completely rotten, im moving the battery to the boot so will tidy this up and seal it before painting the engine bay:

Image

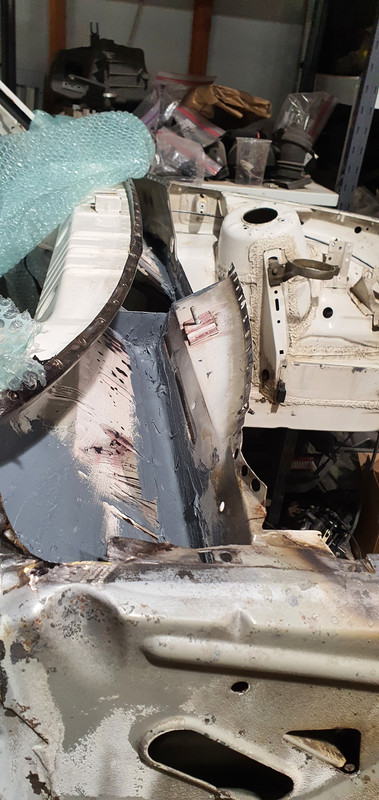
I then started to look at the rot around the Scuttle Drain, upon first glance it didnt look too bad, but it is quite severe, also most of the void behind the scuttle has rust to some extent, i begun to strip it but ran out of time, a job for next weekend:

Image

Image

Image

Image

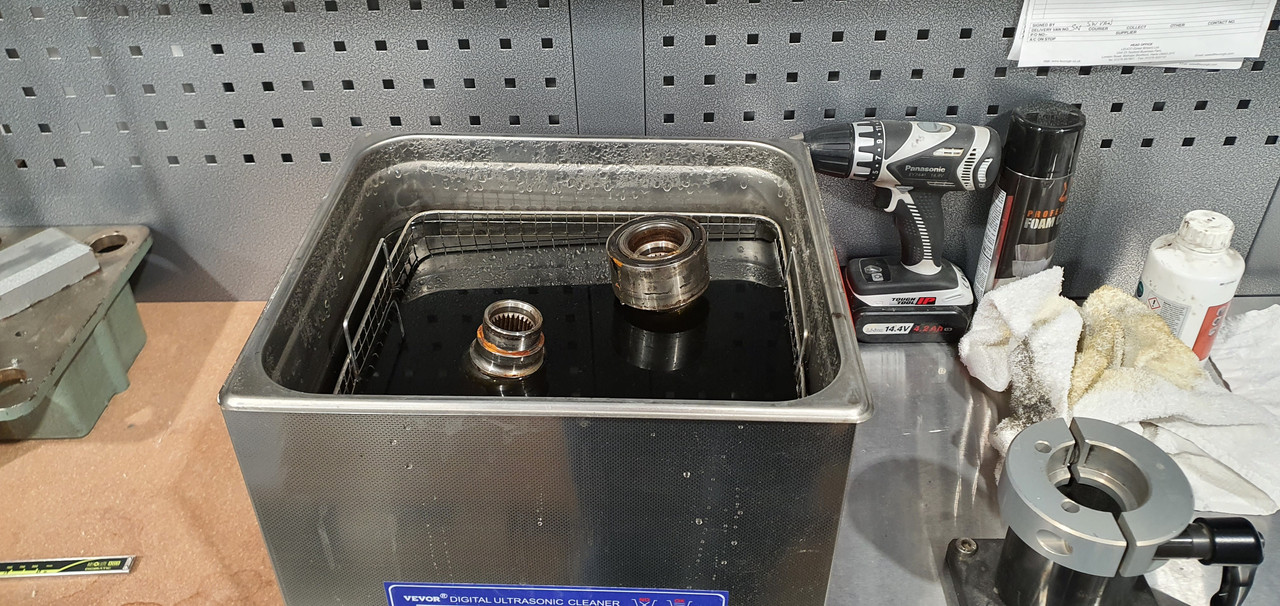
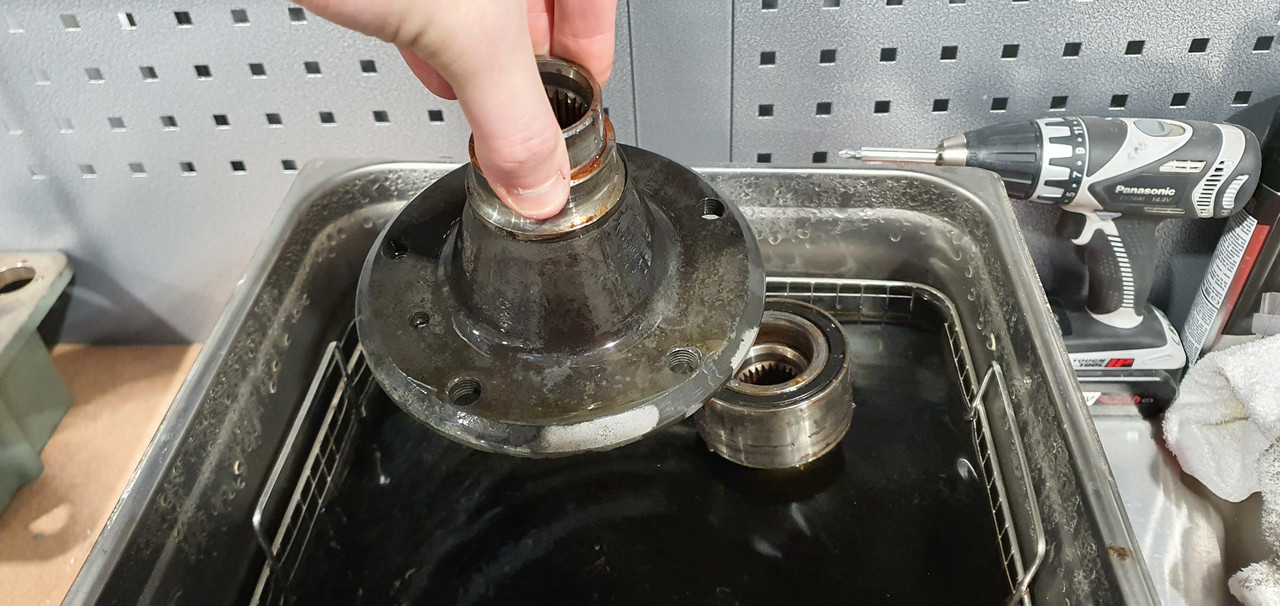
I was searching for new Rear Hub Flanges to go on the 318ti Rear Hubs, however these are actually quite expensive and are really just a solid piece, so i decided to dip mine in the Ultrasonic Bath with Rust Remover, after a Polish / Wire Wheel these should look brand new again:

Image

Image

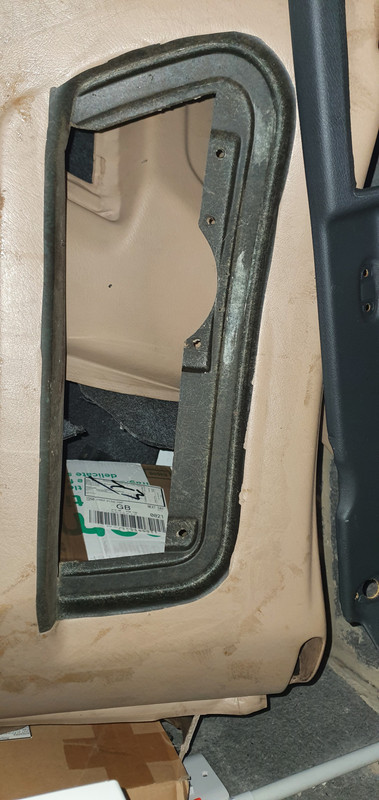
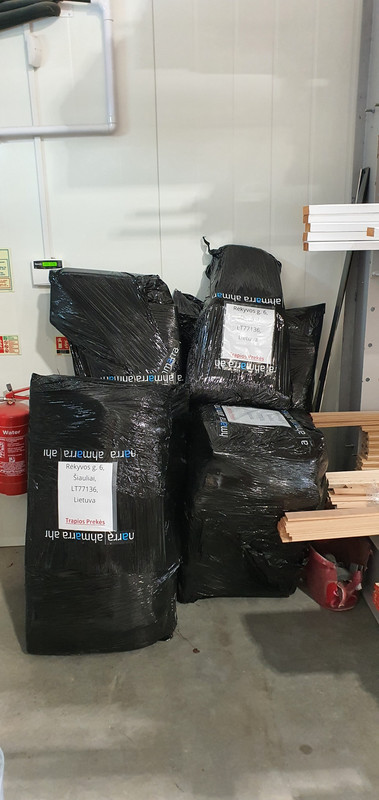
Im also planning on sending my whole interior to Lithuania, i was recommended a really good and well priced company who are on Instagram. I can get the whole interior (Apart From Dashboard) done for around ~1600 Euros (with Logistics), however i am having a really hard time finding another Drivers Rear Door Card, im not sure if this one can be repaired at all? Someone cut it to try fit speakers in:

Image

Not sure if anyone has advice on that?

I also managed to find an M50B25 from an E34 which i should be paying for this week, just waiting on a video of it running and some more details first.

Thanks

Alex
E30 M50B28 Turbo Cabriolet Restoration: Here
coopman
E30 Zone Regular
E30 Zone Regular
Posts: 267
Joined: Tue Feb 25, 2020 10:19 am
Location: Sydney

Mon Jan 10, 2022 10:48 pm

Fair play taking on such a big project - even simple jobs on my 320i cabby drive me crazy.

"This old broom's had 17 new heads and 14 new handles in its time" :D
User avatar
martauto
E30 Zone Team Member
Posts: 6186
Joined: Wed Aug 31, 2005 11:00 pm
Location: leeds

Tue Jan 11, 2022 2:36 pm

What does RC900 do ? :o:
Keep battling on mate, this is such a great thread.

Mart.
Only the E46 cab left now.
Just got too old.
User avatar
AlexD911
E30 Zone Newbie
E30 Zone Newbie
Posts: 128
Joined: Thu Mar 11, 2021 4:21 pm

Tue Jan 11, 2022 7:26 pm

martauto wrote:
Tue Jan 11, 2022 2:36 pm
What does RC900 do ? :o:
Keep battling on mate, this is such a great thread.

Mart.
It's an Epoxy Primer which also has rust neutralisation, I think it's the best I can do with all the tiny bits of light corrosion as opposed to having the whole thing dipped.

Managed to find a set of Rear Door cards super super cheap which I'll be getting at the weekend so that's another thing ticked off the list.

Thanks

Alex
E30 M50B28 Turbo Cabriolet Restoration: Here
User avatar
AlexD911
E30 Zone Newbie
E30 Zone Newbie
Posts: 128
Joined: Thu Mar 11, 2021 4:21 pm

Thu Feb 03, 2022 1:27 pm

Finally got a spare minute to update this, didn't get much time in Janurary to make much progress unfortunately, i'm also due to move house soon which i imagine is going to have a big impact too.

First of all the corrosion under the scuttle panel was pretty bad as mentioned, although i'm not 100% happy with the work i did under there, i'm happy the corrosion wont return, quite simply without de-constructing the car in the reverse order to how it was constructed, its very difficult to replace every piece of corrosion with fresh metal. Cleaning, treating and sealing the corrosion still takes a very long time but you kind of feel like its a bodge at the end of it.

Image

Image

Image

I left it last weekend with a large amount of Seam Sealer curing, i've tried top layer it up so any water naturally drains towards the drain holes. I now need to paint the inside of this area before re-fitting the new Scuttle Panel.

Whilst waiting for the Seam Sealer to dry i tackled the Front Arch Inner Lips & Engine Bay Corners. Panels from Valcas and were a great fit as per usual.

Image

Image

Image

Image

Image

Next on my list after re-fitting the Scuttle Panel is to fix the Chassis Loom Hole and then look to get the ABS MTech 2 kit and get the bodywork done.


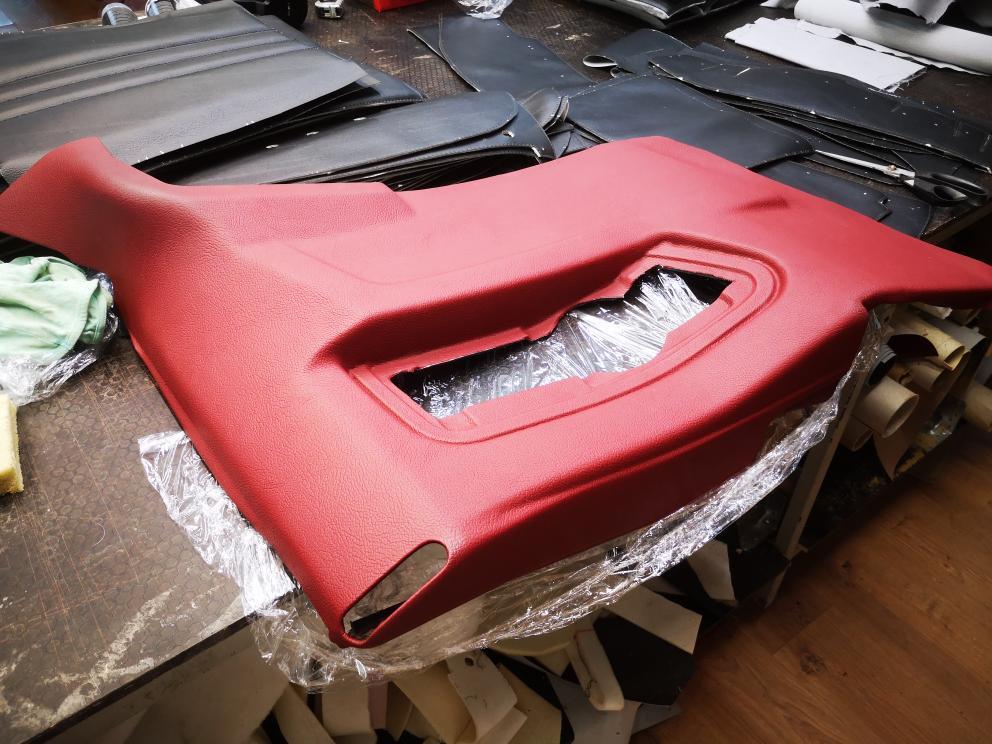
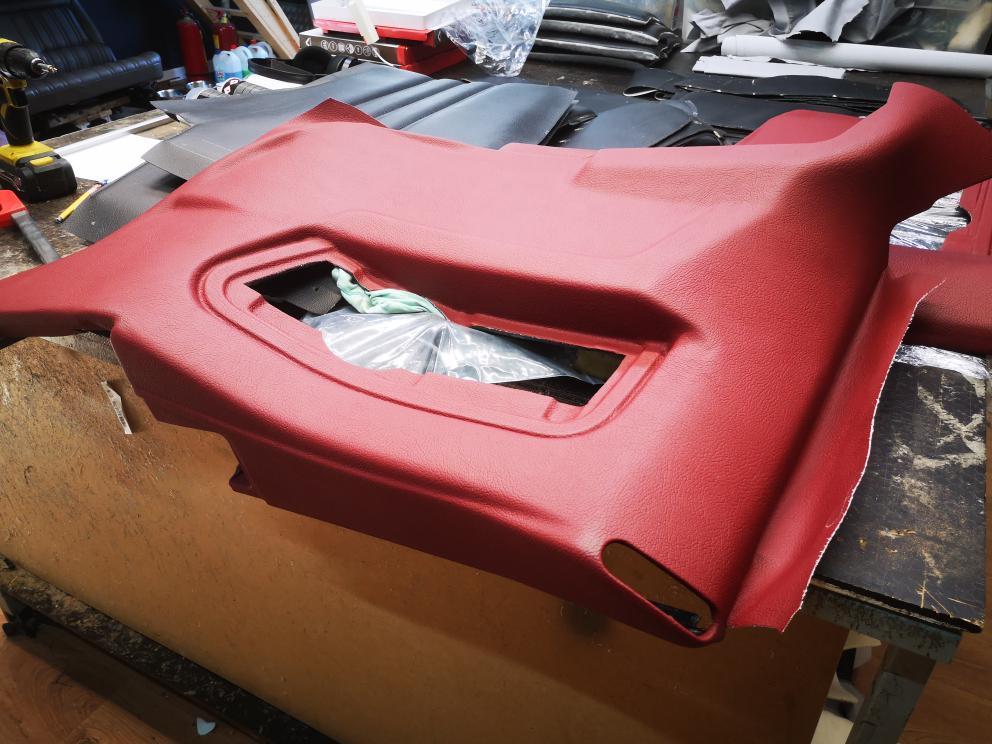
Also wrapped the interior and this is now with RESTAAuto in Lithuania. Hopefully get this back at some point soon but i'm of course in no rush, the longer it sits around the greater the chance it gets damaged. The seats will be
Red Nappa Leather, all the Door Cards & Rear Panels Matching Red Vinyl. All the front of the interior is being Re-done in Stitched Black Vinyl. Price will be in the region of ~2500 Euros, Plus £250 Delivery each way.

Image

I also have a bespoke set of BC Coilovers coming, with E30 Struts, E36 M3 Mountings on the Front and E36 Compact Mountings on the Rear.

Still waiting on my M50B25 to be removed and shipped. Again not an item im currently in a rush for.

Thanks

Alex
E30 M50B28 Turbo Cabriolet Restoration: Here
User avatar
martauto
E30 Zone Team Member
Posts: 6186
Joined: Wed Aug 31, 2005 11:00 pm
Location: leeds

Thu Feb 03, 2022 4:51 pm

Great work Alex, cant wait to see this finished.
What colour are you doing the car ??

Mart.
Only the E46 cab left now.
Just got too old.
User avatar
AlexD911
E30 Zone Newbie
E30 Zone Newbie
Posts: 128
Joined: Thu Mar 11, 2021 4:21 pm

Thu Feb 03, 2022 5:06 pm

martauto wrote:
Thu Feb 03, 2022 4:51 pm
Great work Alex, cant wait to see this finished.
What colour are you doing the car ??

Mart.
Almost certainly Donington Grey unless there are other similar suggestions? One of those colours you have to see in the flesh to truly appreciate but there were a few M5's at the last meet in this colour and its easily my favourite at the moment:

Image

Image
E30 M50B28 Turbo Cabriolet Restoration: Here
User avatar
AlexD911
E30 Zone Newbie
E30 Zone Newbie
Posts: 128
Joined: Thu Mar 11, 2021 4:21 pm

Thu Mar 03, 2022 2:21 pm

I've not had much chance to work on the car lately, been pretty manic at the weekends, going to try start working on it in the evenings as the days get longer.

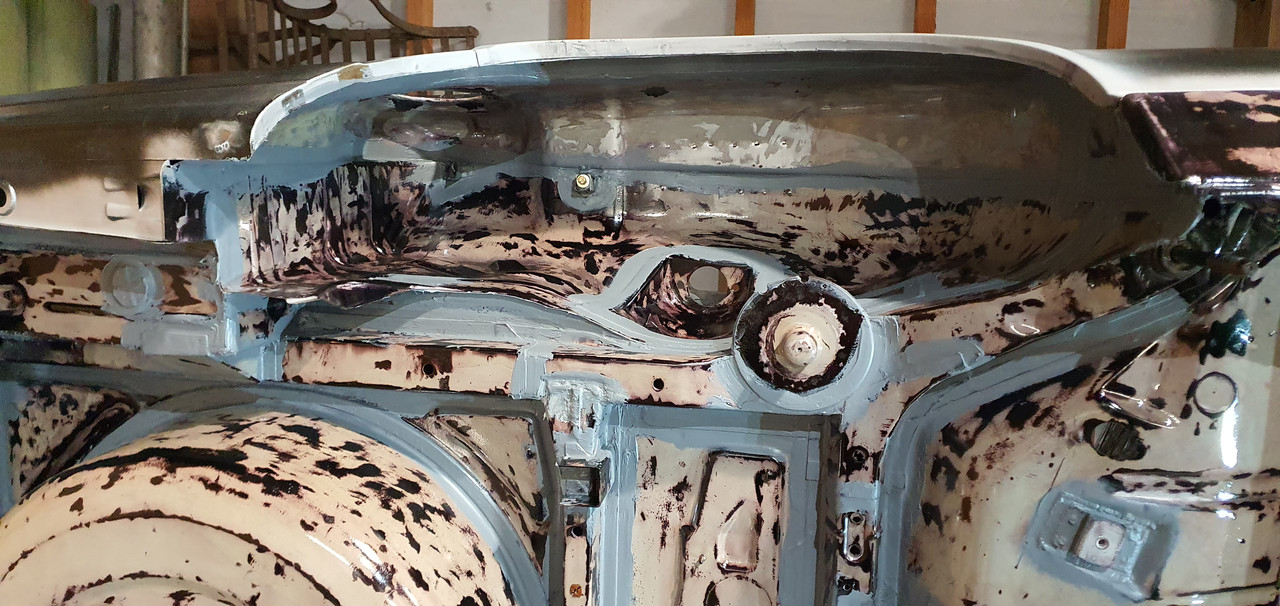
Painted inside the scuttle panel area, and the back of the scuttle panel:

Image

Image

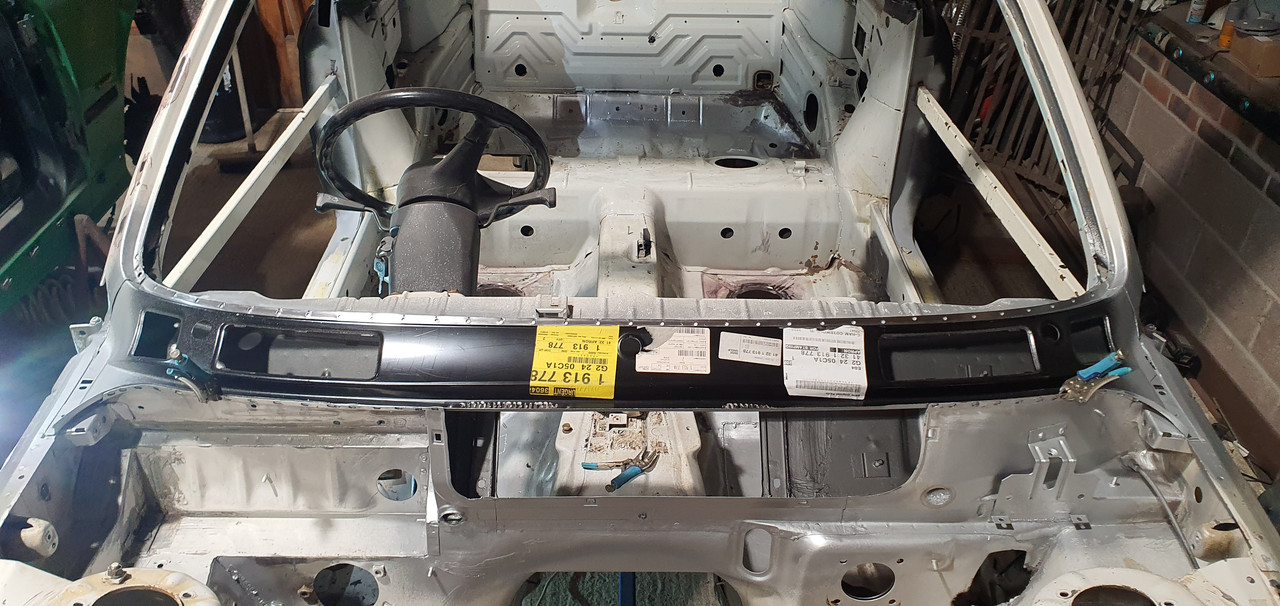
Mocked up and clamped the scuttle panel:

Image

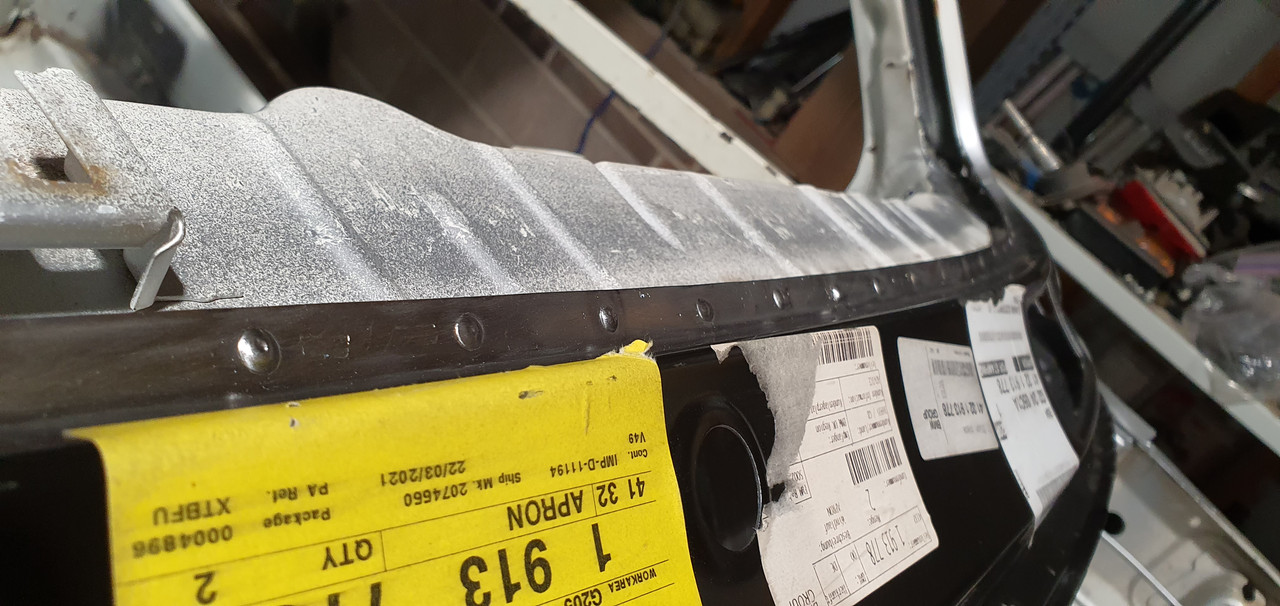
Welded in place:

Image

Image

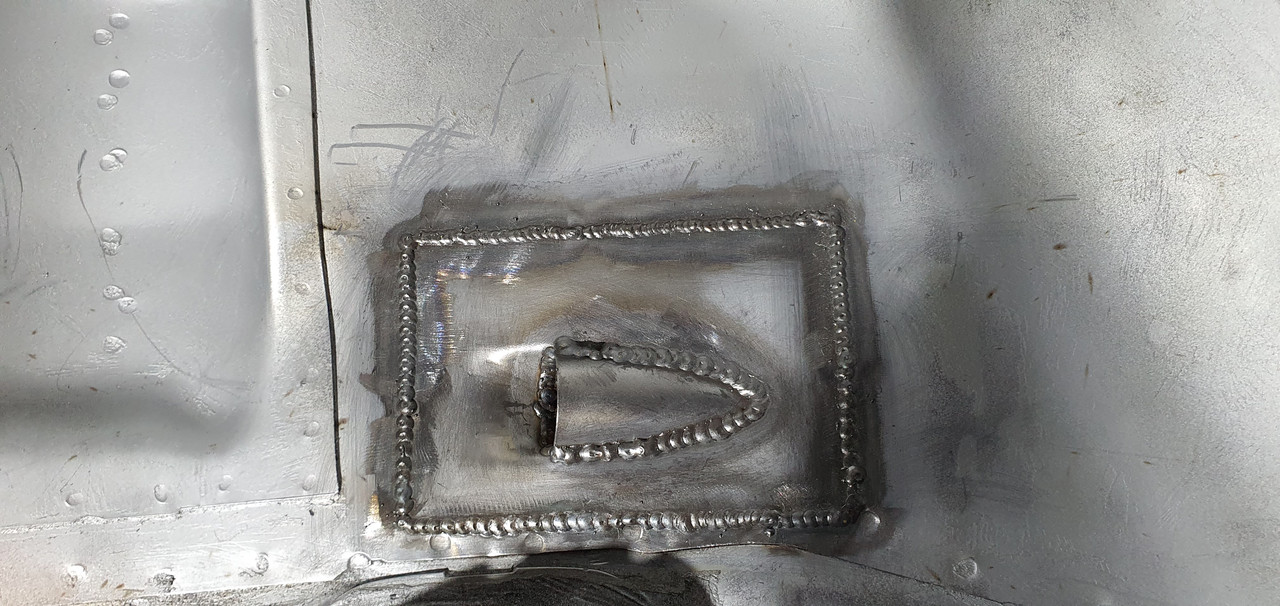
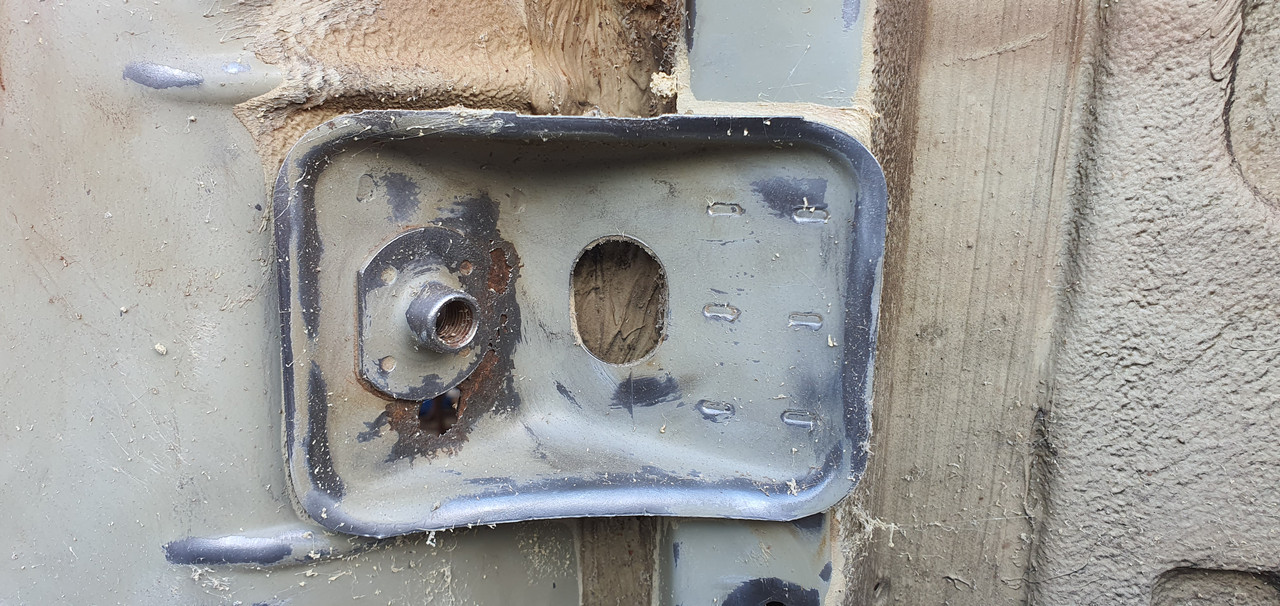
I also corrected a bit of rust on the hole where the passenger door loom plug sits, it was fairly tedious / an odd shape and i forgot to take pictures of it, but with that done it marks the end of the cutting & welding on the car - i only need to re-fit the front crossmember / radiator support when i get the car off the jig, this will be getting bolted anyway.

I now actually need to sit down and think about the order in which things need to be done in order to start re-assembling the car. I want to get it back on its wheels ASAP, which means finishing the bottom as far as possible, Seam Sealing, Undersealing, running fuel / brake lines etc.

I started seam sealing the underside, ended up using much more than anticipated, i think partly due to filling the rear arch lips completely with sealer to stop dirt sitting in there, i need to go back over it all again for a second coat as it looks to dry quite think (Dinitrol Brand).

Image

Image

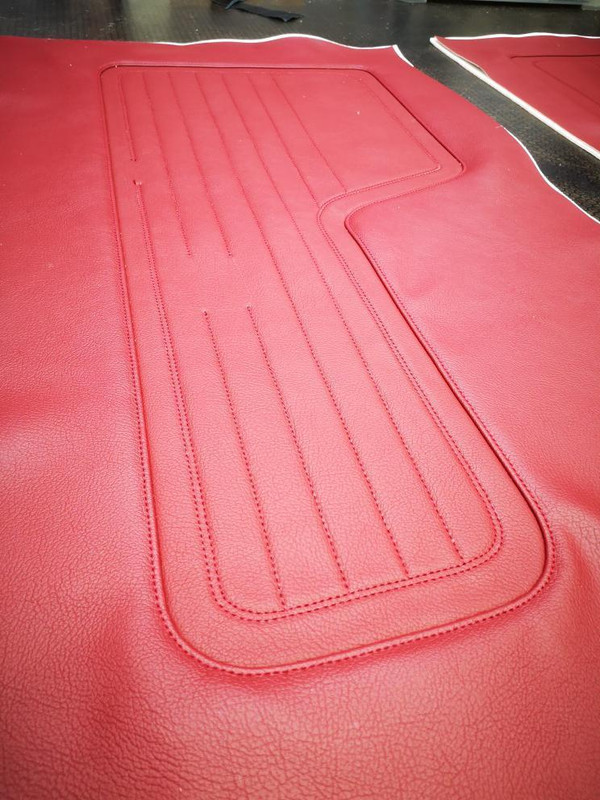
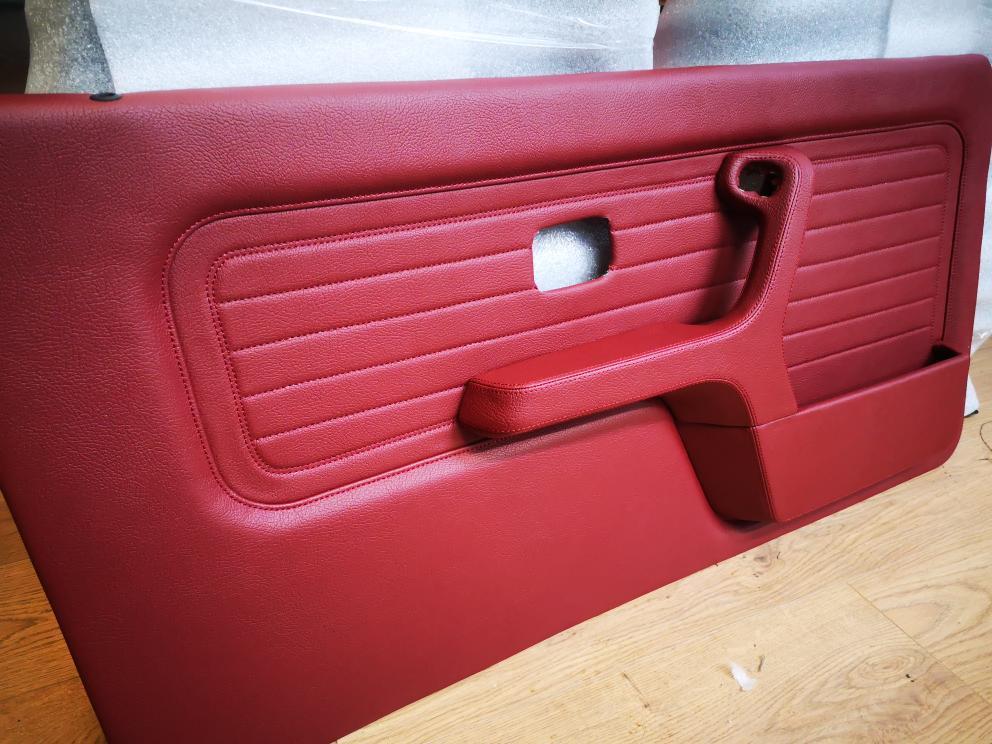
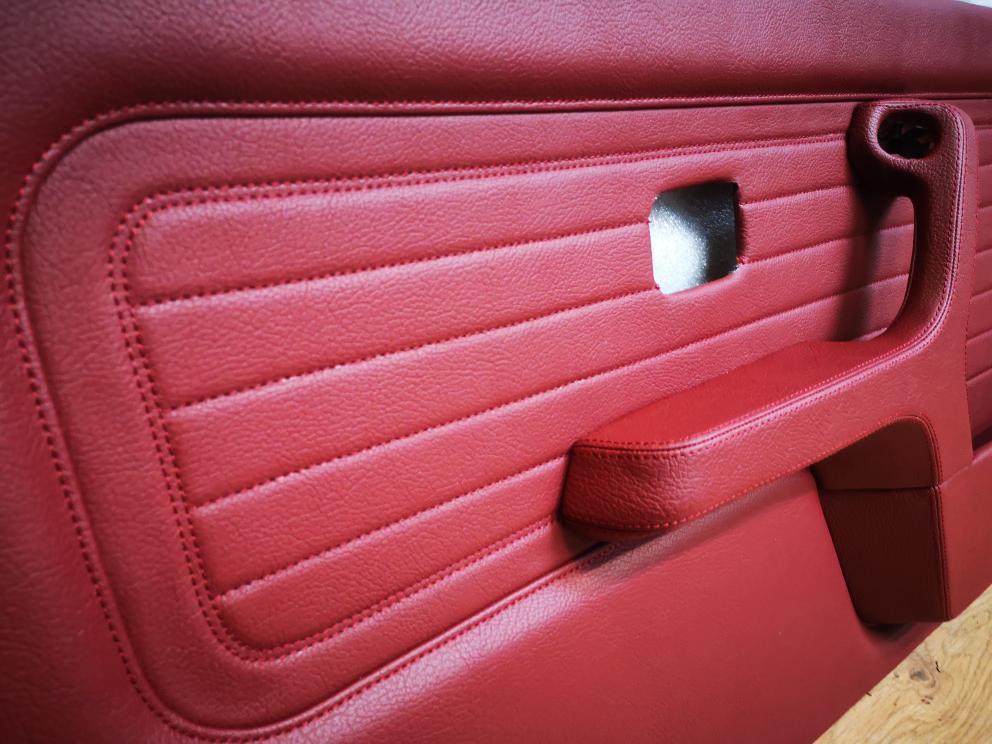
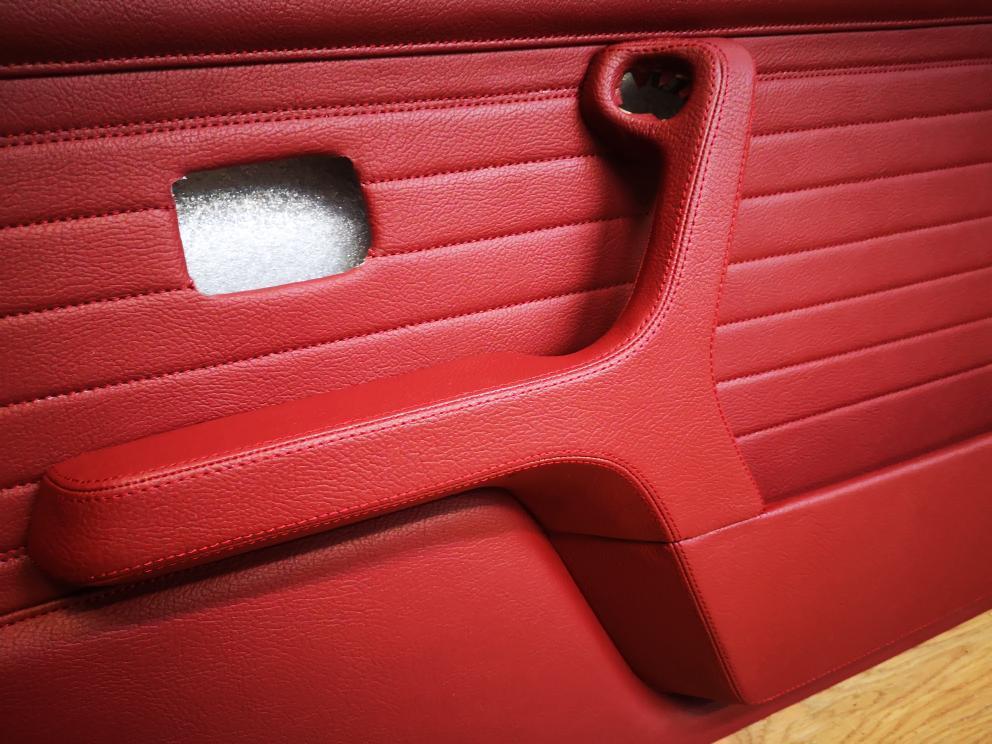
RESTAAuto has also started on my interior, i asked him to send me lots of pictures, which he has been doing. He found a very good match in nappa leather to match the Red Vinyl he typically uses, though this wont arrive to him for 3 - 4 weeks yet. The door cards are done in Vinyl, i think they look very good personally. I was weary how well the same material would last on seats, hence going for leather instead. Very impressed with them so far, great communication and look to be doing a very good job.

Image

Image

Image

Image

Image

Image

Image

Image

Image

Image

Image

Im going to collect my M50b25 this weekend, its from an E34 so has the correct sump etc. I have a build worked out (copying a friends), it will end up being built as an M50b30 Turbo, his has done a drift season @ just over 550bhp so it should be good for a road / occasional track car.

Thanks

Alex
E30 M50B28 Turbo Cabriolet Restoration: Here
User avatar
BenHar
E30 Zone Addict
E30 Zone Addict
Posts: 3066
Joined: Sun Jul 11, 2010 11:00 pm
Location: Reigate, Surrey

Thu Mar 03, 2022 6:08 pm

Those door cards look superb.

Ben
User avatar
AlexD911
E30 Zone Newbie
E30 Zone Newbie
Posts: 128
Joined: Thu Mar 11, 2021 4:21 pm

Fri Mar 04, 2022 10:13 am

BenHar wrote:
Thu Mar 03, 2022 6:08 pm
Those door cards look superb.

Ben
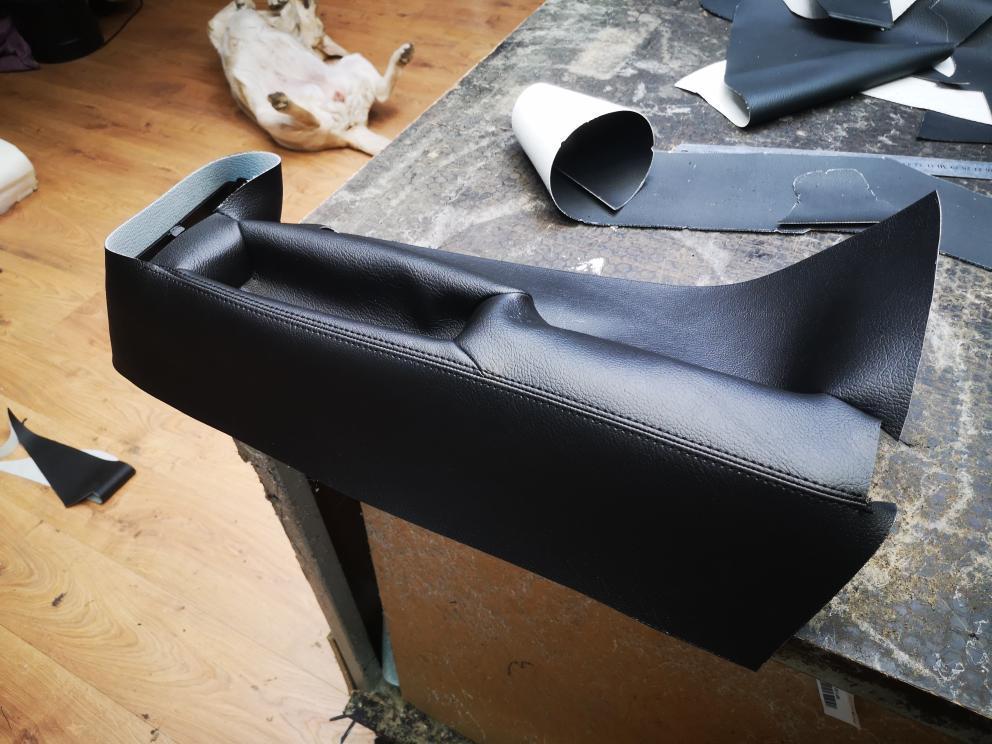
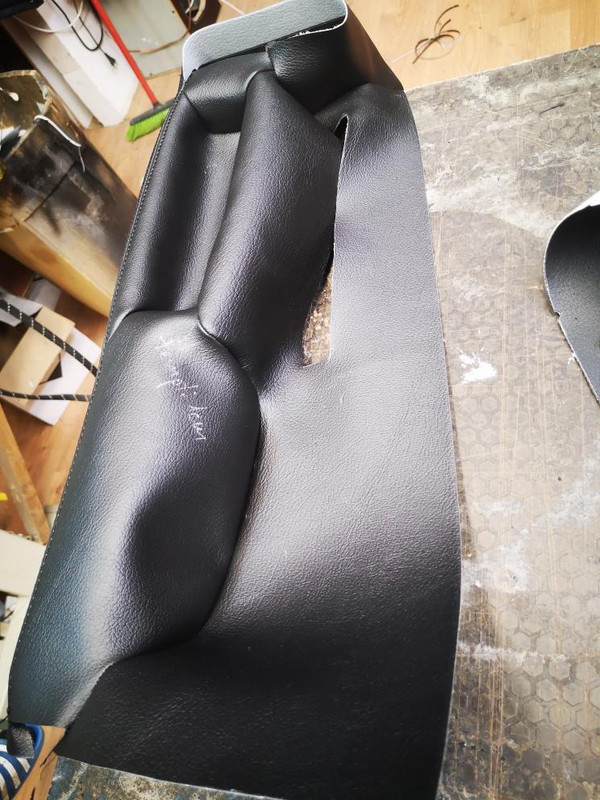
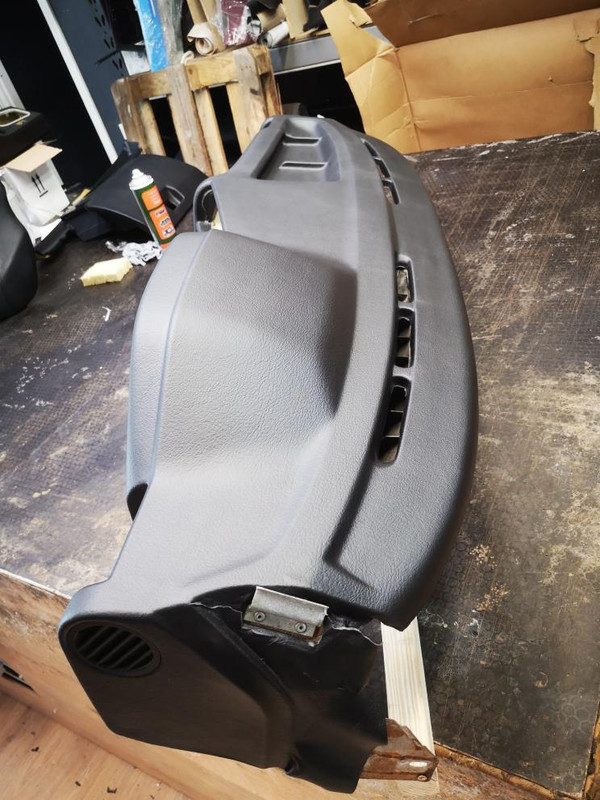
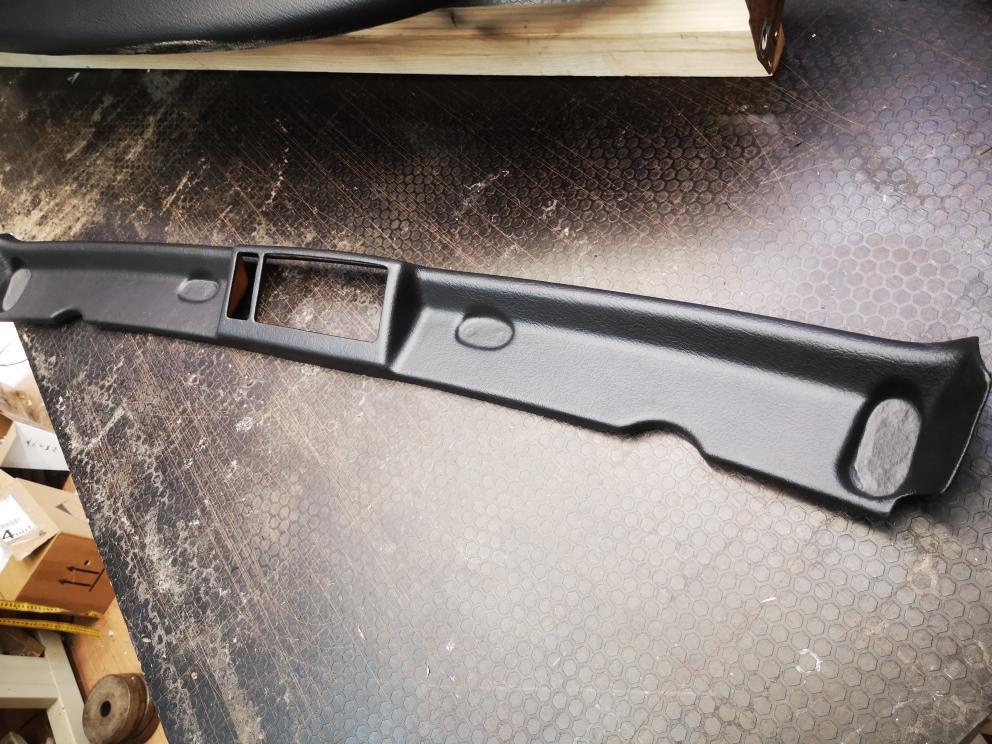
Yeah i think so too, The rears will be done the same, Seats in matching Nappa Leather. Dashboard, pillar trims, center console etc will all be done in the same type of vinyl but black, cant wait to get it back, have to try store it somewhere where it wont get marked.

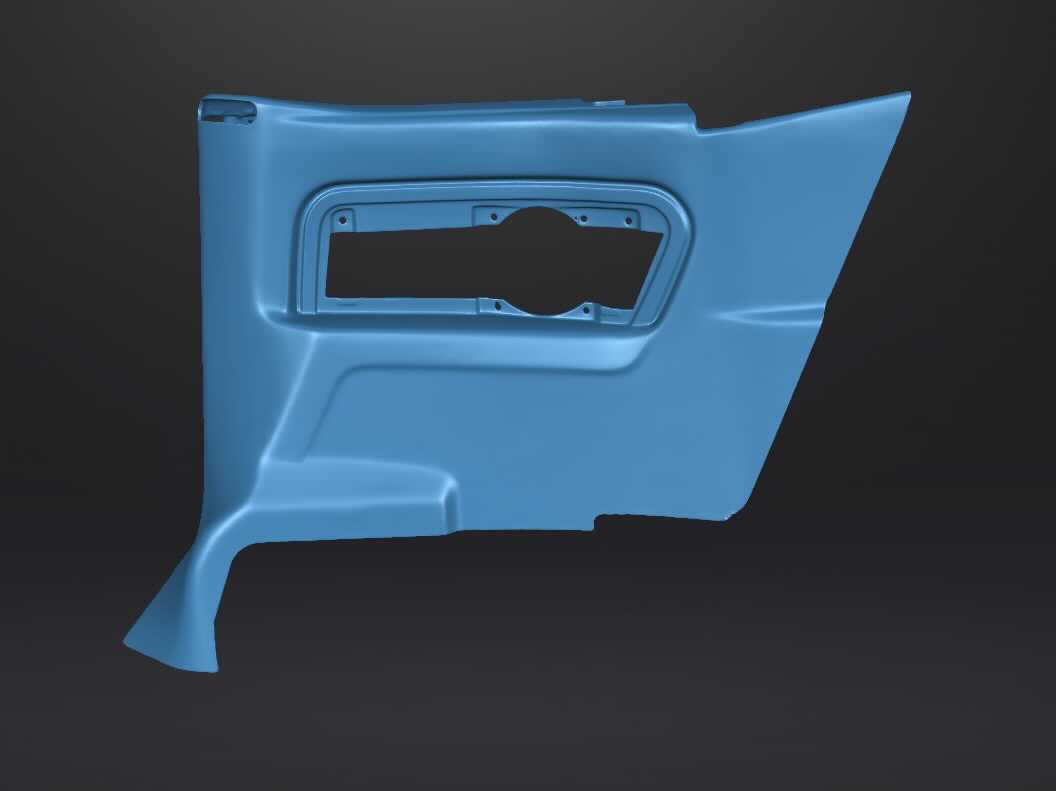
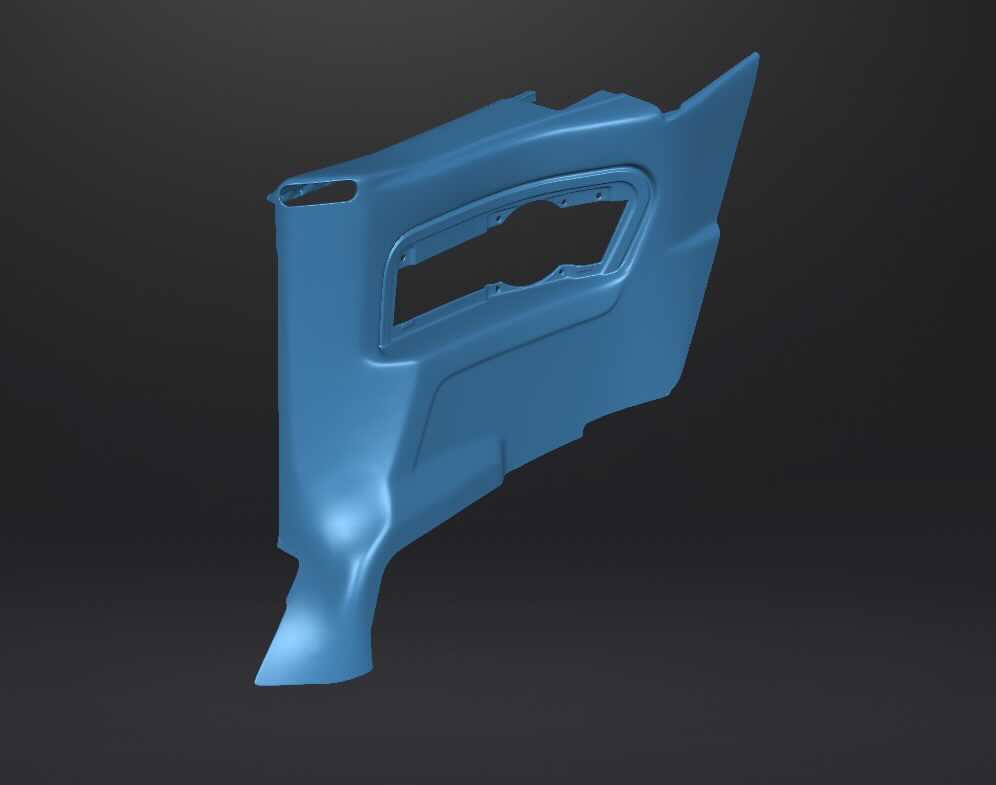
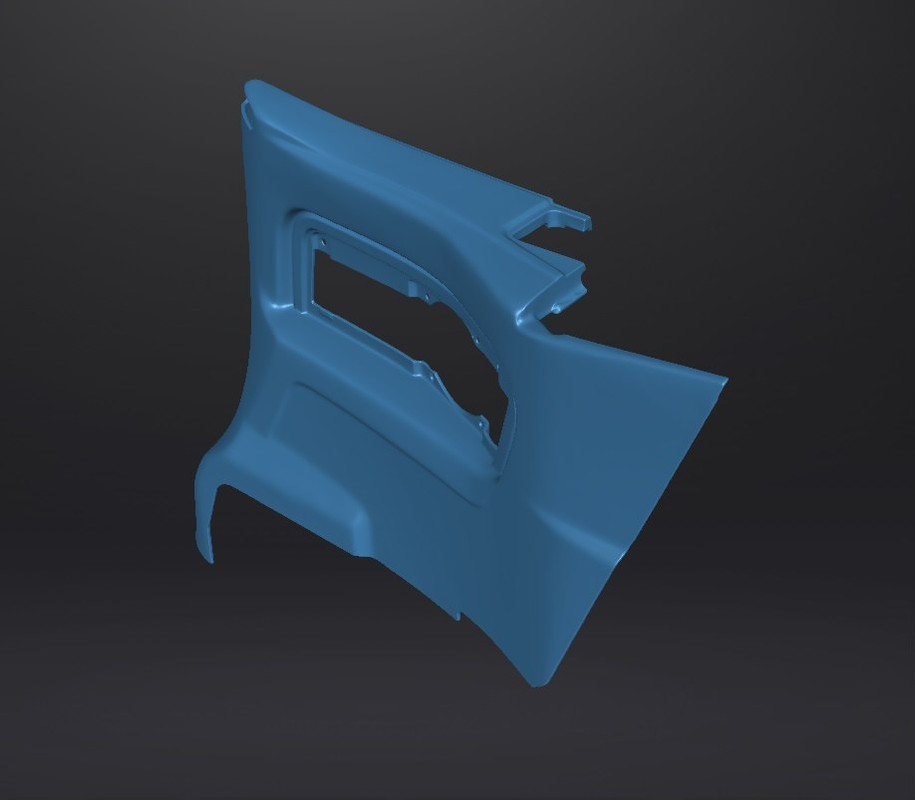
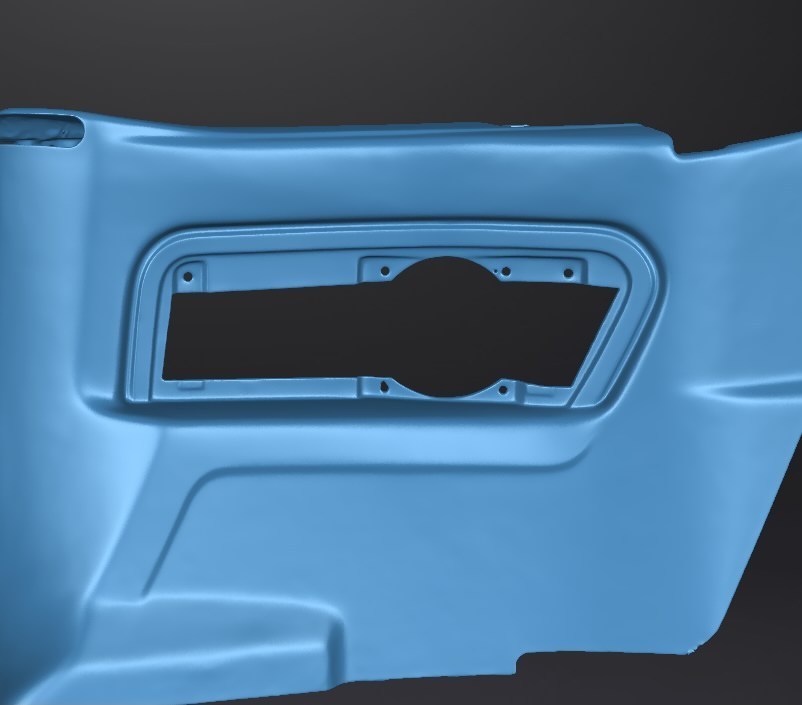
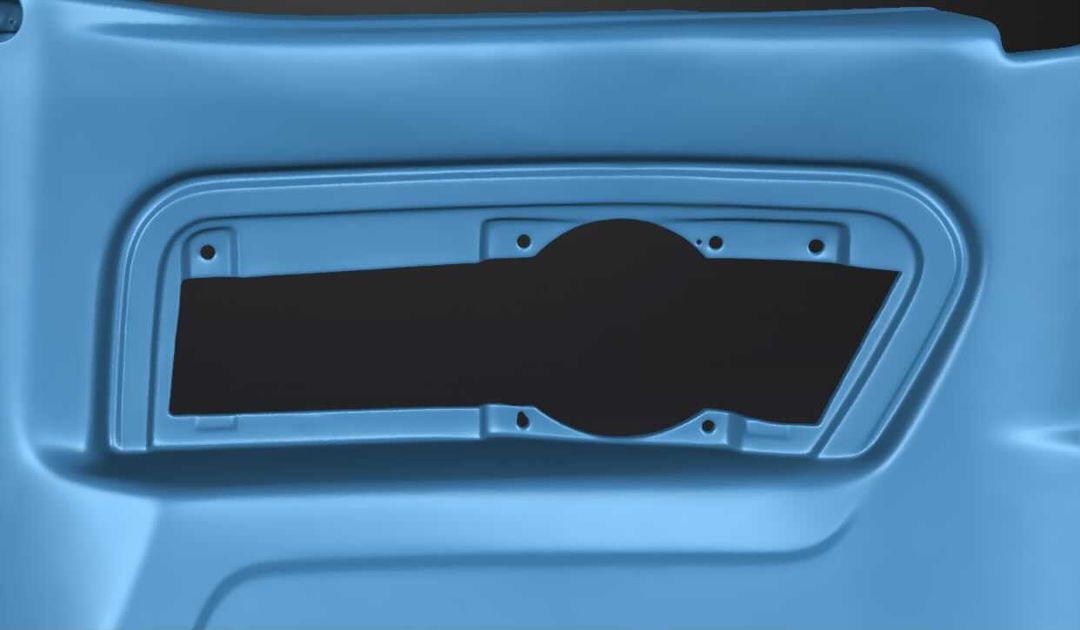
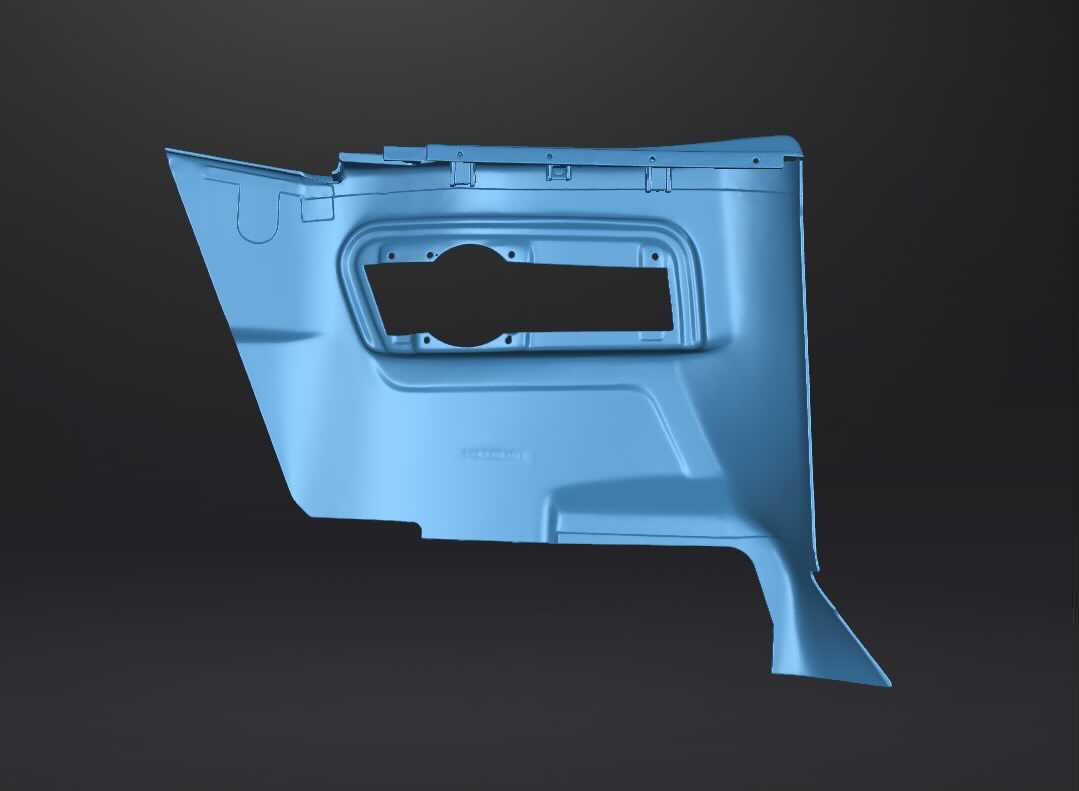
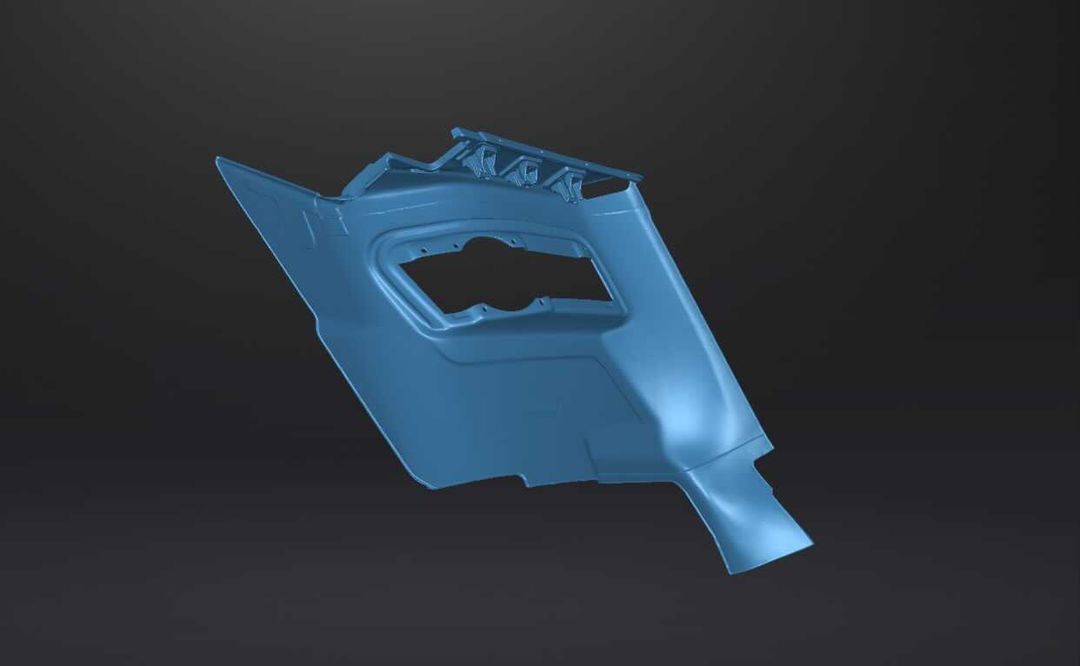
I also sent off one of my spare Rear Door Cards to be 3D scanned, so i can design and 3D Print some speaker grilles / covers, i hate the look of the OEM ones, going to make some nice ones with Mesh / Fabric Covers.
E30 M50B28 Turbo Cabriolet Restoration: Here
User avatar
martauto
E30 Zone Team Member
Posts: 6186
Joined: Wed Aug 31, 2005 11:00 pm
Location: leeds

Fri Mar 04, 2022 1:47 pm

BenHar wrote:
Thu Mar 03, 2022 6:08 pm
Those door cards look superb.

Ben
:clap: :clap: :clap: :clap: :clap: :clap: :clap: :clap: :clap: :clap:

Mart.
Only the E46 cab left now.
Just got too old.
User avatar
AlexD911
E30 Zone Newbie
E30 Zone Newbie
Posts: 128
Joined: Thu Mar 11, 2021 4:21 pm

Mon Mar 14, 2022 11:56 am

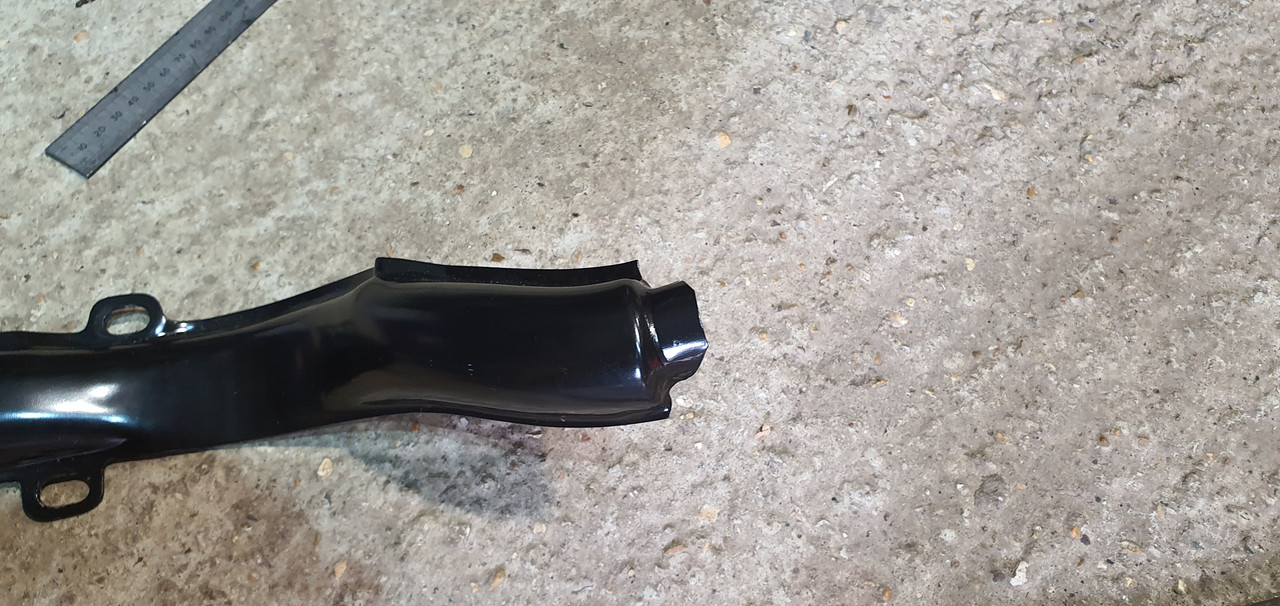
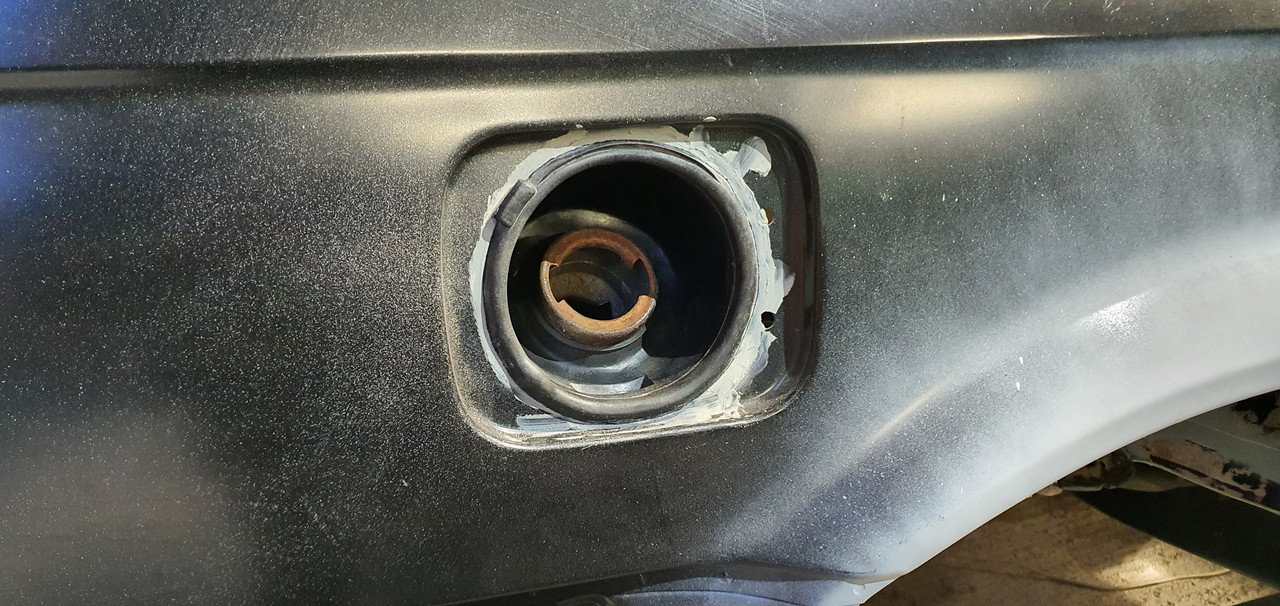
A bit more progress this weekend, unfortunately i forgot about replacing the fuel filler pipe bracket, which was rotten previously. i had to create a basic bracket for this.

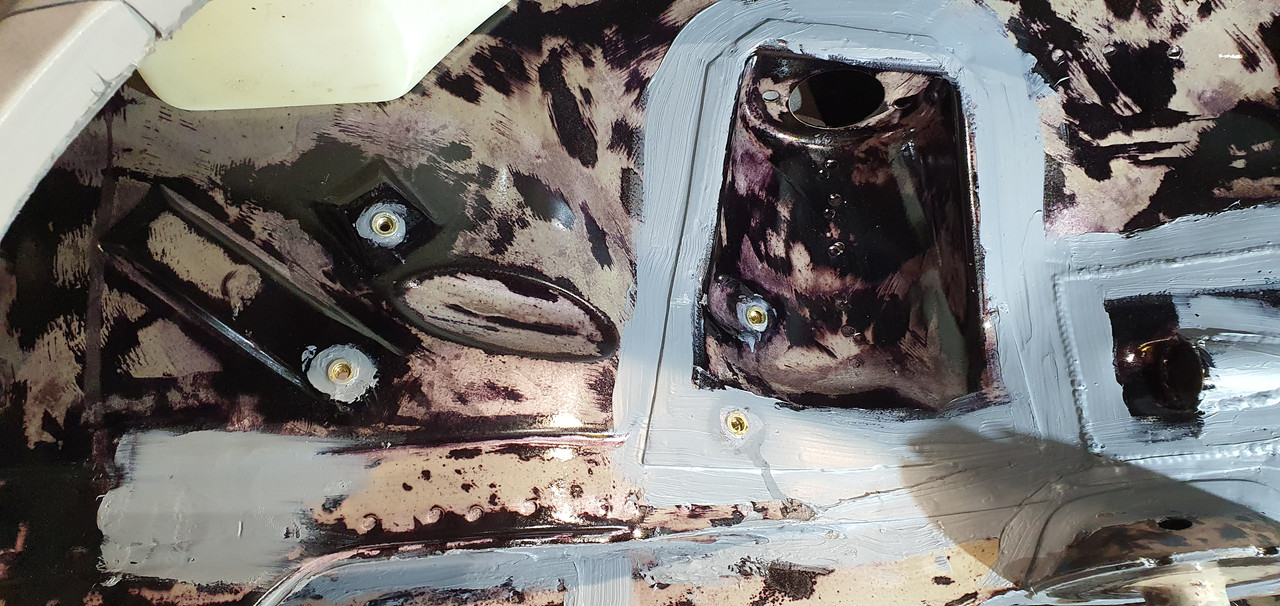
Whilst i was in there i also remembered that, most of the threaded studs which are used to hold the breather pipe cover were also gone, only one was remaining. I decided to Rivnut these instead of trying to put studs back in.

Image

I also added two extra ones where the cover meets the pipe that goes through the interior:

Image

I had to modify the cover plate to add two tabs to allow me to bolt down that end of the pipe (it didnt fit very well to be honest, its a genuine part and cost ~£95 but probably i didnt replace the pipe in the exact same location it came from).

Before:

Image

Modified and everything mock fitted:

Image

Image

I also prepped the front wheel arches and engine bay for painting in RC900 this weekend, no interesting pics of that unfortunately.

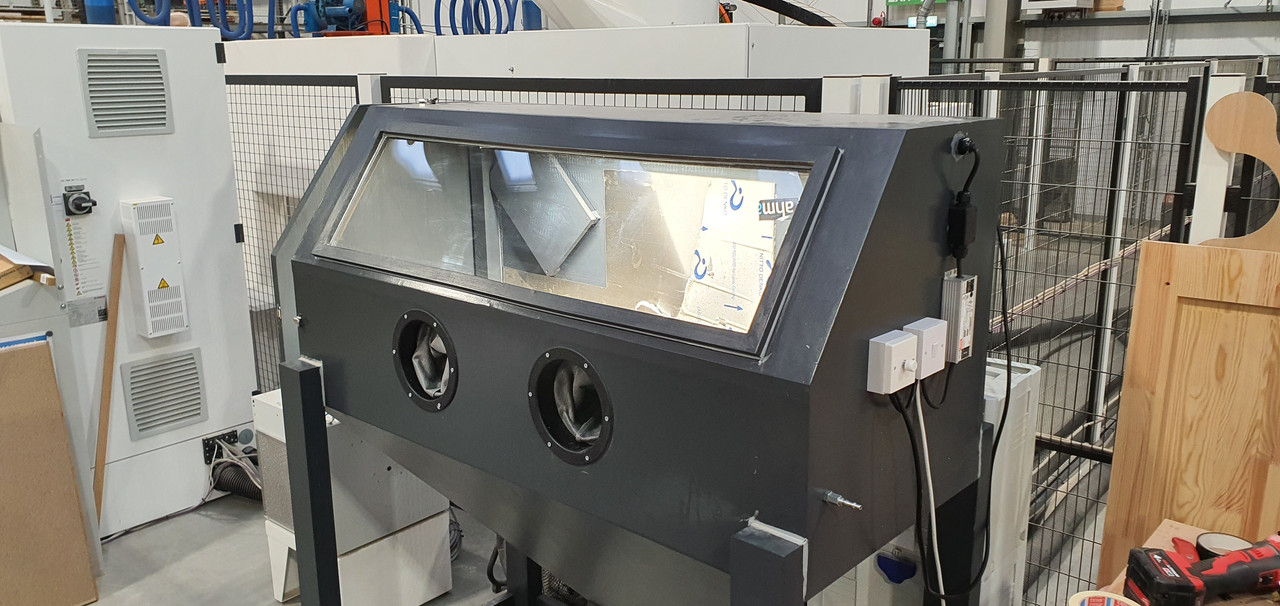
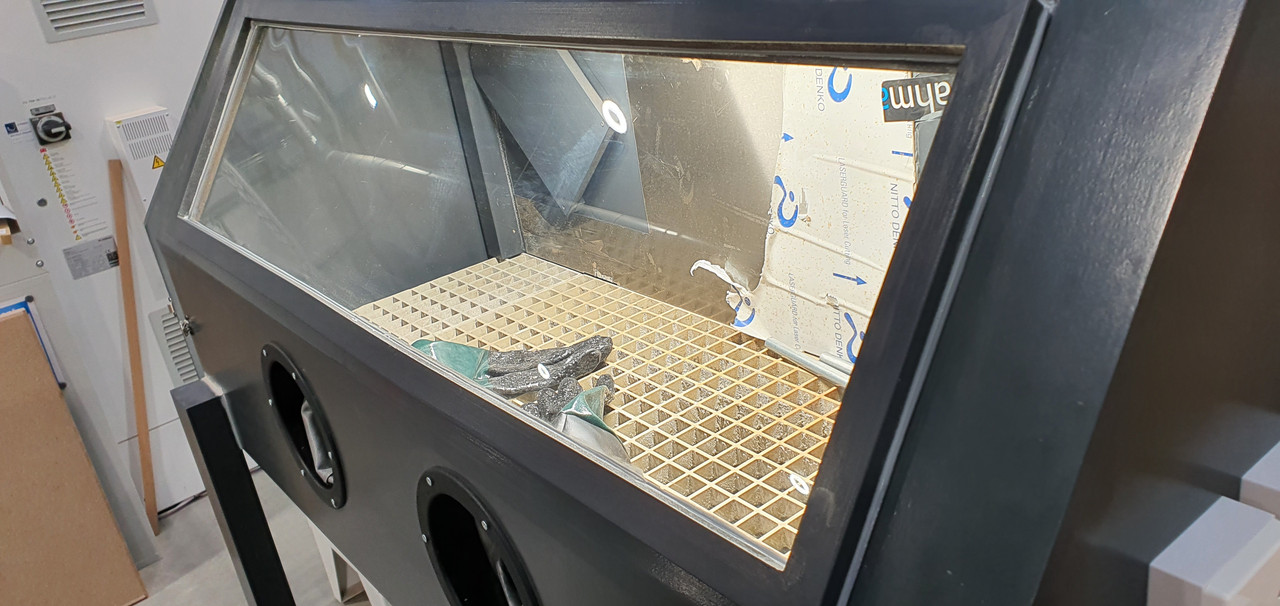
Im also building a 1500 x 600 x 600 shot blasting cabinet so that i can shotblast the subframes, rear arms etc. i should hopefully have that finished by the weekend.

Image

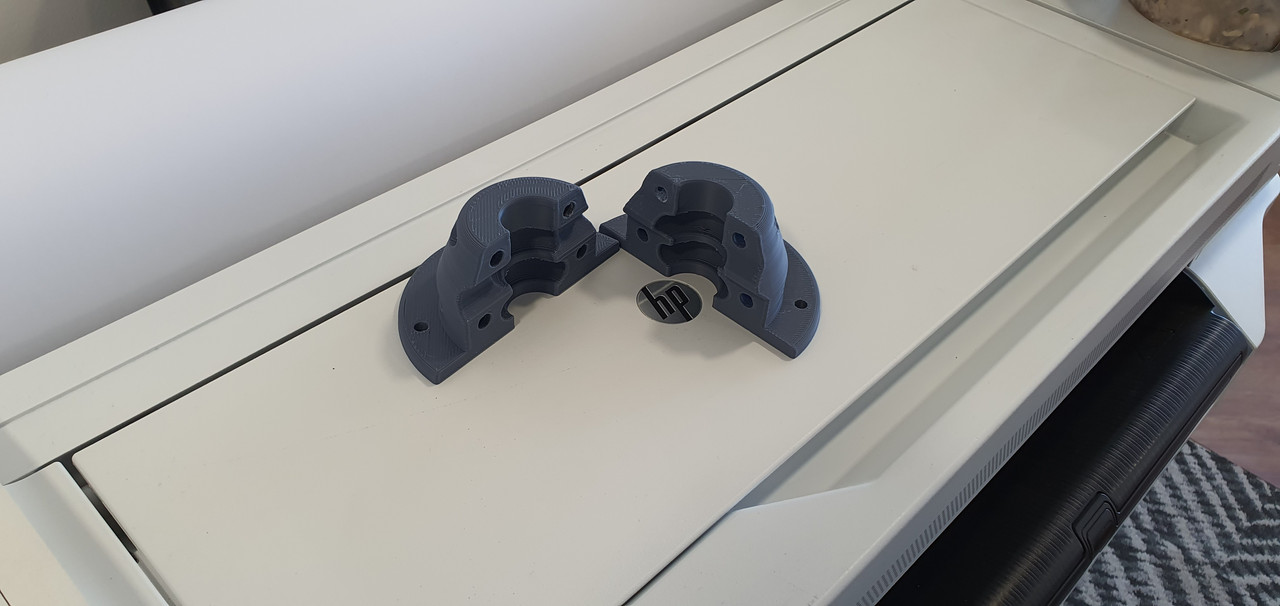
Im also working on a 3D Printed Loom Grommet that can be clamped round the existing loom and bolted to the bulkhead, ill get some pictures of that once its a bit further along.

Alex
E30 M50B28 Turbo Cabriolet Restoration: Here
User avatar
AlexD911
E30 Zone Newbie
E30 Zone Newbie
Posts: 128
Joined: Thu Mar 11, 2021 4:21 pm

Tue Mar 15, 2022 10:01 am

Some pictures of the 3D Scan of my Rear Door Card, i can now design a Speaker / Grille Cover that will fit the look of the interior better, hoping to use traditional Black Speaker Mesh or a Nice Fabric Cover - still undecided atm, i will probably do some 3D Renders.

Image

Image

Image

Image

Image

Image

Image

I think the scan came out really well, hopefully get the files sometime this week, i will make the files available too. The company is called Laminar Solutions, it cost ~£70 for the scan which is small price to pay in my opinion for being able to accurately model off an object without having to try take measurements of an organic shape.

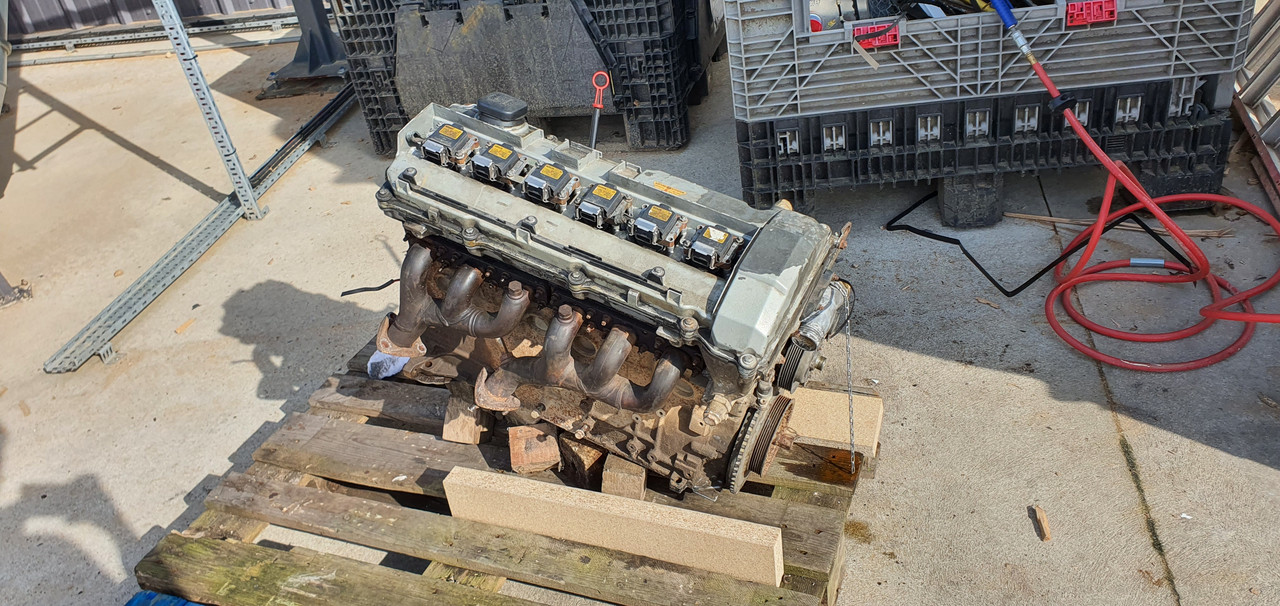
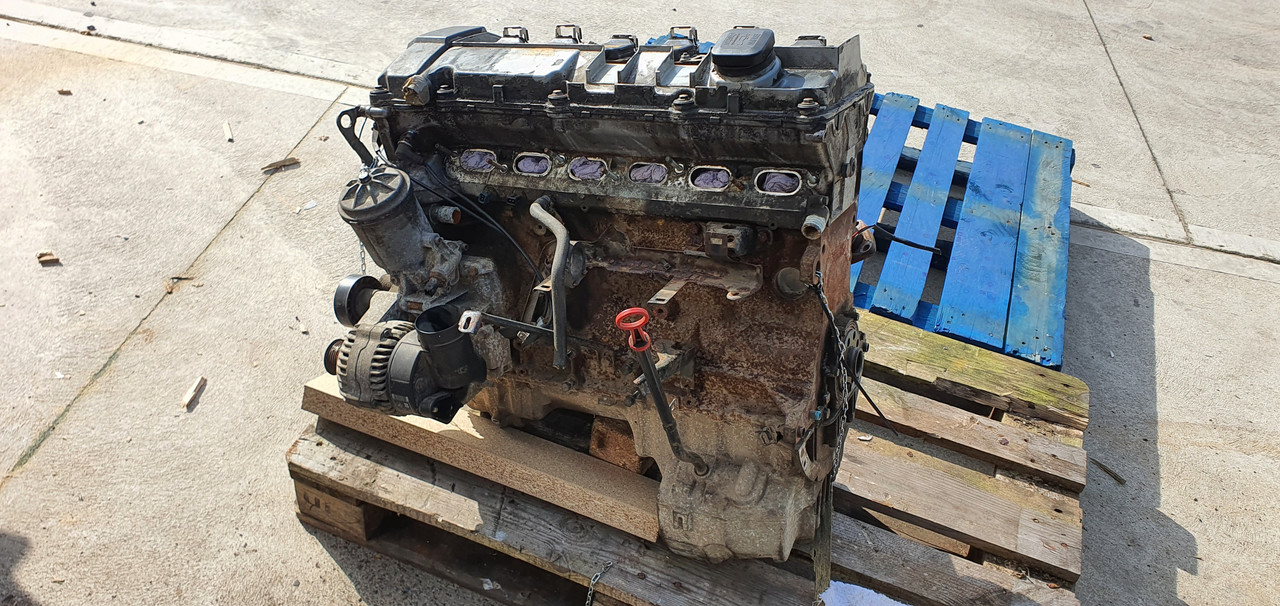
I also managed to find a M50B25 Non-Vanos engine for my build. Previously i had one organised, i drove 3.5 Hours only to get there and find out the guy had an M60 sat there waiting for me? So 7 hours of driving wasted but at least now i finally have one coming which should be here today. Pics to follow.

Alex
E30 M50B28 Turbo Cabriolet Restoration: Here
User avatar
AlexD911
E30 Zone Newbie
E30 Zone Newbie
Posts: 128
Joined: Thu Mar 11, 2021 4:21 pm

Tue Mar 15, 2022 3:27 pm

Engine Arrived. Going to steam wash it off and then put it away until i start piecing together the internals for it.

Image

Image

More Interior Progress Pics

Image

Image

Image

Here is my idea of the Body Loom Grommet, it can be bolted around the existing loom, with 4 Seals inside, and then bolted to the bulkhead after. Need to do a prototype and go from there.

Image

Alex
E30 M50B28 Turbo Cabriolet Restoration: Here
User avatar
spannerrash
E30 Zone Newbie
E30 Zone Newbie
Posts: 203
Joined: Tue Feb 04, 2014 11:00 pm
Contact:

Tue Mar 15, 2022 10:19 pm

Amazing work, that's going to be one hell of a car, I'll be following along with your progress and taking notes for my own. 8)
Be30
E30 Zone Regular
E30 Zone Regular
Posts: 252
Joined: Fri May 03, 2019 5:31 pm

Wed Mar 16, 2022 4:16 pm

Wow those scans are incredible, they must have some pretty wicked equipment.
Sweet build too!
Keen to see how the loom grommet comes out
User avatar
martauto
E30 Zone Team Member
Posts: 6186
Joined: Wed Aug 31, 2005 11:00 pm
Location: leeds

Wed Mar 16, 2022 4:46 pm

Be30 wrote:
Wed Mar 16, 2022 4:16 pm
Wow those scans are incredible, they must have some pretty wicked equipment.
Sweet build too!
Keen to see how the loom grommet comes out
Same from me as well.
Are they scanned with optics ?

Mart.
Only the E46 cab left now.
Just got too old.
User avatar
AlexD911
E30 Zone Newbie
E30 Zone Newbie
Posts: 128
Joined: Thu Mar 11, 2021 4:21 pm

Thu Mar 17, 2022 12:06 am

Pretty sure they are using an EinScan HX which are like £12k+. 0.04mm accuracy
E30 M50B28 Turbo Cabriolet Restoration: Here
User avatar
AlexD911
E30 Zone Newbie
E30 Zone Newbie
Posts: 128
Joined: Thu Mar 11, 2021 4:21 pm

Thu Apr 07, 2022 4:09 pm

Small Update, been spending what little time i have after work getting the shotblasting cabinet finished, its 95% there now. Decent volume chamber so i can crack on with painting all of the suspension & subframe components, i can even fit a fuel tank in here if i want.

Image

Image

Prototype Grommet came out ok, i actually made it much smaller than originally planned, looks like its going to work perfectly fine and fit in the location nicely.

Image

Image

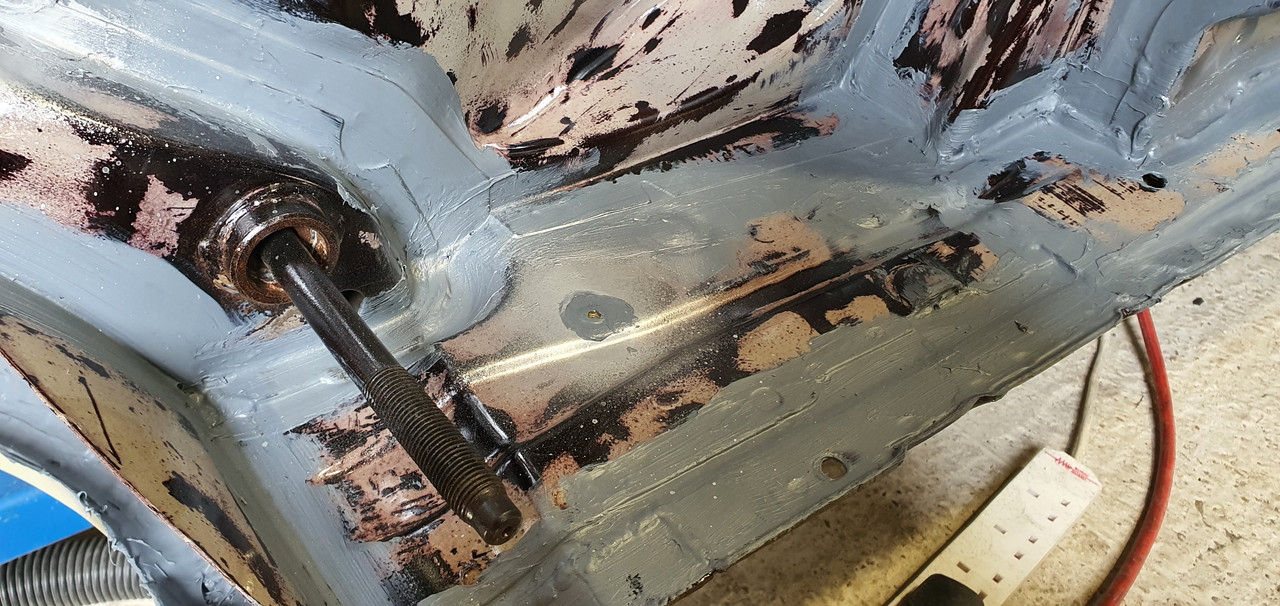
Finished welding, prepping the engine bay and front arches, then a few coats of RC900 totally finishes the underside of the car, i also prepped what was left of rust in the interior and RC900'd all of that as well. I also did in all the cavities related to the car being a cabrio and as much of the chassis internally as possible. This should hopefully put a stopper in any other surface rust that was out of sight, all these cavities will of course have Dinitrol Cavity Wax applied as well further aiding rust prevention.

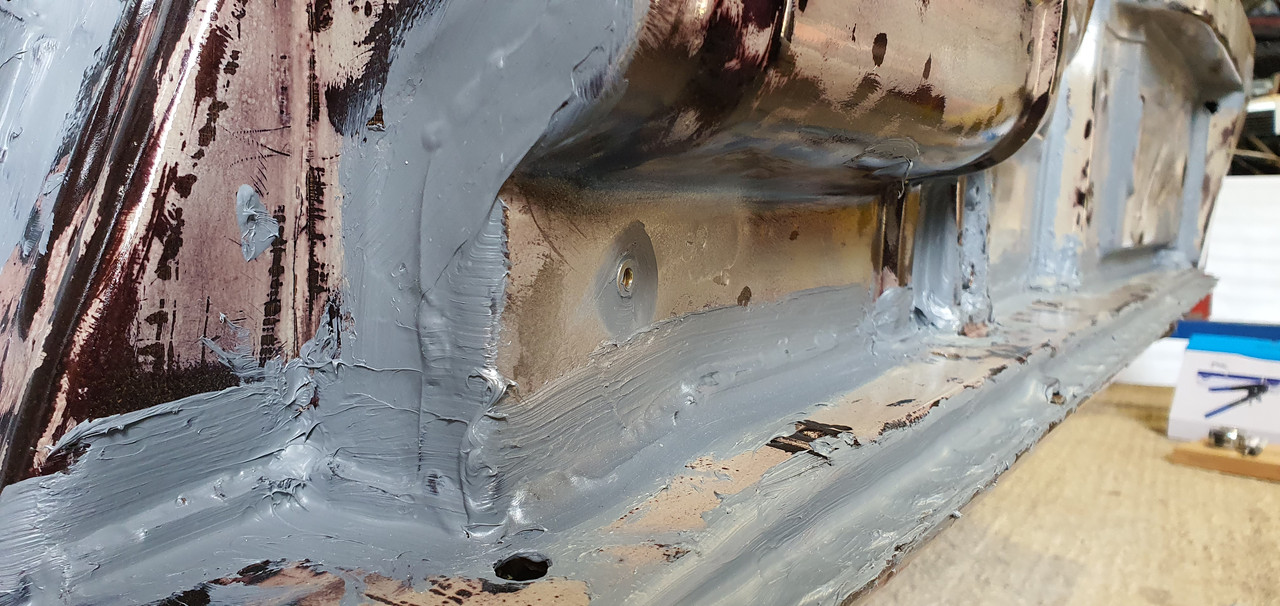
Finished Seam sealing as well, engine bay is complete - i just need to seam seal a few areas in the interior, inside the inner rear quarter panels and in the boot. I've probably gone through 6 or 7 tins of seam sealer but the car is fully sealed, more so than factory.

Image

I'm now prepping to get the car undersealed, im just wracking my brains and trying to think of anything else that should be done before that. Once i have the car undersealed im going to probably try and run fuel & brake lines.

Once thats done, im going to blast & paint the entire suspension assemblies, get it on and try to get it back on the floor. Im hoping i should be able to move fairly quickly now, most of the tedious work is done (in theory) now i just need to spend a bunch of money on new parts and get it back together.

Couple more interior pics, he now has the leather to do the seats so its nearing completion:

Image

Image

Image

Image

Alex
E30 M50B28 Turbo Cabriolet Restoration: Here
User avatar
ah
E30 Zone Addict
E30 Zone Addict
Posts: 2518
Joined: Mon Mar 10, 2008 11:00 pm
Location: surrey

Thu Apr 07, 2022 9:48 pm

One word EPIC ! I can’t wait to to see the finish car.
Image
Born on the 23 April 1990 320i Alpinweiss ll kabriolett! (SOLD BUT NOT FORGOTTEN !) :cry:
User avatar
AlexD911
E30 Zone Newbie
E30 Zone Newbie
Posts: 128
Joined: Thu Mar 11, 2021 4:21 pm

Fri Apr 08, 2022 1:11 pm

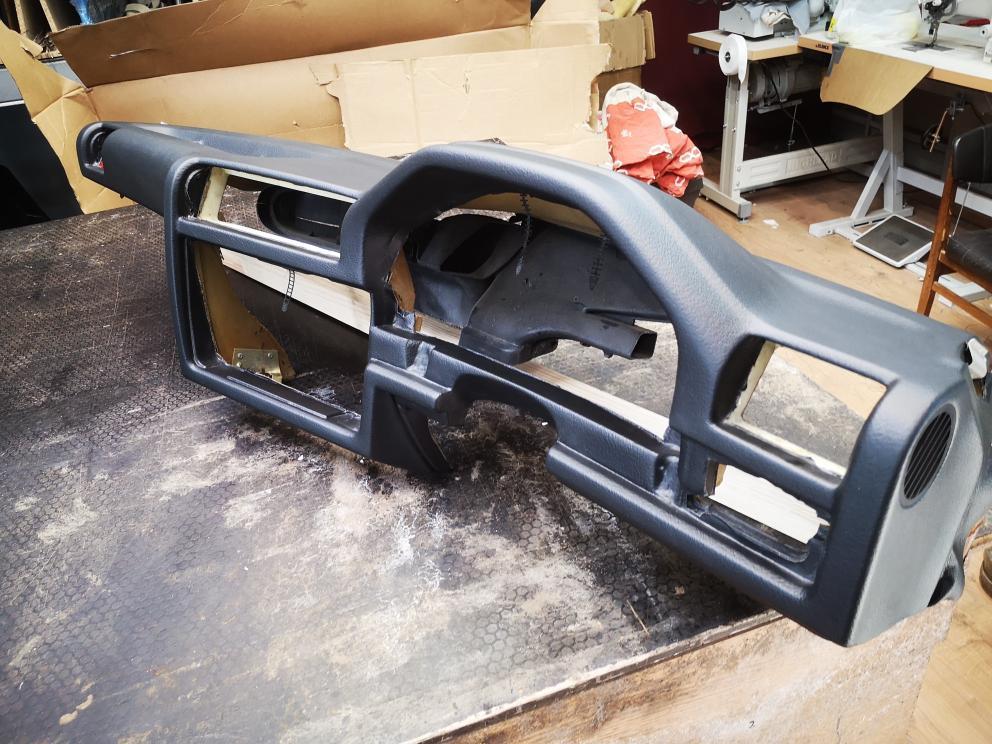
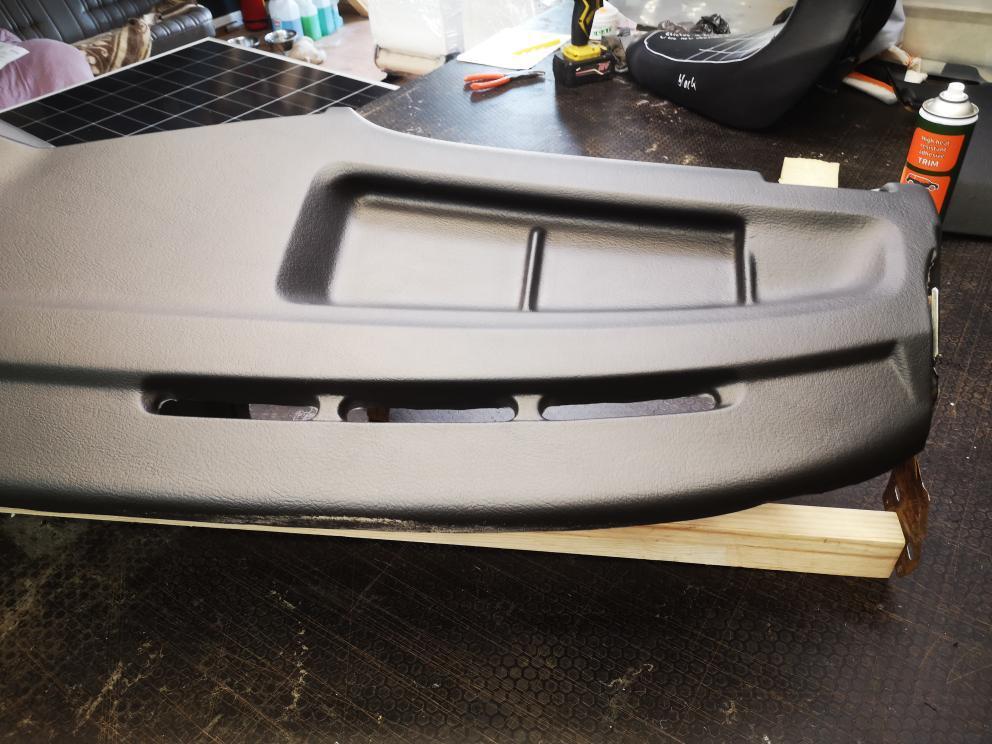
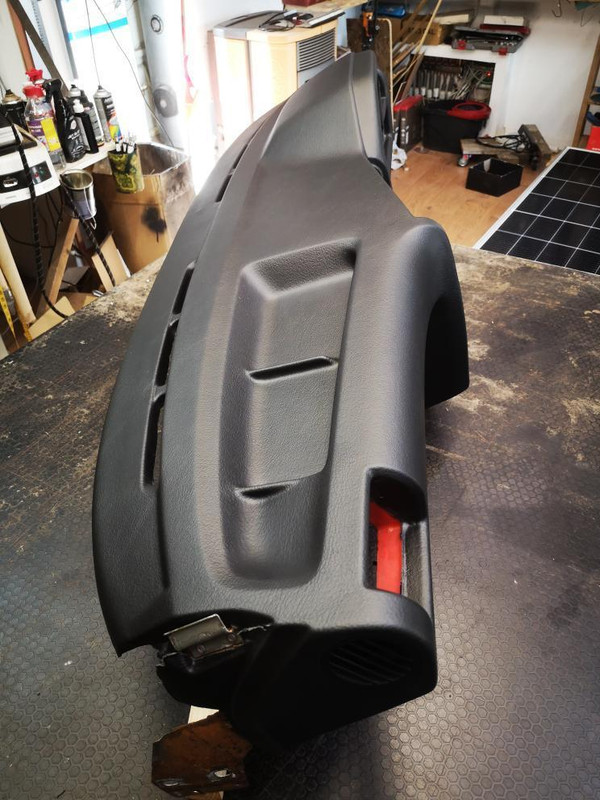
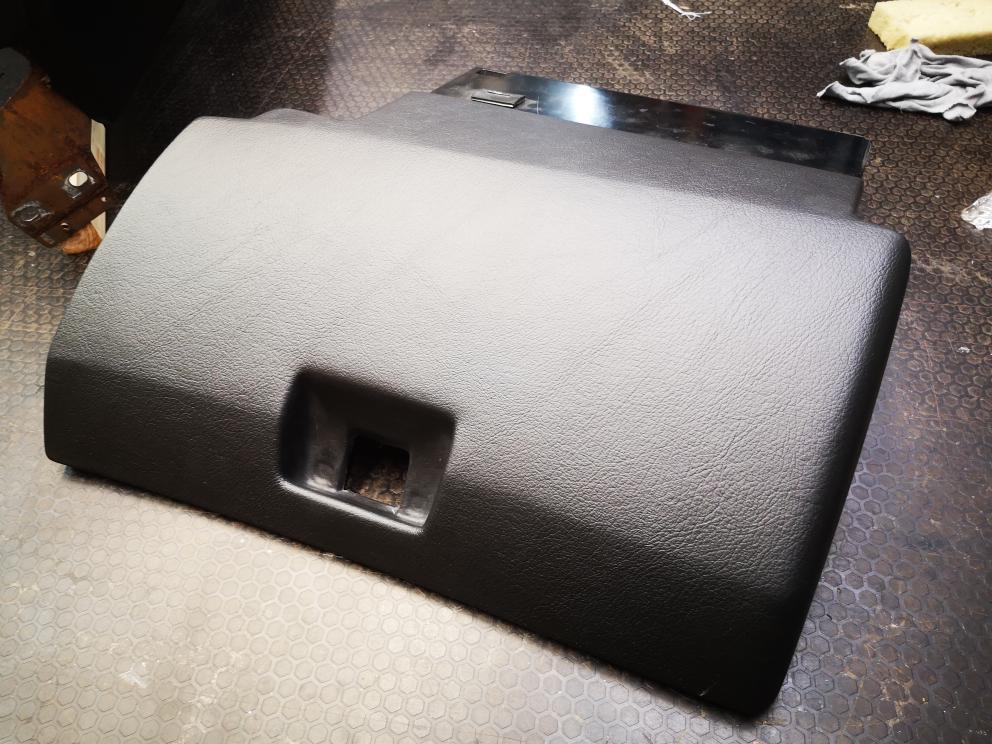
Few more interior pics, my dash was not cracked but the material was faded, worn.

Image

Image

Image

Image

Image

Image

Alex
E30 M50B28 Turbo Cabriolet Restoration: Here
User avatar
martauto
E30 Zone Team Member
Posts: 6186
Joined: Wed Aug 31, 2005 11:00 pm
Location: leeds

Fri Apr 08, 2022 1:56 pm

ah wrote:
Thu Apr 07, 2022 9:48 pm
One word EPIC ! I can’t wait to to see the finish car.
That goes for me as well :clap: :clap: :clap: :clap:

Mart.
Only the E46 cab left now.
Just got too old.
User avatar
AlexD911
E30 Zone Newbie
E30 Zone Newbie
Posts: 128
Joined: Thu Mar 11, 2021 4:21 pm

Wed Apr 13, 2022 12:53 pm

I've ordered all of my poly bushes, and reinforcement kits for the Rear Trailing Arms, Front Subframe & Rear Subframe. I've cleared my to do list now so hopefully i can put some serious time back into the car. Had to spend my free time on my M5 recently, getting it pristine as its now up for sale. Spent a lot of time detailing it and making sure it was perfect. Thought i'd put some pictures here of it.

Image

Image

Image

Image

Image

Image

Thanks

Alex
E30 M50B28 Turbo Cabriolet Restoration: Here
User avatar
AlexD911
E30 Zone Newbie
E30 Zone Newbie
Posts: 128
Joined: Thu Mar 11, 2021 4:21 pm

Thu Apr 14, 2022 9:28 am

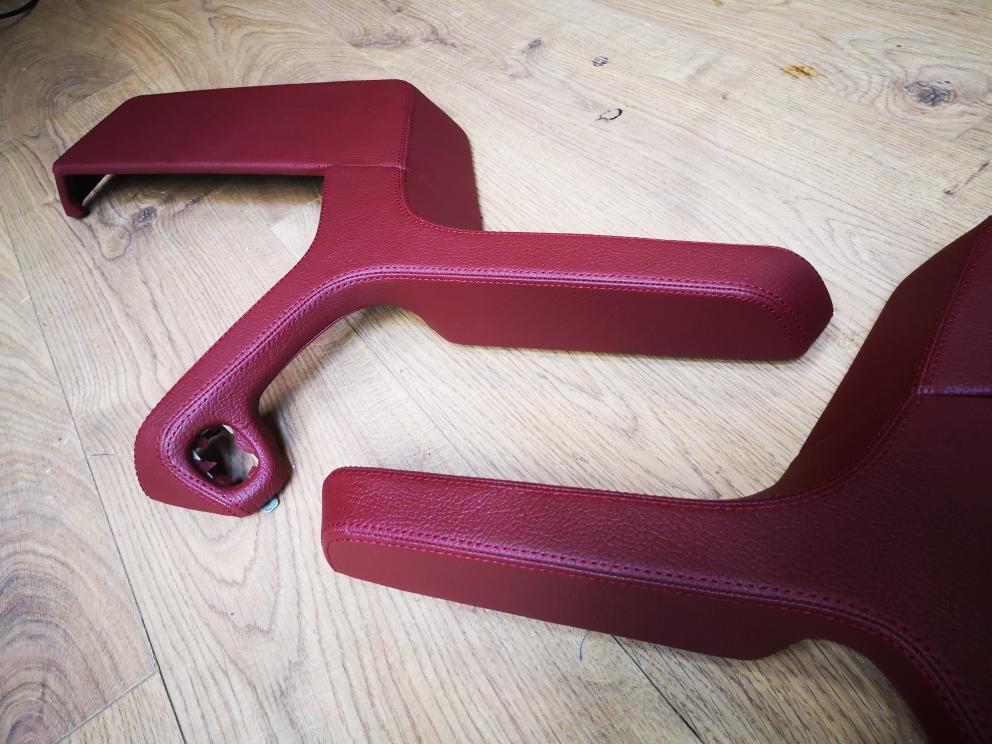
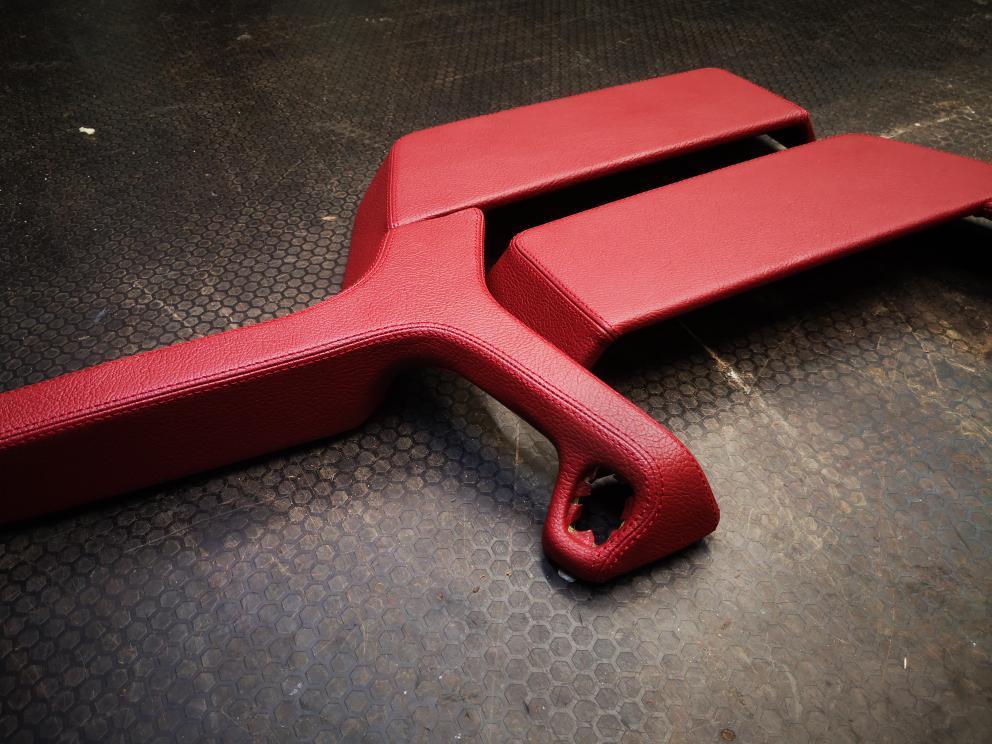
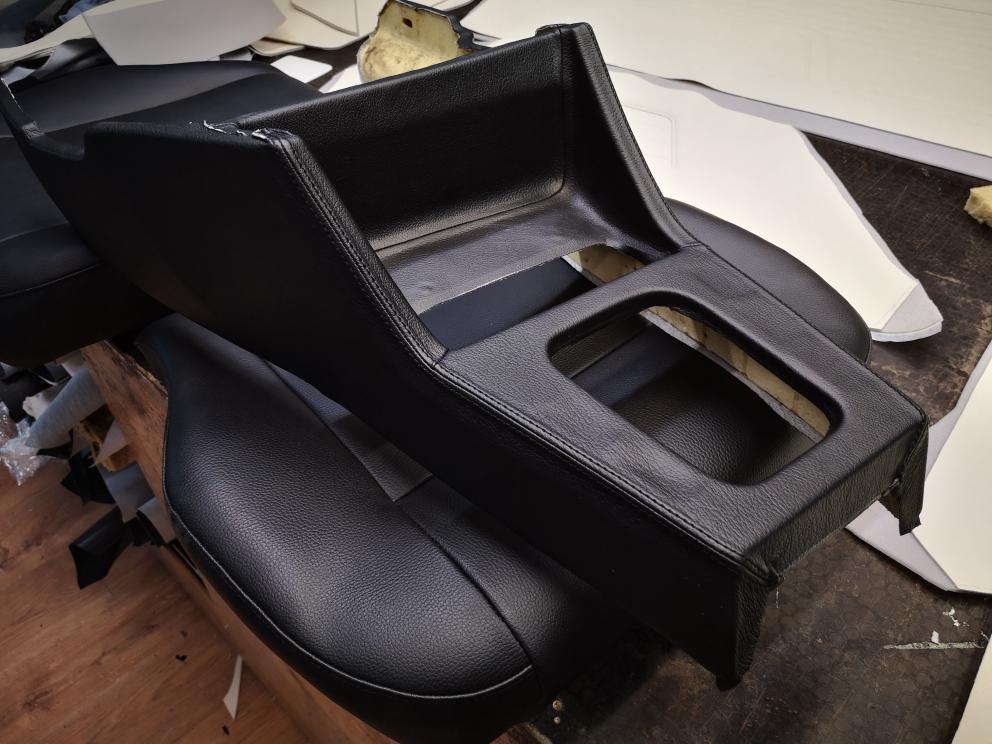
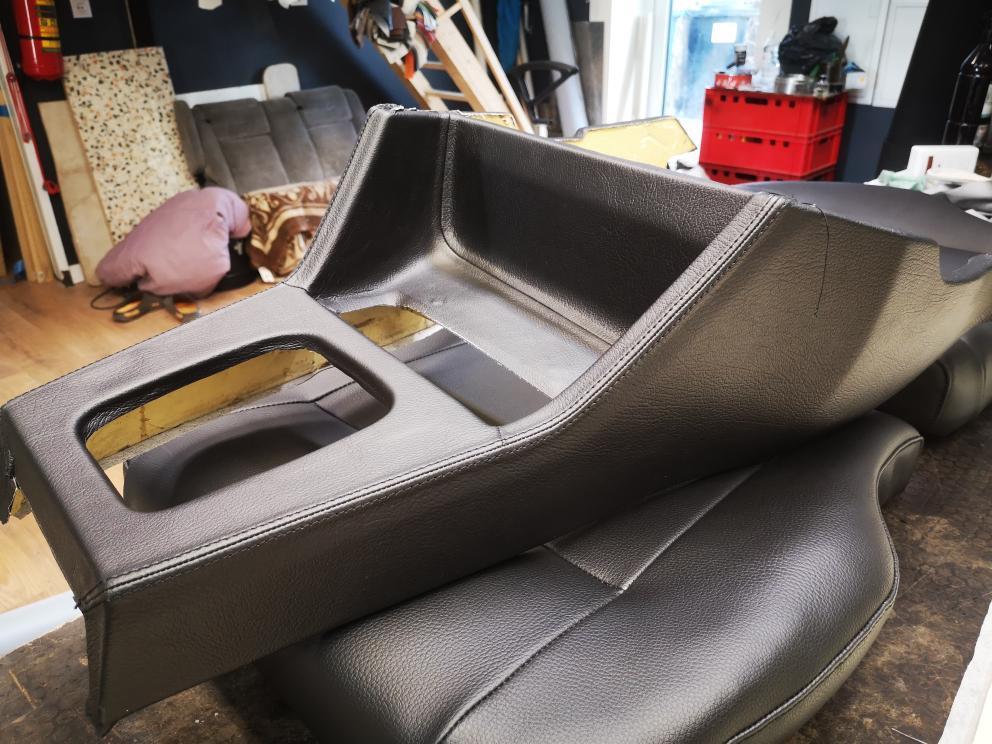
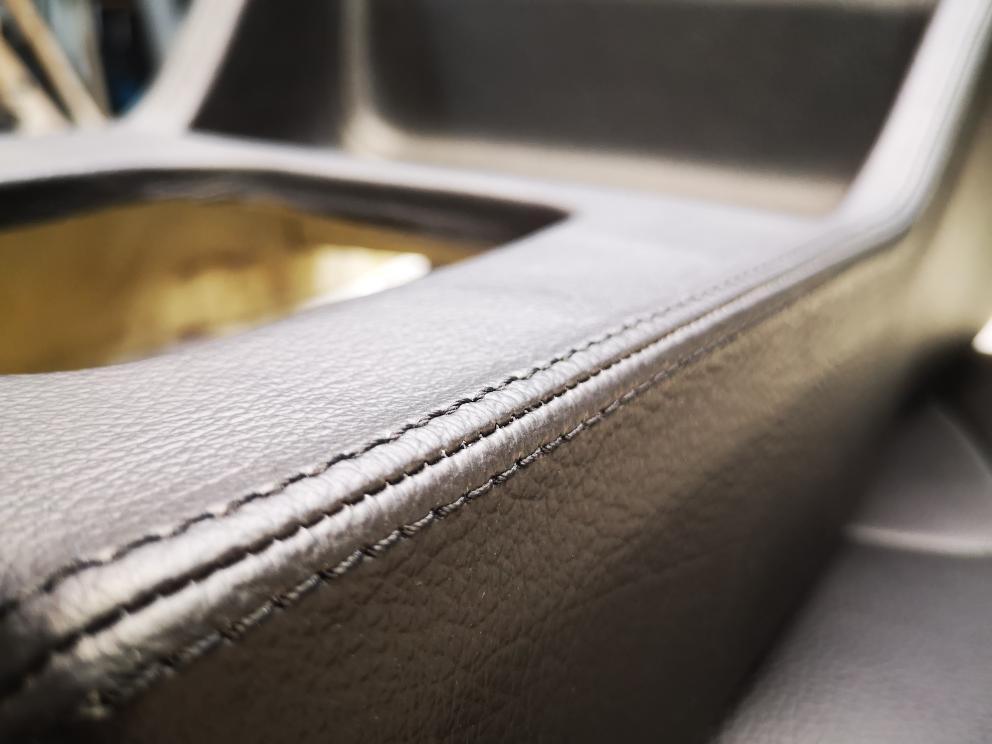
Couple more interior pics (im really happy he is sending me so many).

Image

Image

Image

Image

Hopefully he starts the seats next.

He's also been able to template the centre console pieces i asked him to do so he will be adding those to his DIY Kits he sells on ebay.

Thanks

Alex
Last edited by AlexD911 on Tue Apr 26, 2022 3:31 pm, edited 1 time in total.
E30 M50B28 Turbo Cabriolet Restoration: Here
User avatar
martauto
E30 Zone Team Member
Posts: 6186
Joined: Wed Aug 31, 2005 11:00 pm
Location: leeds

Thu Apr 14, 2022 4:56 pm

HELL thats sooooooooooooooooooooo cool :wan: :wan:
Who said skill has gone ?????

Mart.
Only the E46 cab left now.
Just got too old.
User avatar
aimlessrock
E30 Zone Squatter
E30 Zone Squatter
Posts: 1821
Joined: Sun Dec 06, 2009 11:00 pm
Location: Manchester

Thu Apr 14, 2022 8:09 pm

this is pure porn.
E30 320i Convertible (1989)
190 Mercedes (1988)

"there is nothing more expensive than a cheap E30"
User avatar
AlexD911
E30 Zone Newbie
E30 Zone Newbie
Posts: 128
Joined: Thu Mar 11, 2021 4:21 pm

Tue Apr 26, 2022 3:58 pm

So a bit more progress.

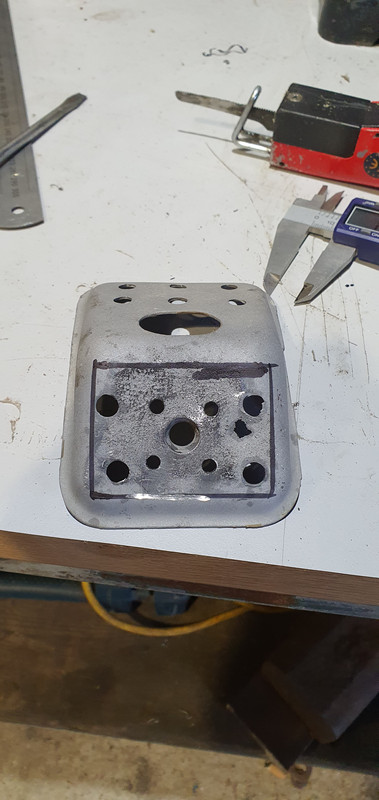
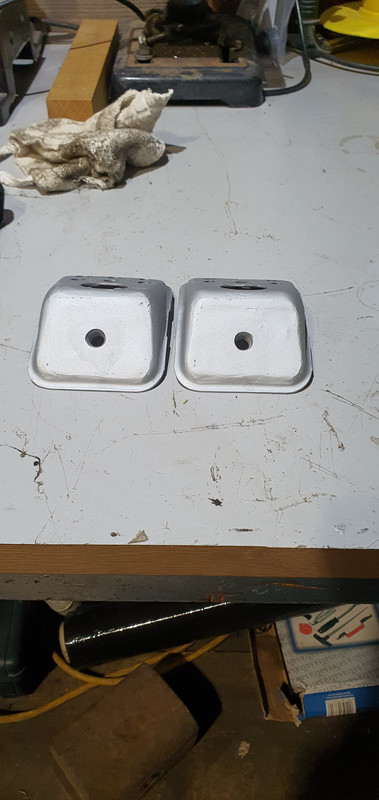
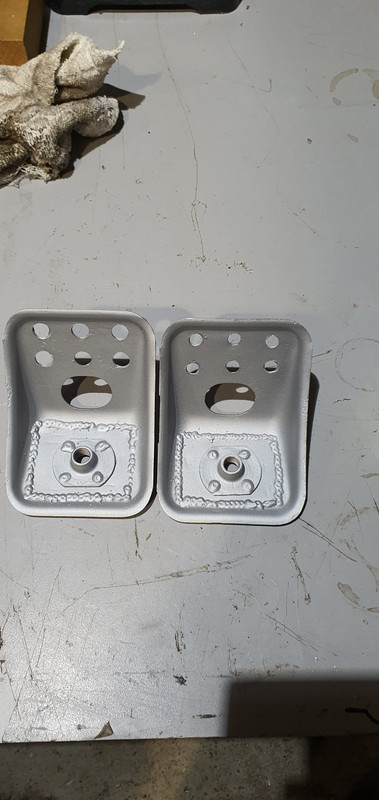
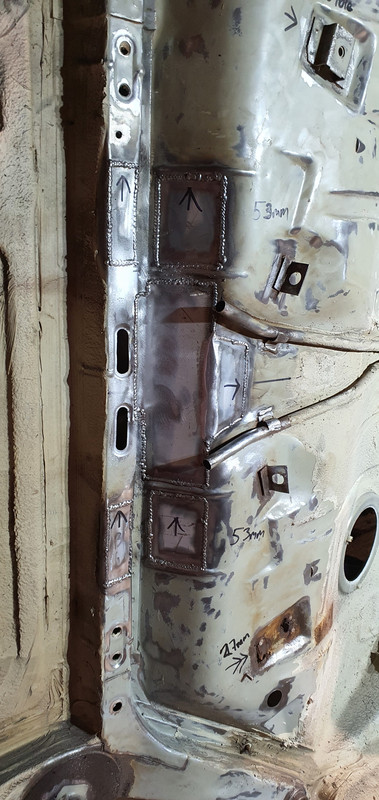
I started looking into PTFE Braided Fuel and brake lines, i decided it was going to be difficult to accommodate these using the OEM Line Mounts, also the Self Tapping studs in the body were half rotten, so i decided to grind these flat and replace them with M4 Rivet Nuts. Ill draw up some bespoke mounts in Solidworks to 3D Print once i know the diameter of the lines and it will be easy to fix them to the body this way:

Image

Image

Image

I also re-fitted the Drain plugs under the front seats:

Image

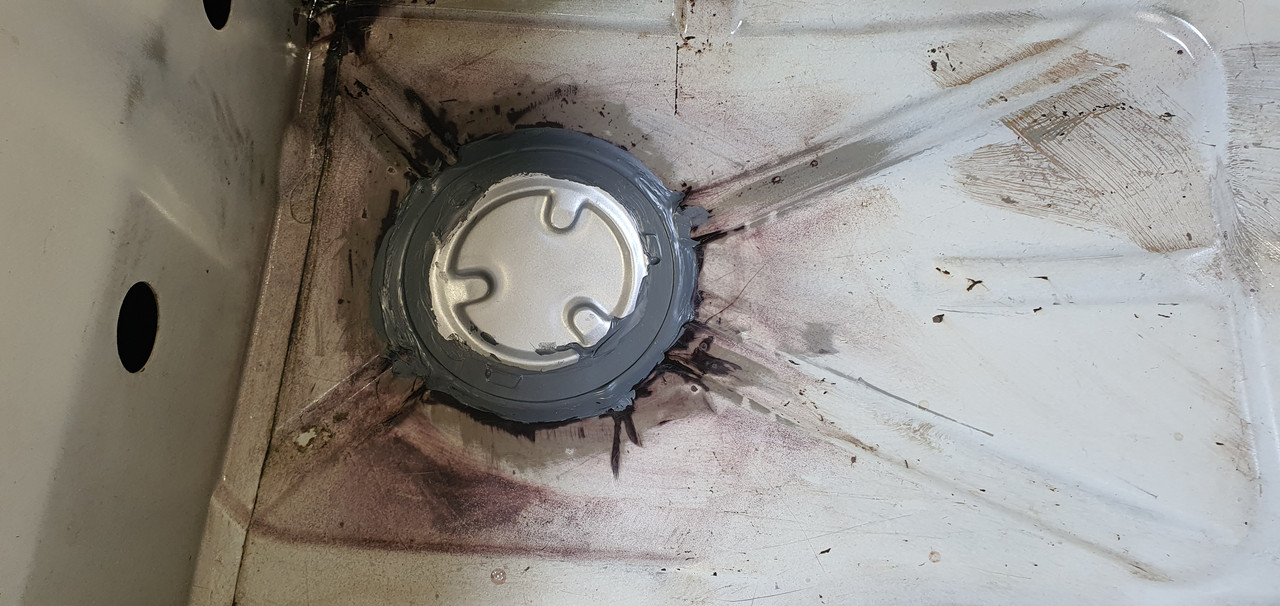
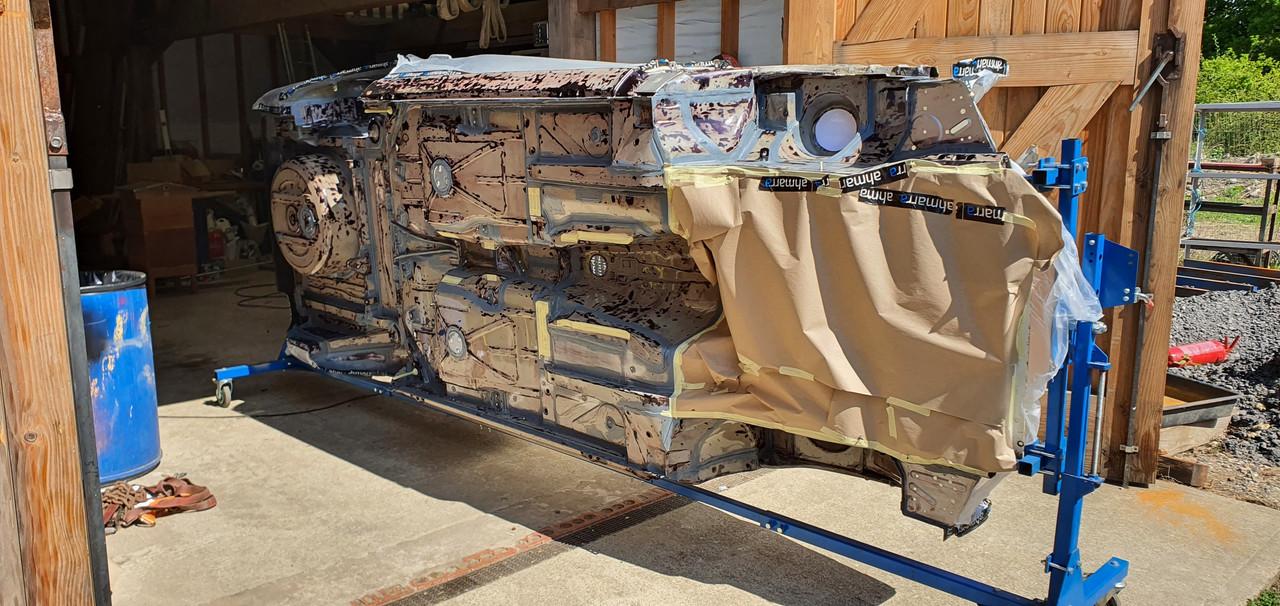
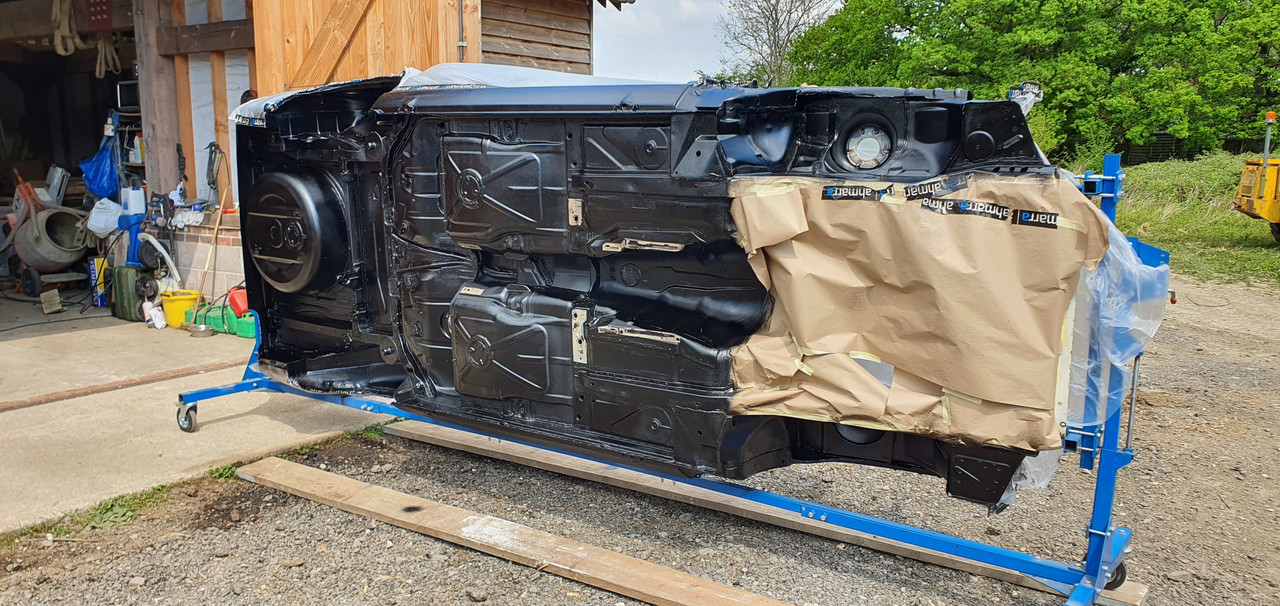
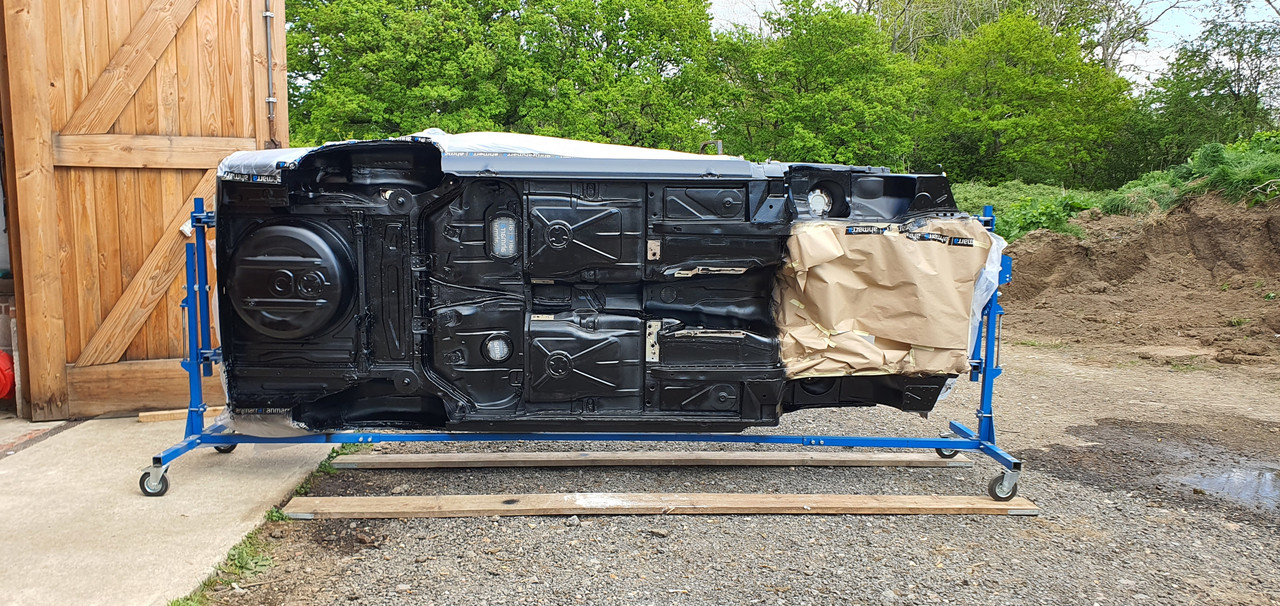
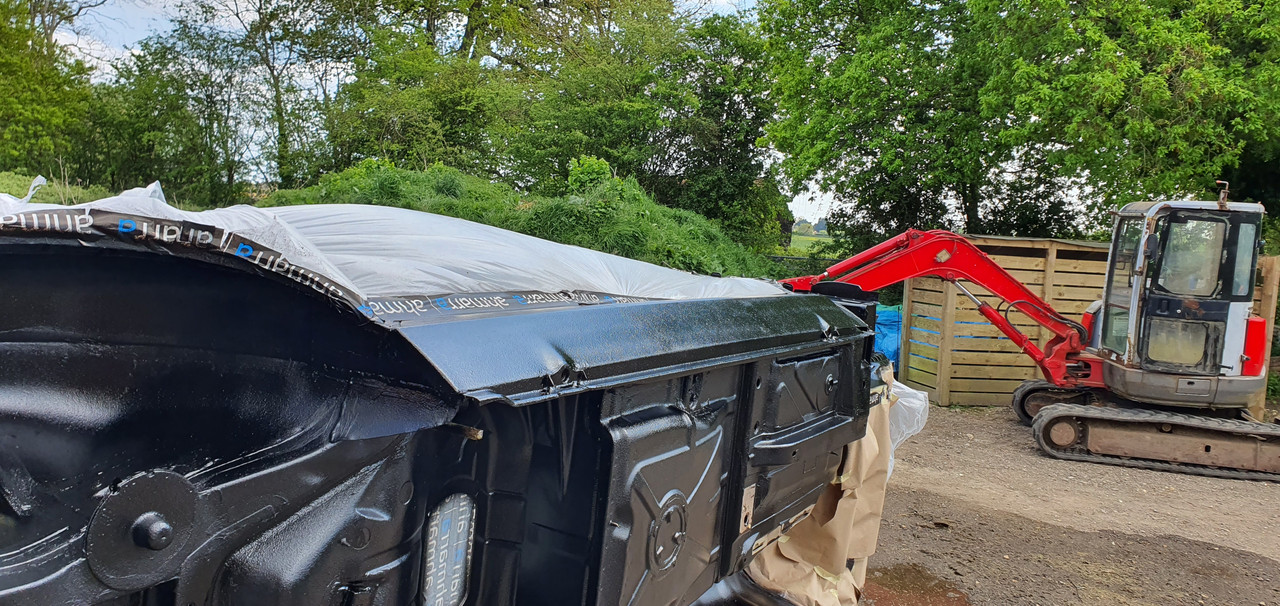
With this done i masked all the necessary places, filled in all of the rivet nuts and finally undersealed the car. Its still pretty wet in the pictures and has dried to a slighty more matte finish which is nice, i hate the look of a car that has been heavily waxoiled and is shiny etc. Also i masked the areas as best i could by the pictures i took previously, i might have to re-visit this briefly when i start bolting stuff back on to get it exactly right but using the gun is very easy and its such a basic job to do:

Image

Image

Image

Image

Image

Image
E30 M50B28 Turbo Cabriolet Restoration: Here
User avatar
AlexD911
E30 Zone Newbie
E30 Zone Newbie
Posts: 128
Joined: Thu Mar 11, 2021 4:21 pm

Tue Apr 26, 2022 4:04 pm

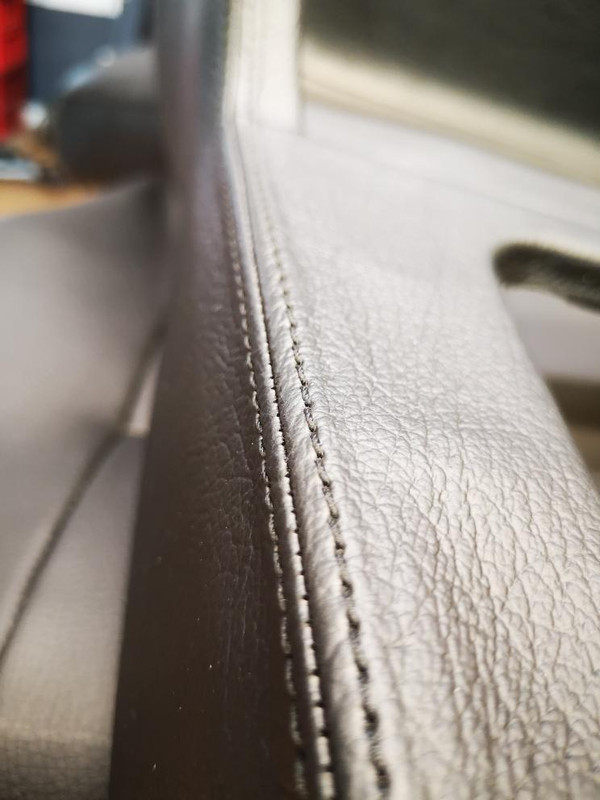
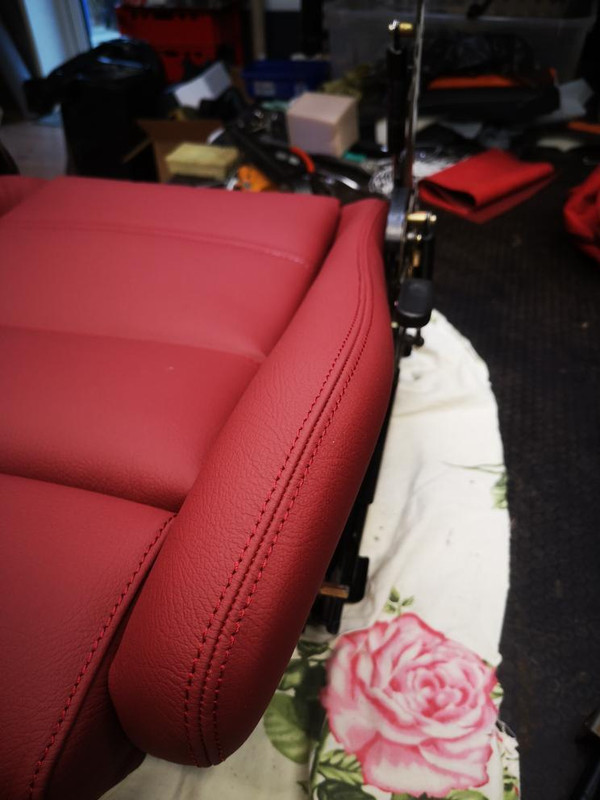
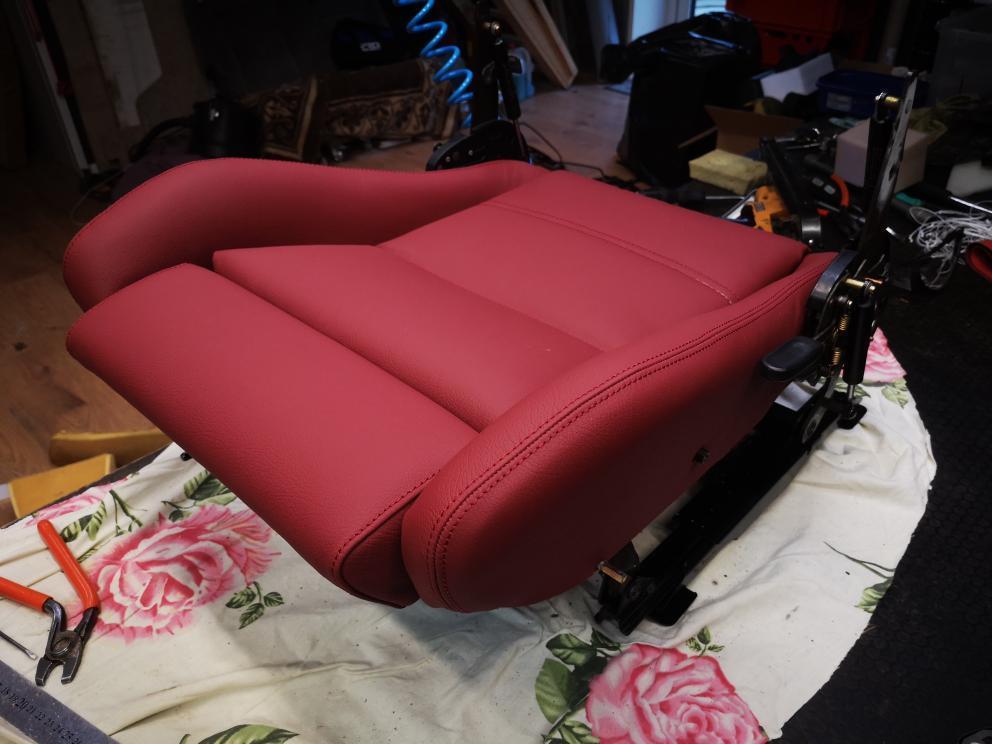
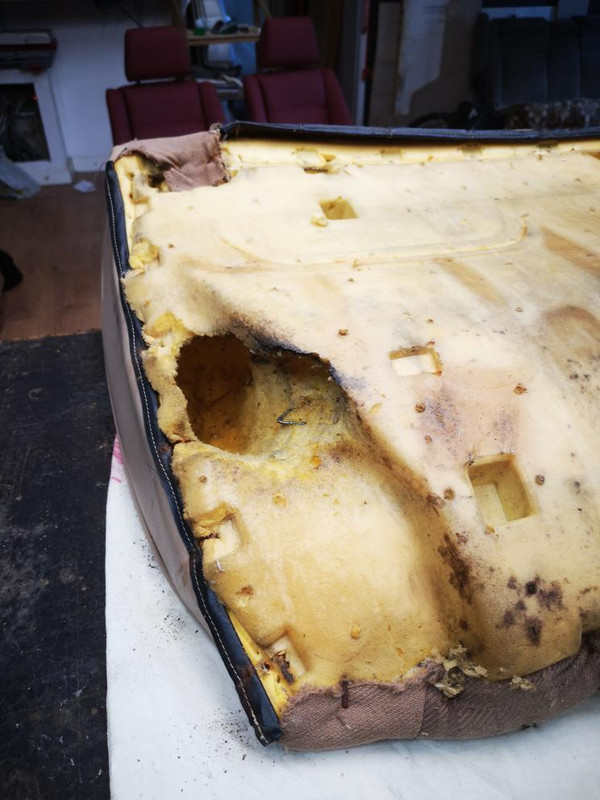
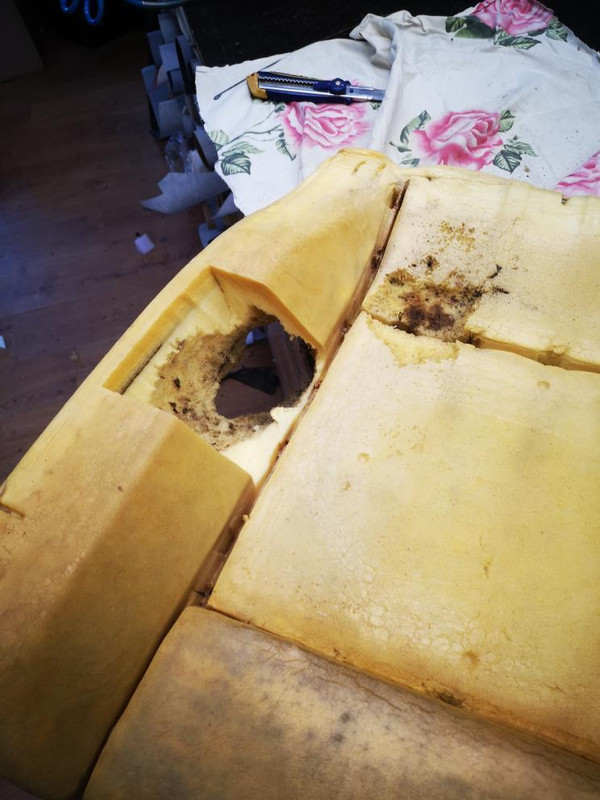
RESTAuto has also received the leather for the seats and started to work on them, im honestly amazed at how good the finish of the leather is, super excited now to see them in real life. He's also replaced the heating elements with a newer modern system, replaced any struts that have failed etc.

Image

Image

Image

Image

Was also really impressed with how he repaired this mouse hole, registered well with my OCD:

Image

Image

Image

Image

Next im going to be prepping and painting the suspension components and subframes, i ordered the reinforcement kits for all the items so will need to weld these on, shot blast and then paint.

Thanks

Alex
E30 M50B28 Turbo Cabriolet Restoration: Here
Post Reply