
Joe's 325i Sport - now M20B28'd - finally back on the road
Moderator: martauto
-
jimbom30cab
- Tech 1 freak
- Posts: 7634
- Joined: Mon Oct 12, 2009 11:00 pm
- Location: in the garage
Barry, I was referring to tech 2 sports in "factory" condition are very rare rather then just any e30, if that makes more sense??
-
bss325i
- E30 Zone Team Member

- Posts: 24536
- Joined: Sat Jan 20, 2007 11:00 pm
- Location: London/Surrey
Define factory condition Jim.
And polsta, I totally agree with you that a lot of zoners are at the bottom end of the E30 market that's for sure!
And polsta, I totally agree with you that a lot of zoners are at the bottom end of the E30 market that's for sure!
-
spook
- League two here we come !!!
- Posts: 7587
- Joined: Sat Aug 19, 2006 11:00 pm
- Location: portsmouth
ãa©ãa®ã‚ˆãa†ãaªæ€§äº¤ãa‚ãaªãaŸãa¯ã‚¢ãƒ³ãƒ‡ã‚£ ãƒaãƒaイãa«ãa¤ãa„ãa¦ 
æ©‹ãa«ãaaã‚aã‚’åa–ã‚‹
æ©‹ãa«ãaaã‚aã‚’åa–ã‚‹

-
pacerpete
- E30 Zone Team Member
- Posts: 18168
- Joined: Sun Jan 23, 2005 11:00 pm
- Location: Iver heath. South bucks.
Long f0000king time !
-
spook
- League two here we come !!!
- Posts: 7587
- Joined: Sat Aug 19, 2006 11:00 pm
- Location: portsmouth
Indeed
-
TriggerFish

- E30 Zone Regular

- Posts: 507
- Joined: Sat Jun 30, 2012 11:00 pm
- Location: Aylesbury, Bucks
Some interesting views on here, always good to see. Anyway, a response to some of the comments:

I couldn't stand the idea of doing some of it now, then finding more next year, and then never getting able to use it, or living in fear of finding a problem every time I did something on the car.


It won't be scrapped, but regarding the sun roof - I did consider that, but then I thought, if it's 'patched up' well enough to last for another few years, then I'd rather have the sunroof for those years, and then once it's really had it, get a new roof skin, rather than just change it right away. Plus it'll add a lot to the bill, and I don't think I could stretch that far right now.
The problem with the kit though, is that it's hidden some (but by all means all) of the rusty areas. I should have looked better though, so no point blaming the body kit.
My latest updates are that work should begin this Monday I need to pop down to the body shop and get the passenger's roof shadow line trim off to respray before they get around to doing the paint side of things. They're also going to take photos of all the progress too, which should be useful for the future. Getting it back without carpets/headlining etc. should mean I can see what work has been done too.
I've also just ordered it some new M-tech stickers for the body kit off Pukar (forgot to add the discount code - do'h!), a new 5-speed gear inlay to replace the 6-speed one on my Clubsport knob, and a new leather gear gaiter. Also got a new leather handbrake handle/gaiter to replace the vile plastic thing.
Another 'exciting' update is due! Given the whole car is being resprayed, I'm cleaning/respraying anything external, like the lights, plate surrounds, shadow line trim etc. as I don't want the little things to let the car down. I started today with one of the door handles as a small, model universal (so cheap if it cocks up) part to test the paint/process. It's just done using cheap Hycote Satin Black spray paint. At £2 a can I thought it was worth a try - I could always buy something 'better' if needed, but it seems really close to the BMW finish and is easy to work with too.
Seems to have gone well with only a light sanding to the factory finish needed for the paint to adhere, and it looks a lot better too, although the photos don't really show this too well. I'll make a start of the rest of the bits over the week I suspect.

Also tidied stuff into boxes depending on what they're for, so I don't just have a masses pile on unlabelled pieces when I come to reassemble the car. I'd forgotten how much cats love boxes -_-

Cheers - I've asked them to do both of those. I'd started removing the sound proofing with a wire brush (fast, but not great if you're worried about the underlying paint). I figured I'd then use dynamat or something to replace it (not fussed about the extra weight - I'd rather it was quieter and a bit slower - it's not fast anyway! I've also got (I think) some underseal stuff to add onto the rear arches too.polsta wrote:Just get it done and once done youl have a better the devil you know sorted car
One thing I'd asvise before paint , with the bulkhead and inner sill and visible floor issues - its absoloutly vital to get the all the floor pan sound deadening stripped out ,
Also get them to have a very close look and poke at the strip that goes across floor pan to bulkhead join , a strip of sealant goes right across over an overlapping join there just after where the floor pan curves up
And also take back all the inner arches sealant too and get that rust checked and re sealed , as Jimbo will know he always does that and there's always rust , a lot of people ignore that , rust hides under that good looking sealant
Brave, or foolhardy?!polsta wrote: But like Pete says this is the norm and it takes a brave man to really hunt out the rust and do it properly , instead if just thinking its a restored car after a quick re spray
Good luck
I couldn't stand the idea of doing some of it now, then finding more next year, and then never getting able to use it, or living in fear of finding a problem every time I did something on the car.
But they look cooler with the kitDuke137 wrote: Anyone else reading this thread thinking of buying a sport just remember that non-kitted cars are the way forward
Good luck, hope you don't scrap it and make it good, I would be tempted to delete that sunroof...
It won't be scrapped, but regarding the sun roof - I did consider that, but then I thought, if it's 'patched up' well enough to last for another few years, then I'd rather have the sunroof for those years, and then once it's really had it, get a new roof skin, rather than just change it right away. Plus it'll add a lot to the bill, and I don't think I could stretch that far right now.
polsta wrote:To be fair RE non kitted cars comments ... Most of them issues are just general e30 rust areas/problems and nothing to do with a body kit and could be any car - ie floor,jacking points,roof, bulkhead,rear pockets
The problem with the kit though, is that it's hidden some (but by all means all) of the rusty areas. I should have looked better though, so no point blaming the body kit.
My latest updates are that work should begin this Monday
I've also just ordered it some new M-tech stickers for the body kit off Pukar (forgot to add the discount code - do'h!), a new 5-speed gear inlay to replace the 6-speed one on my Clubsport knob, and a new leather gear gaiter. Also got a new leather handbrake handle/gaiter to replace the vile plastic thing.
Another 'exciting' update is due! Given the whole car is being resprayed, I'm cleaning/respraying anything external, like the lights, plate surrounds, shadow line trim etc. as I don't want the little things to let the car down. I started today with one of the door handles as a small, model universal (so cheap if it cocks up) part to test the paint/process. It's just done using cheap Hycote Satin Black spray paint. At £2 a can I thought it was worth a try - I could always buy something 'better' if needed, but it seems really close to the BMW finish and is easy to work with too.
Seems to have gone well with only a light sanding to the factory finish needed for the paint to adhere, and it looks a lot better too, although the photos don't really show this too well. I'll make a start of the rest of the bits over the week I suspect.
Also tidied stuff into boxes depending on what they're for, so I don't just have a masses pile on unlabelled pieces when I come to reassemble the car. I'd forgotten how much cats love boxes -_-
-
TriggerFish
- E30 Zone Regular
- Posts: 507
- Joined: Sat Jun 30, 2012 11:00 pm
- Location: Aylesbury, Bucks
Right, time for a bit of an aggregated update (I don't use this site much for posting, just for research).
In good news, I've managed to pick up a cruise control set to retrofit, as it's something I really miss when I drive cars without it, and I've fitted new discs/pads all round, so that's one less thing to do when it's back.
I also managed to pick up a complete (minus head) 2.5l engine, including ECU, inlet manifold + injectors, the complete engine loom, prop, clutch, PAS pump, HT heads/coil, etc. for a massive £41. Plan is to rebuild it into a 2.8 in time.
I refurbed my rocker cover while attempting to set the valve clearances (which I gave up on, and figured I'd do at home where it's easier to work on the car).
This is how it looked at first - covered in oil stains and peeling finish. Nice.

After a quick degrease it cleaned up much nicer, but still tired looking.

A spray of degreaser on the underside has tidied things up nicely too.

And after rubbing it down with a sanding pad thing, we get this. I really liked this finish and the 'patina' (even typing that word makes me feel pretentious!) that was left. However, it wouldn't really fit in with the clean/new look I'm going for, so I ploughed onwards.

I've seen some photos of these done with wrinkle paint, so I bought four cans of this stuff, although I've used just under one, so a bit of a fail there! http://www.ebay.co.u...984.m1497.l2649
After being sprayed with three coats, and left in the garage overnight, you get this:

And some close ups of the finish.


Next stage is to use a sanding block to just rub down the raised bits to get to the metal underneath, and then mask it up, and spray it again.

After leaving it overnight again and peeling the tape off, you end up with this:


There's still some black marks on the metal, but it's not noticeable from a distance, and given it's a 25 year old part, it sort of seems appropriate it's not perfect anyway.
A very simple job, and well worth doing while adjusting the valve clearances IMO. (A new rocker cover gasket is £20 posted from Coltswold BMW too.)
In good news, I've managed to pick up a cruise control set to retrofit, as it's something I really miss when I drive cars without it, and I've fitted new discs/pads all round, so that's one less thing to do when it's back.
I also managed to pick up a complete (minus head) 2.5l engine, including ECU, inlet manifold + injectors, the complete engine loom, prop, clutch, PAS pump, HT heads/coil, etc. for a massive £41. Plan is to rebuild it into a 2.8 in time.
I refurbed my rocker cover while attempting to set the valve clearances (which I gave up on, and figured I'd do at home where it's easier to work on the car).
This is how it looked at first - covered in oil stains and peeling finish. Nice.
After a quick degrease it cleaned up much nicer, but still tired looking.
A spray of degreaser on the underside has tidied things up nicely too.
And after rubbing it down with a sanding pad thing, we get this. I really liked this finish and the 'patina' (even typing that word makes me feel pretentious!) that was left. However, it wouldn't really fit in with the clean/new look I'm going for, so I ploughed onwards.
I've seen some photos of these done with wrinkle paint, so I bought four cans of this stuff, although I've used just under one, so a bit of a fail there! http://www.ebay.co.u...984.m1497.l2649
After being sprayed with three coats, and left in the garage overnight, you get this:
And some close ups of the finish.
Next stage is to use a sanding block to just rub down the raised bits to get to the metal underneath, and then mask it up, and spray it again.
After leaving it overnight again and peeling the tape off, you end up with this:
There's still some black marks on the metal, but it's not noticeable from a distance, and given it's a 25 year old part, it sort of seems appropriate it's not perfect anyway.
A very simple job, and well worth doing while adjusting the valve clearances IMO. (A new rocker cover gasket is £20 posted from Coltswold BMW too.)
-
TriggerFish
- E30 Zone Regular
- Posts: 507
- Joined: Sat Jun 30, 2012 11:00 pm
- Location: Aylesbury, Bucks
Next, I moved onto refurbing my driver's seat, and welding it back together. Passenger's seat still to do.
Ideally, I'd get a fabric interior as I don't like leather, but finding a good condition heated one isn't proving worth the effort!
I used this, from Furniture Clinic:

http://www.furnitureclinic.co.uk/Leathe ... nt_Kit.php + http://www.furnitureclinic.co.uk/Leather_Repair_Kit.php
And I started out with this:


So as you can see, serviceable, but tatty and cracked.
First steps were to split the seat apart, and then rub it down with a couple of supplied cleaners and alcohol wipes, and then sand the leather back a little.
Next stage is to fill the cracks with filler, allow it to dry, and sand it back until it's smooth. Keep repeating this until the filler and the leather are at one level.
These should give you an idea of the amount of cracking/filler I had to use!


Once that's done, another quick wipe with the alcohol cleaner and you're ready to spray. This is simple, and made a lot easier with a proper air compressor. I didn't get any photos of this, I jumped straight to the after ones. The finish is tacky and very shiny after spraying. It attracted a lot of dust that I had to remove, although there's some bits I missed. After spraying it with a 'sealer', you then apply a lacquer (for want of a better word), which is used to flatten down the finish, or make it shiner as needed.
When dry, this is what I ended up with.

And some close ups of the repaired areas:


And there we have it. Far from perfect, and there's a couple of bits that annoy me, but to my parents, who saw the finished product and aren't aware of the imperfections to the same degree I was, they think it looks good. I think so to on the whole. But defiantly an improvement on before.
Now I just need to weld it back together.
(Oh, and excuse the mess - it's the failed aftermath of building work where my parent's had no idea of the end result, or seemingly, the budget either. *slow clap* )
Also painted the seat belt clasp too. Again, not perfect, but better than before.


Ideally, I'd get a fabric interior as I don't like leather, but finding a good condition heated one isn't proving worth the effort!
I used this, from Furniture Clinic:
http://www.furnitureclinic.co.uk/Leathe ... nt_Kit.php + http://www.furnitureclinic.co.uk/Leather_Repair_Kit.php
And I started out with this:
So as you can see, serviceable, but tatty and cracked.
First steps were to split the seat apart, and then rub it down with a couple of supplied cleaners and alcohol wipes, and then sand the leather back a little.
Next stage is to fill the cracks with filler, allow it to dry, and sand it back until it's smooth. Keep repeating this until the filler and the leather are at one level.
These should give you an idea of the amount of cracking/filler I had to use!
Once that's done, another quick wipe with the alcohol cleaner and you're ready to spray. This is simple, and made a lot easier with a proper air compressor. I didn't get any photos of this, I jumped straight to the after ones. The finish is tacky and very shiny after spraying. It attracted a lot of dust that I had to remove, although there's some bits I missed. After spraying it with a 'sealer', you then apply a lacquer (for want of a better word), which is used to flatten down the finish, or make it shiner as needed.
When dry, this is what I ended up with.
And some close ups of the repaired areas:
And there we have it. Far from perfect, and there's a couple of bits that annoy me, but to my parents, who saw the finished product and aren't aware of the imperfections to the same degree I was, they think it looks good. I think so to on the whole. But defiantly an improvement on before.
Now I just need to weld it back together.
(Oh, and excuse the mess - it's the failed aftermath of building work where my parent's had no idea of the end result, or seemingly, the budget either. *slow clap* )
Also painted the seat belt clasp too. Again, not perfect, but better than before.
-
TriggerFish
- E30 Zone Regular
- Posts: 507
- Joined: Sat Jun 30, 2012 11:00 pm
- Location: Aylesbury, Bucks
I also sent my injectors off to be cleaned. Great service from injector tune, if somewhat disappointing results (in so much as there's not going to be a whole new load of power waiting for me)

While not detailed here, the car has been with the body shop since June or July, and nothing's happened yet, until mid September:
Went to see the car today, and got there just in time as there were only a couple of guys there who were having a smoke before locking up, but they let me in for a quick poke around anyway.
Progress has started! I now have inner sills on the passenger's side (maybe the driver's too, I couldn't open the door to check as there was something in the way), a fixed bulkhead on both sides and a solidish (WIP) set of rear arches.
I couldn't tell much as most of the lights were off, and I didn't stay for long as I didn't want to hold the workers up, but the work all looks good. Rubbishy phone photos only, so not sure how well they'll be visible:
Clearly not finished, but at least you can't see the floor any more on the driver's side footwell.


Passenger's footwell:


And inner sill:

Even sprayed the suspension and brake back plates too (just hope they covered the shock tube/strut thing (what's the bit that moves calls? The rod thing)

Various bits of the rear arches/boot pockets in different stages of work


And from the inside:


So at this point (13th Sept) work had finally started and I was happy with the progress being made, I assumed there was more to go. What I didn't realise is that I'd been sent an email on the 11th saying they'd done. (When I took these, there was no-one involved in my car around.)
I then got a text the Friday after (the 19th) saying they'd done, so I went up on the Saturday (20th) to have a look.
While not detailed here, the car has been with the body shop since June or July, and nothing's happened yet, until mid September:
Went to see the car today, and got there just in time as there were only a couple of guys there who were having a smoke before locking up, but they let me in for a quick poke around anyway.
Progress has started!
I couldn't tell much as most of the lights were off, and I didn't stay for long as I didn't want to hold the workers up, but the work all looks good. Rubbishy phone photos only, so not sure how well they'll be visible:
Clearly not finished, but at least you can't see the floor any more on the driver's side footwell.
Passenger's footwell:
And inner sill:
Even sprayed the suspension and brake back plates too (just hope they covered the shock tube/strut thing (what's the bit that moves calls? The rod thing)
Various bits of the rear arches/boot pockets in different stages of work
And from the inside:
So at this point (13th Sept) work had finally started and I was happy with the progress being made, I assumed there was more to go. What I didn't realise is that I'd been sent an email on the 11th saying they'd done. (When I took these, there was no-one involved in my car around.)
I then got a text the Friday after (the 19th) saying they'd done, so I went up on the Saturday (20th) to have a look.
-
TriggerFish
- E30 Zone Regular
- Posts: 507
- Joined: Sat Jun 30, 2012 11:00 pm
- Location: Aylesbury, Bucks
So, I went up today to view the E30 now the welding was 'complete'. I'd been sent a couple of photos via Facebook and was sceptical all the work we'd agreed had been done. On arriving, I got a call to say the 330d had failed the MOT (handbrake, rear tyre and headlight aim), so that annoyed me a bit.
Anyway, the work we'd agreed was a full inside/outside respray, rectify all encountered rust (including, but not limited to the scuttles, sunroof, suspension turret, the floor, the bulkhead), and fit new outer sills (parts supplied by me). He said that, if any extra work resulted after the quote was given, it was his look out to resolve it, as he should have had enough experience to estimate accordingly, which sounded good to me.
Here's some photos of what we currently have. If I hadn't gone up, this would have been painted on Monday. (Also, what's with Photobucket recently? The website is even more terrible than normal, and the mobile app keeps randomly uploading photos over and over again until I force kill it.)
This is the driver's side upper dash area, the previous home of the much fabled structural cardboard.

This is the relay/option socket area in the passenger's foot well:

A hole by the seatbelt mounting point. An MOT fail.

Untouched roof.

Untouched scuttles. Visible rust shown, plus crusting on the underside of that metal.

Crusty inner boot arch -> outer skin join.

Rusty rear valance bit where the numberplate goes:

And inside the boot lock hole:

Patched up, not replaced sill.

Although the work that has been done has been done to a standard I'm happy with.


So yeah. My mood didn't improve on seeing this. I'm a calm person, as those who have met me will testify too, but this is really trying my patience now!
The owner wasn't there. The chap who was, whose fault I don't think it is, said it's likely down to a breakdown in communications between the guys working on it and the boss. I'm a cynic, and have an inherent distrust of any third party, and wonder if it's an attempt at cutting corners in hope I don't notice? I'm expecting an update from someone on Monday as to what happens next.
So there we go. Another down point in my disappointing ownership of this crap heap of a car.
So that's my E30 ownership so far. About 200 miles of use since April, and nothing but disappointment since! Depending on the outcome of Monday's conversation, I'm either going to need to learn to weld, or find someone else willing to do the work (which was challenging before)
Anyway, the work we'd agreed was a full inside/outside respray, rectify all encountered rust (including, but not limited to the scuttles, sunroof, suspension turret, the floor, the bulkhead), and fit new outer sills (parts supplied by me). He said that, if any extra work resulted after the quote was given, it was his look out to resolve it, as he should have had enough experience to estimate accordingly, which sounded good to me.
Here's some photos of what we currently have. If I hadn't gone up, this would have been painted on Monday. (Also, what's with Photobucket recently? The website is even more terrible than normal, and the mobile app keeps randomly uploading photos over and over again until I force kill it.)
This is the driver's side upper dash area, the previous home of the much fabled structural cardboard.
This is the relay/option socket area in the passenger's foot well:
A hole by the seatbelt mounting point. An MOT fail.
Untouched roof.
Untouched scuttles. Visible rust shown, plus crusting on the underside of that metal.
Crusty inner boot arch -> outer skin join.
Rusty rear valance bit where the numberplate goes:
And inside the boot lock hole:
Patched up, not replaced sill.
Although the work that has been done has been done to a standard I'm happy with.
So yeah. My mood didn't improve on seeing this. I'm a calm person, as those who have met me will testify too, but this is really trying my patience now!
The owner wasn't there. The chap who was, whose fault I don't think it is, said it's likely down to a breakdown in communications between the guys working on it and the boss. I'm a cynic, and have an inherent distrust of any third party, and wonder if it's an attempt at cutting corners in hope I don't notice? I'm expecting an update from someone on Monday as to what happens next.
So there we go. Another down point in my disappointing ownership of this crap heap of a car.
So that's my E30 ownership so far. About 200 miles of use since April, and nothing but disappointment since! Depending on the outcome of Monday's conversation, I'm either going to need to learn to weld, or find someone else willing to do the work (which was challenging before)
-
appletree
- E30 Zone Addict

- Posts: 3482
- Joined: Fri Jan 20, 2006 11:00 pm
- Location: Retford
The pass side foot well repair doesn't look to bad but some of the other area look abit rough and ready to me, I wouldn't have done it like that on mine, I think the only way to do this work properly is to take the time, learn, ask for advise and do it your self.

You should never underestimate the predictability of stupidity
M42 Supercharged 285bhp + M3 6speed box
-
Rich320I
- E30 Zone Camper

- Posts: 1272
- Joined: Tue Dec 06, 2011 11:00 pm
- Location: Worcester
some of the issues above, such as the rust by the main loom are major jobs. Byron(maggspower) did similar work on mine and the whole loom needs to come out through the engine bay to repair that area properly. as with alot of these cars, rust is an issue but they are worth it when done. .
the roof area is also a major job in terms of man hours...looks like it could be a nice car though
the roof area is also a major job in terms of man hours...looks like it could be a nice car though
-
Gert_8
- Married to the E30 Zone
- Posts: 11305
- Joined: Mon Dec 08, 2008 11:00 pm
- Location: In your back passage faster than a rat up a drainpipe!
Hi, Your furniture clinic kit supplied you with an air brush. Did you try using this, or did you go straight to using the air compressor and brush? I don't think the airbrush and cannister combination is very successful.
PONY, 2013 - "Anyway span 360 degrees hitting the kerb and giving the old man two fingers as I was spinning like Michael Schumacher would
-
TriggerFish
- E30 Zone Regular
- Posts: 507
- Joined: Sat Jun 30, 2012 11:00 pm
- Location: Aylesbury, Bucks
Agreed, but I could find nobody else to do the work (most people just didn't care/want to know, despite it being a fair chunk of cash), and, sadly, I'm not in a position (time/space or skills - although the latter can be learnt) to do the work myself, although I'd rather DIY it, but hey-ho. That roof - I will get back to you - I just need to think through what I want to do (sun roof/non-sun roof etc.)appletree wrote:The pass side foot well repair doesn't look to bad but some of the other area look abit rough and ready to me, I wouldn't have done it like that on mine, I think the only way to do this work properly is to take the time, learn, ask for advise and do it your self.
Yep, the loom is out now - would have been pretty simple if the previous owner hadn't spliced so much crap into it!Rich320I wrote:some of the issues above, such as the rust by the main loom are major jobs. Byron(maggspower) did similar work on mine and the whole loom needs to come out through the engine bay to repair that area properly. as with alot of these cars, rust is an issue but they are worth it when done.
the roof area is also a major job in terms of man hours...looks like it could be a nice car though
The roof is a pain. For now, I think, and I know this isn't ideal, I'll get it 'patched up', and just leave it until it becomes a real problem. Mainly, as I don't have the spare £££ to fund a roof swap atm, and hopefully by the time that becomes an issue I'll have the time/skills to consider doing the swap myself. The car will be dry stored, so hopefully that'll help!
I used the cannister for the finishers/sealers, mainly as I didn't want to have to clean out my airgun, and it was good enough for that. I wouldn't want to spray the dye with it though - that I did with a compressor/air gun.Gert_8 wrote:Hi, Your furniture clinic kit supplied you with an air brush. Did you try using this, or did you go straight to using the air compressor and brush? I don't think the airbrush and cannister combination is very successful.
I've learnt some lessons from the first seat, so when I do the passenger's this weekend, I'm hoping for a better finish. If I get it better, I'll likely sand the driver's seat down and spray it again.
-
Gert_8
- Married to the E30 Zone
- Posts: 11305
- Joined: Mon Dec 08, 2008 11:00 pm
- Location: In your back passage faster than a rat up a drainpipe!
What sort of compressor and air gun do you have?
PONY, 2013 - "Anyway span 360 degrees hitting the kerb and giving the old man two fingers as I was spinning like Michael Schumacher would
-
TriggerFish
- E30 Zone Regular
- Posts: 507
- Joined: Sat Jun 30, 2012 11:00 pm
- Location: Aylesbury, Bucks
Not 100% on the compressor - something with about 25l of capacity IIRC. My dad picked it up off a friend for £40, so it's nothing fancy. Flows about 5-7CFM I think he said.
Spray gun was just a cheap eBay special for ~£10. They do say they'll rent out compressors FOC, just cover the £20 delivery/return postage (VERY good offer IMO, esp. considering how heavy a compressor is to post).
Spray gun was just a cheap eBay special for ~£10. They do say they'll rent out compressors FOC, just cover the £20 delivery/return postage (VERY good offer IMO, esp. considering how heavy a compressor is to post).
-
Gert_8
- Married to the E30 Zone
- Posts: 11305
- Joined: Mon Dec 08, 2008 11:00 pm
- Location: In your back passage faster than a rat up a drainpipe!
thanks Trigger.
PONY, 2013 - "Anyway span 360 degrees hitting the kerb and giving the old man two fingers as I was spinning like Michael Schumacher would
-
TriggerFish
- E30 Zone Regular
- Posts: 507
- Joined: Sat Jun 30, 2012 11:00 pm
- Location: Aylesbury, Bucks
Well, I haven't updated this for about 18 months - mostly as I got fed up with the constant trolling and idiots on here, but now that's all died down again, I thought I'd make an effort to keep this up to date.
TL:DR body shop were idiots. Finally got it back from them, not a good job. Failed the MOT on substandard welding work. Took it back, they rectified (and cut through one of my brake hoses at the same time!). MOT passed, car fully rebuilt, back on the road for about 3 months. Engine died. Just today finished rebuilding an M20B28, which is nearly ready to fit. Before fitting the engine, seems the ideal time to replace the brake hoses, fuel hoses, rear end bushes, and underseal the chassis/paint the underside parts.
And now, a some more detailed posts. I've taken bits of this from other forums where I kept the thread going, so if some of the sentences/references are a little out of context, my apologies!
-
TriggerFish
- E30 Zone Regular
- Posts: 507
- Joined: Sat Jun 30, 2012 11:00 pm
- Location: Aylesbury, Bucks
So, I went up today to view the E30 now the welding was 'complete'. I'd been sent a couple of photos via Facebook and was sceptical all the work we'd agreed had been done. On arriving, I got a call to say the 330 had failed the MOT (handbrake, rear tyre and headlight aim), so that annoyed me a bit.
Anyway, the work we'd agreed was a full inside/outside respray, rectify all encountered rust (including, but not limited to the scuttles, sunroof, suspension turret, the floor, the bulkhead), and fit new outer sills (parts supplied by me).
Here's some photos of what we currently have. If I hadn't gone up, this would have been painted on Monday. (Also, what's with Photobucket recently? The website is even more terrible than normal, and the mobile app keeps randomly uploading photos over and over again until I force kill it.)
This is the driver's side upper dash area, the previous home of the much fabled structural cardboard.
This is the relay/option socket area in the passenger's foot well:
A hole by the seatbelt mounting point. An MOT fail.
Untouched scuttles. Visible rust shown, plus crusting on the underside of that metal.
Crusty inner boot arch -> outer skin join.
Rusty rear valance bit where the numberplate goes:
And inside the boot lock hole:
Patched up, not replaced sill.
Although the work that has been done has been done to a standard I'm happy with.
So yeah. My mood didn't improve on seeing this. I'm a calm person, as those who have met me will testify too, but this is really trying my patience now!
The owner wasn't there. The chap who was, whose fault I don't think it is, said it's likely down to a breakdown in communications between the guys working on it and the boss. I'm a cynic, and have an inherent distrust of any third party, and wonder if it's an attempt at cutting corners in hope I don't notice? I'm expecting an update from someone on Monday as to what happens next.
So there we go. Another down point in my disappointing ownership of this crap heap of a car.
#####
Anyway, some of the issues have been fixed, some are still outstanding (and I discovered a few more issues today, which have been added to the list). The outside of the car has been primed now, it just needs the inside/shut lines doing and sanding down.
Today I removed the wiring loom to make sure that there was nothing else by the bulkhead grommet, and I'm glad I did! The was a hole there, hidden by some relays/the loom that was on the engine side of wheel arch, so completely hidden by the brake servo/fuse box from above, and the loom from the inside. If this had been left, I'm guessing I'd be in the same situation in a few years time when it all rusted out again.
I was dreading removing the loom, but apart from feeding it through the bulk head (lots of wire, small hole!) it was pretty simple and just a case of being methodical. Surprising how much wiring there is in a car though - I dread to think what the really modern flagship models are like, although I believe Audi at least have moved to fibre optics cables for some things.
Anyway, some photos from last week.
The sills haven't been replaced. In a way I'm pleased - original metal is nicer to have in some ways, and there's no chance of the chassis twisting during fitting. Also, having seen the fitment of the wings I got from the same company, I'm not sure how well they'd fit anyway!
The patches have been ground back, and look fine now. (Excuse the photos, I just tweaked them quickly to bring the detail of the metal out, as they were a bit dark before.)


One of my 3rd party wings. (Later investigations make me think this corner has been in a shunt, so likely not the wing's fault.)

The other was OK, but this is terrible. Where it meets the doors, is fine, so it can't be moved forward (although it doesn't fold around to meet the sill properly), and it bolts up by the headlights just fine, so it's just a terrible casting.
Wheel arch that we'd welded up previously, but it looked terrible, although was sound. It's been ground back and fillered back to the OE shape.

The whole boot, and interior, has been painted in some stone chip stuff, although it's all due to be painted body colour and lacquered.


###
I finished getting the wiring loom out.
This is what I imagine giving birth is like.
All of this (and more in the 'bay):

out through this!

(The small hole to the left of the masking tape)

Outside is all sanded and ready to paint, it just needs the work above doing, and a hole by the fuel filler I'd forgotten about until today, and it should be good to paint.
###
And this is what ~£150 worth of clips and stuff looks like. Also includes new door hinges, as mine have sagged, and two new nuts that hold the rear windows on as mine had faded a little. Also a very good match to the paint I've used on the rest of the metal trim, which is good to know from an originality point of view.
Not exciting at all, but hopefully useful when reassembling.

And now it's all dry:


They were waiting for me to take up the clips and stuff I'd bought so they could put the body kit back on, as they didn't want to polish the small parts without any way to hold them down, which makes sense (so the above is without any work after having been sprayed - it still needs sanding/polishing).
The eagle eyed among you will have noticed some G60 wheels there - it's going to be rolling on those for a while, while the style 5s are refurbished, and until I manage to source some decent tyres for them. 205/55r15 is a horrid size to shop for!
I think it's another couple of weeks, and hopefully, it should be done smile.png Then it's a case of wiring it up, putting the interior together, and giving it a good service ready for the summer.
###
Still no progress from the body shop - still awaiting polishing.
In other news, I collected my 4 extra style 5s (normal E30 BBS/sport wheels) (with semi-decent tyres) for £50. Pretty good nick IMO.


Also got a nice period HU at the same time. It's one of these: http://www.ebay.co.u...E-/261202279135 offered £20, which was accepted smile.png Winning.
Now I've got the top off of it, it's clear that these wires provide an earth/positive to the tape drive, and both the left/right input signals to the amp from the tape deck. I'm hoping to splice into these for a 3.5mm jack coming out of the back for a bit of modern functionality with complete period looks.


While I've not found it yet, I found want to find a source of the pre-amp'd signal. I'm hoping to find a signal feed that's volume controlled, but before it's been run through a 1980's amp - although the amp may do the volume, so I may have to settle for a post-amp feed. I know someone on the BMW forum has done this with a modern 'Business' CD HU, so I'll have a look at that thread and see. I then intend to send this off to a new amp hidden away somewhere to get 21st century sound quality while still looking original, and having the HU front face (volume, radio etc.) being fully functional.
With a bluetooth audio receiver hidden out of the way, connected to my phone, I should have a fully modern and 100% hidden system.
News on the radio front - it lives! I'm not sure why, but I've incredibly excited/enthusiastic in this radio project - more so than anything else in the car atm. I found a tape (we have some!) and away we go. Turns out it was the Jam (Down in the Tube Station). Sounded pretty good considering it's 6watts and a 1980's amp. Hardly going to set the world alight with some D&B or whatever, but it's better than I expected.
Next job - aux input. Only issue is, when it's turned off/loses power, it spits the tape out. To get the aux in to work, it's going to need a dummy tape in there (to switch the source), but it will need to have the ferric tape removed first so it doesn't stop every 45 minutes. Anyway, as it stands, it'll be a pain if it spits it out at the end of each journey, so I need to find what causes that and isolate it.
Anyway, some photos (I'm falling in love with my 50mm lens again too):
That grey tape is one it spat out - they fly that far! Hence why I want it disabling.


Only the LCD has lighting, which is a shame though.
And power taken from a 12v drill charger.

Got it working, with perfect stereo too smile.png Fantastic. Needed a 3.3ohm resistor in combination with a 10k ohm trimmer in the end. Worked out with some help from the great interwebz, and trial and error with some resistors and a potentiometer.
Anyway, all tidied up and back together. Next job is to try and find a pre-amp'd source.
My high-tech test rig (loving my new 15mm lens on a full frame - much better than the crop 18mm I had before which vignetted everything):

And the money shot:

And a wiring diagram if it ever helps anyone else trying to convert a Blaupunkt London sqm 37 to accept a line input/aux connection from the head tape. Excuse the poor diagram!

Still no word on the car itself, and since I lost my phone, I've lost the mobile number for the body shop. I'll give them a ring at some point.
Anyway, the work we'd agreed was a full inside/outside respray, rectify all encountered rust (including, but not limited to the scuttles, sunroof, suspension turret, the floor, the bulkhead), and fit new outer sills (parts supplied by me).
Here's some photos of what we currently have. If I hadn't gone up, this would have been painted on Monday. (Also, what's with Photobucket recently? The website is even more terrible than normal, and the mobile app keeps randomly uploading photos over and over again until I force kill it.)
This is the driver's side upper dash area, the previous home of the much fabled structural cardboard.
This is the relay/option socket area in the passenger's foot well:
A hole by the seatbelt mounting point. An MOT fail.
Untouched scuttles. Visible rust shown, plus crusting on the underside of that metal.
Crusty inner boot arch -> outer skin join.
Rusty rear valance bit where the numberplate goes:
And inside the boot lock hole:
Patched up, not replaced sill.
Although the work that has been done has been done to a standard I'm happy with.
So yeah. My mood didn't improve on seeing this. I'm a calm person, as those who have met me will testify too, but this is really trying my patience now!
The owner wasn't there. The chap who was, whose fault I don't think it is, said it's likely down to a breakdown in communications between the guys working on it and the boss. I'm a cynic, and have an inherent distrust of any third party, and wonder if it's an attempt at cutting corners in hope I don't notice? I'm expecting an update from someone on Monday as to what happens next.
So there we go. Another down point in my disappointing ownership of this crap heap of a car.
#####
Anyway, some of the issues have been fixed, some are still outstanding (and I discovered a few more issues today, which have been added to the list). The outside of the car has been primed now, it just needs the inside/shut lines doing and sanding down.
Today I removed the wiring loom to make sure that there was nothing else by the bulkhead grommet, and I'm glad I did! The was a hole there, hidden by some relays/the loom that was on the engine side of wheel arch, so completely hidden by the brake servo/fuse box from above, and the loom from the inside. If this had been left, I'm guessing I'd be in the same situation in a few years time when it all rusted out again.
I was dreading removing the loom, but apart from feeding it through the bulk head (lots of wire, small hole!) it was pretty simple and just a case of being methodical. Surprising how much wiring there is in a car though - I dread to think what the really modern flagship models are like, although I believe Audi at least have moved to fibre optics cables for some things.
Anyway, some photos from last week.
The sills haven't been replaced. In a way I'm pleased - original metal is nicer to have in some ways, and there's no chance of the chassis twisting during fitting. Also, having seen the fitment of the wings I got from the same company, I'm not sure how well they'd fit anyway!
The patches have been ground back, and look fine now. (Excuse the photos, I just tweaked them quickly to bring the detail of the metal out, as they were a bit dark before.)
One of my 3rd party wings. (Later investigations make me think this corner has been in a shunt, so likely not the wing's fault.)
The other was OK, but this is terrible. Where it meets the doors, is fine, so it can't be moved forward (although it doesn't fold around to meet the sill properly), and it bolts up by the headlights just fine, so it's just a terrible casting.
Wheel arch that we'd welded up previously, but it looked terrible, although was sound. It's been ground back and fillered back to the OE shape.
The whole boot, and interior, has been painted in some stone chip stuff, although it's all due to be painted body colour and lacquered.
###
I finished getting the wiring loom out.
This is what I imagine giving birth is like.
All of this (and more in the 'bay):
out through this!
(The small hole to the left of the masking tape)
Outside is all sanded and ready to paint, it just needs the work above doing, and a hole by the fuel filler I'd forgotten about until today, and it should be good to paint.
###
And this is what ~£150 worth of clips and stuff looks like. Also includes new door hinges, as mine have sagged, and two new nuts that hold the rear windows on as mine had faded a little. Also a very good match to the paint I've used on the rest of the metal trim, which is good to know from an originality point of view.
Not exciting at all, but hopefully useful when reassembling.
And now it's all dry:
They were waiting for me to take up the clips and stuff I'd bought so they could put the body kit back on, as they didn't want to polish the small parts without any way to hold them down, which makes sense (so the above is without any work after having been sprayed - it still needs sanding/polishing).
The eagle eyed among you will have noticed some G60 wheels there - it's going to be rolling on those for a while, while the style 5s are refurbished, and until I manage to source some decent tyres for them. 205/55r15 is a horrid size to shop for!
I think it's another couple of weeks, and hopefully, it should be done smile.png Then it's a case of wiring it up, putting the interior together, and giving it a good service ready for the summer.
###
Still no progress from the body shop - still awaiting polishing.
In other news, I collected my 4 extra style 5s (normal E30 BBS/sport wheels) (with semi-decent tyres) for £50. Pretty good nick IMO.
Also got a nice period HU at the same time. It's one of these: http://www.ebay.co.u...E-/261202279135 offered £20, which was accepted smile.png Winning.
Now I've got the top off of it, it's clear that these wires provide an earth/positive to the tape drive, and both the left/right input signals to the amp from the tape deck. I'm hoping to splice into these for a 3.5mm jack coming out of the back for a bit of modern functionality with complete period looks.
While I've not found it yet, I found want to find a source of the pre-amp'd signal. I'm hoping to find a signal feed that's volume controlled, but before it's been run through a 1980's amp - although the amp may do the volume, so I may have to settle for a post-amp feed. I know someone on the BMW forum has done this with a modern 'Business' CD HU, so I'll have a look at that thread and see. I then intend to send this off to a new amp hidden away somewhere to get 21st century sound quality while still looking original, and having the HU front face (volume, radio etc.) being fully functional.
With a bluetooth audio receiver hidden out of the way, connected to my phone, I should have a fully modern and 100% hidden system.
News on the radio front - it lives! I'm not sure why, but I've incredibly excited/enthusiastic in this radio project - more so than anything else in the car atm. I found a tape (we have some!) and away we go. Turns out it was the Jam (Down in the Tube Station). Sounded pretty good considering it's 6watts and a 1980's amp. Hardly going to set the world alight with some D&B or whatever, but it's better than I expected.
Next job - aux input. Only issue is, when it's turned off/loses power, it spits the tape out. To get the aux in to work, it's going to need a dummy tape in there (to switch the source), but it will need to have the ferric tape removed first so it doesn't stop every 45 minutes. Anyway, as it stands, it'll be a pain if it spits it out at the end of each journey, so I need to find what causes that and isolate it.
Anyway, some photos (I'm falling in love with my 50mm lens again too):
That grey tape is one it spat out - they fly that far! Hence why I want it disabling.
Only the LCD has lighting, which is a shame though.
And power taken from a 12v drill charger.
Got it working, with perfect stereo too smile.png Fantastic. Needed a 3.3ohm resistor in combination with a 10k ohm trimmer in the end. Worked out with some help from the great interwebz, and trial and error with some resistors and a potentiometer.
Anyway, all tidied up and back together. Next job is to try and find a pre-amp'd source.
My high-tech test rig (loving my new 15mm lens on a full frame - much better than the crop 18mm I had before which vignetted everything):
And the money shot:
And a wiring diagram if it ever helps anyone else trying to convert a Blaupunkt London sqm 37 to accept a line input/aux connection from the head tape. Excuse the poor diagram!
Still no word on the car itself, and since I lost my phone, I've lost the mobile number for the body shop. I'll give them a ring at some point.
-
TriggerFish
- E30 Zone Regular
- Posts: 507
- Joined: Sat Jun 30, 2012 11:00 pm
- Location: Aylesbury, Bucks
My phone's come back to life again, I'm happy to say
In car news, I got a call saying it was ready, so toddled off down there to see, and it's nearly ready - there's just a bit more polishing to go and the wheels to collect from the refurbers, and then it's all done. The finish of the paint I'm very pleased with - there's just a few little blobs and pits in the paint, which I'm told will polish out. The rear boot lid was very bad for this, but I'm told that's not been polished at all yet (and the photos don't show the imperfections anyway)
Some photos (first time using my 15mm-30mm DG lens too - I like it!).
A nice sight to be greeted by compared to the previous visits:


Not too sure on the G60s. They're only there as a temp. wheel while the others are refurbed, but I think with some correctly sized tyres, a paint in silver, and some banding, they should look pretty decent.
Two solid suspension towers:


Some general reflection shots (there are some tiny scratches in the roof, but they don't show on camera)

And quite a few on the unpolished boot:


This run on the rear bumper is the worst imperfection though, but I'm told will be removed.

So it's just polish, and weld up the front bulkhead above the throttle pedal, and it's done. The end of the tunnel is in sight!
###
Well, I'm home from having a look at it, and it's a thumbup.gif thumbup.gif from me! Coming home Saturday I hope, just need to talk to the delivery peeps tomorrow.
There's a couple of small imperfections, but one's folded under a crease/coach line in the bumper, and isn't visible, it's just one you can feel. There's another minute one on the side of one of the trim bits, but it's really tiny. Plus, I don't think I'd have much luck asking for any extra work.
When I got there they were polishing it up, but buffed it off the front wing/bonnet for me (hence the weird effect in the photos - which are crap, because I only had one SD card in my camera, and that's throwing an error for some reason, so I used my phone).


###
Not really much of note has happened over Christmas - it's been too cold, and I've been getting up too late to make use of the day light! I've got the wiring loom in (as in, through the bulkhead - it's not connected). The valve clearance have been adjusted (hoping there's less tapping now!), and I've got the inlet manifold/throttle body/cooling/fuel hoses hooked up again.


I got a a little stuck with the cruise control actuator as I'm not sure where it mounts, and I'm also struggling with wiring the injectors back up. The loom is in two parts with a plug in the middle. The original plug corrodes, and are often replaced with crimps. The PO had used double ended bullet connectors, so I had to cut them to remove the injectors/manifold. I've recrimped them with proper, removable crimps. but I've fed the wire too far into the female ones, so there's now not space to insert the male counterpart. Should be simple to fix, but space is tight so it's a job I don't want!
I've also managed to source some new con-rods and pistons from a 320 (don't need the pistons - but the rods are shorter = longer stroke) to go into my spare block for the 2.8 build.

The hydrogen peroxide is to be used with other stuff for plastic bleaching (http://en.wikipedia....iki/Retr0bright).
Then, a couple of weeks later I came across an M52 (e36/e39) 2.8 crank. This goes with the con rods above.
And last week I finally sourced a mint condition dashboard. Yaaaay!


These are terrible for cracking around the indented bit on the passenger side. To find one this good is a very, very rare find from what my searching has shown me.
###
So at this point, things were going fairly well, if slowly. I moved onto changing the fuel filter while the system was still de-pressurised, but the bolts were rusted, so I got the WD40 out and left it. While I was under the car though, I had a look at the work done. After removing the body kit to expose the sills fully, this is what I found.
The metal is fine here, but surely some paint/sealing underneath wouldn't be too much to ask for?

Rear sill - fuel filter in the background.

Same area - fuel pipes in shot - leading off right tothe front

More rear sill - subframe bolt (I think?) in the background

Front sill, passenger's side (no idea how I managed to get my arm in the photo!)

Front sill, before any poking

Same area after 10 seconds of finger poking

I've only looked at the passenger's side so far. I got in a mood and came home - I didn't fancy taking the body kit off the driver's side in a temper. I'm not sure how this will fare MOT time, so my current plan is to get the car to start, bolt in a seat, seat belt, dash, lights, maybe the front windscreen and take it to an MOT centre. If it fails (on the sills), I've got good strong evidence to moan at the body shop. If not, I will still moan. It's even more gouling to know what I've spent on this would now but me nicely at the top of the market for a good condition one which isn't in need of all this work.
Not too sure what to do right now. I don't think there will be much recourse from the body shop, and if it's simple work it might be easier to just foot the bill and get the MOT centre to weld it up (even more so if it's just a simple square like the last picture suggests).
###
here was an alarm inside the car, which I had to remove to get the loom out. On trying to start the car, there's an extra alarm/immo under the bonnet, which I'm still trying to work around. It's this alarm I reference next.
I went over to it again today to try and get it to start, and to try and work out what the remaining alarm is. The other alarm I'm still not sure about, but it only seems to tie into the fuel pump relay and a sensor to see if the bonnet is open. I'm not sure how this is then linked to the ignition?! I'll just remove it completely and see what happens after remaking the connections at the fuel pump replay. While tracing more wires, I also found the radio is being feed directly from the battery point under the bonnet, and not the proper socket behind the glovebox. Fantastic. sleep.png
Anyway, that aside, while I was poking around in the foot well tracing the alarm wires, I came across, you guessed it, rust!
The final repair that I had to mention several times to get done, was a fibre-glassed hole in the top right on the driver's foot well. I noticed that there was some flaking on the paint of the repair, so I started prodding, and what do you know? There's a hole there still! It looks as though a plate was secured (not sure how) from the inside and painted, so at first glance when I inspected it prior to collection, it was solid and looked good. When you look from behind though, it's not so good. There's some sort of expanding foam type stuff, and no metal that I can see.
Anyway, some photos should make my point as I'm not great at describing stuff...
This one shows the plate, with the paint starting to flake off a bit.

This one shows a separate small hole on the edge of the battery box corner

This one the foam

And now with a screwdriver inserted to check where the hole really was. (You can also see the great standard of wiring present through the car!)


You can see the rest of the arch has been under-sealed or stone chipped or something, except this foamy/masticy stuff, so it's clearly been put there afterwards, and isn't left over from the PO's bodges.
(Thankfully I was testing a Canon 100d for work for the weekend, so I was able to fit the camera between the wheel and the arch to get some photos, which my D600 would never have been able to do.)
###
It starts! After tracing some wiring back and remaking the connections from the first alarm, I thought I was ready to go. It turned out though that there was a second immo/alarm installed, one believed to be from new by the dealer. Anyway, that's gone too now (all it did was disable the fuel pump relay. Short two wires and it's over ridden...)

It was running really smokily (not a word!), and wouldn't idle on it's own. I later remembered I'd not connected the rocker cover breather pipe, so there was unmetered air entering the head, and the throttle body. Once that pipe was connected, it idles perfectly.


Since this happy moment, I've managed to change the cam belt (never done one before, but it's beautifully easy on this car, not a terrible prospect like my old Polo!). While doing this though, a couple of bolts snapped, one of which meant we had to remove the PAS pump and alternator. Given the PAS pump is now easily accessible, it seemed like a good time to change the PAS rack for a faster one, as you need new lines which, invariably, connect to the PAS pump and look like a pain to access once buried under an alternator and air filter. (This is proving to be a right pain of a job though.)
While the cambelt change was going on and the car was apart, I took the time to clean/refurb various parts using either paint, 303 aerospace, or just soap & water. I doubt anyone will ever see these parts, but it keeps me happy!
Water pump pulley


Water pipe that runs across the front of the block.


###
For the last two days I've been off work with a temperature and a headache, so rather than moping around watching TV or laying in bed, I've been cleaning some bits up when I've felt well enough. Nothing earth breaking, but it's helped keep me sane (how the career unemployed aren't all bored out of their minds, I'll never know!) and would have annoyed me if they'd gone onto the car dirty.
The centre caps on the wheels were a little tatty (but perfectly serviceable). New from BMW they're something like £45 a corner as they came with the cover for the wheel nuts too, but happily, they also sell embossed metal stickers to cover the originals for a much more reasonable £5, so I cleaned the originals and stuck these on. (For Stu's sake, I'll make sure they're in line with the valve covers.)

The boot lock release also got a wash, but it still looked crap (and had some bubbles in it) so I sanded it down, and sprayed it black. Previously it had a slightly rubberised finish, but it's so tucked away it'll never really be seen anyway.


Next, I turned my attention to the pile of (confusing) rubber trims I had laying around. I didn't photograph all of these, but it's amazing how much dirt is accumulated in these things - esp. the
felt window runners.

Before:


And after some washing with an old flannel, a toothbrush and some washing up liquid:


And the number plate was measured/aligned ready to be fitted (the bolts are behind the plate, so I have to mount the surround to the car first).

This also arrived this afternoon from BMW. A battery tray, securing bolt/bracket for the battery, and a rubber seal for the sunroof. £107 for this lot! ohmy.png

The £20 bolt(!):

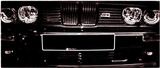
Other little jobs included refitting the rear lights, which has made a massive difference to how finished it looks as you approach the car.

The same was true for the front lights/grills, but then I realised I'll need to remove the grills to aim them properly. D'oh.

And the speedo fitted ready for the MOT.

Still a long way to go, but once this 067 rack is done, I think it should be MOTable fairly quickly as long as I've not lost any parts (I'm not sure where the seat belts are...)
###
Lots of missed updates, but the headline is: it lives!
Need to book an MOT, get some of the bodges fixed at the same time, and then I can finish fitting the right wings, the rest of the bumper, spoiler etc. Insurance is coming back at under £300 too, which I'm happy with considering it's not a classic policy (I'm not old enough), and I've not got any NCB to apply to this car.


In car news, I got a call saying it was ready, so toddled off down there to see, and it's nearly ready - there's just a bit more polishing to go and the wheels to collect from the refurbers, and then it's all done. The finish of the paint I'm very pleased with - there's just a few little blobs and pits in the paint, which I'm told will polish out. The rear boot lid was very bad for this, but I'm told that's not been polished at all yet (and the photos don't show the imperfections anyway)
Some photos (first time using my 15mm-30mm DG lens too - I like it!).
A nice sight to be greeted by compared to the previous visits:
Not too sure on the G60s. They're only there as a temp. wheel while the others are refurbed, but I think with some correctly sized tyres, a paint in silver, and some banding, they should look pretty decent.
Two solid suspension towers:
Some general reflection shots (there are some tiny scratches in the roof, but they don't show on camera)
And quite a few on the unpolished boot:
This run on the rear bumper is the worst imperfection though, but I'm told will be removed.
So it's just polish, and weld up the front bulkhead above the throttle pedal, and it's done. The end of the tunnel is in sight!
###
Well, I'm home from having a look at it, and it's a thumbup.gif thumbup.gif from me! Coming home Saturday I hope, just need to talk to the delivery peeps tomorrow.
There's a couple of small imperfections, but one's folded under a crease/coach line in the bumper, and isn't visible, it's just one you can feel. There's another minute one on the side of one of the trim bits, but it's really tiny. Plus, I don't think I'd have much luck asking for any extra work.
When I got there they were polishing it up, but buffed it off the front wing/bonnet for me (hence the weird effect in the photos - which are crap, because I only had one SD card in my camera, and that's throwing an error for some reason, so I used my phone).
###
Not really much of note has happened over Christmas - it's been too cold, and I've been getting up too late to make use of the day light!
 I've got the wiring loom in (as in, through the bulkhead - it's not connected). The valve clearance have been adjusted (hoping there's less tapping now!), and I've got the inlet manifold/throttle body/cooling/fuel hoses hooked up again.
 I got a a little stuck with the cruise control actuator as I'm not sure where it mounts, and I'm also struggling with wiring the injectors back up. The loom is in two parts with a plug in the middle. The original plug corrodes, and are often replaced with crimps. The PO had used double ended bullet connectors, so I had to cut them to remove the injectors/manifold. I've recrimped them with proper, removable crimps. but I've fed the wire too far into the female ones, so there's now not space to insert the male counterpart. Should be simple to fix, but space is tight so it's a job I don't want!
I've also managed to source some new con-rods and pistons from a 320 (don't need the pistons - but the rods are shorter = longer stroke) to go into my spare block for the 2.8 build.
The hydrogen peroxide is to be used with other stuff for plastic bleaching (http://en.wikipedia....iki/Retr0bright).
Then, a couple of weeks later I came across an M52 (e36/e39) 2.8 crank. This goes with the con rods above.
And last week I finally sourced a mint condition dashboard. Yaaaay!
These are terrible for cracking around the indented bit on the passenger side. To find one this good is a very, very rare find from what my searching has shown me.
###
So at this point, things were going fairly well, if slowly. I moved onto changing the fuel filter while the system was still de-pressurised, but the bolts were rusted, so I got the WD40 out and left it. While I was under the car though, I had a look at the work done. After removing the body kit to expose the sills fully, this is what I found.
The metal is fine here, but surely some paint/sealing underneath wouldn't be too much to ask for?
Rear sill - fuel filter in the background.
Same area - fuel pipes in shot - leading off right tothe front
More rear sill - subframe bolt (I think?) in the background
Front sill, passenger's side (no idea how I managed to get my arm in the photo!)
Front sill, before any poking
Same area after 10 seconds of finger poking
I've only looked at the passenger's side so far. I got in a mood and came home - I didn't fancy taking the body kit off the driver's side in a temper. I'm not sure how this will fare MOT time, so my current plan is to get the car to start, bolt in a seat, seat belt, dash, lights, maybe the front windscreen and take it to an MOT centre. If it fails (on the sills), I've got good strong evidence to moan at the body shop. If not, I will still moan. It's even more gouling to know what I've spent on this would now but me nicely at the top of the market for a good condition one which isn't in need of all this work.
Not too sure what to do right now. I don't think there will be much recourse from the body shop, and if it's simple work it might be easier to just foot the bill and get the MOT centre to weld it up (even more so if it's just a simple square like the last picture suggests).
###
here was an alarm inside the car, which I had to remove to get the loom out. On trying to start the car, there's an extra alarm/immo under the bonnet, which I'm still trying to work around. It's this alarm I reference next.
I went over to it again today to try and get it to start, and to try and work out what the remaining alarm is. The other alarm I'm still not sure about, but it only seems to tie into the fuel pump relay and a sensor to see if the bonnet is open. I'm not sure how this is then linked to the ignition?! I'll just remove it completely and see what happens after remaking the connections at the fuel pump replay. While tracing more wires, I also found the radio is being feed directly from the battery point under the bonnet, and not the proper socket behind the glovebox. Fantastic. sleep.png
Anyway, that aside, while I was poking around in the foot well tracing the alarm wires, I came across, you guessed it, rust!
The final repair that I had to mention several times to get done, was a fibre-glassed hole in the top right on the driver's foot well. I noticed that there was some flaking on the paint of the repair, so I started prodding, and what do you know? There's a hole there still! It looks as though a plate was secured (not sure how) from the inside and painted, so at first glance when I inspected it prior to collection, it was solid and looked good. When you look from behind though, it's not so good. There's some sort of expanding foam type stuff, and no metal that I can see.
Anyway, some photos should make my point as I'm not great at describing stuff...
This one shows the plate, with the paint starting to flake off a bit.
This one shows a separate small hole on the edge of the battery box corner
This one the foam
And now with a screwdriver inserted to check where the hole really was. (You can also see the great standard of wiring present through the car!)
You can see the rest of the arch has been under-sealed or stone chipped or something, except this foamy/masticy stuff, so it's clearly been put there afterwards, and isn't left over from the PO's bodges.
(Thankfully I was testing a Canon 100d for work for the weekend, so I was able to fit the camera between the wheel and the arch to get some photos, which my D600 would never have been able to do.)
###
It starts! After tracing some wiring back and remaking the connections from the first alarm, I thought I was ready to go. It turned out though that there was a second immo/alarm installed, one believed to be from new by the dealer. Anyway, that's gone too now (all it did was disable the fuel pump relay. Short two wires and it's over ridden...)
It was running really smokily (not a word!), and wouldn't idle on it's own. I later remembered I'd not connected the rocker cover breather pipe, so there was unmetered air entering the head, and the throttle body. Once that pipe was connected, it idles perfectly.
Since this happy moment, I've managed to change the cam belt (never done one before, but it's beautifully easy on this car, not a terrible prospect like my old Polo!). While doing this though, a couple of bolts snapped, one of which meant we had to remove the PAS pump and alternator. Given the PAS pump is now easily accessible, it seemed like a good time to change the PAS rack for a faster one, as you need new lines which, invariably, connect to the PAS pump and look like a pain to access once buried under an alternator and air filter. (This is proving to be a right pain of a job though.)
While the cambelt change was going on and the car was apart, I took the time to clean/refurb various parts using either paint, 303 aerospace, or just soap & water. I doubt anyone will ever see these parts, but it keeps me happy!
Water pump pulley
Water pipe that runs across the front of the block.
###
For the last two days I've been off work with a temperature and a headache, so rather than moping around watching TV or laying in bed, I've been cleaning some bits up when I've felt well enough. Nothing earth breaking, but it's helped keep me sane (how the career unemployed aren't all bored out of their minds, I'll never know!) and would have annoyed me if they'd gone onto the car dirty.
The centre caps on the wheels were a little tatty (but perfectly serviceable). New from BMW they're something like £45 a corner as they came with the cover for the wheel nuts too, but happily, they also sell embossed metal stickers to cover the originals for a much more reasonable £5, so I cleaned the originals and stuck these on. (For Stu's sake, I'll make sure they're in line with the valve covers.)
The boot lock release also got a wash, but it still looked crap (and had some bubbles in it) so I sanded it down, and sprayed it black. Previously it had a slightly rubberised finish, but it's so tucked away it'll never really be seen anyway.
Next, I turned my attention to the pile of (confusing) rubber trims I had laying around. I didn't photograph all of these, but it's amazing how much dirt is accumulated in these things - esp. the
felt window runners.
Before:
And after some washing with an old flannel, a toothbrush and some washing up liquid:
And the number plate was measured/aligned ready to be fitted (the bolts are behind the plate, so I have to mount the surround to the car first).
This also arrived this afternoon from BMW. A battery tray, securing bolt/bracket for the battery, and a rubber seal for the sunroof. £107 for this lot! ohmy.png
The £20 bolt(!):
Other little jobs included refitting the rear lights, which has made a massive difference to how finished it looks as you approach the car.
The same was true for the front lights/grills, but then I realised I'll need to remove the grills to aim them properly. D'oh.
And the speedo fitted ready for the MOT.
Still a long way to go, but once this 067 rack is done, I think it should be MOTable fairly quickly as long as I've not lost any parts (I'm not sure where the seat belts are...)
###
Lots of missed updates, but the headline is: it lives!
Need to book an MOT, get some of the bodges fixed at the same time, and then I can finish fitting the right wings, the rest of the bumper, spoiler etc. Insurance is coming back at under £300 too, which I'm happy with considering it's not a classic policy (I'm not old enough), and I've not got any NCB to apply to this car.
-
TriggerFish
- E30 Zone Regular
- Posts: 507
- Joined: Sat Jun 30, 2012 11:00 pm
- Location: Aylesbury, Bucks
My phone's come back to life again, I'm happy to say
In car news, I got a call saying it was ready, so toddled off down there to see, and it's nearly ready - there's just a bit more polishing to go and the wheels to collect from the refurbers, and then it's all done. The finish of the paint I'm very pleased with - there's just a few little blobs and pits in the paint, which I'm told will polish out. The rear boot lid was very bad for this, but I'm told that's not been polished at all yet (and the photos don't show the imperfections anyway)
Some photos (first time using my 15mm-30mm DG lens too - I like it!).
A nice sight to be greeted by compared to the previous visits:
Not too sure on the G60s. They're only there as a temp. wheel while the others are refurbed, but I think with some correctly sized tyres, a paint in silver, and some banding, they should look pretty decent.
Two solid suspension towers:
Some general reflection shots (there are some tiny scratches in the roof, but they don't show on camera)
And quite a few on the unpolished boot:
This run on the rear bumper is the worst imperfection though, but I'm told will be removed.
So it's just polish, and weld up the front bulkhead above the throttle pedal, and it's done. The end of the tunnel is in sight!
###
Well, I'm home from having a look at it, and it's a thumbup.gif thumbup.gif from me! Coming home Saturday I hope, just need to talk to the delivery peeps tomorrow.
There's a couple of small imperfections, but one's folded under a crease/coach line in the bumper, and isn't visible, it's just one you can feel. There's another minute one on the side of one of the trim bits, but it's really tiny. Plus, I don't think I'd have much luck asking for any extra work.
When I got there they were polishing it up, but buffed it off the front wing/bonnet for me (hence the weird effect in the photos - which are crap, because I only had one SD card in my camera, and that's throwing an error for some reason, so I used my phone).
###
Not really much of note has happened over Christmas - it's been too cold, and I've been getting up too late to make use of the day light! I've got the wiring loom in (as in, through the bulkhead - it's not connected). The valve clearance have been adjusted (hoping there's less tapping now!), and I've got the inlet manifold/throttle body/cooling/fuel hoses hooked up again.
I got a a little stuck with the cruise control actuator as I'm not sure where it mounts, and I'm also struggling with wiring the injectors back up. The loom is in two parts with a plug in the middle. The original plug corrodes, and are often replaced with crimps. The PO had used double ended bullet connectors, so I had to cut them to remove the injectors/manifold. I've recrimped them with proper, removable crimps. but I've fed the wire too far into the female ones, so there's now not space to insert the male counterpart. Should be simple to fix, but space is tight so it's a job I don't want!
I've also managed to source some new con-rods and pistons from a 320 (don't need the pistons - but the rods are shorter = longer stroke) to go into my spare block for the 2.8 build.
The hydrogen peroxide is to be used with other stuff for plastic bleaching (http://en.wikipedia....iki/Retr0bright).
Then, a couple of weeks later I came across an M52 (e36/e39) 2.8 crank. This goes with the con rods above.
And last week I finally sourced a mint condition dashboard. Yaaaay!
These are terrible for cracking around the indented bit on the passenger side. To find one this good is a very, very rare find from what my searching has shown me.
###
So at this point, things were going fairly well, if slowly. I moved onto changing the fuel filter while the system was still de-pressurised, but the bolts were rusted, so I got the WD40 out and left it. While I was under the car though, I had a look at the work done. After removing the body kit to expose the sills fully, this is what I found.
The metal is fine here, but surely some paint/sealing underneath wouldn't be too much to ask for?
Rear sill - fuel filter in the background.
Same area - fuel pipes in shot - leading off right tothe front
More rear sill - subframe bolt (I think?) in the background
Front sill, passenger's side (no idea how I managed to get my arm in the photo!)
Front sill, before any poking
Same area after 10 seconds of finger poking
I've only looked at the passenger's side so far. I got in a mood and came home - I didn't fancy taking the body kit off the driver's side in a temper. I'm not sure how this will fare MOT time, so my current plan is to get the car to start, bolt in a seat, seat belt, dash, lights, maybe the front windscreen and take it to an MOT centre. If it fails (on the sills), I've got good strong evidence to moan at the body shop. If not, I will still moan. It's even more gouling to know what I've spent on this would now but me nicely at the top of the market for a good condition one which isn't in need of all this work.
Not too sure what to do right now. I don't think there will be much recourse from the body shop, and if it's simple work it might be easier to just foot the bill and get the MOT centre to weld it up (even more so if it's just a simple square like the last picture suggests).
###
here was an alarm inside the car, which I had to remove to get the loom out. On trying to start the car, there's an extra alarm/immo under the bonnet, which I'm still trying to work around. It's this alarm I reference next.
I went over to it again today to try and get it to start, and to try and work out what the remaining alarm is. The other alarm I'm still not sure about, but it only seems to tie into the fuel pump relay and a sensor to see if the bonnet is open. I'm not sure how this is then linked to the ignition?! I'll just remove it completely and see what happens after remaking the connections at the fuel pump replay. While tracing more wires, I also found the radio is being feed directly from the battery point under the bonnet, and not the proper socket behind the glovebox. Fantastic. sleep.png
Anyway, that aside, while I was poking around in the foot well tracing the alarm wires, I came across, you guessed it, rust!
The final repair that I had to mention several times to get done, was a fibre-glassed hole in the top right on the driver's foot well. I noticed that there was some flaking on the paint of the repair, so I started prodding, and what do you know? There's a hole there still! It looks as though a plate was secured (not sure how) from the inside and painted, so at first glance when I inspected it prior to collection, it was solid and looked good. When you look from behind though, it's not so good. There's some sort of expanding foam type stuff, and no metal that I can see.
Anyway, some photos should make my point as I'm not great at describing stuff...
This one shows the plate, with the paint starting to flake off a bit.
This one shows a separate small hole on the edge of the battery box corner
This one the foam
And now with a screwdriver inserted to check where the hole really was. (You can also see the great standard of wiring present through the car!)
You can see the rest of the arch has been under-sealed or stone chipped or something, except this foamy/masticy stuff, so it's clearly been put there afterwards, and isn't left over from the PO's bodges.
(Thankfully I was testing a Canon 100d for work for the weekend, so I was able to fit the camera between the wheel and the arch to get some photos, which my D600 would never have been able to do.)
###
It starts! After tracing some wiring back and remaking the connections from the first alarm, I thought I was ready to go. It turned out though that there was a second immo/alarm installed, one believed to be from new by the dealer. Anyway, that's gone too now (all it did was disable the fuel pump relay. Short two wires and it's over ridden...)
It was running really smokily (not a word!), and wouldn't idle on it's own. I later remembered I'd not connected the rocker cover breather pipe, so there was unmetered air entering the head, and the throttle body. Once that pipe was connected, it idles perfectly.
Since this happy moment, I've managed to change the cam belt (never done one before, but it's beautifully easy on this car, not a terrible prospect like my old Polo!). While doing this though, a couple of bolts snapped, one of which meant we had to remove the PAS pump and alternator. Given the PAS pump is now easily accessible, it seemed like a good time to change the PAS rack for a faster one, as you need new lines which, invariably, connect to the PAS pump and look like a pain to access once buried under an alternator and air filter. (This is proving to be a right pain of a job though.)
While the cambelt change was going on and the car was apart, I took the time to clean/refurb various parts using either paint, 303 aerospace, or just soap & water. I doubt anyone will ever see these parts, but it keeps me happy!
Water pump pulley
Water pipe that runs across the front of the block.
###
For the last two days I've been off work with a temperature and a headache, so rather than moping around watching TV or laying in bed, I've been cleaning some bits up when I've felt well enough. Nothing earth breaking, but it's helped keep me sane (how the career unemployed aren't all bored out of their minds, I'll never know!) and would have annoyed me if they'd gone onto the car dirty.
The centre caps on the wheels were a little tatty (but perfectly serviceable). New from BMW they're something like £45 a corner as they came with the cover for the wheel nuts too, but happily, they also sell embossed metal stickers to cover the originals for a much more reasonable £5, so I cleaned the originals and stuck these on. (For Stu's sake, I'll make sure they're in line with the valve covers.)
The boot lock release also got a wash, but it still looked crap (and had some bubbles in it) so I sanded it down, and sprayed it black. Previously it had a slightly rubberised finish, but it's so tucked away it'll never really be seen anyway.
Next, I turned my attention to the pile of (confusing) rubber trims I had laying around. I didn't photograph all of these, but it's amazing how much dirt is accumulated in these things - esp. the
felt window runners.
Before:
And after some washing with an old flannel, a toothbrush and some washing up liquid:
And the number plate was measured/aligned ready to be fitted (the bolts are behind the plate, so I have to mount the surround to the car first).
This also arrived this afternoon from BMW. A battery tray, securing bolt/bracket for the battery, and a rubber seal for the sunroof. £107 for this lot! ohmy.png
The £20 bolt(!):
Other little jobs included refitting the rear lights, which has made a massive difference to how finished it looks as you approach the car.
The same was true for the front lights/grills, but then I realised I'll need to remove the grills to aim them properly. D'oh.
And the speedo fitted ready for the MOT.
Still a long way to go, but once this 067 rack is done, I think it should be MOTable fairly quickly as long as I've not lost any parts (I'm not sure where the seat belts are...)
###
Lots of missed updates, but the headline is: it lives!
Need to book an MOT, get some of the bodges fixed at the same time, and then I can finish fitting the right wings, the rest of the bumper, spoiler etc. Insurance is coming back at under £300 too, which I'm happy with considering it's not a classic policy (I'm not old enough), and I've not got any NCB to apply to this car.
In car news, I got a call saying it was ready, so toddled off down there to see, and it's nearly ready - there's just a bit more polishing to go and the wheels to collect from the refurbers, and then it's all done. The finish of the paint I'm very pleased with - there's just a few little blobs and pits in the paint, which I'm told will polish out. The rear boot lid was very bad for this, but I'm told that's not been polished at all yet (and the photos don't show the imperfections anyway)
Some photos (first time using my 15mm-30mm DG lens too - I like it!).
A nice sight to be greeted by compared to the previous visits:
Not too sure on the G60s. They're only there as a temp. wheel while the others are refurbed, but I think with some correctly sized tyres, a paint in silver, and some banding, they should look pretty decent.
Two solid suspension towers:
Some general reflection shots (there are some tiny scratches in the roof, but they don't show on camera)
And quite a few on the unpolished boot:
This run on the rear bumper is the worst imperfection though, but I'm told will be removed.
So it's just polish, and weld up the front bulkhead above the throttle pedal, and it's done. The end of the tunnel is in sight!
###
Well, I'm home from having a look at it, and it's a thumbup.gif thumbup.gif from me! Coming home Saturday I hope, just need to talk to the delivery peeps tomorrow.
There's a couple of small imperfections, but one's folded under a crease/coach line in the bumper, and isn't visible, it's just one you can feel. There's another minute one on the side of one of the trim bits, but it's really tiny. Plus, I don't think I'd have much luck asking for any extra work.
When I got there they were polishing it up, but buffed it off the front wing/bonnet for me (hence the weird effect in the photos - which are crap, because I only had one SD card in my camera, and that's throwing an error for some reason, so I used my phone).
###
Not really much of note has happened over Christmas - it's been too cold, and I've been getting up too late to make use of the day light!
I've got the wiring loom in (as in, through the bulkhead - it's not connected). The valve clearance have been adjusted (hoping there's less tapping now!), and I've got the inlet manifold/throttle body/cooling/fuel hoses hooked up again. I got a a little stuck with the cruise control actuator as I'm not sure where it mounts, and I'm also struggling with wiring the injectors back up. The loom is in two parts with a plug in the middle. The original plug corrodes, and are often replaced with crimps. The PO had used double ended bullet connectors, so I had to cut them to remove the injectors/manifold. I've recrimped them with proper, removable crimps. but I've fed the wire too far into the female ones, so there's now not space to insert the male counterpart. Should be simple to fix, but space is tight so it's a job I don't want!
I've also managed to source some new con-rods and pistons from a 320 (don't need the pistons - but the rods are shorter = longer stroke) to go into my spare block for the 2.8 build.
The hydrogen peroxide is to be used with other stuff for plastic bleaching (http://en.wikipedia....iki/Retr0bright).
Then, a couple of weeks later I came across an M52 (e36/e39) 2.8 crank. This goes with the con rods above.
And last week I finally sourced a mint condition dashboard. Yaaaay!
These are terrible for cracking around the indented bit on the passenger side. To find one this good is a very, very rare find from what my searching has shown me.
###
So at this point, things were going fairly well, if slowly. I moved onto changing the fuel filter while the system was still de-pressurised, but the bolts were rusted, so I got the WD40 out and left it. While I was under the car though, I had a look at the work done. After removing the body kit to expose the sills fully, this is what I found.
The metal is fine here, but surely some paint/sealing underneath wouldn't be too much to ask for?
Rear sill - fuel filter in the background.
Same area - fuel pipes in shot - leading off right tothe front
More rear sill - subframe bolt (I think?) in the background
Front sill, passenger's side (no idea how I managed to get my arm in the photo!)
Front sill, before any poking
Same area after 10 seconds of finger poking
I've only looked at the passenger's side so far. I got in a mood and came home - I didn't fancy taking the body kit off the driver's side in a temper. I'm not sure how this will fare MOT time, so my current plan is to get the car to start, bolt in a seat, seat belt, dash, lights, maybe the front windscreen and take it to an MOT centre. If it fails (on the sills), I've got good strong evidence to moan at the body shop. If not, I will still moan. It's even more gouling to know what I've spent on this would now but me nicely at the top of the market for a good condition one which isn't in need of all this work.
Not too sure what to do right now. I don't think there will be much recourse from the body shop, and if it's simple work it might be easier to just foot the bill and get the MOT centre to weld it up (even more so if it's just a simple square like the last picture suggests).
###
here was an alarm inside the car, which I had to remove to get the loom out. On trying to start the car, there's an extra alarm/immo under the bonnet, which I'm still trying to work around. It's this alarm I reference next.
I went over to it again today to try and get it to start, and to try and work out what the remaining alarm is. The other alarm I'm still not sure about, but it only seems to tie into the fuel pump relay and a sensor to see if the bonnet is open. I'm not sure how this is then linked to the ignition?! I'll just remove it completely and see what happens after remaking the connections at the fuel pump replay. While tracing more wires, I also found the radio is being feed directly from the battery point under the bonnet, and not the proper socket behind the glovebox. Fantastic. sleep.png
Anyway, that aside, while I was poking around in the foot well tracing the alarm wires, I came across, you guessed it, rust!
The final repair that I had to mention several times to get done, was a fibre-glassed hole in the top right on the driver's foot well. I noticed that there was some flaking on the paint of the repair, so I started prodding, and what do you know? There's a hole there still! It looks as though a plate was secured (not sure how) from the inside and painted, so at first glance when I inspected it prior to collection, it was solid and looked good. When you look from behind though, it's not so good. There's some sort of expanding foam type stuff, and no metal that I can see.
Anyway, some photos should make my point as I'm not great at describing stuff...
This one shows the plate, with the paint starting to flake off a bit.
This one shows a separate small hole on the edge of the battery box corner
This one the foam
And now with a screwdriver inserted to check where the hole really was. (You can also see the great standard of wiring present through the car!)
You can see the rest of the arch has been under-sealed or stone chipped or something, except this foamy/masticy stuff, so it's clearly been put there afterwards, and isn't left over from the PO's bodges.
(Thankfully I was testing a Canon 100d for work for the weekend, so I was able to fit the camera between the wheel and the arch to get some photos, which my D600 would never have been able to do.)
###
It starts! After tracing some wiring back and remaking the connections from the first alarm, I thought I was ready to go. It turned out though that there was a second immo/alarm installed, one believed to be from new by the dealer. Anyway, that's gone too now (all it did was disable the fuel pump relay. Short two wires and it's over ridden...)
It was running really smokily (not a word!), and wouldn't idle on it's own. I later remembered I'd not connected the rocker cover breather pipe, so there was unmetered air entering the head, and the throttle body. Once that pipe was connected, it idles perfectly.
Since this happy moment, I've managed to change the cam belt (never done one before, but it's beautifully easy on this car, not a terrible prospect like my old Polo!). While doing this though, a couple of bolts snapped, one of which meant we had to remove the PAS pump and alternator. Given the PAS pump is now easily accessible, it seemed like a good time to change the PAS rack for a faster one, as you need new lines which, invariably, connect to the PAS pump and look like a pain to access once buried under an alternator and air filter. (This is proving to be a right pain of a job though.)
While the cambelt change was going on and the car was apart, I took the time to clean/refurb various parts using either paint, 303 aerospace, or just soap & water. I doubt anyone will ever see these parts, but it keeps me happy!
Water pump pulley
Water pipe that runs across the front of the block.
###
For the last two days I've been off work with a temperature and a headache, so rather than moping around watching TV or laying in bed, I've been cleaning some bits up when I've felt well enough. Nothing earth breaking, but it's helped keep me sane (how the career unemployed aren't all bored out of their minds, I'll never know!) and would have annoyed me if they'd gone onto the car dirty.
The centre caps on the wheels were a little tatty (but perfectly serviceable). New from BMW they're something like £45 a corner as they came with the cover for the wheel nuts too, but happily, they also sell embossed metal stickers to cover the originals for a much more reasonable £5, so I cleaned the originals and stuck these on. (For Stu's sake, I'll make sure they're in line with the valve covers.)
The boot lock release also got a wash, but it still looked crap (and had some bubbles in it) so I sanded it down, and sprayed it black. Previously it had a slightly rubberised finish, but it's so tucked away it'll never really be seen anyway.
Next, I turned my attention to the pile of (confusing) rubber trims I had laying around. I didn't photograph all of these, but it's amazing how much dirt is accumulated in these things - esp. the
felt window runners.
Before:
And after some washing with an old flannel, a toothbrush and some washing up liquid:
And the number plate was measured/aligned ready to be fitted (the bolts are behind the plate, so I have to mount the surround to the car first).
This also arrived this afternoon from BMW. A battery tray, securing bolt/bracket for the battery, and a rubber seal for the sunroof. £107 for this lot! ohmy.png
The £20 bolt(!):
Other little jobs included refitting the rear lights, which has made a massive difference to how finished it looks as you approach the car.
The same was true for the front lights/grills, but then I realised I'll need to remove the grills to aim them properly. D'oh.
And the speedo fitted ready for the MOT.
Still a long way to go, but once this 067 rack is done, I think it should be MOTable fairly quickly as long as I've not lost any parts (I'm not sure where the seat belts are...)
###
Lots of missed updates, but the headline is: it lives!
Need to book an MOT, get some of the bodges fixed at the same time, and then I can finish fitting the right wings, the rest of the bumper, spoiler etc. Insurance is coming back at under £300 too, which I'm happy with considering it's not a classic policy (I'm not old enough), and I've not got any NCB to apply to this car.
-
TriggerFish
- E30 Zone Regular
- Posts: 507
- Joined: Sat Jun 30, 2012 11:00 pm
- Location: Aylesbury, Bucks
Nearly there now!
###
Loooots of updates missed with this, but here's a quick run down of where it stands now... Some bits copied/pasted from my main thread on the BMW forums, so apologies for any slightly disjointed commentary!
I took it for an MOT - it failed miserably! Some bits I was expecting, others came as a surprise. The fail sheet is quite long but the headlines where the welds done previously weren't up to MOT standards! I took it back, and had those redone (at which point they also managed to put a cutting disk through a brake pipe - luckily I noticed before joining the road!). After fixing some other little bits like headlight aim and a faded indicator, it passed Remaining advisories were for brake hard lines/fuel pipes being perished, and low tyre tread (4mm - not that low?). Either way, I had a set of new Bridgestones waiting to go on, so no hardship there.
After getting the MOT in place, I moved on to tidying up the remaining bits, ready to refit the interior. For the MOT I just had the driver's seat, and the speedo cable tied onto the steering column - perfectly MOT friendly, apparently! This started with mundane jobs like replacing all the loom tape - it makes it a lot easier, and nicer to handle the loom.


While adding some new wiring into the car, I studied one of the repairs to the sill for the first time. The floor and sill had become two separate parts of the car, so they've added a panel in to reattach them. Who can see what's wrong with this photo?

Still can't see? Maybe this helps?

That's right! They've only welded the replacement panel at the bottom - it's not attached to sill at the top! default_sleep.png
I noticed this around 1-2pm on Sunday, and was due to return the welder I had borrowed from a friend for something on Sunday afternoon, so it was a rushed job to patch it back up. As much as this welder is so much easier to use than ours, and I can do a decent weld on two sheets of flat, clean metal, this was beyond me.
So out again comes the welder, complete with a new fire extinguisher after I broke the old one... ("Single use discharge. DO NOT TEST" was wasted on me...)

Next up, I moved on to replacing the interior now all the groundworks had been done.
Dashboard in default_biggrin.png I was expecting this to be a terrible job, but it only took about 2 minutes (with my mum to help).

I've also started to add some sound damping. Dunno if it's going to make much difference, but here's hoping! (I started by cutting into neatish sections, then got bored, and just started using it as sheets/half sheets. I've also covered the whole bulkhead under the dash too, as well as replacing the foam gasket from the heaterbox to the air vents)


The rear spoiler wasn't polished when I first got it back, so I returned it a while ago to be done. It came back, and I've since noticed only some of it was polished default_sleep.png I've just had a go myself, and while it feels so much better, it still looks weird. I think this needs a professional to have a go, or redoing again. Let's see how that discussion goes...
Before (some of this is dust from living behind my bed for the last few months...)


Notice the differences in shade though, and the dullness?
After some 1500 grit paper, and some generic polish, it looks and feels much better, but the two shade of paint are still present.


This (one of many) hella runs shows it was at least lacquered...

And from afar. At least it doesn't hold me up at all, but how hard is it to just do a job properly in the first place?!
###
Well, as some of you know/have seen, this is more or less done now. default_smile.png Woo!
There's a few little bits that I need to do, like refit the front speakers, adjust the steering column cowl, fit the boot carpets, but it's a fully functional, perfectly drivable car! default_biggrin.png And yes, everything inside needs a very good clean. I just took it out of storage, wiped the cobwebs off, and threw it in. No deep cleaning or anything has been done yet.
From BMW Show, Santa Pod


It hit the 175k milestone yesterday too. Next on my list: replacement engine. The tapping from mine is driving me mad at speeds above 50ish!
###
So, now I've actually spent some time driving it (I was commuting last week), what's it like? Well, it's not economical! I think I'm getting in the region of 20-25mpg. Not horrific, but not exactly good. I was expecting 25-30mpg, so maybe it's a bit worse than expected.
It's also now on new Bridgestone Potenza tyres, rather than 2003's finest Goodyears. This has made a massive difference! Comparisons are to my e46 330d. It's clearly not a modern car, this one being from 1989 (it was an F plate, before someone added the stupid dateless plate), but it's perfectly liveable day to day. It's not as fast as my 330d, and nor is the engine as relaxing, but it's perfectly able to hold it's own, and overtake slow traffic (like buses!). However, the engine is a lot more flexible, as it will happily sit in 5th at 20-25mph. Sure, it's not fast, but the 330d won't let me into fifth without complaint until I'm going at least 50mph. The engine is really, really, really loud though. It's not exhaust noise, it's just a constant tapping. I've done the valve clearances, but it's still there (turned out, as discovered several months after I first wrote this, that there's at least one snapped exhaust manifold stud). Once about 50mph, it's an all consuming noise. If you put it into neutral, and let the engine idle, it's actually a nice, fairly refined place to me. It's louder than the 330d, but much quieter than, say, a friend's Fiesta.
Comfort is good too. The seats are much more supportive than the 330, which seems to be made for the more... portly driver, but the back is a bit thin, and if you sit wrong, there seems to be a lack of padding. Ride is much, much better than the 'd. It's so smooth in comparison. It seems to handle bumps/ridges better, although it is more rolly. Handling, I don't know, as I haven't pushed it yet, but the steering is great. Very talkative, but not annoyingly so. Nice and direct with the 067 rack (fast rack from an e46), and with new track rods/couplers etc, there's no slack either. I maybe wish it were a little heavier though, as it's more assisted than the 330d. The steering wheel feels lovely and small too, although I think it's 370mm, the same as the 'd, but the rim itself isn't as chunky.
Controls: Brakes? They stop the car. That's about all I can say in their favour! Well that, and they look good behind the tiny wheels (it's all proportionate!) They're very spongy, and I much prefer the modern brakes on the 'd. Much more confidence inspiring, and more progressive/feel in them. Throttle - nice short travel. I prefer this to the longer travel. Even with a new cable though, it's quite stiff, which makes heel and toe a bit tricky. As a result, I often lurch downshifts, something made worse by the pedal spacing being a bit off for me. Not a massive problem, but the later car is an improvement in this respect. The clutch is fine - it's a clutch, it only does one job, but the pedal is heavy. Not a problem for me, but it means the first few times I use a modern clutch, I end up punching the bulkhead with my foot (also known as kicking, I guess!).
The seating position in the 330d is much nicer for me. It's lower in the car, and I can sit with my legs more outstretched. The e30 forces me to sit with my legs tucked a bit behind the steering wheel, otherwise I can't fully let the clutch up. Add in the fact that the seat is a bit higher from the floor, and it's not as nice. It's not bad, and driven in isolation is absolutely fine. The steering wheel does obscure the (inaccurate) speedo between 60-80 though!
So, the 330d does represent a bit improvement over the e30, but the e30 is still a perfectly usable car in today's world, even 33 years after it's release. The biggest let down for me to stop it being a daily? MPG, crash test safety (what safety?!) and the fear of rust/need for upkeep. I'd still say that the e30 is a nicer car than something like my parent's 2007 1.6 Ford Focus (mk2). It drives, steering, handles, rides better - all impressive for such an age gap.
My dad drove it for the first time the other day and his response was 'I can see why these were popular in the 80's!'.
I worked out the mpg today, bang on 25. Considering a fair amount of time was spent idling trying to revive the 330d after its battery died, that's not too bad.
I was also talking to my mum about how fast it is. On the way home, I found a nicely resurfaced long straight quiet back road, so it seemed a shame to pass the opportunity up!

Meant to be 7.7 or7.2 I think, so not great! My other run was 10.3 - there's time to be found in the gear changes, but meh.
I went with my dad (no chance an engine would fit in the back of my car with its tiny boot aperture...) to Monkey World in Wareham to pick up my 'new' M20B25 engine. I'll pick up one of those portable engine stands and make a start on stripping it down. My engine has lost of its coolant again, so it's not healthy. Add this to the burning oil, which is very watery, and seems to stay at a fixed level, and it's looking a bit terminal for my head. I fear leaving it too long will end up with water as a lubricant. Still, it's nearly winter, so it'll be off the road anyway, so no rush to rebuild it.

I've managed to fit the boot carpets (still not done the torsion bars for the boot lid, so excuse the wood!), and found an old school service sticker. Check out the 10 digit phone number!

While doing the boot carpets, it seemed like a good time to fit my MS-8 DSP/amp. This is only the second amp I've fitted, but I'm pleased with it. I think it's a neat, clean install. Miles better than the first one I did anyway!


The MS-8 itself though is very, very impressive! It's a full digital signal processor/EQ and a low powered amp too (30w x8 IIRC). It's being driven by my old 1980's FM radio, and has a separate aux in for my bluetooth streamer. Luckily, it has five different profiles, so I can set the EQ etc. for the radio independently of the aux input.
It makes the FM radio really come alive, and adds a clarity and depth to the music that wasn't present before. It handles aux inputs nicely too. The speakers, considering their small size (5.25") sound pretty decent. Nice and clear with no distortion with fairly clear highs, without being too harsh. Bass isn't amazing, as expected, but it's adequate, and sufficient that I won't bother with a sub (which I didn't really want to do). The trim copes very well too, with only a slight rattle from the passenger's speaker cover on prolonged heavy bass notes. Having a 31 frequency EQ, I'm sure I can tune that out with a bit of tweaking. For me, the volume is fine without the need for an external, high powered amp, which the MS-8 can drive.
The other impressive thing is the isolation of the music from outside the car. I'm not sure if it's a result of the sound deadening, but it's a lot quieter standing outside the E30 with music on than it is the 330d, which lets a lot more noise out.
My only gripe with the whole system is the need for a separate screen to control the unit/change input sources etc. Still, not the end of the world.
###
So at this point, it was going fairly well until one fateful night on the way home from a blood donation session (just what I wanted after being stabbed with a massive needle!)

Caused still not confirmed, but either the head or the head gasket gave in.
I won't put details of the engine build here, mainly as it's patchy coverage, and my phone broke, so there's no photos anyway, but the engine pictured previously in currently being rebuild into a 2.8l. I've got the head together, complete with uprated duration/lift Schrick camshaft, new rocker arms and new rocker shafts. The lower end is together with M52B28 crank shaft, M20B20 conrods, and lightened M20B25 pistons. I just need to mate the head with the engine (waiting on one oil seal to arrive), and then I can get it paired with the gearbox ready to fit. Power estimates are 200-220bhp. Not masses, but up to 100 more than what I estimate I had before based on 0-60 times.

To get the engine out, I had to disconnect/remove the exhaust, so I could unbolt the prop. With the prop out, it seemed like a good time to do the guibo bush, and the prop support bearing. While the prop/exhaust are off (painful jobs!) it seemed like the best time to do something about the MOT advisory brake lines/fuel pipes.
However, to get to those, I have to drop the rear subframe, so I might as well do the diff bush, and subframe bushes, and the rear trailing arm bushes. Basically a full rear end rebuild. Given this, I also got new ARB mounts front/rear, and new front wishbone bushes. While everything is out from under the car, I will give it a good coat of some chassis paint/protection. I love it when things escalate.


Anyway, that's me up to date as the engine rebuild/chassis refresh is still ongoing.
####
As of now, the engine is back together (M20B28, Schrick 272/272 cam - block/head/piston work done by Byron/maggspower, and rebuilt by myself. A nice simple engine to work on for a n00b like me!)
###
Loooots of updates missed with this, but here's a quick run down of where it stands now... Some bits copied/pasted from my main thread on the BMW forums, so apologies for any slightly disjointed commentary!
I took it for an MOT - it failed miserably! Some bits I was expecting, others came as a surprise. The fail sheet is quite long but the headlines where the welds done previously weren't up to MOT standards! I took it back, and had those redone (at which point they also managed to put a cutting disk through a brake pipe - luckily I noticed before joining the road!). After fixing some other little bits like headlight aim and a faded indicator, it passed
After getting the MOT in place, I moved on to tidying up the remaining bits, ready to refit the interior. For the MOT I just had the driver's seat, and the speedo cable tied onto the steering column - perfectly MOT friendly, apparently! This started with mundane jobs like replacing all the loom tape - it makes it a lot easier, and nicer to handle the loom.
While adding some new wiring into the car, I studied one of the repairs to the sill for the first time. The floor and sill had become two separate parts of the car, so they've added a panel in to reattach them. Who can see what's wrong with this photo?
Still can't see? Maybe this helps?
That's right! They've only welded the replacement panel at the bottom - it's not attached to sill at the top! default_sleep.png
I noticed this around 1-2pm on Sunday, and was due to return the welder I had borrowed from a friend for something on Sunday afternoon, so it was a rushed job to patch it back up. As much as this welder is so much easier to use than ours, and I can do a decent weld on two sheets of flat, clean metal, this was beyond me.
So out again comes the welder, complete with a new fire extinguisher after I broke the old one... ("Single use discharge. DO NOT TEST" was wasted on me...)
Next up, I moved on to replacing the interior now all the groundworks had been done.
Dashboard in default_biggrin.png I was expecting this to be a terrible job, but it only took about 2 minutes (with my mum to help).
I've also started to add some sound damping. Dunno if it's going to make much difference, but here's hoping! (I started by cutting into neatish sections, then got bored, and just started using it as sheets/half sheets. I've also covered the whole bulkhead under the dash too, as well as replacing the foam gasket from the heaterbox to the air vents)
The rear spoiler wasn't polished when I first got it back, so I returned it a while ago to be done. It came back, and I've since noticed only some of it was polished default_sleep.png I've just had a go myself, and while it feels so much better, it still looks weird. I think this needs a professional to have a go, or redoing again. Let's see how that discussion goes...
Before (some of this is dust from living behind my bed for the last few months...)
Notice the differences in shade though, and the dullness?
After some 1500 grit paper, and some generic polish, it looks and feels much better, but the two shade of paint are still present.
This (one of many) hella runs shows it was at least lacquered...
And from afar. At least it doesn't hold me up at all, but how hard is it to just do a job properly in the first place?!
###
Well, as some of you know/have seen, this is more or less done now. default_smile.png Woo!
There's a few little bits that I need to do, like refit the front speakers, adjust the steering column cowl, fit the boot carpets, but it's a fully functional, perfectly drivable car! default_biggrin.png And yes, everything inside needs a very good clean. I just took it out of storage, wiped the cobwebs off, and threw it in. No deep cleaning or anything has been done yet.
From BMW Show, Santa Pod
It hit the 175k milestone yesterday too. Next on my list: replacement engine. The tapping from mine is driving me mad at speeds above 50ish!
###
So, now I've actually spent some time driving it (I was commuting last week), what's it like? Well, it's not economical! I think I'm getting in the region of 20-25mpg. Not horrific, but not exactly good. I was expecting 25-30mpg, so maybe it's a bit worse than expected.
It's also now on new Bridgestone Potenza tyres, rather than 2003's finest Goodyears. This has made a massive difference! Comparisons are to my e46 330d. It's clearly not a modern car, this one being from 1989 (it was an F plate, before someone added the stupid dateless plate), but it's perfectly liveable day to day. It's not as fast as my 330d, and nor is the engine as relaxing, but it's perfectly able to hold it's own, and overtake slow traffic (like buses!). However, the engine is a lot more flexible, as it will happily sit in 5th at 20-25mph. Sure, it's not fast, but the 330d won't let me into fifth without complaint until I'm going at least 50mph. The engine is really, really, really loud though. It's not exhaust noise, it's just a constant tapping. I've done the valve clearances, but it's still there (turned out, as discovered several months after I first wrote this, that there's at least one snapped exhaust manifold stud). Once about 50mph, it's an all consuming noise. If you put it into neutral, and let the engine idle, it's actually a nice, fairly refined place to me. It's louder than the 330d, but much quieter than, say, a friend's Fiesta.
Comfort is good too. The seats are much more supportive than the 330, which seems to be made for the more... portly driver, but the back is a bit thin, and if you sit wrong, there seems to be a lack of padding. Ride is much, much better than the 'd. It's so smooth in comparison. It seems to handle bumps/ridges better, although it is more rolly. Handling, I don't know, as I haven't pushed it yet, but the steering is great. Very talkative, but not annoyingly so. Nice and direct with the 067 rack (fast rack from an e46), and with new track rods/couplers etc, there's no slack either. I maybe wish it were a little heavier though, as it's more assisted than the 330d. The steering wheel feels lovely and small too, although I think it's 370mm, the same as the 'd, but the rim itself isn't as chunky.
Controls: Brakes? They stop the car. That's about all I can say in their favour! Well that, and they look good behind the tiny wheels (it's all proportionate!) They're very spongy, and I much prefer the modern brakes on the 'd. Much more confidence inspiring, and more progressive/feel in them. Throttle - nice short travel. I prefer this to the longer travel. Even with a new cable though, it's quite stiff, which makes heel and toe a bit tricky. As a result, I often lurch downshifts, something made worse by the pedal spacing being a bit off for me. Not a massive problem, but the later car is an improvement in this respect. The clutch is fine - it's a clutch, it only does one job, but the pedal is heavy. Not a problem for me, but it means the first few times I use a modern clutch, I end up punching the bulkhead with my foot (also known as kicking, I guess!).
The seating position in the 330d is much nicer for me. It's lower in the car, and I can sit with my legs more outstretched. The e30 forces me to sit with my legs tucked a bit behind the steering wheel, otherwise I can't fully let the clutch up. Add in the fact that the seat is a bit higher from the floor, and it's not as nice. It's not bad, and driven in isolation is absolutely fine. The steering wheel does obscure the (inaccurate) speedo between 60-80 though!
So, the 330d does represent a bit improvement over the e30, but the e30 is still a perfectly usable car in today's world, even 33 years after it's release. The biggest let down for me to stop it being a daily? MPG, crash test safety (what safety?!) and the fear of rust/need for upkeep. I'd still say that the e30 is a nicer car than something like my parent's 2007 1.6 Ford Focus (mk2). It drives, steering, handles, rides better - all impressive for such an age gap.
My dad drove it for the first time the other day and his response was 'I can see why these were popular in the 80's!'.
I worked out the mpg today, bang on 25. Considering a fair amount of time was spent idling trying to revive the 330d after its battery died, that's not too bad.
I was also talking to my mum about how fast it is. On the way home, I found a nicely resurfaced long straight quiet back road, so it seemed a shame to pass the opportunity up!
Meant to be 7.7 or7.2 I think, so not great! My other run was 10.3 - there's time to be found in the gear changes, but meh.
I went with my dad (no chance an engine would fit in the back of my car with its tiny boot aperture...) to Monkey World in Wareham to pick up my 'new' M20B25 engine. I'll pick up one of those portable engine stands and make a start on stripping it down. My engine has lost of its coolant again, so it's not healthy. Add this to the burning oil, which is very watery, and seems to stay at a fixed level, and it's looking a bit terminal for my head. I fear leaving it too long will end up with water as a lubricant. Still, it's nearly winter, so it'll be off the road anyway, so no rush to rebuild it.
I've managed to fit the boot carpets (still not done the torsion bars for the boot lid, so excuse the wood!), and found an old school service sticker. Check out the 10 digit phone number!
While doing the boot carpets, it seemed like a good time to fit my MS-8 DSP/amp. This is only the second amp I've fitted, but I'm pleased with it. I think it's a neat, clean install. Miles better than the first one I did anyway!
The MS-8 itself though is very, very impressive! It's a full digital signal processor/EQ and a low powered amp too (30w x8 IIRC). It's being driven by my old 1980's FM radio, and has a separate aux in for my bluetooth streamer. Luckily, it has five different profiles, so I can set the EQ etc. for the radio independently of the aux input.
It makes the FM radio really come alive, and adds a clarity and depth to the music that wasn't present before. It handles aux inputs nicely too. The speakers, considering their small size (5.25") sound pretty decent. Nice and clear with no distortion with fairly clear highs, without being too harsh. Bass isn't amazing, as expected, but it's adequate, and sufficient that I won't bother with a sub (which I didn't really want to do). The trim copes very well too, with only a slight rattle from the passenger's speaker cover on prolonged heavy bass notes. Having a 31 frequency EQ, I'm sure I can tune that out with a bit of tweaking. For me, the volume is fine without the need for an external, high powered amp, which the MS-8 can drive.
The other impressive thing is the isolation of the music from outside the car. I'm not sure if it's a result of the sound deadening, but it's a lot quieter standing outside the E30 with music on than it is the 330d, which lets a lot more noise out.
My only gripe with the whole system is the need for a separate screen to control the unit/change input sources etc. Still, not the end of the world.
###
So at this point, it was going fairly well until one fateful night on the way home from a blood donation session (just what I wanted after being stabbed with a massive needle!)
Caused still not confirmed, but either the head or the head gasket gave in.
I won't put details of the engine build here, mainly as it's patchy coverage, and my phone broke, so there's no photos anyway, but the engine pictured previously in currently being rebuild into a 2.8l. I've got the head together, complete with uprated duration/lift Schrick camshaft, new rocker arms and new rocker shafts. The lower end is together with M52B28 crank shaft, M20B20 conrods, and lightened M20B25 pistons. I just need to mate the head with the engine (waiting on one oil seal to arrive), and then I can get it paired with the gearbox ready to fit. Power estimates are 200-220bhp. Not masses, but up to 100 more than what I estimate I had before based on 0-60 times.
To get the engine out, I had to disconnect/remove the exhaust, so I could unbolt the prop. With the prop out, it seemed like a good time to do the guibo bush, and the prop support bearing. While the prop/exhaust are off (painful jobs!) it seemed like the best time to do something about the MOT advisory brake lines/fuel pipes.
However, to get to those, I have to drop the rear subframe, so I might as well do the diff bush, and subframe bushes, and the rear trailing arm bushes. Basically a full rear end rebuild. Given this, I also got new ARB mounts front/rear, and new front wishbone bushes. While everything is out from under the car, I will give it a good coat of some chassis paint/protection. I love it when things escalate.
Anyway, that's me up to date as the engine rebuild/chassis refresh is still ongoing.
####
As of now, the engine is back together (M20B28, Schrick 272/272 cam - block/head/piston work done by Byron/maggspower, and rebuilt by myself. A nice simple engine to work on for a n00b like me!)
-
TriggerFish
- E30 Zone Regular
- Posts: 507
- Joined: Sat Jun 30, 2012 11:00 pm
- Location: Aylesbury, Bucks
So, time for another backdated update!
Last time I left this I'd just finished removing the old engine, and rebuilding the new, and was stock piling parts. Since then, the parts have all been fitted, the underside undersealed, the MOT passed (no advisories ) and it's back on the road.
What was changed? From memory, so I might be missing some bits:
- fuel lines
- brake lines
- brake hoses
- petrol tank
- fuel pump
- clutch
- prop CSB
- guibo
- front & rear ARB droplinks and bushes
- RTA bushes
- subframe bushes
- wishbone bushes
- CPS
- thermostat
- all gaskets
- rotor/distributor
- all gear shift parts, including a z3 short shifter and gearbox oil
- radiator
- diff bush/oil is pending
- rear driver's arch inner splash guard fitted
- engine bay cleaned, and any rust (minimal) treated, including the underside of the chassis rails
But how did I get to that stage? Let's find out... (I'll keep it short!)
Once the engine was rebuilt, I still had to finish all the other replacements/prep before I was ready to refit it.

Prep included stripping the underside, cleaning off any mud/dirt and tackling the (thankfully tiny amount) of rust. Most of it was by the sides of the petrol tank.

And after a first coat:

And after a second, and mid-way into the reattaching of parts


Now the underseal was on, I was happy to fit the engine and gearbox, so in that went:

All the bushes were done too, but I'll leave those photos out as we all know what a bush in a refurbished beam/RTA looks like!
After reliving some recent history and discovering lost countries in the 1989's dealer map, I was ready to get the car out for an MOT


Some of you might have seen my thread, but my joy of having built up a running engine myself, and having put it back into a functioning car were short lived, thanks to this bastard and an epic fail on my part...


And there, lurking in the sump, the culprit and sign of my retardedness

One recleaned sump ready for refitting

Blast.
Oh well, these things happen! I sourced a new head (under 1,000 miles old, apparently and I easily believe it) off eBay, and set to rebuilding it.


And the money shoot, a 2001 BMW casting.

And all rebuilt

At this point, I sent it for an MOT, which it failed at first due to a weak handbrake, and non-functioning rear brake lights (I knocked the switch plug when trying to troubleshoot my CPS).
I fixed the brake lights on the forecourt, and went home to sort the hand brake. Upon having adjusted it again, it went through with no advisories, which isn't too bad for an IT guy who's never done anything like this before.
Once again, however, my joy was short lived, as it broke down less than a mile from the MOT center

I believe this was a fuel pump failing, masked by a bad wiring repair to the injector power feed under the manifold.
Anyway, I fixed the wiring and set about cleaning it up for Gaydon. The paint job on this car is awful, a real let down, and is booked it again to be redone on the 3rd October. It still shines up well enough, but there's huge runs everywhere, bits that were never polished, and, amazingly, the rear spoiler is two colours, and part of the rear bumper isn't painted at all!

However... I never made it to Gaydon (well, I did, but in a friend's Z4M, not my E30), and ended the day like this!

Basically a failed temperature gauge sensor giving the impression of a gradual overheat. I didn't realise this until I got home, and didn't want to risk anything given the engine was still under 50 miles old at this point... I swapped the sensor out for another, and it's been fine since.
So that's my E30 up to date, and on the road, finally. Next, I just need to get the bodywork sorted, refit the missing panels (half the spoiler and the front wing pods) and it's finally done. Until the next brakedown!
Thanks for reading, and I'll try to keep this updated as I go in the future...
Last time I left this I'd just finished removing the old engine, and rebuilding the new, and was stock piling parts. Since then, the parts have all been fitted, the underside undersealed, the MOT passed (no advisories
What was changed? From memory, so I might be missing some bits:
- fuel lines
- brake lines
- brake hoses
- petrol tank
- fuel pump
- clutch
- prop CSB
- guibo
- front & rear ARB droplinks and bushes
- RTA bushes
- subframe bushes
- wishbone bushes
- CPS
- thermostat
- all gaskets
- rotor/distributor
- all gear shift parts, including a z3 short shifter and gearbox oil
- radiator
- diff bush/oil is pending
- rear driver's arch inner splash guard fitted
- engine bay cleaned, and any rust (minimal) treated, including the underside of the chassis rails
But how did I get to that stage? Let's find out... (I'll keep it short!)
Once the engine was rebuilt, I still had to finish all the other replacements/prep before I was ready to refit it.
Prep included stripping the underside, cleaning off any mud/dirt and tackling the (thankfully tiny amount) of rust. Most of it was by the sides of the petrol tank.
And after a first coat:
And after a second, and mid-way into the reattaching of parts
Now the underseal was on, I was happy to fit the engine and gearbox, so in that went:
All the bushes were done too, but I'll leave those photos out as we all know what a bush in a refurbished beam/RTA looks like!
After reliving some recent history and discovering lost countries in the 1989's dealer map, I was ready to get the car out for an MOT
Some of you might have seen my thread, but my joy of having built up a running engine myself, and having put it back into a functioning car were short lived, thanks to this bastard and an epic fail on my part...
And there, lurking in the sump, the culprit and sign of my retardedness
One recleaned sump ready for refitting
Blast.
Oh well, these things happen! I sourced a new head (under 1,000 miles old, apparently and I easily believe it) off eBay, and set to rebuilding it.
And the money shoot, a 2001 BMW casting.
And all rebuilt
At this point, I sent it for an MOT, which it failed at first due to a weak handbrake, and non-functioning rear brake lights (I knocked the switch plug when trying to troubleshoot my CPS).
I fixed the brake lights on the forecourt, and went home to sort the hand brake. Upon having adjusted it again, it went through with no advisories, which isn't too bad for an IT guy who's never done anything like this before.
Once again, however, my joy was short lived, as it broke down less than a mile from the MOT center
I believe this was a fuel pump failing, masked by a bad wiring repair to the injector power feed under the manifold.
Anyway, I fixed the wiring and set about cleaning it up for Gaydon. The paint job on this car is awful, a real let down, and is booked it again to be redone on the 3rd October. It still shines up well enough, but there's huge runs everywhere, bits that were never polished, and, amazingly, the rear spoiler is two colours, and part of the rear bumper isn't painted at all!
However... I never made it to Gaydon (well, I did, but in a friend's Z4M, not my E30), and ended the day like this!
Basically a failed temperature gauge sensor giving the impression of a gradual overheat. I didn't realise this until I got home, and didn't want to risk anything given the engine was still under 50 miles old at this point... I swapped the sensor out for another, and it's been fine since.
So that's my E30 up to date, and on the road, finally. Next, I just need to get the bodywork sorted, refit the missing panels (half the spoiler and the front wing pods) and it's finally done. Until the next brakedown!
Thanks for reading, and I'll try to keep this updated as I go in the future...
-
Gert_8
- Married to the E30 Zone
- Posts: 11305
- Joined: Mon Dec 08, 2008 11:00 pm
- Location: In your back passage faster than a rat up a drainpipe!
Holy moly. I just read through your whole thread. this has been a real labour of love. Great work and patience though, so well done!
PONY, 2013 - "Anyway span 360 degrees hitting the kerb and giving the old man two fingers as I was spinning like Michael Schumacher would
-
TriggerFish
- E30 Zone Regular
- Posts: 507
- Joined: Sat Jun 30, 2012 11:00 pm
- Location: Aylesbury, Bucks
You deserve a medal for reading sonething that badly written all the way through!
And thanks, labour of love is a fair statement!
And thanks, labour of love is a fair statement!
-
Gert_8
- Married to the E30 Zone
- Posts: 11305
- Joined: Mon Dec 08, 2008 11:00 pm
- Location: In your back passage faster than a rat up a drainpipe!
I enjoyed it. If I were in your position, I'm sure I would have torched the thing a long time into the rebuild! You're a star.
PONY, 2013 - "Anyway span 360 degrees hitting the kerb and giving the old man two fingers as I was spinning like Michael Schumacher would
-
TriggerFish
- E30 Zone Regular
- Posts: 507
- Joined: Sat Jun 30, 2012 11:00 pm
- Location: Aylesbury, Bucks
It reads better on other forums where it wasn't all lumped together retrospectively.
I nearly did during one bit of welding - I'd already tested the 'single use - do not test!' fire extinguisher too. Opps!
I nearly did during one bit of welding - I'd already tested the 'single use - do not test!' fire extinguisher too. Opps!
-
DanThe
- E30 Zone Team Member
- Posts: 28646
- Joined: Sat Sep 10, 2005 11:00 pm
- Location: Staffs
Well done
-
joeyb
- E30 Zone Regular
- Posts: 427
- Joined: Mon Oct 31, 2011 11:00 pm
- Location: Fareham, Hampshire
Just read through this. Good effort, well done for sticking with it!