'91 318iS minor resto.. ;-)

Doing a minor build / restoration or an epic one, post it here

Moderator: martauto

Post Reply
Split_S
POR 15 junkie
Posts: 529
Joined: Sun Jun 16, 2013 11:00 pm
Location: Canada

Thu Oct 30, 2014 1:45 pm

Pics of my new parts car. Lovingly dubbed "Number 2:

Image

Image

Image

Image

Image

Image

Image

Just a blown head gasket to fix...

Image

M3 must be next...hehe.. I wish...There is some parking space left on the front lawn...hehehe
Last edited by Split_S on Fri Mar 22, 2019 8:25 pm, edited 2 times in total.
Split_S
POR 15 junkie
Posts: 529
Joined: Sun Jun 16, 2013 11:00 pm
Location: Canada

Sat Nov 01, 2014 12:53 pm

Well with the apron welded in it was high time to get the rest of the d*mn welding done... Welding is a bit tedious and it really is an acquired skill. Therefore, since I dislike the former and lack the latter, my apologies for what comes next to those of you with the knowledge and skills to have done a better job!

The worst section of rust as far as I was concerned was the rear right corner: The section where the subframe bolts to the chasis and the lower portion of the wheel arch. This bit kept me up at night..

Image

The whole bottom part was totally rusted out and would have to be rebuilt. BMW made a nice replacement panel for just this scenario, which, of course, is NLA...

Image

And its basically where three sheets of metal meet...

Image

So, when in doubt, get the grinder out!!

Image

A bit more...

Image

And the arch too..

Image

Image

I thought this approach would be better than welding in a complete rear quarter panel as all the rest of the quarter panel was mint...

So my first move was to replace the first layer, the lower edge.. I cut a piece to size and welded it in..

Image

Next up was to double this part up and create a piece that would mate with the top piece...

Image

Image

Its actually one piece, cut and welded together to give the curve required..

Image
I welded in that piece and then started bending metal for my third layer.. Im pretty proud of this part considering Im a bit of a hack at this...

Hand-bent...
Image

Initial test fitting..
Image

Before welding it in I POR-15'd the interior sheets to ensure NO MAS rust... Then I welded it in..
Image

Image

After the shock that I had actually accomplished this wore off I proceed to spend an hour tack welding in pieces of steel to form the missing inside arch bit..

Image

Image

Then I spent another hour shaping a piece of steel to form the outer edge of the arch, which was tricky due to the shaping where the arch and the rubber stripping meet...

Image

Tack welded in place.. and then cut relief strips to be able to bend it over and weld it to my inner portion...

Image

Bent and welded.. (you can also see I completely stripped the lower sill and POR 15'd the whole thing..no biggie but nice!)

Image

POR 15'd and ready for final prep later on..

Image

Yes, more welding to come... :eek:
Last edited by Split_S on Fri Mar 22, 2019 8:27 pm, edited 3 times in total.
Split_S
POR 15 junkie
Posts: 529
Joined: Sun Jun 16, 2013 11:00 pm
Location: Canada

Sun Nov 09, 2014 4:13 pm

Welding was FINALLY wrapped up with some strengthening of the supports for the fuel expansion system in the RR wheelwell. It was a REAL pain to weld these up as there is so little room to maneuver...

All welded up and POR 15'd...
Image

Image

I also welded a couple of supports in the engine bay (clutch line bracket) and fixed a rust hole or two...

Image

Image

And the rear left inner arch needed love..

Image

With that done I turned my attention to completing the underside....

Got my professional tools out..
Image

And scrubbed like a slave for hours... Everywhere rust or a break in the undercoat was discovered it was ground out, cleaned, rust treated and POR 15'd...
Image

It was pretty rewarding work actually - having this rotisserie is magical.... so is this stuff:
Image

I didn't fool around with the quality of the seam sealant and undercoat.. 3M is the only way to go....
I got the underside so clean you can see the original undercoat was tan colored.... The pink is the 3M sealant...

Image

Image

Image

With every seam sealed, it was time to introduce this member of the 3M family...
Image

You guys are gonna like this part....

First coat...
Image

Second...
Image

Third... (white spots are sunlight)
Image

Image

Image

Image

Yeah I know...trunk too.... Don't flame me... it's gonna be painted...
Image

Car is starting to come alive..... :D
Last edited by Split_S on Fri Mar 22, 2019 8:29 pm, edited 4 times in total.
User avatar
BenHar
E30 Zone Addict
E30 Zone Addict
Posts: 3067
Joined: Sun Jul 11, 2010 11:00 pm
Location: Reigate, Surrey

Sun Nov 09, 2014 5:17 pm

Great work, Split.

Ben
Demlotcrew
E30 Zone Team Member
Posts: 13329
Joined: Mon Dec 20, 2004 11:00 pm
Location: East Anglia

Sun Nov 09, 2014 7:29 pm

Finish looks great!
hennared323i
Old Skooler
Old Skooler
Posts: 2350
Joined: Wed Jul 25, 2007 11:00 pm

Mon Nov 10, 2014 9:16 am

Superb work fella
e30Passion
E30 Zone Newbie
E30 Zone Newbie
Posts: 232
Joined: Wed Jun 20, 2012 11:00 pm
Location: Netherlands

Tue Nov 11, 2014 2:28 pm

Great finish and supurb work indeed :D
Split_S
POR 15 junkie
Posts: 529
Joined: Sun Jun 16, 2013 11:00 pm
Location: Canada

Tue Nov 11, 2014 7:40 pm

Thanks gents... Work continues on the car but I've just busted 2 ribs playing hockey this week... Hurts to breath and working on the car is going a bit slow as a result.. However, I am getting some nice work done in the engine bay...update to follow...
User avatar
Royalratch
E30 Zone Addict
E30 Zone Addict
Posts: 4921
Joined: Sat Oct 21, 2006 11:00 pm
Location: London

Tue Nov 11, 2014 7:49 pm

Epic stuff dude. Seriously impressive for a 'non-mechanic' lol.

You a fighter pilot?

Or Top Gun fan?
:cool:
Split_S
POR 15 junkie
Posts: 529
Joined: Sun Jun 16, 2013 11:00 pm
Location: Canada

Tue Nov 11, 2014 8:27 pm

Royalratch wrote:Epic stuff dude. Seriously impressive for a 'non-mechanic' lol.

You a fighter pilot?

Or Top Gun fan?

:cool:
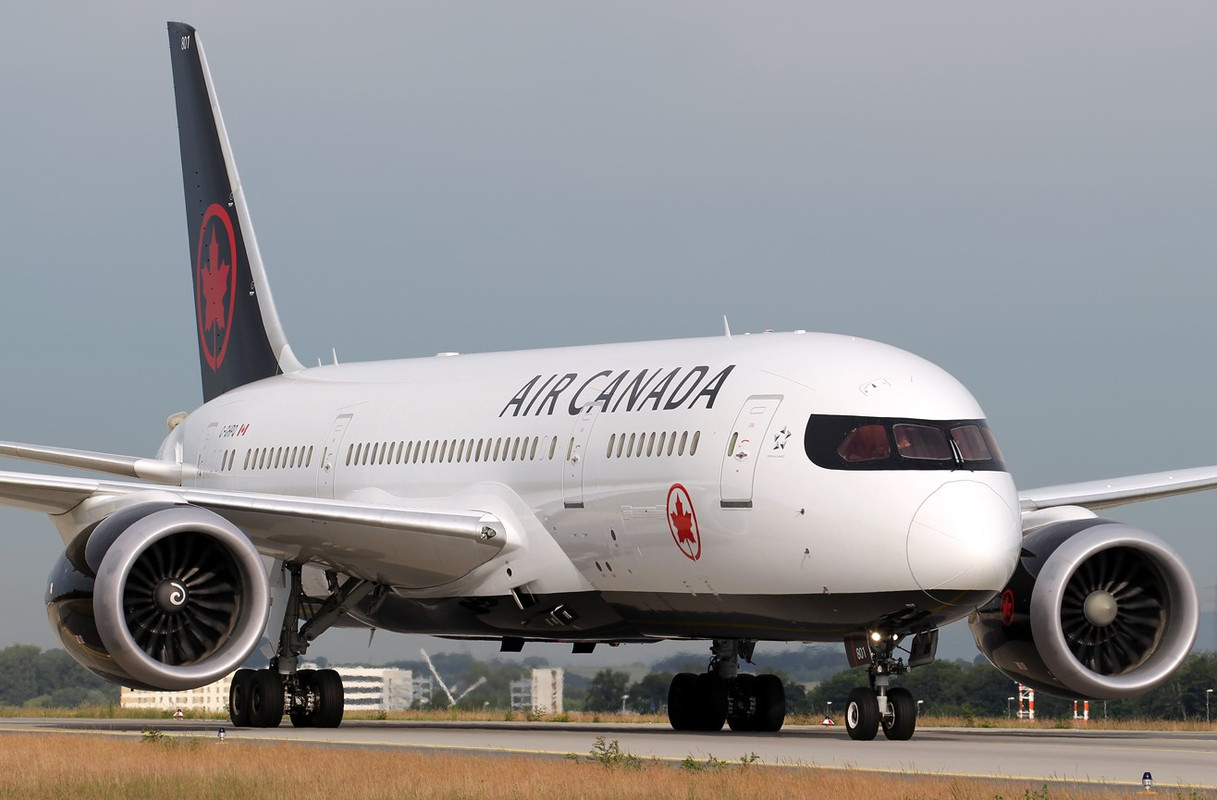
Are you asking 'cause of my nickname? You're the first one to ever have commented on it... Was a canadian air force instructor in my "younger" days, spent lots and lots of time upside down and spinning.. 8O Hence the nickname.. now, well, I fly something a little tamer.... for passengers, upside down is bad... :(

Here is my day job..

Image

...jets are cool but e30's rock...
Last edited by Split_S on Fri Mar 22, 2019 8:36 pm, edited 2 times in total.
User avatar
Royalratch
E30 Zone Addict
E30 Zone Addict
Posts: 4921
Joined: Sat Oct 21, 2006 11:00 pm
Location: London

Tue Nov 11, 2014 11:00 pm

Jets are cooler dude! Mad respect.
Split_S
POR 15 junkie
Posts: 529
Joined: Sun Jun 16, 2013 11:00 pm
Location: Canada

Wed Nov 19, 2014 3:48 pm

Gentlemen...Been a little slowed down with my injury..however Im feeling much better and I have gotten things done...
This next update focuses in on the engine bay...

Here are some recap pics taken earlier showing some of the progress...
I started cleaning the grime out even before I pulled the engine out... The whole engine bay was covered in grease/dirt..

Just a few of examples after hours of cleaning already done..

Image

Image

Image

This stuff was a b*tch to remove...I went thru lots of rags and dollar-store toothbrushes and hours of work little by little as work progressed. The absolute best stuff, which I discovered only once I starting using the POR15 is the POR15 degreaser. You mix it 50/50 with hot water and the grease just dissolves. It by far the best and easiest stuff Ive used. It made cleaning so much easier. And no, I dont have ANYTHING to do with the makers of that stuff!! It just works!

Much cleaner and grinding out the rusty areas... This work started back in September...
Image

Image

Some of the last of the sound insulation being removed and cleaned...

Image
\
Image

Rusty area on the far left...
Image

Image

Lots and lots of little areas and spots to grind off the rust...

Image

Image

Finishing up cleaning the battery connection area...

Image

Image

Now time to get comfy...
Started just with a first coat on the rust spots...
Image

With all that done I starting on the RH side...

Image

Image

Image

Man I love this stuff....

In order to properly do the LH side I need to get the MC and brake booster out of the way...


Removing the MC is just two nuts.. I felt highly confident handling that...

Image

Brake booster without MC...

Image

Image

Now getting the brake booster out isn't hard it just requires crouching under the dash to loosen four bolts and a retain clip. You'll need around a 10' extension for your socket to get them out..

Image

Three of them come out fairly easily but the 4th is an PITA... You'll need the extension, a flashlight and some luck..
In this pic Im trying to highlight the access hole you need to put your extension thru...Epic fail I think....

Image

Before dealing with the bolts you need to disconnect a spring...

Image

One end of the spring loops around a retaining bolt and on the other end is a retaining clip.. as shown here, removed..

Image

And still in place...

Image

Gently pushing the clip off (while prying it open at the same time) is the way to do it...

With all that done you get one more piece of junk on your work table...

Image

and whats left...

Image

With that out of the way I cleaned up that whole corner. I set aside the fuse box as much as I could and cleaned in behind and managed to get everywhere. Without removing the brake booster there is just no way of doing it right...

So a few more flicks of the paintbrush and...

Image

Image

Image

Image

Image

I put two coats on and it will all be final sanded prior to being painted... Looks nice black methinks...
Last edited by Split_S on Fri Mar 22, 2019 8:38 pm, edited 4 times in total.
e30325itourer
E30 Zone Newbie
E30 Zone Newbie
Posts: 182
Joined: Sun Jan 09, 2005 11:00 pm
Location: belfast norn iron

Wed Nov 19, 2014 6:20 pm

Absolutely epic
THE ULTIMATE DRIVING MACHINE
e30325itourer
E30 Zone Newbie
E30 Zone Newbie
Posts: 182
Joined: Sun Jan 09, 2005 11:00 pm
Location: belfast norn iron

Wed Nov 19, 2014 6:20 pm

Absolutely epic
THE ULTIMATE DRIVING MACHINE
e30325itourer
E30 Zone Newbie
E30 Zone Newbie
Posts: 182
Joined: Sun Jan 09, 2005 11:00 pm
Location: belfast norn iron

Wed Nov 19, 2014 6:21 pm

Absolutely epic
THE ULTIMATE DRIVING MACHINE
hennared323i
Old Skooler
Old Skooler
Posts: 2350
Joined: Wed Jul 25, 2007 11:00 pm

Wed Nov 19, 2014 8:08 pm

e30325itourer wrote:Absolutely epic
What he said

Thrice :cool:
hennared323i
Old Skooler
Old Skooler
Posts: 2350
Joined: Wed Jul 25, 2007 11:00 pm

Wed Nov 19, 2014 8:09 pm

Serious question....

Was there no rust in the engine bay to cut out and replace or had you already done that?
Split_S
POR 15 junkie
Posts: 529
Joined: Sun Jun 16, 2013 11:00 pm
Location: Canada

Thu Nov 20, 2014 12:46 am

hennared323i wrote:Serious question....

Was there no rust in the engine bay to cut out and replace or had you already done that?
Seeing as most of the engine bay was covered in oil and dirt/oil I believe this saved most of it from oxidizing.. There were two holes that needed addressing: one was around a plug found on the passenger side of the firewall and the other around the bracket for the clutch hydraulic line. Not sure if they are common rust spots but they needed new steel and welding (which I didn't post about...)

bracket for clutch line..
Image

RH side just under apron drain... (wet sound insulation=rust)
Image

The worst of the rust was on the front assembly - where the rad bolts on... Most rust was at the joint of two pieces..it's also where the was minimal oil/grime covering the steel... Later, I will have to spray the inside of these pieces to stop the rust on the inside... not looking forward to that!!

Thanks for the nice comments btw!

Brake lines and more next time...
Last edited by Split_S on Fri Mar 22, 2019 8:39 pm, edited 3 times in total.
Split_S
POR 15 junkie
Posts: 529
Joined: Sun Jun 16, 2013 11:00 pm
Location: Canada

Wed Nov 26, 2014 5:56 pm

Drove down to the US to pick up my fuel tank and other goodies last week. The fuel tank is made by a company 10km from my home - the cheapest I could get it in Canada was 350$ Cdn.. I ordered it for 190$ Cdn in the US - shipping to the border included... Pathethic...

Anyways, nice OEM spec fuel tank:

Image

Image

Image

The connector doesn't come with it so I refurbished mine...

Image

Image

Nice lick of jet black..

Image

Setting that aside I started on the complete refurbishing of the brake system. Along the way I discovered I have a gift for brake bending...

Note in case you don't know: BMW BRAKE LINES DO NOT COME PRE-BENT.

I bent my lines exactly like the OEM lines. I also used BMW lines for lengths that demanded it and non-OEM stainless steel lines which are 10X less expensive and exactly the same... I also bought the spacer thingies...

Once bent all lines received three coats of paint as well as the spacer thingies... just because...

Image

Those two in the pic are the center ones beneath the fuel tank. I had to order the 3 meter one from BMW that runs from the splitter to the front... it was 50$ which is cheap considering a 20cm line cost 35$... go figure...

For bending I used a brake bender which was of limited usefulness trying to duplicate the OEM bends.. Better was my vice grip and some steel pipes I have...

Image

New splitter and lines installed...

Before...yuck...
Image

Now... winkeye
Image

With new stainless steel braided flexible lines..

Image

To think it all used to look like this:

Image

The hardest line to bend was the 3 meter line.. After about an hour of cursing I found the trick to perfectly replicating the line..

Make the first bend and then tie-wrap the old line and new lines together. Keep them together as you copy the bends using whatever necessary... It worked fantastically well.. End result was a new line that I could clip into the original holders with ease..

You can kinda see how I did it here...
Image

Installed (runs downwards from the splitter to the front). to say I was AMAZED it actually fit perfectly first go is an epic understatement!

Image

Image

Added new parking brake lines:
Image

Installed:
Image

Cut the wiring for the ABS sensor wires and filled the rubber grommet with rubber undercoat.. Small touch but nice...

Image

Installed the new rubber bushings to my fuel filter mount which I had previously refurbed and installed fuel filter..
(you can see the brake line just below)

Image

Image

Image

With that done I installed the new fuel lines (these DO come pre-bent) which I had also thrice coated with new paint to the new brackets.. Brake line was also clipped on...

Image

Image

Im not sure but I think Im loving the look of this!!

Fuel system next for those of you who made it thru this update!! :D
Last edited by Split_S on Fri Mar 22, 2019 8:41 pm, edited 4 times in total.
Split_S
POR 15 junkie
Posts: 529
Joined: Sun Jun 16, 2013 11:00 pm
Location: Canada

Sun Nov 30, 2014 3:19 pm

Small boring update but no matter...

Took advantage of the lack of snow so far to pull the doors off my parts car yesterday. No pics of that
but I can say it is possible to pull off an e30 door and replace it all by yourself.. All you need is a jack to pop the door off its hinges once you've removed the bolts and pin.

Here they are nice and warm in the garage...

Image

Had I been smarter I would have left them outside because I decided to grind down the little rust there was right away...
So I dragged them back outside ground away the rust and brought them back in...

All cleaned up...
Image

Por15'd..
Image

Man Im happy I bought the 2nd e30.. Both my original doors were rusted out and I couldn't find 2nd hand replacements...
Two hours of work and I have two good as new doors ready to go!!

Also decided to have a look at my headlights.. I pulled them out of the shed and cleaned them all up.. I removed about 25 dead
spiders and their egg pods..yuck....

Cleaned and polished...
Image

Removed the metal rims and wire brushed them clean and repainted them...
Image

Then did this...
Image

Pretty cool...
Last edited by Split_S on Fri Mar 22, 2019 8:42 pm, edited 2 times in total.
hennared323i
Old Skooler
Old Skooler
Posts: 2350
Joined: Wed Jul 25, 2007 11:00 pm

Tue Dec 02, 2014 8:14 pm

When do you project it to be back on the road?
Split_S
POR 15 junkie
Posts: 529
Joined: Sun Jun 16, 2013 11:00 pm
Location: Canada

Tue Dec 02, 2014 8:32 pm

Hi hennared...Aiming loosely for July-August. Bringing the LSD diff for a rebuild tomorrow as well as the transmission (just an inspection on that one but may change out some syncros if required). Also bringing the engine to the builder I've chosen on Thursday. Not sure where I'm going with that yet. I can't decide.
Gonna drop off my alternator for ouput testing and my starter for a rebuild. All stuff I can't do myself.
Also called for estimates on the paint job. I may spend the winter sanding this thing myself if the prices are too high...Gonna miss my fingertips if thats the case.... :D
hennared323i
Old Skooler
Old Skooler
Posts: 2350
Joined: Wed Jul 25, 2007 11:00 pm

Tue Dec 02, 2014 8:52 pm

:D :D :D :D :D
Split_S
POR 15 junkie
Posts: 529
Joined: Sun Jun 16, 2013 11:00 pm
Location: Canada

Mon Dec 15, 2014 11:01 pm

With the bottom all done up I refurbed the fuel expansion system...

Just after I pulled everything out, including fuel lines...
Image

All out...
Image

Underside resprayed..
Image

I ordered new fuel lines (fuel overflow and vent). They pass thru the metal tube . They were a SUPREME b*tch to get out...
To get the new ones back in was ACTUALLY NEAR impossible. I didn't take any pics but I wire brushed the inside of the tube to smooth it out as it was rusty.. I then used a metal "fish" securely attached to all three tubes and with the help of my dad pulling and me pushing we got them thru after MUCH effort. That was the toughest bit yet on this project honestly...
Once in...
Image

Image

Here is the fuel expansion tank back in with new fuel lines and clips and reservoir painted black just because...
Image

Image

Fuel pipe in..
Image

Remember this?
Image

This looks better..
Image

Image

Image

This looks even better still...
Image

So with that done I've basically decided to keep the charcoal filter setup.. At the beginning I'd swore Id turf it but
Ive decided to keep it..Does no harm and its stock.. So cool...

Btw..

Transmission, differential and driveshaft were brought to Eastern Transmission here in MTL for complete rebuilds... Super nice people there and a great reputation for quality work.. Transmission is in for an inspection and respray and whatever needs fixing...

All the rear subframe components were brought to Speed Automotive for new bushings and new bearings... Same rep for quality work..

Ive also brought the M42 to Ben at Performance Automotive for a complete rebuild. Top notch reputation and super nice guy to boot.
Spent over an hour discussing options with him and we haven't yet begun... Its gonna be fun...

Here she is on her way...
Image

(Thats Is number two in the pic outside unfortunately... too tight in the garage with her in there...)
Last edited by Split_S on Fri Mar 22, 2019 8:43 pm, edited 4 times in total.
hennared323i
Old Skooler
Old Skooler
Posts: 2350
Joined: Wed Jul 25, 2007 11:00 pm

Tue Dec 16, 2014 7:25 am

That second last picture........Is that a cable tie I spy :eek: :eek: :eek:


Impressive work there Mr Split. Does this mean the weldathon is over and it is pre paint prep time?

Keep the updates coming please - I wouldn't worry about the lack of comments, bumfestgate, ponygate, prince rossygate and the rest of the gates seem to be occupying most peoples attention at the mo - it will blow over in time
milescook
E30 Zone Camper
E30 Zone Camper
Posts: 1283
Joined: Thu Jan 13, 2011 11:00 pm
Location: The 'bran of Cwm
Contact:

Tue Dec 16, 2014 7:53 am

Loving the work! :cool:
The story so far... http://www.cookracing.co.uk/

Also please help the race budget by watching some videos :) https://www.youtube.com/cookracinguk
appletree
E30 Zone Addict
E30 Zone Addict
Posts: 3482
Joined: Fri Jan 20, 2006 11:00 pm
Location: Retford

Wed Dec 17, 2014 6:43 am

Great work, missed the last couple of updates but was good to read them in one go and see the project. progress a good bit! Keep the updates coming! :D
Image

You should never underestimate the predictability of stupidity

M42 Supercharged 285bhp + M3 6speed box
User avatar
faissalo
E30 Zone Newbie
E30 Zone Newbie
Posts: 17
Joined: Thu Oct 10, 2013 11:00 pm

Wed Dec 17, 2014 9:14 am

Amazing work!

Keep all your skin covered for the weldathons matey.
Split_S
POR 15 junkie
Posts: 529
Joined: Sun Jun 16, 2013 11:00 pm
Location: Canada

Sat Dec 20, 2014 4:29 pm

Gentlemen,

Thank-you for the nice words - Im surprised with the responses as it has been dead here for the past couple of months.. I was starting to wonder if I was wasting my time posting all this stuff.. Im glad to see some of you are interested in the project!

Im trying my best to do a quality job - some pretty high standards have been set by others on here and I only hope to not fail too badly in comparison... yet the best bits of this project are still to come... However, as the updates are pretty much real time expect another 6-8 months of this!!

I'll have another update in the coming days as I have 11 days off coming and a fuel system to renew... 8)

Cheers...
Jesus325iTouring
Frog freak !
Frog freak !
Posts: 11356
Joined: Sun Jan 09, 2005 11:00 pm
Location: Omnipresent!

Sat Dec 20, 2014 7:57 pm

It's still read lots :D Proper balls out resto this 8)
Image

X5 V8 for thrills, CRV for chills, Range Rover P38 V8 for sooooo much aggravation...
User avatar
Brianmoooore
E30 Zone Team Member
Posts: 49358
Joined: Mon Jan 10, 2005 11:00 pm

Sat Dec 20, 2014 8:12 pm

As above. Loads of zoners following this thread and awaiting notifications!
Split_S
POR 15 junkie
Posts: 529
Joined: Sun Jun 16, 2013 11:00 pm
Location: Canada

Sun Dec 21, 2014 5:01 pm

hennared323i wrote:That second last picture........Is that a cable tie I spy :eek: :eek: :eek:


Impressive work there Mr Split. Does this mean the weldathon is over and it is pre paint prep time?

Keep the updates coming please - I wouldn't worry about the lack of comments, bumfestgate, ponygate, prince rossygate and the rest of the gates seem to be occupying most peoples attention at the mo - it will blow over in time
Mr.Split...that's funny hennared...

That cable you spied is the parking brake cable I installed in an earlier update..you must have missed it...and the Weldathon is definitely OVER. This car is solid now. Now the shiny new bits will start making an appearance... :D


This pic is just cool methinks...Took it before I had to get #2 out of the garage for lack of workspace...Three Bmw's in that pic...sooo cool...

cheers...


Image
Last edited by Split_S on Fri Jan 15, 2016 11:32 pm, edited 1 time in total.
Jesus325iTouring
Frog freak !
Frog freak !
Posts: 11356
Joined: Sun Jan 09, 2005 11:00 pm
Location: Omnipresent!

Sun Dec 21, 2014 6:17 pm

Oh for a garage like that, I have to make do with a tumble down corrugated shack that gets as wet inside as out when the weather is bad, another "one of those days i'll get around to water proofing it" :roll:
Epic pic :cool:
Image

X5 V8 for thrills, CRV for chills, Range Rover P38 V8 for sooooo much aggravation...
Split_S
POR 15 junkie
Posts: 529
Joined: Sun Jun 16, 2013 11:00 pm
Location: Canada

Sun Dec 21, 2014 6:34 pm

For you Brits its rain, for us canucks it's snow...its about 2 degrees in there right now.. too costly to heat it 24/7.. gonna warm her up tomorrow though and get busy on number 1...

I count my blessings Ive been able to afford a setup like this....Its all pretty new to me, remember I just moved here back in May...Just wanted to share the pic 'cause I just love seeing the e30's in there...so cool...

And Im sure I'll wind up in London one day Jesus... i'll give you a call then and we'll do all the stuff you haven't the time for: services and sheds included...winkeye
Post Reply