'91 318iS minor resto.. ;-)

Doing a minor build / restoration or an epic one, post it here

Moderator: martauto

Post Reply
Split_S
POR 15 junkie
Posts: 529
Joined: Sun Jun 16, 2013 11:00 pm
Location: Canada

Mon Oct 07, 2013 1:42 am

Finally picked up an E30 this week.. a 318iS, DOB 07/01/91. I would have liked a m3 but
my wallet didnt like the flared quarter panels... Anyway, I downloaded the
"Buying an e30 guide" and left it at home, unread, as I headed out to check
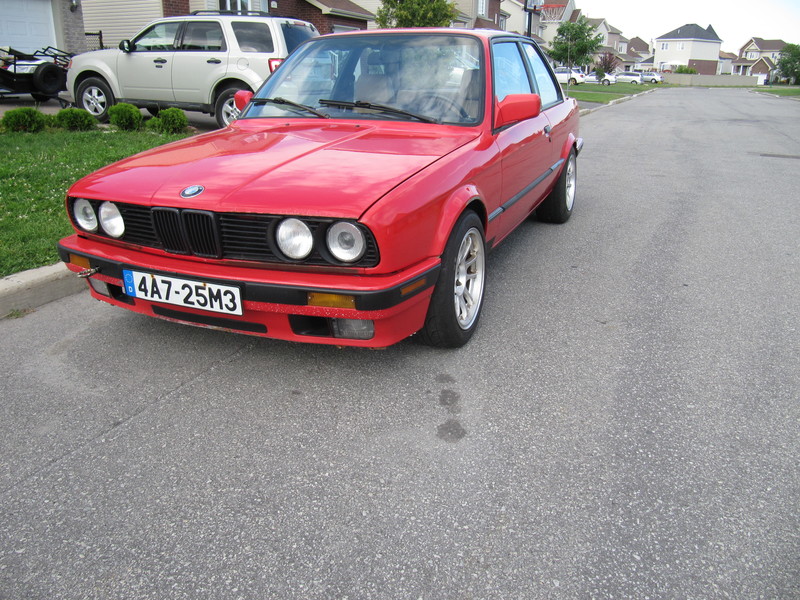
out this 318iS. I even rented a trailer, just in case I bought it, so I could
drag it home...This was the result...

Image

I did kinda check it out though...

Image

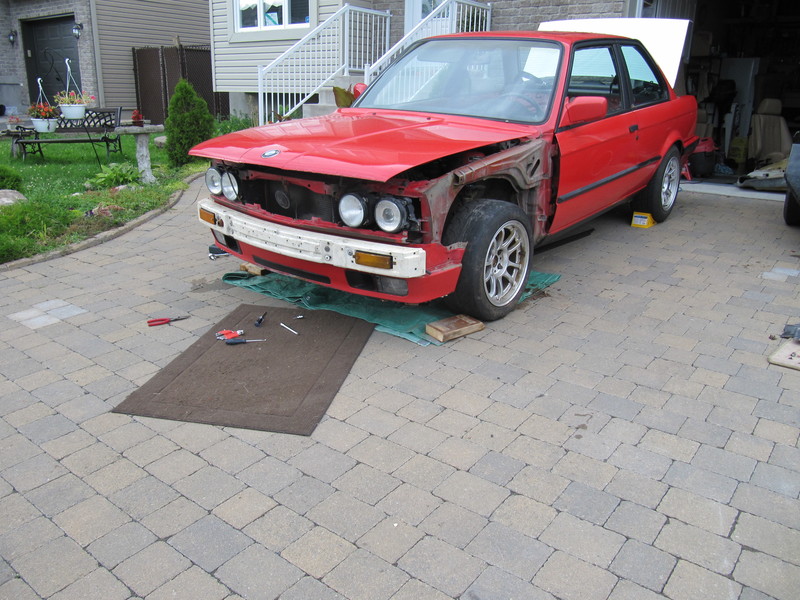
Long story short, I bought it and brought it home...

Image

Image

Image

Image

Image

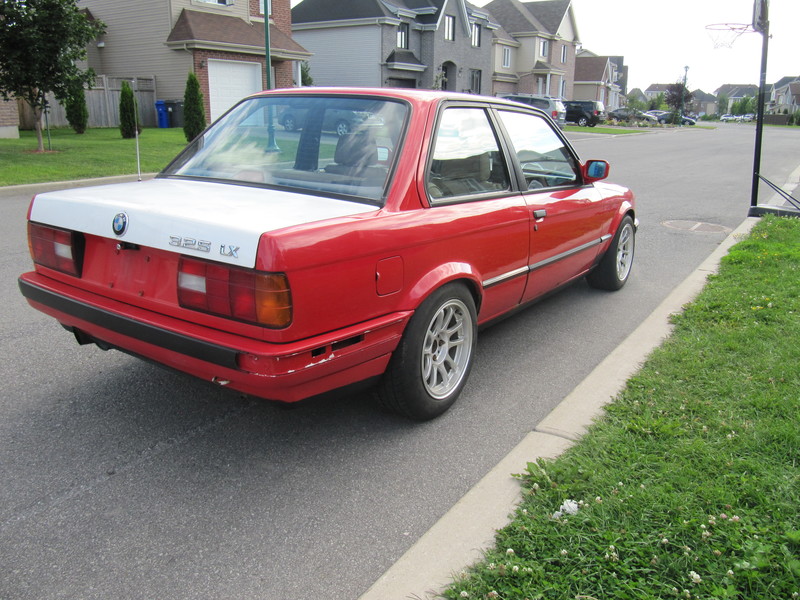
I sat and looked it for a while, still kinda amazed Id bought it...

I hadn't even test driven it (who cares?) as the brakes were not connected...
The PO was in the process of changing the brakes when he realized he didn't
really have the $$ to dump into this car... The engine ran though and
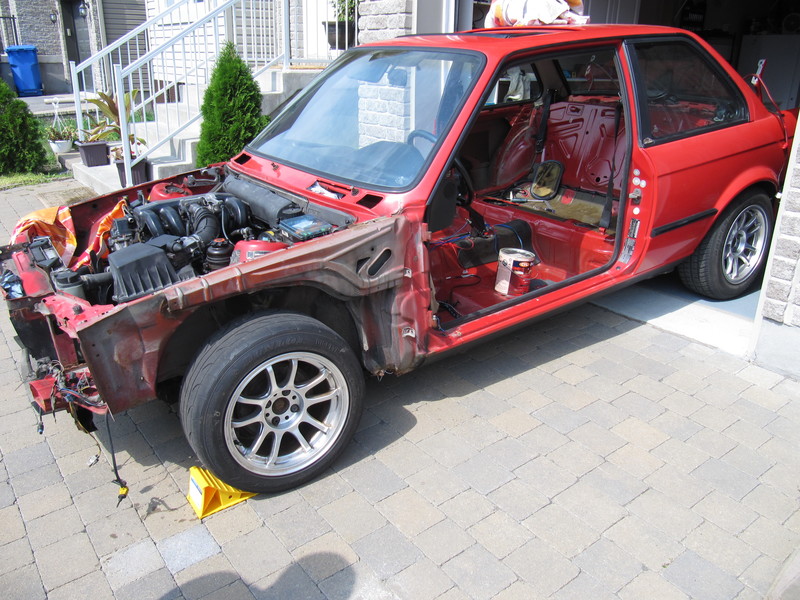
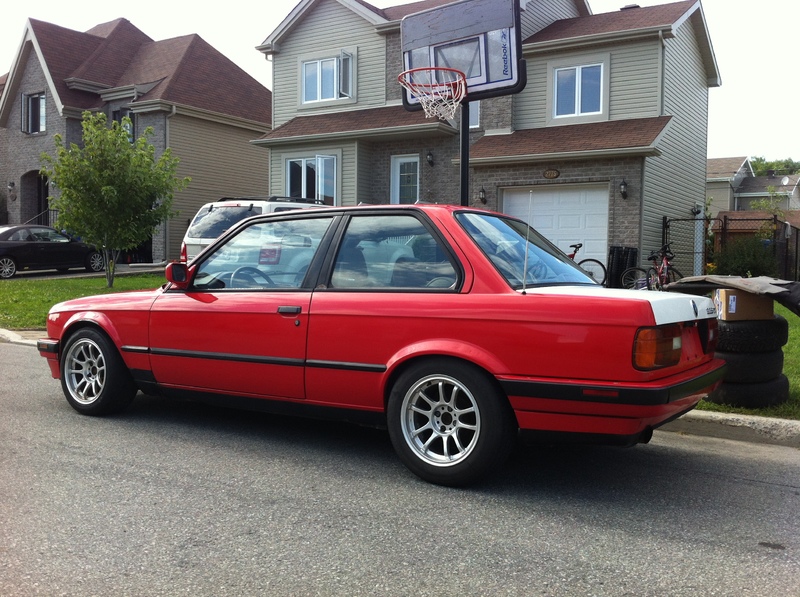
sounded good... So I backed it into the driveway and started having a look...

Image

Image

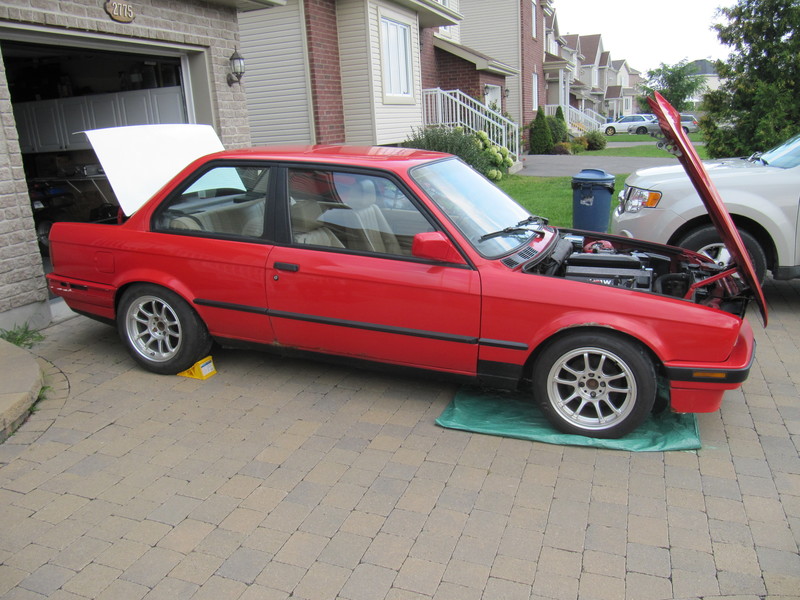
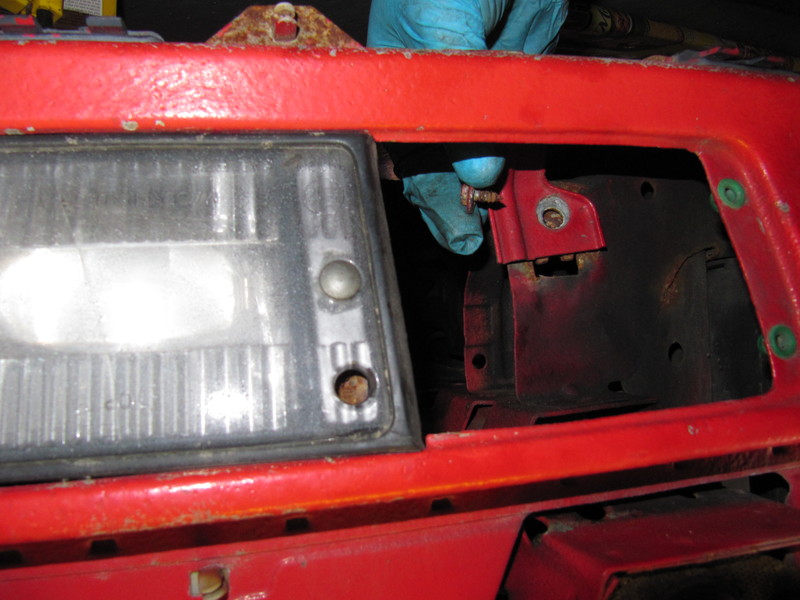
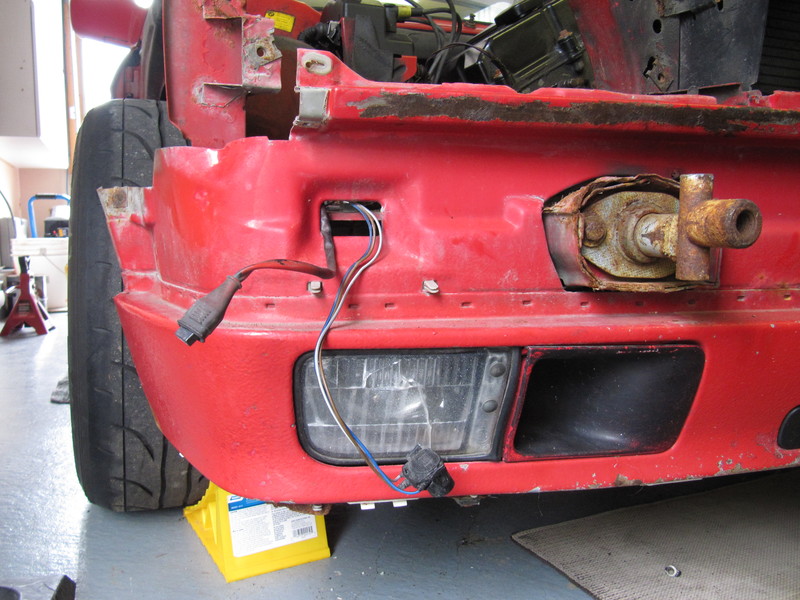
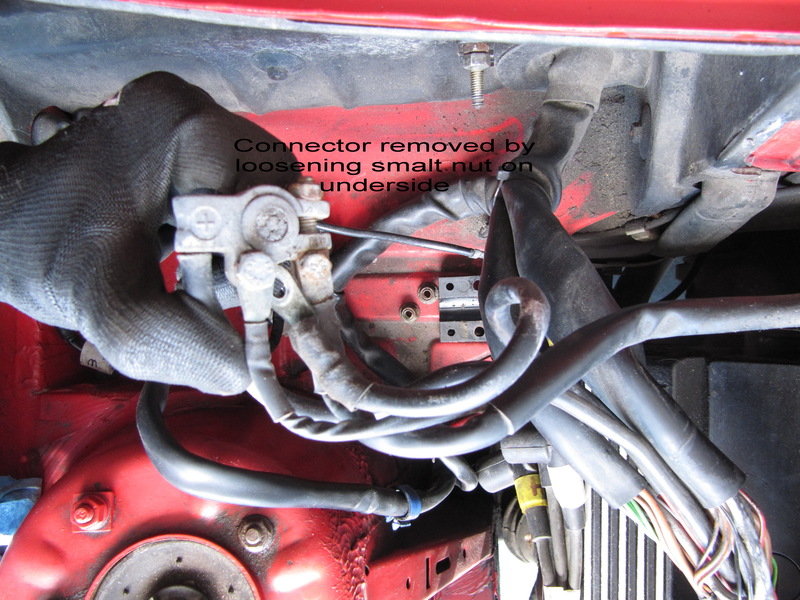
Now, Im not a mechanic and Ive never played around with cars at all but I
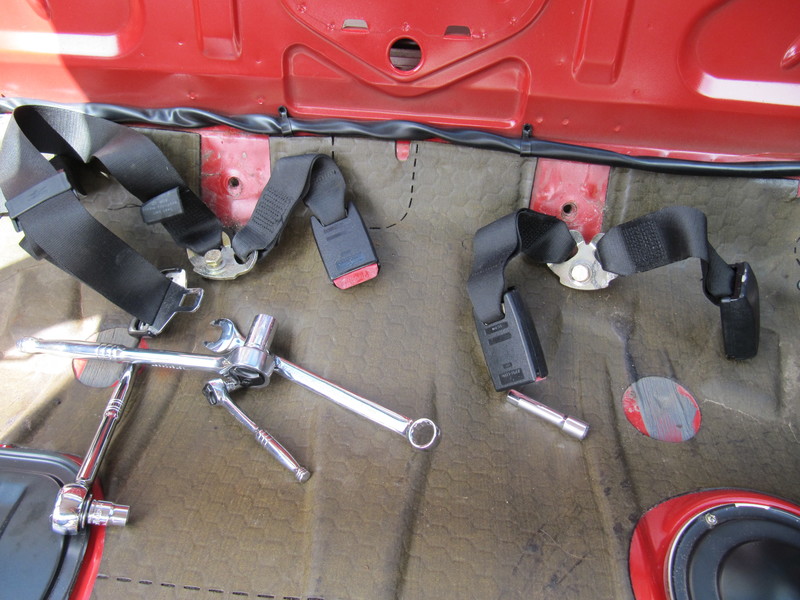
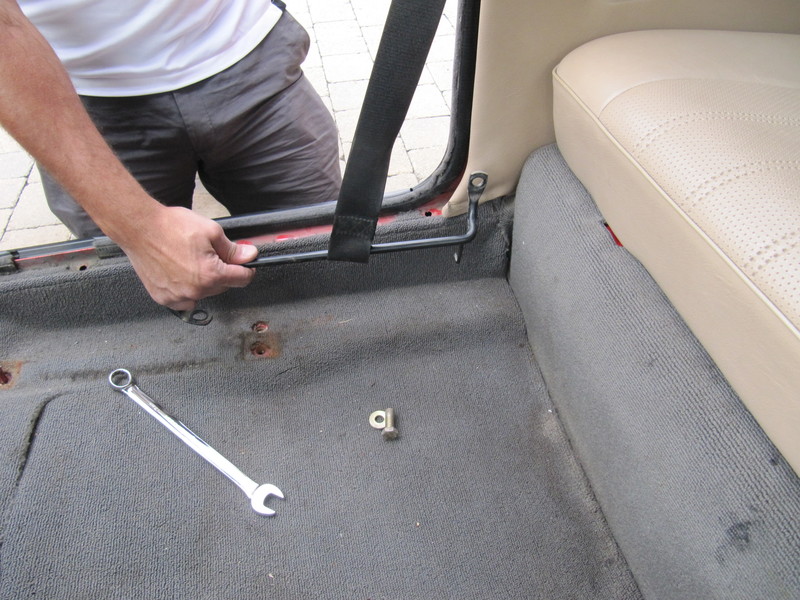
thought a closer look was in order... Sooo I pulled out the DS seat...

Image

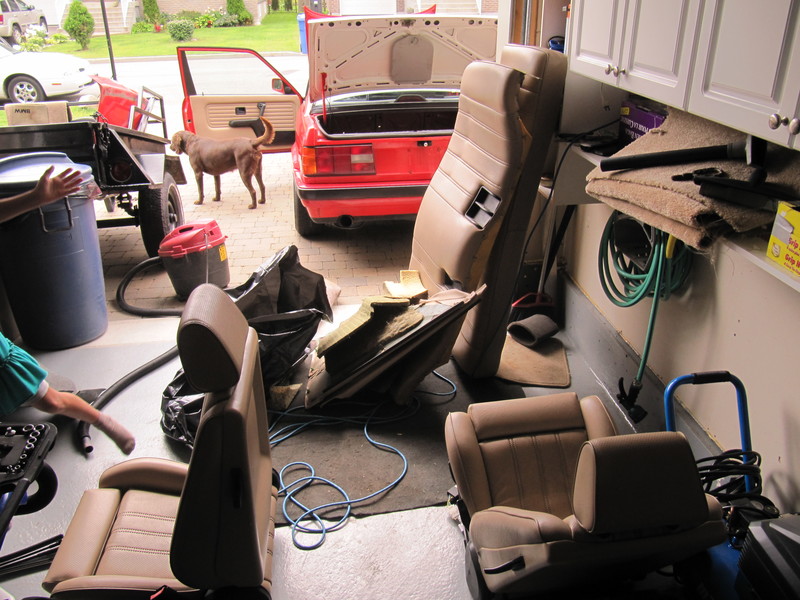
That was kinda cool so I pulled out the PS seat too...

Image

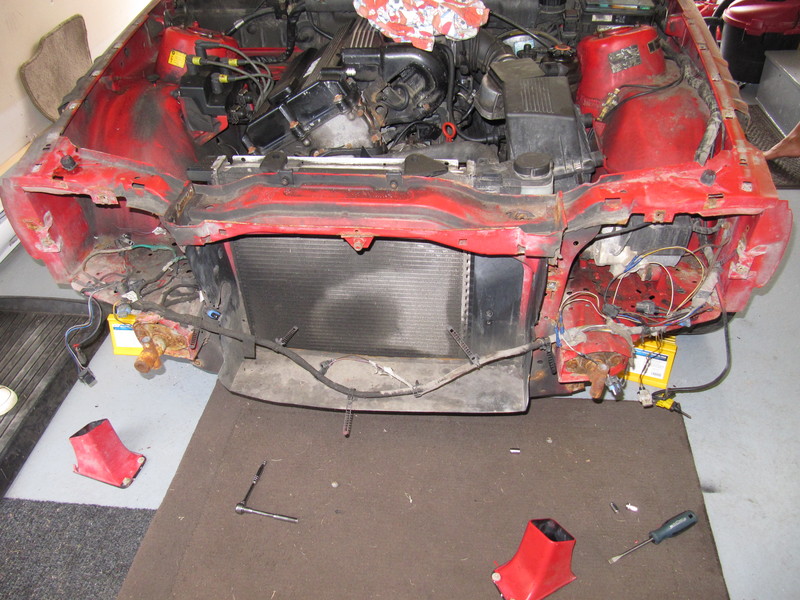
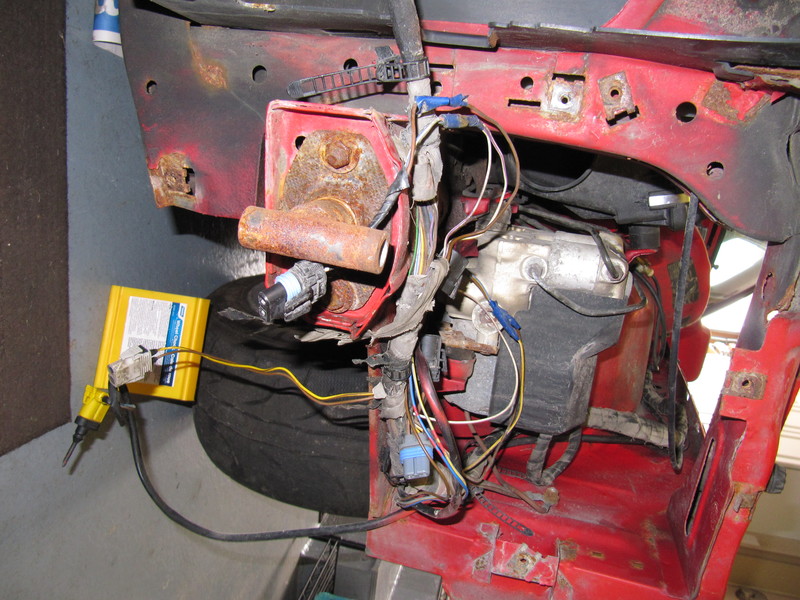
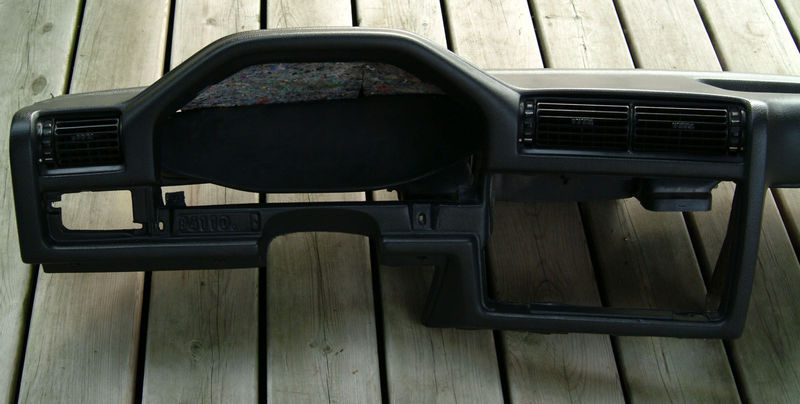
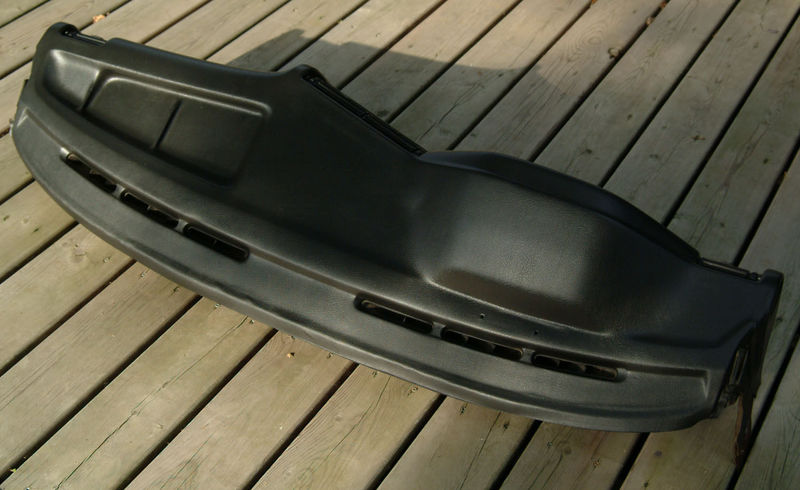
and then some other bits...

Image

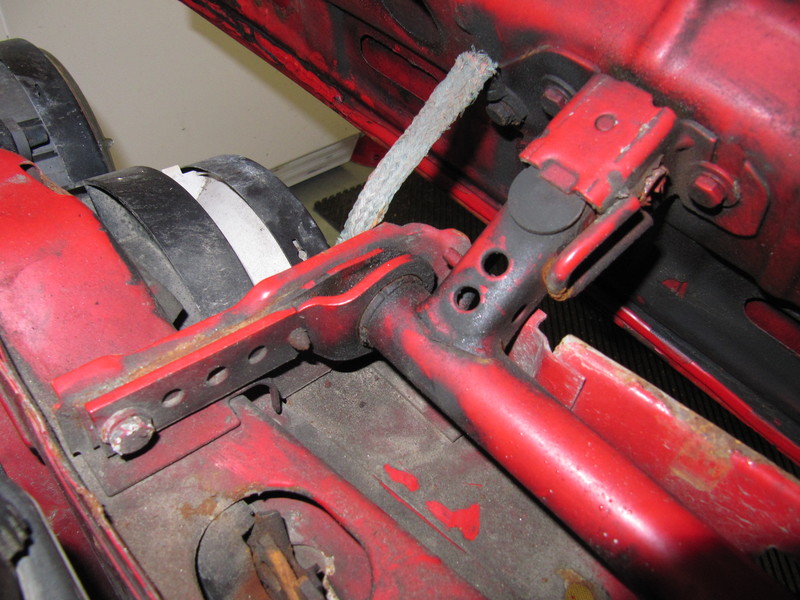
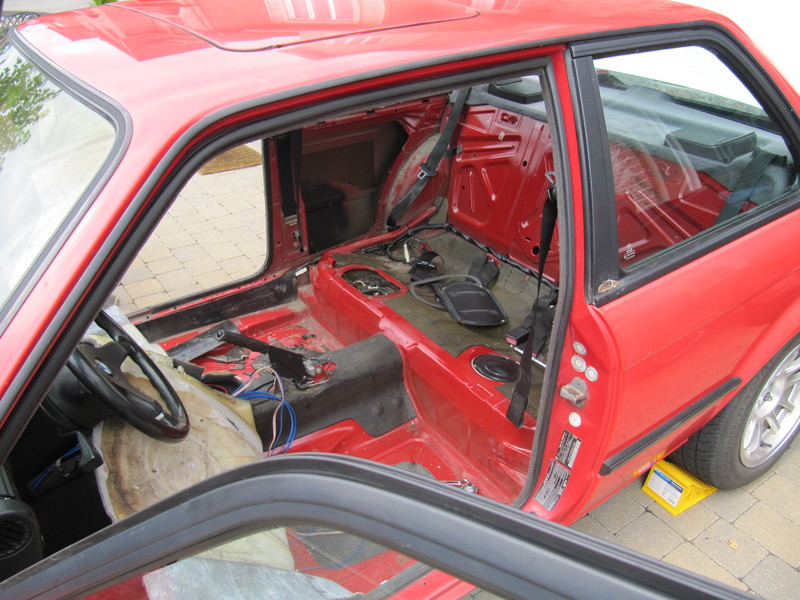
the carpet made an exit and then some more was yanked...

Image

Image

Image

Image

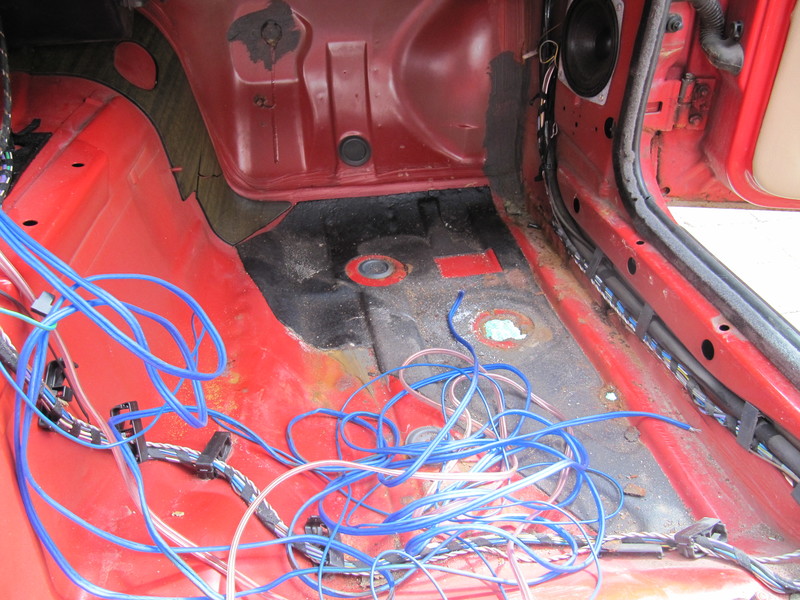
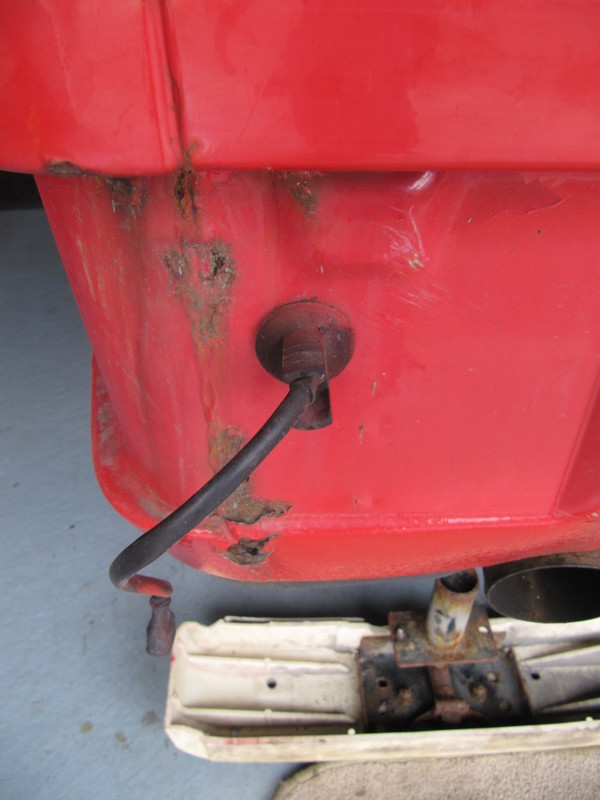
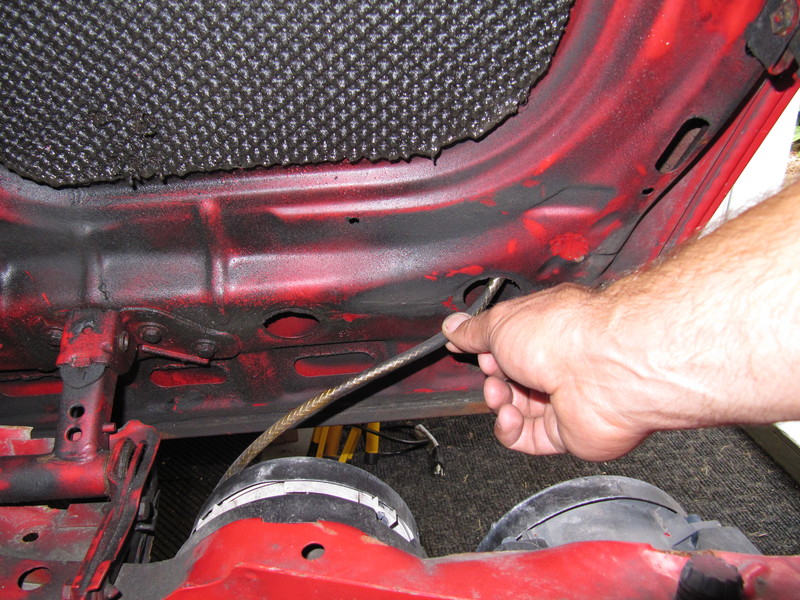
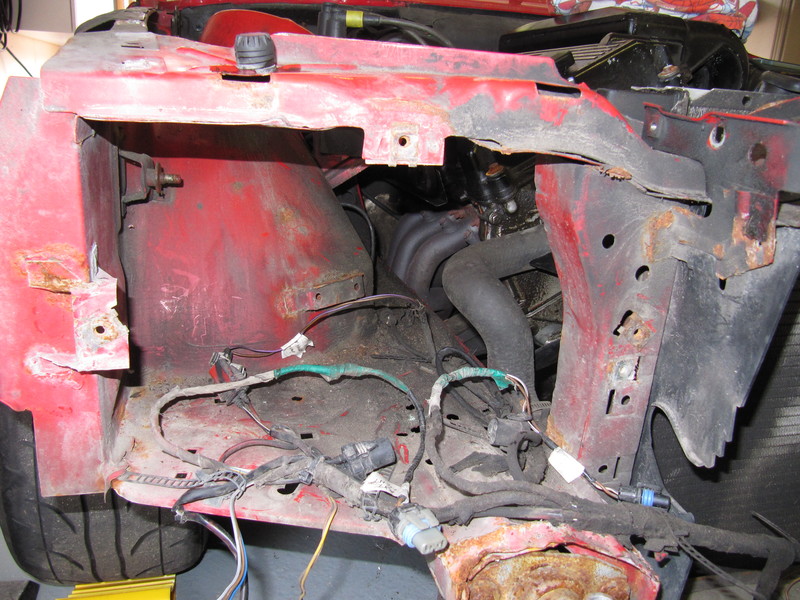
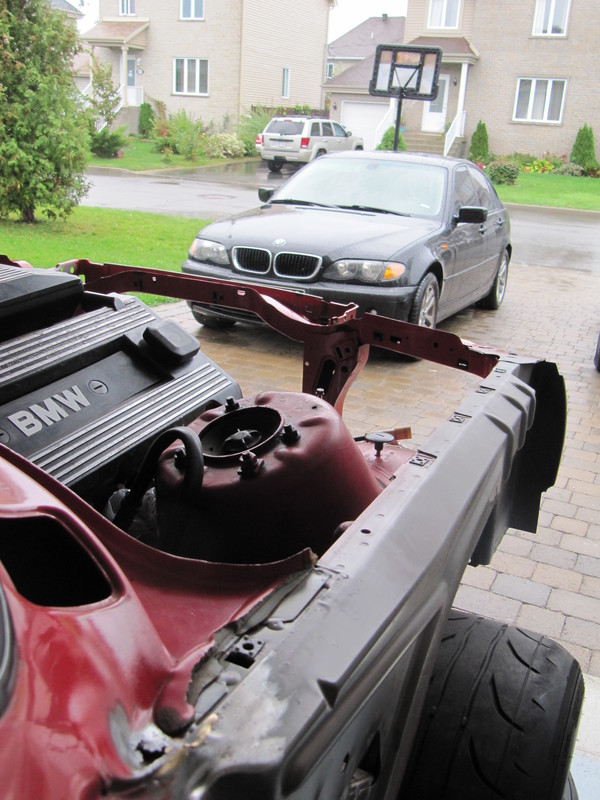
Now the more astute among you may have noticed a wee bit of steel among
the rust there... Im scratching my head now wondering if I would have
been better off spending the $$ Id just spent on bringing the kids to
Disneyland...
Last edited by Split_S on Fri Mar 22, 2019 10:02 pm, edited 58 times in total.
Split_S
POR 15 junkie
Posts: 529
Joined: Sun Jun 16, 2013 11:00 pm
Location: Canada

Mon Oct 07, 2013 2:03 am

Well of course Disneyland will always be there baring any ridiculous rise in the ocean levels so Ive decided to keep the car.... So on we go with strip show...

Image

Image

Image

Image

Image

I had a feeling that sound insulation was hiding some nasty surprises so as you can see above I started scraping it off for about an hour with a screwdriver until I remembered Id just bought an air powered chisel..you know, the kind made just for that sorta thing...

Image

Idiot....
Last edited by Split_S on Tue Jul 17, 2018 2:59 pm, edited 3 times in total.
Split_S
POR 15 junkie
Posts: 529
Joined: Sun Jun 16, 2013 11:00 pm
Location: Canada

Mon Oct 07, 2013 2:22 am

So with my "new" 1991 318iS starting to shed weight in a drastic fashion Ive some decisions
to make... Im not a mechanic but I am stubborn and not afraid of rust (but seized bolts terrify
me). I bought the car for the following reasons:

1) I LOVE this model. I thought I loved my E46 but the E30 is truly a classic.

2) I dont know sh*t about mechanics but I am fairly able. Here is the chance to learn.

3) I will get to weld. 'Nuff said.

4) This car was fairly near death. Being a non-religious guy (though I do go to church...for fun mostly...)
I want to resurrect it if you will... But I want to keep it stock..no fancy BS plastic bits and loads
of aftermarket nonsense...

5) Having purchased it without being able to drive it at all, its kinda motivating to look forward to the day
I can fire her up for the first time and take her out and stretch her legs....

So Ive decided to restore her best I can..

Most, if not all of you, will think Im f@*ken nuts and I agree. But
here we go...

It will be a LONG journey...
adit
Married to the E30 Zone
Posts: 13727
Joined: Wed Jun 20, 2007 11:00 pm
Location: portsmouth

Mon Oct 07, 2013 6:45 am

welcome to E30 ownership in all it's glory "split" :wink:
Image

E30 Parts Galore!! 07901 888019

[quote="bss325i"]
Get a f* grip,we are talking about 20+yr.old sub £10k cars here,NOT the crown jewels!
Automaton
E30 Zone Regular
E30 Zone Regular
Posts: 448
Joined: Wed Apr 03, 2013 11:00 pm
Location: India

Mon Oct 07, 2013 6:58 am

Great start.

And thanks for the pictures, will help me show the bare interior panels to the welder, sorry floor maker, :)
We will attempt following the patterns in the metal.

Where do you get the replacement insulation?
Does after market stuff like 'Dampmat' do the trick?
Maneesh

1986 E30 M10 316 Manual Schwarz Chromie
1982 E28 M20 520i Henna Rot - Project
1988 E32 M70 750iL Schwarz - MASSIVE Project

1991 W201 190e Automatic Schwarz - Sold
1991 W201 190e Automatic Silver AMG Tribute - Sold
1993 E36 M40 316i Manual Brillantrot (RIP: rotting in peace)

Join other Carb Fanatics: E30 316 Carb - The Faithfuls https://www.facebook.com/groups/444263742439145/
Split_S
POR 15 junkie
Posts: 529
Joined: Sun Jun 16, 2013 11:00 pm
Location: Canada

Mon Oct 07, 2013 3:40 pm

Great start.

And thanks for the pictures, will help me show the bare interior panels to the welder, sorry floor maker, Smile
We will attempt following the patterns in the metal.

Where do you get the replacement insulation?
Does after market stuff like 'Dampmat' do the trick?
Im planning on using the OEM noise insulation. It comes in sheets, which you cut your pattern out and then heat it up to mold it to shape.. There is also stuff like hushmat, which is peel and stick.. That also looks good. But that will be done only after the repaint... Nowhere near there yet!
Automaton
E30 Zone Regular
E30 Zone Regular
Posts: 448
Joined: Wed Apr 03, 2013 11:00 pm
Location: India

Mon Oct 07, 2013 4:21 pm

Thanks will check the local dealer for some when we come to it.
Till then will be following this DIY refurbishment thread.

cheers!
Maneesh

1986 E30 M10 316 Manual Schwarz Chromie
1982 E28 M20 520i Henna Rot - Project
1988 E32 M70 750iL Schwarz - MASSIVE Project

1991 W201 190e Automatic Schwarz - Sold
1991 W201 190e Automatic Silver AMG Tribute - Sold
1993 E36 M40 316i Manual Brillantrot (RIP: rotting in peace)

Join other Carb Fanatics: E30 316 Carb - The Faithfuls https://www.facebook.com/groups/444263742439145/
Split_S
POR 15 junkie
Posts: 529
Joined: Sun Jun 16, 2013 11:00 pm
Location: Canada

Mon Oct 07, 2013 5:00 pm

Thanks... I'll do my best...

Sound insulation Bmw part # is 51488165271, listing at 50$ US for a 116 x 70cm sheet...
Automaton
E30 Zone Regular
E30 Zone Regular
Posts: 448
Joined: Wed Apr 03, 2013 11:00 pm
Location: India

Thu Oct 10, 2013 2:06 pm

Would you have a picture of metal behind the door cards by any chance?
I need a reference of the door interiors without cards.
Maneesh

1986 E30 M10 316 Manual Schwarz Chromie
1982 E28 M20 520i Henna Rot - Project
1988 E32 M70 750iL Schwarz - MASSIVE Project

1991 W201 190e Automatic Schwarz - Sold
1991 W201 190e Automatic Silver AMG Tribute - Sold
1993 E36 M40 316i Manual Brillantrot (RIP: rotting in peace)

Join other Carb Fanatics: E30 316 Carb - The Faithfuls https://www.facebook.com/groups/444263742439145/
Split_S
POR 15 junkie
Posts: 529
Joined: Sun Jun 16, 2013 11:00 pm
Location: Canada

Sat Oct 12, 2013 2:44 pm

Automaton wrote:Would you have a picture of metal behind the door cards by any chance?
I need a reference of the door interiors without cards.
No.. the doors are off and in storage while the bodywork advances... I did not take the cards off (yet) but when I do I will post... Sorry...
Automaton
E30 Zone Regular
E30 Zone Regular
Posts: 448
Joined: Wed Apr 03, 2013 11:00 pm
Location: India

Sat Oct 12, 2013 3:30 pm

Thanks will wait :)
Maneesh

1986 E30 M10 316 Manual Schwarz Chromie
1982 E28 M20 520i Henna Rot - Project
1988 E32 M70 750iL Schwarz - MASSIVE Project

1991 W201 190e Automatic Schwarz - Sold
1991 W201 190e Automatic Silver AMG Tribute - Sold
1993 E36 M40 316i Manual Brillantrot (RIP: rotting in peace)

Join other Carb Fanatics: E30 316 Carb - The Faithfuls https://www.facebook.com/groups/444263742439145/
User avatar
dirtee-herbert
E30 Zone Regular
E30 Zone Regular
Posts: 327
Joined: Sat Apr 23, 2011 11:00 pm
Location: Keighley, West Yorkshire.

Sat Oct 12, 2013 3:38 pm

looks like you have made a flying start. the car looks like a fantastic candidate for a 'resurrection' from the photos.

Im a big fan of the IS model tho I am a touring man myself and I love the red car tan interior combo.

best of luck :cool:
Split_S
POR 15 junkie
Posts: 529
Joined: Sun Jun 16, 2013 11:00 pm
Location: Canada

Mon Oct 14, 2013 12:05 pm

dirtee-herbert wrote:looks like you have made a flying start. the car looks like a fantastic candidate for a 'resurrection' from the photos.

Im a big fan of the IS model tho I am a touring man myself and I love the red car tan interior combo.

best of luck :cool:
Thanks - from the amount of stuff coming out of the car I will need more than luck! :D
Split_S
POR 15 junkie
Posts: 529
Joined: Sun Jun 16, 2013 11:00 pm
Location: Canada

Mon Oct 14, 2013 4:56 pm

Well the adventure continues...

After removing the front bumper cover, which was a fairly straight forward affair: remove screws and slide off, an epic battle was fought with both the front and rear bumpers... The front finally gave in once common sense was applied instead of brute force and stupidity..

Image

Loosen the 2 bolts on the bottom of the bumper. Those facing you hold the metal support plate to the bumper... They dont loosen.

Image

Image
Above, on the far left, you see where the bolt screws into...

The rear bumper however, hung on and eventually needed an angle grinder and some strong language to finally be persuaded to let go.

Image

The bolt heads had to be cut off as no amount of torque, loose nut or cursing was getting them off. As a result I had to cut the tow hook to access the bolts - no great loss - I wanted it gone anyways. Something about a tow hook says to me "This car is shitty, it will probably break down..." So none of that on my car...

Removing the front bumper revealed some very slight damage to the right side shock mount: evidence of a thump sometime in the cars past:

Image

As best as I can tell that is the extent of the damage..The left side mount had no damage at all and there are no ripples any where else or evidence of repair anywhere....

With the bumpers off I could have a looksee at the metal behind and this is what I saw:

Image

Image

Image

Image

Image

I need to get a welder...

Oh.. and I need to learn how to weld.... :(
Last edited by Split_S on Tue Jul 17, 2018 3:00 pm, edited 4 times in total.
Automaton
E30 Zone Regular
E30 Zone Regular
Posts: 448
Joined: Wed Apr 03, 2013 11:00 pm
Location: India

Tue Oct 15, 2013 8:21 am

Looks like a bunch of parts from a white car are attached?

Looking forward to the cut and weld adventure.
Maneesh

1986 E30 M10 316 Manual Schwarz Chromie
1982 E28 M20 520i Henna Rot - Project
1988 E32 M70 750iL Schwarz - MASSIVE Project

1991 W201 190e Automatic Schwarz - Sold
1991 W201 190e Automatic Silver AMG Tribute - Sold
1993 E36 M40 316i Manual Brillantrot (RIP: rotting in peace)

Join other Carb Fanatics: E30 316 Carb - The Faithfuls https://www.facebook.com/groups/444263742439145/
nickso
E30 Zone Addict
E30 Zone Addict
Posts: 4396
Joined: Sat Jul 23, 2005 11:00 pm
Location: Go do that voodoo that you do so welllllllll!!

Tue Oct 15, 2013 9:12 am

When you replace the battery box in the boot just bin the tow eye, its a pointless rust trap. If you still need a tow eye you can fab one out of a front tow eye and put it in the rear bumper like mine.

Least the front bulkhead looks solid.
Image

'88 e30 328i M52 track bint.
Split_S
POR 15 junkie
Posts: 529
Joined: Sun Jun 16, 2013 11:00 pm
Location: Canada

Tue Oct 15, 2013 2:15 pm

Automaton wrote:Looks like a bunch of parts from a white car are attached?

Looking forward to the cut and weld adventure.
No, only the rear boot lid.. The original, which I have, was rusted all along the seams. The PO had replaced it only a few weeks ago with used 325 lid.
When you replace the battery box in the boot just bin the tow eye, its a pointless rust trap. If you still need a tow eye you can fab one out of a front tow eye and put it in the rear bumper like mine.

Least the front bulkhead looks solid.
Absolutely..Its gone... I will look into how to cut out the base and patch weld it so it looks as if it was never there... 8)


Well work continues... The car seems happy in my garage, kinda like its thinking "F$ck its about time!".. Maybe its just me....

Image

Image

Image

Image
The M42 is a nice looking engine. I look at it and compare it to my M54 in my E46 and see many similarities.. I cant wait to yank it out!

One thing I am thinking about is the seasons. Being in Canada, winter is not too far away and I have to plan my work around the fact its gonna be really cold really soon... I had planned on doing body work all winter but I have scrapped that idea as I dont have ventilation in my garage to deal with the dust all that bodywork will generate. So the plan is now to get some welding done before its too cold to work with the doors open, redo the rear suspension in all its glory, yank the engine and at some point rebuild some components of the engine. Maybe, just maybe, I may pull the dash out but that is scaring the sh*t out of me right now....

Here is the state of the rear of the car as we speak:

Image

Image

Image
Remember my comments on Disneyland?... :roll:
Last edited by Split_S on Tue Jul 17, 2018 3:01 pm, edited 4 times in total.
Split_S
POR 15 junkie
Posts: 529
Joined: Sun Jun 16, 2013 11:00 pm
Location: Canada

Thu Oct 24, 2013 8:27 pm

Chugging along...

Time to get that bonnet out of the way...

Step 1: Open bonnet...

See bracket on right under all that grease..
Image

Bracket on left under same grease...
Image

Both at once... BEAUTIFUL...
Image

Identify tubing for wiper spray nozzles... Remove...
Image

Remove rusty roller guides and set aside for deep cleaning
Image

Image

Take note of grounding strap and then loosen all those bolts...
Image

Call a thirsty friend and tell him you have beer.. Once he's at your
place...well... now you know how I got help removing my bonnet..
No time to waste remove that ugly washer reservoir..Im thinking relocating
it to the boot...
Image

Feeling good I then worked on the lights, removing the plastic grills..

Image

Grills out, loosen bolts that hold light bracket in place then...

Image

Image

Image

Pray to God you can remember how to put it all back a year from now....

Image

Ta-daaaa...

Image

Now I have to build a second shed to start putting ALL THIS STUFF in it... :mad: :mad: :mad: :mad: :mad: :mad:
Last edited by Split_S on Tue Jul 17, 2018 3:02 pm, edited 4 times in total.
Split_S
POR 15 junkie
Posts: 529
Joined: Sun Jun 16, 2013 11:00 pm
Location: Canada

Thu Oct 31, 2013 4:51 pm

Well, new shed built to accommodate all this stuff, not very exciting pics but for a 2 day job Im happy with it...

Image

Image

Image

Image

Work continues on the car too...

Got all the screws out for the front valence without breaking any...
Image

Image

Dropped the valance, pretty good shape I think... no doubt I'll buy a new one...

Image

Looks awesome like this...

Image

Image

Rads good but Im gonna get a new one, this one will never clean up proper...

Image

Gonna loose that ABS unit..anyone with a guide on an ABS delete feel free to link it!

Image

Lots of grease to clean out... and that damn rust...

Image

Finished the day by cleaning off the ww container. Looks like new....
Image
Last edited by Split_S on Tue Jul 17, 2018 3:03 pm, edited 5 times in total.
Widge
E30 Zone Addict
E30 Zone Addict
Posts: 3661
Joined: Tue Jan 11, 2005 11:00 pm
Location: Leeds

Thu Oct 31, 2013 6:59 pm

Awesome thread mate, keep up the good work.
The IS is a great car, and although you have some tin worm to deal with, it will all come good.

Dont worry about being scared by the dashboard etc, there is plenty of explanation on the net and in the Wiki, and people on here who have done it all before to help. And at the end of the day these cars arent THAT complicated!

As for the welding, you'll want a MIG! Feel free to PM me if you need any more help, onlearning or chosing a welding set.

I've done sub-sea welding, but usually on things with less rust :wink:
adit
Married to the E30 Zone
Posts: 13727
Joined: Wed Jun 20, 2007 11:00 pm
Location: portsmouth

Thu Oct 31, 2013 7:13 pm

w/w bottle in the boot? :?
it looks pretty clean now, to me
Image

E30 Parts Galore!! 07901 888019

[quote="bss325i"]
Get a f* grip,we are talking about 20+yr.old sub £10k cars here,NOT the crown jewels!
Split_S
POR 15 junkie
Posts: 529
Joined: Sun Jun 16, 2013 11:00 pm
Location: Canada

Thu Oct 31, 2013 8:22 pm

Widge wrote:Awesome thread mate, keep up the good work.
The IS is a great car, and although you have some tin worm to deal with, it will all come good.

Dont worry about being scared by the dashboard etc, there is plenty of explanation on the net and in the Wiki, and people on here who have done it all before to help. And at the end of the day these cars arent THAT complicated!

As for the welding, you'll want a MIG! Feel free to PM me if you need any more help, onlearning or chosing a welding set.

I've done sub-sea welding, but usually on things with less rust :wink:
Thanks!! I'll probably be taking you up on that offer!- Got a Miller 175 Mig welder too.. Blowing holes through some metal already!! :D
w/w bottle in the boot? Confused
it looks pretty clean now, to me
Just think the engine bay will look awesome without it.. Besides, who ever wants to see the boot?? :wink:
Last edited by Split_S on Thu Oct 31, 2013 8:58 pm, edited 1 time in total.
Split_S
POR 15 junkie
Posts: 529
Joined: Sun Jun 16, 2013 11:00 pm
Location: Canada

Thu Oct 31, 2013 8:39 pm

Short Post... Doors are off and those with keen eyesight will see the boot lid is off too... 8) Removing the pins is the EASY way of removing the doors... I left the brackets in place... RH door will have to be replaced though..Bottom is rusted out... :(

Written notes on pics are for my reference...

Image

Image

No clue what that blue wire is for...

Image

I like the look of her, all stripped down... sexy... winkeye

Image

Next up is getting some of the accessories off the engine...
Last edited by Split_S on Tue Jul 17, 2018 3:04 pm, edited 5 times in total.
Split_S
POR 15 junkie
Posts: 529
Joined: Sun Jun 16, 2013 11:00 pm
Location: Canada

Mon Nov 04, 2013 4:20 pm

Moving along, Ive started to tackle the engine bay. Between work, wife and kids this has become my second full-time job. I literally get up on my days off, have breakfast and go to the garage till the kids come home. It's awesome actually.

So, first things first was to get the starter out. A lot of these pics have labels
on them, I did that for a bunch to keep track of what goes where - never thought about saving a copy of the pics without the labelling..sorry about that..

The starter was quite a bitch to get out. Lotsa stuff in the way and the bolts were rusty and and didnt really want to give. Swearing alot really helps though...
Image

Image

Ive become good friends with WD40 already...

Image


All the coolant lines were soft and old. Its all scrap...

Image

The fuel lines too..

Image

I am planning to simplify the coolant lines by deleting the throttle body heater plate as this will be a summer car (well Canadian summer car...:wink:)

Image

Image

I labelled as much as I could.. Funny thing is the flash from the camera removed all traces of what I'd written on the labels!! Aaah the irony...

Image

Image

Image

Image

The coolant hose connector kinda broke off in the engine...Its a rubber ring thats pressed fit in. It basically disintegrated.I searched on realoem for the part but its part number is not listed.. Gonna need replacing..Like everything else! :doh:

Image

better pic of it here..

Image

Starter FINALLY out!!!... Felt like Id just ran a marathon....

Image

The car is looking AWESOME....

Image

Image

Image

Removed the radiator (no pics of that) and splash shield which was as easy as things get and continued on...

Image

Next up, accessories...

Image

First the alternator, which funny enough Im planning the refurbish over the winter along with the starter... No idea how to but it will be fun...

Image

Image

Image

Image

Image

Getting the alternator out is pretty straight forward. Remove the belt by loosening the tensioner and then loosen up the bolts. The only sticky part was prying it off the bushings from the housing that the bolts slide thru. Mine were REALLY tight. You just have to wiggle it left to right for a while and they'll finally give...

Image

Out and on the workbench... :cool:

Image

Next up, the power steering pump and lines...Pretty straight forward... Just be ready with a bucket of some sort underneath... duh...

Image

Image

Image

Pretty messy but done! All this will be binned and bought new...

Image

Out with the charcoal filter...

Image

I think this bracket is NLA so Im gonna clean it up...

Image

Image

Charcoal canister out and binned.. These things arent cheap...

Image

Soaking the rusty brackets in Evaporust...Works great...

Image

Enough posting, gotta get to work on the car... :)
Last edited by Split_S on Tue Jul 17, 2018 3:06 pm, edited 4 times in total.
User avatar
JM2012
E30 Zone Newbie
E30 Zone Newbie
Posts: 102
Joined: Mon Apr 23, 2012 11:00 pm

Mon Nov 04, 2013 5:41 pm

Good stuff, well and truely getting stuck in!
Jesus325iTouring
Frog freak !
Frog freak !
Posts: 11356
Joined: Sun Jan 09, 2005 11:00 pm
Location: Omnipresent!

Mon Nov 04, 2013 6:37 pm

What a cracking write up :cool: Look forward to reading more, I like the style!
Image

X5 V8 for thrills, CRV for chills, Range Rover P38 V8 for sooooo much aggravation...
User avatar
Jozi
E30 Zone Addict
E30 Zone Addict
Posts: 3076
Joined: Thu Nov 22, 2007 11:00 pm
Location: Dublin, Ireland

Tue Nov 05, 2013 6:10 pm

Great thread this, looking forward to more updates. I might also have to reference your images for when my own goes back together, the notes on them are a great idea!
Split_S
POR 15 junkie
Posts: 529
Joined: Sun Jun 16, 2013 11:00 pm
Location: Canada

Tue Nov 05, 2013 8:32 pm

Jesus325iTouring wrote:What a cracking write up :cool: Look forward to reading more, I like the style!
Cheers, thanks...

Jozi wrote:Great thread this, looking forward to more updates. I might also have to reference your images for when my own goes back together, the notes on them are a great idea!
My pleasure.. have at her...was a bit embarrassed about the notes though but wtf... makes sense to have 'em.."
Split_S
POR 15 junkie
Posts: 529
Joined: Sun Jun 16, 2013 11:00 pm
Location: Canada

Sat Nov 09, 2013 3:04 pm

While doing all this nonsense I also found the courage to disconnect the throttle cable...

Bracket is overtop the charcoal canister bracket:
Image

Pic of throttle assembly but what I like in this pic is my completely SEIZED blower in the background.. Can't wait to tackle that biatch.... :cry:

Image

Image

Image

Joining the starter and other orphaned components on my workbench:

Mr Power himself:
Image

and his amigo, El bomba...

Image

Soaked this stuff in Evaporust:

Before:
Image

After:
Image

Image
Water and molasses does the same thing at a 9:1 ratio (9 parts water to one part molasses) but takes a bit longer and may affect other metals, but is way cheaper...Evaporust wont attack other metals, is faster but cost way more.. either way end result is the same...

While I was waiting on that my wife brought me this:

Image

and the mailman brought me this:

Image

Which led to MORE stuff on my workbench.....

Image


Im very happy right now..... :D
Last edited by Split_S on Fri Mar 22, 2019 7:23 pm, edited 3 times in total.
Split_S
POR 15 junkie
Posts: 529
Joined: Sun Jun 16, 2013 11:00 pm
Location: Canada

Tue Nov 12, 2013 3:38 pm

Alright zoners, this is where she's at:

Image

Ignition coil was removed as Im planning a CoP setup.. Gotta figure that one out later on... :beer:

I also removed the fan using my home made fan clutch removal tool which I'd just recently made for my e46... (shitty thermostat!). Here is a pic...

Image

Its 34cm long by 4cm wide... Center of 1st hole is 5.8cm from edge and closer hole center is 2cm from edge...
Diameter of half moon is 3.6cm with the center at 4cm from the edge...
Worked great on both the e30 and e46... Hope this helps someone out...
Im torn between going electric or just remounting a new fan and clutch (this clutch is finished).

Anyone notice any differences going electric? Pros / cons?? Recommendations??

I also started removing the loom in the engine compartment too... It was kinda like the first time I had sex: slow, awkward, kinda scary.. :o:

Image

Image

Image

Image

Image

Image

Image

Image

With it all disconnected I put everything in a plastic bag.. Im not planning on removing the loom from the car as that scares the sh@t out of me...

Image

Joking aside it was quite straightforward to take off but Im not at the point of taking the complete loom out. Im trying to pace out the work and I dont want to pull the dash just yet as Ive simply got nowhere to put it!! Can't build another damn shed now can I!! So the plan is just to remove what I can and get it all ready... I've wrapped the loom ends in garbage bags to keep from repeatedly stepping on it...:roll:

All in all Im pleased with how far she's come.. Unlike most of you I've never messed around with cars before, so for me, this is pretty intense!!

Here's an artist shot of the old and the not so-old...

Image
Last edited by Split_S on Fri Mar 22, 2019 7:24 pm, edited 2 times in total.
Split_S
POR 15 junkie
Posts: 529
Joined: Sun Jun 16, 2013 11:00 pm
Location: Canada

Thu Nov 14, 2013 3:08 pm

Not that anyone cares but just scored a MINT crack-free dash on ebay... 450 cdn... looks new... pics to follow...
Widge
E30 Zone Addict
E30 Zone Addict
Posts: 3661
Joined: Tue Jan 11, 2005 11:00 pm
Location: Leeds

Thu Nov 14, 2013 3:14 pm

Hey mate. Well done on the build, and the new dash.
Love reading the thread - please keep posting - even if no one comments!! There will be plenty of poeple reading it and learning little details!
Split_S
POR 15 junkie
Posts: 529
Joined: Sun Jun 16, 2013 11:00 pm
Location: Canada

Thu Nov 14, 2013 3:18 pm

Thanks, comments like yours makes all the extra hassle of putting this together worth it.... cheers! :D

Pics...

Image

Image

Image

Just 7hrs of driving to go pick it up, 570$ to pay for it, 2 more years of toil to get the car up and running and she'll look great!
Last edited by Split_S on Fri Mar 22, 2019 7:25 pm, edited 7 times in total.
polsta
Married to the E30 Zone
Posts: 10322
Joined: Fri Oct 09, 2009 11:00 pm
Location: portsmouth

Thu Nov 14, 2013 3:19 pm

good work that man, good read and good progress

heater blower- very easy to remove, just unclips and pulls out , takes 2 minutes
Split_S
POR 15 junkie
Posts: 529
Joined: Sun Jun 16, 2013 11:00 pm
Location: Canada

Thu Nov 14, 2013 9:29 pm

Coming soon to a theatre near you...... (not really)

(Cue deep throated movie trailer guy...)

Day 19.... Engine Day....

One Man.....One lift....One Engine to bind them all....


Image


The adventure continues in solid 2d!! winkeye
Last edited by Split_S on Fri Mar 22, 2019 7:25 pm, edited 5 times in total.
Post Reply