
Shame we didn't pickup on that spreader plate sooner though, Do'h!
My Track Car Build, Spanning past 3 years
Moderator: martauto
-
Silverfang
- E30 Zone Regular

- Posts: 937
- Joined: Fri Dec 23, 2005 11:00 pm
- Location: Northampton
I hope to see video of this running soon 
Shame we didn't pickup on that spreader plate sooner though, Do'h!
Shame we didn't pickup on that spreader plate sooner though, Do'h!
BMW and Opel, both RWD, both german, both good fun
http://www.clockservicing.co.uk/ For any clock repairs try here.
http://www.clockservicing.co.uk/ For any clock repairs try here.
-
Motorhole
- E30 Zone Addict

- Posts: 2395
- Joined: Tue Jul 12, 2005 11:00 pm
- Location: Cheshire
Hopefully won't be far off! Got a couple of booked-up weekends coming so won't get owt done then, but going to start spending Monday evenings on it, while it's still light and the missus is at her parents 
-
Motorhole
- E30 Zone Addict
- Posts: 2395
- Joined: Tue Jul 12, 2005 11:00 pm
- Location: Cheshire
Okay, so not been any updates for a while. I have been progressing though, albeit steadily. A few hours in the evenings here and there has got things moving and I have a few more bits on order.
So first up, fitting the propshaft. After I'd fitted the centre bearing, I thought it was going to be easy as pie. I was wrong!
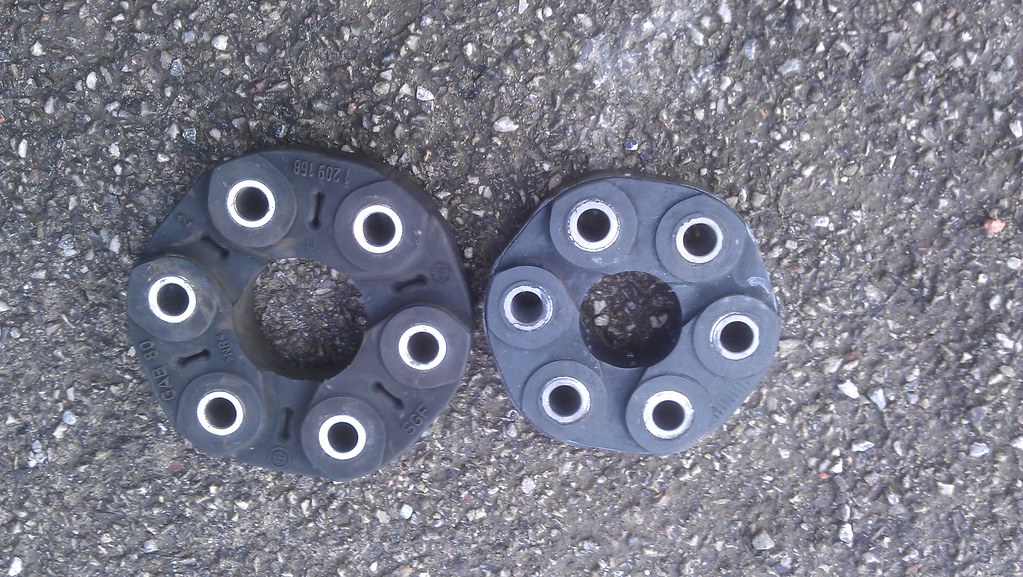
First problem was that I'd ordered the wrong prop guibo. For some reason, 328i saloons have different, smaller, guibos to all other 328is. So I'd made an assumption and had fallen foul of assumption being the cause of all f*ck ups.
Original guibo is on the left, the one I ordered is on the right:
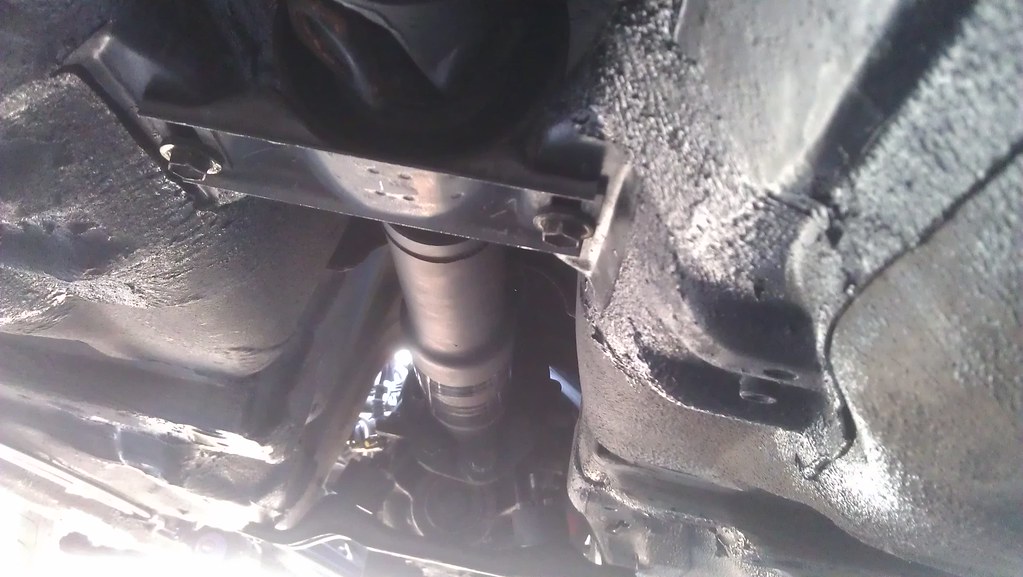
Second problem was the centre bearing didn't fit. I don't know if this is because it was a cheap Meyle item or because it was for a pre-facelift rather than a post-facelift car. Nevertheless, this was the result once I had one bolt loosely in:

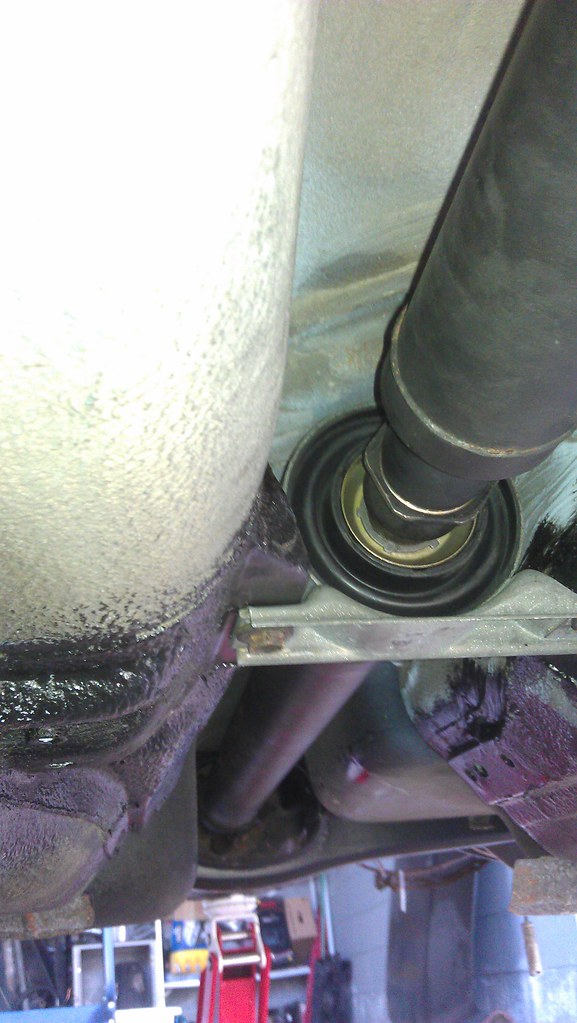
The other just wouldn't line up. So, I ordered a Lemforder guibo for the RIGHT car and a Febio-Bilstein centre bearing and housing for the RIGHT car and refitted everything.

I did notice that the housing on the FB bearing wasn't symmetrical whereas on the Meyle one it was. The whole E36 prop assembly actually sits slightly offset in the E30 transmission tunnel. Anyway, bolting this lot up was now no bother. New lock nuts from BMW used on the guibo/gearbox end of course.
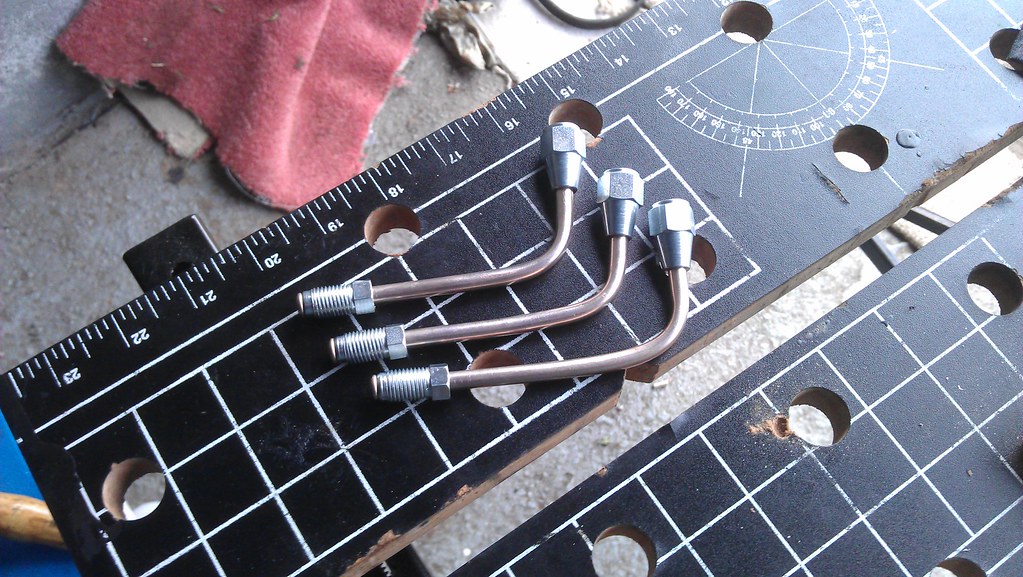
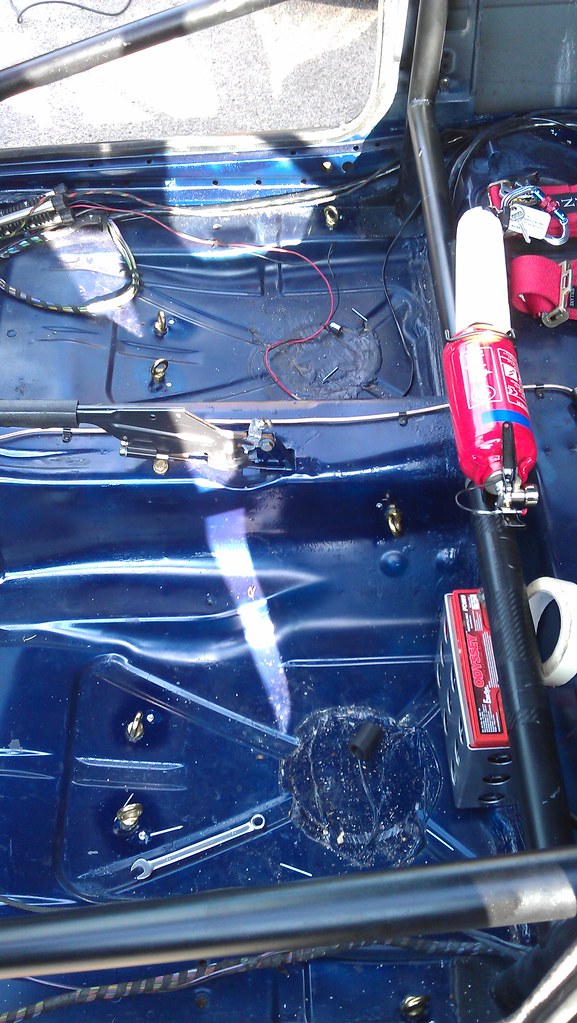
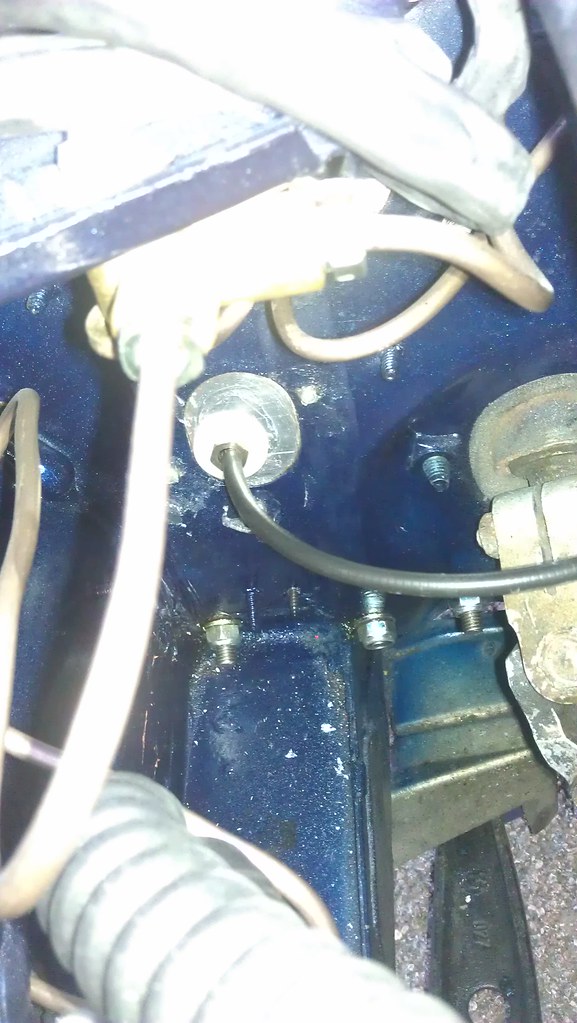
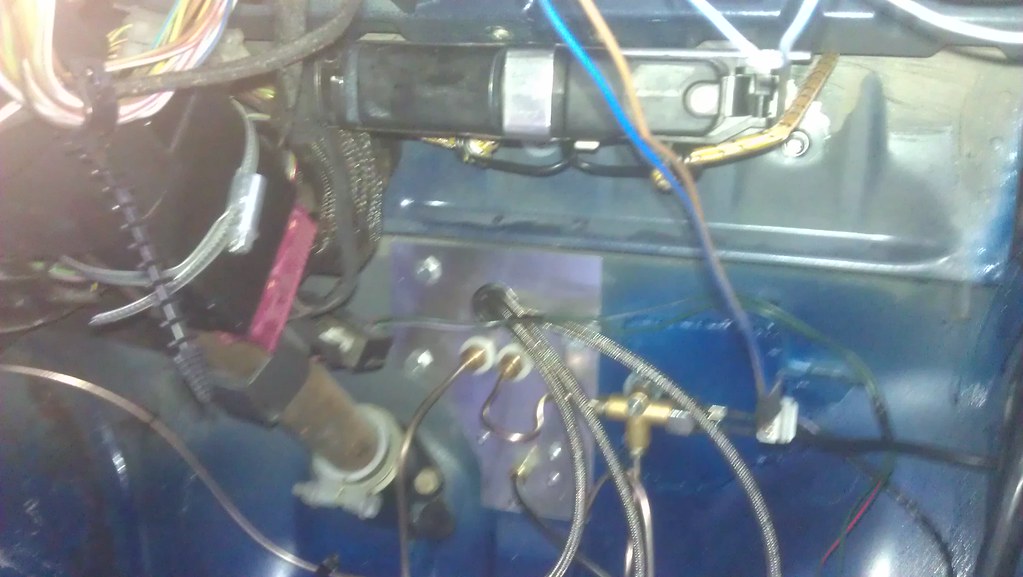
Then I turned my attention to mounting the clutch/brake fluid reservoirs. Again, trying to keep chassis chopping/drilling to a minimum, I don't want to cut a hole in the battery tray, but room for the flexi-lines is tight. So I made some 90-degree fittings from 1/4" pipe and the required UNF fittings:
Of course, it's good practice to keep joins etc to a minimum to minimise fluid leaks, but as this is in the feed line and isn't under pressure, I'm quite happy that there shouldn't be any issues. I drilled the bulkhead to fit the mounting bracket that came with the reservoirs and used some nylon washers as bushes/gaskets to ensure no metal on metal action. I needed to order some lock nuts for the reservoirs, then I can get everything lined up, tightened and hopefully in order. As of now, I left it looking like this:

I also need to rearrange the feed lines slightly so that the engine doesn't pinch them closed against the battery tray on left hand bends
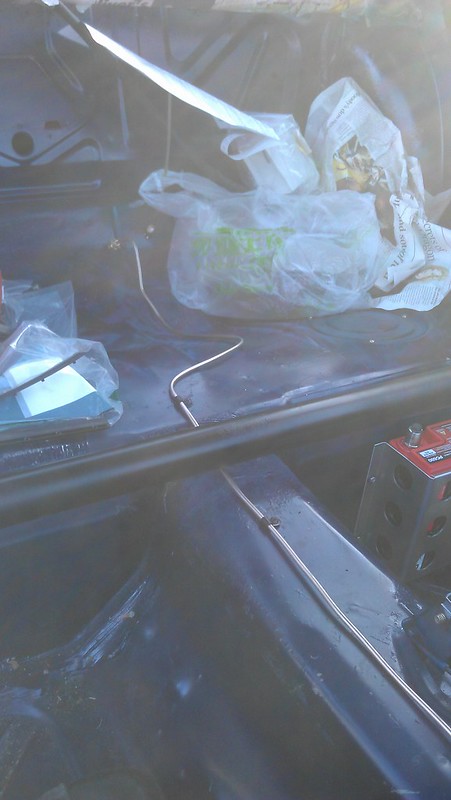
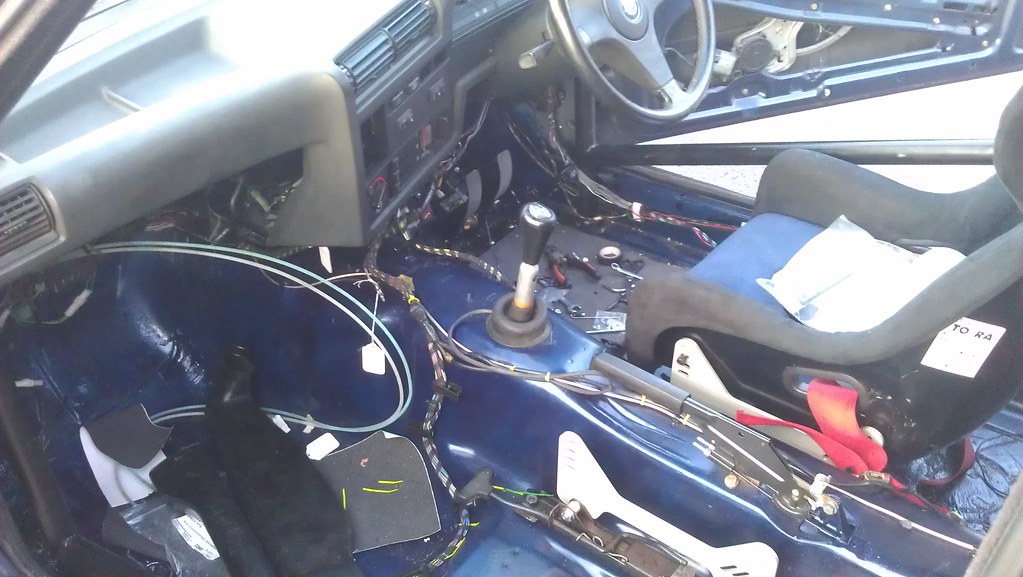
Then I began on a job I'd been putting off due to sheer awkwardness. The front-rear brake line inside the car! I used a short section of copped to make a dummy bended pipe for the awkward part around the pedal box as this would be easier to manoeuvre. I then used this to begin making up the real line, which I will finish at the weekend.

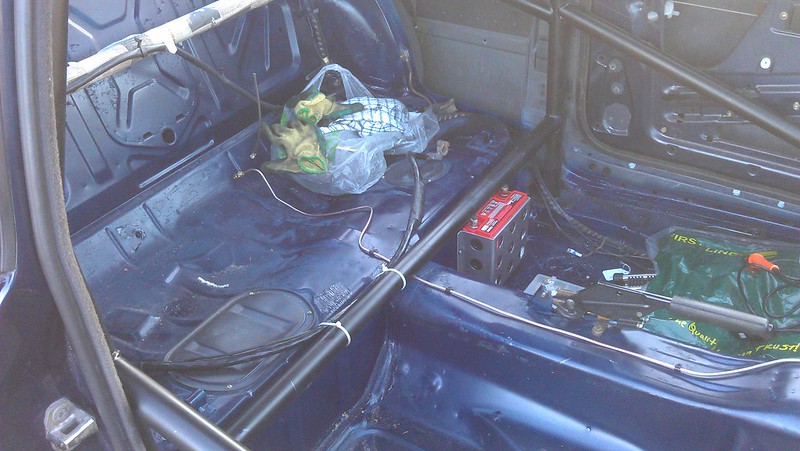
I've also decided on wear to mount my battery (nearside of the boot, as close to the rear-seat bulkhead as it can get) and prepped a suitable earthing point, connected fuel lines, fitted bonnet badge and gearshift rubber and done various little odd jobs. As my pre-made starter lead and earth straps are now here too, I may even get round to trying to start the b*stard pretty soon
So first up, fitting the propshaft. After I'd fitted the centre bearing, I thought it was going to be easy as pie. I was wrong!
First problem was that I'd ordered the wrong prop guibo. For some reason, 328i saloons have different, smaller, guibos to all other 328is. So I'd made an assumption and had fallen foul of assumption being the cause of all f*ck ups.
Original guibo is on the left, the one I ordered is on the right:
Second problem was the centre bearing didn't fit. I don't know if this is because it was a cheap Meyle item or because it was for a pre-facelift rather than a post-facelift car. Nevertheless, this was the result once I had one bolt loosely in:
The other just wouldn't line up. So, I ordered a Lemforder guibo for the RIGHT car and a Febio-Bilstein centre bearing and housing for the RIGHT car and refitted everything.
I did notice that the housing on the FB bearing wasn't symmetrical whereas on the Meyle one it was. The whole E36 prop assembly actually sits slightly offset in the E30 transmission tunnel. Anyway, bolting this lot up was now no bother. New lock nuts from BMW used on the guibo/gearbox end of course.
Then I turned my attention to mounting the clutch/brake fluid reservoirs. Again, trying to keep chassis chopping/drilling to a minimum, I don't want to cut a hole in the battery tray, but room for the flexi-lines is tight. So I made some 90-degree fittings from 1/4" pipe and the required UNF fittings:
Of course, it's good practice to keep joins etc to a minimum to minimise fluid leaks, but as this is in the feed line and isn't under pressure, I'm quite happy that there shouldn't be any issues. I drilled the bulkhead to fit the mounting bracket that came with the reservoirs and used some nylon washers as bushes/gaskets to ensure no metal on metal action. I needed to order some lock nuts for the reservoirs, then I can get everything lined up, tightened and hopefully in order. As of now, I left it looking like this:
I also need to rearrange the feed lines slightly so that the engine doesn't pinch them closed against the battery tray on left hand bends
Then I began on a job I'd been putting off due to sheer awkwardness. The front-rear brake line inside the car! I used a short section of copped to make a dummy bended pipe for the awkward part around the pedal box as this would be easier to manoeuvre. I then used this to begin making up the real line, which I will finish at the weekend.
I've also decided on wear to mount my battery (nearside of the boot, as close to the rear-seat bulkhead as it can get) and prepped a suitable earthing point, connected fuel lines, fitted bonnet badge and gearshift rubber and done various little odd jobs. As my pre-made starter lead and earth straps are now here too, I may even get round to trying to start the b*stard pretty soon
-
Demlotcrew
- E30 Zone Team Member

- Posts: 13329
- Joined: Mon Dec 20, 2004 11:00 pm
- Location: East Anglia
Looking good

-
Motorhole
- E30 Zone Addict
- Posts: 2395
- Joined: Tue Jul 12, 2005 11:00 pm
- Location: Cheshire
So, here we go again. Some more progress this weekend.
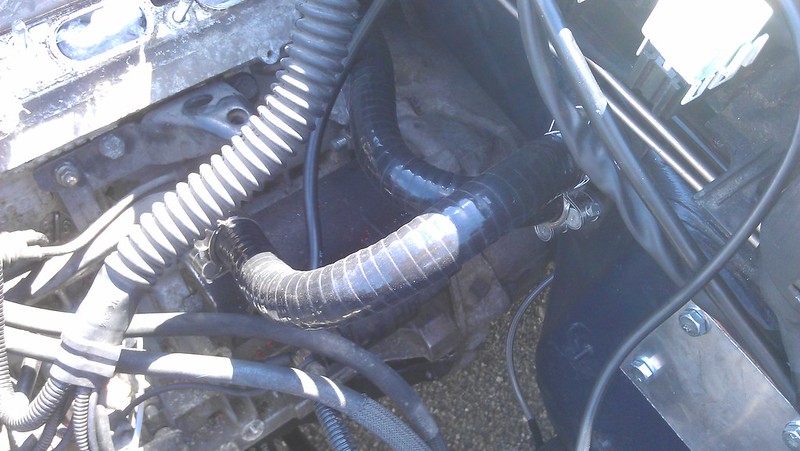
My silicon radiator top/bottom hoses arrived. These are cheapo ones from China - not something I would normally invest in to be said, but I did quite a bit of research on this Winner Racing seller on Ebay beforehand and nobody has said anything negative about their hoses - some people (Supra/Scooby forums and the like) have had them fitted for up to a year with no issues. So at £30 delivered, at least worth a punt I thought.
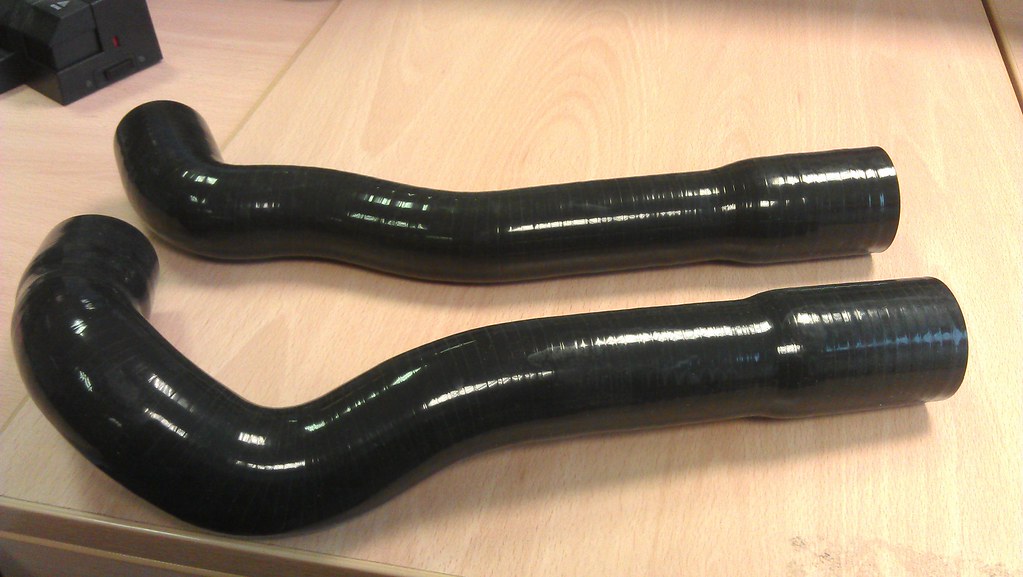
Yeah, unfortunately I wasn't thinking when I took that pic. Anyway they seem to be polyester reinforced 4 ply just like the real deal. So I'll let you guys know how they work out once it's running. I am still waiting for my remaining hose bits and pieces (Ash for these) to arrive so I can plumb in the heater matrix and refit the manifold. For now I will bypass the throttle body with a length of hose until I can get someone with a welder to plug the holes in the block/pipe properly.
I chopped up the cowling on the E36 electric fan to make it fit in front of the radiator in the E30.
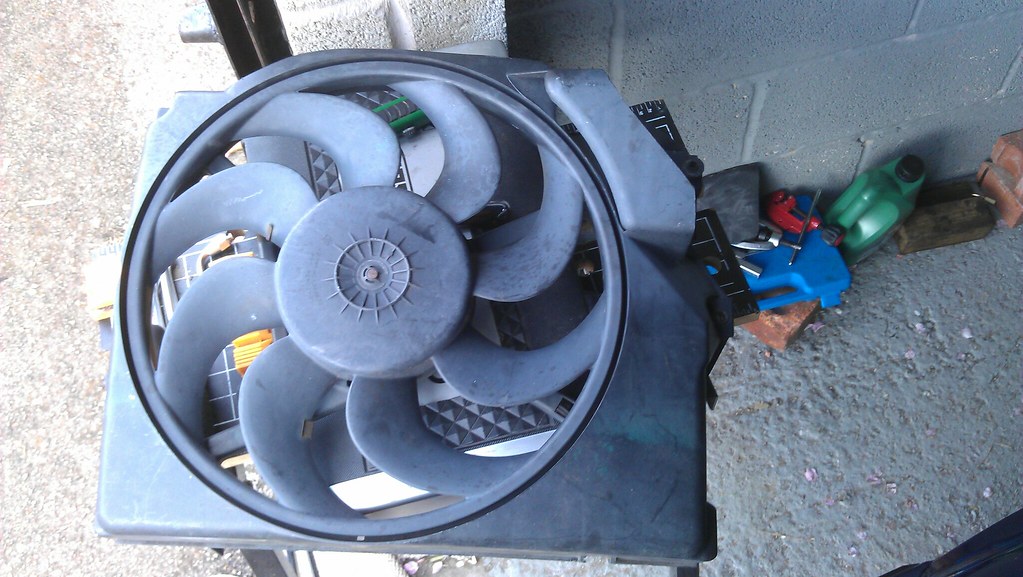

I was going to mount this with a couple of self tappers at the bottom and a couple of small brackets and bolts at the top. If anyone would advise against this, please let me know!
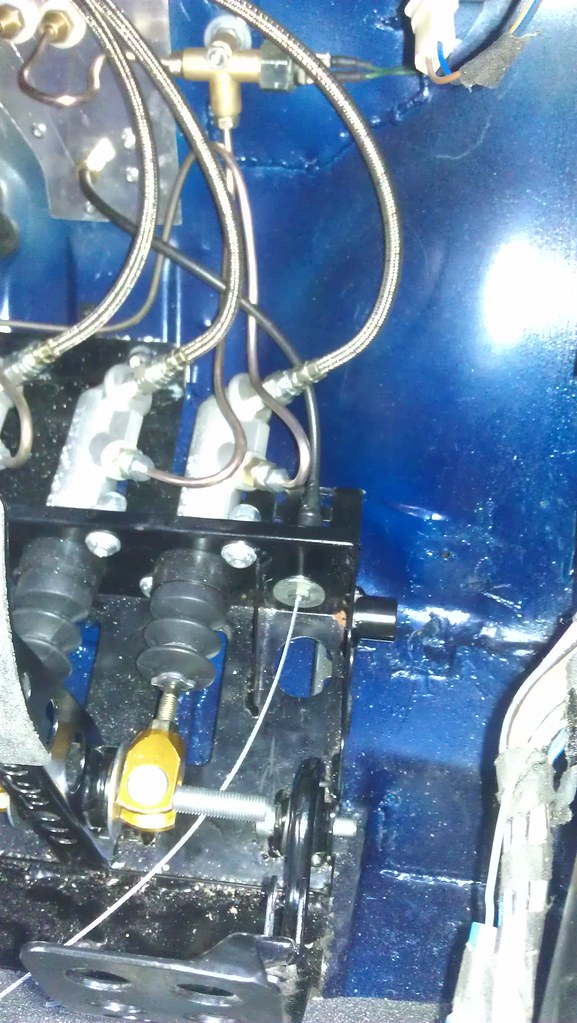
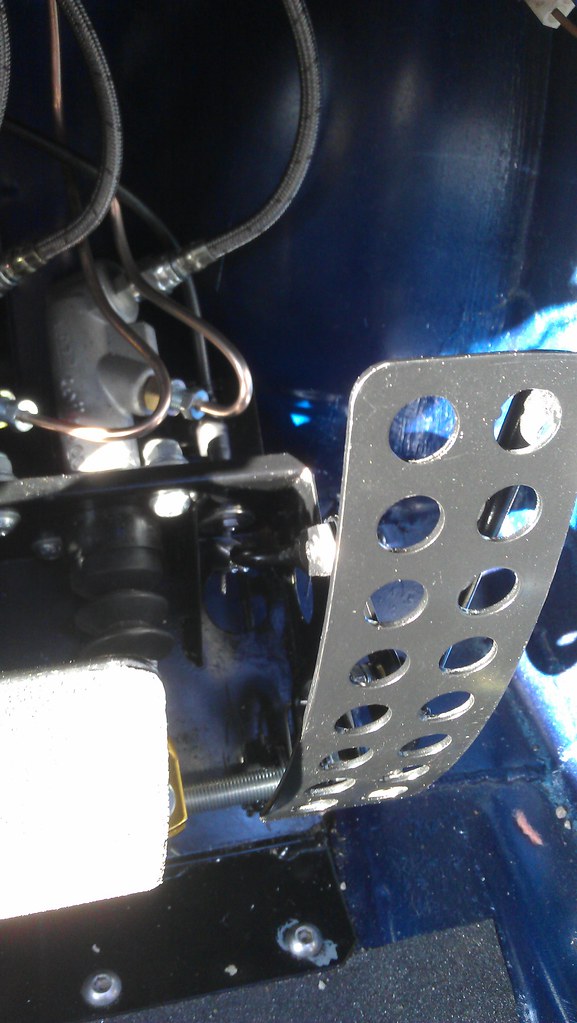
Finally got fluid reservoirs mounted properly.
But I need to order some p-clips to finish of the front-rear brake line. Either way it's been routed fully and cut to length so that should be a half hour job when I can get some. Then my brake/clutch circuits will be complete
I've also changed the oil filter and filled the engine up with oil. That was more of a saga than I'd hoped. The oil obviously hadn't been changed in some time - I knew this from the state of the rocker cover when I cleaned out under there - but the filter came apart in my hands leaving the bottom bit stuck in the housing. Half an hour of arsing about trying to pry it out with a pair of screwdrivers eventually resulted in breaking the plastic. Then I just pulled it out with my fingers. Note to self - if this happens again, just break the plastic.
Then I moved onto finishing up on the wiring. Fitted a pair of 16 mm2 earth straps, making sure all connections were clean and free of paint/oxidation:
Then moved onto interior wiring, labelling what I could figure out and connecting what can be connected.

So now, provided that I have my hose bits (so I can refit the manifold without having to remove it again), a battery and some wiring conundrums sorted by next Sunday, It will be time to turn the key and see what does
My silicon radiator top/bottom hoses arrived. These are cheapo ones from China - not something I would normally invest in to be said, but I did quite a bit of research on this Winner Racing seller on Ebay beforehand and nobody has said anything negative about their hoses - some people (Supra/Scooby forums and the like) have had them fitted for up to a year with no issues. So at £30 delivered, at least worth a punt I thought.
Yeah, unfortunately I wasn't thinking when I took that pic. Anyway they seem to be polyester reinforced 4 ply just like the real deal. So I'll let you guys know how they work out once it's running. I am still waiting for my remaining hose bits and pieces (Ash for these) to arrive so I can plumb in the heater matrix and refit the manifold. For now I will bypass the throttle body with a length of hose until I can get someone with a welder to plug the holes in the block/pipe properly.
I chopped up the cowling on the E36 electric fan to make it fit in front of the radiator in the E30.
I was going to mount this with a couple of self tappers at the bottom and a couple of small brackets and bolts at the top. If anyone would advise against this, please let me know!
Finally got fluid reservoirs mounted properly.
But I need to order some p-clips to finish of the front-rear brake line. Either way it's been routed fully and cut to length so that should be a half hour job when I can get some. Then my brake/clutch circuits will be complete
I've also changed the oil filter and filled the engine up with oil. That was more of a saga than I'd hoped. The oil obviously hadn't been changed in some time - I knew this from the state of the rocker cover when I cleaned out under there - but the filter came apart in my hands leaving the bottom bit stuck in the housing. Half an hour of arsing about trying to pry it out with a pair of screwdrivers eventually resulted in breaking the plastic. Then I just pulled it out with my fingers. Note to self - if this happens again, just break the plastic.
Then I moved onto finishing up on the wiring. Fitted a pair of 16 mm2 earth straps, making sure all connections were clean and free of paint/oxidation:
Then moved onto interior wiring, labelling what I could figure out and connecting what can be connected.
So now, provided that I have my hose bits (so I can refit the manifold without having to remove it again), a battery and some wiring conundrums sorted by next Sunday, It will be time to turn the key and see what does
-
DanThe
- E30 Zone Team Member
- Posts: 28649
- Joined: Sat Sep 10, 2005 11:00 pm
- Location: Staffs
Re the self tappers in the fan, use threadlock when fitting them, if they rattle loose they will end up imbedded in your radiator or worse your tyres 
If you want to post that coolant pipe over I will weld it up for return postage costs
If you want to post that coolant pipe over I will weld it up for return postage costs
-
Motorhole
- E30 Zone Addict
- Posts: 2395
- Joined: Tue Jul 12, 2005 11:00 pm
- Location: Cheshire
Good call on the self tappers Dan, thanks! I have some locking tabs too, will use these. Also, you have a pm 
-
Motorhole
- E30 Zone Addict
- Posts: 2395
- Joined: Tue Jul 12, 2005 11:00 pm
- Location: Cheshire
Progress hasn't been astounding of late, in part due to my continued incompetence with selecting and ordering hoses. More on that later, but this instalment was never going to go well after I'd snapped the horn-push switch whilst talking bucket seats out the car.
Despite my fears, this is not an NLA part from BMW and a week later I had a new one sitting around ready to fit. In the meantime, I'd begun to crack on with sorting heater matrix hoses. I wanted to get these done ASAP because that would mean I could fit the inlet manifold (without having to remove it again later) and try to start the thing! Unfortunately, this has proved quite difficult. It's the block to matrix-in hose that's the crux of the problem, due a very tight 90-degree bend with different sized outlet/inlet (22 mm to 17 mm to be precise). It wasn't helped by an attack of retarditis the first time I measured up either and I ordered an assortment of hoses and t-clips that fitted - well, nothing. To be frank.
Anyway once I had the right sized hoses and clips, I tried a 22 mm - 16 mm reducing elbow at 45-degrees and a length of flexi hose, using a plastic joiner.

This was the closest I got. But although it may have done the job, it was too bodgetastic for my liking and I wasn't convinced it would stay kink free with the engine moving around under cornering.
I also tried some 22mm flexi-hose with that wire helix reinforcement in it, but that wasn't flexible enough and kinked too readily. I did notice that some 13 mm wire reinforced stuff was easily flexible enough, so now I have my fingers crossed that the 19 mm hose I have now ordered will be too. Other than that, it's going to be a custom hose jobby - more money thrown at something that shouldn't have been a problem
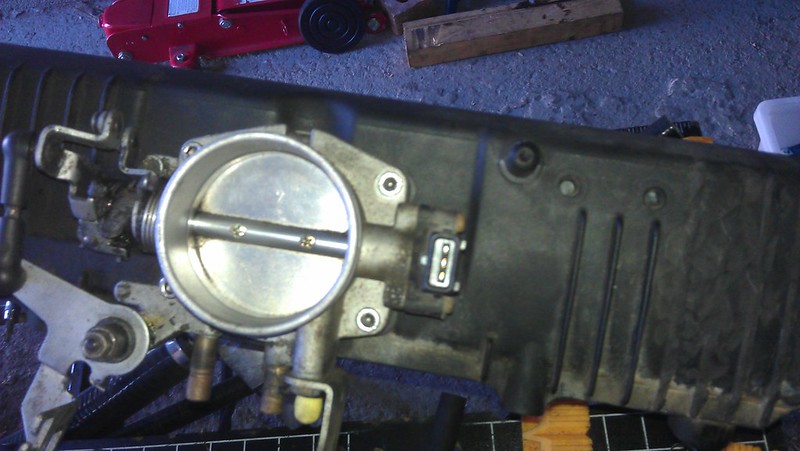
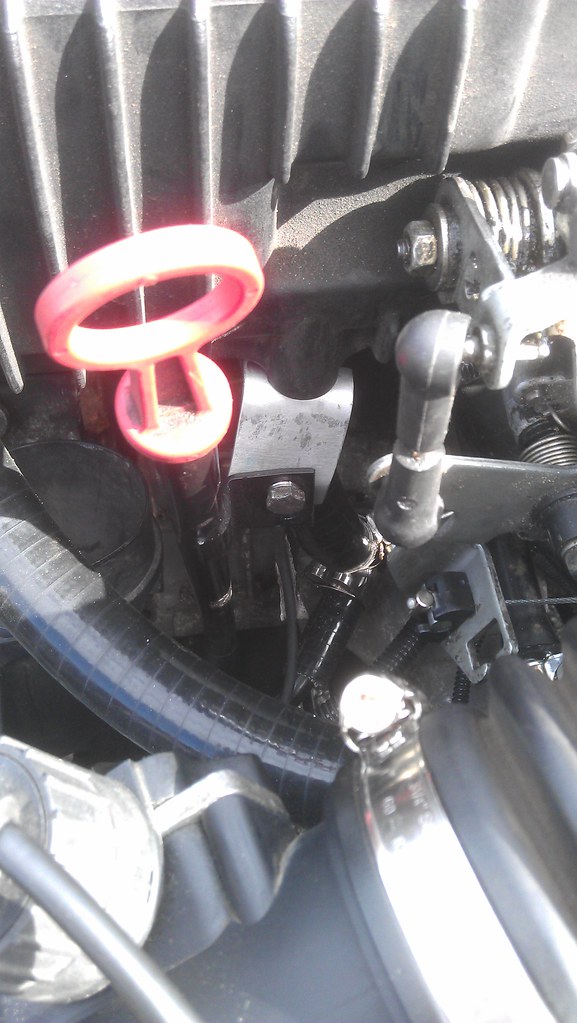
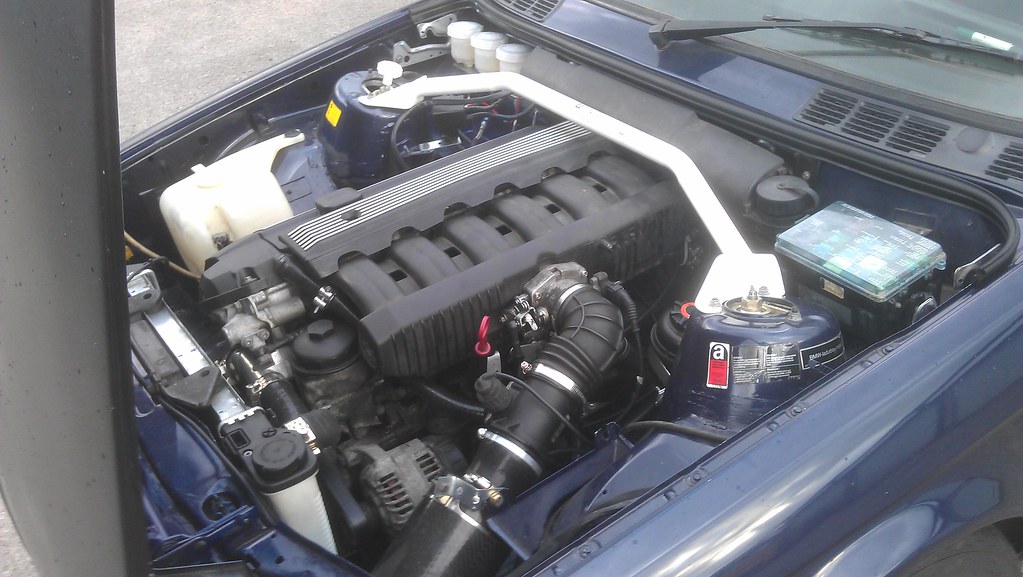
Anyway, I did manage to bypass the throttle body coolant feed and plug the various redundant vacuum take-offs in the M50 manifold.

I just need to plug the take-off for the brake servo now seeing as I no longer need that, then this is pretty much ready to go on. As E30BeemerLad mentions in his M50 manifold swap guide, the hose clip that goes from the underside of the manifold to the ICV fits about as well as - well, the appendage is loose in the hole, put it that way. Was thinking some PTFE plumber's tape would solve this.
For good measure, the car has now been fuelled and a new fuel filter has been fitted, all in preparation for starting!
Still trying to put off the heater hose, I tidied up the under-bonnet wiring and relocated the p/s fluid reservoir to make room for the inlet elbow. I just need to make some sort of bracket to mount the power terminal.
There really is no shortage of stuff to do, I just needed to get the obsession with starting out my head for a little while! Other wiring jobs I needed to do were cut off the plug for the stock brake light switch and extend the loom to reach the in-line hydraulic switch I'd fitted. I also had to do something similar for the reverse light switch, seeing as it is now gearbox mounted rather than gear lever mounted. Using the wiring diagrams on the wiki, I ordered the appropriately sized and coloured wiring from Auto Electric Supplies, at the bank-breaking price of about 30p a metre. Then I set to work with strippers, clippers and a soldering iron.


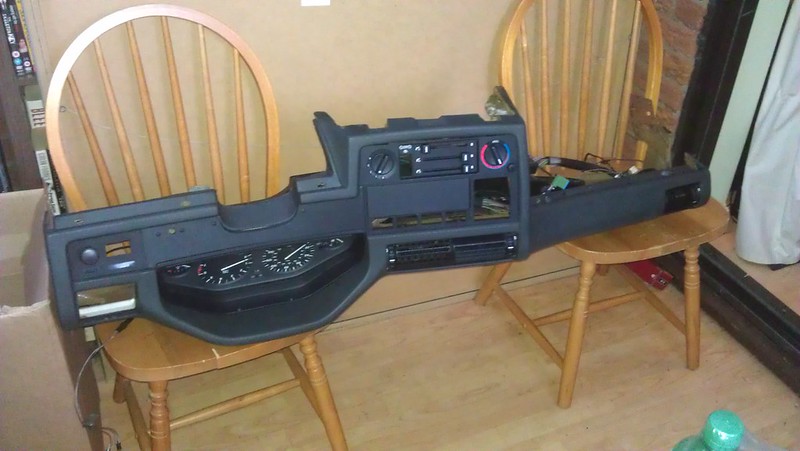
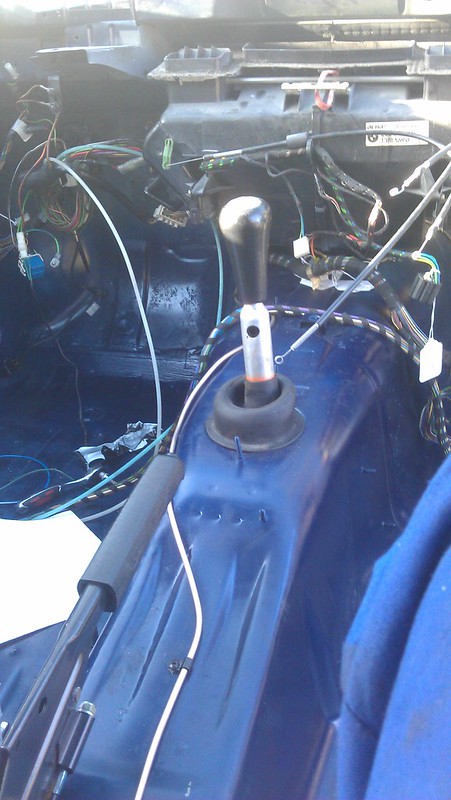
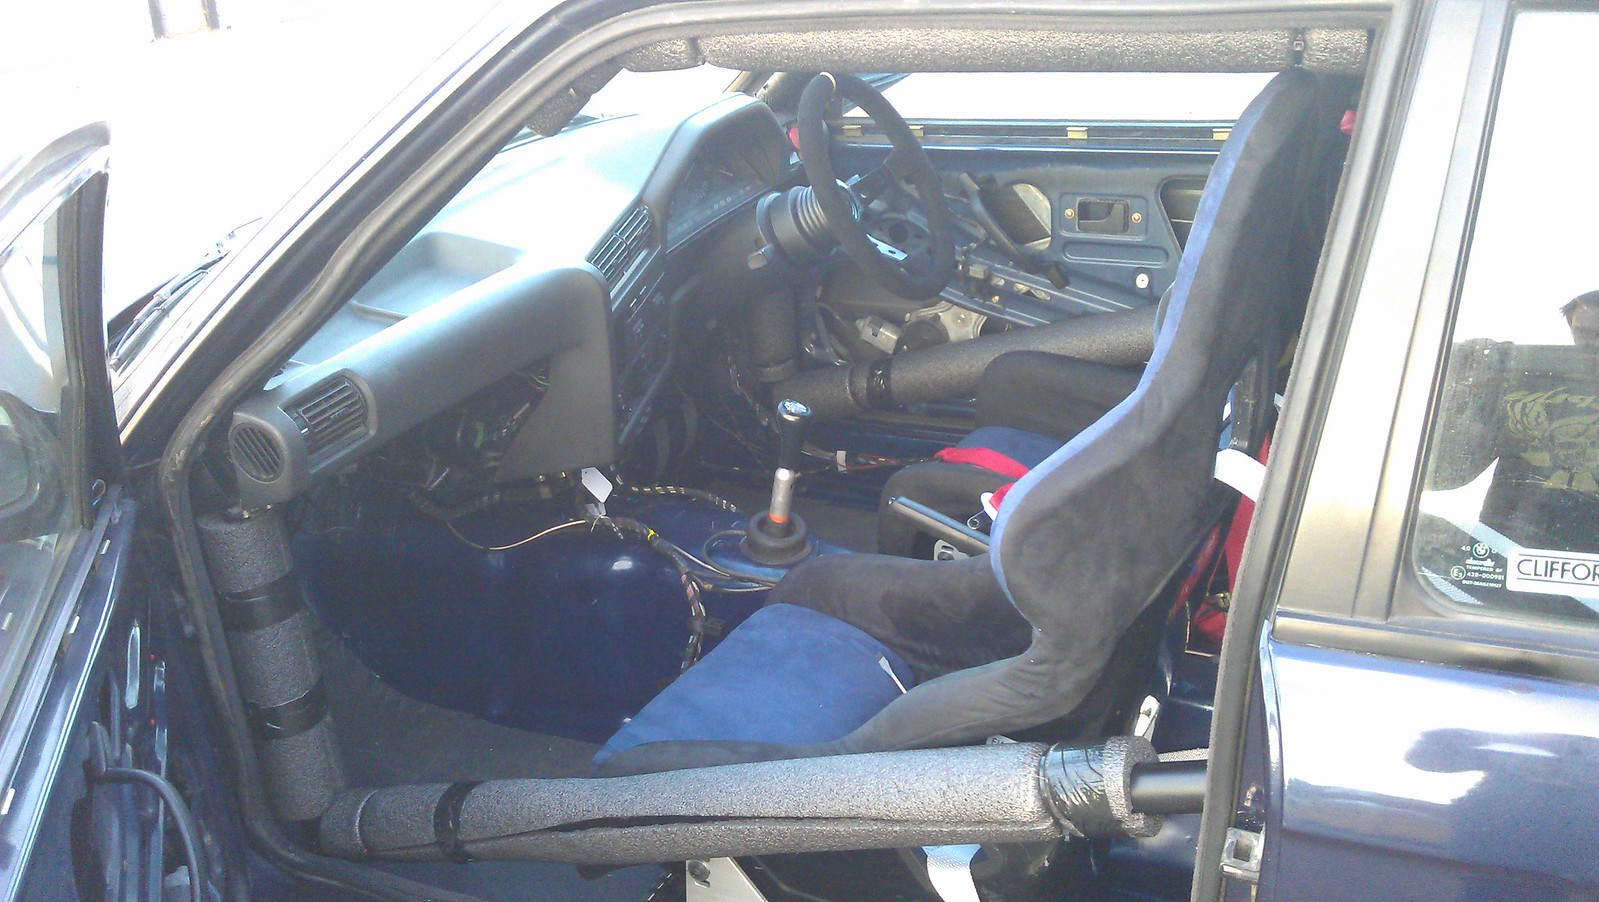
The dash is now also ready to go in! Luckily, for the 2 years or so it's been in my shed, the mice havn't got to it! Sadly, the roll cage is going to interfere with the side vents so I'm going to have to cut shese short, just keeping the fronts in for show and use some ducting to direct air stealthily from under the dash. I'll be mounting the brake bias controller in the stereo blanking plate and will probably put the headlight level adjusters where the OBC once lived. I also plan to fabricate a little plate from sheet ally to make up a small console for potentially mounting VDO guages and a kill switch in the future.
This little spate of work was finished by finishing off the front-rear brake line inside the car and fitting the Oddyseey PC680 battery I'd ordered, following recommendations from guys on here. The battery relocation kit reaches the positive terminal easily enough and I'll put an earthing point on the steel inside of the nearside wheelarch. I've also insulated the cage local to the batttery because it's quite tight and I don't want any accidental short circuits!


So, by the next update hopefully the heater issue will be adequately resolved, it will be running and I'll be thinking about bleeding the brakes and clutch, fitting pads and adjusting the handbrake
Despite my fears, this is not an NLA part from BMW and a week later I had a new one sitting around ready to fit. In the meantime, I'd begun to crack on with sorting heater matrix hoses. I wanted to get these done ASAP because that would mean I could fit the inlet manifold (without having to remove it again later) and try to start the thing! Unfortunately, this has proved quite difficult. It's the block to matrix-in hose that's the crux of the problem, due a very tight 90-degree bend with different sized outlet/inlet (22 mm to 17 mm to be precise). It wasn't helped by an attack of retarditis the first time I measured up either and I ordered an assortment of hoses and t-clips that fitted - well, nothing. To be frank.
Anyway once I had the right sized hoses and clips, I tried a 22 mm - 16 mm reducing elbow at 45-degrees and a length of flexi hose, using a plastic joiner.
This was the closest I got. But although it may have done the job, it was too bodgetastic for my liking and I wasn't convinced it would stay kink free with the engine moving around under cornering.
I also tried some 22mm flexi-hose with that wire helix reinforcement in it, but that wasn't flexible enough and kinked too readily. I did notice that some 13 mm wire reinforced stuff was easily flexible enough, so now I have my fingers crossed that the 19 mm hose I have now ordered will be too. Other than that, it's going to be a custom hose jobby - more money thrown at something that shouldn't have been a problem
Anyway, I did manage to bypass the throttle body coolant feed and plug the various redundant vacuum take-offs in the M50 manifold.
I just need to plug the take-off for the brake servo now seeing as I no longer need that, then this is pretty much ready to go on. As E30BeemerLad mentions in his M50 manifold swap guide, the hose clip that goes from the underside of the manifold to the ICV fits about as well as - well, the appendage is loose in the hole, put it that way. Was thinking some PTFE plumber's tape would solve this.
For good measure, the car has now been fuelled and a new fuel filter has been fitted, all in preparation for starting!
Still trying to put off the heater hose, I tidied up the under-bonnet wiring and relocated the p/s fluid reservoir to make room for the inlet elbow. I just need to make some sort of bracket to mount the power terminal.
There really is no shortage of stuff to do, I just needed to get the obsession with starting out my head for a little while! Other wiring jobs I needed to do were cut off the plug for the stock brake light switch and extend the loom to reach the in-line hydraulic switch I'd fitted. I also had to do something similar for the reverse light switch, seeing as it is now gearbox mounted rather than gear lever mounted. Using the wiring diagrams on the wiki, I ordered the appropriately sized and coloured wiring from Auto Electric Supplies, at the bank-breaking price of about 30p a metre. Then I set to work with strippers, clippers and a soldering iron.
The dash is now also ready to go in! Luckily, for the 2 years or so it's been in my shed, the mice havn't got to it! Sadly, the roll cage is going to interfere with the side vents so I'm going to have to cut shese short, just keeping the fronts in for show and use some ducting to direct air stealthily from under the dash. I'll be mounting the brake bias controller in the stereo blanking plate and will probably put the headlight level adjusters where the OBC once lived. I also plan to fabricate a little plate from sheet ally to make up a small console for potentially mounting VDO guages and a kill switch in the future.
This little spate of work was finished by finishing off the front-rear brake line inside the car and fitting the Oddyseey PC680 battery I'd ordered, following recommendations from guys on here. The battery relocation kit reaches the positive terminal easily enough and I'll put an earthing point on the steel inside of the nearside wheelarch. I've also insulated the cage local to the batttery because it's quite tight and I don't want any accidental short circuits!
So, by the next update hopefully the heater issue will be adequately resolved, it will be running and I'll be thinking about bleeding the brakes and clutch, fitting pads and adjusting the handbrake
-
duracel79
- E30 Zone Newbie

- Posts: 106
- Joined: Mon Jan 10, 2005 11:00 pm
- Location: Stevenage
You could try an E21 hose for the heater, not sure if its 4 or 5 here:
http://www.realoem.com/bmw/showparts.do ... g=64&fg=18
I'll try and find an old one in the garage at the weekend.
Duracel79
http://www.realoem.com/bmw/showparts.do ... g=64&fg=18
I'll try and find an old one in the garage at the weekend.
Duracel79

-
Motorhole
- E30 Zone Addict
- Posts: 2395
- Joined: Tue Jul 12, 2005 11:00 pm
- Location: Cheshire
Might do the job if I cut the second angle off - if you have one, a measurement of the inner diameters and the length of each of the legs would be great!duracel79 wrote:You could try an E21 hose for the heater, not sure if its 4 or 5 here:
http://www.realoem.com/bmw/showparts.do ... g=64&fg=18
I'll try and find an old one in the garage at the weekend.
Duracel79
-
duracel79
- E30 Zone Newbie
- Posts: 106
- Joined: Mon Jan 10, 2005 11:00 pm
- Location: Stevenage
The pic's on realoem aren't always accurate, its shape is much more like the one you mocked up. The pic for the later E21 shows the shape beter but it has a valve in it as well. Pipe 4 & 5 here:Motorhole wrote:Might do the job if I cut the second angle off - if you have one, a measurement of the inner diameters and the length of each of the legs would be great!duracel79 wrote:You could try an E21 hose for the heater, not sure if its 4 or 5 here:
http://www.realoem.com/bmw/showparts.do ... g=64&fg=18
I'll try and find an old one in the garage at the weekend.
Duracel79
http://www.realoem.com/bmw/showparts.do ... g=64&fg=18
Duracel79
-
DanThe
- E30 Zone Team Member
- Posts: 28649
- Joined: Sat Sep 10, 2005 11:00 pm
- Location: Staffs
Have you seen this - http://www.e30zone.net/modules.php?name ... &start=125
-
Motorhole
- E30 Zone Addict
- Posts: 2395
- Joined: Tue Jul 12, 2005 11:00 pm
- Location: Cheshire
Ah yeah, I remember seeing those in your workshop but couldn't remember how you'd done it. Ideally I want the hoses to be 1-piece though, minimise risk of failure. Did you shorten the plastic heater pipes by cutting them or did you move them back somehow? They way you've done it definitely helps with the angle!
-
DanThe
- E30 Zone Team Member
- Posts: 28649
- Joined: Sat Sep 10, 2005 11:00 pm
- Location: Staffs
I cut them down pretty much flush with the bulkhead, purely to get the hoses as close to the bulkhead as possible. You wont be able to do it with one piece hoses, due to the angles and the different sized ends.
I wouldnt use plastic joiners either, they eventually turn brittle and ive seen them cracked even on OEM German plastic coolant pipe, the alloy joiners are not much more money
I wouldnt use plastic joiners either, they eventually turn brittle and ive seen them cracked even on OEM German plastic coolant pipe, the alloy joiners are not much more money
-
Motorhole
- E30 Zone Addict
- Posts: 2395
- Joined: Tue Jul 12, 2005 11:00 pm
- Location: Cheshire
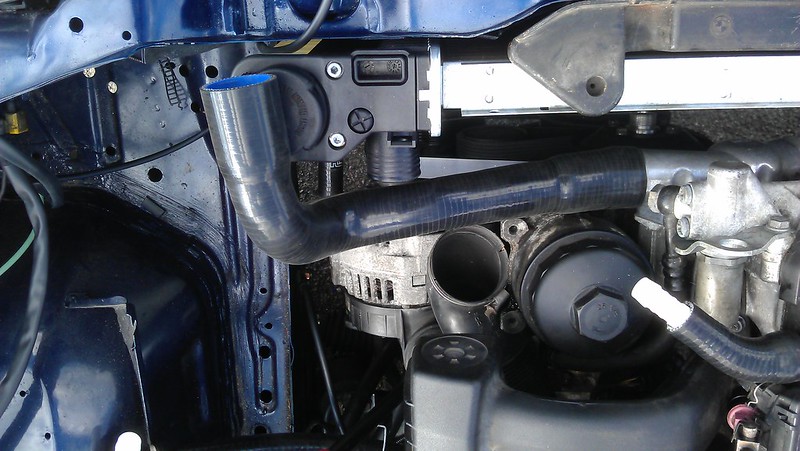
Okay, so this 19 mm wire-reinforced silicon hose arrived. First test was kink resistance, which it seemed to pass with flying colours:
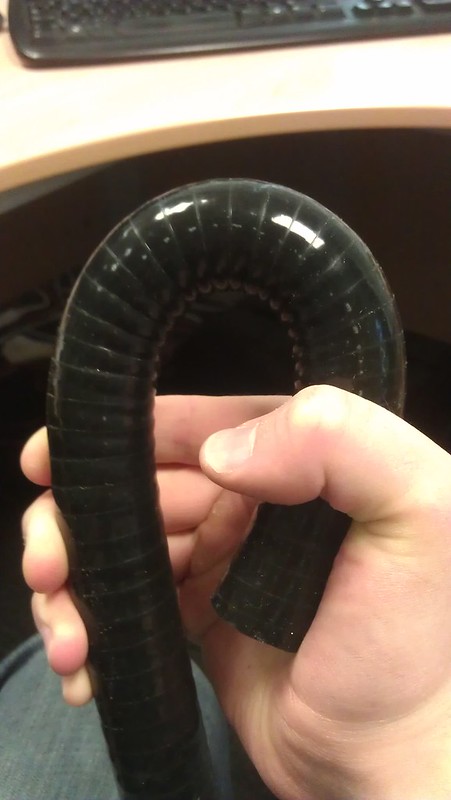
So I set about sorting out heater hoses for hopefully the final time. It actually wasn't too difficult - the hose stretch easily enough up to the 22 mm side outlet/inlet on the engine yet was still fairly snug on the 18 mm heater matrix inlet/outlet. So here we go, heater hoses connected up, using stainless t-bolts, with no kinks
Now I could finally set about fitting the inlet manifold. I plugged the hole forthe servo vacuum takeoff with a screw and some ptfe tape and I improved the fit of the inlet-icv pipe with more ptfe tape...
This was more of a pain in the ass than I originally envisaged - I had to take off the loom carrier and cut one of my heater hoses an inch shorter to change the angle at which it came off the matrix outlet, but after some fiddling, it was on
By this time, as I'd taken a break at lunch to meet my missus in town and had dropped some tools of at a mate's and spent some time scratching our heads over his k-series Midget build, it was about time to pack up.
But...I was only 3 plugs and a battery connect-up away from a trial start. It would've been rude not to try, right?
[youtube][/youtube]
Well - yeah. Not worried at the moment, didn't have any time to do any diagnosis stuff, I just disconnected the battery and shoved it back in the garage! But I didn't hear a thing from the fuel pump so that's my first port of call. Also - when I got home I realised that I might have removed the fuel pump fuse when I parked the car up 3 years ago...as a halfarsed security measure.
Monday - mission = get it running.
-
Motorhole
- E30 Zone Addict
- Posts: 2395
- Joined: Tue Jul 12, 2005 11:00 pm
- Location: Cheshire
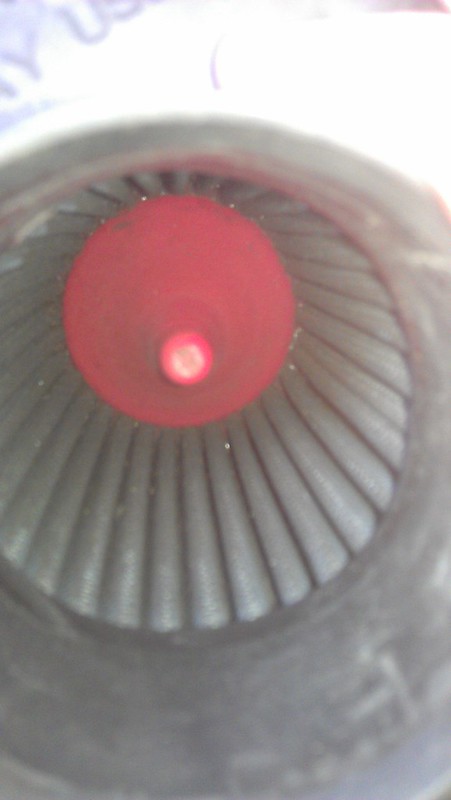
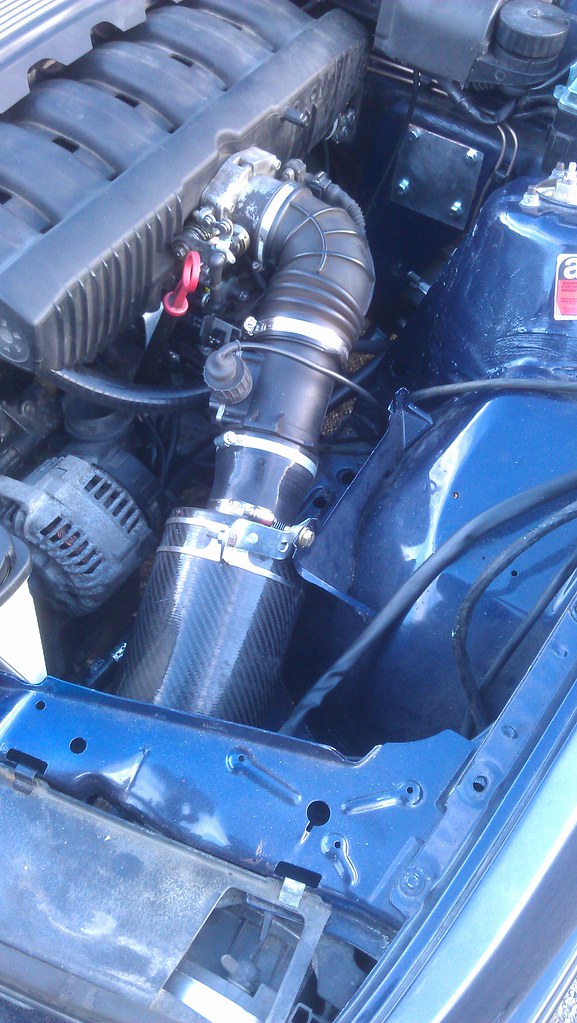
I couldn't work on the car yesterday due to gardening and BBQ'ing duties, but I did, between jobs, get to sort out my air filter. I purchased a BMC Carbon Dynamic Airbox on Ebay, 2nd hand off a breaker, for the grand total of £14.99. With another £15 spent on a cleaning kit, this was one job I could do in little bits.
As it was recieved:
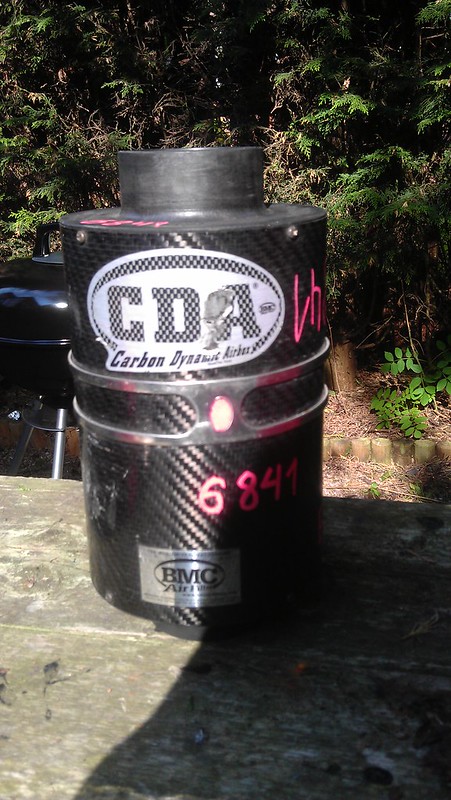
Filter element was undamagaed. So it was a bit of a bargain, given the near -£200 retail for one of these.

Instructions basically say soak in supplied detergent, rinse, leave to dry overnight, oil, drain, refit. So this is what I did. I thought the filter looked clean, until I soaked it in detergent! Anyway, one clean filter:
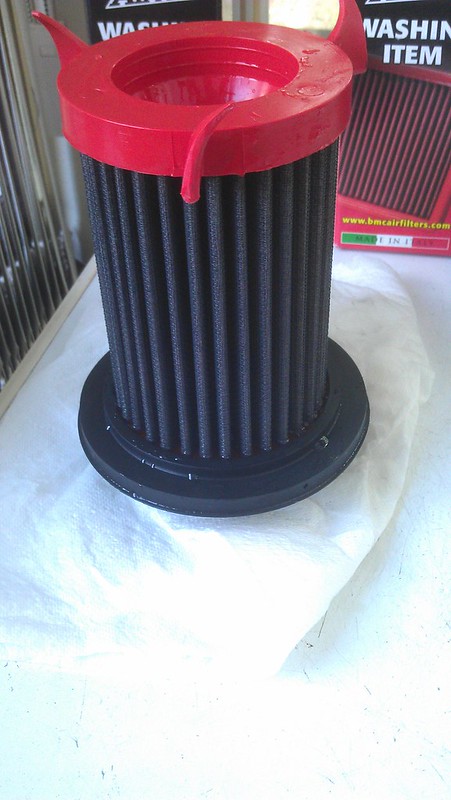
One oiled filter:

And back into a well-scrubbed airbox.
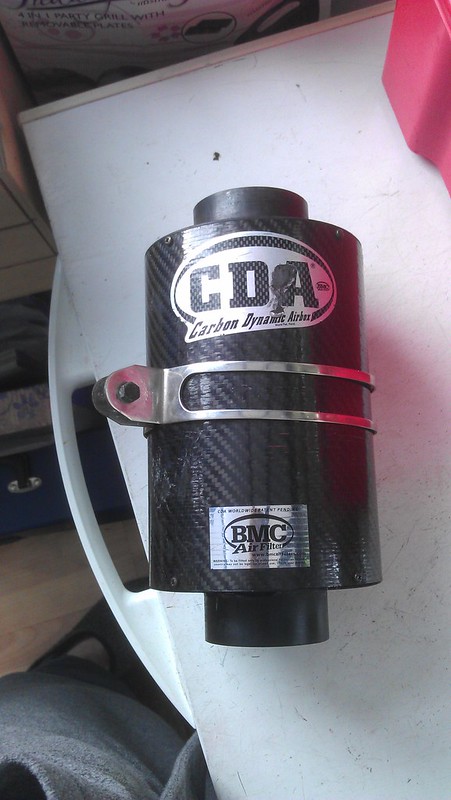
This certainly beats the bodge job I had in mind of putting a cone filter inside a stock airbox. And probably cheaper.
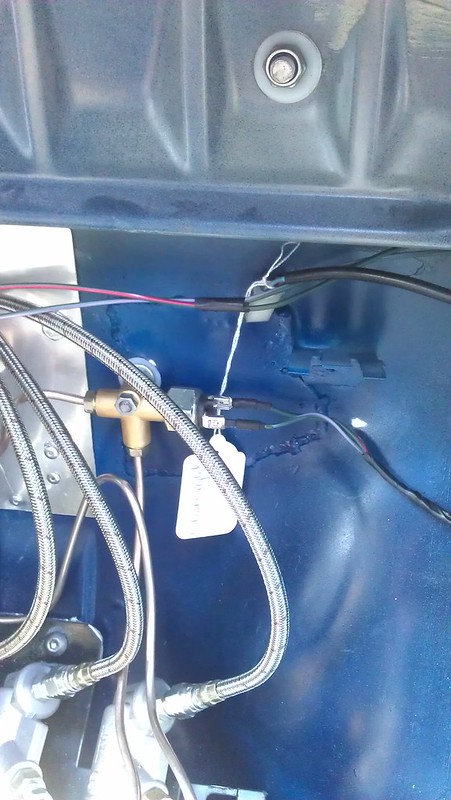
Then today, I had some help from k-series midget dude and we set about sorting out the starting issue. Some precursory checks showed that there was no spark and the fuel pipes were dry. Some further investigation showed that there was no power to the fuel pump. This was leading us down an EWS path, but checking the basics quickly showed that although there was 12V live at the starter cable on the under-bonnet terminal, there was nothing at the ECU/engine loom live. Followed the battery cable back, undid a large wrapping of insulation tape and found that the fusible link was gone. I assume this was gone when I purchased the battery relocation kit, but nevertheless we temporarily bridged it and tried again. Hey presto, fuel pump primed and engine coughed into life with no hesitation.
[youtube][/youtube]
I now just need to source a replacement fusible link of some sort.
On a different note, after I was packing up, I went to disconnect the battery - once the earth was off, I was undoing the +ve terminal and dropped my spanner - just my luck it landed across the 2 terminals and shorted the battery! Tell you what, these Odyssey batteries generate some big sparks. Scared the F*cking sh*te out of me! Anyway, I now hope I havn't fried the battery. Will find out when I go to fit the dash on Wednesday...and I must fit something there to prevent dropped tools shorting terminals again
As it was recieved:
Filter element was undamagaed. So it was a bit of a bargain, given the near -£200 retail for one of these.
Instructions basically say soak in supplied detergent, rinse, leave to dry overnight, oil, drain, refit. So this is what I did. I thought the filter looked clean, until I soaked it in detergent!
One oiled filter:
And back into a well-scrubbed airbox.
This certainly beats the bodge job I had in mind of putting a cone filter inside a stock airbox. And probably cheaper.
Then today, I had some help from k-series midget dude and we set about sorting out the starting issue. Some precursory checks showed that there was no spark and the fuel pipes were dry. Some further investigation showed that there was no power to the fuel pump. This was leading us down an EWS path, but checking the basics quickly showed that although there was 12V live at the starter cable on the under-bonnet terminal, there was nothing at the ECU/engine loom live. Followed the battery cable back, undid a large wrapping of insulation tape and found that the fusible link was gone. I assume this was gone when I purchased the battery relocation kit, but nevertheless we temporarily bridged it and tried again. Hey presto, fuel pump primed and engine coughed into life with no hesitation.
[youtube][/youtube]
I now just need to source a replacement fusible link of some sort.
On a different note, after I was packing up, I went to disconnect the battery - once the earth was off, I was undoing the +ve terminal and dropped my spanner - just my luck it landed across the 2 terminals and shorted the battery! Tell you what, these Odyssey batteries generate some big sparks. Scared the F*cking sh*te out of me! Anyway, I now hope I havn't fried the battery. Will find out when I go to fit the dash on Wednesday...and I must fit something there to prevent dropped tools shorting terminals again
-
Silverfang
- E30 Zone Regular
- Posts: 937
- Joined: Fri Dec 23, 2005 11:00 pm
- Location: Northampton
Always a good feeling to see something finally get to a stage when you can start it up.
Shame the video sound isn't great, any straight 6 always sounds good on open pipes
Can't be far away from the first drive to the MOT bay.
Edit: Listening to it again, sounds like a bloody biplane in a dive!
Shame the video sound isn't great, any straight 6 always sounds good on open pipes
Can't be far away from the first drive to the MOT bay.
Edit: Listening to it again, sounds like a bloody biplane in a dive!
BMW and Opel, both RWD, both german, both good fun
http://www.clockservicing.co.uk/ For any clock repairs try here.
http://www.clockservicing.co.uk/ For any clock repairs try here.
-
Motorhole
- E30 Zone Addict
- Posts: 2395
- Joined: Tue Jul 12, 2005 11:00 pm
- Location: Cheshire
Right, where was I up to? Yeah - it's running. But I had lots of tidying up stuff to do.
Now, I thought fitting the dash would be easy. I'd made my cardboard templates for the cutouts, cut the dash as carefully as I could, re-assembled everything after going through the wiring and soldering/shrink wrapping bodged stereo/Clifford B*llocks and I was looking forward to everything slotting nicely in place and connecting it all up.
Of course, I'd cut the dash to fit in it's original place, without any consideration of how to actually get it there in the first place. Could I get it past the rollcage and under the screen? Could I b*llocks. There was absolutely no way it was going in. I sat and scratched my head, briefly considered doing away with the dash completely - then settled on more cutting. This meant - because of the way I had cut it before, to sit around the cage on the A pillars, I had to cut out the original mounting tabs too. This meant a bit of jiggery-pokery to figure out exactly where it should fit and making up a few new mounts.
Trial-fitting the dash:

Before I secured anything, I plugged in all the instruments and fired it up again to make sure they all worked. Thankfully, all was good. My friend had also come to visit me with a brew and she sh*t a brick when it fired, it was awesome. So I set about making some new dashboard mounts. They're not pretty, and I mean to revisit this perhaps with a new dash, perhaps with no dash, at some point in the future. But it is really solid and it is in the right place.
Offside bolted into the standard dash mounting spot and bolted through the steel on the dash:
Nearside bracket secured to cage with t-bolt and screwed into steel on the dash:
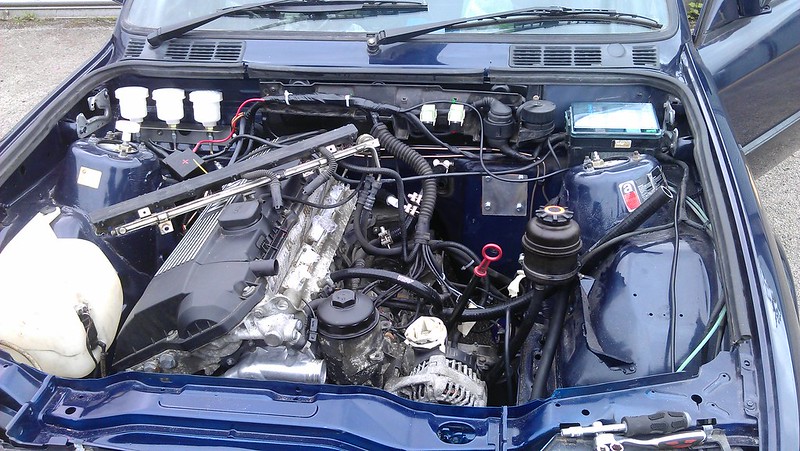
So with everything in place, working and running, I set about re-fitting the loom carrier in the engine bay and tidying it all up for the second time - after I had to remove it to fit the inlet manifold.
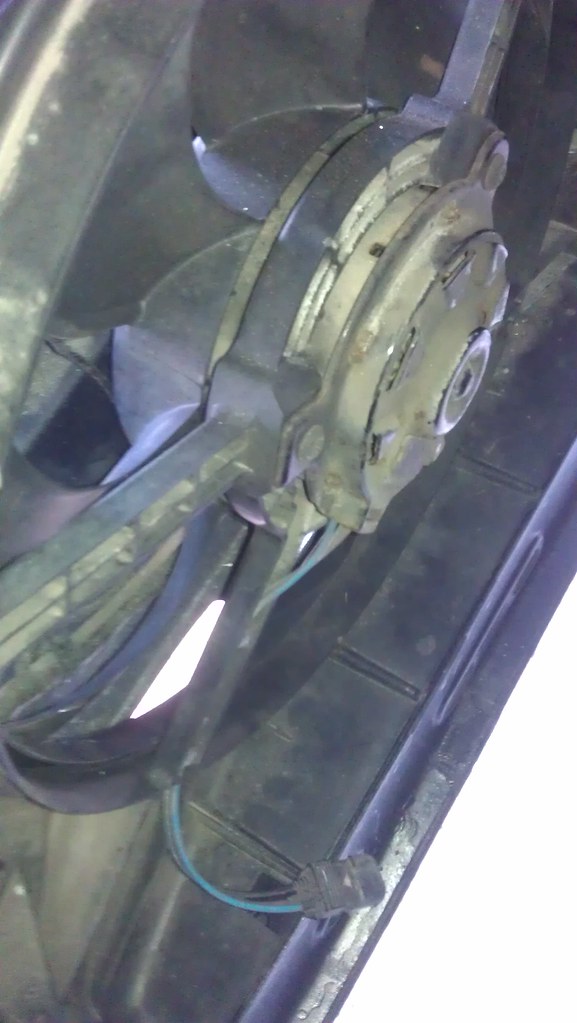
Onto cooling. In another thread, I was confused about how to securely fit the electric fan from the donor car, but I figured it out through the use of more aluminium bracketry. I also modified the nearside M40 radiator mounting to bolt to the mount on the chassis and ensure the radiator fit snugly, as two offside mountings ended up too far apart.
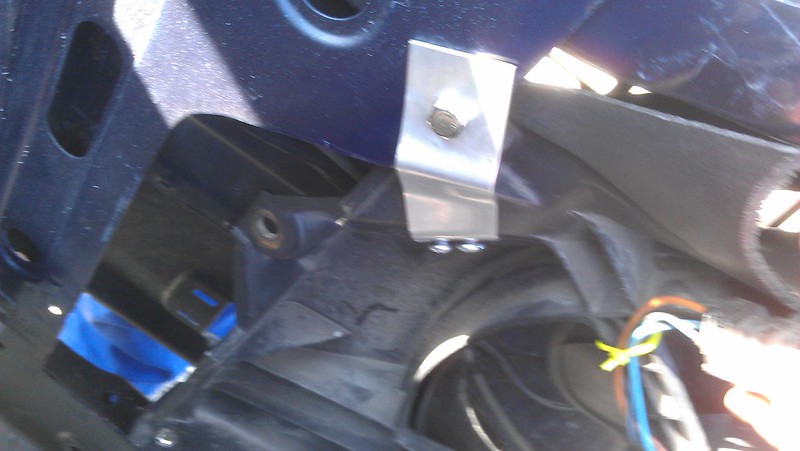
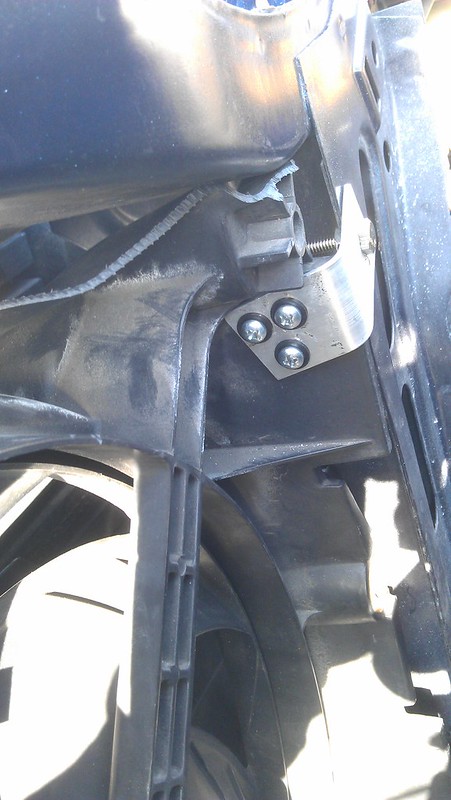
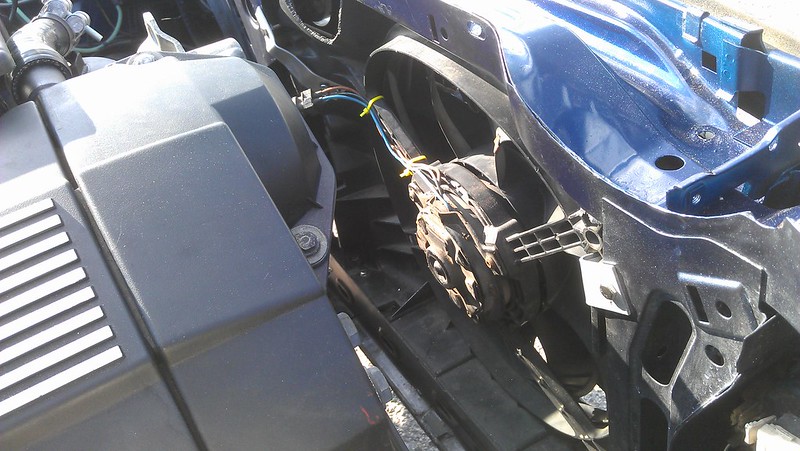

Now everything is secure and snug-as and the electric fan is all wired up using one of DanThe's looms.
Now, I'd purchased some silicone radiator hoses - from Winner Racing on Ebay - and they seemd to be good enough quality. They also fit really well - in their stock application (E36 S50). But in this application, the bottom hose needed a little trimming to fit and the top hose was...well...f*cking miles off.
I also couldn't trim this one as the thinner part of the hose was too small to persuade onto the thermostat housing. No way in hell that was going on. Instead, I butchered the stock M52 top hose and plan to wrap that in silicone tape - purely for aesthetic reasons, so it matches the other hoses - and utilise that. That fits perfectly well.
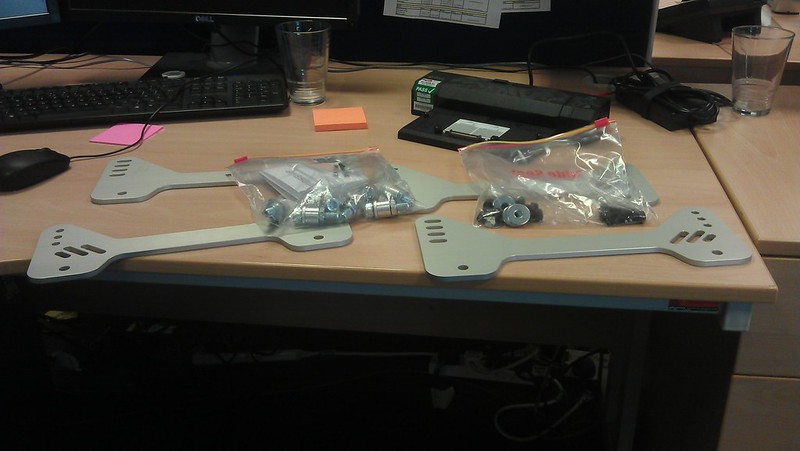
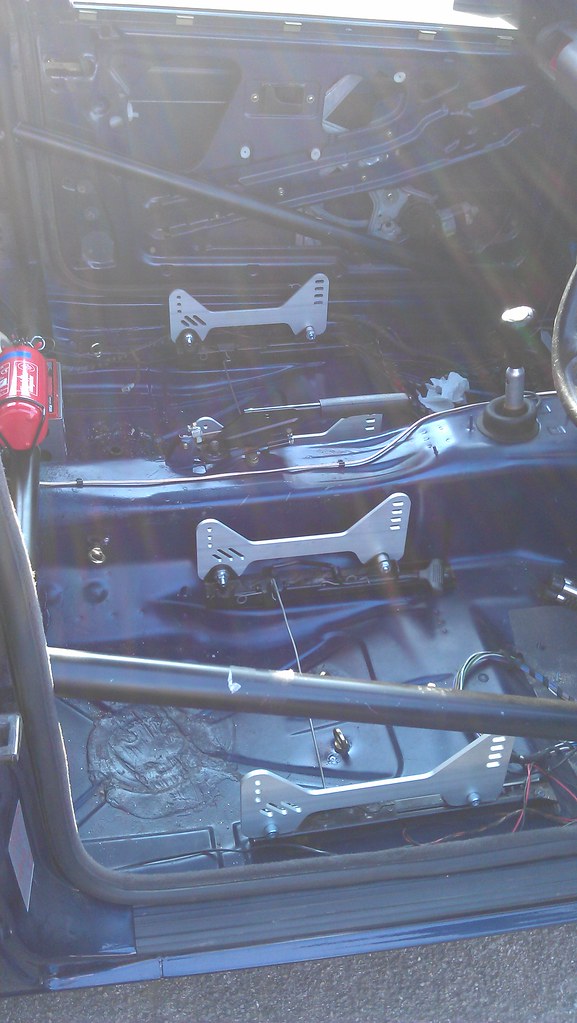
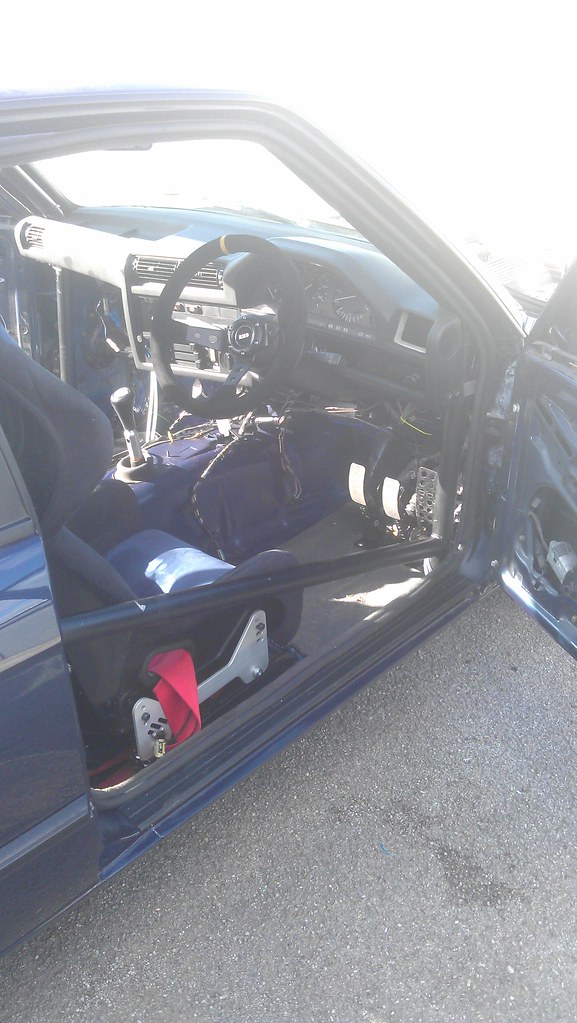
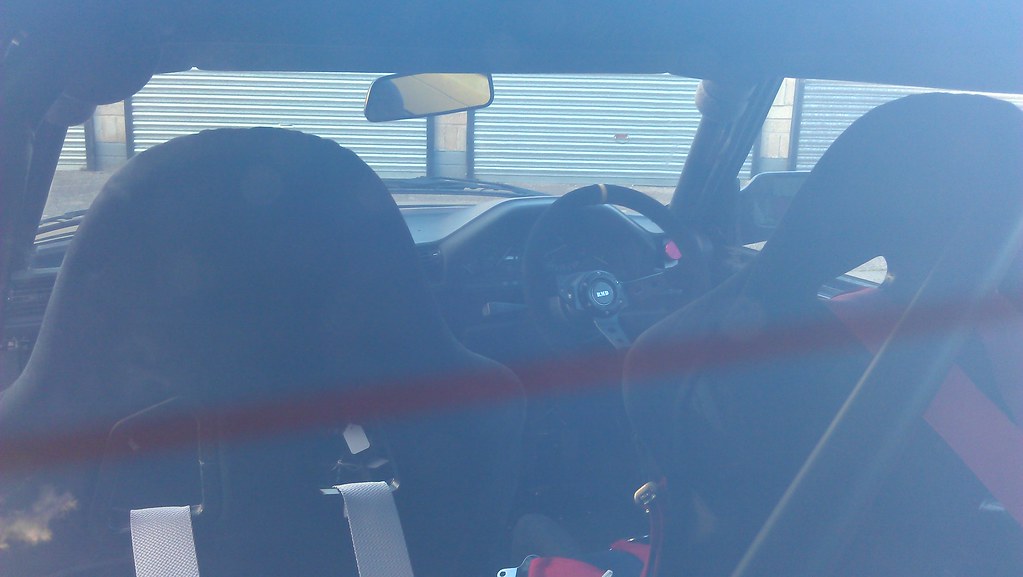
I'd been thinking about fitting the bucket seats for a while. I'd considered modifying some stock side mounts and even drew up some mounts in solidworks - a version that would bolt to the floor and a version that would bolt to the stock sliders. However, the cost of laser cutting plus the hassle of further 'fine tuning' a prototype and then getting a better two sets cut really wasn't worth the time and money. I ended up purchasing two sets of these from Massive Brakes in Canada:
http://www.massivebrakes.com/accessorie ... sidemounts
They mount to the stock sliders and all R&D has been done. They even come with seat bolts, spacers and all the kit needed to fit. They are reasonably priced but the sting in the tail is $95 shipping. Still, even then all in at circa £220 they represented good enough value as a plug and play solution. If you're willing to wait 8 weeks, shipping costs 'just' $50. But I'm not waiting 8 weeks.
So that's about where I'm at. Not too far off and from here-on in most jobs are tidying/fixing jobs. I don't have much in the way of weekends this month though so I hope the weather stays good so I can get some quality evening time in. I'm still hoping to get it MOT'd end of June/early July and I think I'm still on schedule. Provided there are no more major hold-ups...
Now, I thought fitting the dash would be easy. I'd made my cardboard templates for the cutouts, cut the dash as carefully as I could, re-assembled everything after going through the wiring and soldering/shrink wrapping bodged stereo/Clifford B*llocks and I was looking forward to everything slotting nicely in place and connecting it all up.
Of course, I'd cut the dash to fit in it's original place, without any consideration of how to actually get it there in the first place. Could I get it past the rollcage and under the screen? Could I b*llocks. There was absolutely no way it was going in. I sat and scratched my head, briefly considered doing away with the dash completely - then settled on more cutting. This meant - because of the way I had cut it before, to sit around the cage on the A pillars, I had to cut out the original mounting tabs too. This meant a bit of jiggery-pokery to figure out exactly where it should fit and making up a few new mounts.
Trial-fitting the dash:
Before I secured anything, I plugged in all the instruments and fired it up again to make sure they all worked. Thankfully, all was good. My friend had also come to visit me with a brew and she sh*t a brick when it fired, it was awesome. So I set about making some new dashboard mounts. They're not pretty, and I mean to revisit this perhaps with a new dash, perhaps with no dash, at some point in the future. But it is really solid and it is in the right place.
Offside bolted into the standard dash mounting spot and bolted through the steel on the dash:
Nearside bracket secured to cage with t-bolt and screwed into steel on the dash:
So with everything in place, working and running, I set about re-fitting the loom carrier in the engine bay and tidying it all up for the second time - after I had to remove it to fit the inlet manifold.
Onto cooling. In another thread, I was confused about how to securely fit the electric fan from the donor car, but I figured it out through the use of more aluminium bracketry. I also modified the nearside M40 radiator mounting to bolt to the mount on the chassis and ensure the radiator fit snugly, as two offside mountings ended up too far apart.
Now everything is secure and snug-as and the electric fan is all wired up using one of DanThe's looms.
Now, I'd purchased some silicone radiator hoses - from Winner Racing on Ebay - and they seemd to be good enough quality. They also fit really well - in their stock application (E36 S50). But in this application, the bottom hose needed a little trimming to fit and the top hose was...well...f*cking miles off.
I also couldn't trim this one as the thinner part of the hose was too small to persuade onto the thermostat housing. No way in hell that was going on. Instead, I butchered the stock M52 top hose and plan to wrap that in silicone tape - purely for aesthetic reasons, so it matches the other hoses - and utilise that. That fits perfectly well.
I'd been thinking about fitting the bucket seats for a while. I'd considered modifying some stock side mounts and even drew up some mounts in solidworks - a version that would bolt to the floor and a version that would bolt to the stock sliders. However, the cost of laser cutting plus the hassle of further 'fine tuning' a prototype and then getting a better two sets cut really wasn't worth the time and money. I ended up purchasing two sets of these from Massive Brakes in Canada:
http://www.massivebrakes.com/accessorie ... sidemounts
They mount to the stock sliders and all R&D has been done. They even come with seat bolts, spacers and all the kit needed to fit. They are reasonably priced but the sting in the tail is $95 shipping. Still, even then all in at circa £220 they represented good enough value as a plug and play solution. If you're willing to wait 8 weeks, shipping costs 'just' $50. But I'm not waiting 8 weeks.
So that's about where I'm at. Not too far off and from here-on in most jobs are tidying/fixing jobs. I don't have much in the way of weekends this month though so I hope the weather stays good so I can get some quality evening time in. I'm still hoping to get it MOT'd end of June/early July and I think I'm still on schedule. Provided there are no more major hold-ups...
-
Motorhole
- E30 Zone Addict
- Posts: 2395
- Joined: Tue Jul 12, 2005 11:00 pm
- Location: Cheshire
Okay, so I'm back. Progress has been slow due to teething problems with heater, temp gauge and a few other things, but now these are largely resolved.
First up, temp gauge was playing up. As soon as the cluster had power (ignition position 2), the temp gauge would go to full hot. I tried tightening the ground nut, I tried unplugging the brown temp sender but all to no avail. On top of that, my heater blower was sounding weedy and only worked on levels 1 & 2 if you first turned it to level 4, then back down again.
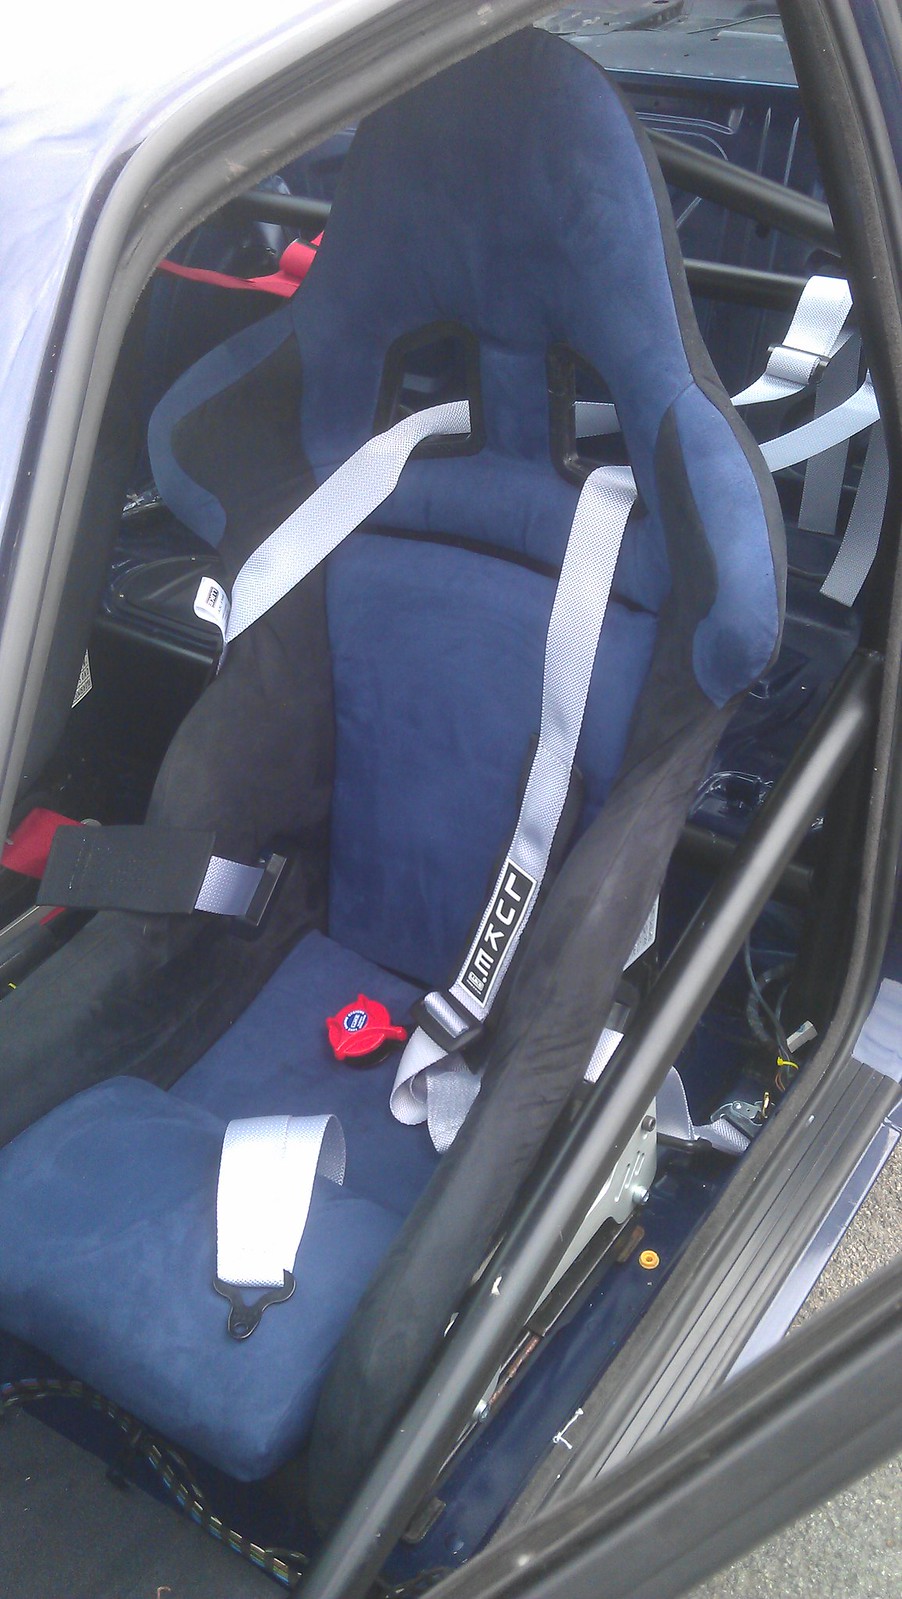
So working around (read - ignoring) these problems initially, I test fitted my drivers seat on the Massive mounts. As I had two very similar looking, albeit mismatching seats, I planned to fit the smaller Sparco seat on the driver's side (in the knowledge that my slender waist would fit) and put the Toora on the nearside so I had the option for carrying a variety of different sized passengers. This didn't work out well though - once the seat was in position, the harness holes for the shoulder straps were too low and the seat wasn't comfortable around my upper back, my shoulders were too big to slot nicely into place. So I swapped for the Toora and this fit me like it was custom made. So slim passengers only in this E30 I'm afraid!
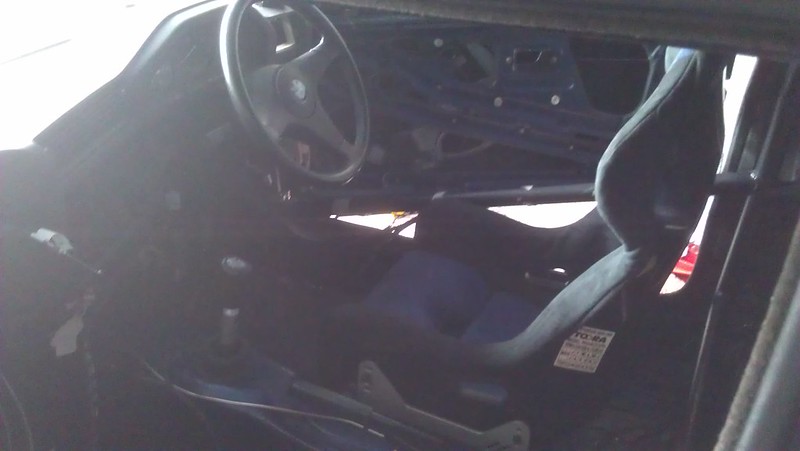
Steering wheel is a little too far away for comfort though so will be getting a dished one to replace the standard SE item.
So the seat came back out and I went about reconnecting all the bowden cables for the heater. This went surprisingly well, until I got to the heater control knob. I'm stumped on this one and still am! My current solution is to buy all the little clips and random bits of sh*te along with a new cable from BMW and see how the whole lot might go together as for all I know, I've misplaced some key component in the 3 years that have passed since I took it to pieces. In the long run though, I think I'm going to bin the dash completely and fit a lightweight heater box and some kind of ally panel to mount all the switched. No need to keep the thing and it does weight quite a bit.
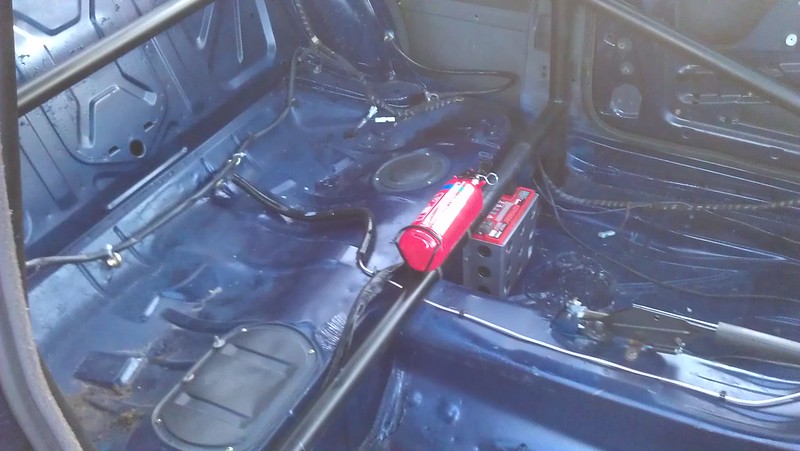
I've measured up and fitted all the harness mounts and re-fitted the seat mounts properly, after cleaning up and re-greasing the sliders. I also threw some leftover silicone hose around the exposed brake line on the back seat to keep it from getting damaged.
I took a wire wheel to the £40 325i exhaust I sourced and it came out surprisingly well, considering it was buried in the snow for a couple of weeks earlier this year!
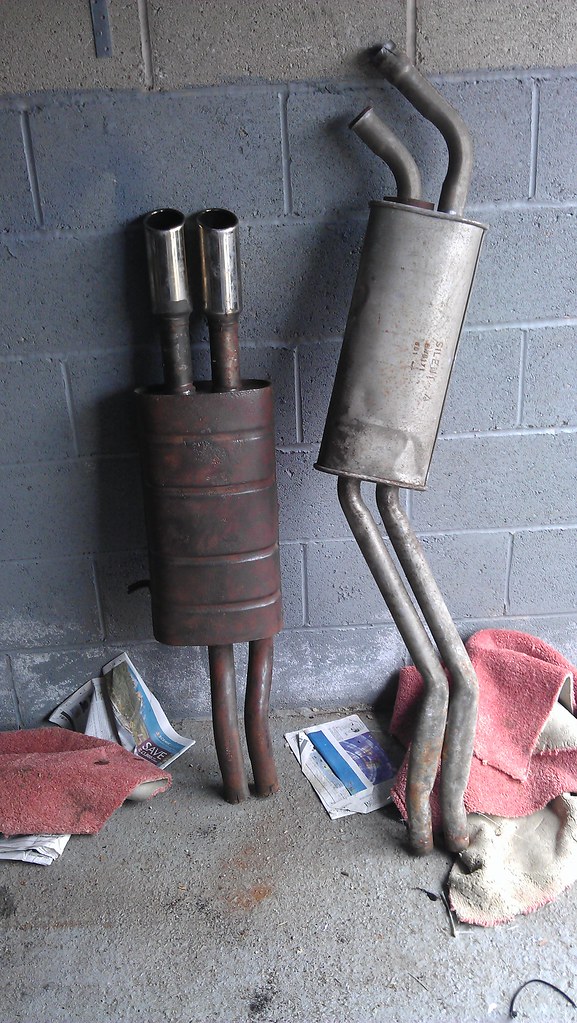
A lick of the exhaust paint on the backbox (3 coats to be precise!) and it looked quite tidy.
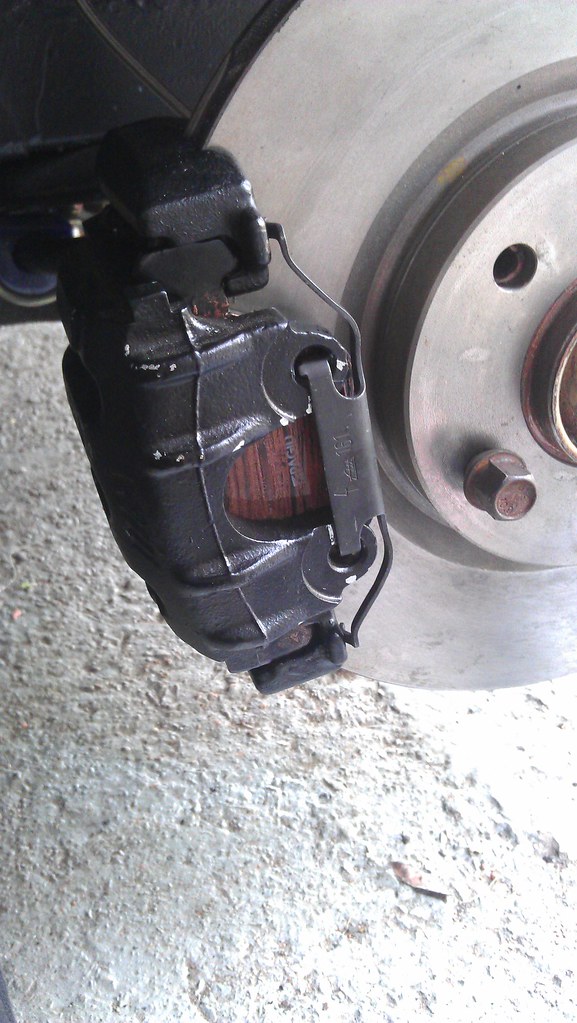
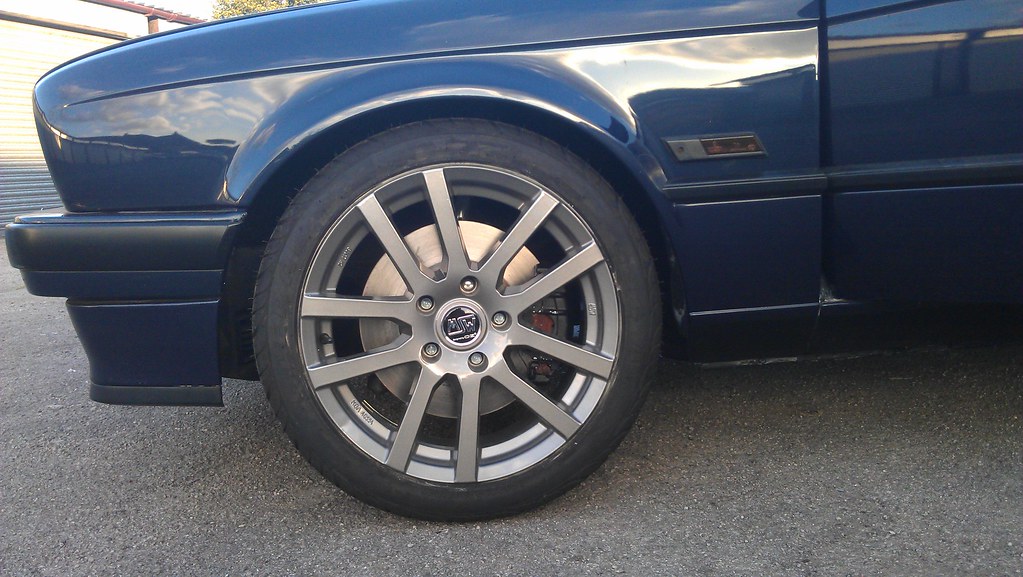
And I also got round to lowering the front coilovers to something nearing actual ride height and I packed out the gap between the hub knuckle and the strut with some stainless steel washers in order to increase static negative camber. With the car at the actual height, I've ended up with about -3.5 degrees with the top mounts in the centre position so I can take about 1.5 off or add 1.5 on. With everything torqued up as per the manual, I ran some emery cloth over the discs, cleaned them with brake cleaner and fitted new pads.
At the weekend then, I set off determined to resolve temp gauge issues. I started by unplugging the C101 in the engine bay to determine whether the issue was on the instrument cluster side or the engine loom side. Low and behold, with the C101 unplugged, the gauge stayed still with the ignition at stage 2. The problem most likely laid under the bonnet then.
I pulled the rubber boots back on each side of the C101 and consulted the wiring diagrams. Pins 4 and 5 didn't match up as they should - and my first call was, however unlikely, that DanThe had c*cked up one of his looms - sorry Dan!
But on closer inspection, it turned out it was me who was the 'tard. Actually, the most likely explanation given my history...anyway, I'd plugged the brown temp sensor plug into the oil pressure sender and vice versa. I swapped these plugs around and weyhey! Temp gauge worked as it should. I started the car, ran the engine until the temp got just out of the blue and turned it off again. Job done.
I then pulled out the heater panel from the firewall and took the motor cowling to pieces. I gave it all a good clean then sucked all the dead leaves and cr*p out the heater box. I cleaned the motor resister and put a touch of lube on the shafts and I had a fully operational heater box again. Reassembled, job done.
So pretty much finishing jobs now. I need to fit the rear pads and bleed the brakes/clutch, finish off the heater controls assembly and fit the window/heater switches etc, adjust handbrake, fit seats, fit exhaust. You get the jist. Hopefully just one or two more updates before MOT time!
First up, temp gauge was playing up. As soon as the cluster had power (ignition position 2), the temp gauge would go to full hot. I tried tightening the ground nut, I tried unplugging the brown temp sender but all to no avail. On top of that, my heater blower was sounding weedy and only worked on levels 1 & 2 if you first turned it to level 4, then back down again.
So working around (read - ignoring) these problems initially, I test fitted my drivers seat on the Massive mounts. As I had two very similar looking, albeit mismatching seats, I planned to fit the smaller Sparco seat on the driver's side (in the knowledge that my slender waist would fit) and put the Toora on the nearside so I had the option for carrying a variety of different sized passengers. This didn't work out well though - once the seat was in position, the harness holes for the shoulder straps were too low and the seat wasn't comfortable around my upper back, my shoulders were too big to slot nicely into place. So I swapped for the Toora and this fit me like it was custom made. So slim passengers only in this E30 I'm afraid!
Steering wheel is a little too far away for comfort though so will be getting a dished one to replace the standard SE item.
So the seat came back out and I went about reconnecting all the bowden cables for the heater. This went surprisingly well, until I got to the heater control knob. I'm stumped on this one and still am! My current solution is to buy all the little clips and random bits of sh*te along with a new cable from BMW and see how the whole lot might go together as for all I know, I've misplaced some key component in the 3 years that have passed since I took it to pieces. In the long run though, I think I'm going to bin the dash completely and fit a lightweight heater box and some kind of ally panel to mount all the switched. No need to keep the thing and it does weight quite a bit.
I've measured up and fitted all the harness mounts and re-fitted the seat mounts properly, after cleaning up and re-greasing the sliders. I also threw some leftover silicone hose around the exposed brake line on the back seat to keep it from getting damaged.
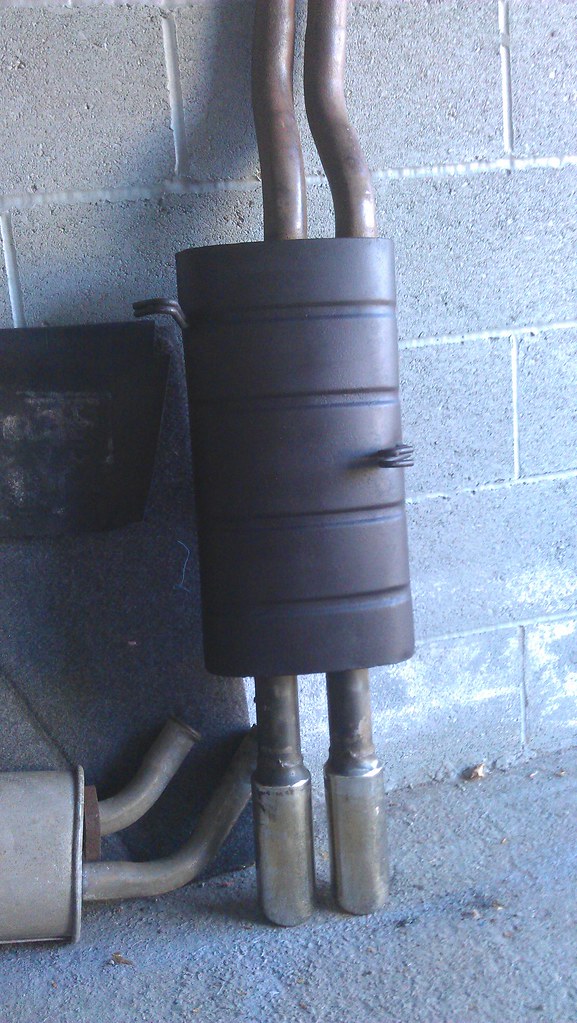
I took a wire wheel to the £40 325i exhaust I sourced and it came out surprisingly well, considering it was buried in the snow for a couple of weeks earlier this year!
A lick of the exhaust paint on the backbox (3 coats to be precise!) and it looked quite tidy.
And I also got round to lowering the front coilovers to something nearing actual ride height and I packed out the gap between the hub knuckle and the strut with some stainless steel washers in order to increase static negative camber. With the car at the actual height, I've ended up with about -3.5 degrees with the top mounts in the centre position so I can take about 1.5 off or add 1.5 on. With everything torqued up as per the manual, I ran some emery cloth over the discs, cleaned them with brake cleaner and fitted new pads.
At the weekend then, I set off determined to resolve temp gauge issues. I started by unplugging the C101 in the engine bay to determine whether the issue was on the instrument cluster side or the engine loom side. Low and behold, with the C101 unplugged, the gauge stayed still with the ignition at stage 2. The problem most likely laid under the bonnet then.
I pulled the rubber boots back on each side of the C101 and consulted the wiring diagrams. Pins 4 and 5 didn't match up as they should - and my first call was, however unlikely, that DanThe had c*cked up one of his looms - sorry Dan!
But on closer inspection, it turned out it was me who was the 'tard. Actually, the most likely explanation given my history...anyway, I'd plugged the brown temp sensor plug into the oil pressure sender and vice versa. I swapped these plugs around and weyhey! Temp gauge worked as it should. I started the car, ran the engine until the temp got just out of the blue and turned it off again. Job done.
I then pulled out the heater panel from the firewall and took the motor cowling to pieces. I gave it all a good clean then sucked all the dead leaves and cr*p out the heater box. I cleaned the motor resister and put a touch of lube on the shafts and I had a fully operational heater box again. Reassembled, job done.
So pretty much finishing jobs now. I need to fit the rear pads and bleed the brakes/clutch, finish off the heater controls assembly and fit the window/heater switches etc, adjust handbrake, fit seats, fit exhaust. You get the jist. Hopefully just one or two more updates before MOT time!
-
rix313
- E30 Zone Team Member
- Posts: 4967
- Joined: Fri Oct 31, 2008 11:00 pm
- Location: Silverstone
I've been looking at the mirco heaters that Demon Tweeks do. Just got off the phone to Jason and he recommended the larger one as he's seen some one running that in compact cup with good results.Motorhole wrote: In the long run though, I think I'm going to bin the dash completely and fit a lightweight heater box and some kind of ally panel to mount all the switched. No need to keep the thing and it does weight quite a bit.
http://www.demon-tweeks.co.uk/motorspor ... ght-heater
-
Motorhole
- E30 Zone Addict
- Posts: 2395
- Joined: Tue Jul 12, 2005 11:00 pm
- Location: Cheshire
Cheers for that, seems like it may be a worthwhile exercise in the near future
-
Motorhole
- E30 Zone Addict
- Posts: 2395
- Joined: Tue Jul 12, 2005 11:00 pm
- Location: Cheshire
Time for more updates.
As I said last time, next job was to adjust the handbrake and fit rear pads. This didn't prove quite as simple as fitting pads in the front as they were more of a tight fit, but I got there in the end. Also, one of the handbrake shoe hold-down pins had polled through some corrosion in the backplate - a common problem on E30/E36 models. This was remedied with the use of some Lockheed washers off Ebay. So the handbrake now works, but it still needs a touch of fine tuning before MOT time.

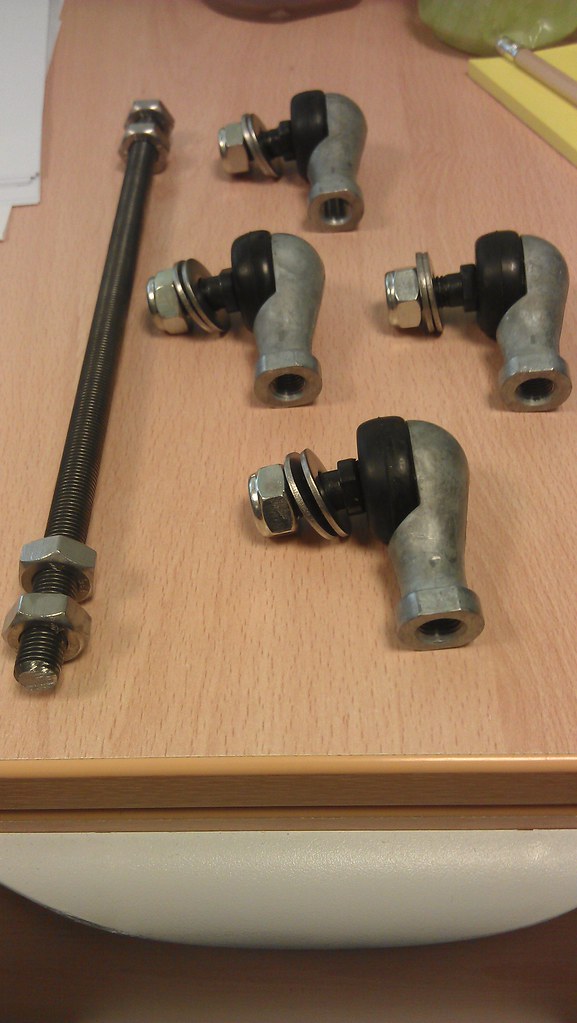
I also ordered parts for making my own drop links. 4 high-misalignment ball joints, some threaded bar, some nuts, nyloc nuts and washers. Got this all put together and bolted up to the struts, with a bit of grease on the bar to keep corrosion at bay. Also a handy hint for anyone strugggling to get the ARB into place with the bushes fitted - put the slot bit into the subframe first, put the bolt through the hole then use a bottle jack on the corner of the bush cup to lift it into place, just enough to get a few threads of the nut onto the bolt to hold everything in place. Then it can be tightened up normally.
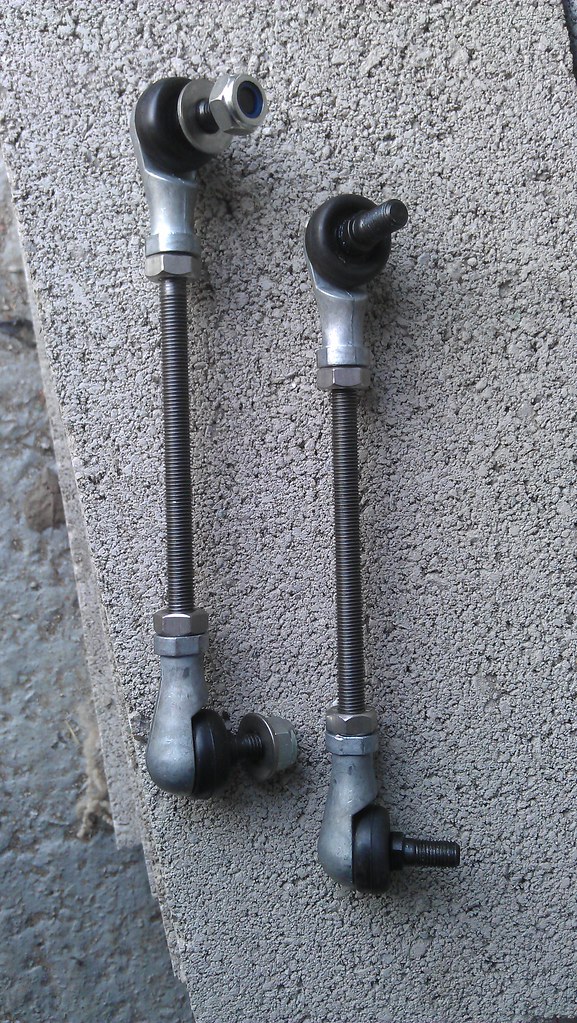
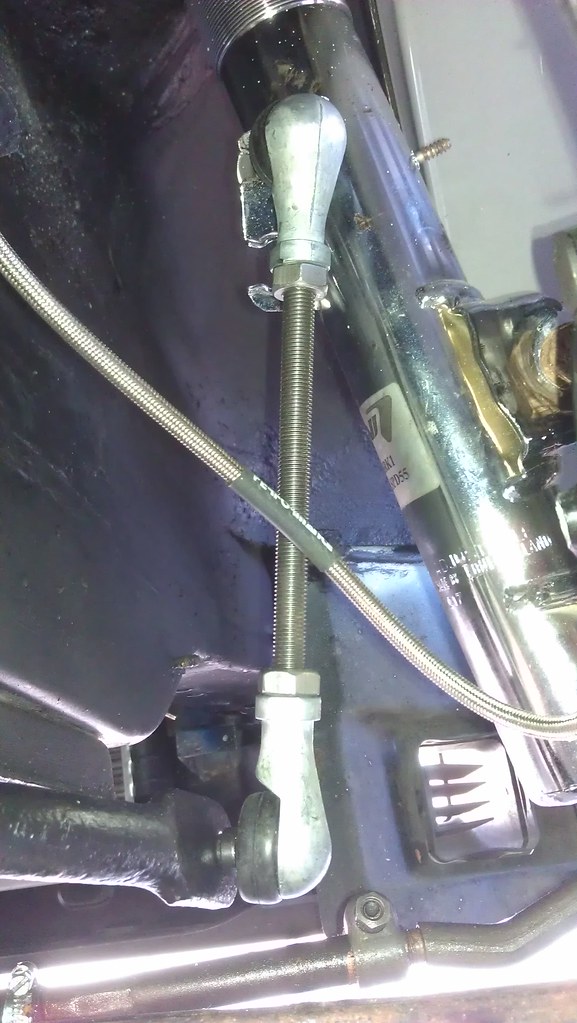
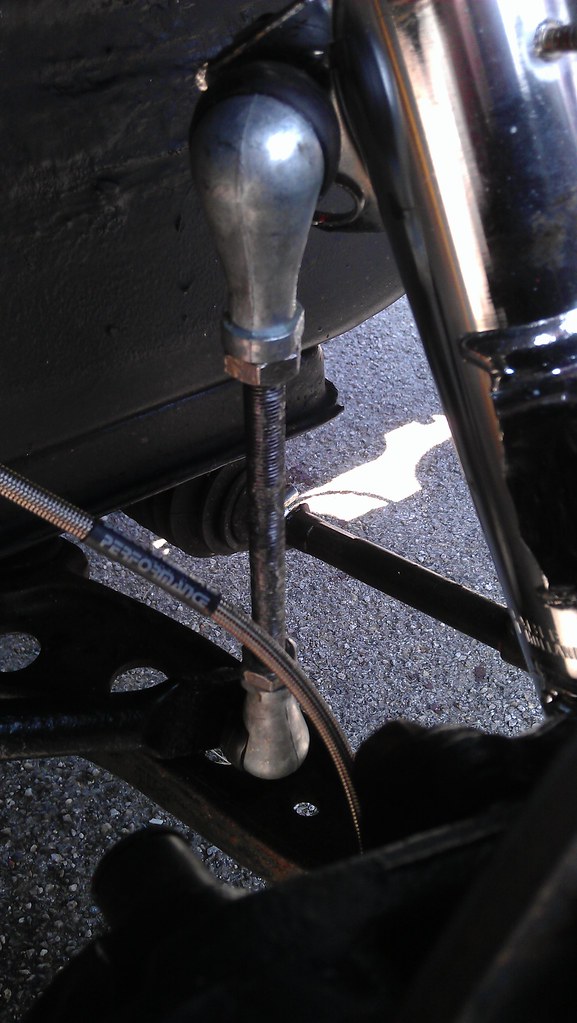
Slightly odd thing I noted - the brackets on the struts for the drop link are not the same, offside/nearside. Nearside one has 3 holes, whereas the offside only has two and it I couldn't get a socket on the nearside one as it was too close to the strut. No such problem on the offside. I assume the 3 holes on the nearside is because the E36 compacts only have an ABS sensor on one front wheel, as per E30? I'm not sure. Anyway, all torqued up now.
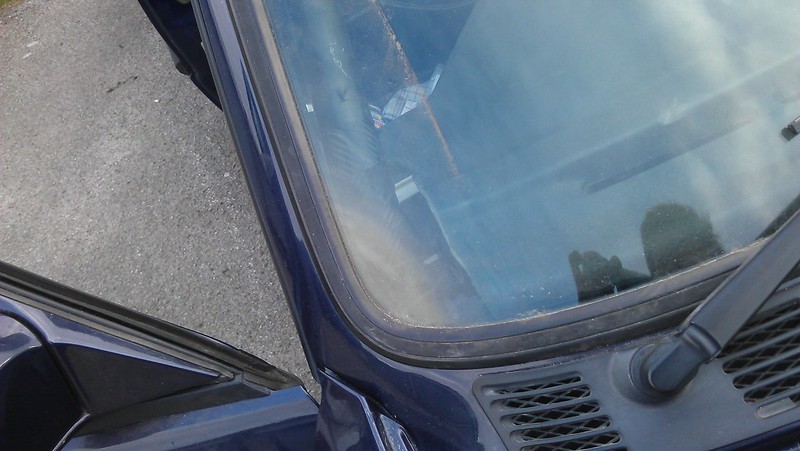
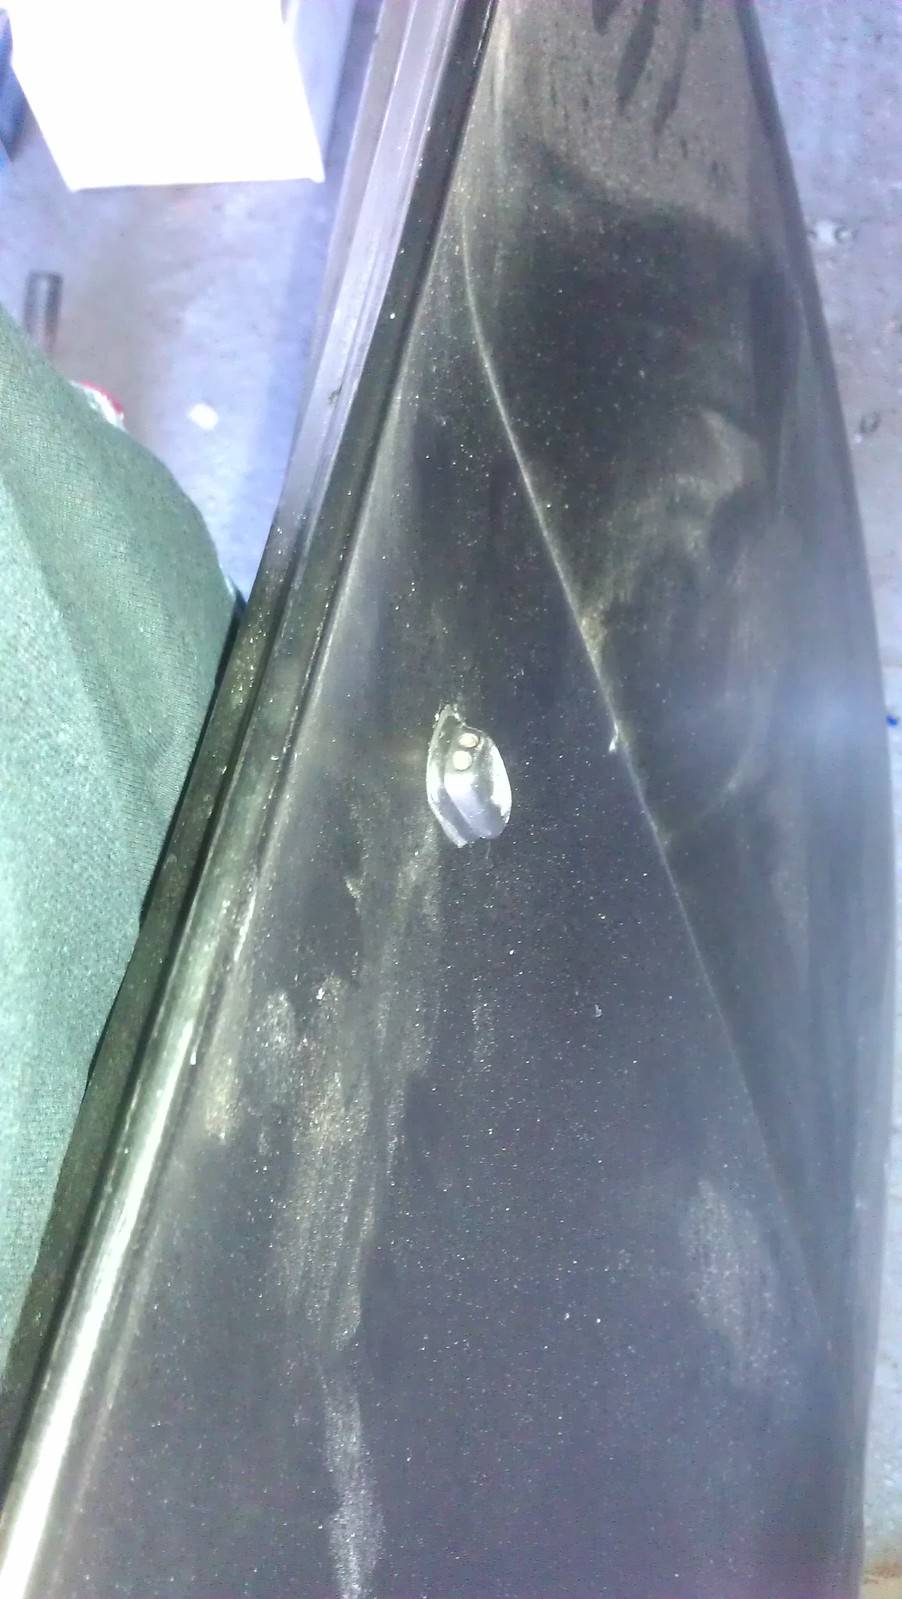
I've made the hole for the exhaust in the rear valence bigger to suit the twin exhaust, but whilst doing so, noticed a) corrosion and b) the true state the rear arches have been left in. I scrubbed back all the rust with a wire wheel and sprayed it in primer and stonechip just to seal it until it gets to a bodyshop post-MOT. I don't see the corrosion causing an MOT issue. Gutted I need to throw more cash at the body but I guess I can only learn from this one.
Biggest hole is underneath the rear battery mount. Identified itself as bubbly underseal and I prodded it...
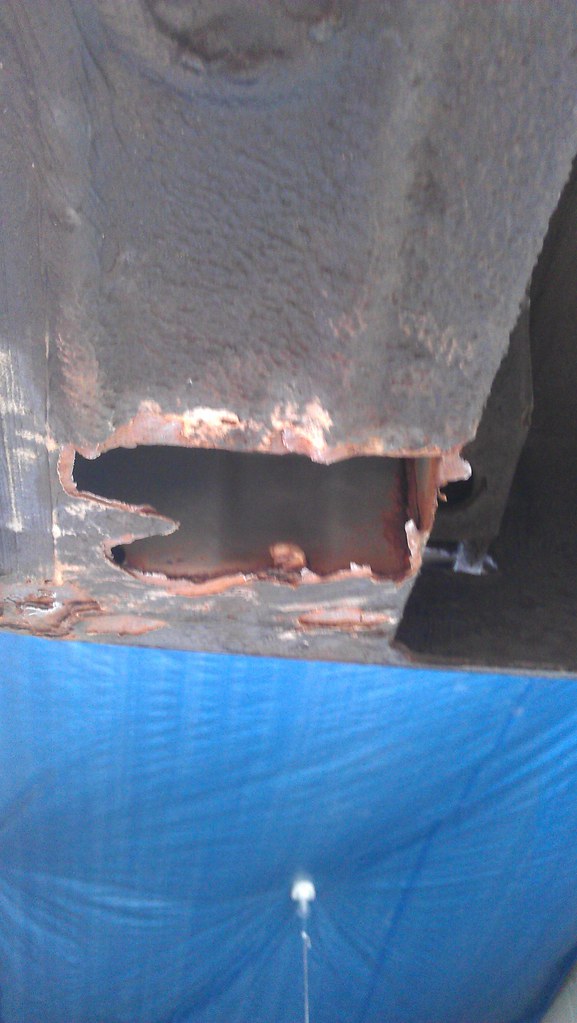
There's another about the size of a 5p piece on the other side.
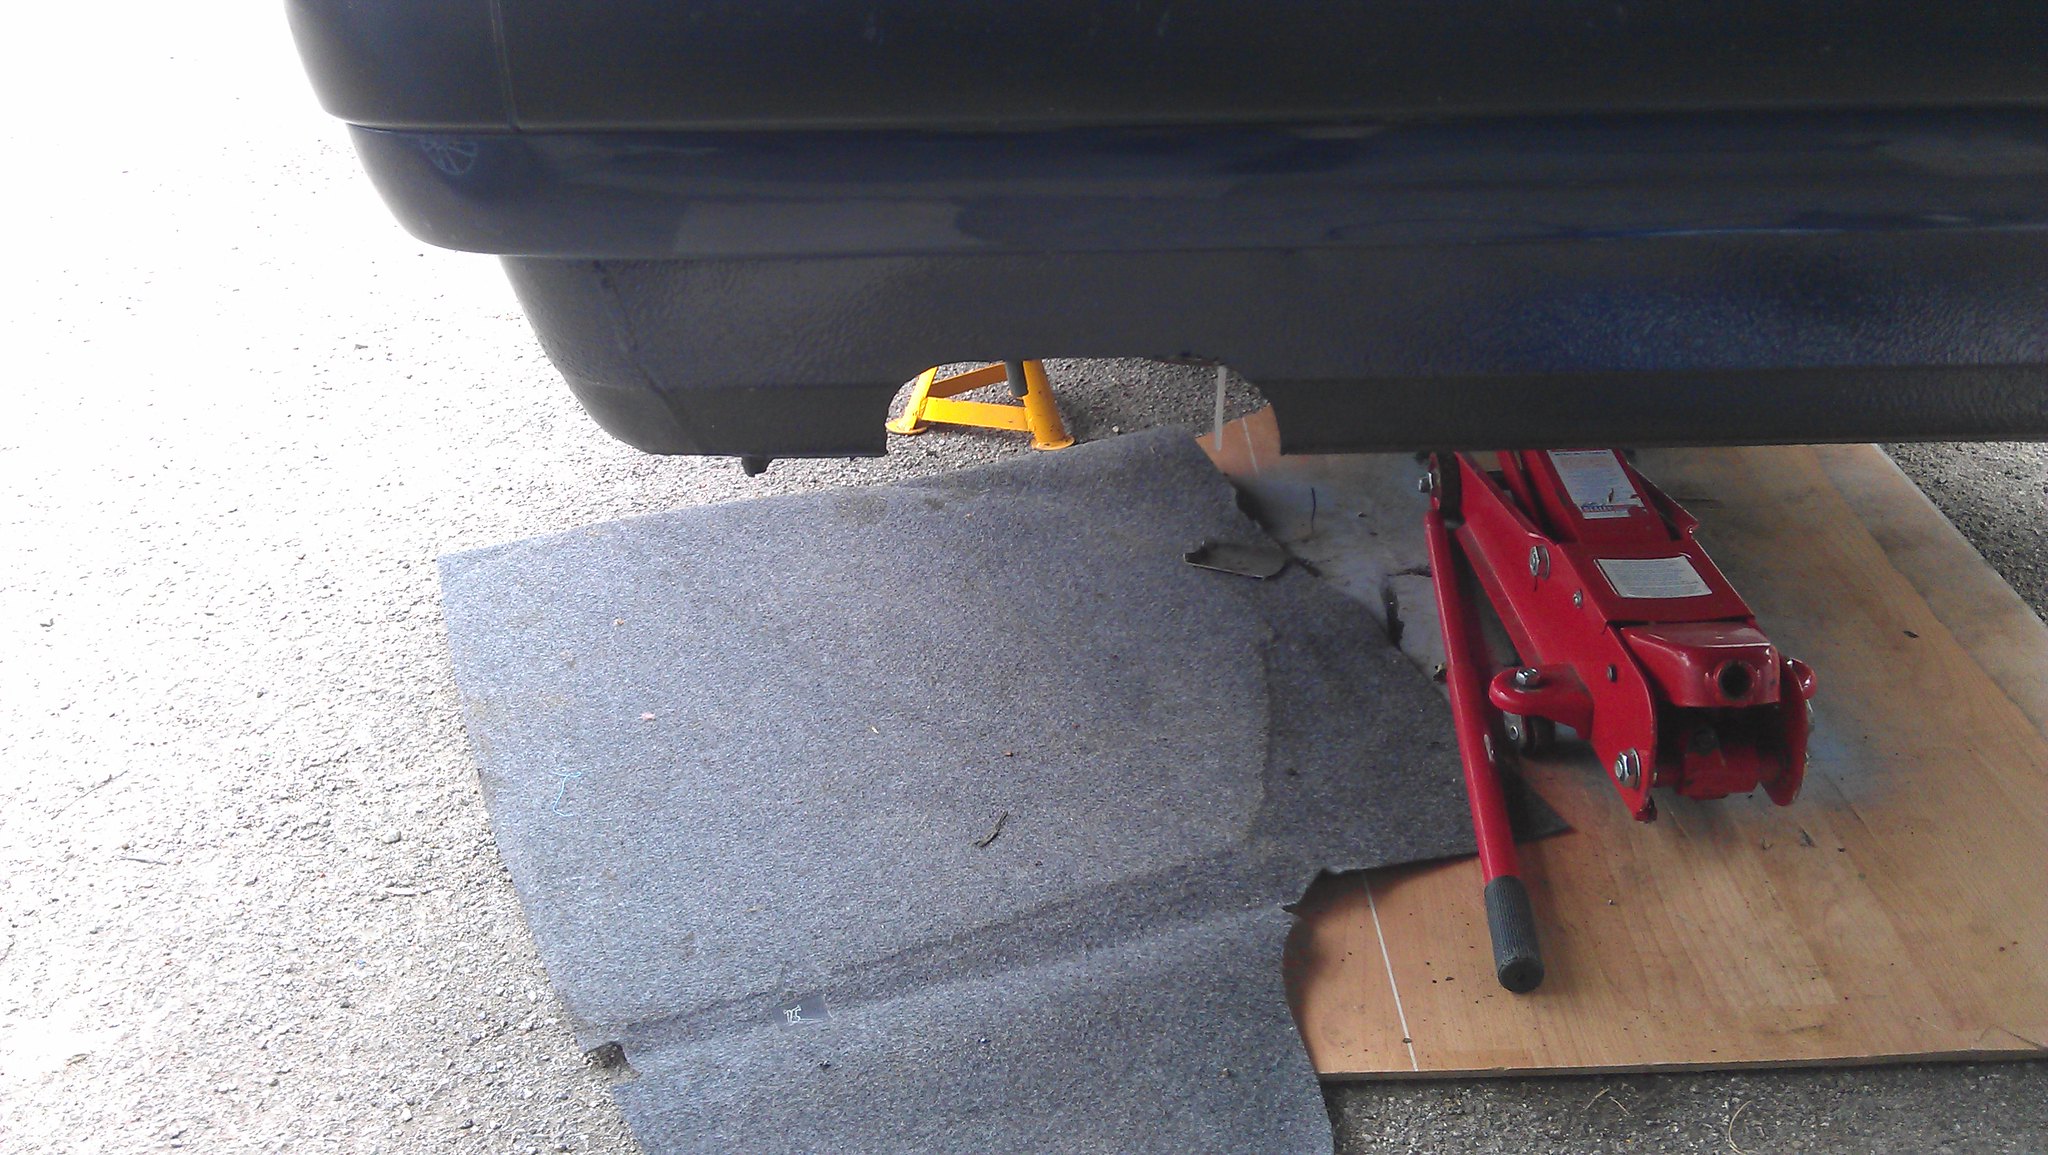
Cut & finished valence:
Thanks to the help of a couple of mates (one of whom is alias 'renrut'), we got the brakes and clutch bled and operational. Bias bar on the brakes may need some fine tuning, but they DO stop the car! Only one leak in my lines too - just a union I'd not nipped up properly. Very pleased with that, well worth being anal when it comes to accepting/rejecting flares as anything I might have needed to replace would've been a major nut-ache with everything now in place.
So I'm now waiting for a few exhaust mounting bits and cable bits on back-order from BMW - once that's fitted, throttle cable is fitted and I've bodged up sume under-bonnet bracketry for a few bits and pieces, I just need to sort out all the switches in the interior, fix the passenger door latch, sort the wheel alignment and give it a good clean inside and out before MOT time
As I said last time, next job was to adjust the handbrake and fit rear pads. This didn't prove quite as simple as fitting pads in the front as they were more of a tight fit, but I got there in the end. Also, one of the handbrake shoe hold-down pins had polled through some corrosion in the backplate - a common problem on E30/E36 models. This was remedied with the use of some Lockheed washers off Ebay. So the handbrake now works, but it still needs a touch of fine tuning before MOT time.
I also ordered parts for making my own drop links. 4 high-misalignment ball joints, some threaded bar, some nuts, nyloc nuts and washers. Got this all put together and bolted up to the struts, with a bit of grease on the bar to keep corrosion at bay. Also a handy hint for anyone strugggling to get the ARB into place with the bushes fitted - put the slot bit into the subframe first, put the bolt through the hole then use a bottle jack on the corner of the bush cup to lift it into place, just enough to get a few threads of the nut onto the bolt to hold everything in place. Then it can be tightened up normally.
Slightly odd thing I noted - the brackets on the struts for the drop link are not the same, offside/nearside. Nearside one has 3 holes, whereas the offside only has two and it I couldn't get a socket on the nearside one as it was too close to the strut. No such problem on the offside. I assume the 3 holes on the nearside is because the E36 compacts only have an ABS sensor on one front wheel, as per E30? I'm not sure. Anyway, all torqued up now.
I've made the hole for the exhaust in the rear valence bigger to suit the twin exhaust, but whilst doing so, noticed a) corrosion and b) the true state the rear arches have been left in. I scrubbed back all the rust with a wire wheel and sprayed it in primer and stonechip just to seal it until it gets to a bodyshop post-MOT. I don't see the corrosion causing an MOT issue. Gutted I need to throw more cash at the body but I guess I can only learn from this one.
Biggest hole is underneath the rear battery mount. Identified itself as bubbly underseal and I prodded it...
There's another about the size of a 5p piece on the other side.
Cut & finished valence:
Thanks to the help of a couple of mates (one of whom is alias 'renrut'), we got the brakes and clutch bled and operational. Bias bar on the brakes may need some fine tuning, but they DO stop the car! Only one leak in my lines too - just a union I'd not nipped up properly. Very pleased with that, well worth being anal when it comes to accepting/rejecting flares as anything I might have needed to replace would've been a major nut-ache with everything now in place.
So I'm now waiting for a few exhaust mounting bits and cable bits on back-order from BMW - once that's fitted, throttle cable is fitted and I've bodged up sume under-bonnet bracketry for a few bits and pieces, I just need to sort out all the switches in the interior, fix the passenger door latch, sort the wheel alignment and give it a good clean inside and out before MOT time
-
Motorhole
- E30 Zone Addict
- Posts: 2395
- Joined: Tue Jul 12, 2005 11:00 pm
- Location: Cheshire
[quote=motorhole]So I'm now waiting for a few exhaust mounting bits and cable bits on back-order from BMW - once that's fitted, throttle cable is fitted and I've bodged up sume under-bonnet bracketry for a few bits and pieces, I just need to sort out all the switches in the interior, fix the passenger door latch, sort the wheel alignment and give it a good clean inside and out before MOT time [/quote]
This was what I said last time right? Well doing some of that has taken an age, due to being on holiday, visiting relatives and being kept busy at work for some of my weekends. Generally, being occupied by 'real life', but a very fine life that is too...
Nevertheless, I've been abandoning the infinitely patient Mrs Motorhole whenever I can to make little bits of progress.
From the above scope of work then, I have tidied up 90% of the wiring and fitted dash switches etc. I cut a pair of holes in a stereo blanking plate for the window switches seeing as they were previously mounted in the now non-existent centre console. From the bits I ordered from BMW, I finally worked out how the heater control cable all does together, so now that all works. It didn't help that the old cable was seized virtually solid either!
Sadly, while I was on holiday, although all of my home made brake lines have proven themselves completely leakproof, the reservoirs had not. Brake fluid had dripped out the bottom of the reservoirs, onto the mounting bracket and then accumulated on the battery tray. So I've had to remove the reservoirs, clean up the mess and rub the paint back for an annoyingly non-matching respray. Problem was partially my fault though. The reservoirs have a brass nipple and clamping nut and washer in the bottom and I'd done the nut up, then just nipped it tight for fear of cracking the plastic. This wasn't tight enough though. A few more turns now has them tight and leakproof and the reservoirs have not cracked.
Then we come to the throttle cable. Because of the pedal box design, the arm on the throttle pedal is now near the floorpan rather than being halfway up the bulkhead. This meant that my E34 525i throttle cable wasn't long enough. I ordered a universal throttle cable kit from Venhill and made a hybrid cable from those bits and some bits removed from the BMW cable (like the nipple for the throttle body and the adjuster that mounts into the throttle body). A male and female brake union pair, drilled out to 7 mm, made a pretty good bulkhead fitting for the cable.
I then had all kinds of fun trying to get the cable to stay in place at the pedal end whilst still allowing the cable to move freely. I tell you, working in a footwell, through a rollcage is NOT a comfortable place at all. Certainly not for the couple of hours it took for me to come to an arrangement I was finally happy with. But now it seems okay and I'm just waiting for a solderless nipple to attach it to the pedal.
All I need, I think, is one good, interruption free weekend (not this weekend, sadly) and I think it'll be just about there. Apologies for this thread being picture light, but not much has gone on. Until next time...
-
Motorhole
- E30 Zone Addict
- Posts: 2395
- Joined: Tue Jul 12, 2005 11:00 pm
- Location: Cheshire
More news - its nearly done!
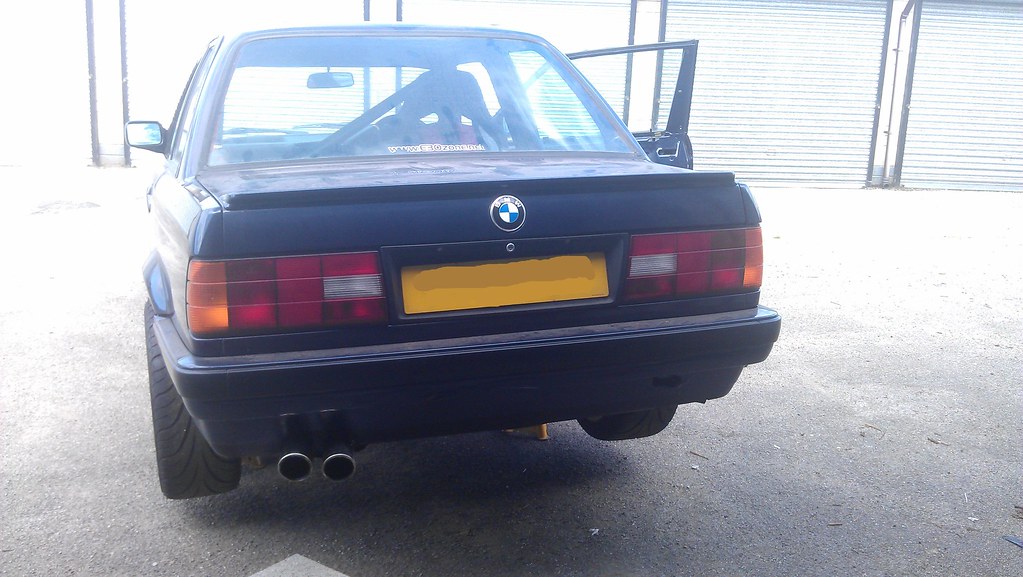
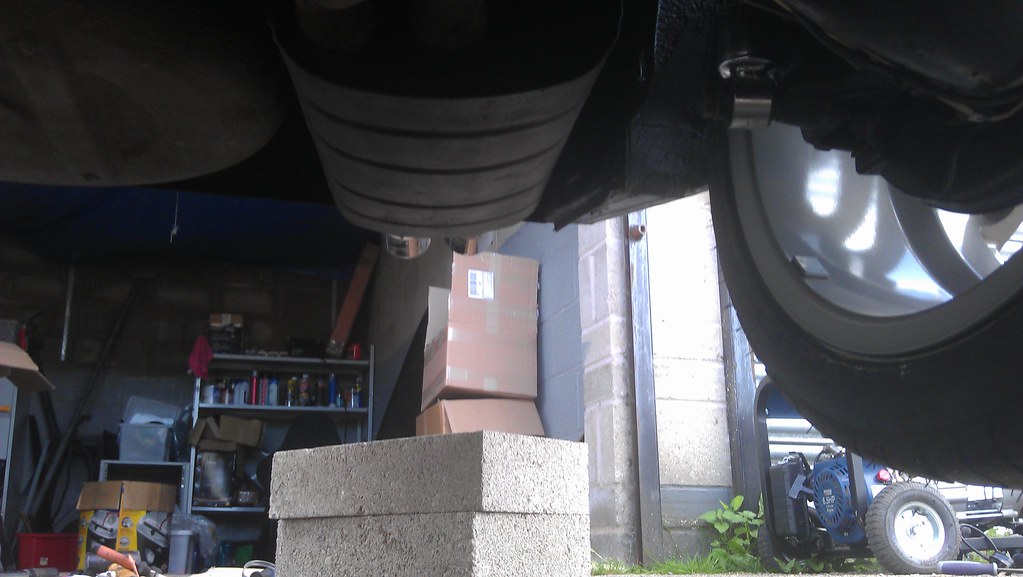
Once the throttle cable was sorted, the only thing that was stopping me taking it for a quick spin around the compound was the anti-social lack of exhaust. So I remedied this by refitting the heat shield for the prop (which took much longer to figure out than it should've done) and fit my £40 exhaust. Fitting an exhaust on your own, on axle stands is not easy nor enjoyable. But I got there in the end and now the car really is starting to look presentable.

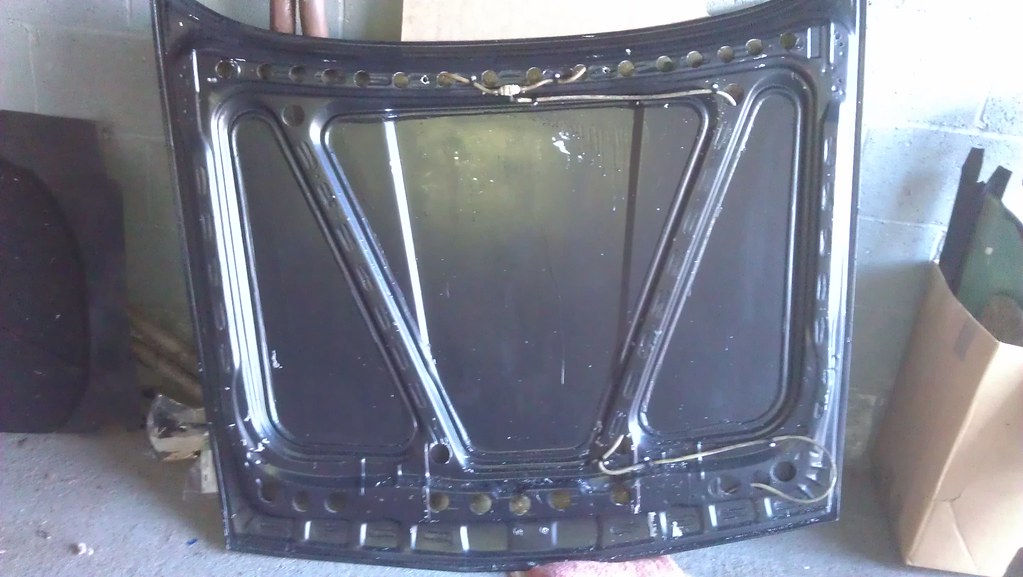
I then plumbed in the screenwash tubes for the fibreglass bonnet. An easy job requiring nothing more than some short self-tappers and some p-clips, but fitting the nozzles was another matter.
These are made of plastic and have a small stub with two tabs on it, so when you push them through the holes in the bonnet, the tabs stop it being pulled back out again. This is all well and good when you have a bonnet of 0.3 mm thick steel, but the skin of my fibreglass bonnet is somewhat thicker than that! So they didn't fit very well at all.
Enter Sugru. If you've not come across this stuff before, it's kinda like chemical metal, but the rubber version. And it bonds to stuff really well.
http://sugru.com/
One of my colleagues has made himself some custom ear buds for his headphones and I was really impressed. I thought it would be perfect for fitting my washer jets, and you know what? It was.
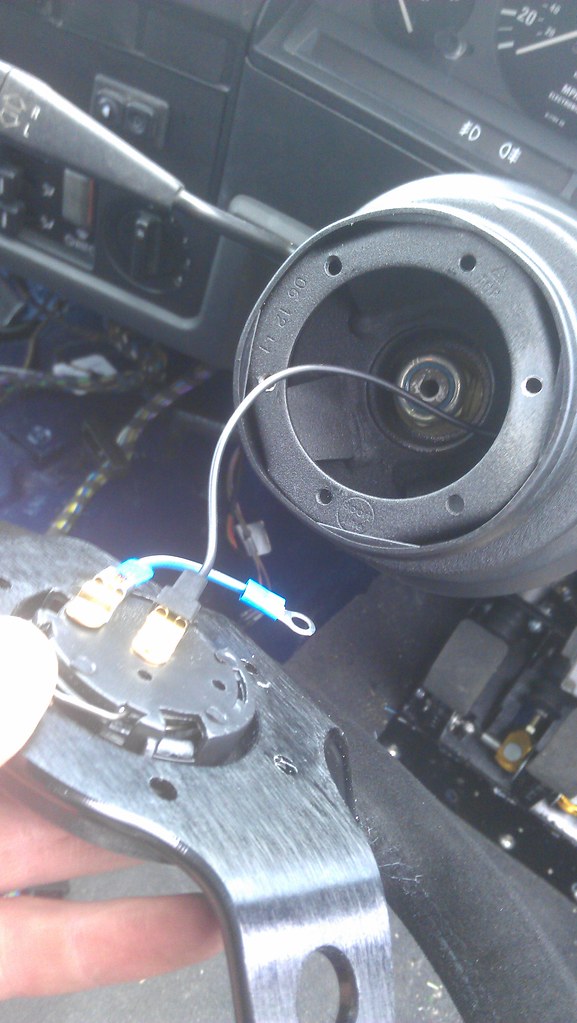
Then I addressed my issues with the standard steering wheel; namely it being too far away and being large enough to seriously impede my entry and exit from the car with my long ass legs. I got a dished 350 mm wheel and OMP boss from Rally Design, made a short wire to complete the earth circuit for the horn and all was good. The driving position is now infinitely better. And the horn works as it should.

It was at this point that I fired it up and took it for a quick spin, albeit not faster than walking pace. Unfortunately, the ECU is not secure yet and has a habit of dropping behind the clutch and/or brake pedal so until that was fixed, I wasn't going to give it any juice. Sounds well though. Very well. The non-assisted brakes felt weird at first but I quickly got the feel for them and the clutch is heavy, but smooth.
This afternoon, I skipped of work early, given the good weather and set about doing a little more work. First, I gave the inside of the rear windows, rear shelf & bench a good clean, cleaned up the passenger seat then fitted it properly, complete with harness and grip-tape in the floorpan.
I started tidying up the last of the wiring and found a place to mount the ECU securely. Albeit with a bungee cord, but a small luggage strap will do a more permanent job once I get a hold of one. Basically, it's suspended upside down underneath the dashboard and strapped solidly to the bulkhead by threading the strap through factory holes in the bulkhead.
Then I gave it the juice
I've also done a quick test of lights and electrics with a fairly good success rate, but currently I'm without electric windows and indicators, both which are a problem. Also, the fan doesn't kick in when it should so I need to figure out what's going on there.
Once I've resolved these, the only outstanding matters are figuring out what to do with the fuel tank breather, wheel alignment and (still) a few outstanding brackets I need to make for the power terminal under the bonnet, the PAS fluid reservoir and the bias bar adjuster. Then it's MOT time baby!
Once the throttle cable was sorted, the only thing that was stopping me taking it for a quick spin around the compound was the anti-social lack of exhaust. So I remedied this by refitting the heat shield for the prop (which took much longer to figure out than it should've done) and fit my £40 exhaust. Fitting an exhaust on your own, on axle stands is not easy nor enjoyable. But I got there in the end and now the car really is starting to look presentable.
I then plumbed in the screenwash tubes for the fibreglass bonnet. An easy job requiring nothing more than some short self-tappers and some p-clips, but fitting the nozzles was another matter.
These are made of plastic and have a small stub with two tabs on it, so when you push them through the holes in the bonnet, the tabs stop it being pulled back out again. This is all well and good when you have a bonnet of 0.3 mm thick steel, but the skin of my fibreglass bonnet is somewhat thicker than that! So they didn't fit very well at all.
Enter Sugru. If you've not come across this stuff before, it's kinda like chemical metal, but the rubber version. And it bonds to stuff really well.
http://sugru.com/
One of my colleagues has made himself some custom ear buds for his headphones and I was really impressed. I thought it would be perfect for fitting my washer jets, and you know what? It was.
Then I addressed my issues with the standard steering wheel; namely it being too far away and being large enough to seriously impede my entry and exit from the car with my long ass legs. I got a dished 350 mm wheel and OMP boss from Rally Design, made a short wire to complete the earth circuit for the horn and all was good. The driving position is now infinitely better. And the horn works as it should.
It was at this point that I fired it up and took it for a quick spin, albeit not faster than walking pace. Unfortunately, the ECU is not secure yet and has a habit of dropping behind the clutch and/or brake pedal so until that was fixed, I wasn't going to give it any juice. Sounds well though. Very well. The non-assisted brakes felt weird at first but I quickly got the feel for them and the clutch is heavy, but smooth.
This afternoon, I skipped of work early, given the good weather and set about doing a little more work. First, I gave the inside of the rear windows, rear shelf & bench a good clean, cleaned up the passenger seat then fitted it properly, complete with harness and grip-tape in the floorpan.
I started tidying up the last of the wiring and found a place to mount the ECU securely. Albeit with a bungee cord, but a small luggage strap will do a more permanent job once I get a hold of one. Basically, it's suspended upside down underneath the dashboard and strapped solidly to the bulkhead by threading the strap through factory holes in the bulkhead.
Then I gave it the juice
I've also done a quick test of lights and electrics with a fairly good success rate, but currently I'm without electric windows and indicators, both which are a problem. Also, the fan doesn't kick in when it should so I need to figure out what's going on there.
Once I've resolved these, the only outstanding matters are figuring out what to do with the fuel tank breather, wheel alignment and (still) a few outstanding brackets I need to make for the power terminal under the bonnet, the PAS fluid reservoir and the bias bar adjuster. Then it's MOT time baby!
-
Motorhole
- E30 Zone Addict
- Posts: 2395
- Joined: Tue Jul 12, 2005 11:00 pm
- Location: Cheshire
Thanks SJW.
I have a few more photos and stories to bring it up to date now and I will add these in the very near future. Nevertheless, MOT is booked for Wednesday now, after making sure the tester was happy to pass the pedal box and absence of servo. Fingers crossed!
I have a few more photos and stories to bring it up to date now and I will add these in the very near future. Nevertheless, MOT is booked for Wednesday now, after making sure the tester was happy to pass the pedal box and absence of servo. Fingers crossed!
-
Motorhole
- E30 Zone Addict
- Posts: 2395
- Joined: Tue Jul 12, 2005 11:00 pm
- Location: Cheshire
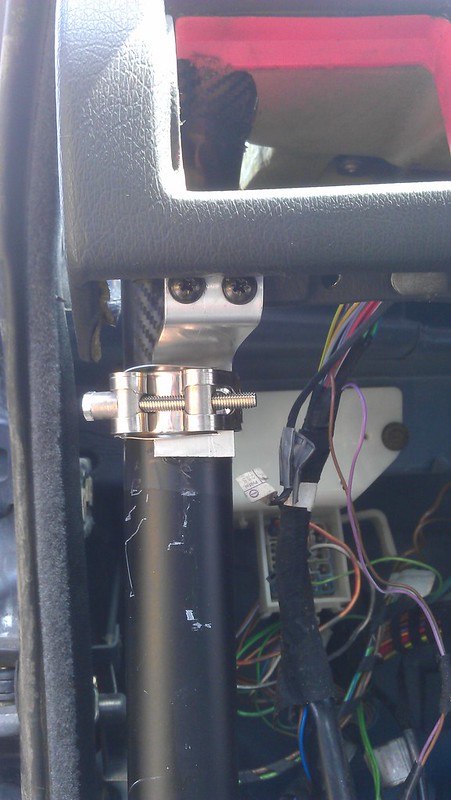
So, stepping back a fortnight or so, here was my ECU suspended underneath the dashboard by a bungee cord:
This is now secured properly with some slip straps. It's not going anywhere. Under the bonnet, I had some brackets to make for the dipstick tube, the airbox and the power block.
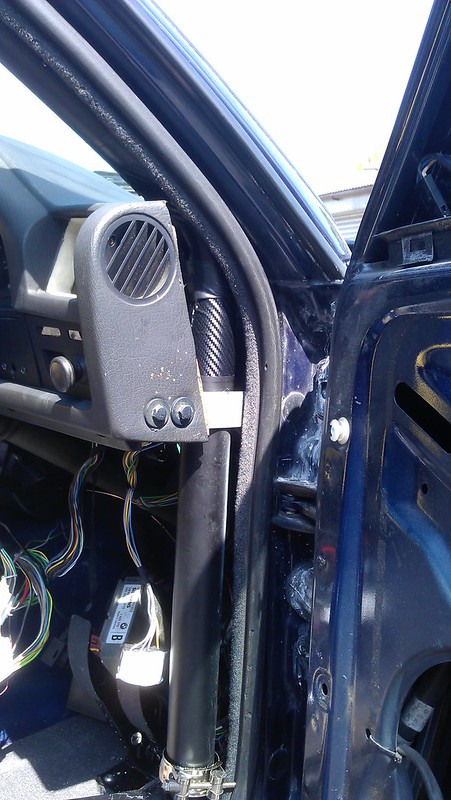
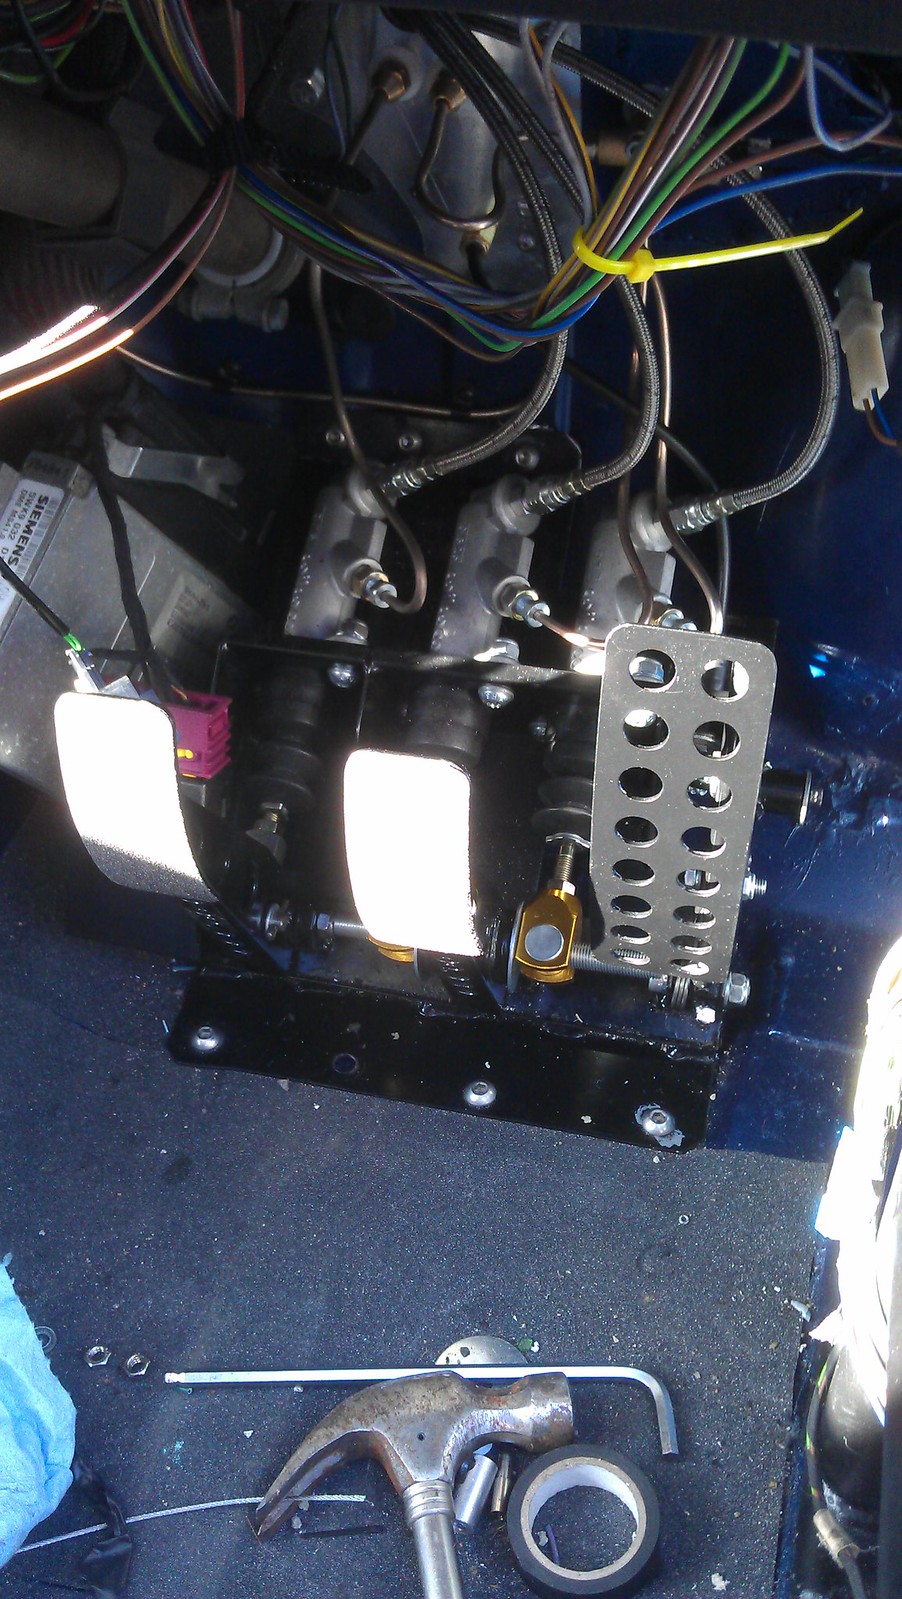
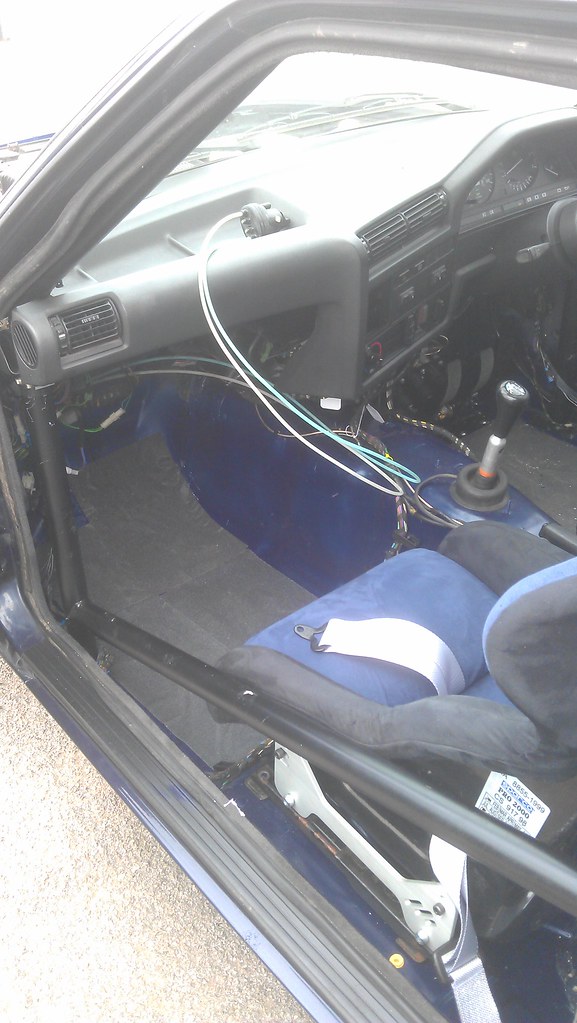
And I also had to fit and mount my brake bias knob. I'd left the driver's side air vent free precisely for this purpose:
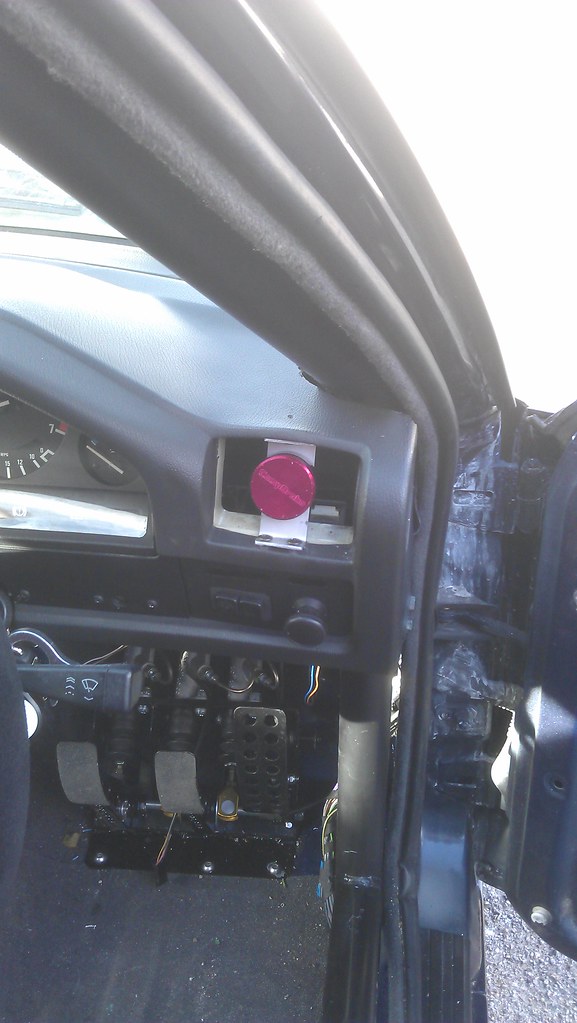
With regards to potential issues with the immenent MOT; I've had an ongoing problem with weeping brake fluid since I'd done the bleed of the braking system. It only weeped under pressure and it was coming from a union between a hard line and flexi pipe at the top of the offside rear trailing arm. The hardest b*stard union to get access to on the whole car. I was putting this off as I had a suspicion I might need to replace the hardline which may well have been a 'drop the heat shield & exhaust' job. As it turns out, it was just a matter of getting the right angle on it with a pair of spanners. It wasn't tight - it just felt tight because I'd assembled it dry about 14 months ago. It clicked then I got an easy half turn out of it and the weeping has stopped. I now have a fluid-tight braking system.
I also had no working indicators. At all. I had power to the hazard light switch as when that was pushed, it lit up, but there was no flashing and there were no signal lights.
As the hazard light switch performs as a bit of a junction box, I started my troubleshooting by jumping various ports on the hazard light switch socket to see what reactions I got. I could get the indicators to light up, I could get them to flash, I could get them to flash via the indicator stalk, albeit only on the offside...and then the socket began to fall apart in my hands. Wires started falling out of the crimps and there was a dodgy looking connection on the power feed. I sourced a second hand socket with plenty wire attached, along with another hazard light switch for good measure, then cut out the old one and soldered in the new one. Problem solved, indicators then worked perfectly - save for the ones in the front bumper. Some testing with a multimeter narrowed this down to a poor connection between the bulb and bulb holder, so some adjustments to the spring in the holder saw these working too.
I was struggling with ideas with what to do about the fuel tank breather too, another job I'd been putting off. From a bit of research, I found that pre-facelift (i.e. pre-1987) E30s just had the breather open above the fuel tank, whereas facelifted (post 1987) E30s had a pipe running from the tank to a carbon cannister under the bonnet and then into the intake manifold via a valve. I didn't particularly like either of these ideas - one being that I found it difficult to thread a pipe up and over the fuel tank due to clearances. I ended up with a sort of half-way measure using an idea I swiped from a kit car forum. I used a small universal fuel filter, opened it up and filled it with activated carbon pellets - the stuff used for fish tank filters. I closed it and attached the breather pipe to this, then left the top open up at the top of the fuel tank. This meant I had an open breather but without the stink of fuel typically associated with old cars.
Moving onto some mundane tasks; there was fitting the bonnet, fitting roll-cage padding, cleaning the car out and doing front wheel alignment (which I've slightly c*cked up, but I'll talk about that in my next post once I've remedied it). I had a bracket to make for the exhaust centre box and managed to source a front strut brace (Ultra Racing) cheap as an ex-display item.
Then, just when I thought I was about done, my engine started sounding like a sewing machine.
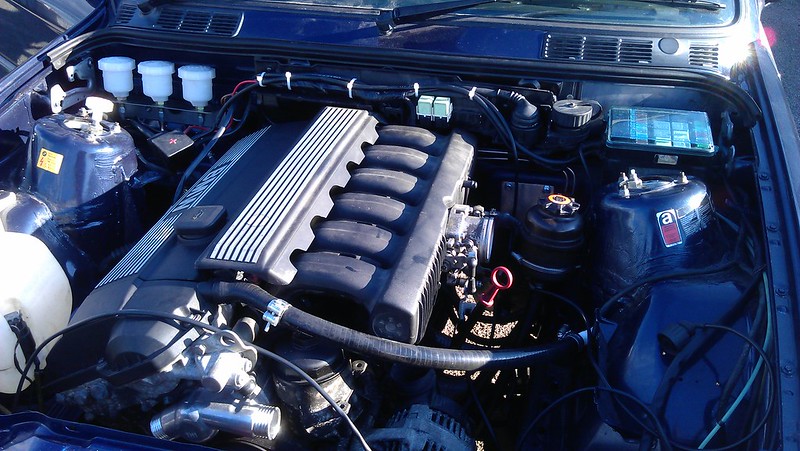
Poking around using a large screwdriver as a stethoscope, I sourced the noise down to the injectors - all 6 of them. Batch firing? perhaps. Nevertheless, I checked electrical connections for the cam sensor, crank sensor, lambda sensors, VANOS and fuel rail. I made sure the inlet manifold was properly torqued down and checked all breather connections. I also pulled the cam sensor, cleaned it up with a bit of fuel and replaced it. I then had a nice quiet M52, but a broken bracket on the cam sensor due to my having hands like feet. Nearly £80 for a new one! Nevertheless, problem resolved.
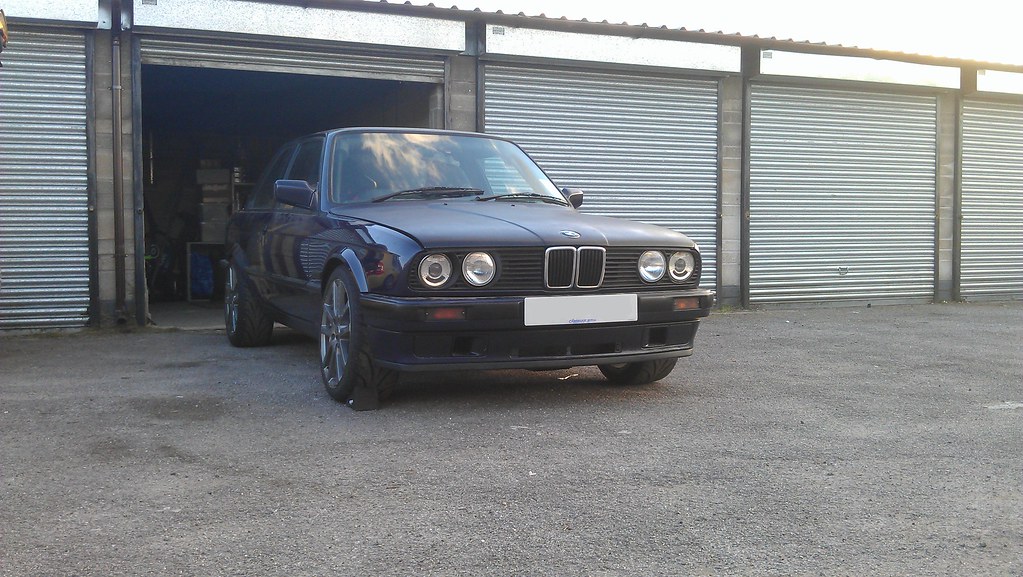
So today (4th Sept '13), it has gone for the MOT. Fingers are crossed, hoping for the best. In the meantime, here's some photos of the (hopefully) road-worthy car. I'm not going to say it's finished as, well it's not. Quite. And probably never will be. But for now...
This is now secured properly with some slip straps. It's not going anywhere. Under the bonnet, I had some brackets to make for the dipstick tube, the airbox and the power block.
And I also had to fit and mount my brake bias knob. I'd left the driver's side air vent free precisely for this purpose:
With regards to potential issues with the immenent MOT; I've had an ongoing problem with weeping brake fluid since I'd done the bleed of the braking system. It only weeped under pressure and it was coming from a union between a hard line and flexi pipe at the top of the offside rear trailing arm. The hardest b*stard union to get access to on the whole car. I was putting this off as I had a suspicion I might need to replace the hardline which may well have been a 'drop the heat shield & exhaust' job. As it turns out, it was just a matter of getting the right angle on it with a pair of spanners. It wasn't tight - it just felt tight because I'd assembled it dry about 14 months ago. It clicked then I got an easy half turn out of it and the weeping has stopped. I now have a fluid-tight braking system.
I also had no working indicators. At all. I had power to the hazard light switch as when that was pushed, it lit up, but there was no flashing and there were no signal lights.
As the hazard light switch performs as a bit of a junction box, I started my troubleshooting by jumping various ports on the hazard light switch socket to see what reactions I got. I could get the indicators to light up, I could get them to flash, I could get them to flash via the indicator stalk, albeit only on the offside...and then the socket began to fall apart in my hands. Wires started falling out of the crimps and there was a dodgy looking connection on the power feed. I sourced a second hand socket with plenty wire attached, along with another hazard light switch for good measure, then cut out the old one and soldered in the new one. Problem solved, indicators then worked perfectly - save for the ones in the front bumper. Some testing with a multimeter narrowed this down to a poor connection between the bulb and bulb holder, so some adjustments to the spring in the holder saw these working too.
I was struggling with ideas with what to do about the fuel tank breather too, another job I'd been putting off. From a bit of research, I found that pre-facelift (i.e. pre-1987) E30s just had the breather open above the fuel tank, whereas facelifted (post 1987) E30s had a pipe running from the tank to a carbon cannister under the bonnet and then into the intake manifold via a valve. I didn't particularly like either of these ideas - one being that I found it difficult to thread a pipe up and over the fuel tank due to clearances. I ended up with a sort of half-way measure using an idea I swiped from a kit car forum. I used a small universal fuel filter, opened it up and filled it with activated carbon pellets - the stuff used for fish tank filters. I closed it and attached the breather pipe to this, then left the top open up at the top of the fuel tank. This meant I had an open breather but without the stink of fuel typically associated with old cars.
Moving onto some mundane tasks; there was fitting the bonnet, fitting roll-cage padding, cleaning the car out and doing front wheel alignment (which I've slightly c*cked up, but I'll talk about that in my next post once I've remedied it). I had a bracket to make for the exhaust centre box and managed to source a front strut brace (Ultra Racing) cheap as an ex-display item.
Then, just when I thought I was about done, my engine started sounding like a sewing machine.
Poking around using a large screwdriver as a stethoscope, I sourced the noise down to the injectors - all 6 of them. Batch firing? perhaps. Nevertheless, I checked electrical connections for the cam sensor, crank sensor, lambda sensors, VANOS and fuel rail. I made sure the inlet manifold was properly torqued down and checked all breather connections. I also pulled the cam sensor, cleaned it up with a bit of fuel and replaced it. I then had a nice quiet M52, but a broken bracket on the cam sensor due to my having hands like feet. Nearly £80 for a new one! Nevertheless, problem resolved.
So today (4th Sept '13), it has gone for the MOT. Fingers are crossed, hoping for the best. In the meantime, here's some photos of the (hopefully) road-worthy car. I'm not going to say it's finished as, well it's not. Quite. And probably never will be. But for now...
-
Motorhole
- E30 Zone Addict
- Posts: 2395
- Joined: Tue Jul 12, 2005 11:00 pm
- Location: Cheshire
So, it's now all road legal and above board failed the MOT first time round on headlamp misalignment and the adjusters needed freeing up. But 2nd time pass with no advisories. I'm a happy man!
The drive to/from the garage did highlight a couple of issues though. Firstly, I have the rear dampers set way too soft. The exhaust hits the valence when turning/over bumps. The rear tyres scrub the arches from time to time. So first stop is the bodyshop to sort out the arches and amend the previous bodge job. Then I'll address the issues with the dampers and I should be able to give it some stick and see how it goes.
I'm also not entirely happy with my top hose arrangement, it looks a little restrictive so I'm going to sort this out. Then I have 6 litres of 5w40 fully synthetic Valvoline to go in and replace the 5w30 diesel oil that's in there now cleaning things out.
Very pleased with the way it sounds and can't wait to give it death
-
rix313
- E30 Zone Team Member
- Posts: 4967
- Joined: Fri Oct 31, 2008 11:00 pm
- Location: Silverstone
-
Motorhole
- E30 Zone Addict
- Posts: 2395
- Joined: Tue Jul 12, 2005 11:00 pm
- Location: Cheshire
Well, the E30 was due for its first trackday on Friday 20th at Blyton Park, but...sadly...it didn't make it.
I got the car back from the bodyshop on Tuesday, where they had been tidying up some previously bodged arch work and trying to get extra clearance for the wheels. When I got back from the short drive through traffic, coolant was pissing out of the expansion cap and dripping from a hose that I knew was weeping and needed fixing anyway (although temperature was fine). Not good at all. I could only presume that my regular but small coolant top ups due to the weeping hose had somehow worked an airlock into the troublesome M52 coolant circuit. I hoped it wasn't a head gasket problem...
I took a long lunch hour on Wednesday to re-bleed the system from scratch but didn't manage to bleed it properly. I ended up with an airlocked system that wouldn't blow hot air from the heaters. I then decided that Thursday night was the night and I would do it properly, no rushing...and fix that damn weeping hose while I was at it.
So I drained the system, took the hose apart at the join where it was weeping, fitted slightly smaller t-bolts for a tighter fit (before the t-bolts were at their min diameter and still weren't gripping the hose correctly) and replaced it. I then took my time to refill the system correctly and replaced the expansion cap with another spare I had lying around for good measure. Done, fired up, warmed up, hot air through heaters, fan kicks in, tiny spot of air on slackening the bleed screw and nothing more, job done. Sadly, I didn't have time for the test drive and I wasn't willing to risk a 250 mile round trip and trackday on Friday in a car with questionable durability...so track duties were left to the ever reliable Fabia.
Fabias arn't built for racetracks. Too heavy and too much body roll. It was all too easy to cook the brakes, but I still had a laugh!
Nevertheless, this morning I went back to the BMW. After warming it up, I took it for a proper spin. Town driving, dual carriageway, some redline action, about 15 miles in all - and it took it with no problems. When I'd finished, I checked for air at the bleed screw and there was none. So, it appears, it's now ready for action, just one day late.
I am still suffering from rear tyre scrub though, particularly in harder left handers and under hard acceleration. I think I'm going to have to go the hard route and find some 16" wheels that'll clear the E36 M3 front brakes, in a slightly higher offset. Sad to loose money on nearly new wheels and tyres, but it will make for a better drive in the long run I think. Still, pleased to finally have it on the road and running properly
-
milescook
- E30 Zone Camper

- Posts: 1285
- Joined: Thu Jan 13, 2011 11:00 pm
- Location: The 'bran of Cwm
Excellent news! And looks smart
The story so far... http://www.cookracing.co.uk/
Also please help the race budget by watching some videos https://www.youtube.com/cookracinguk
Also please help the race budget by watching some videos
-
Motorhole
- E30 Zone Addict
- Posts: 2395
- Joined: Tue Jul 12, 2005 11:00 pm
- Location: Cheshire
So since the E30 ducked out of Blyton, I've taken a bit of a break, had a lovely week in Budapest with the missus then returned refreshed and determined to solve my problem! Starting with a new set of 16" wheels.
I got these BMW style 42s (16"x7J ET47) from Ebay for a bargain price - I was the only bidder and there was no reserve - taking a gamble that they would fit over the front brakes. Sold as professionally refurbished in a black powdercoat, style wise they were bang on.
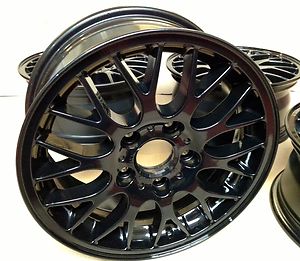
When I tried to bolt them up to the car though, the caliper fouled the lip that runs around the inside of the wheel behind the spokes. Inner diameter clearance was fine though, so I ordered 4 x 15mm hubcentric spacers and a stud conversion kit for good measure.
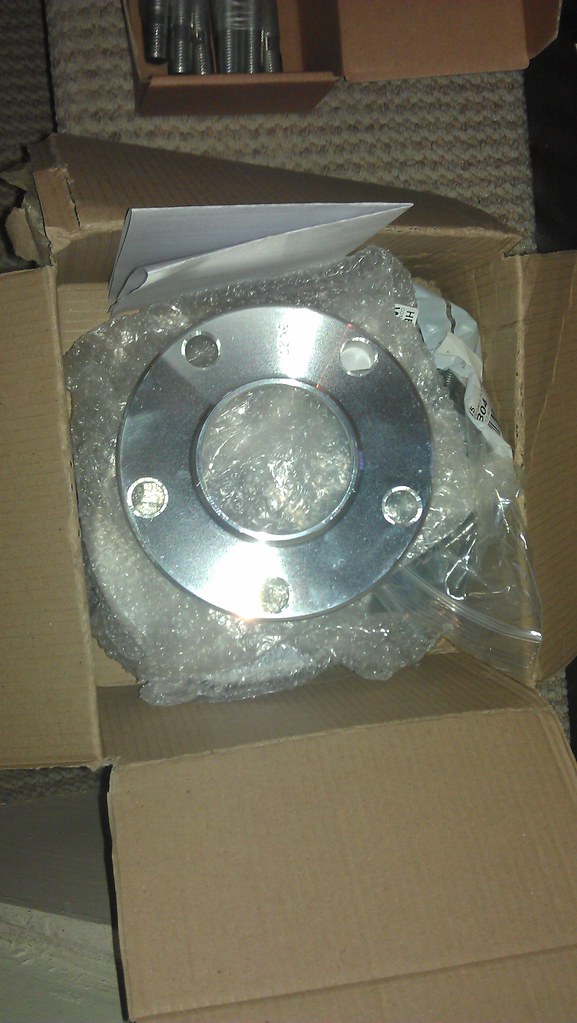
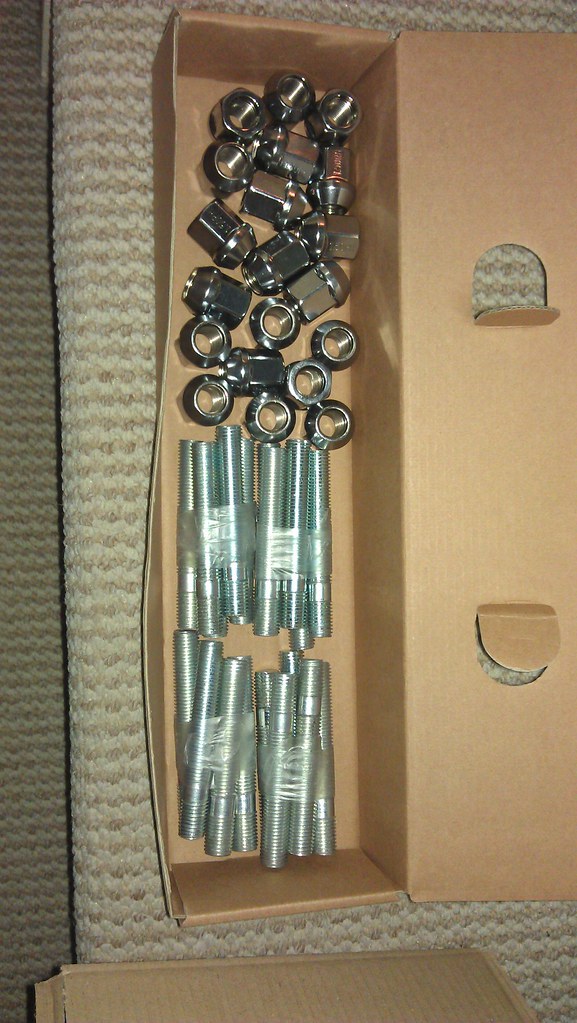
Bolting up the wheels again, clearance looked tight. Very tight, I could just about get a credit card between the caliper and the inside of the lip. But it was true, no fouling etc.
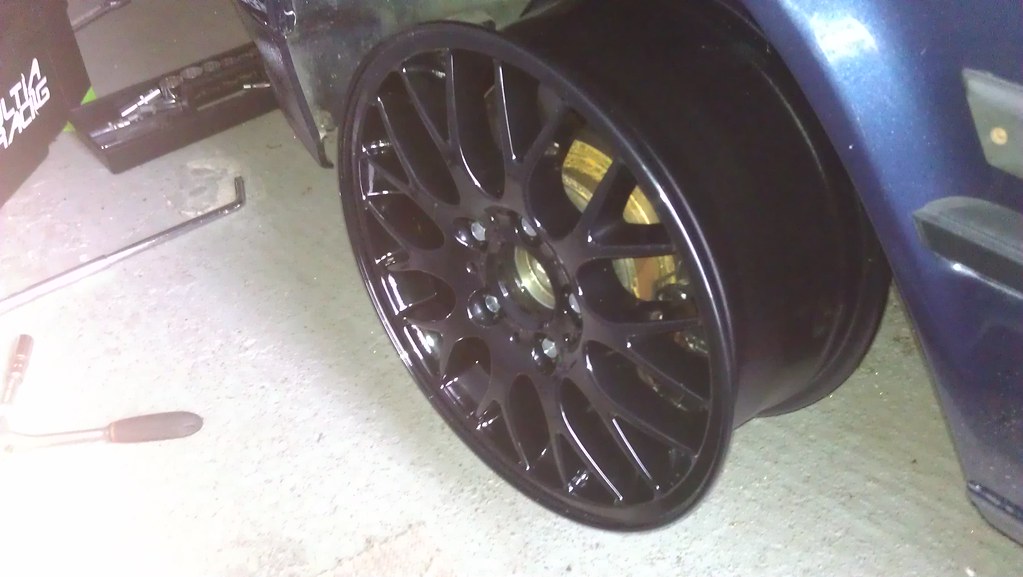
I went ahead and got tyres fitted and valved and the wheels balanced. They balanced up just fine, but I couldn't afford another set of track-day tyres this time round. I got a set of GT Radial UHPs on the basis that they hold up to high temps well. And they were cheap. Once these are worn, I will get another set of RSRs, but until then, off with the old and on with the new:
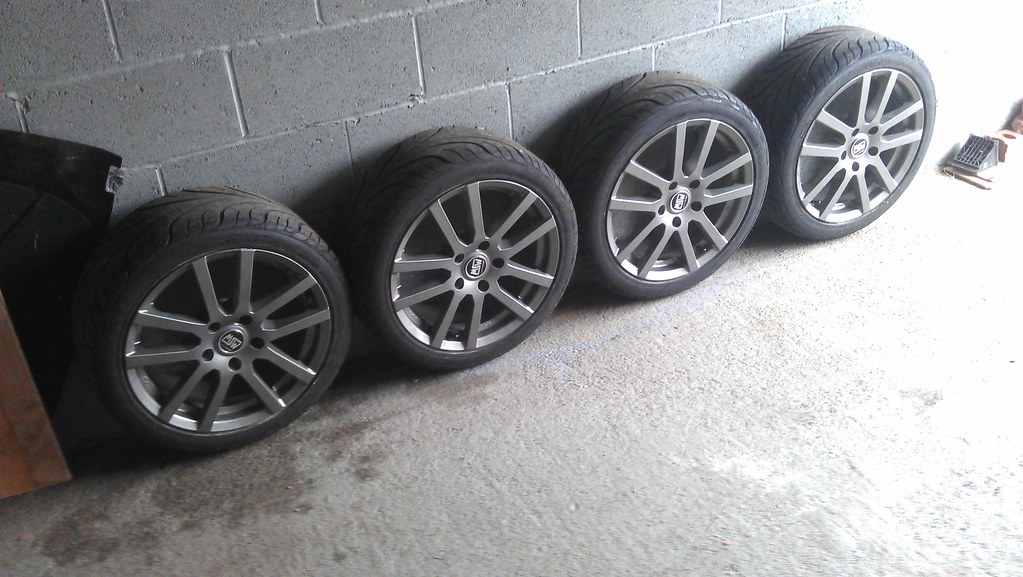
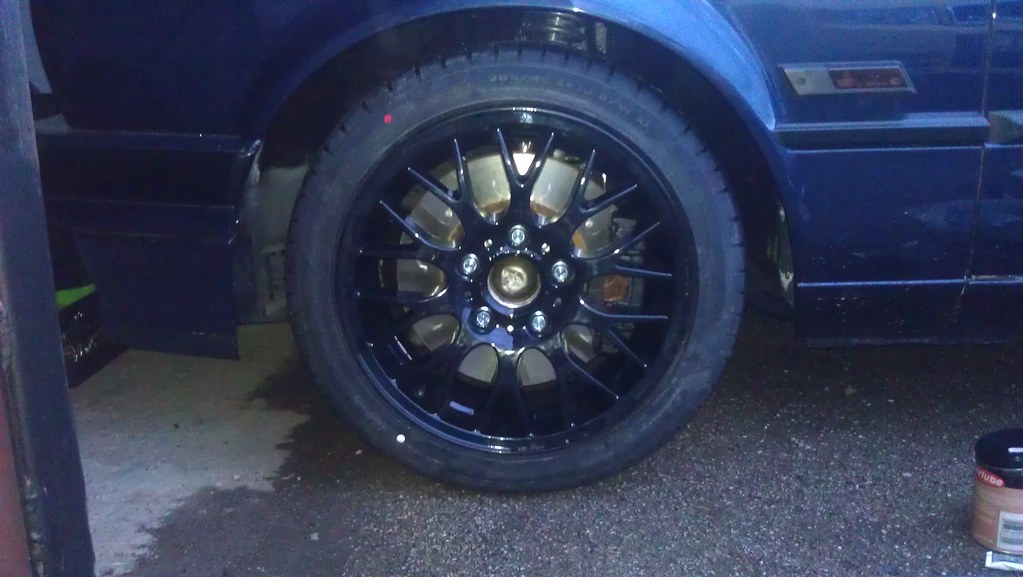
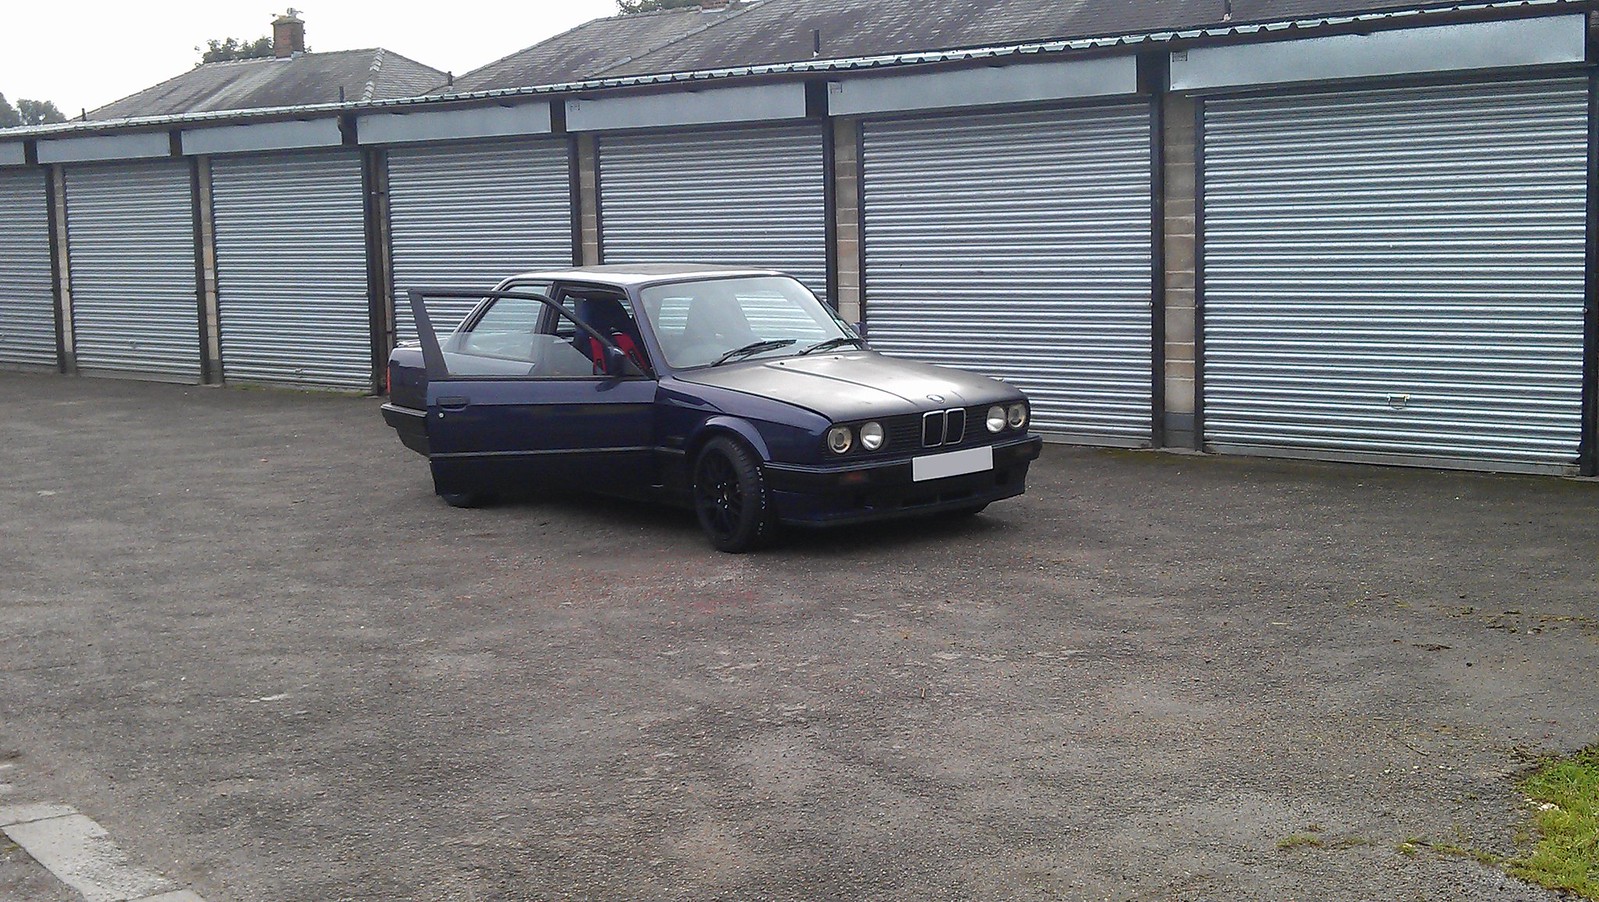
Car drives a lot better on the 16s. Miles of clearance - I can even lower it another 10-15mm easy. No fouling anywhere. Feels a little livelier too, must be some 3kg difference per corner at least! I prefer the looks too, suit the car better. I just need a set of centre caps to finish them off.
I've not fitted the studs yet, I've just used the longer wheel bolts that came with the spacers to test everything out. I'll fit the studs properly another weekend. Until then I'm going to enjoy the car a little bit whilst we still get the odd dry day, ironing out niggles and what not!
On a different note, this is what was left of the rear pads on the Fabia after Blyton park...
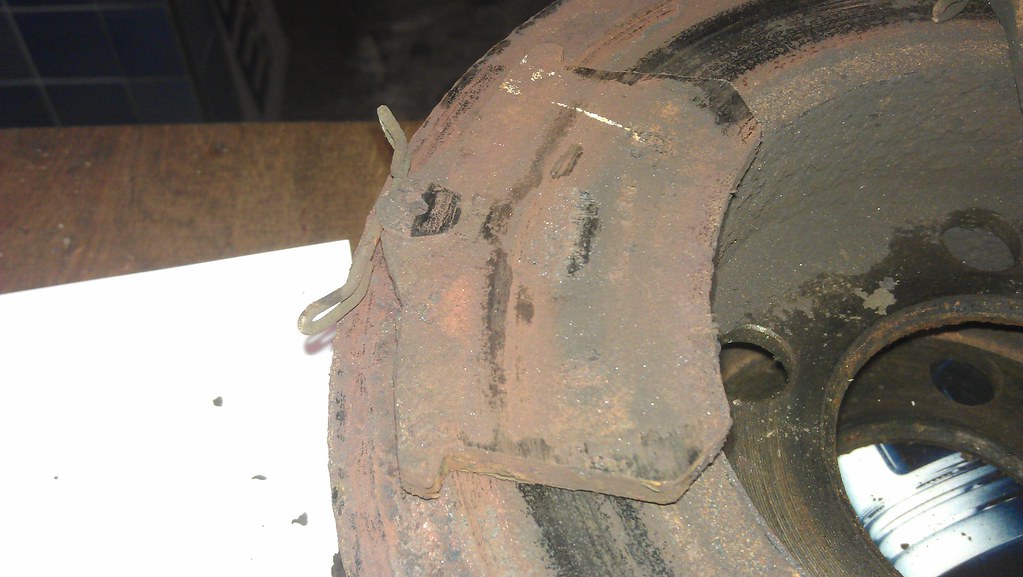
...I thought there might have been 1000 miles left in them before the trackday...or about 30 track miles it seems!
I got these BMW style 42s (16"x7J ET47) from Ebay for a bargain price - I was the only bidder and there was no reserve - taking a gamble that they would fit over the front brakes. Sold as professionally refurbished in a black powdercoat, style wise they were bang on.
When I tried to bolt them up to the car though, the caliper fouled the lip that runs around the inside of the wheel behind the spokes. Inner diameter clearance was fine though, so I ordered 4 x 15mm hubcentric spacers and a stud conversion kit for good measure.
Bolting up the wheels again, clearance looked tight. Very tight, I could just about get a credit card between the caliper and the inside of the lip. But it was true, no fouling etc.
I went ahead and got tyres fitted and valved and the wheels balanced. They balanced up just fine, but I couldn't afford another set of track-day tyres this time round. I got a set of GT Radial UHPs on the basis that they hold up to high temps well. And they were cheap. Once these are worn, I will get another set of RSRs, but until then, off with the old and on with the new:
Car drives a lot better on the 16s. Miles of clearance - I can even lower it another 10-15mm easy. No fouling anywhere. Feels a little livelier too, must be some 3kg difference per corner at least! I prefer the looks too, suit the car better. I just need a set of centre caps to finish them off.
I've not fitted the studs yet, I've just used the longer wheel bolts that came with the spacers to test everything out. I'll fit the studs properly another weekend. Until then I'm going to enjoy the car a little bit whilst we still get the odd dry day, ironing out niggles and what not!
On a different note, this is what was left of the rear pads on the Fabia after Blyton park...
...I thought there might have been 1000 miles left in them before the trackday...or about 30 track miles it seems!
-
DanThe
- E30 Zone Team Member
- Posts: 28649
- Joined: Sat Sep 10, 2005 11:00 pm
- Location: Staffs
Those disks look very 'abrasive'
-
Motorhole
- E30 Zone Addict
- Posts: 2395
- Joined: Tue Jul 12, 2005 11:00 pm
- Location: Cheshire
Yep, discs were well knackered too! Apparently a common problem on Fabia/Ibiza/Polo - rear discs corrode due to lack of use.
Need to drive faster more of the time I guess
Need to drive faster more of the time I guess
-
DanThe
- E30 Zone Team Member
- Posts: 28649
- Joined: Sat Sep 10, 2005 11:00 pm
- Location: Staffs
Rear calipers like to stick/seize too giving a long handbrake, thankfully because its a common problem GSF sell lots at a very reasonable price