E30 Cabriolet MTech 1 - Resto Project

Show off your pride and joy here

Moderator: martauto

Post Reply
User avatar
Stubbsy5
E30 Zone Newbie
E30 Zone Newbie
Posts: 48
Joined: Mon Apr 25, 2011 11:00 pm
Location: Leicestershire

Sat Jan 26, 2013 1:00 pm

Hi

New to the ownership of an E30, although I have known and worked on this car for the last 13 years, it is now mine. The car is mainly in good condition the winscreen surround needs some attention and I am hoping to have the bodykit removed this weekend for a look behind... any one give me any advice? The engine is smokey on startup if parked downhill so I will be doing the valve seals at some point this month.

As I keep working and hopefully get it back on the road for April, I will update the photos.

If there are any members in the Huddersfield area who can cast their eyes over her it would be appreciated.

Image

Image

Image

Image

Image

Image

Image

Image

Many Thanks

Chris
Last edited by Stubbsy5 on Thu Jan 31, 2013 1:08 pm, edited 1 time in total.
e30topless
E30 Zone Team Member
Posts: 13598
Joined: Wed Aug 23, 2006 11:00 pm
Location: surrounded by scrap

Sat Jan 26, 2013 1:02 pm

Hi Chris I'm in Huddersfield should you need any help :D
scott180gtb
E30 Zone Camper
E30 Zone Camper
Posts: 1251
Joined: Thu Mar 26, 2009 11:00 pm
Location: Yorkshire

Sat Jan 26, 2013 2:01 pm

I can vouch for Steve as one of the zone's gold members.

He loves scrap.
Cars

2007 VW Caravelle 2.5 TDI 250 bhp 550 NM
1989 325i Sport Gone :(
2003 E46 320d Touring
1998 E36 M3 EVO Track Toy
1996 E36 328i Sport welder-up project
User avatar
Stubbsy5
E30 Zone Newbie
E30 Zone Newbie
Posts: 48
Joined: Mon Apr 25, 2011 11:00 pm
Location: Leicestershire

Sat Jan 26, 2013 2:51 pm

Well managed to remove the sideskirts and I though that there was going to be a real mess behind them, but they are not 'that' bad, it will keep me busy a couple of nights this week...

Image

Rear Archs aren't too bad all round, there is the scab that can be seen here, going to need a bit of welding to get it back to been sound though.

Image

Image

Image

After a bit of fettling with the wire brush on the drill, and the angry grinder there is good metal behind, but it looks like the top skin has gone through completely.

Image

Image

It is far better for a car thats been outside most of its life than I was thinking, is this normal or better than expected??

Thanks

Chris
daimlerman
**BANNED**
Posts: 15968
Joined: Mon Feb 27, 2006 11:00 pm
Location: Grumpy Old Man

Sat Jan 26, 2013 3:31 pm

That's about normal,similar rear damage to my cabbie,my bodyman prefered to let in part of a repair panel,but my car has no kit!

Image


Regarding your windscreen frame,that is very similar to the rust damage I found on my touring,I found with the 'screen and seal out that a flap of trim that holds the inner bulkhead insulation in was blocking the drain hole,so I took a pair of scissors to it.Make sure when you go back to get the seal drain holes aligned correctly with the drain hole,that is also a cause of that type of rot.
tonybtonyb
E30 Zone Addict
E30 Zone Addict
Posts: 3580
Joined: Wed Jun 13, 2007 11:00 pm
Location: essex

Wed Jan 30, 2013 2:26 am

Coming along nicely :cool:
They don't make bm's like this anymore!..They should.
Image
User avatar
Stubbsy5
E30 Zone Newbie
E30 Zone Newbie
Posts: 48
Joined: Mon Apr 25, 2011 11:00 pm
Location: Leicestershire

Thu Jan 31, 2013 1:11 pm

Hi

Been having a good look round on here for the last few days, and I have now removed the carpets and the floor and bulkhead is perfect. The dashboard is now out and other than the rust around the windscreen the rest of it seems fine. Going to remove the bumpers and kit at passenger side and cross my fingers because she ain't looking too bad at the moment!

Thanks

Chris
jimbom30cab
Tech 1 freak
Posts: 7634
Joined: Mon Oct 12, 2009 11:00 pm
Location: in the garage

Thu Jan 31, 2013 2:15 pm

great project mate. I love rust !!!!

Have you had a look at the back of the inner rear driver's side arch yet. Mine was a house of horrors there

keep up up the good work and enjoy!!

jim
polsta
Married to the E30 Zone
Posts: 10322
Joined: Fri Oct 09, 2009 11:00 pm
Location: portsmouth

Thu Jan 31, 2013 4:05 pm

get that taken right back that rust there may hole, take the whole area back to bare metal, and the rear arches there probably need some attention, you really outa take back all the sealant on the rear inner arch walls and as jim says a proper inspection of them rear arches, as above you may need a repair panel on them to do it properly

also with the dash out, see if any signs of leaking- trails/stains comming down from bukhead, and have a good look around the big rubber gromet on the glove box side that the wiring goes through, theres pretty much always issues lurking there
User avatar
S14M3
E30 Zone Newbie
E30 Zone Newbie
Posts: 95
Joined: Mon May 21, 2012 11:00 pm

Sat Feb 02, 2013 9:51 pm

That car would make my e30 car list pretty much complete. Nice find and good luck with the project.
User avatar
Stubbsy5
E30 Zone Newbie
E30 Zone Newbie
Posts: 48
Joined: Mon Apr 25, 2011 11:00 pm
Location: Leicestershire

Mon Feb 04, 2013 7:19 pm

Well seems this is quite a good shell, I have taken out the carpets, dash, etc and have now had a good look at the bulkhead and floor sections, and under the door. Need to do the passenger side but will have to move the car over to do that, just hope that side is just as good, all that is needed is a wire brussh on a few little bits and an epoxy prime.

Image

A bit of rush but its only on the surface, nothing from underneath.

Image

Rear section is nearly perfect, going to lift the black pads to check underneath but all looks OK so far.

Image

Bulkhead is also good, the rust around the windscreen doesn't appear to have spread.

Image

Bottom of the door look really good.

Image

With the dash out looks remarkably bare!! Just need to take out the insulation bits and make sure that behind is in good condition. Overall really pleased with it, now to do the other side and get the bumpers removed, my spare room now looks like a breakers yard!

Any comments and advice greatfully recieved.

Thanks

Chris
User avatar
Stubbsy5
E30 Zone Newbie
E30 Zone Newbie
Posts: 48
Joined: Mon Apr 25, 2011 11:00 pm
Location: Leicestershire

Sun Feb 17, 2013 8:38 am

Hi

Well there had to be some failry major rust somewhere and I think I have found it, I removed the wings which are perfect and the front bumper and the front valancefell to pieces, there are huge chunks missing and the rest you can push your fingers through. It looks like a bolt on piece and doesn't look like it has spread to anywhere else at the front as that is in great condition also. I will get some pictures later today, I will also have a word with the BMW dealer locally to see if I can get a new panel.

Thanks

Chris
User avatar
Stubbsy5
E30 Zone Newbie
E30 Zone Newbie
Posts: 48
Joined: Mon Apr 25, 2011 11:00 pm
Location: Leicestershire

Mon Feb 18, 2013 6:56 pm

Hi

Now got some pictures of the rusty bits.....

Front end with the bumper removed...


Image

Bumper going to need respraying..

Image

The Front Panel or lack of...

Image

Front Panel removed..

Image

Rust Hole in the bottom corner under washer bottle, the other side is similar, going to get the grinder and wire wheel to see weather a new panel or a repair..

Image

Front crossmember has some surface rust but nothing too major, just a wire brush treat and readt for repainting..

Image

I'm also starting to think that the car has been in a small accident at some point at the driver side, the bumper bracket is bent and the crossmember above the headlight is slightly out of shape..

Image

And another...

Image

On a plus point though both front wings are in perfect condition.

I have also decided to strip the entire car and get the problems rectified before they get too major as I hope to keep the car for a lot time yet..

Will continue to update as I remove more bits...

Thanks Chris.
User avatar
Stubbsy5
E30 Zone Newbie
E30 Zone Newbie
Posts: 48
Joined: Mon Apr 25, 2011 11:00 pm
Location: Leicestershire

Mon Mar 04, 2013 2:59 pm

Hi

Finally got some time of work over the weekend and took the boot, bumper and interior trim out of the way, to reveal a faily solid body. Firstly with the bumber out of the way I stripped the rear driverside arch back to bear metal to make sure nothing was hiding, and all there is are two little bits on the arches that can be patched from a repair panel.

Behind the bumper looks good...

Image

The front that was behind the bodykit is where the repair is needed...

Image

and a small repair needed where the bumper wraps around the rear arch...

Image

The rest of the arch is in perfect condition, but at the back of the wheel there is what looks like something from production that has completely gone, is it needed or is it safe to continue the contour of the body and leave it off??

Image

There are 2 holes in the inner arch on the driver side about the size of 50p pieces, one next to the filler flap...

Image

and the other at the top of the arch by a bracket, this seems common from the other threads that I have read..

Image

and from the inside...

by the filler flap..

Image

and the hole by the top bracket..

Image

What would be the battery tray, this had quite a heavy piece of metal bolted in with four bolts, whats the purpose of it?

Image

The rest of the boot floor looks in good condition, the wheel is now removed and its as good underneath.

Image

The well at the passenger side where the jack sits is OK but will need a repair or replacement as there is some rust on the front of..

Image

The rear passenger arch looks good from the inside so far.

Image

I am going to order a replacement repair panel for the rear driverside arch if possible and replace the bits that need doing, the inner arch will be completely stripped of underseal back to bear metal to make sure it is all OK and the two hole I have found so far will be repaired and treated as necessary. Once the driverside is repaired I will turn the car around and tackle the passenger side. The back panel is in good shape, I need to get somepics next time I am playing there was some surface rust where the stone chip had cracked but nothing major. Lookily I have a pit in my garage and the underneath looks good, there are a few splits in the underseal that I have taken back to bear metal and treated, but the rest looks really clean, fingers crossed...

Thanks

Chris
polsta
Married to the E30 Zone
Posts: 10322
Joined: Fri Oct 09, 2009 11:00 pm
Location: portsmouth

Mon Mar 04, 2013 3:50 pm

good work chris, keep it going, nothing that cant be sorted and fixed and nice to see the car being saved, its good practice to strip all the sealant from under them arches and remove the expansion tank from up by the rear arch pasenger side, and check all around the brackets, the floor- as you had some rot you cut out there, it would be a good idea to pull up all the floor deadening (use a heat gun or hair dryer to warm it then pull it all up) ,as water gets trapped under there during leaks and damp and rusts, if you want to keep the car many years its worth doing, strip it right back and treat and re paint it all with new deadening thats cheap to buy (£20 the lot) the drivers front floor section there you want more than a sire brush, get it all ground right back and have a good poke with a screwdriver at the corner and see if there are any weak bits

the heavy metal thing in the boot you found, is a counter weight balance that is needed in the boot to make it a bit heavier to balance the weight out

keep up the good work, get topless round hel be the man to have a good look and advise , he knows e30s well you cant beat an expirienced opinion
shedrool83
Old Skooler
Old Skooler
Posts: 4395
Joined: Thu May 10, 2007 11:00 pm
Location: Dundee Scotland

Mon Mar 04, 2013 5:26 pm

Nice to see another one being saved.
Great work.
Image
User avatar
Stubbsy5
E30 Zone Newbie
E30 Zone Newbie
Posts: 48
Joined: Mon Apr 25, 2011 11:00 pm
Location: Leicestershire

Wed May 01, 2013 5:24 pm

Hi

Please excuse the long update..

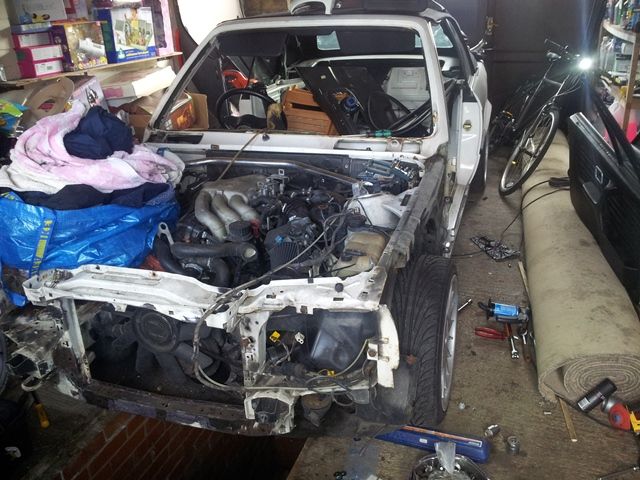
It’s been a while since I last uploaded any pictures and work that has been done. I have now stripped both sides of the car and the interior, and hope that the majority of the rust has been found that needs to be repaired. There are some parts that I need to remove the underseal / stonechip from just to check that the condition of the metal underneath, but the worst I hope has now been found.

A few people have sent me a few e-mails asking a few questions including if they can buy parts as the car looks like scrap, and also a few asking about the history of the car. The answer about the scrap is no!, the car will be finished; by trade I am an engineer and I work at the local university running the engine testing facility which means I have access to a lot of fabrication and workshop facilities that help a lot in this type of work.
The history of the car and why it is getting repaired and restored to the level it is (an acid dip is not yet ruled out).

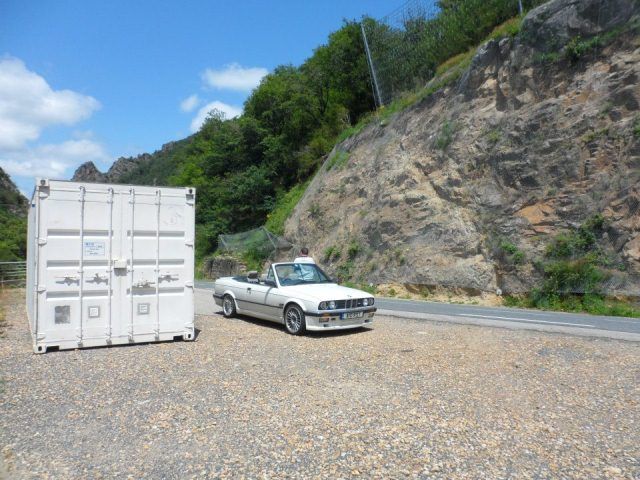
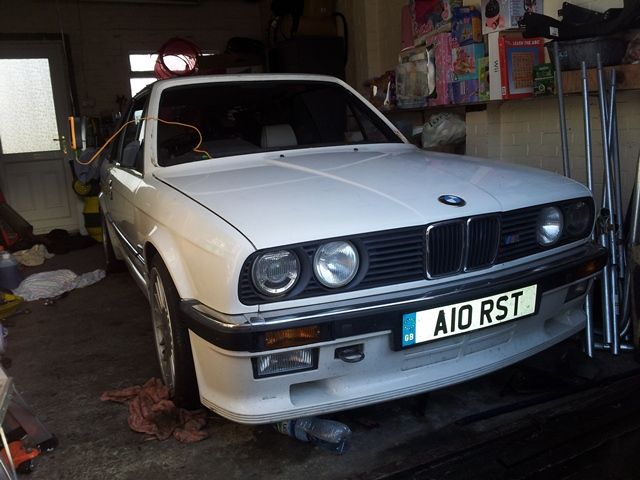
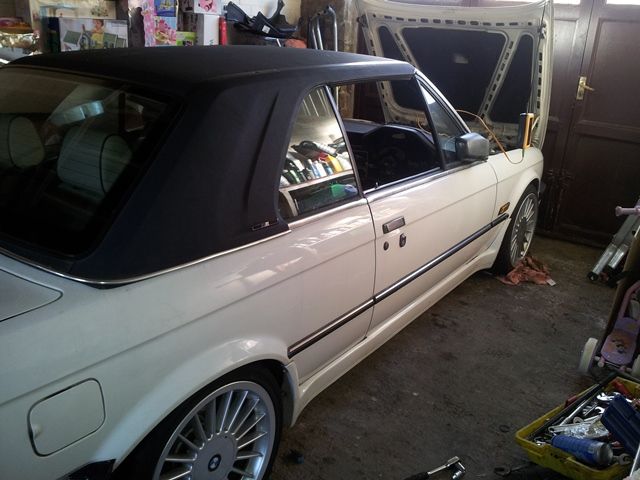
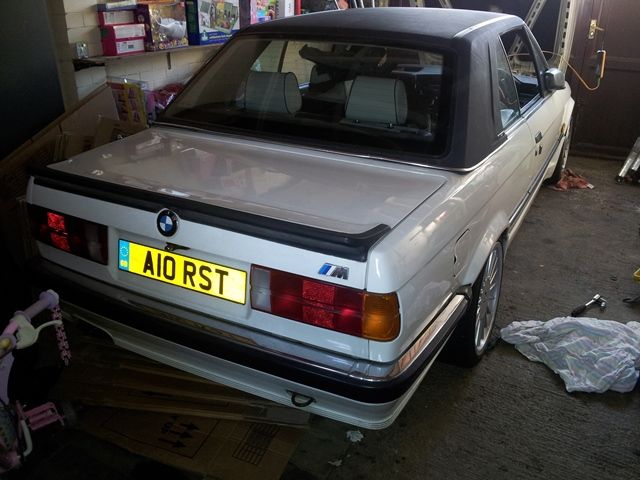
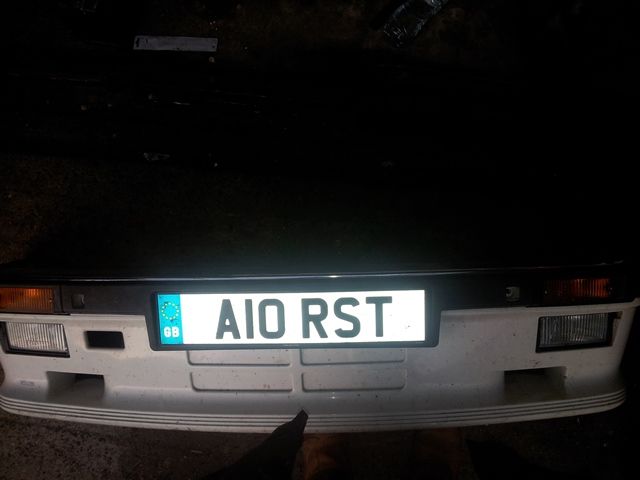
The car as mentioned in a previous post was bought from one of my best friends, prior to his ownership it was owned by his father Roy (the registration plate that is on the car and will stay on the car A10RST was his, the RST were his initials). Very sadly Roy died in 2009 very suddenly leaving a massive gap (why this always happens to the truly nice and amazing people I will never know and it is very un-fair), the car however was very much a father and son project and both liked the car a lot and spent a lot of time and money. Roy was also a very close friend of mine and growing up without my father was someone who I was also very close to, this included the car. There was a covenant in place that if the car was ever sold outside the family it was mine for first refusal. Last summer after the car had sat a lot since Roy’s death the rear subframe was removed and all the bushes replaced and reconditioned, new brakes and any part that was still available from BMW was fitted. The same was done at the front at the same time. The head was removed from the engine as the oil was weeping from the front corner and work carried out to bring it back to standard. At this point we decided on a road trip to Le Mans classic and then down through France and Spain as a holiday which we completed with no major dramas, when we returned the car sat on my drive and I used it every now and then, my friend didn’t use the car again and the question on December was raised about me buying the car. Trying to agree a price on a car between friends is always hard one not wanting to rip the other off etc, so I agreed and made an offer of £3k, with full test, hardtop and a lot of work done including me knowing the car very well I bought the car and knowing that I would be keeping it for a long time decided to restore the car as a few bits began to look a little bit tired”¦

So here we are now and I am sorry if I have bored you but a little history is always good and knowing the drive behind the project. My plan for the car is to rebuild to factory using as many factory parts as I can, the car has a Spax adjustable setup 60/40 lowering that will remain and I intend to put a set of 15”a BBS wheels on the car when a set become available. Engine wise I am on the look out for a 2.5 lump, intake and ECU, I will rebuild the engine when it arrives to standard spec. I would stick with the 2.0 but it is slightly underpowered and it also needs some work doing on it.

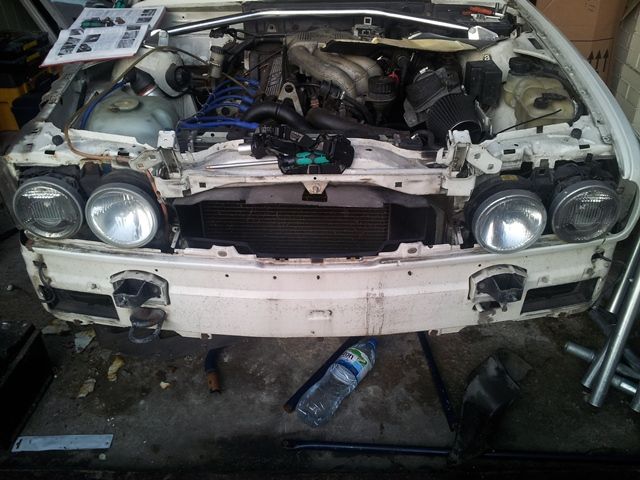
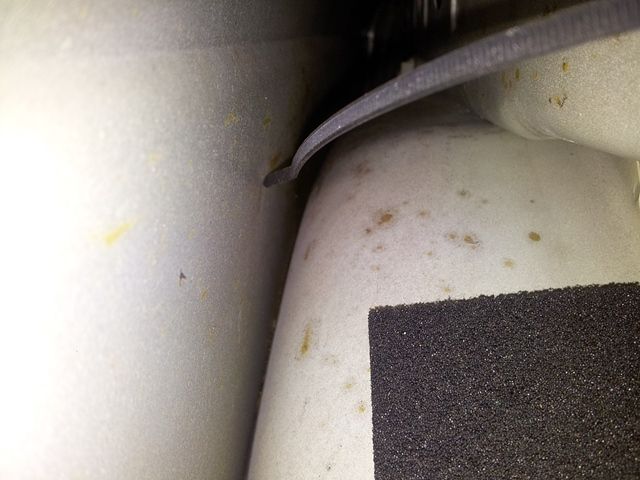
Anyway the car is now stripped out bar the engine and drive train that I will complete on Monday, so some pictures below show the work that has to be done, the rust is in some of the usual places and will need to be sorted, but the bulkhead, sills and floorpan is perfect, I have a pit and have looked under the car and there are a few scabs I have flap disked back and the car is solid. The final thing I did was to borrow a really high quality borescope from work and I have looked inside all of the sills and chassis plates and it all looks really good”¦..

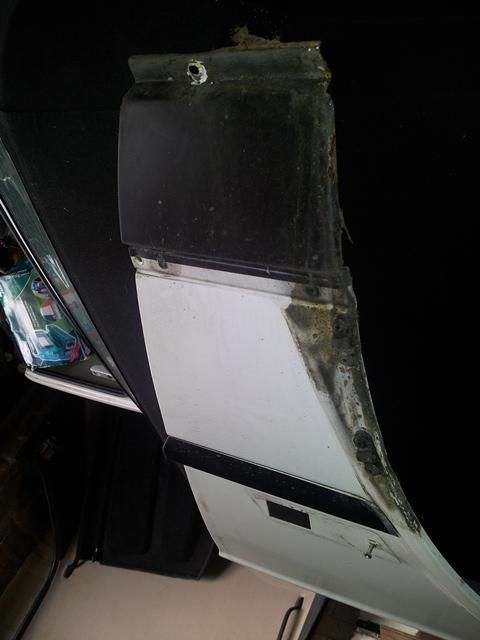
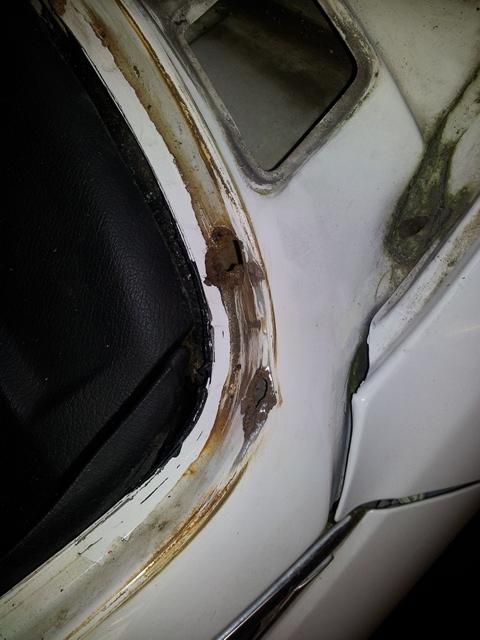
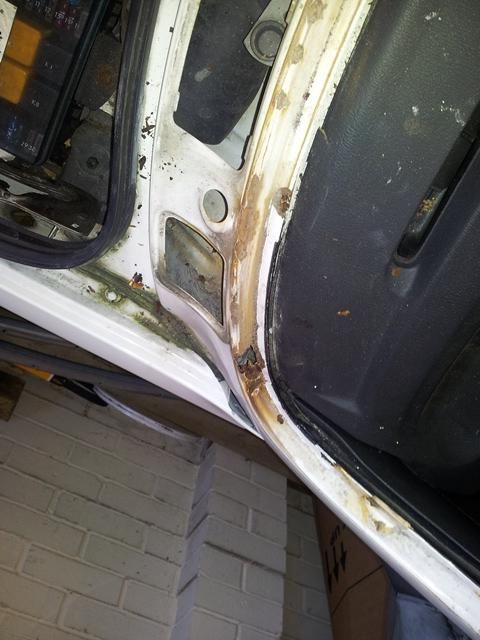
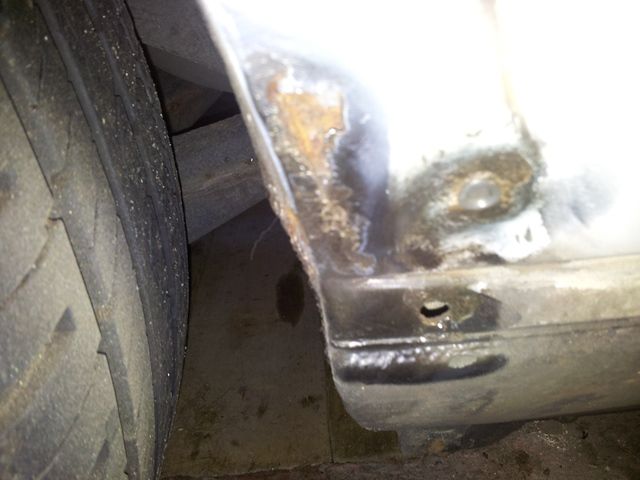
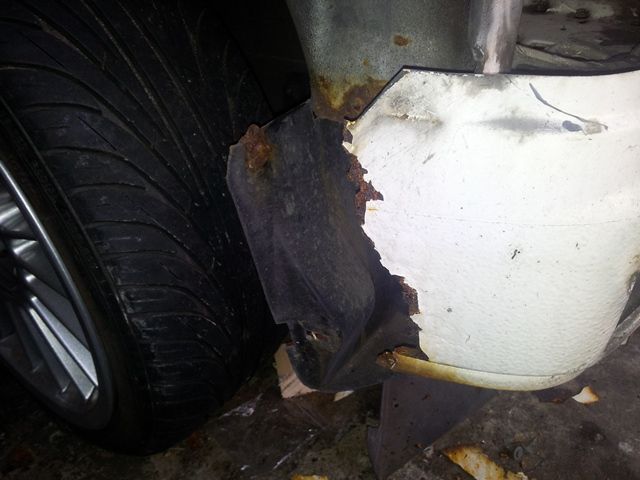
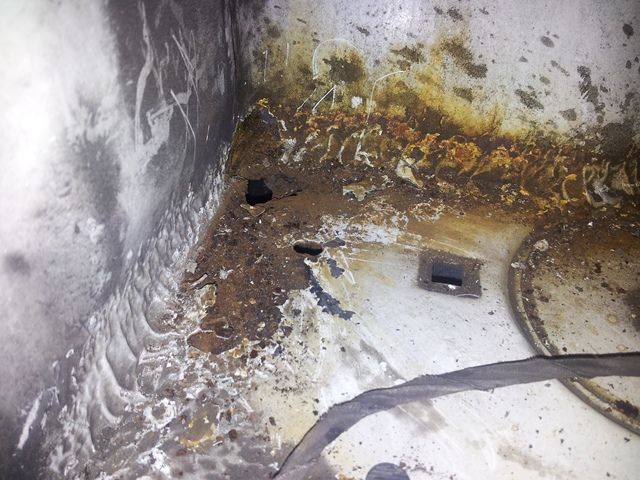
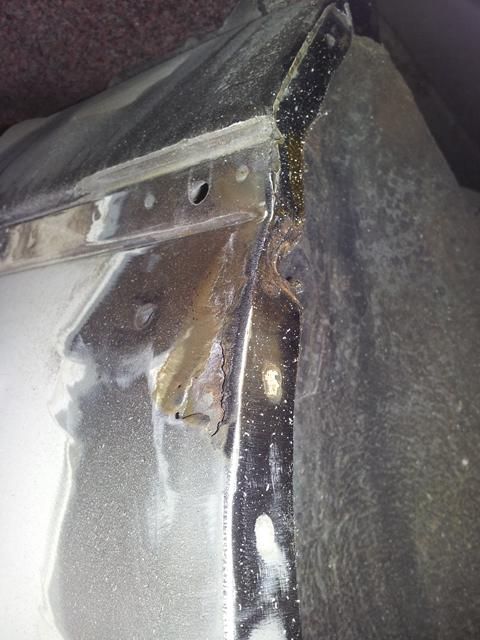
Rear drivers side arch has been taken back to metal and I have yet to decide weather to remove the entire inner panel or to fix it accordingly”¦

Image
Image
Image
Image
Image

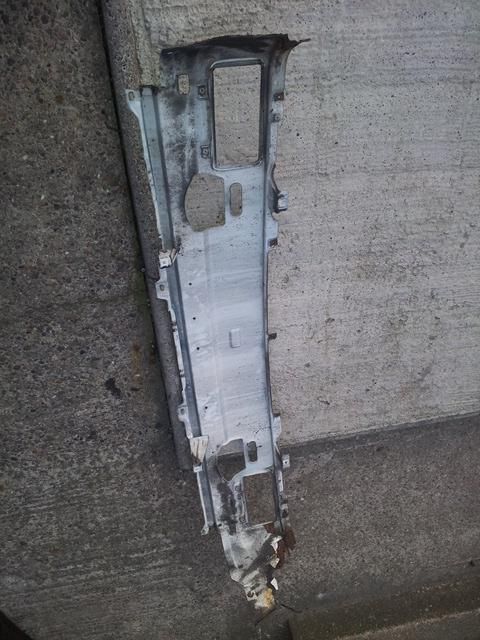
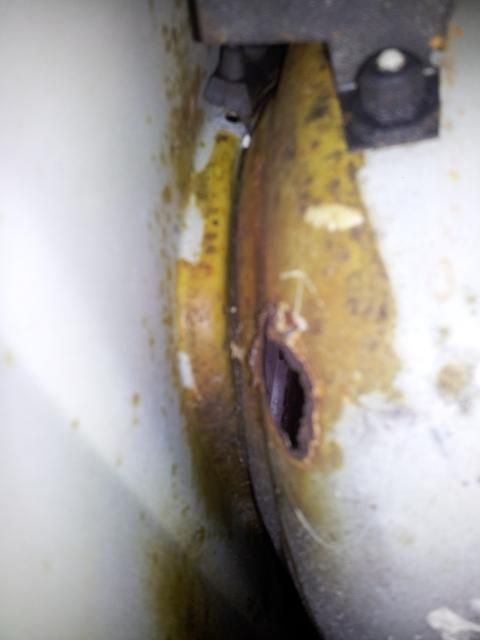
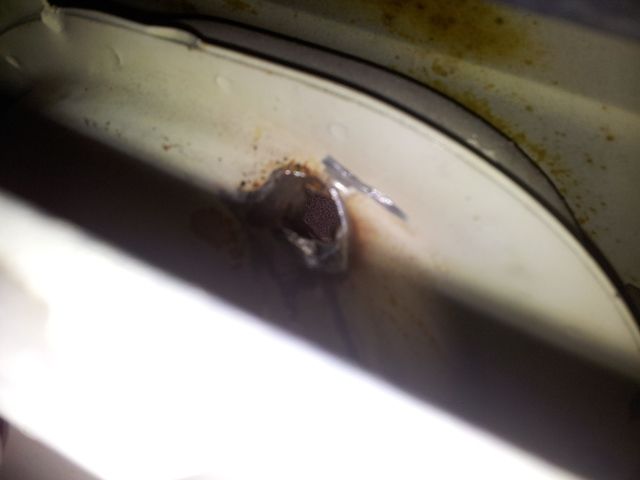
I cut the eye piece out as it was badly corroded and left it like this..

Image

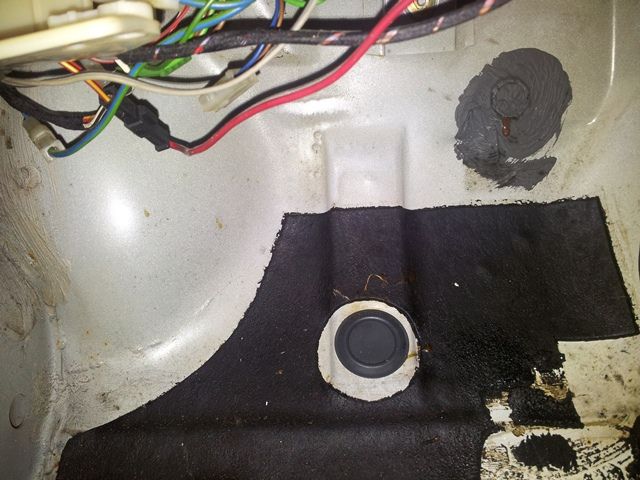
Now that the passenger seat and door were removed the next was the carpet and insulation from the bulkhead which revealed a near perfect section, with the exception of a small area which is in the pics below.
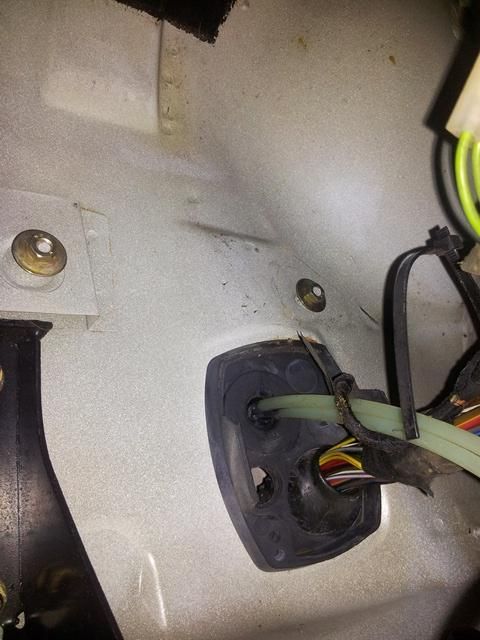
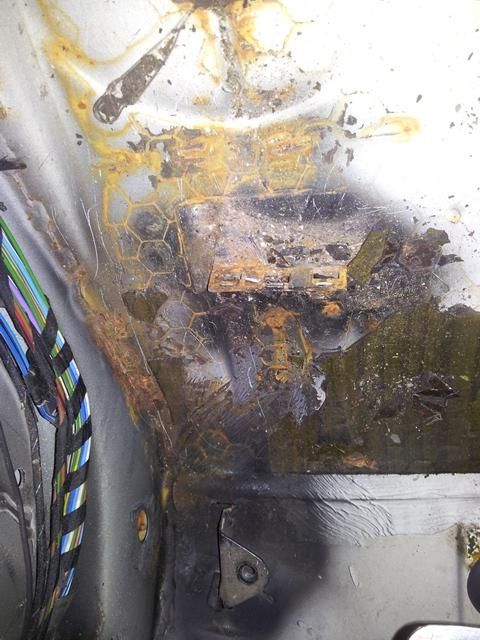
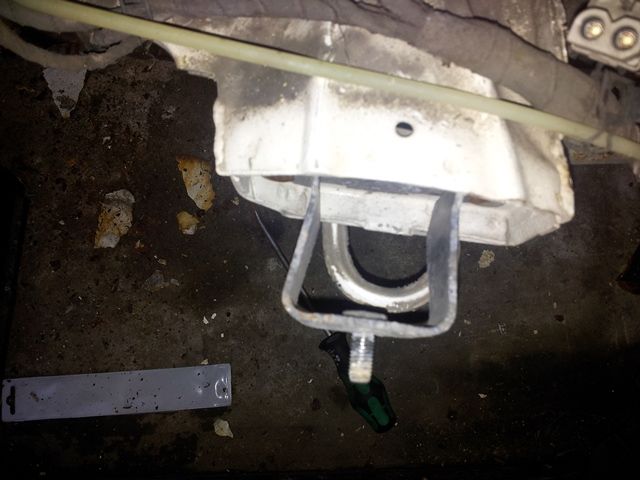
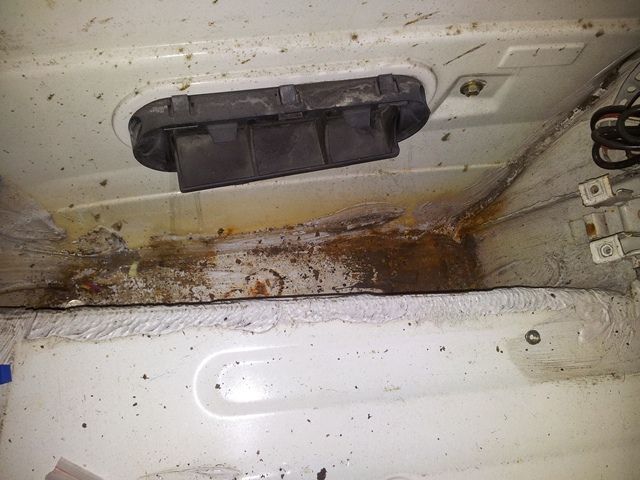
Bulkhead wiring gromit..

Image
Image

I have now removed the sound deadening and it is perfect underneath as well..

Image

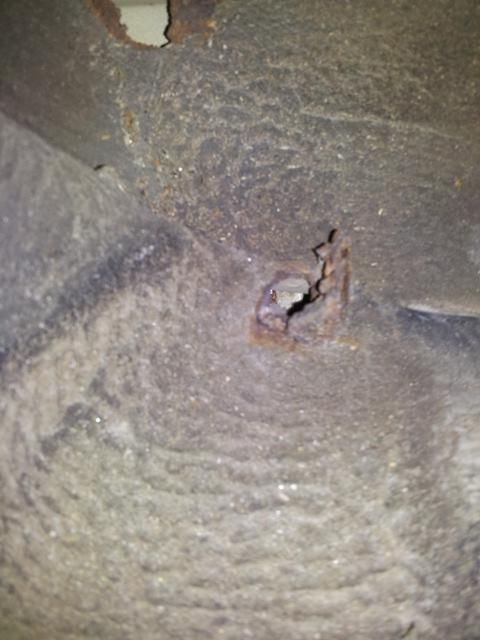
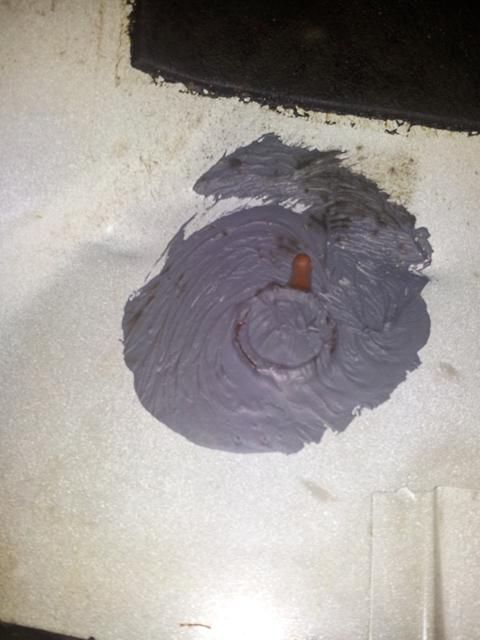
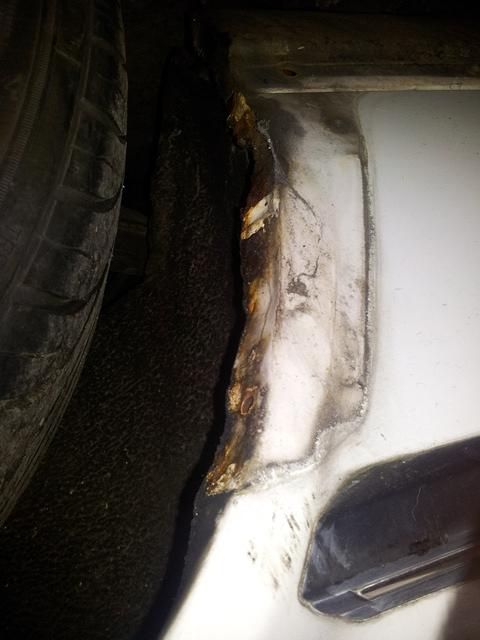
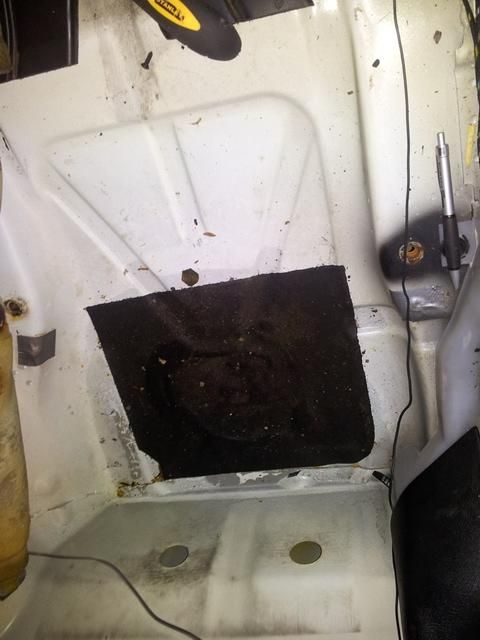
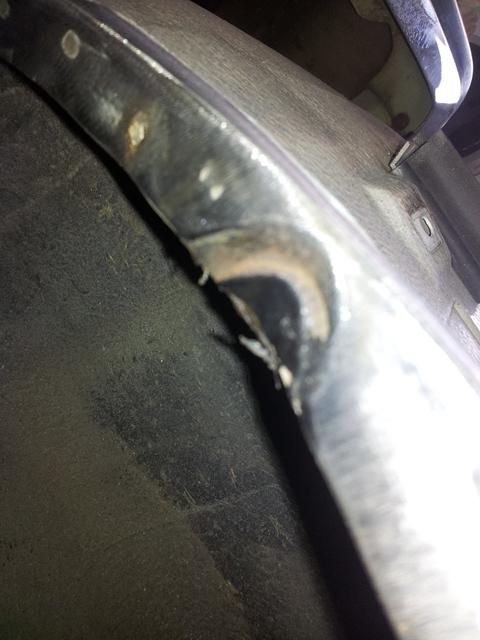
This is the bit for concern, although when flap disked back it is near perfect..

Image

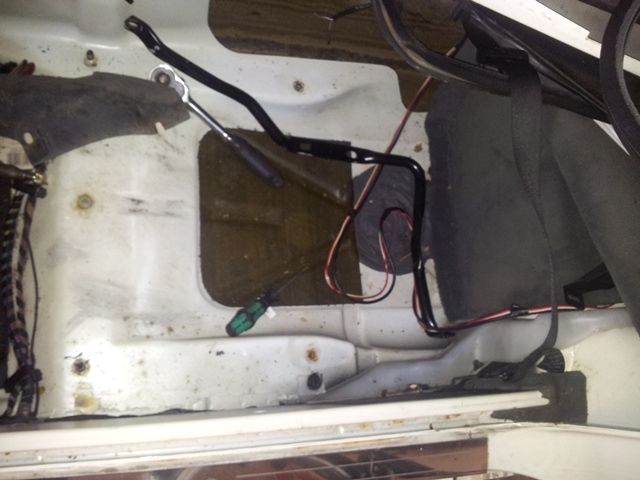
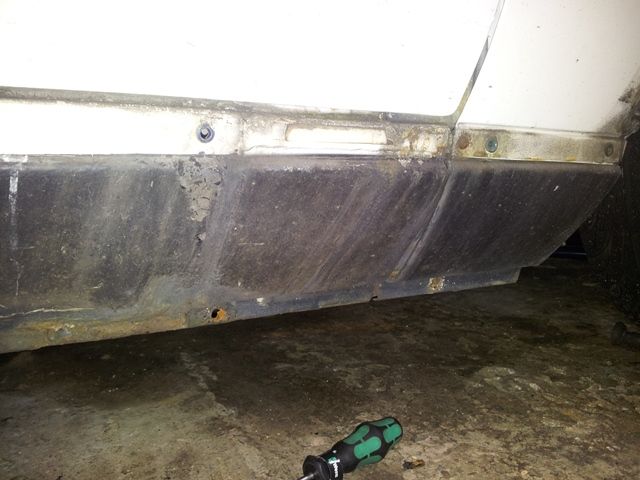
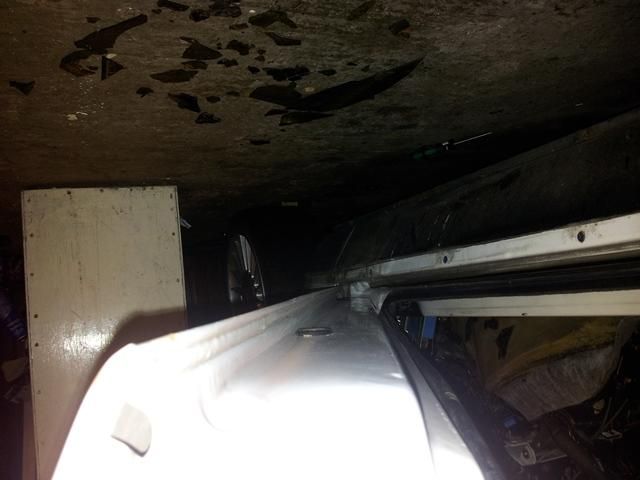
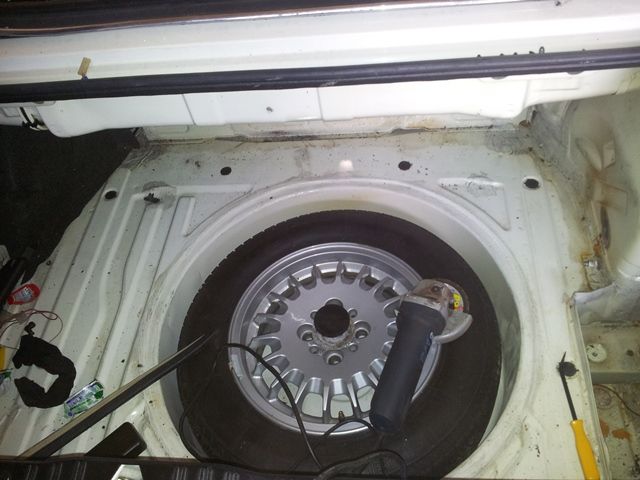
The rear floor pan, again when sound deadening was removed it is all good, I will get the pictures up in the next few days..

Image

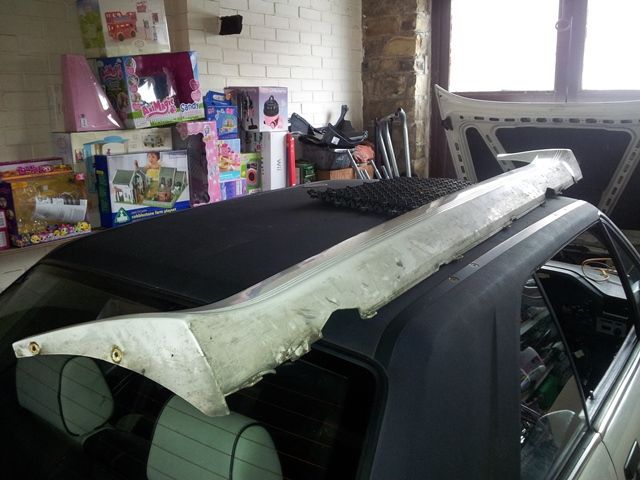
A few more when parts have been removed..

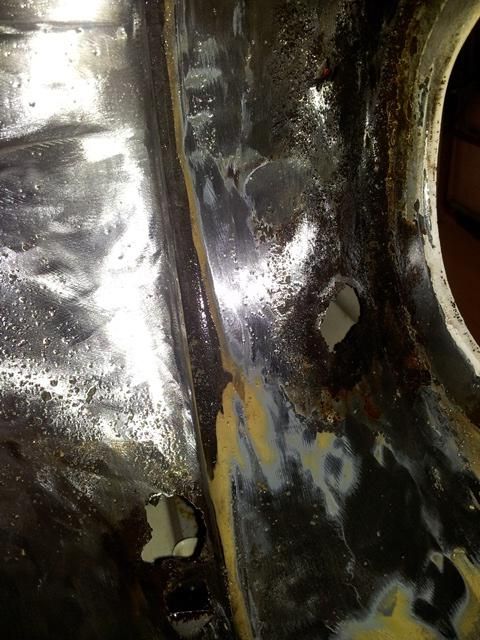
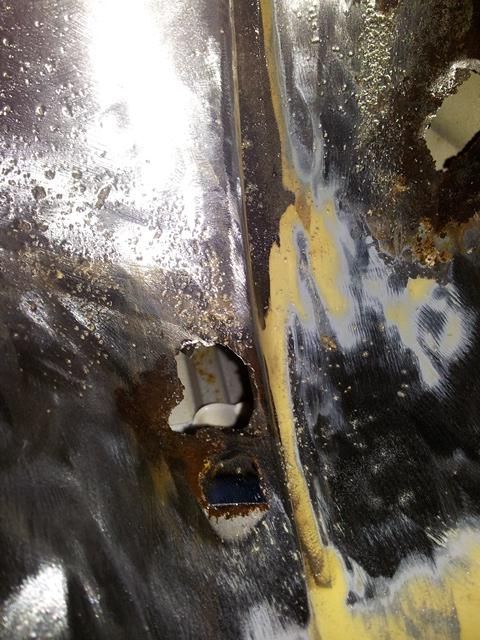
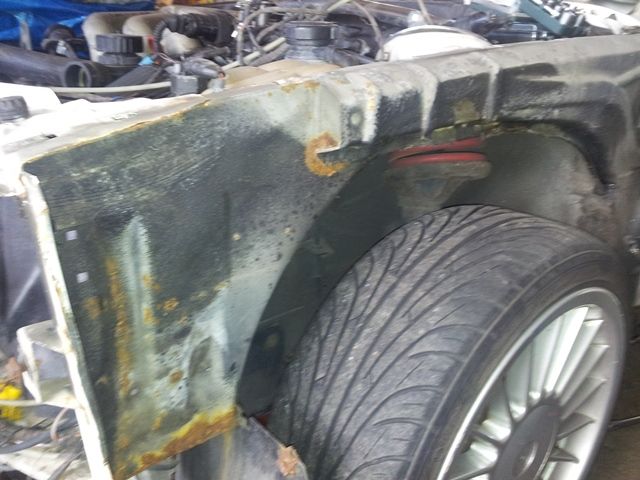
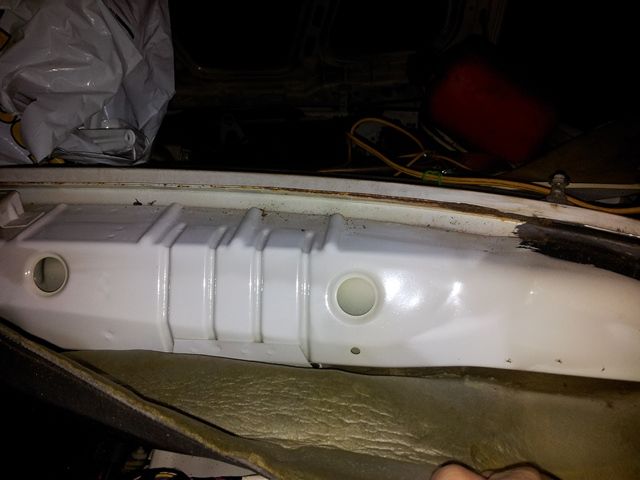
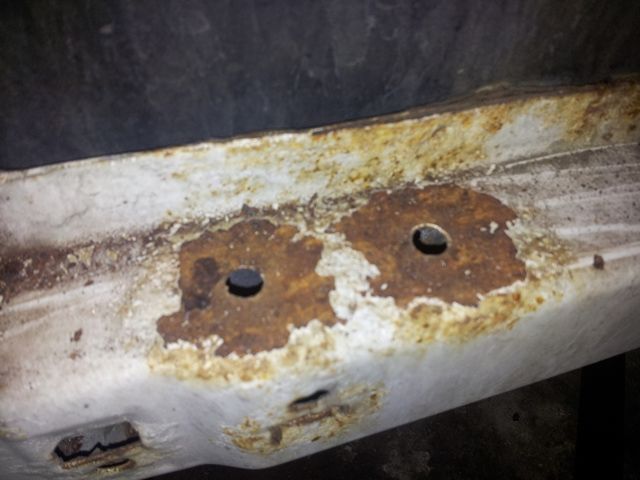
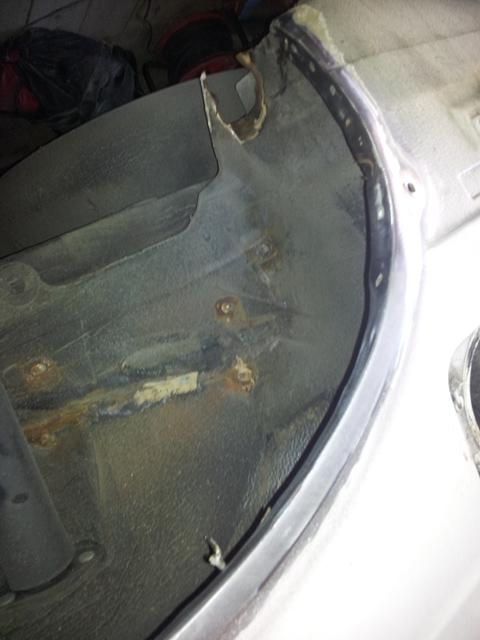
Inner front wing, this needs looking at and at least a patch under the coolant header..

Image

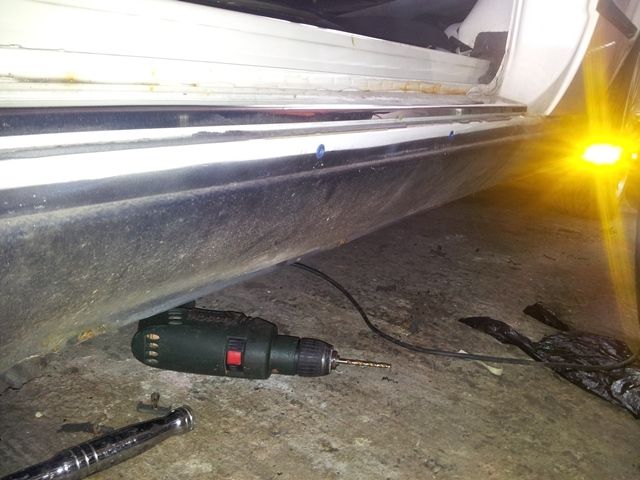
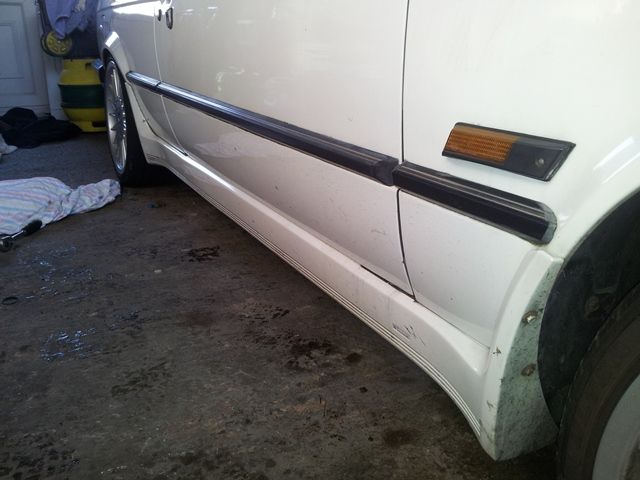
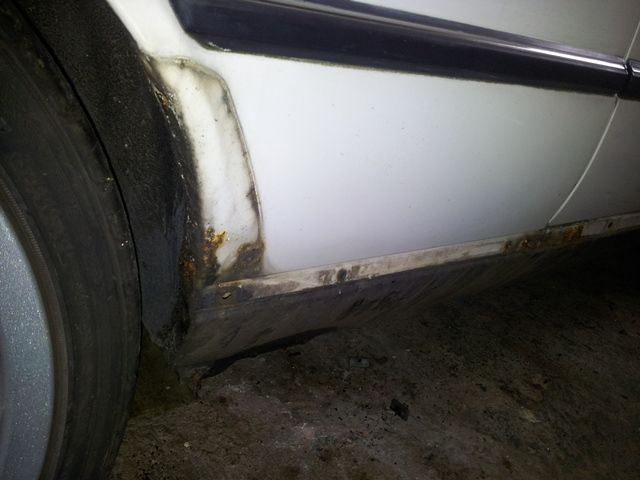
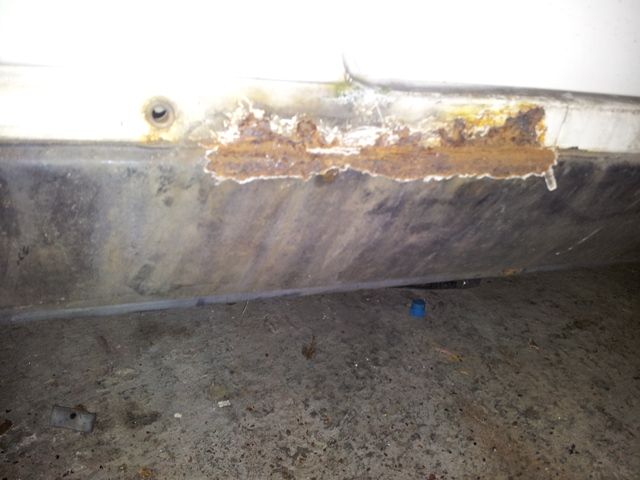
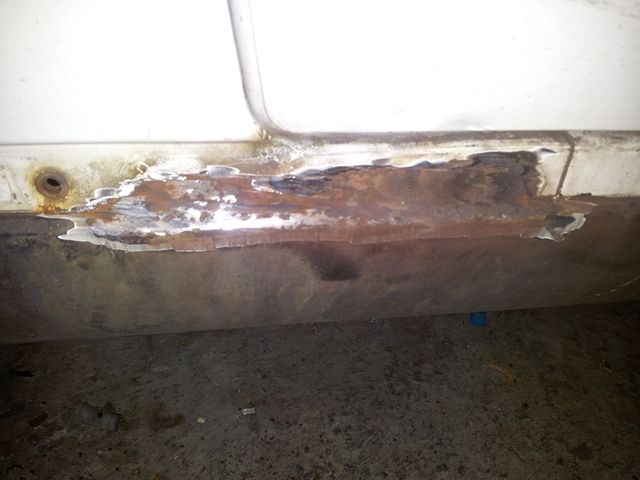
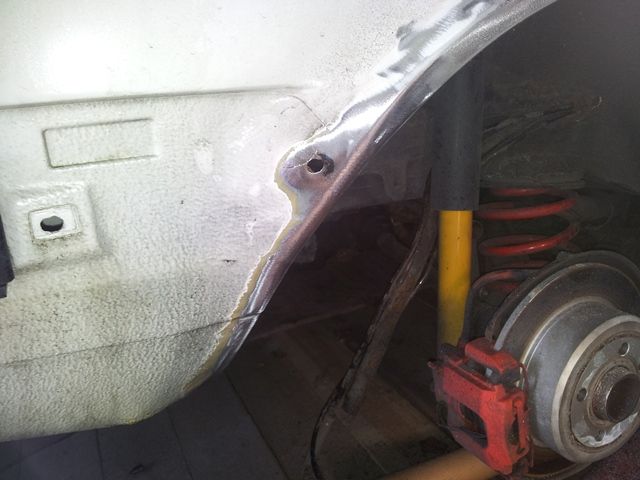
Sills are good, need to flap back the stonechip..

Image

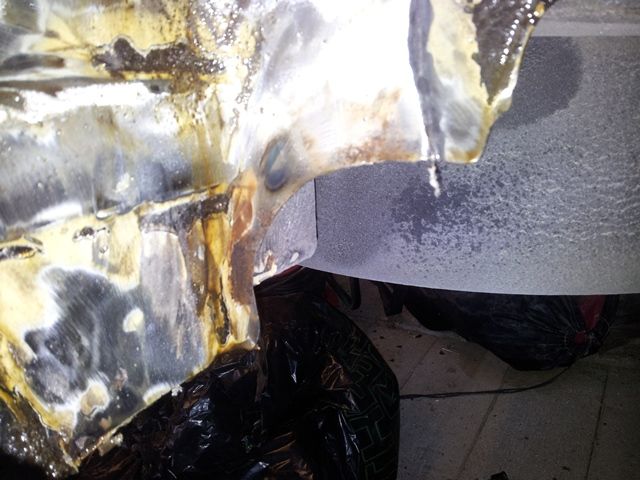
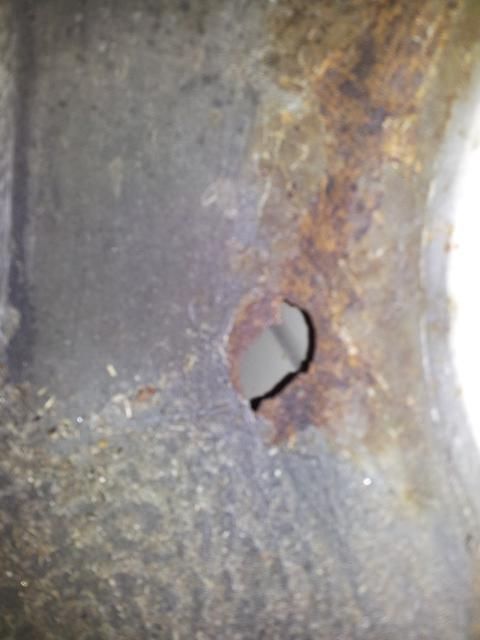
Rear arch will need some attention, need to flap back to see what extent..

Image
Image

Front wings are both good, bar a clean up..

Image

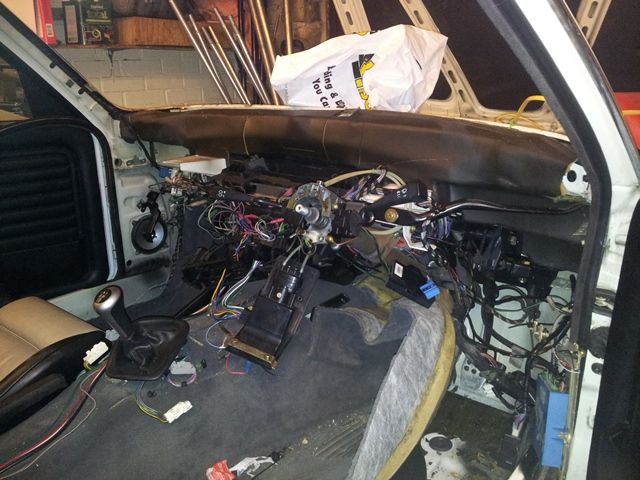
As it stands now, excuse my washing bag on the engine..

Image

If you have read this far I hope you are not too bored, will update this next week when I have the passenger inner arch taken back and the sills flapped back to metal, hopefully should be all good, then out comes the welder..

Thanks

Chris :D
User avatar
Stubbsy5
E30 Zone Newbie
E30 Zone Newbie
Posts: 48
Joined: Mon Apr 25, 2011 11:00 pm
Location: Leicestershire

Mon Jul 22, 2013 4:21 pm

Hi

Been a bit busy over the last few months but finally got back to the car and started fabricating and welding in the repair panels. Started with the front inner arch that needed some attention, so cut a few pieces out and made a new section.

First Section cut out..

Image

Flat Piece made from paper template

Image

Bend tabs up

Image

Weld in the corners

Image

Image

Puddle weld the 2 pieces together

Image

One finished piece

Image

Image

Just got 5 other bits to make at work then take them home and get them into the car with some careful trimming for finally adjustment.

Hopefully by the weekend everything should be made and a welding session on the car can be done :D...

More to follow this week...

Chris
Sanchez
Married to the E30 Zone
Posts: 7578
Joined: Sun Apr 17, 2005 11:00 pm
Location: Sunny Scotland

Mon Jul 22, 2013 4:29 pm

Love these resto build threads, top work.
Image
User avatar
Stubbsy5
E30 Zone Newbie
E30 Zone Newbie
Posts: 48
Joined: Mon Apr 25, 2011 11:00 pm
Location: Leicestershire

Mon Aug 14, 2017 12:18 pm

Well after 4 years and various things holding me back from having a good go at continuing with the car and getting it to a state of repair that I was happy with I now have some free time and my weekends back so I can continue.

The car has mainly sat for the last 4 or so years with the odd weekend here and there where some work was done.
During this time the drivetrain was removed in full and the car was put on a spit to enable work to the underside and arches, etc. I saw a previous post and blatantly copied it as it seemed to work well.

There were 4 bearing housings that had failed inspection in the scrap bin at work which were put to good use; they could turn the Titanic so they will be fine for holding the car.

Image

To attach them to the car I bought a set of used bumper mountings:

Image

The rears were welded to give them the required strength and fitted to the spit.

Image

Whilst the car was lifted with 4 floor jacks the drivetrain was dropped to the floor to start with the work needed to restore
them fully.

A welding session was needed to correct the corrosion that was in various parts of the car. As the windscreen surround was in need of quite a few repairs”¦.

Image
Last edited by Stubbsy5 on Mon Aug 14, 2017 12:40 pm, edited 3 times in total.
User avatar
Stubbsy5
E30 Zone Newbie
E30 Zone Newbie
Posts: 48
Joined: Mon Apr 25, 2011 11:00 pm
Location: Leicestershire

Mon Aug 14, 2017 12:18 pm

I decided to get a scuttle from a breakers that was delivered along with a few other goodies. I used the donor scuttle to replace the sections from the original that needed to be completed and also used it to set the welder up for sections.

Image

Started by cutting a 1.2mm slot in the panel to see what settings on the welder worked best, then spot welded along the length allowing to cool with a compressed air blast in between, then at the end ground back to make sure there were no pin pricks or areas that hadn’t fully penetrated.

Image

Spot Welds built up one at a time”¦.

Image

Until the whole length was completed”¦.

Image

Then ground back”¦.

Image

Now that was right I cut out the sections from the scuttle on the car, I used a Dremel with a thin cutting disk so that it was easy to make a thin and accurate cut”¦.

Image

Then the same from the donor scuttle”¦.

Image
Last edited by Stubbsy5 on Mon Aug 14, 2017 12:46 pm, edited 3 times in total.
User avatar
Stubbsy5
E30 Zone Newbie
E30 Zone Newbie
Posts: 48
Joined: Mon Apr 25, 2011 11:00 pm
Location: Leicestershire

Mon Aug 14, 2017 12:18 pm

Then welded in for all of the sections in the scuttle. Not been an expert in this it took me a whole day to complete the scuttle and the 8 patches. You can see the process in the next 6 photos”¦.

Image

Image

Image

Image

Image

As it was the correct gauge steel I also used a piece to repair a section at the top of the front passenger wheel well that has
expired”¦.

Image

There are a number of other sections in the rear arches that need to be repaired so I have bought repair panels from Ebay, and whilst they aren’t the best fit I can use the sections of both the inner and outer arches to compete the process in the same way.

I have now completed most of the front end with an exception to some corrosion on the bulkead where the heater motor connects to the matrix box, but this is going to be a real pain so need to spend some time working out how to complete it.
Last edited by Stubbsy5 on Mon Aug 14, 2017 12:55 pm, edited 1 time in total.
User avatar
Stubbsy5
E30 Zone Newbie
E30 Zone Newbie
Posts: 48
Joined: Mon Apr 25, 2011 11:00 pm
Location: Leicestershire

Mon Aug 14, 2017 12:21 pm

For some reason the pics aren't showing, I'll have a look and see what I can do......

Now working..... the idiot at this end had copied the wrong link over....
Last edited by Stubbsy5 on Mon Aug 14, 2017 3:35 pm, edited 1 time in total.
User avatar
Stefan on probation
E30 Zone Newbie
E30 Zone Newbie
Posts: 0
Joined: Fri Nov 14, 2014 11:00 pm

Mon Aug 14, 2017 1:49 pm

I can see them,
User avatar
Stefan on probation
E30 Zone Newbie
E30 Zone Newbie
Posts: 0
Joined: Fri Nov 14, 2014 11:00 pm

Mon Aug 14, 2017 1:49 pm

Dp
Last edited by Stefan on probation on Mon Aug 14, 2017 1:50 pm, edited 1 time in total.
User avatar
Stefan on probation
E30 Zone Newbie
E30 Zone Newbie
Posts: 0
Joined: Fri Nov 14, 2014 11:00 pm

Mon Aug 14, 2017 1:50 pm

I can see them,
Sanchez
Married to the E30 Zone
Posts: 7578
Joined: Sun Apr 17, 2005 11:00 pm
Location: Sunny Scotland

Mon Aug 14, 2017 2:02 pm

Nice update.

I can see the pictures too but hope your not using photo bucket as they are asking for mega bucks to use them as a photo host.
Image
User avatar
Stubbsy5
E30 Zone Newbie
E30 Zone Newbie
Posts: 48
Joined: Mon Apr 25, 2011 11:00 pm
Location: Leicestershire

Mon Aug 14, 2017 3:32 pm

Hi

Thanks for that, originally they decided not to work but may have been the idiot at this end of the PC using the wrong link. What other options other than Photobucket are available for hosting and will work on this forum?

Thanks

Chris
User avatar
Stubbsy5
E30 Zone Newbie
E30 Zone Newbie
Posts: 48
Joined: Mon Apr 25, 2011 11:00 pm
Location: Leicestershire

Mon Aug 14, 2017 5:11 pm

A little bit more in to do with what is planned and what the specification will be when completed.

Engine wise I have a M52 B28 engine that has had the required changes made (EWS delete, M50 Manifold and the wiring changes) by DanThe. I have also bought the parts to utilise a Z3 steering rack to make the steering a little quicker which was probably the only gripe I had with the original car. The transmission will use a 5 speed that has come from a 1990 318is as I believe from all of the posts this is the best one for the job.

Engines. Lesson learned here, not all E36 2.8 Engines are suitable as the first of these I managed to buy was a twin vanos unit and isn’t suitable for the car. The changes to the engines mean the ECU and wiring changes are far more difficult on this engine than the M52.

Image

Sump & Servo

Sump is from an E34 and the Servo came from a 1.4 2004 Renault Clio

Image

Exhaust Manifolds

Modified and supplied with different downpipes to suit the E30 and will be connected to a mid section back system

Image

Power Steering Pipes

Image

Thermostat

Lower opening temp to suit prevent any overheating and allow the fan to kick in and out

Image

Engine Loom

Modified to fit the E30 plug

Image[/URL

Inlet Manifolds

The one on the left is the standard one and the right is an M50 2.5L which apparently gives better performance and driveablilty.

[URL=http://s969.photobucket.com/user/Chriss ... o.jpg.html]Image


I have also got a 3.62 LSD which has been sent off for refurbishment so should sort the rear end out nicely as well as the option to adjust the camber and toe on the rear axle. The aim for the car isn’t to be used for anything but a weekend car but with a little more torque / power than the standard 2 litre that came with the car.

The rest of the parts I have accumulated are from the main dealers and should mean the rest of the car is stock, nothing has or will be done to mean that it can’t go back to standard with any major issues.

The final part of the refurbishment is that the shell is booked in for acid dipping, and after that E-Coating which should make it fine for another few years. I am hoping that I have got all of the rust sorted, but there is an inspection window between the dip and e-coat so I can inspect and repair anything that I have missed. This will be completed by the end of August so fingers crossed I don’t get a sieve back!!

The only part that I am going to need is a full cabriolet wiring loom including the drivers door loom as there have been 3 alarms / immobilisers fitted over its life which haven’t been done sympathetically and all are still present in one form or the other as well as the factory one. The wiring between the drivers door has at some point had the quick connector bypassed and hardwired which I have had to cut through to remove the doors, so if anyone has a good un-molested example anywhere and is willing to part with it please let me know.

A few pics of the accumulation of the parts that are ready to go back in the car”¦..

Car as now

This is the car as it looks now, the front end near complete and just the rear driverside arches and inner to complete.

Image

Repair Panels

These are for the rear arches, the passenger side is now repaired and I aim to complete the driver side tomorrow.

Image

Spal Fan

This will be used in conjunction with a new part of a wiring loom and operate automatically from a sensor installed in an
E36 radiator

Image

More updates to follow.
Post Reply