
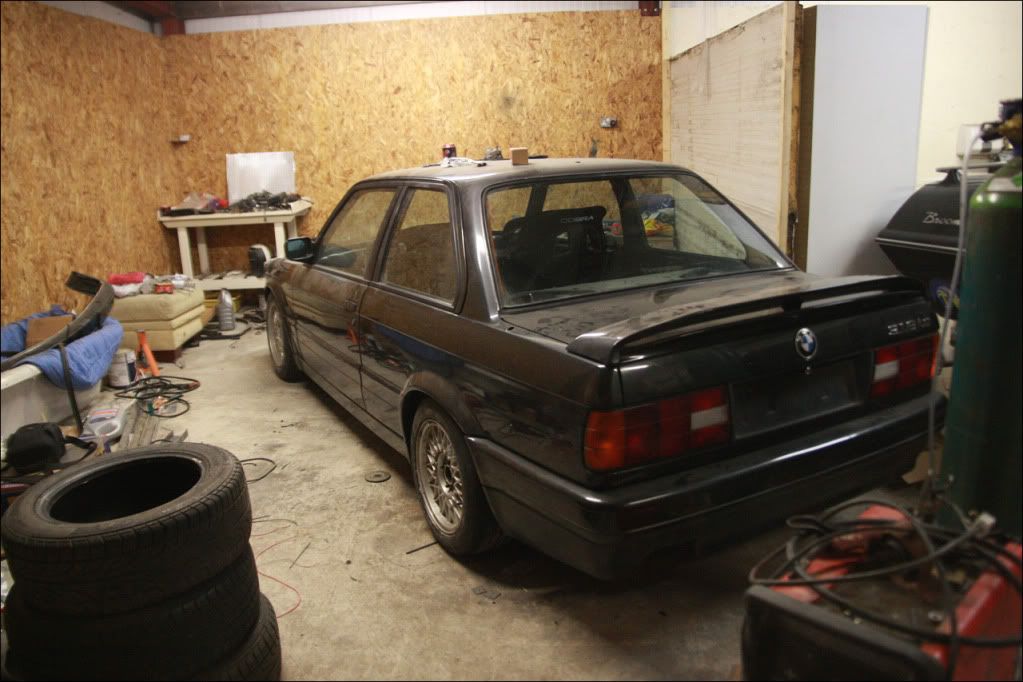
E30 SR20DET
Moderator: martauto


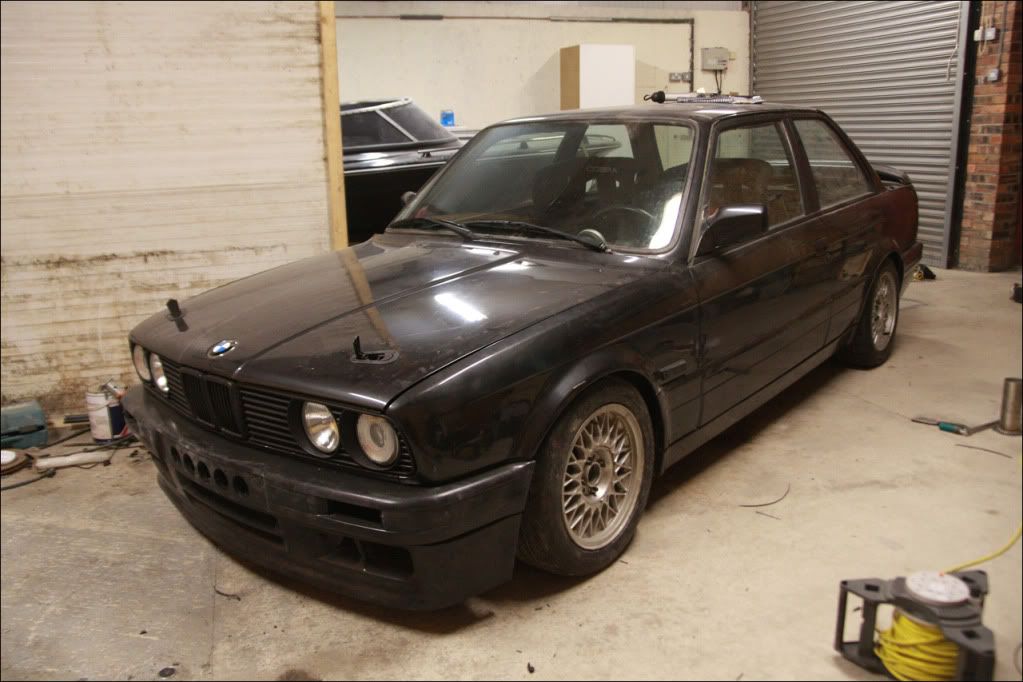
Right then, proper update time. This is from a while back, so there are quite a few updates.
Well, the Gaz's came back on Friday. Although, they still aren't right. They have just been supplied with 6" springs and helpers now instead of the 9" single spring. So yeah, the spring platform will be higher to miss the tyre, but if I want to wind it down il be back to square one.
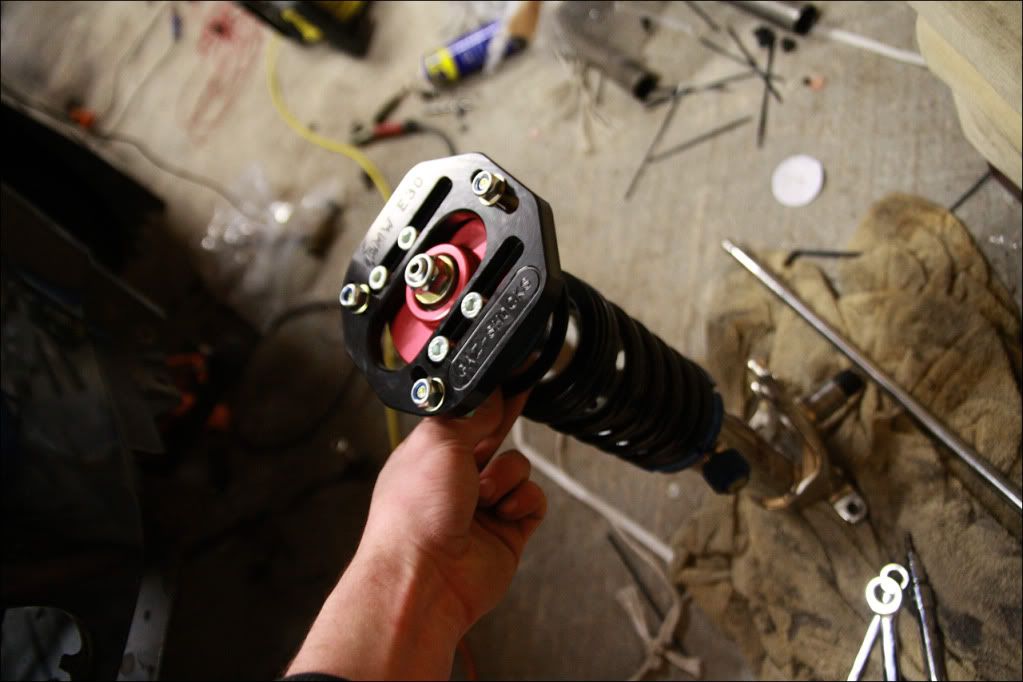
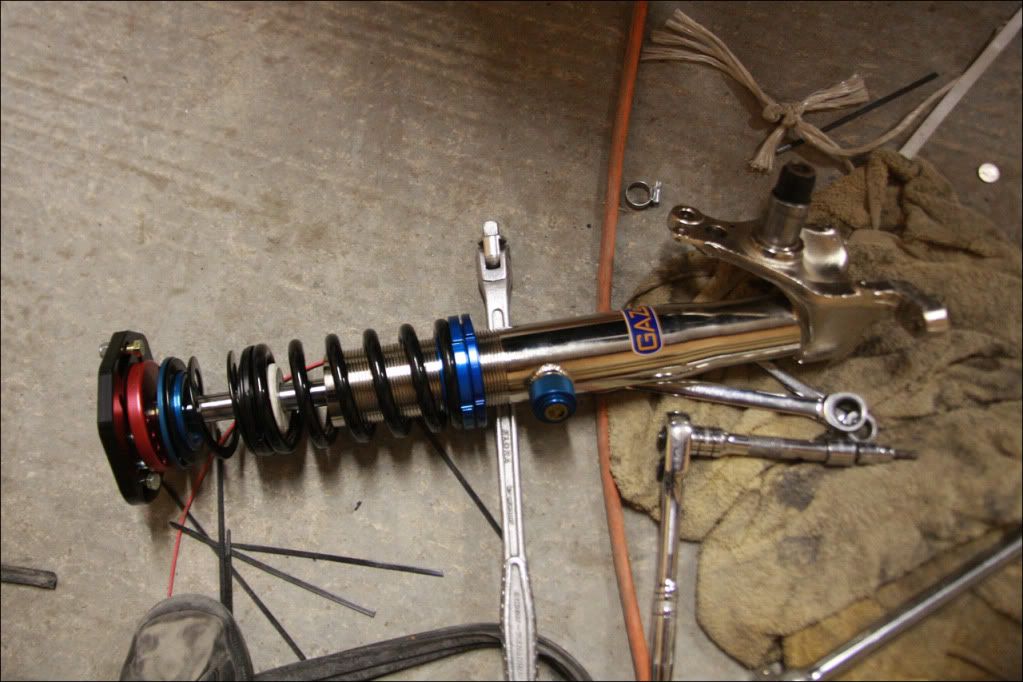
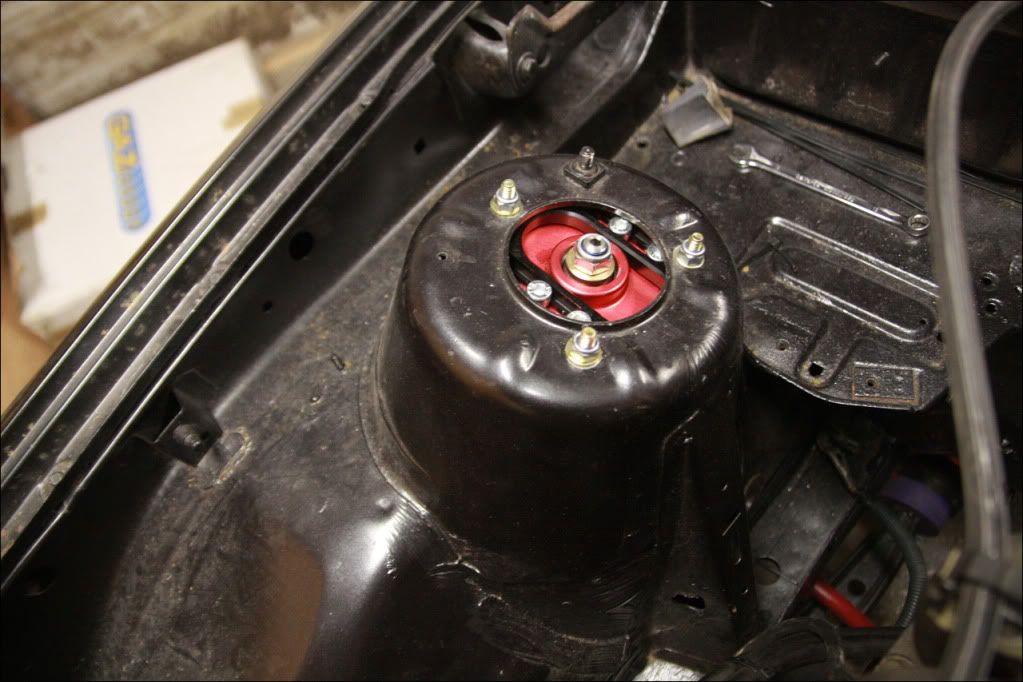
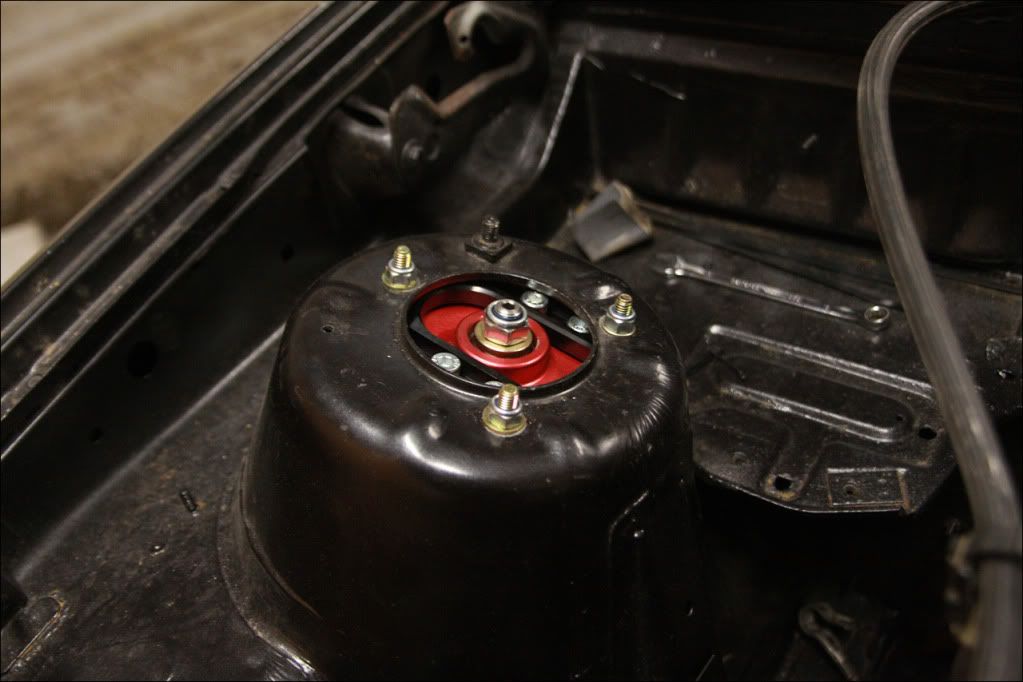
Fitted both sides to the car and wound the coilovers to around 25 threads up to see how it went. Also bolted up the top mounts in a pretty neutral position.
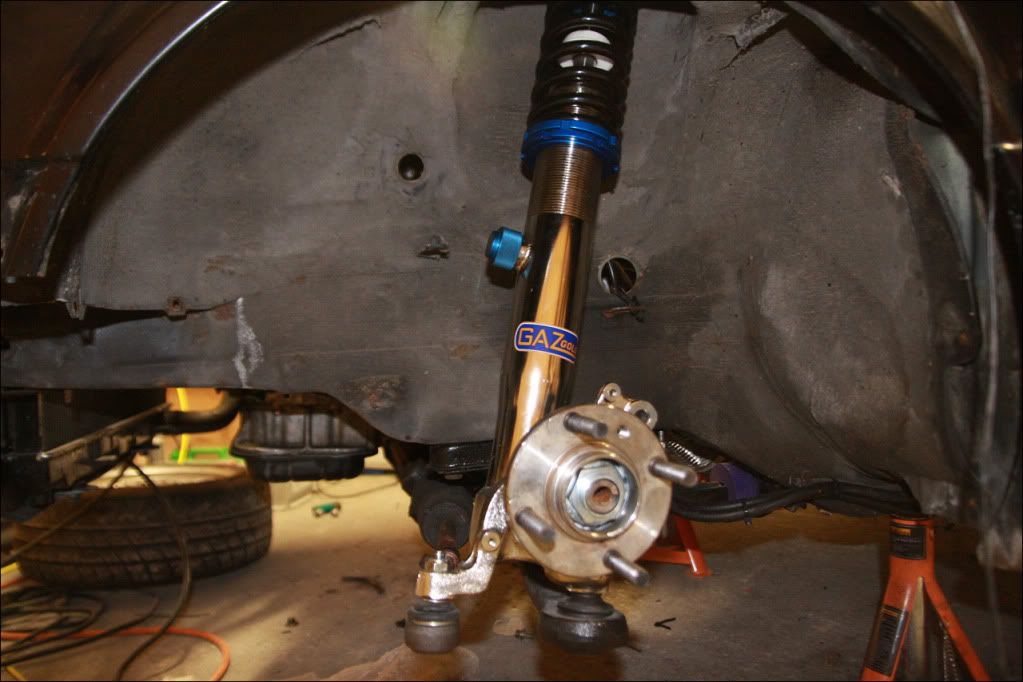
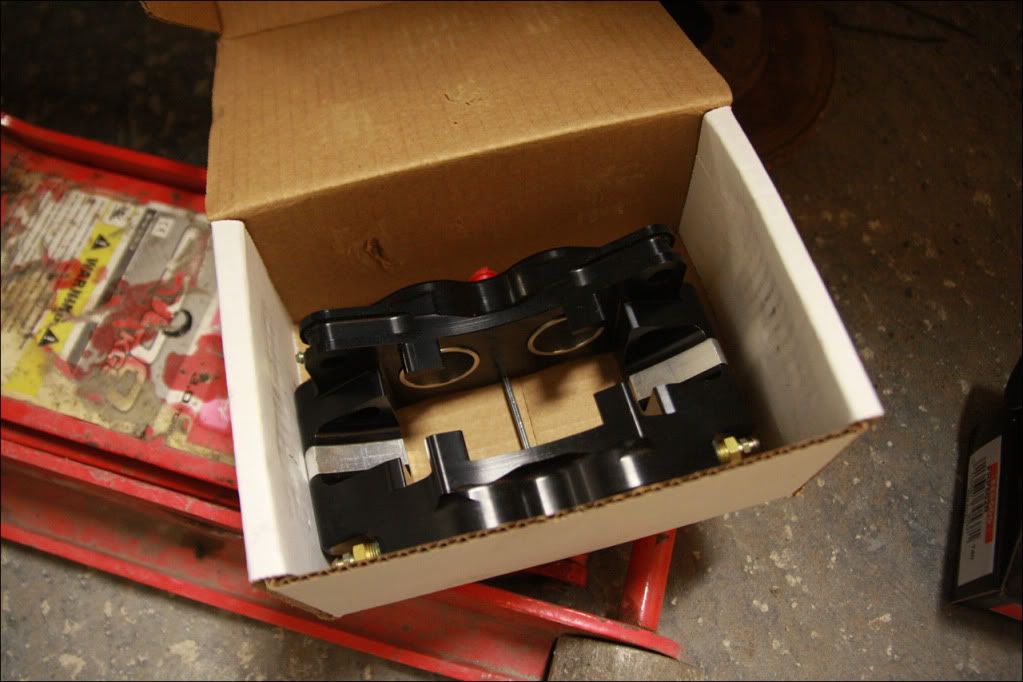
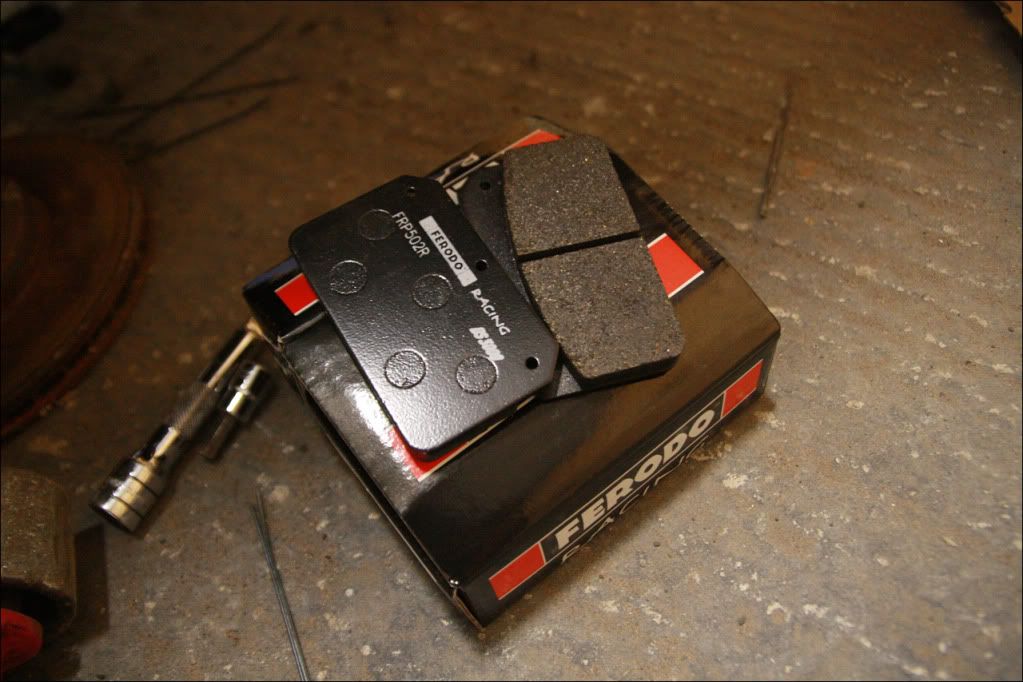
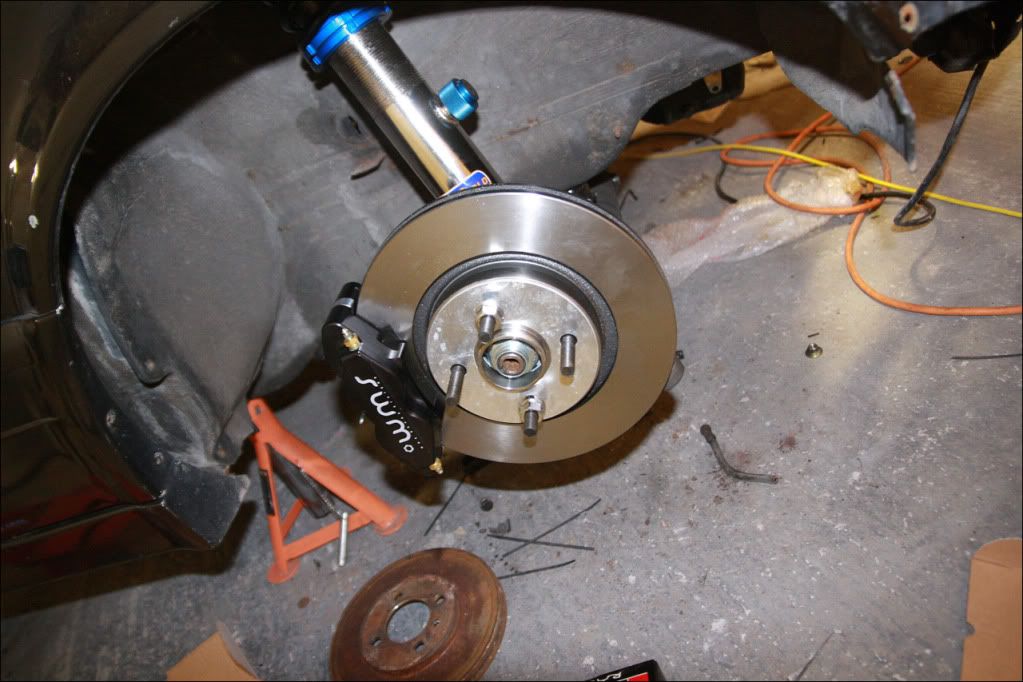
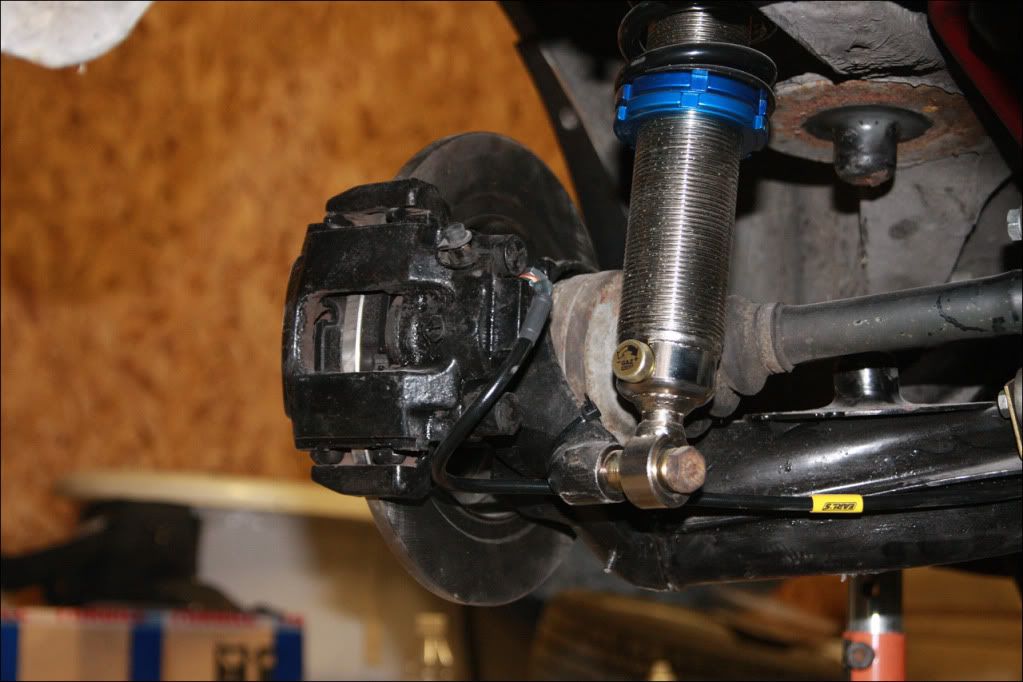
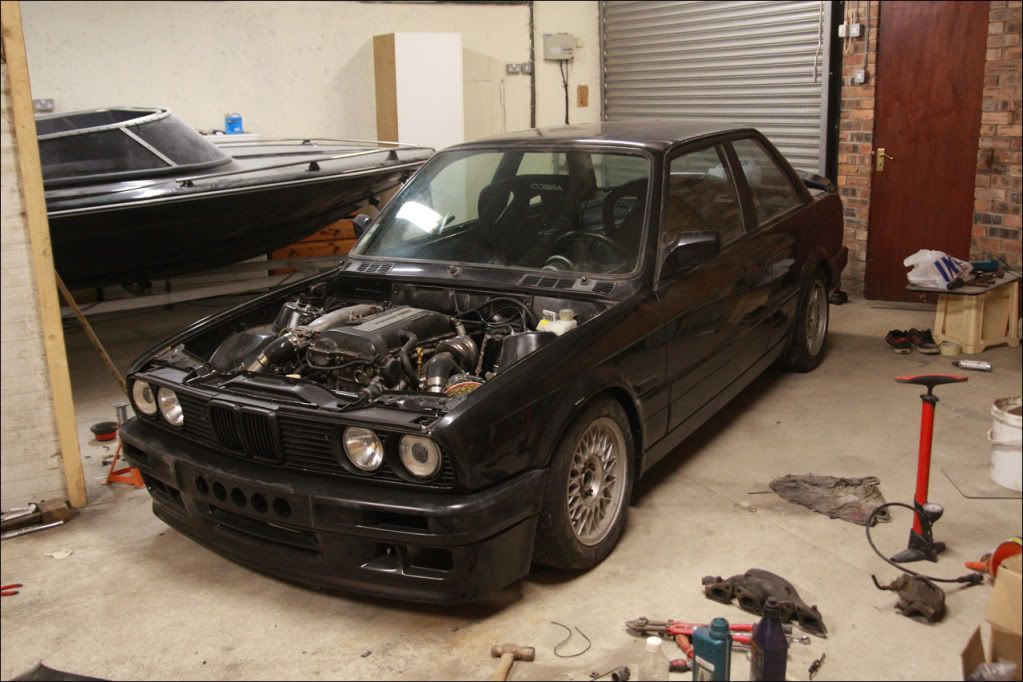
I went on to fit the brakes before testing the height... so 4pots and DS3000s with VW Corrado discs..
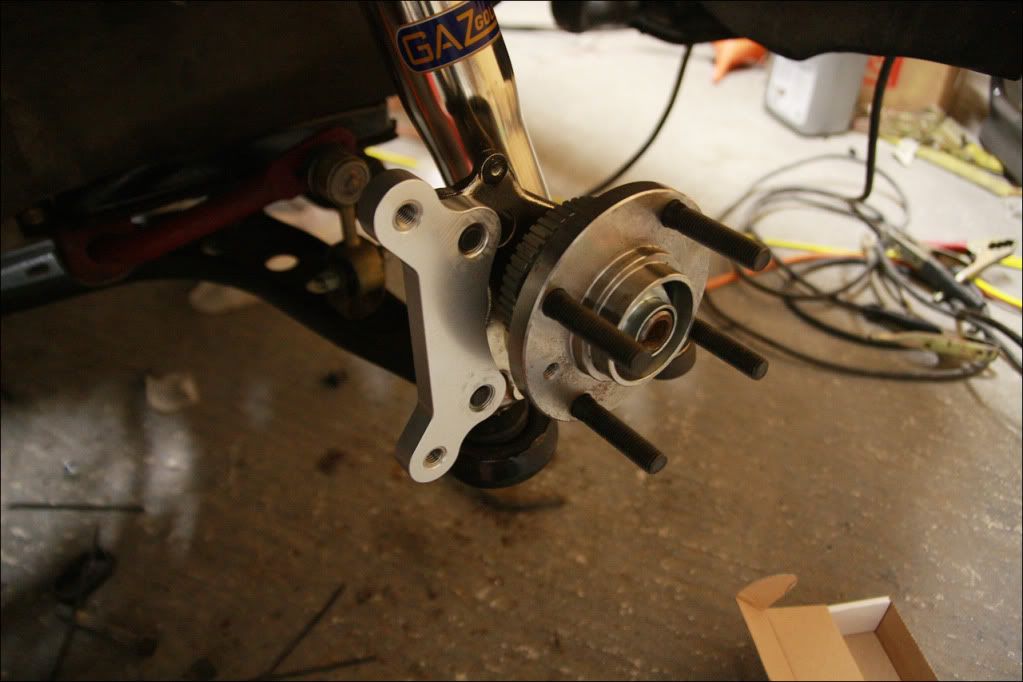
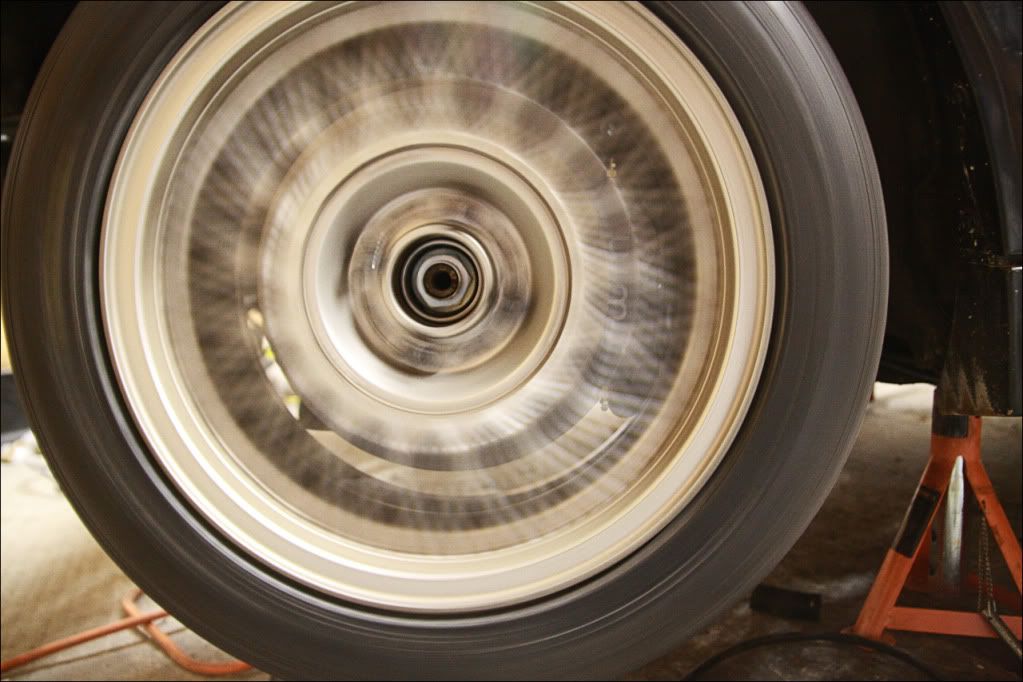
Then got the wheels on both sides and checked the clearance..
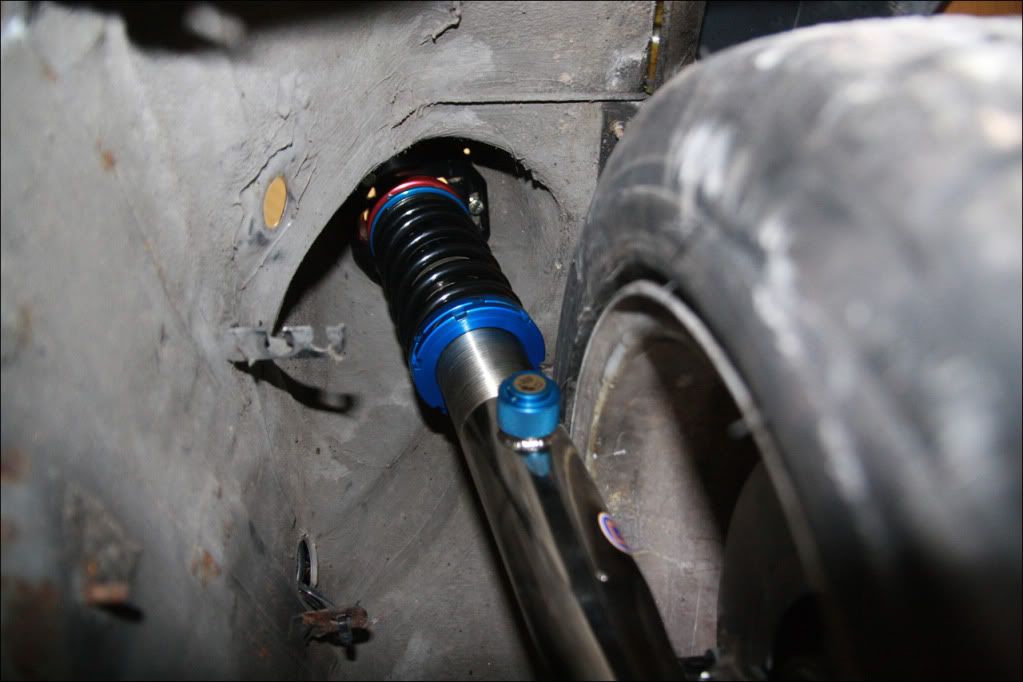
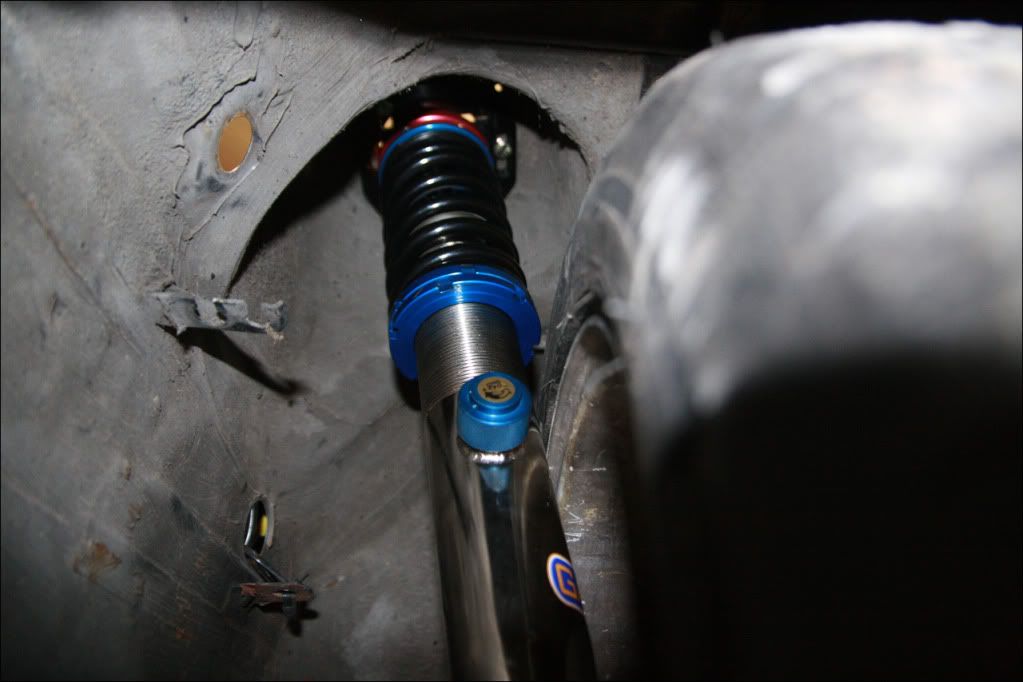
Yep, it now clears by quite a bit, but obviously it would as the spring is shorter. Completely pointless having helpers on there also as they are 100% compressed even set at this height, so need removing really. I let it down onto the floor and its about 20mm (if not more) too high than the height I wanted to start with.
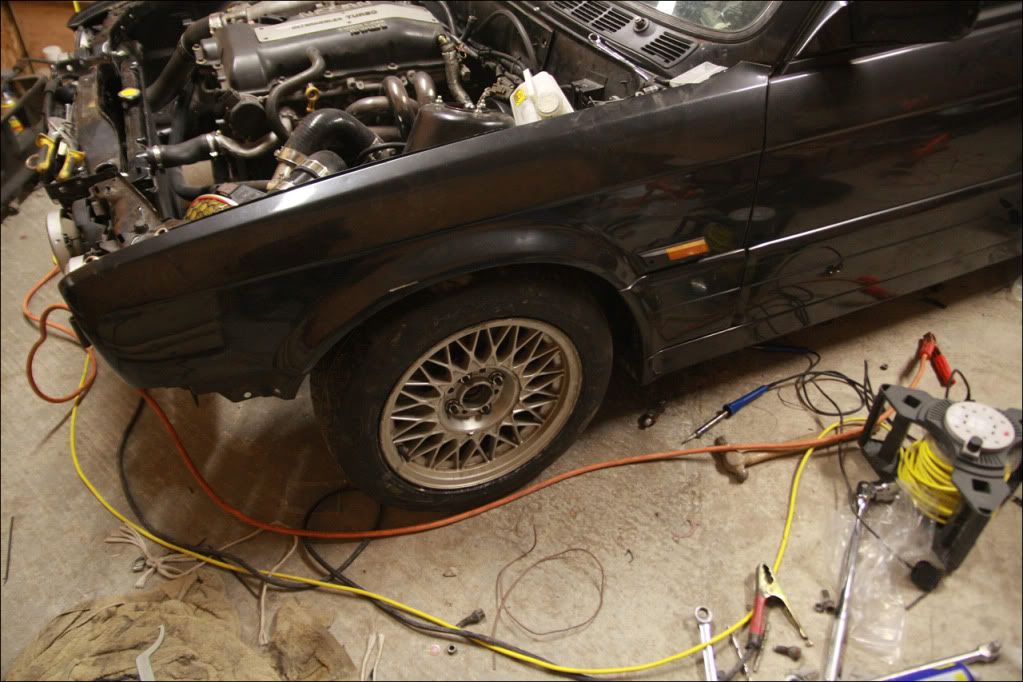
Now if I wind it down that amount, the spring platforms will be on the tyre again. I may gain 10mm of space removing the helper (i.e not having to wind it down the full 20mm), but its besides the point, I may aswell just be running springs and shocks. So I'm going to have to get back in contact with them again, brilliant! Anyway, I got on with some other bits instead..
710N recirc fitted and tidied up..
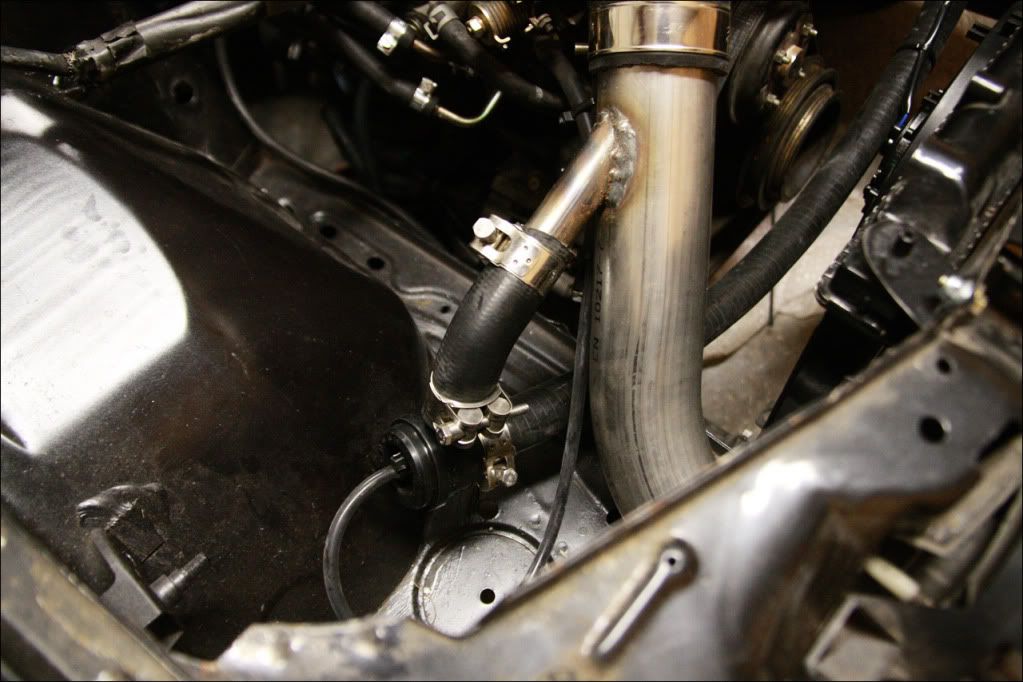
Over the past week I have moved all the wiring inside to its final position, mounted the ECUs to the side of the foot well and incorporated a Clio (engine side) fuse box, as it only has a few slots and is ideal for what I need. After getting it all mounted, working and tidy I got on with some other electrical bits..
Picked up a 12" electric fan for the radiator and fitted it..
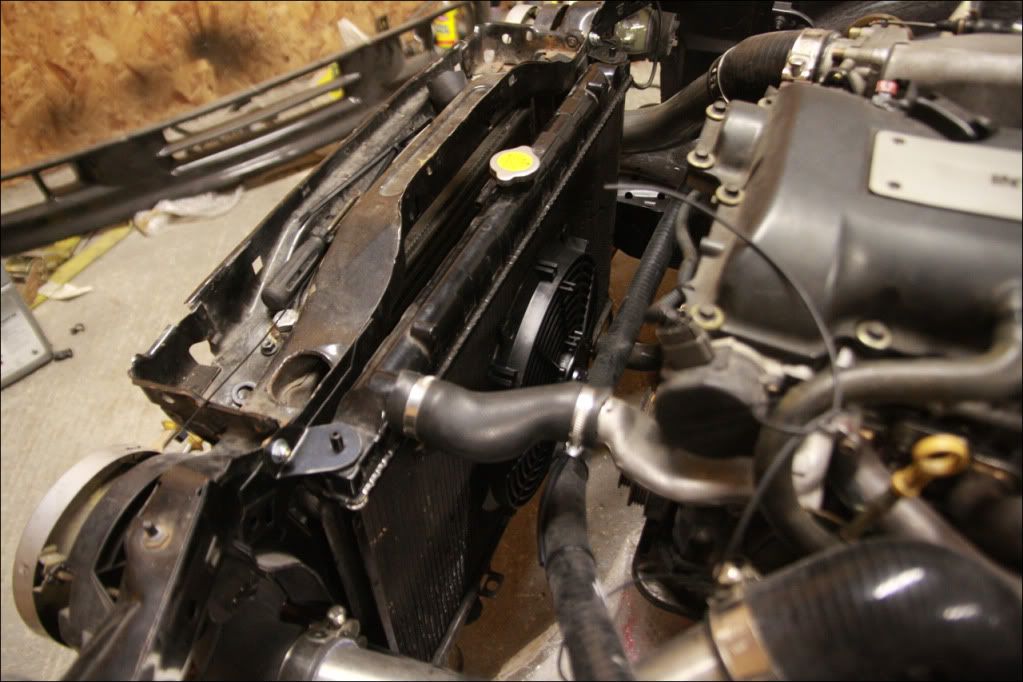

I ran some wiring back inside along with the MAF/GReddy solenoid wiring, then set up a fused relay that the ECU can trigger to turn the fan on and off. After I was happy with that I ran the car up to temperature and made sure the fan came on and switched off when the ECU wanted, which it did!
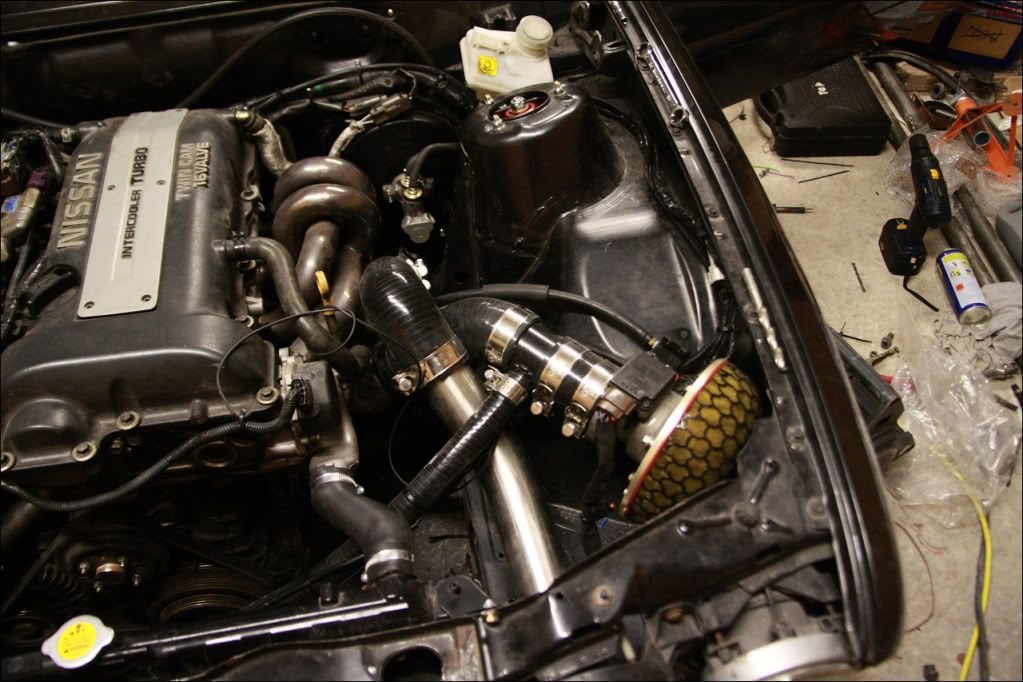
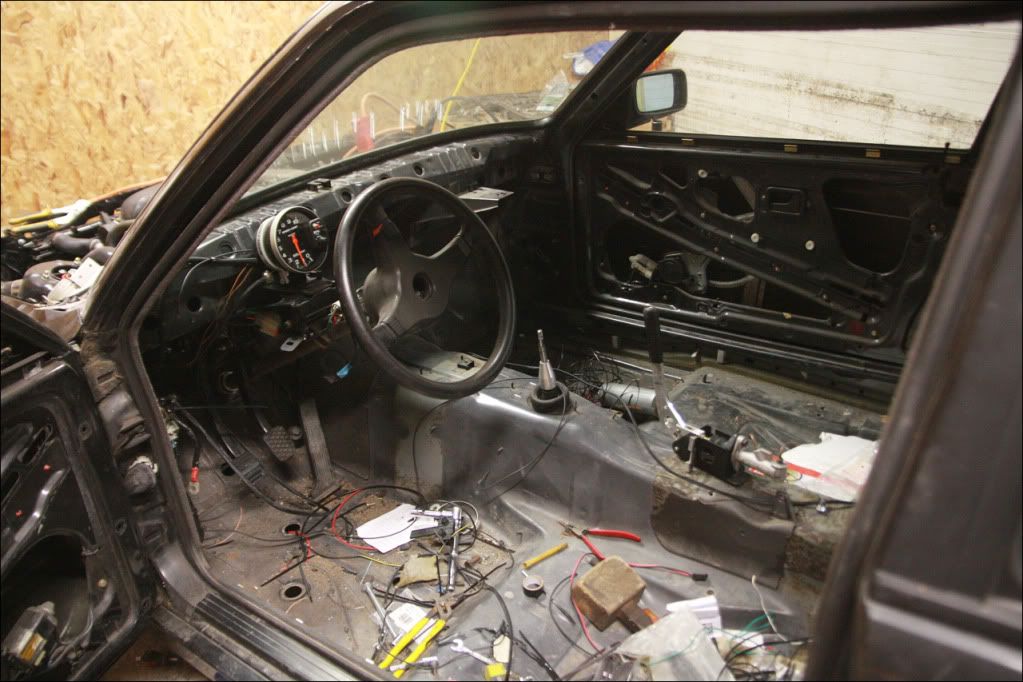
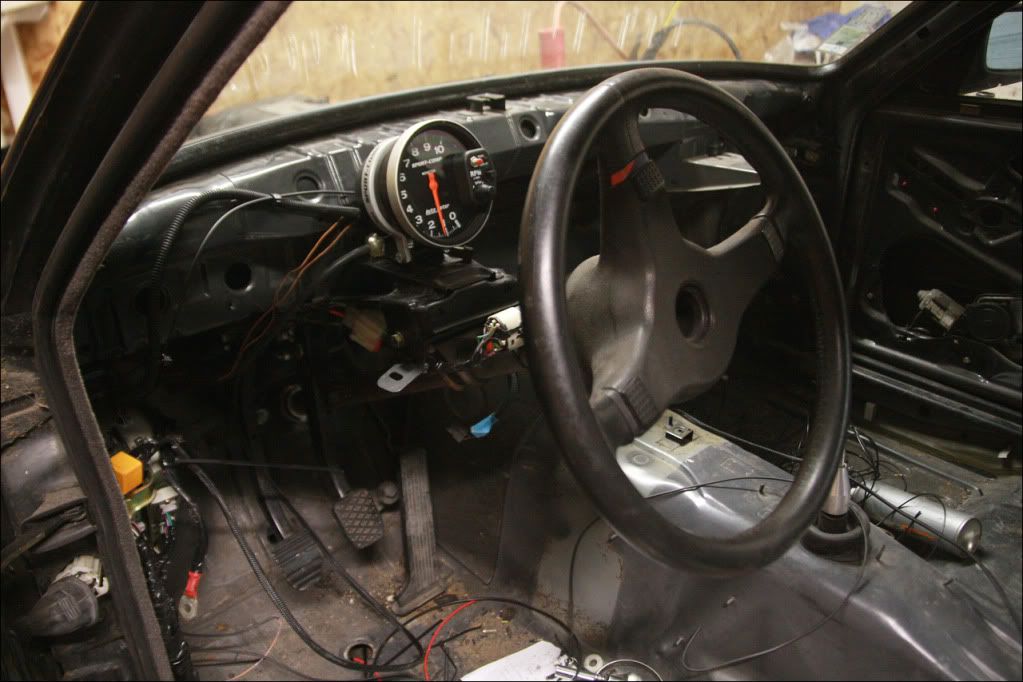
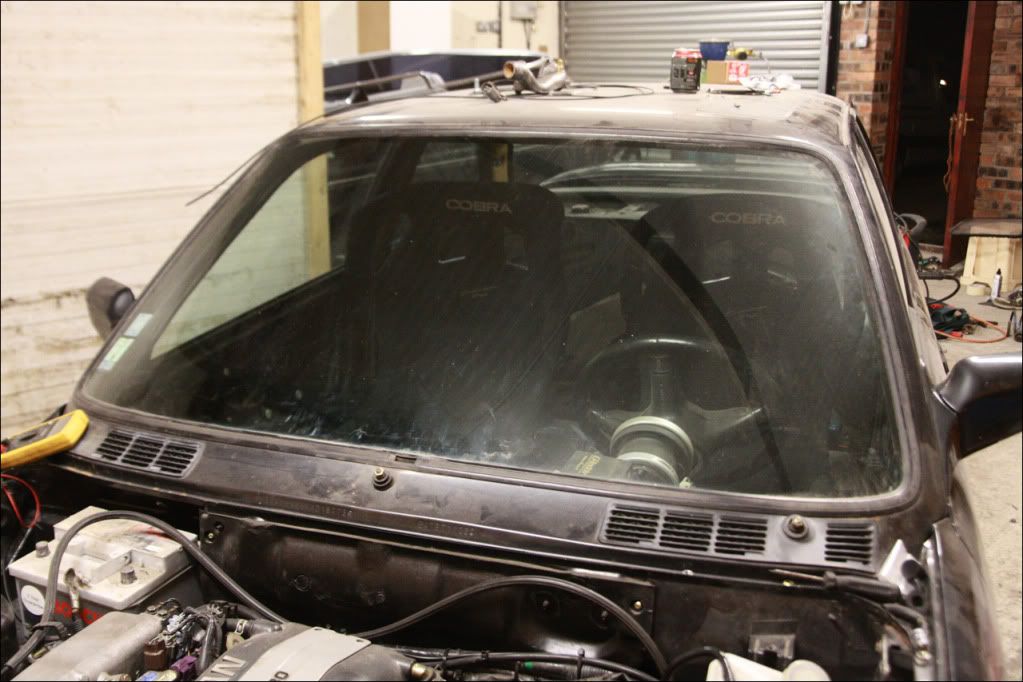
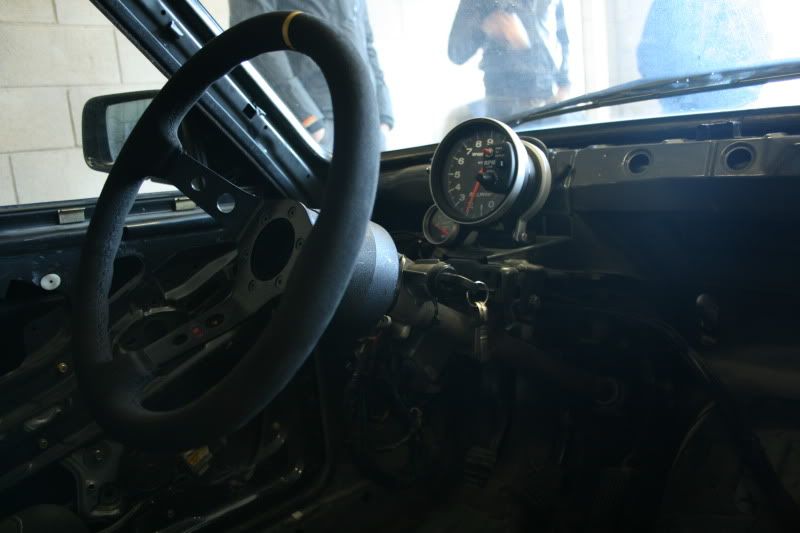
The loose wire above the top radiator hose is for an additional coolant temperature gauge (to run an aftermarket gauge), thought it would be wise to add in while I was running wires! Next up was the rev counter. I picked up an Autometer Tacho from another forum, as I am only going to run a rev counter, coolant temperature gauge and AFR for now. I mounted it on top of the steering column bracket, and wired it into the feed that the ECU outputs for RPM..
Started the car and let it warm up again, although the idle will not drop below 1100rpm. Checked for any vacuum leaks, checked the boost pipework, all the usual stuff, yet it still refuses to drop. However, if the feed for the ICV is removed and blocked off, it sits at 800rpm. With the ICV pipe connected upto the inter cooler cold pipe the idle goes back to 1100rpm. Very weird! Hopefully a few posts on a few SR based forums will shed some light. Even at 1100rpm its very smooth, so not too much of an issue as of yet.
A few other bits were tidied up, mainly wiring and adding braid to parts of the loom inside and out. Only 3 relays are now present - ECU Power, Fuel Pump and Radiator Fan. The fuse box just needs mounting above the ECU and then all the wiring is pretty much hidden!
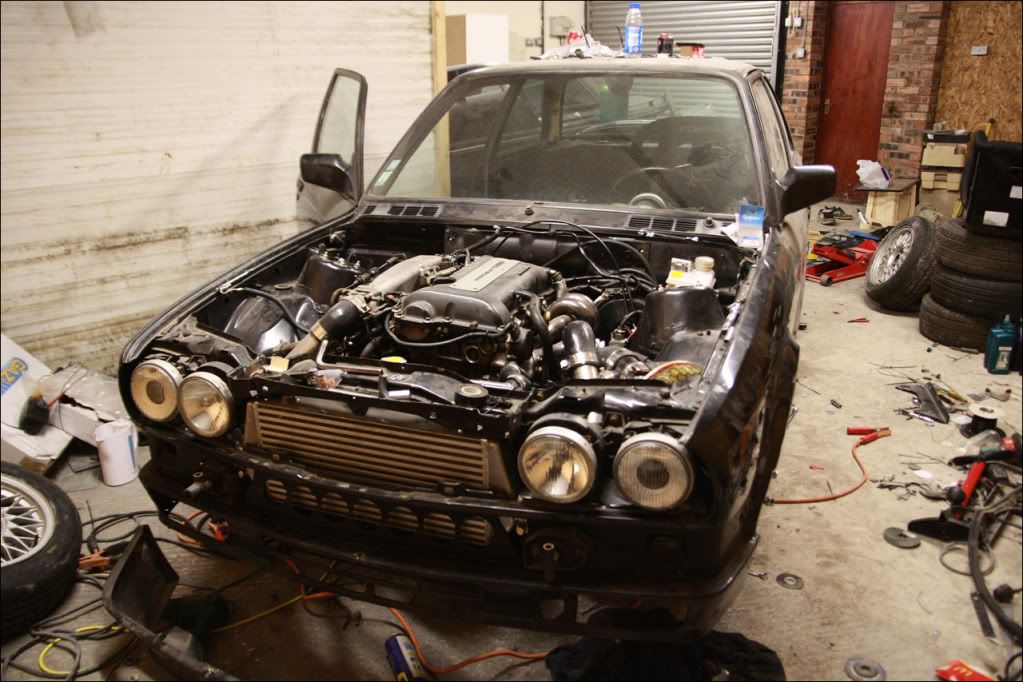
The next major job is to get the front end to fit again, the metal valance will require some trimming to fit around the inter cooler. Happy that the grills fit without modification though!

and lastly...
http://www.youtube.com/watch?v=FAwjWzd12dU
More soon!
Well, the Gaz's came back on Friday. Although, they still aren't right. They have just been supplied with 6" springs and helpers now instead of the 9" single spring. So yeah, the spring platform will be higher to miss the tyre, but if I want to wind it down il be back to square one.
Fitted both sides to the car and wound the coilovers to around 25 threads up to see how it went. Also bolted up the top mounts in a pretty neutral position.
I went on to fit the brakes before testing the height... so 4pots and DS3000s with VW Corrado discs..
Then got the wheels on both sides and checked the clearance..
Yep, it now clears by quite a bit, but obviously it would as the spring is shorter. Completely pointless having helpers on there also as they are 100% compressed even set at this height, so need removing really. I let it down onto the floor and its about 20mm (if not more) too high than the height I wanted to start with.
Now if I wind it down that amount, the spring platforms will be on the tyre again. I may gain 10mm of space removing the helper (i.e not having to wind it down the full 20mm), but its besides the point, I may aswell just be running springs and shocks. So I'm going to have to get back in contact with them again, brilliant! Anyway, I got on with some other bits instead..
710N recirc fitted and tidied up..
Over the past week I have moved all the wiring inside to its final position, mounted the ECUs to the side of the foot well and incorporated a Clio (engine side) fuse box, as it only has a few slots and is ideal for what I need. After getting it all mounted, working and tidy I got on with some other electrical bits..
Picked up a 12" electric fan for the radiator and fitted it..
I ran some wiring back inside along with the MAF/GReddy solenoid wiring, then set up a fused relay that the ECU can trigger to turn the fan on and off. After I was happy with that I ran the car up to temperature and made sure the fan came on and switched off when the ECU wanted, which it did!
The loose wire above the top radiator hose is for an additional coolant temperature gauge (to run an aftermarket gauge), thought it would be wise to add in while I was running wires! Next up was the rev counter. I picked up an Autometer Tacho from another forum, as I am only going to run a rev counter, coolant temperature gauge and AFR for now. I mounted it on top of the steering column bracket, and wired it into the feed that the ECU outputs for RPM..
Started the car and let it warm up again, although the idle will not drop below 1100rpm. Checked for any vacuum leaks, checked the boost pipework, all the usual stuff, yet it still refuses to drop. However, if the feed for the ICV is removed and blocked off, it sits at 800rpm. With the ICV pipe connected upto the inter cooler cold pipe the idle goes back to 1100rpm. Very weird! Hopefully a few posts on a few SR based forums will shed some light. Even at 1100rpm its very smooth, so not too much of an issue as of yet.
A few other bits were tidied up, mainly wiring and adding braid to parts of the loom inside and out. Only 3 relays are now present - ECU Power, Fuel Pump and Radiator Fan. The fuse box just needs mounting above the ECU and then all the wiring is pretty much hidden!
The next major job is to get the front end to fit again, the metal valance will require some trimming to fit around the inter cooler. Happy that the grills fit without modification though!
and lastly...
http://www.youtube.com/watch?v=FAwjWzd12dU
More soon!
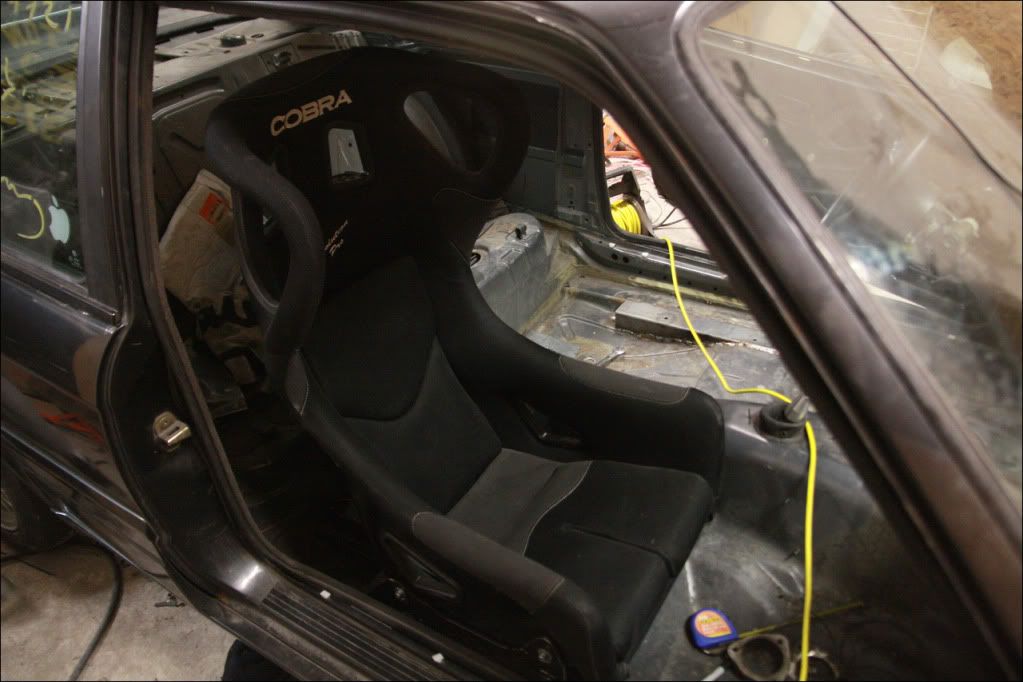
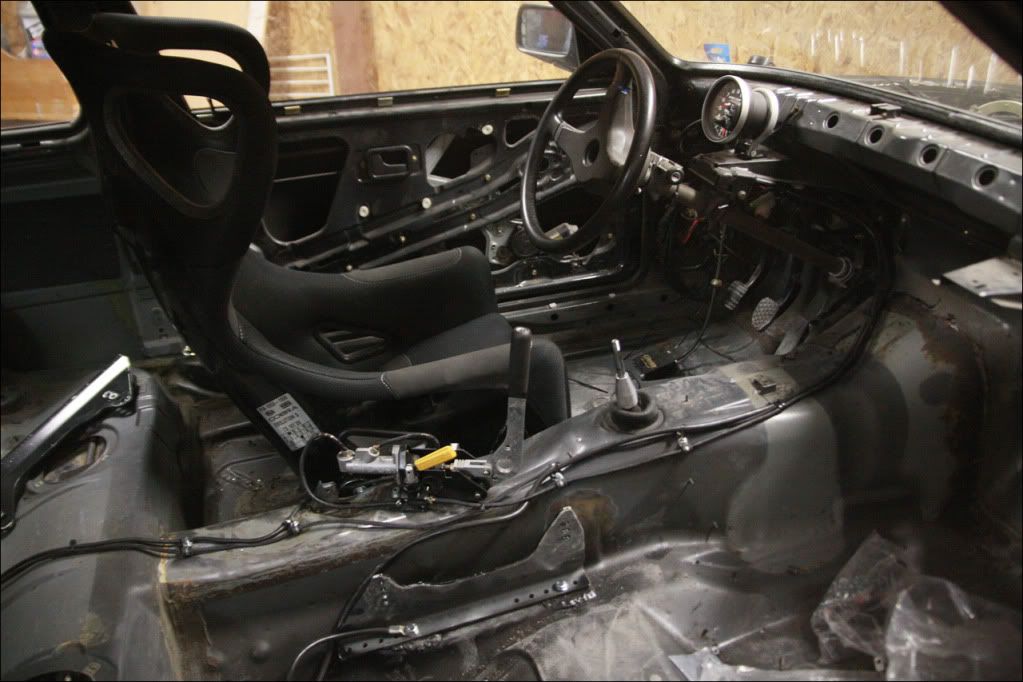
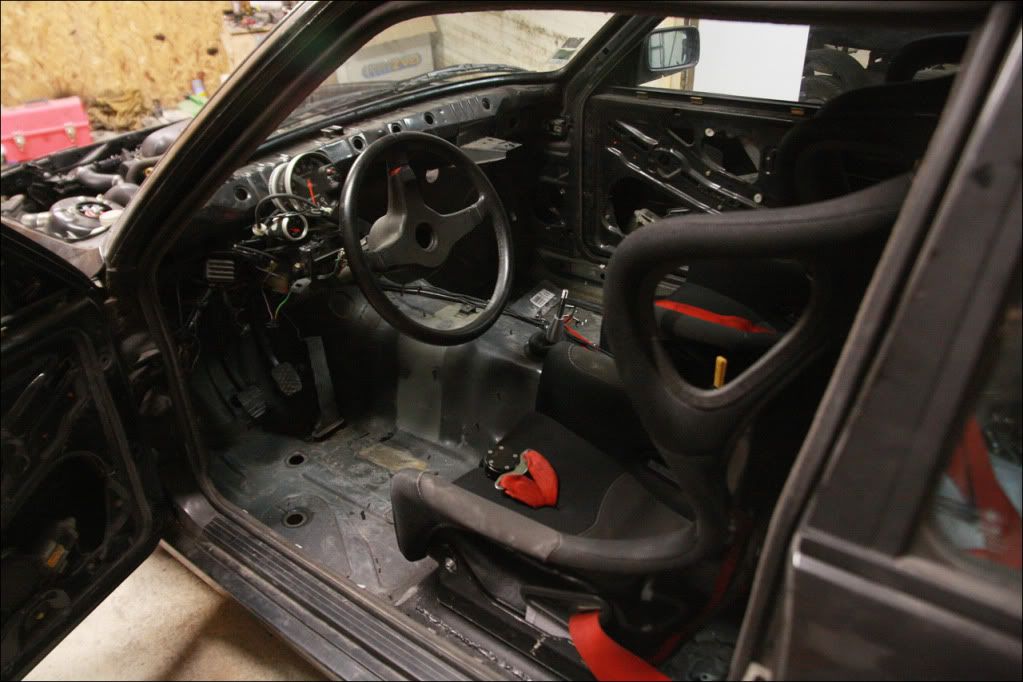
I changed the way that the seats were going to be mounted, simply because with 40/45mm bar welded across the floor pan the seat would be rather high, I wanted to keep them quite low and just use the holes on the sidemounts if I ever wanted to raise them up.
These are the same seats I had in the Clio, one is a standard width (drivers) and one is GT width (wider). After a bit of measuring I realised I would be able to retain two of the factory threaded holes in the floor for the GT width seat. I could only keep one of the threaded holes for the narrower drivers seat.
I did a bit of reading on various sites/other E30 projects to get an idea of how people usually mount them, and ended up doing it the same way (retaining the holes as above). I put the sidemount as close to the exhaust tunnel as possible retaining the factory threaded hole (rear bolt) and it worked out well that the front hole would be on a flat part of the chassis. I used 3mm plate and welded it over which should be sufficient. For the outside, I used 3mm plate again which was bent to 90degrees, then profiled to follow the shape of the floorpan (slopes down to the back of the car). Because the drivers seat is narrower, I could not retain the outside rear threaded hole, so I drilled and welded an M10 nut on the back before welding the whole thing to the car.

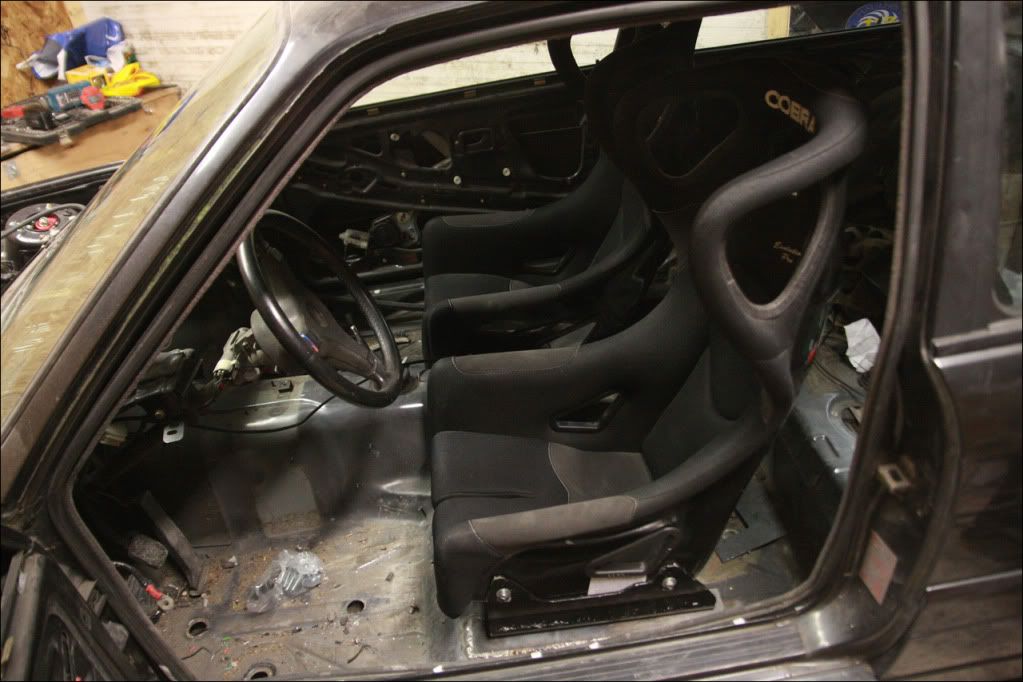
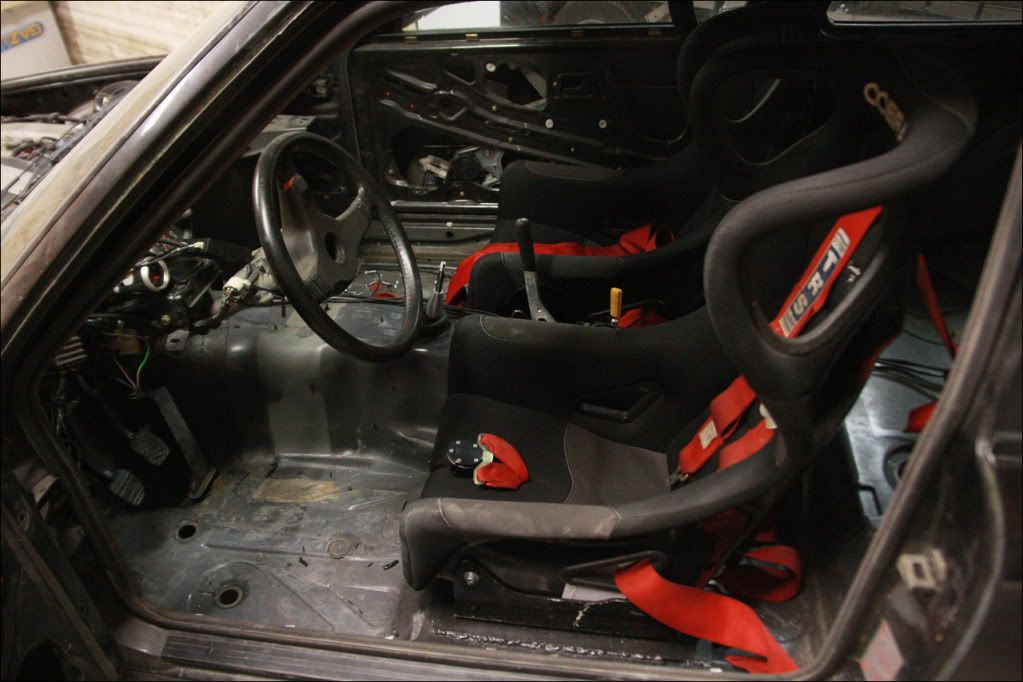
With the passenger seat, I managed to retain the factory threads for both rear holes which was useful. Next job was to trial fit them and check the position - both were spot on and perfectly level which I was happy with..
As mentioned in the previous update the suspension was still to high, and I was going to remove the helper springs. I have since removed them and it dropped 20mm without having to touch the adjuster rings - so its usable for now, but I will be getting in contact with Gaz once again after Oulton to see what the actual issue is, as its pointless having coilovers if I cant adjust the height!
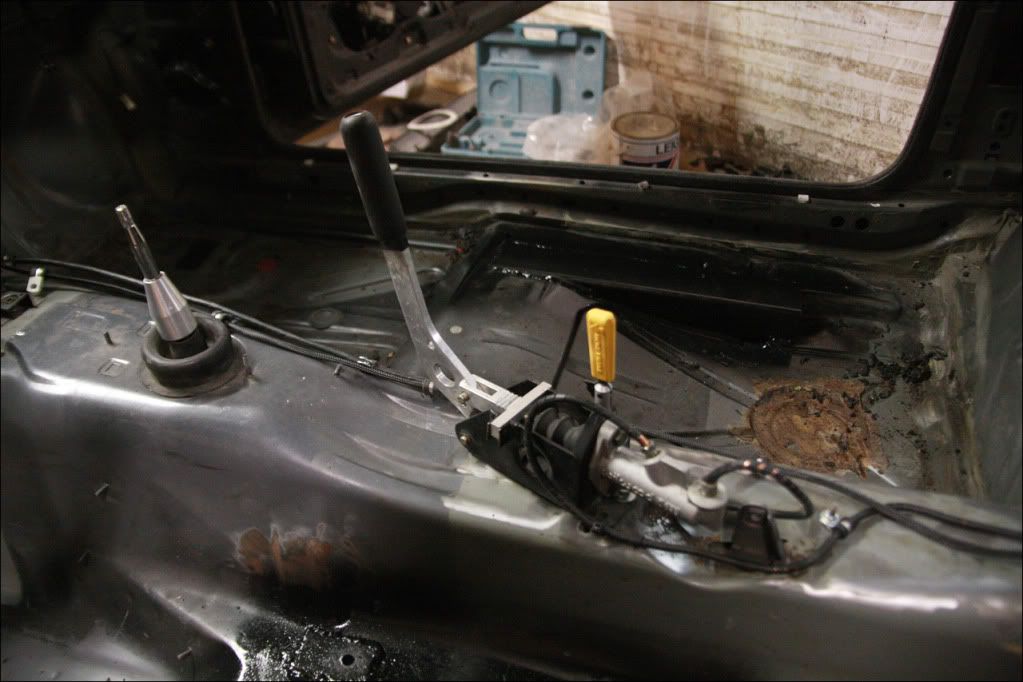
Now I had the seats in position, I could check where the hydraulic handbrake and bias valve needed to be mounted. After trying a few positions I got it where I wanted and marked it up. Drilled through the chassis (I managed to retain one of the rear threaded holes already in the exhaust tunnel) then bolted it down. I also mounted the Tilton bias valve to the side of the handbrake frame..
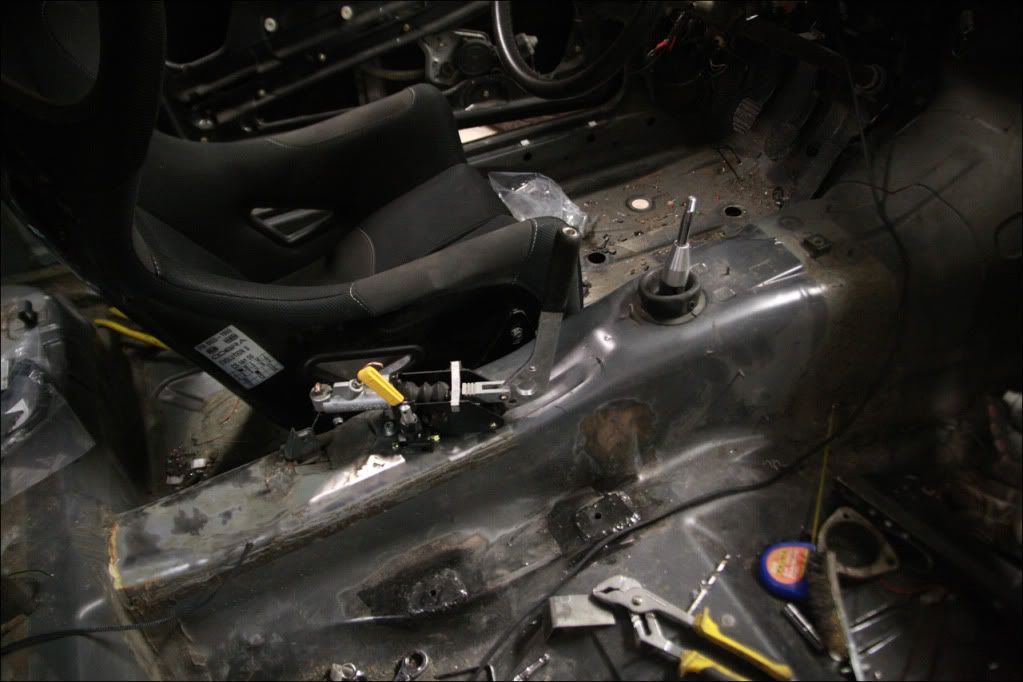
Once it was mounted I could run the line from the master cylinder to the rear T-piece above the diff. I used standard copper pipe for ease, and wrapped it with spiral wrap to make it look a bit tidier. The line goes into the bias valve, then into the handbrake, then out to the rear..
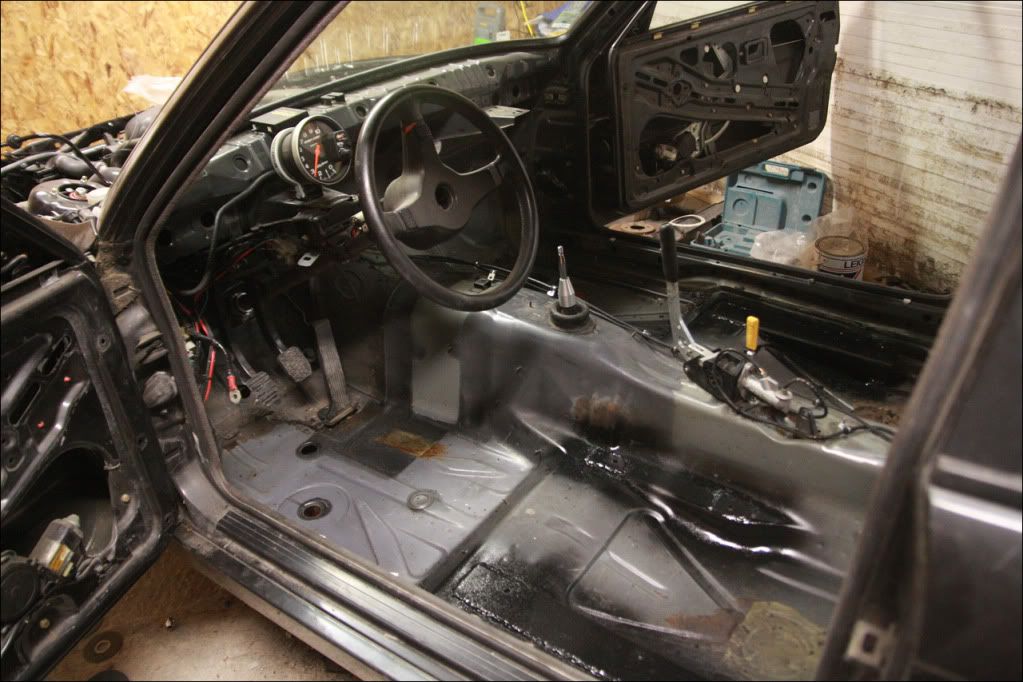
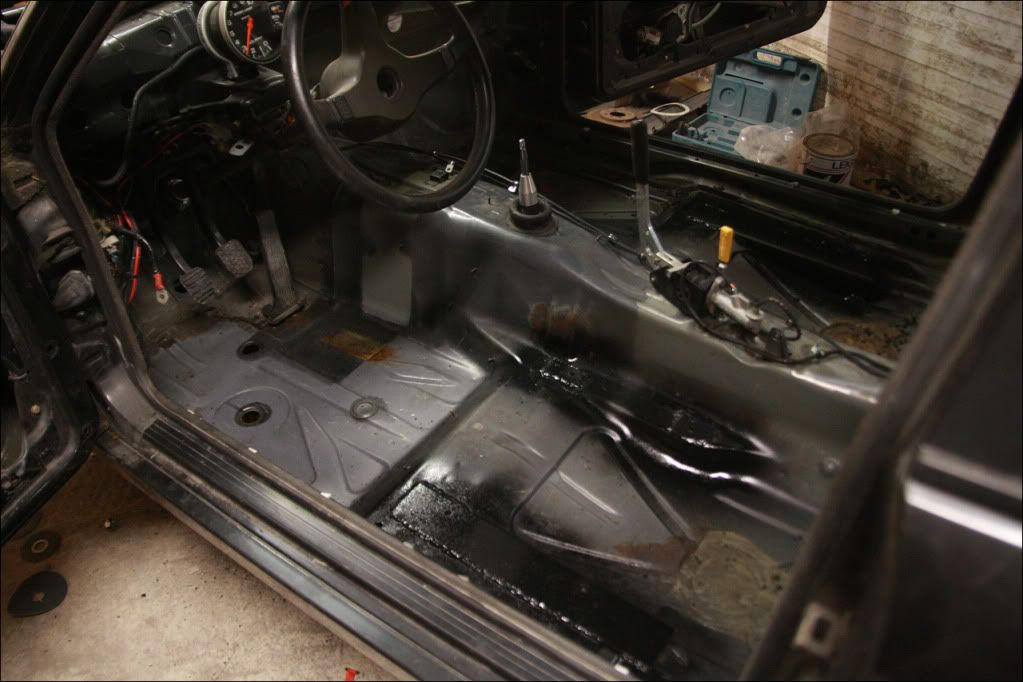
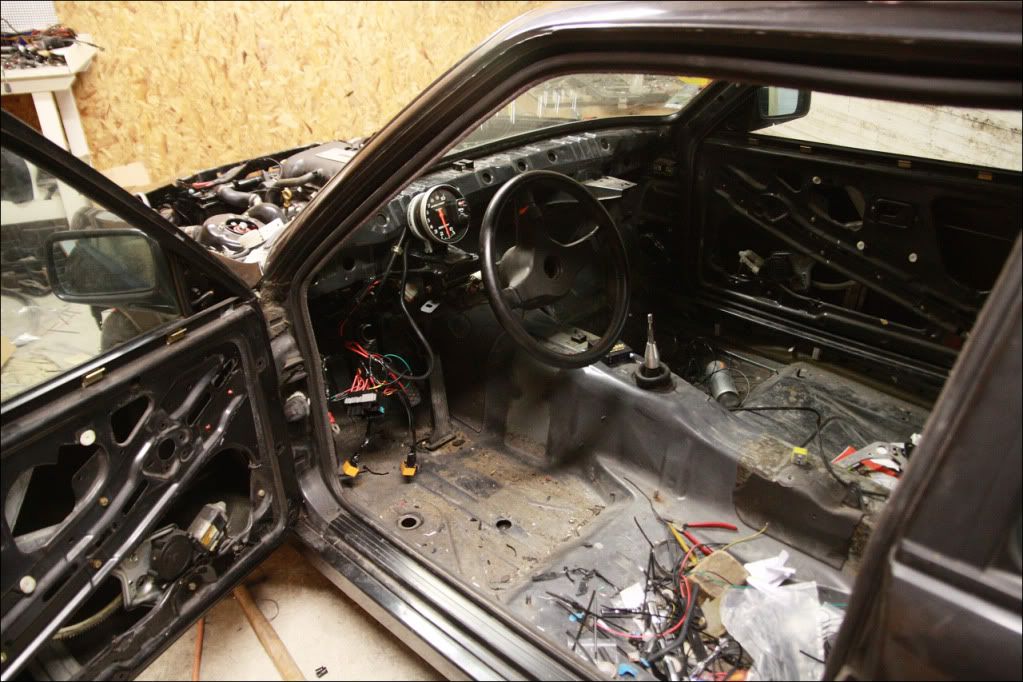
As you may have noticed the inside has been cleaned up and the rest of the sound deadening removed. Also gave the seat mounts a quick spray on both sides to stop any surface rust forming for now.
I had ordered four braided lines from Earls - Master cylinder to front caliper on both sides and T-piece to rear calipers on both sides at the back. They came next day so I got on and fitted those. Opted for banjo fittings on the rear calipers to keep it tidy and out of the way, same with the master cylinder end. I didnt get any pictures of the front but everyones seen braided lines before....
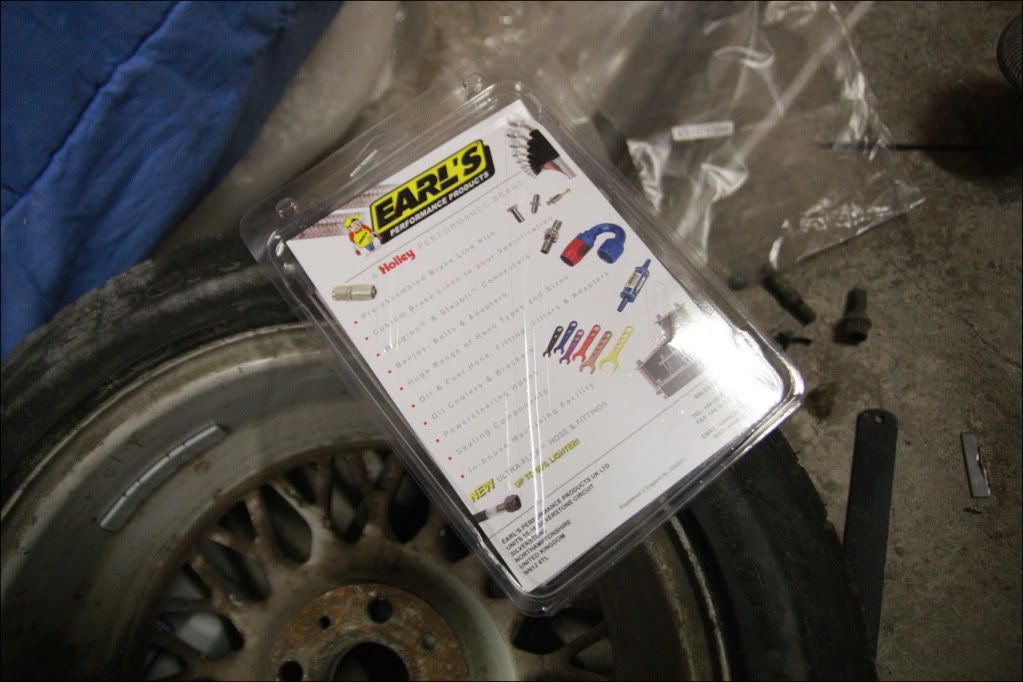
Also knocked up a quick bracket for the punto reservoir..

I put some fluid in and bled the clutch which works well. Filled up the gearbox oil with 75w90, and filled up the diff with some proper Castrol oil. I gave it a quick 'drive' on the axle stands to check the clutch was functioning, took it up to 4th gear and all seemed smooth. Just need to bleed the brakes (probably tonight) before I can try and drive it properly.
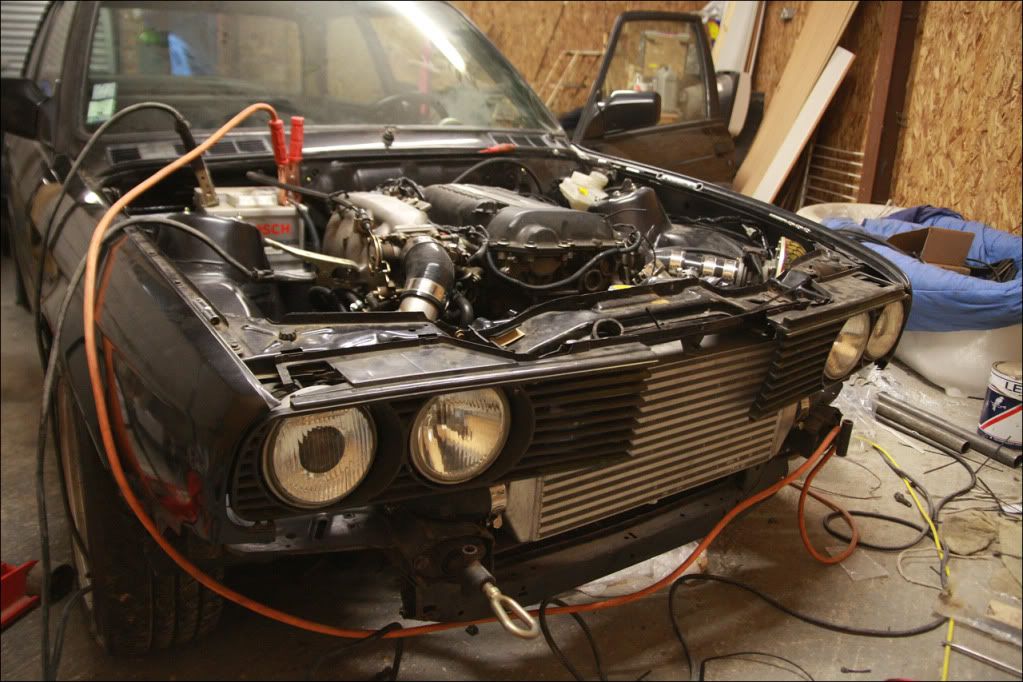
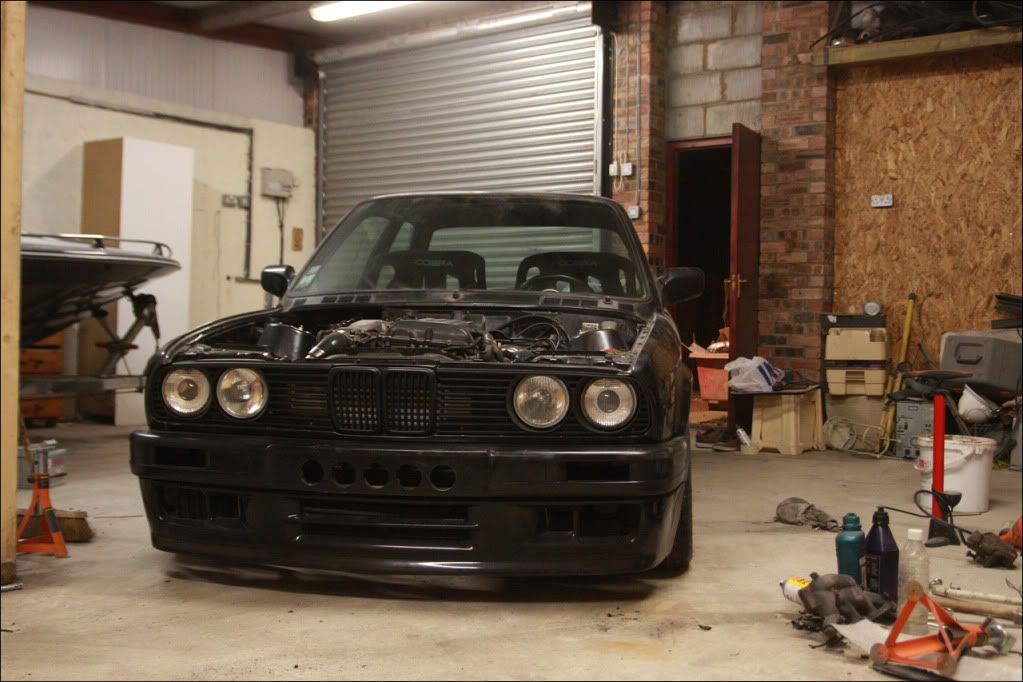
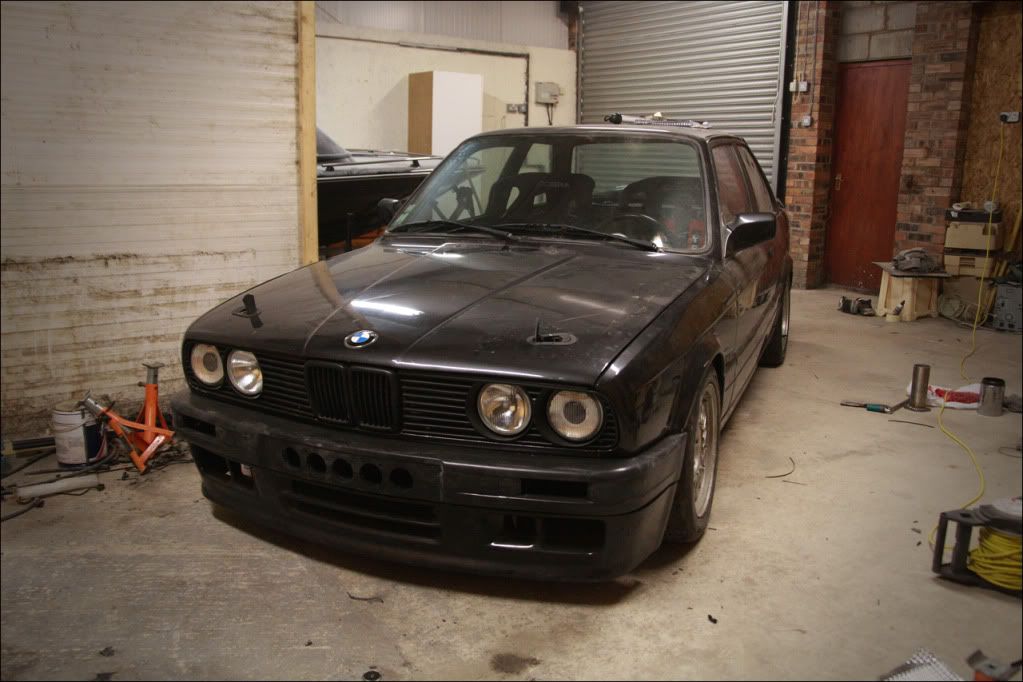
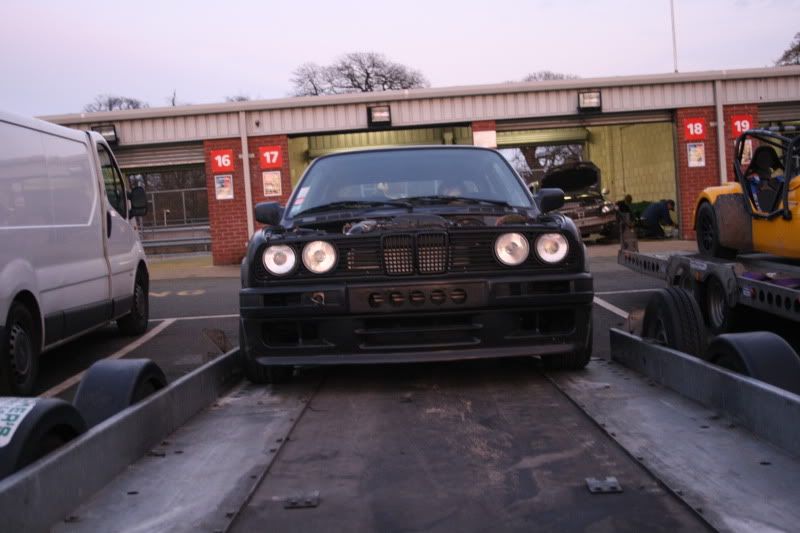
Lastly I finished off trimming the front valance to fit round the intercooler/pipework, and holesaw'd the front panel which is usually solid metal. Gave the bare metal edges a quick spray of black then mounted it onto the car..
Along with the MTEC front valance/trim, and freshly painted grills..
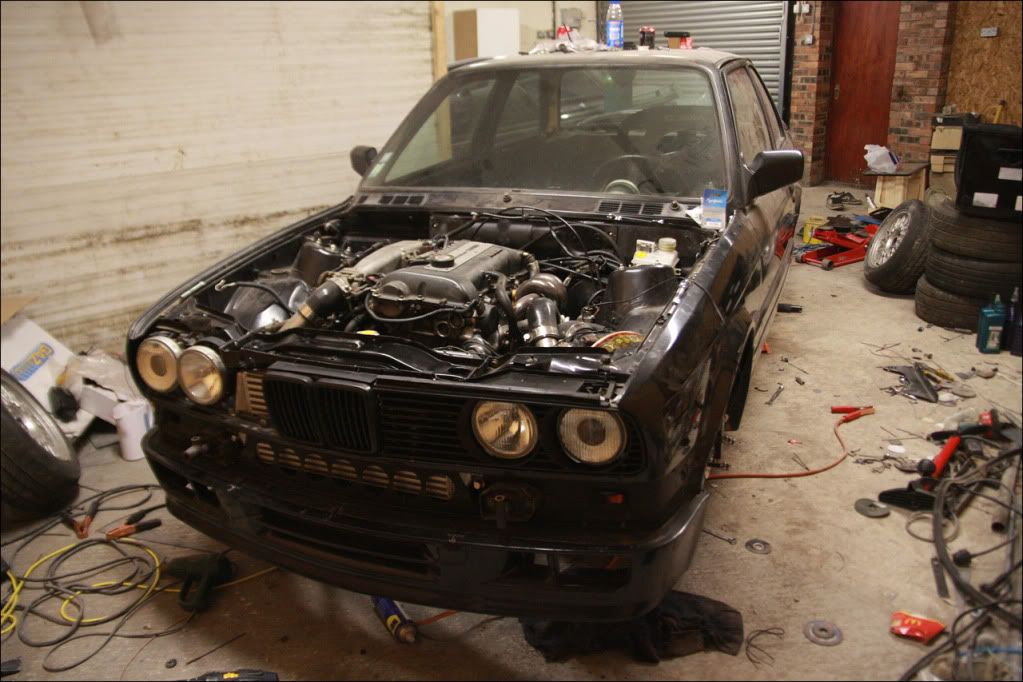
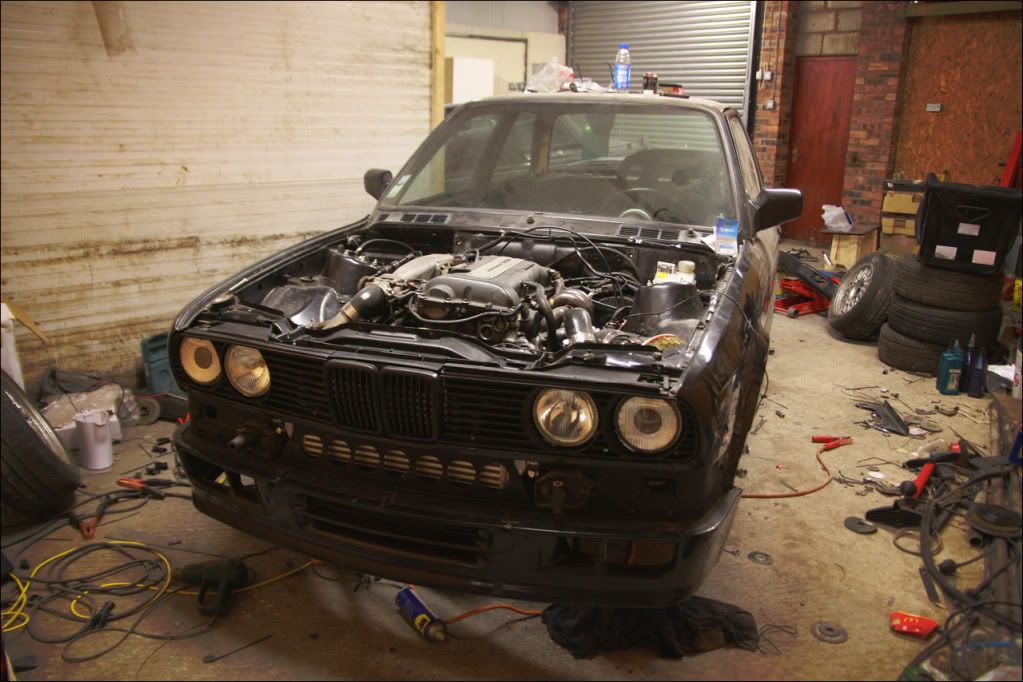
Last thing to do is holesaw the actual front 'bumper' which goes round between the valance and grills, then that can be fitted. Not many jobs left on the list now so fingers crossed I'm getting there!
These are the same seats I had in the Clio, one is a standard width (drivers) and one is GT width (wider). After a bit of measuring I realised I would be able to retain two of the factory threaded holes in the floor for the GT width seat. I could only keep one of the threaded holes for the narrower drivers seat.
I did a bit of reading on various sites/other E30 projects to get an idea of how people usually mount them, and ended up doing it the same way (retaining the holes as above). I put the sidemount as close to the exhaust tunnel as possible retaining the factory threaded hole (rear bolt) and it worked out well that the front hole would be on a flat part of the chassis. I used 3mm plate and welded it over which should be sufficient. For the outside, I used 3mm plate again which was bent to 90degrees, then profiled to follow the shape of the floorpan (slopes down to the back of the car). Because the drivers seat is narrower, I could not retain the outside rear threaded hole, so I drilled and welded an M10 nut on the back before welding the whole thing to the car.
With the passenger seat, I managed to retain the factory threads for both rear holes which was useful. Next job was to trial fit them and check the position - both were spot on and perfectly level which I was happy with..
As mentioned in the previous update the suspension was still to high, and I was going to remove the helper springs. I have since removed them and it dropped 20mm without having to touch the adjuster rings - so its usable for now, but I will be getting in contact with Gaz once again after Oulton to see what the actual issue is, as its pointless having coilovers if I cant adjust the height!
Now I had the seats in position, I could check where the hydraulic handbrake and bias valve needed to be mounted. After trying a few positions I got it where I wanted and marked it up. Drilled through the chassis (I managed to retain one of the rear threaded holes already in the exhaust tunnel) then bolted it down. I also mounted the Tilton bias valve to the side of the handbrake frame..
Once it was mounted I could run the line from the master cylinder to the rear T-piece above the diff. I used standard copper pipe for ease, and wrapped it with spiral wrap to make it look a bit tidier. The line goes into the bias valve, then into the handbrake, then out to the rear..
As you may have noticed the inside has been cleaned up and the rest of the sound deadening removed. Also gave the seat mounts a quick spray on both sides to stop any surface rust forming for now.
I had ordered four braided lines from Earls - Master cylinder to front caliper on both sides and T-piece to rear calipers on both sides at the back. They came next day so I got on and fitted those. Opted for banjo fittings on the rear calipers to keep it tidy and out of the way, same with the master cylinder end. I didnt get any pictures of the front but everyones seen braided lines before....
Also knocked up a quick bracket for the punto reservoir..
I put some fluid in and bled the clutch which works well. Filled up the gearbox oil with 75w90, and filled up the diff with some proper Castrol oil. I gave it a quick 'drive' on the axle stands to check the clutch was functioning, took it up to 4th gear and all seemed smooth. Just need to bleed the brakes (probably tonight) before I can try and drive it properly.
Lastly I finished off trimming the front valance to fit round the intercooler/pipework, and holesaw'd the front panel which is usually solid metal. Gave the bare metal edges a quick spray of black then mounted it onto the car..
Along with the MTEC front valance/trim, and freshly painted grills..
Last thing to do is holesaw the actual front 'bumper' which goes round between the valance and grills, then that can be fitted. Not many jobs left on the list now so fingers crossed I'm getting there!
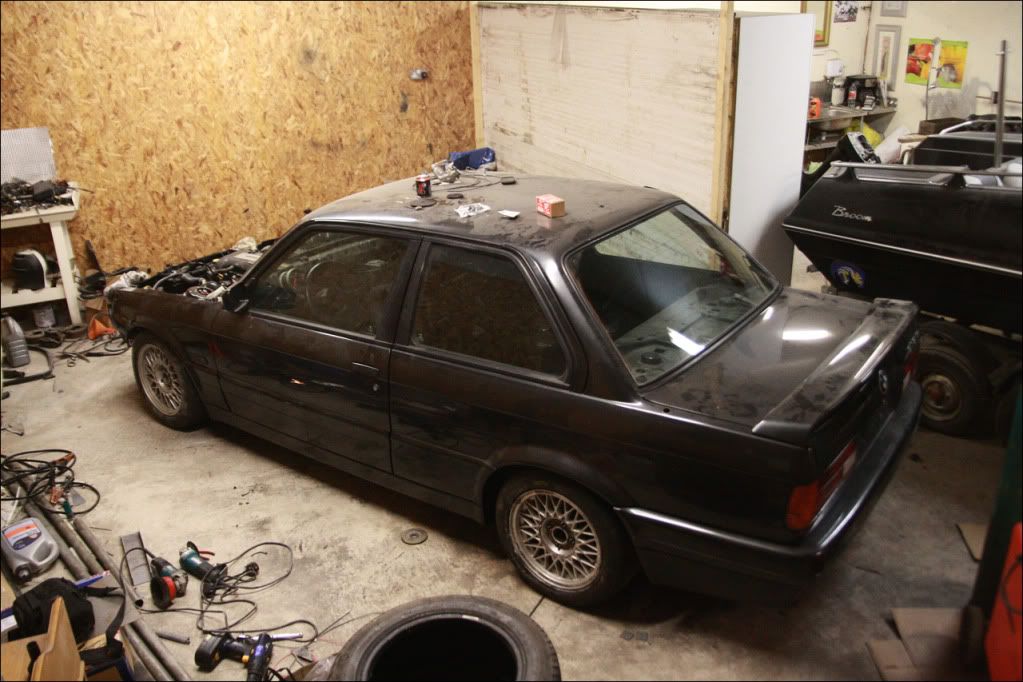
Well its pretty much ready for Oulton Park on Saturday, happy with how its come together. I had a few issues bleeding the brakes, particularly one of the rear calipers, nothing would come out of the bleed screw. Stripped it down and the hole was rusted/blocked, so cleaned it all out, re-assembled and its spot on now.
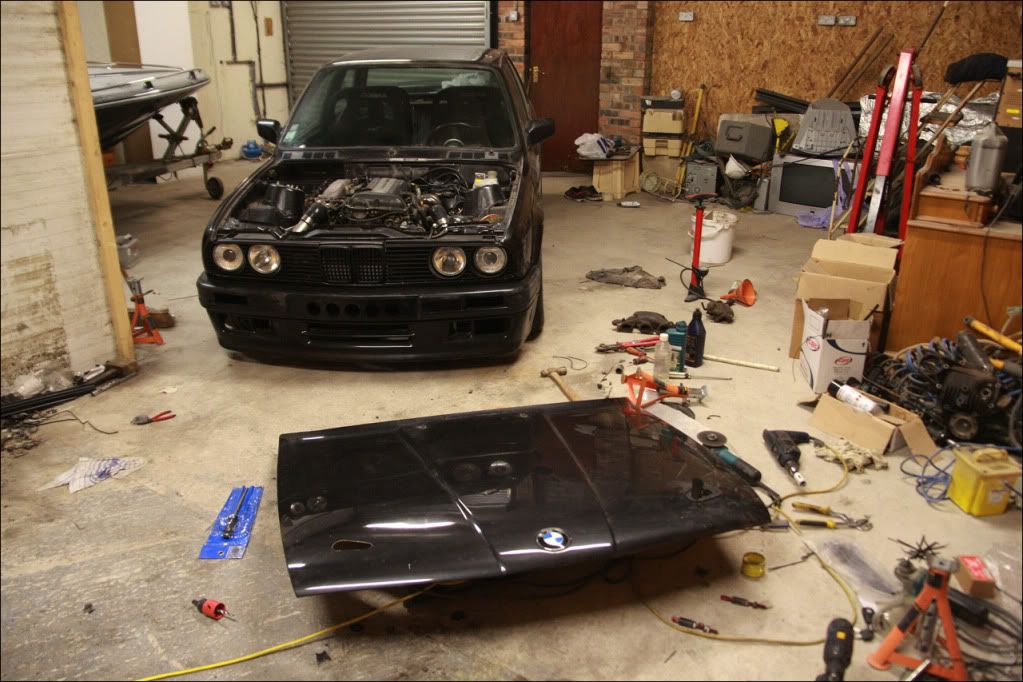
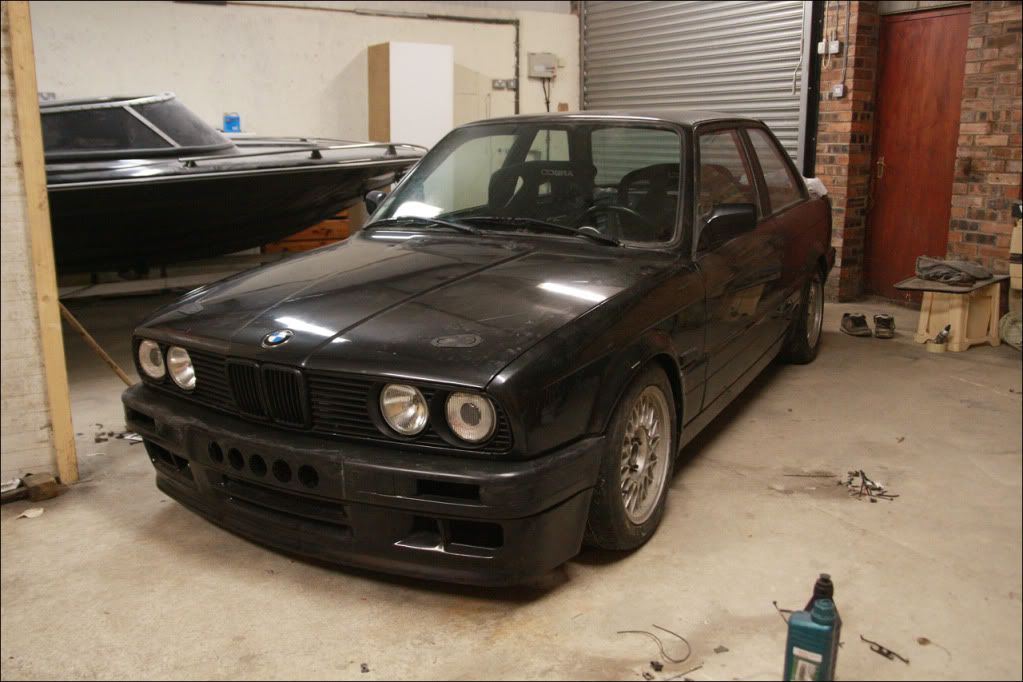
Bled the whole system with a pressure bleeder and they feel really good - time will tell how good they are on track. Fitted the front bumper after drilling it for airflow (to match the holes in the valance) and secured the sideskirts that were quite loose..
Next job was to sort the bonnet - I have retained the rear runners for now (eventually going to get a fiberglass bonnet), and just put two of my aerocatches on the front. Used the same method as the Clio, measure, guess, measure, drill. Worked out OK!
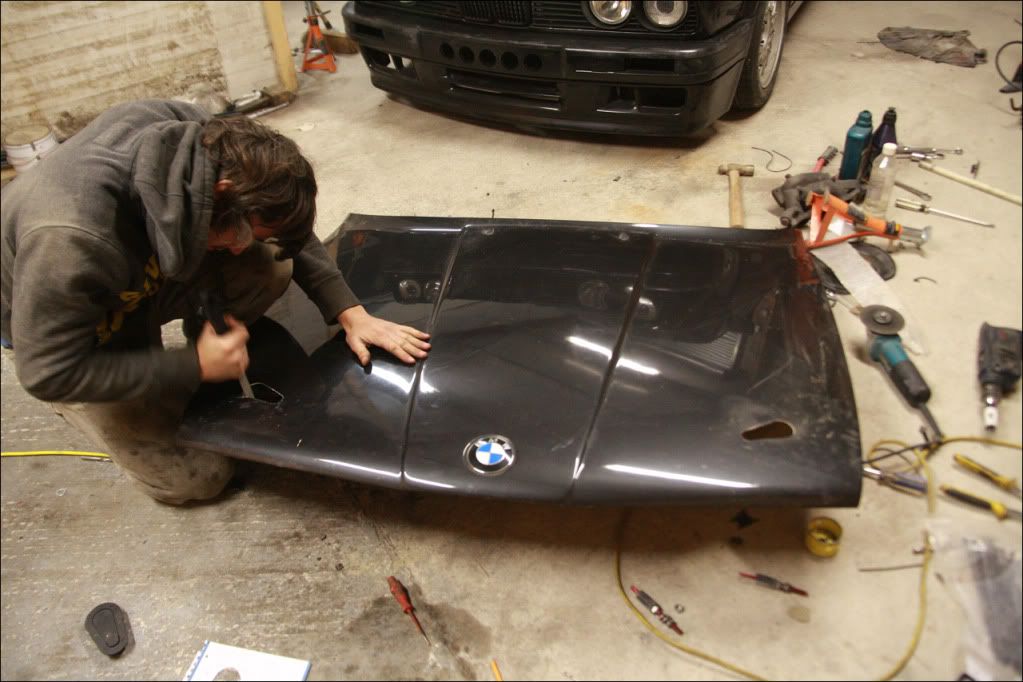
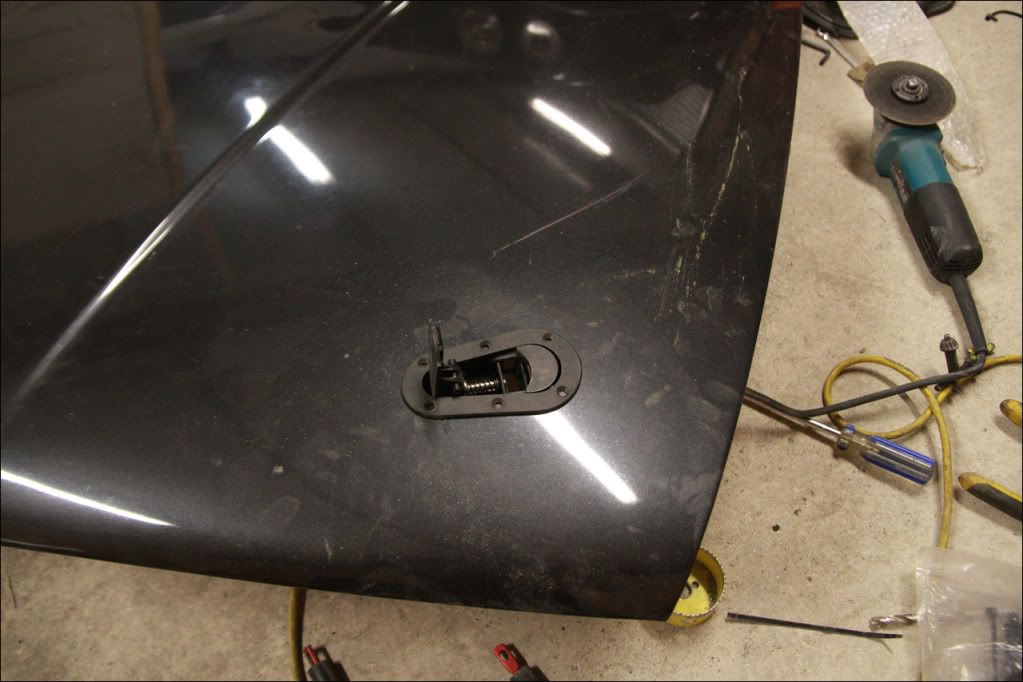
After a bit of adjustment on the pins, and cutting the rubber stops to size, it was pretty much spot on. Carried on and wired the GReddy boost controller and coolant temperature gauge up, along with fitting the harnesses. Thankfully the GReddy had retained its setup from the car it was from (same car as the engine was out of), so at least I don't have to mess around with that for now..
Then dropped the rear coilovers around 10mmm further. Set the damping all round to the middle setting (out of 40 odd), so I'l have to have a play with that on the day. Also wired up the brake lights and adjusted the brake pedal switch to suit, along with a push button for the right indicator down near the handbrake.

..and thats about it. Few little bits to finish off before putting it on the trailer tomorrow, like fitting a proper steering wheel, and checking a couple of nuts/bolts.
Bled the whole system with a pressure bleeder and they feel really good - time will tell how good they are on track. Fitted the front bumper after drilling it for airflow (to match the holes in the valance) and secured the sideskirts that were quite loose..
Next job was to sort the bonnet - I have retained the rear runners for now (eventually going to get a fiberglass bonnet), and just put two of my aerocatches on the front. Used the same method as the Clio, measure, guess, measure, drill. Worked out OK!
After a bit of adjustment on the pins, and cutting the rubber stops to size, it was pretty much spot on. Carried on and wired the GReddy boost controller and coolant temperature gauge up, along with fitting the harnesses. Thankfully the GReddy had retained its setup from the car it was from (same car as the engine was out of), so at least I don't have to mess around with that for now..
Then dropped the rear coilovers around 10mmm further. Set the damping all round to the middle setting (out of 40 odd), so I'l have to have a play with that on the day. Also wired up the brake lights and adjusted the brake pedal switch to suit, along with a push button for the right indicator down near the handbrake.
..and thats about it. Few little bits to finish off before putting it on the trailer tomorrow, like fitting a proper steering wheel, and checking a couple of nuts/bolts.
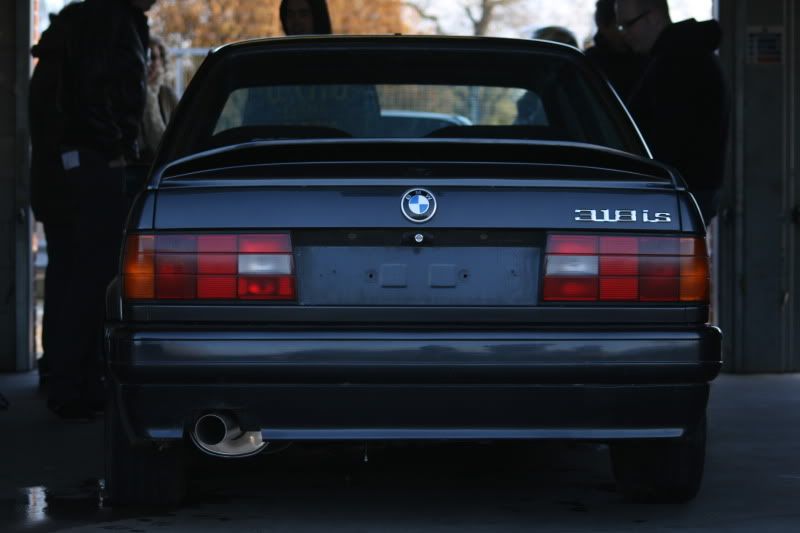
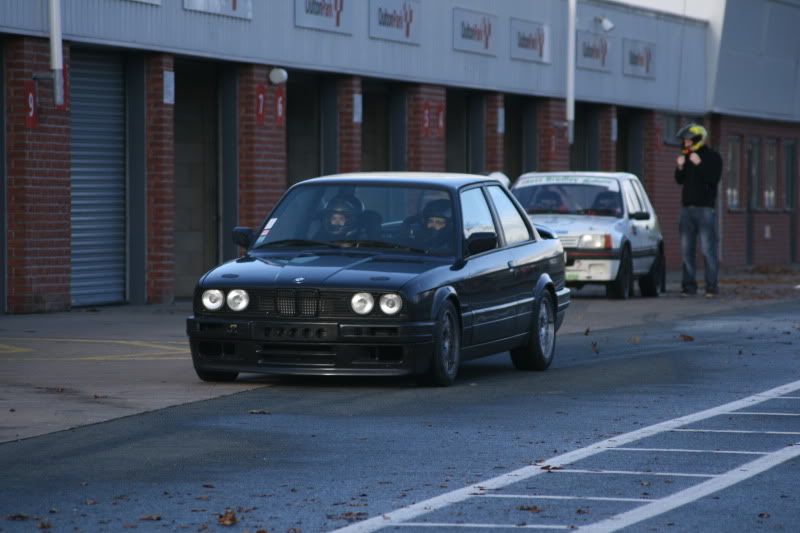
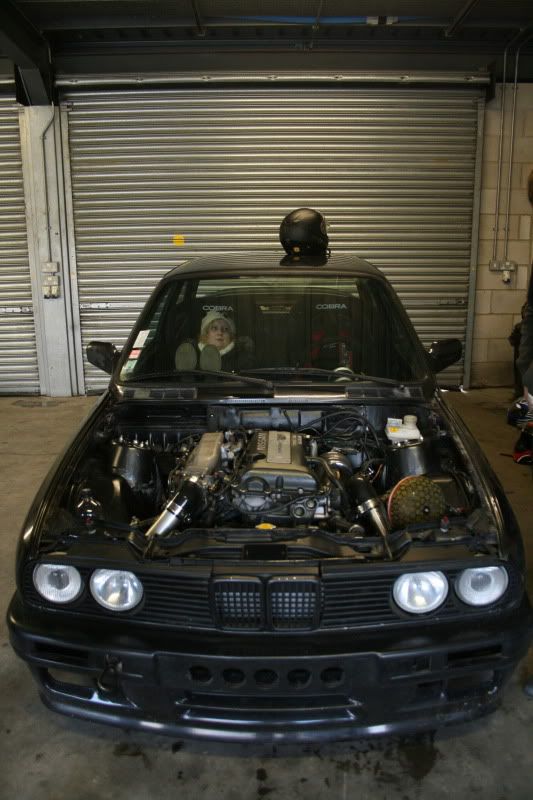
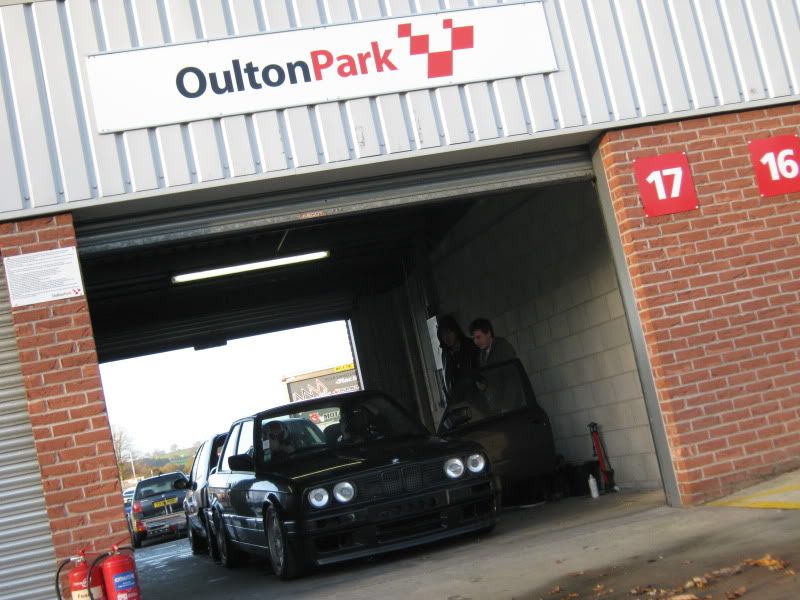
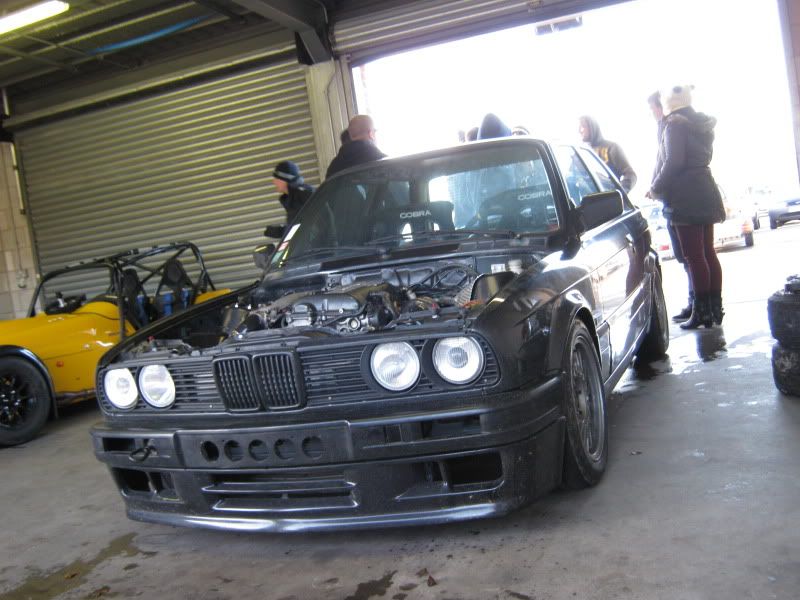
Bit of a summary about what happened at Oulton then. I had the exhaust made on Friday - I wanted it 3inch all the way back and not boomy/loud. Ended up putting a 100cell sports cat (that I already had) up front with a backbox, then just a 3" straight tip. Whole thing was TIG'd, really nice job, happy with the sound too.
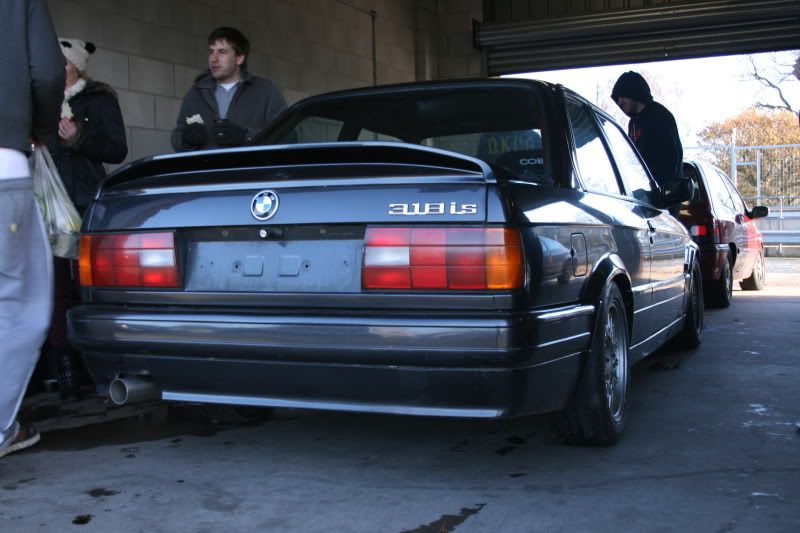
Also fitted a steering wheel and boss after the exhaust had been finished..
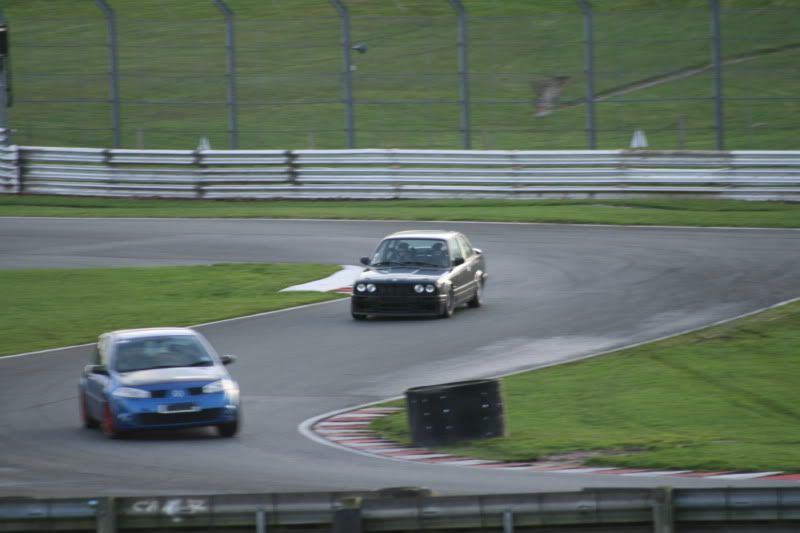
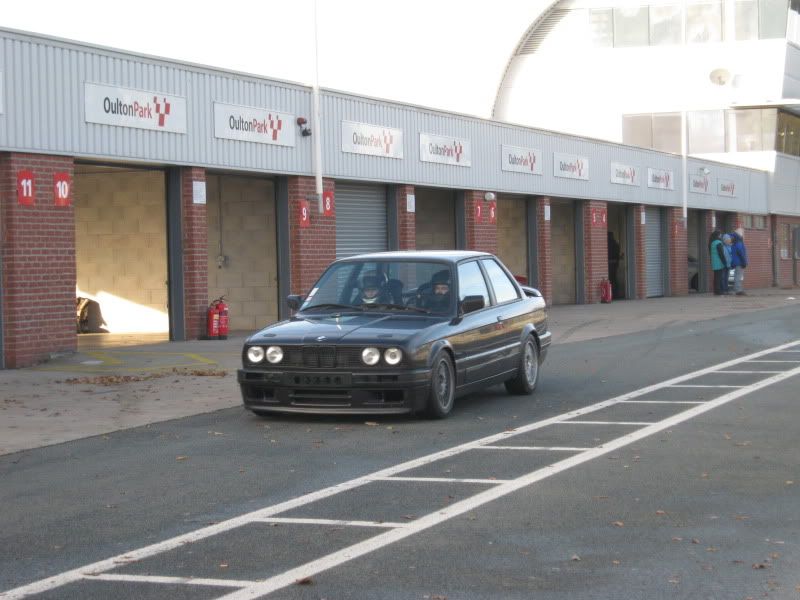
Arrived at Oulton on the Saturday, all was well. Took it out on the sighting laps and it certainly spins the rear wheels up very easily when the boost comes in (only stock at the moment!). Anyway, after a few laps I started giving it a bit more throttle (plus there was a dry line by this point), but it just didnt want to boost past 4000rpm, it was like the engine didn't want to rev, or the turbo was dropping all the boost.
Everything else felt OK, suspension is really nice, turn in is good despite not even being set up fully yet, brakes are good too. After a lot of messing around with boost pipes, checking if the actuator was OK, running it without a boost controller, running it without a recirc valve, checking all the vacuum hoses, it still didnt want to rev up when put under load. I originally thought it could be fuel (before checking any of that stuff), but ended up thinking it wasn't after testing it at the rail and it seemed to have good pressure. You could rev it up to 7k when stationary, just would not pass around 4000rpm once moving, and it had very little power.
After testing all the above and it making no difference, I decided to remove the pump from the tank and try it in a bucket of fuel. When it was inside the tank it was very loud (high pitched) but I thought that was just how it was (Walbro 255 from an S14a). After running it in the bucket it was silent, which kind of pointed towards this being the problem. I removed the filter from the bottom of the pump and it was full of sh*t - I think it had been sat on the bottom of the tank and the pump was just sucking against the bottom, not getting enough fuel - hence not being able to rev up under load. You could put as much throttle as you wanted on but the revs would not change.

By this point it was nearly 4pm, so I decided to re-fit it into the tank without its filter as a test. Started it up and the pump was near enough silent, engine ran smoother too. Turns out that damn fuel pump was more than likely the cause of the whole days issues. Oh well!
..and a couple of videos someone got. Sorry no videos of it on track due to all the issues - no doubt I will get it back out there soon!
http://www.youtube.com/watch?v=fhHL_StlooA
http://www.youtube.com/watch?v=CobrhEjtBt4
Also fitted a steering wheel and boss after the exhaust had been finished..
Arrived at Oulton on the Saturday, all was well. Took it out on the sighting laps and it certainly spins the rear wheels up very easily when the boost comes in (only stock at the moment!). Anyway, after a few laps I started giving it a bit more throttle (plus there was a dry line by this point), but it just didnt want to boost past 4000rpm, it was like the engine didn't want to rev, or the turbo was dropping all the boost.
Everything else felt OK, suspension is really nice, turn in is good despite not even being set up fully yet, brakes are good too. After a lot of messing around with boost pipes, checking if the actuator was OK, running it without a boost controller, running it without a recirc valve, checking all the vacuum hoses, it still didnt want to rev up when put under load. I originally thought it could be fuel (before checking any of that stuff), but ended up thinking it wasn't after testing it at the rail and it seemed to have good pressure. You could rev it up to 7k when stationary, just would not pass around 4000rpm once moving, and it had very little power.
After testing all the above and it making no difference, I decided to remove the pump from the tank and try it in a bucket of fuel. When it was inside the tank it was very loud (high pitched) but I thought that was just how it was (Walbro 255 from an S14a). After running it in the bucket it was silent, which kind of pointed towards this being the problem. I removed the filter from the bottom of the pump and it was full of sh*t - I think it had been sat on the bottom of the tank and the pump was just sucking against the bottom, not getting enough fuel - hence not being able to rev up under load. You could put as much throttle as you wanted on but the revs would not change.
By this point it was nearly 4pm, so I decided to re-fit it into the tank without its filter as a test. Started it up and the pump was near enough silent, engine ran smoother too. Turns out that damn fuel pump was more than likely the cause of the whole days issues. Oh well!
..and a couple of videos someone got. Sorry no videos of it on track due to all the issues - no doubt I will get it back out there soon!
http://www.youtube.com/watch?v=fhHL_StlooA
http://www.youtube.com/watch?v=CobrhEjtBt4

There was always going to be daft shakedown issues first time out - good progress in my book! 
WMS E30 brake kits! (4-pot 280mm & 300mm front / 2-pot 290mm rear)
www.wms-brakes.co.uk / http://www.e30zone.net/modules.php?name ... c&t=209737
www.wms-brakes.co.uk / http://www.e30zone.net/modules.php?name ... c&t=209737
-
Jhonno
- Homo Hair
- Posts: 20362
- Joined: Mon Jan 10, 2005 11:00 pm
- Location: FLAT, FLAT, FLAT!!
- Contact:
You understand what a helper spring actually does right? It is supposed to be fully compressed with weight on.. It just stops the main spring coming loose under rebound..f0xy wrote:Yep, it now clears by quite a bit, but obviously it would as the spring is shorter. Completely pointless having helpers on there also as they are 100% compressed even set at this height, so need removing really. I let it down onto the floor and its about 20mm (if not more) too high than the height I wanted to start with.
Now if I wind it down that amount, the spring platforms will be on the tyre again. I may gain 10mm of space removing the helper (i.e not having to wind it down the full 20mm), but its besides the point, I may aswell just be running springs and shocks. So I'm going to have to get back in contact with them again, brilliant! Anyway, I got on with some other bits instead..
Spacers or lower offset wheels.

Yep - obviously. The clue is in the name... problem is the helper spring is fully compressed, along with the main spring being under a LOT of tension. Even if I got 6ft of air the suspension would never expand enough to even make the main spring slack - hence why I said its pointless having them on....
If they are left on the car will not go any lower in height than in the picture above, as if you wind the collars down its back on the tyre. Whereas if the helper was removed and platform left in the same place, I got a lower height whilst still keeping quite a bit of tension on the main spring..
If they are left on the car will not go any lower in height than in the picture above, as if you wind the collars down its back on the tyre. Whereas if the helper was removed and platform left in the same place, I got a lower height whilst still keeping quite a bit of tension on the main spring..
Love this thread, doing sort of the same but mine has a c20let from a vauxhall and will be a road car and will be using rpm suspension aswell but with 17" wheels, hope i dont have the same problems as you. Very nice motor well done you.

He's back! 
WMS E30 brake kits! (4-pot 280mm & 300mm front / 2-pot 290mm rear)
www.wms-brakes.co.uk / http://www.e30zone.net/modules.php?name ... c&t=209737
www.wms-brakes.co.uk / http://www.e30zone.net/modules.php?name ... c&t=209737
Yeah its purely track. Im on the lookout for a sump and rocker stoppers at the moment. Also the possibility of ditching the standard tanks and using a tank in the spare wheel space with a swirl pot and decent pump. Il have to see come the new year!
Its just what was available at the time in decent condition and known mileage. I calculated approx mph figures when paired with an S14a box and a 3.73 diff before going for it, which worked out at:
(all at 7000rpm)
1st - 37mph
2nd - 66mph
3rd - 95mph
4th - 125mph
5th - 163mph
Which seemed to be OK for what I needed. My previous track car used to hit 161mph @ 7500rpm in 5th so pretty much the same. If it was a 3.91 the difference would be marginal with 4th being 118mph and 5th being 158mph. All only rough calculations mind.
I thought the different gearing affects the accelaration times and top speed no? I think the 3.91 will improve acceleration but sacrifice a little bit of top speed, as you hv shown in ur calculation. I am confused as to which gearing to choose from en route to my swap 

At some point yeah - I just want to get it driving/working properly for now on track then I can fiddle with different gearboxes and LSDs
Spent too much on a new tow car for the time being to be spending lots on the E30 lol. Back at Oulton on friday for another day out with the car though!
Spent too much on a new tow car for the time being to be spending lots on the E30 lol. Back at Oulton on friday for another day out with the car though!

Hi mate, the m42 is running well now! Turned out to be a few damaged wires in the loom.
Have you experienced any problems with the exhaust manifold and brake mc being so close?
Also, are you running a standard sump?
Really nice car by the way, I've sat with Theo in his, and boy does it fly! I love the SR
Good luck for the next track day!
Have you experienced any problems with the exhaust manifold and brake mc being so close?
Also, are you running a standard sump?
Really nice car by the way, I've sat with Theo in his, and boy does it fly! I love the SR
Good luck for the next track day!
Long overdue a bit of an update in here. So on the 17th February a group of us went over to our most local circuit, Oulton Park. It was quite damp and I was running Pilot Sport Cups, suspension hadn't been set up as per fuel pump issues last year, so I was taking it very easily.

Still, after about an hour I came over Clay Hill and just as it was coming on boost the back end went light, spun it round and hit the wall coming to a stop against it.
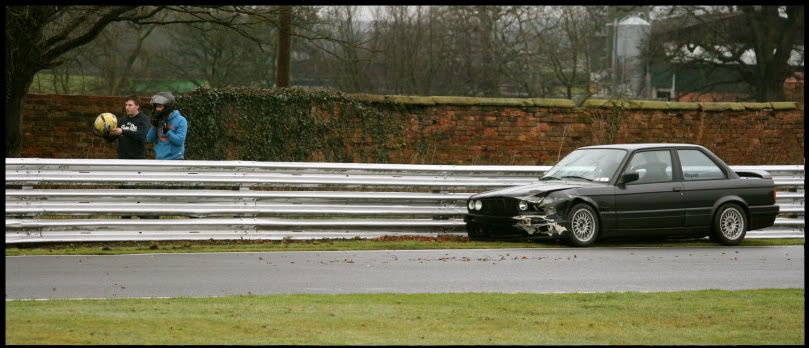
Initially thought it wasn't too bad, but since the steering wouldn't turn properly (jamming on the downpipe) I new quite a few bits had moved.
So I finally got some time to strip it down, and I was hoping it would be a scratch! Unfortunately not..
About the only thing on the front end thats still solid (thankfully) is the intercooler. Suspension/wishbone/brakes are all OK too. Radiator has twisted/split and the bumpers/panels are scrap too obviously..

Luckily when I was putting the engine in I took measurements of the distance between the chassis legs from both front and back of the engine bay. The first thing i measured was the difference in the front which was obviously going to be quite a bit... measured the back hoping for there to be no difference but it was approx 20mm narrower.
The steering was very notchy when we moved it after the crash and kept sticking, I thought it may have been the rack but it wasnt..

Its the steering linkage touching the downpipe, which means the lower subframe (that the engine sits on/rack bolts to) has moved... I could fit my hand between the linkage/downpipe beforehand.


After looking at the other side where the alternator is near the chassis leg it seems the engine has moved slightly (well, the lower subframe). But the main problem is the difference in measurements between the two chassis legs, the side that hit seems to have moved all along and took the inner wing/strut/lower subframe with it. Now if it was just the front section of the chassis leg it would be a relatively simple fix I guess, but replacing the whole leg means going from the bulkhead.


The upper crossmember has only deformed on the side that hit, the middle and other side have retained their shape. The lower crossmember that the radiator sits on has moved all the way along and would need replacing from the other side across to the side that hit. Obviously its fixable, anything is, but I dont want to be cutting chassis leg/inner wing/strut/ off all the way up to the bulkhead, its just not cost effective at all.

So with the amount it would cost to get someone else to fix it, or attempt to cut another car up and bodge it myself I decided to see if there were any other shells around.
Luckily found one on here within 30 miles of my house for not much money at all, solid shell just absolutely bare. Perfect for what I need really, as the welding inside for the seat bars and other bits would need doing again.
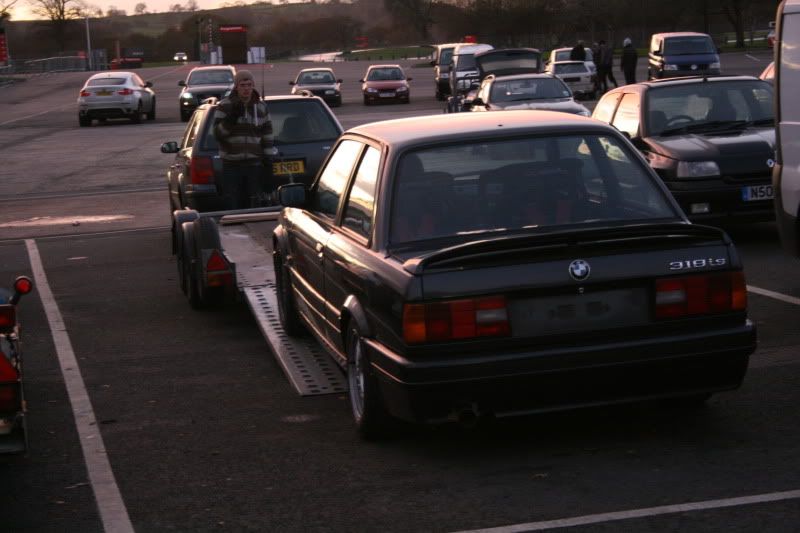
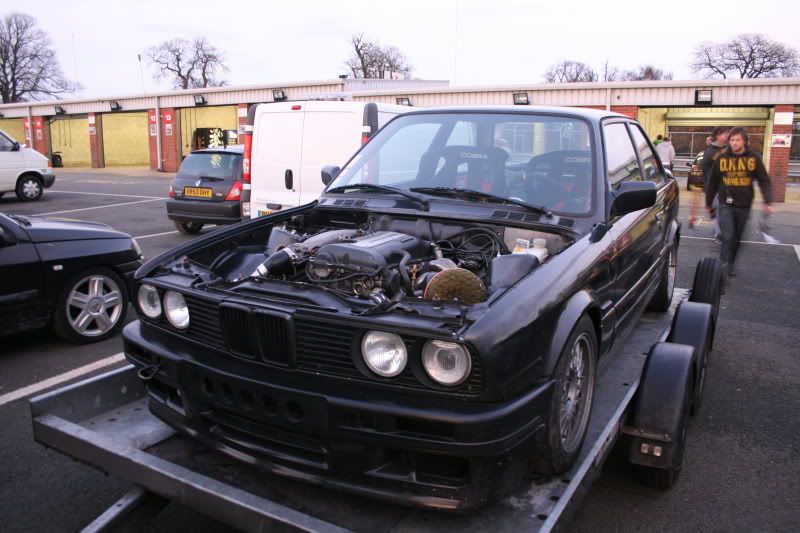
A couple of evenings later I took a flatbed up to collect it, got round to unloading it today. Moved the black car over to one side and managed to get them sat next to each other in the garage so everything can be swapped in one go.


Getting it off the trailer and into the garage was interesting to say the least, engine crane and numerous jacks got us there in the end..


It came with doors too, just took them off to make it easier to strap down. Its rust free bar one small bubble on the O/S rear arch which I will sand out before painting it. Footwells, scuttle panel sides, inner rear arches and engine bay are solid. It was was originally a RHD shell. I got a RHD pedalbox, column and other bits off the guy the shell was from too, so I'm going to keep it RHD. E46 'Club Sport' 067 rack will be going on instead.
I'm going to be putting the MTec kit on this one too, but obviously its red and the kit is black. Once I've done the welding I need to do (Seat bars and bulkhead) I'm going to spend a weekend and base coat the whole thing one color and keep it matte for the rest of the year until I decide to put a cage into it - probably getting it painted properly after that. The only work that needs to be done different to the other shell is I want to move the servo/brakes over to the drivers (RH) side and mount them behind the pedal box like on a Clio for example, unlike usually all E30s have them on the N/S with a link bar behind the dashboard.
Still, after about an hour I came over Clay Hill and just as it was coming on boost the back end went light, spun it round and hit the wall coming to a stop against it.
Initially thought it wasn't too bad, but since the steering wouldn't turn properly (jamming on the downpipe) I new quite a few bits had moved.
So I finally got some time to strip it down, and I was hoping it would be a scratch! Unfortunately not..
About the only thing on the front end thats still solid (thankfully) is the intercooler. Suspension/wishbone/brakes are all OK too. Radiator has twisted/split and the bumpers/panels are scrap too obviously..
Luckily when I was putting the engine in I took measurements of the distance between the chassis legs from both front and back of the engine bay. The first thing i measured was the difference in the front which was obviously going to be quite a bit... measured the back hoping for there to be no difference but it was approx 20mm narrower.
The steering was very notchy when we moved it after the crash and kept sticking, I thought it may have been the rack but it wasnt..
Its the steering linkage touching the downpipe, which means the lower subframe (that the engine sits on/rack bolts to) has moved... I could fit my hand between the linkage/downpipe beforehand.
After looking at the other side where the alternator is near the chassis leg it seems the engine has moved slightly (well, the lower subframe). But the main problem is the difference in measurements between the two chassis legs, the side that hit seems to have moved all along and took the inner wing/strut/lower subframe with it. Now if it was just the front section of the chassis leg it would be a relatively simple fix I guess, but replacing the whole leg means going from the bulkhead.
The upper crossmember has only deformed on the side that hit, the middle and other side have retained their shape. The lower crossmember that the radiator sits on has moved all the way along and would need replacing from the other side across to the side that hit. Obviously its fixable, anything is, but I dont want to be cutting chassis leg/inner wing/strut/ off all the way up to the bulkhead, its just not cost effective at all.
So with the amount it would cost to get someone else to fix it, or attempt to cut another car up and bodge it myself I decided to see if there were any other shells around.
Luckily found one on here within 30 miles of my house for not much money at all, solid shell just absolutely bare. Perfect for what I need really, as the welding inside for the seat bars and other bits would need doing again.
A couple of evenings later I took a flatbed up to collect it, got round to unloading it today. Moved the black car over to one side and managed to get them sat next to each other in the garage so everything can be swapped in one go.
Getting it off the trailer and into the garage was interesting to say the least, engine crane and numerous jacks got us there in the end..
It came with doors too, just took them off to make it easier to strap down. Its rust free bar one small bubble on the O/S rear arch which I will sand out before painting it. Footwells, scuttle panel sides, inner rear arches and engine bay are solid. It was was originally a RHD shell. I got a RHD pedalbox, column and other bits off the guy the shell was from too, so I'm going to keep it RHD. E46 'Club Sport' 067 rack will be going on instead.
I'm going to be putting the MTec kit on this one too, but obviously its red and the kit is black. Once I've done the welding I need to do (Seat bars and bulkhead) I'm going to spend a weekend and base coat the whole thing one color and keep it matte for the rest of the year until I decide to put a cage into it - probably getting it painted properly after that. The only work that needs to be done different to the other shell is I want to move the servo/brakes over to the drivers (RH) side and mount them behind the pedal box like on a Clio for example, unlike usually all E30s have them on the N/S with a link bar behind the dashboard.
After plodding on after work during the week I managed to get the got the black one pretty much stripped down and ready to get the red one rolling...


The downpipe looks like it has plenty of room when its out of the car, but it really does not once its in there!


Bracket onto the engine side of the gearbox mount to keep it from banging/attached to the engine movement..

Then dropped the front subframe/suspension setup off in once piece, hoping to bolt it up to the other in one go..


But it would not fit, 10mm out on the holes so it must have bent slightly when it was hit. Luckily I picked up a spare with the shell so il have to swap everything over. Can see the bent leg more with the engine out..


Along with a hefty dent in the downpipe where the steering linkage hit..

Got hold of an E46 'club sport' 067 rack..

Couple of pictures of the exhaust off the car, never put any up after it was made..


Dropped the whole rear subframe and diff off but no pictures of that, last job is to swap the tank to the other shell before fitting the suspension and getting it rolling.
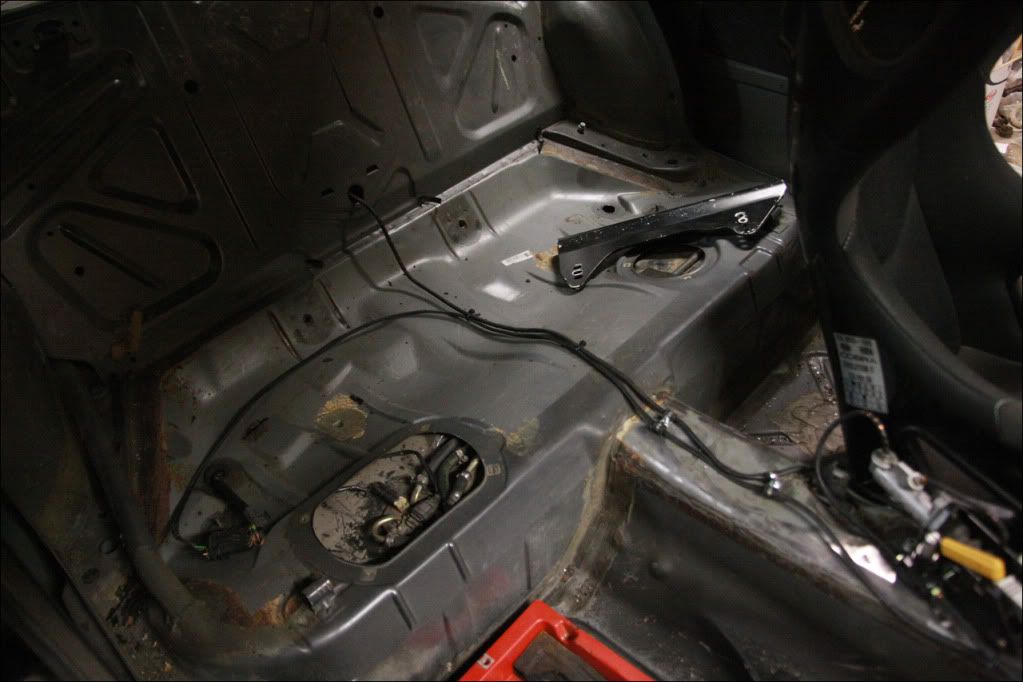
Eventually got round to swapping the tank from the black shell to the red one with a bit of messing around. I wanted to route the fuel pipes down the drivers (O/S) side of the car, due to the fuel setup on the SR20 being on the drivers side too. Before the pipes would run across the top of the tank, up the N/S, then back over to the O/S in the engine bay which was a pain. After a bit of tank (panel) beating using some wood and a hammer, I had a good shape to let the pipes fit down and along the drivers side nicely.
Next up we tried to fit the whole front suspension/subframe setup in one go, until we put it in position and the holes would not line up, meaning the other subframe must have been bent in the crash. I got a spare with the replacement shell, so swapped everything over to that then put it onto the car. Fitted the E46 '067' rack and RHD column, just need to screw the E30 tie rods on then its good to go.


Used some 3mm plate over the top of the ARB mount on the rear arms, then welded them on..


Dragged the rear beam (complete) under the car and bolted it up into position..

Fitted the column linkage between the rack and column..


Dropped the back down..

Then the front, back on four wheels again..


Hopefully the black shell will be gone at some point over the weekend, only a few more bits to take off it. There is only a bit of welding (bulkhead blanks, seat bars, etc) and drilling left to do on the red shell before its ready to be prepped and painted.
The downpipe looks like it has plenty of room when its out of the car, but it really does not once its in there!
Bracket onto the engine side of the gearbox mount to keep it from banging/attached to the engine movement..
Then dropped the front subframe/suspension setup off in once piece, hoping to bolt it up to the other in one go..
But it would not fit, 10mm out on the holes so it must have bent slightly when it was hit. Luckily I picked up a spare with the shell so il have to swap everything over. Can see the bent leg more with the engine out..
Along with a hefty dent in the downpipe where the steering linkage hit..
Got hold of an E46 'club sport' 067 rack..
Couple of pictures of the exhaust off the car, never put any up after it was made..
Dropped the whole rear subframe and diff off but no pictures of that, last job is to swap the tank to the other shell before fitting the suspension and getting it rolling.
Eventually got round to swapping the tank from the black shell to the red one with a bit of messing around. I wanted to route the fuel pipes down the drivers (O/S) side of the car, due to the fuel setup on the SR20 being on the drivers side too. Before the pipes would run across the top of the tank, up the N/S, then back over to the O/S in the engine bay which was a pain. After a bit of tank (panel) beating using some wood and a hammer, I had a good shape to let the pipes fit down and along the drivers side nicely.
Next up we tried to fit the whole front suspension/subframe setup in one go, until we put it in position and the holes would not line up, meaning the other subframe must have been bent in the crash. I got a spare with the replacement shell, so swapped everything over to that then put it onto the car. Fitted the E46 '067' rack and RHD column, just need to screw the E30 tie rods on then its good to go.
Used some 3mm plate over the top of the ARB mount on the rear arms, then welded them on..
Dragged the rear beam (complete) under the car and bolted it up into position..
Fitted the column linkage between the rack and column..
Dropped the back down..
Then the front, back on four wheels again..
Hopefully the black shell will be gone at some point over the weekend, only a few more bits to take off it. There is only a bit of welding (bulkhead blanks, seat bars, etc) and drilling left to do on the red shell before its ready to be prepped and painted.
Been trying to get all the big jobs and welding done before paint. Set about getting the seat mounts welded - not many images 'in progress' but I was just cracking on. Pretty much the same as what I did on the black shell, 3mm plate for strength and made use of the threaded holes already in the floorpan of the E30 chassis. I changed the way it was done slightly (good thing about having done the same before I guess!), although I still had to box out the drivers side (as the seat is narrower), but this was not required on the passenger side as the seat is GT width.


Next up was the intercooler mount. Two bolts through the top of the slam panel as before, then a piece of 25mm x 5mm bar welded underneath as a support. Cut it to a tight fit then welded it solid.


Made sure there was enough room behind the cooler as a 16row oil cooler is going to be mounted on the bottom of the crossmember stepped behind the intercooler..


The majority of the brackets/mounts in the engine bay are not required so needed cutting off. I also decided to cut out the battery tray on the drivers side as its not required. Also cut out the servo mount from the bulkhead as it will be plated up with the rest of the holes..


Next up was the intercooler mount. Two bolts through the top of the slam panel as before, then a piece of 25mm x 5mm bar welded underneath as a support. Cut it to a tight fit then welded it solid.
Made sure there was enough room behind the cooler as a 16row oil cooler is going to be mounted on the bottom of the crossmember stepped behind the intercooler..
The majority of the brackets/mounts in the engine bay are not required so needed cutting off. I also decided to cut out the battery tray on the drivers side as its not required. Also cut out the servo mount from the bulkhead as it will be plated up with the rest of the holes..
Bit of a change in plans as I was going to use Marham to test the car but its now been postponed until the end of May so I've got a bit more time. I've been painting panels over the past few weeks when I've had a bit of free time here and there, the majority of things are done bar the shell now. I ended up using a light grey high build primer (as £27/5L vs £100+/5L for a color) can't be justified at this point, considering it does not have a cage and if something needs modifying/welding once its been used I dont want to be grinding off more expensive paint. Once I'm happy with the car/shell I will paint it properly once and for all - putting the effort in with the prep and primer should pay off in the long run anyway whenever that may be.


Hopefully get round to doing the shell in the next week or so once I know all the welding/modifications have been done. I had already cut out the standard servo mount on the N/S (same place on all E30s) and welded it up. Also plated up any other holes that are not needed in the bulkhead. The main reason everything was being blanked is I was going to swap the standard servo/master cylinder setup for an aftermarket pedal box - allowing me to choose separate master cylinders for front and rear.
Although the lead time on the type I wanted was 2 weeks+, and Marham was 3 weeks away, so not enough time for any errors. So I ended up forgetting that idea and making a one-off setup as below. Since then Marham has been postponed so in hindsight I could have actually gone with the pedal box, but I've made it work now so there's no need for it as of yet.
As I have previously mentioned the Servo/MC on an E30 is usually on the N/S (regardless of it being RHD or LHD), so it was always going to be an issue with the SR20DET having the exhaust/turbo on that side also. Last time I moved the whole servo/MC setup over by ~40mm to get the required clearance, but it was never an ideal solution.
I decided on this shell I wanted to move the whole setup to the other side, with it being RHD, it would be directly behind the pedalbox like on a Clio for example. The problem was as far as myself and a couple of others could find no one else had really done this. There was one person who had flipped the whole standard setup over 180degrees on a LHD shell, meaning the servo was on the RH side, but that was only done to fit an M5 V10 engine. Far from ideal as this new shell was to be RHD and I didn't want the 'link bar' behind the dashboard loosing feel in the pedal.
Basically with the linkage mechanism removed and the pedal box mounted to the car, this is what you are left with. The top circle is where I need the clevis for the pedal to connect to, the second lower circle is a reference to the engine bay side in the lower picture.


Ideally I needed it to be slightly higher to match the height of the pedal connection. On the second image you can see an X penciled onto the bulkhead, this about as high as it can go before having issues with the servo rod hitting the top of the pedal box.
The next major problem was the overall diameter of the servo. I wanted to retain the Clio (182) servo as its a dual diaphram and one of the smallest diameter/slimmest cobminations readily available to get from breakers. The E30 ones are larger, and I even looked at using an S14 one which is a tad bigger than a Clio one also. So I set about working from the dimensions of that.
Obviously the mounting point would have to be moved inward slightly to clear the inner arch, but when I set about measuring that up I hit problem number 2 - I could only gain around 10mm due to the clutch master cylinder being mounted on the pedal box inside also. If I wanted to go further than 10mm over, I would have to re-fab the whole pedalbox and move the clutch MC over too. This in turn would cause more issues as I would not be able to use the standard throttle linkage either!
10mm seemed like it would be enough thankfully after measuring a couple of times, so I marked the bulkhead up first. Obviously the servo has a large round piece of pedal sticking out of the back, so the bulkhead would have to be chopped (along with the pedal box) and then plated back up.

Before marking up and cutting the pedal box I decided to check what the maximum length of servo and master cylinder combination would fit before it would be touching the suspension turret. Near enough bang on 220mm dependant on diameter of master cylinder. The Clio servo and master cylinder combo came in at 200mm so I could carry on..

The chosen point on the pedalbox was marked and drilled..


You can see the position of it in relation to the reference hole mentioned in the first few pictures, quite a bit higher and 10mm further over. Next came the holesaw and grinder..


Leaving me with a channel for the back of the servo to sit in..

I then marked up the two bottom servo mounting holes on the pedalbox and drilled them. Slotted the servo into position and used the grinder to get the perfect amount of room inside the pedalbox..


The clevis comes through in the correct position and the red line indicates where the pedal pin usually goes. The clevis on this (spare) Clio master cylinder has been chopped down from when it was on a Mk1 clio, normally its a lot longer and will meet up with the pedal mount even in its highest positon.

Even better (and thanks to the careful measurements) the clutch master cylinder fits perfectly in its stock position with no modification

So now the pedal box would accept the servo, I needed to cut the bulkhead so it would fit through also. From the markings made earlier I double checked the measurements and cut it out...


Then bolted the pedalbox to position inside the car and slotted the servo into position for a trial fit..


It would not 100% sit flush at first, so I took the best tool in the box (hammer) to the inner arch to give it a bit more room. After giving a select few areas a bit of modification it slotted in perfectly. As you may have noticed with the cuts this means there is going to be a hole in the top of the bulkhead where the servo passes through..

Not to mention nowhere for the top two servo mounts to bolt to. With the servo being sat slightly proud of flat, I used some 2mm plate bent to 90degrees for a start. Then to give me a bit of a 'hump' so it would clear the servo I used a piece of 45mm roll cage tubing and a hammer to shape the piece of metal. Once I was happy with the position, I marked and drilled the two mounting holes.
After loosley bolting everything into place again I tacked the plate into place and welded it all the way round. Then removed the pedal box and welded the underside also..

Obviously there was going to still be a great gaping hole in the bulkhead that was originally there. So cut a bit of 2mm plate to shape and welded that in too, didnt turn out too bad considering the bulkhead is like a coke can in thickness.

Hopefully get round to doing the shell in the next week or so once I know all the welding/modifications have been done. I had already cut out the standard servo mount on the N/S (same place on all E30s) and welded it up. Also plated up any other holes that are not needed in the bulkhead. The main reason everything was being blanked is I was going to swap the standard servo/master cylinder setup for an aftermarket pedal box - allowing me to choose separate master cylinders for front and rear.
Although the lead time on the type I wanted was 2 weeks+, and Marham was 3 weeks away, so not enough time for any errors. So I ended up forgetting that idea and making a one-off setup as below. Since then Marham has been postponed so in hindsight I could have actually gone with the pedal box, but I've made it work now so there's no need for it as of yet.
As I have previously mentioned the Servo/MC on an E30 is usually on the N/S (regardless of it being RHD or LHD), so it was always going to be an issue with the SR20DET having the exhaust/turbo on that side also. Last time I moved the whole servo/MC setup over by ~40mm to get the required clearance, but it was never an ideal solution.
I decided on this shell I wanted to move the whole setup to the other side, with it being RHD, it would be directly behind the pedalbox like on a Clio for example. The problem was as far as myself and a couple of others could find no one else had really done this. There was one person who had flipped the whole standard setup over 180degrees on a LHD shell, meaning the servo was on the RH side, but that was only done to fit an M5 V10 engine. Far from ideal as this new shell was to be RHD and I didn't want the 'link bar' behind the dashboard loosing feel in the pedal.
Basically with the linkage mechanism removed and the pedal box mounted to the car, this is what you are left with. The top circle is where I need the clevis for the pedal to connect to, the second lower circle is a reference to the engine bay side in the lower picture.
Ideally I needed it to be slightly higher to match the height of the pedal connection. On the second image you can see an X penciled onto the bulkhead, this about as high as it can go before having issues with the servo rod hitting the top of the pedal box.
The next major problem was the overall diameter of the servo. I wanted to retain the Clio (182) servo as its a dual diaphram and one of the smallest diameter/slimmest cobminations readily available to get from breakers. The E30 ones are larger, and I even looked at using an S14 one which is a tad bigger than a Clio one also. So I set about working from the dimensions of that.
Obviously the mounting point would have to be moved inward slightly to clear the inner arch, but when I set about measuring that up I hit problem number 2 - I could only gain around 10mm due to the clutch master cylinder being mounted on the pedal box inside also. If I wanted to go further than 10mm over, I would have to re-fab the whole pedalbox and move the clutch MC over too. This in turn would cause more issues as I would not be able to use the standard throttle linkage either!
10mm seemed like it would be enough thankfully after measuring a couple of times, so I marked the bulkhead up first. Obviously the servo has a large round piece of pedal sticking out of the back, so the bulkhead would have to be chopped (along with the pedal box) and then plated back up.
Before marking up and cutting the pedal box I decided to check what the maximum length of servo and master cylinder combination would fit before it would be touching the suspension turret. Near enough bang on 220mm dependant on diameter of master cylinder. The Clio servo and master cylinder combo came in at 200mm so I could carry on..
The chosen point on the pedalbox was marked and drilled..
You can see the position of it in relation to the reference hole mentioned in the first few pictures, quite a bit higher and 10mm further over. Next came the holesaw and grinder..
Leaving me with a channel for the back of the servo to sit in..
I then marked up the two bottom servo mounting holes on the pedalbox and drilled them. Slotted the servo into position and used the grinder to get the perfect amount of room inside the pedalbox..
The clevis comes through in the correct position and the red line indicates where the pedal pin usually goes. The clevis on this (spare) Clio master cylinder has been chopped down from when it was on a Mk1 clio, normally its a lot longer and will meet up with the pedal mount even in its highest positon.
Even better (and thanks to the careful measurements) the clutch master cylinder fits perfectly in its stock position with no modification
So now the pedal box would accept the servo, I needed to cut the bulkhead so it would fit through also. From the markings made earlier I double checked the measurements and cut it out...
Then bolted the pedalbox to position inside the car and slotted the servo into position for a trial fit..
It would not 100% sit flush at first, so I took the best tool in the box (hammer) to the inner arch to give it a bit more room. After giving a select few areas a bit of modification it slotted in perfectly. As you may have noticed with the cuts this means there is going to be a hole in the top of the bulkhead where the servo passes through..
Not to mention nowhere for the top two servo mounts to bolt to. With the servo being sat slightly proud of flat, I used some 2mm plate bent to 90degrees for a start. Then to give me a bit of a 'hump' so it would clear the servo I used a piece of 45mm roll cage tubing and a hammer to shape the piece of metal. Once I was happy with the position, I marked and drilled the two mounting holes.
After loosley bolting everything into place again I tacked the plate into place and welded it all the way round. Then removed the pedal box and welded the underside also..
Obviously there was going to still be a great gaping hole in the bulkhead that was originally there. So cut a bit of 2mm plate to shape and welded that in too, didnt turn out too bad considering the bulkhead is like a coke can in thickness.
Now everything was welded I covered the lot in seam sealer to protect it. I tidied up the cuts on the pedal box and painted that also. Then put the pedal box back into place and bolted the servo up for one last trial fit..


Versus the old setup on the other side..


As the servo comes through to the inside everything lines up as previously seen..


I just need to swap out the spare Clio servo for a standard one with a full length clevis which will line up perfectly. Im quite happy with how everything fits and its another part of the conversion worked out as it proves its possible to move it to that side.
Previously I used the Clio 182 cylinder which has a 22.2mm bore, but I had issues at Oulton with a really long pedal. After posting on here and GeoffBob helping out I could do a direct upgrade to an E30 M3 master cylinder onto the Clio servo which has a 25mm bore, but I could still go larger again as the Clio servo gives plenty of assistance.
After a bit more discussion we came to the conclusion (with a slight bit of modification) a Nissan R33 GTR (or Nissan 300ZX) master cylinder would fit, which has a 27mm bore and two outlets on the engine side - perfect.
I had to machine the two mounting holes inwards 10mm, as the Clio studs are 60mm apart, whereas the R33 studs are 80mm. Luckily there was enough material for this, and it slots on perfectly. The rod inside the Clio servo had to be wound out slightly, then it went on and bolted up perfectly. Checked the fit on the car and I only had to modify a small part of the turret strengthening bar to get it to slot in.
Il post come pictures of the R33 cylinder on later in the week when I go back upto the car, as I've not had chance over the weekend. So there you have it, servo moved to the right hand side on an E30. More soon!
Versus the old setup on the other side..
As the servo comes through to the inside everything lines up as previously seen..
I just need to swap out the spare Clio servo for a standard one with a full length clevis which will line up perfectly. Im quite happy with how everything fits and its another part of the conversion worked out as it proves its possible to move it to that side.
Previously I used the Clio 182 cylinder which has a 22.2mm bore, but I had issues at Oulton with a really long pedal. After posting on here and GeoffBob helping out I could do a direct upgrade to an E30 M3 master cylinder onto the Clio servo which has a 25mm bore, but I could still go larger again as the Clio servo gives plenty of assistance.
After a bit more discussion we came to the conclusion (with a slight bit of modification) a Nissan R33 GTR (or Nissan 300ZX) master cylinder would fit, which has a 27mm bore and two outlets on the engine side - perfect.
I had to machine the two mounting holes inwards 10mm, as the Clio studs are 60mm apart, whereas the R33 studs are 80mm. Luckily there was enough material for this, and it slots on perfectly. The rod inside the Clio servo had to be wound out slightly, then it went on and bolted up perfectly. Checked the fit on the car and I only had to modify a small part of the turret strengthening bar to get it to slot in.
Il post come pictures of the R33 cylinder on later in the week when I go back upto the car, as I've not had chance over the weekend. So there you have it, servo moved to the right hand side on an E30. More soon!
-
Karan
- Married to the E30 Zone

- Posts: 8004
- Joined: Mon Jan 10, 2005 11:00 pm
- Location: Cheshunt, Hertfordshire
Good work, but are you not concerned that the main activation rod as well as being too low is actually to the left also a fair bit (when viewed from inside). I know there is lateral movement in the rod but that doesn't necessarily mean it's meant to be taking load at that angle