

Story of my M-tech 2
Moderator: martauto
-
shimsheemer
- E30 Zone Regular

- Posts: 533
- Joined: Sun Oct 08, 2006 11:00 pm
- Location: South
That looks very low, mine has just had Eibachs to lower the front by 35mm and this is how they look...

-
oomz1975
- E30 Zone Addict

- Posts: 2019
- Joined: Mon Feb 09, 2009 11:00 pm
- Location: London UK
Thats properly clean, thanks for sharing.


-
EddyK
- E30 Zone Newbie

- Posts: 29
- Joined: Sun Jan 17, 2010 11:00 pm
There are some more photos of my car before resurrection:


And some more photos after:


And some more photos after:

-
b4gga83

- E30 Zone Regular
- Posts: 436
- Joined: Fri Jan 14, 2005 11:00 pm
- Location: West Midlands
Want want want want want want want want!!!
Very cool
Very cool
-
si911t
- E30 Zone Regular
- Posts: 634
- Joined: Thu Oct 07, 2010 11:00 pm
- Location: Lancashire
Wow! if mine looks ahalf as good as yours when done, im going to be a very happy chappy!
Serioudly though, well done and hope it brings you joy and happiness!
Ps is that a new engine or reconditioned?
Serioudly though, well done and hope it brings you joy and happiness!
Ps is that a new engine or reconditioned?
-
charlie_ogden
- Old Skooler

- Posts: 1266
- Joined: Sun May 25, 2008 11:00 pm
I've always wanted to see what the extra gauges look like. I've seen some for sale with no sensors just the gauges and the pod. Where a bouts do all the sensors go ie pressure, cel, and volts are they just a standard sensor? Or do they replace /run off sensors already there?
Cheer Charlie
Cheer Charlie
-
EddyK
- E30 Zone Newbie
- Posts: 29
- Joined: Sun Jan 17, 2010 11:00 pm
Thank You for the compliments! Engine is reconditioned.si911t wrote:Wow! if mine looks ahalf as good as yours when done, im going to be a very happy chappy!
Serioudly though, well done and hope it brings you joy and happiness!
Ps is that a new engine or reconditioned?
-
EddyK
- E30 Zone Newbie
- Posts: 29
- Joined: Sun Jan 17, 2010 11:00 pm
When I bought this car, gauges was almost there. But without sensors. I had to buy an aftermarket oil pressure and temperature sensors.charlie_ogden wrote:I've always wanted to see what the extra gauges look like. I've seen some for sale with no sensors just the gauges and the pod. Where a bouts do all the sensors go ie pressure, cel, and volts are they just a standard sensor? Or do they replace /run off sensors already there?
Cheer Charlie
-
aj_mckay
- E30 Zone Squatter

- Posts: 1782
- Joined: Sun Nov 11, 2007 11:00 pm
- Location: Winchester
That's a seriously impressive restoration! The only thing that lets it down is the aerial on the back - get an original electric aerial and it will look loads better 
-
suchy
- True Zone Relic
- Posts: 6604
- Joined: Tue Apr 26, 2005 11:00 pm
- Location: Portsmouth
Very nice indeed- wish I had the balls and skills to do that!!! Drive-train porn shoot
-
Duke137
- Married to the E30 Zone
- Posts: 7207
- Joined: Sat Aug 29, 2009 11:00 pm
I'll be 100% honest and say:
50% of me wants to pat you on the back say well done and and just admire how good a job you have done.
50% of me thinks you coont, I will never have an E30 that looks like that and I am just outright jealous of your skills/time/money
A very cool E30, you seriously should be happy with what you have achieved there, it is as another zoner said better than when it left Munich on relaese day.
How do you pronounce 'either'? I say 'either', but some say 'either'. Either is correct.
-
staley_turbo
- E30 Zone Camper

- Posts: 1391
- Joined: Tue Jan 19, 2010 11:00 pm
- Location: Leicester
Very nice, only just seen this. Gives me a few ideas how i should be doing mine.

-
Royalratch

- E30 Zone Addict
- Posts: 4921
- Joined: Sat Oct 21, 2006 11:00 pm
- Location: London
Very nice dude. Respect!
-
SHAKEELE30
- Boost Junkie
- Posts: 3278
- Joined: Mon Apr 04, 2005 11:00 pm
- Location: CROYDON
Mate the underside of that car must look incredible mint, just got some ideas for mine, and want a finish as similar to yours as possible...
Eddy are those orginal alluminuim wishbones?
well done fella
Eddy are those orginal alluminuim wishbones?
well done fella
-
Royalratch
- E30 Zone Addict
- Posts: 4921
- Joined: Sat Oct 21, 2006 11:00 pm
- Location: London
Alloy ones don't have holes in - but could be wrong.
The engine shot is one of the most impressive things I've ever seen on the Zone.
The engine shot is one of the most impressive things I've ever seen on the Zone.
-
SHAKEELE30
- Boost Junkie
- Posts: 3278
- Joined: Mon Apr 04, 2005 11:00 pm
- Location: CROYDON
ratch, yeah your kind of right, alluminium ones only have 2 holes... Is there any other advantage of these apart from being lighter than usual ones....
oh and im getting sooo tempted to attempt a engine/suspension pic like the one eddys done
oh and im getting sooo tempted to attempt a engine/suspension pic like the one eddys done
-
MurphyE30
- E30 Zone Addict
- Posts: 2543
- Joined: Wed Dec 22, 2010 11:00 pm
- Location: North
Simplty Stunning
nice work you have done looks great, Engine and Running gear shot looks awsome!
nice work you have done looks great, Engine and Running gear shot looks awsome!
-
EddyK
- E30 Zone Newbie
- Posts: 29
- Joined: Sun Jan 17, 2010 11:00 pm
Thanks everyone for compliments! No, wishbones aren't alluminium, they are just covered with powder paint.SHAKEELE30 wrote:Mate the underside of that car must look incredible mint, just got some ideas for mine, and want a finish as similar to yours as possible...
Eddy are those orginal alluminuim wishbones?
well done fella
-
boomerm20
- E30 Zone Regular
- Posts: 625
- Joined: Thu Sep 09, 2010 11:00 pm
- Location: Florida, USA
Do you mind sharing what paint you used on the trim panel and tool tray?
-
EddyK
- E30 Zone Newbie
- Posts: 29
- Joined: Sun Jan 17, 2010 11:00 pm
I received another pleasant details:
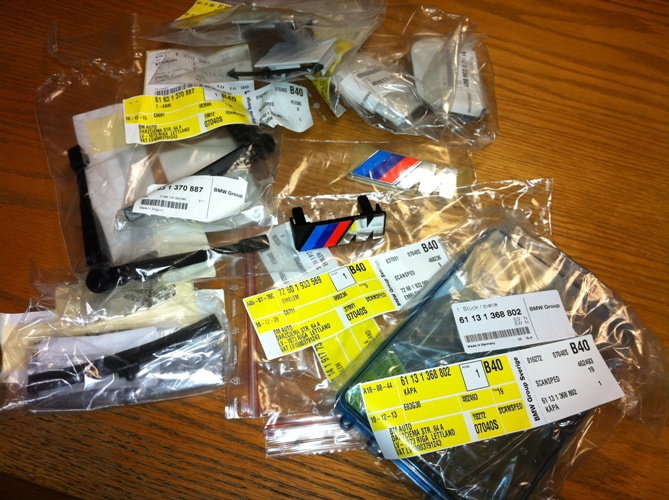
And I add one more option:

And I add one more option:
-
EddyK
- E30 Zone Newbie
- Posts: 29
- Joined: Sun Jan 17, 2010 11:00 pm
I have to find a canister in the garage after a couple of days, then I could tell.boomerm20 wrote:Do you mind sharing what paint you used on the trim panel and tool tray?
-
Royalratch
- E30 Zone Addict
- Posts: 4921
- Joined: Sat Oct 21, 2006 11:00 pm
- Location: London
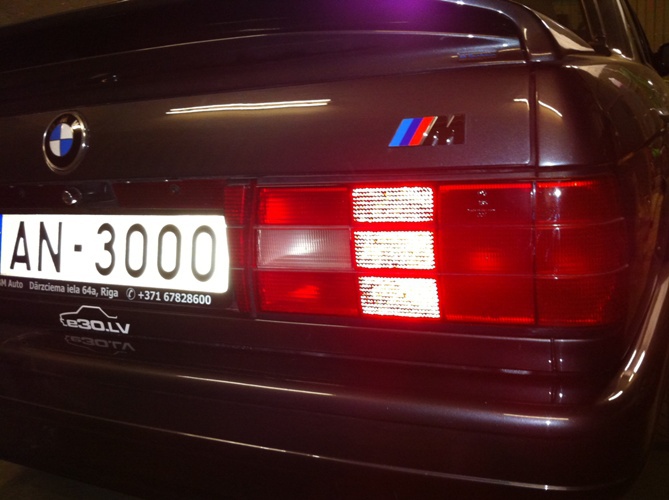
Uggh. M Badge. Well it couldn't last...
-
boomerm20
- E30 Zone Regular
- Posts: 625
- Joined: Thu Sep 09, 2010 11:00 pm
- Location: Florida, USA
delete
Last edited by boomerm20 on Mon Feb 21, 2011 11:12 pm, edited 1 time in total.
-
tonybtonyb
- E30 Zone Addict
- Posts: 3580
- Joined: Wed Jun 13, 2007 11:00 pm
- Location: essex
I would have to agree with what everybody has said.What a smashing job you have done,looks like it had just come out of the factory! 

They don't make bm's like this anymore!..They should.

-
EddyK
- E30 Zone Newbie
- Posts: 29
- Joined: Sun Jan 17, 2010 11:00 pm
Due to the fact that the radiator suddenly had a thorough leak, it was decided to tidy up the cooling system:


-
Topblag
- Old Skooler
- Posts: 7095
- Joined: Wed Jul 30, 2008 11:00 pm
- Location: Fife - You got a problem with that ?
Lovely
Think it deserves a new leather interior to finish it off.
Think it deserves a new leather interior to finish it off.
1990 325i Cab auto in Alpine White II
1988 Alpina C2.5 moredoor in Black, 71k
1990 325ix, moredoor auto in Laser Blue. 51k
1984 Hartge H35 in Black
2004 996 C4S in Silver 43k manual
2006 Audi S6 V10 in Black 58k
1988 Alpina C2.5 moredoor in Black, 71k
1990 325ix, moredoor auto in Laser Blue. 51k
1984 Hartge H35 in Black
2004 996 C4S in Silver 43k manual
2006 Audi S6 V10 in Black 58k
-
EddyK
- E30 Zone Newbie
- Posts: 29
- Joined: Sun Jan 17, 2010 11:00 pm
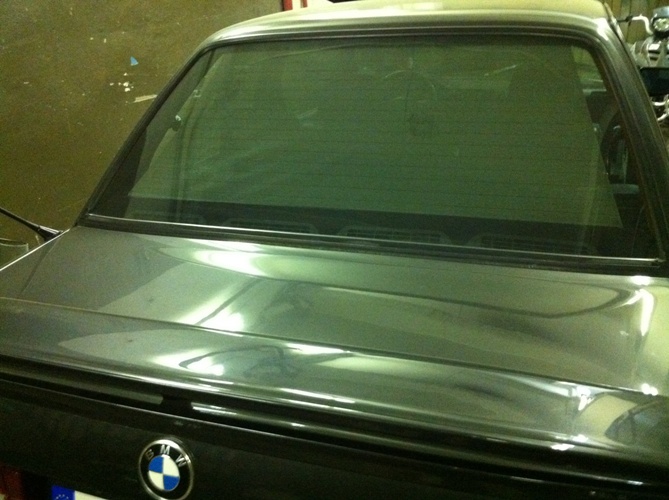
Got back after powercoating this nice thing:

And successfully installed in place:

And after waiting that lasts 1,5 years I finally got trunk lid panel from local BMW dealer. And it became twice expensive in this period of time - when I ordered it, the price was about 70 eur, but now, when I had to buy it, the price was nearly 150 eur...

And successfully installed in place:
And after waiting that lasts 1,5 years I finally got trunk lid panel from local BMW dealer.

-
EddyK
- E30 Zone Newbie
- Posts: 29
- Joined: Sun Jan 17, 2010 11:00 pm
There's something done since my last post:
Start of installing process of the very rare accessory. I decided to clean ventilation grills, where the dirt was more than necessary:

I'm satisfied with the result - the plastic looks like new!

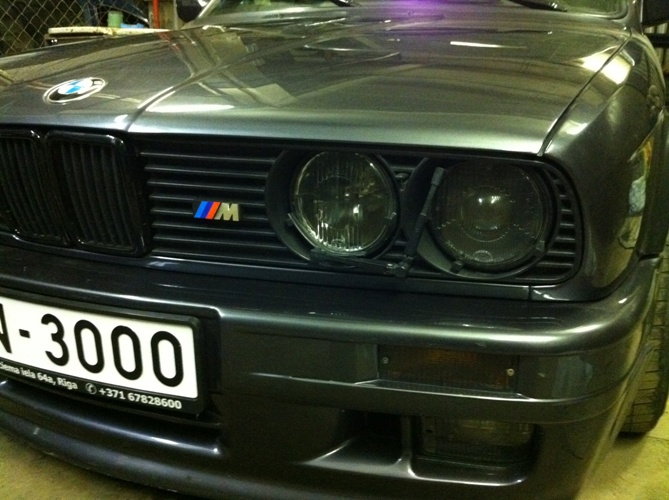
And there comes the most rare piece of plastic:


Finally Alpina gauges are alive!

Then arrived my Christmas gift. Searched and expected for long time...


In process:

On the first day was dismounted the interior and metal roof. We remake slider - the one which came with moonroof was totally corrupted. Sliders are the same for the metal roof and for the moonroof - the only difference is that moonroofs slider got stopper. So we dismount stopeer from corrupted slider and attach it to the good one. This procedure allowed to avoid the sliders alteration.
Almost all the parts of the moonroof mechanism are identical to metal roof mechanism. This fact made the work a little bit easier and it was necessary to replace only a few parts.
There was a problem with one spring - I couldn't figure out where should I place it... But in the evening, digging up Internet, I found installation manual of the glass moonroof. I found out that the springs should be two (they are holding drain gutter), so the next day I went to the shop and bought similar springs.
But then came out another unexpected problem. The metal frame of the moonroof was not in very attractive look, so I repaint it in High gloss shadow line color. However, when I imposit the frame back, there remain aprox 0.5 mm wide space between the frame and glass part. I mount brand new OEM sealing rubber and moonroof starts to tackle. I had to pull off the frame, it appeared that the glue used is too good, but, fortunately, I separate the frame from the glass successfully and stick it one more time without any gaps. But when the moonroof was pleaced, it starts to tackle again, just a little bit this time. I hope that the rubber sealing will rub off after some time and this defect will be lost.


Start of installing process of the very rare accessory. I decided to clean ventilation grills, where the dirt was more than necessary:
I'm satisfied with the result - the plastic looks like new!
And there comes the most rare piece of plastic:
Finally Alpina gauges are alive!
Then arrived my Christmas gift. Searched and expected for long time...
In process:
On the first day was dismounted the interior and metal roof. We remake slider - the one which came with moonroof was totally corrupted. Sliders are the same for the metal roof and for the moonroof - the only difference is that moonroofs slider got stopper. So we dismount stopeer from corrupted slider and attach it to the good one. This procedure allowed to avoid the sliders alteration.
Almost all the parts of the moonroof mechanism are identical to metal roof mechanism. This fact made the work a little bit easier and it was necessary to replace only a few parts.
There was a problem with one spring - I couldn't figure out where should I place it... But in the evening, digging up Internet, I found installation manual of the glass moonroof. I found out that the springs should be two (they are holding drain gutter), so the next day I went to the shop and bought similar springs.
But then came out another unexpected problem. The metal frame of the moonroof was not in very attractive look, so I repaint it in High gloss shadow line color. However, when I imposit the frame back, there remain aprox 0.5 mm wide space between the frame and glass part. I mount brand new OEM sealing rubber and moonroof starts to tackle.
-
aj_mckay
- E30 Zone Squatter
- Posts: 1782
- Joined: Sun Nov 11, 2007 11:00 pm
- Location: Winchester
-
spook
- League two here we come !!!
- Posts: 7587
- Joined: Sat Aug 19, 2006 11:00 pm
- Location: portsmouth
Cracking car mate,and some nice extras

-
Blitz
- Married to the E30 Zone
- Posts: 11155
- Joined: Mon Jan 30, 2006 11:00 pm
- Location: East London+Basildon
Very nice. glass sunroof is my favourite.
-
adit
- Married to the E30 Zone
- Posts: 13727
- Joined: Wed Jun 20, 2007 11:00 pm
- Location: portsmouth
wow!

E30 Parts Galore!! 07901 888019
[quote="bss325i"]
Get a f* grip,we are talking about 20+yr.old sub £10k cars here,NOT the crown jewels!
-
tonybtonyb
- E30 Zone Addict
- Posts: 3580
- Joined: Wed Jun 13, 2007 11:00 pm
- Location: essex
Amazing work
They don't make bm's like this anymore!..They should.