
'86 316 M20B28
Moderator: martauto
-
capri_rob
- Married to the E30 Zone

- Posts: 9681
- Joined: Tue Feb 19, 2008 11:00 pm
- Location: South Staffordshire
Bugger. At least you found it before you put it all back together mate 

e30topless said : Proper BMW's have 4 headlights, last of the run was the E30 and E34/E32 anything after that is just complete shite
-
DanThe
- E30 Zone Team Member

- Posts: 28649
- Joined: Sat Sep 10, 2005 11:00 pm
- Location: Staffs
Surely that bubbled on the inside? At least you dont have sills and arches to graft in! 
-
Dezzy
- CR24v it's a lifestyle
- Posts: 11974
- Joined: Thu May 15, 2008 11:00 pm
- Location: Middlesbrough
Thats fook all really! 

Co Founder of CR24vTM By Invitation Only. Absolutely no riff raff!!!
-
mercdriver

- E30 Zone Regular

- Posts: 814
- Joined: Mon May 30, 2011 11:00 pm
- Location: Derby
A lucky escape compared to some turds on the zone!
I'll check with the manager
-
Kedge
- Old Skooler

- Posts: 7702
- Joined: Thu Jan 13, 2005 11:00 pm
- Location: Leicestershire
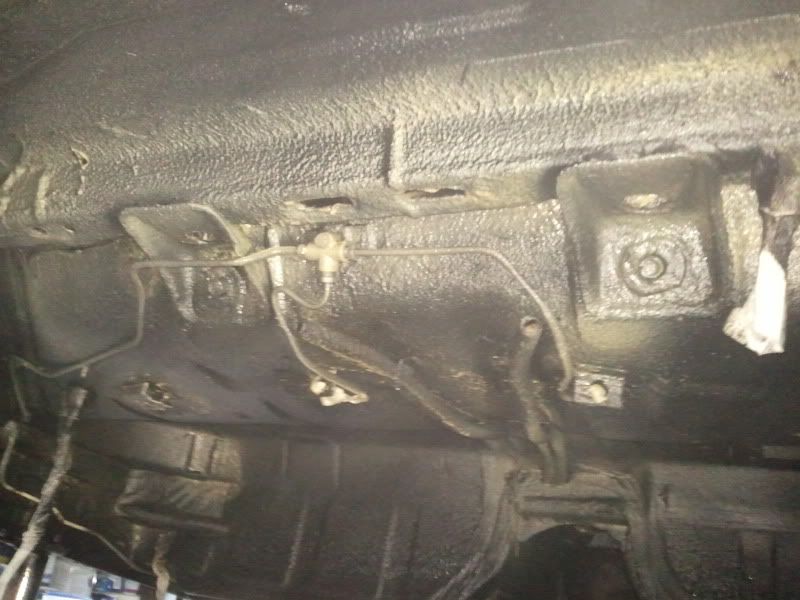
Looking where I poked through any bubbling will be hidden by seam sealer from the inner wing to the boot floor.DanThe wrote:Surely that bubbled on the inside? At least you dont have sills and arches to graft in!
It does need a spot of work on the rear section of the nearside sill, as with all the paint and metal work needed on this car, it's getting done by a professional.
Certainly makes me wonder how many E30s really are rust free!
-
Dezzy
- CR24v it's a lifestyle
- Posts: 11974
- Joined: Thu May 15, 2008 11:00 pm
- Location: Middlesbrough
Kedge wrote: Certainly makes me wonder how many E30s really are rust free!
VERY FEW
Co Founder of CR24vTM By Invitation Only. Absolutely no riff raff!!!
-
magpie
- Old Skooler
- Posts: 28035
- Joined: Sun Jun 29, 2008 11:00 pm
- Location: Consett,Durham.
nipped in the bud

m52 b30 stroker 6-speed 318is Galvanizer
m42 touring
+ a yard full of scrap turds
-
Kedge
- Old Skooler
- Posts: 7702
- Joined: Thu Jan 13, 2005 11:00 pm
- Location: Leicestershire
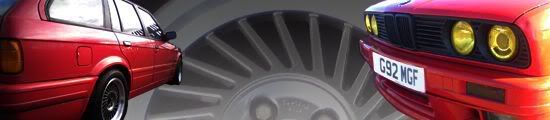
Just a quick update as i got my tank a filler neck back today from being powder coated and they look pretty damn sweet
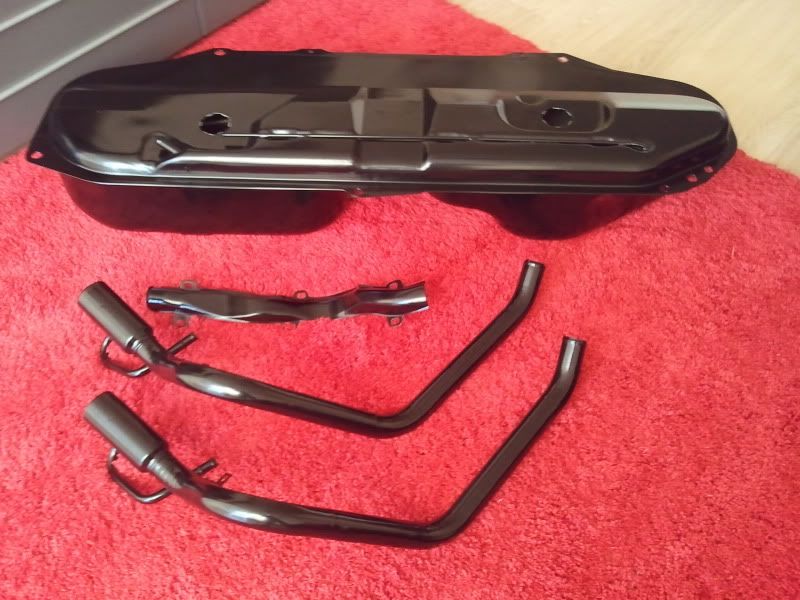
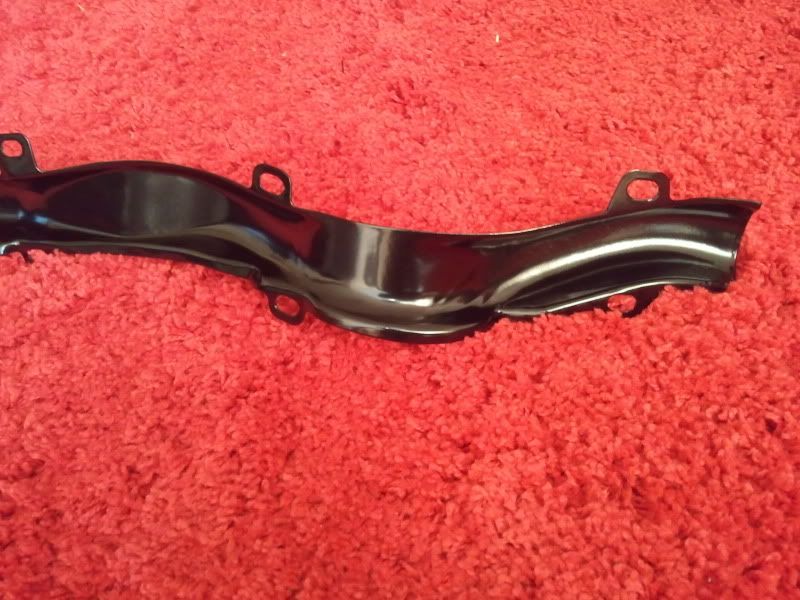

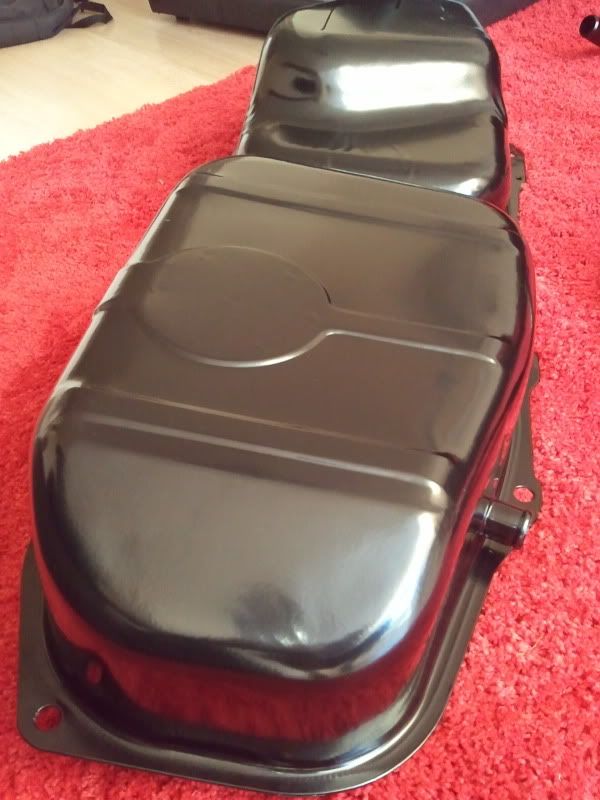

Just going to have to rub it back a little on the pump and sender unit holes but other than that i'm well happy with the results (the second filler neck will be up forsale at somepoint if anyone is interested).
Also had a delivery from BMMiniParts, just a load of clips, nuts, bolts and general crap (few things for the touring in there to). Was suprised to see that the tank guards are metal rather than the original pastic, dare say these will get powder coated next, not much there for just over £100
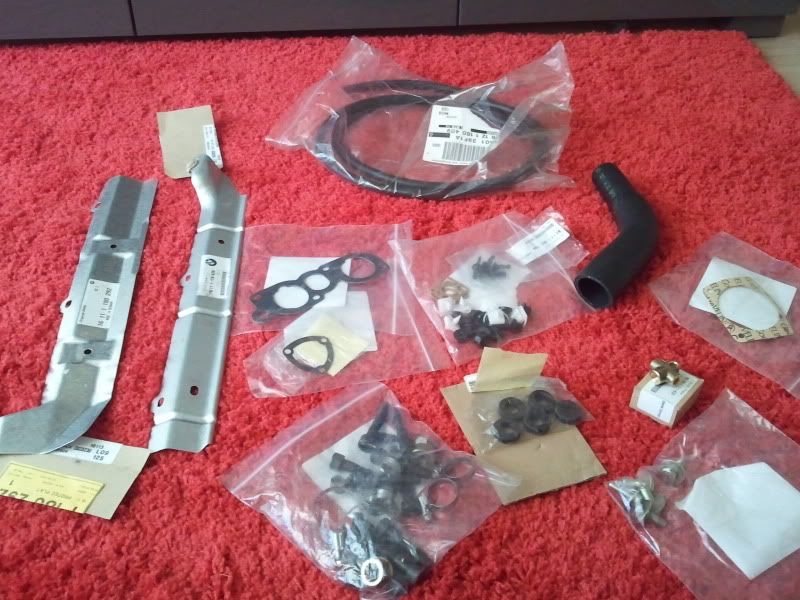
Next weeks work is to get the underside Waxoyled and the tank in and everything cleaned back (inside & out) for the inner wing repair.
Just going to have to rub it back a little on the pump and sender unit holes but other than that i'm well happy with the results (the second filler neck will be up forsale at somepoint if anyone is interested).
Also had a delivery from BMMiniParts, just a load of clips, nuts, bolts and general crap (few things for the touring in there to). Was suprised to see that the tank guards are metal rather than the original pastic, dare say these will get powder coated next, not much there for just over £100
Next weeks work is to get the underside Waxoyled and the tank in and everything cleaned back (inside & out) for the inner wing repair.
-
Jim320i
- E30 Zone News / COTM Team

- Posts: 10627
- Joined: Sun Oct 25, 2009 11:00 pm
- Location: Leicestershire
Where did you get them bits powder coated Dave? And at what cost? Looks mint!
-
MurphyE30
- E30 Zone Addict
- Posts: 2543
- Joined: Wed Dec 22, 2010 11:00 pm
- Location: North
Great progress here 
Good that you caught the rust before putting it back together.
Good that you caught the rust before putting it back together.
Could you Pm me with a price on this(the second filler neck will be up forsale at somepoint if anyone is interested).
-
Kedge
- Old Skooler
- Posts: 7702
- Joined: Thu Jan 13, 2005 11:00 pm
- Location: Leicestershire
I'll PM you both.
-
e30topless
- E30 Zone Team Member
- Posts: 13598
- Joined: Wed Aug 23, 2006 11:00 pm
- Location: surrounded by scrap
Powdercoated Tank FTW
-
Kedge
- Old Skooler
- Posts: 7702
- Joined: Thu Jan 13, 2005 11:00 pm
- Location: Leicestershire
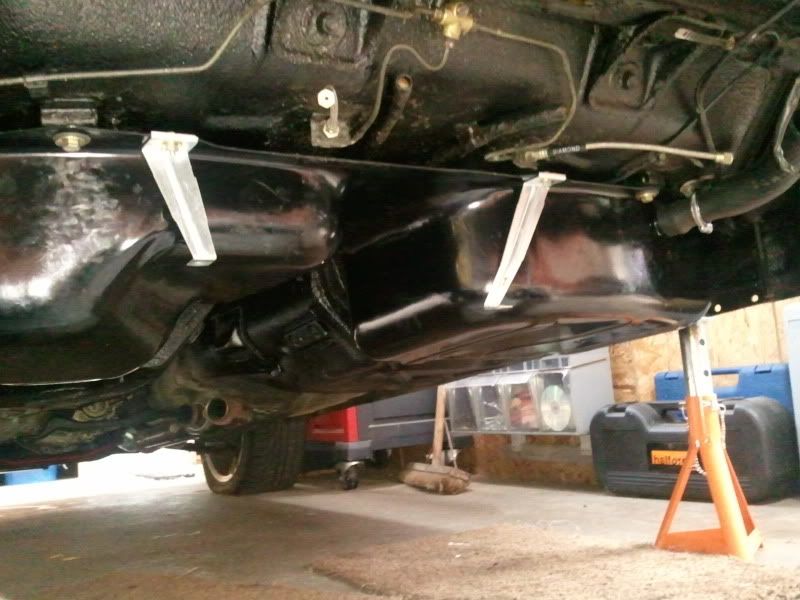
Cleaned down the inside of the rear wheel arch now ready for welding, certainly now sign of rust on the inside;
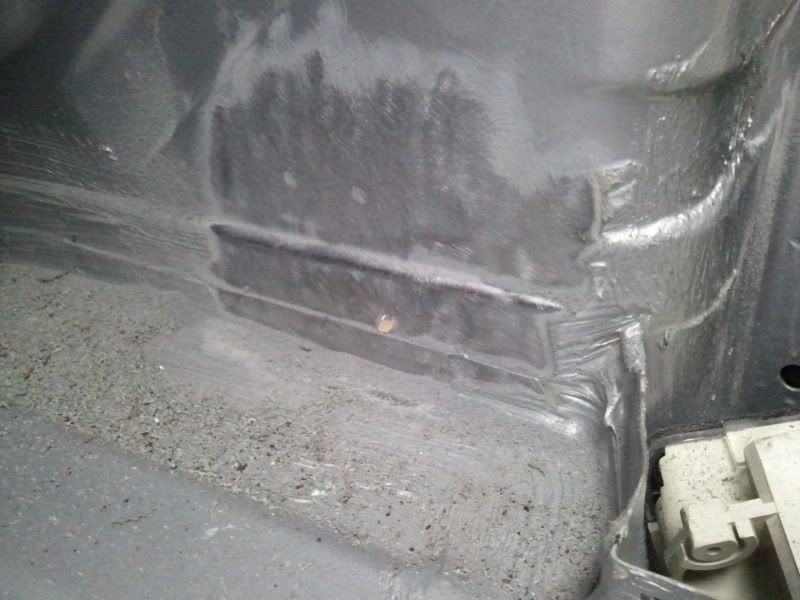
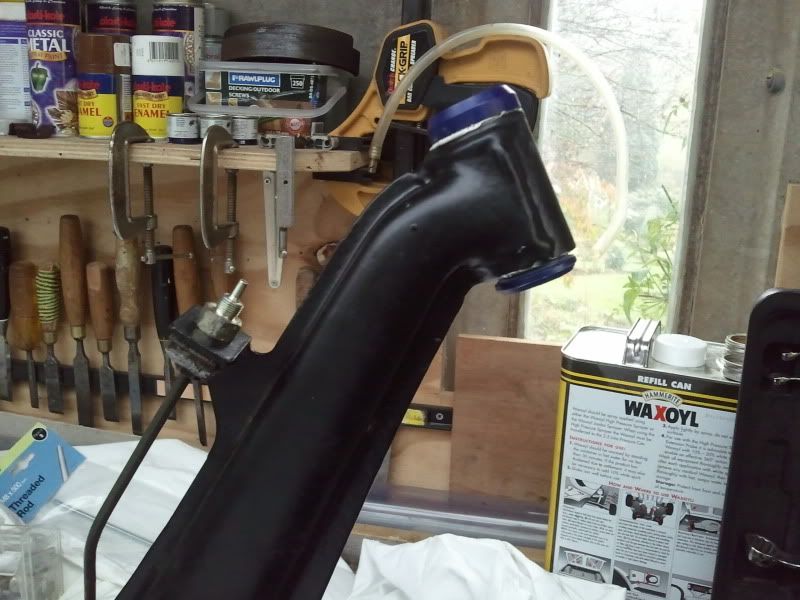
I have also got the underside and box sections waxoyled, need to do the box sections from inside the boot as well for maximum effect now;
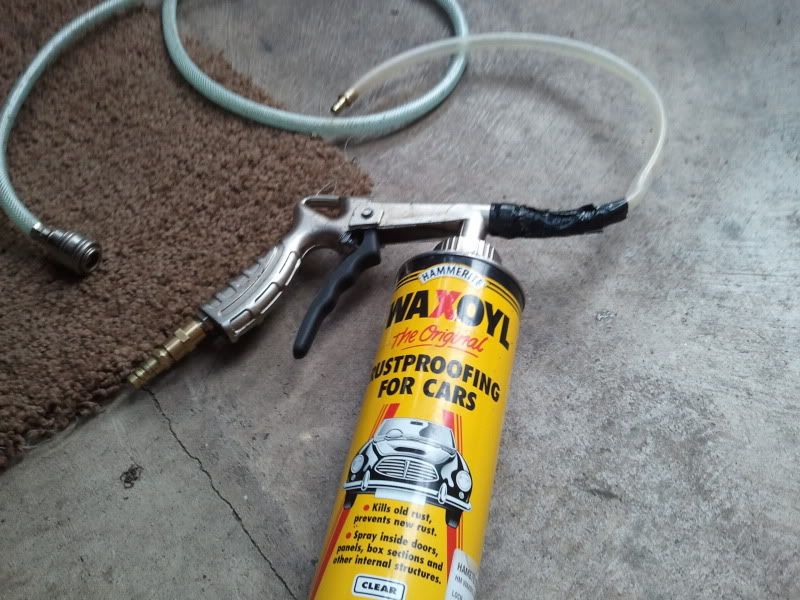
Tool of choice.
Sample of crossmember box section done.
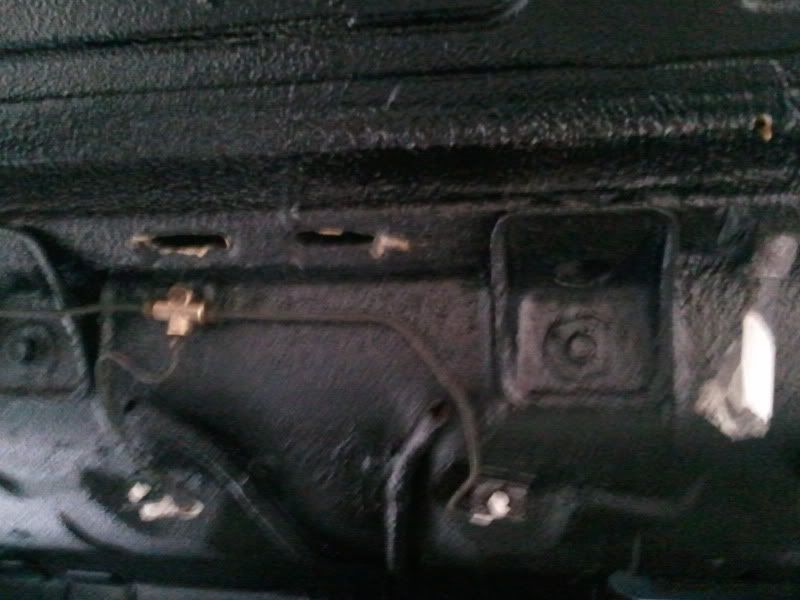
Now all over is covered, 2l sunk into it so far, don't want to give rust anychance to set in.
Also picked up a Polaris bonnet from Sweep in the week so that'll save the pain of getting a bonnet painted inside and out, will just get blown over now. Does look weird having the right colour bonnet on there
Now on a big hunt for some clips for the tank so i can get that fitted, struggling at the moment though
I have also got the underside and box sections waxoyled, need to do the box sections from inside the boot as well for maximum effect now;
Tool of choice.
Sample of crossmember box section done.
Now all over is covered, 2l sunk into it so far, don't want to give rust anychance to set in.
Also picked up a Polaris bonnet from Sweep in the week so that'll save the pain of getting a bonnet painted inside and out, will just get blown over now. Does look weird having the right colour bonnet on there
Now on a big hunt for some clips for the tank so i can get that fitted, struggling at the moment though
-
Kedge
- Old Skooler
- Posts: 7702
- Joined: Thu Jan 13, 2005 11:00 pm
- Location: Leicestershire
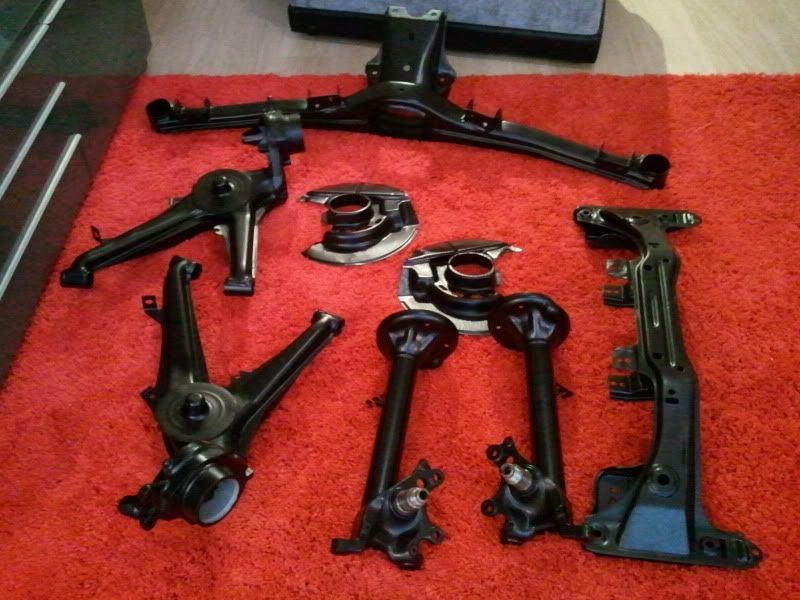
Collected yet more powdercoated parts from Dan at the weekend, might actually start putting some of these parts back on the car at some point .....................nice big expensive parts order coming up first though i think 
-
Duke137
- Married to the E30 Zone
- Posts: 7207
- Joined: Sat Aug 29, 2009 11:00 pm
Proper cool
Keep at it mate
Keep at it mate
How do you pronounce 'either'? I say 'either', but some say 'either'. Either is correct.
-
Rav335uk
- E30 Zone Meets/Events Team

- Posts: 27985
- Joined: Wed Jan 19, 2005 11:00 pm
- Location: Mad mad mad
Reminds me, i have to go and collect mine from the powdercoaters 

If you Got "Haters",Then your doing something Right!
CR24v??? Where's it all gone?? LOL
-
MurphyE30
- E30 Zone Addict
- Posts: 2543
- Joined: Wed Dec 22, 2010 11:00 pm
- Location: North
Gota love getting nice fresh bits delivered
keep up the good work
keep up the good work
-
Dezzy
- CR24v it's a lifestyle
- Posts: 11974
- Joined: Thu May 15, 2008 11:00 pm
- Location: Middlesbrough
Powdercoat ftw!
Getting it delivered is great! Bolting it to the car and getting the car finish is graft!
Good look with it all mate
Getting it delivered is great! Bolting it to the car and getting the car finish is graft!
Good look with it all mate
Co Founder of CR24vTM By Invitation Only. Absolutely no riff raff!!!
-
Kedge
- Old Skooler
- Posts: 7702
- Joined: Thu Jan 13, 2005 11:00 pm
- Location: Leicestershire
Finally got the spanners out and started putting this back together again. Firts off I owe Dan a big thanks for sorting out the powder coating of my last batch of scrap, pressing in the beam bushes and wheel bearings and then coming to the rescue with his beam washers this week as I went and lost one of mine :notworthy:
Got the tank fitted last week, what a ball ache!! With it being the bigger tank and the chromie having external fuel pump mounts it took some real persuading!!
Then with Dans washers in place and Waxoyled the beam went in and the diff got bolted up.
One Waxoyled washer(bargain compared to new OEM ones).
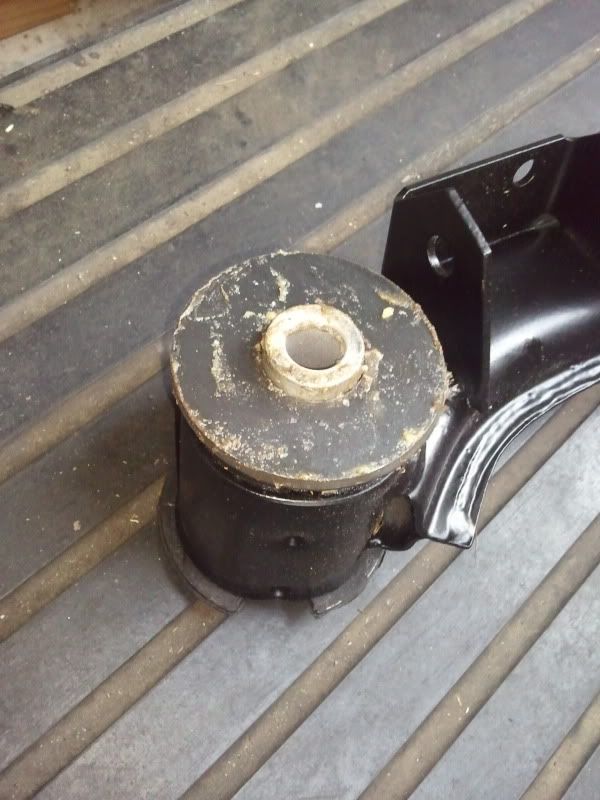
Forgot to get a pic of the beam & diff in place as I tried to crack on with getting the arms on and light was running out (no lights in my mums garage ).
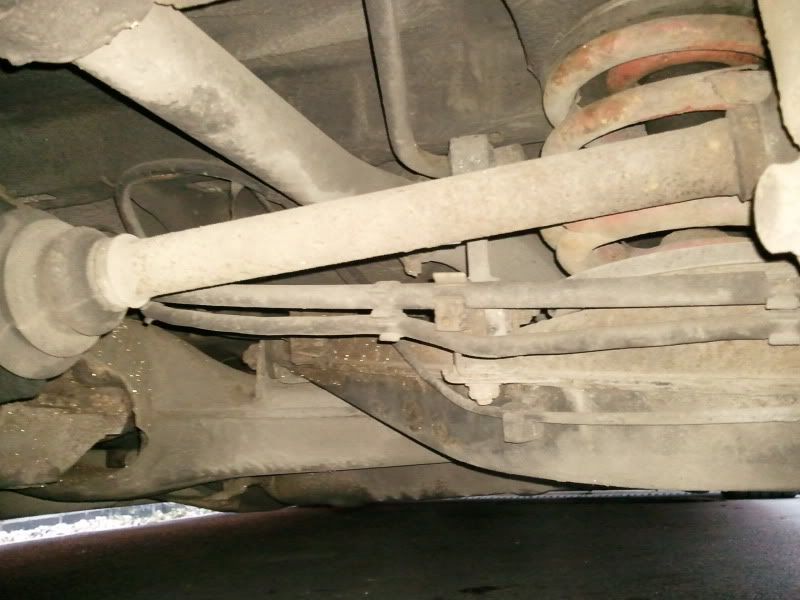
Supaflex bushes getting wound in, please tell me I've not fitted these the wrong way round, the instructions didn't mention whether they had to go a certain way round.....

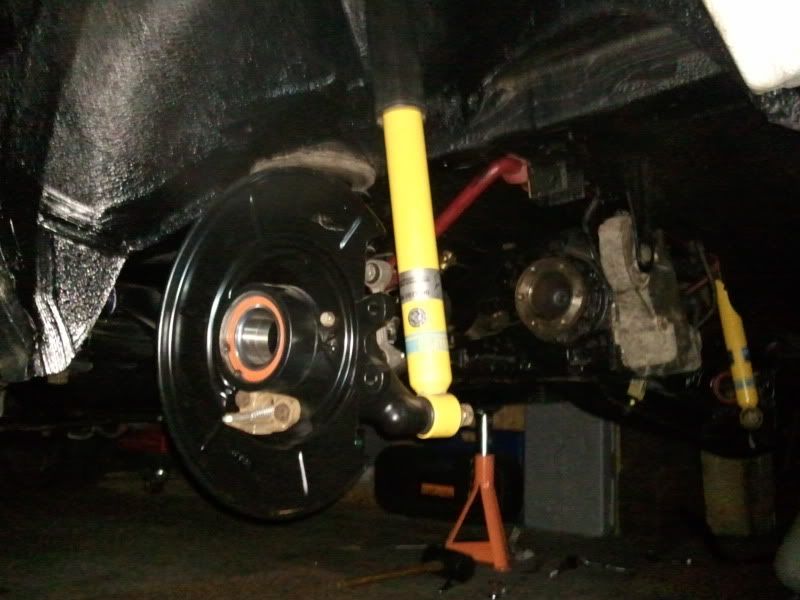
Arms and shocks ready to go,
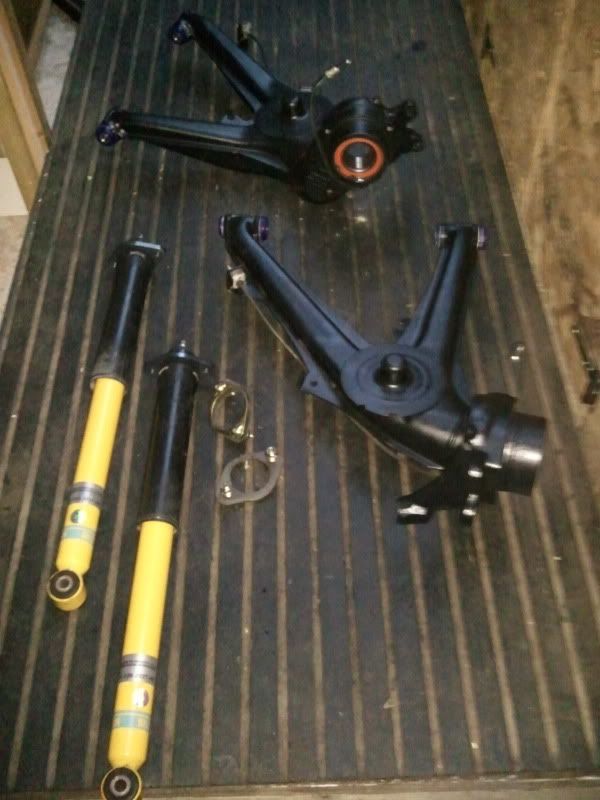
Quickly found with light running out that the Supaflex bushes are a VERY tight fit into the beam, had pretty much the same issue with fitting everything else like that to the powder coated shizzle. Will be cracking on with that tomorrow when I can see properly.
Got the tank fitted last week, what a ball ache!! With it being the bigger tank and the chromie having external fuel pump mounts it took some real persuading!!
Then with Dans washers in place and Waxoyled the beam went in and the diff got bolted up.
One Waxoyled washer(bargain compared to new OEM ones).
Forgot to get a pic of the beam & diff in place as I tried to crack on with getting the arms on and light was running out (no lights in my mums garage
Supaflex bushes getting wound in, please tell me I've not fitted these the wrong way round, the instructions didn't mention whether they had to go a certain way round.....
Arms and shocks ready to go,
Quickly found with light running out that the Supaflex bushes are a VERY tight fit into the beam, had pretty much the same issue with fitting everything else like that to the powder coated shizzle. Will be cracking on with that tomorrow when I can see properly.
-
DanThe
- E30 Zone Team Member
- Posts: 28649
- Joined: Sat Sep 10, 2005 11:00 pm
- Location: Staffs
The inner bush is the wrong way round mate, the large parts of the bush should be on the outsides
-
Kedge
- Old Skooler
- Posts: 7702
- Joined: Thu Jan 13, 2005 11:00 pm
- Location: Leicestershire
Got ya! Could've been worse, take it they comeback out ok?DanThe wrote:The inner bush is the wrong way round mate, the large parts of the bush should be on the outsides
-
e30topless
- E30 Zone Team Member
- Posts: 13598
- Joined: Wed Aug 23, 2006 11:00 pm
- Location: surrounded by scrap
Noice powdercoating that Dave
why did you go for the superflex?
why did you go for the superflex?
-
Rav335uk
- E30 Zone Meets/Events Team
- Posts: 27985
- Joined: Wed Jan 19, 2005 11:00 pm
- Location: Mad mad mad
They'll come out DaveKedge wrote:Got ya! Could've been worse, take it they comeback out ok?DanThe wrote:The inner bush is the wrong way round mate, the large parts of the bush should be on the outsides
If you Got "Haters",Then your doing something Right!
CR24v??? Where's it all gone?? LOL
-
Kedge
- Old Skooler
- Posts: 7702
- Joined: Thu Jan 13, 2005 11:00 pm
- Location: Leicestershire
They are what Dan recommended, beam bushes are OEM thoughe30topless wrote:Noice powdercoating that Dave
why did you go for the superflex?
-
capri_rob
- Married to the E30 Zone
- Posts: 9681
- Joined: Tue Feb 19, 2008 11:00 pm
- Location: South Staffordshire
Nice work Dave - not long before its on the road now ?
e30topless said : Proper BMW's have 4 headlights, last of the run was the E30 and E34/E32 anything after that is just complete shite
-
Kedge
- Old Skooler
- Posts: 7702
- Joined: Thu Jan 13, 2005 11:00 pm
- Location: Leicestershire
Still a looooong way up go Rob.capri_rob wrote:Nice work Dave - not long before its on the road now ?
-
Kedge
- Old Skooler
- Posts: 7702
- Joined: Thu Jan 13, 2005 11:00 pm
- Location: Leicestershire
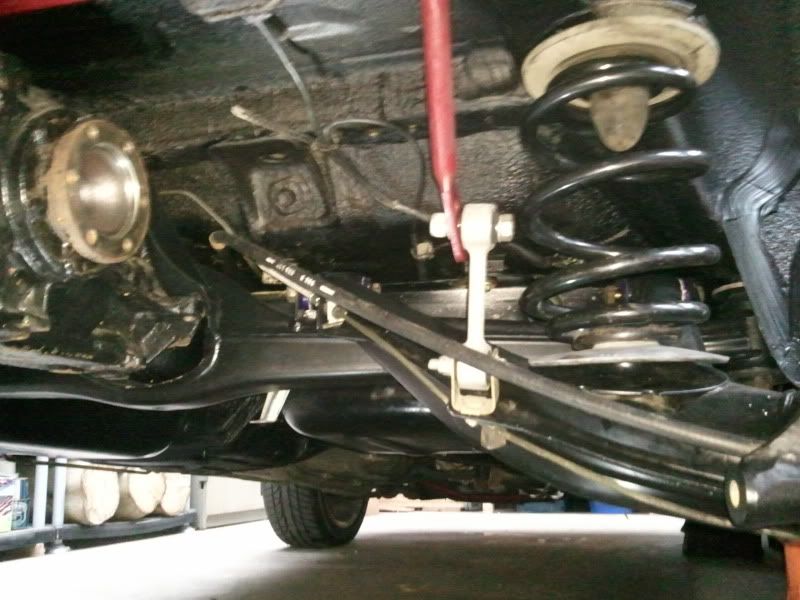
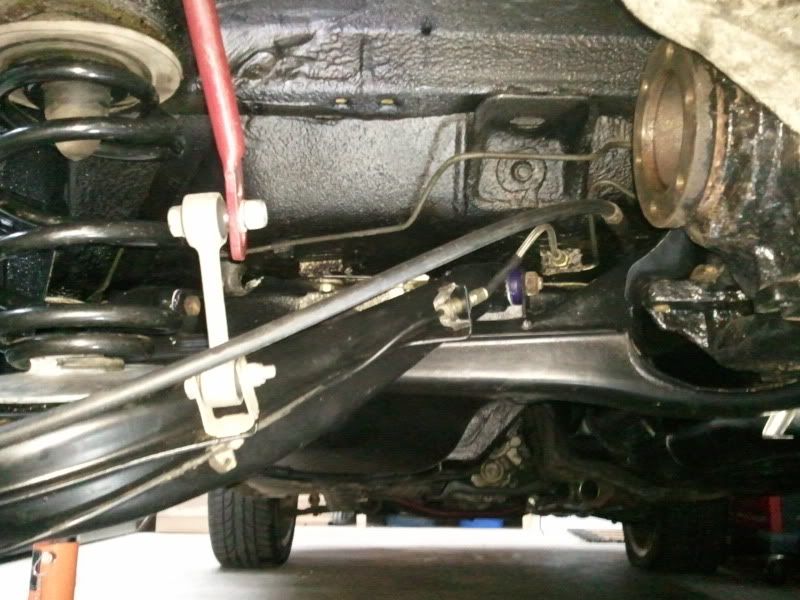
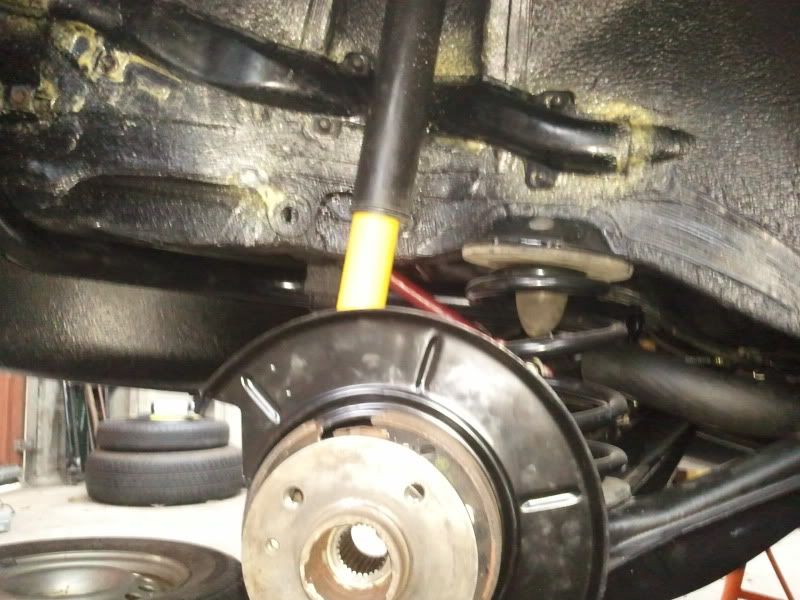
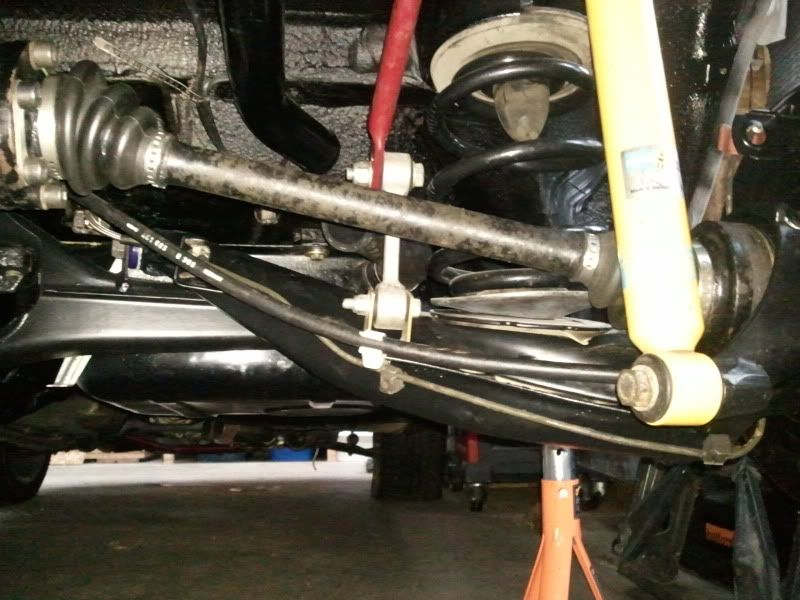
Bit more progress this afternoon. First thing was obviously to swap the bushes round the right way, which wasn't too hard thankfully.
Funnily enough this then seemed the make the arms go in a bit easier, still a bloody tight fit, especially the nearside. Also got the ARB, springs, brake lines, handbrake cables all fitted. Got a feeling i need to clip the handbrake cable to the arms, will double check the touring tomorrow to confirm that though.
Tomorrows tasks are to tighten everything up, regrease the driveshafts and fit, new center bearing, guibo and bolts on the prop and refit and rebuild the handbrakes. No rush though, everything so far has taken a lot longer than anticipated.
-
Duke137
- Married to the E30 Zone
- Posts: 7207
- Joined: Sat Aug 29, 2009 11:00 pm
Buftyness
How do you pronounce 'either'? I say 'either', but some say 'either'. Either is correct.
-
capri_rob
- Married to the E30 Zone
- Posts: 9681
- Joined: Tue Feb 19, 2008 11:00 pm
- Location: South Staffordshire
IIRC there is a metal tab that bolts between the droplink and trailing arm which the handbrake cable clips to.
Or cable-tie the mofo
Or cable-tie the mofo
e30topless said : Proper BMW's have 4 headlights, last of the run was the E30 and E34/E32 anything after that is just complete shite
-
Kedge
- Old Skooler
- Posts: 7702
- Joined: Thu Jan 13, 2005 11:00 pm
- Location: Leicestershire
Your not the first person on the zone to suggest using cable ties to put things back together on this
I've sure either the Touring or 323i can donate said bracket if that's what's needed. Can only picture the one on drum arms, can't see anywhere else something can fit.
I've sure either the Touring or 323i can donate said bracket if that's what's needed. Can only picture the one on drum arms, can't see anywhere else something can fit.
-
capri_rob
- Married to the E30 Zone
- Posts: 9681
- Joined: Tue Feb 19, 2008 11:00 pm
- Location: South Staffordshire
e30topless said : Proper BMW's have 4 headlights, last of the run was the E30 and E34/E32 anything after that is just complete shite
-
Kedge
- Old Skooler
- Posts: 7702
- Joined: Thu Jan 13, 2005 11:00 pm
- Location: Leicestershire
Sweet, i'm sure i can dig something out from somewherecapri_rob wrote:Just kidding dude
http://www.realoem.com/bmw/showparts.do ... g=34&fg=30
11 & 12 are what you need
-
Dan320is
- E30 Zone Squatter

- Posts: 1813
- Joined: Wed Jan 12, 2005 11:00 pm
- Location: Cambridgeshire
I've a craving to do a project like this, powder coated drivetrain and suspension give me the horn.

-
Kedge
- Old Skooler
- Posts: 7702
- Joined: Thu Jan 13, 2005 11:00 pm
- Location: Leicestershire
Didn't get much done at all today, couldn't really be bothered. Checked the other E30s and the 323i looks to have the necessary brackets for the handbrake cable so they'll be coming off in the near future.
I then got the handbrakes rebuilt and tried to start fitting the hubs by tapping it in. This didn't seem to be going too easily and there felt like a lot of play, so folks how do I fit the hubs correctly? The other issue I noticed, the bolt that dame with the bearings is too big for the driveshafts
I got the filler neck and vent piping all fitted, just need to dig out a rubber collar for the filler neck to sit on the bracket under the floor correctly before it's finally plumbed in. Gave it all a coat of Waxoyl behind the vent cover and all the other little traps.
I then progressed to regressing the drive shafts. Just pulled back the gators, cleaned out all the old grease as best as I could before refilling and fitting new crimps.
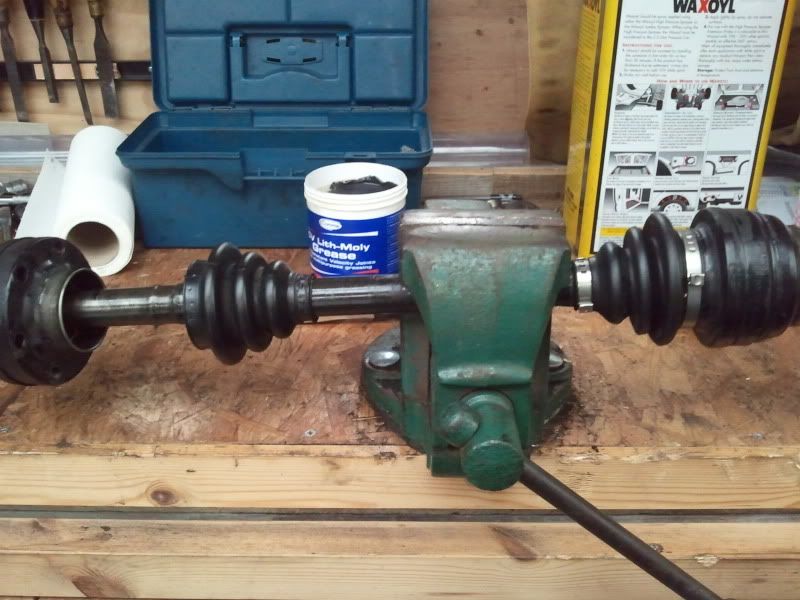
One down, one to go.
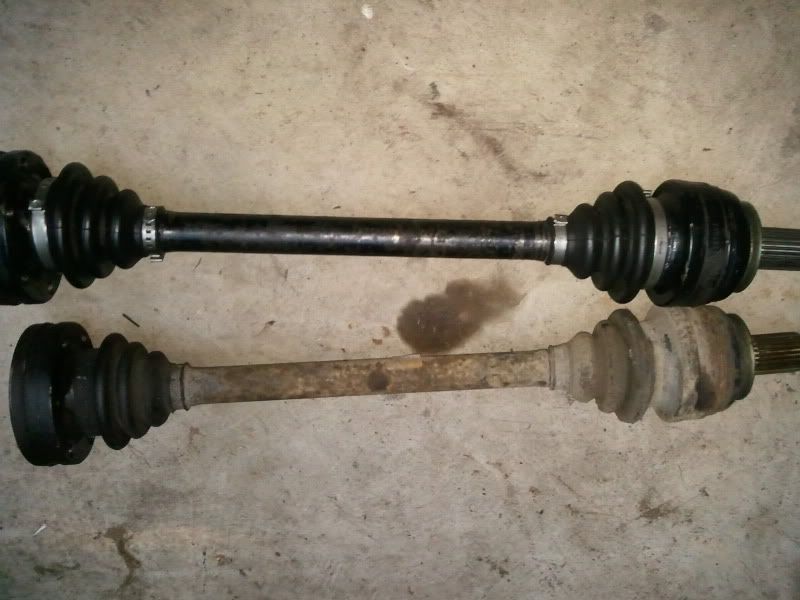
Just need a degrease and a lick of paint. Is there anything I can put on the gators to keep them supple?

I then got the handbrakes rebuilt and tried to start fitting the hubs by tapping it in. This didn't seem to be going too easily and there felt like a lot of play, so folks how do I fit the hubs correctly? The other issue I noticed, the bolt that dame with the bearings is too big for the driveshafts
I got the filler neck and vent piping all fitted, just need to dig out a rubber collar for the filler neck to sit on the bracket under the floor correctly before it's finally plumbed in. Gave it all a coat of Waxoyl behind the vent cover and all the other little traps.
I then progressed to regressing the drive shafts. Just pulled back the gators, cleaned out all the old grease as best as I could before refilling and fitting new crimps.
One down, one to go.
Just need a degrease and a lick of paint. Is there anything I can put on the gators to keep them supple?
Get it done then fella, you've got the perfect car to do it to!!Dan320is wrote:I've a craving to do a project like this, powder coated drivetrain and suspension give me the horn.
-
Kedge
- Old Skooler
- Posts: 7702
- Joined: Thu Jan 13, 2005 11:00 pm
- Location: Leicestershire
Been completely lacking motivation to do anything with the car this weekend but spent a bit of time on it this afternoon getting the hubs on and driveshafts fitted.
Any tips on setting up the handbrakes? Just before coming in i grabbed some old discs i had lying around but they wouldn't clear the brake shoes, do i just need to wind the toothed thing in at the top or tighten things up and the lever end? Still all loose at that end.
Any tips on setting up the handbrakes? Just before coming in i grabbed some old discs i had lying around but they wouldn't clear the brake shoes, do i just need to wind the toothed thing in at the top or tighten things up and the lever end? Still all loose at that end.