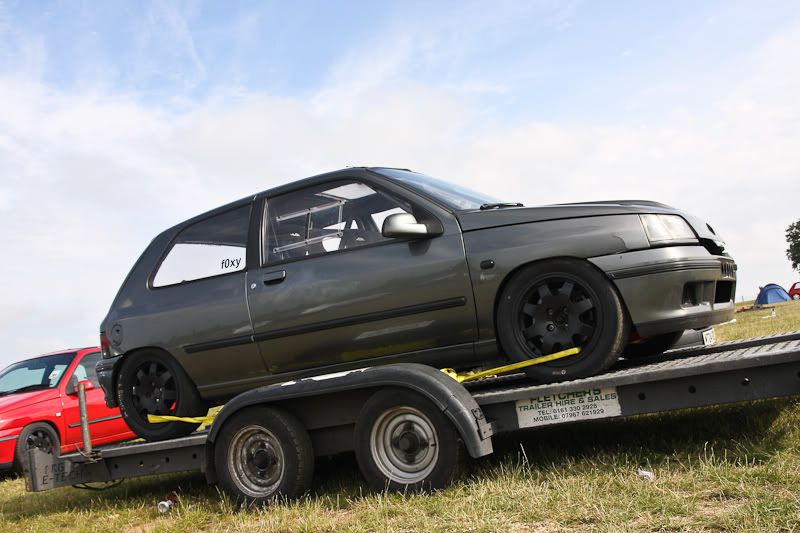
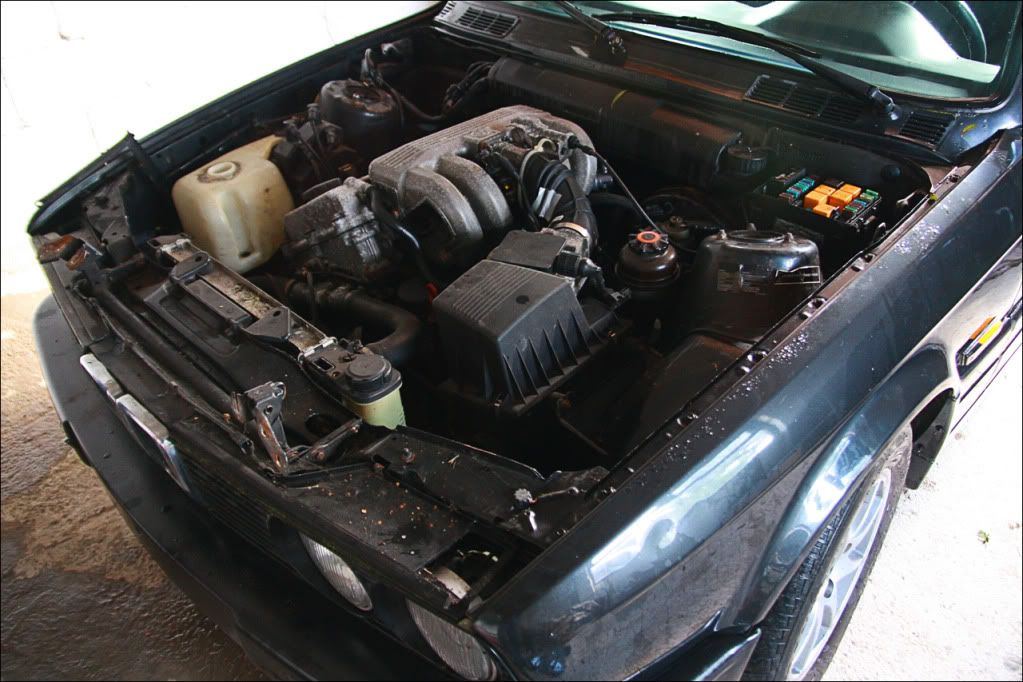
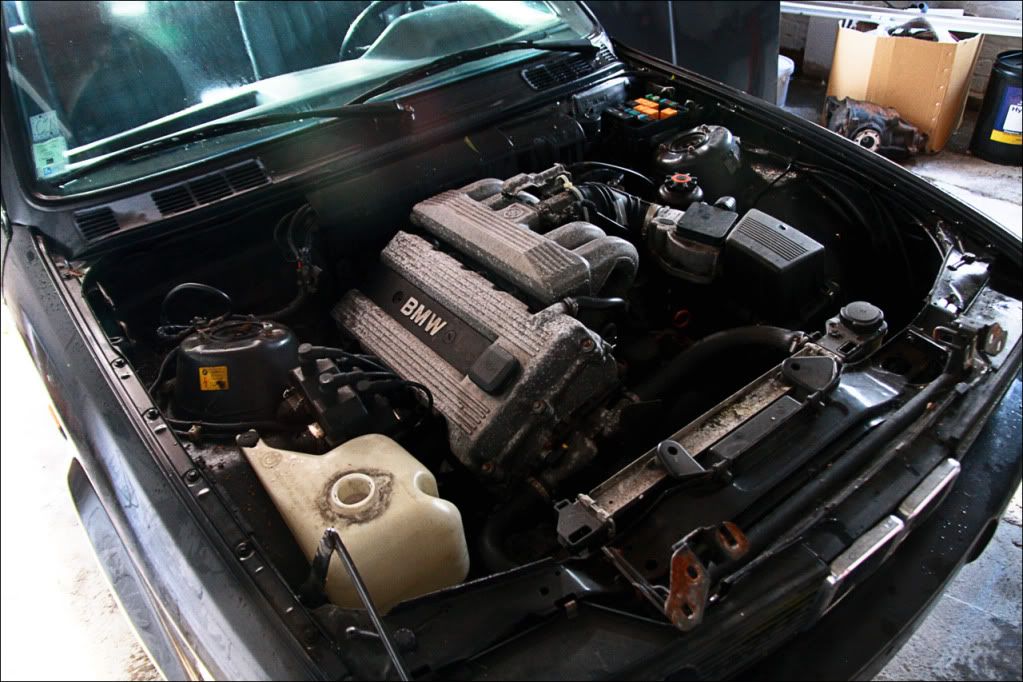
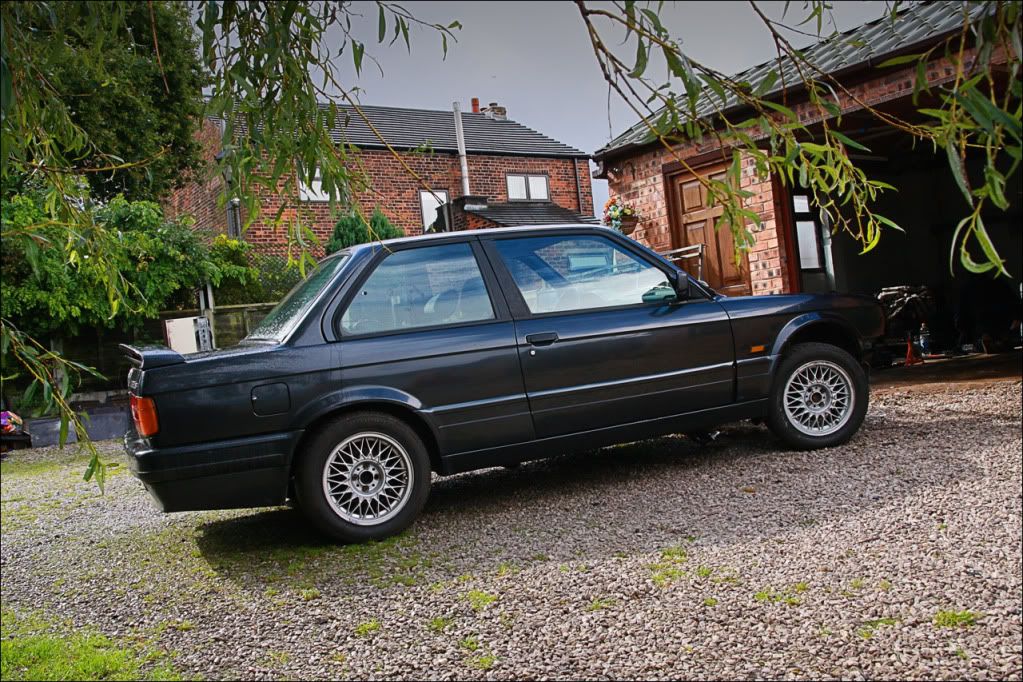
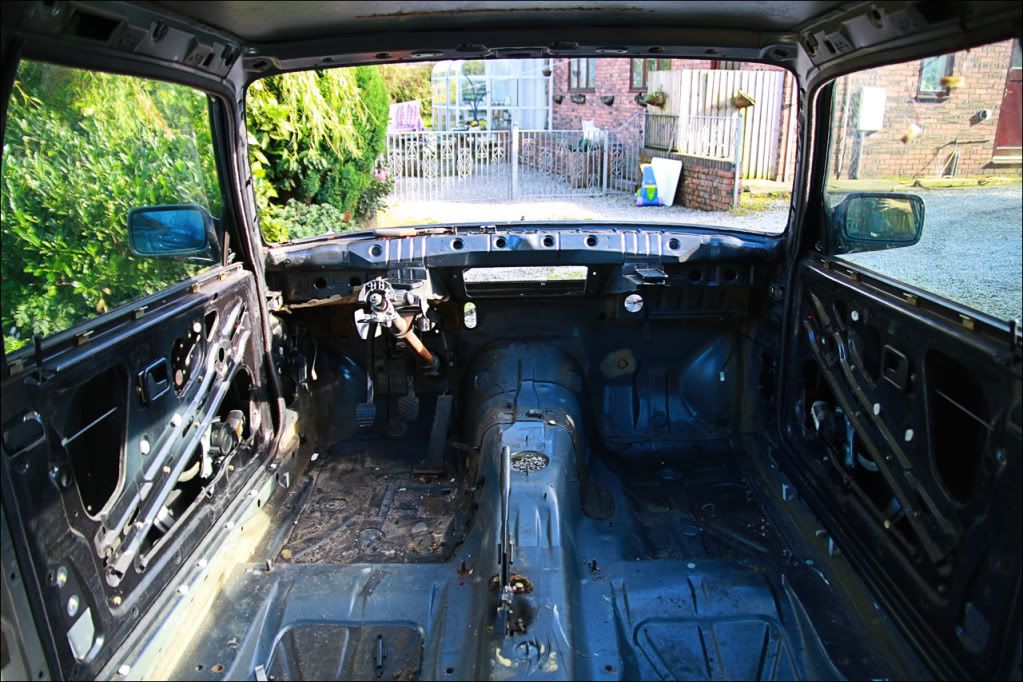
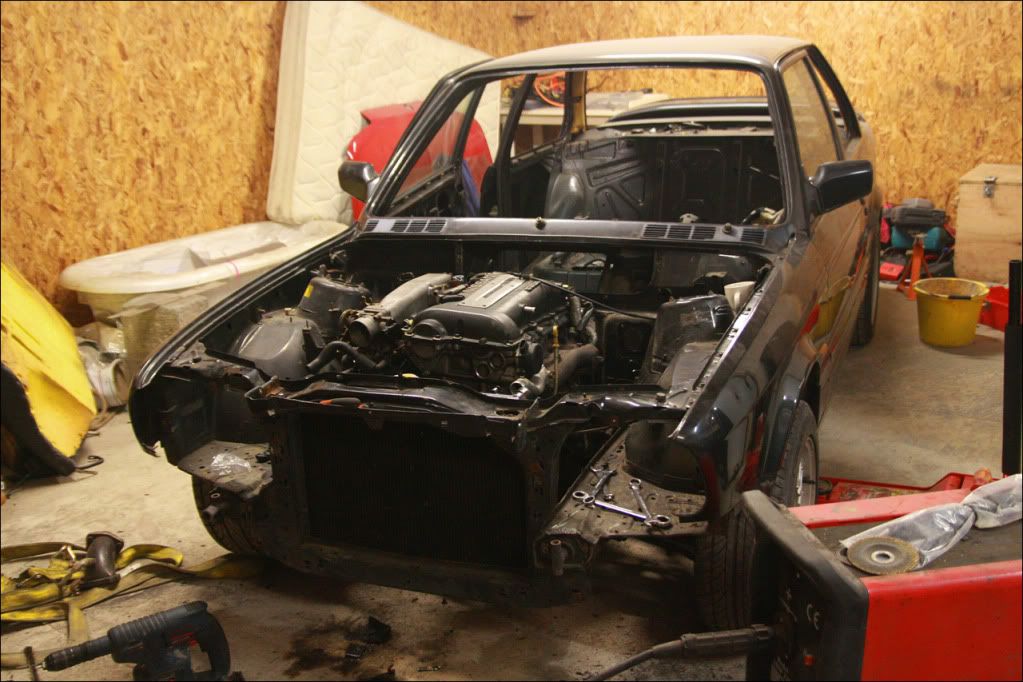
Having had a couple of E30 Tourings in the past I have always had the thought of building one in the back of my mind. After 3 years of fun on track in my Clio...
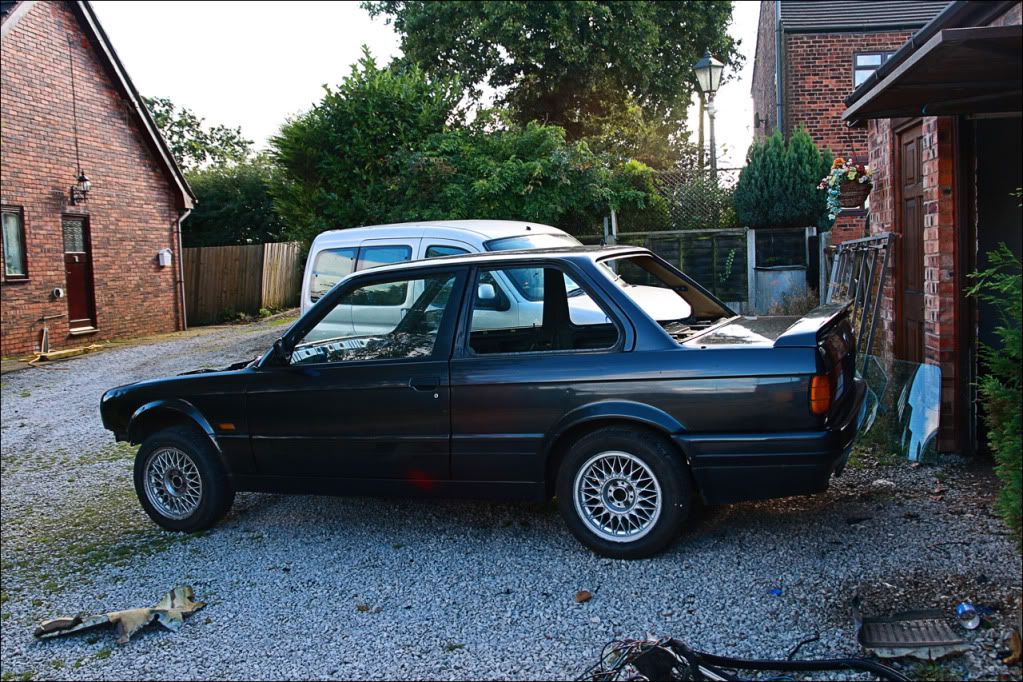
...I started to get bored. 210bhp/tonne on slicks was fun for quite some time, but I was getting the itch to build something new. After looking around I wanted a 2dr saloon that was solid, specifically one without a sunroof. I found Barx on here had one, which was black and included the Mtec2 kit, although it was LHD.
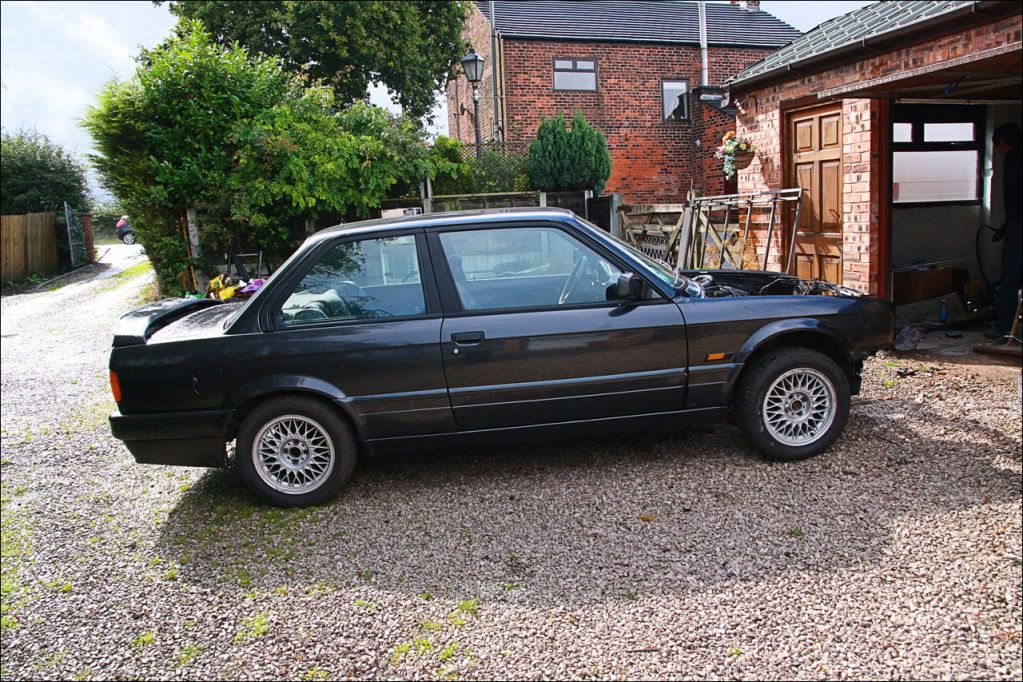
A couple of weeks went by, with other cars looked at, until I decided to just go for the LHD one due to it being the most solid out of what I had seen, and a bit more unique. No doubt the LHD was going to cause issues with engine fitment, but I like a challenge to make things work.
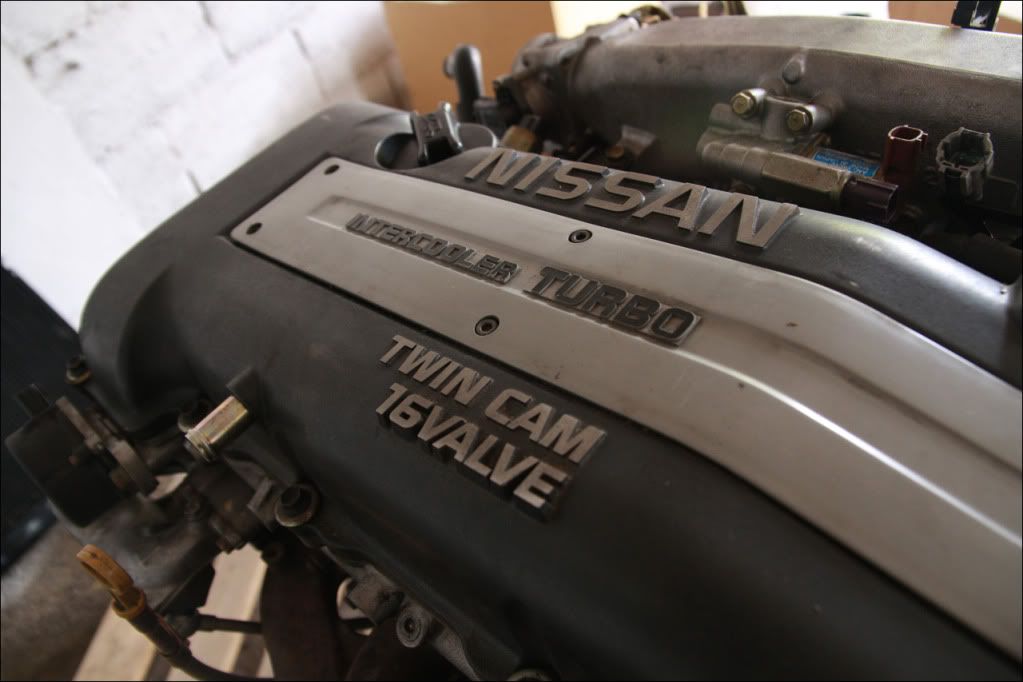
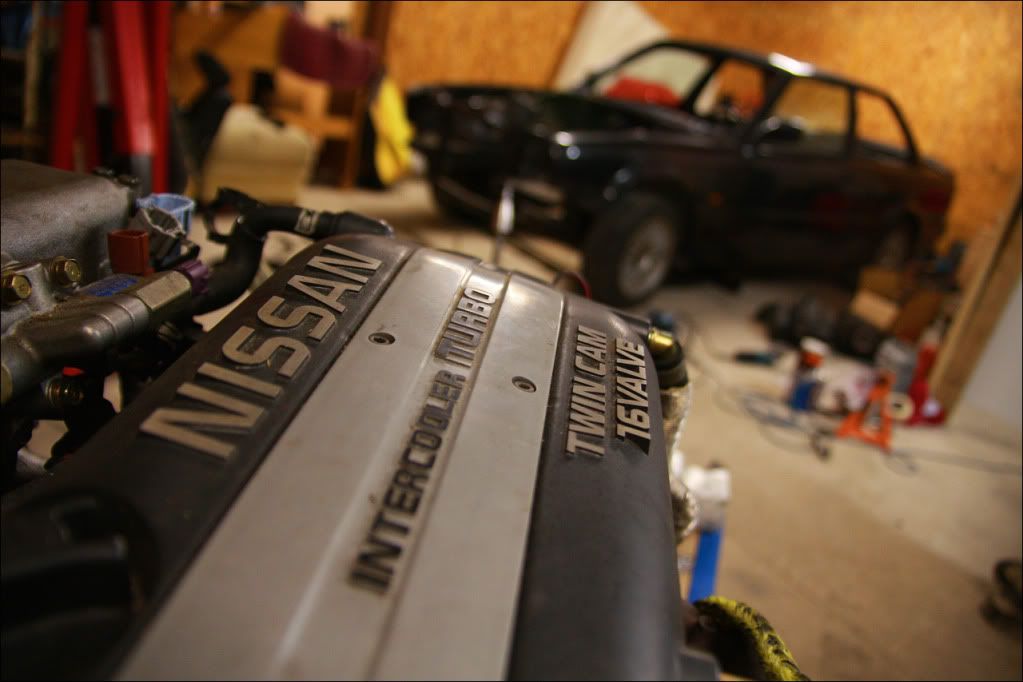
In the meantime I had been tearing the Clio apart, selling the parts off including the shell, yet keeping the seats/harnesses/other bits for the BMW. I had already decided that I wanted to do an SR20DET conversion after first seeing it on a foreign forum a few months earlier, then saw Theo's on here which basically confirmed the choice.
I had certainly thought about a home brew turbo conversion on a BMW lump, but I wanted it to be reliable at 5-7k RPM all day long around a track, not having to worry about things breaking, which I already knew the SR20DET could do if setup correctly. Plus not to mention they are a lot lighter, which is a big plus factor for a track car.
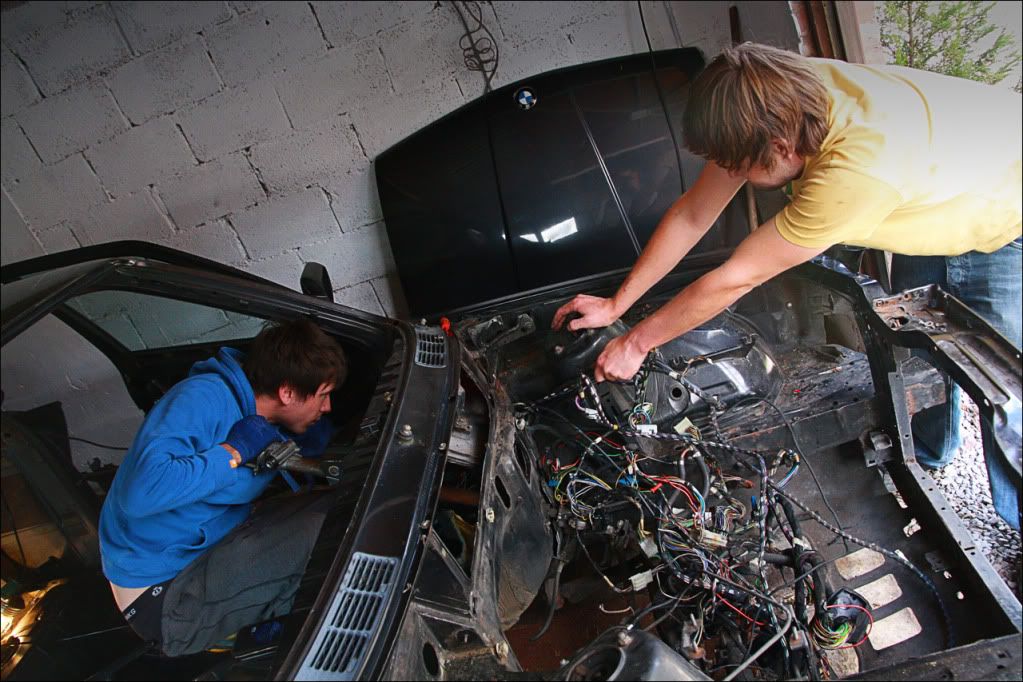
So after I had shifted the Clio shell I arranged to pick it up early September and started work...
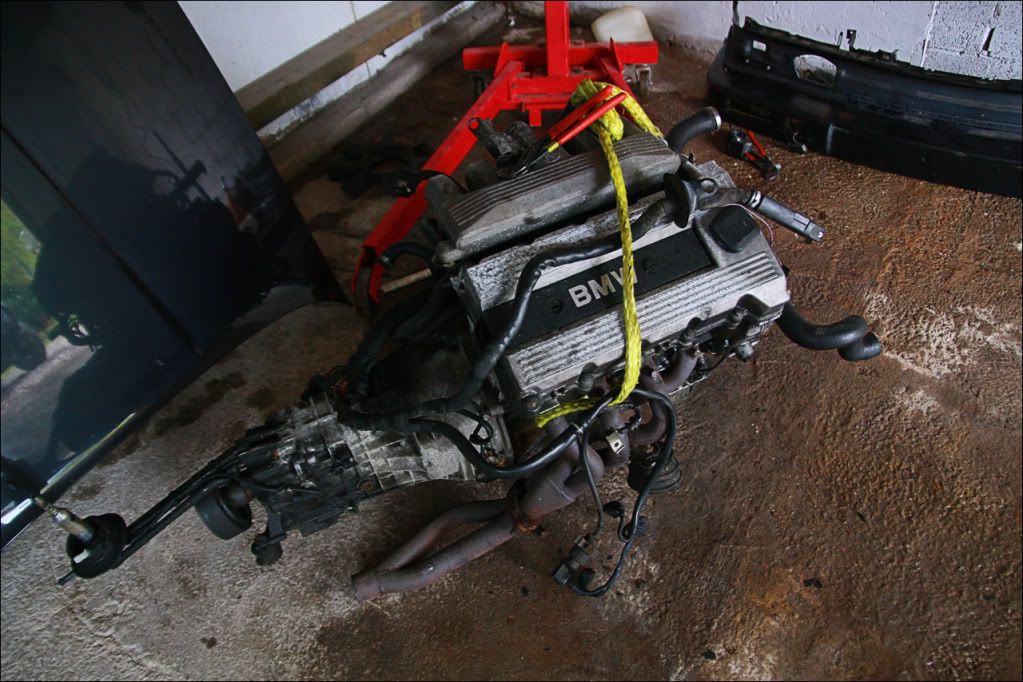
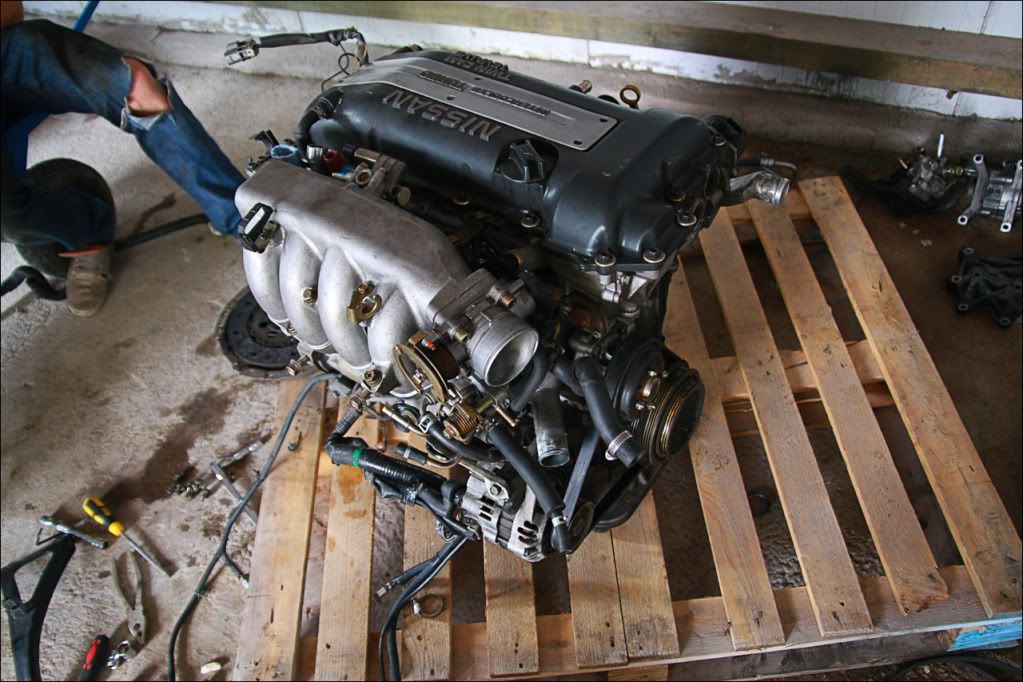
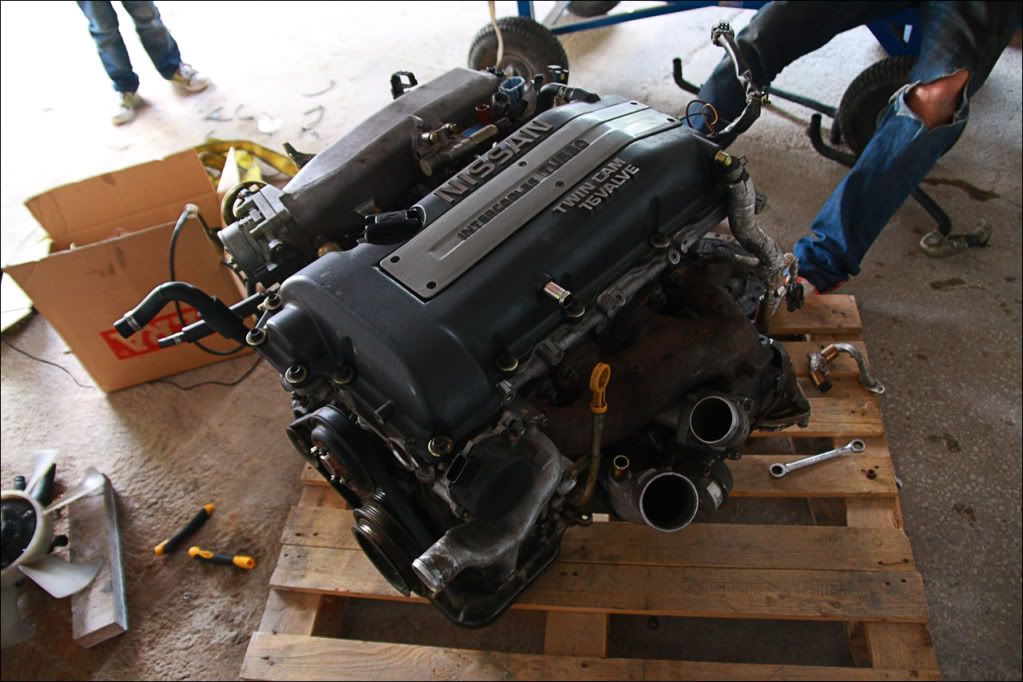
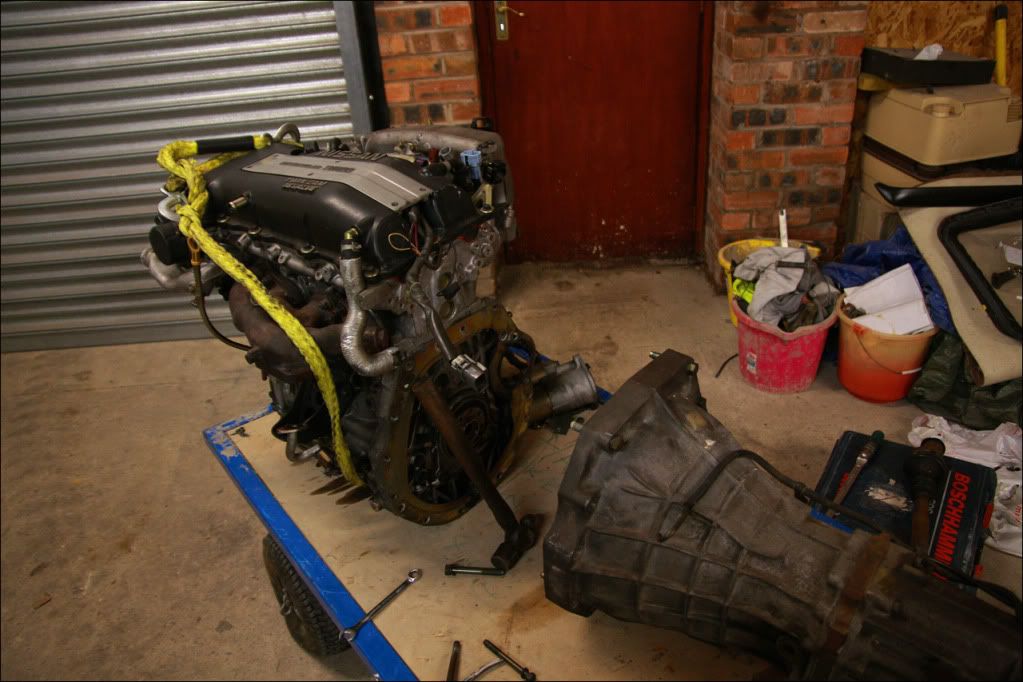
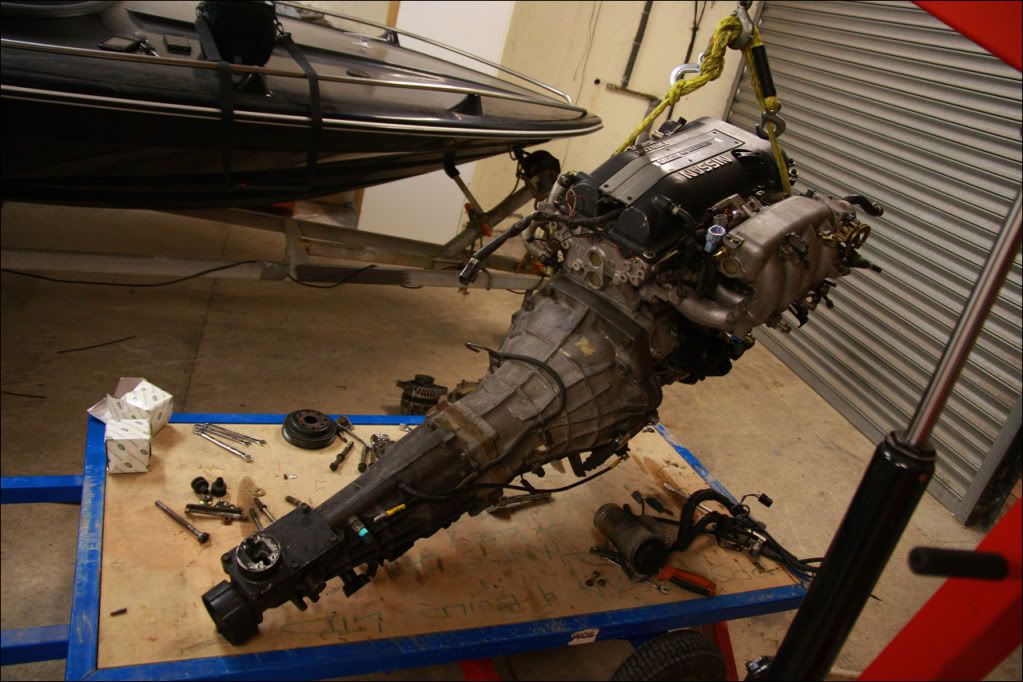
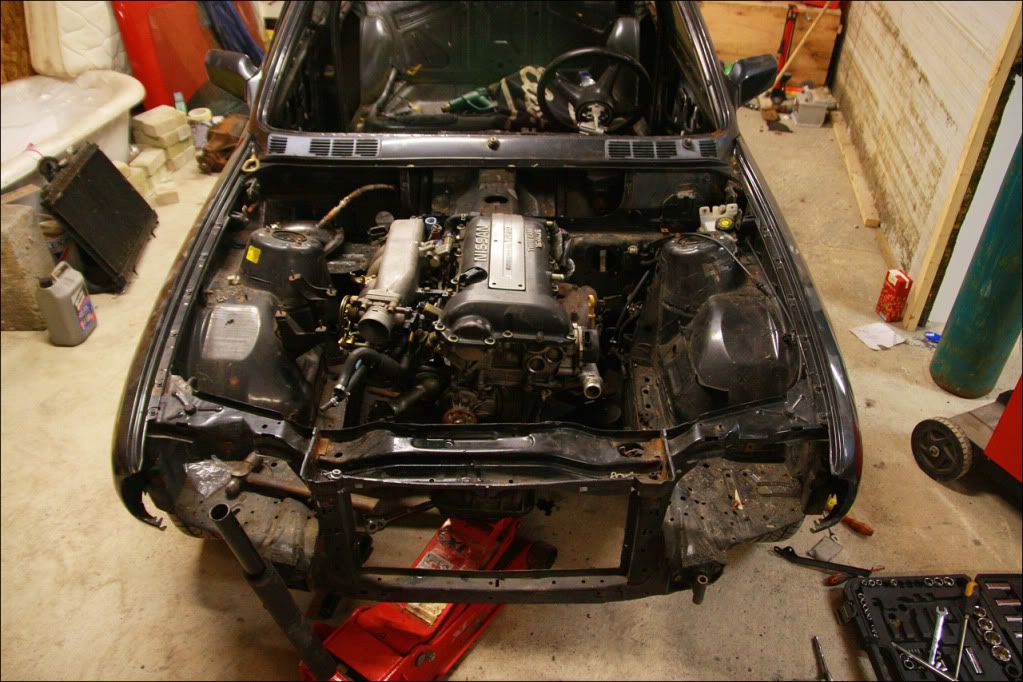
I decided to look for an engine and picked one up that had been removed from a fresh import S15 on 30,000kms.
At the same time I picked up a GReddy Profec II Boost Controller, Remote Oil Filter Kit and a couple of other bits. I didn't want to run the S15 box as it is 6spd, not to mention it being a lot longer. I sourced an S14 box with quick shift and a few other bits. I will need to change the S15 flywheel for the thinner S14 item to allow me to run the box. In the meantime I had picked up a 3.73 BMW LSD to use with the 5spd Nissan box.
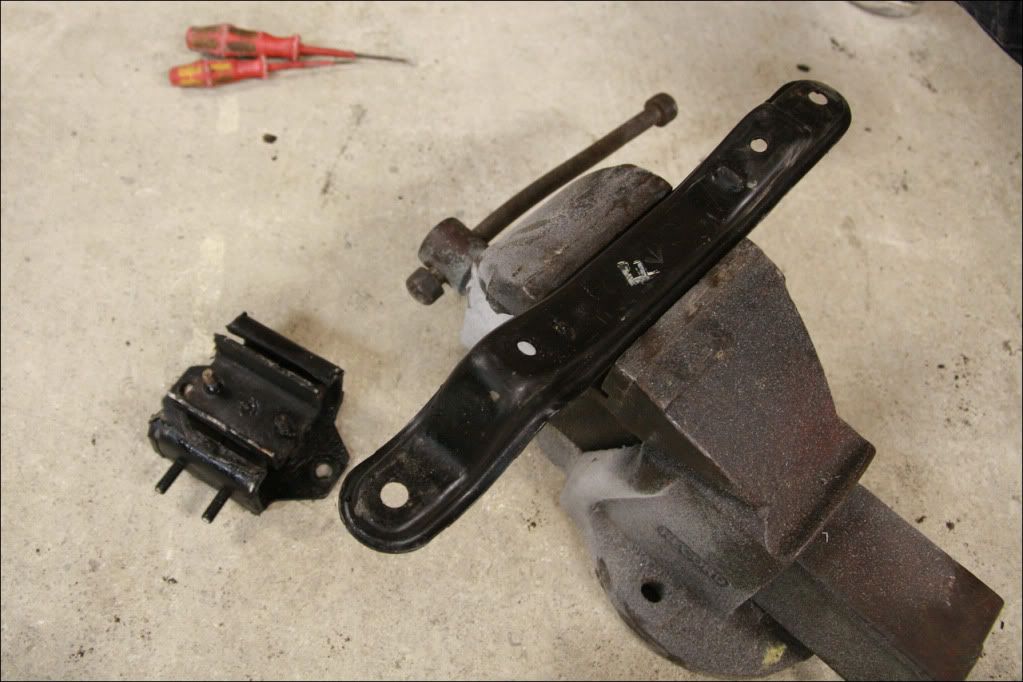
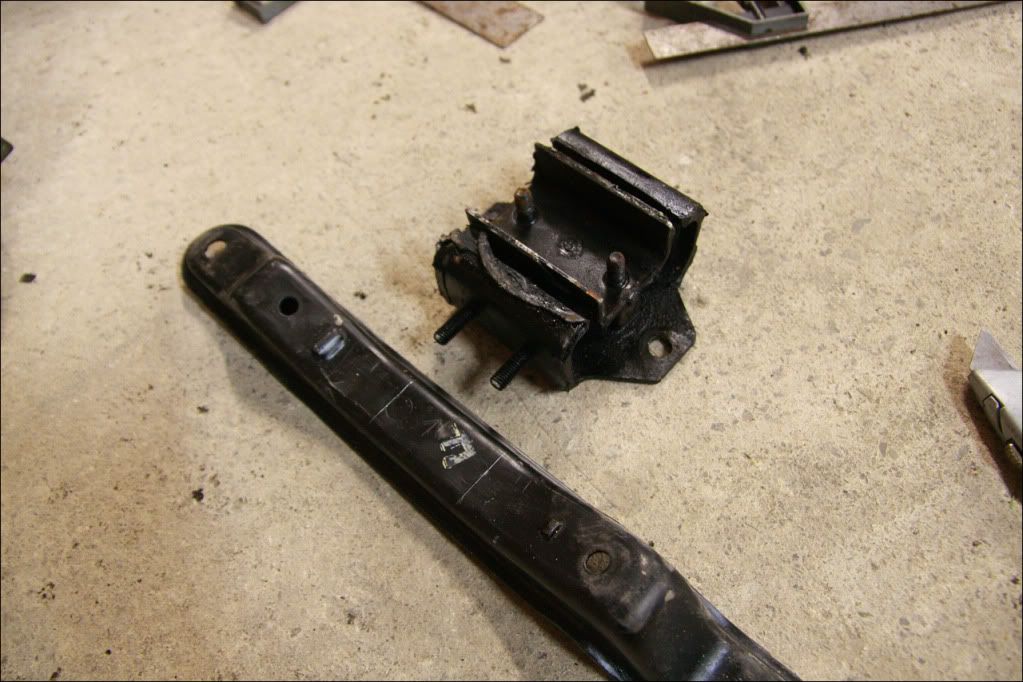
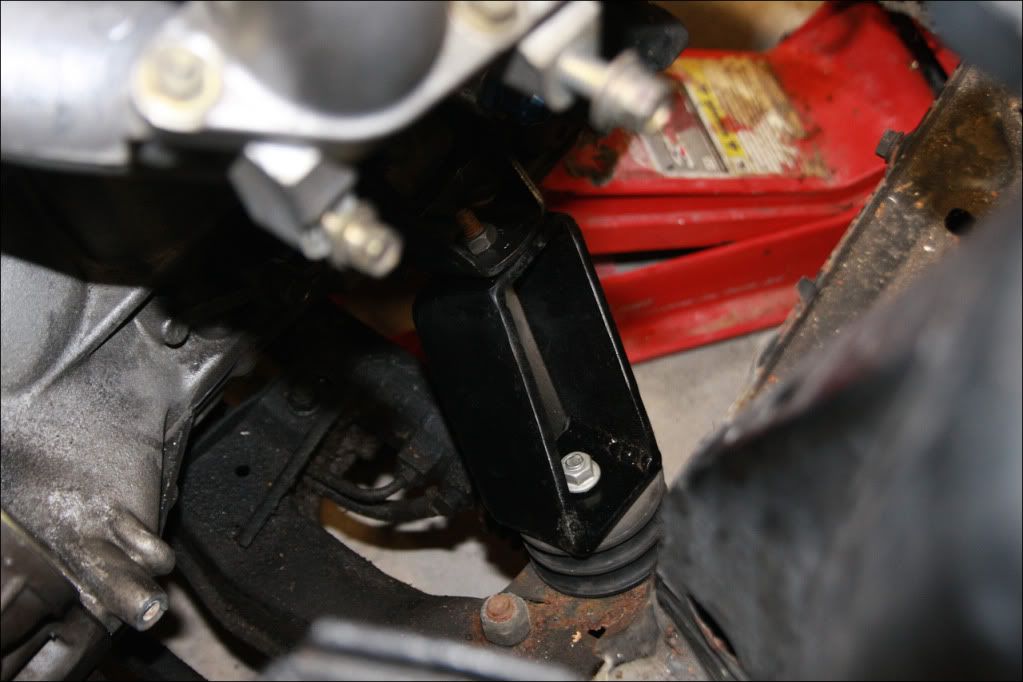
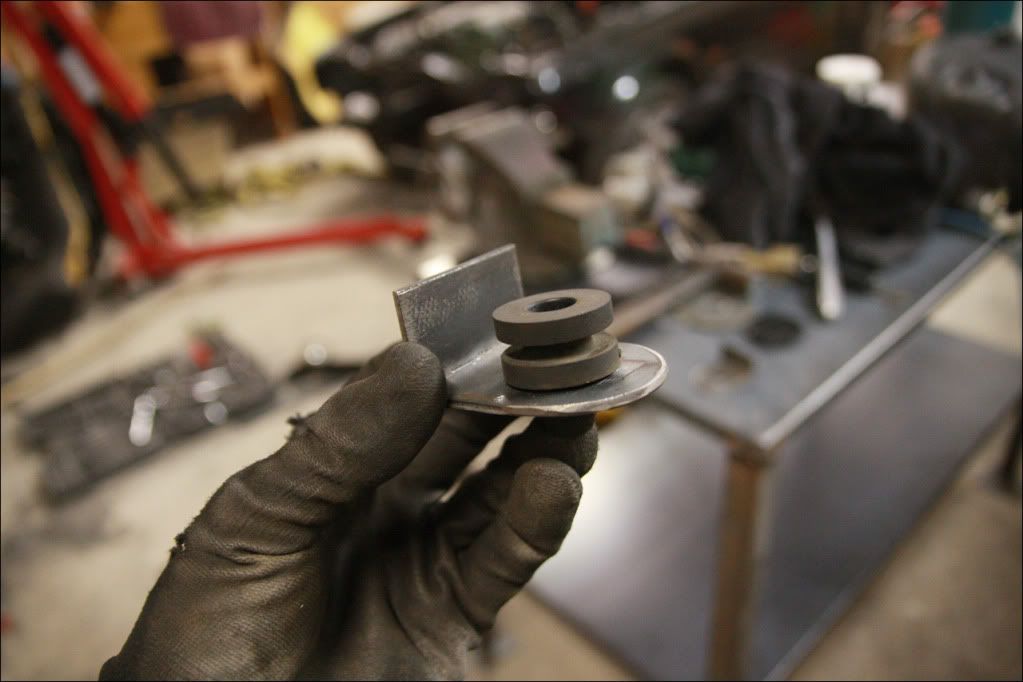
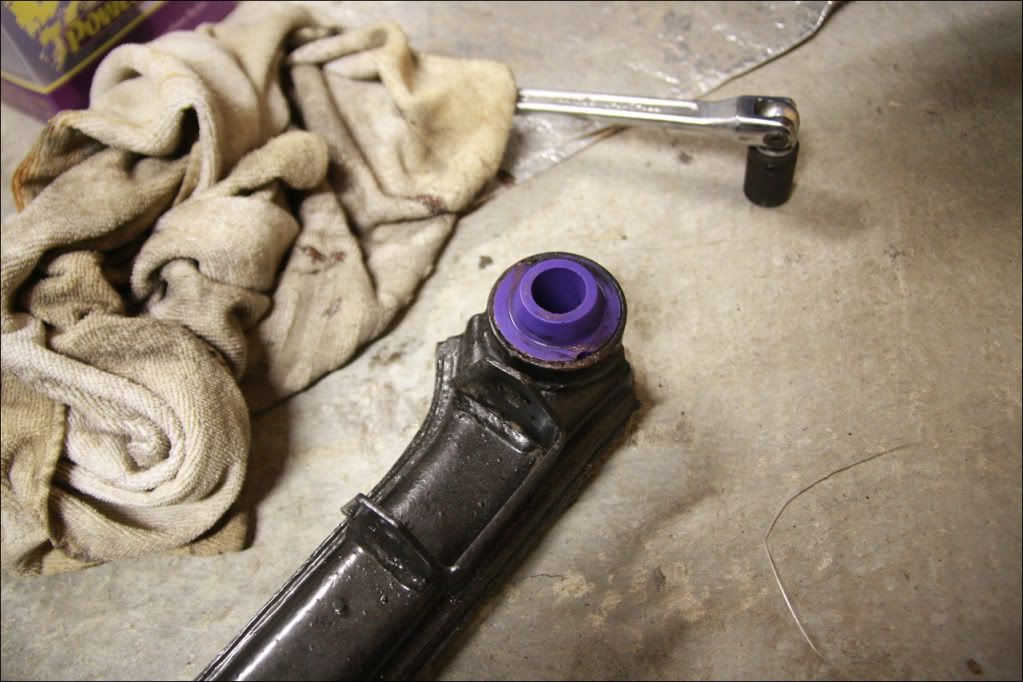
The priority was to get the engine sat in place and mounts made up so I could see how it sat. I had a couple of days of research to get an idea but got nowhere really. After a bit of reading I decided on using some Land Rover V8 rubbers for the bottom of the mounts - readily available, dirt cheap and very stiff.
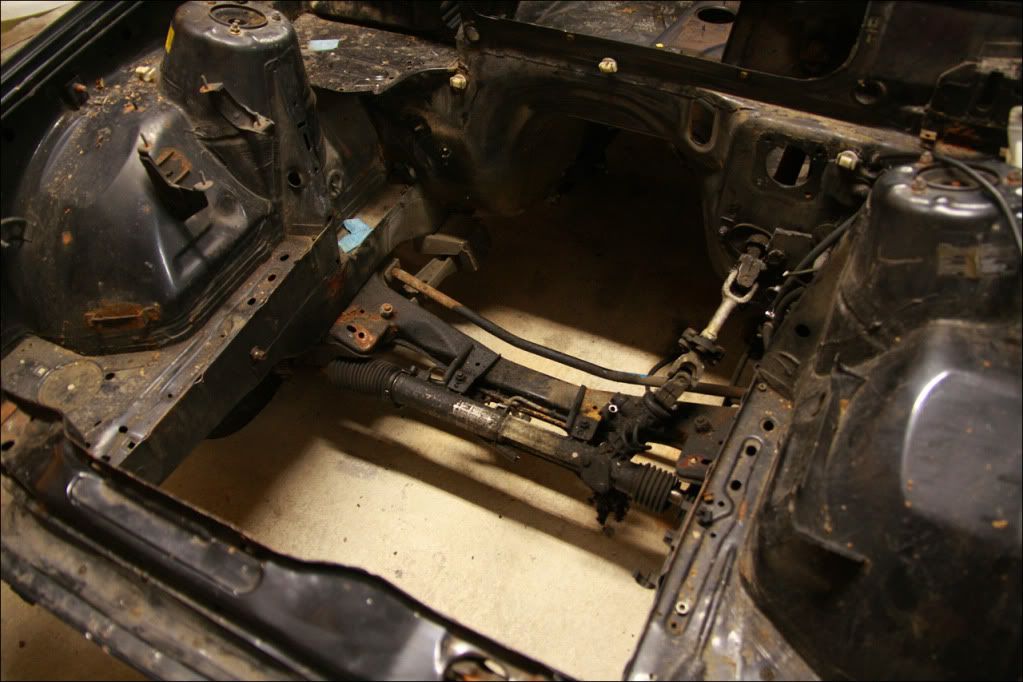
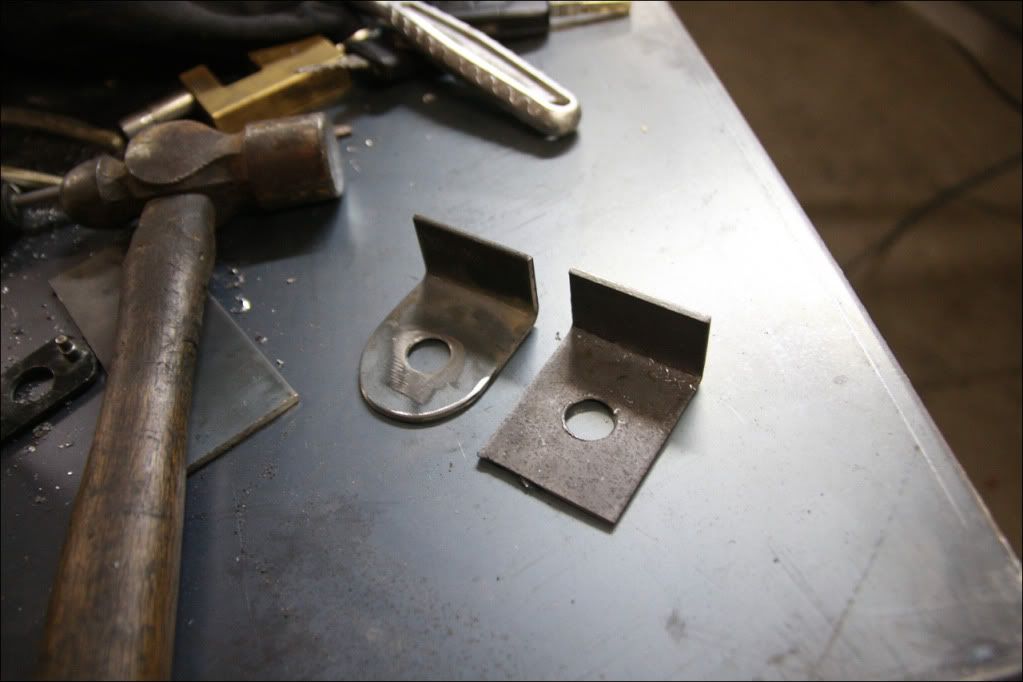
These were bolted to the E30 chassis as so..
Removed the S15 flywheel before fitting the S14 box for trial fitting..
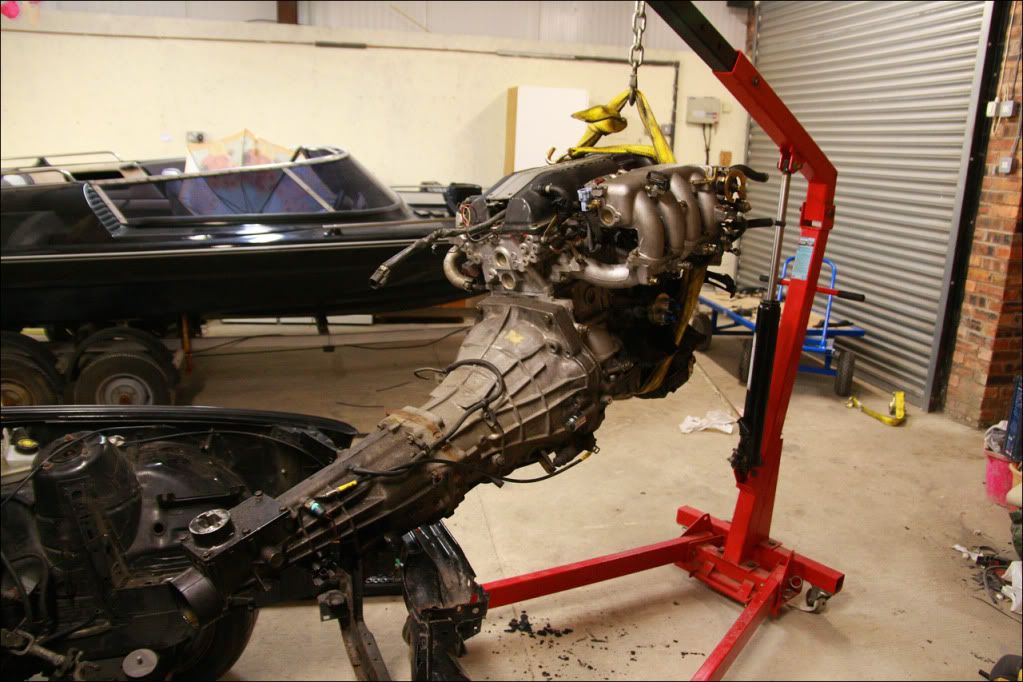
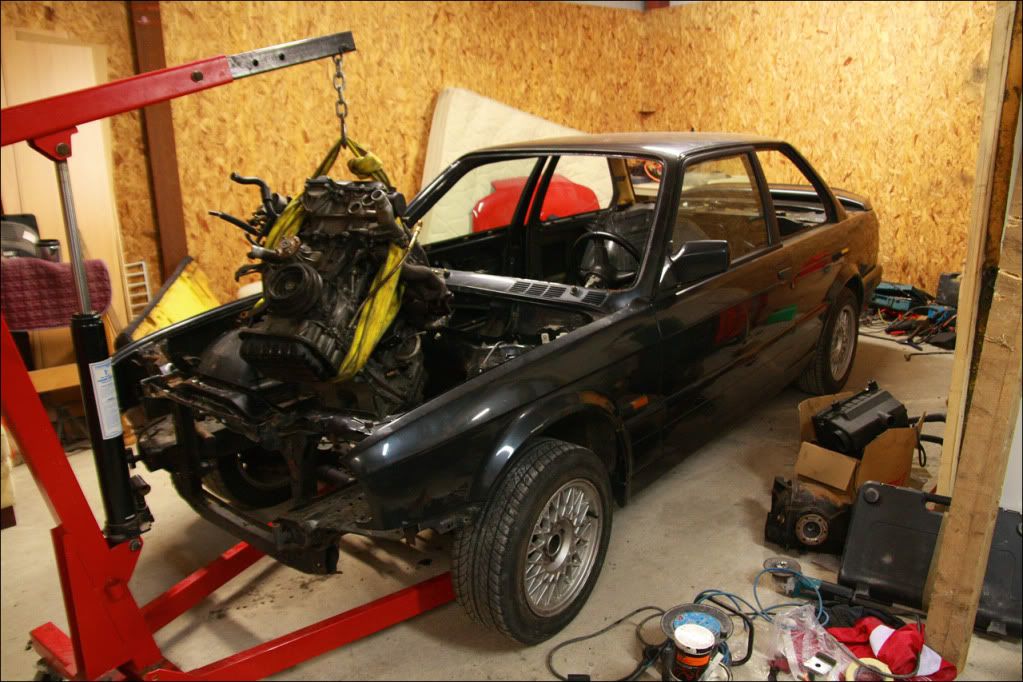
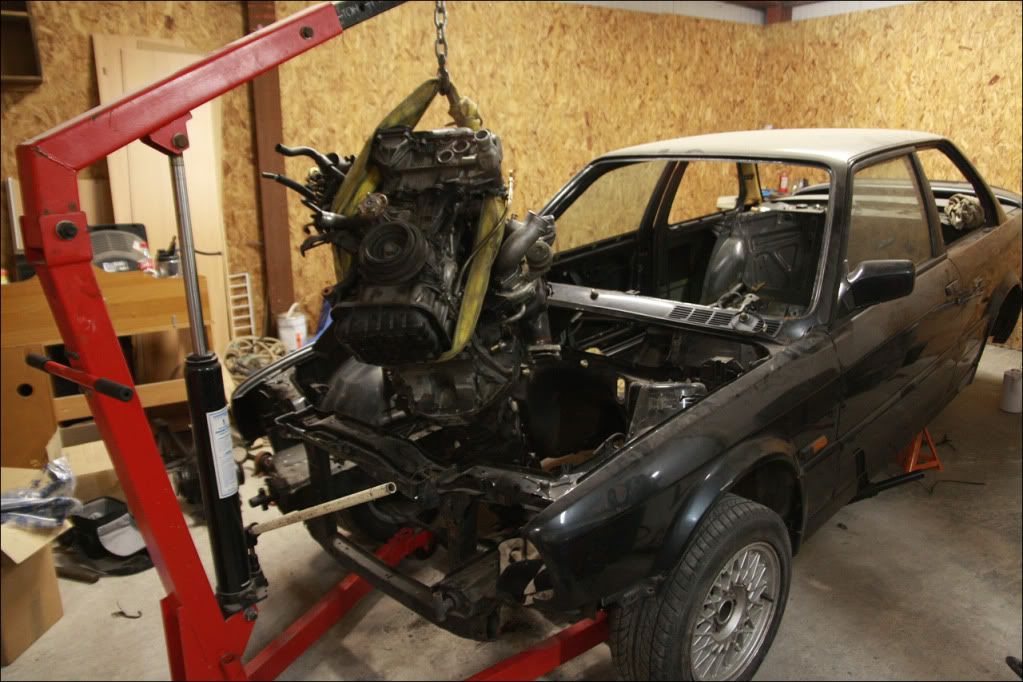
Then lifted the SR20 into place..
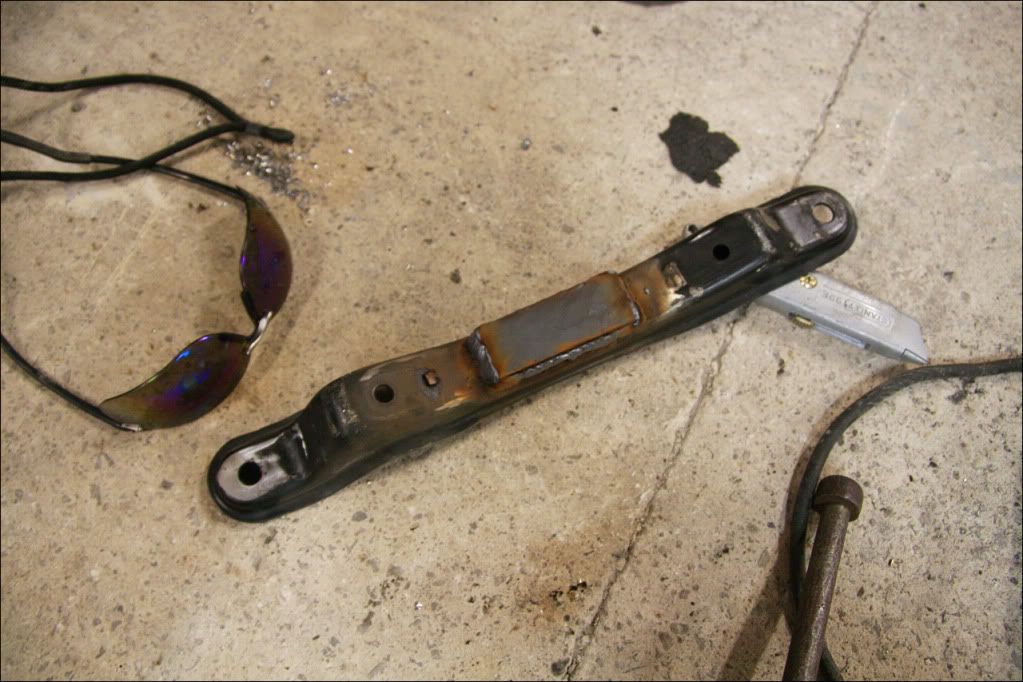
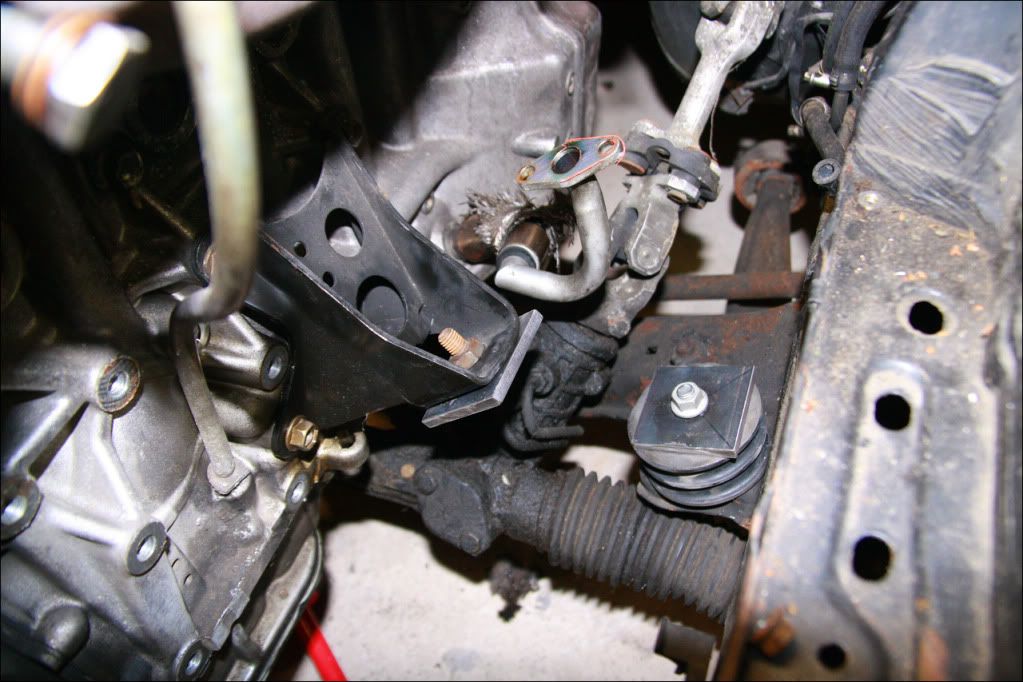
Before making the engine mounts I wanted to get the gearbox mount out of the way. It consists of a Nissan gearbox rubber and the standard E30 transmission mount.
Marked out the center of the transmission mount and drilled the holes for the rubber..
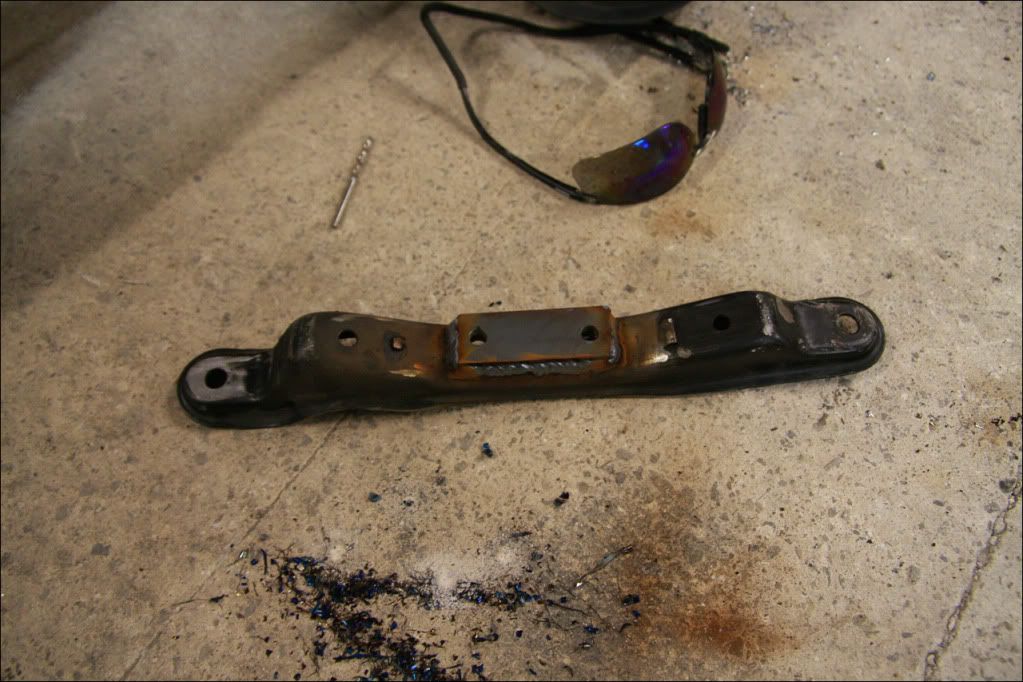
This was then fitted to the box so the back end was mounted and the jack could be used to get the engine in the correct position instead of the crane. After looking at the mount once fitted I decided the transmission needed raising to bring the prop shaft up level - and more importantly clear the ARB. Two pieces of 5mm plate were welded to the E30 transmission mount to give it 5mm more height...
Resulting in a much better height. A quick check inside confirmed the engine/box were as far back as I could get them without cutting the exhaust tunnel up..
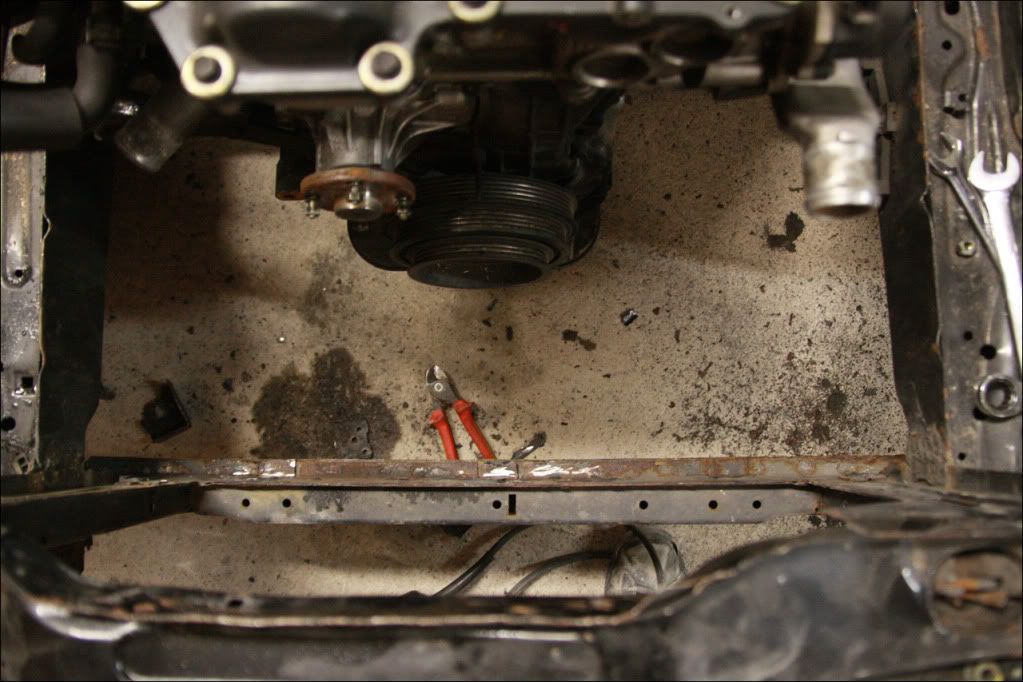
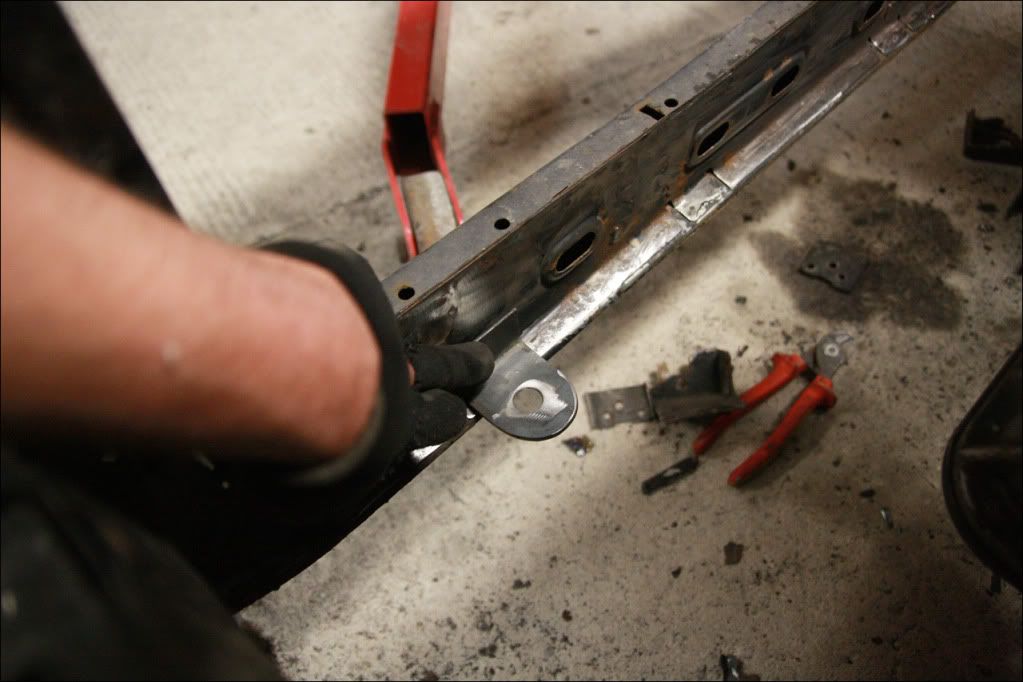
Then the real work could begin making the engine mounts - The engine could physically go back another inch to an inch and half as that's how much room is available between the bulkhead, but then I would run into issues with the gear shifter hole and sump hitting the steering rack. I was happy with the position so carried on.
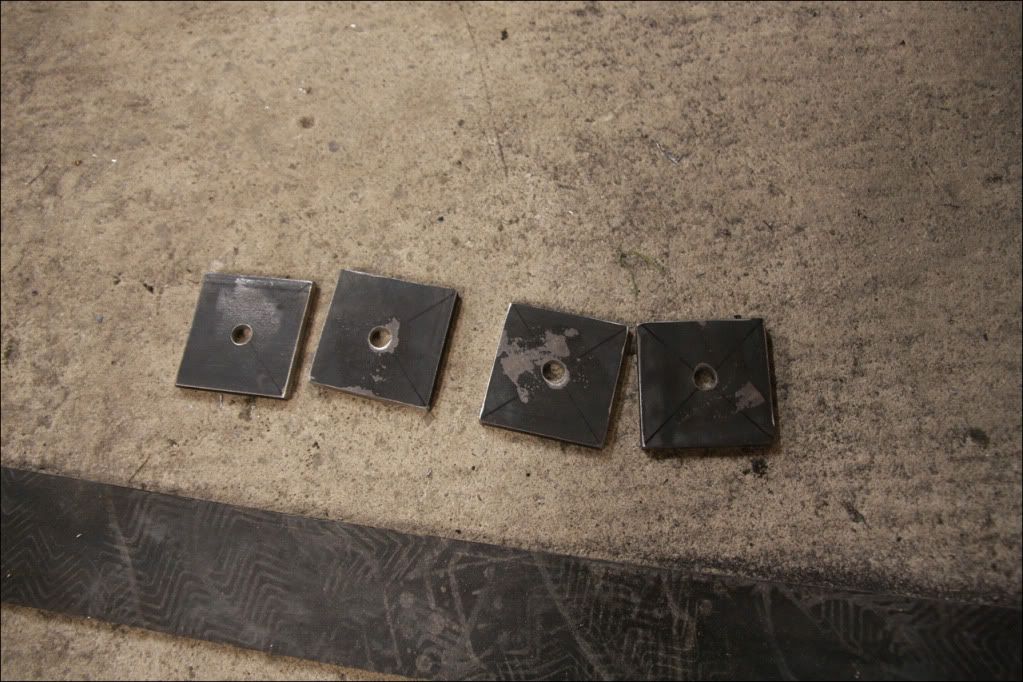
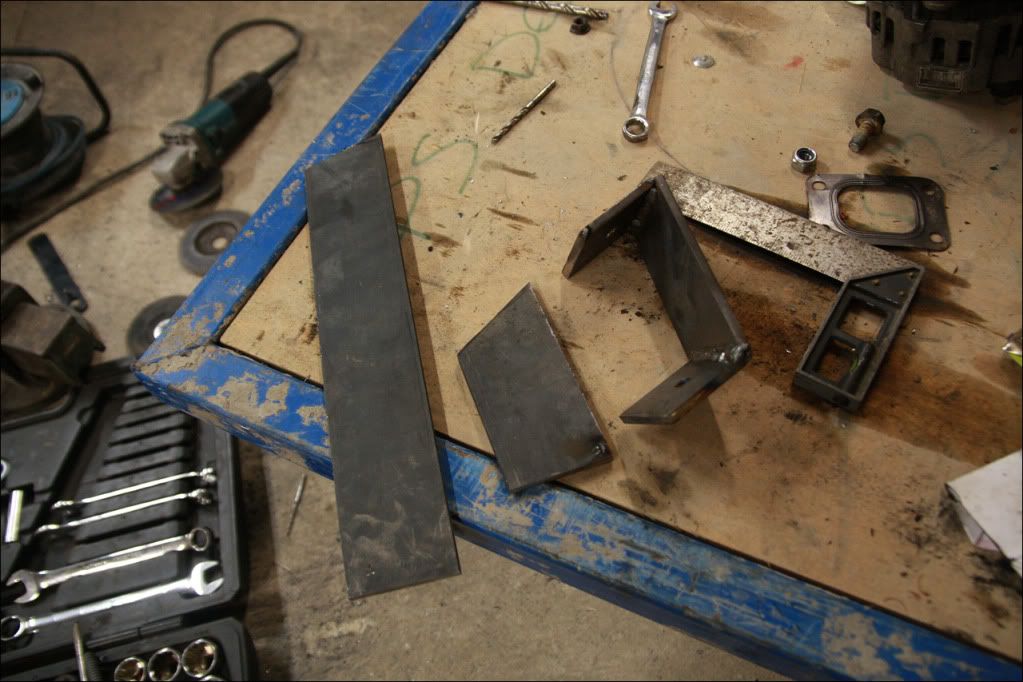
Started with the passenger side mount first. Began with four pieces of 60mm square 5mm plate and drilled them to 10mm...
Then bolted them to the chassis and rubber on both sides..
Had a quick measure of the engine in the bay and got it to the correct height, along with being bang in the middle of the engine bay...
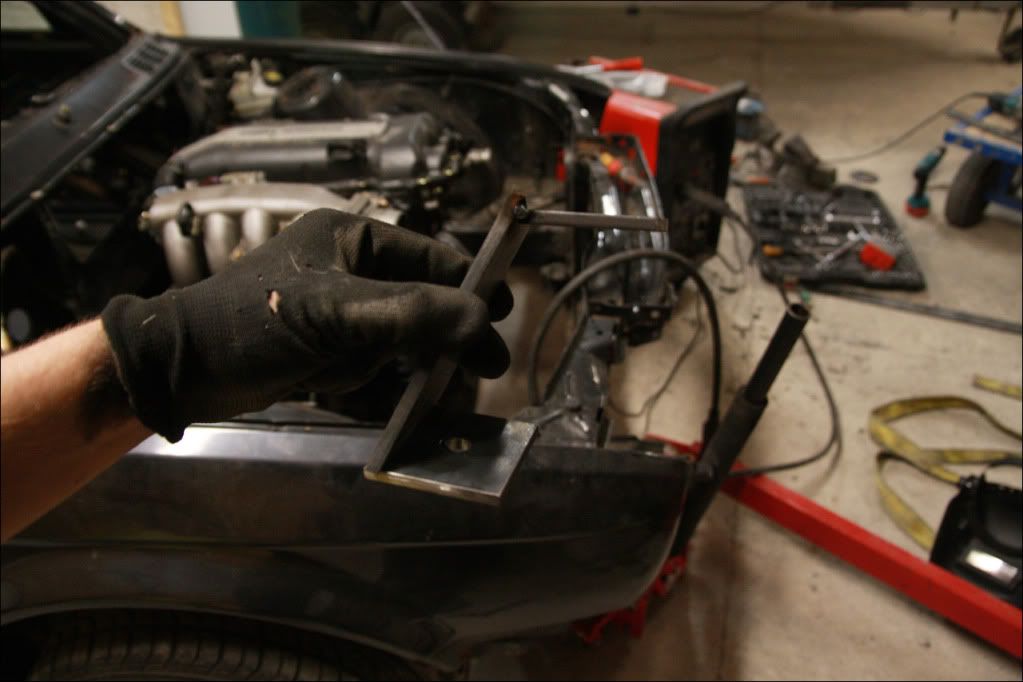
Next, used a piece of scrap to tack both plates together in the correct position so I could make the mount off the car..
Made plates for either side, then the back..
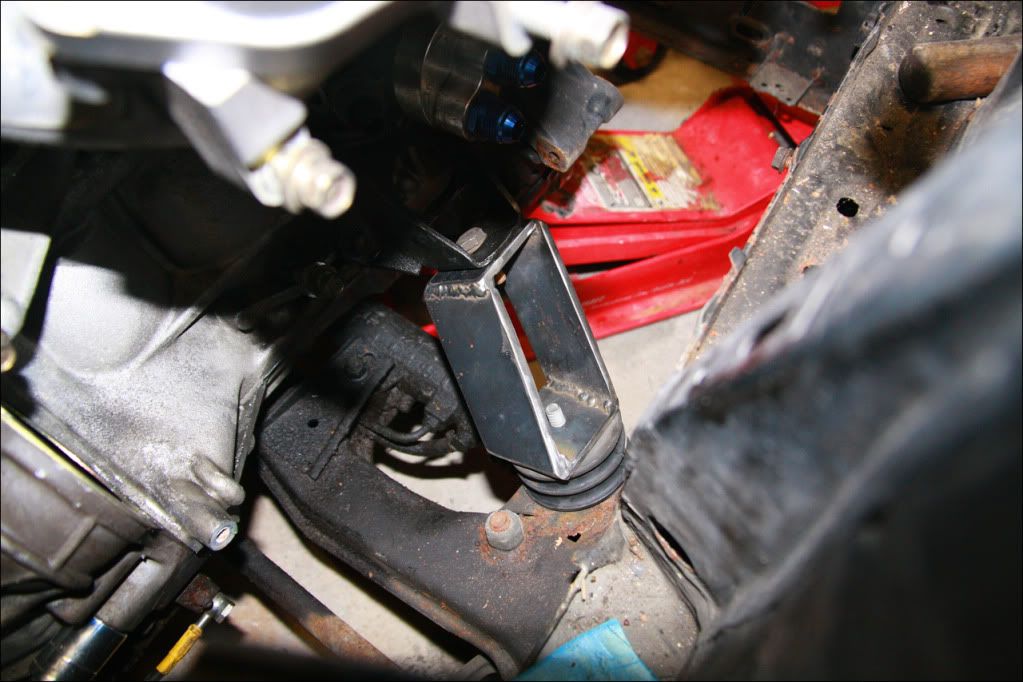
and bolted it upto the engine..
Checked the position of the engine once again and cracked on with the drivers side. Same method, tacked some scrap in..
Then some of this, and that..
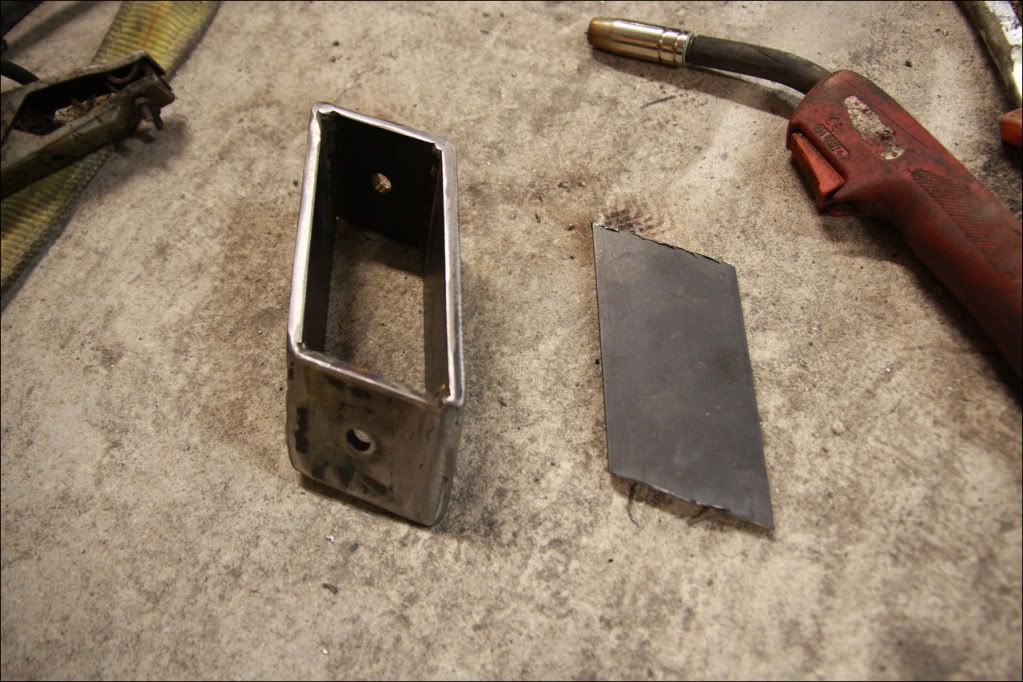
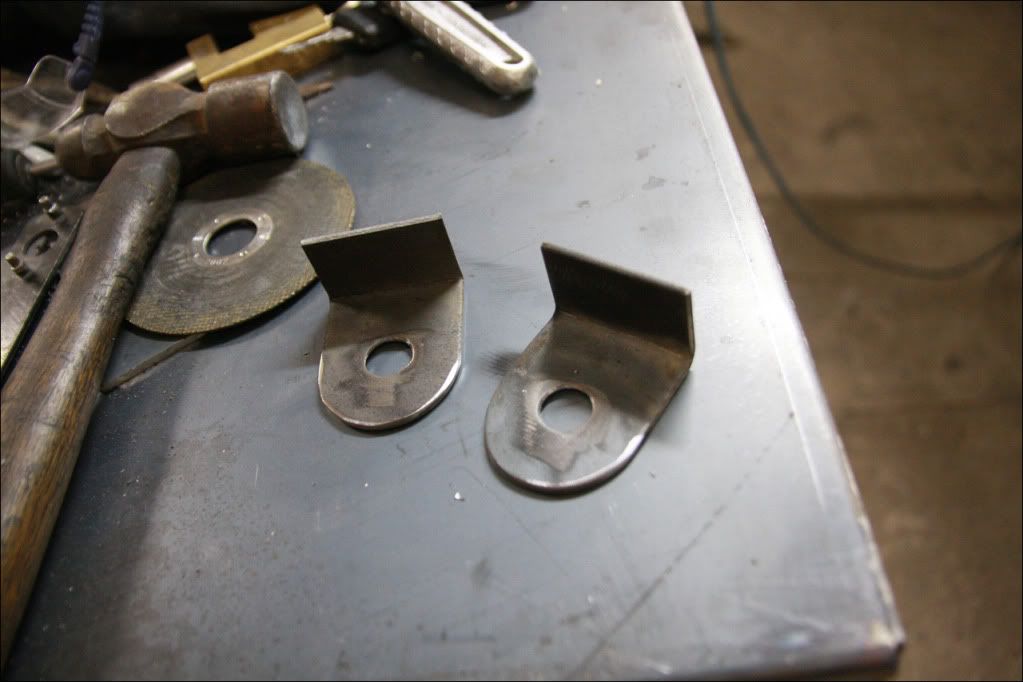
Resulted in getting somewhere near..
Then the finished piece..
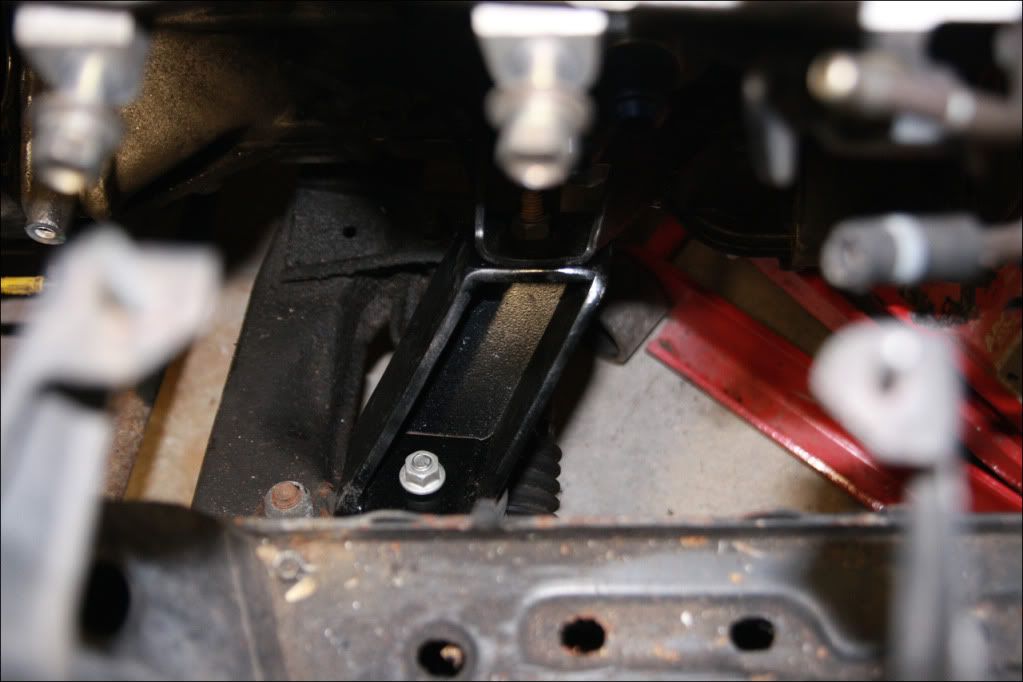
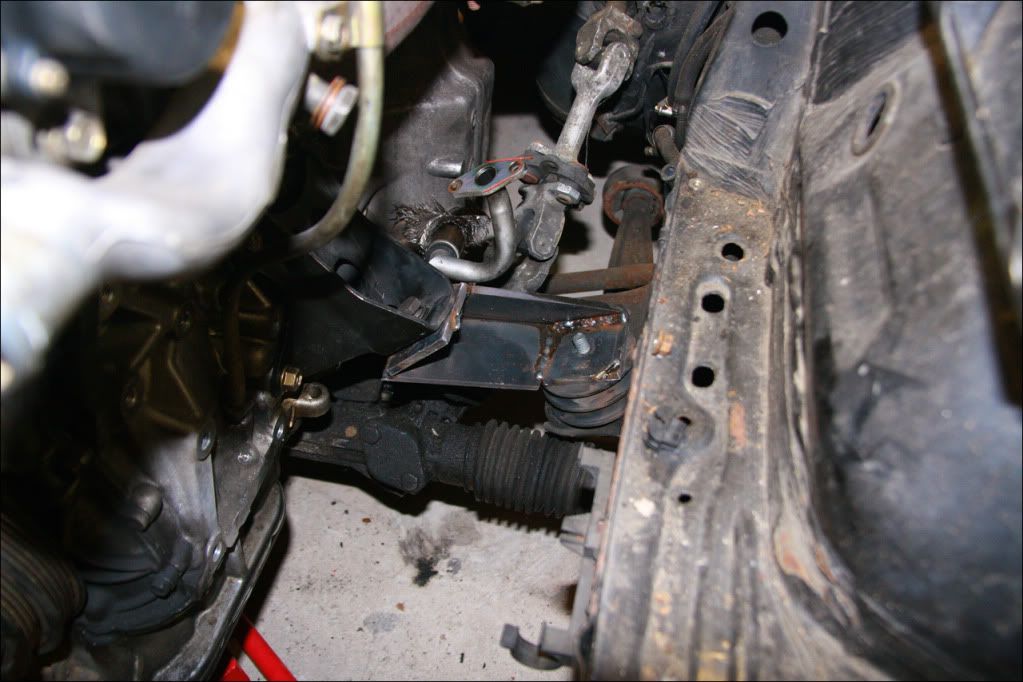
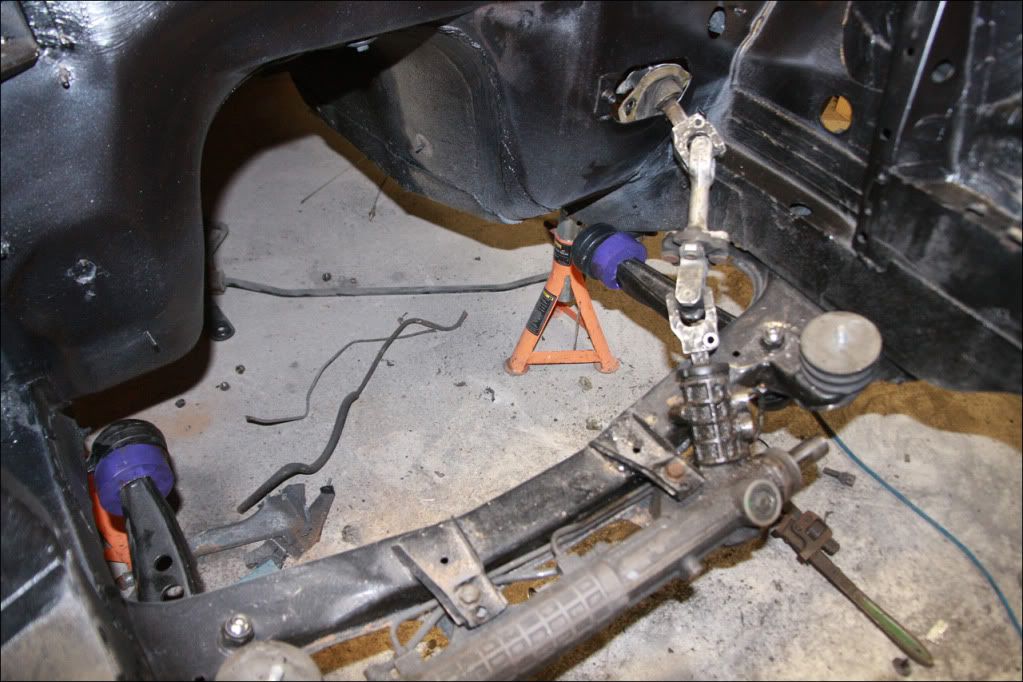
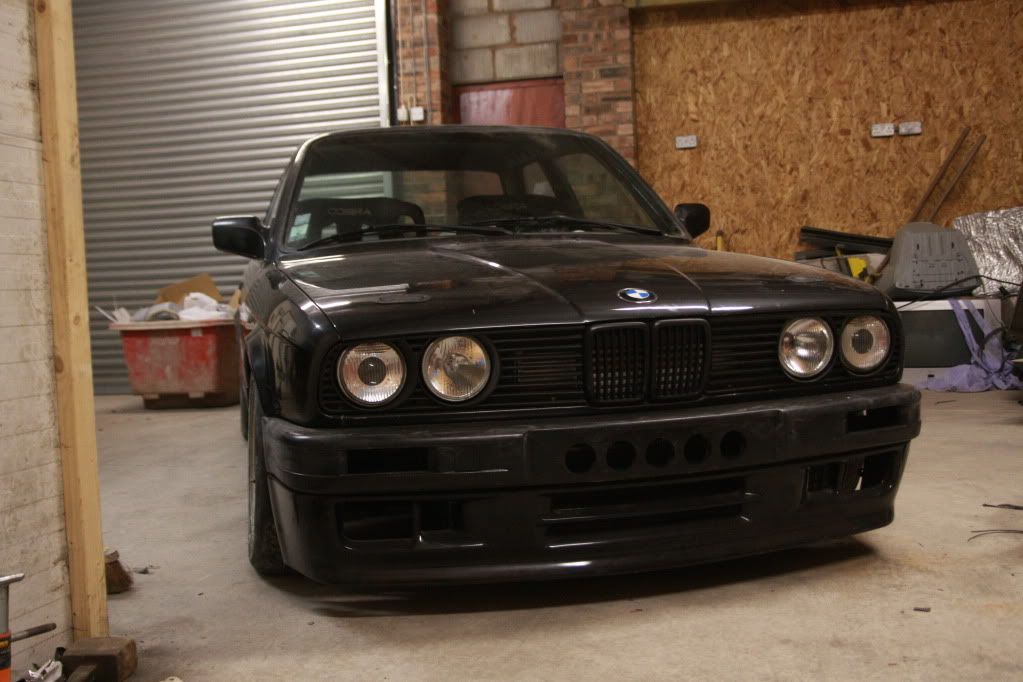
Bolted both sides up solid and let it down off the jack for the first time. The weight difference between this and the 318is seems to be quite a bit, as the front of the car has lowering springs on and its now higher than standard would be! Had a quick check of the steering rack and ARB clearances..
Its pretty close to the standard ARB (which is going to be significantly larger), and clears the steering rack nicely. Its about as low as it will go without modifying anything else, especially with how much clearance there is on the ARB! Looks about right
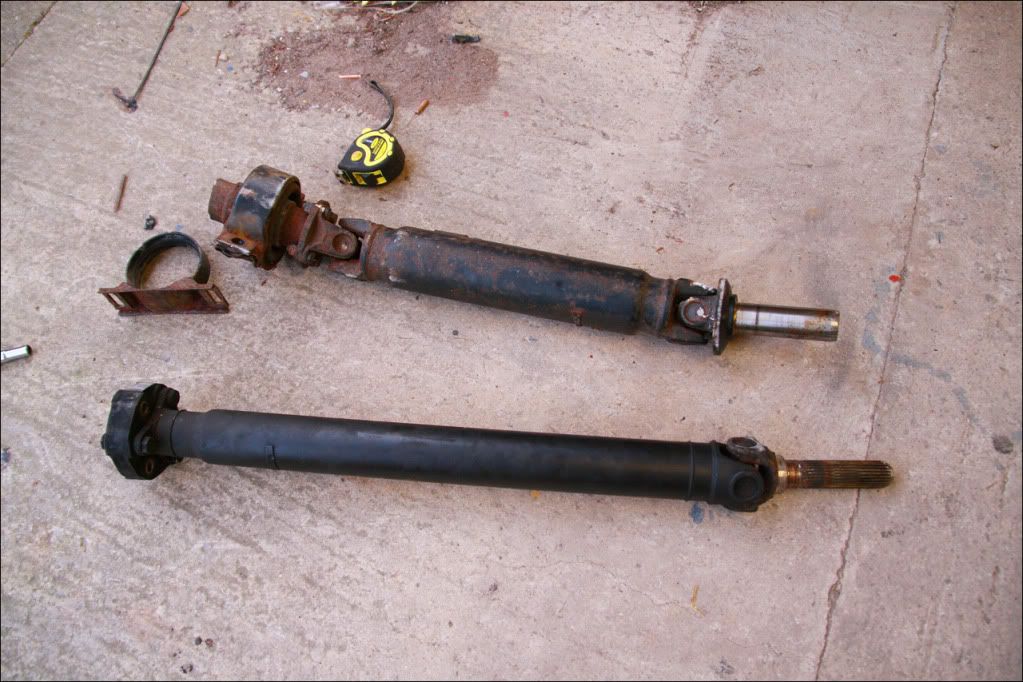
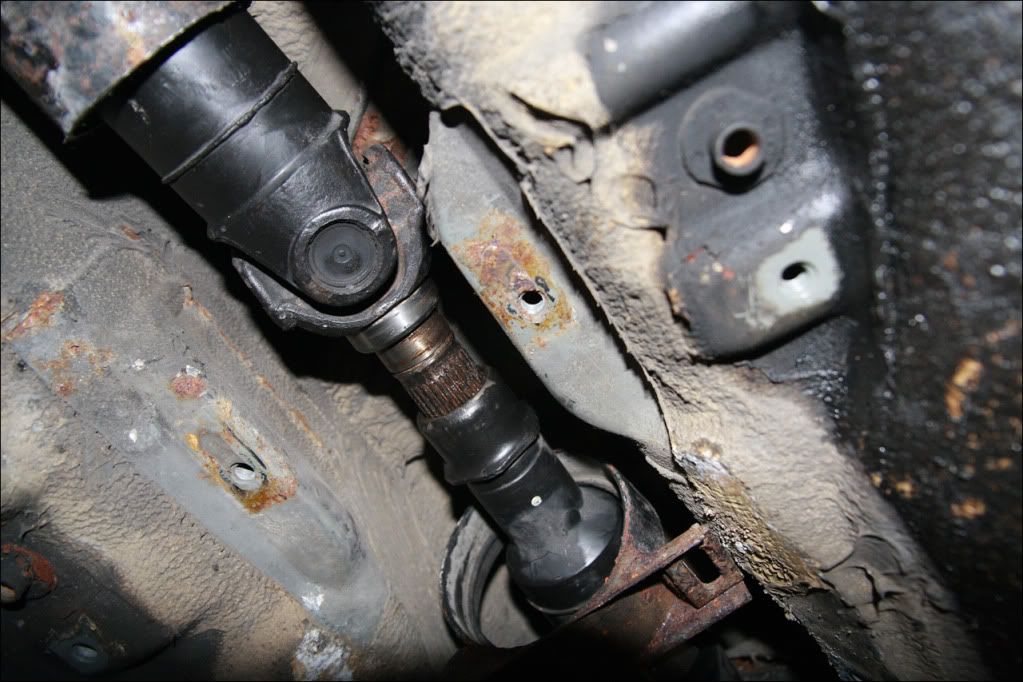
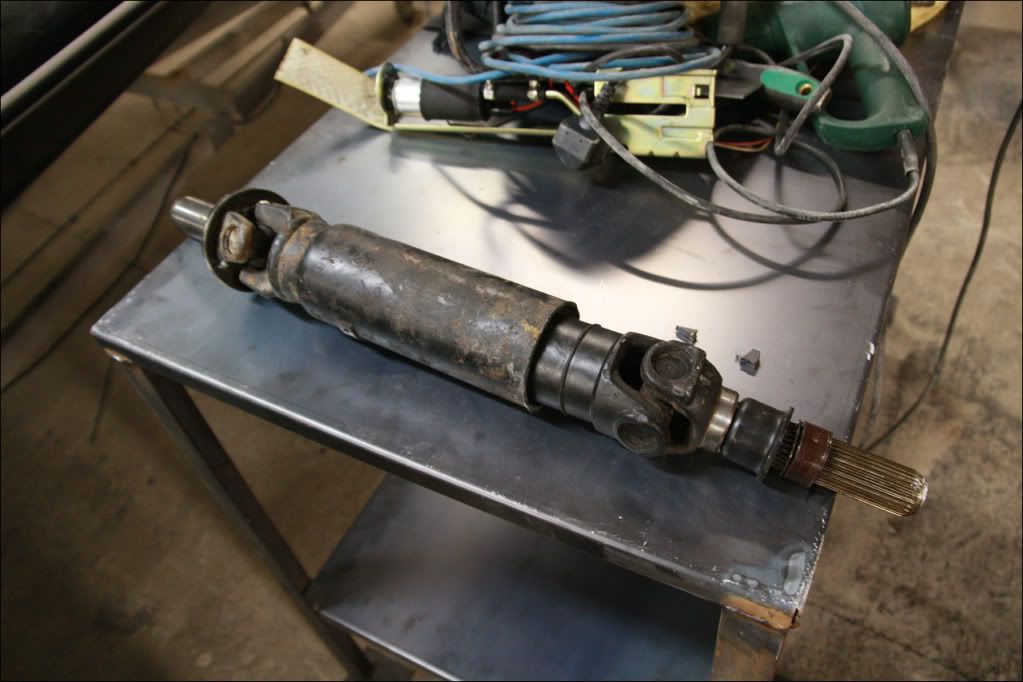
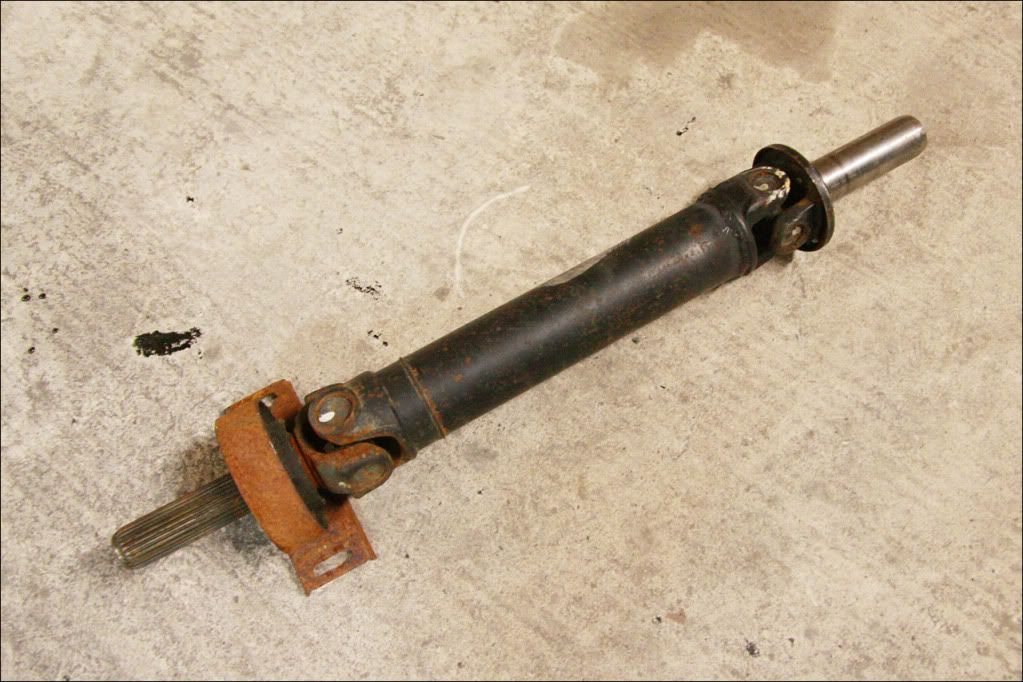
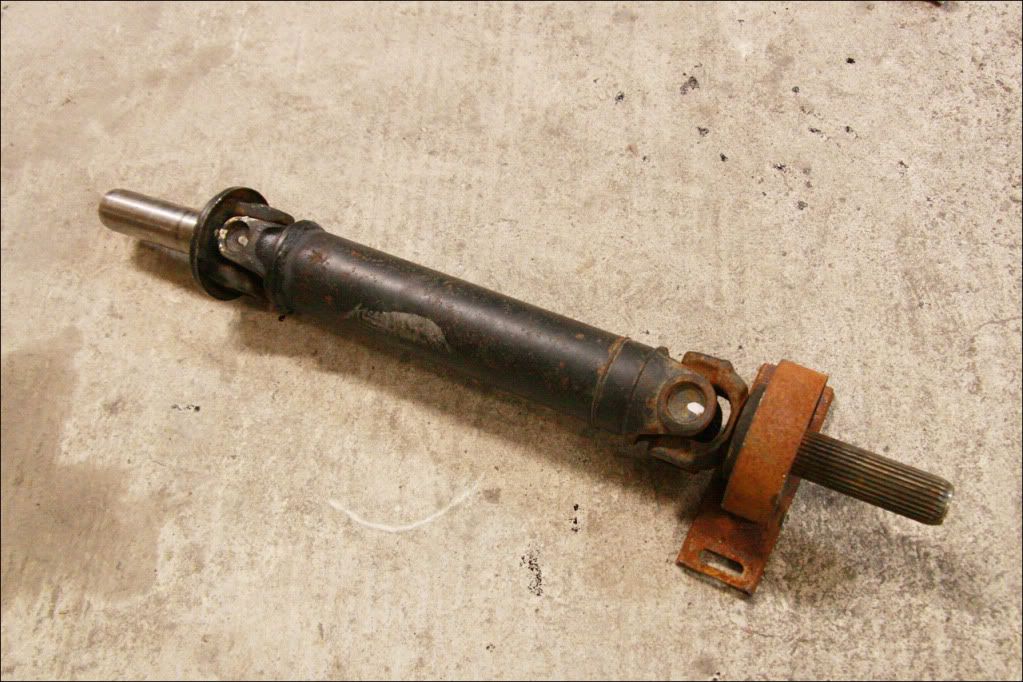
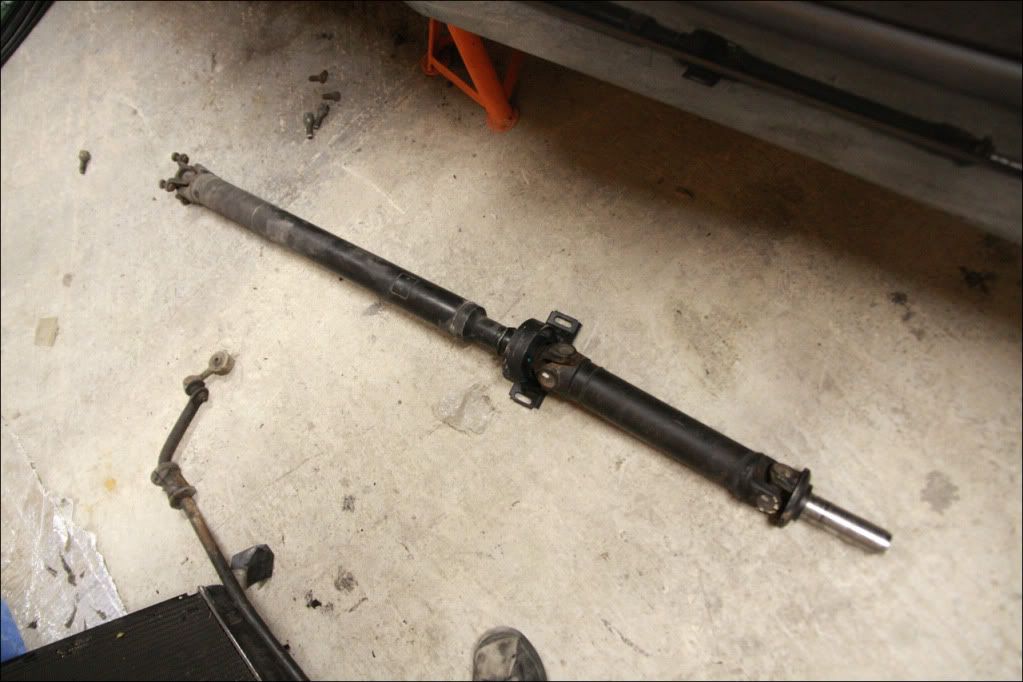
E30 Prop (Front Section) vs S14 Prop (Front Section)..
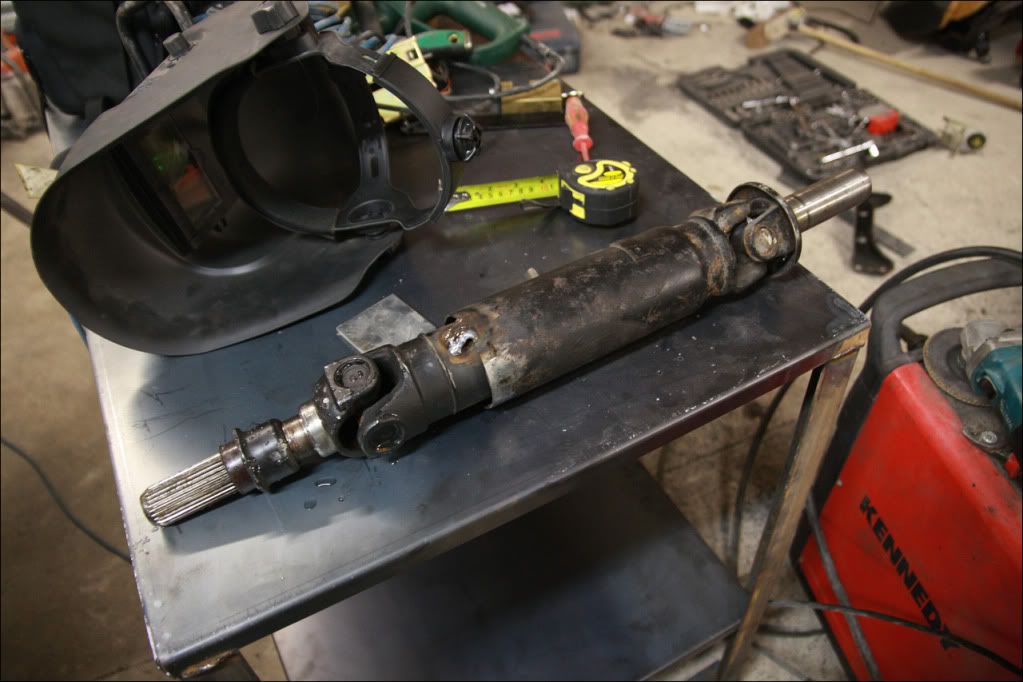
Chopped them up so they could be sleeved, then adjusted to length under the car and bolted a new center bearing up to be sure of the length..
Tacked it under the car then removed it to put a bit more weld on to hold it at the correct length..
Dropped it off at a local prop shaft manufacturer a few days ago so I should have a nice new prop at the correct length next week
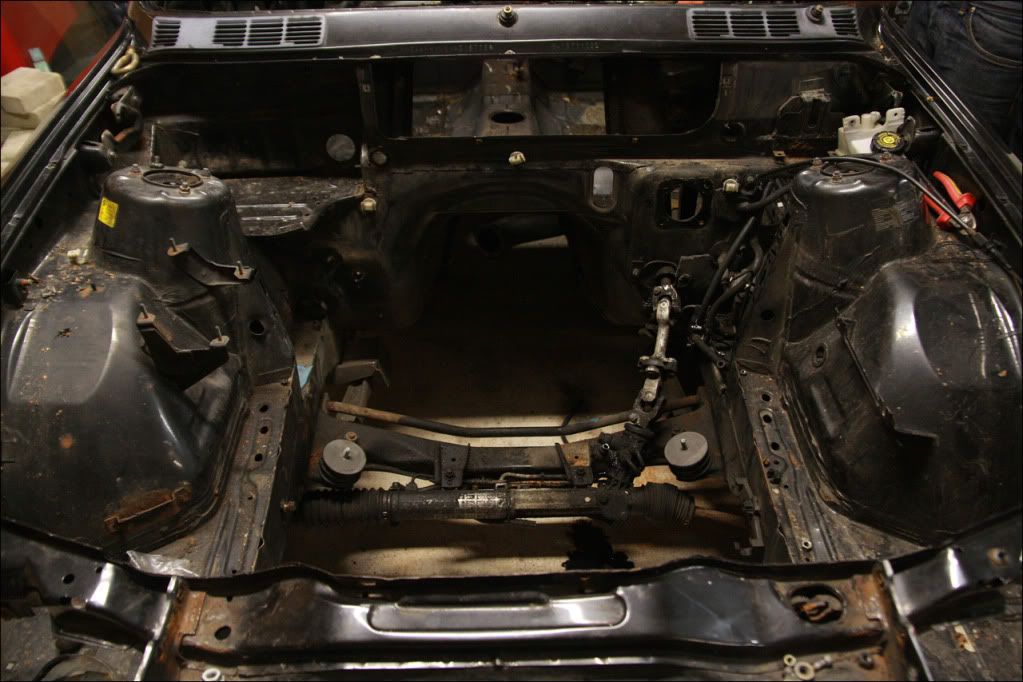
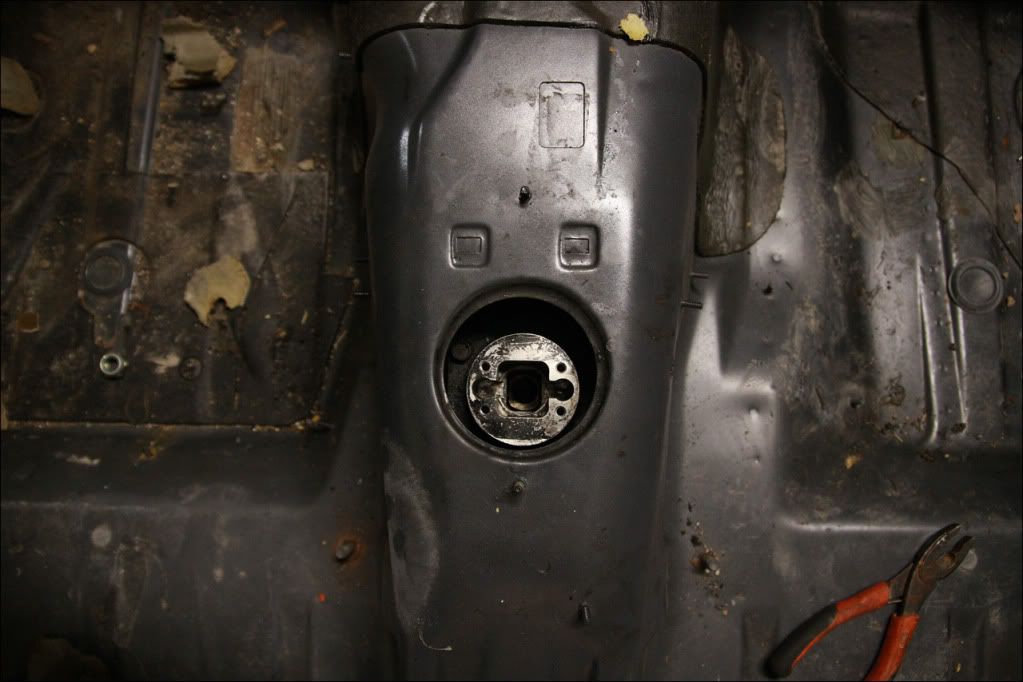
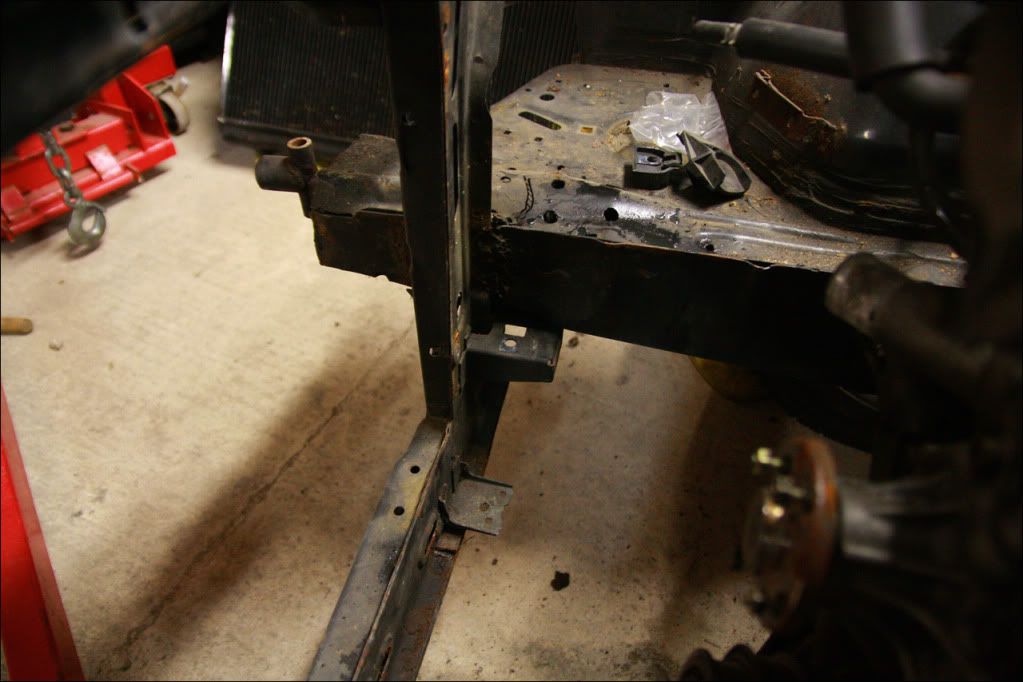
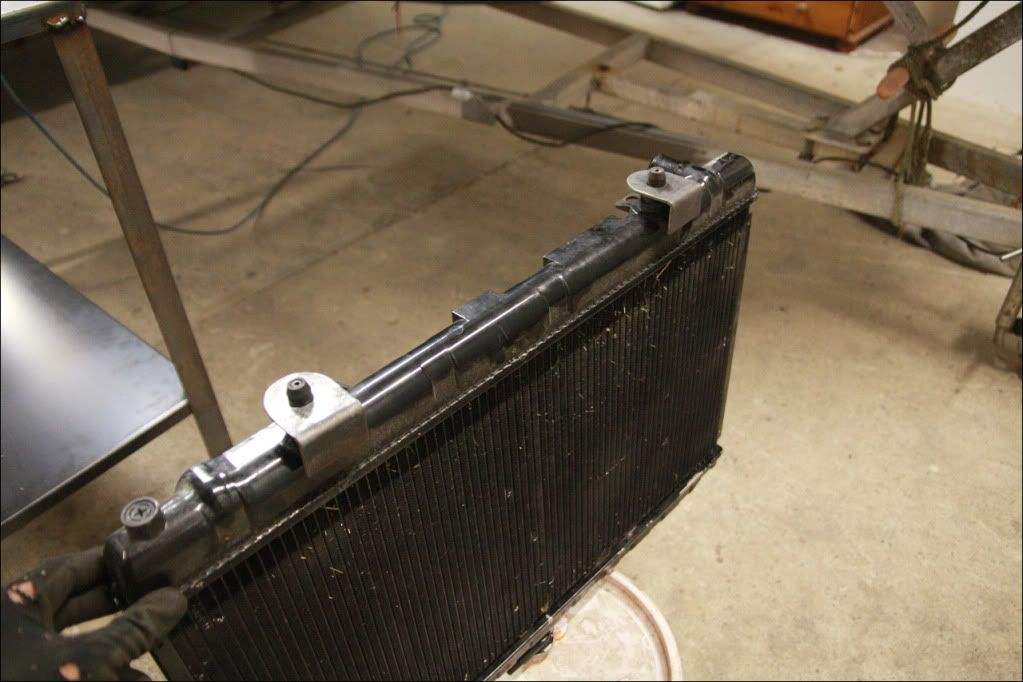
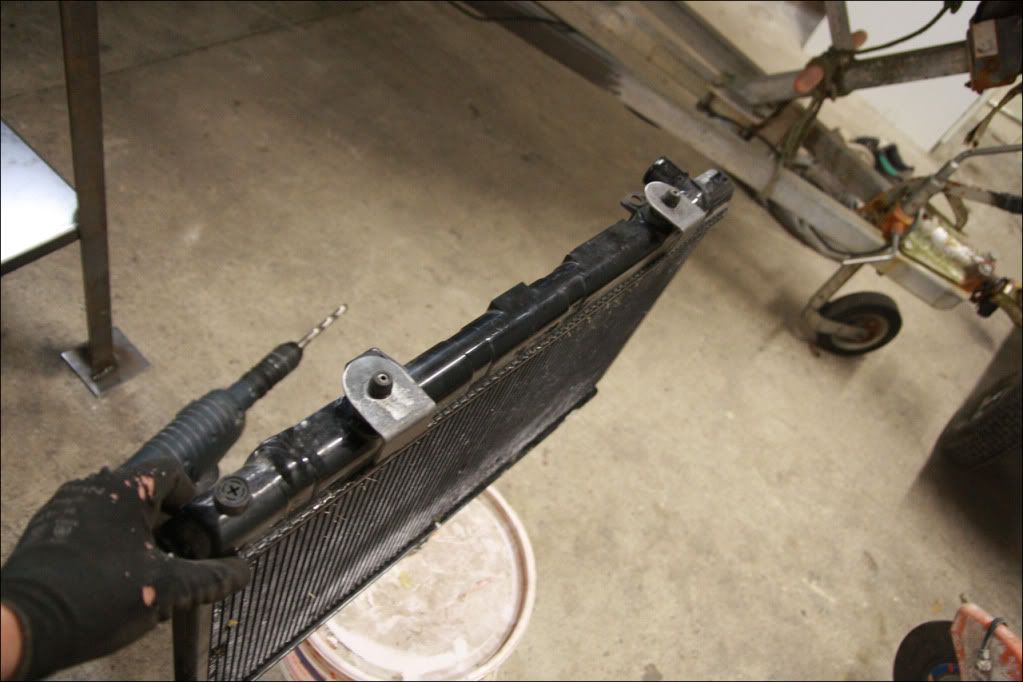
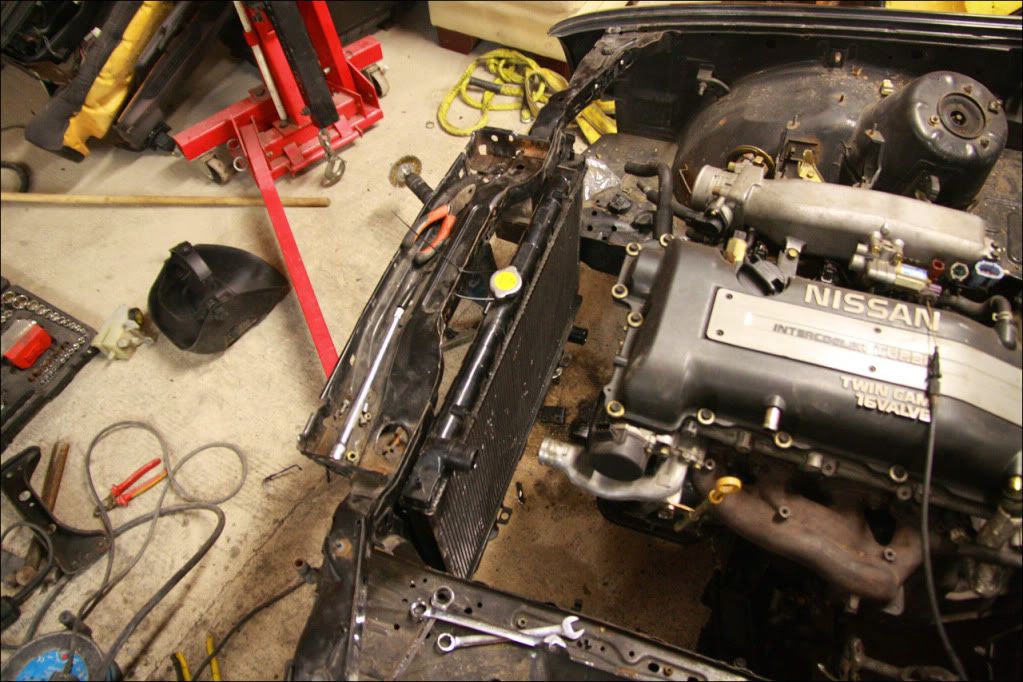
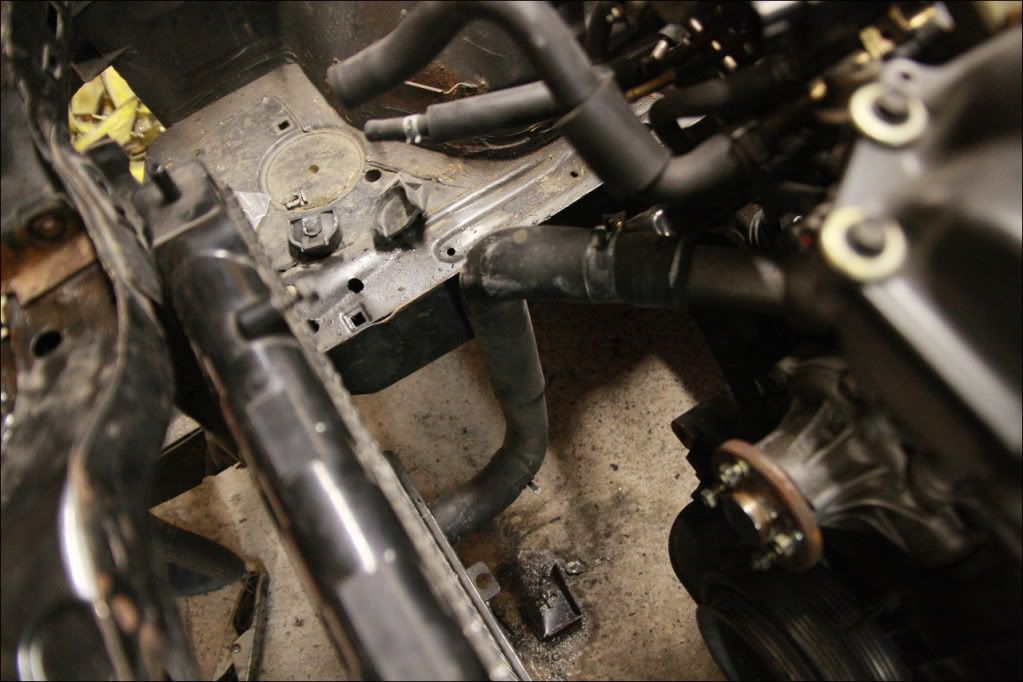
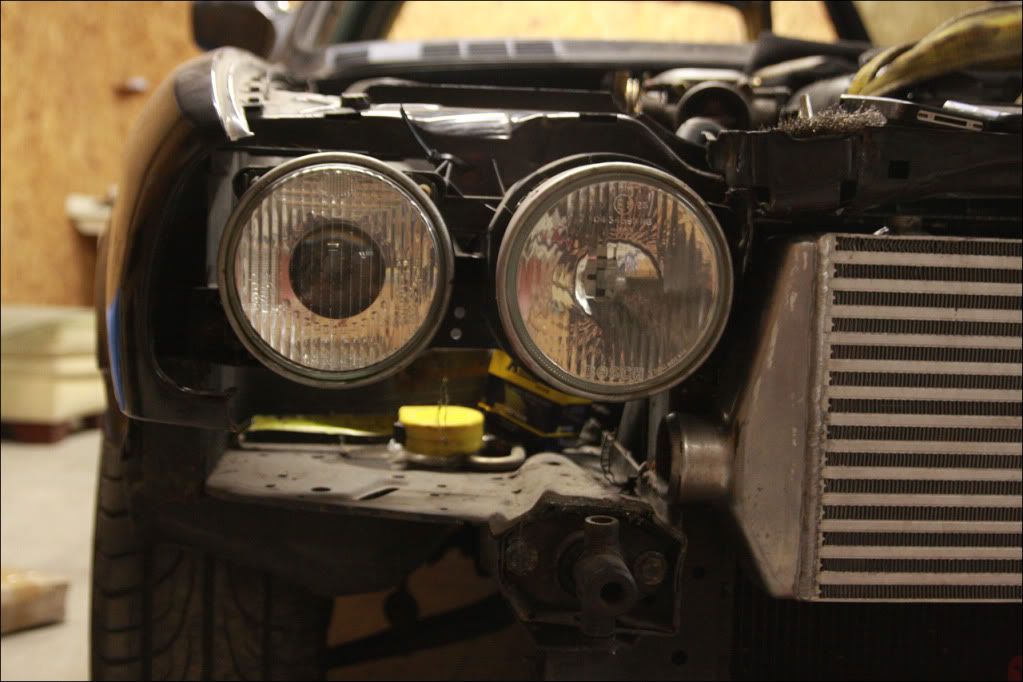
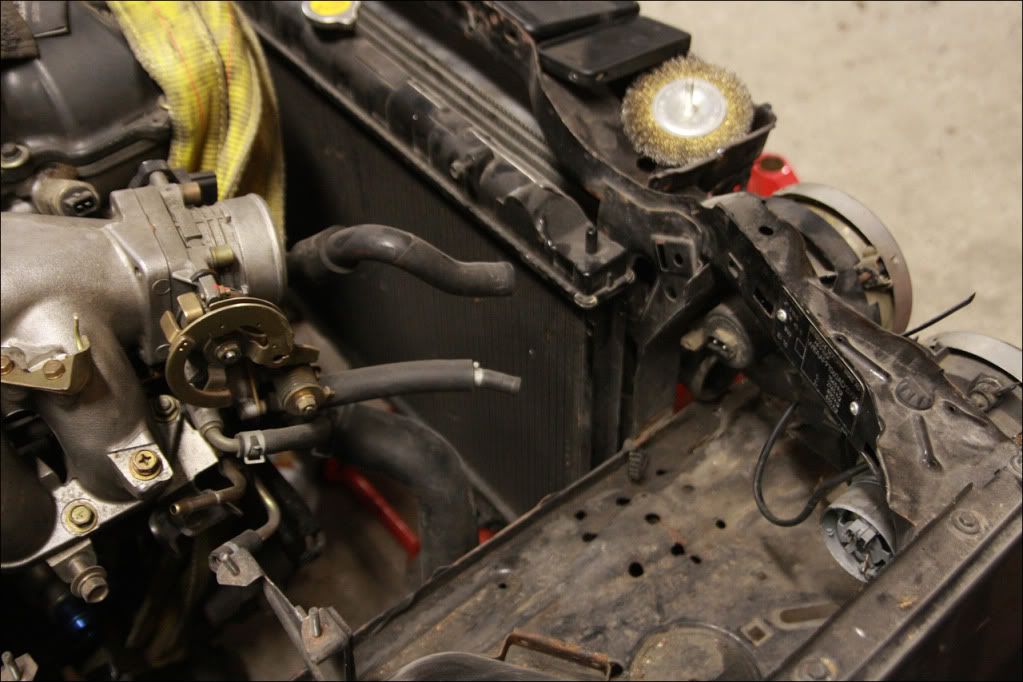
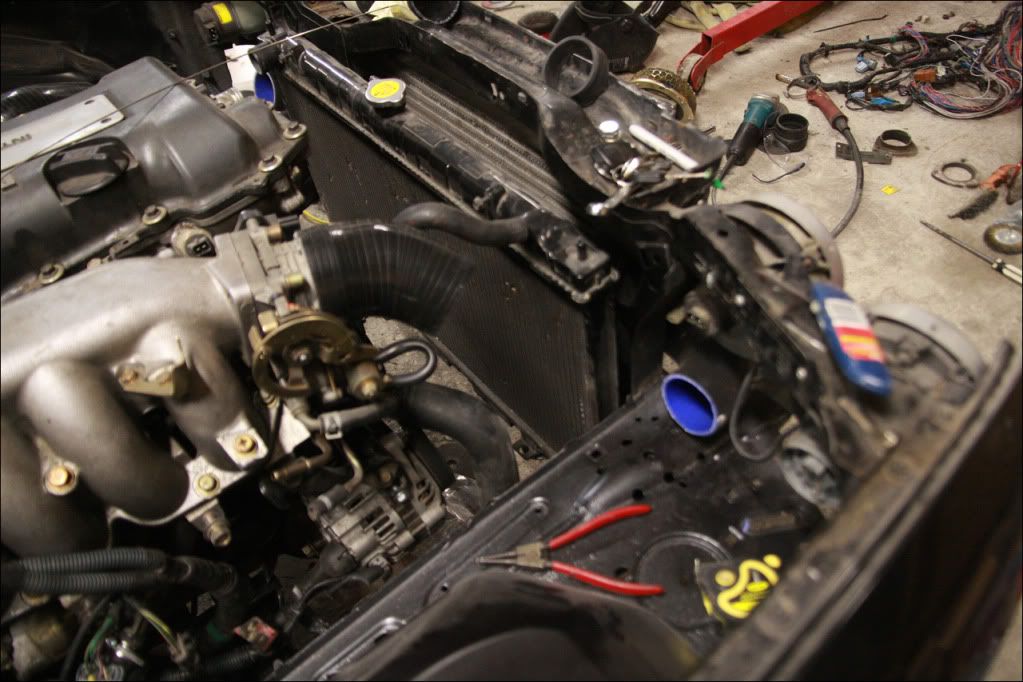
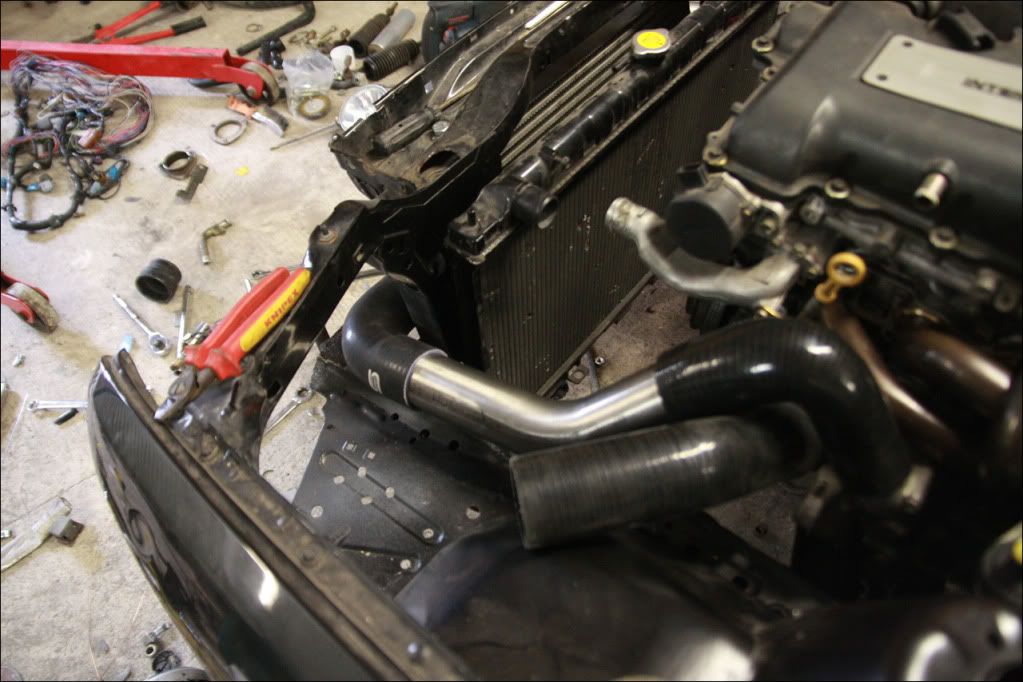
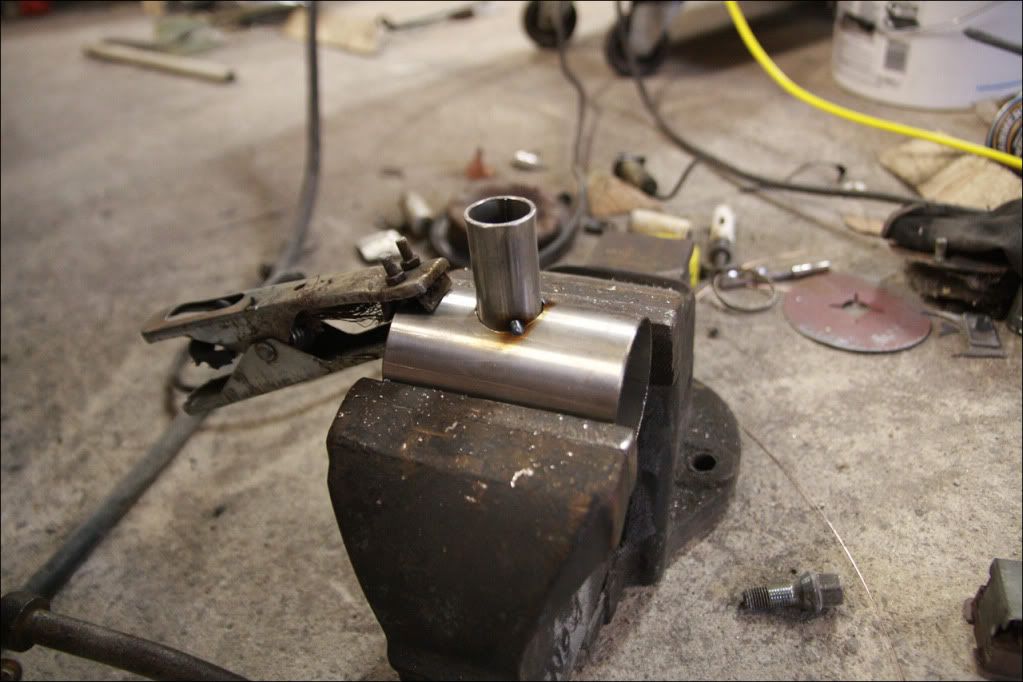
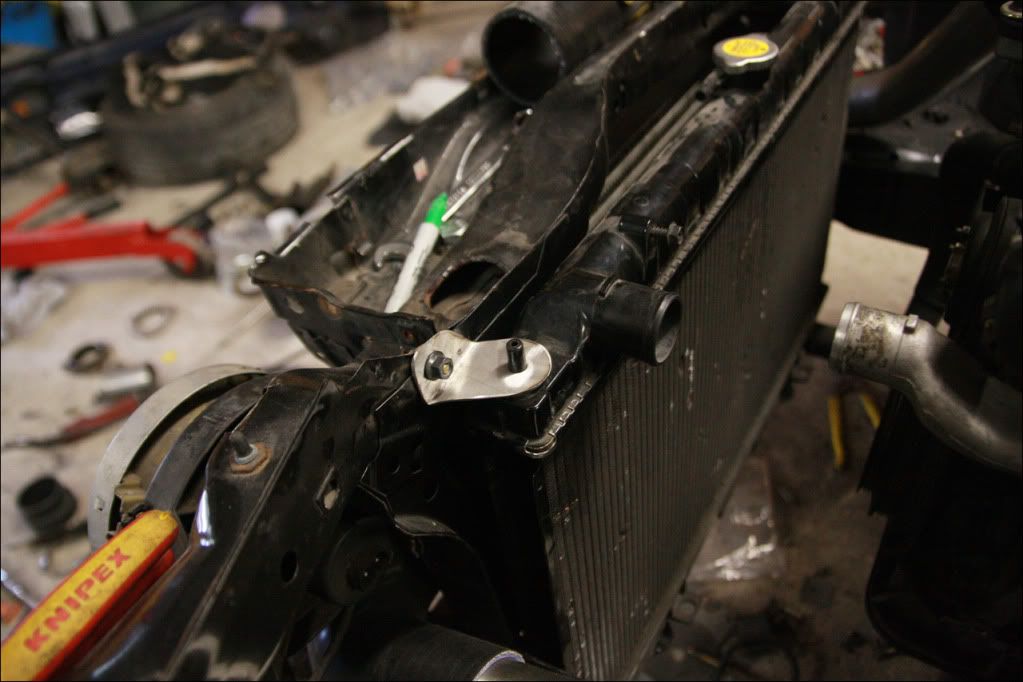
After that I decided to make up a couple of lower radiator brackets. I am using the S14/S15 radiator as it fits perfectly between the chassis legs on the E30 (with about 5mm to spare either side!).
The standard BMW radiator mounts look like so..
So those were promptly chopped off and the lower metal cleaned up..
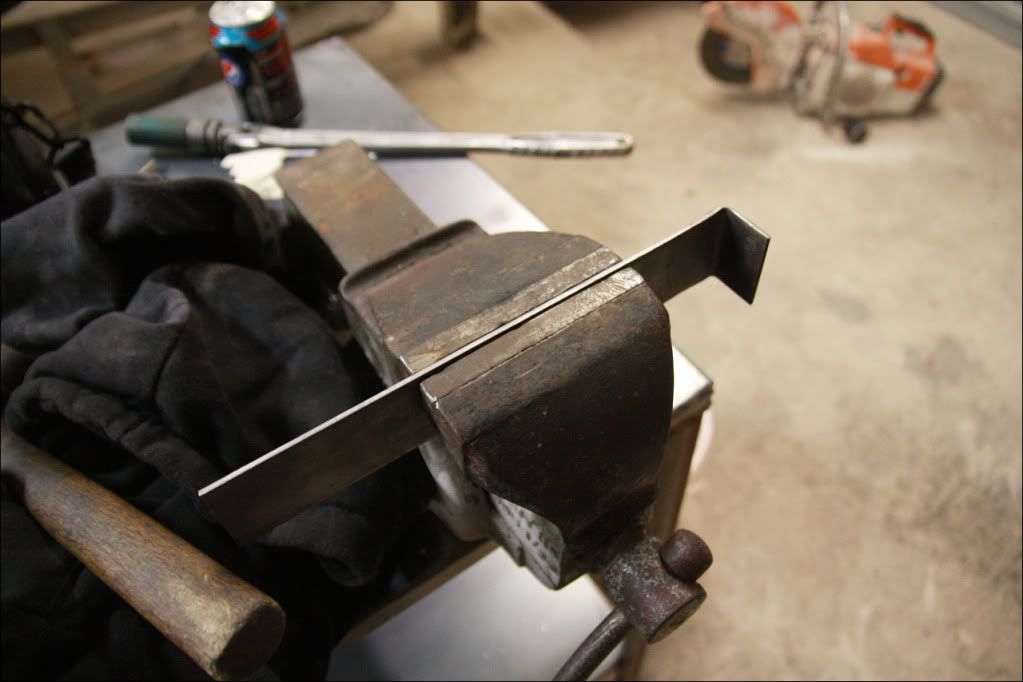
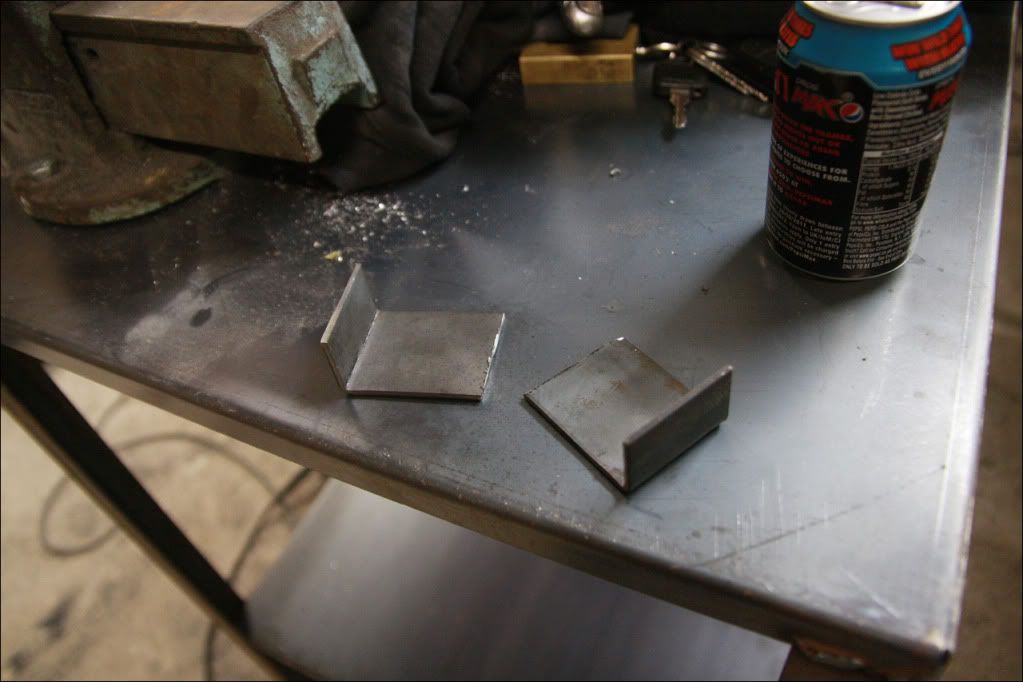
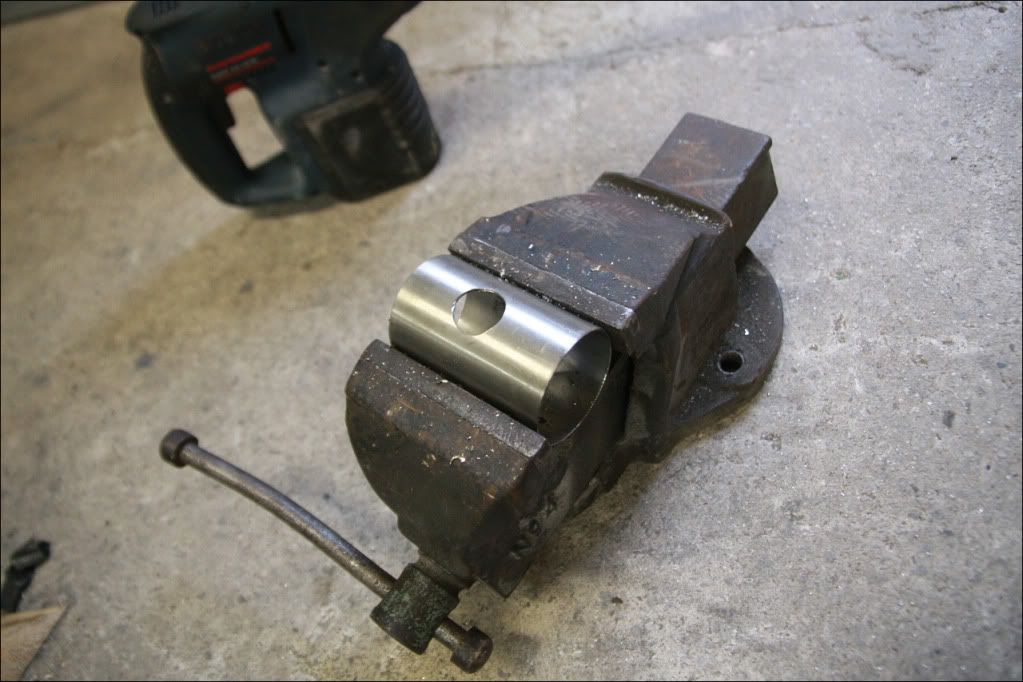
Bent a couple of brackets to shape in the vice..
Drilled them to the size of the S14/S15 radiator rubber and rounded the edges..
They sit on the radiator like..
Which I was happy with. So after a bit of messing I managed to get them tacked in the right place and then fully welded them on..
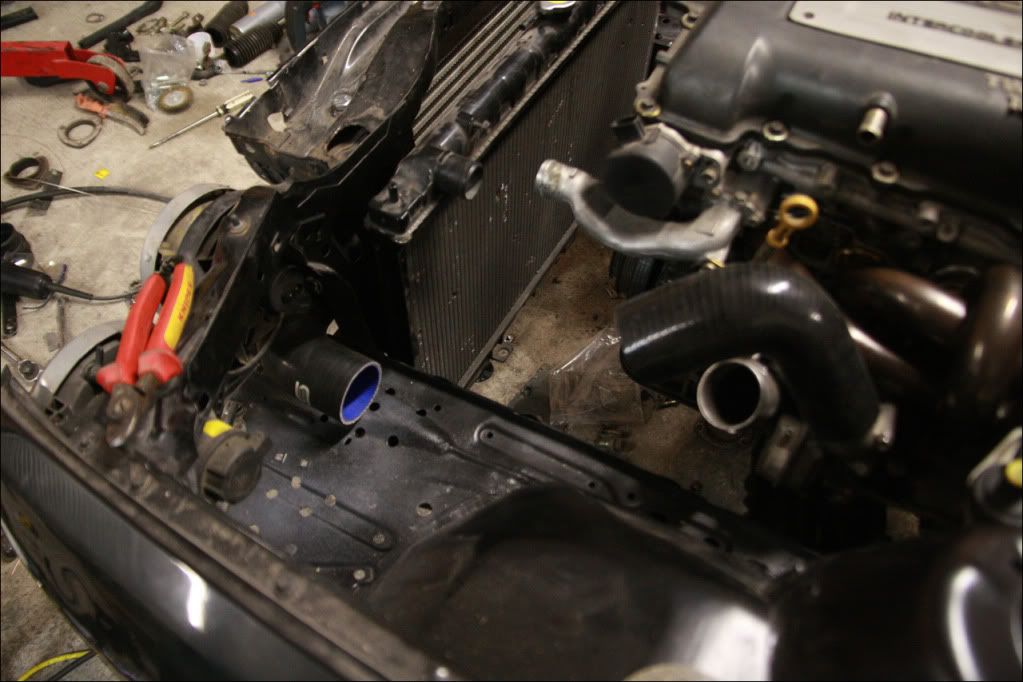
Then sat the radiator in place..
The lower hose from the S14/S15 fits perfectly, although I'l need to find one for the upper..
Then finished by undersealing the brackets..
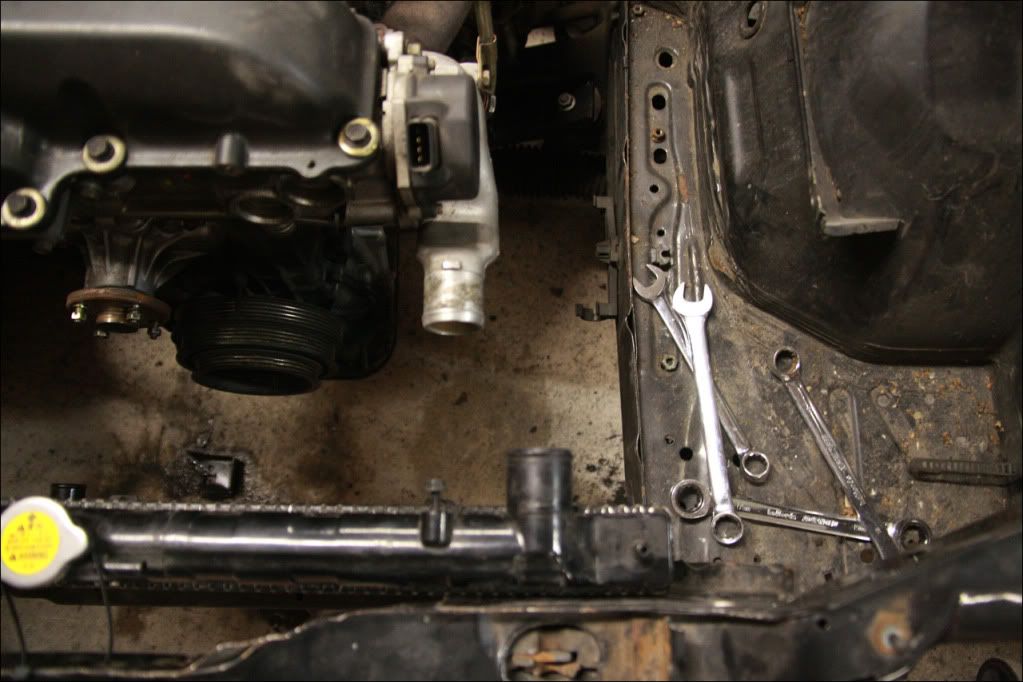
The whole bay will be properly sorted and painted once I've got the bigger jobs out of the way. Still got to make a pair of upper radiator brackets over the next few days but nothing major!
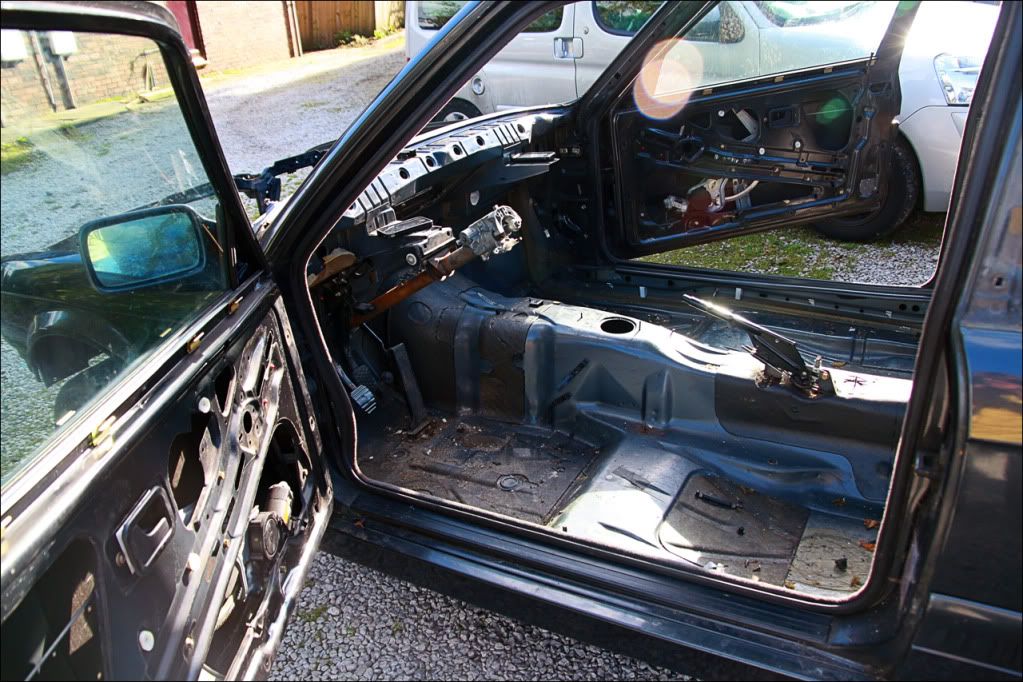
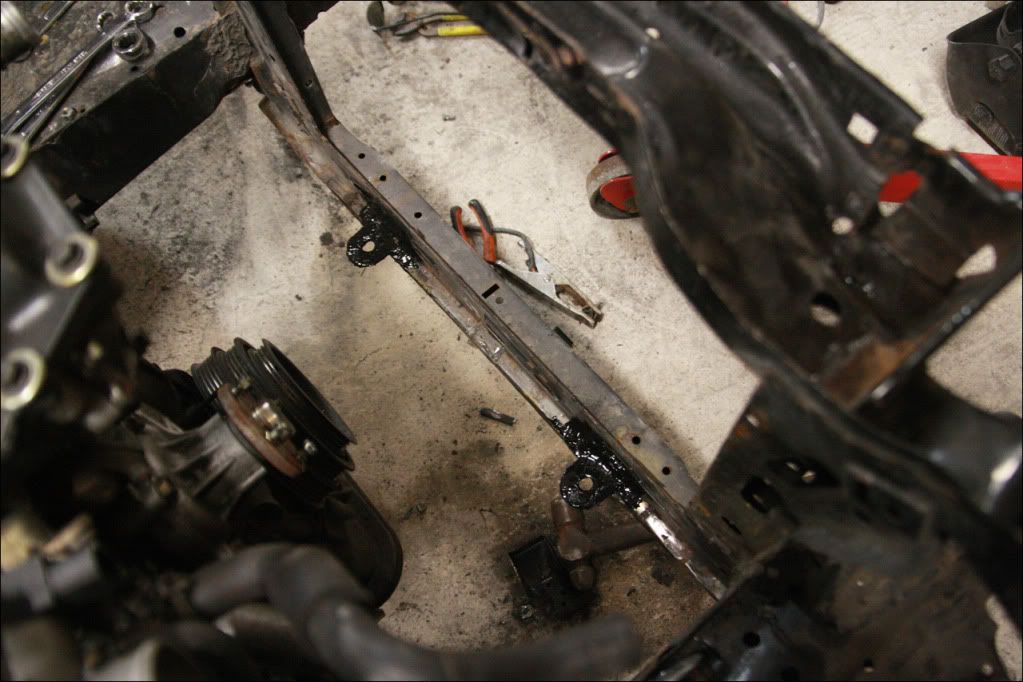
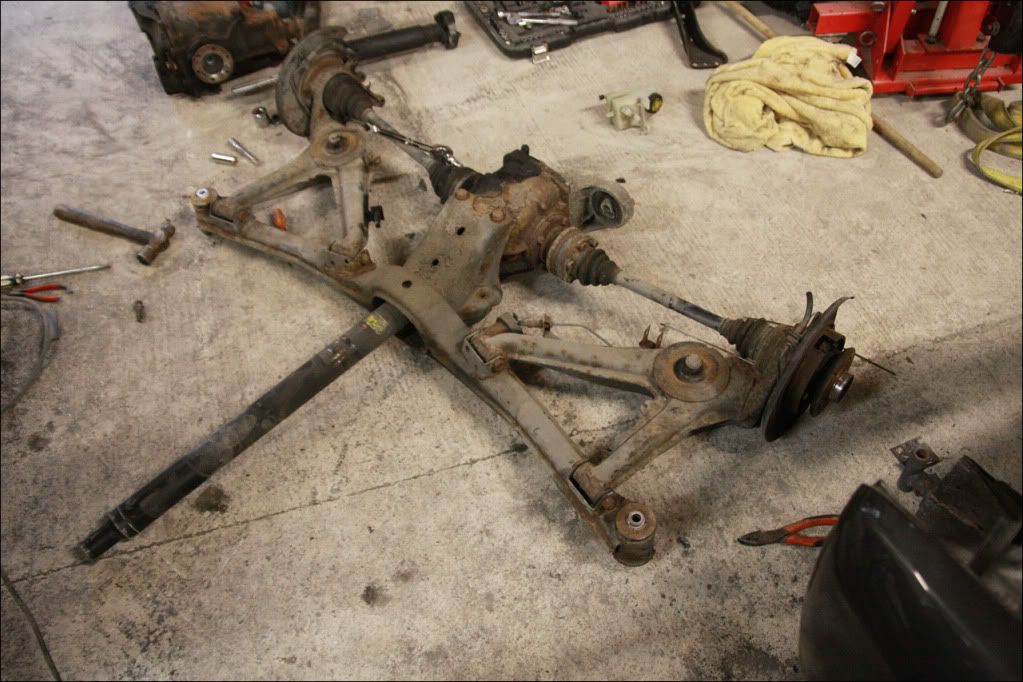
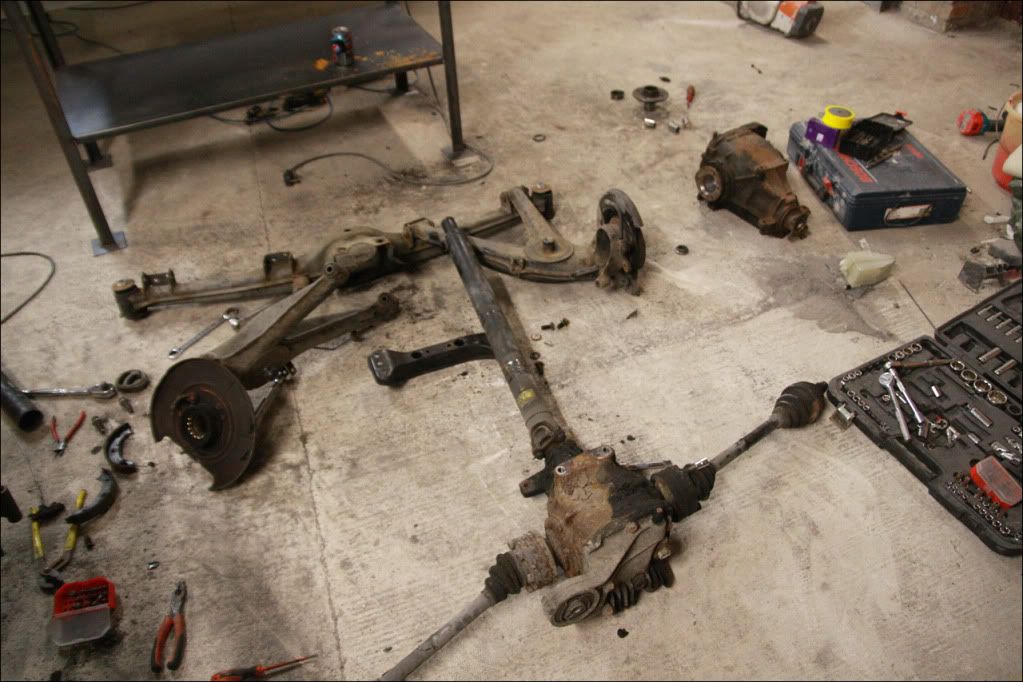
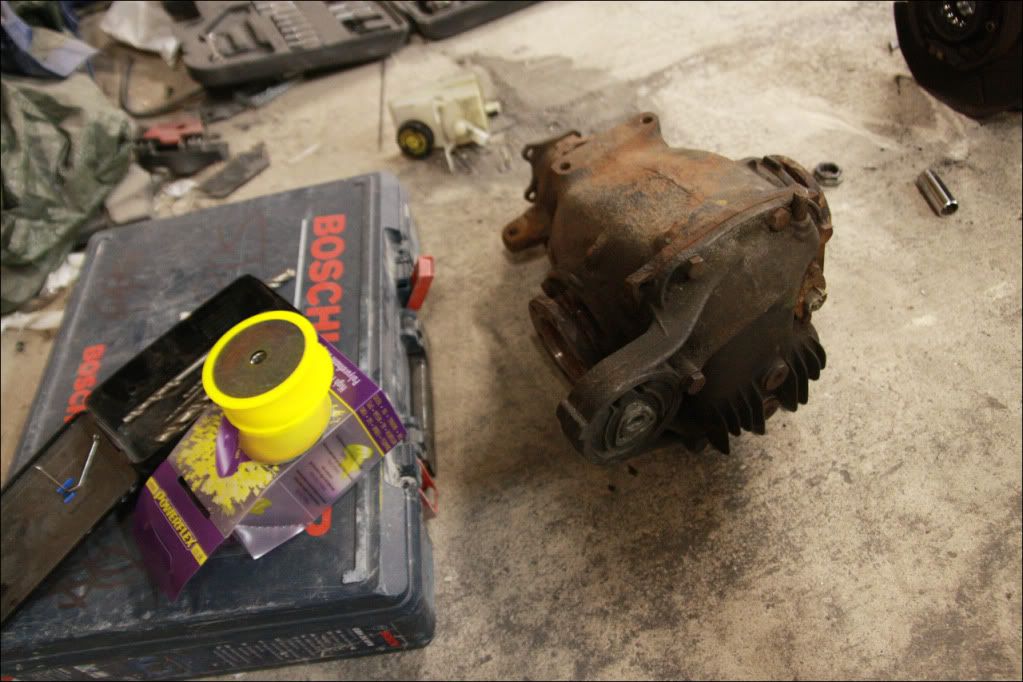
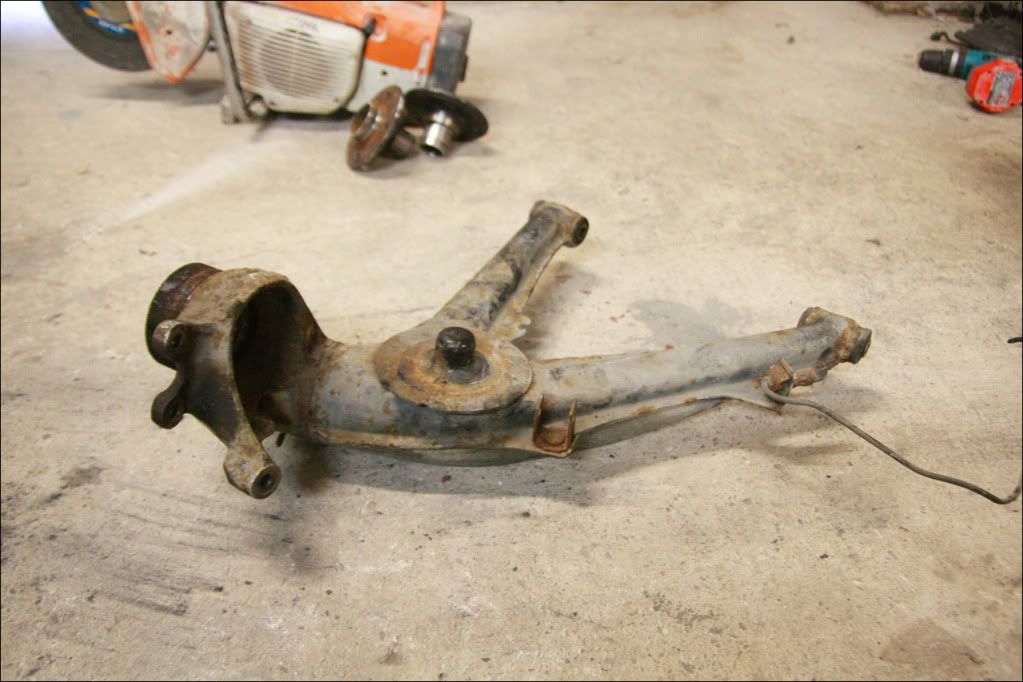
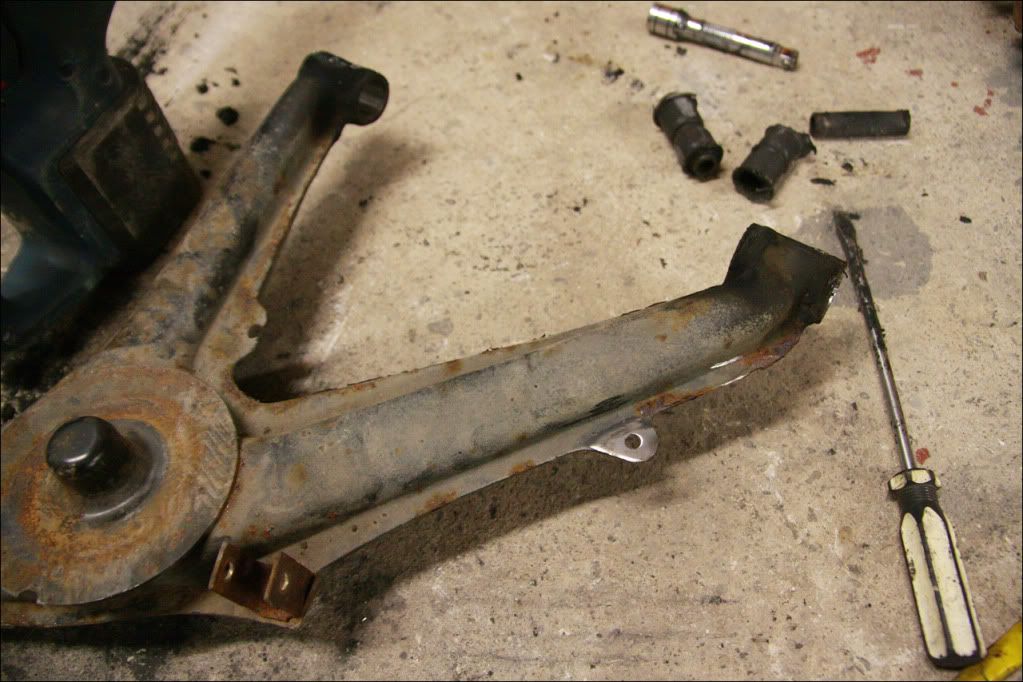
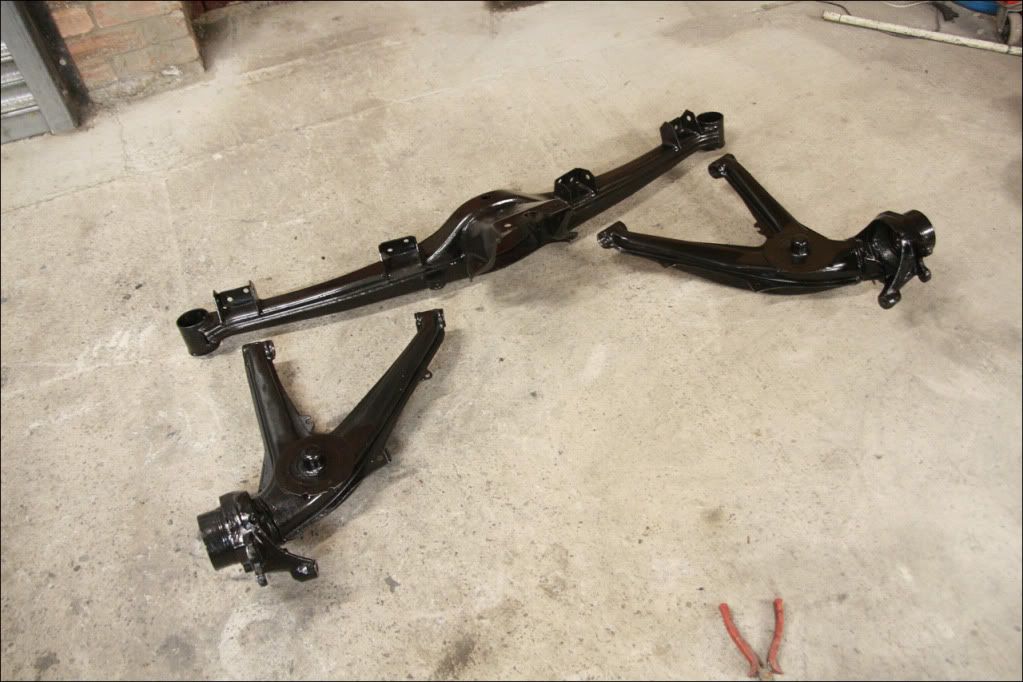
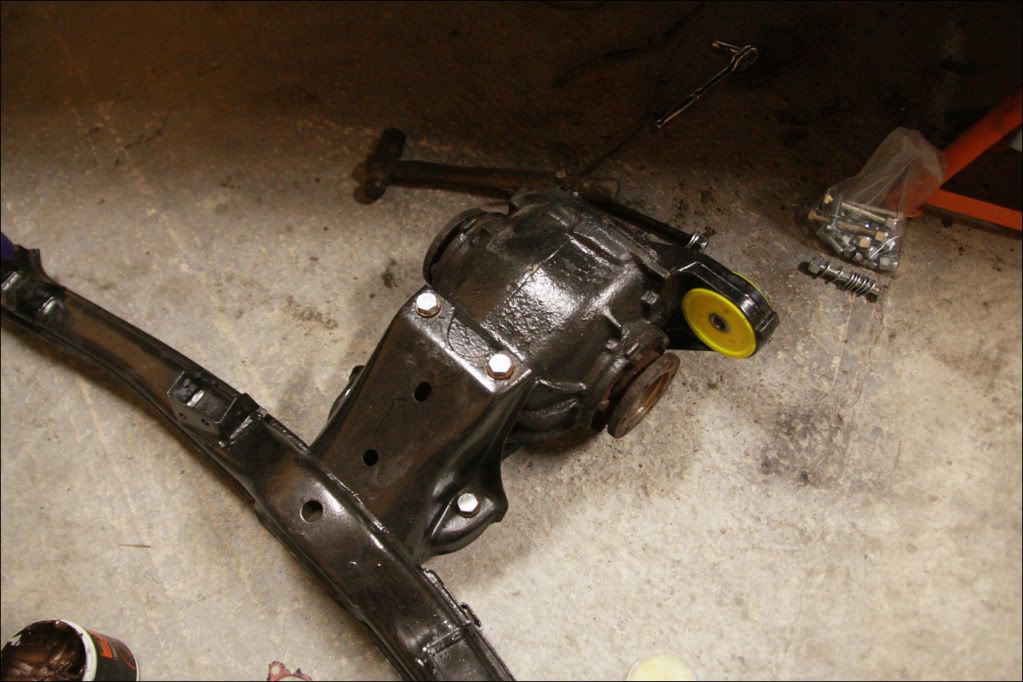
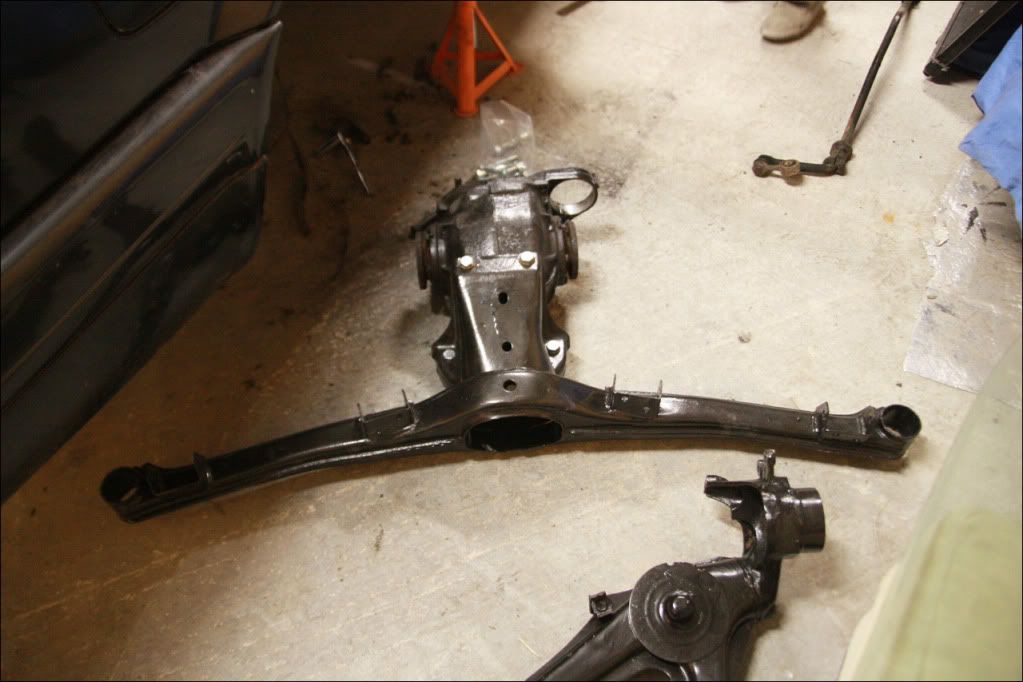
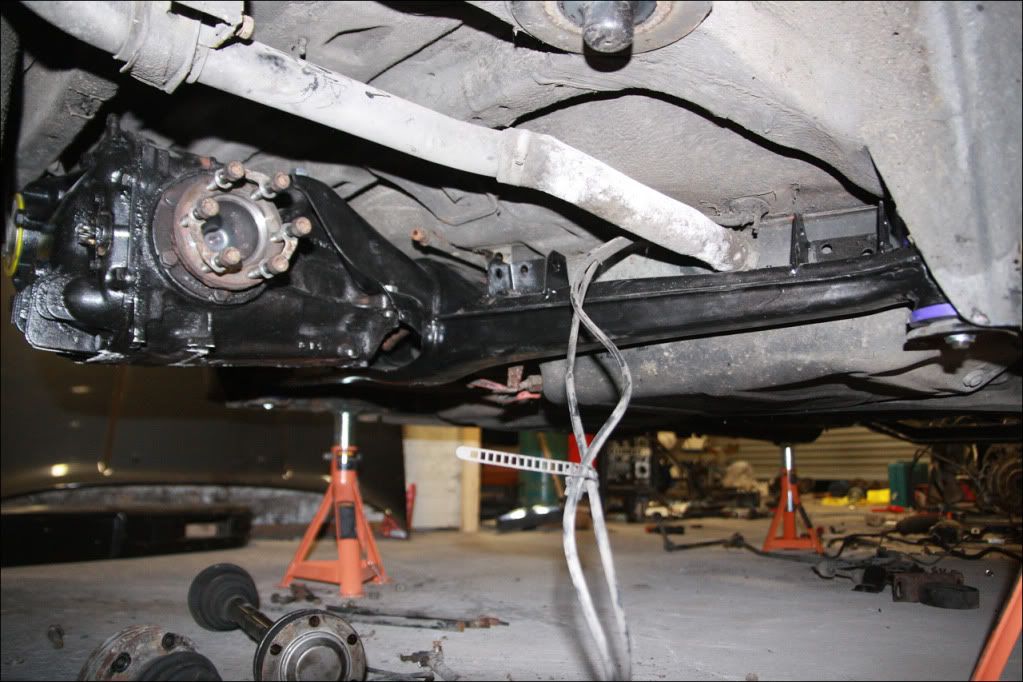
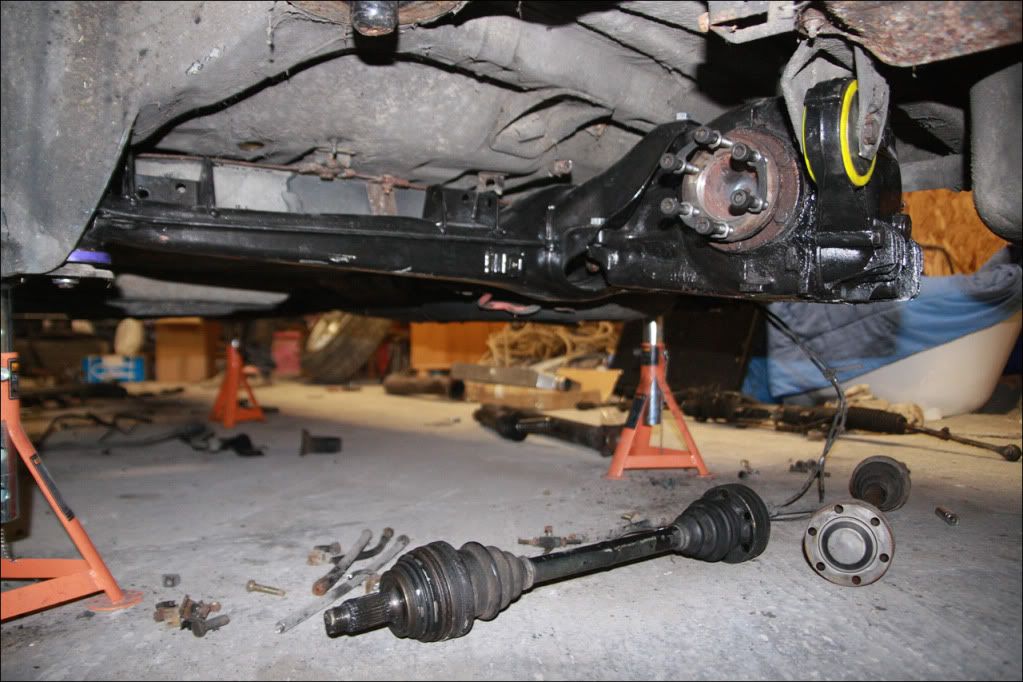
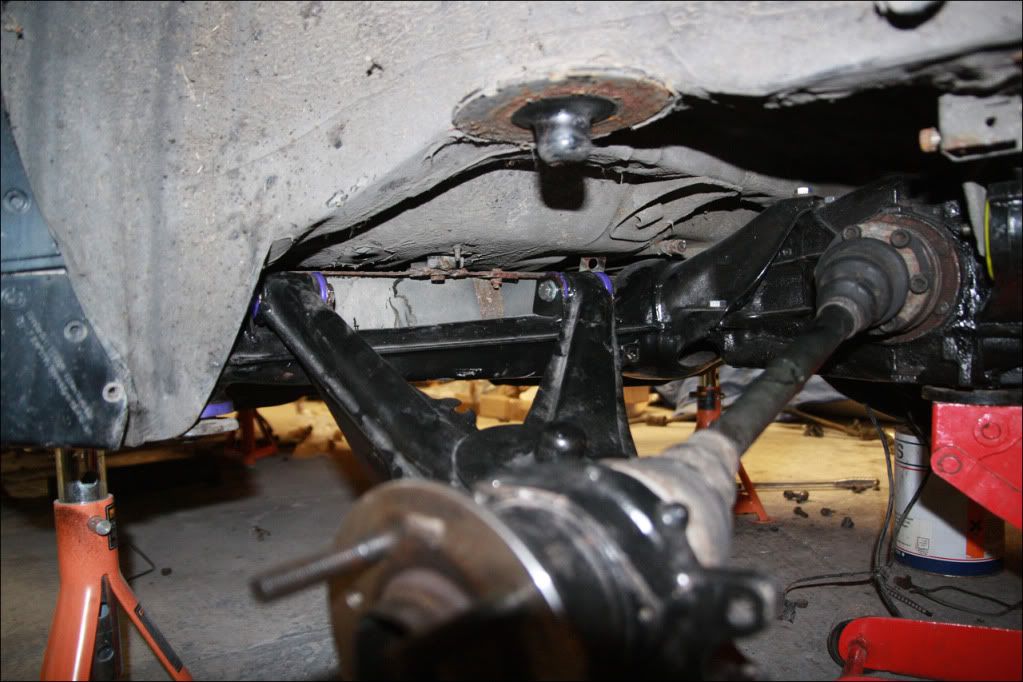
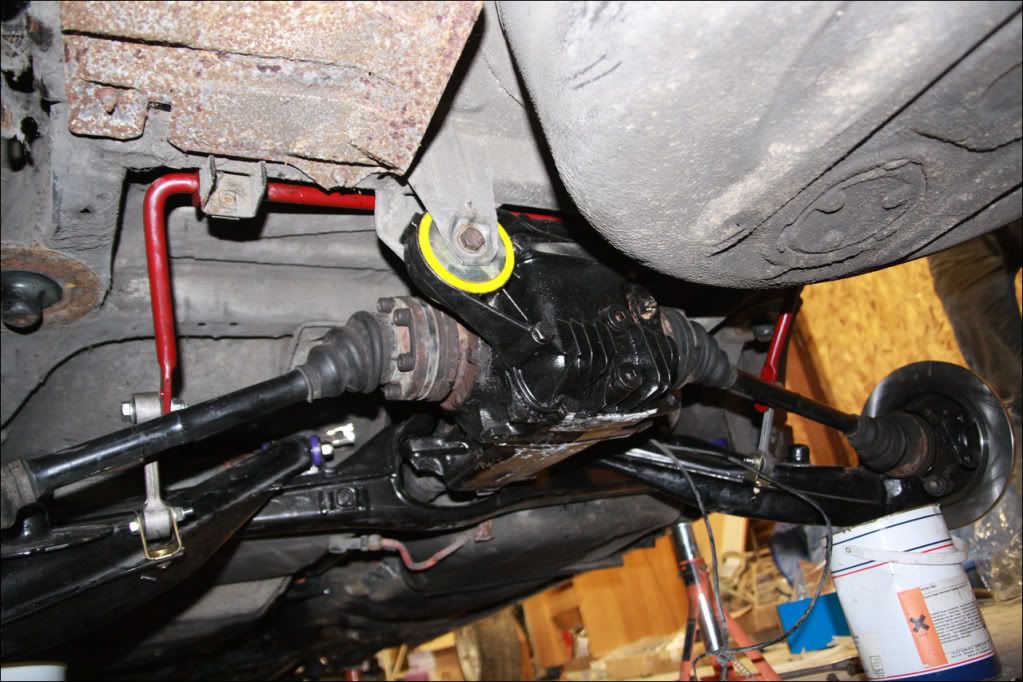
I had a delivery of polybushes the other day including - Rear Beam Mounts, Rear Trailing Arm Bushes, Diff Mount and Front M3 Wishbone Bushes. Decided to rip the whole rear setup off in one go and start stripping it down..
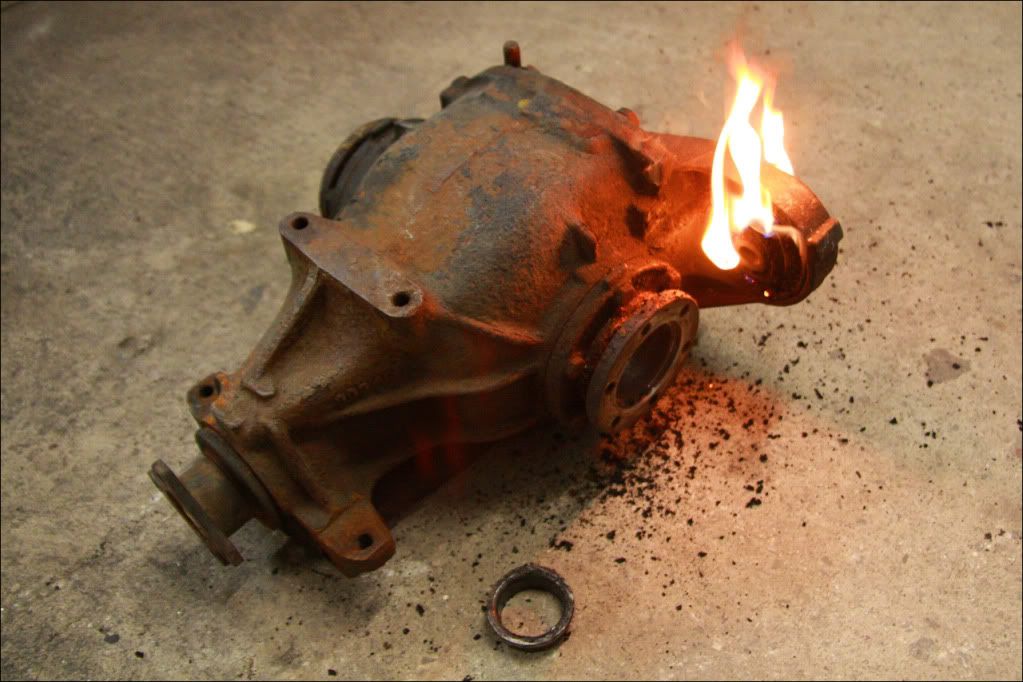
I burned the bush out of the LSD ready for the poly bush to be fitted sometime soon..
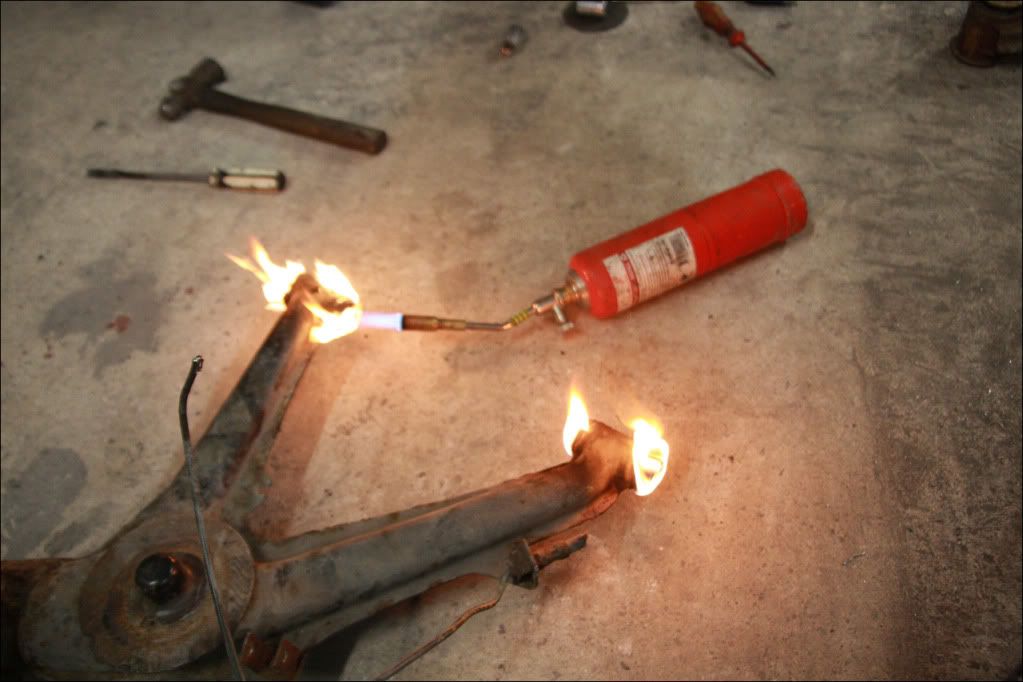
Then removed the bushes from the trailing arms..
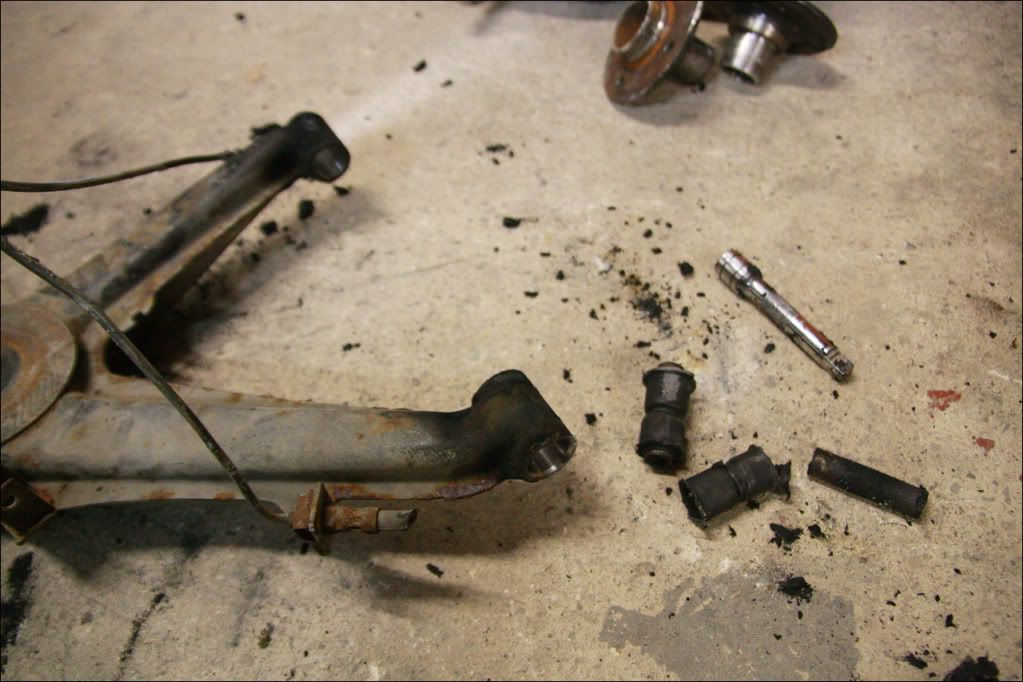
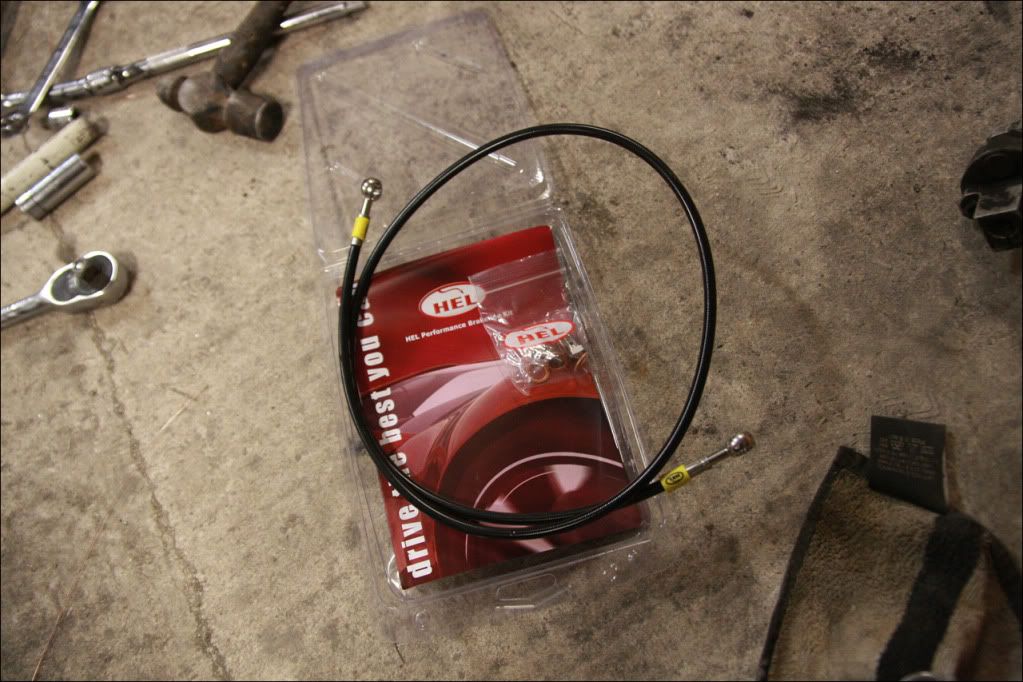
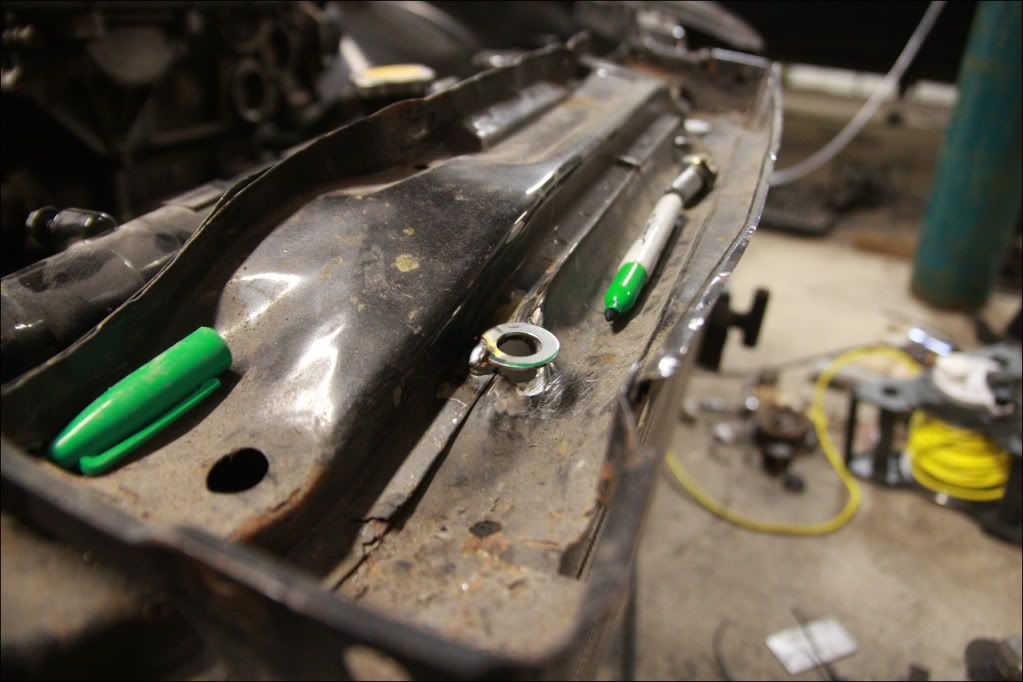
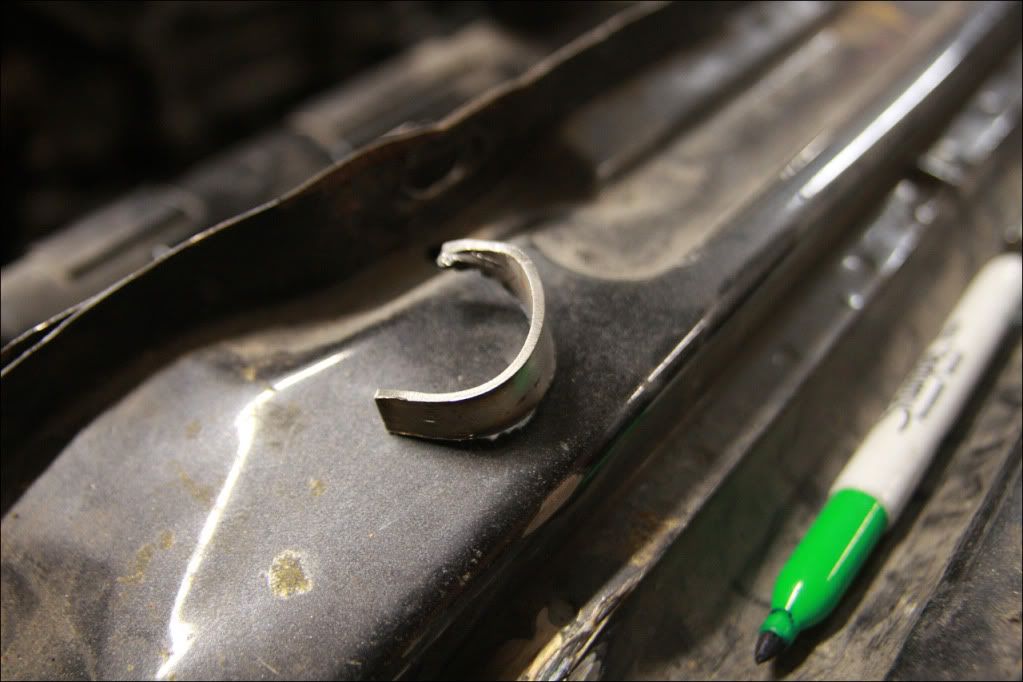
I'm going to be running braided lines to the back so decided to cut off the copper line mount and drill a small hole so the braided line can be fastened to it easily..
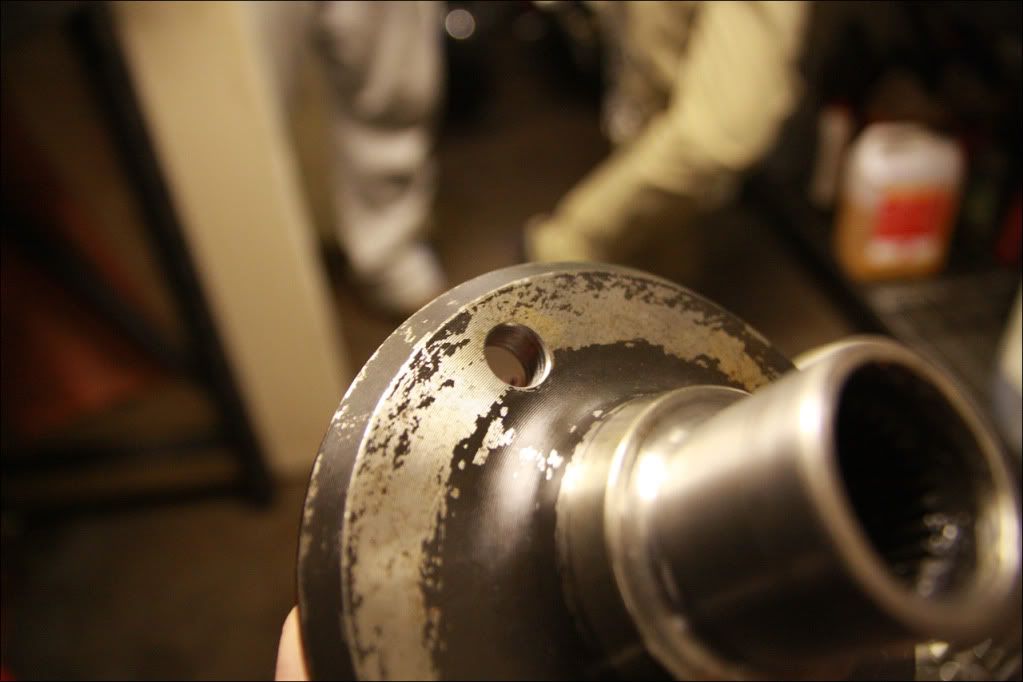
Also removed the stubs from the hubs on the rear so the threads can be drilled out to 1/2" and studs pressed in like I did on the Clio. More on that when I've had time to machine them..
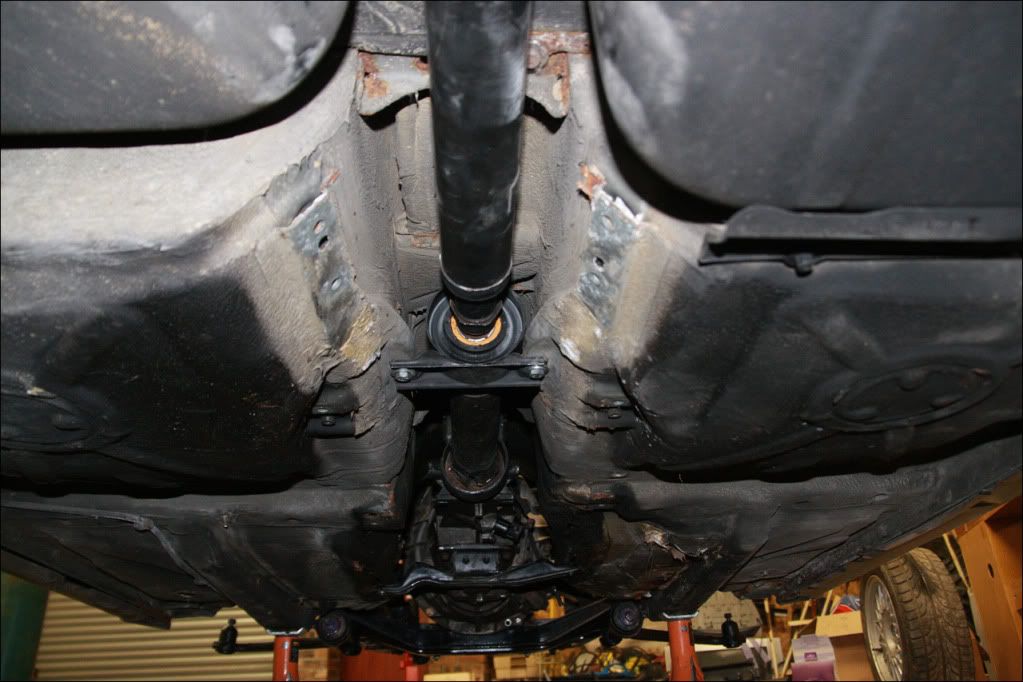
Lastly removed the rear beam/subframe bushes which was a bit harder...
I was planning on dropping the trailing arms and beam/subframe off for powder coating but I need to get it built back up and the place I usually use are busy so that will have to wait until over winter. I will probably give everything a quick clean with a wire wheel and put some hammerite on it all for now. The ideal thing is with poly bushes they can be removed as and when required then re-fitted
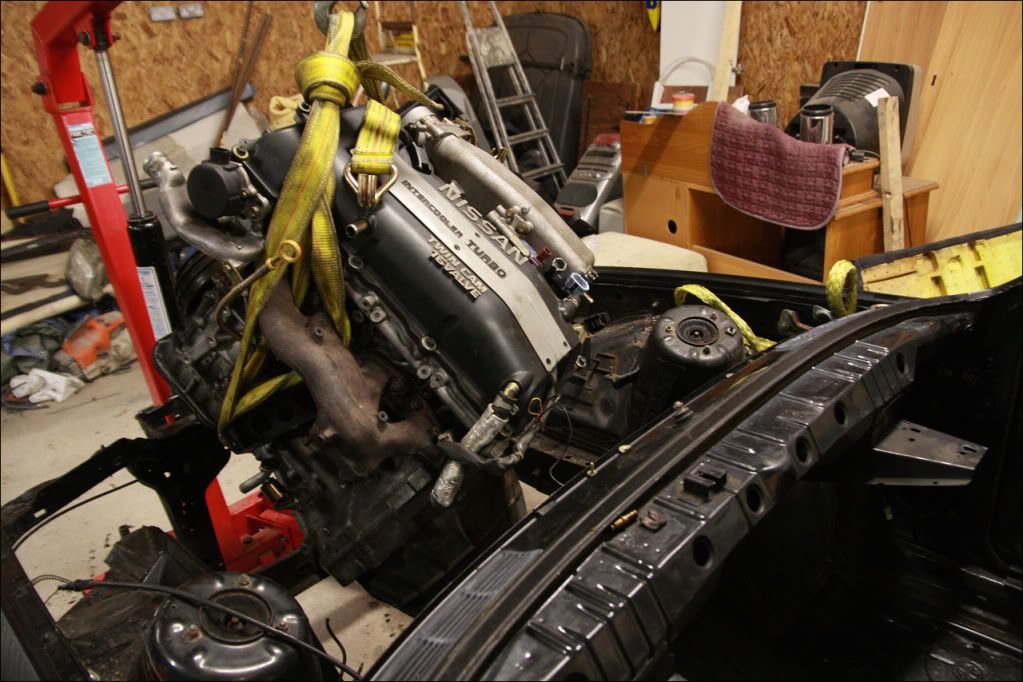
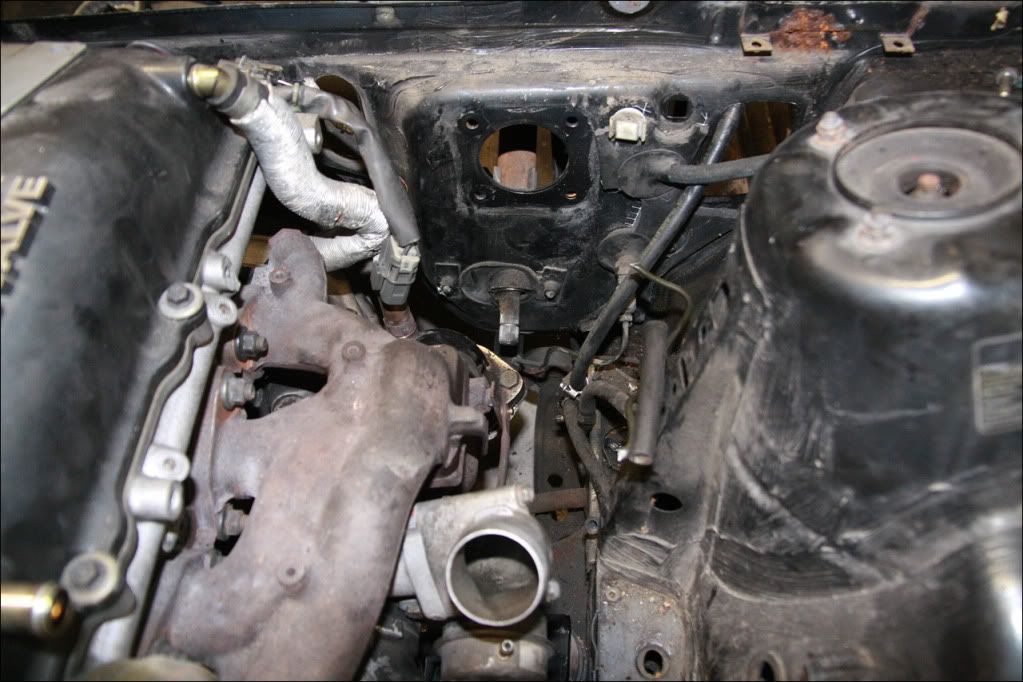
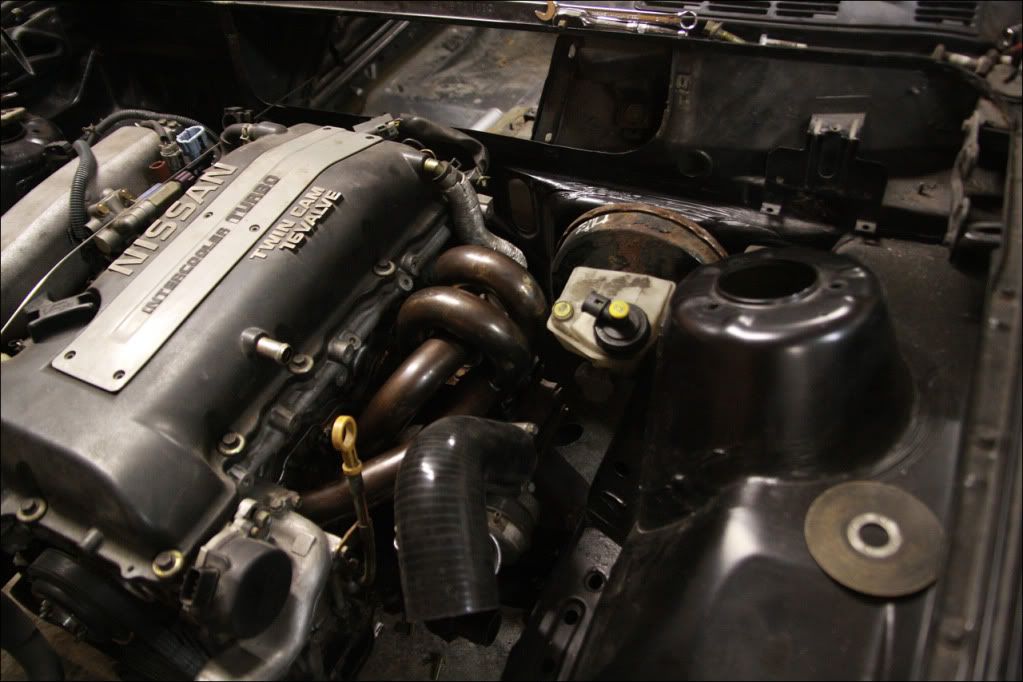
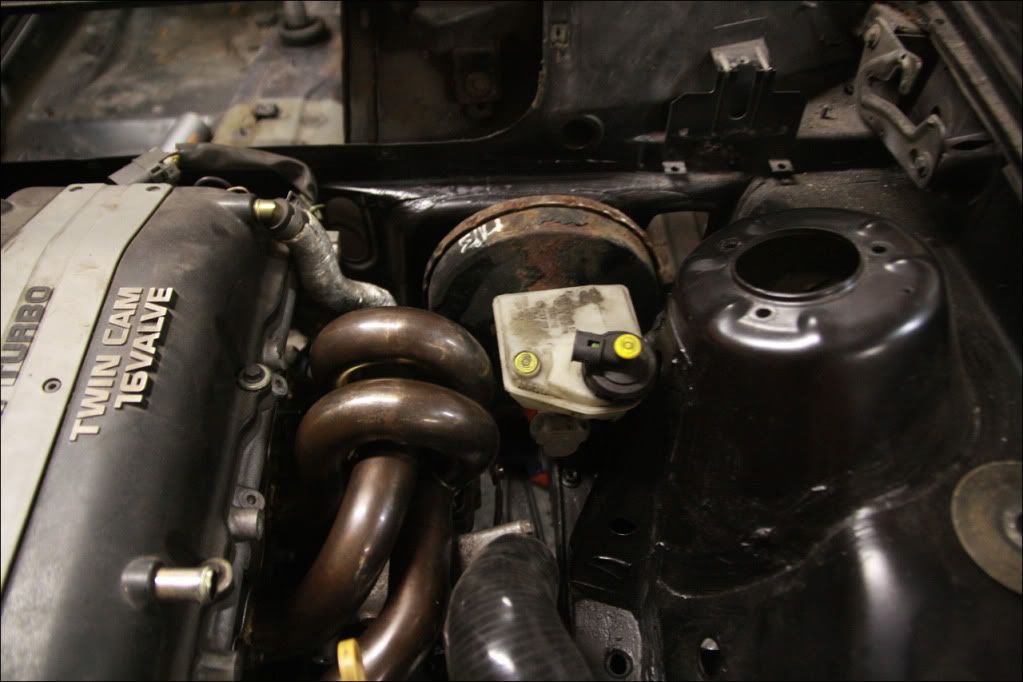
The engine was also pulled out the other evening so I could remove the steering rack and column linkage - basically to give me an idea if the down pipe was going to fit past the column. Mounted the turbo to the engine and then the down pipe to the turbo and dropped the engine back in..
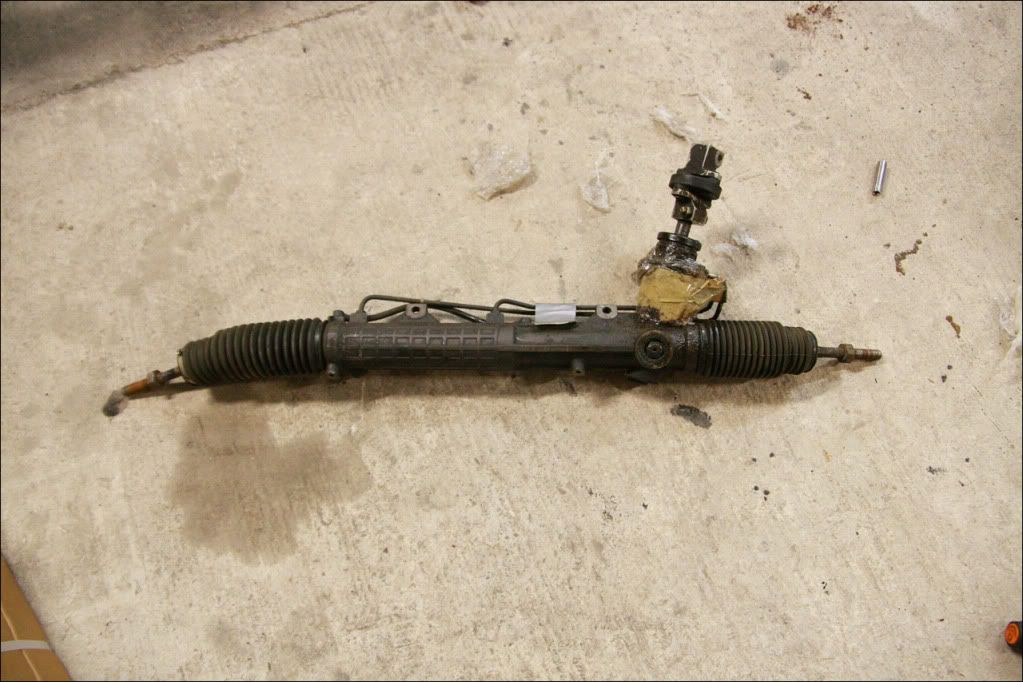
Needless to say the column is going to have to be moved slightly and a custom linkage making up. If the column was extended at its current position it would just fit past, it does look deceiving in the picture, although its not ideal. I also somehow managed to source an E36 M3 rack thats LHD from a forum member which was very lucky!
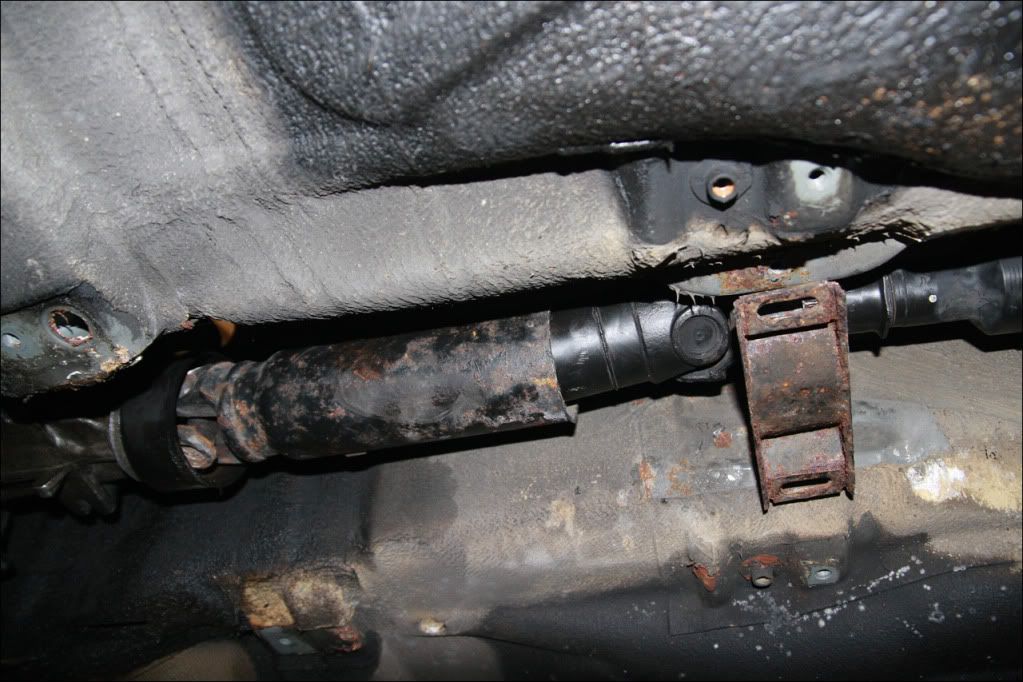
I fitted the Walbro 255lph pump I got from an S14 into the BMW housing earlier, no pictures of that though. Modified the BMW frame that slots into the tank to accept the Nissan fit Walbro pump, secured it and re-fitted to the tank. Picked the completed prop shaft up, S14-to-E30 retaining the original BMW center bearing. I have a new center bearing due to be delivered, so the rusty one isn't staying! From:
To:
Which should do the job fine! It will probably be a pain to fit as its a spline both ends, but I will just do it when dropping the engine back in. Theo's looks much nicer with a flange half way down, but I forgot to ask the prop shaft guy to put one in for me!
Painted, dry and ready to be reassembled over the weekend with poly bushes. As much as I wanted it powder coating (Crispy - probably subtle black!) paint will have to do until its ripped apart in the future...
E36 M3 rack arrived also - will be swapping the E30 arms onto this and comparing them both at some point. The pinion is positioned differently which I hope will give me more room to work with for a linkage..
Also had a big delivery (Cheers to Maynard@GSF) - Rear discs, new drop links all round, new front wishbones, new rear bearings, new prop shaft center bearing, etc..
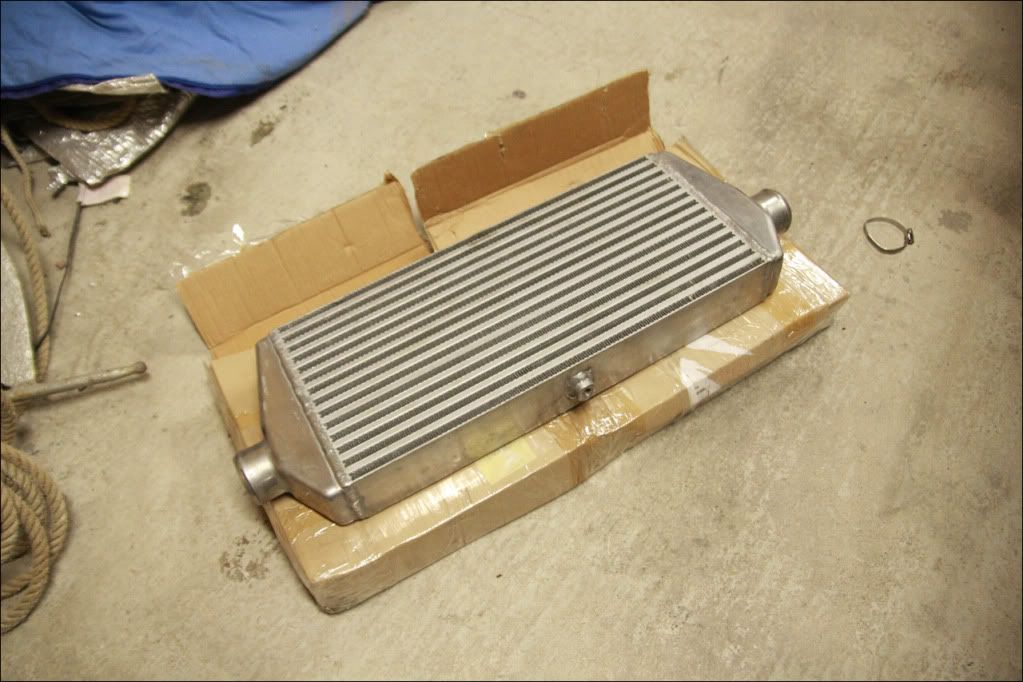
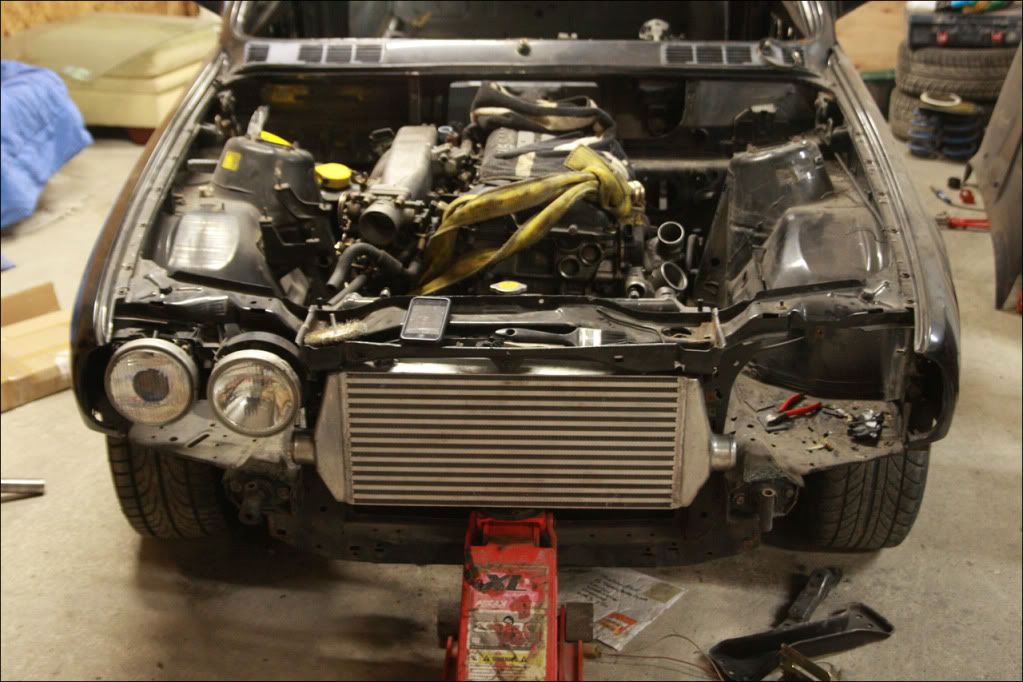
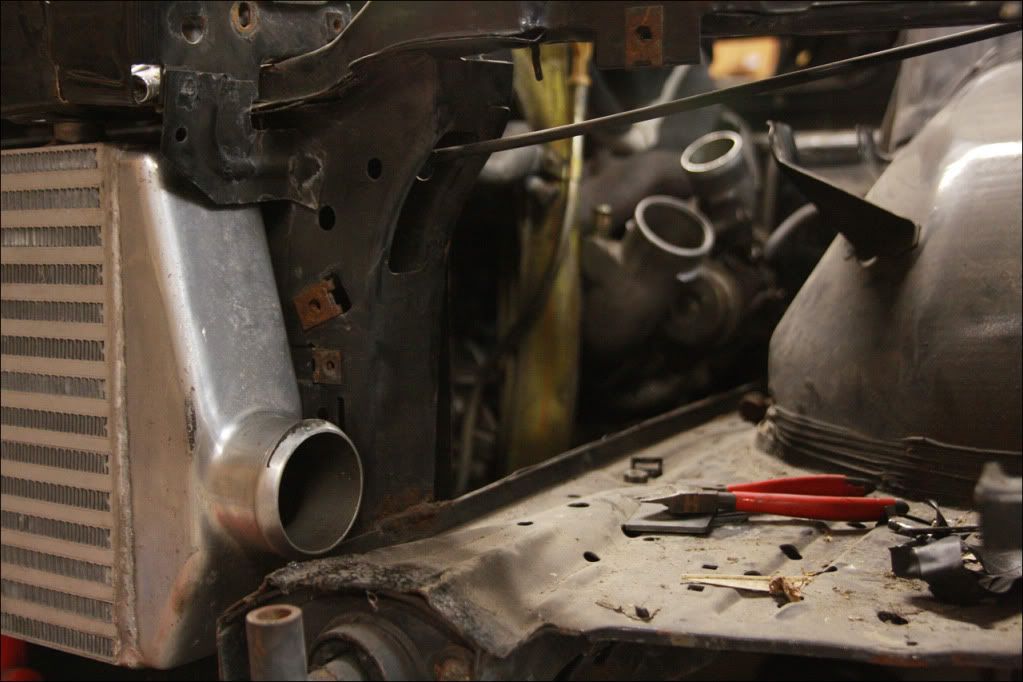
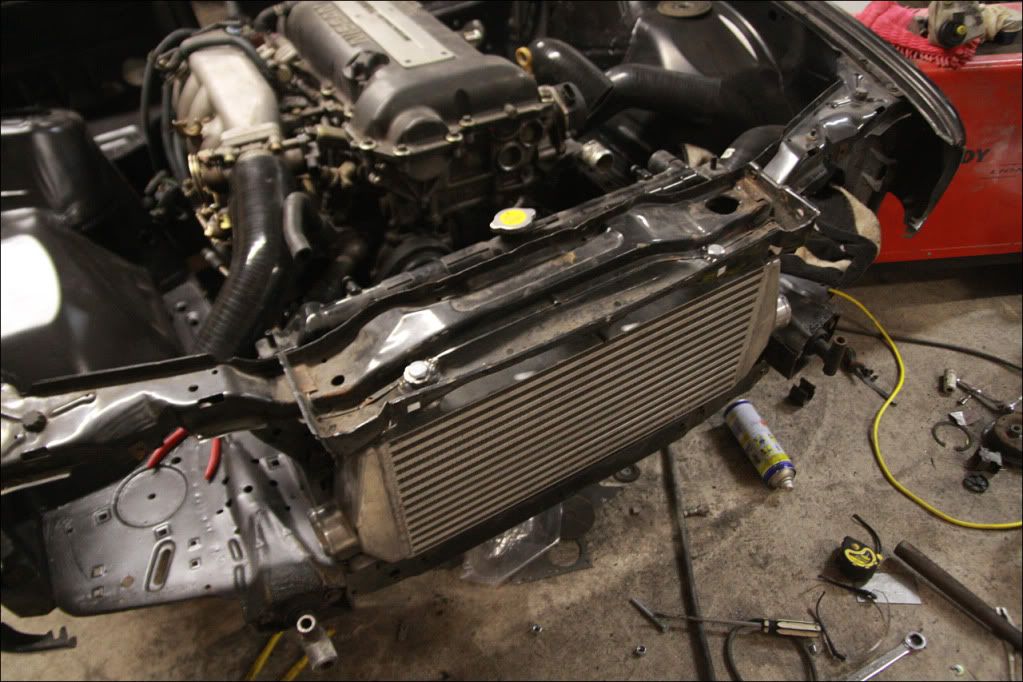
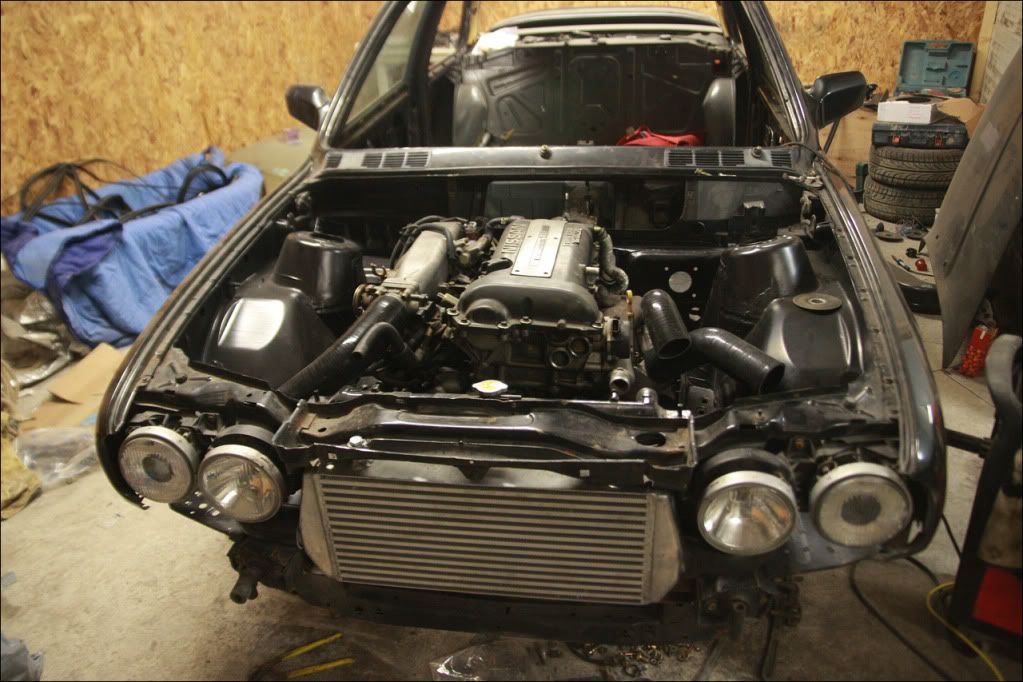
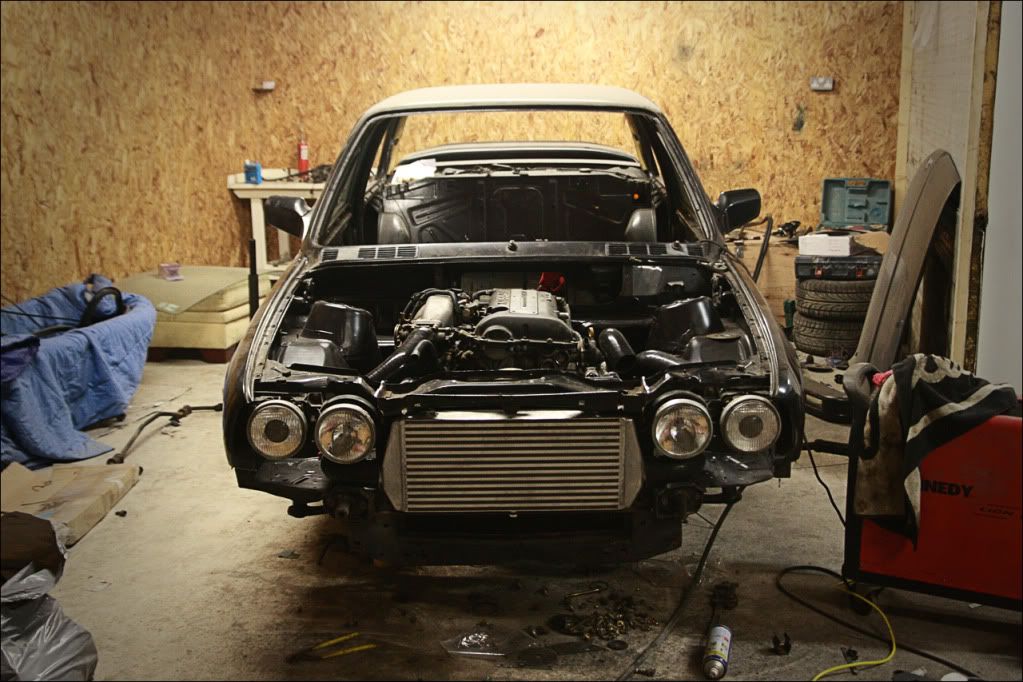
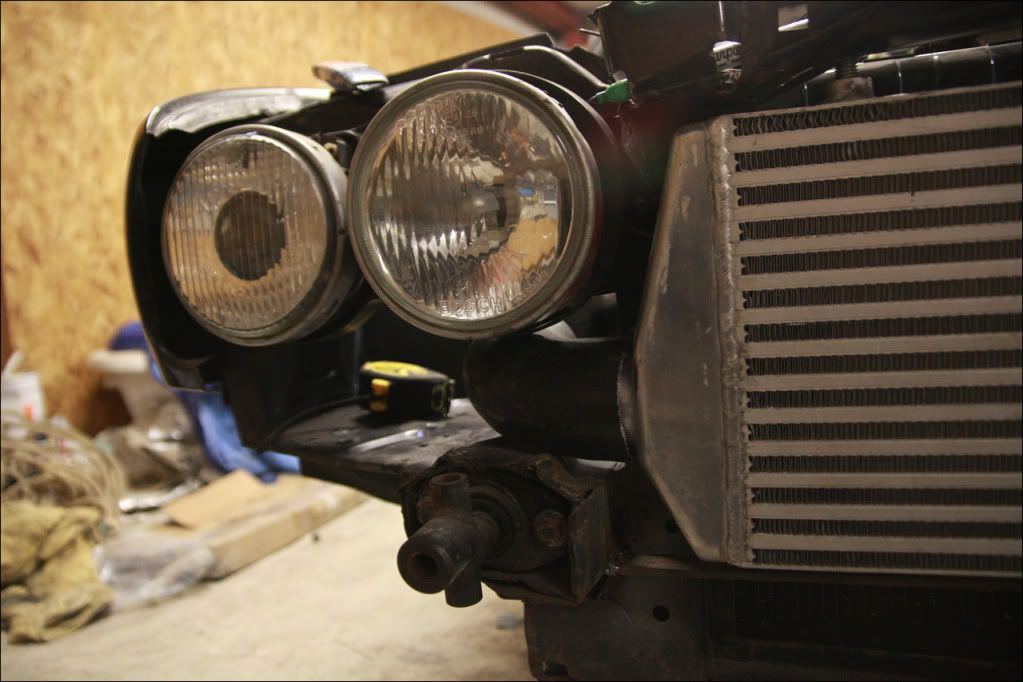
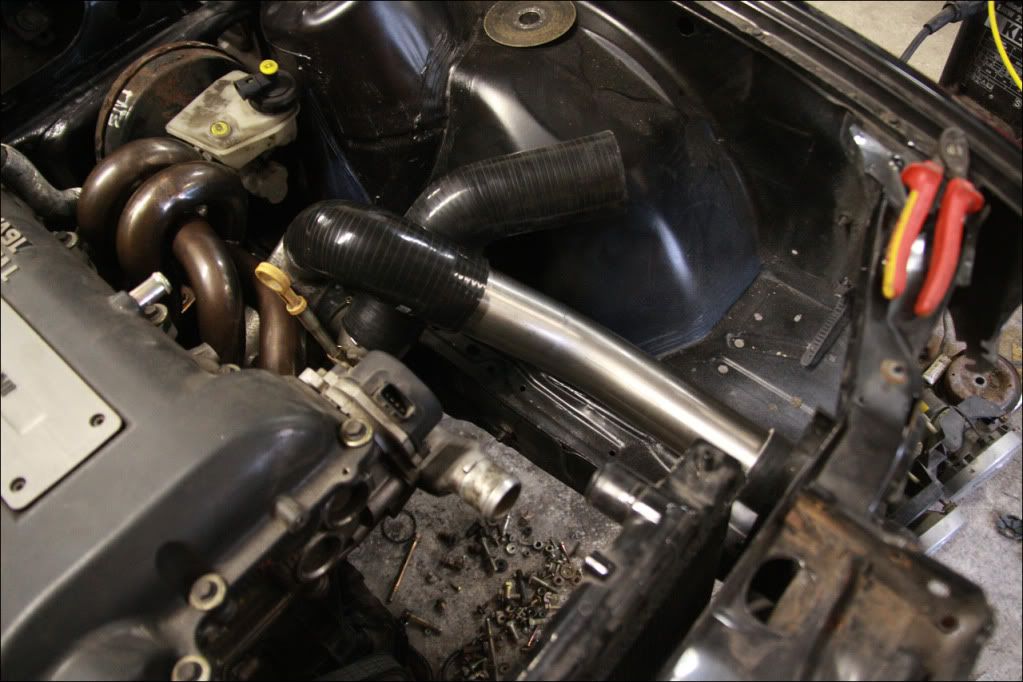
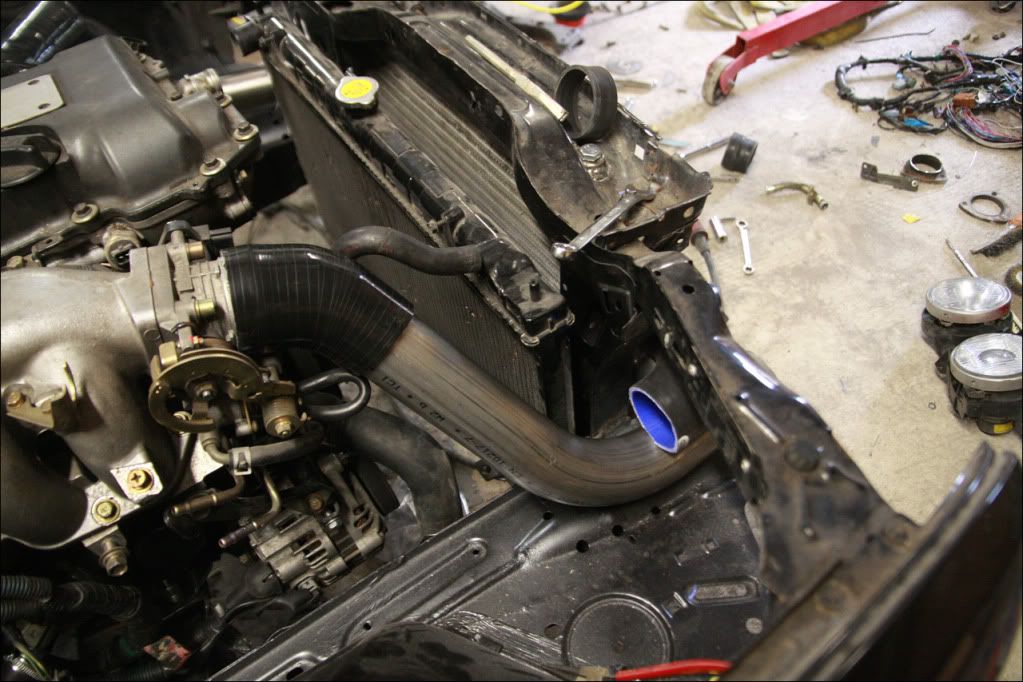
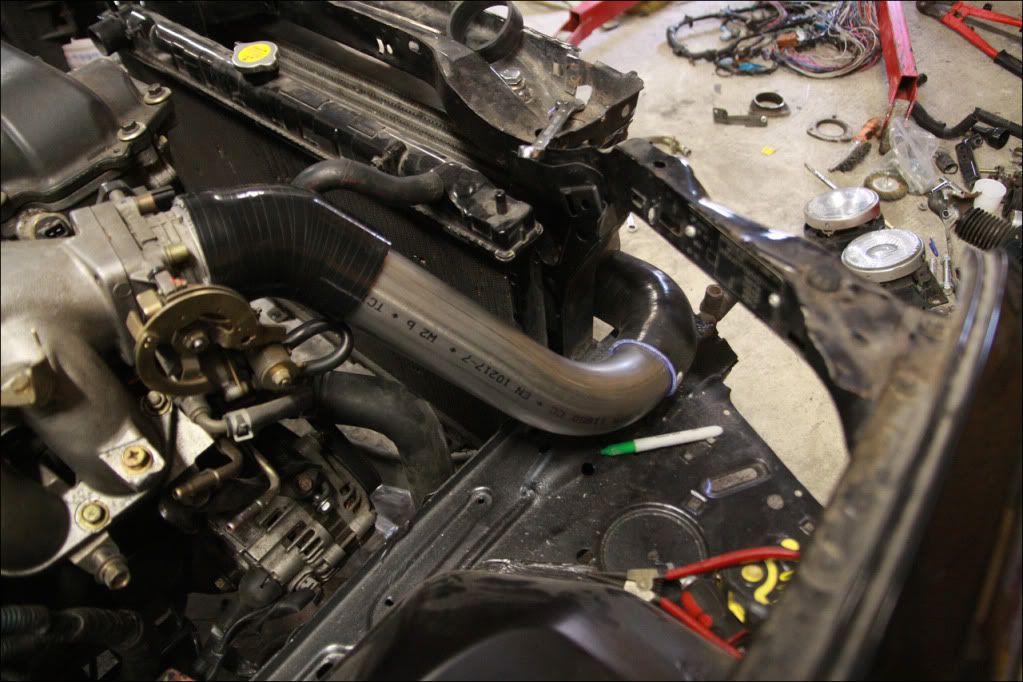
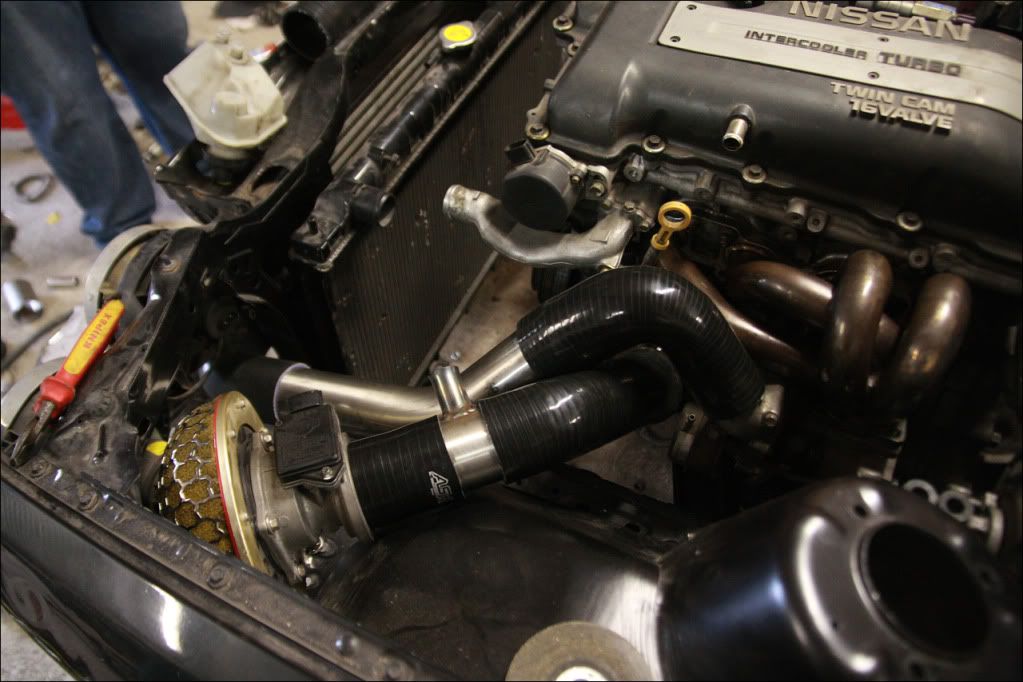
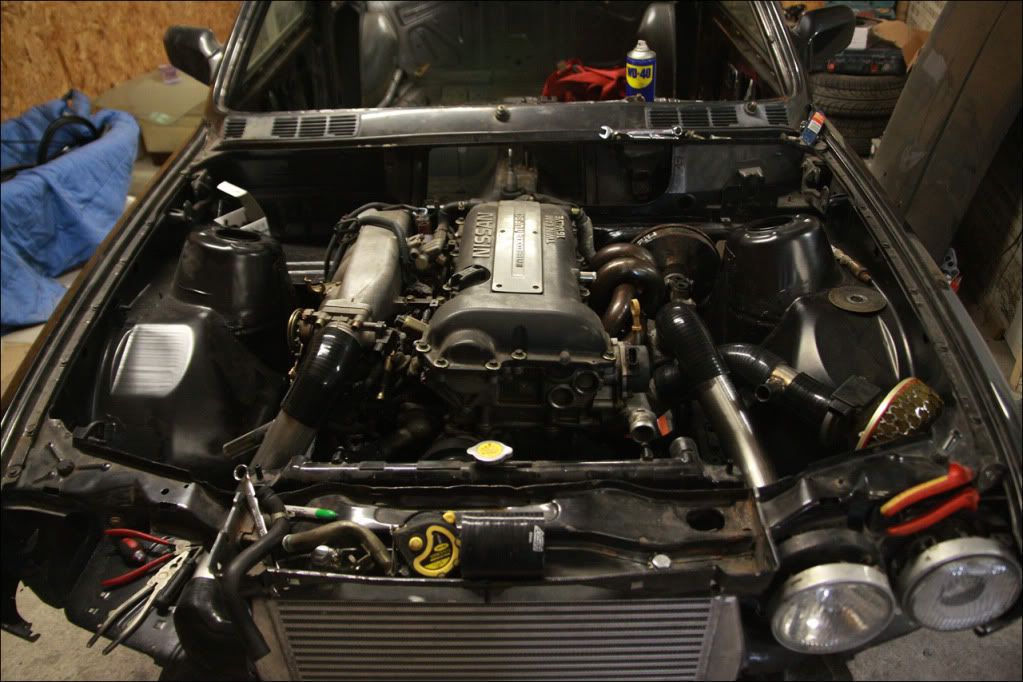
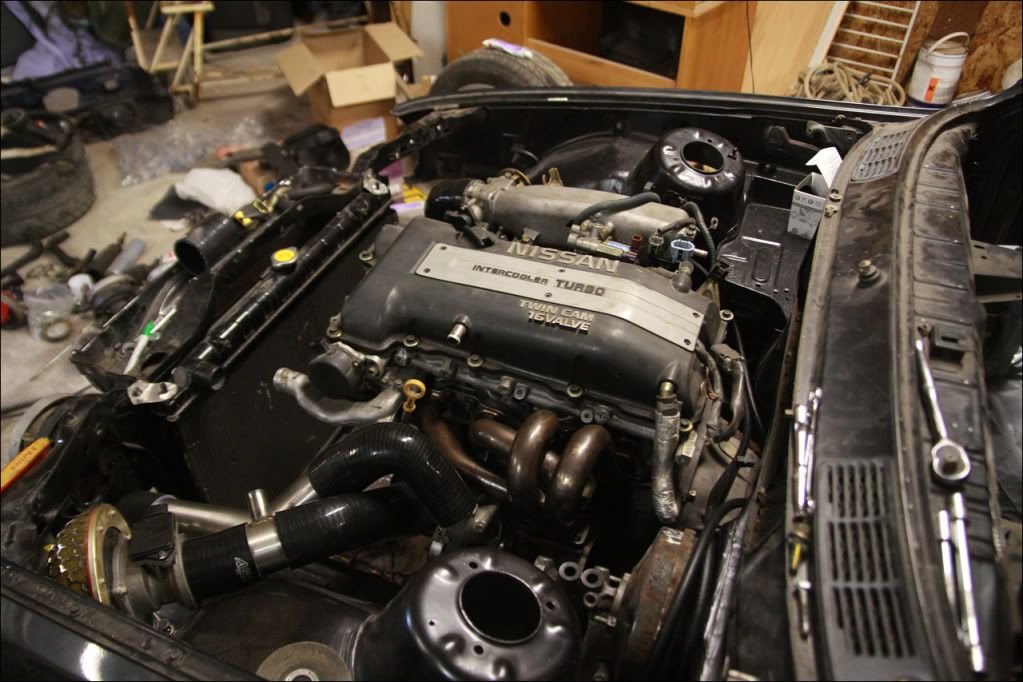
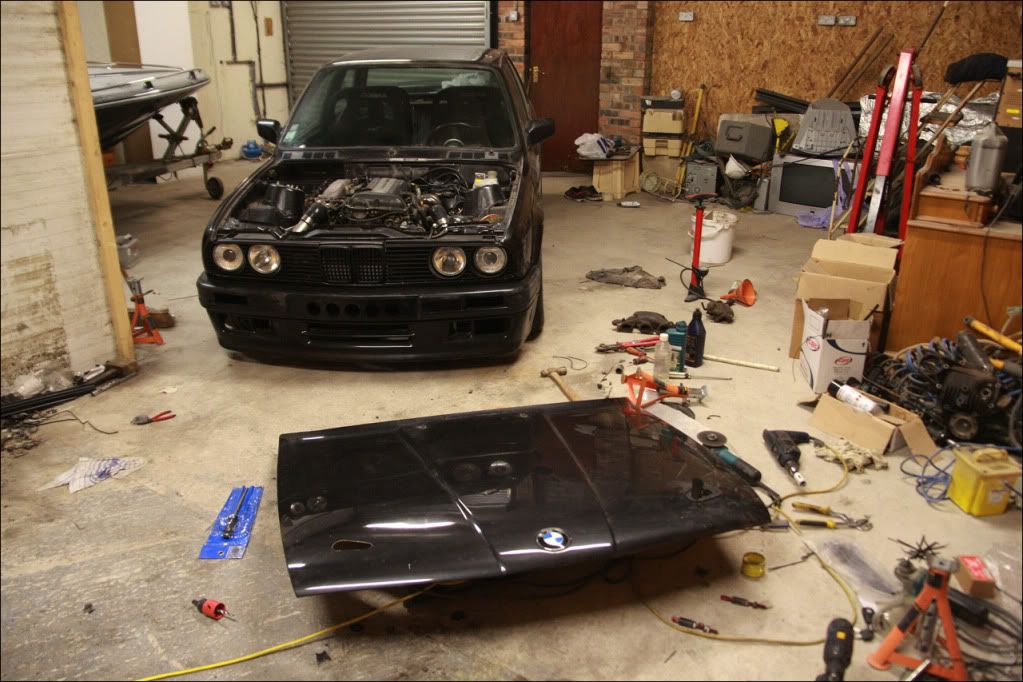
The intercooler turned up a couple of days ago also, and as I had hoped its perfect for what I imagined I would need..
Fits nicely butt up against the top of the slam panel, leaving the inlet/outlet sat just above the chassis legs, with enough room under the headlights to fit a 90deg bend...
Giving a nice short run from the turbo and to the inlet..
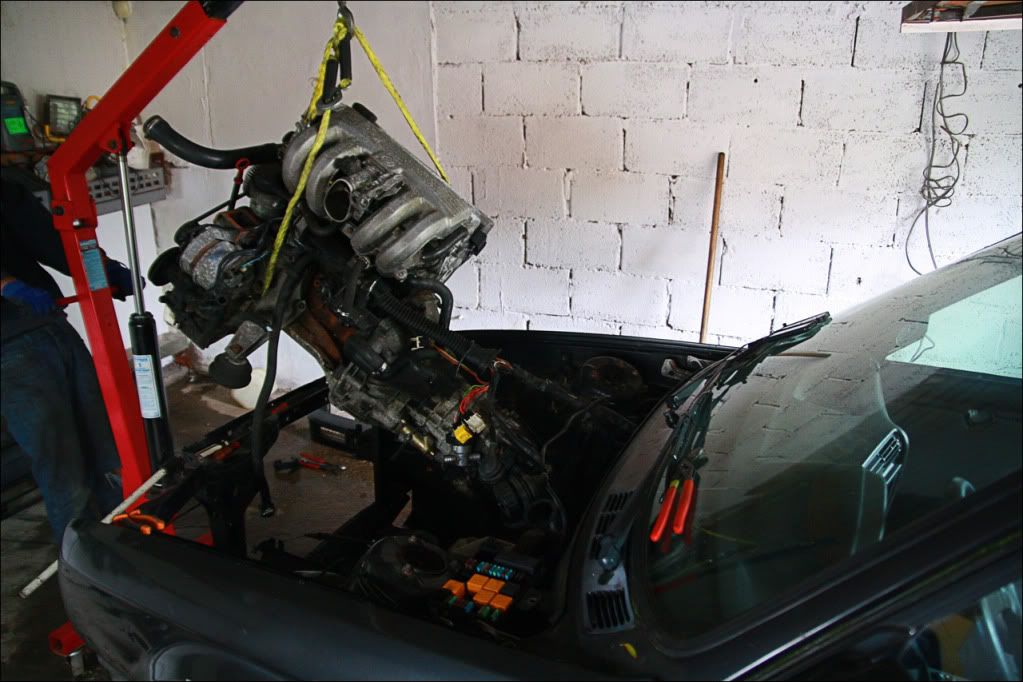
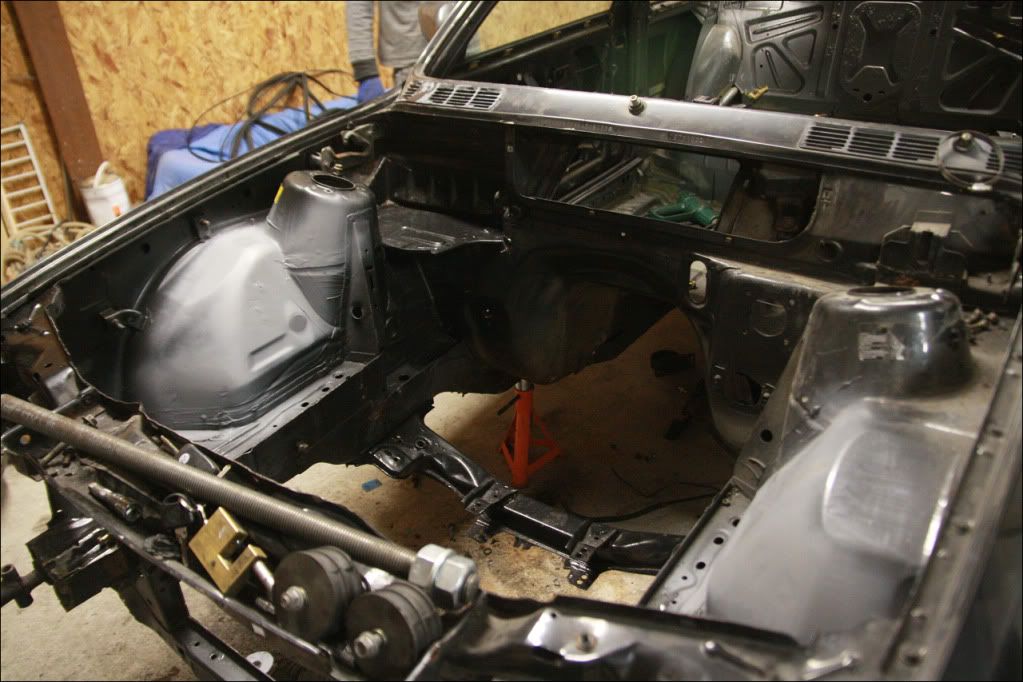
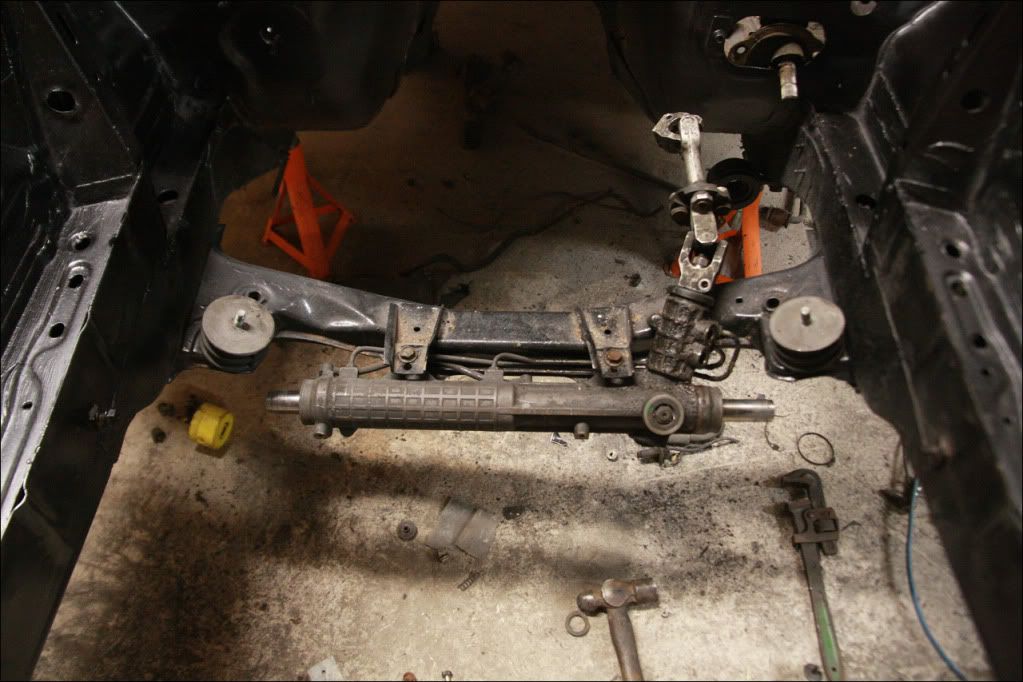
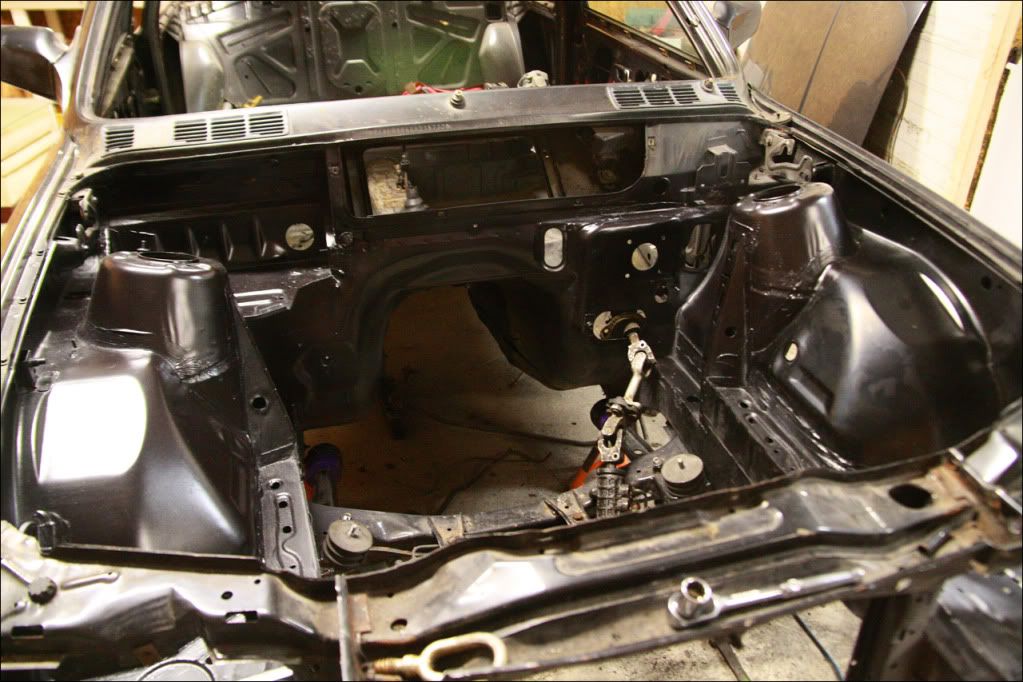
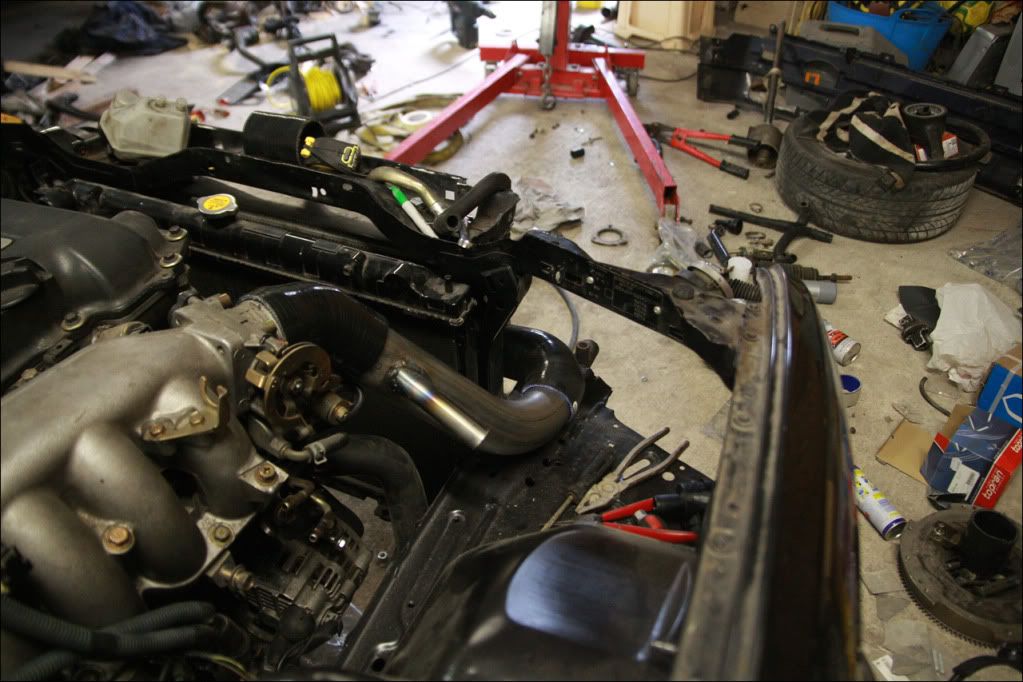
Lastly lifted the engine out before calling it a day giving me more room to sort the front sub frame and steering rack mounts out...
...not to mention lots more room to fit new turbo gaskets and braided oil/coolant lines once they arrive.
From an Evo yep. Il have a look over the rear mount arms and get some plate on there then, I'm going to pull them and the rear beam off at some point for powdercoating (probably when I get round to sorting the cage over winter), so I will make sure its done before then. The idea was to get everything fabbed/bolted up to check it drove/ran straight before doing anything serious in it anyway!
First off was refitting the rear beam and LSD with polybushes...
After a bit of effort/balancing act on a jack everything was bolted up in position..
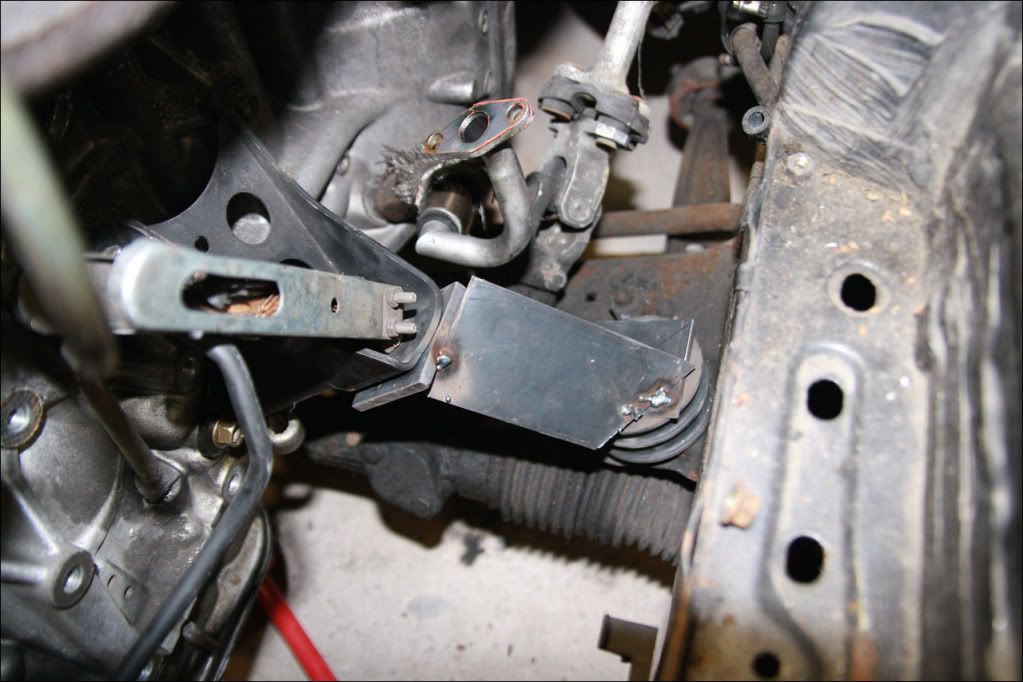
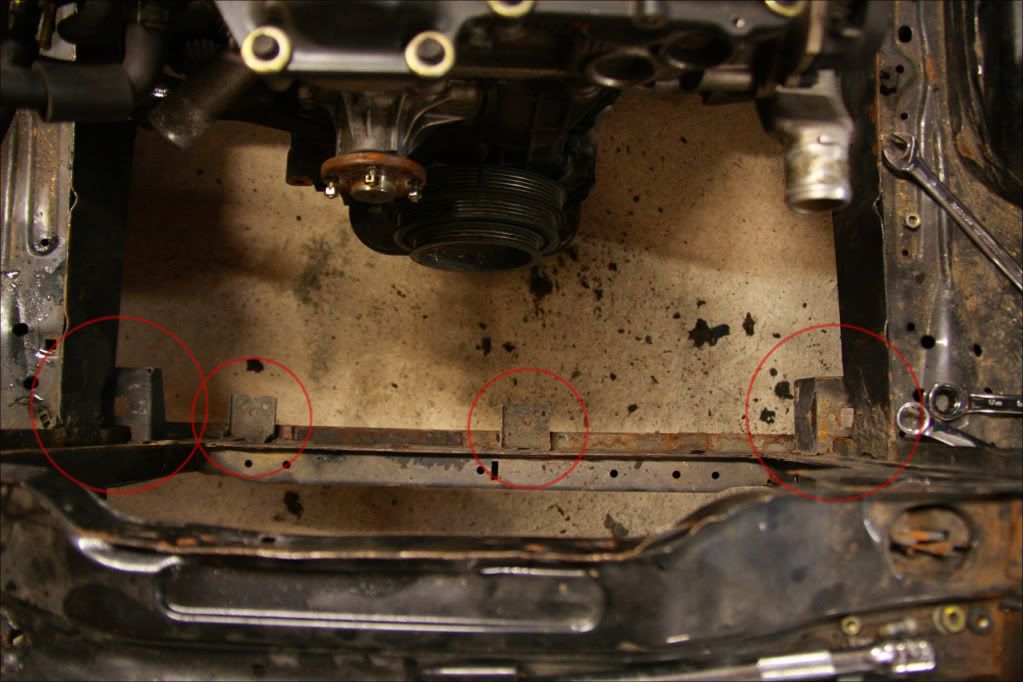
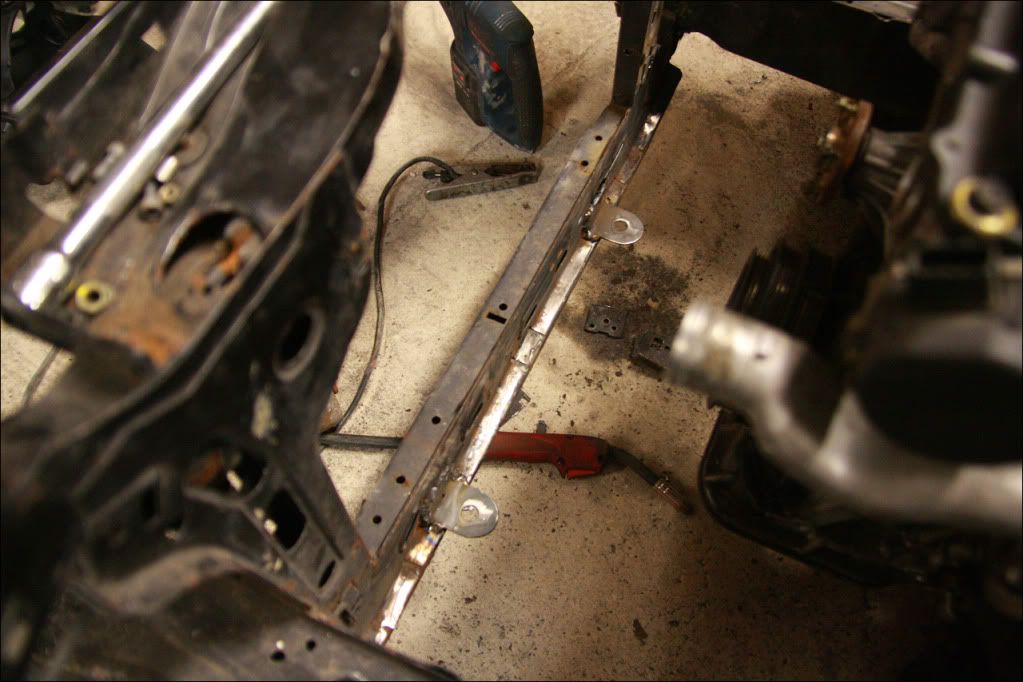
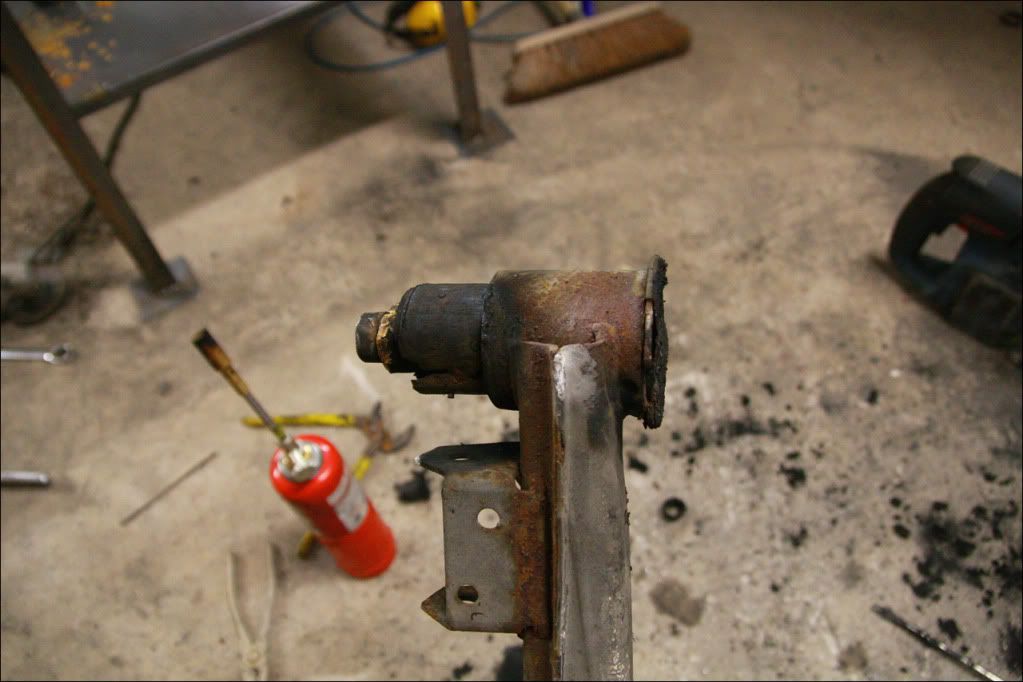
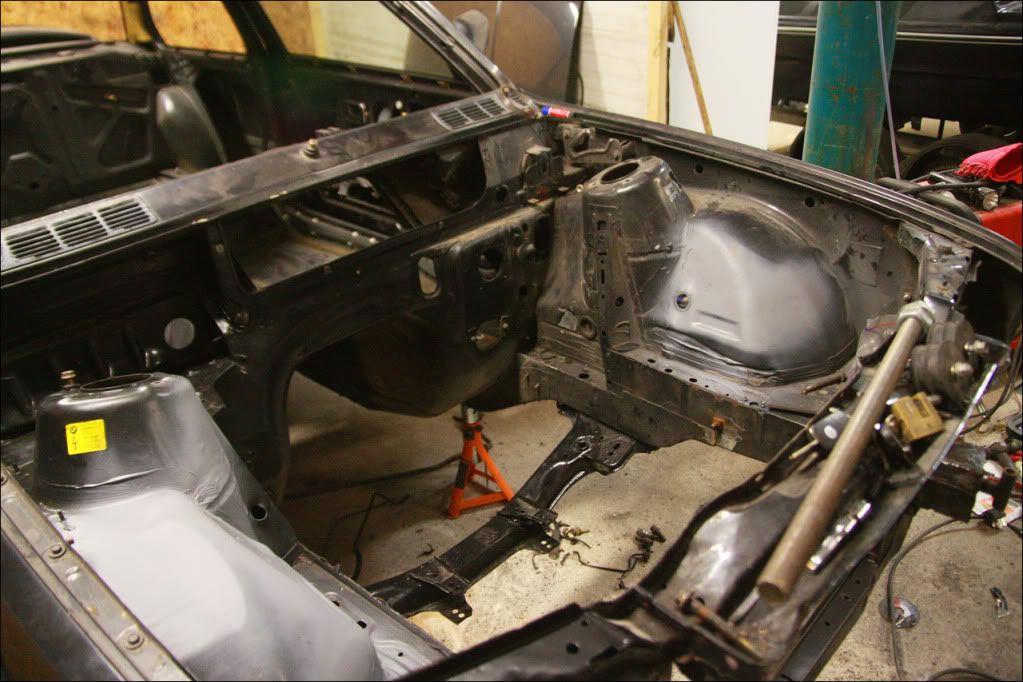
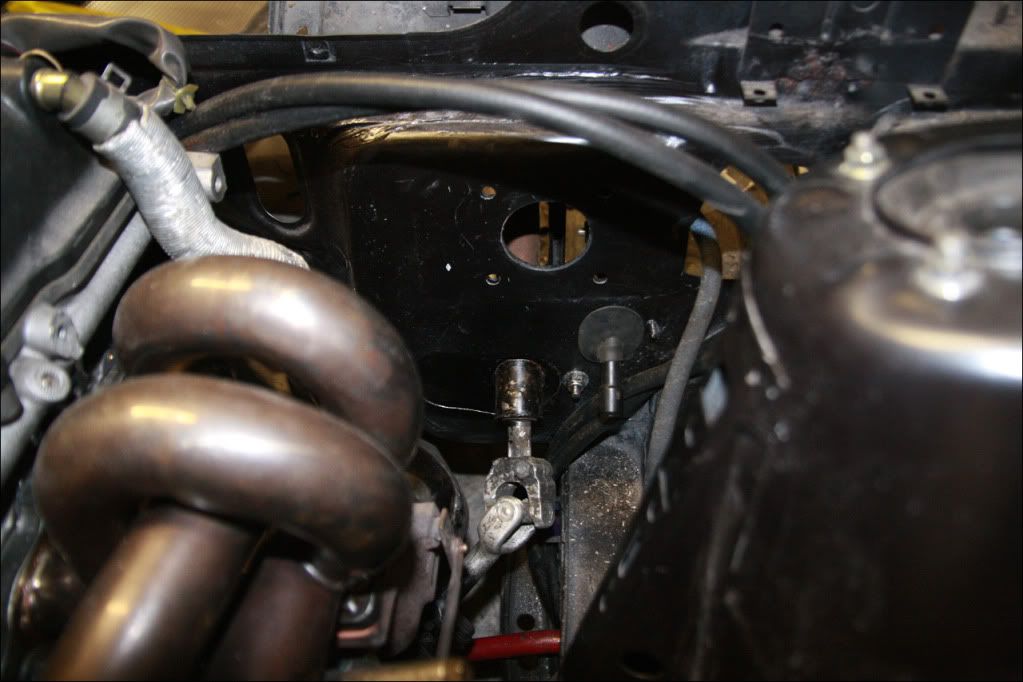
Next thing was I wanted to grind all the brackets out of the engine bay that were no longer needed..
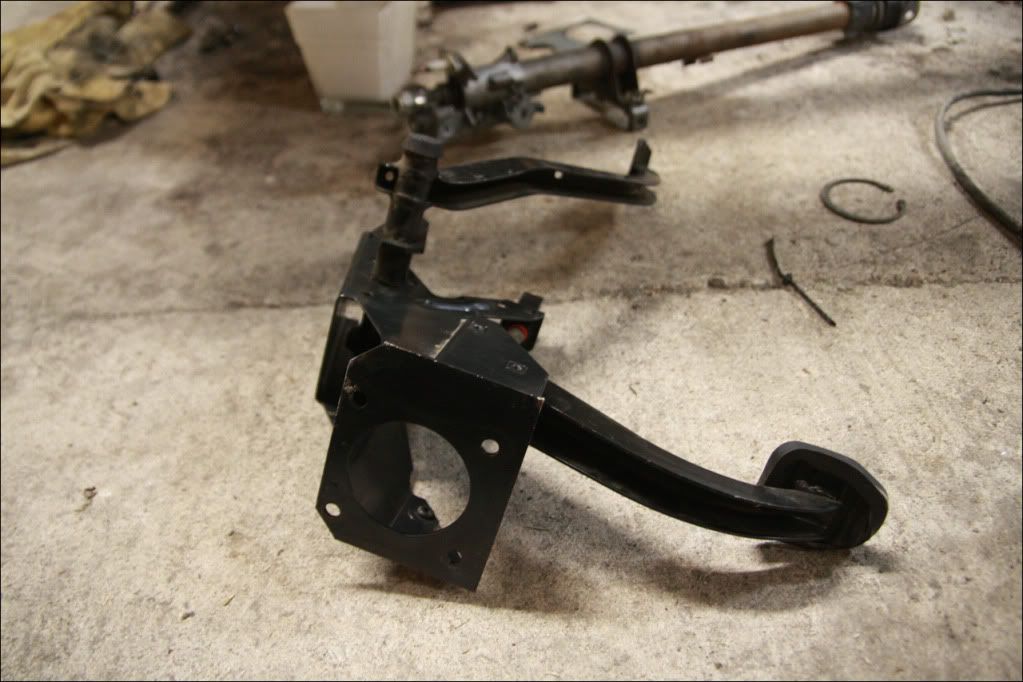
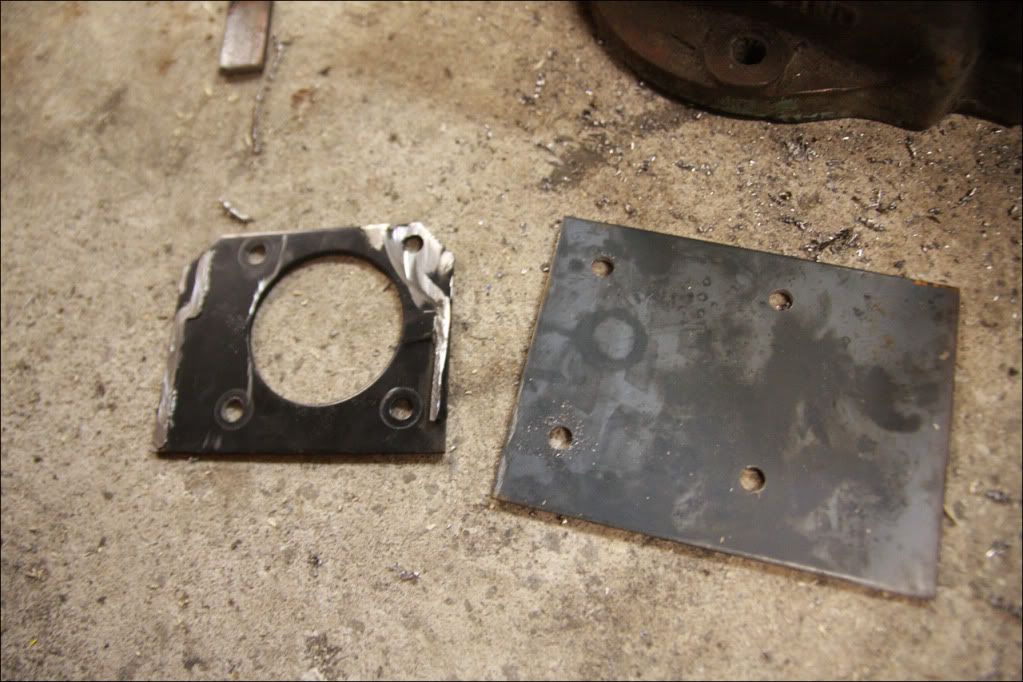
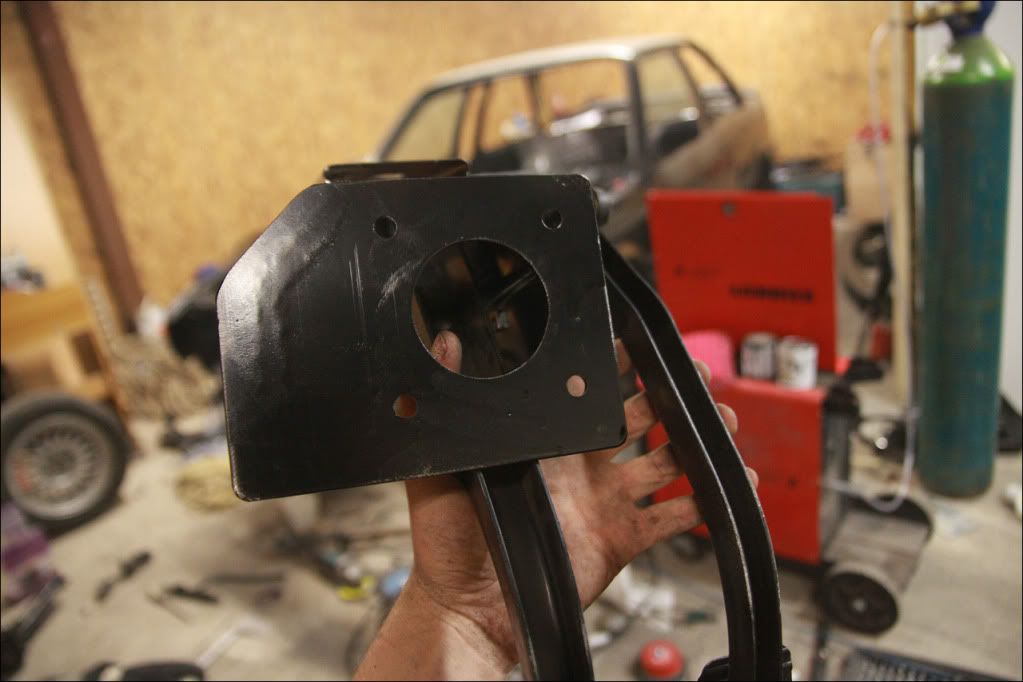
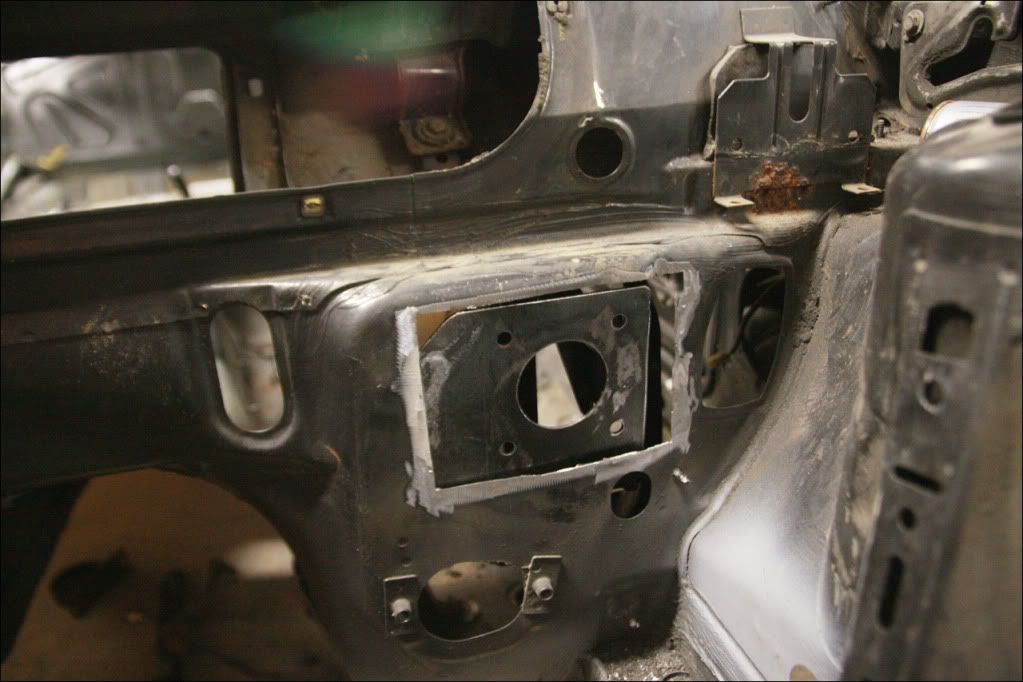
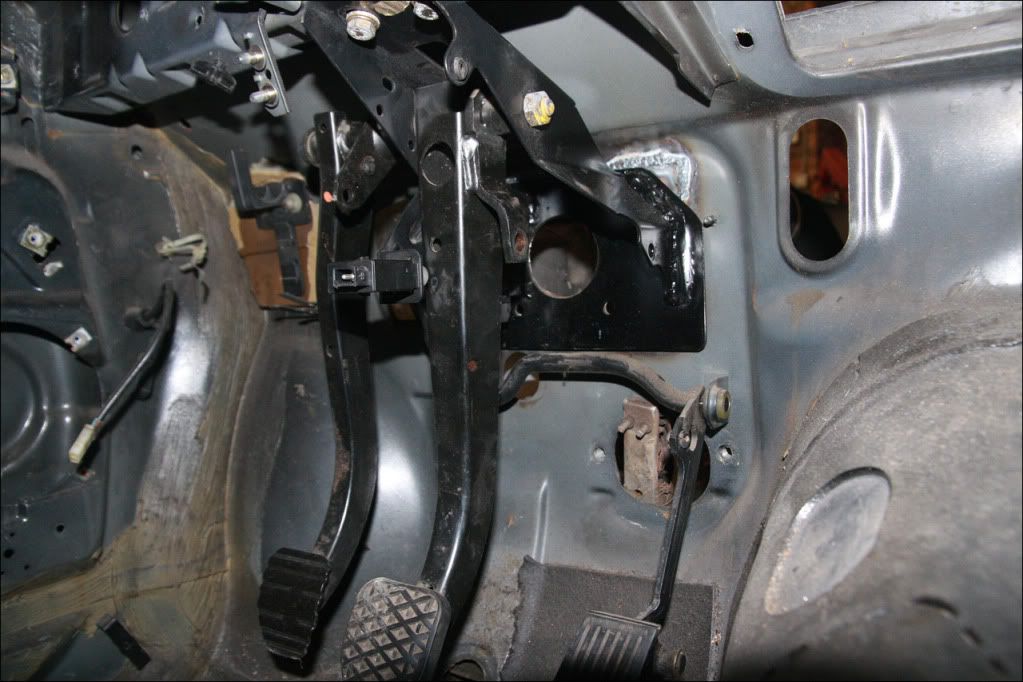
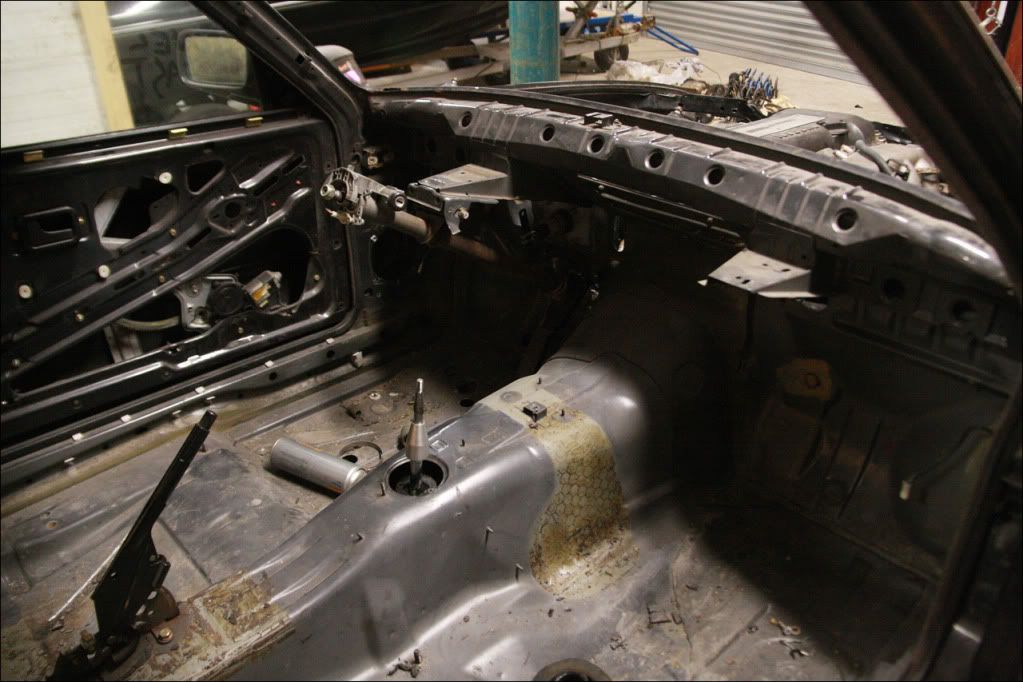
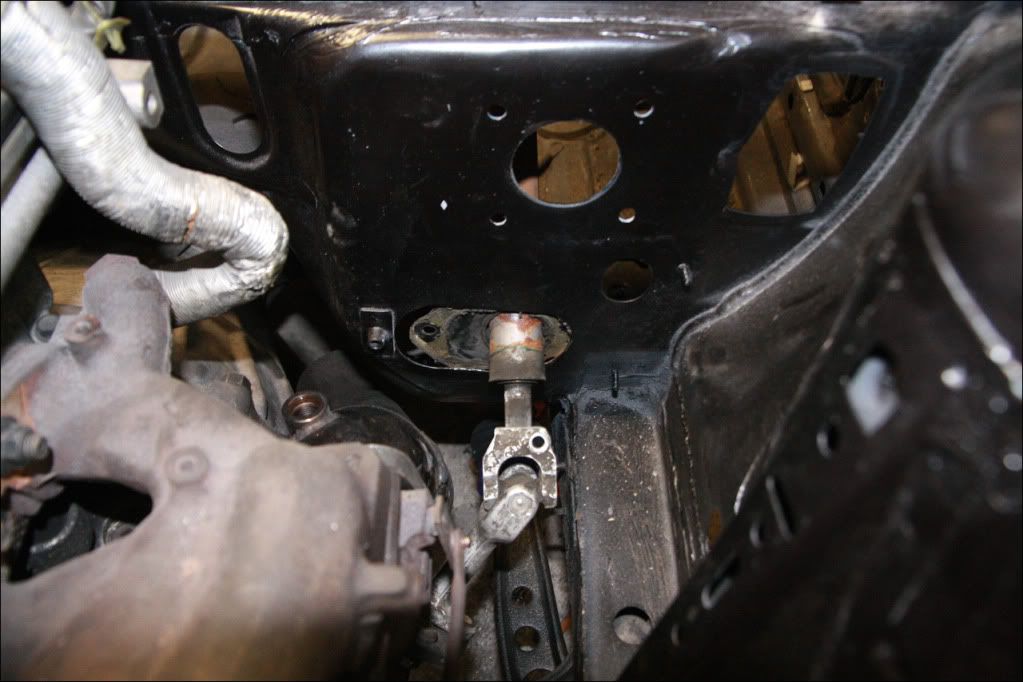
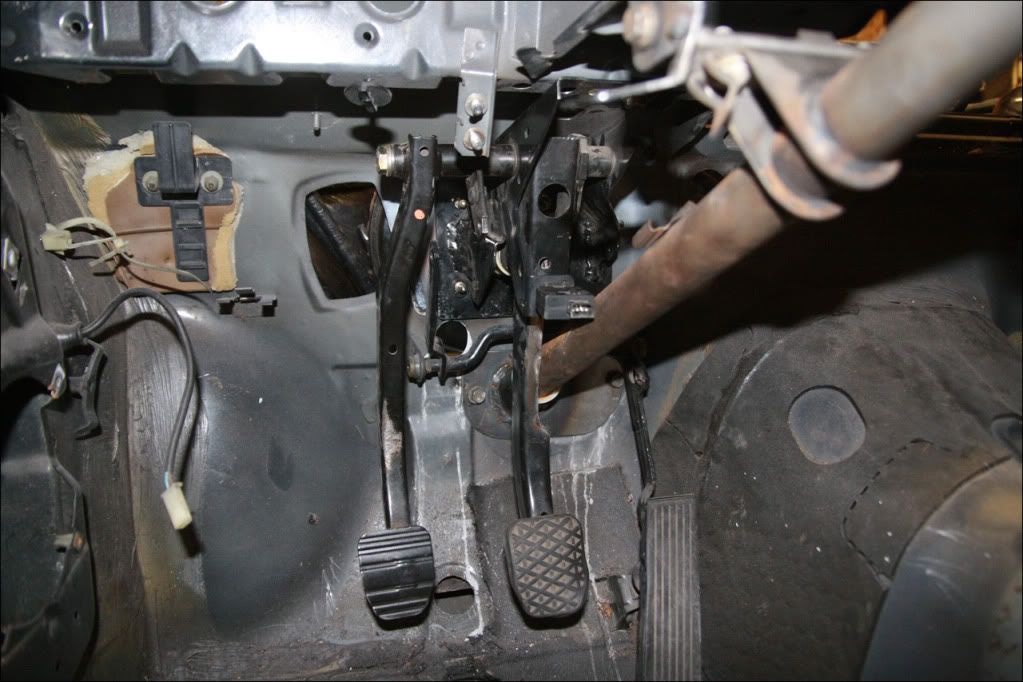
Now I had to crack on with a job I had been putting off for a while. I needed to move the servo over as far as possible (so its further away from the turbo/manifold). Its in the same place on all E30s, just the RHD models have a bar behind the dash that links the pedal to it.
I am using a (Clio) 182 master cylinder and servo with it having a good sized piston, so started by holding it in position to see how much room there was to play with..
There was a good 40-45mm available, so I removed the pedal box to see how that was set up..
The 'fork' on the servo usually goes around the piece that sticks out with a pin through it.
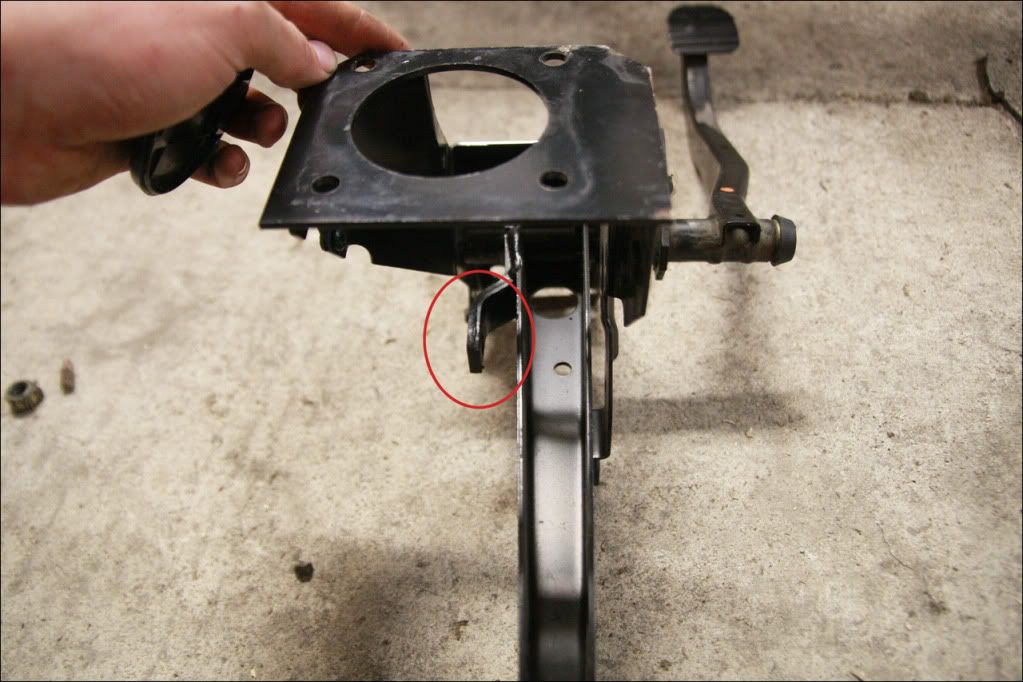
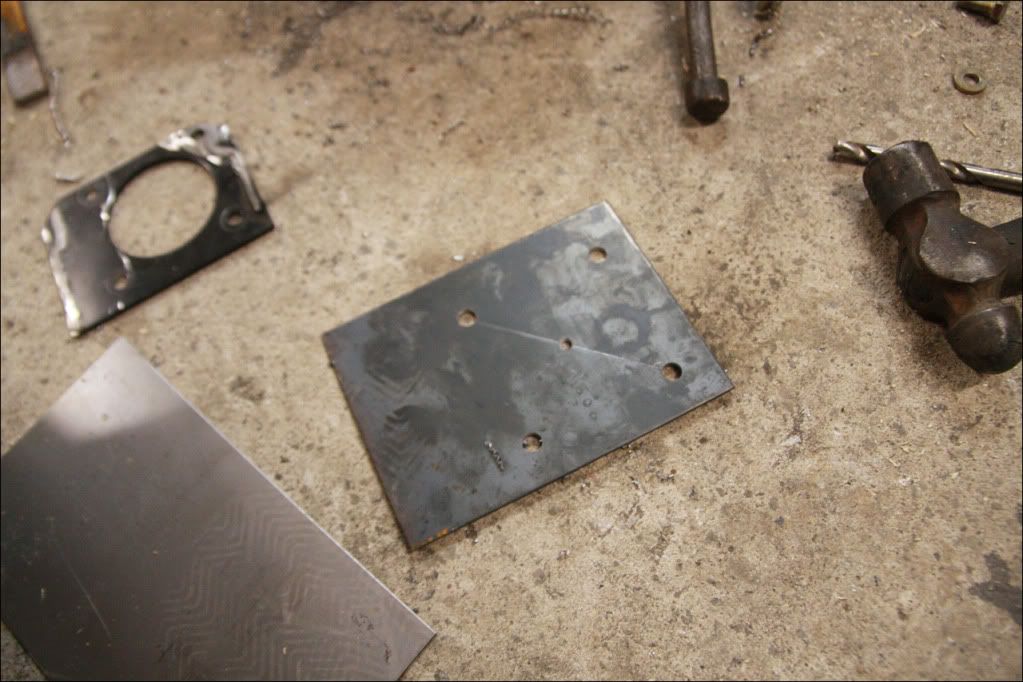
The furthest over I could go was around 40mm, so the fork of the servo would be inside the pedal like it is on a Clio. Out came the grinder..
..and then started measuring up. Its only possible to remove the back plate and not the side, as the clutch master cylinder bolts to the side of the pedal box so that had to remain where it was. I could just get 40mm out of it before the servo hit the metal on the side of the pedal box. Used some 3mm plate and marked it up so the servo would fit perfectly up against the side of the pedal box frame..
Then welded it back onto the pedal box itself in the correct position (as far over as it would go)..
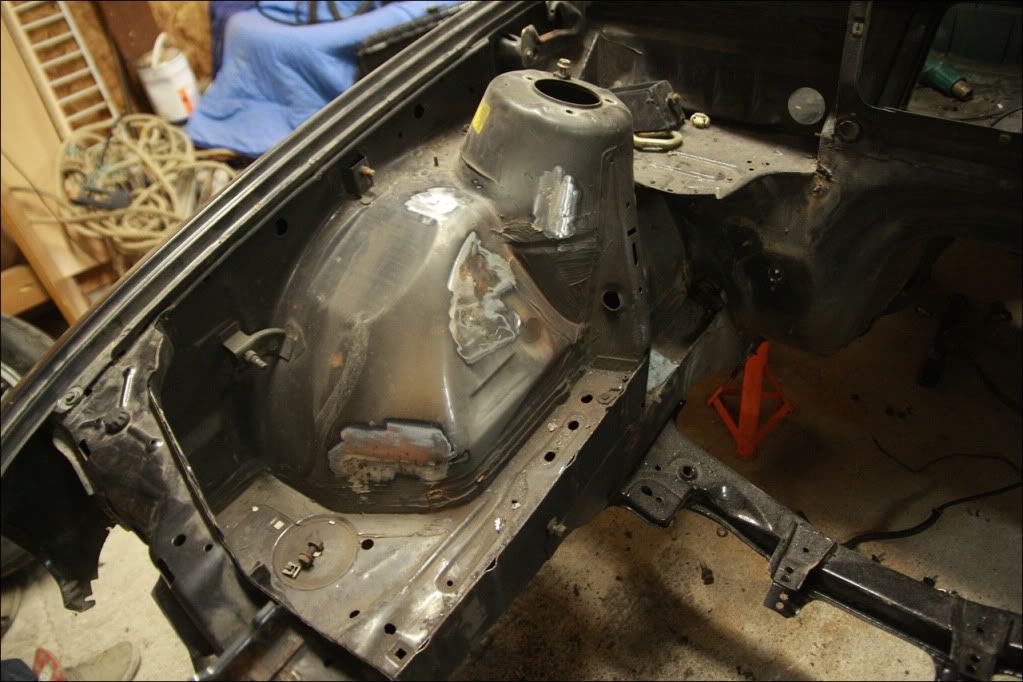
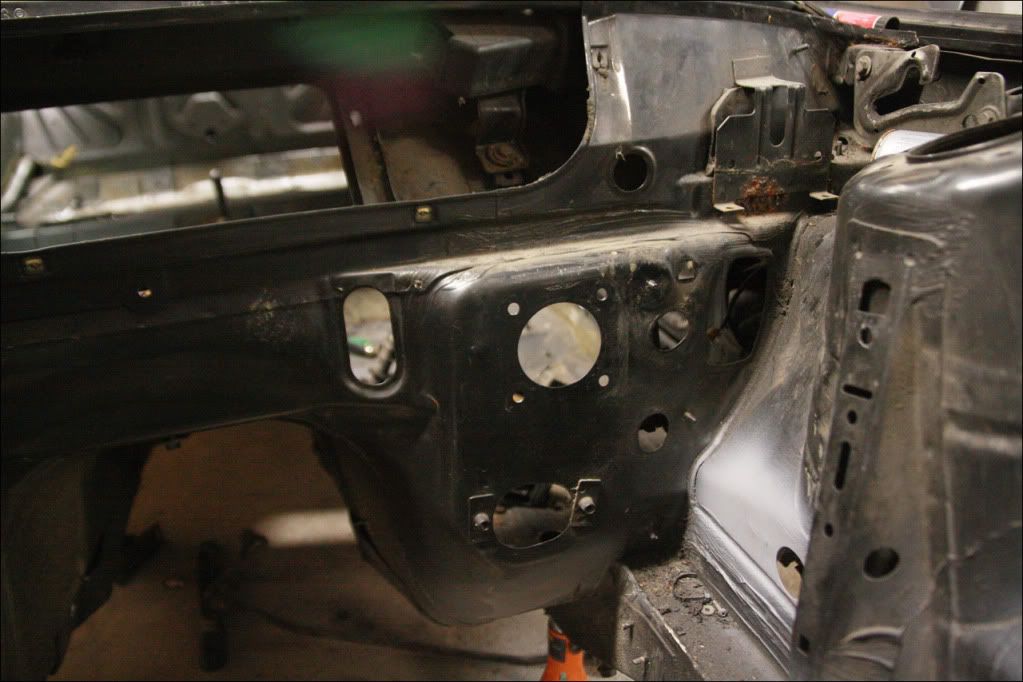
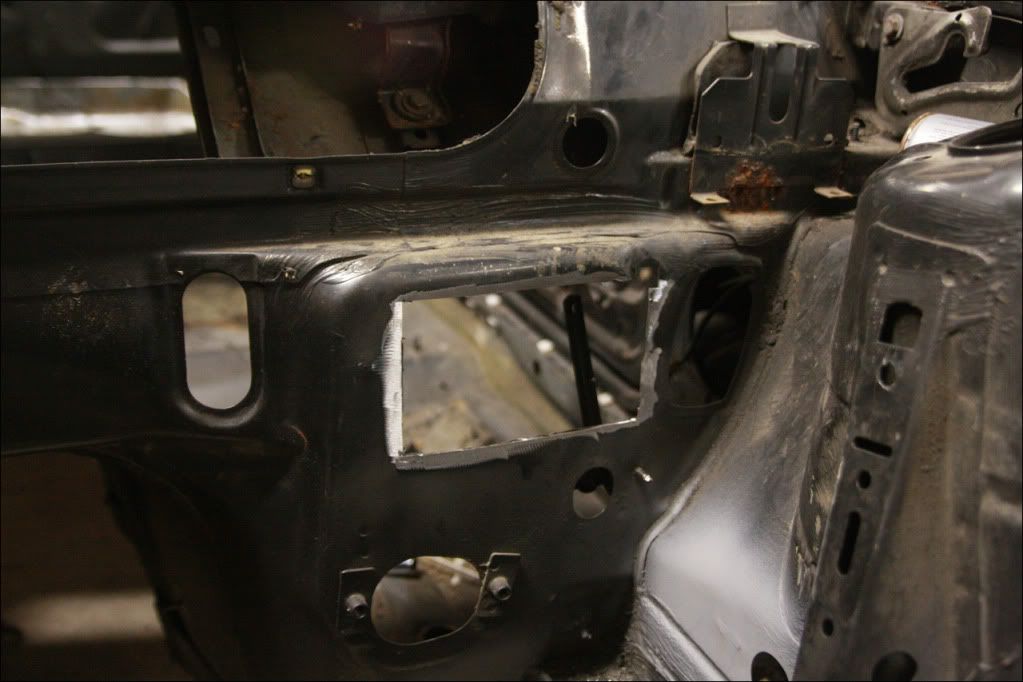
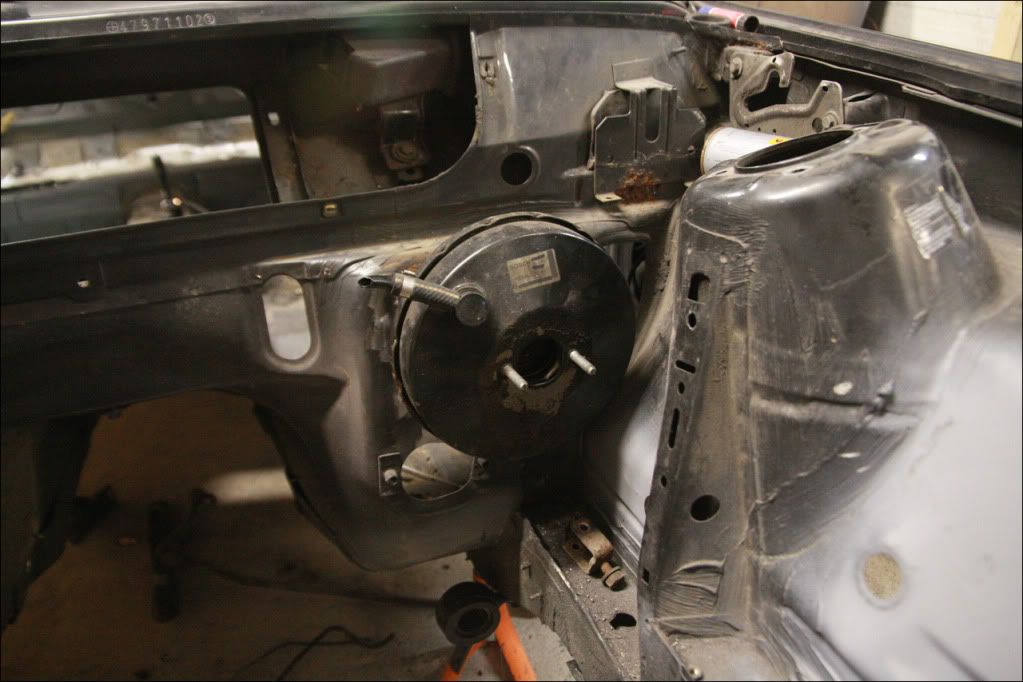
Obviously this would not line up with the holes in the bulkhead on the car, so I got chopping. Before:
After:
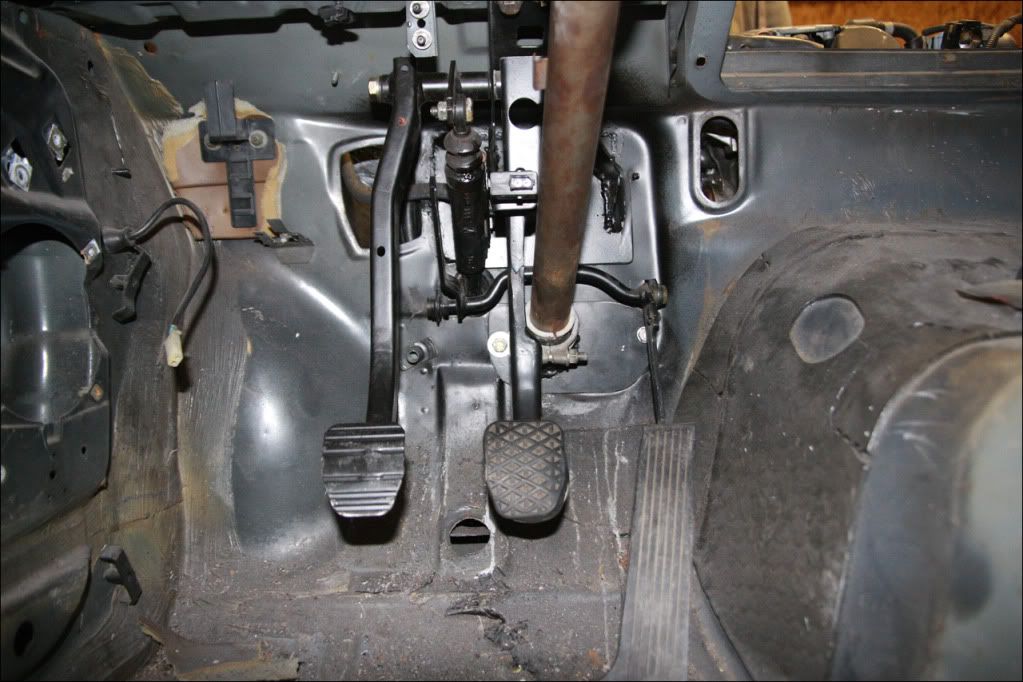
..and roughly got the 'new' pedal box in the correct position..
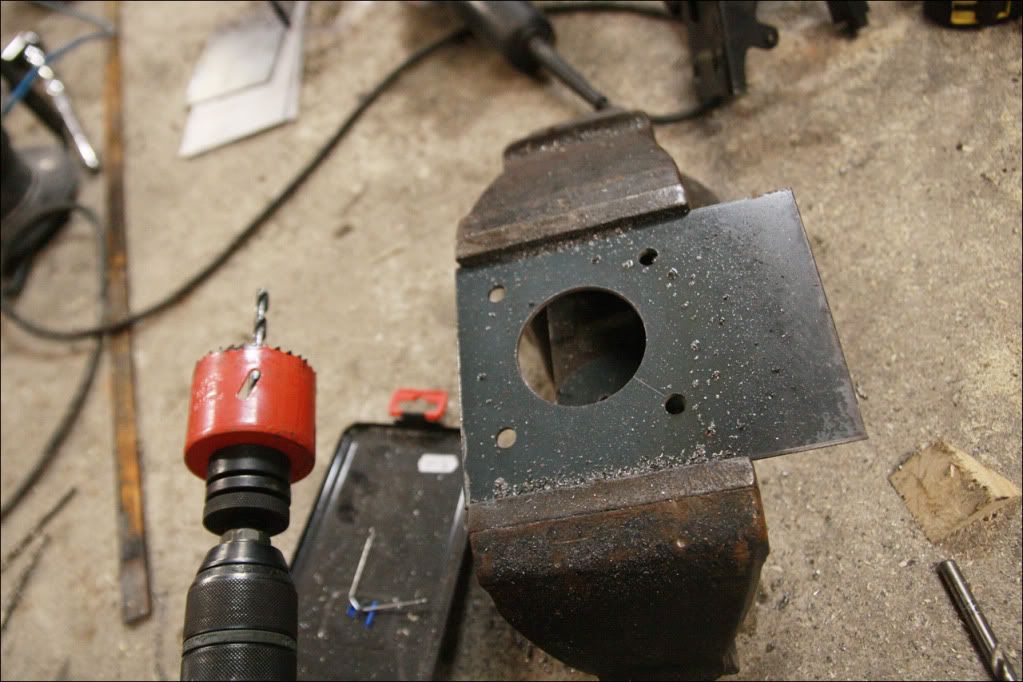
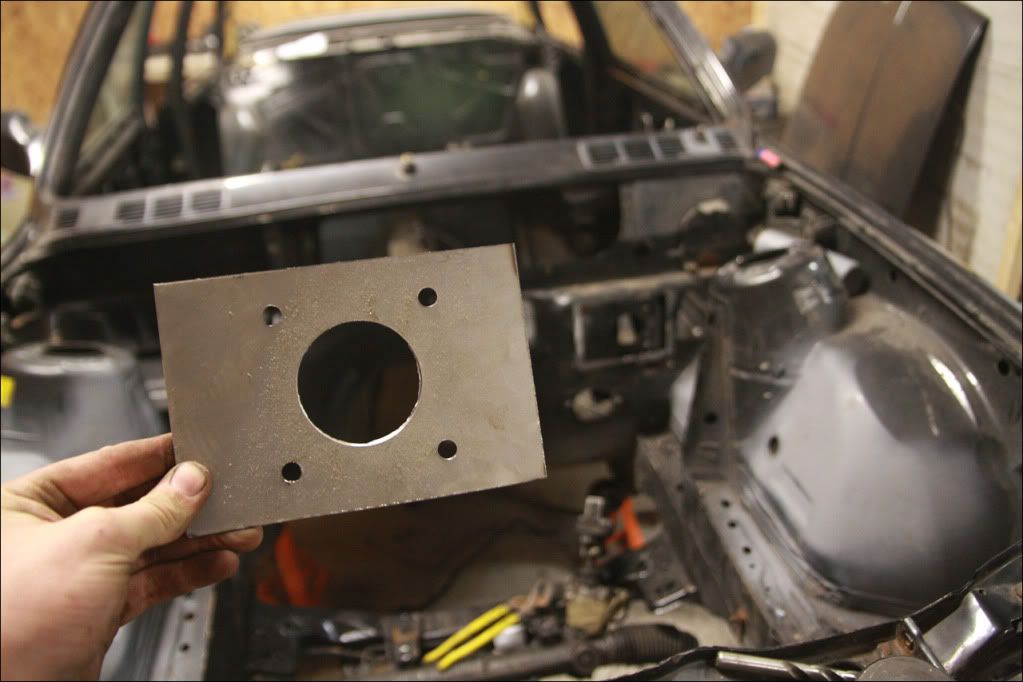
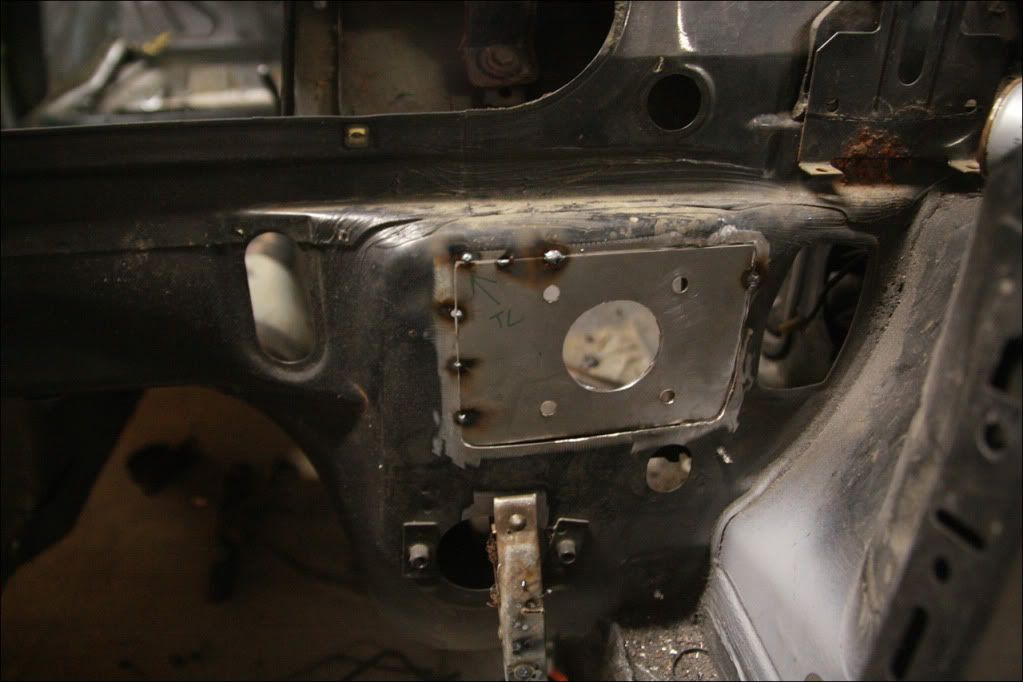
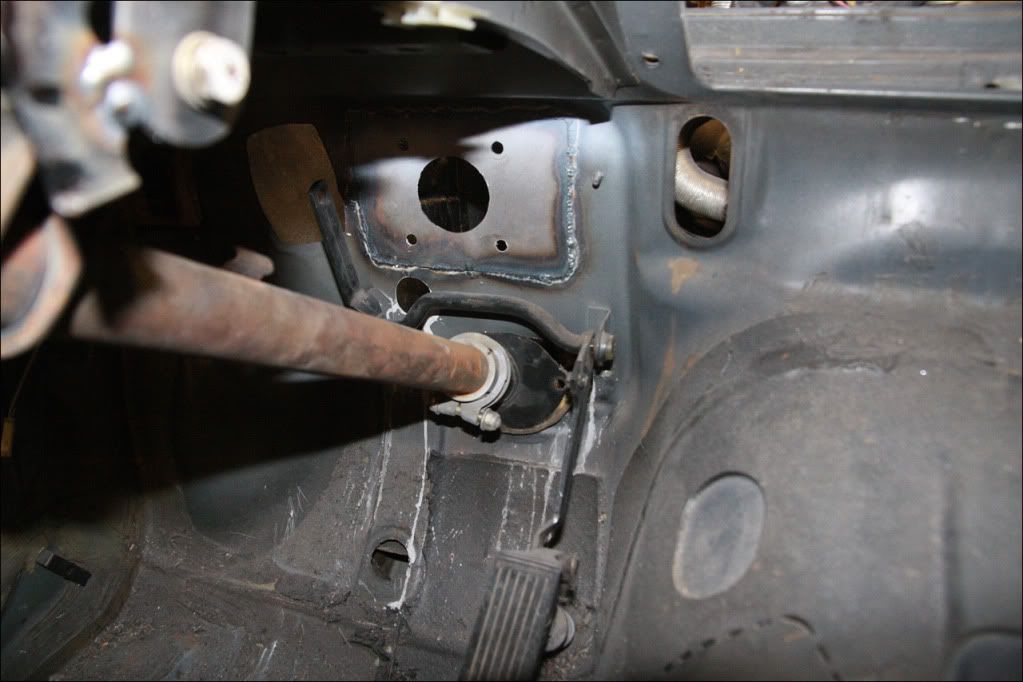
From that I cut some 1.5mm plate slightly over sized with the holes in the right position for the new pedal box. After lots of trimming with a sanding disc I got it sat inside the hole pretty well and tacked it in..
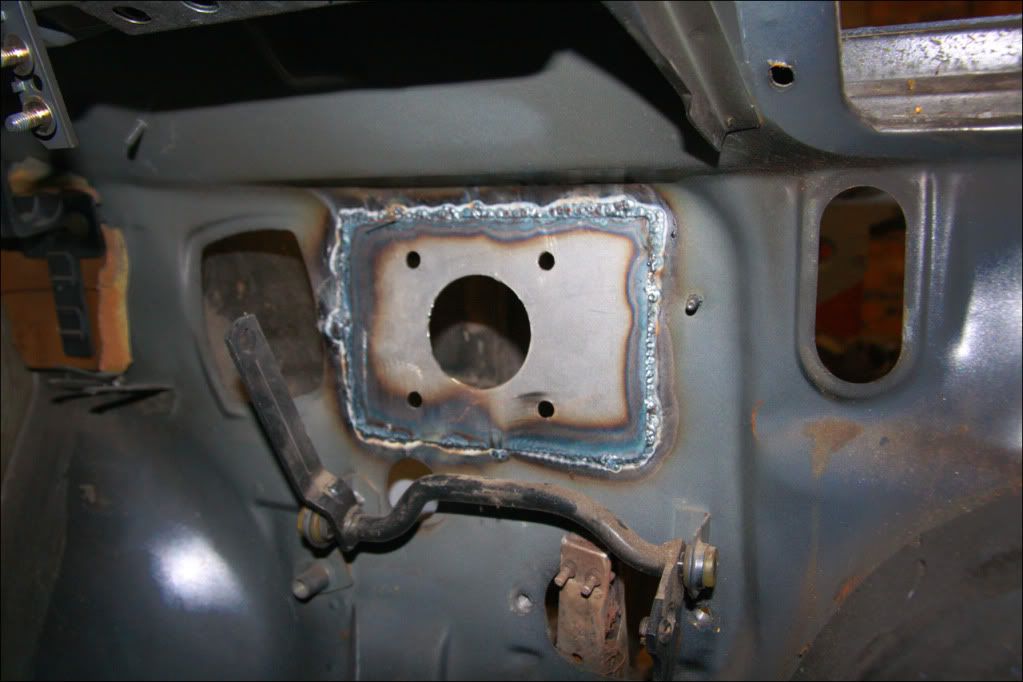
Happy with the position it was welded solid from the engine bay side. Couldn't get a good picture so took one from inside..
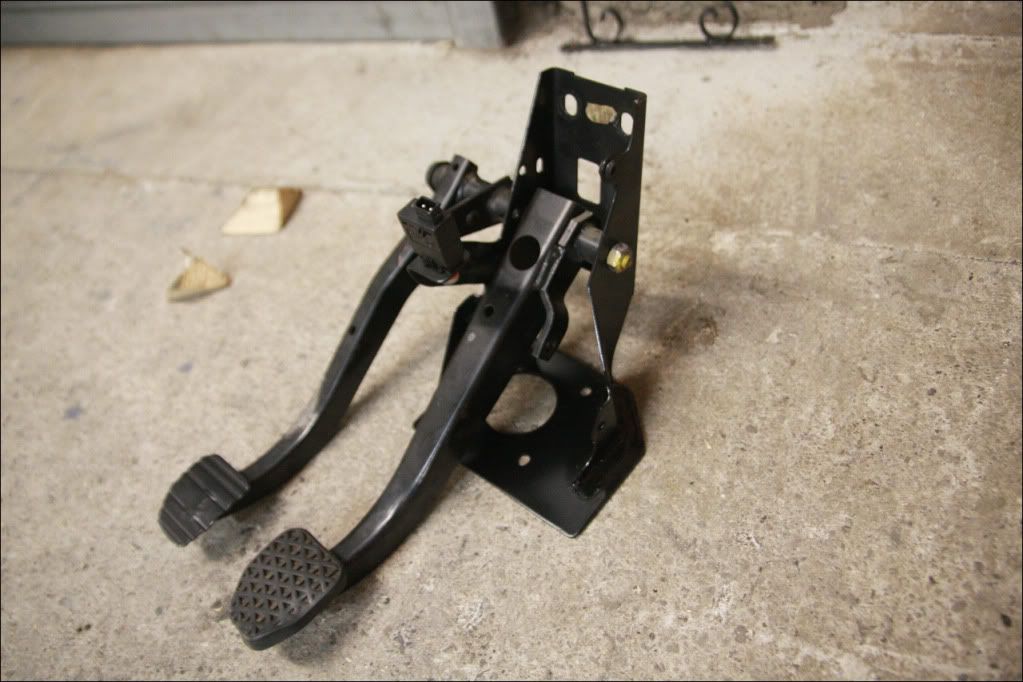
Pedal box bolted up fully in the correct position and everything lined up really well..
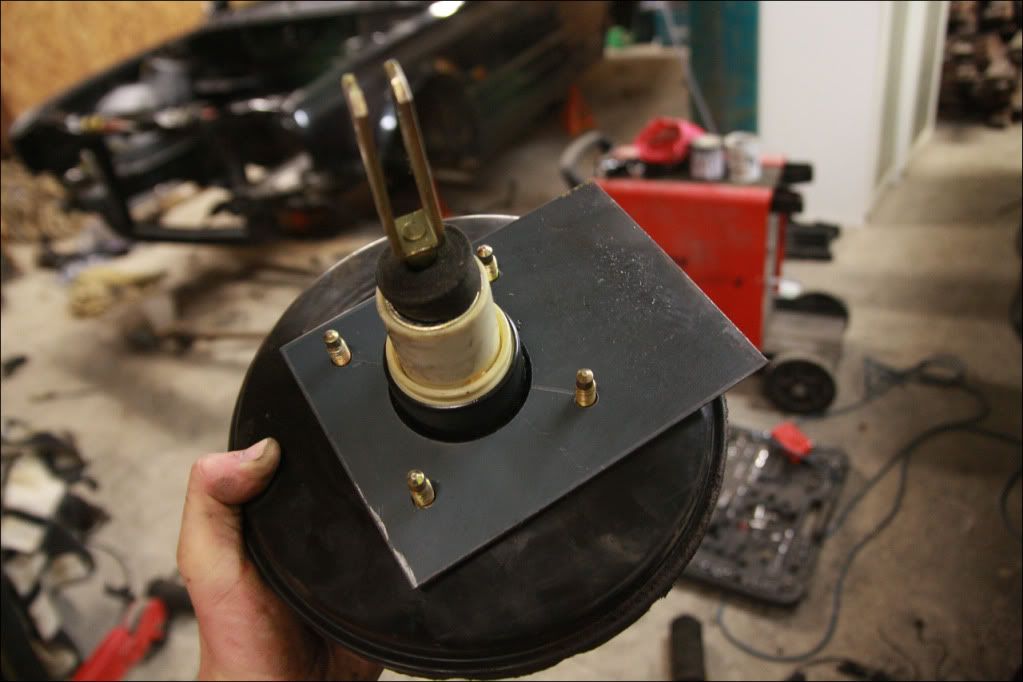
The servo was then bolted on to check fitment, along with the master cylinder..
Much further over when compared with the original picture further up and should give me a lot more room to play with! The pedal just needed drilling through to accept a bolt for the servo fork to finish it off..
Lastly I sanded the engine bay down quickly and gave it a freshen up with some black spray. I will eventually get the whole car properly done once its caged (a lot of the body work is flat), but that's something for the future!
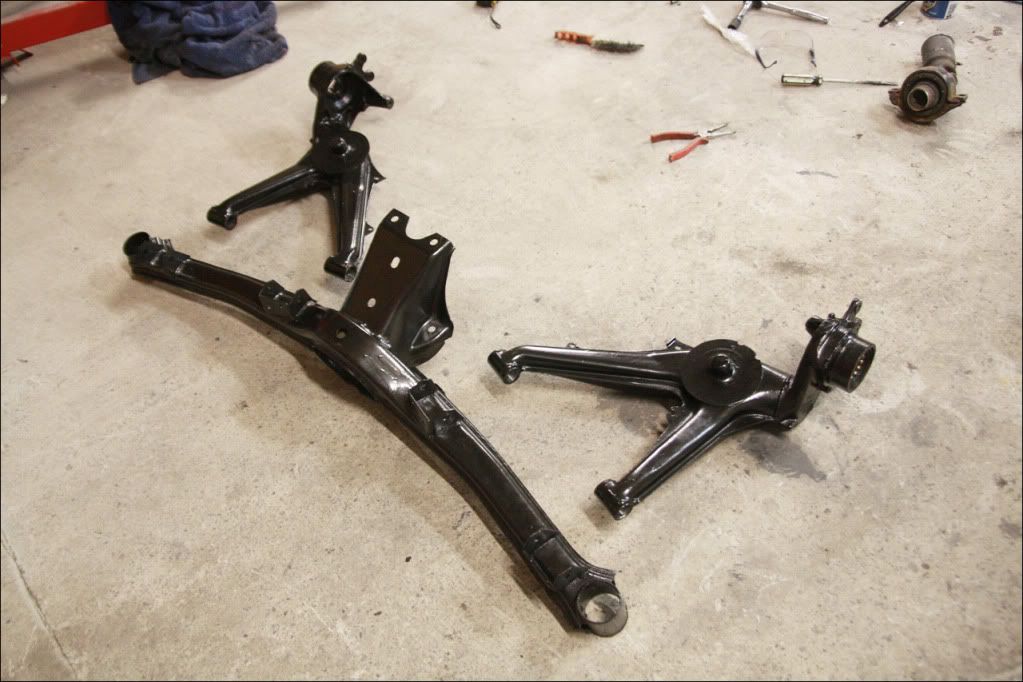
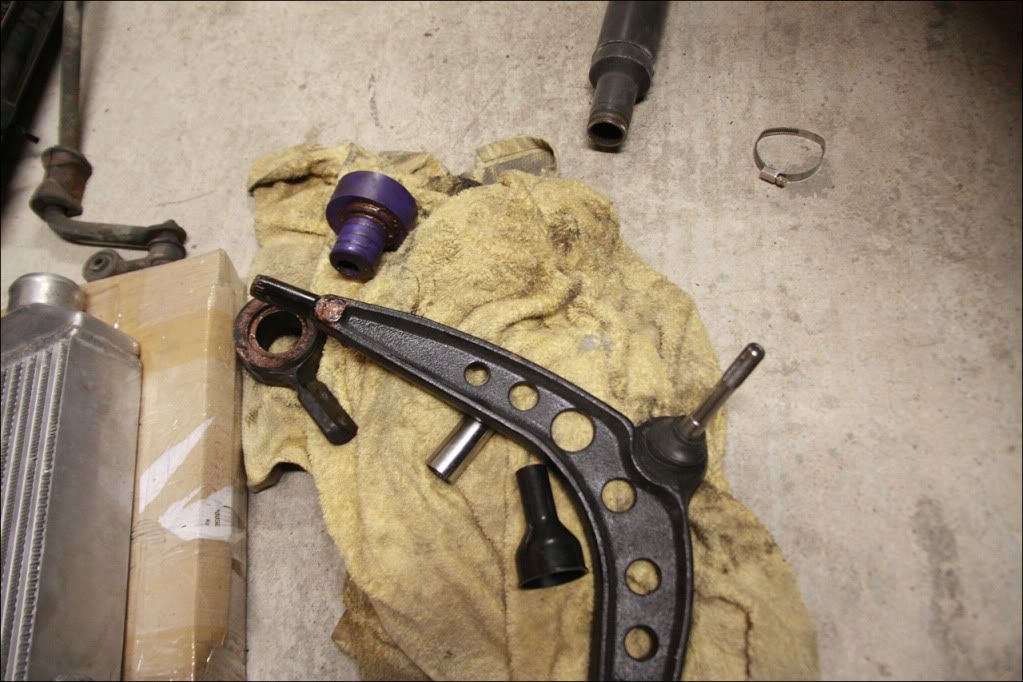
I decided to fit the new front wishbones before the engine as its easier to get to the bolts etc, so set about that. I have used PowerFlex (M3) eccentric wishbone bushes - this involved removing the old bush and sleeve from the housing and pressing the first part of the PowerFlex bush home in a vice..
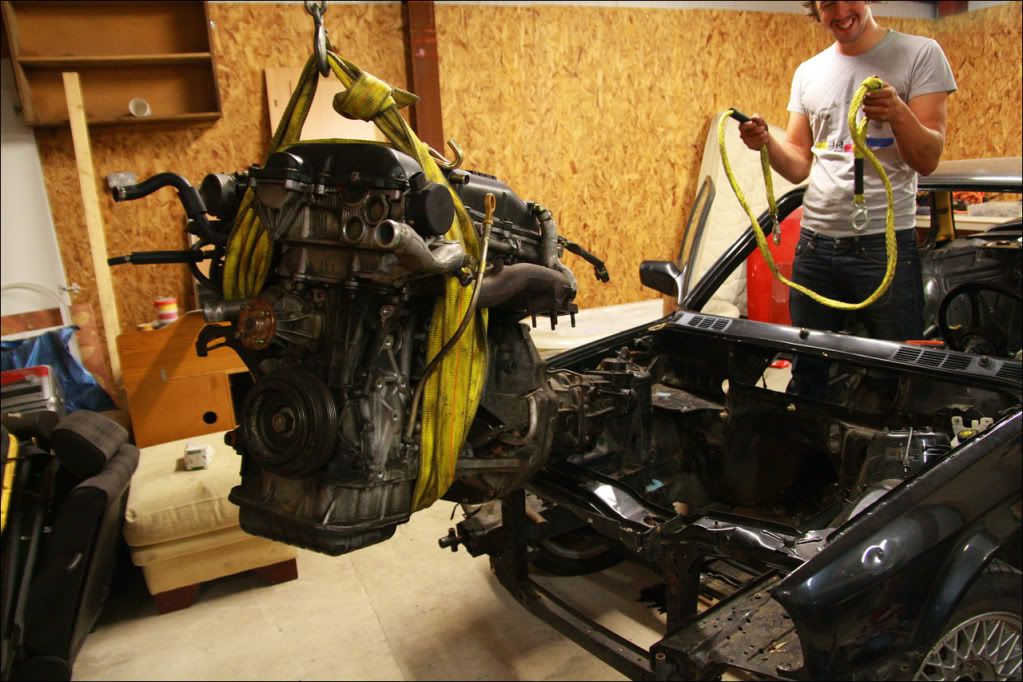
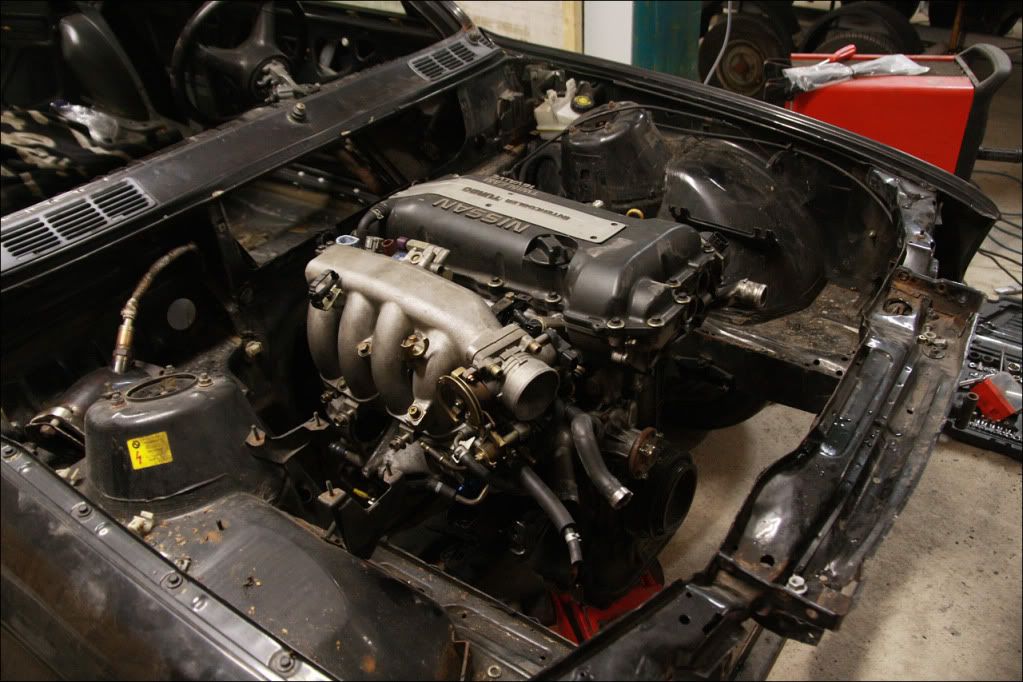
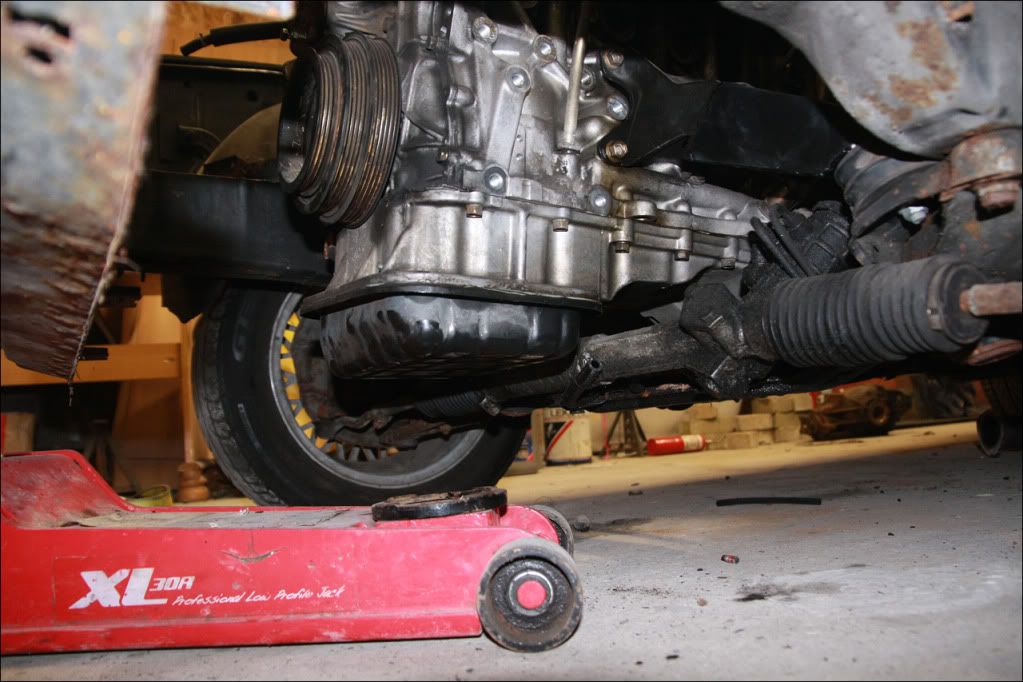
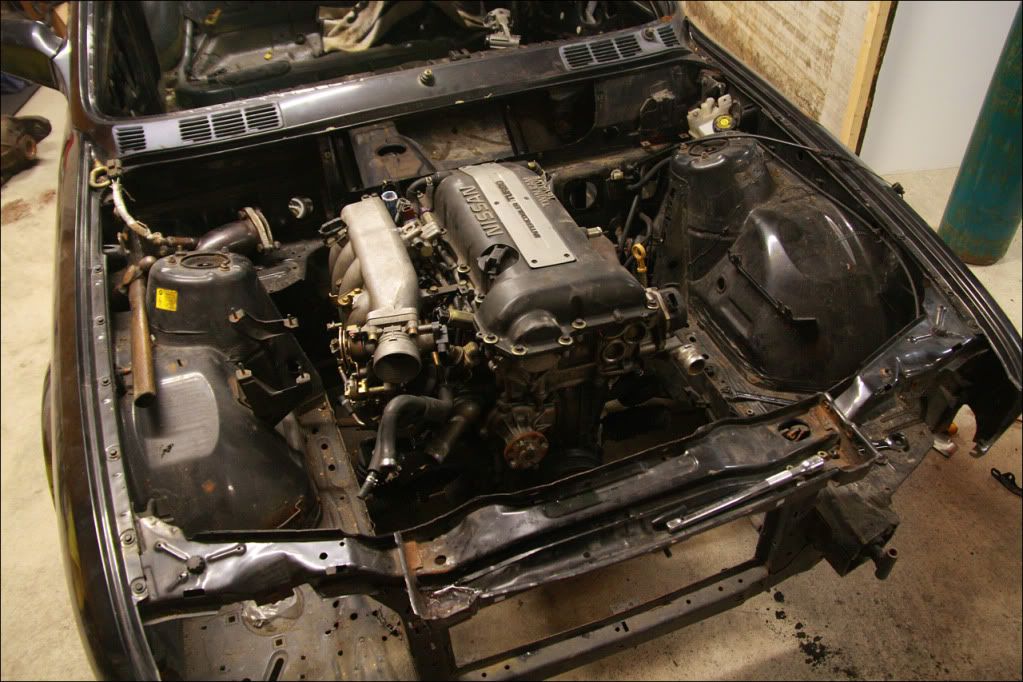
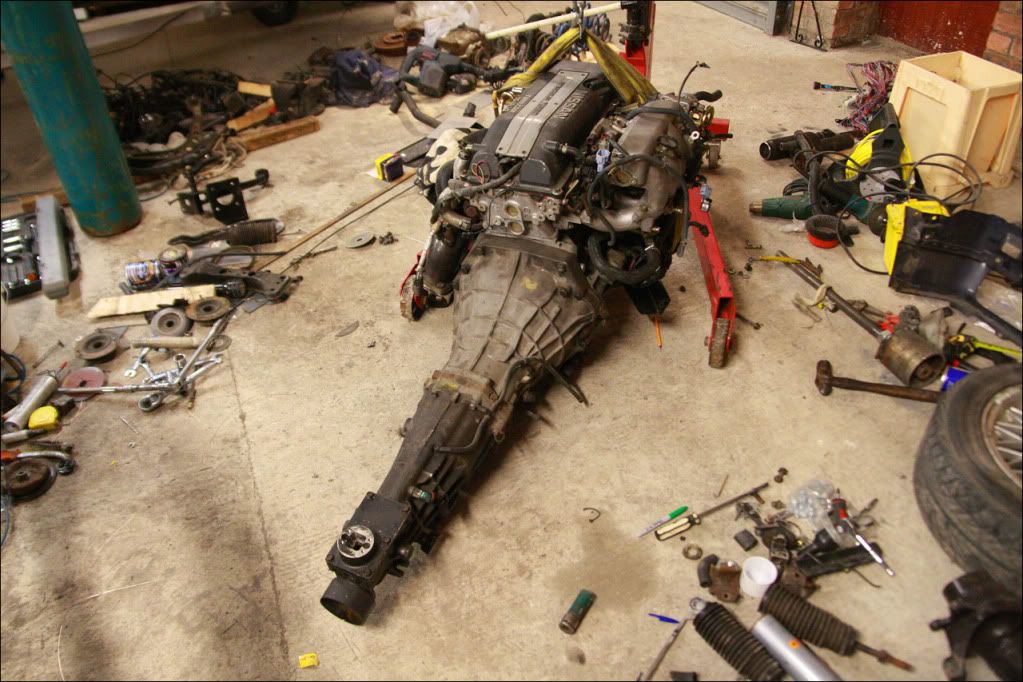
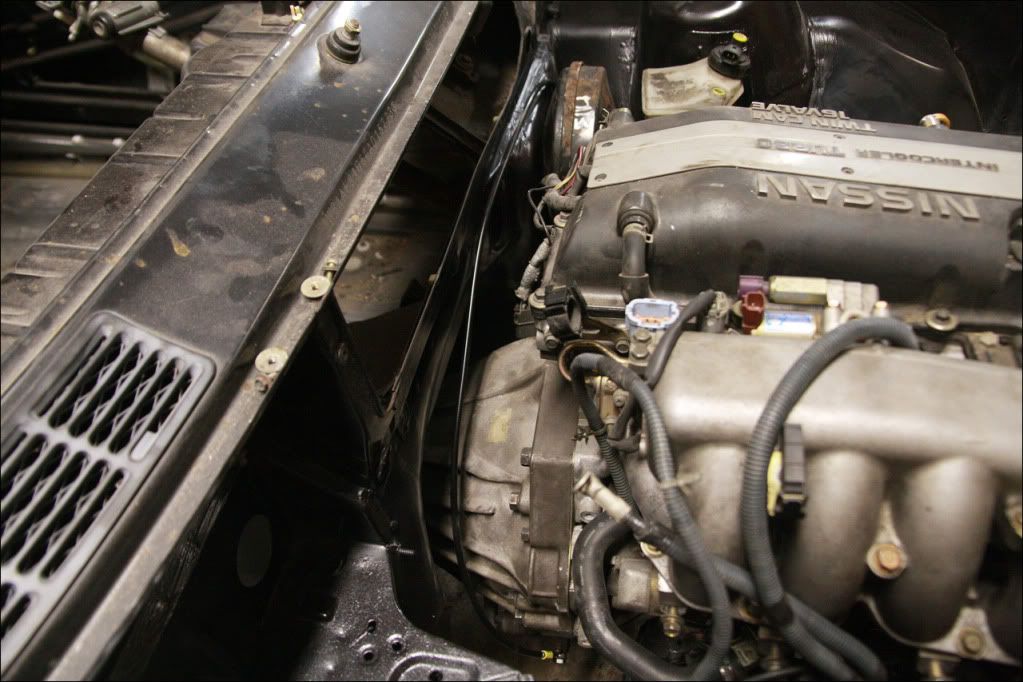
Then fitted the alternator and other bits to the engine - also looped back the coolant pipes that go to the heater matrix as I am not running one. Didn't fancy doing that when the engine was in the car as the pipes are under the inlet manifold. Engine bay and complete engine/transmission assembly ready to lift in..
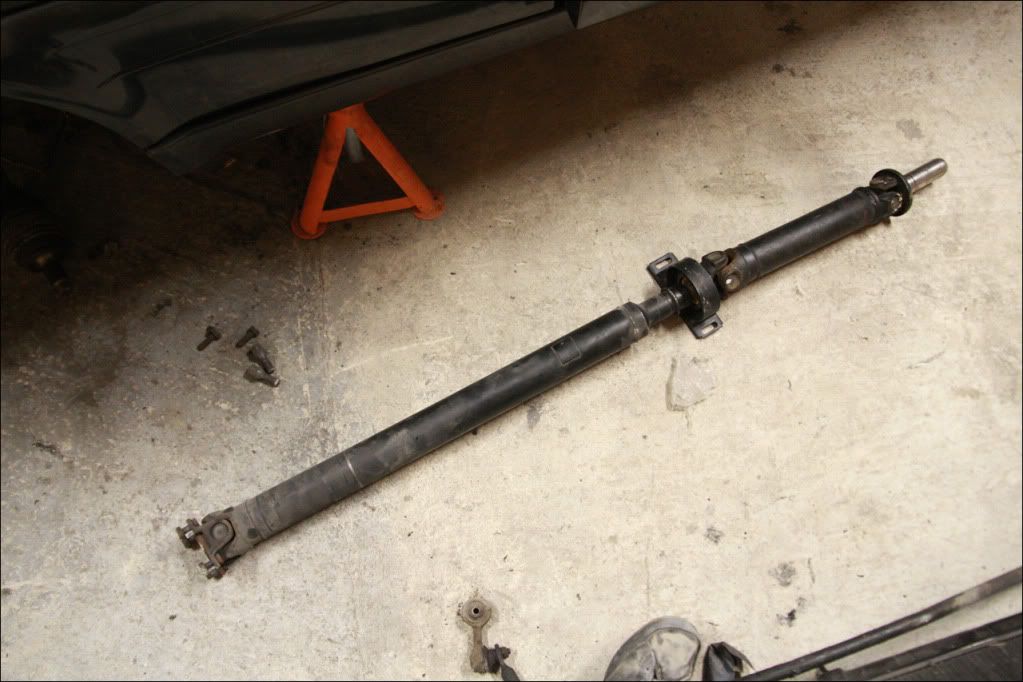
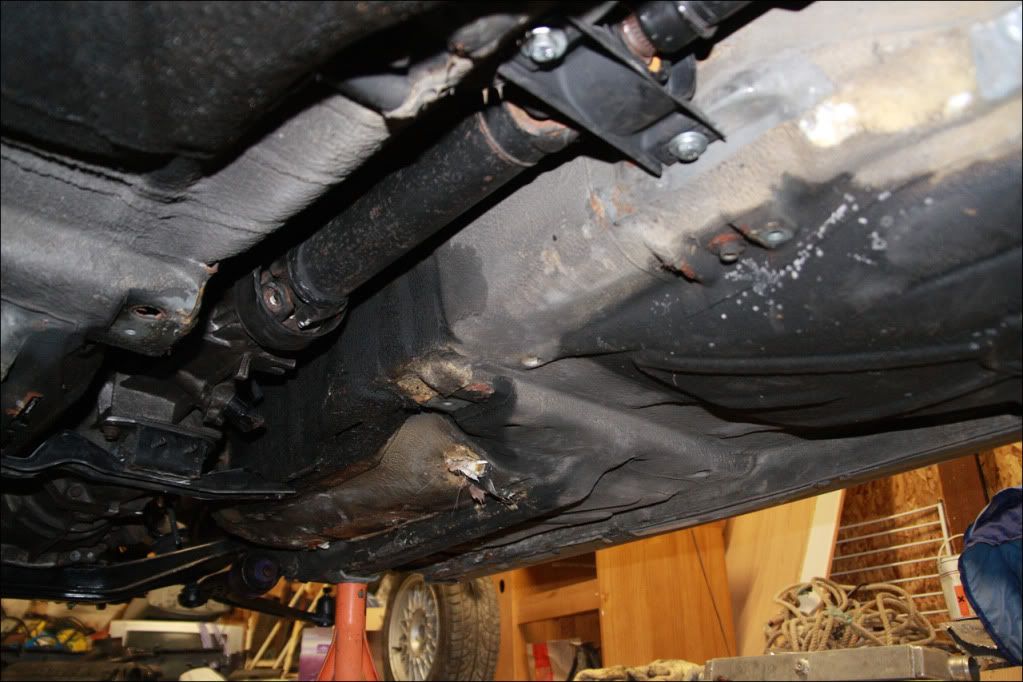
Put the new centre prop shaft bearing on and attached the rear section..
Then lifted the engine in and fitted the prop shaft. Really happy with the fit, its a perfect length and the center bearing bolts up with room to spare either side position wise. Gearstick fits well too..
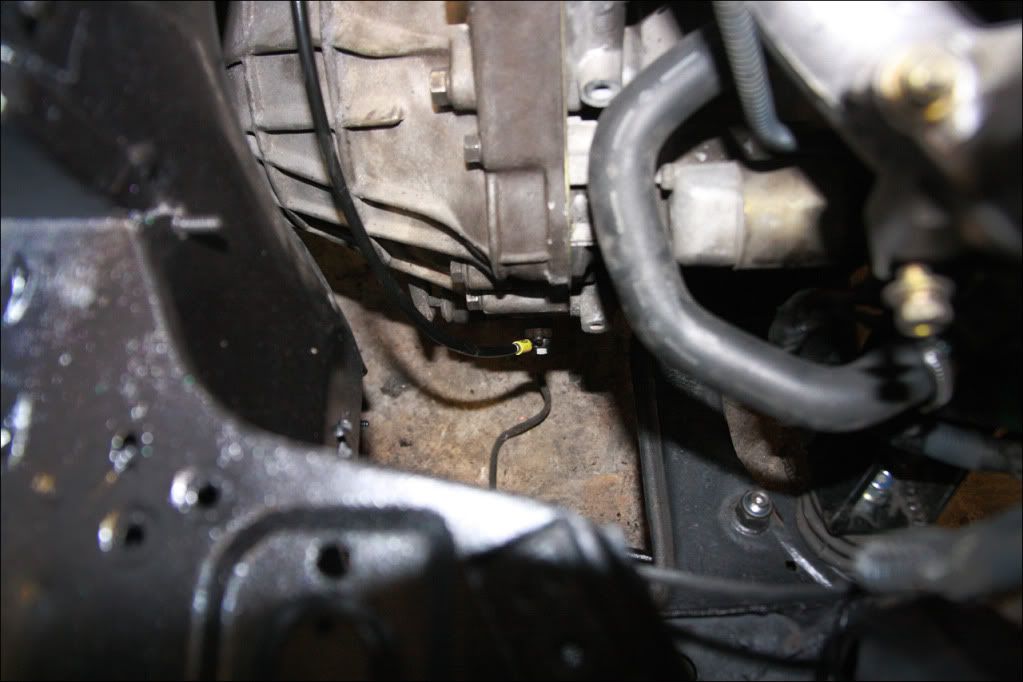
Had a custom clutch line made up with banjos on either end for easy fitment, the other (s14 item) was a bit too short. Runs from the slave cylinder over the box and top of the bulkhead then down behind the servo as the clutch master cylinder comes out under the servo..
Got a lot more clearance (well, as much as I can get) on the servo/master cylinder now too. Need some heat shielding for sure.
Lastly I had moved the column over when the engine was out to see how much room it would give me - quite a bit of clearance now. Still need to make a custom plate to mount it to the bulkhead (to replace the original) and probably extend the shaft. Got a couple of linkages and bits to play with but I am confident I can get something to work past the space I now have...
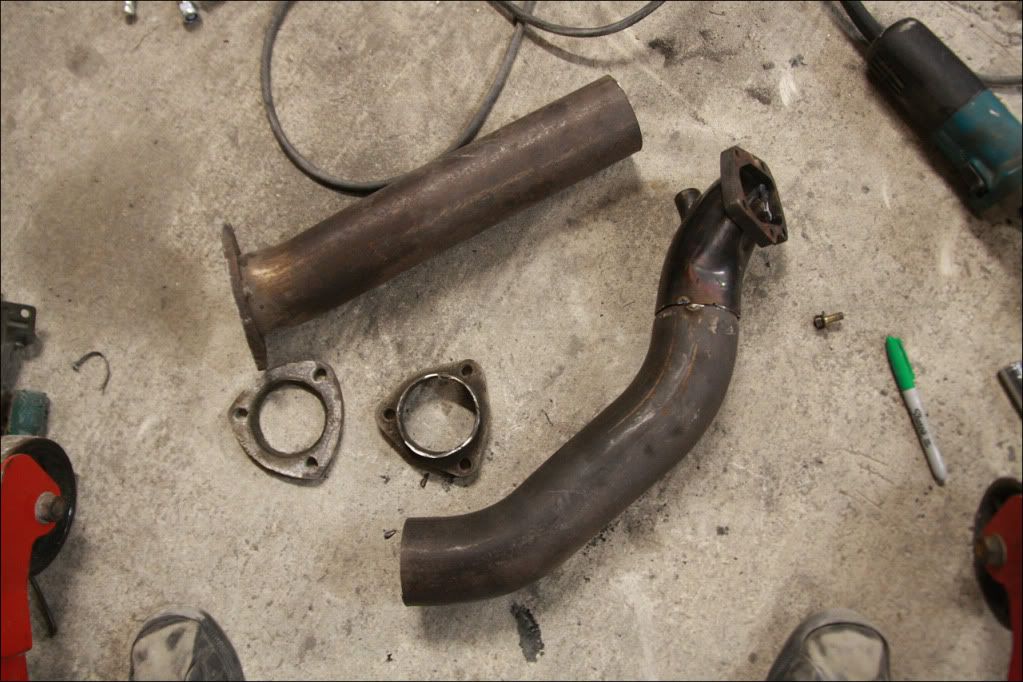
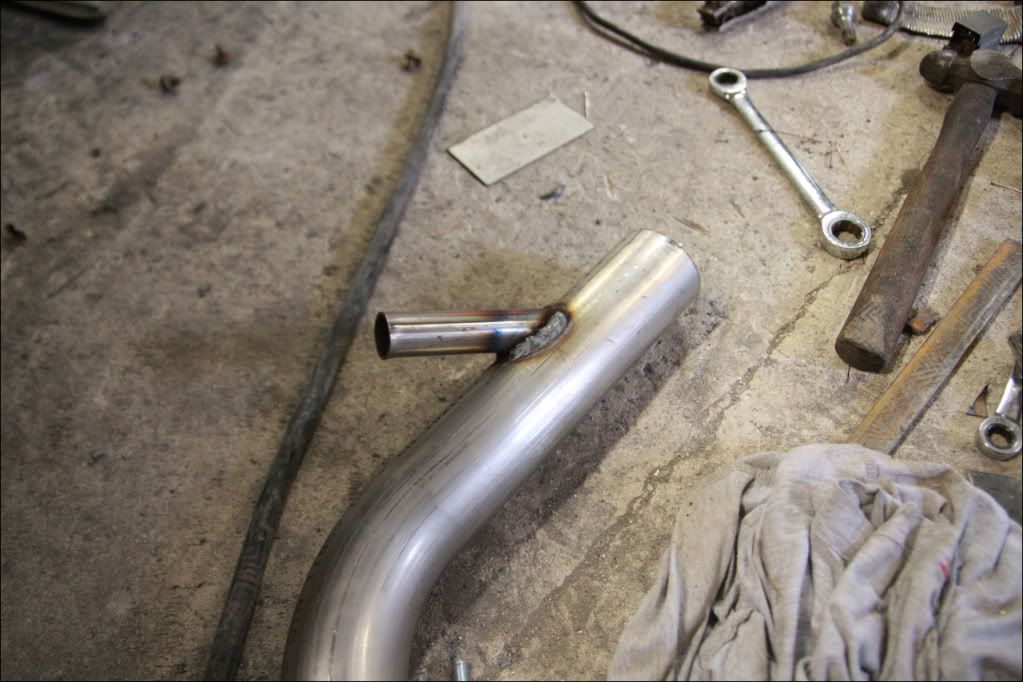
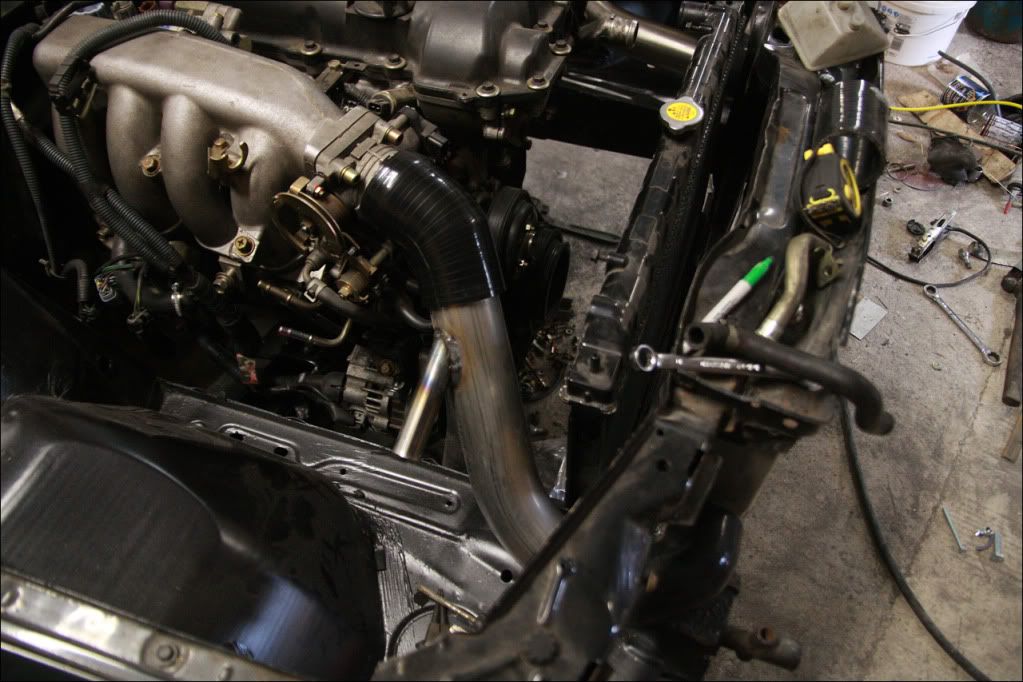
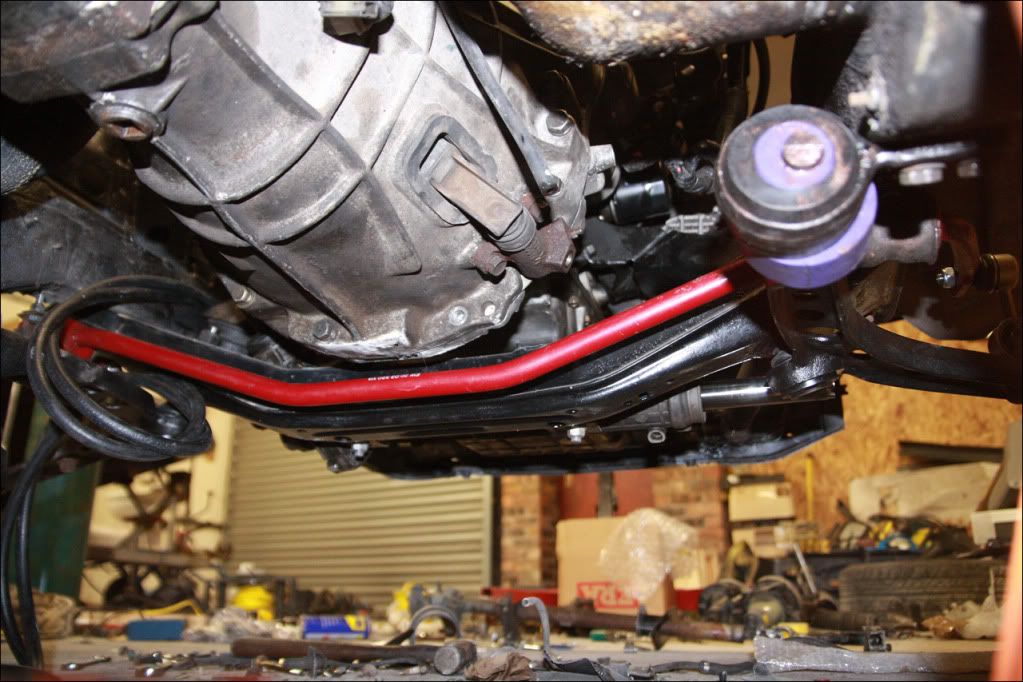
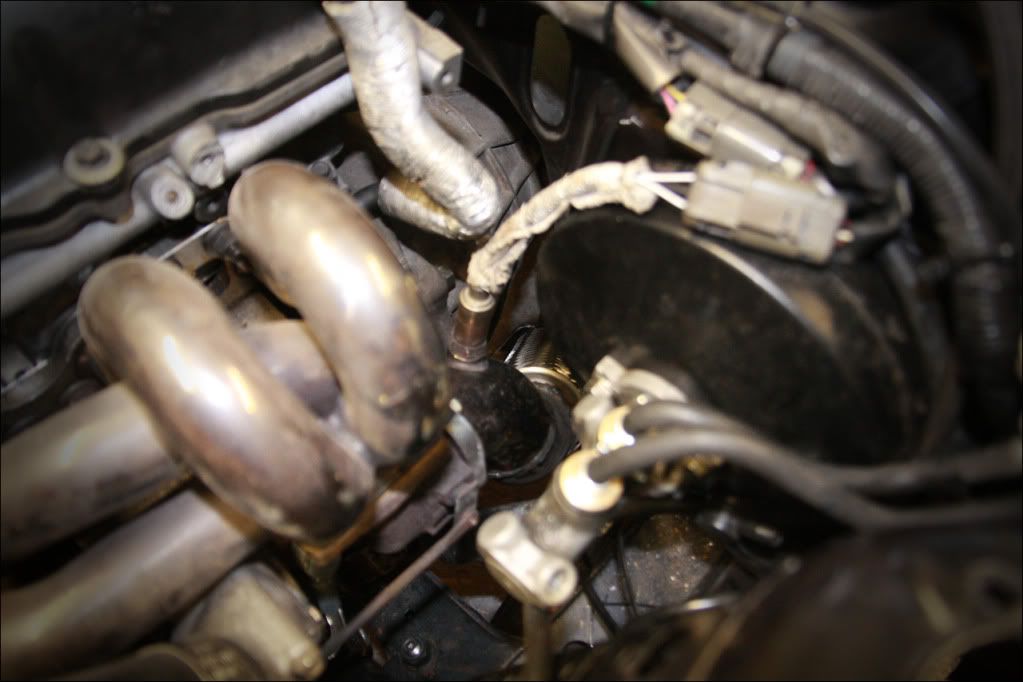
I also realised there is quite a bit of room between the down pipe and bulkhead, and moving it closer (further backwards) would give me more room for a steering linkage too. I have a complete down pipe that links to the exhaust from an S14a too, in the same bore (3"), so I might chop the flange off the short down pipe, adjust the angle and use the S14a down pipe to make a single piece custom item thats closer to the bulkhead giving me more room.
As mentioned previously I thought about making another down pipe to do away with the flange that's on the short turbo down pipe. I had a bit of a measure and decided to just go for it, set about with the grinder...
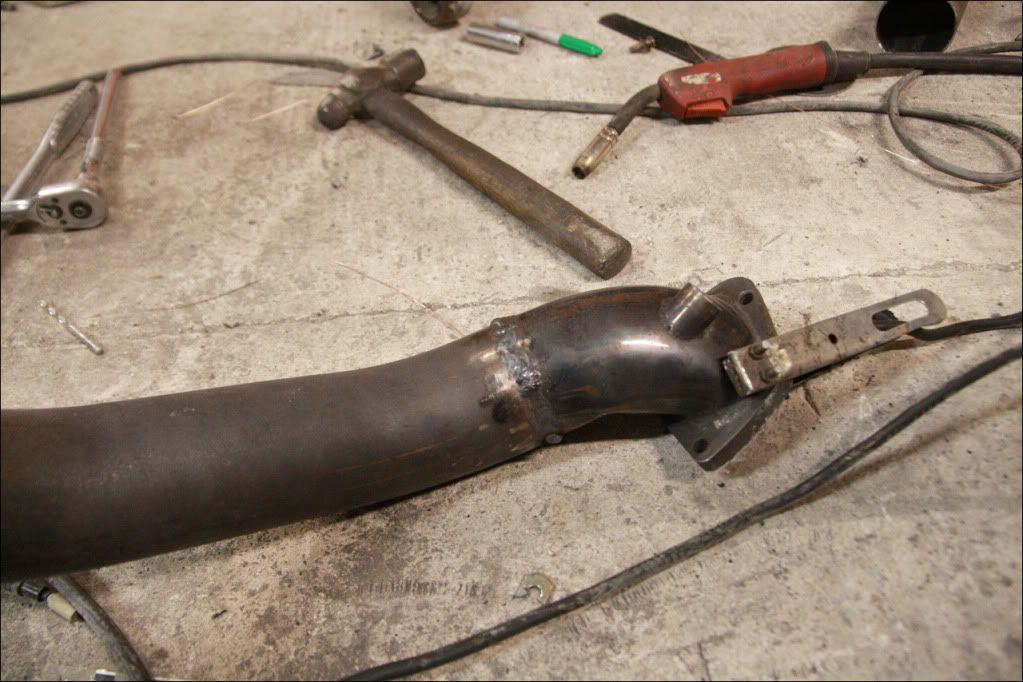
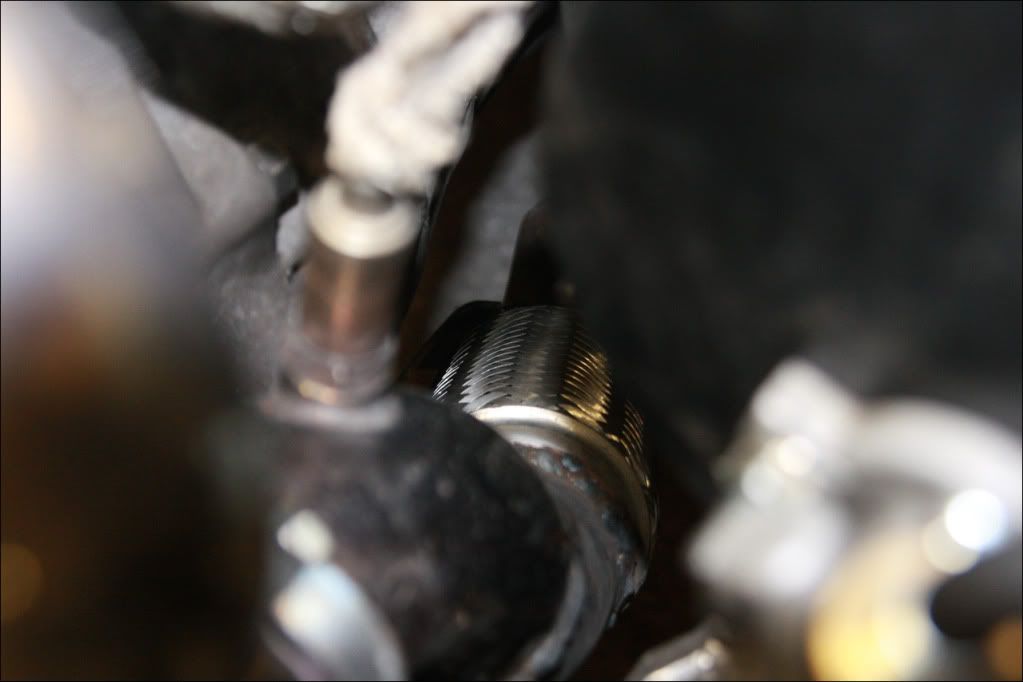
I was lucky that the end of the big down pipe got a tiny bit smaller before the flange, which allowed it to slot into the top part nicely. I cut the bottom off at a point where it was down the gap nicely, twisted it to fit and welded it solid..
As can be seen it follows the gap and line of the gearbox well. It comes out under the car perfectly - Just need to cut an angle into the other part of the down pipe and weld the straight section on which will line everything up with the tunnel on the car. In an ideal world I would make the down pipe go further back straight off the turbo before dropping down, but I've just made do with what I have for now!
The good thing is that there is no flange in the engine bay on the down pipe now and it has free'd up a lot more room for a steering linkage...
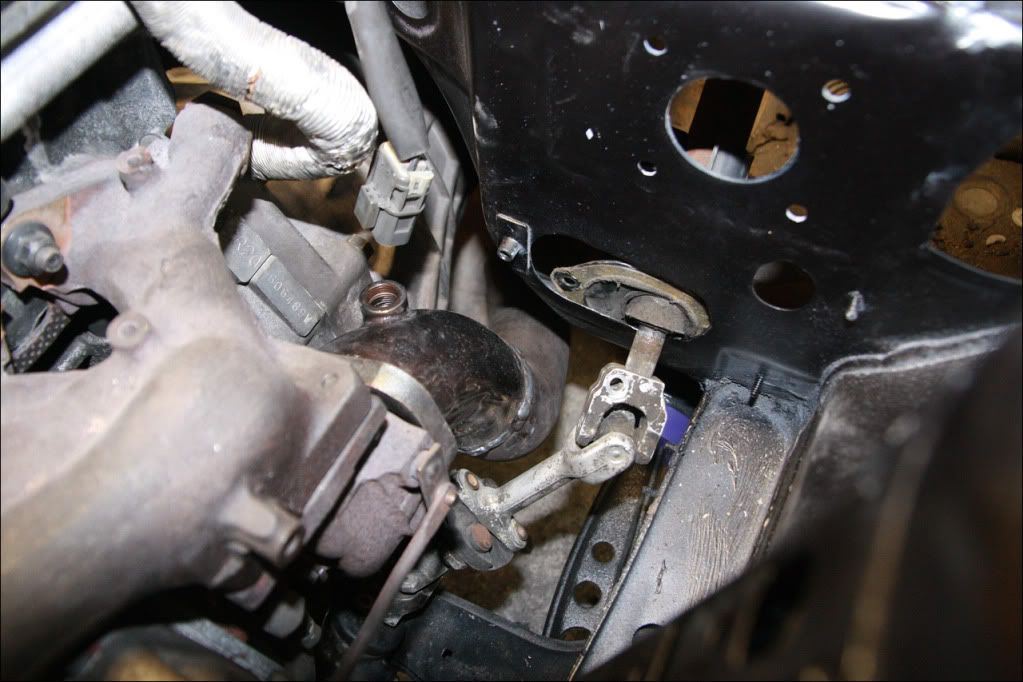
The rubber bushing between the two parts of the column linkage is a common failure on the E30's, even more so with extreme exhaust temperatures right next to it, so that's being replaced with a machined piece of steel and bolts to the same size - more on that once its done.
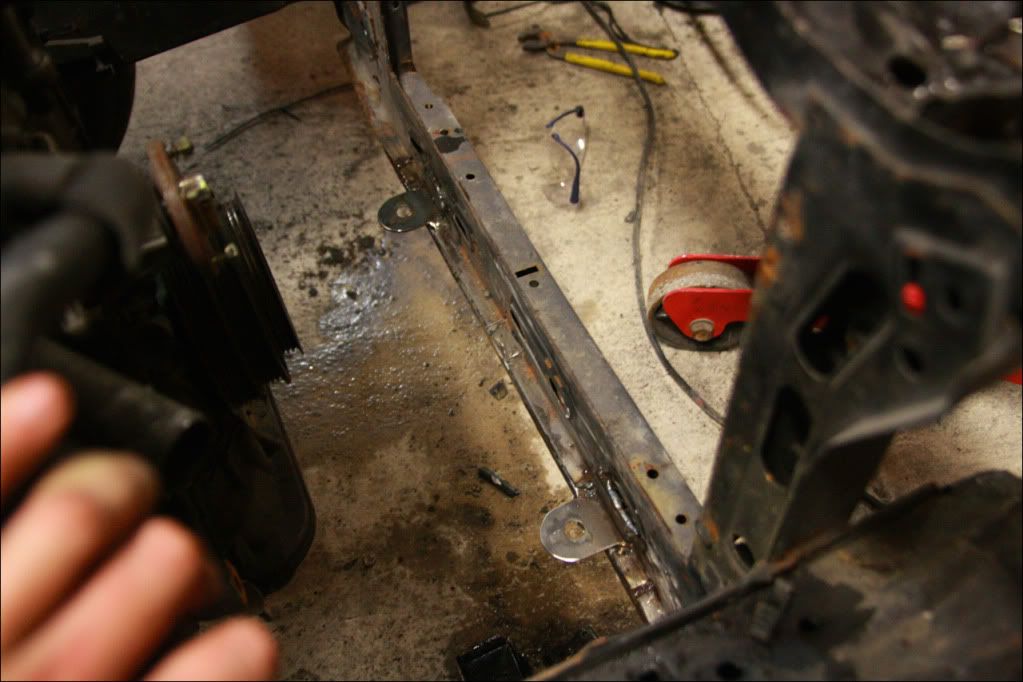
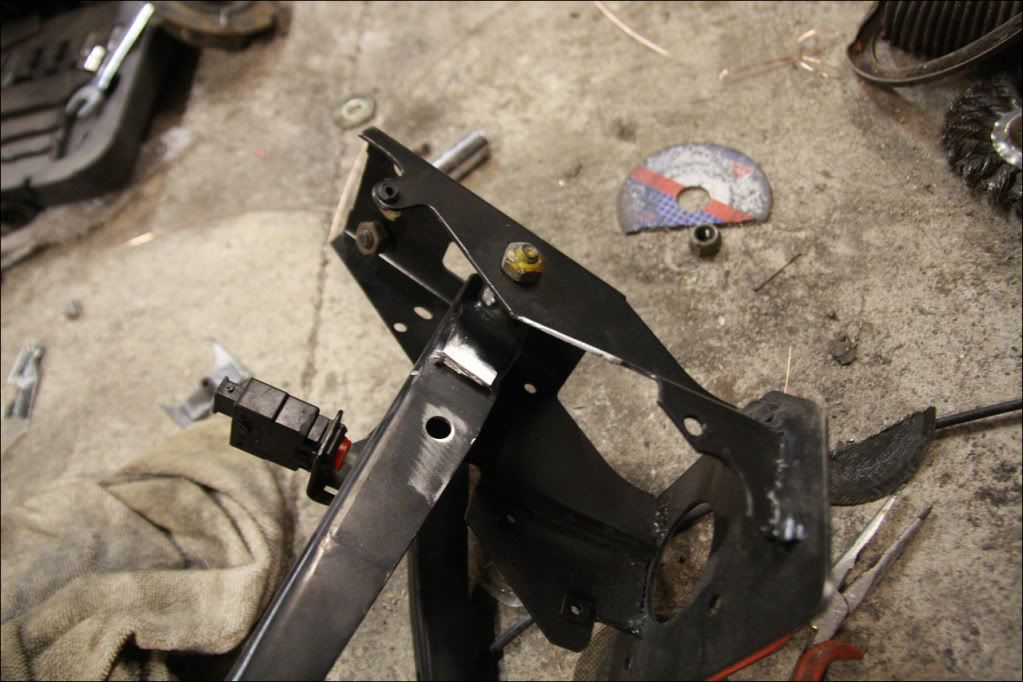
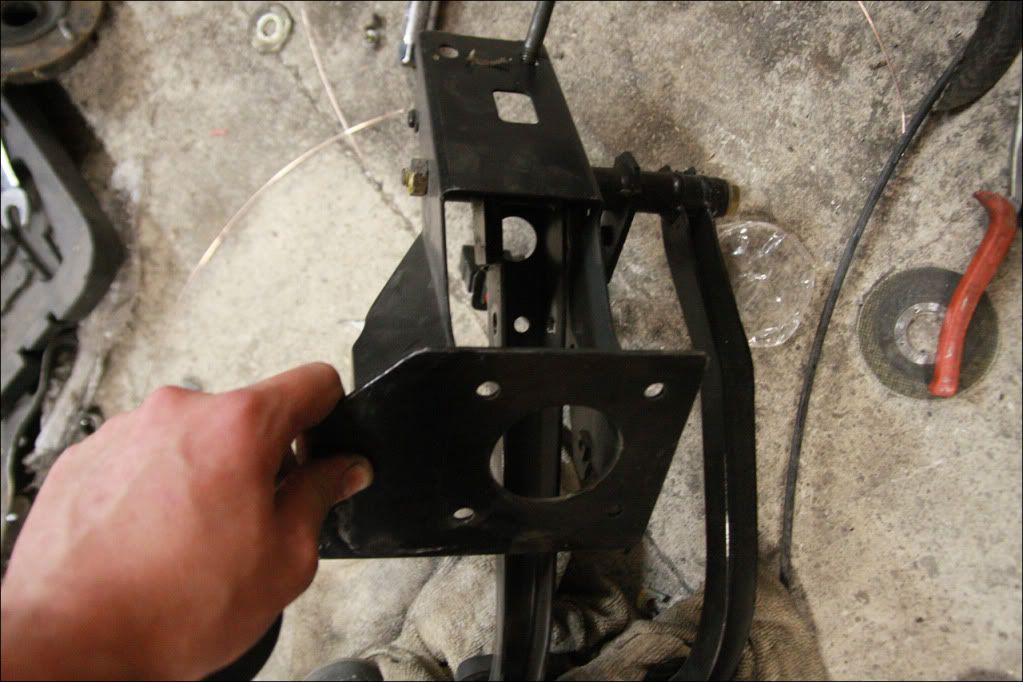
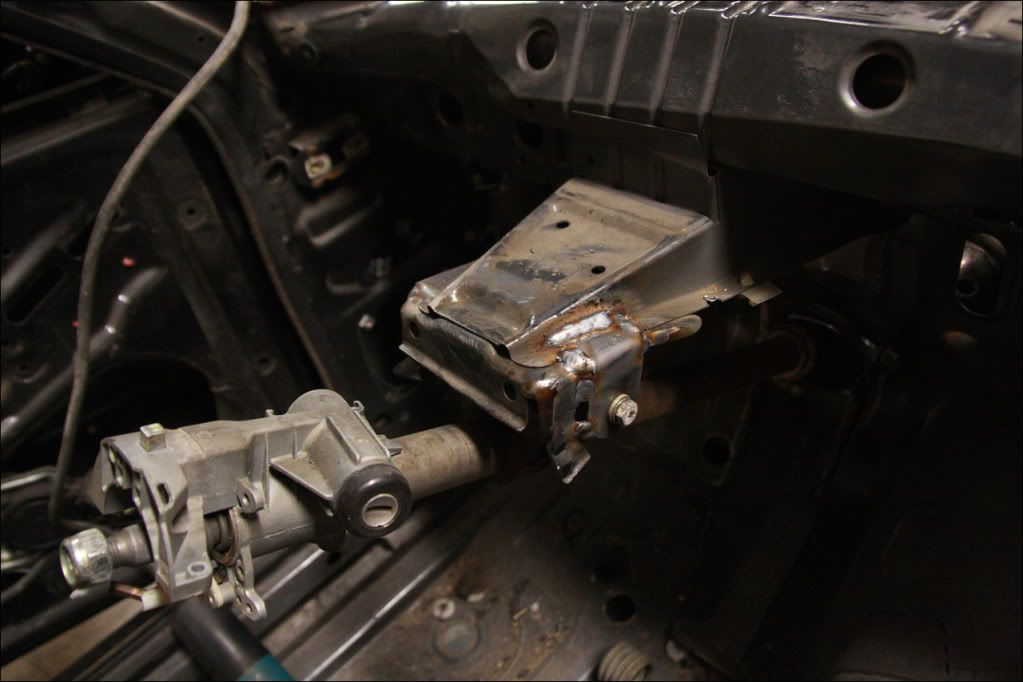
Now the column has moved over around an inch sideways and half an inch forwards from its original position, so obviously the mounts on the chassis inside would be in the wrong place. Bent some pieces of 2.5mm steel to 90deg and cut them to shape - drilled an M8 hole through them in the correct position and welded them solid..
The excess metal from the old brackets still need cutting off but that's nothing major. It just needs a new 'plate' making for the bottom now that follows the shape of the hole and bolts onto the bulkhead like the original, shouldn't be too hard to make up next time I'm there..
Everything still rotates freely with a nice amount of clearance which I'm happy about With the column moved over the casing is very close to the brake pedal itself, which will probably need a slight notch cutting into it and plating when I've had a measure. Another thing on the list to look at but not too much of a concern.
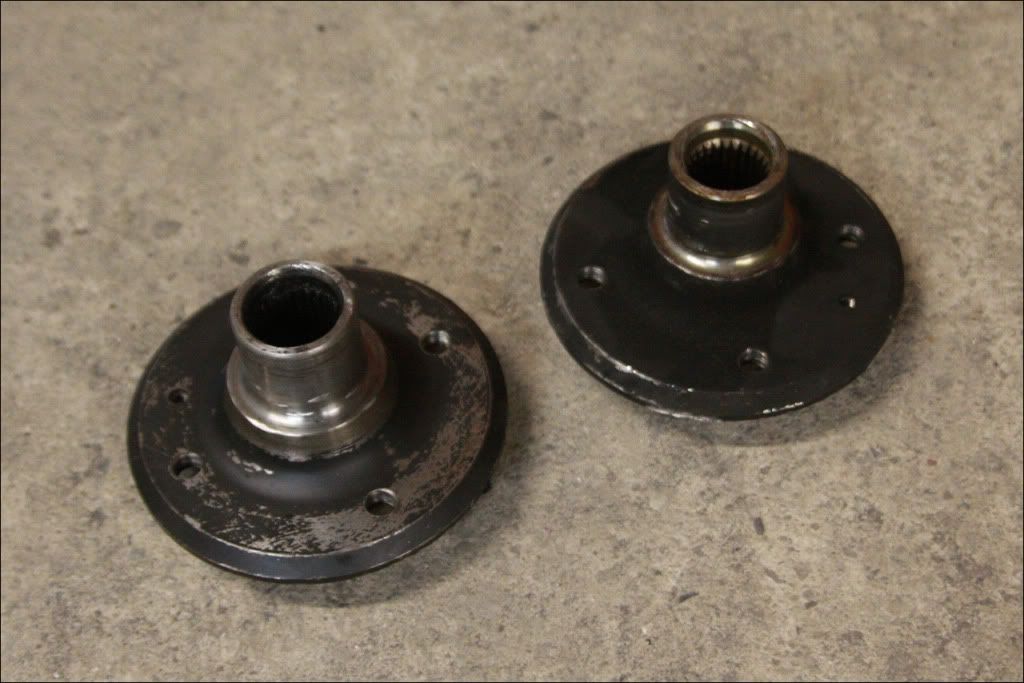
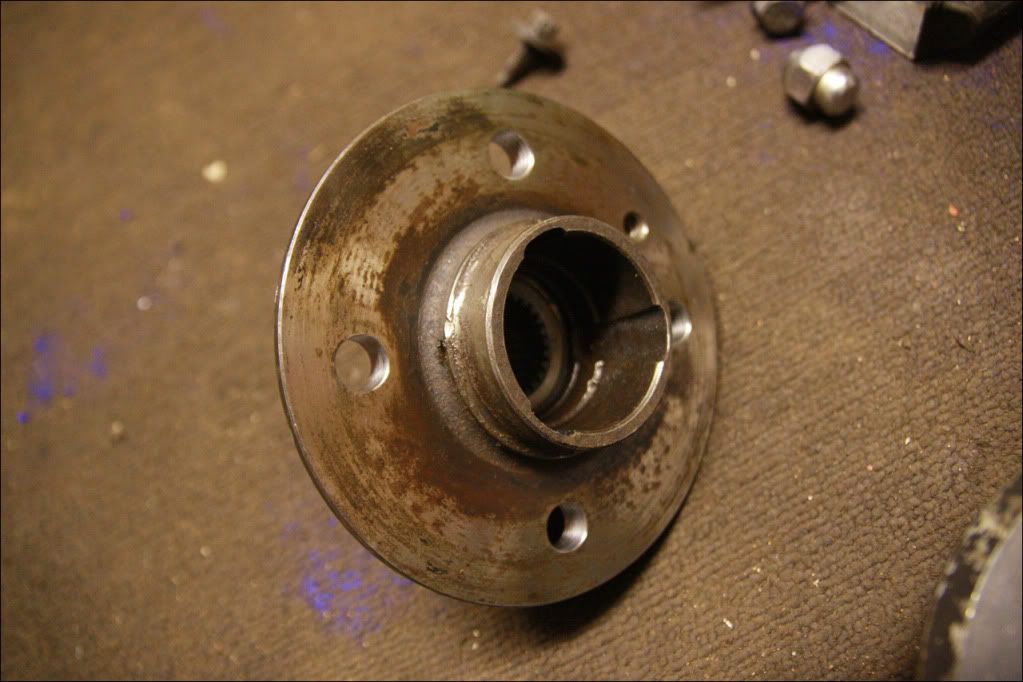
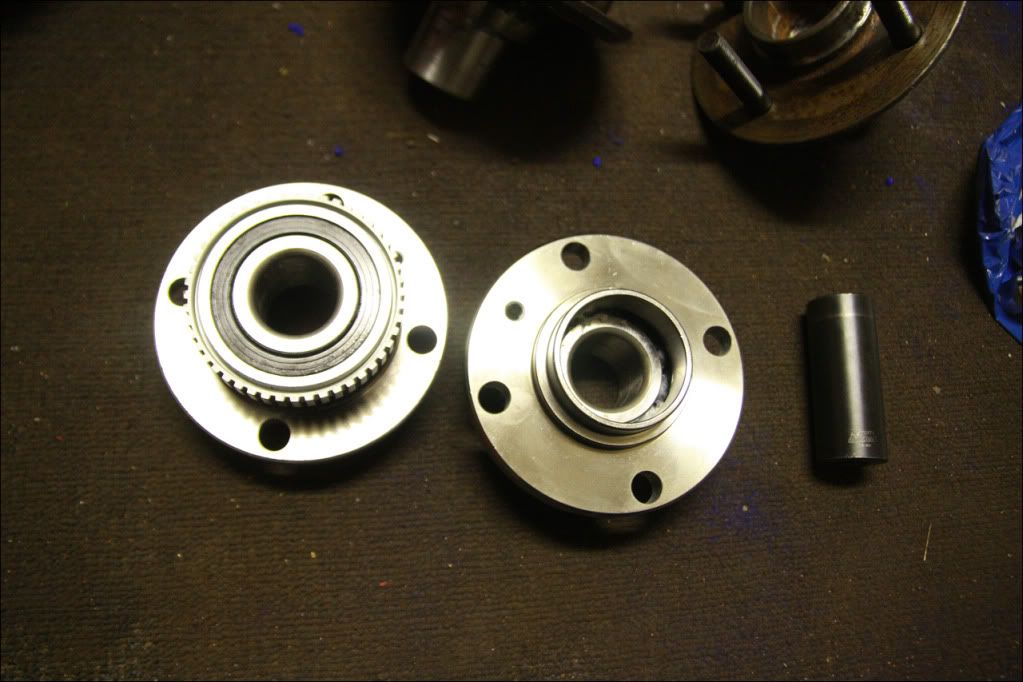
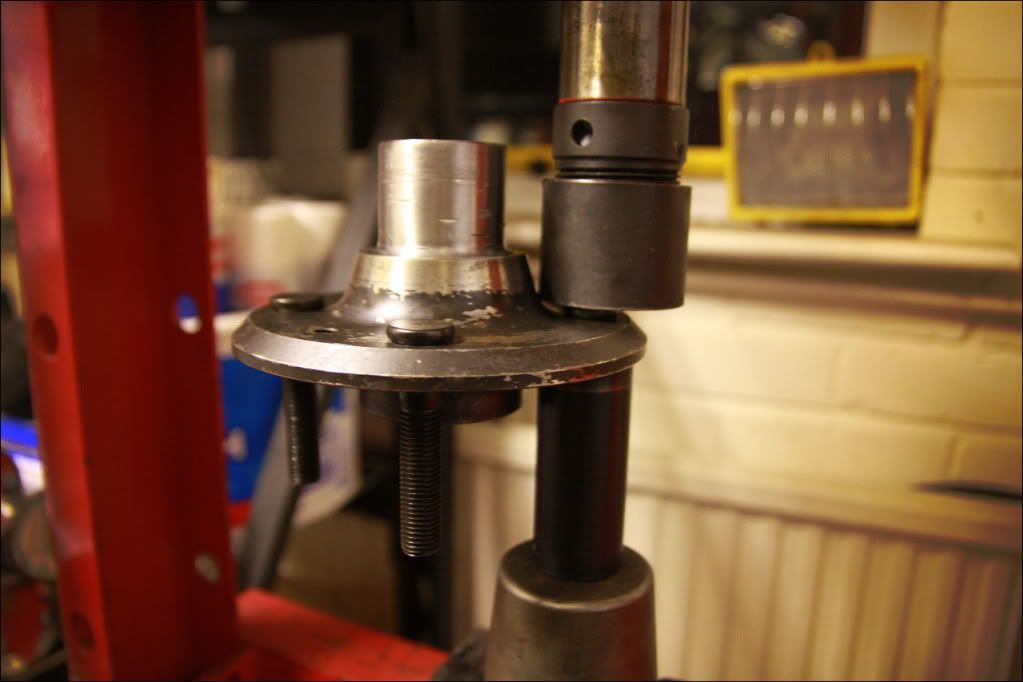
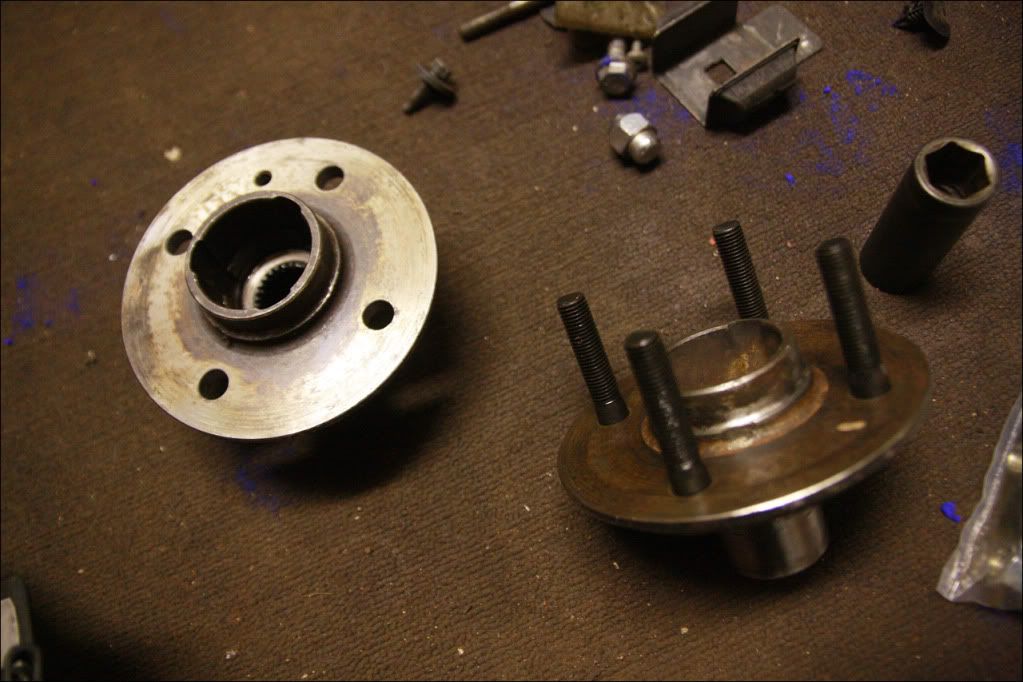
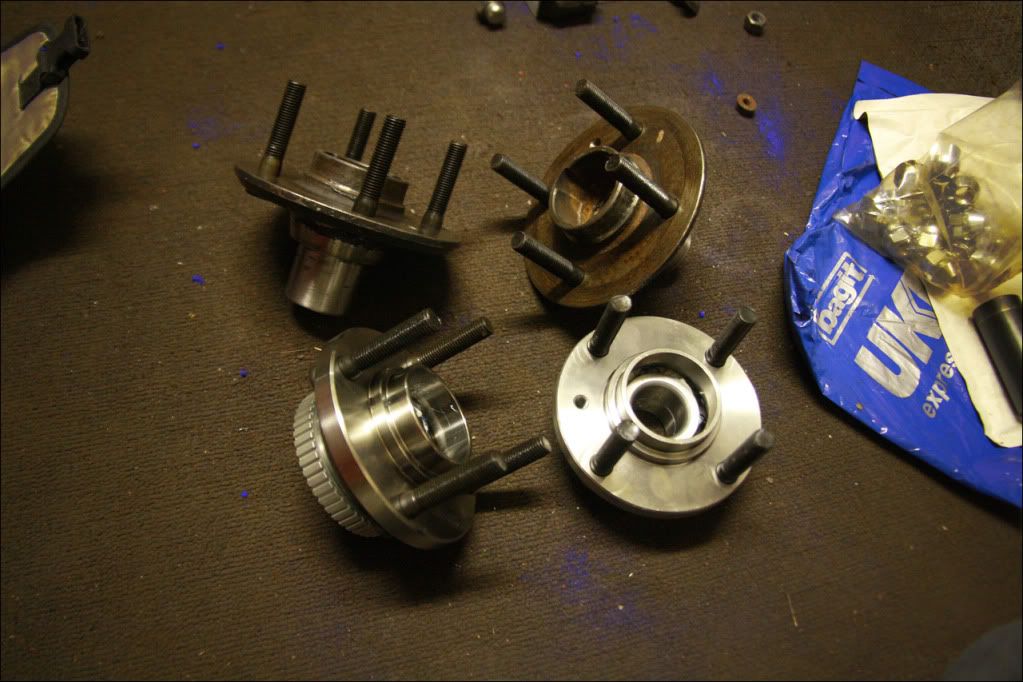
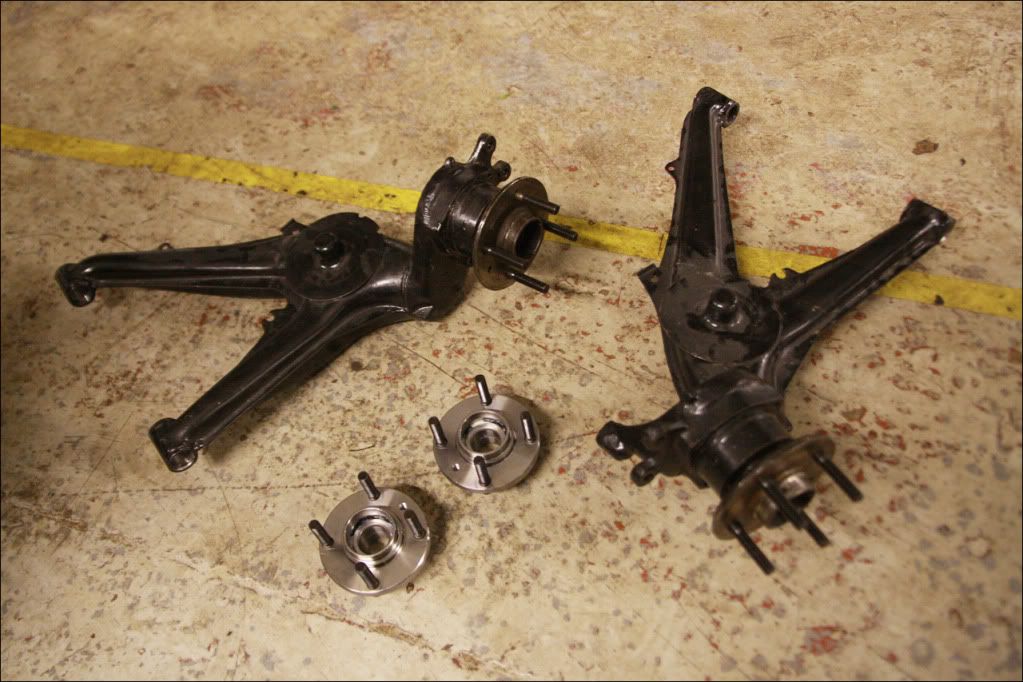
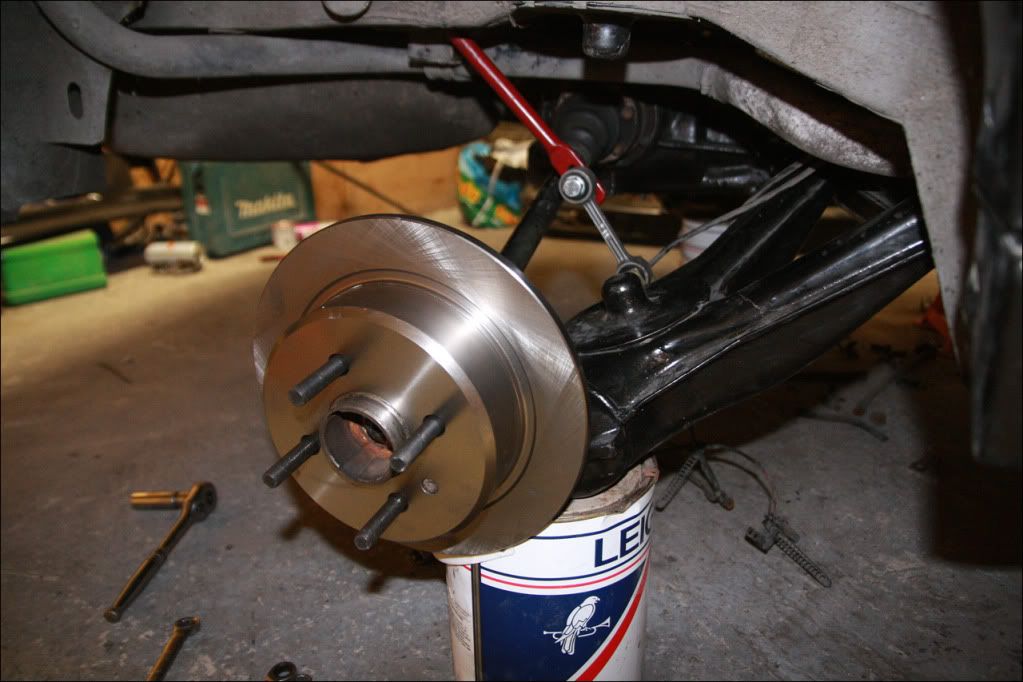
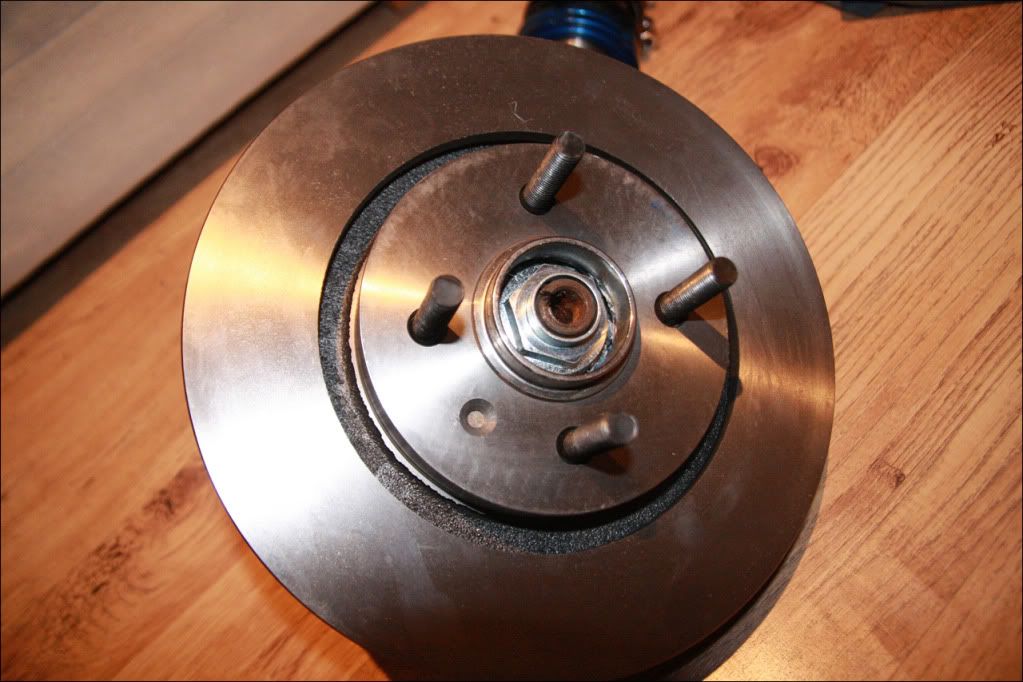
I had decided to do the same stud conversion which made life much easier on the Clio for two years, especially swapping wheels so often. Milled out the threads on the rear stubs to 1/2", then got two new front hubs/bearings (come as a complete unit) and milled those out too...
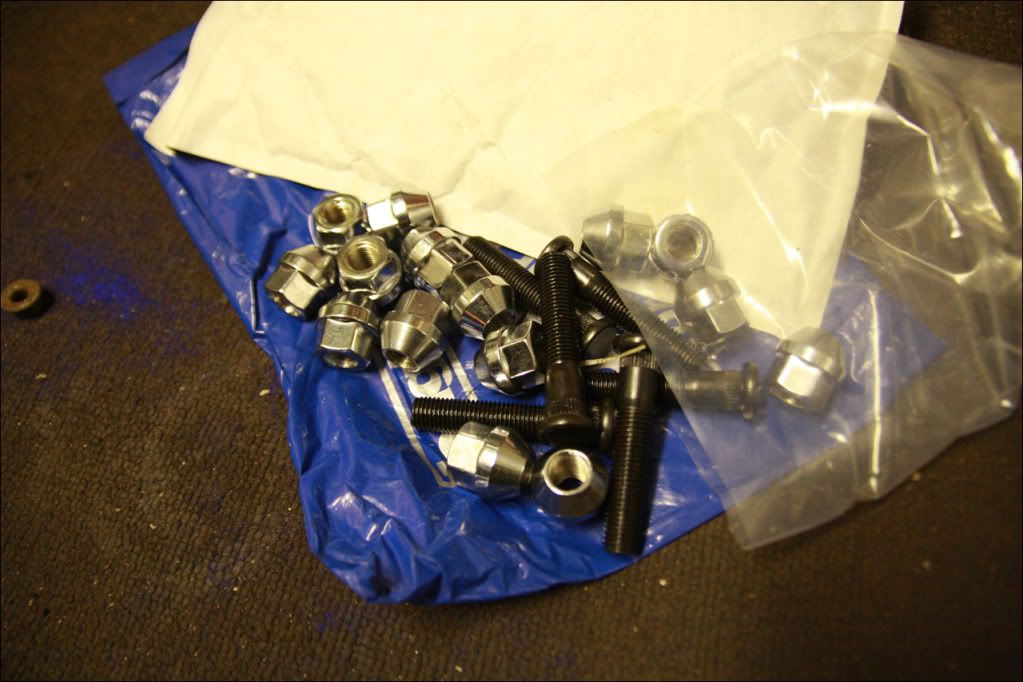
Ordered 16 x 12x1.5 studs and open ended nuts. Got the longest ones I could again like on the Clio...
Pressed them home..
New bearings fitted to the rear trailing arms, then the stubs pressed into those..
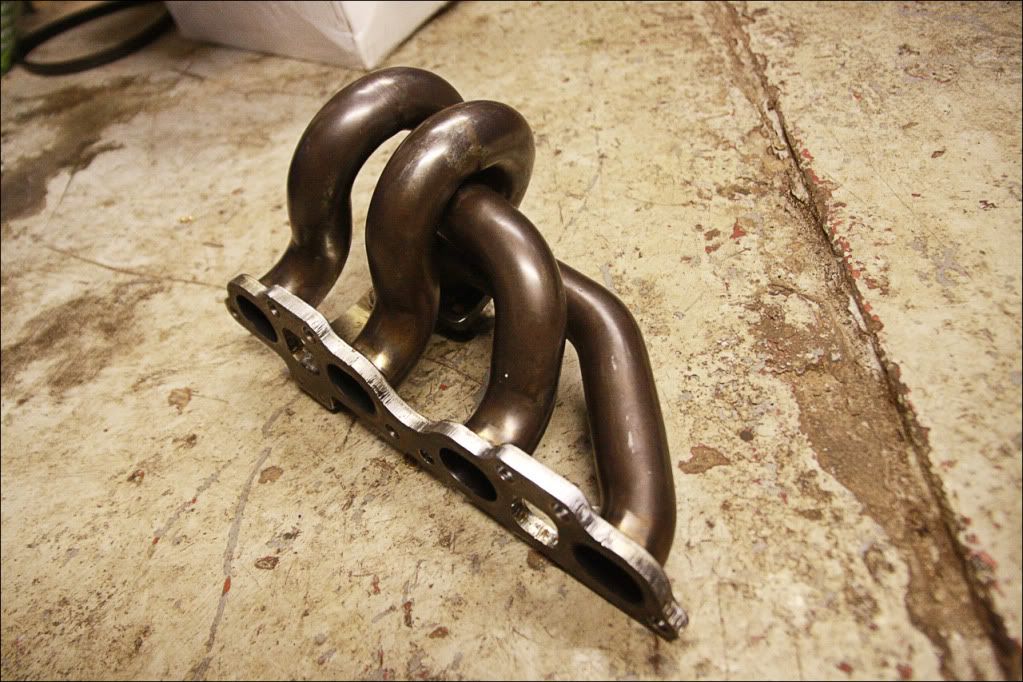
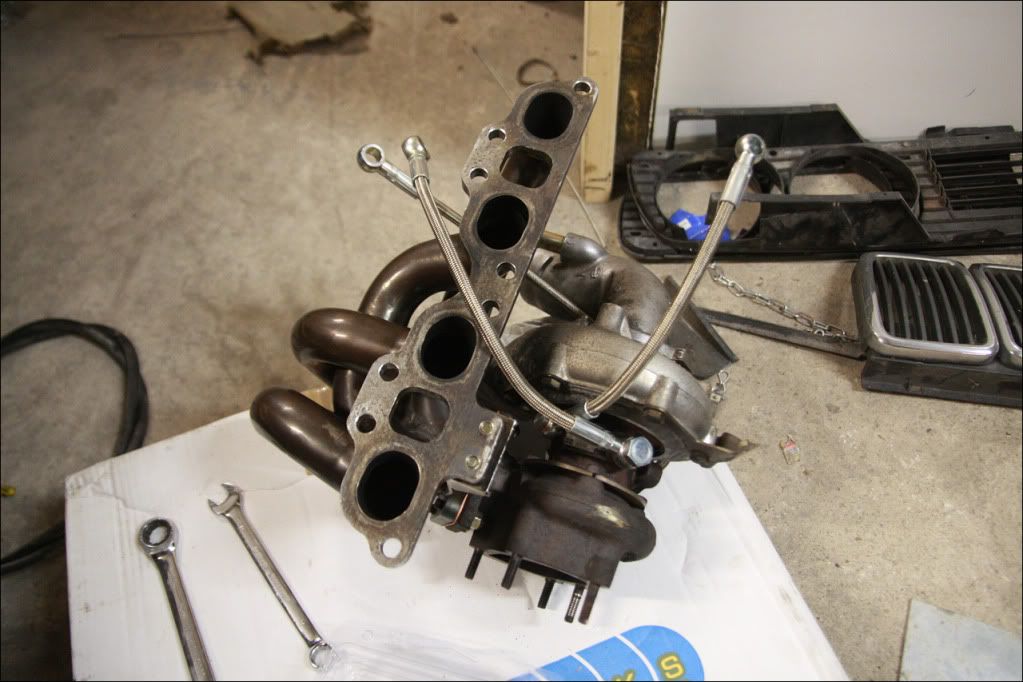
Picked up a different exhaust manifold off someone I knew for cheap...
Next job was to mount the intercooler so I could measure what pipes were required. The problem was the top of the chassis where the bolts needed to go is far from flat - so I ended up drilling the holes, then tacking a large washer in place. Shaped some sheet metal to fill the gap and welded the whole thing solid.
One side needed a bit more work than the other but got them both finished and solid. Luckily the height of the intercooler worked out perfectly to put a bar underneath for more support. Used some 4mm flat bar, drilled a hole and cut to length, then welded solid at either end..
From there I could then start to work out how much room had to be made up with hard pipe..
Simply used a bit of steel wire bent to shape to get an idea of angle, then measured it off the car.
I ended up needing a 70deg bend for the cold side, and a 40deg bend for the hot side. Before I got on with that the next issue arose..
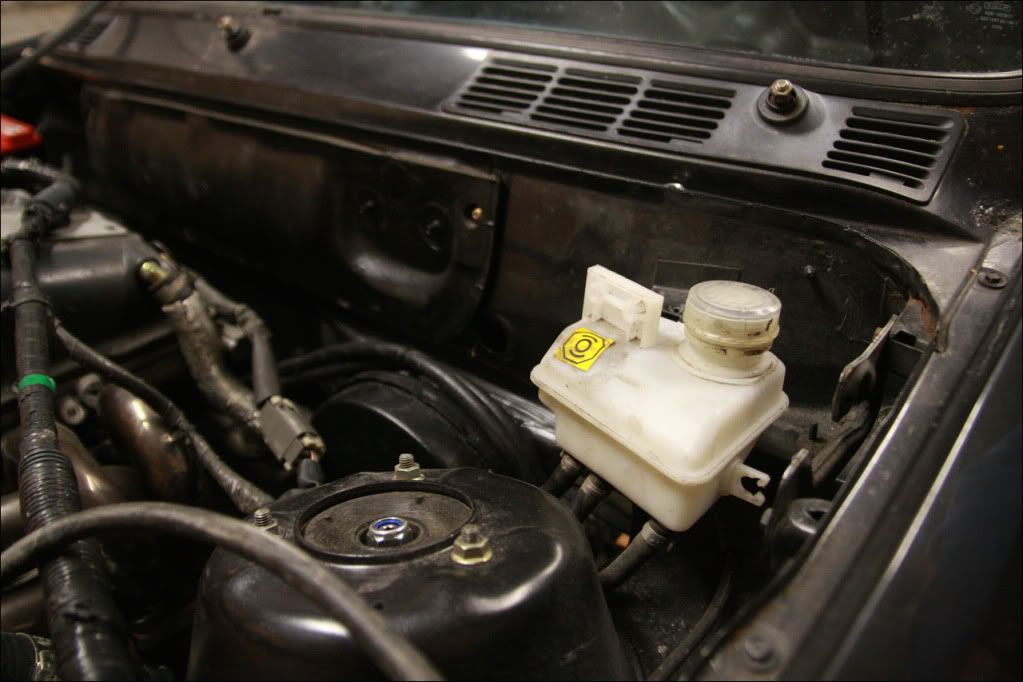
Zero clearance on the fluid reservoir with the bigger manifold test fitted, even with the servo/master cylinder moved 40mm over. I decided to stick with it anyway and remote mount the reservoir, more on that later.
I picked up the hard pipes I needed - stuck with 63mm (2.5") pipework throughout with the exception of the throttle body being 70mm and the turbo outlet ~50mm. The intercooler inlet/outlet are 63mm also which was the deciding factor. Hot side...
Cold side..
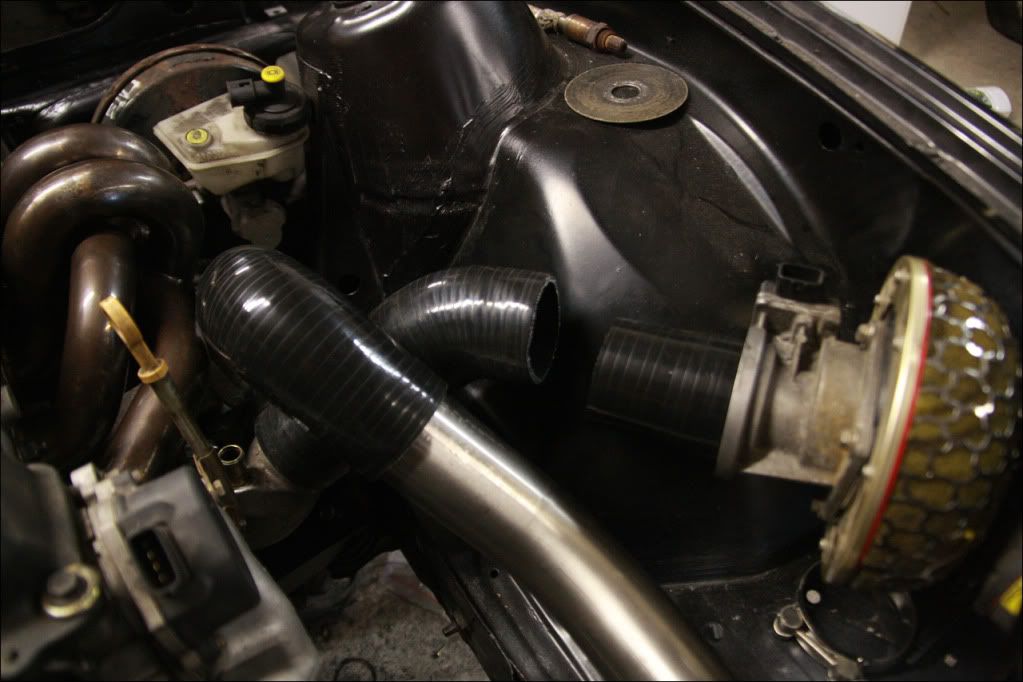
I ended up deciding to keep the HKS filter that came with the engine to get it running as its already got the MAF bolted to it and just a lot less hassle. Turns out it fits behind the headlight pretty well - although I needed to make a metal joiner between them so the recirc could be T'd back in..
25mm tube cut to length with the end opened slightly in a press, then tacked on..
The same applied for a piece off the cold pipe for the recirc valve, made it a bit longer and positioned it towards the large amount of space behind the headlight..
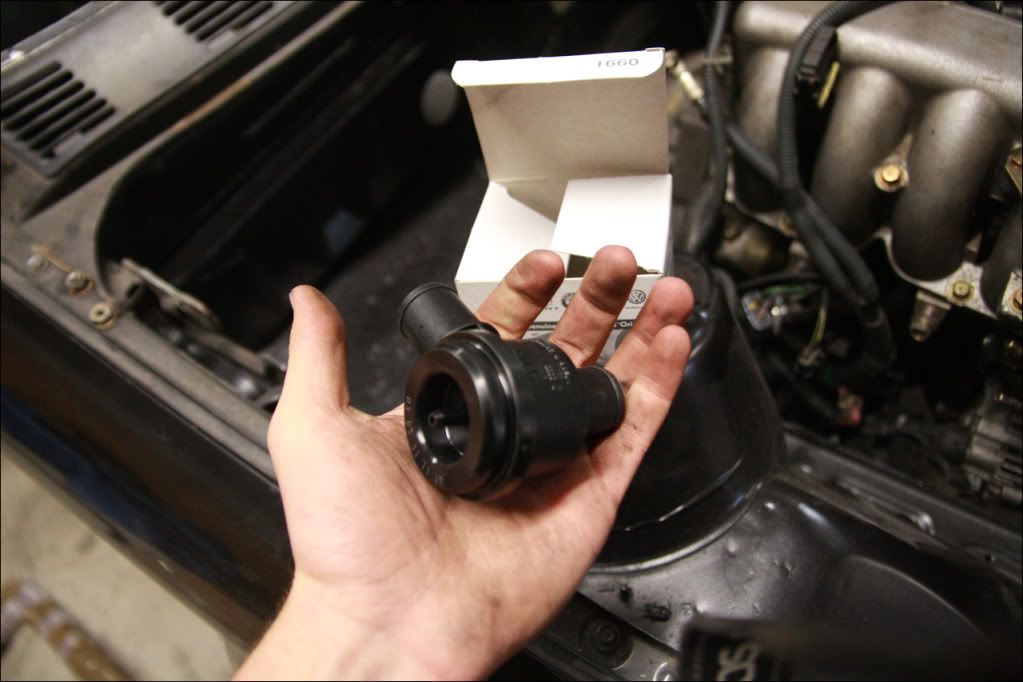
Going to be using the ever so common 710N VAG recirc valve for now..
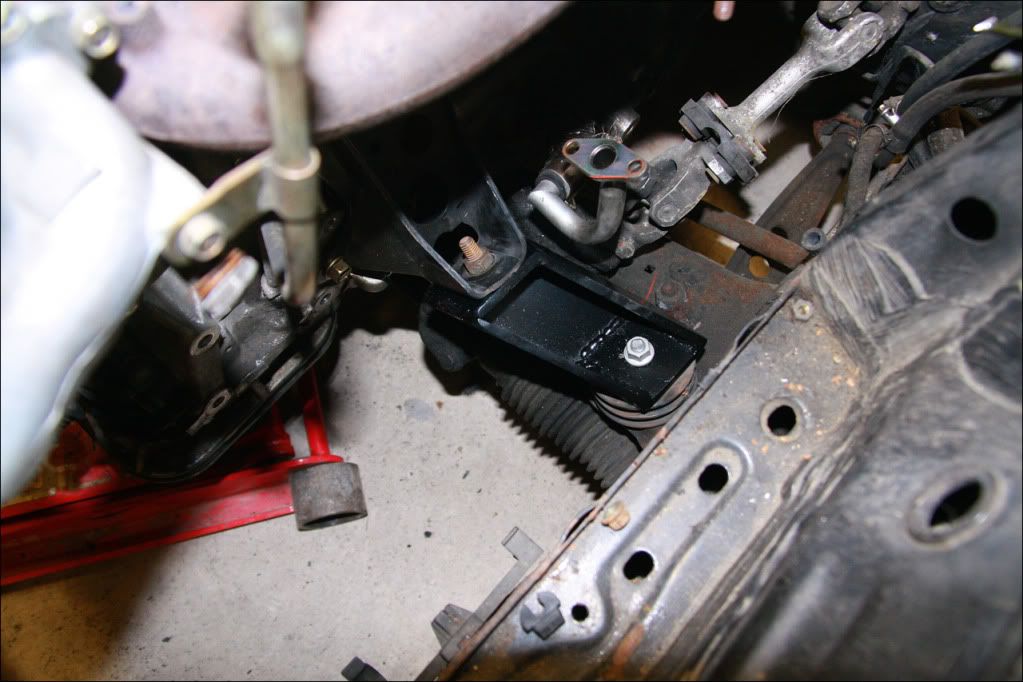
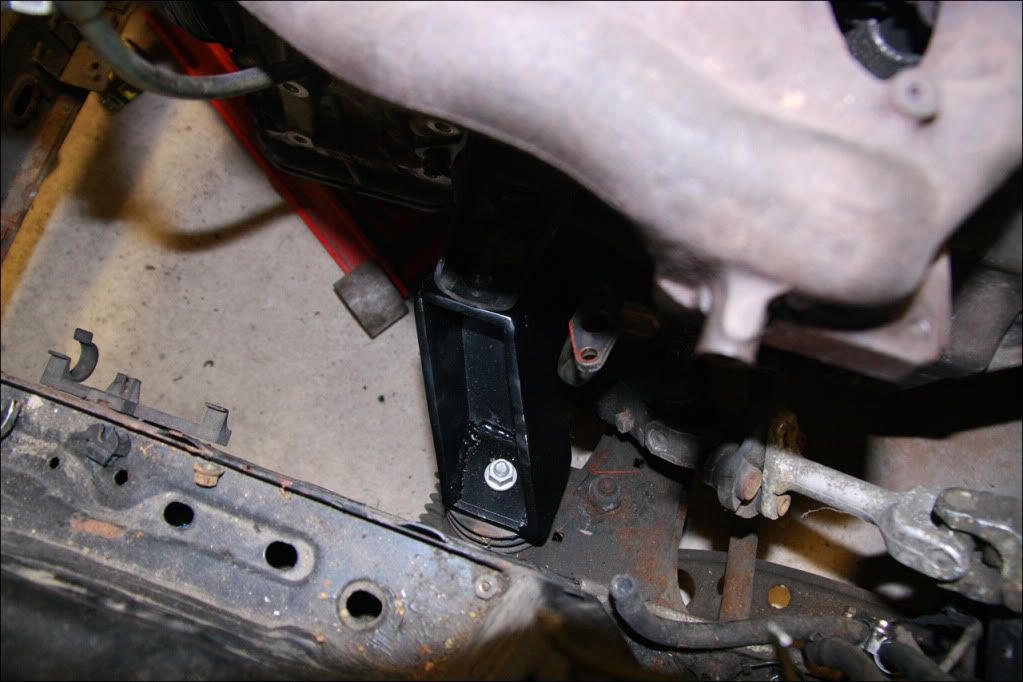
So that will be piped up once the 25mm silicone arrives. Quickly knocked up two upper radiator brackets that can be bolted on/off to remove the radiator if required..
They need a quick coat of paint but will do the job for now. All three hard pipes are going to have the ends lipped at the weekend when I make the exhaust too.
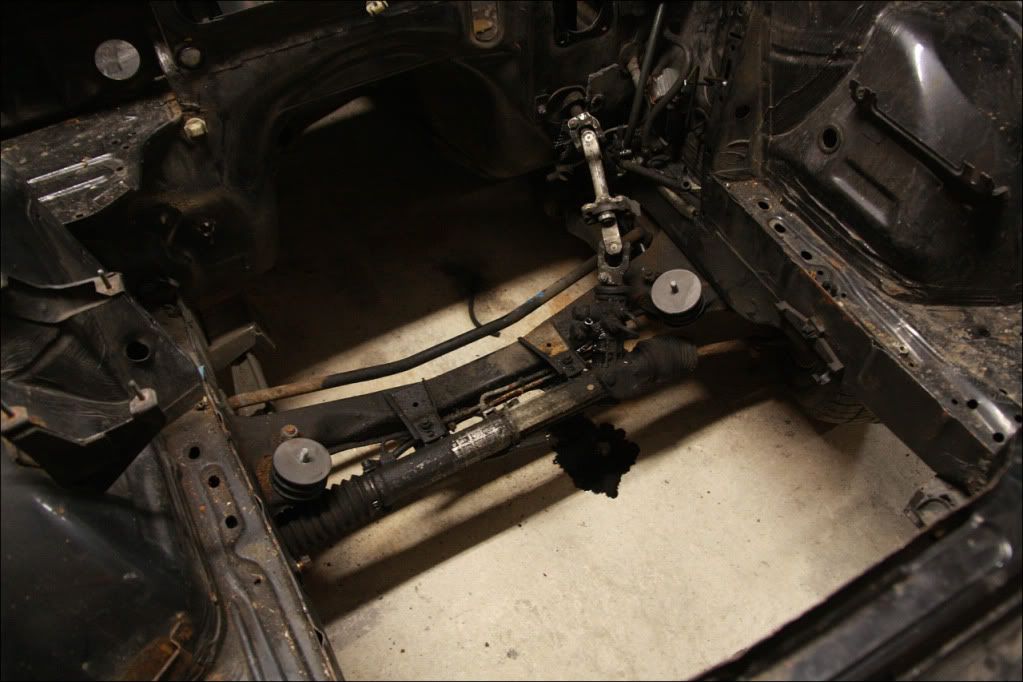
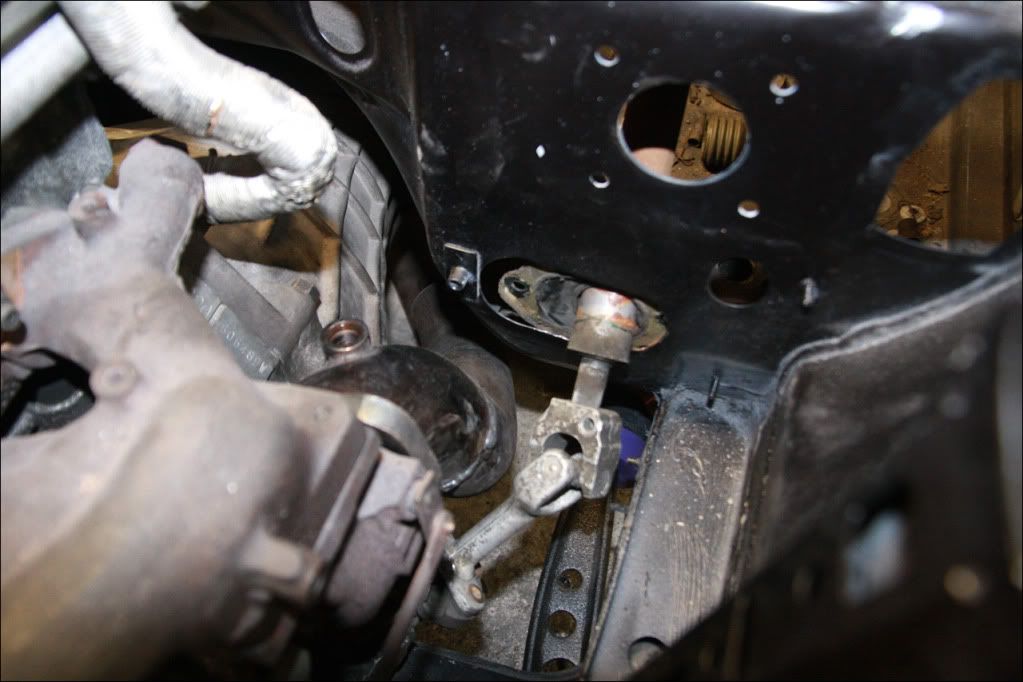
I needed to get rid of the rubber section in the steering linkage - so made up two 20mm steel spacers, then drilled out the holes on either side of the linkage to 10mm and used an M10 bolt with a decent shoulder so everything was a tight fit...
If you didn't see earlier in the thread the rubber was replaced for two reasons - first one being it was literally an inch from the turbo down pipe, and secondly they tend to give the e30 steering lots of 'play'. After that I continued to make the replacement bottom plate for the column itself, so everything would bolt up tight to the bulkhead. I had to notch the brake pedal too as the column has moved that far over - it was cut then the hole plated with 3mm steel and boxed in, so in all its probably stronger than standard..
Now that was out of the way and more parts were arriving things could start to be bolted back on. Rear trailing arms and shafts..
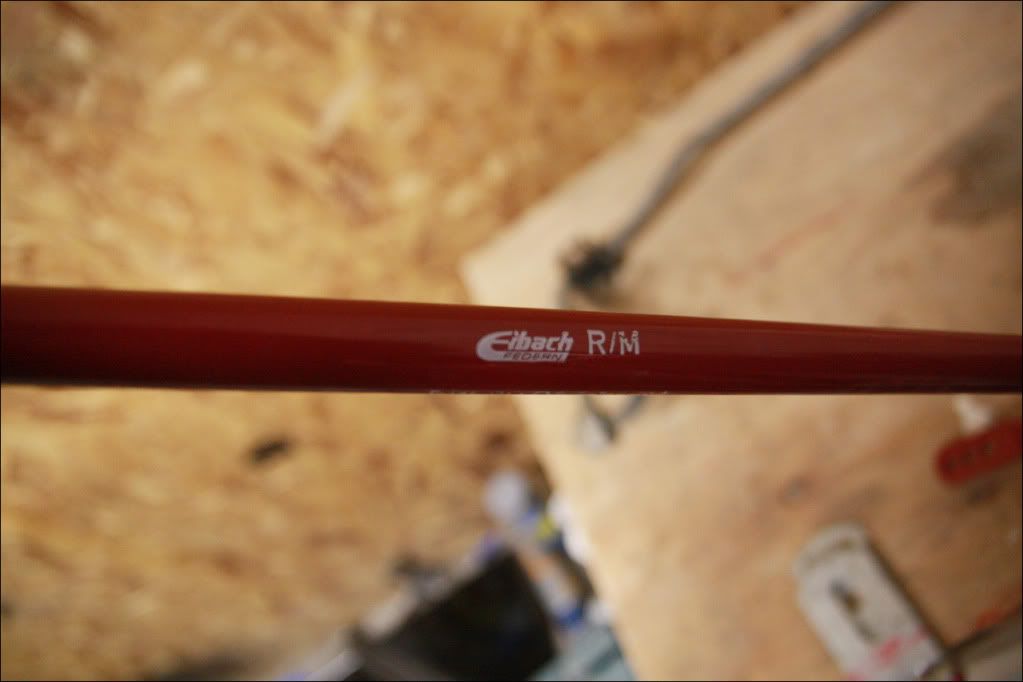
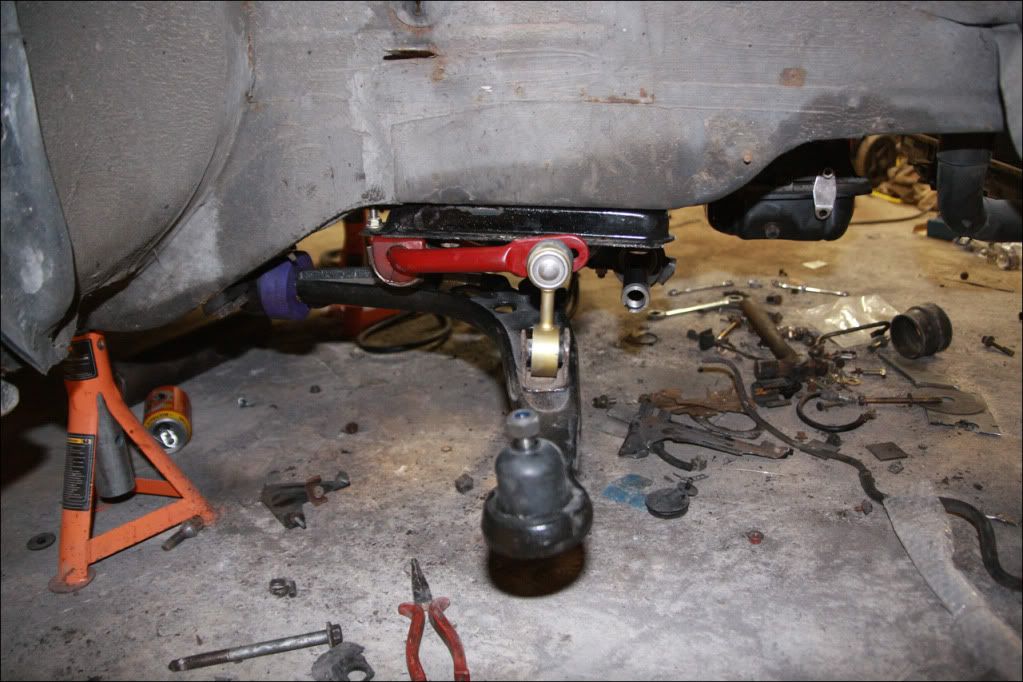
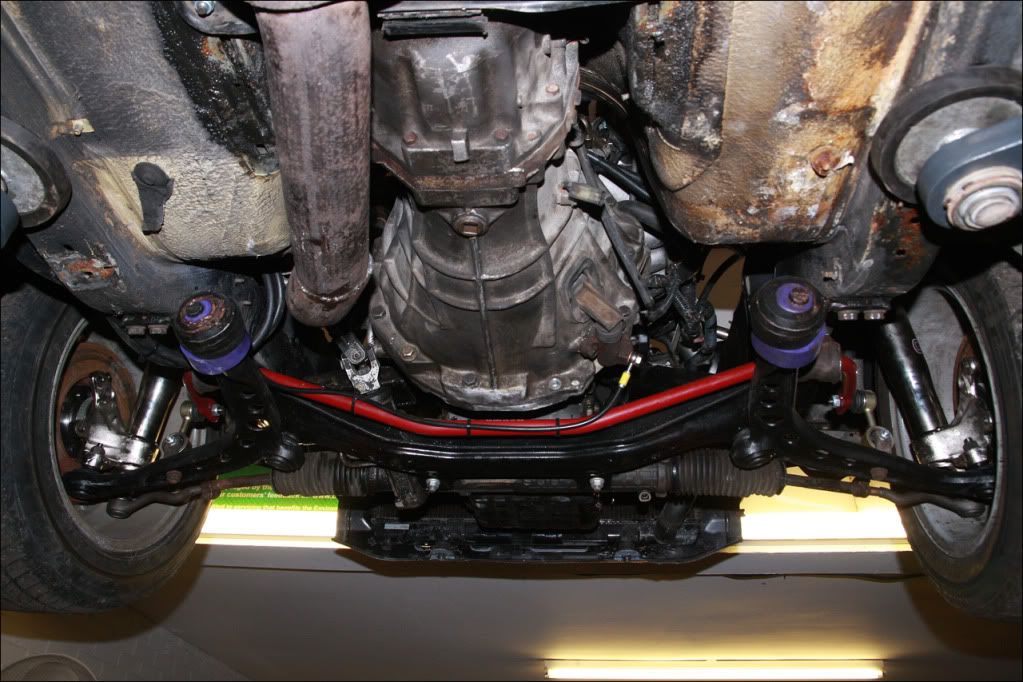
Then the new rear ARB, bushes and drop links. I ended up going for Eibach adjustables front and rear, as I spotted someone selling a brand new pair including drop links and bushes for half the retail price..
The front ARB was an absolute nightmare to do, it would have been much easier off the car. Lots of swearing later and it was fitted..
New rear discs..
Braided turbo lines with new banjo's and washers..
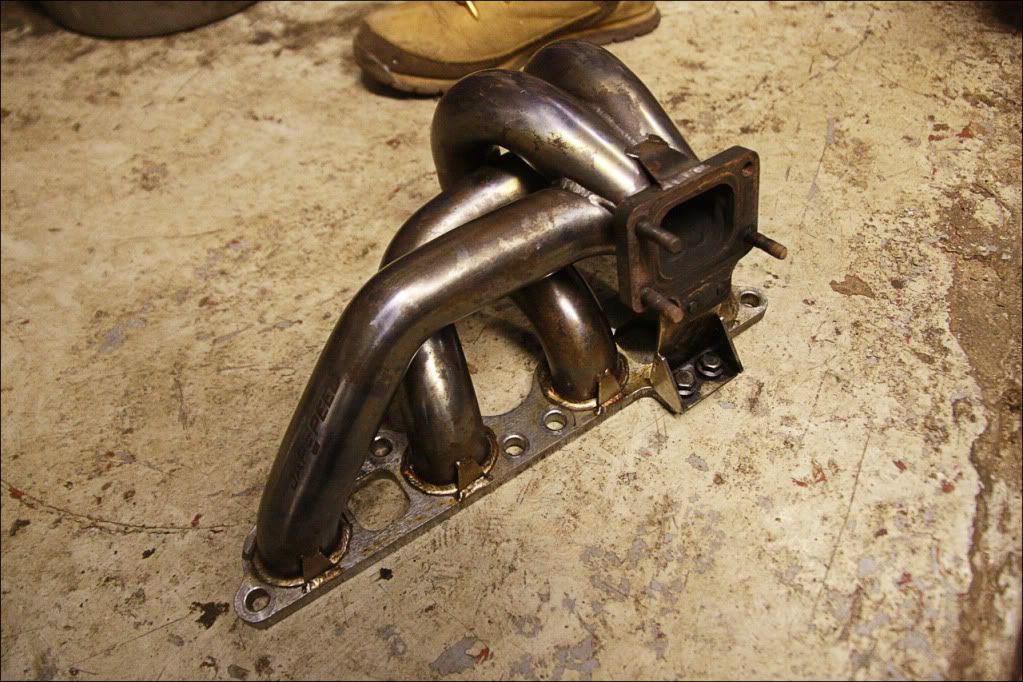
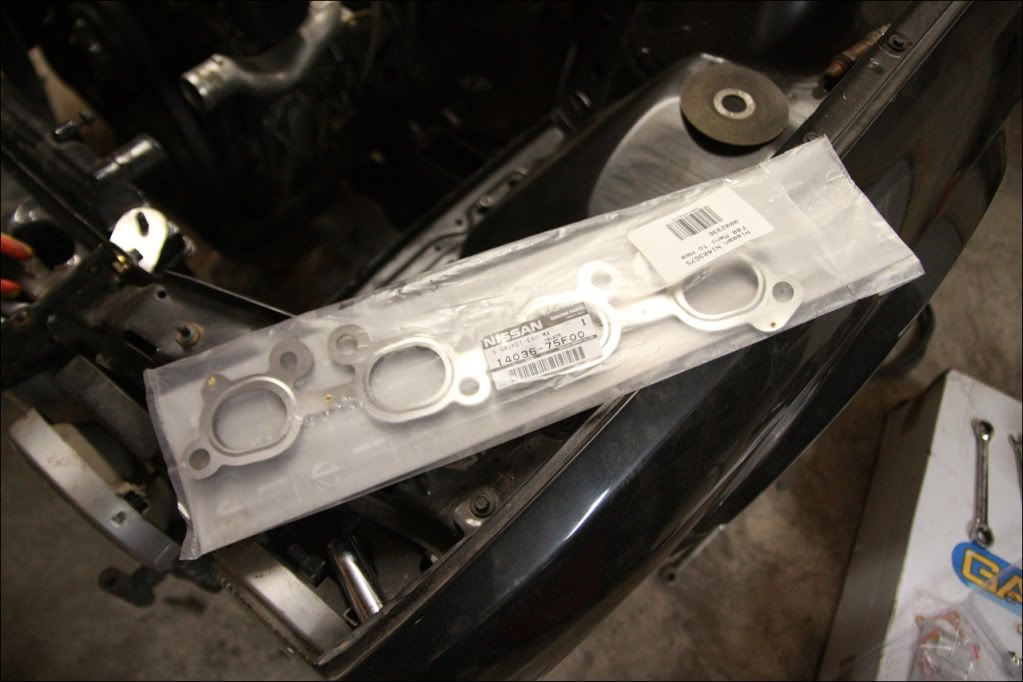
An (expensive) exhaust manifold gasket, hopefully 'do it once do it right' will be the case here..
Then fitted the manifold/turbo assembly back to the car for the last time and torqued it onto the head in the correct order. Connected up the turbo lines to the block with new banjo's and washers again..
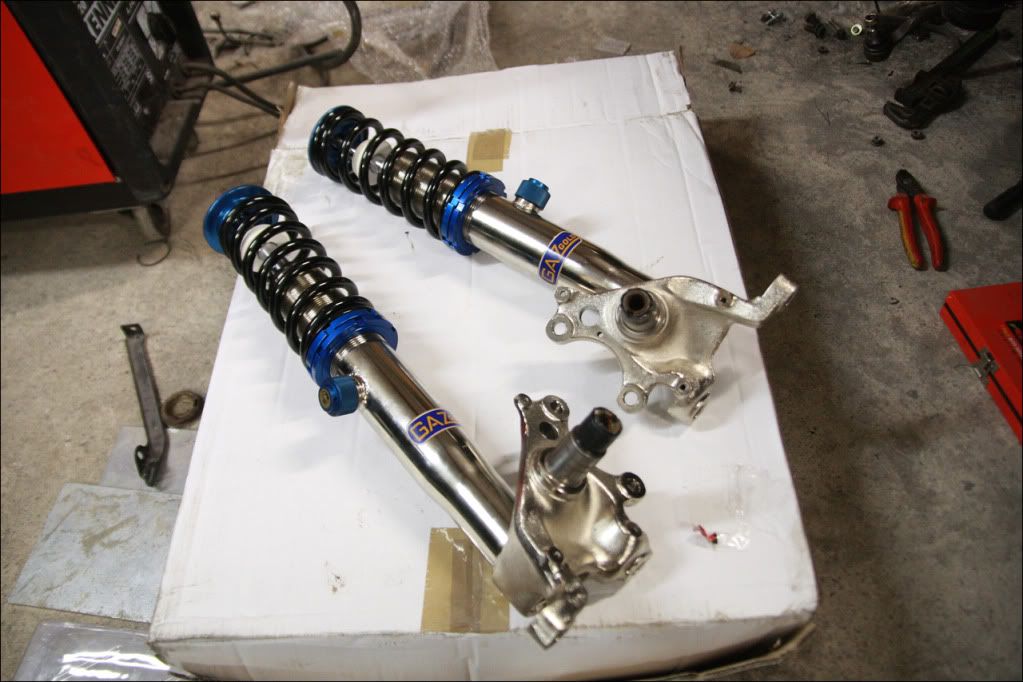
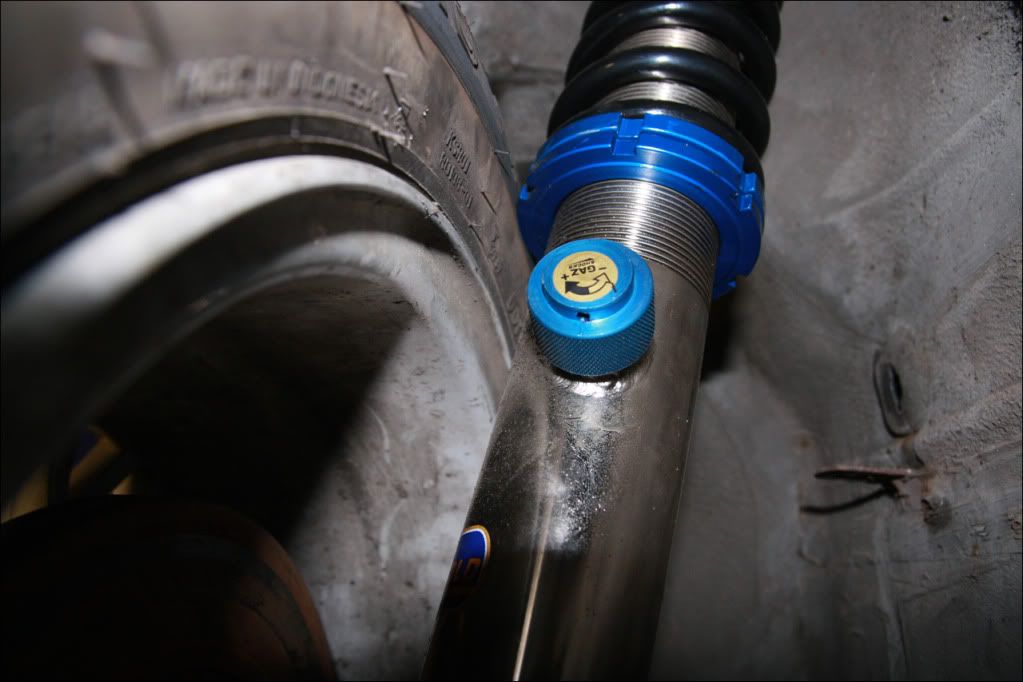
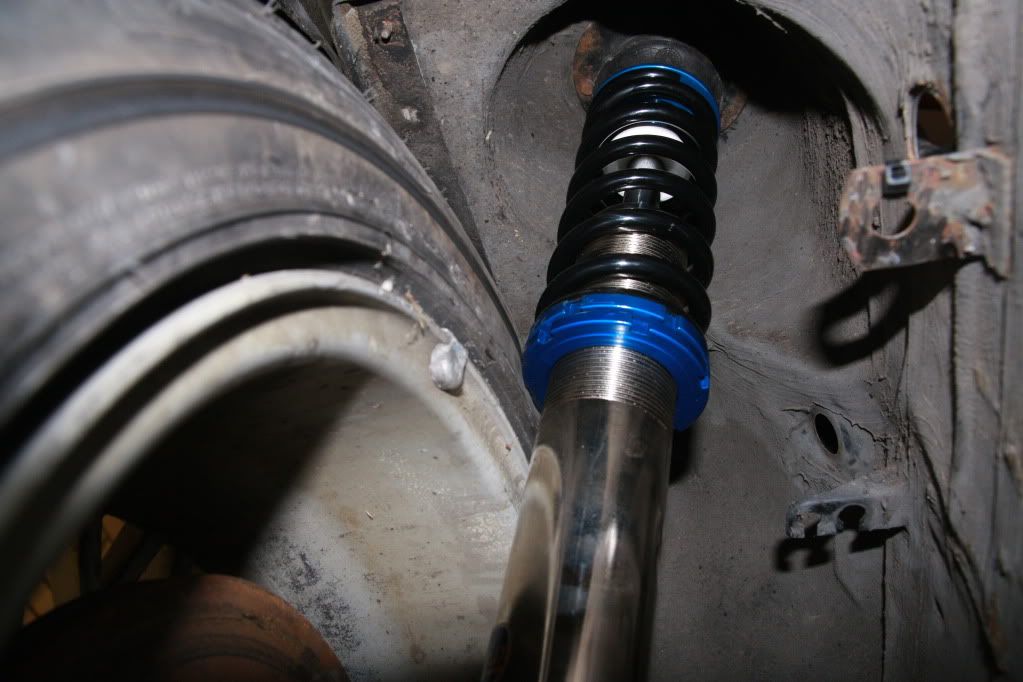
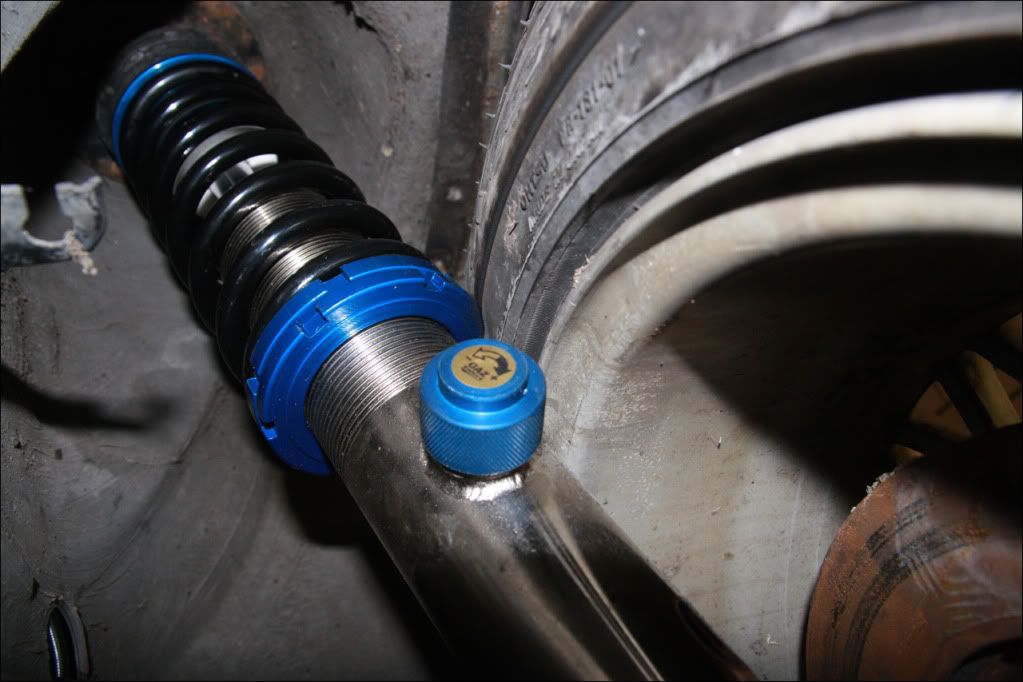
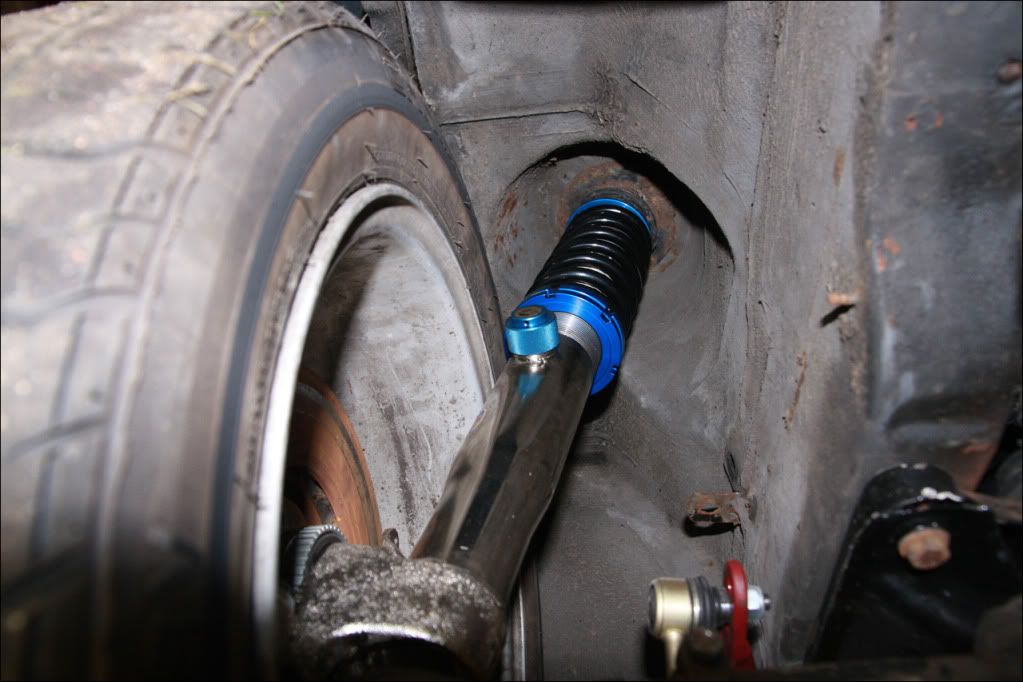
Now for the suspension. I originally was going to buy KW V2s, which were rather pricey at £1200 with adjustable height and damping. I then asked about how soon they could be turned around, to which 4 weeks put me off.
I ended up contacting RPM/Jimmy on here about Gaz, as their suspension is well tested and used on various E30s from what I had seen. I was impressed with the service and advice that Jimmy gave - so I made the order. I ended up going with some Gaz Golds - along with coilover rears instead of spring/damper, and sprung to the weight of the car/engine with it being stripped and having an engine in that's lighter than the original iS engine. The best part was I sent my donor hubs off and the coilovers were delivered within a week. Very helpful company and even better being UK based I guess.
Fitted them onto the car with the standard top mounts for now, until I decide what I am going to do with those. Not fitted the rears yet as I am waiting for rear top mounts to arrive (hopefully before the weekend).
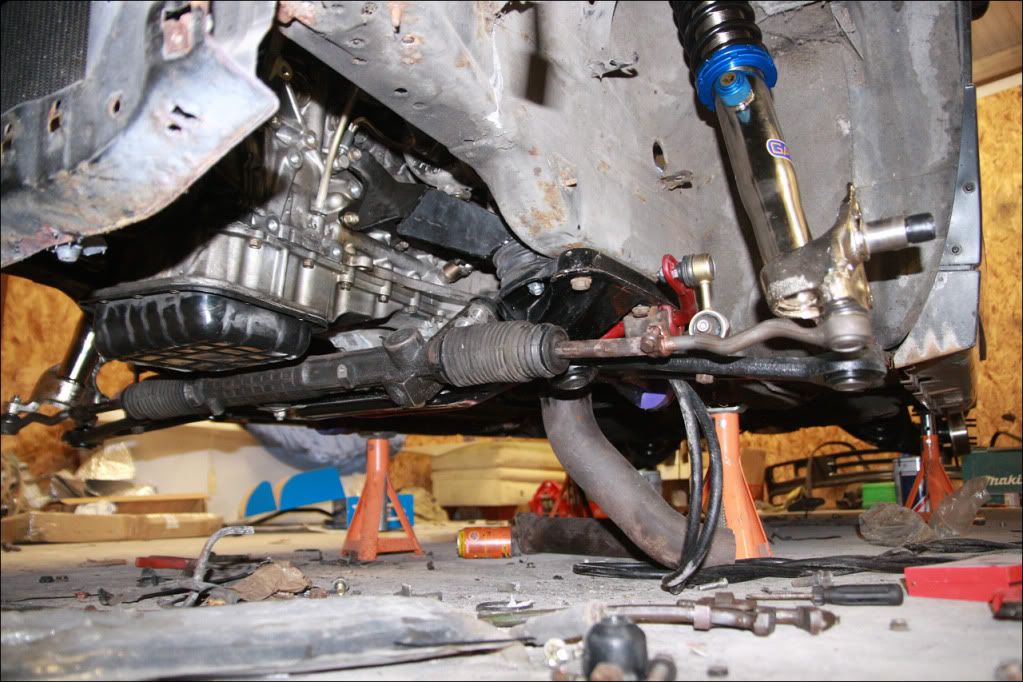
The last part of the front subframe setup was to fit the E30 arms onto the E36 rack with the gaiters and new track rod ends. After a lot of heat, swearing and effort the old track rod ends were out and new ones in...
Everything was then bolted up tight on the steering column and bulkhead, steering linkage clamped onto the splines at either end and tested out. Happy with the clearance and how it turns from lock to lock...
Video:
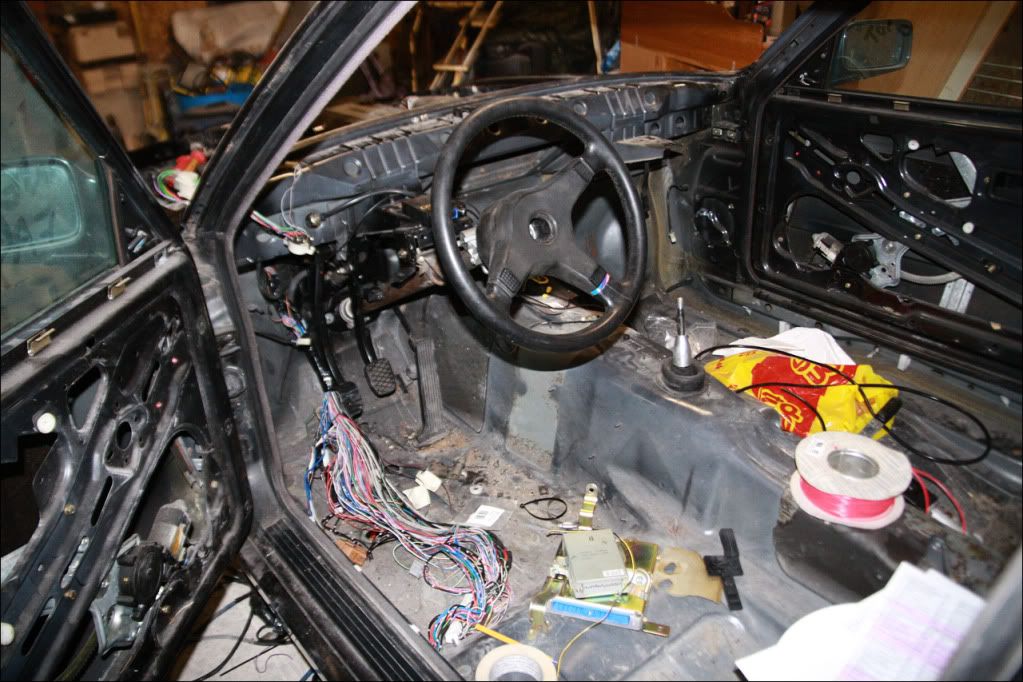
Then that's about up to date. I fitted the S15 engine loom earlier and brought it through the standard E30 location. There are no BMW looms on the car anymore, so I am basically just wiring up the bare minimum to make it run, have an indicator and working brake lights for now.
Started to connect up the wires I need for it to run and then left it for the night. Will hopefully get it fired up in the next day or so.
Well after connecting the required wires up in the loom, it came to life - Only for a short while mind as there was no coolant in yet, oh and no downpipe..
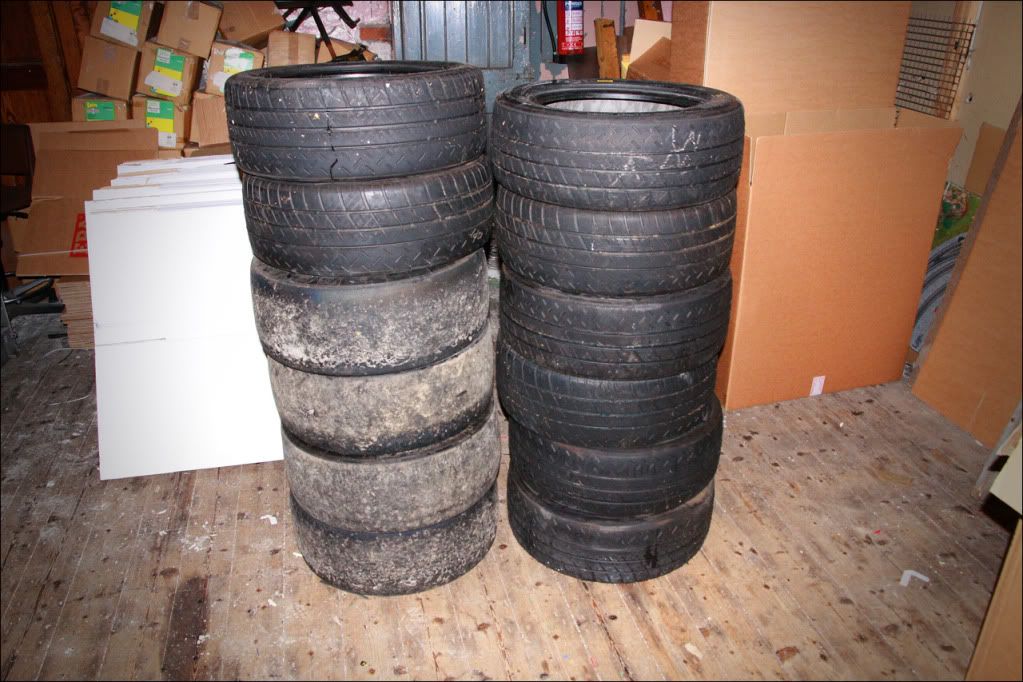
Gained some more tyre stock a few weeks back - 8 x Michelin Pilot Sport Cups in 205/50/15, and 4 more slicks to go with the 4 I already had from the Clio.
Obviously I didn't make it to Oulton Park last Friday due to various issues, mainly down to suspension. After originally fitting it I never bothered to fit the wheels as I didn't need to move it at the time, but the weekend before Oulton I did. Fitted DS2500s to the rear with refurbished calipers and new discs...
It only needed wheels on to be moved now - and as I was taking it to get the exhaust made on the trailer, I went to fit them. Although, the car would hardly move.
It turned out the front wheels were rubbing on the adjuster rings on the front coil overs, so it was pretty tough to get onto a trailer. The rears are spot on, no issues at all and plenty of space. I had some 5mm universal spacers that I thought would sort it for the time being, but once it was up on the ramp it was apparent it needed more than 5mm, well, more than 10mm!
And the side with a 10mm spacer..
Needless to say I wasn't impressed. The wheels were bolted up with the standard 318iS discs as the new front brakes had not arrived at the time, but that would make no difference anyway. I expected standard wheels to fit at least, considering I have a number of them and I had spec'd the front brakes to fit under them specifically.
I posted a thread up on here in the technical area, and people were basically saying that you have to use spacers. After a few dicsussions with RPM (who I got them through) I was told they should fit WITHOUT spacers, as even Jimmy had ran standard wheels with Gaz coilovers on an e30 without spacers. I was also told by Gaz I should have been supplied 6" springs, not 9" which are on it. The front shocks have since been removed and sent back to Gaz to be replaced.
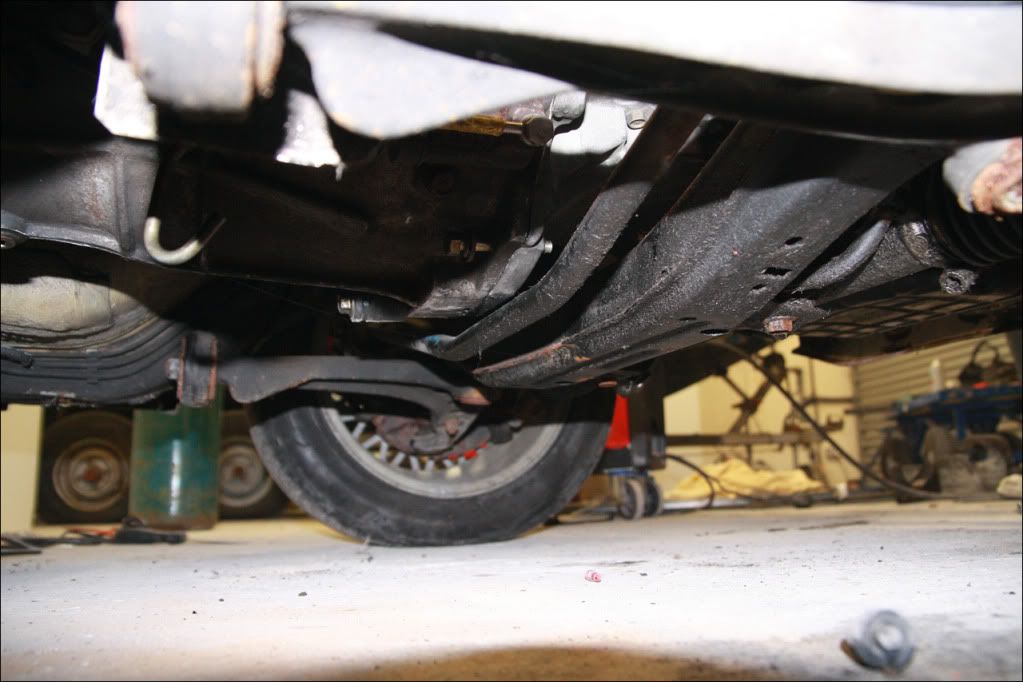
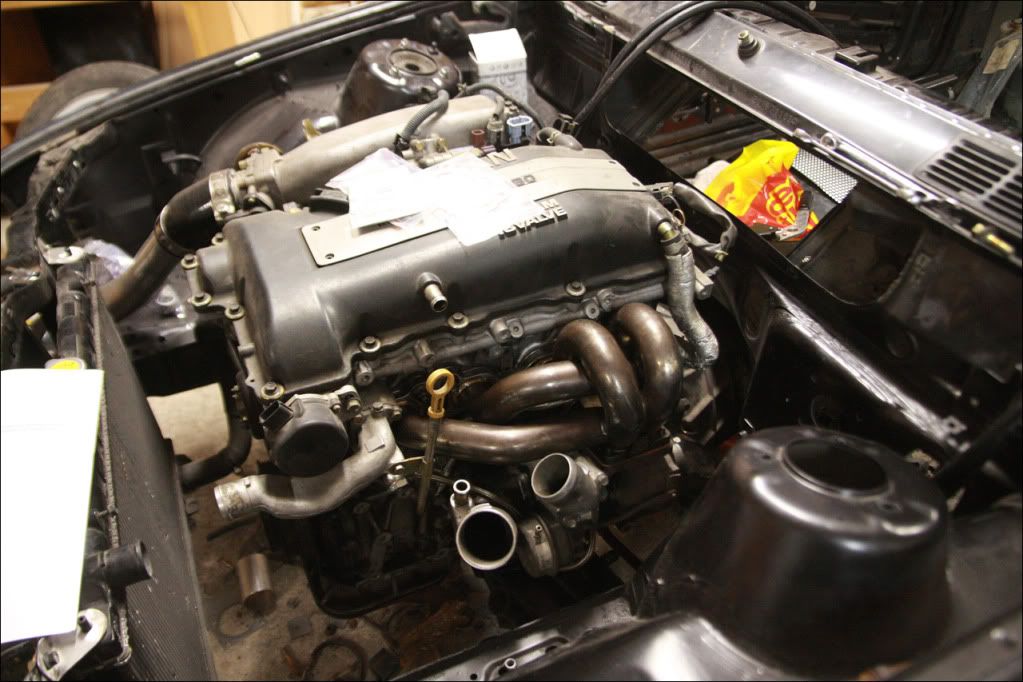
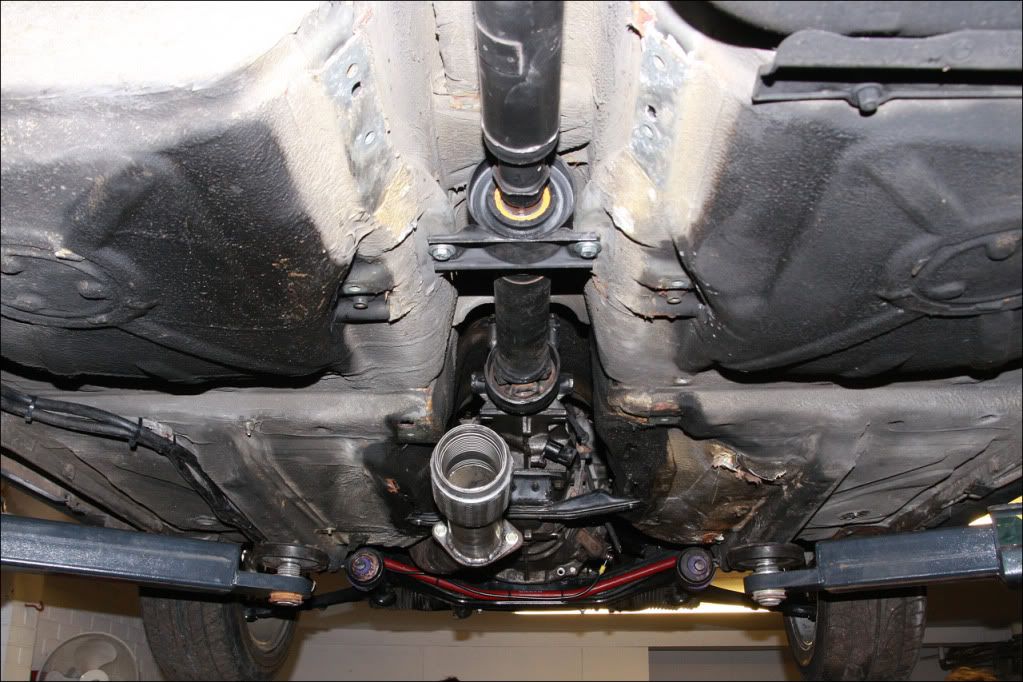
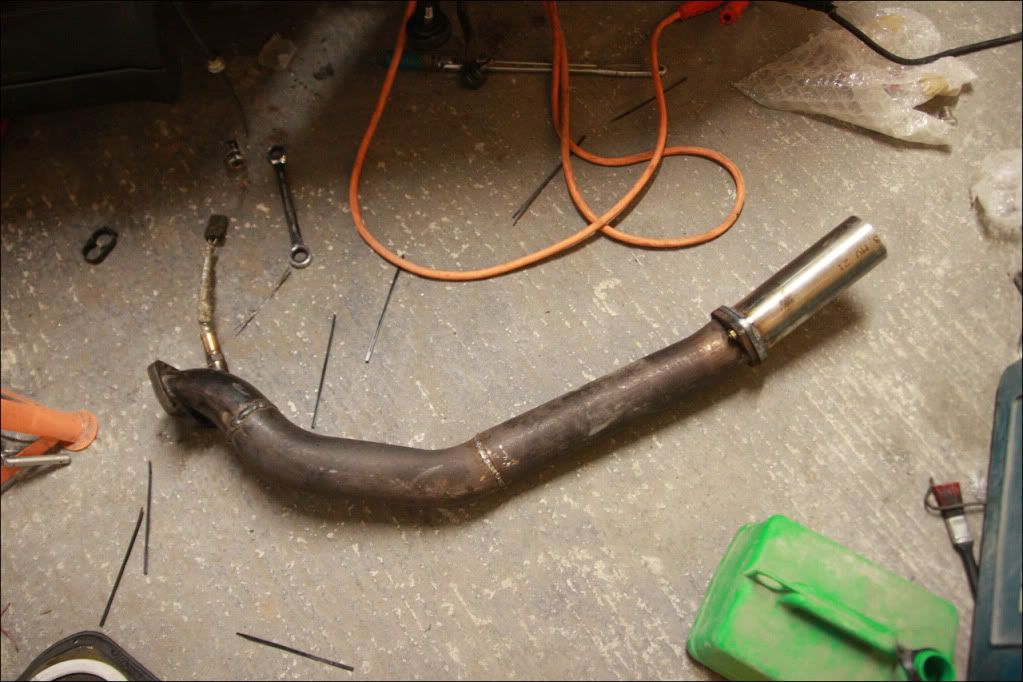
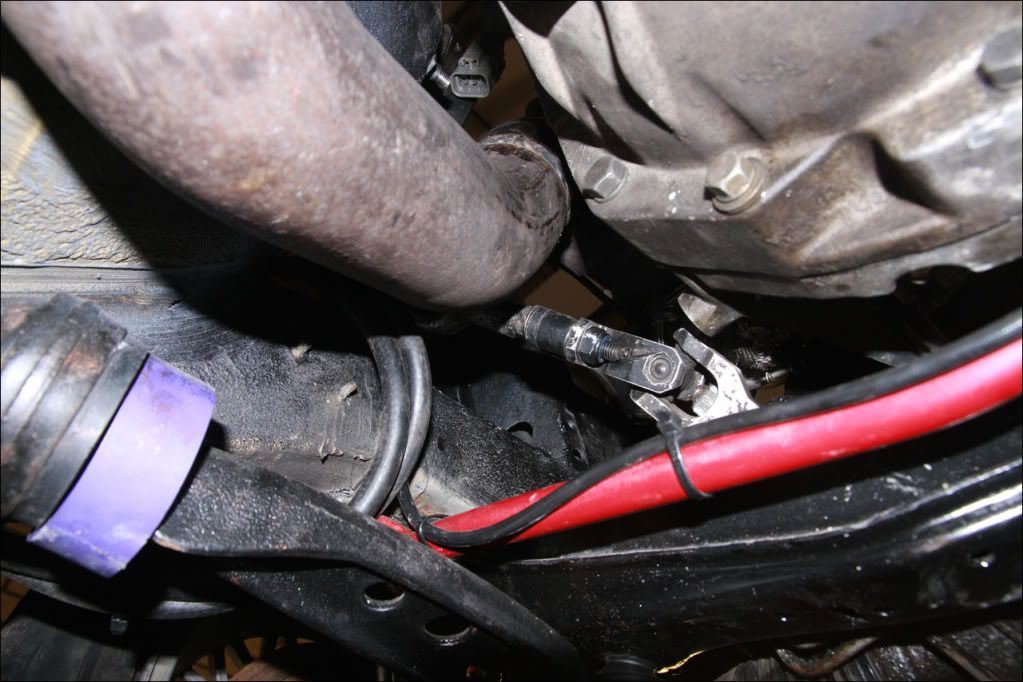
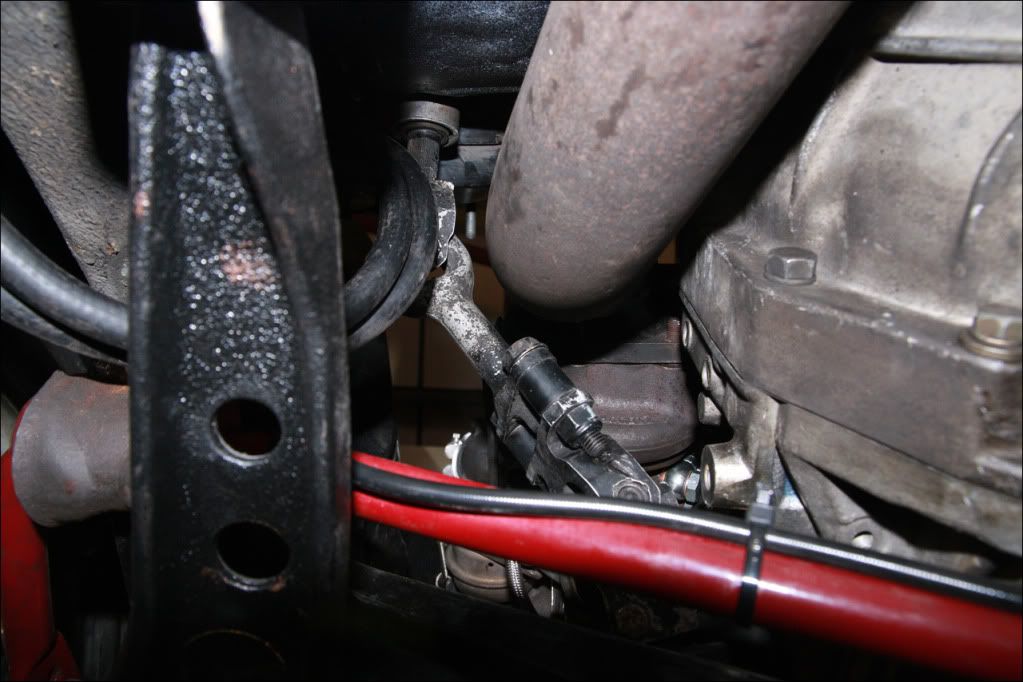
Considering the messing about that went on with the wheels, the exhaust never got made (another reason why Oulton was cancelled). Although, I managed to get the downpipe finished, which now comes out under the gearbox in the transmission tunnel - pretty much the stock E30 location..
Nice amount of clearance on everything, including the steering linkage..
The last job before bolting it up with the gasket is to make a brace from two of the gearbox bolts to take some of the strain off the manifold/turbo - I will probably get that sorted in the next few days.
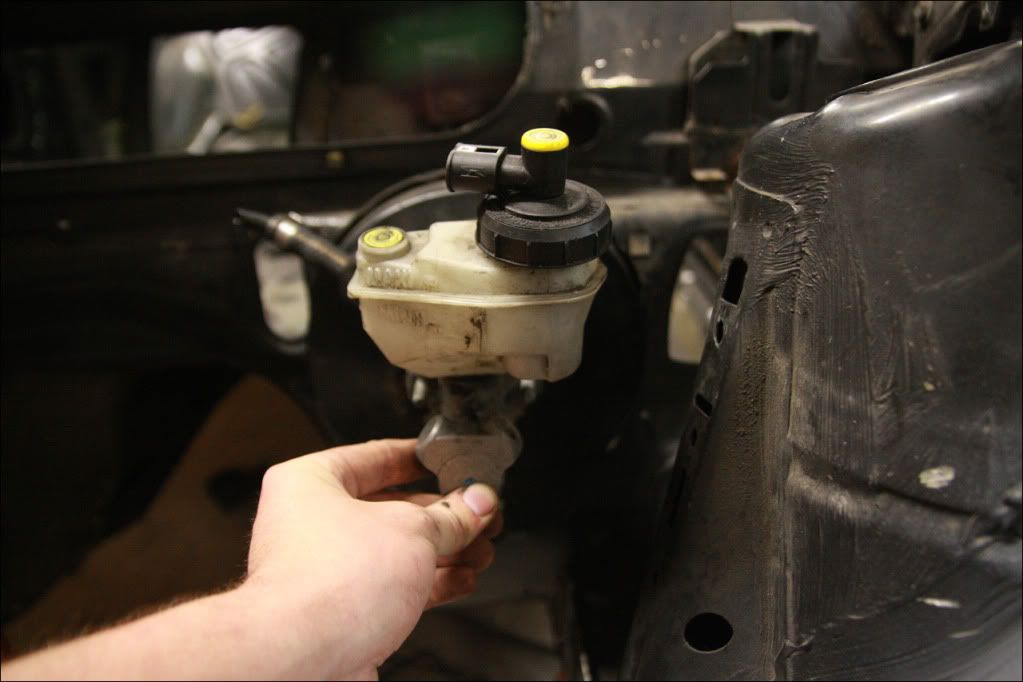
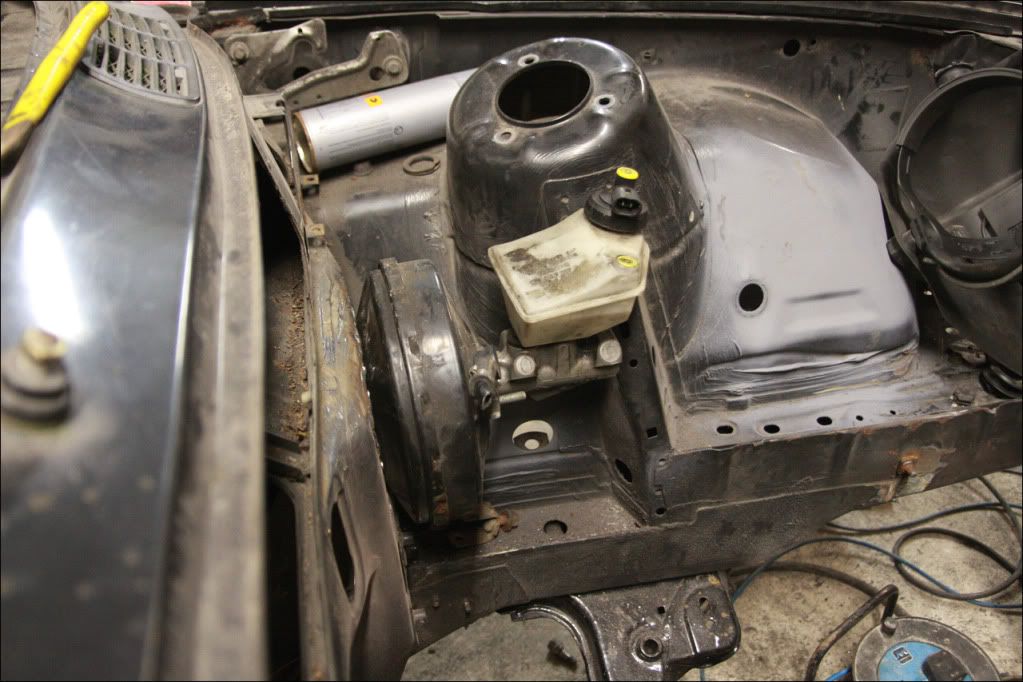
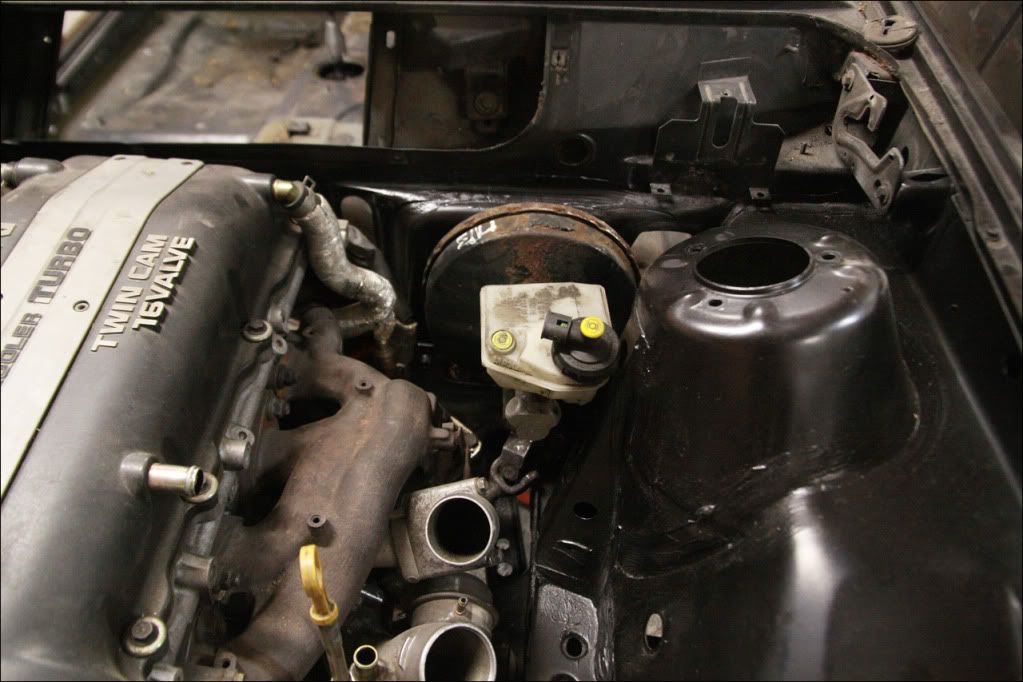
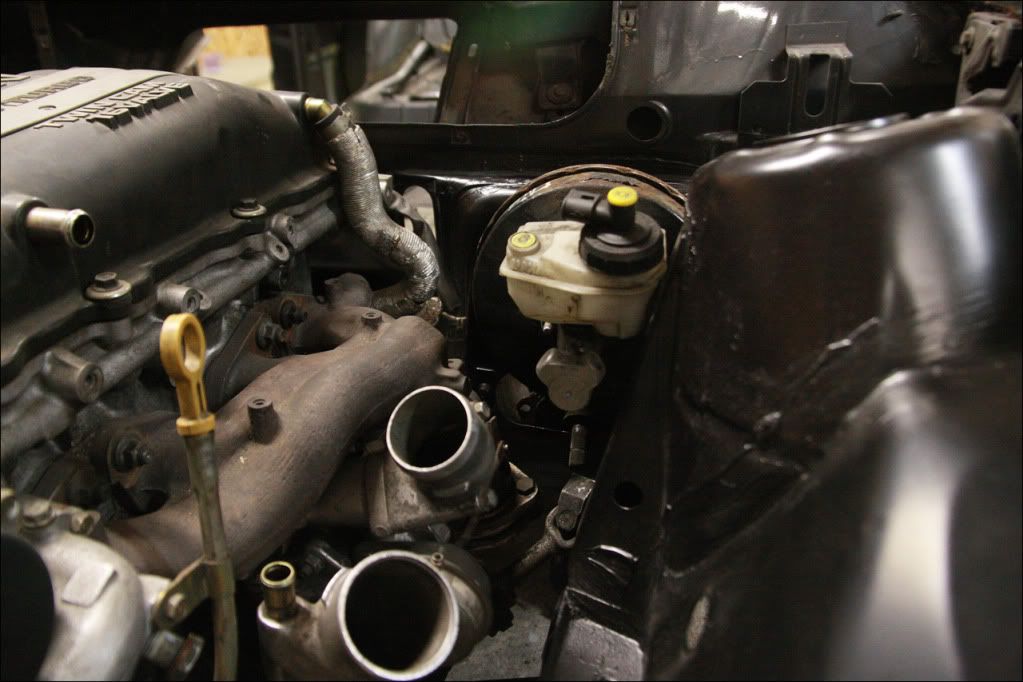
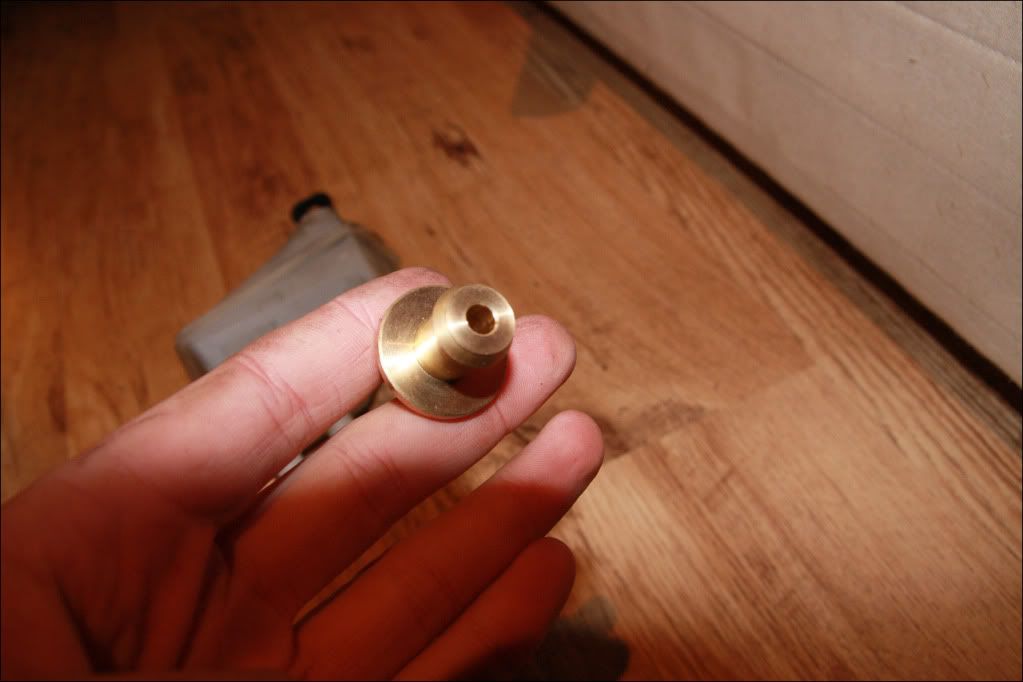
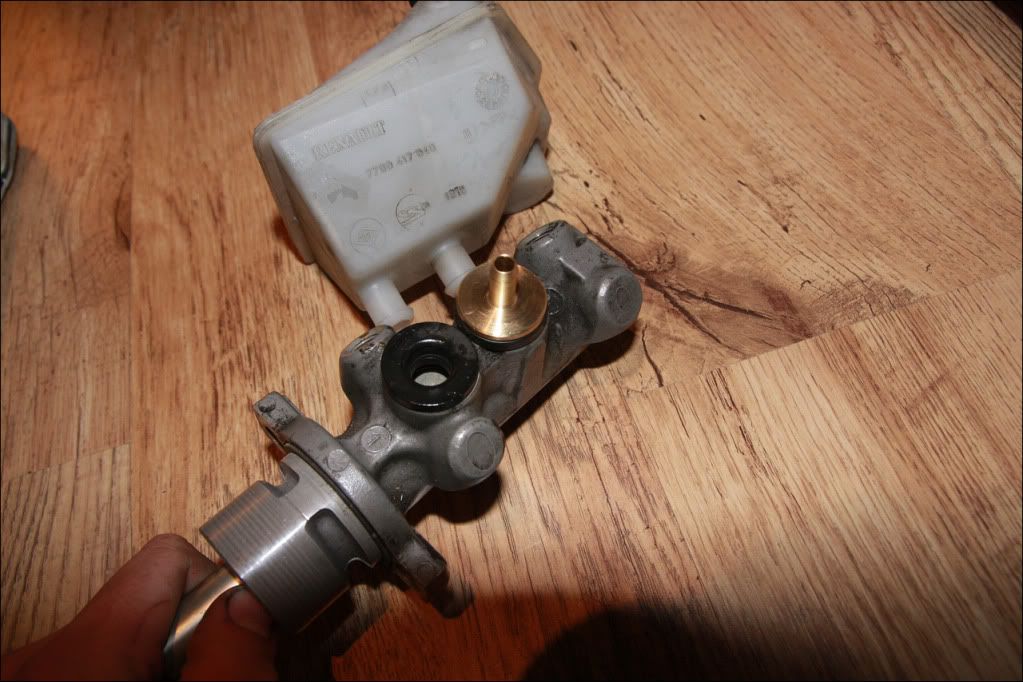
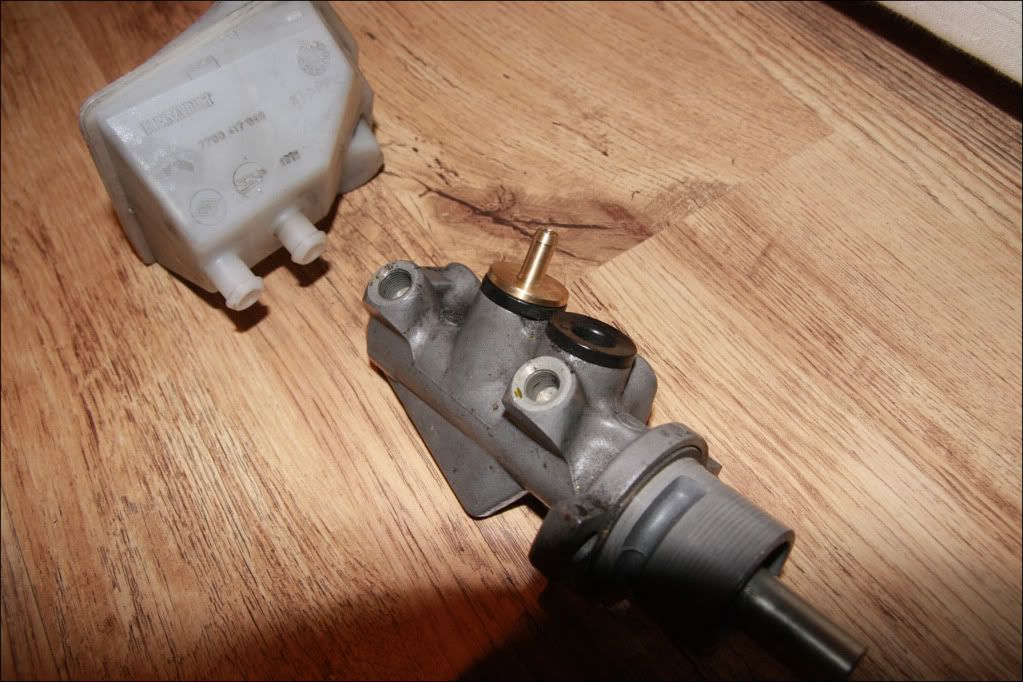
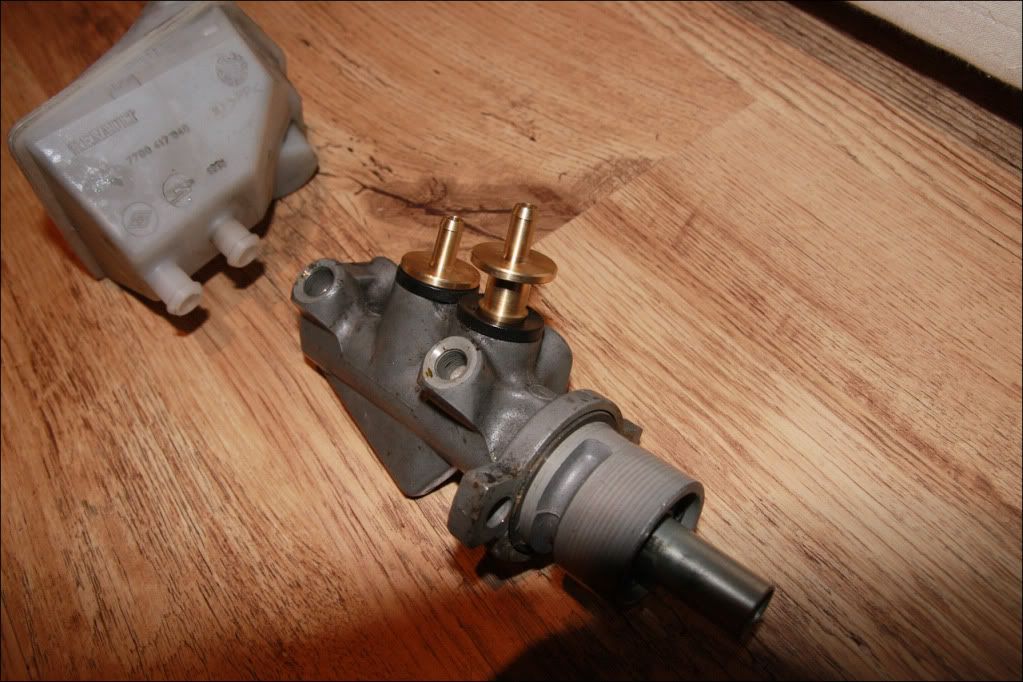
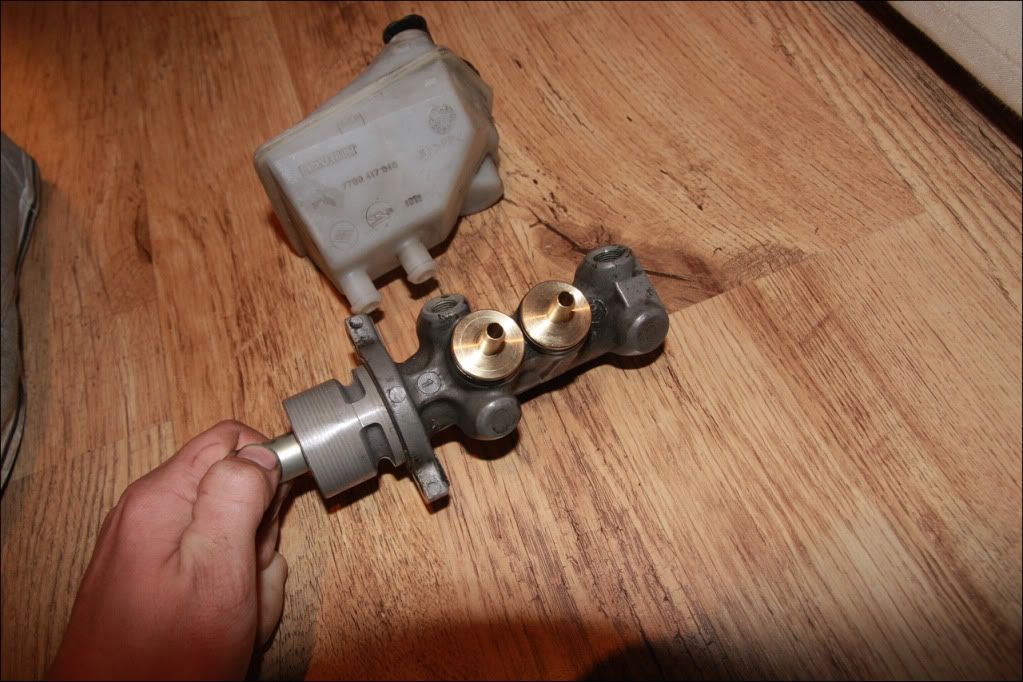
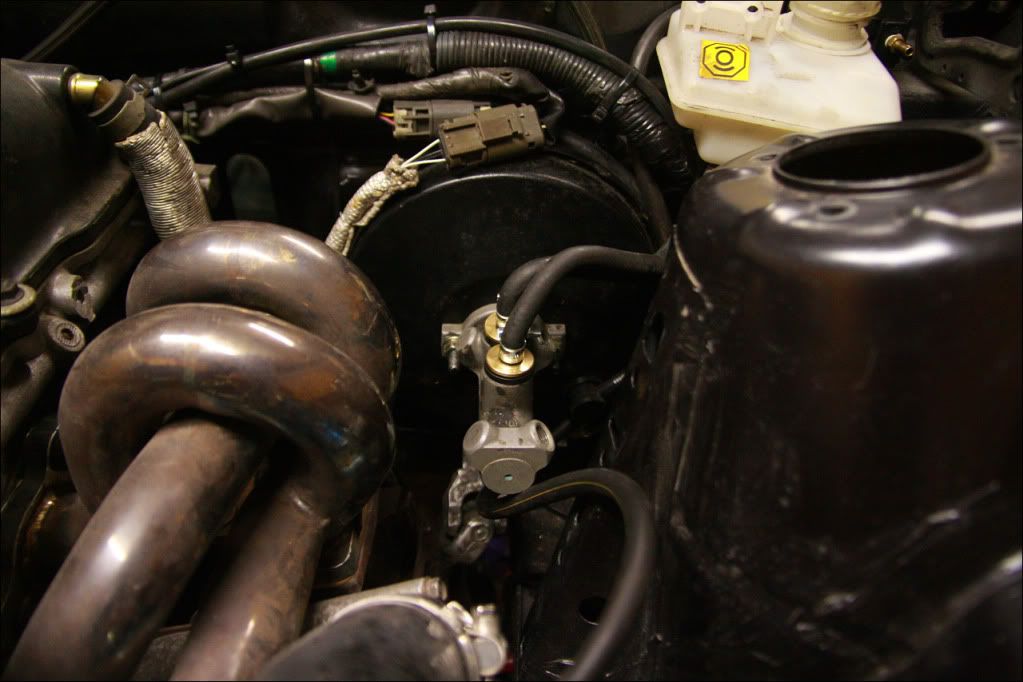
With the aftermarket exhaust manifold fitted I clearly had an issue with the master cylinder reservouir..
I wanted to remote mount it to give more space for a heat shield, and to ensure it didn't melt within 30 seconds of running. I spent many evenings reading, but didnt really find anything that would work like I wanted. Many cars use remote reservoirs, the bigger BMWs were the ones I saw appear the most. Although, finding parts proved hard and I didnt want to pay dealer prices.
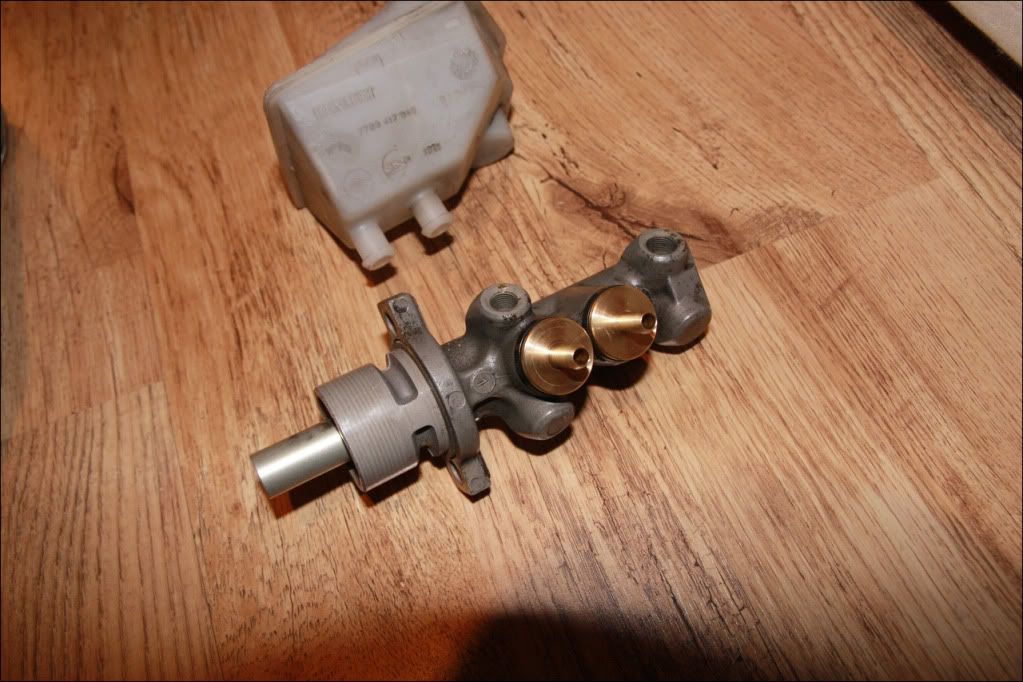
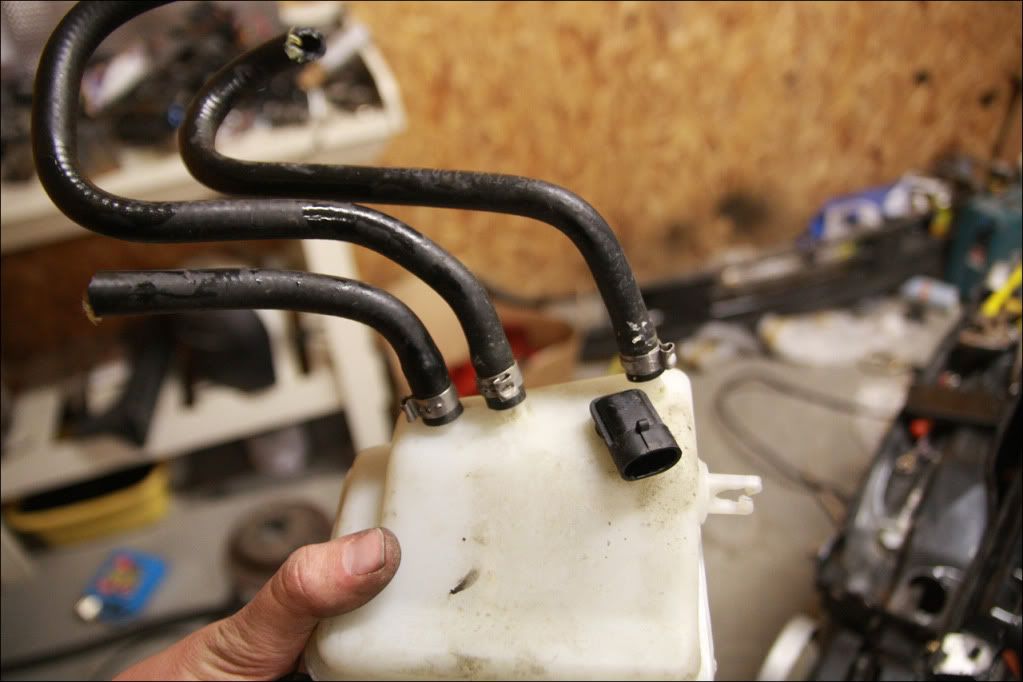
Most OEM setups are a reservoir with push fit pipes, then the master cylinder has push fit fittings in the seals. Finding the push fit fittings for the master cylinder proved near impossible, not to mention they might not be the right size for the 172 master cylinder (seals) I am going to be using. In the end I drew up some from scratch copying the design of the 172 reservoir, and turned them into fittings.
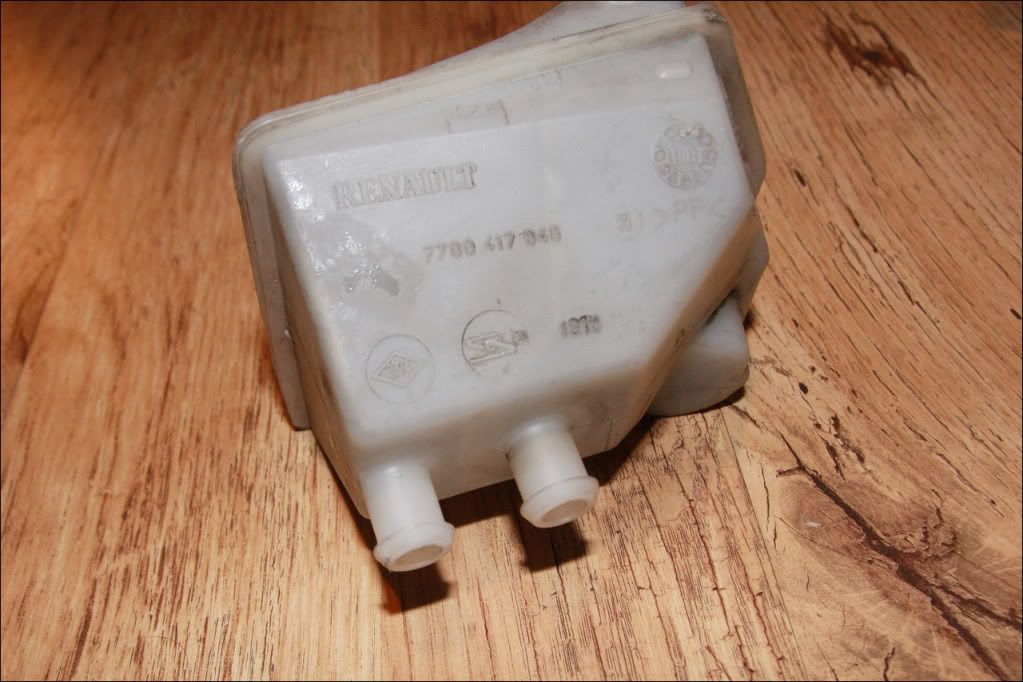
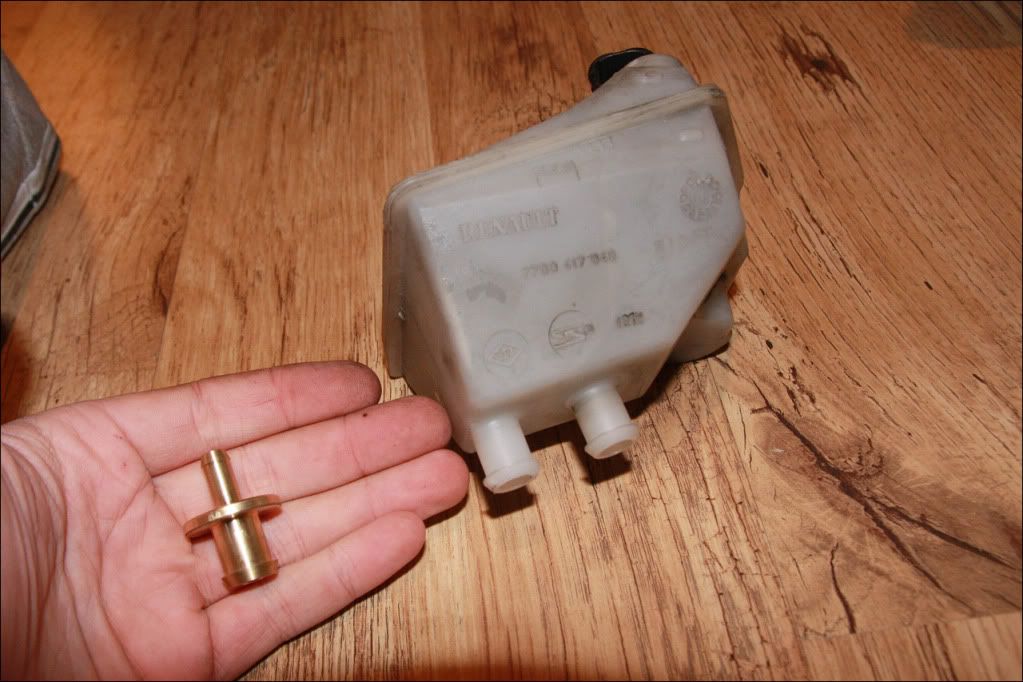
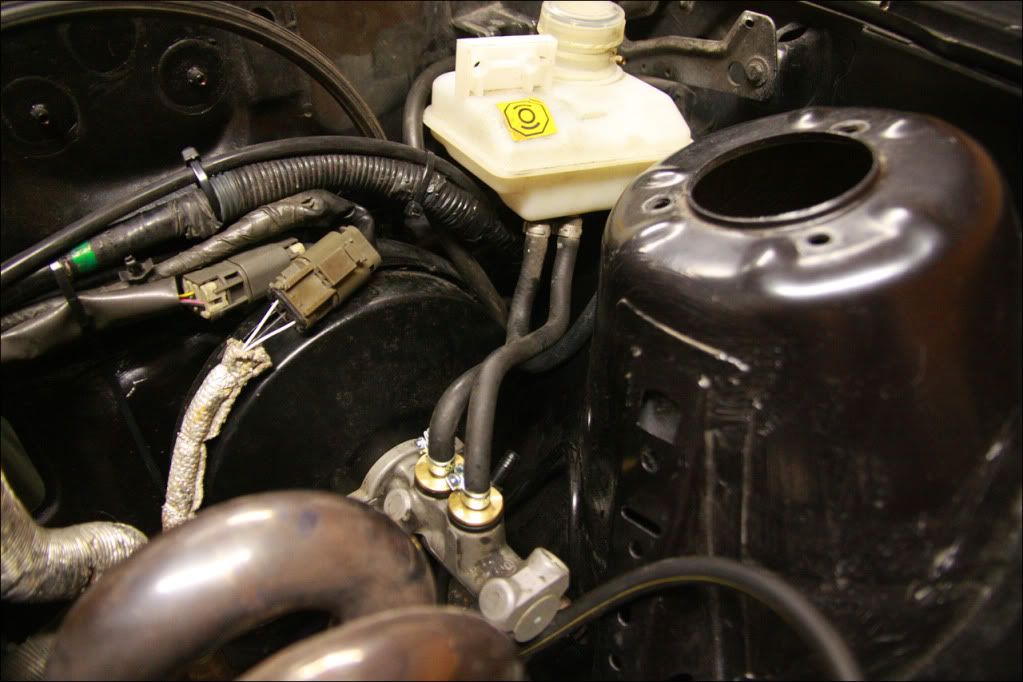
They are a very tight fit in the seal, just as I wanted them to be. The push fit is for an 8mm pipe (as most OEM remote setups seem to be around this) with a small barb on the end. Obviously the 172 reservoir was now useless, as I needed to find one that would fit in the space I had to the top right of the engine bay, and have push fitting pipes. After more searching, I found Mk2 Punto's have a remote reservoir setup. Nipped down to the scrap yard over the weekend and managed to get one...
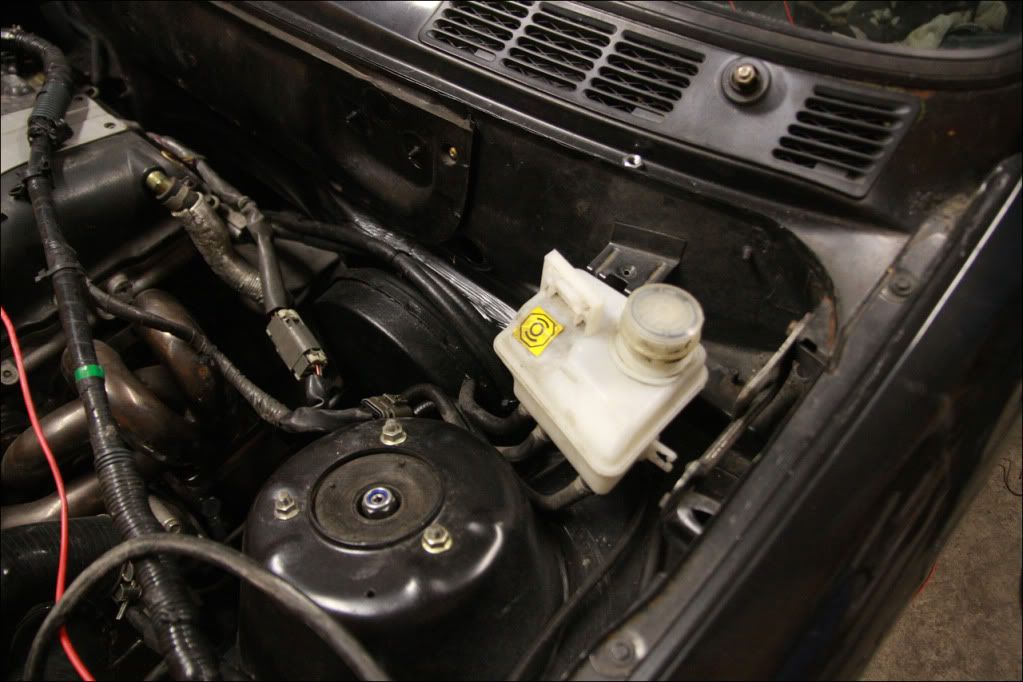
Even better that it has 3 outputs, as the third can be used on my clutch which is a push fit as standard on the E30 anyway.
As can be seen above, it fits well in the engine bay and just needs a small 90 degree bracket making to support it before plumbing in.
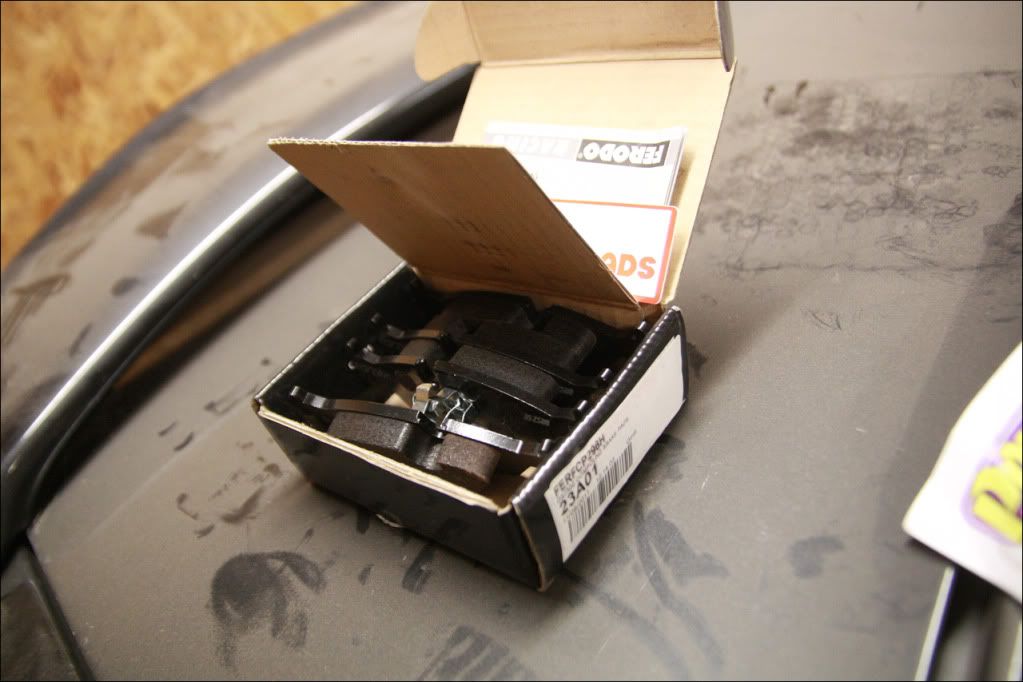
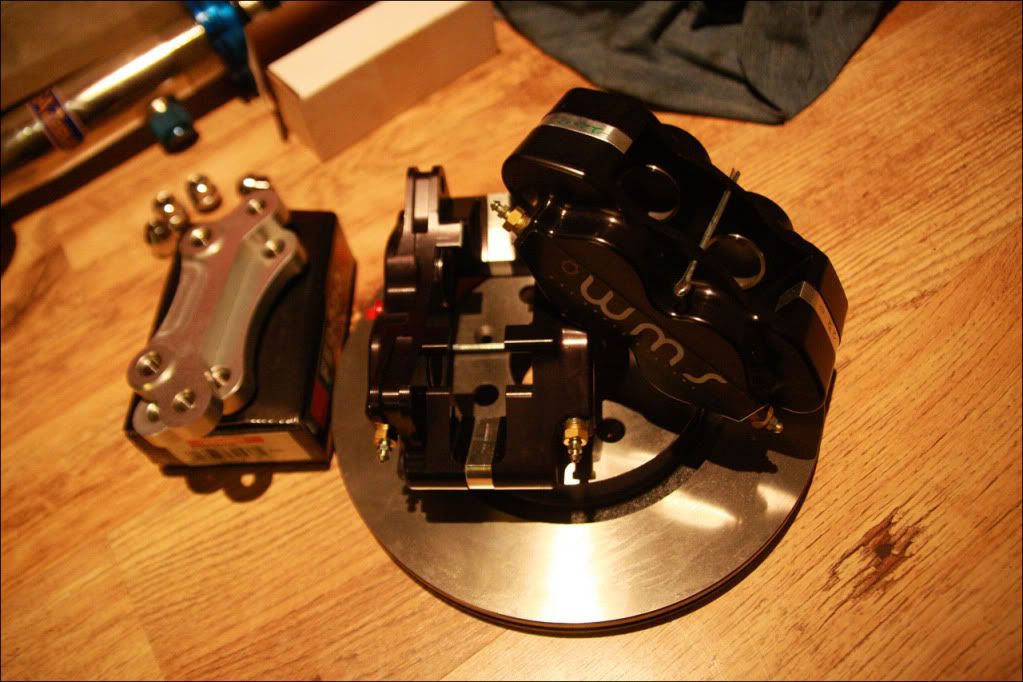
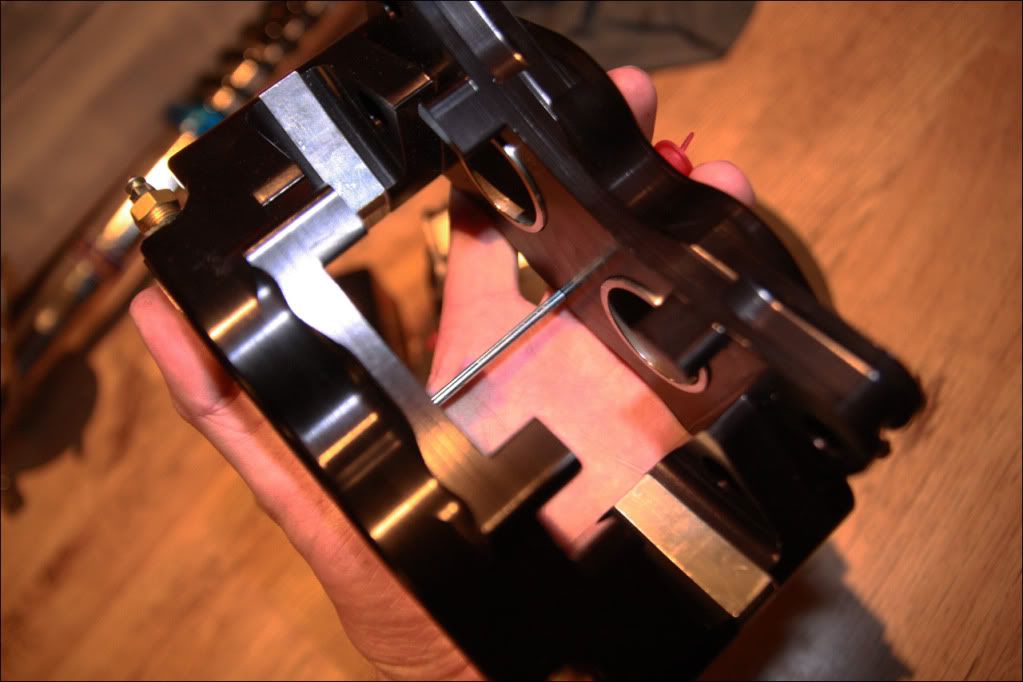
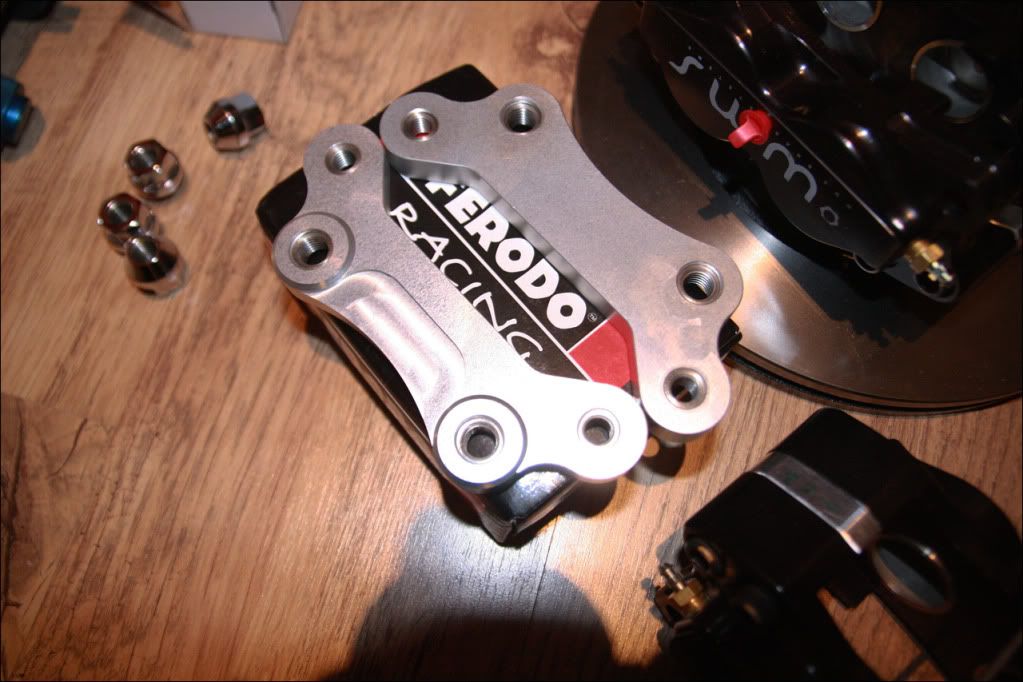
Last bit for now, the front brakes turned up a few days ago. I decided on a WMS 4P025 kit, mainly down to that they were deigned around the standard 15" E30 wheel.
Yeah, the sports either had a 19mm or 21mm piston depending on model/age/cup, 172 and 182 respectively. Im using a 182 one
I'm only based 10 miles from Oulton, so its quite local for me.
The thread is a bit behind, I was supposed to get it there on the 4th November but missed it due to the coilover issues etc, so it will probably be the 3rd or 10th of December now. In no rush really, but I wanted to give it a test before the end of the year!
Yeah, they were 230mm free length. Will have to see what the replacements are like when they arrive..
To be honest ive not seen any other linkages, its a bit tight angle wise with how it is now so I will have to see what happens when I drive it. I will have a search for what people use on the 24v's and see if I can improve it!
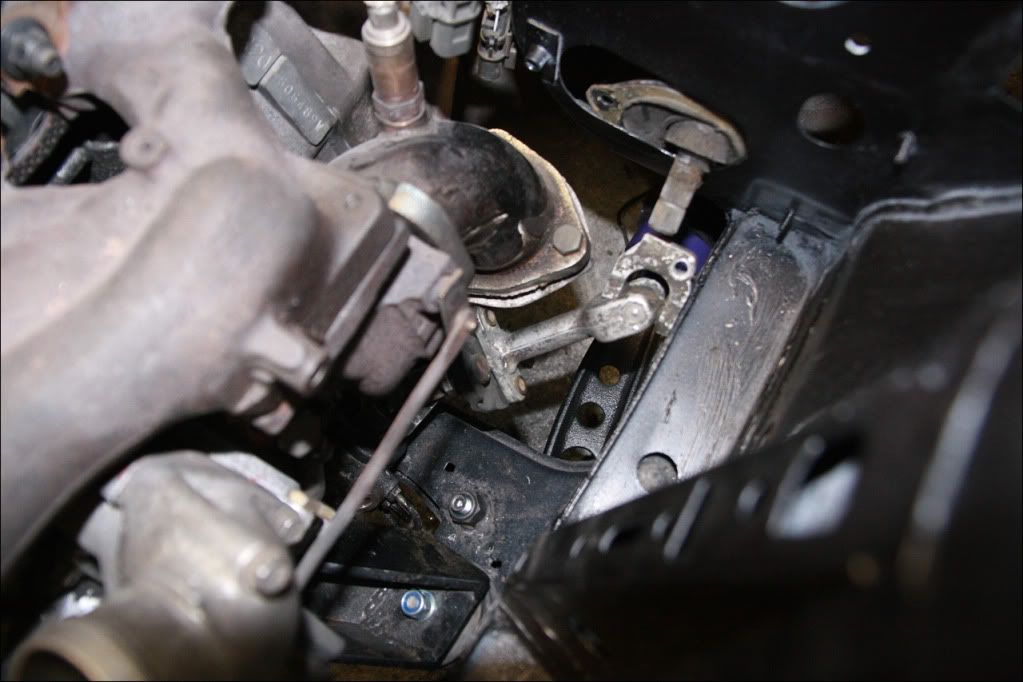
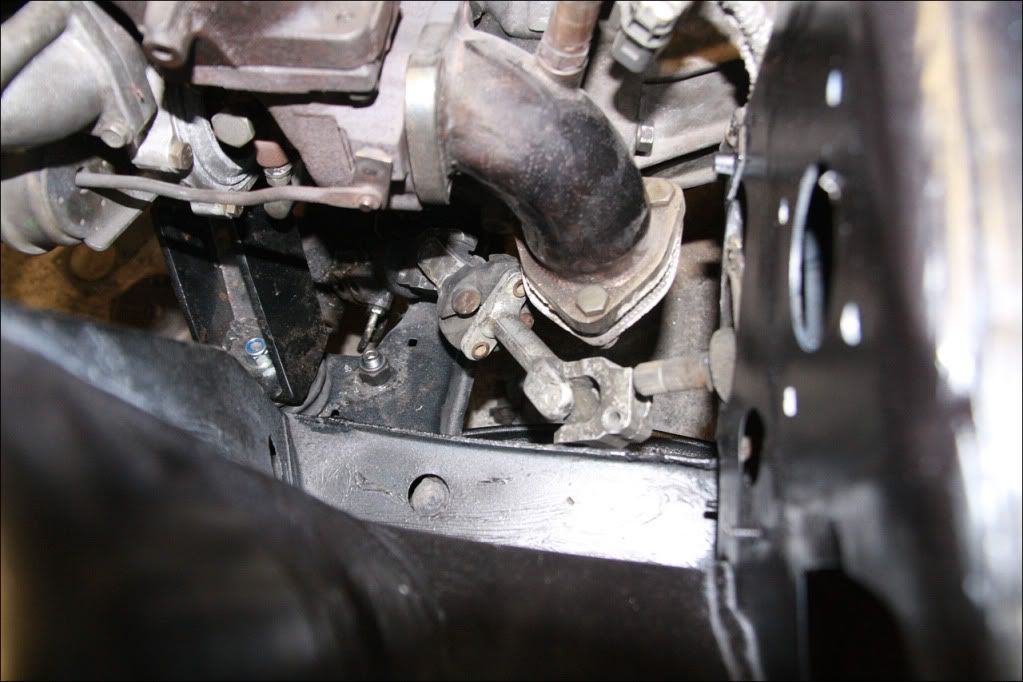
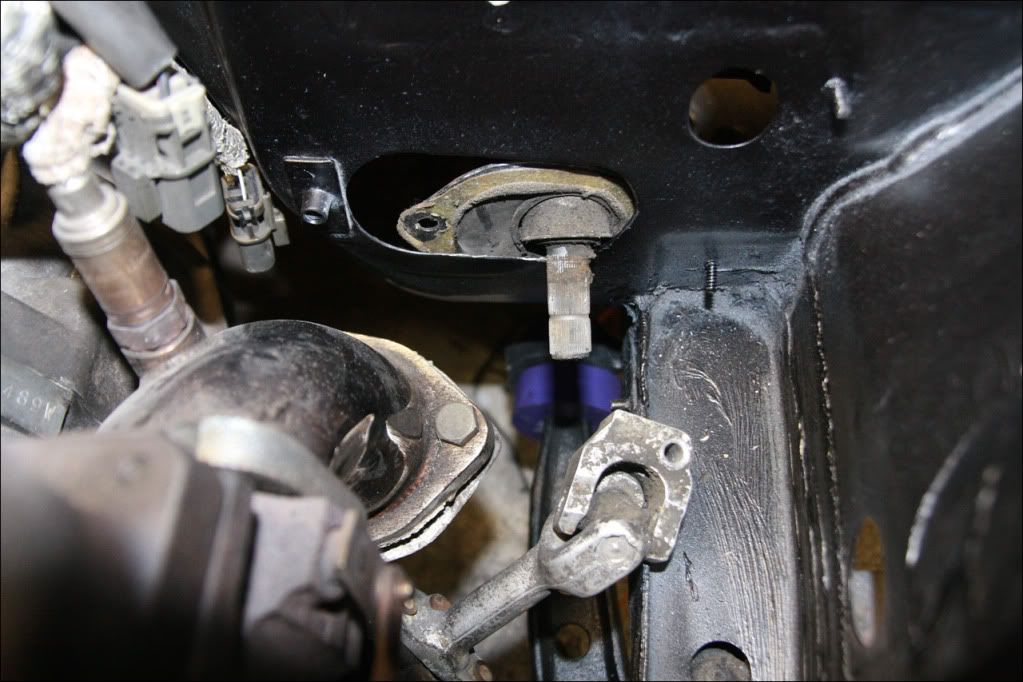
Yeah, its quite close, before the reservoir was moved it was actually touching the manifold. I have already got some Nimbus heat shielding to use yeah, which I've still got to cut and make fit over the next week or so. Not much else I can do with it really apart from a new pedalbox/no servo.
I have been trying to find some heat shielding for the body/tunnel also, as the downpipe is quite close to the bulkhead/tunnel/footwell - I'm after the stuff that's adhesive on the back ideally, but I cant remember where I last saw it sold!
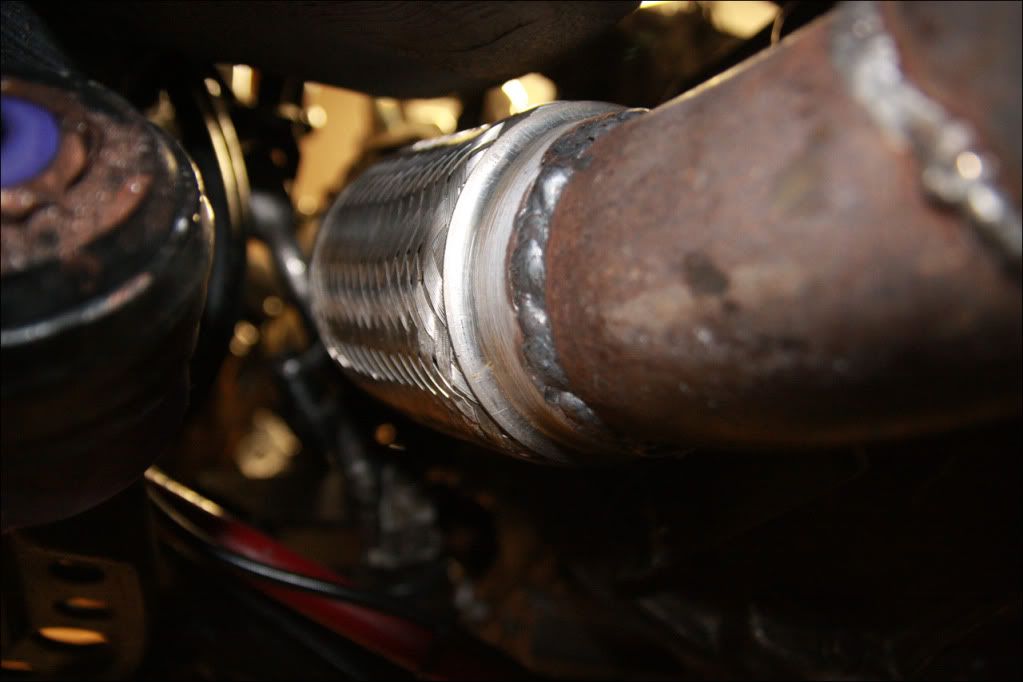
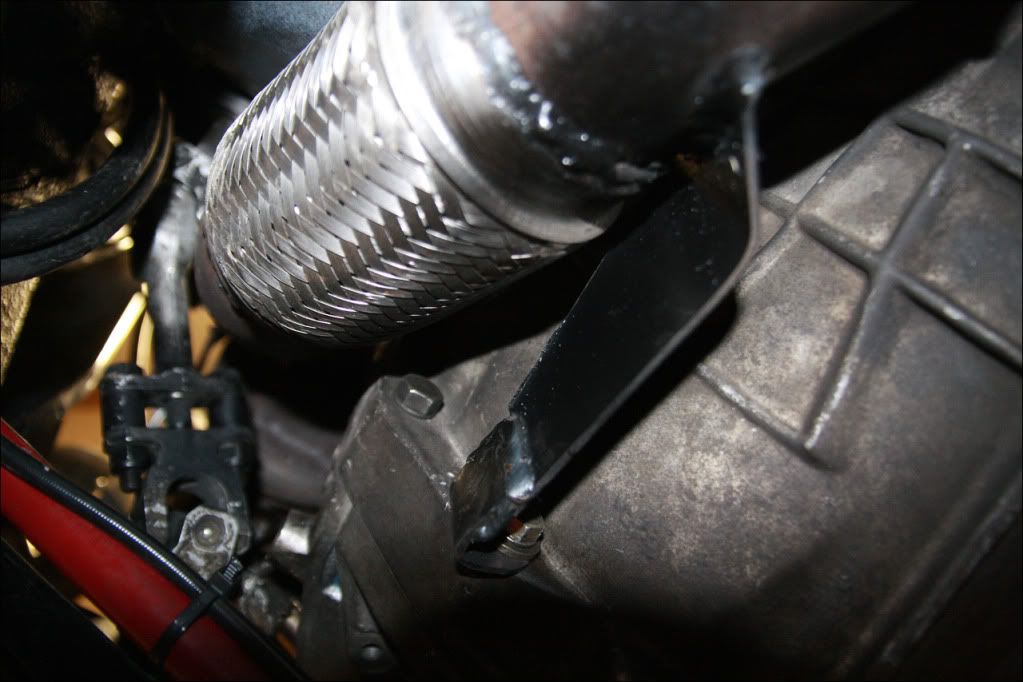
Modified the downpipe to include a flexi now also. I was going to run the flexi at the start of the center section, but after speaking to a few S14/S15 owners I thought I would try and make it fit in the gap. After a bit of measuring and cutting, managed to get it sat in the right place - along with making a brace to one of the gearbox bellhousing bolts..
Unfortunately I don't have any pictures of it off the car, as I just got it done and bolted it up to the turbo with a new gasket. The end of the downpipe still comes out in the same place, so I'm happy with that and just need an exhaust making now. Oh, and some heat shielding on the exhaust tunnel/bulkhead.
After the downpipe was done I made a new hole for the throttle cable above the servo (as moving the servo has blocked the old hole). Fitted the throttle cable (Mk1 Clio item) and checked I could get full throttle, which was fine. Last job before fitting the master cylinder to the servo was to make up a pin for the clevis/pedal as the original BMW item would not work now due to moving the servo over. An M10 bolt was modified and fitted.
I then bolted up the master cylinder and cut the hoses from the Mk2 Punto reservoir to the correct length. I also fitted the clutch line to the 3rd outlet which runs back inside the car to the clutch cylinder. Just needs a bracket/mount making for the reservoir, which I will have to get round to doing sometime this week.
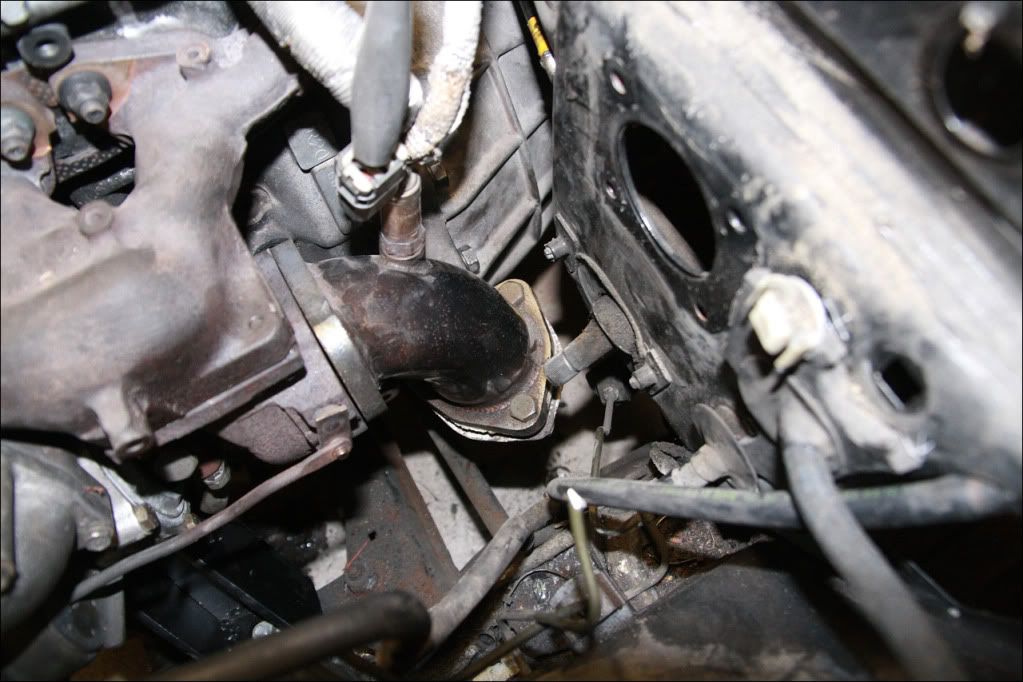
Now that the top hose was sorted I decided to run the engine upto temperature with coolant in it - thankfully its very smooth, with no oil or coolant leaks
From that I knew the wiring was all OK, so had a few hours on it this afternoon fitting it all into the correct location through the original E30 bulkhead grommet, and mounting the ECU inside out of the way. Just need to wait for the suspension to come back from Gaz during the week now so the front brakes can be fitted.
Im doing the same, only mine is a RHD and Im sure it will be all easier
A few questions if you dont mind for my own swap to consider later:
1. Are the original s15 engine mounts still there on the engine side in addition to the rover mounts? Or did you discard them away?
2. "Two pieces of 5mm plate were welded to the E30 transmission mount to give it 5mm more height... " -> so you raised a total of 10mm?
Can't wait to see yours fired up and hear how the rover mounts feel. Strongly recommends Greddy or similar oil pan and rocker arm stoppers if you plan to track the car though
benzz280 wrote:Im doing the same, only mine is a RHD and Im sure it will be all easier
A few questions if you dont mind for my own swap to consider later:
1. Are the original s15 engine mounts still there on the engine side in addition to the rover mounts? Or did you discard them away?
2. "Two pieces of 5mm plate were welded to the E30 transmission mount to give it 5mm more height... " -> so you raised a total of 10mm?
Can't wait to see yours fired up and hear how the rover mounts feel. Strongly recommends Greddy or similar oil pan and rocker arm stoppers if you plan to track the car though
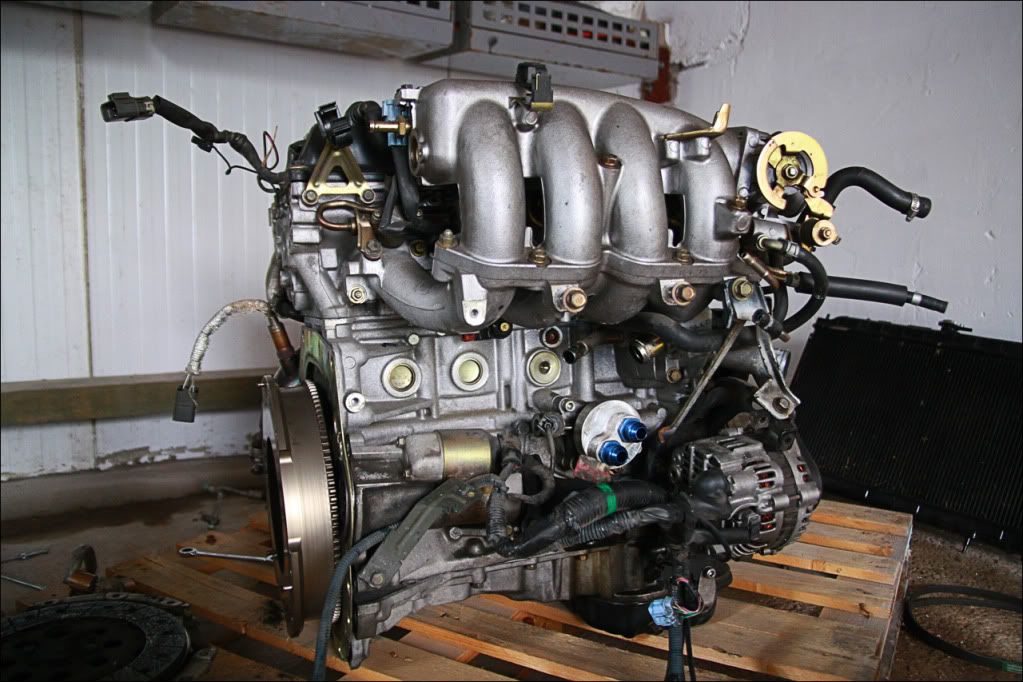
1 - I've left the S15 metal mounts on the block yes, then made mounts from that to the rubber..
2 - Sorry I changed what I was writing, 10mm was too much, it only needed 5mm
The V8 rubbers are very stiff, had it started and revving with zero movement really. Obviously under load things will be different, but they are very stiff.
Jhonno wrote:I think on further looking, that manifold is in danger of contacting on the steering coupling under heavy cornering. Are you using poly engine mounts?
Landy V8 Rubbers, basically a solid block of rubber with metal plates/threads either side. They are stiffer than the poly engine mounts I had on my previous track car. On initial running and pulling the engine with bars they are pretty stiff.
The pictures are quite deceiving, I can fit my hand flat/knuckles between the manifold down pipe and steering column in all steering positions, there is more room than looks in pictures to be honest.
I've been speaking to Dan regarding his 24v linkages, and I'm going to have a measure later when I go down to the unit. If i've worked it out right doing away with the big joint where the rubber used to be should give me enough room to move the column back some to reduce the angle on the top UJ - I'l know for sure later.
skipunda wrote:I like this build! Might add a link from the home page with a few others.
I had beefy rubber ones on my S50, you couldn't move the engine by hand.. It used to lock up on harder left handers, and that had a good 10-15mm gap iirc. You would be surprised.
Yeah I think its just going to be one of those things to look at if it happens, as with quite a few bits on it. Im confident Dan's linkage bar will give me more room as above.
I think if I have any issues with it hitting I will re-do the downpipe, and make it come out of the turbo a few inches then down (so its closer to the bulkhead), rather than straight down (as it is now), which would give it more room too I guess
Going to be taking it to Oulton in a few weeks time for a bit of a run out to see what its like, and to see what problems arise.
Ditched all the E30 loom, just got the S15 engine loom and ECU. Wired it into a small fusebox out of the way, couple of relays, a button to make the indicator flash at the back on a switch near the handbrake and the brake lights - thats about it.
There is a lot to update in here, its all working and driving now, taking it to Oulton Park in a couple of days. Il update when I get a spare minute