325i sport sterling silver (light restoration!)

Show off your pride and joy here

Moderator: martauto

User avatar
toole325i
E30 Zone Newbie
E30 Zone Newbie
Posts: 110
Joined: Sun Mar 23, 2008 11:00 pm

Wed May 18, 2011 10:42 pm

Hi there everyone the time has come to get my bmw back on the road where it belongs. It has been neglected lying in my garage for the last 3years! Absoloutly shocking i know but thats all about to change its time to bring her back to life.

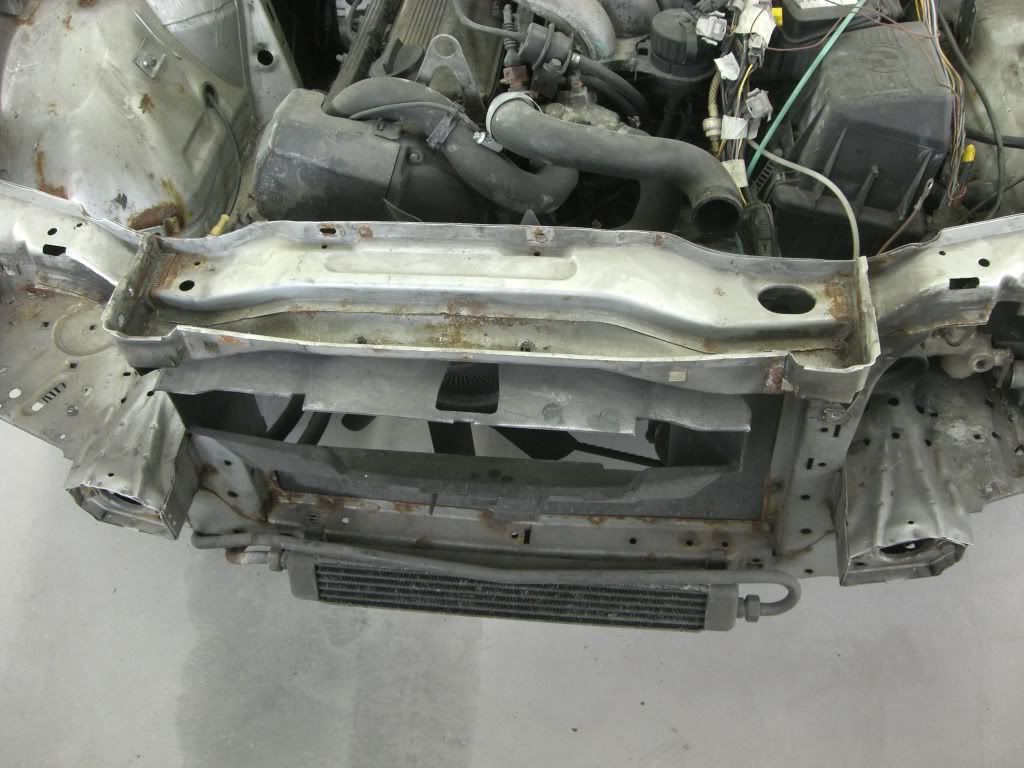
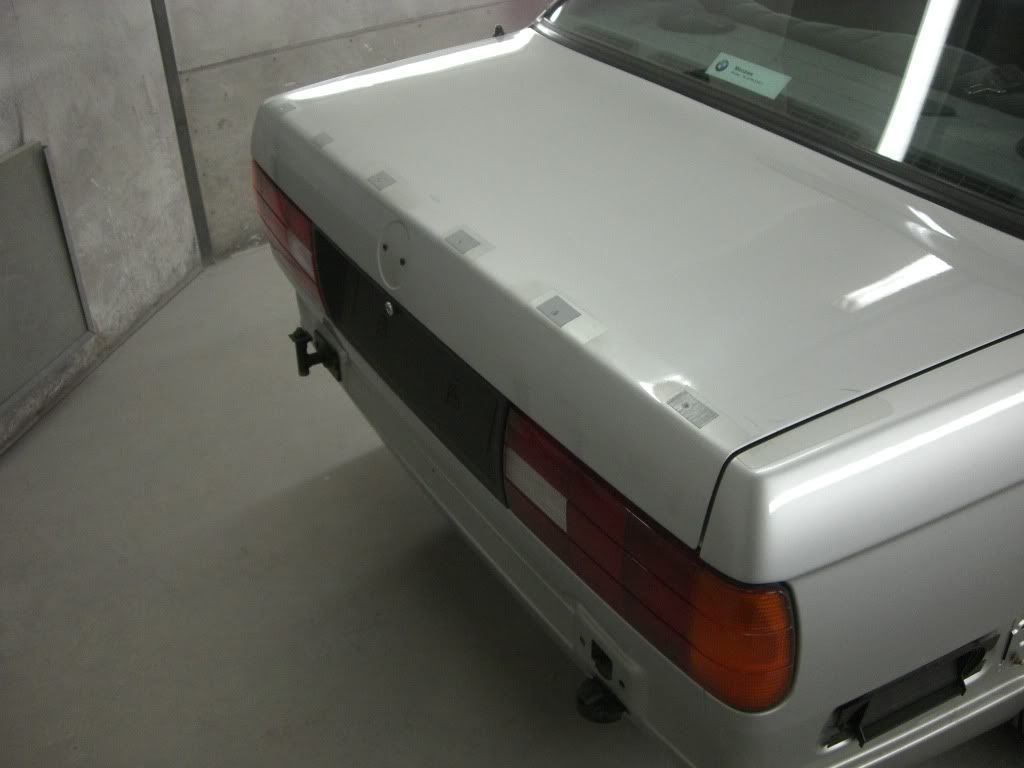
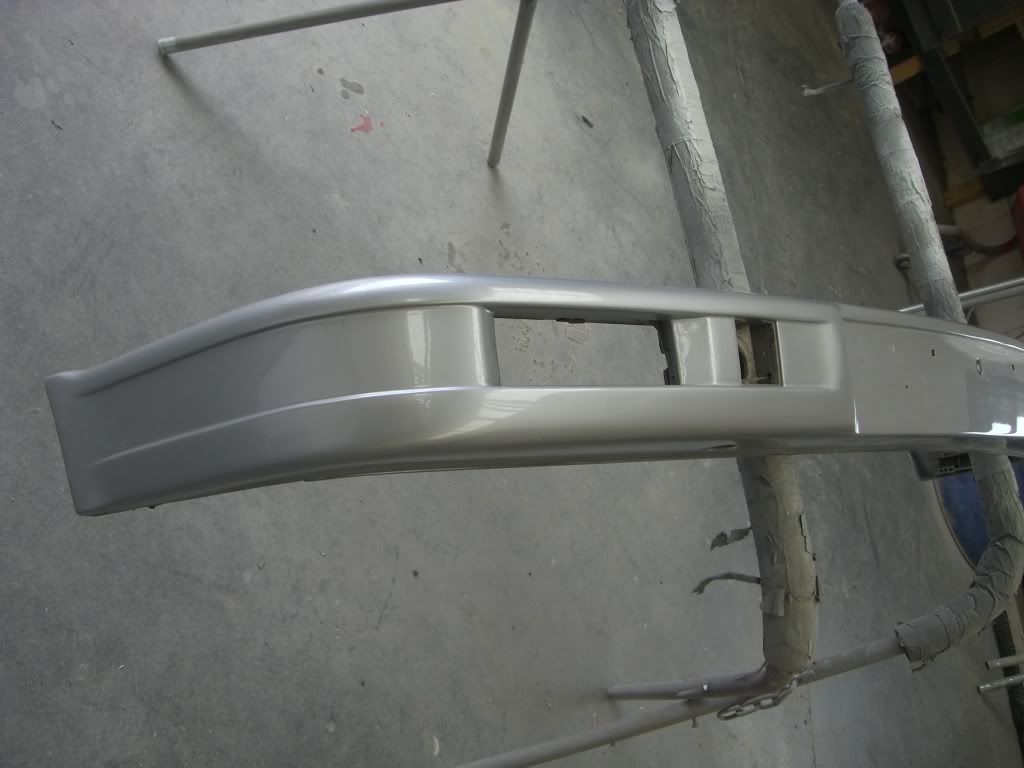
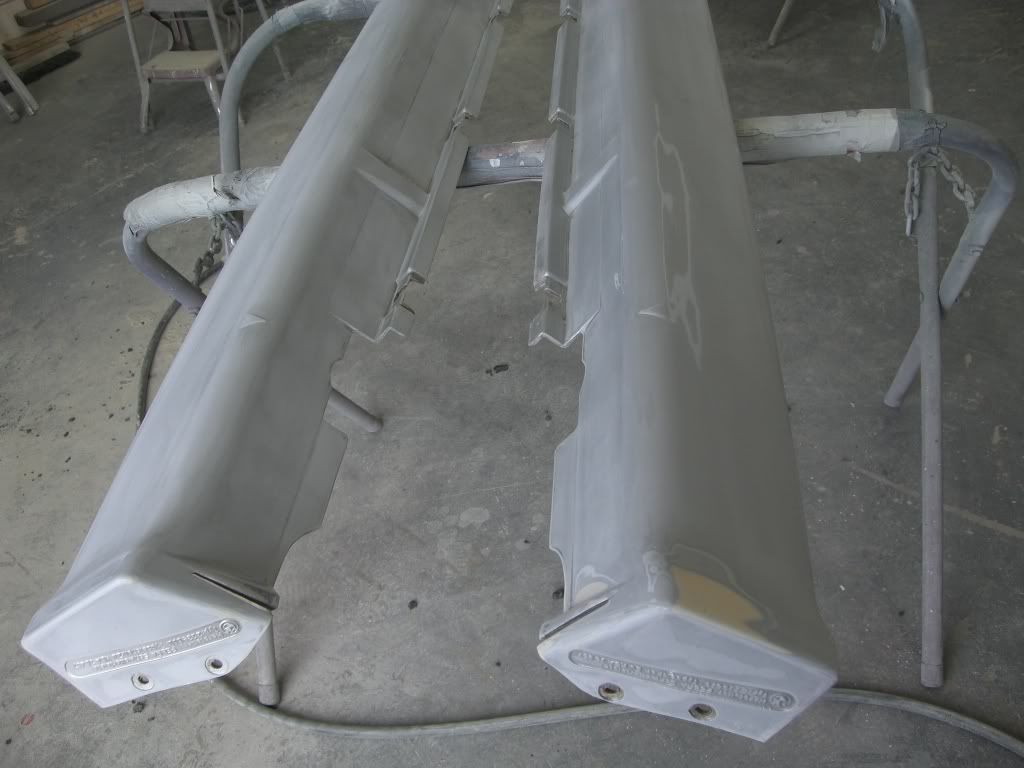
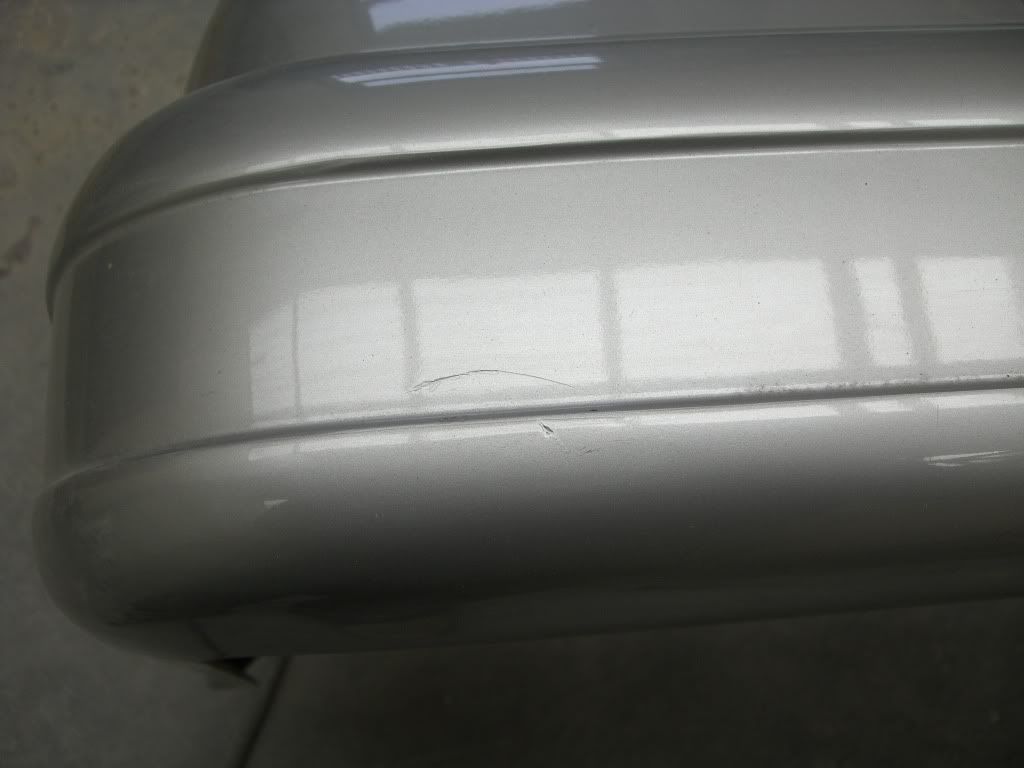
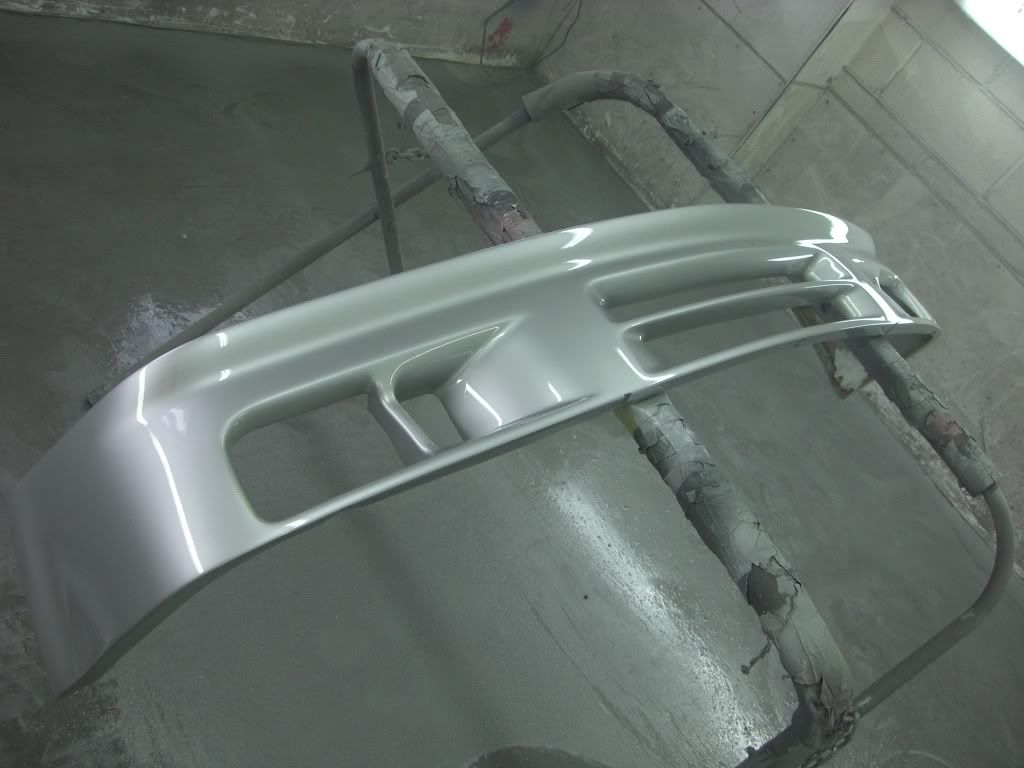
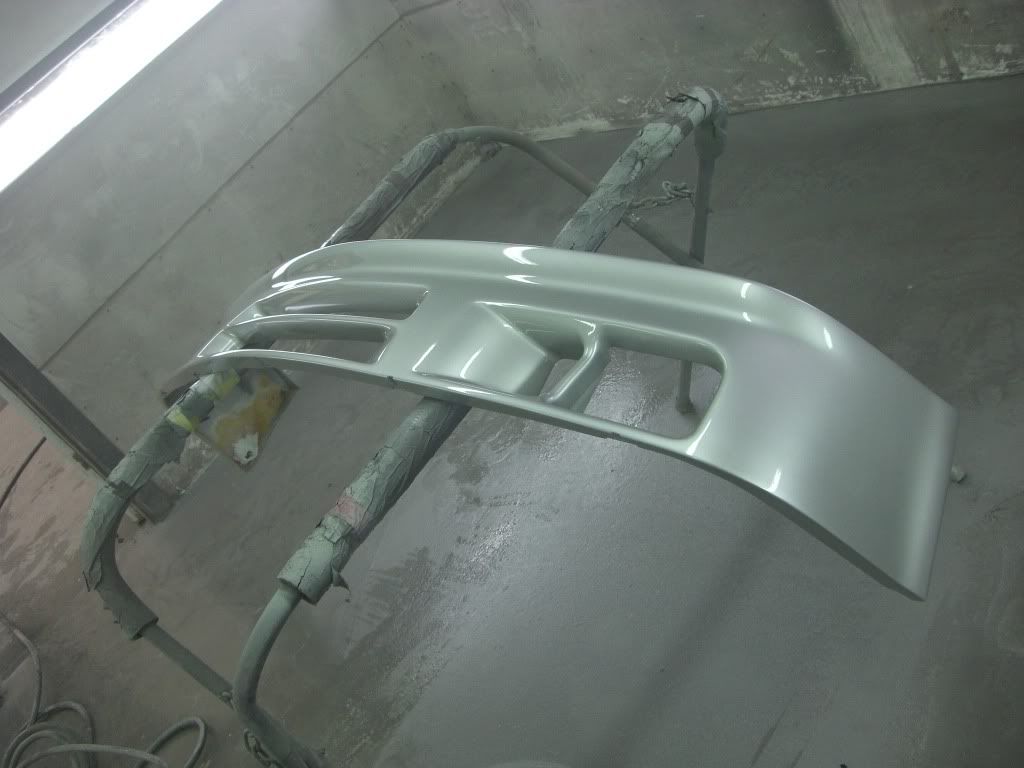
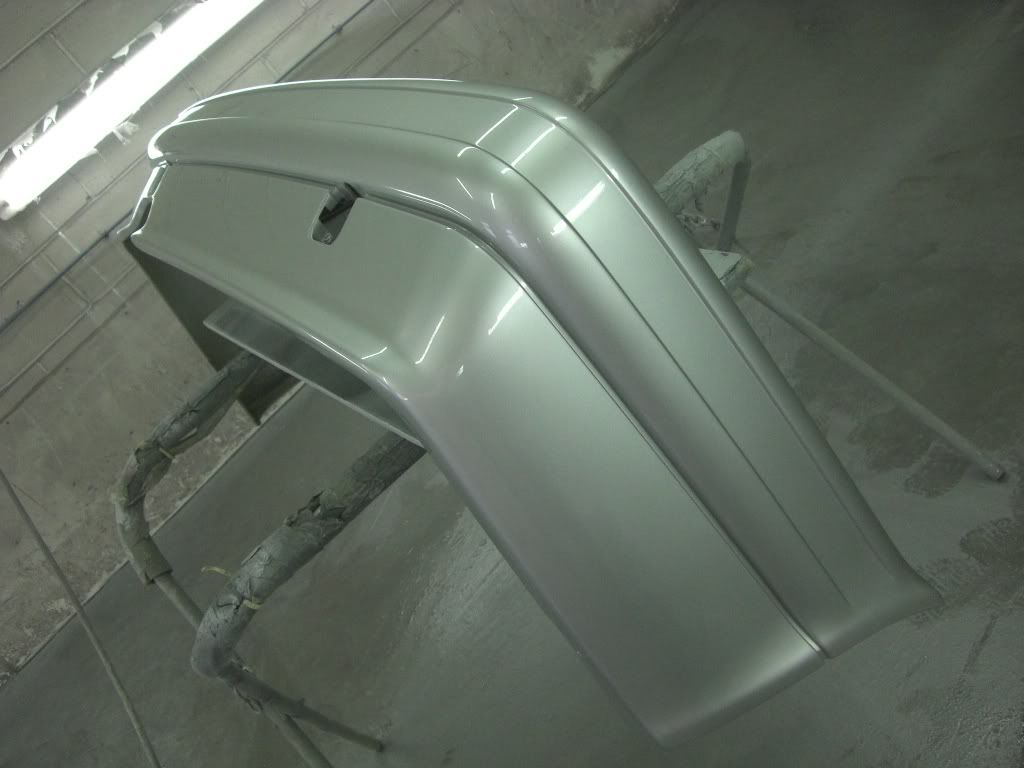
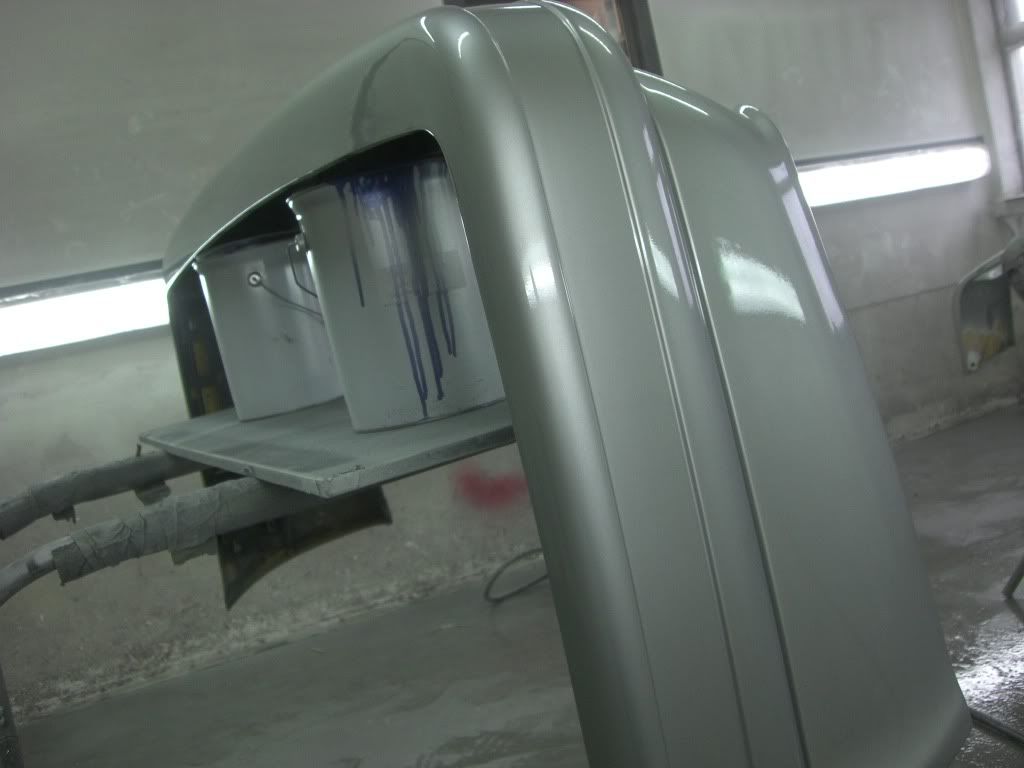
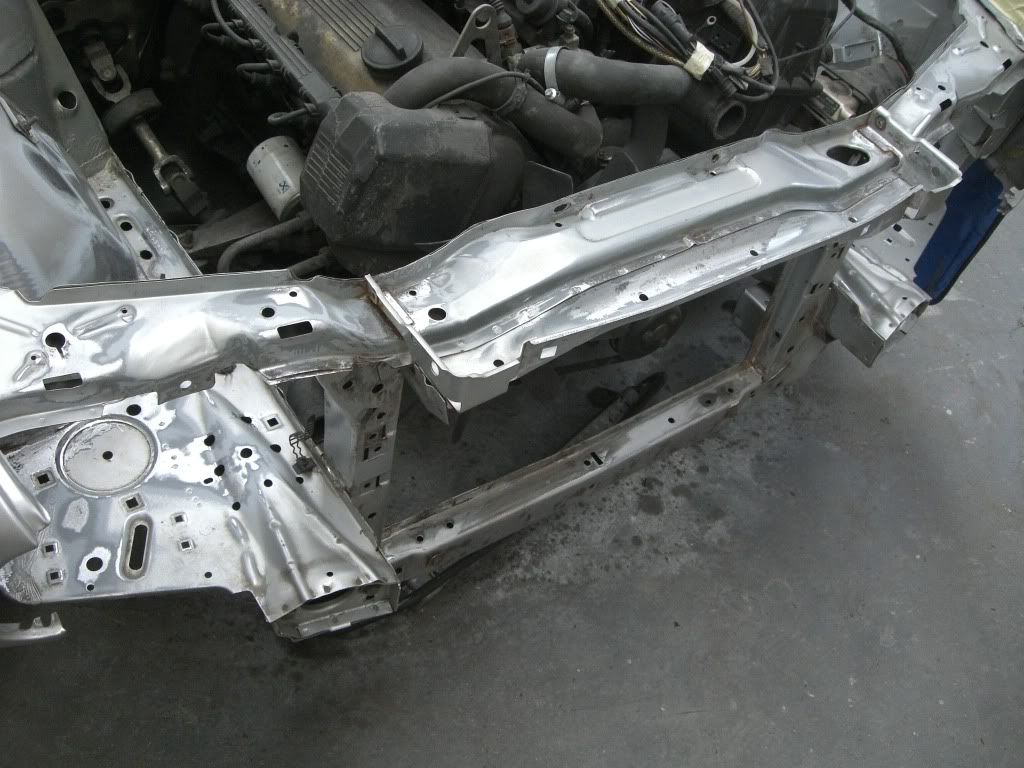
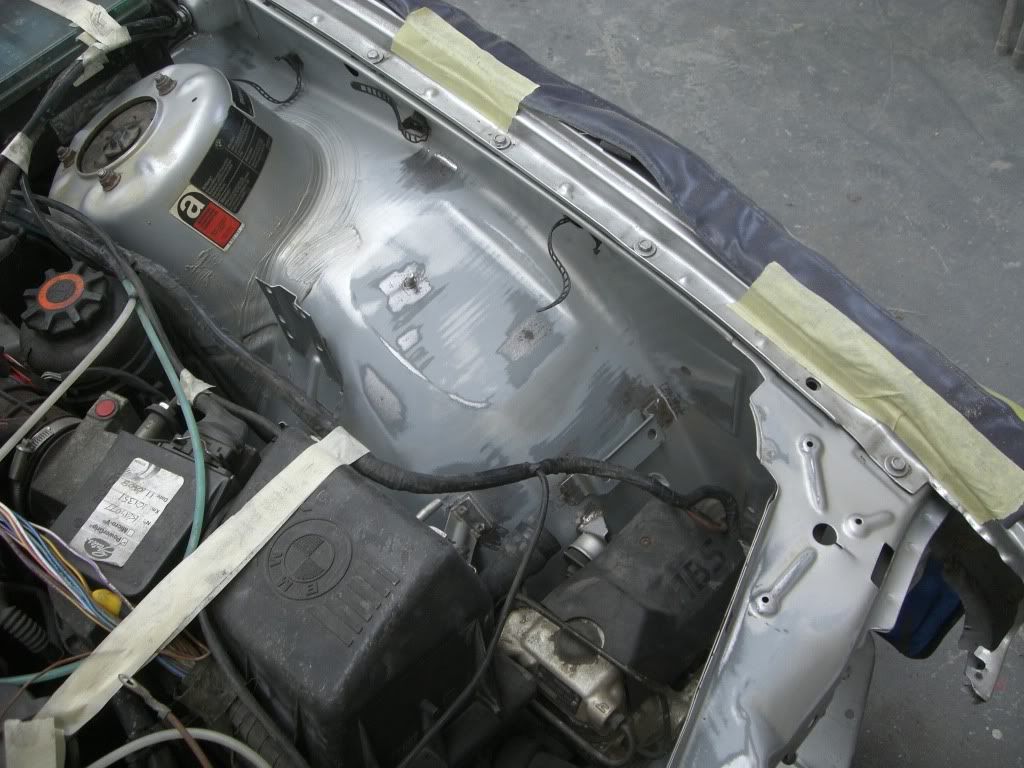
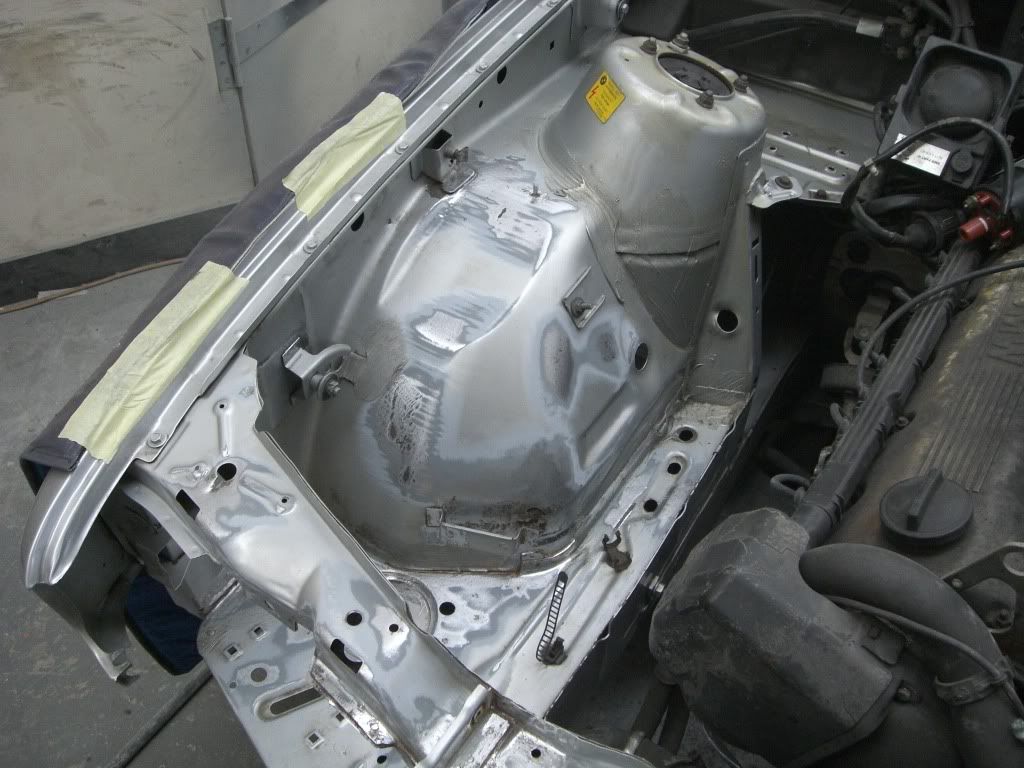
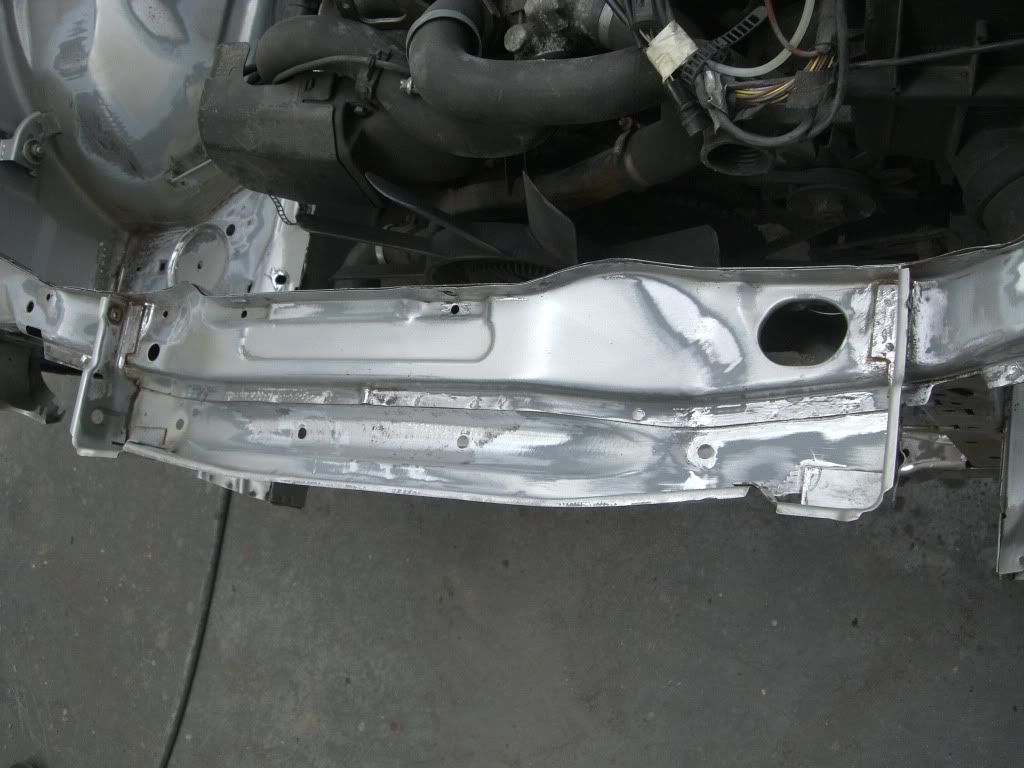
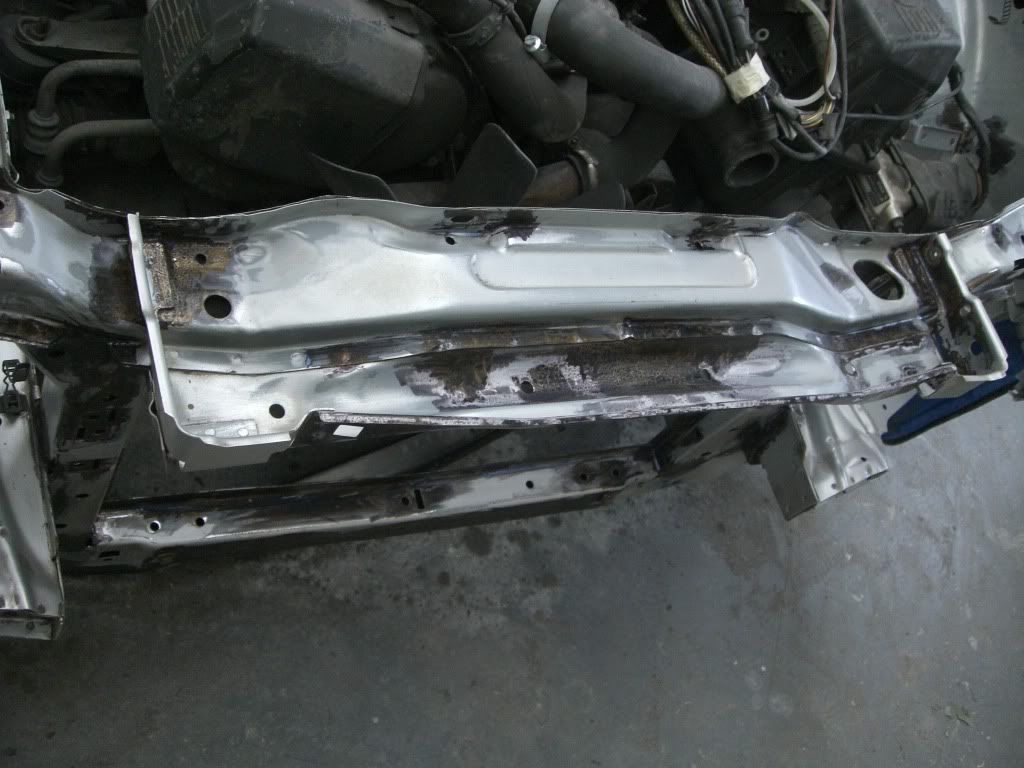
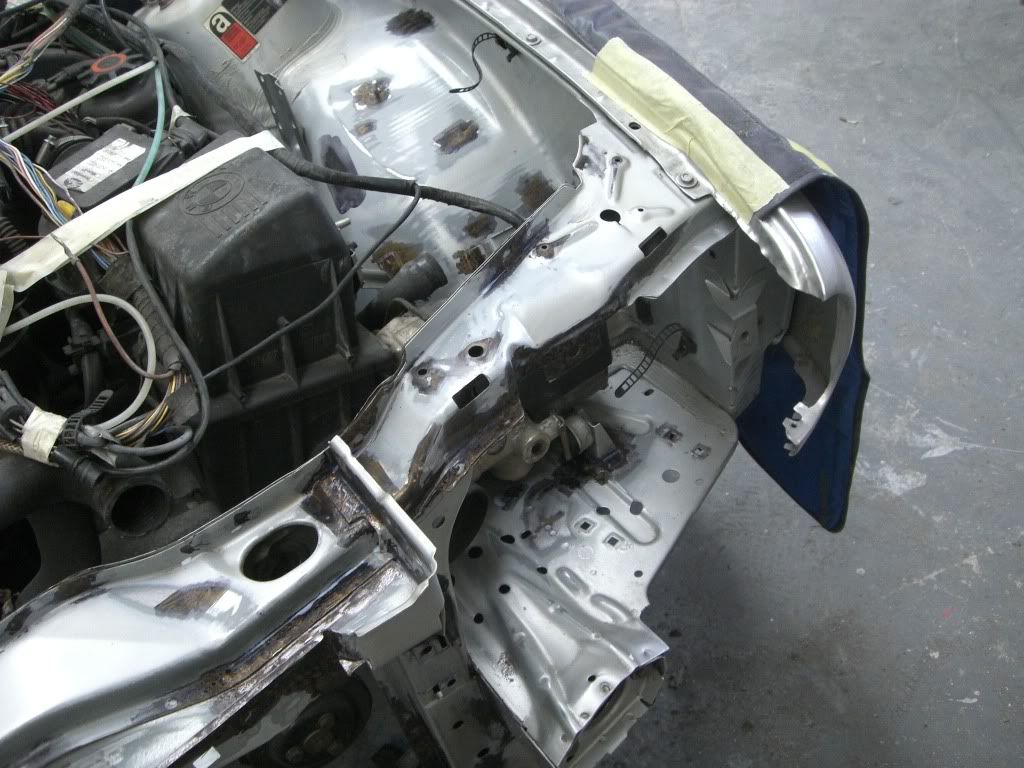
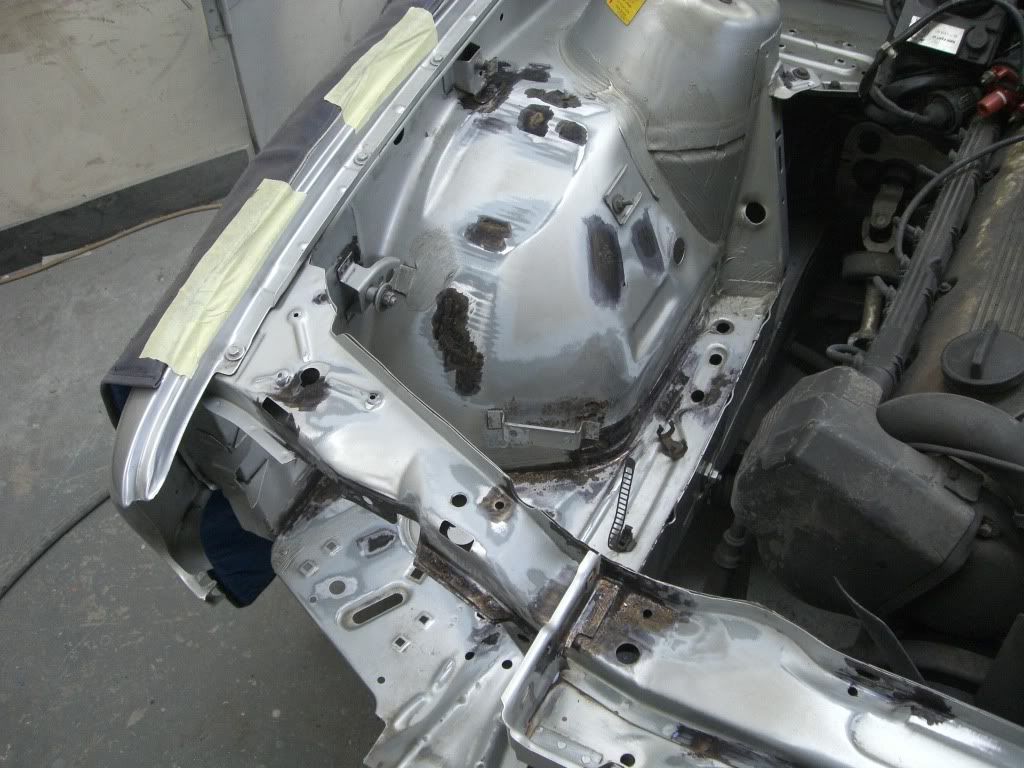
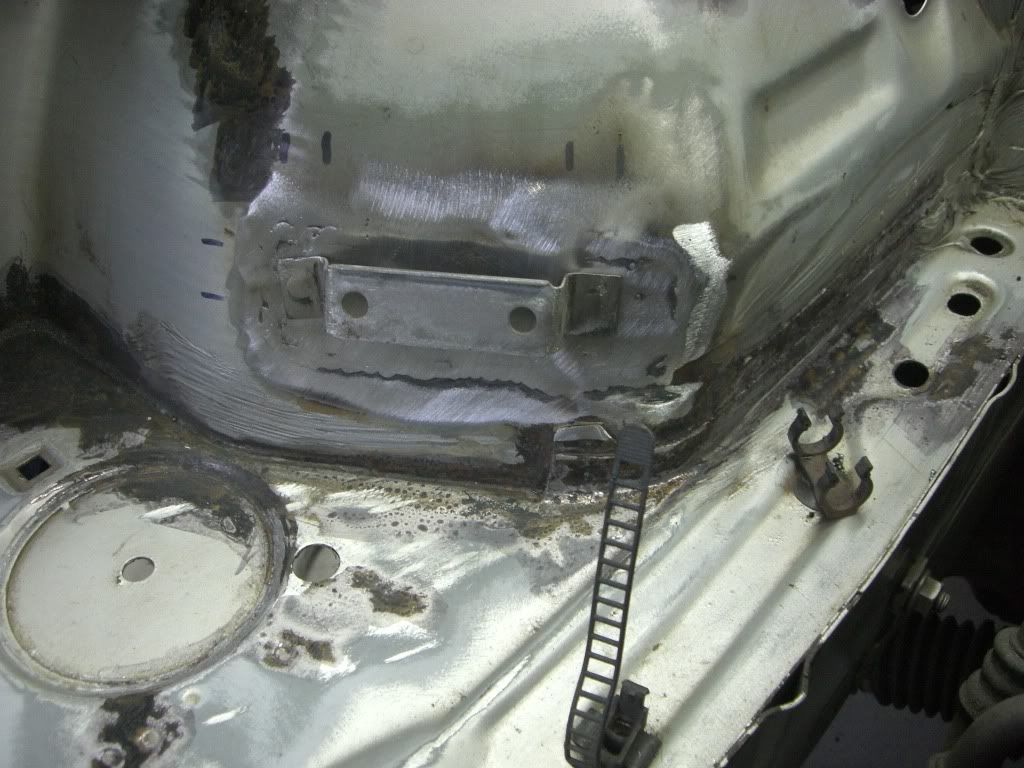
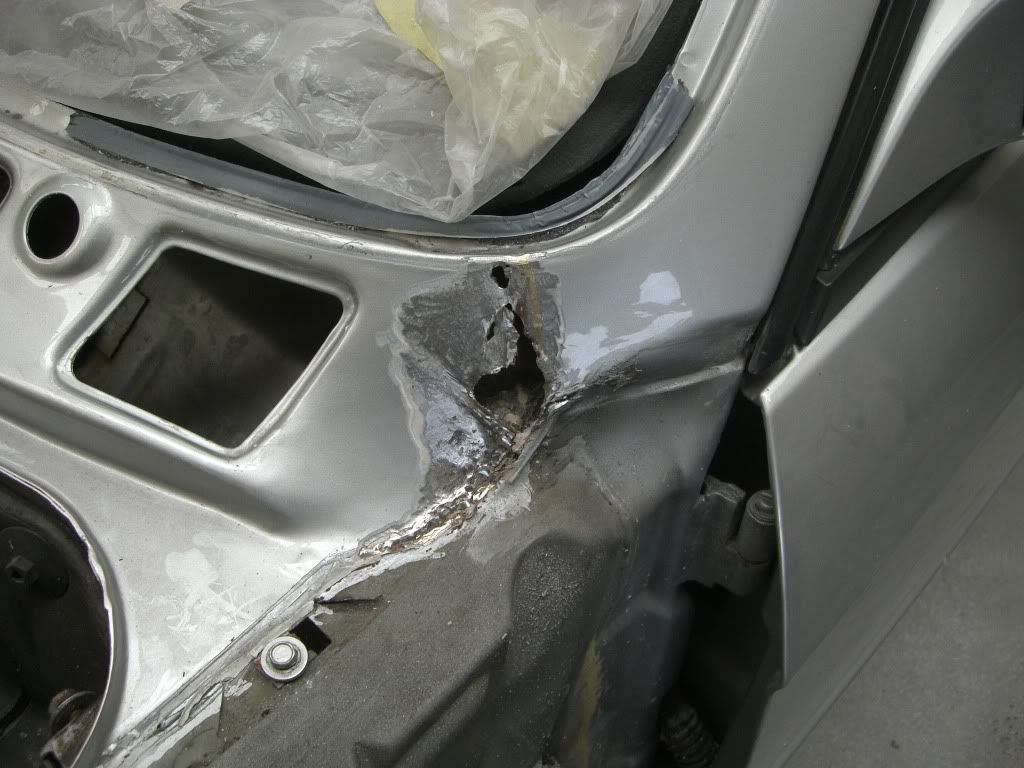
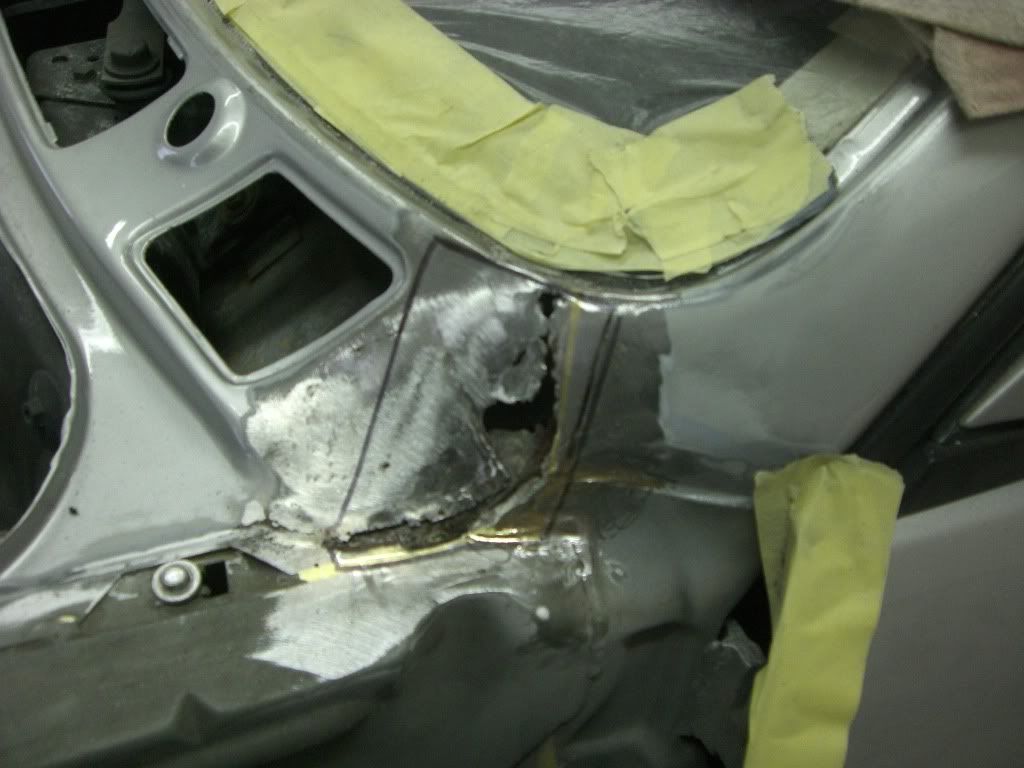
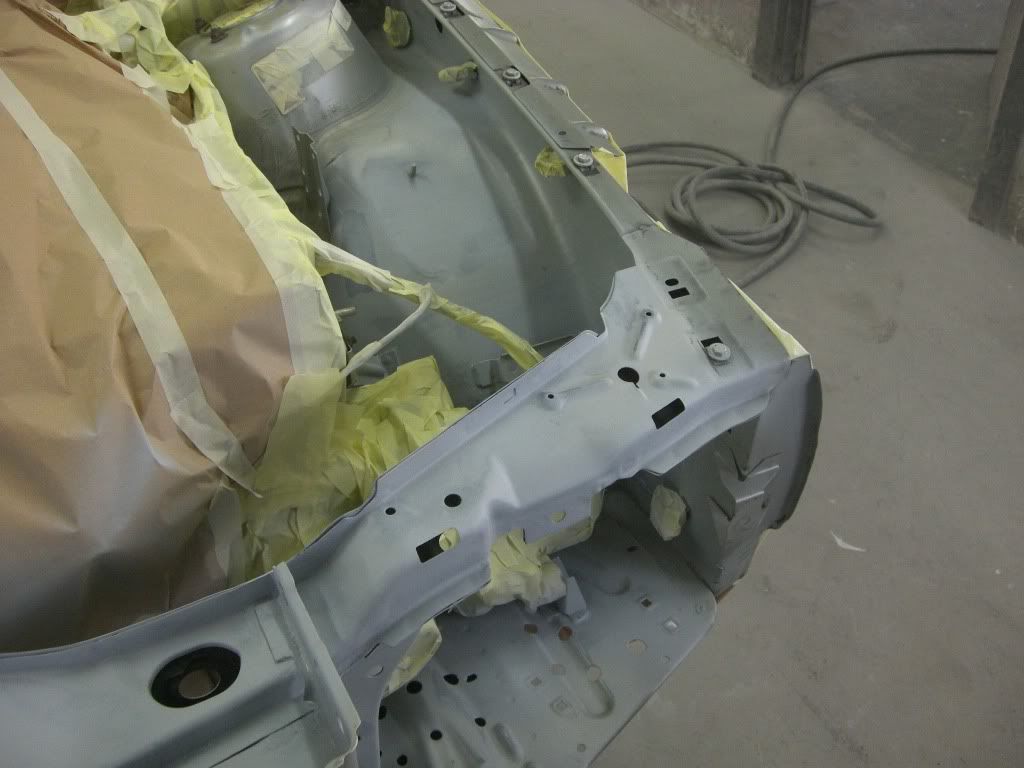
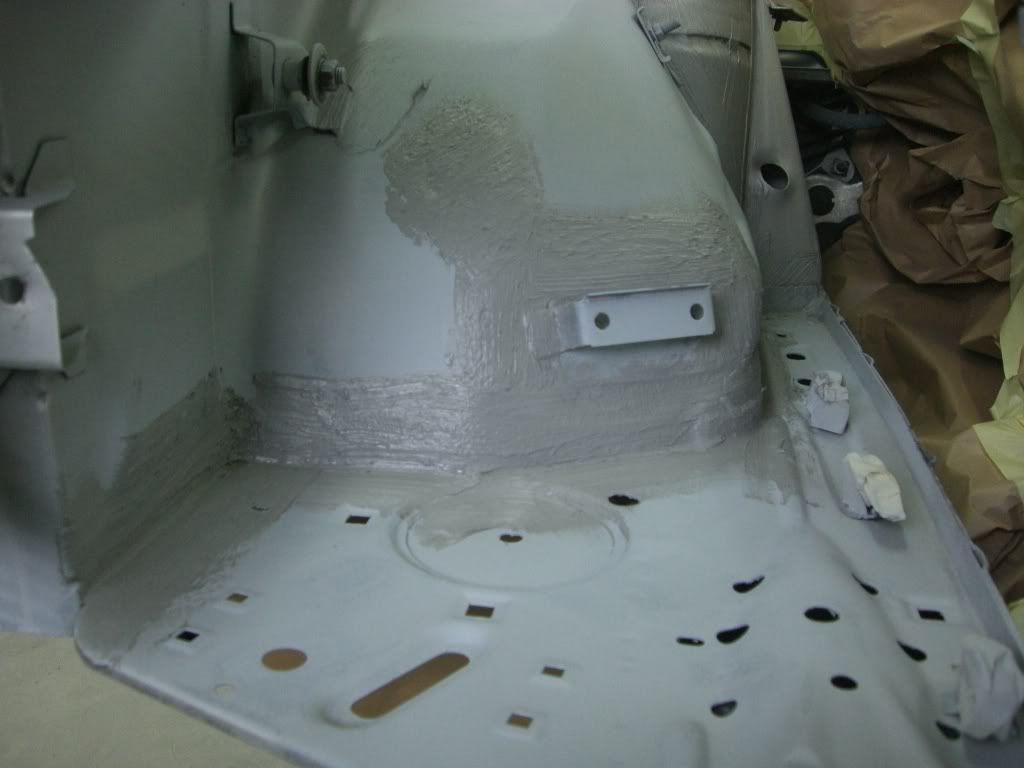
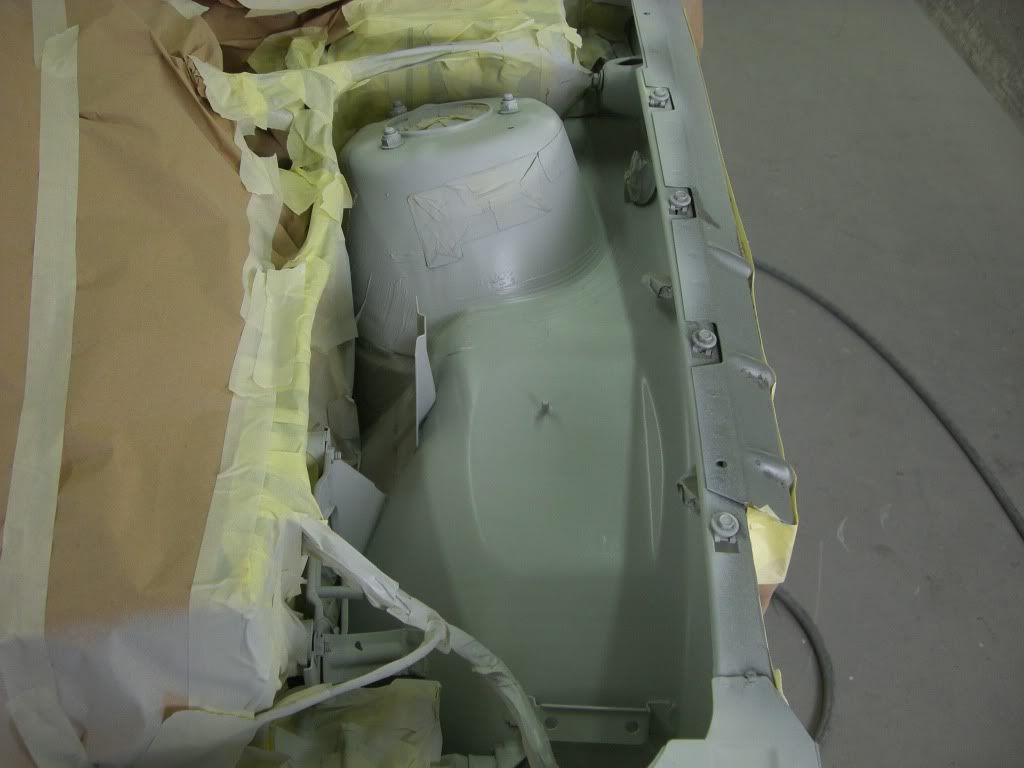
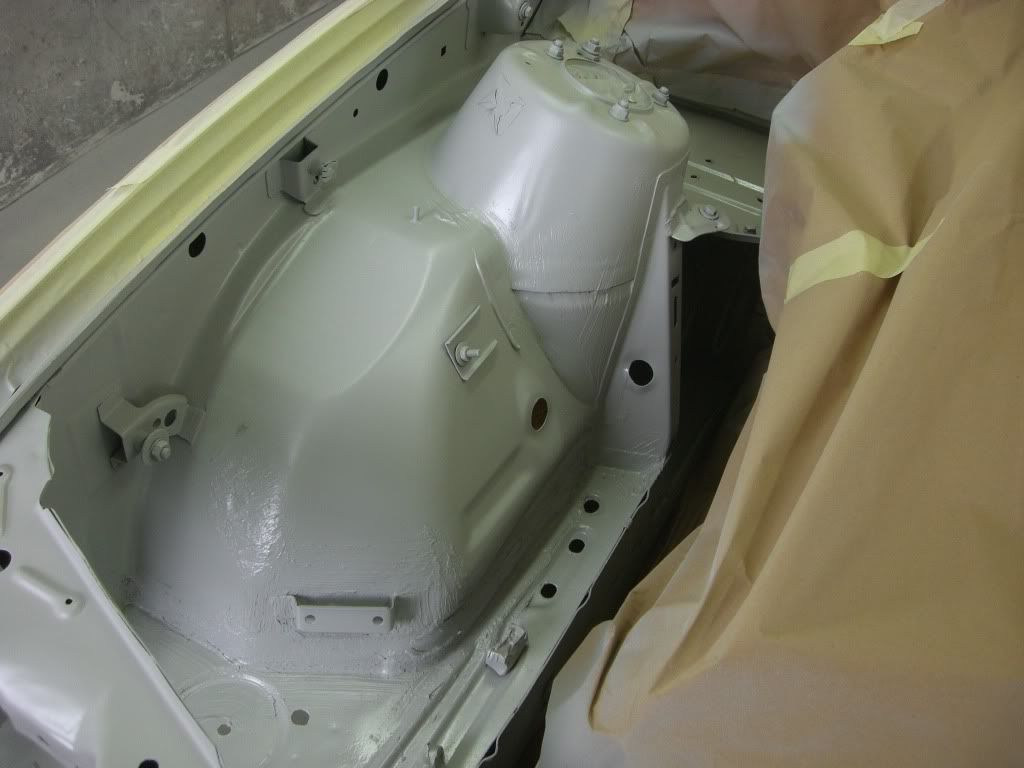
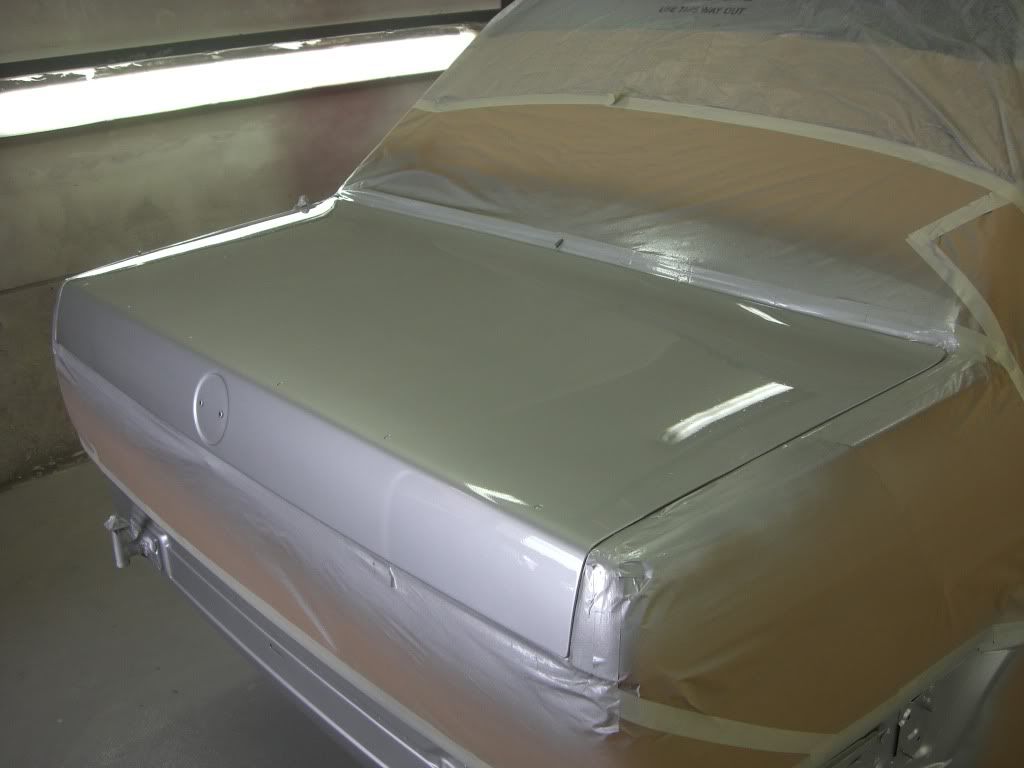
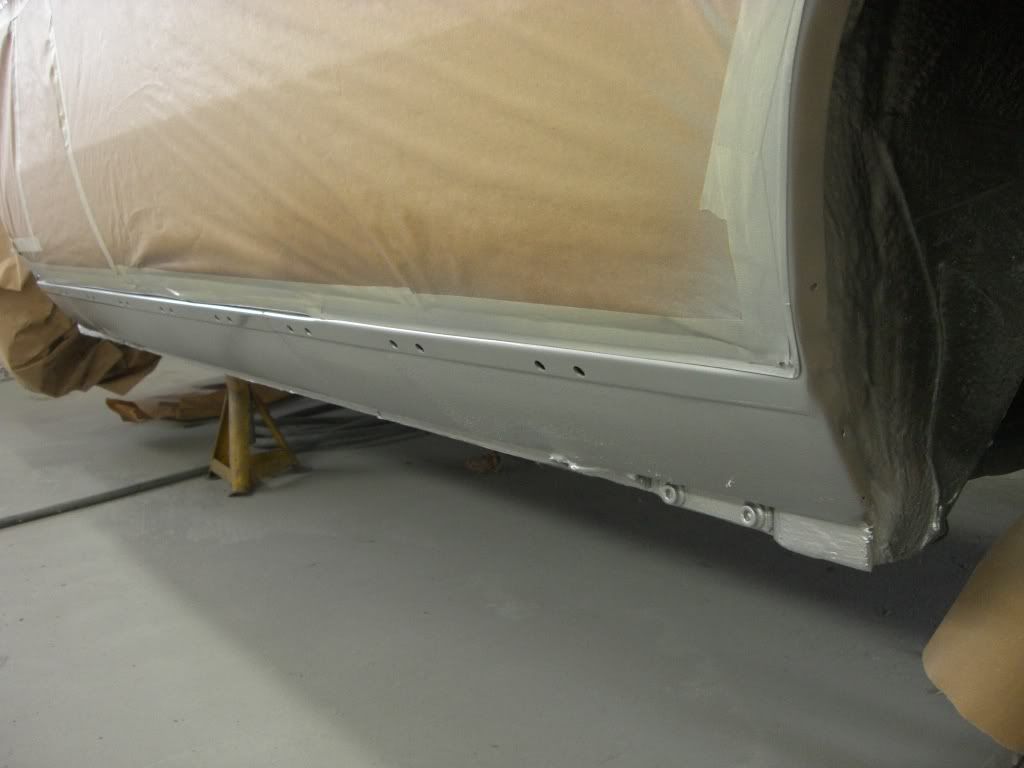
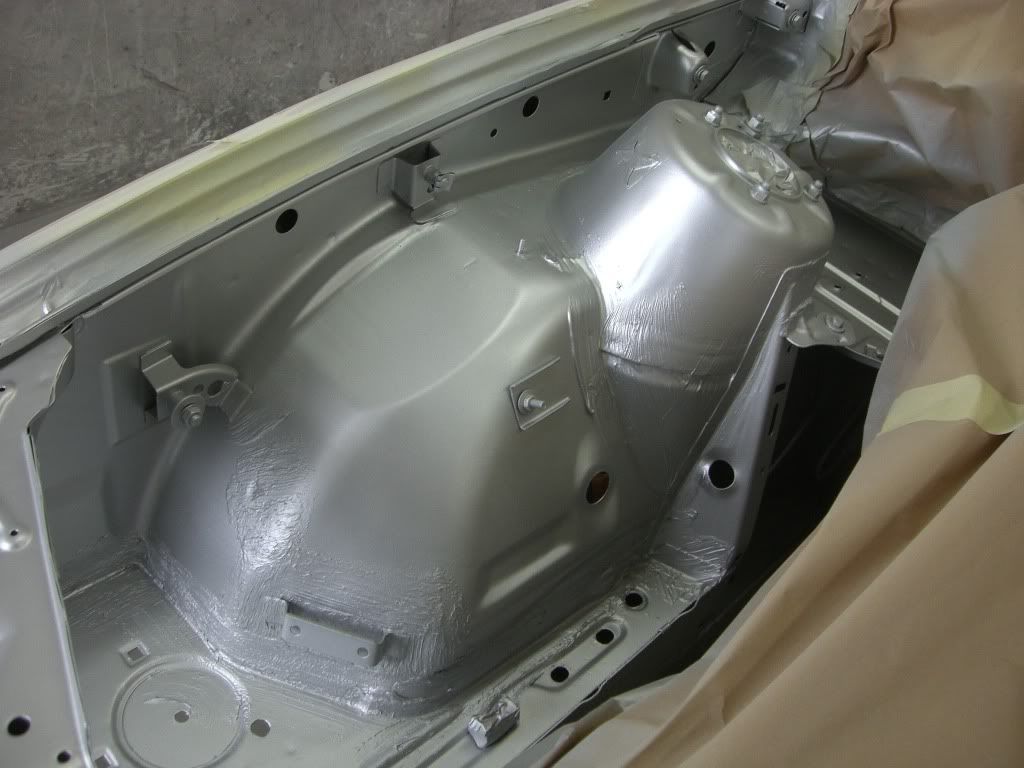
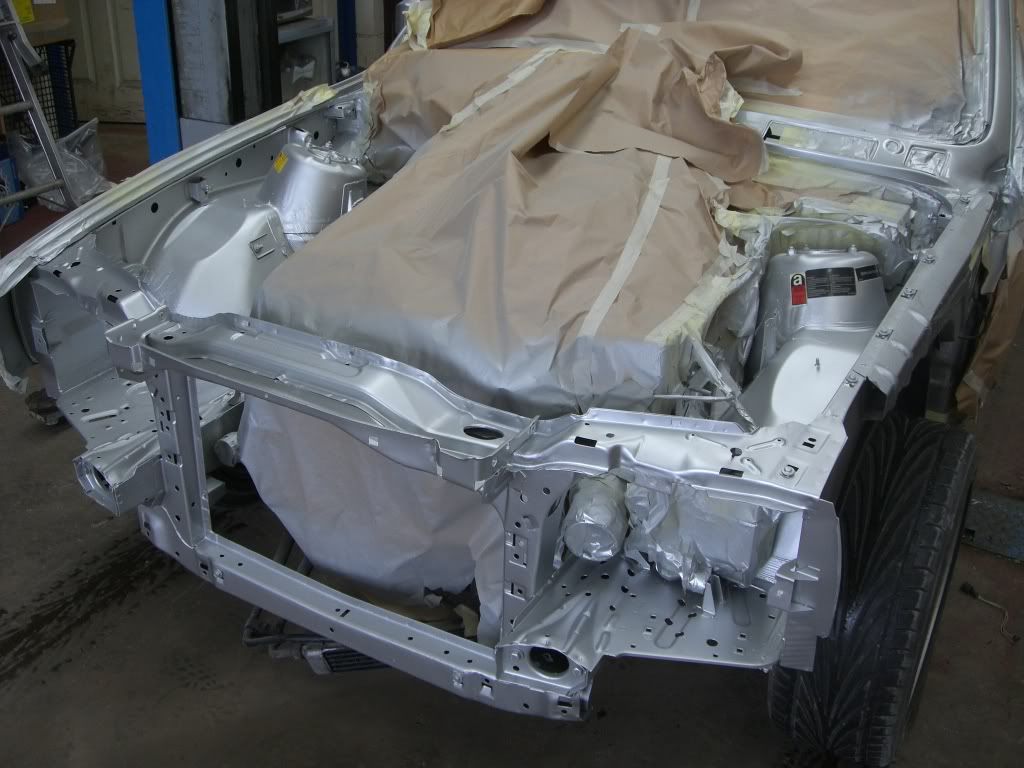
Overall the car is in excellent condition but i am on a mission to get this thing looking as good as i possibly can. The two sides including the bodykit, bonnet (apart from the back of it) and roof are immaculate but the rest of the car needs tidying especially the engine bay!

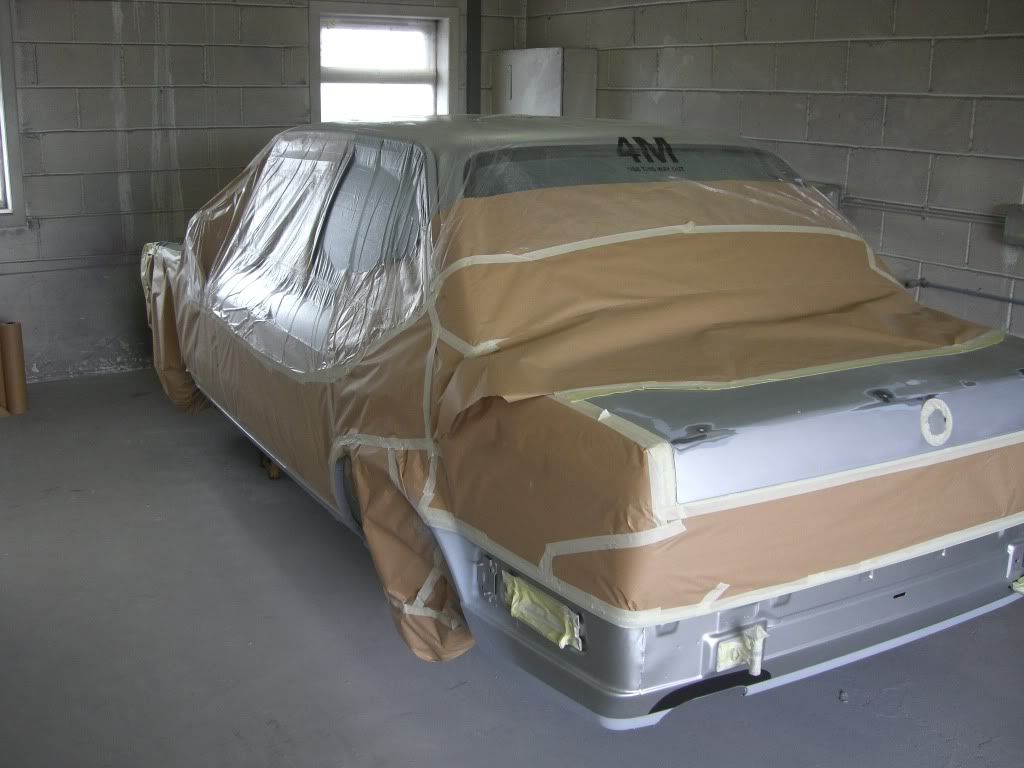
I am going totally standard with it by doing things like replacing the 205/50/15 tyres that are on the bbs's at the moment with the correct 205/55/15 tyres that would have been on it when it left the factory the car is also on the original suspension, i have also sold the mint stainless scorpion rear box that was on the car for a superb condition full standard exhaust system.

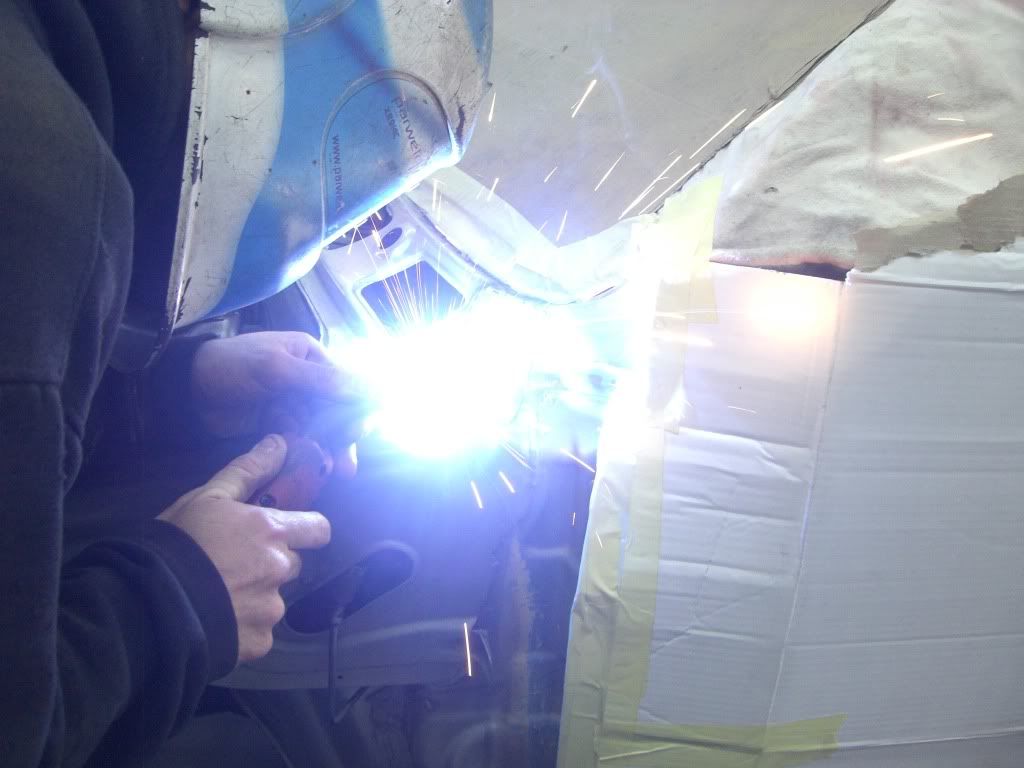
Anyways enough of the blethering for now and i'll get the pics up of the progress made this week when i figure out how to do it. Yes i know its a doddle but i am hopeless when it comes to doing computer related tasks, so i'll get them up tomorrow lunch time when my mate shows me what to do. :)
User avatar
si911t
E30 Zone Regular
E30 Zone Regular
Posts: 634
Joined: Thu Oct 07, 2010 11:00 pm
Location: Lancashire

Wed May 18, 2011 10:48 pm

Sounds good- look forward to seeing some pics
tonybtonyb
E30 Zone Addict
E30 Zone Addict
Posts: 3580
Joined: Wed Jun 13, 2007 11:00 pm
Location: essex

Wed May 18, 2011 11:19 pm

Hi fella pic's please winkeye
They don't make bm's like this anymore!..They should.
Image
User avatar
toole325i
E30 Zone Newbie
E30 Zone Newbie
Posts: 110
Joined: Sun Mar 23, 2008 11:00 pm

Wed May 18, 2011 11:49 pm

Yes! I managed it lol heres some pics of the engine bay as it sits right now i've stripped alot of it already. Radiator, bottles, etc. Still got to remove the airbox and other various parts for cleaning and painting.

I've done alot of work to the front panel, front bumper, front valance, rear bumper and side skirts already so i'll get pics of them up shortly, now i've figured out how to do it. winkeye

I threw in a random pic of the rear end aswell dono why but there it is minus the rear bumper and spoiler.


Image

Image

Image

Image
User avatar
toole325i
E30 Zone Newbie
E30 Zone Newbie
Posts: 110
Joined: Sun Mar 23, 2008 11:00 pm

Thu May 19, 2011 12:25 am

Front bumper before repairing: It actually looks ok in the pics but there were a few marks, chips, etc that needed rectifying.

Image

Image

Image

After all the repair work was carried out it was now ready for the primer stage: The front bumper had 12 coats of various primers, paints and lacquers applied to it during its life. Thats a hell of alot of material on one panel!

Image

Image

Now the same for the front valance:

Image

Image

Image

Image

Image

Ready for primer:

Image

Image

Image

Side skirts:

Image

Image

Image

Ready for primer:

Image

Rear bumper and toe eye covers:

Image

Image

Image

Ready for primer:

Image

Image

Image

Image


I'll add the pics of everything primed tomorrow plus the work carried out to the front panel from start to finish.
User avatar
toole325i
E30 Zone Newbie
E30 Zone Newbie
Posts: 110
Joined: Sun Mar 23, 2008 11:00 pm

Thu May 19, 2011 5:40 pm

heres a pic of all the parts in the spray booth ready for primer:

Image

time to prime lol. plastic primer on the left which goes on first then light grey high build primer

Image

all primed up :D

Image

next thing to get treated was the front panel which was rather rough and needed two corner sections removed and replaced with better sections from a donor panel kindly given to me by my mate.

heres the rotten corner bits that got removed:

Image

time to cut off the good bits from the donor panel:

Image

Image

new bits welded in place by my good mate kyle at chizfab, his workmanship is truly top notch!

Image

Image

Image

next thing to do was scotchbrite the whole panel with petrol and rub out any rust on the rest of it with the orbital sander and a 120grit disc then a 320grit disc.

Image

Image

now all the rubbed out rust was ready for this stuff to stop the dreaded brown stuff from returning in the future.

Image

it goes on white and turns purple blue with it bites into the treated areas.

Image

now thats dried its time to put some brushable seam sealer over the welds and then underseal the bits that require it.

Image

Image

Image

Image

now thats done its time to prime the whole thing and paint the back of it just now as the front of it will be getting painted at a later date.

Image

Image

Image

with that out the road for the moment it was on to the back of the bonnet.

as you can see its in need of some work :?

Image

i removed all the glue left by the old tatty heat insulation then scotchbrited the whole panel with petrol and rubbed out all the rust, again using 120grit and 320grit disc.

Image

time for the rust treatment again.

Image

after that dried it was time for primer and paint. but first i had to mask up the front of the bonnet to prevent it from getting covered in overspray.

Image

primed then painted.

Image

Image

with that done i ordered brand new insulation from my local bmw dealership phoenix in kirkcaldy along with some other bits n bobs aswell as a full inspection 2 service kit minus the diff oil which i'll order later on.

Image

Image

been rubbing all the primed bits today. great fun! //// just about done. I'll get more pics up tomorrow of progress made today,


:)
User avatar
bhups
E30 Zone Regular
E30 Zone Regular
Posts: 510
Joined: Tue Nov 06, 2007 11:00 pm

Thu May 19, 2011 5:57 pm

Good work mate!
Image
User avatar
toole325i
E30 Zone Newbie
E30 Zone Newbie
Posts: 110
Joined: Sun Mar 23, 2008 11:00 pm

Thu May 19, 2011 8:46 pm

bhups wrote:Good work mate!
Thanks mate. Theres still loads to do but i'm getting there lol. :)
User avatar
toole325i
E30 Zone Newbie
E30 Zone Newbie
Posts: 110
Joined: Sun Mar 23, 2008 11:00 pm

Fri May 20, 2011 9:34 pm

Quick update of further progress made today.

sideskirts, front panel, front bumper and toe eve covers. Primer all rubbed, panel wiped and ready for some sterling silver and lacquer. :)

Image

Here's the results after the paint fumes were extracted.

Image

Image

Image

Image

Image

Image

Image

Image

Image

I'm delighted with the finish i achived today :D

Same treatment for the front valance and rear bumper tomorrow.
jaymos
E30 Zone Addict
E30 Zone Addict
Posts: 2271
Joined: Tue Aug 25, 2009 11:00 pm
Location: st helens

Fri May 20, 2011 10:14 pm

I love these threads, good work fella. :cool:
Image

vier Türen sind für Menschen mit Freunden.
Alpina99
E30 Zone Camper
E30 Zone Camper
Posts: 1000
Joined: Sat Nov 17, 2007 11:00 pm
Location: Portsmouth

Sat May 21, 2011 7:26 am

That's going to be a stunning motor when it's finished,
Keep the updates coming,
This is great,
:D
Gone, but not forgotten !!
oomz1975
E30 Zone Addict
E30 Zone Addict
Posts: 2019
Joined: Mon Feb 09, 2009 11:00 pm
Location: London UK

Sat May 21, 2011 8:40 am

Great work, this is my favourite type of thread.
Attention to detail is spot on. :D
Image
oguz327
Captain Armco
Captain Armco
Posts: 4174
Joined: Tue Oct 25, 2005 11:00 pm
Location: Hampshire

Sat May 21, 2011 9:06 am

Fresh Stirling mmmm :cool:
suchy
True Zone Relic
Posts: 6604
Joined: Tue Apr 26, 2005 11:00 pm
Location: Portsmouth
Contact:

Sat May 21, 2011 9:28 am

This is kool, mine needs all of this done (mine is also worse than yours) so a good inspiration 8) I do love a proper full-on resto read, but know mine will never get it so this kind of resto is more real world for me. Keep the updates and pics coming :D
User avatar
toole325i
E30 Zone Newbie
E30 Zone Newbie
Posts: 110
Joined: Sun Mar 23, 2008 11:00 pm

Sun May 22, 2011 10:30 pm

Quick update of further progress made on saturday.

front valance and rear bumper, primer rubbed, panel wiped awaiting paint and lacquer.

Image

All done :D

Image

Image

Image

Image

Image

Image

Image

Image

With all these bits done now its time to start the dreaded engine bay tomorrow. :?
tonybtonyb
E30 Zone Addict
E30 Zone Addict
Posts: 3580
Joined: Wed Jun 13, 2007 11:00 pm
Location: essex

Mon May 23, 2011 10:59 pm

So far so good keep it up :D
They don't make bm's like this anymore!..They should.
Image
lyricalnut02
E30 Zone Regular
E30 Zone Regular
Posts: 849
Joined: Fri Nov 23, 2007 11:00 pm
Location: London

Mon May 23, 2011 11:16 pm

excellent resto mate, going to be stunning when finished.
325i Sport Tech 1 - R.I.P

E30 addict.
User avatar
toole325i
E30 Zone Newbie
E30 Zone Newbie
Posts: 110
Joined: Sun Mar 23, 2008 11:00 pm

Wed May 25, 2011 10:34 pm

Thanks for the kind comments guys i'm really enjoying doing this now its going totally according to plan. :D

Been a busy week so heres an update of the progress made.

First thing on the cards this week was to rectify all the rust on the engine bay/slam panel.

Image

Image

Image

After a whole day of scotchbrighting with petrol, cleaning it with petrol and alot of grinding and buffing with 80grit heres what i achived.

Image

Image

Image

Image

Image

now thats done it was time for some rust proofing again.

Image

Image

Image

Now the engine bay was ready for primer it was time to move onto the sills and wheel arches

heres pics of the passenger and drivers side sills before i started

Image

Image

Image

Image

So i ground all the rust back and scotchbrighted the whole sill on both sides.

Image

Image

Image

Image

Then i applied the rust proofing then the seamsealer.

Image

Image

Image


Image

Image

Image

Image

Same drill for the wheel arches.

Image

Image

Image

Image

Image

Image

Image

Image

Image

Now thats done i'm going to move onto the bootlid and scuttle panel tomorrow before more priming and painting. winkeye
Simon13
The longest resto in the world !
Posts: 22697
Joined: Mon Jan 10, 2005 11:00 pm
Location: Camberley, Surrey don't u know

Wed May 25, 2011 11:36 pm

epic. serious graft into it. You can't beat a sterling sport.
User avatar
toole325i
E30 Zone Newbie
E30 Zone Newbie
Posts: 110
Joined: Sun Mar 23, 2008 11:00 pm

Thu May 26, 2011 10:59 pm

Got lots more done today so heres a round up of whats been happening down at toole design HQ!

First thing for today was to repair the nasty bits on the bootlid.

Image

Image

Rubbed all the bad bits out and applied some rust proofing.

Image

Image

Image

Time to mask it up for primer and paint.

Image

Image

Image

Image

Then i undersealed the sills and rear panel.

Image

Image

Image

Now it was all masked and sealed it was time for kyle at chizfab to work his magic again.

First thing to get some new metal was a rather nasty bit on the engine bay.

Image

Kyle cut out the rot replicated the section needing replaced then welded it in. Mint!!

Image

Image

While he was doing that i had some time to tidy up some of the bits to go back in the engine bay after it was painted.

Image

Image

Image

Image

Image

Image

Image

With the engine bay section done kyle was ready to move onto the scuttle panel.

It doesnt look to bad in this pic but it was!

Image

We proceeded to dig out alot of fibre glass from a previous repair. there was alot of it but we got it all out eventually. :)

Image

Now we had good metal to weld on kyle proceeded to work his magic.

Image

Image

Image

Image

Image

Image

With the new section welded in place and buffed down all it needed now was a light skim of filler.

Image

With all the prep work complete on the car its time to prime and paint all the parts shown tomorrow.
suchy
True Zone Relic
Posts: 6604
Joined: Tue Apr 26, 2005 11:00 pm
Location: Portsmouth
Contact:

Fri May 27, 2011 8:48 am

Coming along nicely I see... :D
User avatar
toole325i
E30 Zone Newbie
E30 Zone Newbie
Posts: 110
Joined: Sun Mar 23, 2008 11:00 pm

Fri May 27, 2011 6:42 pm

What a day! i'm knackered, had to go in at 6:30am today so i could get all this done before kyle could get a shot of the booth tonight to paint his drift car. Anyways heres what went down today.

First of all i finished the rest of the masking from yesterday

Image

Image

The engine bay took flippin ages!!!!!!!

Image

Image

Image

I then etch primed all the bare metal.

Image

Image

Image

Then i seam sealed the bracket kyle welded in the bay and some other bits.

Image

Image

Now thats done it was time to shoot some 2pack primer.

Image

Image

Image

Image

Image

Once the primer was rock hard it was ready to be flattened using 320grit discs then 500grit discs then all panel wiped and painted.

Image

Image

Image

Image

Image

Image

Image

Image

Image

Image

Image

Image
tonybtonyb
E30 Zone Addict
E30 Zone Addict
Posts: 3580
Joined: Wed Jun 13, 2007 11:00 pm
Location: essex

Sat May 28, 2011 2:38 pm

A work of art fella! :cool:
They don't make bm's like this anymore!..They should.
Image
User avatar
toole325i
E30 Zone Newbie
E30 Zone Newbie
Posts: 110
Joined: Sun Mar 23, 2008 11:00 pm

Sat May 28, 2011 6:24 pm

tonybtonyb wrote:A work of art fella! :cool:
Thanks very much mate. I actually didn't expect this resto to go as well as its going. Cant wait to get stuck into that engine bay next week :)
RustyRuss
E30 Zone Regular
E30 Zone Regular
Posts: 985
Joined: Sat Nov 12, 2005 11:00 pm
Location: Central Scotland

Sat May 28, 2011 11:41 pm

Stunning Stunning car mate, love the thread, no doubt see you about ... Pheonix is my local too!
Russell A Macfarlane
Central Scotland
1987 Lachs Silver BMW E30 320i 4 Door Manual
User avatar
toole325i
E30 Zone Newbie
E30 Zone Newbie
Posts: 110
Joined: Sun Mar 23, 2008 11:00 pm

Sun May 29, 2011 12:21 am

RustyRuss wrote:Stunning Stunning car mate, love the thread, no doubt see you about ... Pheonix is my local too!
Thanks very much mate. Decent! yea there pretty fond of me now seeing as i've spent a flippin fortune in there parts department in the last few weeks. lol
RustyRuss
E30 Zone Regular
E30 Zone Regular
Posts: 985
Joined: Sat Nov 12, 2005 11:00 pm
Location: Central Scotland

Sun May 29, 2011 8:28 am

Haha yeah i can well imagine mate, they will be smiling as soon as they see you pull up! All worth it though mate as at the end of the day you have an absolute stunner there :-) Look forward to seeing it in the flesh!!
Russell A Macfarlane
Central Scotland
1987 Lachs Silver BMW E30 320i 4 Door Manual
User avatar
toole325i
E30 Zone Newbie
E30 Zone Newbie
Posts: 110
Joined: Sun Mar 23, 2008 11:00 pm

Mon May 30, 2011 9:21 pm

Quick update of todays progress

Airbox and other bits before and after.

Image

Image

Image

Image

Image

Image

Image

Image

Image

Got loads more done to the rest of the engine bay today so i'll get some more pix up of it when its all done.
User avatar
mrjonchandler
E30 Zone Regular
E30 Zone Regular
Posts: 832
Joined: Sun Sep 06, 2009 11:00 pm
Location: Warks

Wed Jun 01, 2011 12:10 am

How do you get the plastic parts looking so good?
Where are you based, the level of work looks amazing, nice one.
Jon
leeparkes
Married to the E30 Zone
Posts: 9538
Joined: Thu Jan 03, 2008 11:00 pm
Location: Black country

Wed Jun 01, 2011 12:33 am

Cool thread, subscribed.

Sterling sport FTW 8)
Cypriotgeeza wrote:I done both my mates in my old 318is
felt so proud,even tried it with a E30 325i and got put in my place.. :o:
User avatar
toole325i
E30 Zone Newbie
E30 Zone Newbie
Posts: 110
Joined: Sun Mar 23, 2008 11:00 pm

Wed Jun 01, 2011 7:41 pm

mrjonchandler wrote:How do you get the plastic parts looking so good?
Where are you based, the level of work looks amazing, nice one.
Jon
I scotchbrite them with petrol to get all the crap off them then give them a light haze coat of matt black aerosol.

I'm based in lochgelly fife just outside edinburgh.

Thanks for the comments mate :)
User avatar
mrjonchandler
E30 Zone Regular
E30 Zone Regular
Posts: 832
Joined: Sun Sep 06, 2009 11:00 pm
Location: Warks

Wed Jun 01, 2011 7:53 pm

toole325i wrote:
mrjonchandler wrote:How do you get the plastic parts looking so good?
Where are you based, the level of work looks amazing, nice one.
Jon
I scotchbrite them with petrol to get all the crap off them then give them a light haze coat of matt black aerosol.

I'm based in lochgelly fife just outside edinburgh.

Thanks for the comments mate :)
What is scotchbrite? The airbox and metal parts come up like new! Any particular brand of aerosol?
Would be keen to do this to my engine.
Jon
User avatar
toole325i
E30 Zone Newbie
E30 Zone Newbie
Posts: 110
Joined: Sun Mar 23, 2008 11:00 pm

Wed Jun 01, 2011 8:28 pm

mrjonchandler wrote:
toole325i wrote:
mrjonchandler wrote:How do you get the plastic parts looking so good?
Where are you based, the level of work looks amazing, nice one.
Jon
I scotchbrite them with petrol to get all the crap off them then give them a light haze coat of matt black aerosol.

I'm based in lochgelly fife just outside edinburgh.

Thanks for the comments mate :)
What is scotchbrite? The airbox and metal parts come up like new! Any particular brand of aerosol?
Would be keen to do this to my engine.
Jon
Its like a brilo pad mate, you can pick them up at your local halfords in the paint and car bodywork section. Im just using halfords own brand matt black its great stuff but the key to success is light haze coats, put it on to thick and it'll just flake off.

Yeah, go for it! Its time consuming but so worth it my engine bays nearly done now so i'll get some new pics up of it tomorrow.
User avatar
mrjonchandler
E30 Zone Regular
E30 Zone Regular
Posts: 832
Joined: Sun Sep 06, 2009 11:00 pm
Location: Warks

Wed Jun 01, 2011 10:41 pm

toole325i wrote:
mrjonchandler wrote:
toole325i wrote: I scotchbrite them with petrol to get all the crap off them then give them a light haze coat of matt black aerosol.

I'm based in lochgelly fife just outside edinburgh.

Thanks for the comments mate :)
What is scotchbrite? The airbox and metal parts come up like new! Any particular brand of aerosol?
Would be keen to do this to my engine.
Jon
Its like a brilo pad mate, you can pick them up at your local halfords in the paint and car bodywork section. Im just using halfords own brand matt black its great stuff but the key to success is light haze coats, put it on to thick and it'll just flake off.

Yeah, go for it! Its time consuming but so worth it my engine bays nearly done now so i'll get some new pics up of it tomorrow.
Brilliant, will check it out. Thanks for the advice.
Jon
User avatar
toole325i
E30 Zone Newbie
E30 Zone Newbie
Posts: 110
Joined: Sun Mar 23, 2008 11:00 pm

Wed Jun 01, 2011 10:48 pm

mrjonchandler wrote:
toole325i wrote:
mrjonchandler wrote: What is scotchbrite? The airbox and metal parts come up like new! Any particular brand of aerosol?
Would be keen to do this to my engine.
Jon
Its like a brilo pad mate, you can pick them up at your local halfords in the paint and car bodywork section. Im just using halfords own brand matt black its great stuff but the key to success is light haze coats, put it on to thick and it'll just flake off.

Yeah, go for it! Its time consuming but so worth it my engine bays nearly done now so i'll get some new pics up of it tomorrow.
Brilliant, will check it out. Thanks for the advice.
Jon
Your welcome mate.
Post Reply