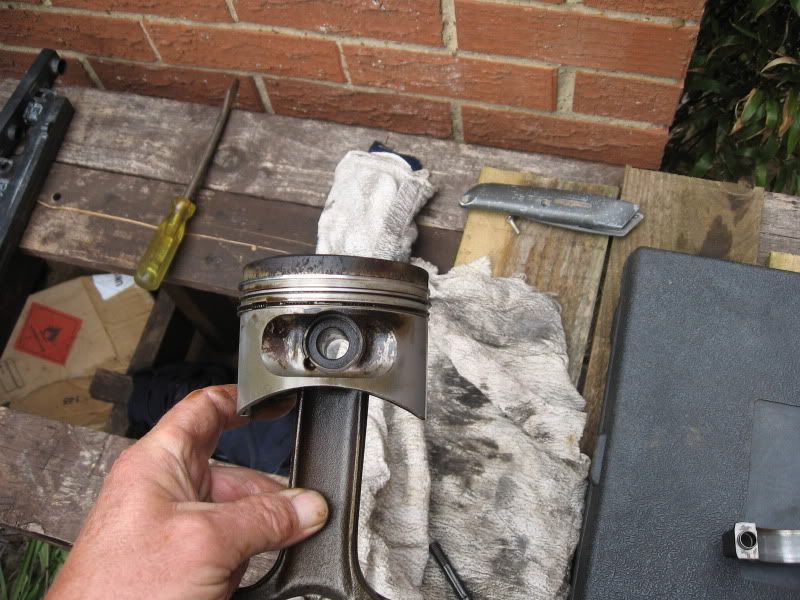
Cylinder Head Stripdown & possible 2.8 Stroker Build.

Need technical Q/A then you're in the right place

Moderator: martauto

User avatar
gooner1
Out humping Reindeer
Posts: 13280
Joined: Fri Apr 14, 2006 11:00 pm
Location: Northampton.For my sins.

Post Wed May 04, 2011 5:33 pm

Before i go any further with this lump, is the below normal :?:

Image

Image

To be fair, the coolant left inside does appear to be clean,
just concerned about the rust on the outer cylinder wall, though it may well just be on the surface.
Image
B7
E30 Zone Team Member
Posts: 15841
Joined: Tue Feb 13, 2007 11:00 pm
Location: Surrey / West Sussex

Post Wed May 04, 2011 7:14 pm

These are more often than not, an ugly sight in there. As long as you run the correct mix of coolant then it won't get any worse.

Seen some that have big miles on them clean as a whistle. Seen others on more normal mileage that look like shit in there. I wouldn't worry too much. :D
B7's Motto. "If it's French, BURN IT!!!!!!"
User avatar
gooner1
Out humping Reindeer
Posts: 13280
Joined: Fri Apr 14, 2006 11:00 pm
Location: Northampton.For my sins.

Post Wed May 04, 2011 8:20 pm

That's a relief, Trev. :thumb:

Have got the loan of an Engine stand later in the week, does the
Flywheel need to be removed to mount the engine on it :?:
Image
town325i
E30 Zone Team Member
Posts: 7050
Joined: Thu Jun 26, 2008 11:00 pm
Location: cannock staffordshire

Post Wed May 04, 2011 8:33 pm

gooner1 wrote:That's a relief, Trev. :thumb:

Have got the loan of an Engine stand later in the week, does the
Flywheel need to be removed to mount the engine on it :?:
the stand i have the fly wheel needs taking off
Image
B7
E30 Zone Team Member
Posts: 15841
Joined: Tue Feb 13, 2007 11:00 pm
Location: Surrey / West Sussex

Post Wed May 04, 2011 10:14 pm

town325i wrote:
gooner1 wrote:That's a relief, Trev. :thumb:

Have got the loan of an Engine stand later in the week, does the
Flywheel need to be removed to mount the engine on it :?:
the stand i have the fly wheel needs taking off
Yeah, I think it does on the one I borrowed from Barry as well.
B7's Motto. "If it's French, BURN IT!!!!!!"
User avatar
gooner1
Out humping Reindeer
Posts: 13280
Joined: Fri Apr 14, 2006 11:00 pm
Location: Northampton.For my sins.

Post Thu May 05, 2011 8:29 pm

It does indeed need removing. Any tips on how to chock the Flywheel or Crank bolt
so i can undo the Flywheel bolts :?:
Image
daimlerman
**BANNED**
Posts: 15968
Joined: Mon Feb 27, 2006 11:00 pm
Location: Grumpy Old Man

Post Thu May 05, 2011 9:06 pm

Stick a large screwdriver through the starter hole and into the ring gear teeth.

BTW,when you find a way to undo the front crank bolt with the engine out,I am all ears.... :D
Youth is wasted on the young.
User avatar
Brianmoooore
E30 Zone Team Member
Posts: 49360
Joined: Mon Jan 10, 2005 11:00 pm

Post Thu May 05, 2011 10:05 pm

gooner1 wrote: Any tips on how to chock the Flywheel or Crank bolt
so i can undo the Flywheel bolts :?:
I use a tapered block of wood that I keep especially for the purpose, hammered lightly into the starter hole.
User avatar
gooner1
Out humping Reindeer
Posts: 13280
Joined: Fri Apr 14, 2006 11:00 pm
Location: Northampton.For my sins.

Post Fri May 06, 2011 1:43 pm

Think Brians wood solution sounds a bit more engine friendly ,Malc. :)
Crankshaft bolt , i was kind of putting off thinking about that.
Image
User avatar
gooner1
Out humping Reindeer
Posts: 13280
Joined: Fri Apr 14, 2006 11:00 pm
Location: Northampton.For my sins.

Post Fri May 06, 2011 3:05 pm

http://forums.nicoclub.com/how-to-remov ... 86353.html.

Used the above method, easy as. :D

Image

Ready to mount block on to stand now, am i right with the
stand arm placements, demonstrated by my not so willing
assistant here.

Image

Image

If so what bolts are normally used for this, the four holes i[m
using are of two different sizes, and i presume the bolt heads need to big enough to not slip through the mounting arms.
Last edited by gooner1 on Fri May 06, 2011 4:16 pm, edited 3 times in total.
Image
Duke137
Married to the E30 Zone
Posts: 7207
Joined: Sat Aug 29, 2009 11:00 pm

Post Fri May 06, 2011 3:12 pm

gooner1 wrote:http://forums.nicoclub.com/how-to-remov ... 86353.html.

Used the above method, easy as. :D
Link doesn't work dude
How do you pronounce 'either'? I say 'either', but some say 'either'. Either is correct.
User avatar
gooner1
Out humping Reindeer
Posts: 13280
Joined: Fri Apr 14, 2006 11:00 pm
Location: Northampton.For my sins.

Post Fri May 06, 2011 3:53 pm

Image
B7
E30 Zone Team Member
Posts: 15841
Joined: Tue Feb 13, 2007 11:00 pm
Location: Surrey / West Sussex

Post Fri May 06, 2011 5:10 pm

gooner1 wrote:http://forums.nicoclub.com/how-to-remov ... 86353.html.

Used the above method, easy as. :D

Image

Ready to mount block on to stand now, am i right with the
stand arm placements, demonstrated by my not so willing
assistant here.

Image

Image

If so what bolts are normally used for this, the four holes i[m
using are of two different sizes, and i presume the bolt heads need to big enough to not slip through the mounting arms.
Bottom ones are incorrect mate. need move it up to the lowest thread hole on the actual iron block. Where your mounting it there is to the bellhousing reinforcing panel which will need to be removed before the sump.
Last edited by B7 on Fri May 06, 2011 5:12 pm, edited 1 time in total.
B7's Motto. "If it's French, BURN IT!!!!!!"
B7
E30 Zone Team Member
Posts: 15841
Joined: Tue Feb 13, 2007 11:00 pm
Location: Surrey / West Sussex

Post Fri May 06, 2011 5:12 pm

And I think they are M12 but I used M12 studding and nuts with big penny washers as the holes in the block are not threaded.
B7's Motto. "If it's French, BURN IT!!!!!!"
User avatar
gooner1
Out humping Reindeer
Posts: 13280
Joined: Fri Apr 14, 2006 11:00 pm
Location: Northampton.For my sins.

Post Fri May 06, 2011 5:48 pm

B7 wrote:And I think they are M12 but I used M12 studding and nuts with big penny washers as the holes in the block are not threaded.
Trial fitted it using the old head bolts, perfect fitment width wise
but too long, so off to B@Q for shorter bolts of the same size
and nuts to fit.


" Bottom ones are incorrect mate. need move it up to the lowest thread hole on the actual iron block. Where your mounting it there is to the bellhousing reinforcing panel which will need to be removed before the sump."

Noted Trev. :thumb:
Image
User avatar
gooner1
Out humping Reindeer
Posts: 13280
Joined: Fri Apr 14, 2006 11:00 pm
Location: Northampton.For my sins.

Post Mon May 09, 2011 6:22 pm

Even by my standards i think my latest feck up is of epic proportions :(
Left two Camshafts i had removed from cylinder heads underneath a waterproof tarpaulin , weighted it down securely, or so i thought. Wind must have got beneath and lifted
the Tarpaulin. Result.... 2 Camshafts with extensive surface rust. :x

Please someone.... anyone.. tell me this can be rectified.
On another note, is this metal gasket reusable, sits up against the block, behind the flywheel.

Image
Image
daimlerman
**BANNED**
Posts: 15968
Joined: Mon Feb 27, 2006 11:00 pm
Location: Grumpy Old Man

Post Mon May 09, 2011 7:26 pm

Engine back plate(metal gasket thingy)will clean up fine and be re-usable.

Camshafts are a different matter,I'm going to stick my neck on the block and suggest that you clean them up,on the basis that their working surfaces are case hardened.So start with non-aggressive stuff like WD40,and then move up to fine emery cloth.
Youth is wasted on the young.
User avatar
mattycoops43
E30 Zone Regular
E30 Zone Regular
Posts: 471
Joined: Sun Jan 02, 2011 11:00 pm
Location: Newport, South Wales

Post Mon May 09, 2011 7:44 pm

I would say the rust hasn't been on there long enough to cause deep pitting, but it's if it will clean off ok or not, WD40 is amazing at removing surface rust so hopefully that will do the trick, certainly shouldn't need an abrasive. I would also suggest that once in the engine and being used, that will help stop it re-occuring, but all the time they are sat about waiting to be installed is gonna be bad, especially now it has started to rust inthe first place.

I would clean it all off, then liberally paint grease on and leave them in a sealed bag of some kind, and clean them off literally just before you re install.
1990 325i se "weinrot"-How did they know?
User avatar
gooner1
Out humping Reindeer
Posts: 13280
Joined: Fri Apr 14, 2006 11:00 pm
Location: Northampton.For my sins.

Post Wed May 11, 2011 6:53 am

Result on the Camshafts, a liberal spraying of an Oil used on Railway moving
parts and it all just wiped off. All wrapped up in Oil soaked newspaper and boxed up.
They, and many other parts now reside in the kitchen. Well , she did want it off the decking :)
Trev, spent a good while reading through your Rebuild post.
http://www.e30zone.net/modules.php?name ... &start=250.

Great work, and should cut down on the amount of questions i need to ask.
Now need to find a way of undoing the Crankshaft before i mount it on the Engine stand, thanks for that Whipsey :thumb:

Rang the Machine shop re my Head yesterday, they hadn't even started on it, so decided
to add a recut/valve lapping to the work already requested.
Really need to get a shift on now as the MOT/ reTax is due in July, and can't see it passing while it's smoking as it is atm.
Image
Andyboy
Alpina Colada
Posts: 12577
Joined: Mon Sep 11, 2006 11:00 pm
Location: Notts

Post Wed May 11, 2011 12:36 pm

Crankshaft bolt = massive fun. The problem isn't stopping the crank from turning (hammer handle) or even how tight it is - it's trying to keep the block still whilst you undo the bastard.

Not as bad as the M30 crank nut though - 440nm. 8O The last one of those I did required a grinder and a cold chisel - no way was it coming off, even with 3/4 inch stuff and the BMW crankshaft locking tool. Ever seen a 3/4 inch bar bend?
User avatar
gooner1
Out humping Reindeer
Posts: 13280
Joined: Fri Apr 14, 2006 11:00 pm
Location: Northampton.For my sins.

Post Wed May 11, 2011 1:32 pm

Andyboy wrote:Crankshaft bolt = massive fun. The problem isn't stopping the crank from turning (hammer handle) or even how tight it is - it's trying to keep the block still whilst you undo the bastard.
That's exactly the problem I'm having.Andy.

As this is a temporary Engine, i might just take a chance on it Pull
my current block with suspected broken rings, fit the rebuilt
head to the temp one, after as good a clean up as i can do,, along
with a rebuilt Oil Pump and new sump gaskets. :idea:

Then i can work on my original Engine, which i intend to fit
the 2.8 Crank to anyway. I will make sure i loosen the Crank
before i pull the engine though.

As an after thought, how much work can i do with the Sump removed but with the Crank still installed :?:
Image
daimlerman
**BANNED**
Posts: 15968
Joined: Mon Feb 27, 2006 11:00 pm
Location: Grumpy Old Man

Post Wed May 11, 2011 3:34 pm

Only way that I have found to undo that 22mm crank bolt is by using a long bar,a block of timber and the starter motor.....engine still in the car,of course!

The current Machine Mart catalogue(spring/summer)page 289 shows a 'torque multiplier',this was a tool mentioned to me some years back when I had my M20 in bits.No idea how this works,but another zoner may see this and enlighten us!
Youth is wasted on the young.
User avatar
gooner1
Out humping Reindeer
Posts: 13280
Joined: Fri Apr 14, 2006 11:00 pm
Location: Northampton.For my sins.

Post Wed May 11, 2011 8:14 pm

Haven't completely given up on undoing the Crank just yet, i have a plan that involves
a pickup with a Hiab, and adjustable stabilizing legs.

In the meantime, just partly stripped down the Oil Pump i bought of Ezagood.

Image

Image

Image

From the outside appearance it looks almost new, inside it's just as good :D

Image

Image

No marks on Cog teeth at all. Metal sieve/filter needs a bit of a clean but happy with it's condition

Image

Still got to look at the 3rd Cog/gear wheel, when I've read my Bentley and figured out how
to get at it but can't see why it won't be in the same condition as the other 2.
Image
Rav335uk
E30 Zone Meets/Events Team
Posts: 27978
Joined: Wed Jan 19, 2005 11:00 pm
Location: Mad mad mad

Post Wed May 11, 2011 8:35 pm

Looks like you're turning into the "Diddler" there Rob :mad:
Image
If you Got "Haters",Then your doing something Right!
CR24v??? Where's it all gone?? LOL
User avatar
gooner1
Out humping Reindeer
Posts: 13280
Joined: Fri Apr 14, 2006 11:00 pm
Location: Northampton.For my sins.

Post Wed May 11, 2011 8:41 pm

Rav335uk wrote:Looks like you're turning into the "Diddler" there Rob :mad:
Judging by the standard of Pauls car, that would be no bad thing,Rav.
Image
User avatar
gooner1
Out humping Reindeer
Posts: 13280
Joined: Fri Apr 14, 2006 11:00 pm
Location: Northampton.For my sins.

Post Thu May 12, 2011 9:22 pm

Right, some progress, of a sort.
Between my Daughter, myself and our very nice Polish neighbour, Mr Kronenburg 1064, we
managed to lift the engine and get it mounted on the stand.

Image

Image

Image

Sump removed.

Image

Oil pump removed.

Image

Image

Pics of the internals.
Image

Image

Image

Image

Image

A few more with the Crank moved round a bit.

Image

Image

Image

Slight apologies for the amount of pics but as i don't really know what I'm looking for, or at, i'm sort of hoping someone spots
anything amiss.

Steptoe would be proud of our back garden atm. :o:
Image
User avatar
gooner1
Out humping Reindeer
Posts: 13280
Joined: Fri Apr 14, 2006 11:00 pm
Location: Northampton.For my sins.

Post Thu May 12, 2011 10:29 pm

Can get the loan of one of these from work to have a go on the Crankshaft, trouble is it's a 1inch drive and i can't find a 1 to half inch adaptor anywhere.


http://www.bance.com/en/tools/impactwre ... ayout=item
Image
User avatar
mark_i
E30 Zone Regular
E30 Zone Regular
Posts: 972
Joined: Thu Aug 10, 2006 11:00 pm
Location: Widnes

Post Thu May 12, 2011 10:47 pm

better to buy a 22mm 6-sided socket with 1 inch drive
daimlerman
**BANNED**
Posts: 15968
Joined: Mon Feb 27, 2006 11:00 pm
Location: Grumpy Old Man

Post Fri May 13, 2011 1:03 am

gooner1 wrote:Can get the loan of one of these from work to have a go on the Crankshaft, trouble is it's a 1inch drive and i can't find a 1 to half inch adaptor anywhere.


http://www.bance.com/en/tools/impactwre ... ayout=item
Wonder how far your engine and stand will fly with a two stroke engine attached to the crank bolt.... winkeye

You will need an impact type heavy duty socket,for sure!

The experts will need to see the bearing shells to assess possible crank wear/damage.
Youth is wasted on the young.
User avatar
gooner1
Out humping Reindeer
Posts: 13280
Joined: Fri Apr 14, 2006 11:00 pm
Location: Northampton.For my sins.

Post Fri May 13, 2011 6:43 am

Am i completely wasting my time going any further with this, with out removing the Crank?
Could i remove all the Pistons and Rods, then remove the Crank ala below:?:


Malc, even i'm not daft enough to try the Bance with the block still on the stand.

:)
Image
daimlerman
**BANNED**
Posts: 15968
Joined: Mon Feb 27, 2006 11:00 pm
Location: Grumpy Old Man

Post Fri May 13, 2011 10:54 am

Pistons and rods are your next stage,this will expose the big end bearings for us all to see :D

But that 22mm bolt has to come out to get to the front oil seal,the crank cannot be re-ground with that still in place.

It is possible to lift the crank out complete with the front oil seal and it's mounting plate,but there a'nt a lot of point to it!
Youth is wasted on the young.
User avatar
gooner1
Out humping Reindeer
Posts: 13280
Joined: Fri Apr 14, 2006 11:00 pm
Location: Northampton.For my sins.

Post Sat May 14, 2011 3:14 pm

Pistons and Rods removed, downloading now for your perusal and opinions. This is, and is going to get, very picture heavy.
So if any Mod feels this should be moved, feel free.

Firstly Pics of the Pistons and shells in the order they were
removed, 6 - 1.

Image

Image

Image
Image All No 6.

Image
Image
Image
Image
Image All No5.

Image
Image
Image
Image
Image All No 4.

Image
Image
Image
Image
Image All No 3.

Image
Image
Image
Image
Image
Image All No 2.

Image
Image
Image
Image
Image All No1.

Some shots of the Crankshaft now.

Image
Image

Finally, for today, my ultra high spec Piston container.
Image.
Image
e301988325i
E30 Zone Addict
E30 Zone Addict
Posts: 3701
Joined: Fri Feb 01, 2008 11:00 pm
Location: Taunton, Somerset

Post Sat May 14, 2011 4:36 pm

daimlerman wrote:Only way that I have found to undo that 22mm crank bolt is by using a long bar,a block of timber and the starter motor.....engine still in the car,of course!

The current Machine Mart catalogue(spring/summer)page 289 shows a 'torque multiplier',this was a tool mentioned to me some years back when I had my M20 in bits.No idea how this works,but another zoner may see this and enlighten us!
I can't see the exact one you mention, but typically they have an internal gear drive to increase the torque to the output drive.

Gooner, great thread, love to see an M20 in bits. I'm sure you know this, but it's important the bearing caps for both mains and rods need to be put back from where they came from.
I said:

Can anyone suggest how to test if the boot lights are staying on with the boot shut?

e30topless said:

lock the wife in there
User avatar
gooner1
Out humping Reindeer
Posts: 13280
Joined: Fri Apr 14, 2006 11:00 pm
Location: Northampton.For my sins.

Post Sat May 14, 2011 5:07 pm

[quote="e301988325i

Gooner, great thread, love to see an M20 in bits. I'm sure you know this, but it's important the bearing caps for both mains and rods need to be put back from where they came from.[/quote]

Thanks, but I'll be happier when it's all back together. :)
Please don't hesitate to point out even the simplest of things
re this strip/rebuild. Even if i did/do know whatever is pointed out,
you'd be amazed how easy i forget/miss stuff. :thumb:

Btw, i did carry out the Feeler Gauge measurement on the Piston
connector rods and the Crankshaft webs, they were all well
within the 0.41 tolerance, so happy with that bit at least.
Image
User avatar
gooner1
Out humping Reindeer
Posts: 13280
Joined: Fri Apr 14, 2006 11:00 pm
Location: Northampton.For my sins.

Post Sun May 15, 2011 4:25 pm

Just been reading a thread that states BMW actually made some of the early
Bearing Caps, ones with a single tab, so that you could spin/rotate them in order to reuse
them. That can't be good, can it :?:
The thread in question. http://www.e30zone.net/modules.php?name ... ght=shells.
Is it even worth me examining my Piston Con-rod shells, as opposed to just ordering new ones
:?:
Image