Martin's rally car rebuild

Show off your pride and joy here

Moderator: martauto

User avatar
martinpallot
E30 Zone Regular
E30 Zone Regular
Posts: 352
Joined: Sat Aug 04, 2007 11:00 pm
Location: Jersey C.I

Post Mon Jan 24, 2011 5:51 pm

I started today feeling more like I was goin backwards than making any progress. There was a little bit of crust exposed wherw the sill meets the floor when we stripped off the rubbery crap, I prodded it with a screwdriver which exposed a small hole, nothing to worry about but thought i'd better check from the inside, when that was prodded it fell through :cry: so what started off as an innocent 1" long gash turned into this:

Image

Set off plating the floor first

Image

Then made a plate to reconstruct the rotten inner sill, dont ask how long this took :lol:

Image

Welded in

Image

Then put the patch work quilt of the outer sill back together. Strangely enough this was untouched, requiring only a bit of buffing off on the inside

Image

Buffed off and you'd never know!

Image

Now thats that's out the way, I can do some proper jobs tomorrow
Jhonno
Homo Hair
Posts: 20362
Joined: Mon Jan 10, 2005 11:00 pm
Location: FLAT, FLAT, FLAT!!

Post Mon Jan 24, 2011 6:45 pm

:cool:

Forking loving it.. :twisted:
Got cable ties? Get diffin..

Arch roller for hire.

www.zeroexhausts.co.uk

Image
winx
E30 Zone Camper
E30 Zone Camper
Posts: 1099
Joined: Wed Jul 30, 2008 11:00 pm
Location: almost certainly not working on my E30...

Post Mon Jan 24, 2011 7:25 pm

the more I see the more I like! Well done on such a cracking build.
User avatar
martinpallot
E30 Zone Regular
E30 Zone Regular
Posts: 352
Joined: Sat Aug 04, 2007 11:00 pm
Location: Jersey C.I

Post Thu Feb 17, 2011 6:38 pm

Well, no real updates on the car although I have been doing the odd job here and there.

Good news is that the welding is now fully completed and Im happy theres no rot.

Bad news is that the sandblasting never materialised, mainly due to the temperamental weather but also because I wasnt 100 sure that everything I wanted doing was done.

Today I knocked up a frame with some 5" castor wheels so that I can get the turd trailored up to the sandbalsters' yard, that way Im not bound by the weather like if he was doing it here. He's also going to etch prime it before I get it back so wont have to worry about rust!

Here's how it stands at the moment, should be handy for when it makes its trip to the paint shop too :D

Image
User avatar
martinpallot
E30 Zone Regular
E30 Zone Regular
Posts: 352
Joined: Sat Aug 04, 2007 11:00 pm
Location: Jersey C.I

Post Wed Mar 09, 2011 11:29 pm

Shell was blasted last week, no putrid brown on it anymore. Wheel arches stone chipped and the underside is now painted so its back on its wheels. Have prepped and flatted the engine bay so should be getting painted tomorrow Also made a last minute mod to the strut towers to gain some more travel. In the meantime heres some pics of the past weeks progress.

Image

Image
Image

Image


Image

Image

Image

Image

Image

Image
E30BeemerLad
Married to the E30 Zone
Posts: 16806
Joined: Mon Mar 28, 2005 11:00 pm
Location: Norfolk

Post Wed Mar 09, 2011 11:36 pm

Nice work, I'm enjoying watching your progress 8)
User avatar
martinpallot
E30 Zone Regular
E30 Zone Regular
Posts: 352
Joined: Sat Aug 04, 2007 11:00 pm
Location: Jersey C.I

Post Thu Mar 10, 2011 3:41 pm

Thanks, painted the engine bay this morning,

Flatted with 400 then 600 grit paper.

Image

Layer of wet on wet sealer/tinter to give a deeper shine (1 part colour, 1 part primer, 1 part thinner and 1 part hardener)

Image

And top coat, nice an shiney :cool:

Image

Image

Pretty happy with the finish considering it was done in my dusty old workshop. Now to get started on the inside and boot!
User avatar
martinpallot
E30 Zone Regular
E30 Zone Regular
Posts: 352
Joined: Sat Aug 04, 2007 11:00 pm
Location: Jersey C.I

Post Tue Mar 15, 2011 5:36 pm

Well after 2 days of drama the inside is painted, I primed it at the weekend and all was looking well. Yesterday I started painting it sitting inside the car with a sheet down on the floors, started off well until I got about half way down and sandblasting grit which was stuck inside the sills and other crevices started to blowing out and going all over the place, I carried on in my frustration and shut the garage up without thinking about it too much.

Went back in the morning thinking It'l be fine. However as soon as I looked at it I realised that it looked utter shite and there was no way it was staying like that. 6 hours later the inside had been sanded back and I painted it again after a good session with the compressor blowing out any grit I could find. luckily round 2 was more successful.

Its not amazing but at the end of the day im not a pro, it hasnt cost me anything and its shiny and protected, so I'm 90% happy, which will do :D

Image

Image

Image
CHR1S1990
E30 Zone Camper
E30 Zone Camper
Posts: 1121
Joined: Fri Mar 14, 2008 11:00 pm
Location: Blackpool

Post Tue Mar 15, 2011 5:49 pm

i dont think you give yourself enought credit. :cool:

where do you get your paint from might I ask?
Image
nickso
E30 Zone Addict
E30 Zone Addict
Posts: 4396
Joined: Sat Jul 23, 2005 11:00 pm
Location: Go do that voodoo that you do so welllllllll!!

Post Tue Mar 15, 2011 7:41 pm

more fabulous work martin. :)

can i ask what you are going to do with the heater box vents on the scuttle now you dont seem to have a heater box?
Image

'88 e30 328i M52 track bint.
DanThe
E30 Zone Team Member
Posts: 28649
Joined: Sat Sep 10, 2005 11:00 pm
Location: Staffs

Post Tue Mar 15, 2011 8:47 pm

Proper job that :cool:
User avatar
martinpallot
E30 Zone Regular
E30 Zone Regular
Posts: 352
Joined: Sat Aug 04, 2007 11:00 pm
Location: Jersey C.I

Post Wed Mar 16, 2011 4:54 pm

Cheers Guys

Chris1990 - I buy my primer off ebay, The colours I get from my local auto paint supplier. Its plain industrial grade selemix 2 pack. Ussualy used on truck bodies where gloss isnt as important as a road car.

Nickso - Im fitting one of these instead of the standard unit: http://www.t7design.co.uk/index.php?mai ... ffd73ba9cb
So still need the vents in the scuttle, just need to make up a plate to hold some 4" ducting to feed it to the dash vent off the same website.
nickso
E30 Zone Addict
E30 Zone Addict
Posts: 4396
Joined: Sat Jul 23, 2005 11:00 pm
Location: Go do that voodoo that you do so welllllllll!!

Post Sun Mar 20, 2011 2:28 pm

martinpallot wrote:Nickso - Im fitting one of these instead of the standard unit: http://www.t7design.co.uk/index.php?mai ... ffd73ba9cb
So still need the vents in the scuttle, just need to make up a plate to hold some 4" ducting to feed it to the dash vent off the same website.
i have been looking for something like that for ages. :)

do you have it in your hand or have you yet to buy it?
Image

'88 e30 328i M52 track bint.
User avatar
martinpallot
E30 Zone Regular
E30 Zone Regular
Posts: 352
Joined: Sat Aug 04, 2007 11:00 pm
Location: Jersey C.I

Post Sun Mar 20, 2011 6:20 pm

Don't have one in my hand as yet. Everytime I make an order he's sold out :-x

Apparantly he cant get hold of the parts to make them fast enough as they fly out of the door. A lot of people use them in rally cars and have heard good things.
nickso
E30 Zone Addict
E30 Zone Addict
Posts: 4396
Joined: Sat Jul 23, 2005 11:00 pm
Location: Go do that voodoo that you do so welllllllll!!

Post Sun Mar 20, 2011 6:25 pm

i like the look of the 4 port version. i don't really need anything other than de-mist but could have that over the standard heater. might take a punt on that if he has them in stock.
Image

'88 e30 328i M52 track bint.
DanThe
E30 Zone Team Member
Posts: 28649
Joined: Sat Sep 10, 2005 11:00 pm
Location: Staffs

Post Sun Mar 20, 2011 6:30 pm

Those heaters are the tits, makes me want to chop out my bulkhead :D
User avatar
martinpallot
E30 Zone Regular
E30 Zone Regular
Posts: 352
Joined: Sat Aug 04, 2007 11:00 pm
Location: Jersey C.I

Post Tue Mar 22, 2011 6:05 pm

Given the beautiful weather we've had the past few days I decided it was a good time to do some shotblasting, 150 kilos of grit later and after littering the driveway with makeshift hanging rails I painted most of the odds and sods yesterday and today. I'm now left with lots of shiney parts and nowhere to put them, so tomorrow I'l start assembling some of it to get the car rolling at last.

First parts to make it onto the car were the handbrake lever and gearbox brackets, just cos they were easy :lol:


Also spoke to TTV about a flywheel, they do a 5.5 kilo one for the S50 which is standard clutch fitment, so I can keep my uprated pressure and friction plate. The previous one was 7.5 kilos and the engine revved very ncely with it, so im hoping this wil be another noticeable improvent whilst also giving the gearbox a bit of an easier life. Price was 270 quid delivered for anyone interested. Bloody good if you ask me but bearing in mind most of you would have to pay VAT on top of that.....Unlike me :mrgreen:

Image

Image

Image

Image
User avatar
martinpallot
E30 Zone Regular
E30 Zone Regular
Posts: 352
Joined: Sat Aug 04, 2007 11:00 pm
Location: Jersey C.I

Post Tue May 03, 2011 7:06 pm

Haven't touched the car for the past month until this weekend. The good news is that the new diff (4plate with 30 degree ramp angles) is assembled and ready to drop in. Have also ordered my fuel lines and fitting aswell as a fuel smapling kit from torques UK. Flywheel is ordered too but have been told a couple of weeks until another batch are complete.

So, I turned my attention to the front of the car. Bearing in mind i wanted something to mount the skid guard to but also wanted it to be more permanent than the previous set up which was a pure bolt on jobby. This is what I came up with. The top part is removable so that the motor can go in without having to be tilted at al sorts of angles and the scuttle bolts onto the innner wings and the gusseted tubes via 6mm nutserts and some cap head bolts. Just need to paint this lot satin black, then when the flywheel is here I can focus on getting the motor and box together and in the car. Should give me a bit more motivation, not to mention more space in the garage ehich is in short supply at the moment!

Image

Image
User avatar
martinpallot
E30 Zone Regular
E30 Zone Regular
Posts: 352
Joined: Sat Aug 04, 2007 11:00 pm
Location: Jersey C.I

Post Sat May 07, 2011 2:53 pm

Whilst I was in the other shed on Thursday I took the bumper and front panel off a tech 1 sport I keep in there just to see how well it looks. First off I trimmed the front panel down to the bare minimum to shed a bit of weight. After a bit of bending and bashing I got it to fit reasonably well. The car it came off has quite obviously been in a bump and poorly repaired so its no wonder nothing would fit at first.

Image

Just need to make some tabs coming off the scuttle support bars and that should hold it securely enough.

Image

And a trial fit of the bumper. Luckily it sits spot on with the frame I welded in for the sump guard. I think it should suit the new colour scheme a bit more. Reg will also be getting transfered just cos im sad :oops:

Image

Ive approached the stage now where the garage really needs another deep clean before anything can get done properly so think thats going to be the next job unless of course the flywheel arrives before that!
Dezzy
CR24v it's a lifestyle
Posts: 11974
Joined: Thu May 15, 2008 11:00 pm
Location: Middlesbrough

Post Sat May 07, 2011 10:47 pm

I have loved watching this thread :cool:
Image
Co Founder of CR24vTM By Invitation Only. Absolutely no riff raff!!!
User avatar
Royalratch
E30 Zone Addict
E30 Zone Addict
Posts: 4921
Joined: Sat Oct 21, 2006 11:00 pm
Location: London

Post Tue May 10, 2011 2:08 pm

Yeh - V cool dude.
Jhonno
Homo Hair
Posts: 20362
Joined: Mon Jan 10, 2005 11:00 pm
Location: FLAT, FLAT, FLAT!!

Post Tue May 10, 2011 2:41 pm

Definitely one of my favourite e30 builds! :cool:
Got cable ties? Get diffin..

Arch roller for hire.

www.zeroexhausts.co.uk

Image
User avatar
martinpallot
E30 Zone Regular
E30 Zone Regular
Posts: 352
Joined: Sat Aug 04, 2007 11:00 pm
Location: Jersey C.I

Post Thu May 12, 2011 4:51 pm

Thanks for the compliments guys!

The flywheel arrived today as promised, looks identical to the last billet steel one I had, yet it weighs about 60% the amount. Now when I get the front painted I can get the motor and box in!

Image

Image
DanThe
E30 Zone Team Member
Posts: 28649
Joined: Sat Sep 10, 2005 11:00 pm
Location: Staffs

Post Thu May 12, 2011 5:59 pm

Nice, how heavy is that out of interest?
User avatar
martinpallot
E30 Zone Regular
E30 Zone Regular
Posts: 352
Joined: Sat Aug 04, 2007 11:00 pm
Location: Jersey C.I

Post Thu May 12, 2011 8:54 pm

DanThe wrote:Nice, how heavy is that out of interest?
Its 5.5 kilos, so basically half the weight of a standard one 8O
User avatar
cheech
E30 Zone Newbie
E30 Zone Newbie
Posts: 17
Joined: Wed Mar 07, 2007 11:00 pm

Post Sat May 14, 2011 2:53 am

hi,j32525?was that the same 325 attached to that plate when u bought it?thats some serious work btw ,impresive !!
User avatar
martinpallot
E30 Zone Regular
E30 Zone Regular
Posts: 352
Joined: Sat Aug 04, 2007 11:00 pm
Location: Jersey C.I

Post Sat May 14, 2011 10:56 am

cheech wrote:hi,j32525?was that the same 325 attached to that plate when u bought it?thats some serious work btw ,impresive !!
Thanks, No the plate was on a black tech1 sport which I keep for parts, will transfer it to this one once the car is finished.
User avatar
martinpallot
E30 Zone Regular
E30 Zone Regular
Posts: 352
Joined: Sat Aug 04, 2007 11:00 pm
Location: Jersey C.I

Post Fri Jun 10, 2011 2:30 pm

Bit the bullet and ordered one of these off ebay from Hong Kong, it was very cheap and I'd heard mixed reviews but thought what the hell. Supposedly they are of varying quality and its pot luck whether you get one with the internal trumpets or one without. Luckily, the one that turned up had the trumpets. I got on to fitting to the engine, the only minor problem was that the holes to bolt it to the TB's needed opening up slightly but other than that, nothing major.

Here is it fitted
Image

On the bottom side I needed to drill a hole for the BMW temp sensor to fit, the ICV piping fits straight on as you can see, the Other fitting you can see is the one which ussualy sits under the trumpets on the alloy plenum and goes to the head with the standard arrangment, somewhere in between it goes to the plastic oil sperator. This isnt a very good design in that if I were to plumb this straight to the head the box would end up full of oil constantly, not a massive deal with the alloy chamber as it has a fitting which allows the oil to drain back into the sump, but this doesnt. I've got a small catch tank so will plumb this in between the plenum and the head, and fit an 8mm fitting onto the drain hole in the bottom of it to allow it to drain back into the sump. This way the box should never have oil in it and I can ditch the plastic separator.

Image

I also purchased the H&H 'Alpha N' Vanos and DME chips to run it for the time being until I get my arse round to getting it on proper management.
Jhonno
Homo Hair
Posts: 20362
Joined: Mon Jan 10, 2005 11:00 pm
Location: FLAT, FLAT, FLAT!!

Post Fri Jun 10, 2011 3:03 pm

Awesome.. Loving it. (Still) :cool:
Got cable ties? Get diffin..

Arch roller for hire.

www.zeroexhausts.co.uk

Image
goosiegander
Zonegoose
Posts: 2544
Joined: Sun Nov 19, 2006 11:00 pm
Location: East Anglia

Post Fri Jun 10, 2011 3:05 pm

Exciting stuff! :D
Dezzy
CR24v it's a lifestyle
Posts: 11974
Joined: Thu May 15, 2008 11:00 pm
Location: Middlesbrough

Post Fri Jun 10, 2011 7:05 pm

Looking good. This should be a proper tool once finished. :cool:
Image
Co Founder of CR24vTM By Invitation Only. Absolutely no riff raff!!!
User avatar
martinpallot
E30 Zone Regular
E30 Zone Regular
Posts: 352
Joined: Sat Aug 04, 2007 11:00 pm
Location: Jersey C.I

Post Tue Jun 14, 2011 5:19 pm

Bit more progress to report today. Painted the bits I welded onto the front end
Image
Then had to engineer a solution to the internal clutch slave cylinder. I know I probably wont need to bleed it unless the box has been off, but thought I better make up some extended piping so that if need be I dont need to take the box off just for that.
Image
And the outside
Image
Got some nice PTFE hosing and fittings for the fuel lines (This might be the first car I have that doesnt smell like a petrol station inside!) Also an MSA fuel sampling kit.
Image
Fresh 4 plate and 30 degree ramp angle diff ready to go in its home
Image
and after much sweating and cursing in my greenhouse/garage where the temperature measured a beautiful 28 degrees I got the engine in. The catch tank im using is mounted on the L/H chassis leg.
Image
Now I need to get the bellhousing fitted along with the box. I also have a slight problem in that the carbon airbox fouls the bars going to the strut tops. Annoyingly only by about half an inch or so, but it does mean that the flange wont bolt up to the inlet, rendering it pretty useless for now. I'm in the process of devising a solution but will hold back on showing progress until I sort it, If you dont see anything reported there may be a carbon airbox going cheap :lol:
User avatar
martinpallot
E30 Zone Regular
E30 Zone Regular
Posts: 352
Joined: Sat Aug 04, 2007 11:00 pm
Location: Jersey C.I

Post Fri Jun 17, 2011 10:10 pm

Had a busy couple of days, managed to fit the flywheel and clutch, followed by the box yesterday. today I fitted the diff and took measurements for how much I would need to cut and shut the propshaft, needed a whopping 35cm taking out of it! I then made the carrier for the centre bearing. Its heavier duty than I would have liked, but I figured it needed to be able to hold the bearing steady when the prop is spinning at a fair rate of knots. At least this way its one component i shouldn't have to worry about breaking.

I then moved on to making the second gearbox mount. I was advised by Elite to fit one at the front of the box to take the weight and another at the rear to steady it. As this is the evo2 box the drive flange is much further back, meaning that any vibrations from the prop over a long period of time could put more than desired amount of stress on the lugs at the front of the box. hopefully this will keep it in check.

Image
ross_jsy
Married to the E30 Zone
Posts: 7307
Joined: Sun Jul 12, 2009 11:00 pm
Location: Jersey, C.I.

Post Sun Jun 19, 2011 5:11 pm

Looking good Martin, looking forward to seeing this out
User avatar
martinpallot
E30 Zone Regular
E30 Zone Regular
Posts: 352
Joined: Sat Aug 04, 2007 11:00 pm
Location: Jersey C.I

Post Wed Jul 06, 2011 2:27 pm

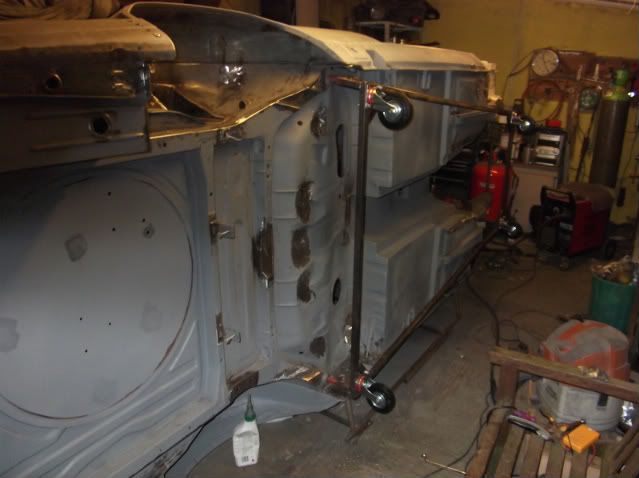
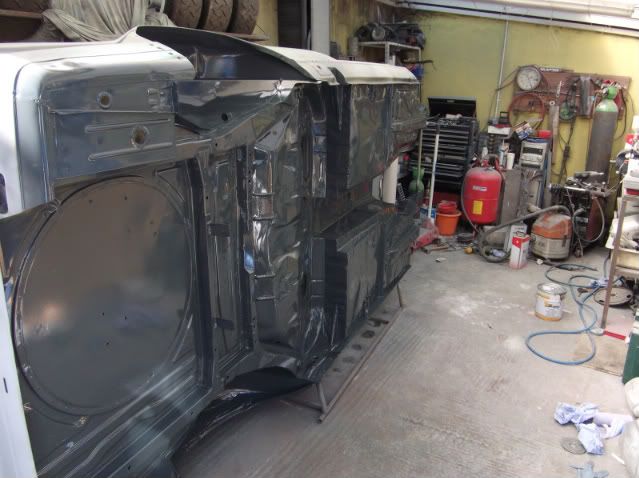
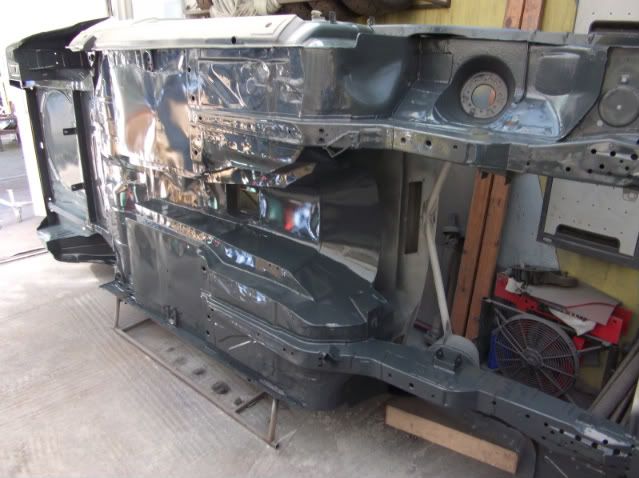
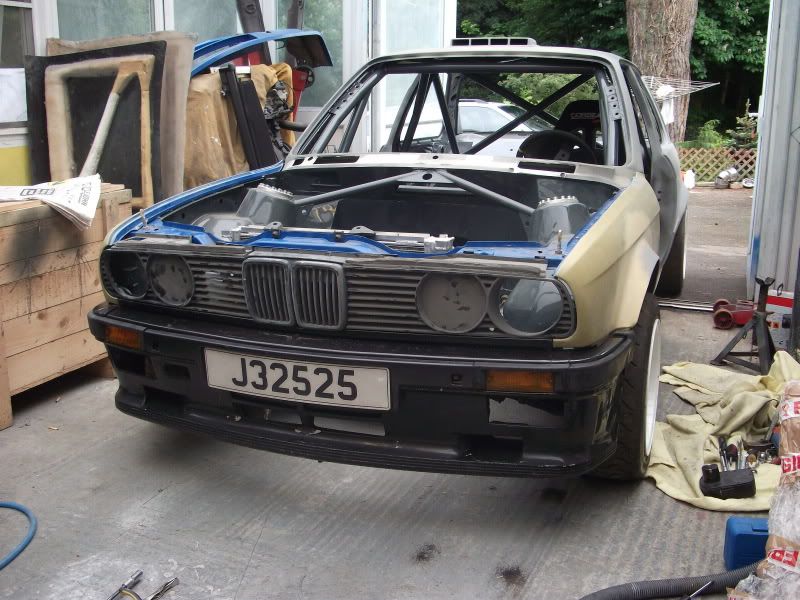
Been cracking on with the car these past few weeks. although it feels like nothing much has been done its taking forever to do all these little jobs. Also been been out shopping as you can see.....

Image

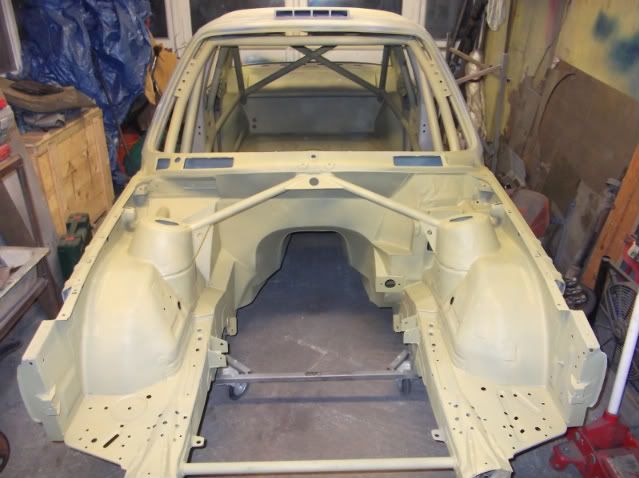
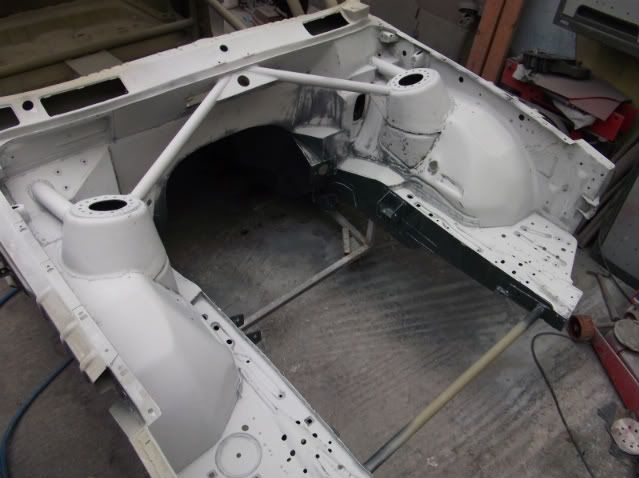
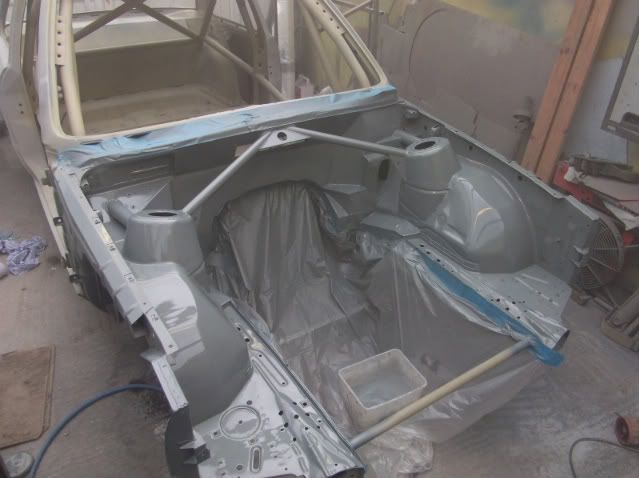
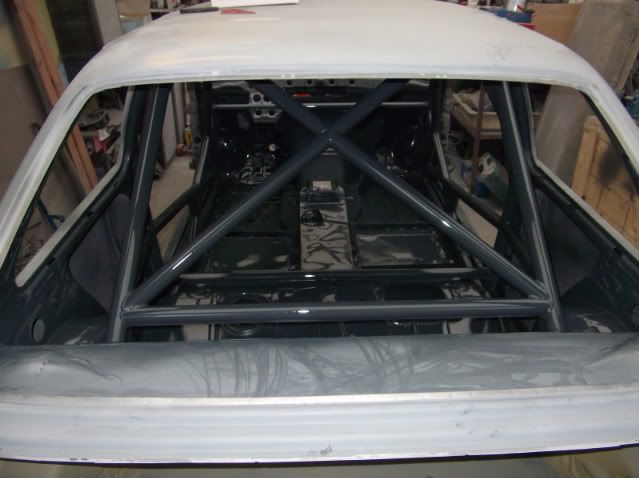
Sierra blade type roll bar kitalong with all sort of odds and sodds. This looks like it will work, the blades need chopping and angling in to make the overall width at the tips 4" narrower (never realised sierras were that wide!) The turrets supplied will be used as a base but chopped about a lot as they weigh more than the roll bar itself atm

Image
Image

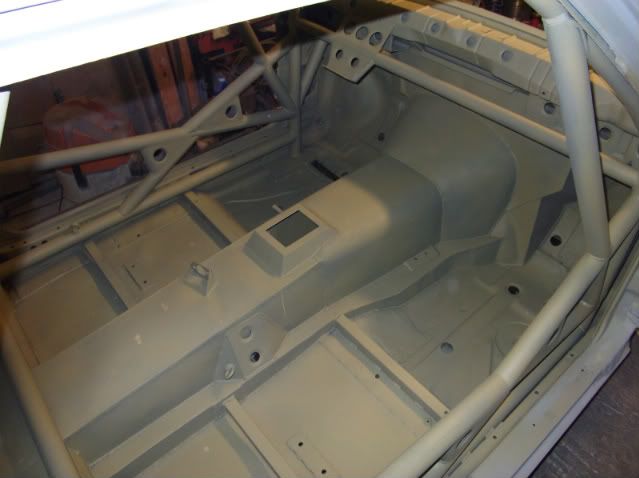
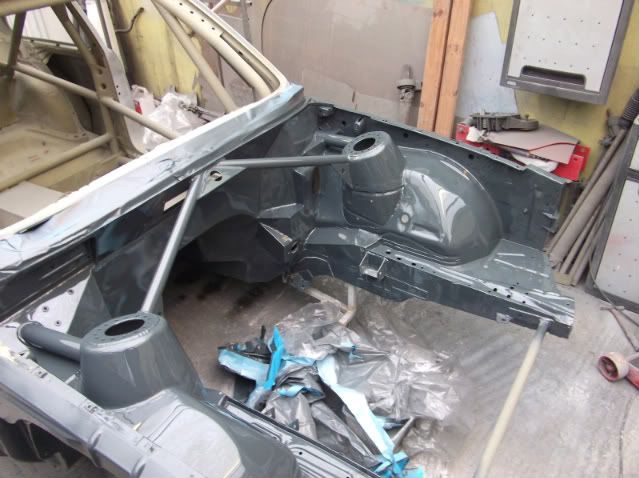
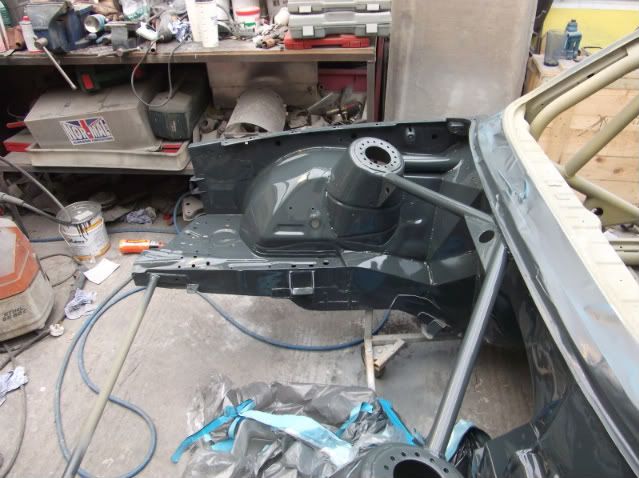
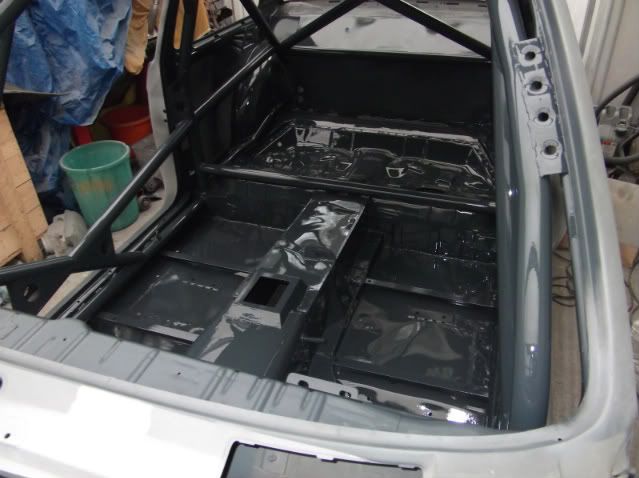
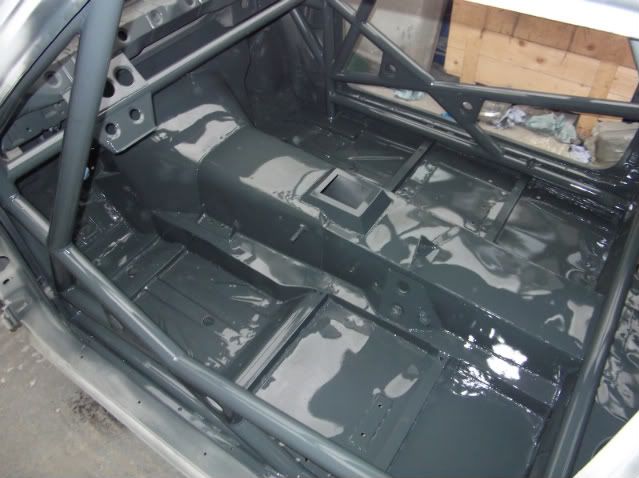
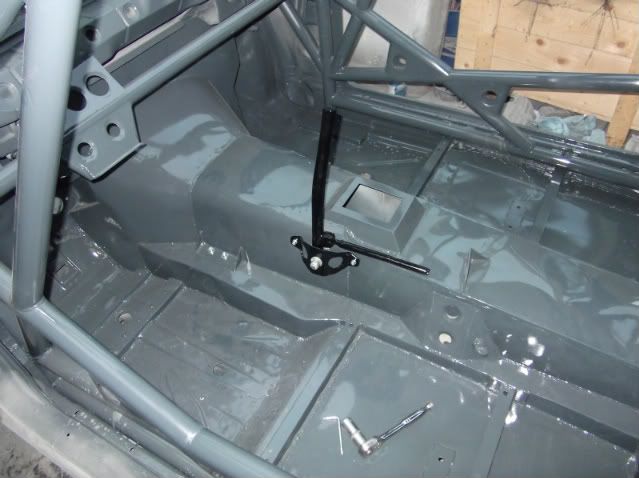
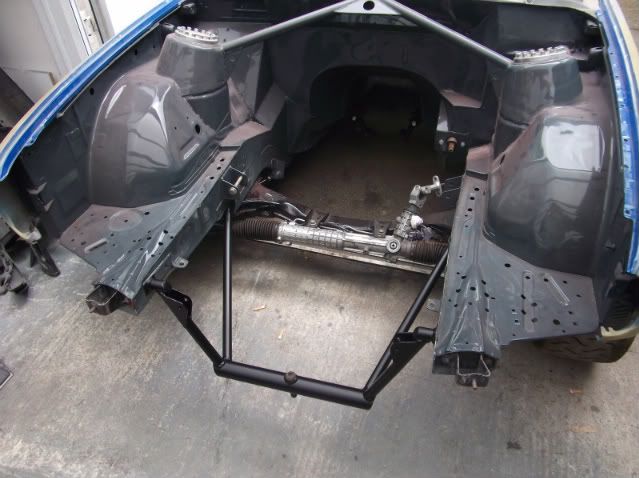
Made some plates for the gear lever area and the rear bulkhead fittings

Image

After sitting in the car making brum brum noises for a couple of hours I wasnt happy with the brake and clutch pedal position, I choped the pedals up which has given me 2.5" more leg room and a better overall angle for my ankles, feels much more like it should be.

Image

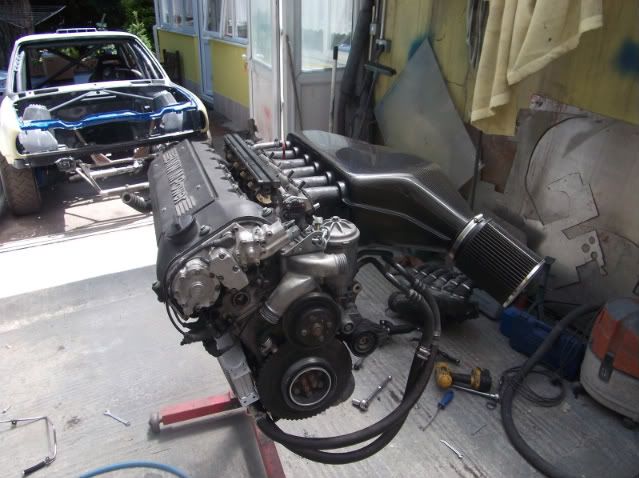
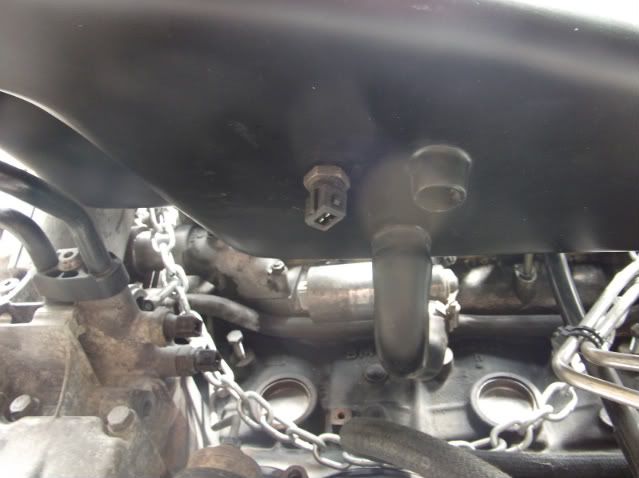
Overcame the problem with the airbox, this took about 3 days to do and im never doing it again. I made a plate to the shape of the area I cut out, made a mould from it, trimmed it. Ground through about 3mm of the carbon layer and countersunk the lot so that it would sit flush, then just glassed it in. Light skim of filler and some satin black and it looks like it came out the factory like that lol. I decided to lob off the carpy glass pipes to the airbox and use some trimmed down standard ones. this exacerbated the clearance problem slightly but got rid of the nasty 30 sharp angle at the joint between the airbox and the TB's.

Image

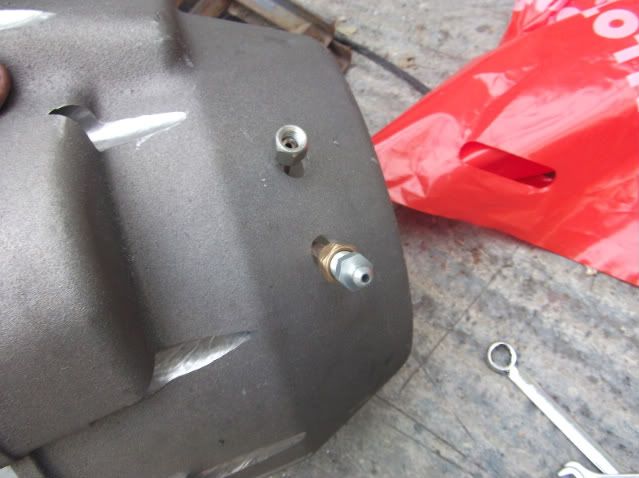
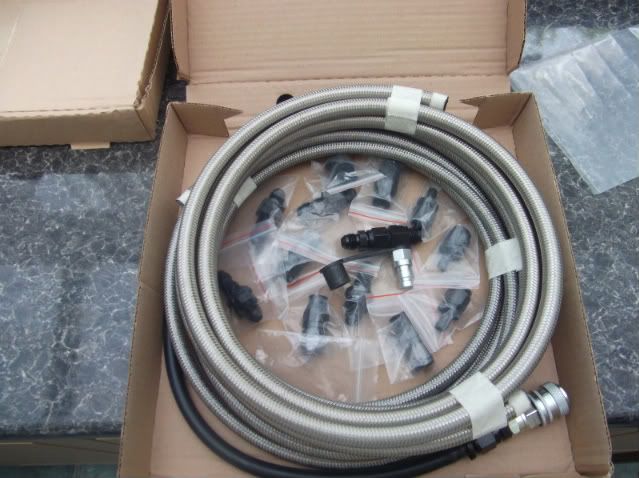
Finally, binned the old oil coller with the push on fitting and jubilee clips in favour of some proper -10 jobbies. Still awaiting the fittings for the oil filter housing from turner motorsport.

Nowhere near as far as I wanted to be with it tbh and theres deffinately no rallying for me this years as both time and the rally car fundare quickly drying up, But hoping that if its done by Christmas I'll have a good few months to get used to it properly until the first event!