Twin Seq. Dry sumping for beginners :D

Discuss general engine, turbo and supercharger conversions in this section

Moderator: martauto

Turbo-Brown
Boost Junkie
Posts: 4705
Joined: Tue Feb 15, 2005 11:00 pm
Location: Aldershot, Hants
Contact:

Sat Mar 20, 2010 2:13 pm

Oh my god I should've done this differently!

I covered the pattern for the charge cooler in resin which I was gonna sand back and polish. Unfortunately the resin is much more resistant to sanding than body filler so it's taking rather a long time :lol:

Still, getting there!

The underside's almost done save for a little bit of making good. Filled the pots for the air outlets with plaster of paris to stop them from distorting whenever they had any weight put on them. Should've made them a bit shorter really thinking about it and might still chop them down to a more manageable size before making the molds.

Image


And the top side, which needs to be perfect (ha!) for shape and finish as it'll all be visible.

Image
325i Twin Turbo (until 10am 01/12/07 :( )

www.air-in.co.uk free M20 exhaust and inlet flange
Turbo-Brown
Boost Junkie
Posts: 4705
Joined: Tue Feb 15, 2005 11:00 pm
Location: Aldershot, Hants
Contact:

Thu Apr 01, 2010 10:17 pm

Getting there slowly with the charge cooler pattern. Getting the visible faces nice and smooth / flat has taken quiiiite a long time! However, started to paint it this evening :D

Image


Also, cut back the outlet stubs last weekend as for some reason I'd made them huge and the more I looked at them I couldn't figure out why! Bit more manageable now:

Image
325i Twin Turbo (until 10am 01/12/07 :( )

www.air-in.co.uk free M20 exhaust and inlet flange
gareth
E30 Zone Team Member
Posts: 11009
Joined: Tue Jan 11, 2005 11:00 pm
Location: hastings, east sussex

Thu Apr 01, 2010 11:02 pm

looks good alex :D
i've been busy making stuff too :cool:
http://www.e30zone.net/modules.php?name ... 43#1820243
Sole founder of Fe2O3-12V it's a lifestyle
Image
LSD rebuilding / modification services provided, PM for details
m_jermyn
E30 Zone Team Member
Posts: 4208
Joined: Sat Mar 14, 2009 11:00 pm
Location: Sydney Australia Mate

Sat Apr 10, 2010 9:06 am

Hurry up Turbobrown I need another update man..
Turbo-Brown
Boost Junkie
Posts: 4705
Joined: Tue Feb 15, 2005 11:00 pm
Location: Aldershot, Hants
Contact:

Tue Apr 13, 2010 10:20 pm

:lol: just for you dude!

Been busy with holidays, meetings and new girlfriend of late so progress has been a bit slow. (Definitely not complaining about anything but the meetings though!)

Also, waiting for paint to dry is much like.....watching paint dry.

However, gave the pattern a couple of coats of metallic grey paint just as a guide coat, then laqured it about a million times and now.....finally....have flatted it back and polished the 'show' side :D

Image

Image


Have to say, it's immensely satisfying to have turned such a rough shape into something so smooth and shiny :D

Will start making the mold for the show side this weekend. The whole thing can then be turned over so the underside can be finished off, although this doesn't need to be quite so shiny :D
325i Twin Turbo (until 10am 01/12/07 :( )

www.air-in.co.uk free M20 exhaust and inlet flange
gareth
E30 Zone Team Member
Posts: 11009
Joined: Tue Jan 11, 2005 11:00 pm
Location: hastings, east sussex

Tue Apr 13, 2010 10:48 pm

:bling: :D
Sole founder of Fe2O3-12V it's a lifestyle
Image
LSD rebuilding / modification services provided, PM for details
Turbo-Brown
Boost Junkie
Posts: 4705
Joined: Tue Feb 15, 2005 11:00 pm
Location: Aldershot, Hants
Contact:

Wed Apr 14, 2010 8:01 am

:lol: cheers dude :)

Not quite perfect (you can see that the outer corner isn't dead straight:

Image

but hopefully the distracting pattern of CF will hide that to an extent :D

Been quite a useful exercise in terms of seeing how easy it is to get a really good gloss finish on Halfords laquer! Once the molds for this are done, it's onto the air filter enclosure and then full steam ahead with panels :D
325i Twin Turbo (until 10am 01/12/07 :( )

www.air-in.co.uk free M20 exhaust and inlet flange
Turbo-Brown
Boost Junkie
Posts: 4705
Joined: Tue Feb 15, 2005 11:00 pm
Location: Aldershot, Hants
Contact:

Sun Apr 18, 2010 10:12 pm

Started on the mold for the top of the cooler today.

First step is to apply release wax. It says apply 3 to 5 coats, but I usually do a minimum of 8, just to be on the safe side.

Image


For unimportant bits, you can just apply a thick coat of candle wax.

Next up is to make up margins for the mold. Done this by taping release film to cardboard:

Image

This isn't the best way of doing things if you wanted dead flat flanges for example, but it's adequate for this mold.

These borders are then taped to the pattern and the little gap that's left filled with plasticine (forgot to photo the plasticine fillet!)

Image


And last up is gelling the mold before laying up some glass reinforcement. The gel is this rather fetching shade of green as it's a special tooling gel. Have to say I'm not very impressed with it as it's just run off of the vertical surfaces and sagged at the bottom!

Image


However, a very resin rich layer of surface tissue should prevent this from being a problem.
325i Twin Turbo (until 10am 01/12/07 :( )

www.air-in.co.uk free M20 exhaust and inlet flange
m_jermyn
E30 Zone Team Member
Posts: 4208
Joined: Sat Mar 14, 2009 11:00 pm
Location: Sydney Australia Mate

Mon Apr 19, 2010 9:40 am

Brown, I love your updates man keep them coming..

I myself am taking a mould of a dashboard as most of our Aussie dashes are cracked I want to make a fibreglass dash mat that can be trimmed in leather or vinyl.. Not like them ugly carpet dash mats..

Now get cracking mate, more updates.

Mike
Turbo-Brown
Boost Junkie
Posts: 4705
Joined: Tue Feb 15, 2005 11:00 pm
Location: Aldershot, Hants
Contact:

Wed Apr 21, 2010 8:16 am

Dude, you've got to post up some pics of your progress with the dash!

Every once in a while I think about how difficult it'd be to make a CF dash before convincing myself it'd be a massive ball ache.
325i Twin Turbo (until 10am 01/12/07 :( )

www.air-in.co.uk free M20 exhaust and inlet flange
Turbo-Brown
Boost Junkie
Posts: 4705
Joined: Tue Feb 15, 2005 11:00 pm
Location: Aldershot, Hants
Contact:

Tue May 04, 2010 7:55 am

Have been slowly toiling away on the molds for the charge cooler of late.

The shiny side is all laid up, just have to pray that it releases all right! :lol:

Here's a quick snap of the underside:

Image

The underside mold needs making in three parts (there'll be a second split line at the narrowest points between the outlet stubs) or the molds wouldn't come off the pattern and the new parts wouldn't come out of the molds!
325i Twin Turbo (until 10am 01/12/07 :( )

www.air-in.co.uk free M20 exhaust and inlet flange
march109
Engaged to the E30 Zone
Posts: 6632
Joined: Sun Aug 20, 2006 11:00 pm
Location: Bournemouth
Contact:

Thu May 06, 2010 7:50 pm

Ooooh you are making progress, my vacuum pump arrived safe and sound tidy bit of kit but not enough consumables to make anything large enough for my needs! Well onwards and upwards. Carbon fibre lung here I come.
325i Tech 1 Touring, breaking.

2.5 high comp. M20, 3.64 LSD, Fully undersealed, Spax springs & Bilstein shocks, s/s exhaust, Alpina rep wheels and more.
Turbo-Brown
Boost Junkie
Posts: 4705
Joined: Tue Feb 15, 2005 11:00 pm
Location: Aldershot, Hants
Contact:

Fri May 07, 2010 1:59 pm

:lol: Gonna start using mine on Sunday, although for propper vacuum bagging rather than the resin infusion I'm planning to use for my panels. Also, unfortunately, not making components for me :(
325i Twin Turbo (until 10am 01/12/07 :( )

www.air-in.co.uk free M20 exhaust and inlet flange
march109
Engaged to the E30 Zone
Posts: 6632
Joined: Sun Aug 20, 2006 11:00 pm
Location: Bournemouth
Contact:

Fri May 07, 2010 2:10 pm

I'm going to use up the few consumables I got with the pump to do a fuse box lid, if it comes up ok I'll work out how to put some sort of perspex screen into it too.

Still not warm enough to start doing large panels outside in the shed.

Got a funny look buying 3 tubs of white play doh in early learning centre though!
325i Tech 1 Touring, breaking.

2.5 high comp. M20, 3.64 LSD, Fully undersealed, Spax springs & Bilstein shocks, s/s exhaust, Alpina rep wheels and more.
User avatar
smith4130
E30 Zone Newbie
E30 Zone Newbie
Posts: 41
Joined: Thu Jan 10, 2008 11:00 pm

Sat May 08, 2010 12:09 pm

spent my moring reading this thread.....

hats off, amazing work.

looking foward to next update.
Turbo-Brown
Boost Junkie
Posts: 4705
Joined: Tue Feb 15, 2005 11:00 pm
Location: Aldershot, Hants
Contact:

Sun May 16, 2010 10:42 pm

That'd be kinda cool. Especially if you could put a little window onto a turbo through a bonnet or something :D

Latest update: Bordered up for the first half of the runners and started making the mold.

Praying that this all releases all right as it's pretty much 5 months work so far! :lol:

Image
325i Twin Turbo (until 10am 01/12/07 :( )

www.air-in.co.uk free M20 exhaust and inlet flange
Turbo-Brown
Boost Junkie
Posts: 4705
Joined: Tue Feb 15, 2005 11:00 pm
Location: Aldershot, Hants
Contact:

Tue May 18, 2010 10:36 pm

Made a start on the prep for the final bit of the mold this afternoon.

Started off by stripping the border off of the pattern:

Image

And then cleaned all of the plasticine out of the nooks and crannies before drilling some location nubbins and coating with release agent (which is the blue stuff)

Image
325i Twin Turbo (until 10am 01/12/07 :( )

www.air-in.co.uk free M20 exhaust and inlet flange
Turbo-Brown
Boost Junkie
Posts: 4705
Joined: Tue Feb 15, 2005 11:00 pm
Location: Aldershot, Hants
Contact:

Thu May 20, 2010 10:52 pm

The final part of the mold is curing as we speak!

Might do another couple of layers tomorrow, but in principal it's all in place :D

Image

Image

Everybody cross their fingers that it all releases okay! :)
325i Twin Turbo (until 10am 01/12/07 :( )

www.air-in.co.uk free M20 exhaust and inlet flange
Turbo-Brown
Boost Junkie
Posts: 4705
Joined: Tue Feb 15, 2005 11:00 pm
Location: Aldershot, Hants
Contact:

Sun May 23, 2010 10:47 pm

Bit of a mixed bag with the cooler molds this weekend.

Haven't got a pic, but unfortunately the lovely polished paint I applied to the top side all dissolved under the resin! :lol:

The mold released fine (if a little stickily) and the paint cleans off easily enough, but there's a lot of flatting back and re-polishing to be done.

Good news is that the last section released...........after some stern persuasion! :D

Image


Image

Once the rest of the molds are released, I'll probably give them all a quick wax and PVA and knock up a crappy fibreglass shell just to make sure it all fits.
325i Twin Turbo (until 10am 01/12/07 :( )

www.air-in.co.uk free M20 exhaust and inlet flange
Turbo-Brown
Boost Junkie
Posts: 4705
Joined: Tue Feb 15, 2005 11:00 pm
Location: Aldershot, Hants
Contact:

Thu May 27, 2010 10:48 pm

Started trying to sort out the mold for the top side of the cooler today.

Here's how it started:

Image


Note to all, don't use halfords paint under polyester resin! Not their fault at all, just found out the hard way! :lol:


And here's how far I got it this evening:

Image

Still some way to go!


Just to cheer myself up, released the remaining underside molds.

Image

They came off nice and easy and look pretty much good to go! :D
325i Twin Turbo (until 10am 01/12/07 :( )

www.air-in.co.uk free M20 exhaust and inlet flange
Turbo-Brown
Boost Junkie
Posts: 4705
Joined: Tue Feb 15, 2005 11:00 pm
Location: Aldershot, Hants
Contact:

Thu Jun 10, 2010 8:13 am

Thought I'd capitolise on being at my folks' house for a while by making another mold.

This is my first direct mold (where the mold is made without first making a pattern) and is for the new vacuum capsules.

It's ever-so-shiny because, inevitably, these are being made in carbon fibre :D

Image

Image


Idea is to make two halves per capsule, then bond them together with the diaphragm inbetween. Think probably silicone sealant should do fine for this.
325i Twin Turbo (until 10am 01/12/07 :( )

www.air-in.co.uk free M20 exhaust and inlet flange
m_jermyn
E30 Zone Team Member
Posts: 4208
Joined: Sat Mar 14, 2009 11:00 pm
Location: Sydney Australia Mate

Fri Jun 11, 2010 12:00 pm

You are the master!
Turbo-Brown
Boost Junkie
Posts: 4705
Joined: Tue Feb 15, 2005 11:00 pm
Location: Aldershot, Hants
Contact:

Mon Jun 14, 2010 7:55 am

:lol: wouldn't go quite that far! :D


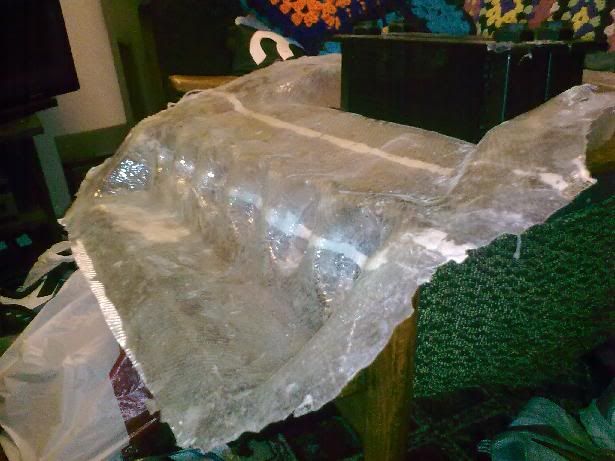
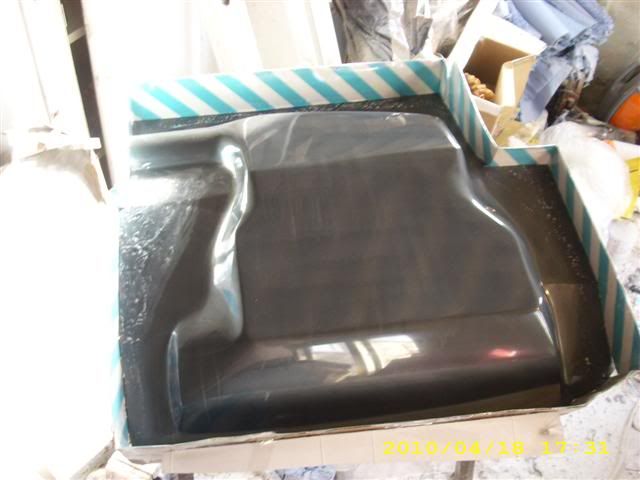
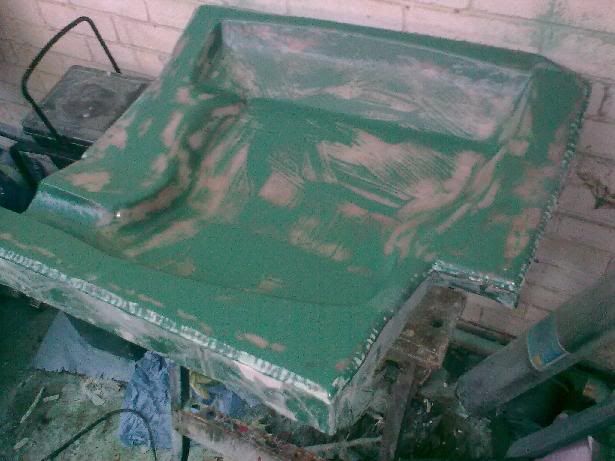
Had a quick trial run of the bottom half of the cooler this weekend.

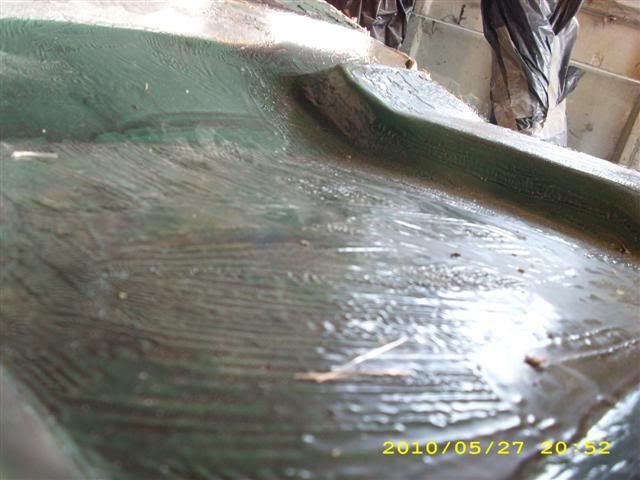
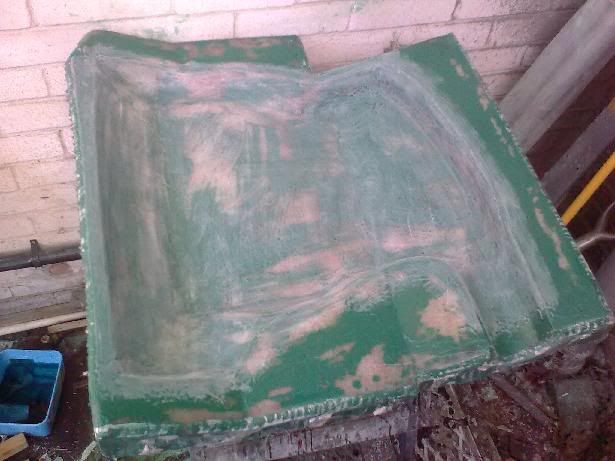
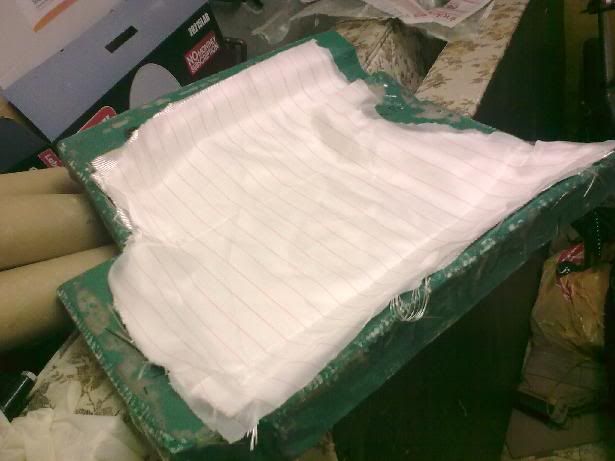
Started off by waxing the three bits of the mold and then clamping them together. If you're not worried about the finish of the component, you can rub candle wax over the mold surface and the part will release dead easy. For a beld'n'braces approach, I coated it with PVA release agent too.

Image


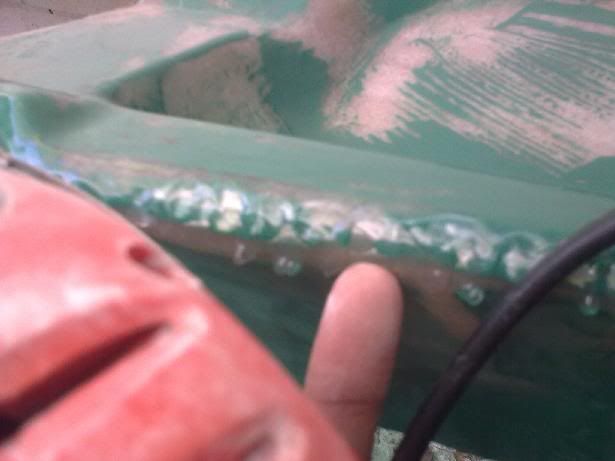
Next up is to plug the seams so that resin doesn't get in there and glue the mold sections together. This is just plasticine but for the final parts I'll be silicone sealing the sections together as I need them to be air tight.

Image


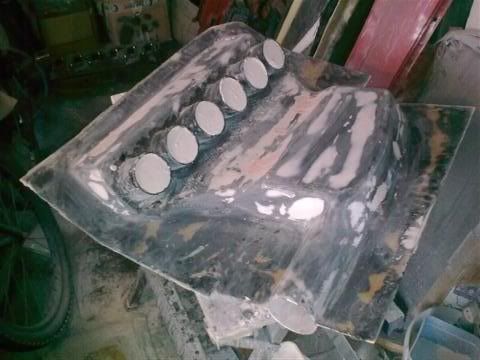
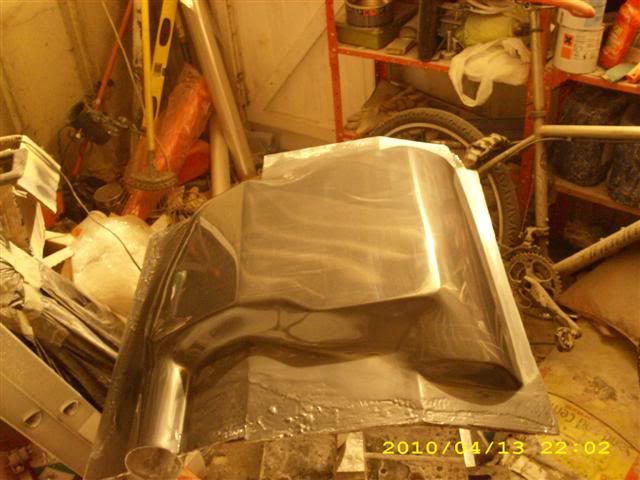
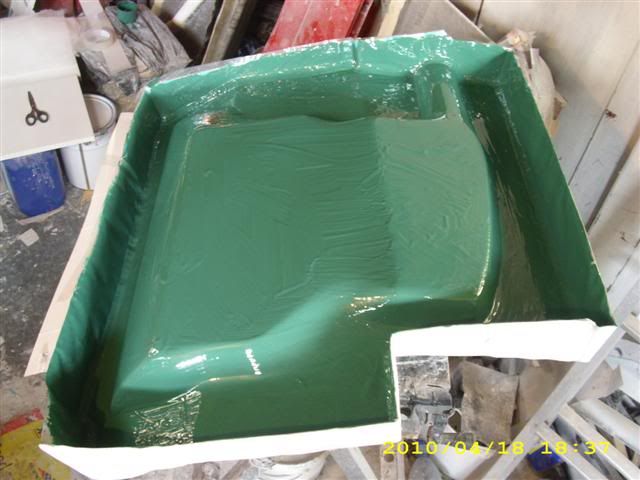
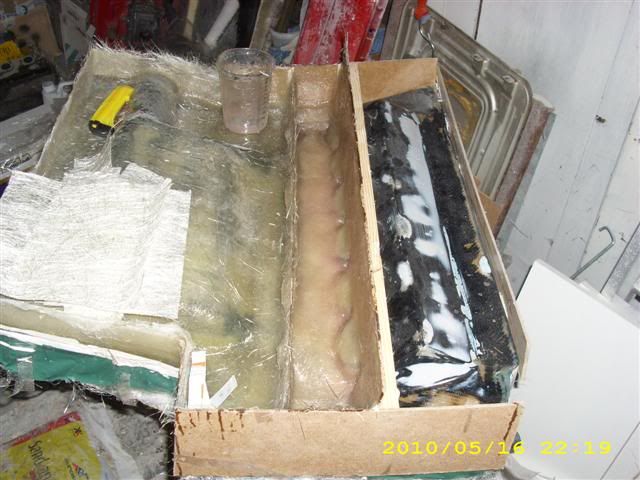
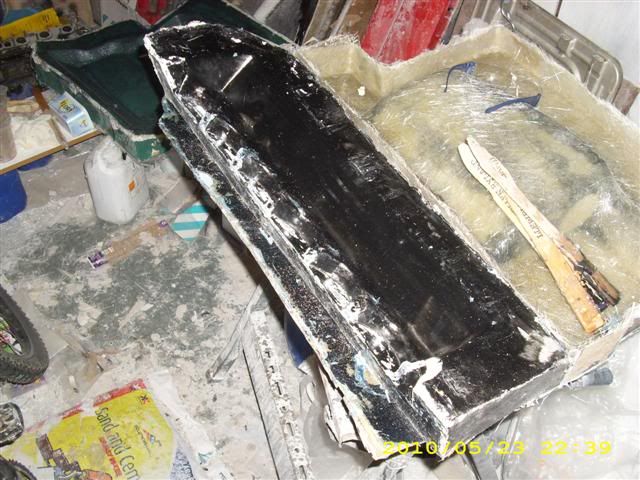
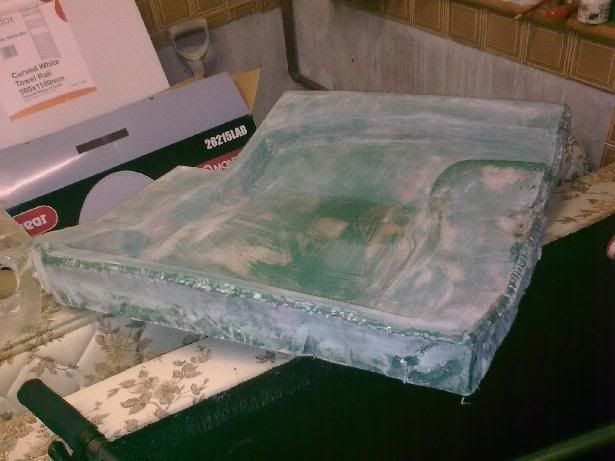
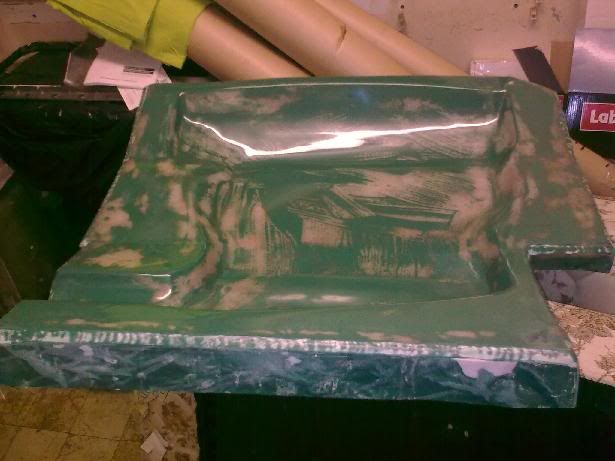
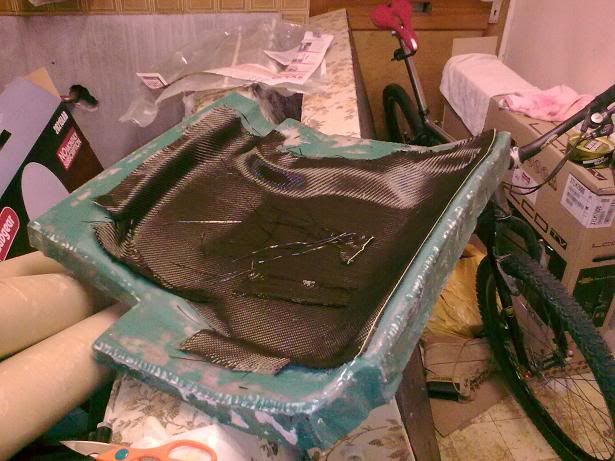
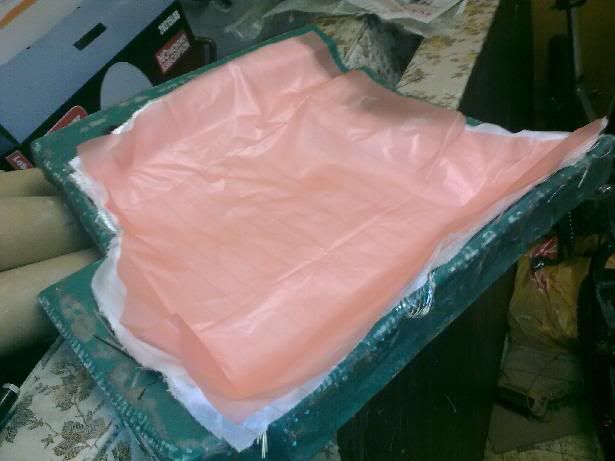
And here's the result of a very quick and not especially thourough laminate of two plies of glass. Final produce will be 4 plies of carbon and one of diolen. This bit isn't much to look at, but it let me prove the molds release properly and I can use it to determine how long the trumpets need to be.

Image


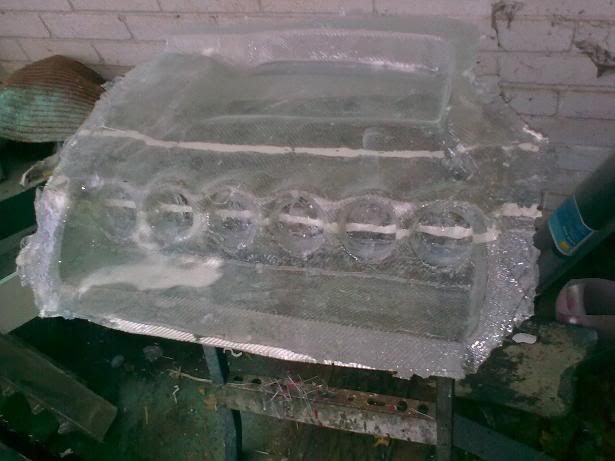
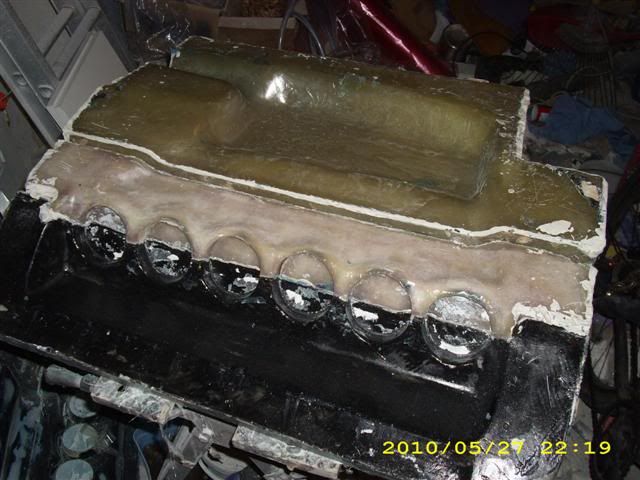
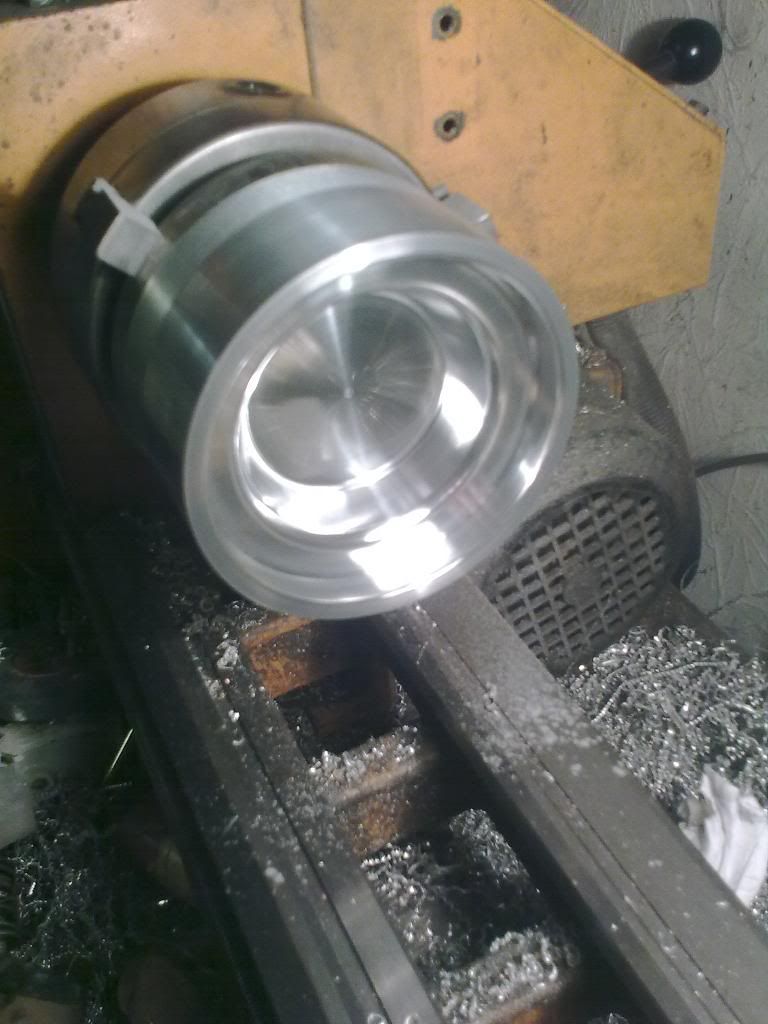
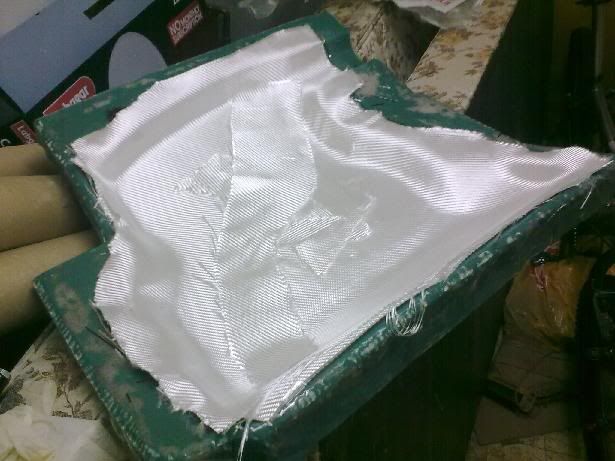
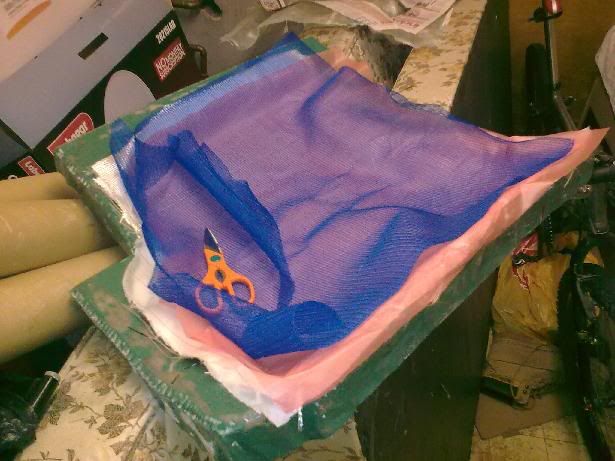
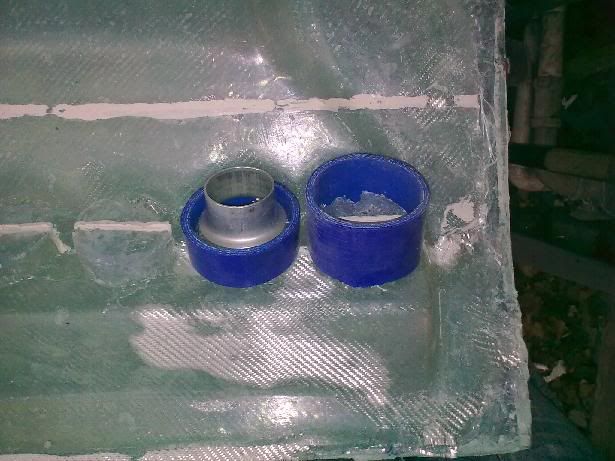
Also let me check that the hose joiners actually fit! And also that there's enough room for a trumpet there. :lol:

Image


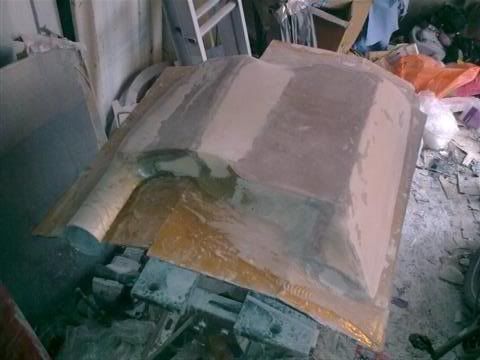
In other news, bought a little electric sander just to speed up the recovery of the top half of the mold. Hoping to get that finished this evening and then make a dummy top half so that it can all go under the bonnet to check for fit.

Image


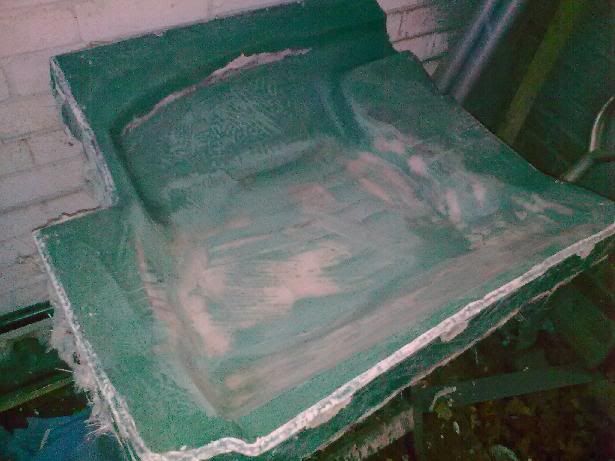
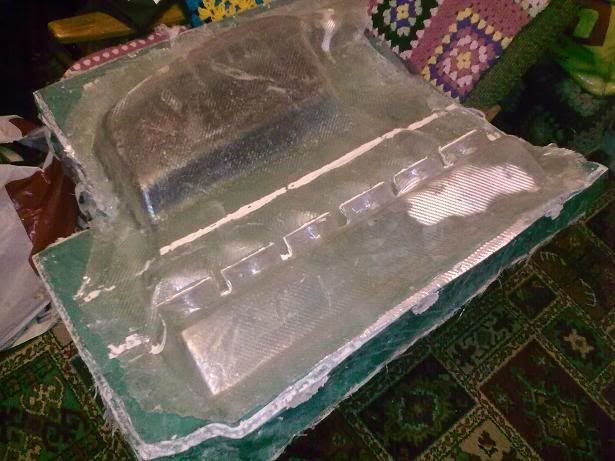
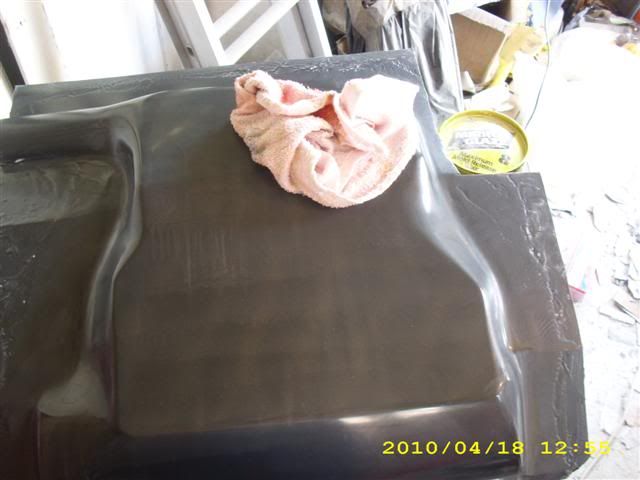
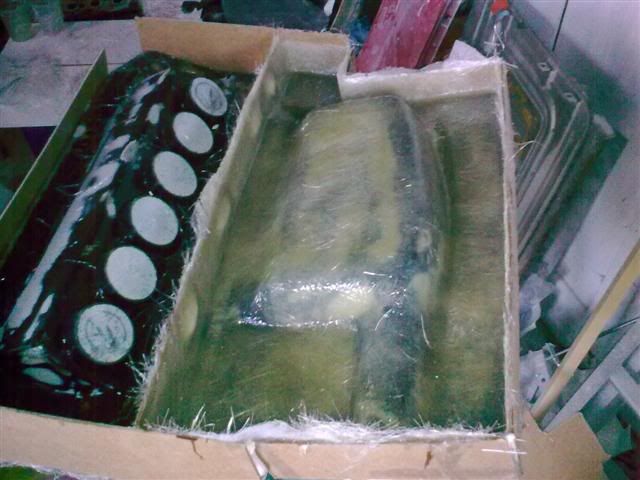
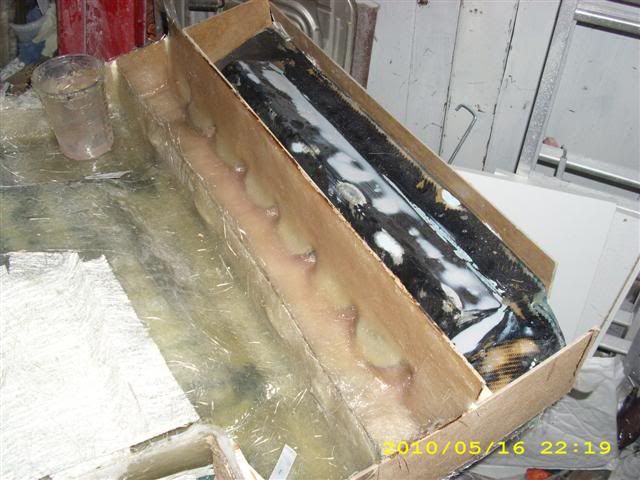
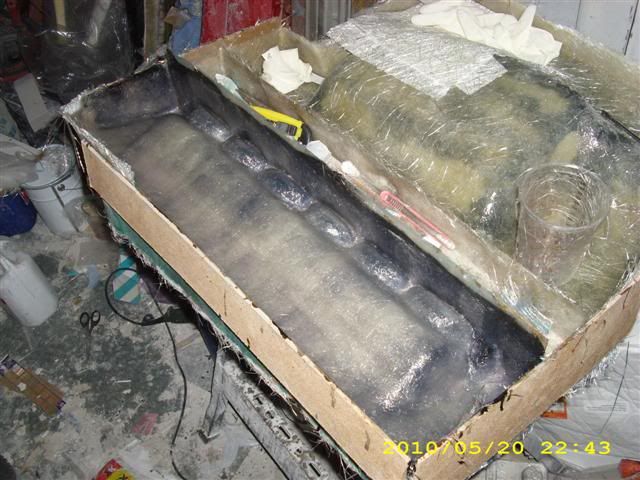
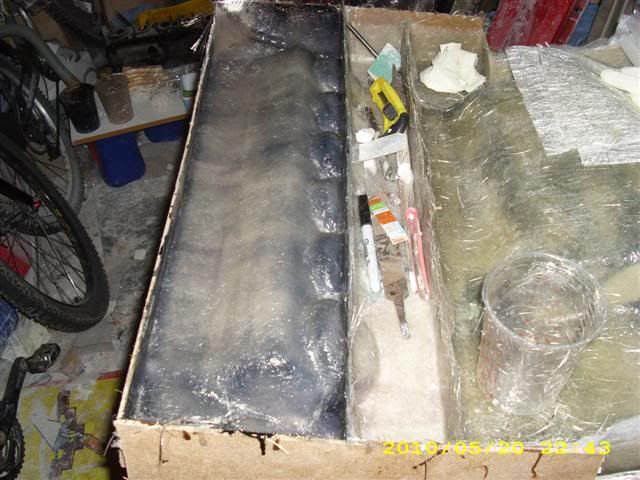
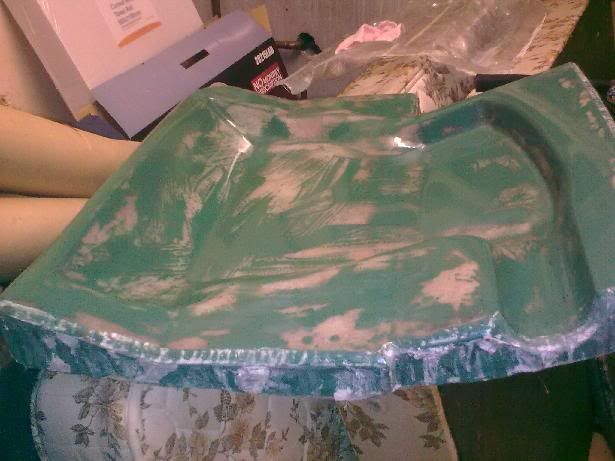
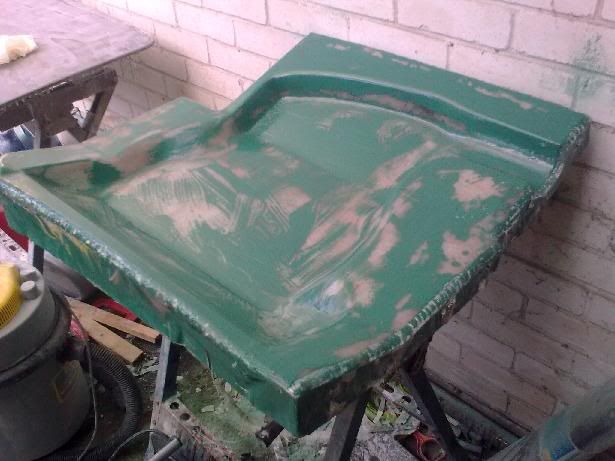
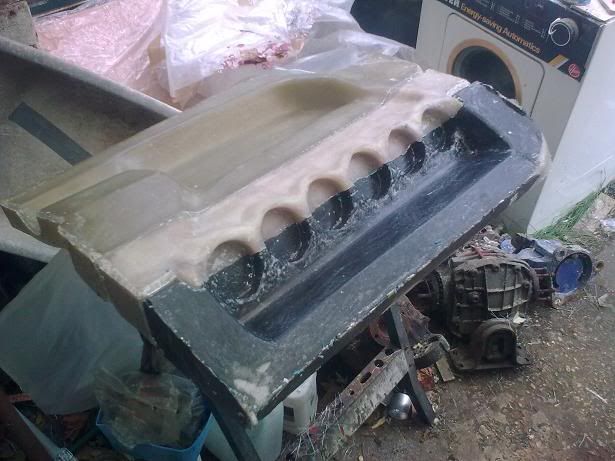
Last but not least, here's the dummy bottom half with the cores in it:

Image

Image
325i Twin Turbo (until 10am 01/12/07 :( )

www.air-in.co.uk free M20 exhaust and inlet flange
Turbo-Brown
Boost Junkie
Posts: 4705
Joined: Tue Feb 15, 2005 11:00 pm
Location: Aldershot, Hants
Contact:

Wed Jun 16, 2010 7:50 am

Turns out there was quite a lot of work involved in healing the top of the mold.

Sanded all the way through the gel pretty much everywhere which means it can't be polished :(

The only remedy for this is to build up some layers of resin, top off with a flow coat and then flat and polish that.

Probably doesn't show up all that well, but here's the flow coated mold waiting to be finished and used :D

Image
325i Twin Turbo (until 10am 01/12/07 :( )

www.air-in.co.uk free M20 exhaust and inlet flange
m_jermyn
E30 Zone Team Member
Posts: 4208
Joined: Sat Mar 14, 2009 11:00 pm
Location: Sydney Australia Mate

Wed Jun 16, 2010 12:04 pm

Not long now hey buddy?
Turbo-Brown
Boost Junkie
Posts: 4705
Joined: Tue Feb 15, 2005 11:00 pm
Location: Aldershot, Hants
Contact:

Fri Jun 18, 2010 8:13 am

Got slightly closer to the mold being ready to use last night :)

Image

Pretty much all the rough shaping is done so that the surfaces are flat. Any last imperfections will have to be sanded and polished off the final product which will have a good 1mm thick clear coat molded onto it.

All that remains to be done now is to fine sand and polish :D

Had a delivery of all the resin infusion materials I'll need to do a trial run too.

For the trial, gonne experiment with a fire-retardant corner to the mold (where it's near the exhaust housing of the big turbo), a bit of carbon fibre, this clear coating idea and generally how the process works and what kind of finish the resin clears to.
325i Twin Turbo (until 10am 01/12/07 :( )

www.air-in.co.uk free M20 exhaust and inlet flange
Turbo-Brown
Boost Junkie
Posts: 4705
Joined: Tue Feb 15, 2005 11:00 pm
Location: Aldershot, Hants
Contact:

Mon Jun 21, 2010 8:03 am

Ooh, doesn't look too bad now!

There are still some scabby areas, but these can be flatted back and polished on the final thing:

Image

Image


Have got as far as coat two (out of eight) of release wax. Not taking any chances with this one, the coats are going on, getting a least an hour to set up before being buffed off ready for the next one! Will cry if this goes wrong now! :lol:
325i Twin Turbo (until 10am 01/12/07 :( )

www.air-in.co.uk free M20 exhaust and inlet flange
GeoffBob
Forced Induction Specialist
Posts: 1843
Joined: Tue Apr 28, 2009 11:00 pm

Mon Jun 21, 2010 8:10 am

Turbo-Brown wrote:Will cry if this goes wrong now!
No doubt you would after all the excellent hard work you have put in. Measure twice, cut one and wax it eight times :D Will be watching with interest to see how it comes out.

Good luck
Geoff
Image

"It is amazing how many drivers, even at the Formula-1 level, think that brakes are for slowing the car down." - Mario Andretti
march109
Engaged to the E30 Zone
Posts: 6632
Joined: Sun Aug 20, 2006 11:00 pm
Location: Bournemouth
Contact:

Mon Jun 21, 2010 8:14 am

Not thought about doing a test run with glass fibre to reduce costs and test for error?

I don't envy you though after all the waxxing you probably just want to get on with it.
325i Tech 1 Touring, breaking.

2.5 high comp. M20, 3.64 LSD, Fully undersealed, Spax springs & Bilstein shocks, s/s exhaust, Alpina rep wheels and more.
Turbo-Brown
Boost Junkie
Posts: 4705
Joined: Tue Feb 15, 2005 11:00 pm
Location: Aldershot, Hants
Contact:

Mon Jun 21, 2010 1:32 pm

Oh yes!

Will definitely be doing a glass trial run.

Gonna do my clear flow-coat. Then sand that with 80 grit just to experiment with how clear a finish can be achieved.

Will put a piece of carbon in the trial just to see how it comes out and the rest will be glass.

If nothing else, this top half needs bonding to the trial bottom half I made the other day and then some giant holes drilled in the top half so I can measure how long the trumpets need to be :D
325i Twin Turbo (until 10am 01/12/07 :( )

www.air-in.co.uk free M20 exhaust and inlet flange
Turbo-Brown
Boost Junkie
Posts: 4705
Joined: Tue Feb 15, 2005 11:00 pm
Location: Aldershot, Hants
Contact:

Tue Jun 22, 2010 8:08 am

Still applying coats of release wax to the mold last night. Apply coat.....break surface film.....wait an hour.......buff off......apply coat..... :lol:

Up to coat 6 of 8 now though!

To ease the boredom between coats of wax, thought I'd re-start the sunroof. Gonna take molds from both the top side and the underside and then bond them together in much the same way that the factory did.

Plan is to make a direct replacement if people want it, so there's the option of having a tilt/slide carbon panel or it can be bonded in and all the mechanism binned :D

Image

Have built up 4 coats of clear resin on this which can now be sanded and polished. Not risking paint again! :lol:
325i Twin Turbo (until 10am 01/12/07 :( )

www.air-in.co.uk free M20 exhaust and inlet flange
march109
Engaged to the E30 Zone
Posts: 6632
Joined: Sun Aug 20, 2006 11:00 pm
Location: Bournemouth
Contact:

Tue Jun 22, 2010 11:20 am

Wicked Exactly what I'm upto at the moment too, I might leave you too it as the boot is taking up too much of my time. Its waay more complicated.
325i Tech 1 Touring, breaking.

2.5 high comp. M20, 3.64 LSD, Fully undersealed, Spax springs & Bilstein shocks, s/s exhaust, Alpina rep wheels and more.
Turbo-Brown
Boost Junkie
Posts: 4705
Joined: Tue Feb 15, 2005 11:00 pm
Location: Aldershot, Hants
Contact:

Wed Jun 23, 2010 8:22 am

Well, last wax coat is on!

It gets easier and easier to apply coats as you go on, which is nice :D

Tonights to-do list is:

Buff off last wax coat from mold.
Apply 2No. coats of clear resin with the second being a flowcoat.
While that's setting, start work on flatting the sunroof back.
Depending on how quickly the resin in the mold sets up, flat that back with 80 grit.....but this might have to wait as realistically it takes a day for it to cure properly.
325i Twin Turbo (until 10am 01/12/07 :( )

www.air-in.co.uk free M20 exhaust and inlet flange
Turbo-Brown
Boost Junkie
Posts: 4705
Joined: Tue Feb 15, 2005 11:00 pm
Location: Aldershot, Hants
Contact:

Fri Jun 25, 2010 8:10 am

Managed to get a few bits and bobs done over the last couple of days for the cooler case :D

First up, here's the clear coat. Put two layers on as hopefully any imperfections will be slight and can easily be rectified. This is just an experimental jobby so we'll see how well the two coats work.

Image


Had a bit of a panic about this all releasing so gave the edge a bit of a lift. Can't really see in the pic, but it's released easily....phew! :D

Image


Last messy job is to give the whole surface a good going over with 80 grit paper so that the reinforcements stick. Once it's all roughed up, give it a thourough cleaning with acetone.

Image


Next up, making a very accurate and space-age template for the reinforcements:

Image


And then it's onto loading the mold up with carbon:

Image


Two layers of glass:

Image


A layer of peel ply:

Image


Release film:

Image


and infusion mesh:

Image


Next job is to make the resin distribution network, vacuum path bag the whole thing up and also make a resin catch pot. It's all go 'ere! :lol:
325i Twin Turbo (until 10am 01/12/07 :( )

www.air-in.co.uk free M20 exhaust and inlet flange
m_jermyn
E30 Zone Team Member
Posts: 4208
Joined: Sat Mar 14, 2009 11:00 pm
Location: Sydney Australia Mate

Fri Jun 25, 2010 10:44 am

Oh hurry up will you
Post Reply