Doing a minor build / restoration or an epic one, post it here
Moderator: martauto
-
x-works
- E30 Zone Regular

- Posts: 332
- Joined: Thu Mar 10, 2005 11:00 pm
- Location: Ireland
Post
Tue Mar 03, 2009 8:41 pm
thanks again for the kind comments lads 
Rich_W
Every time you do a update I wish I had the money to buy a Sport Evo and send it to you with a blank cheque!
me too, don't worry about the cheque
just send the sport evo!
Mr_Gerbic_iS
Have you set any kind of timescale for completion, or is it more of a case of 'it's done when it's done'?
I have set a date, many many times, as a matter of
fact each time I finish a section I convince myself it's getting there
now. Would love to take some time off from the day job and just
get stuck in but the irony is it'd probably be a pain in the ass soon
afterwards doing it 9 till 5, day in, day out, as opposed to evenings
and weekends as a hobby. Hopefully it'll be finished for the summer
just need to figure out what year that'll be.
beardymat
havnt seen that in a while mostly due to the cost and the fact it doesnt go far
your not lying there, I remember after spraying the first bag thinking
"Christ where the f*cks the rest of it?"
As for dipping your shell, thats a choice for you to make,
but I'd be very supprised if there was much rust lurking as it
looks mint.
Simon13
Thats a better job than factory! but i expect cost for them was an issue
erm, truth be told I've a crap short term memory and
couldn't remember where the original stuff used to cover, so just
decided to cover everything.  bmwe30mtech
Do you find that when your using grey stripe it starts to dry on the brush after about 10 minutes of working with it?
yep, was a bit frustrating at first after stopping for a
smoke to come back and find you've got a hairy chisel instead of
a paint brush. Started keeping a little jar of standard thinners on
the bench then to give it a quick clean every so often, plus the
evaporating thinners fumes help to ease all your worries away 
-
Simon13
- The longest resto in the world !
- Posts: 22697
- Joined: Mon Jan 10, 2005 11:00 pm
- Location: Camberley, Surrey don't u know
Post
Tue Mar 03, 2009 9:02 pm
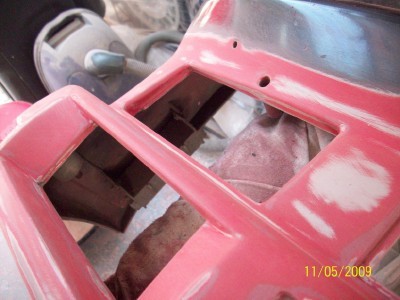
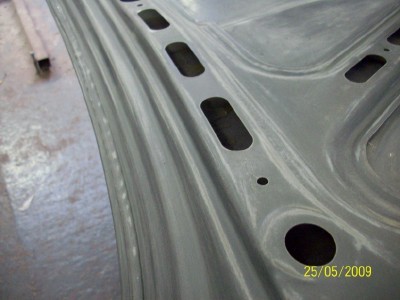
from the factory the transmission tunned isn't covered as it's covered by the ali heat sheilds, nor right underneath the fuel tank right below the rear seats only on the sides of the sills. And most of the brackets in this area aren't seam sealered either.
I've never seen an E30 rot out in these areas but it certainly won't hurt will it! Protecting it to last again is what counts
-
x-works
- E30 Zone Regular
- Posts: 332
- Joined: Thu Mar 10, 2005 11:00 pm
- Location: Ireland
Post
Tue Mar 03, 2009 10:09 pm
With the underside sealed it was time to move on to preping the
bodywork for paint. Before I type any more I'd like to take
a second to point out, I'm not nor ever have I been a panel beater/
spray painter. The reason I say that is the following is how I've
chosen to prep my car for paint, it might turn out nice, it might
turn out horrifically crap, but if you've never made a balls of
something then odds are, you'll never make anything at all.
Moral of the story is if it comes up nice after paint then exellent,
I must have done something right, if it goes t*ts up, then at least
you'll have a detailed guide of what not to do! 
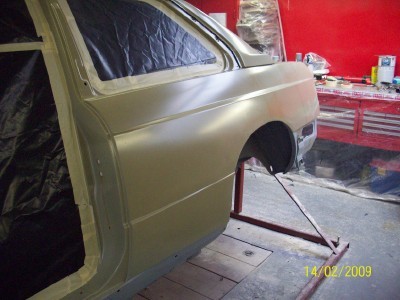
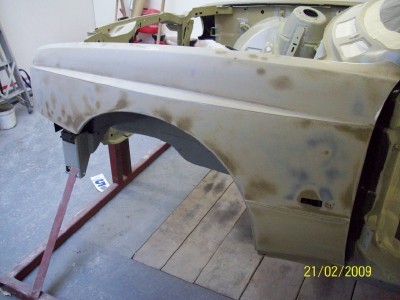
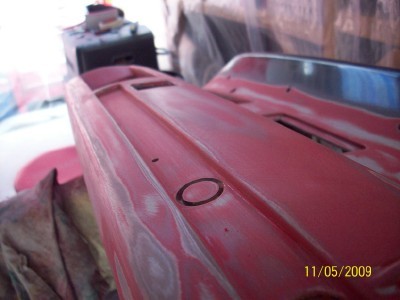
First up was to refit the front wings, these will be sprayed on the
car. Thought this would be a 5 minute job until we realised that to
fit the wings on straight we'd also have to fit both doors, the
bonnet, front grill bar and the front bumper. Once happy with all
the panel gaps everything was removed again and the wings
screwed down tight....
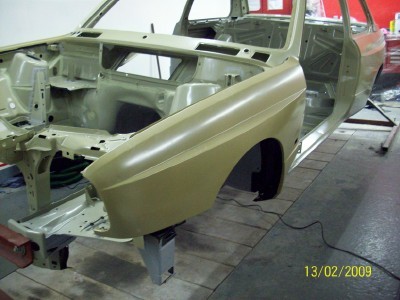
the keen eye'd amongst you might have noticed from earlier
pic's that we've eventually decided upon the final color. The
rear of both wings and the parts of the chassis legs covered by
the wings were hand painted Jet black before fitment....
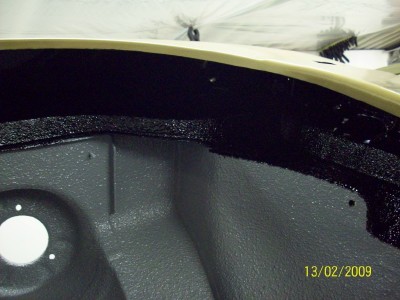
also we ran a little bead of sealer along the top of the chassis
leg where the wing bolts down on to, it stops any stray water
sprayed up from the wheels creeping into the engine bay.
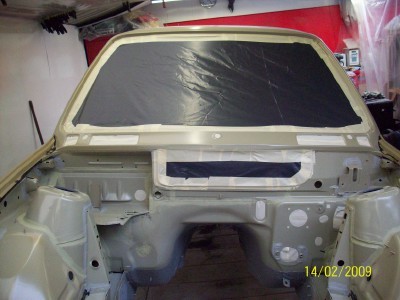
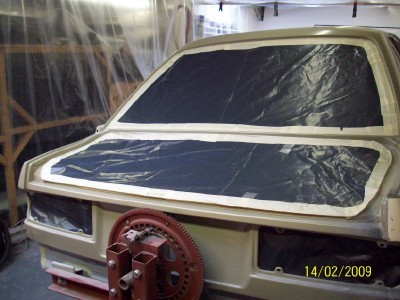
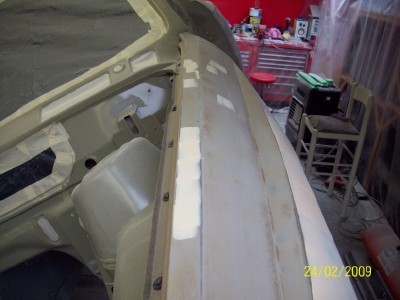
after that we masked off the interior and boot of the car. It's
not 100% tight like you might do if you were about to spray but
it's just to stop the majority of the sanding dust finding it's way
into every nook and cranny inside....
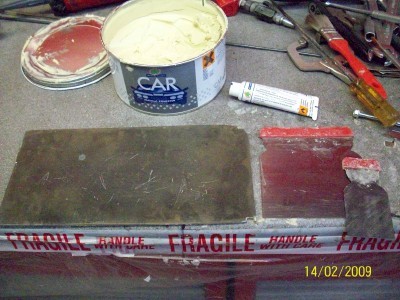
this is some of the stuff we'll be using over the next while.
First up is filler, some decent spreaders and a perspex mixing
board. It appears there's different types of fillers, some easier
to use (apply/sand) than other. I don't know enough to say
which are good and which are not, if your going to use some
your local paint suppliers should be able to advice. If they say
they're all the same please pm me and I'll return to my supplier
and beat a refund from him. The metal spreaders in the pic are
handy as I find them a lot easier to keep clean over the plastic
ones. And the bit of clear perspex is handy as a mixing board
as you can see any dirt on it rather than finding it as a dirty big
plough mark down the middle of that nice smooth run of filler
you just applied.....
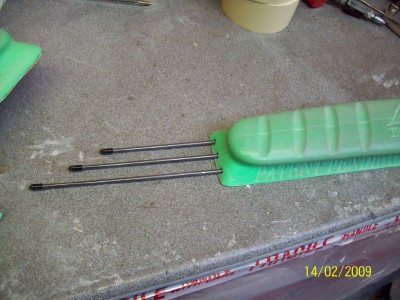
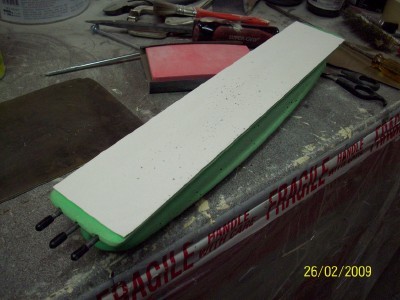
next up are sanding blocks. Bought these a while back and love
them. As you can see there's 3 different sizes....

basically they're just block's of rubber with a sheet of spring steel
bonded on to one side.....
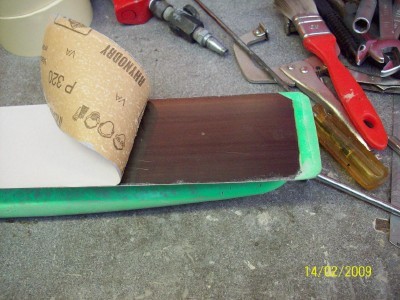
the steel can flex but should always remains consistent against the
panel your sanding. How much it flexes/curves can be controlled by
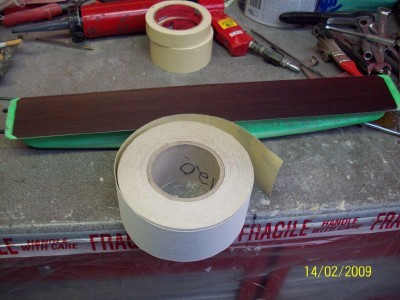
inserting 1 to 3 of the little steel rods into the rubber block....
the sandpaper for them comes in rolls and the back peals off
so it can stick to the steel....
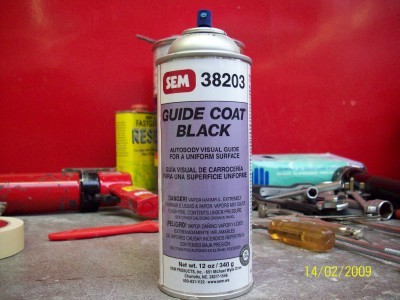
next up is an aerosol of paint called guide coat. Its a little different
from normal paint in that it's very thin, as in thinned out a lot.
This gives it 2 advantages, it dries out instantly on contact with
the panel and it gives a very light coating which can be
sanded off with a light rub....
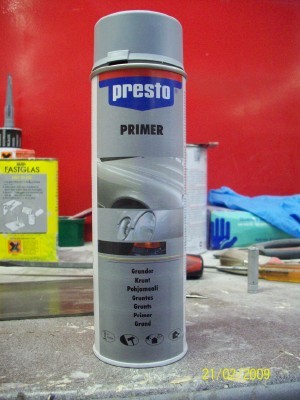
and last thing is a decent can of grey primer. Like most people
I've used loads of cans of primer over the years and recently
made a discovery. Cheap motor factor cans of primer is cheap
for a reason, they splutter out the paint and take loads of coats
to get a decent covering. Whereas a decent aerosol from a paint
suppliers, sprays out in a nice mist and gives a much better
covering. If you get a chance try one....
Before the body prep starts I'll just take a second to explain
why the choice of final colour took so long. We've decided to
spray the car Jet black and as I've found out a cars bodywork
really needs to be super flat to show off black paint. I struggled
to get my head around this first till it was explained to me.
Lighter colour cars don't throw up the same level of reflections
that a dark colour car does. That is to say a dent will be easily
spotted in any colour car if it's clean but if going for a mirror
type finish then a dark colour will make the imperfection much
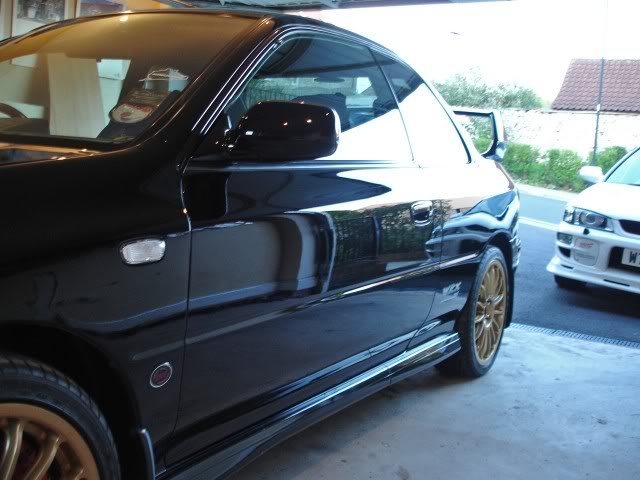
easier to see. Heres a few pictures of some Subaru's i found on the
net, which hopefully show how much more reflections black
throws up......

and then a white one....
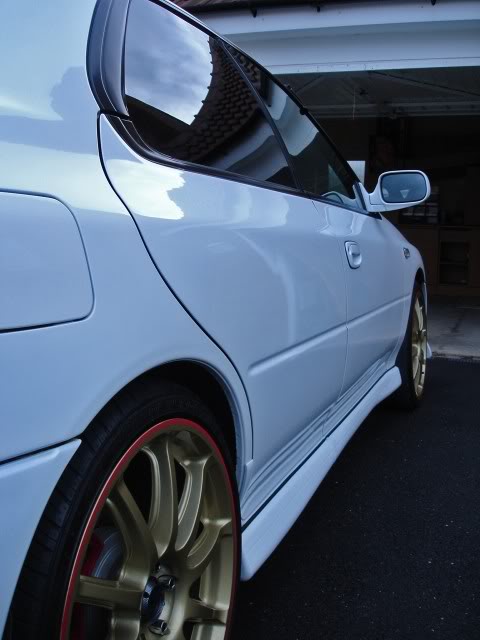
both cars are spotless, but you can see how a black one will
show everything underneath whereas the white can hide a little.
So, no pressure then.
The next sequence of pictures are taken a little out of sink, just
to show what we're going to do to the whole car.
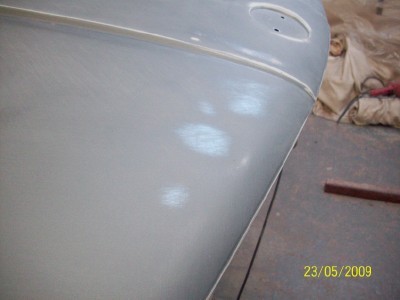
This is a flat piece of bodywork at the base of the rear windscreen.
It has never been damaged or dented from what I can tell so it's
as it left the factory....
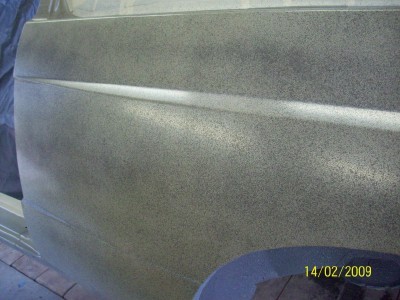
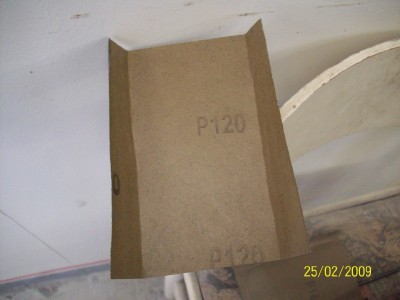
first up is to give it a light sprinkling of guide coat....
then some 120 grit sand paper on the block....
after a light sanding this is how flat it is....

now that we know the section can be gotten a little flatter, it's
preped for filler. I learnt this next lesson the hard way years ago.
Filler sticks to a panel by gripping the surface, if the surface is
silky smooth it don't grip that well, so, a light sanding all over
with 80 grit gives it something to grip to...
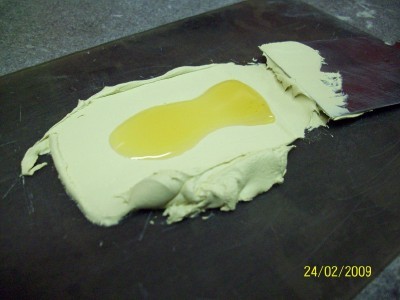
next up a little filler and some hardener, well a lot of hardner
actually, it's still f**king freezing out here and the filler is
taking for ever to go off. It took me quite a while to learn how much
hardner to put in the fillers and I guess it just takes practice to
get the amounts right. Rough guide though is if your wrist breaks
while mixing it on the board ease up a little. If you can still draw
happy faces in it on the car 3 days later might be time to try a little
more.
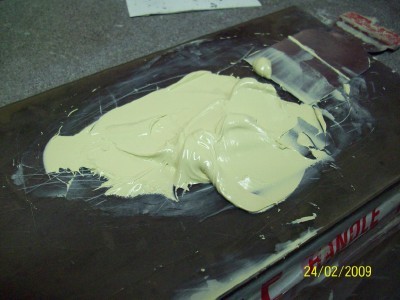
And before anyone has a heart attack
not all this filler is for that tiny panel, most is going elsewhere.
The car needs to fit out the garage doors when finished....
some more guide coat....
and then sand most of it back off again....

sanding is stopped when the highest parts of the metal just start to
show through. As you can see theres still a few patches of guide
coat, so another little bit required. However this time its only a
slight smear of filler required so we thin out the filler a little to
make it easier to apply thin. This is done by using some of this.....
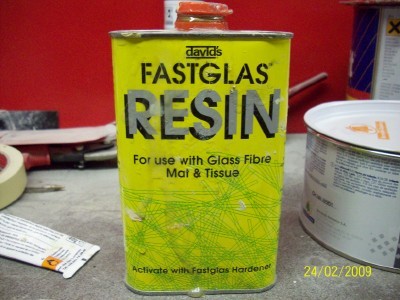
it's fiberglass resin, the stuff you use on the tissue type fiberglass.
A little of this is mixed with the filler before adding
the hardener.....
and then when the whole lot is slopped together the end result
is a mix which is runnier and easier to put on in thin
smears....
more guide coat....
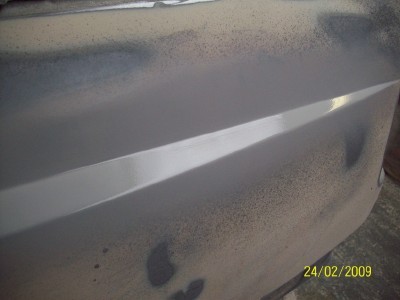
more sanding and volla, a perfectly flat panel....
which reflects light straight....
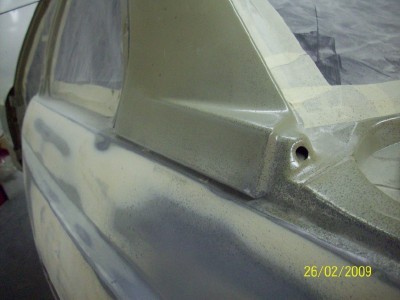
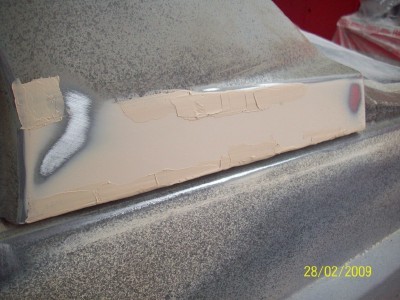
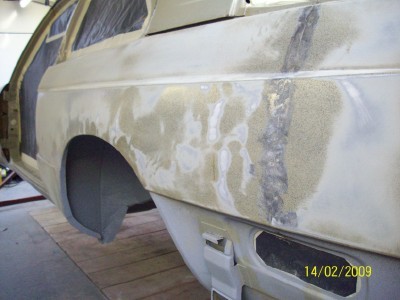
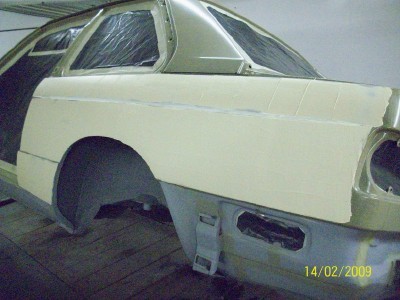
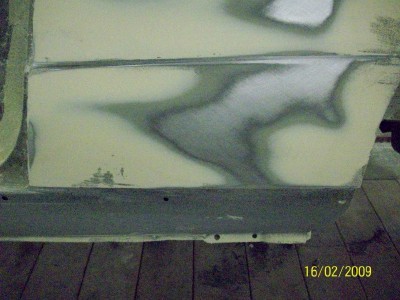
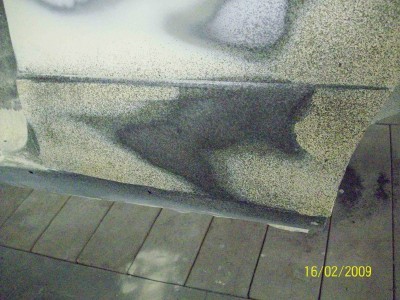
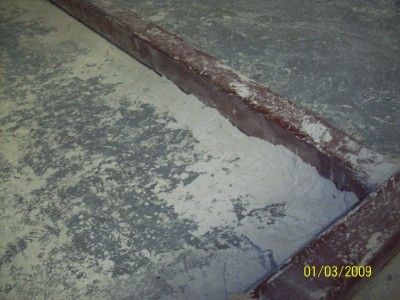
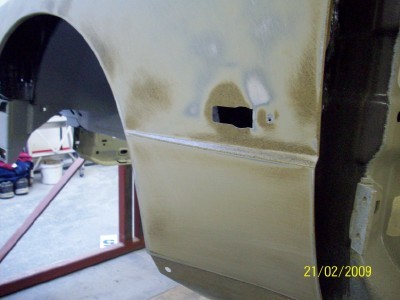
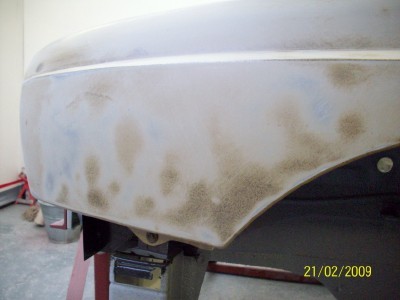
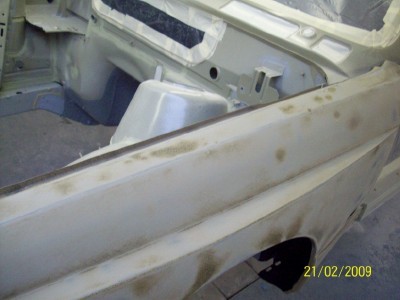
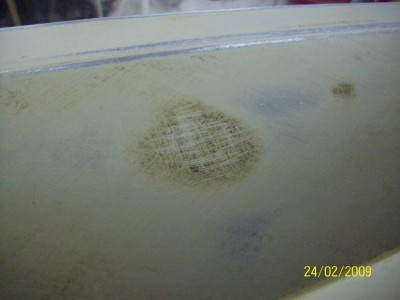
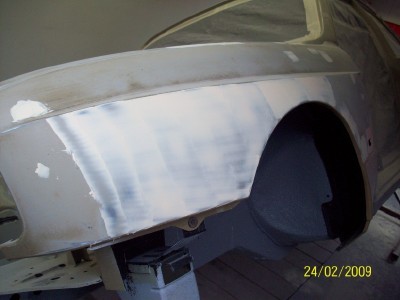
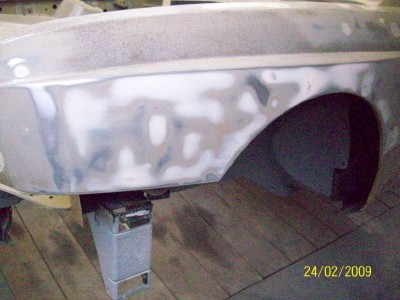
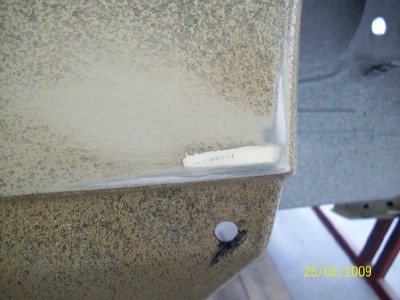
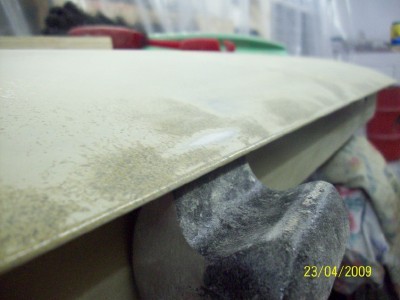
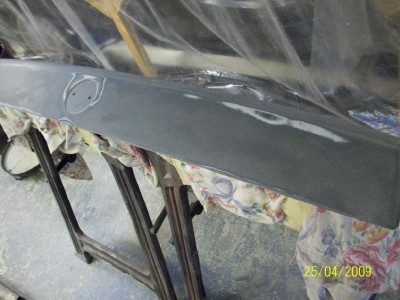
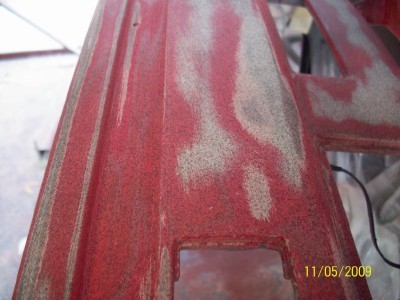
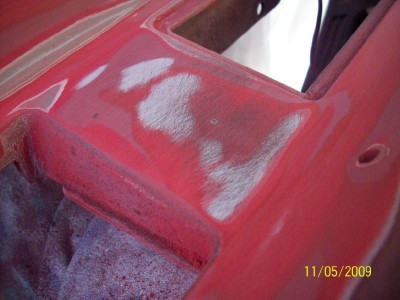
next up is the most challenging panel on the car the rear quarter
which was previously straightened and repaired and had a
section joined in it years ago.
On first glance it looks nice and straight doesn't it.....
a little closer reveals the joint of the rear section. The stuff you
can see either side is lead or solder which is what they used
years ago to fill joints which has melted and ran out after the
shell was baked after being primer dipped. We knew this would
happen but decided to deal with it now rather than trying to tease it
out before the shell went for dipping.....
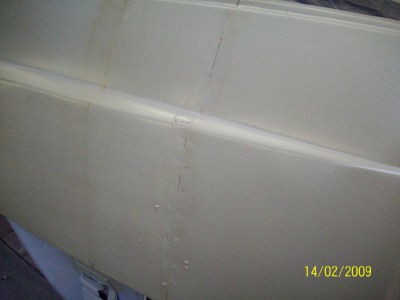
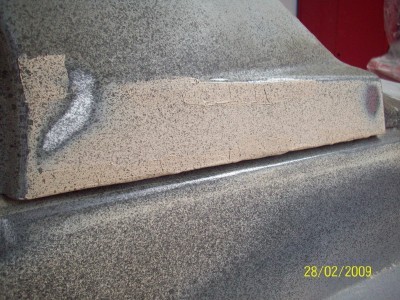
The dark stains that show in the pictures are not rust stains
by the way it's where some of the primer ran down the panels
after the dipping.
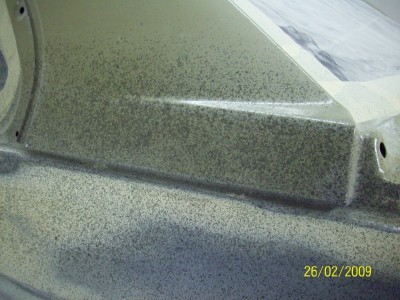
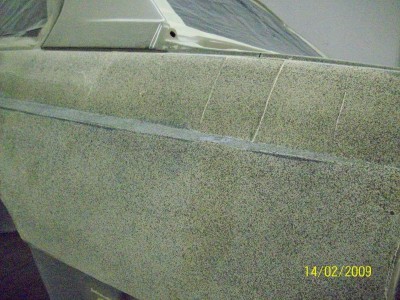
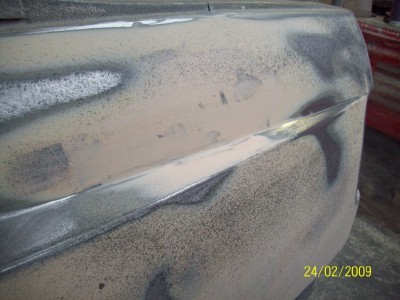
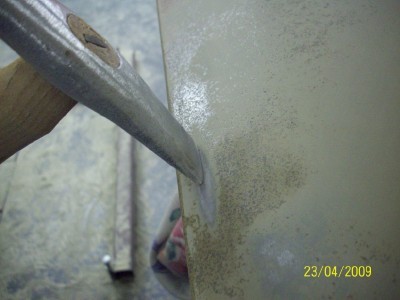
First up was to sand away the solder residue.....

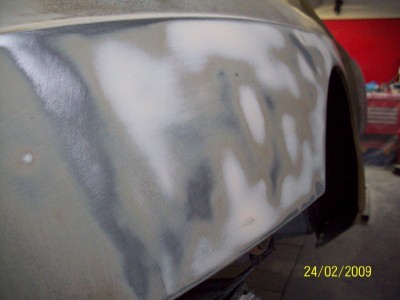
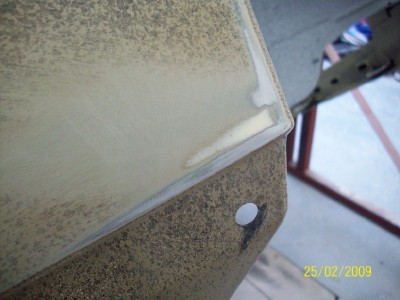
then coat the whole panel in guide coat....
then very lightly rub it down with the sanding block and 240grit paper.....
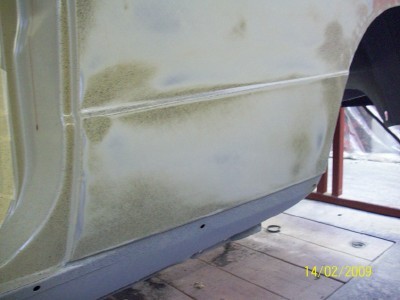
weren't expecting that were you! The camera makes it look much
worse than it actually is, I tried to take the pic from different
angles to show a true reflection but they all come out like this.
If you run your hand across the panel you can feel slight rises
and falls but the picture makes it look like you might loose a
finger or two. The panel was obviously dollyed out back when
the original repair was done and what you see is as flat as it
was got with a hammer and dolly.
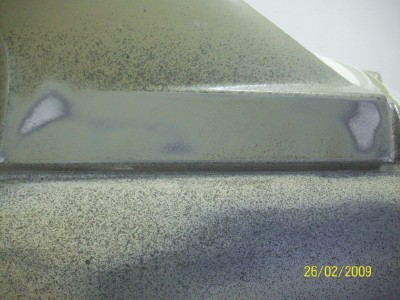
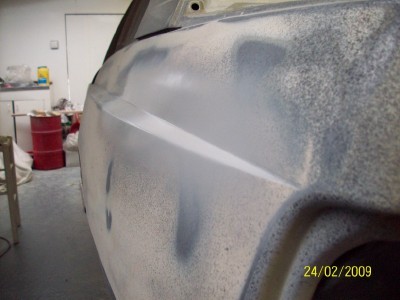
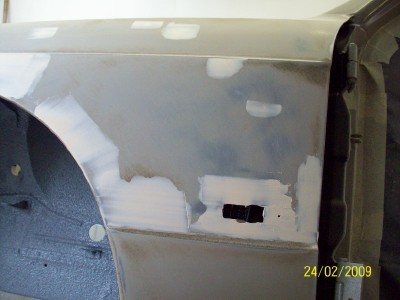
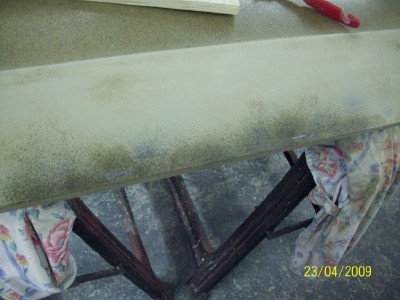
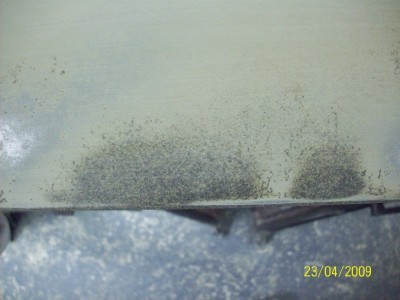
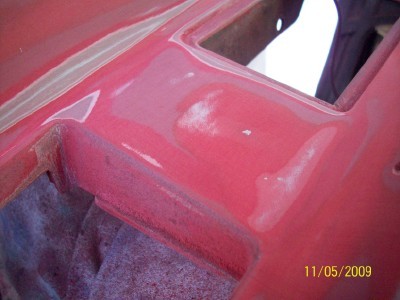
So now that we know theres no awkward high spots that need
further flattening the whole panel is roughed up for filler....
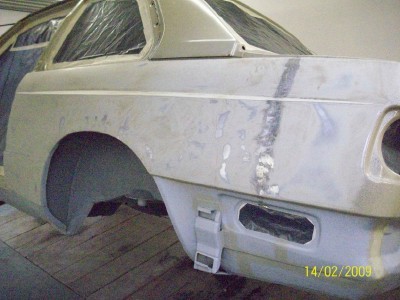
a light coat is applied to the whole panel....
and some guide coat....
first block sand reveals some small spots that need a second coat....
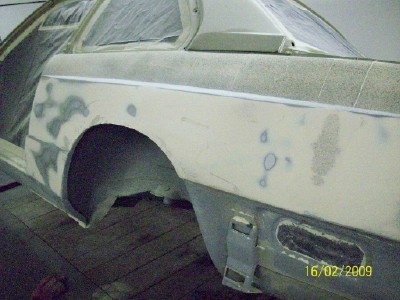
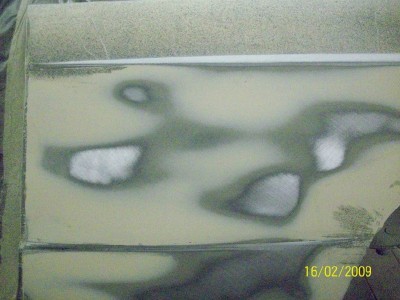
you can see from the remaining guide coat where the section of
quarter panel was added, that the joint was left low so it could
be hidden with filler....
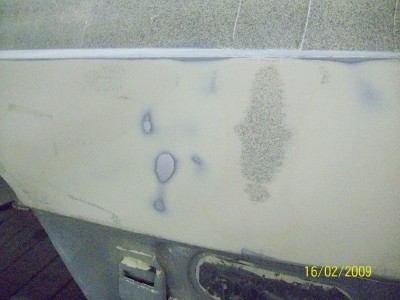
so a lighter second coat.....
some more guide coat.....
and after the final sanding.....
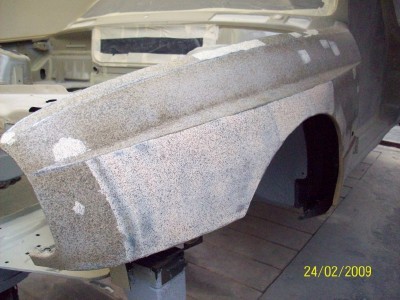
the panel is then given a light coat of primer to protect the bare
metal form any dampness that might seep in before the spraying
begins.....
for any of you who may be concerned that the car will need
stiffer springs to carry the extra weight of filler when its
finished, then rest assured, this is the "least straight" panel on
the car requiring the most amount of filler. The total amount of filler
left on the panel after sanding would be equal to about the size of
a tennis ball. And the rest, well, it's just dust....
Theres a little more left, but it's late and my finger's worn to the
knuckle from my one fingered typing, I'll stick it up tomorrow eve. Goodnight.
Last edited by x-works on Fri Mar 04, 2016 10:48 pm, edited 4 times in total.
-
hoshy
- E30 Zone Wiki Guru

- Posts: 4118
- Joined: Tue Jan 18, 2005 11:00 pm
- Location: Munich
Post
Wed Mar 04, 2009 12:01 am
Thanks for this. There is a lot to be learned from your work!
E46 M3 CSL but dreaming of another E30.
-
nickso
- E30 Zone Addict

- Posts: 4396
- Joined: Sat Jul 23, 2005 11:00 pm
- Location: Go do that voodoo that you do so welllllllll!!
Post
Wed Mar 04, 2009 12:13 am
very interesting.
you have far more patience than me thats for sure.

'88 e30 328i M52 track bint.
-
tomson
- E30 Zone Addict
- Posts: 3598
- Joined: Sun Nov 06, 2005 11:00 pm
- Location: Bristol
Post
Wed Mar 04, 2009 5:54 pm
A truely heroic thread.....
-
ricey46
- E30 Zone Regular
- Posts: 982
- Joined: Fri Dec 02, 2005 11:00 pm
- Location: Edinburgh
Post
Wed Mar 04, 2009 6:07 pm
great work, this is gonna look amazing when it's finished

Also I agree with what you say about white compaired to black, the darker colours give off a much better reflection, that black scooby looks spot on

.
one of my favourite reflection shots...., some of Clark's work at Polished bliss...
Sorry to spam your thread...
Paul.
325i sport Tech1
335i Chromie - Sold
2001 E46 M3-Sold
1999 E39 M5

-
x-works
- E30 Zone Regular
- Posts: 332
- Joined: Thu Mar 10, 2005 11:00 pm
- Location: Ireland
Post
Wed Mar 04, 2009 6:33 pm
And finally, Just before I leave the rear quarter panel theres another
little thing that can help sometimes. The joint on the quarter
panel runs from top to bottom and as mentioned the whole
join was left slightly low so as to be covered be fillers. The
part I found trickiest to fill and sand was the crease line's along
the wing. With a couple of coats of guide coat and a few thin
layers of filler of slightly differing colours depending on the amount
of red hardner that was used, it can become visually hard to tell
if you've gotten the crease lines straight....
so when I thought I was close I gave it a light coat of primer on it
and the surrounding area and while it is still wet you can look
down along the panel and try and catch the light reflecting on it
and check to see if your lines are straight....
not rocket science I suppose but it all helps.
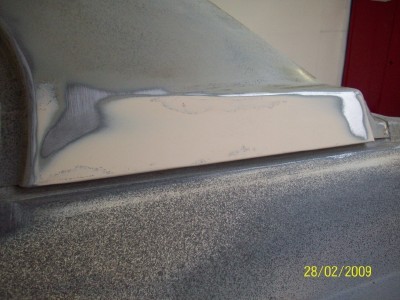
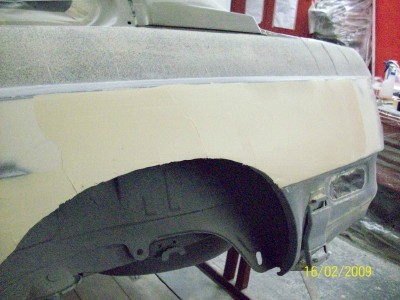
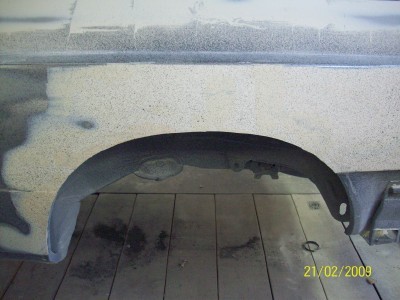
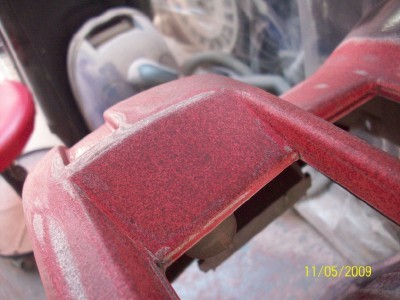
After that it was on to the front wings. The drivers side first.
The wings looked reasonably clean and straight with only one
or two small dents, but when you ran your hands along them
you could feel very slight little dips. So....
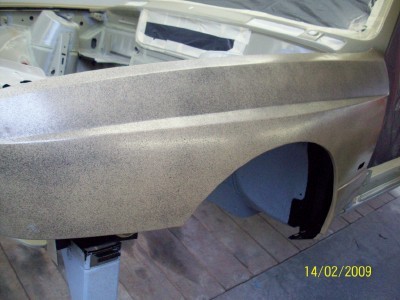
this was the only one I could actually see before sanding....
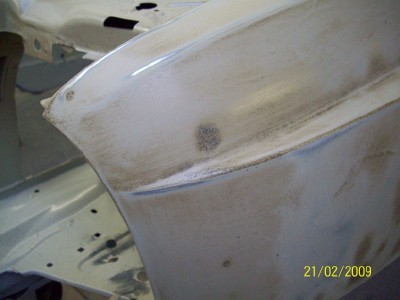
now I can't say for sure but I'm fairly certain that that last dent
would be the only one that that would have showed up if I were
hand sanding this instead of block sanding it. Will the final finish
be any the better for filling all these imperfections? Time will
tell, but I've gotta believe it will otherwise it's an awful lot of
sanding for nowt. 
next up a little sanding to everywhere gettin filled....
and apply a very thin skim of filler.....
followed by guide coat....
and then softly rub most of it back off again till theres no more
guide coat left....
when done and you run you hand back over the panel it certainly
feels smoother, but that could be because I've worn away most
of my fingers with all the sanding.
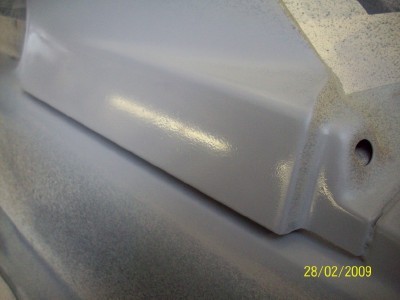
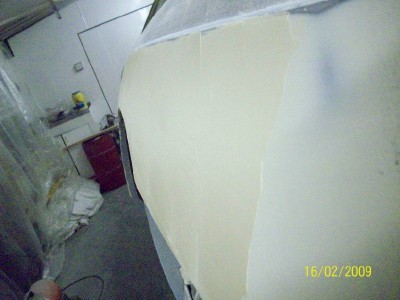
There are some areas of the panelwork that are too small to use
the sanding blocks on such as this bit at the bottom of the front
wings, it's got a sharp curve to it and no matter how flexible the
sanding block is, it's just to big to use....

so for these areas I use these these....

they're small sanding pads, which are used with normal sheets
of wet/dry sand paper....
the black side is soft sponge like, where as the red side is harder
rubber like....
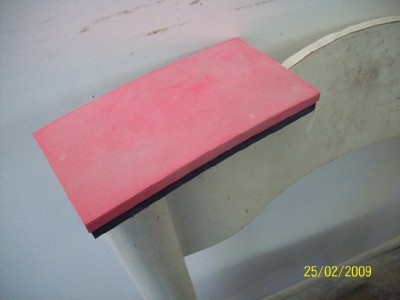
I use the red harder side to shape the filler first....
and then when it feels reasonably flat, use the black sponge side
to fade the filler in to the surroundings....
and thats it, thats where we're up to at the moment. Going back
to do some more now, which quite frankly will be probably
easier than trying to write up all this waffle.
Will post up when we get something more interesting done.
Last edited by x-works on Fri Mar 04, 2016 10:52 pm, edited 2 times in total.
-
E30Mark
- E30 Zone Team Member

- Posts: 8107
- Joined: Sun Jan 09, 2005 11:00 pm
- Location: Wimborne, Dorset
Post
Fri May 22, 2009 10:57 pm
Any updates on this

-
E30Gheko
- E30 Zone Addict
- Posts: 3789
- Joined: Sun Sep 28, 2008 11:00 pm
- Location: Wirral
Post
Sat May 23, 2009 2:18 am
yeah where's the next bit guys?
-
b4gga83
- E30 Zone Regular
- Posts: 436
- Joined: Fri Jan 14, 2005 11:00 pm
- Location: West Midlands
-
mhuk
- E30 Zone Regular
- Posts: 478
- Joined: Mon Jun 30, 2008 11:00 pm
- Location: Heathrow Airport
Post
Sat May 23, 2009 12:12 pm
stunning work you been doing!!!!!
Triumph Spitfire MKIV
BMW E30 325i 4dr rightness
SUbaru Justy Gen2 AWD
-
x-works
- E30 Zone Regular
- Posts: 332
- Joined: Thu Mar 10, 2005 11:00 pm
- Location: Ireland
Post
Sun May 24, 2009 1:17 pm
Bit of a delay in getting the next instalment up I'm afraid.
Still working hard on the bodywork trying to get it perfect.
But, thanks to the catastrophic failure of my efforts to grow
money tree's, I've had to take some time away from the car
to go and earn some cash. With the amount of money being
spent on this car I'm actually quite surprised it hasn't kick
started the economy yet. Anywho, still taken pics of everything
as we go along and all going according to plan should be
starting to shoot some primer within the next week or two.
Will have an update up before that of the last of the prep work.
Thank you for your patience,
Yours sincerly,
Ihatefuckingsanding.
-
StefanAnghel
- E30 Zone Camper

- Posts: 1403
- Joined: Tue Nov 20, 2007 11:00 pm
- Location: Essex/Hertfordshire/London
Post
Fri May 29, 2009 2:35 am
wowwww good work
I'd love to have your welding skills!!
-
Alpina99
- E30 Zone Camper
- Posts: 1000
- Joined: Sat Nov 17, 2007 11:00 pm
- Location: Portsmouth
Post
Wed Jun 03, 2009 10:45 am
Still hooked on this thread & enjoying every update,
Keep it up, can't wait to see the finished article,
Gone, but not forgotten !!
-
madaboutthe30
- E30 Zone Camper
- Posts: 1391
- Joined: Sun Oct 21, 2007 11:00 pm
- Location: Stanmore, Harrow
Post
Thu Jun 04, 2009 11:36 pm
Hey x-works, where did you learn all these skills and knowledge from?
Dreaming of the day I purchase an E30 M3
--- e30 motorsport cab-- in the process of becoming a trailer queen
--- Z4M Coupe - daily driver
-
x-works
- E30 Zone Regular
- Posts: 332
- Joined: Thu Mar 10, 2005 11:00 pm
- Location: Ireland
Post
Sun Jun 07, 2009 8:46 pm
erm.... bit of an awkward one to answer that, I'm not
sure really. Been buildin cars since as far back as I can
remember I suppose, and if you make a balls of something
enough times "Sod's Law" says you'll eventually get the hang
of it. Watching builds on discovery tv, reading them on the net,
speaking to lads in the trade helps to give you ideas of how
other people go about things and then just have a go yourself
and see how it turns out. Being a mechanic for a day job
probably helps some to, teaches you how to become proficient
in the use of large hammers and a variety of different curses
for when the job goes t*ts up. Most of all though, it's just patience,
you learn to take your time, learn that things will go wrong
just as often as they go right and when they do just start again.
And most of all, know when to walk away for a while, when you
get pissed off with something and that little voice in the back
of your head says "ahh f*ck it, it'll do, it'll be grand", then the
quality is going to slip, so walk away, be it for an hour, a day
or a week. But don't come back till your fired up and ready to
have a good crack at it again. Thats what works for me anyway.
-
x-works
- E30 Zone Regular
- Posts: 332
- Joined: Thu Mar 10, 2005 11:00 pm
- Location: Ireland
Post
Sun Jun 07, 2009 9:53 pm
Evenin all,
As mentioned earlier theres been a little bit of a gap since the last update,
reason being the budget had started to run low for this project so I
decided I would win the national lottery, for some reason I can't yet
fathom I haven't been contacted by the Lottery people to arrange
how much I'd like to win. Still I'm sure it's only a matter of time.
The next plan to rob a bank has come to no end as it would appear
the banks have even less money than I do, bad timing, I know.
So after a month working the spanners for other people I could
now return to my own project. Where more sanding awaited.
With the exterior of the shell wrapped up last time it was now on
to the individual panels. First up, the doors....
looks nice and flat doesn't it, and in fairness it actually felt reasonably
flat aswell, but we all know a car doesn't make to through 20 years
without getting the few odd belts of the supermarket trolley, so, a
coat of guide coat....
and some 320 grit on the sanding block....

and volla, instant dents, I can also make rabbits appear from hats
but they too would probably be dented or missing an ear or something...
dents weren't actually too bad, these group of 3 below the crease line
being the most noticeable...
while those above the line couldn't really be called dents, more depressions
really, what you might get as a result of a fat kamikaze bumble bee ...
so a little filler to all and let it dry while moving on to the next door....
which also looked pretty smooth....
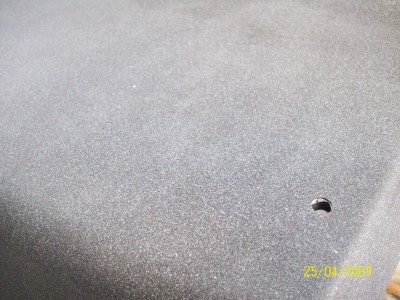
apart from 2 quite obvious high spots at the base of the door skin...
a little hard to see in the picture I know, but you could feel them
fairly obvious when you rub your hand over the panel, and after
guide coating and sanding the panel down you can see where the
high spots has rubbed through to the bare metal....
the high spots would need to be taken down level with the rest of the
skin and to do this we break out a hammer and dolly...
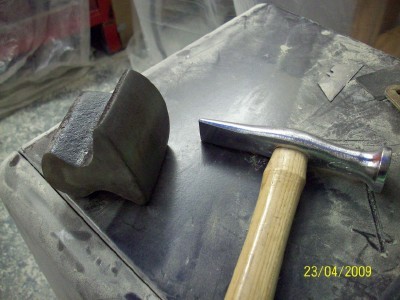
place the dolly under the high spot....
and then beat the sh*t out of the raised section, well actually no,
if your like me you have to use all your self restraint and ever so
gently tap the metal down....
when done another little coat of guide coat just to confirm that the
raised spots have gone down enough....
and thankfully they have....
a talented panel beater could get that section flat enough that no filler
would be needed and someday I hope to be able to..... hire one to
do it for me.
So, all the dents identified....
shovel on the filler...
sand most of it back off again and take a little step closer to
insanity in the process...
when that was done, flip the door over and sand every inch to
complete the task of going insane...
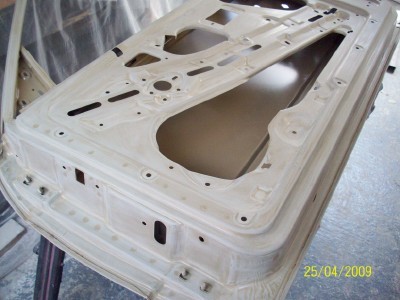
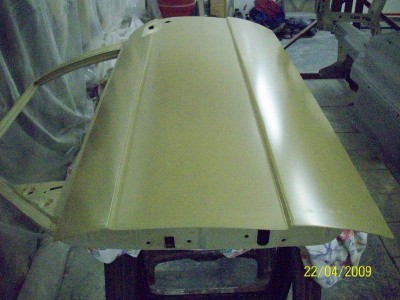
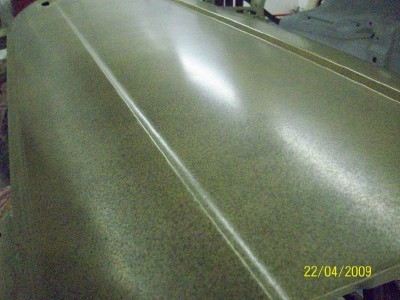
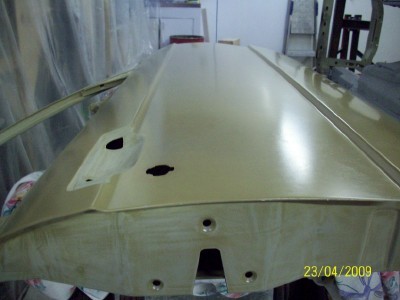
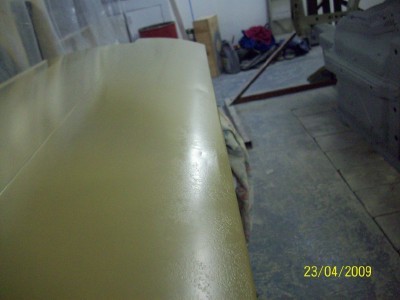
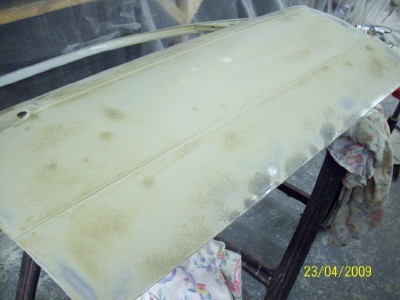
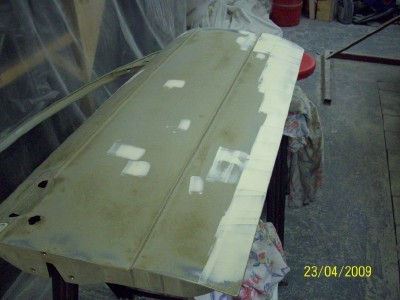
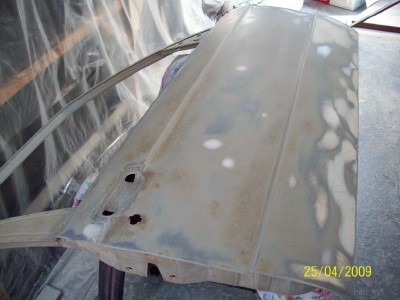
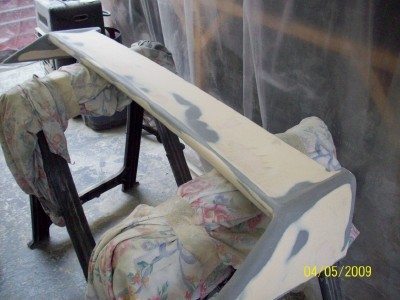
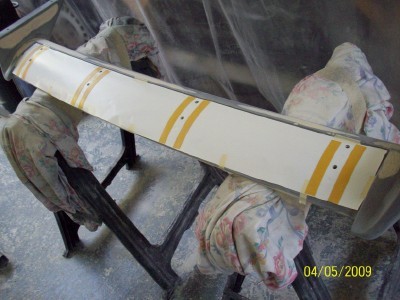
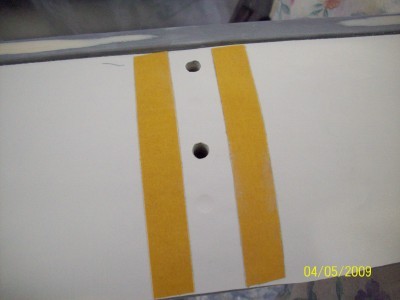
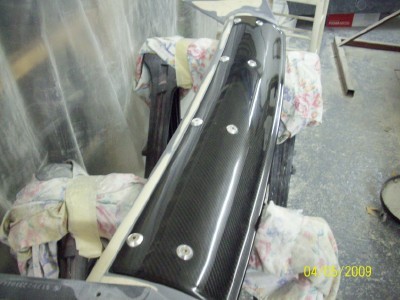
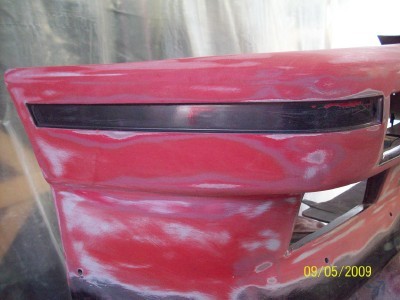
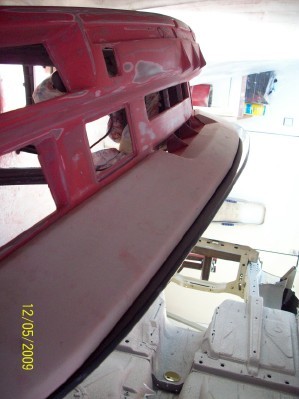
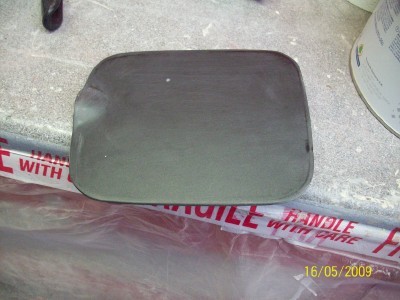
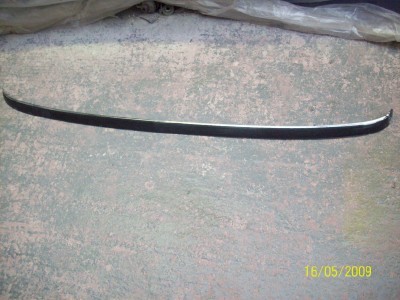
with the doors done it was on to the bootlid, as you can see it's
still in the original colour because M3 bootlids are made from GRP
and dipping it in a vat of acid would have resulted in an expensive
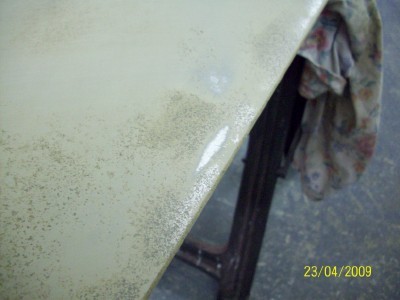
pool of gue. So, a quick lick of 320 to break the lacquer...
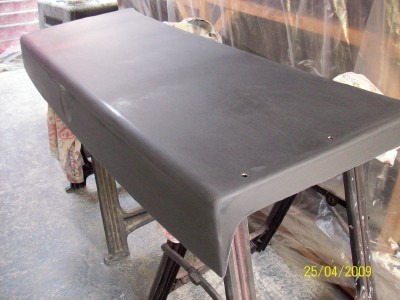
and then a guide coat, white guide coat this time as the mensa members
among you will have guessed black guide coat on a black panel
would be as useful an under water hairdryer....
had to take a minute to admire the quality of the panel when sanded,
no filler needed in a 20 year old fibreglass moulded panel. Thats
pretty neat...
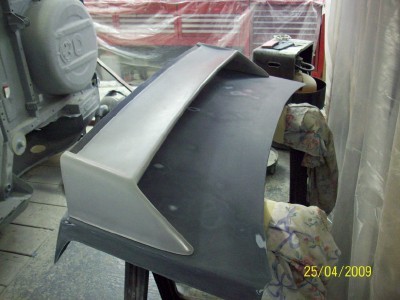
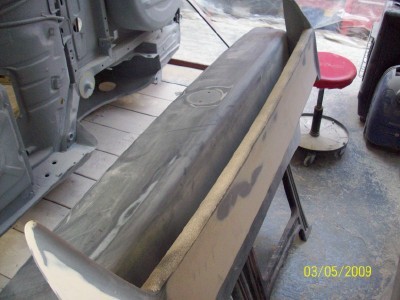
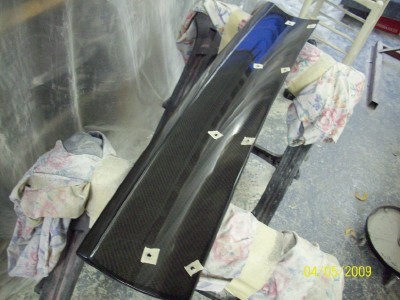
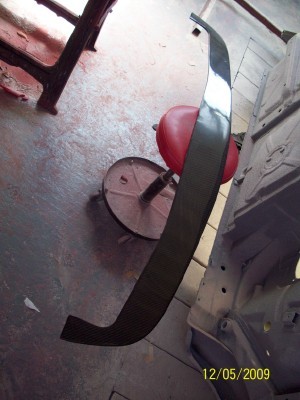
then as you may have noticed from the picture above it was on to the
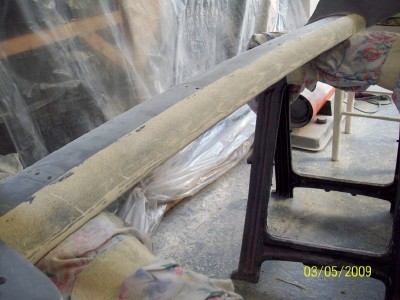
after market spoiler i'd bought to replace the original. It's a fiberglass
replica of the sport evolution item with the adjustable flap. I had
considered buying the genuine item from BMW right up till I phoned them
for the price, after the cardiopulmonary resuscitation I started searching
for a cheaper alternative. The item was sold as a race quality part and having
done some work on fiberglass parts before I knew it would probably
take some work to get totally flat, but given the price difference it was
worth the extra effort.
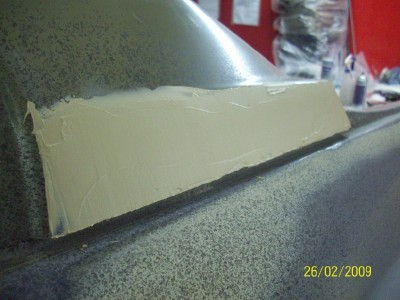
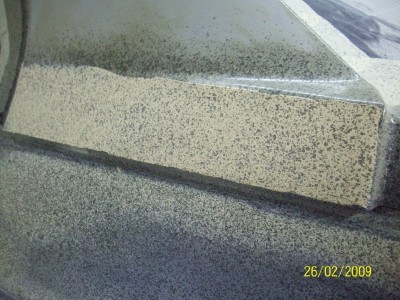
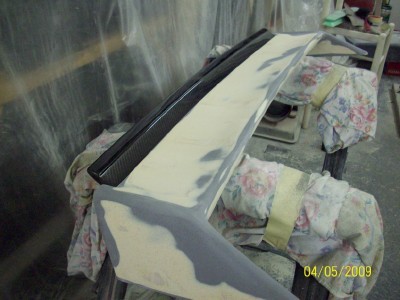
First up some guide coat to the main flap....
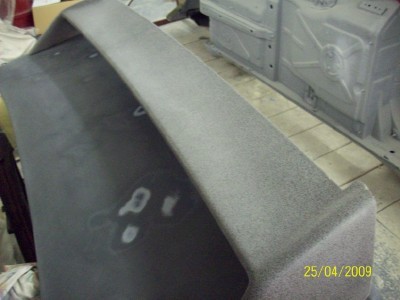
well maybe quite a bit of work....
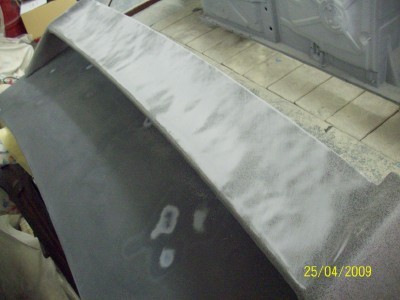
was a bit awkward to hold the spoiler for sanding so ended up bolting
it to the bootlid backwards and forwards to get at it all. It only
needed some filler here....
and here...
and here....
tiny bit here....
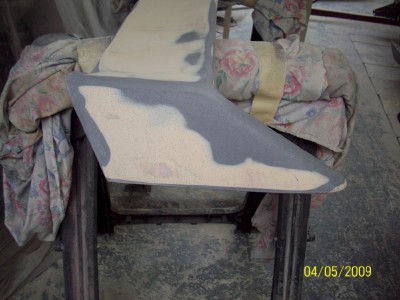
here...
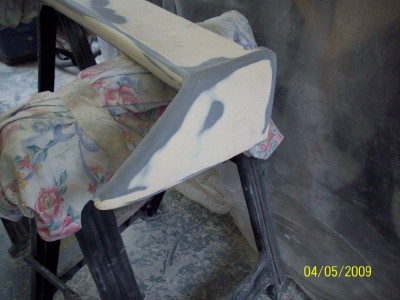
and here...
and there....
like I said just a little bit of extra effort and a weeks sanding.
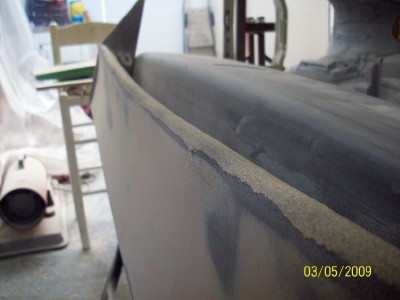
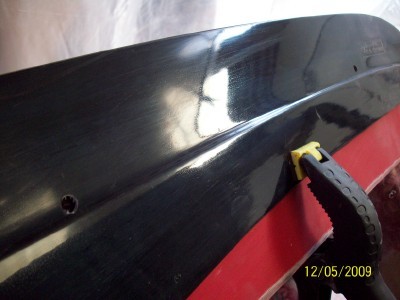
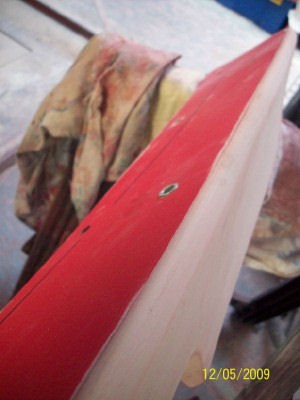
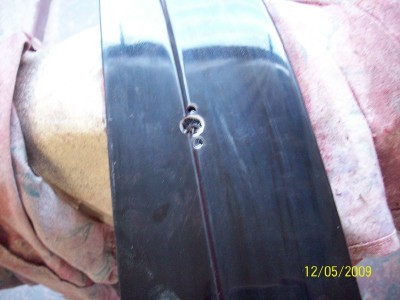
next up was the flap that bolts on to the wing using these bolt holes
underneath.....
the fibreglass spoiler did come with a fibreglass flap as seen in
the pic below, but, I'd also bough a carbon fibre flap to replace
this with.....
only snag being that while the fibre glass flap was predrilled with
the correct spacing holes....
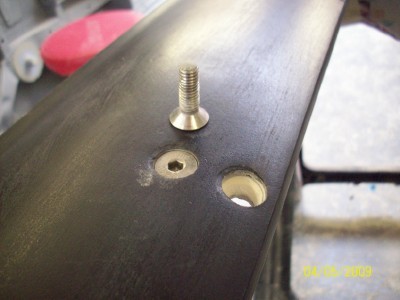
the carbon fibre one wasn't drilled at all....
so how to transfer the holes to the new flap and get them in the
right place without making a balls of it? Sheet of paper the size
of the flap taped to the spoiler, punch the holes in it and...
place a few bits of double sided tape on top of the paper...
place the new flap down on top of the spoiler and hope the paper
sticks to the new spoiler showing you where to drill the holes.
I know, I can't believe it worked either...
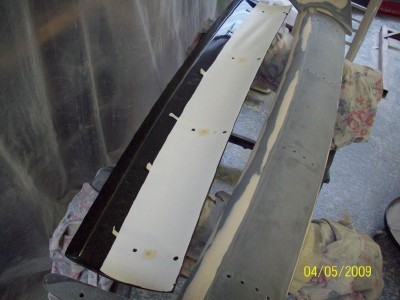
tape up the marks for drilling....
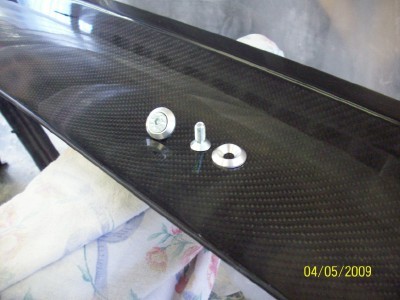
and bolt it up with the new bolts....
to be honest the new bolts that came with the carbon flap were handy,
instead of needing the flap to be drilled precisely for the countersunk
heads, these came with a nice little cupped washer which meant you
could elongate the holes underneath to get everything lined up right....
and thats about all for tonight, still have another 80 or so pics
and verbal diorea that comes with them for tomorrow night.
Last edited by x-works on Fri Mar 04, 2016 10:55 pm, edited 4 times in total.
-
oi_oi_savaloy
- E30 Zone Newbie

- Posts: 204
- Joined: Sun Feb 03, 2008 11:00 pm
- Location: Nr Narberth, Deepest, darkest West Wales
Post
Sun Jun 07, 2009 10:12 pm
Epic thread and rebuild. The quality of the write up is, I think, testament to the actual restoration. Brilliant.
-
nickso
- E30 Zone Addict
- Posts: 4396
- Joined: Sat Jul 23, 2005 11:00 pm
- Location: Go do that voodoo that you do so welllllllll!!
Post
Sun Jun 07, 2009 10:14 pm
i'm full of admiration for all of this time consuming work and i dont want to sound negative but isnt this all going a little too far?
most folk aren't going to notice if its got a wee dent below the bumpstrip. you could still have a very nice car and keep your sanity/bank account in one piece without all this hassle.
'88 e30 328i M52 track bint.
-
DanThe
- E30 Zone Team Member
- Posts: 28649
- Joined: Sat Sep 10, 2005 11:00 pm
- Location: Staffs
Post
Mon Jun 08, 2009 12:31 am
Much respect on every part
Do you hate the car yet? I know I would

-
x-works
- E30 Zone Regular
- Posts: 332
- Joined: Thu Mar 10, 2005 11:00 pm
- Location: Ireland
Post
Mon Jun 08, 2009 9:06 pm
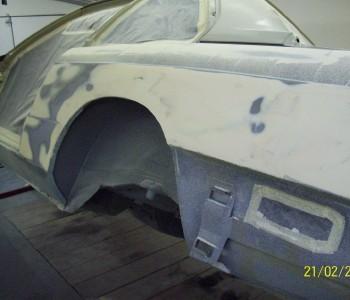
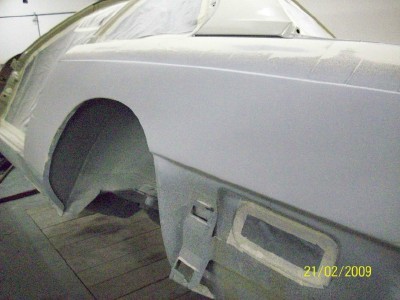
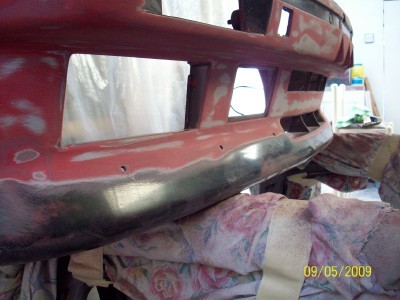
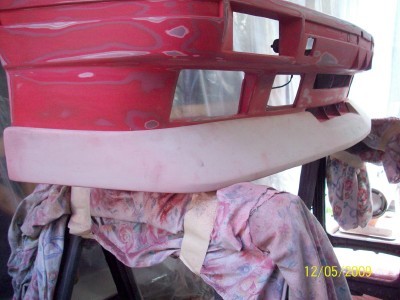
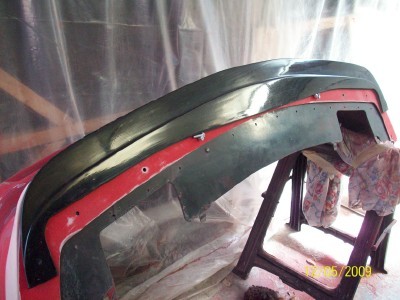
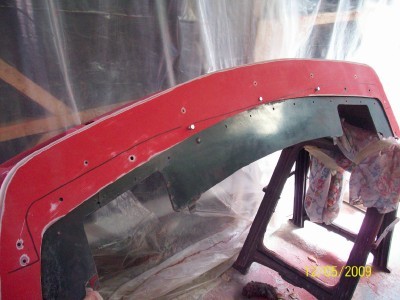
with the rear end panels done it was time to move closer to the front.
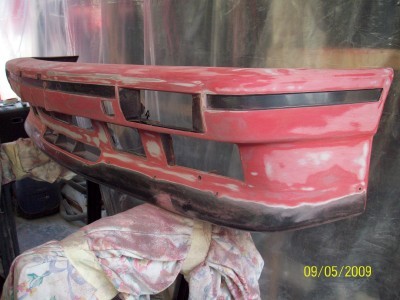
And first up was the front bumper. I wasn't looking forward to this as
I had a feeling there was going to be a good deal of effort (read ballache)
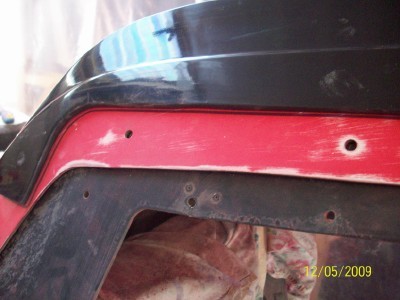
involved in getting the bumper fit for paint. The problem was that the
front bumper was originally off a red car and had been resprayed
diamond swartz when fitted to this car, that in itself is not usually a
problem if done right, however, this bumper looks as if it wasn't
fully preped before the black was put on....
the bumper had the usual stone chips you'd expect from a car of
it's age, but in the corners and along the crease lines you could see
where the black paint was lifting to reveal the red underneath because
the bumper wasn't fully sanded before painting.
So, a choice had to be made. It wasn't possible to know where the
black was stuck well and where it wasn't, meaning that if I chose just
to give everything a quick sanding over and sprayed on top of this,
then even if my paint job stuck well the paint underneath could still lift
down the line and end up looking crap again. I thought about it for a
while and decided if that happened after this much effort there was a
good chance I'd set fire to the car, so, no other option really,
all the black had to come off.
but as with most other things I tend to do, it wasn't that simple. The
red underneath was the original factory red and was really well stuck
on, so I wanted to leave as much of that as possible on, as my paint
job stands a better job of sticking to it as opposed to a bare plastic
bumper. Yeah, I know, I could probably make boiling an egg into
a four hour mammoth task.
80 grit paper and elbow set to full power....
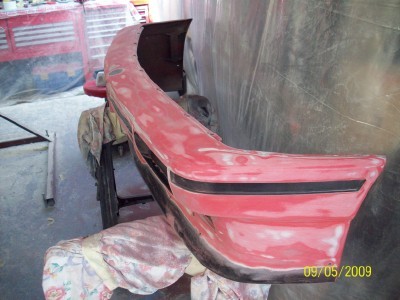
only block sanded the top part as it's really the only large flat surface on
the bumper, hand sanded the rest. Block showed up a dent right in the
middle of the bumper, should've hand sanded it too....
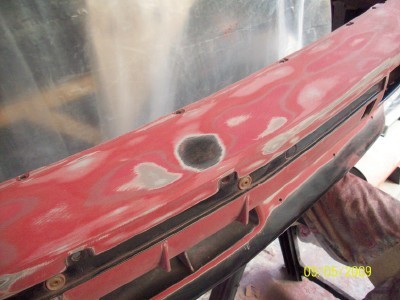
bit more of the pealing paint in the indicator recesses.....
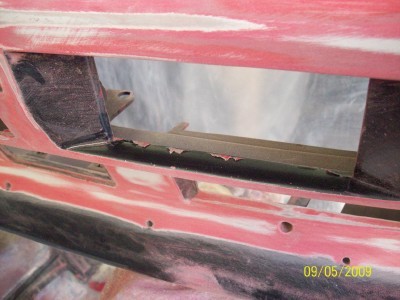
these channels were a pig to get into....
no need to totally do the bottom couple of inches as there will be a
spoiler covering it.....
this...
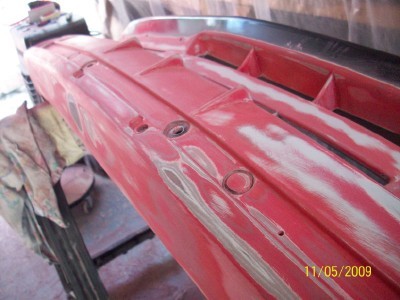
drove...
me....
f*cking ga ga....
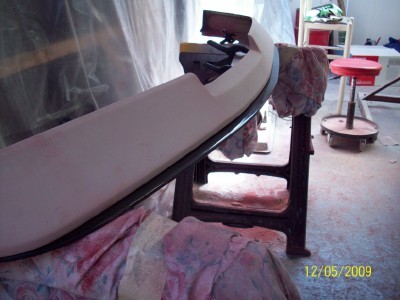
finished, well actually no, while the 80 grit is good at getting the paint
off it's to coarse a finish to paint over and you'll see the sanding
scratches through the paint, so, a complete coat of guide coat
everywhere....
and then do it all again with 180 grit untill you see the scratches
fade away....
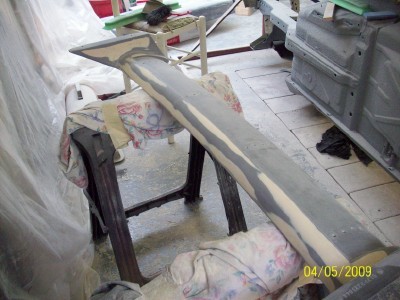
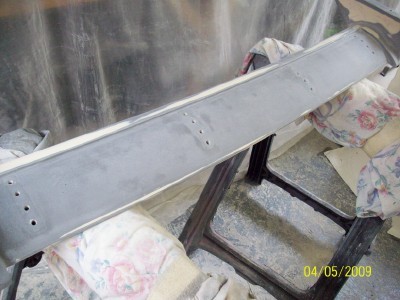
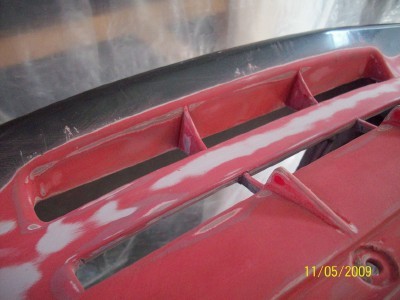
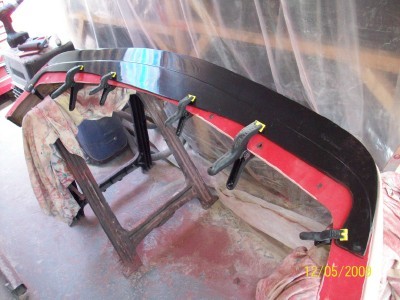
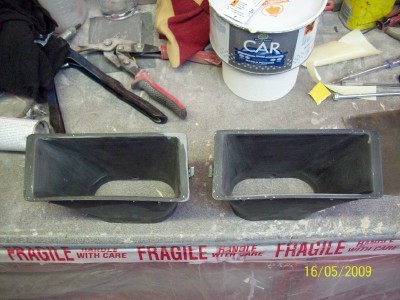
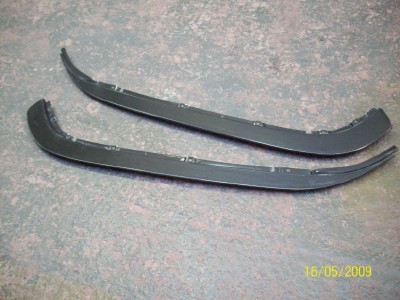
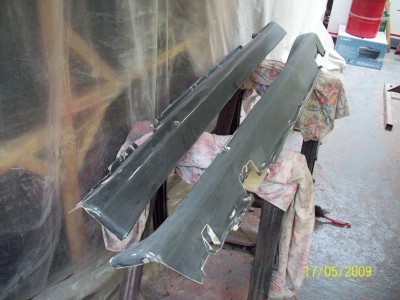
next up was the evo two chin spoiler, which was also multi layered
red and black, unfortunately she'd experienced some heavy landings
during her time and all the layers of paint had cracked quite badly,
so she got sanded back to the bone...
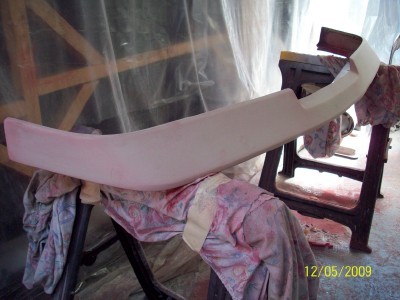
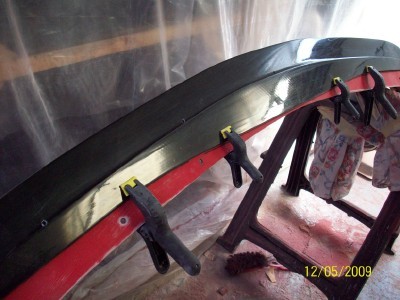
bolt it all together for the next part....
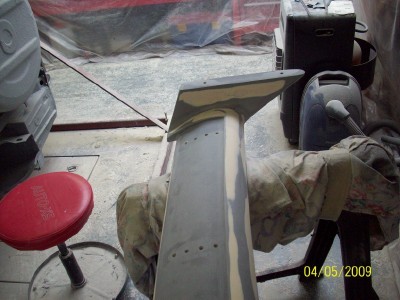
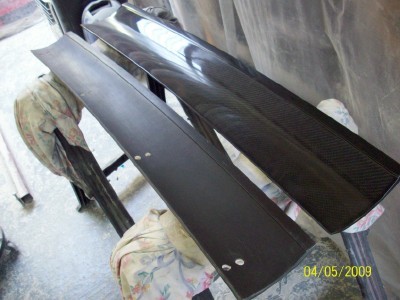
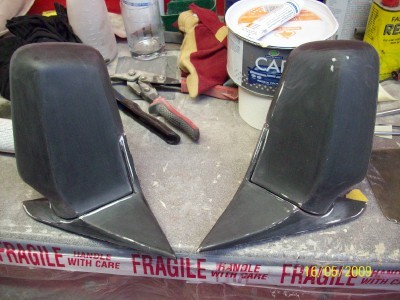
which was to size up the next carbon addition. This part was actually
fitted to the sport evolution and wasn't fitted along with the chin spoiler
above. But I've decided to fit both, not technically correct I know,
but if you don't tell anyone and I don't, then maybe they won't notice,
it can be our little secret. (yep, sanding is starting to get to me).
sat it up against the chin spoiler and decided on how much I wanted it
to stick out....
then traced a line on the chin spoiler....
removed it....
and removed the chin spoiler before clamping the carbon piece to it
again to check all is still square....
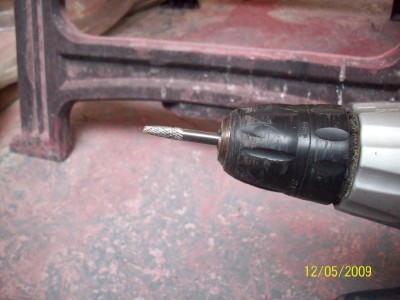
then take out the drill and mow a few holes through the pair of them....
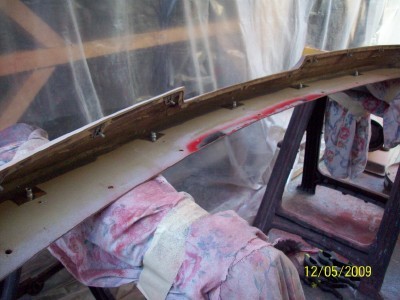
the plan was to sink a few threaded rivets into the chin spoiler so the
the carbon piece could be easily bolted on and off in the event of
it breaking down the line during a hard re-entry....
but the rivets were going to sit a little proud of the surface and as such
not let the carbon splitter mount up flush...
so recessed the hole a little while preying the drill didn't slip all
the way through and render the hole useless....
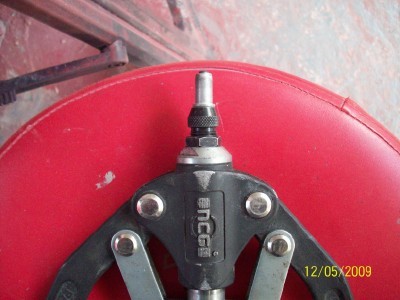
whip out the rivet nut squeezers (i'm fairly sure thats not it's proper name)...
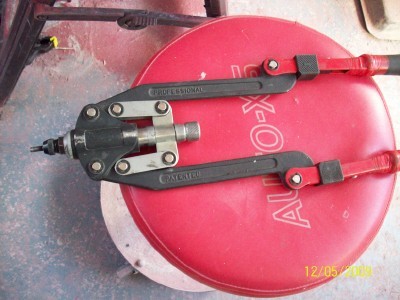
screw on a rivet nut....
cut out a little aluminium reinforcing place...
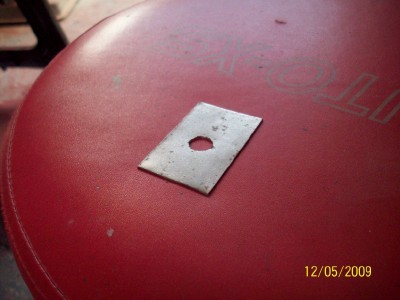
pop the rivet through the spoiler and plate....
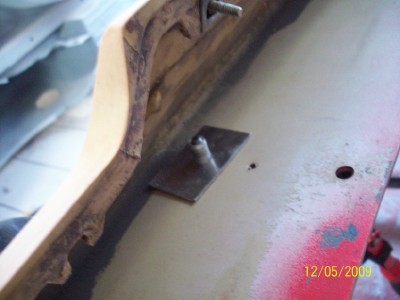
and give it a wee squeeze....

which leaves a nice tight secure nut...

which is flush with the bottom of the spoiler....
8 of them in total....
then on to the splitter. It's made up of two skins which are hollow in between.
I didn't want to use a large headed bolt to tighten it and end up squeezeing
the two skins together, which would probably cause it to crack over time,
so, two little holes either side of the main one on just the bottom surface....
ream all 3 of them into one...
and cut up a little reinforcing plate...
slip it in to hole (large hammer kept nicely out of picture)....
bolt the plate down tight to straighten it out once in place....
remove bolt, tape up top side of hole....
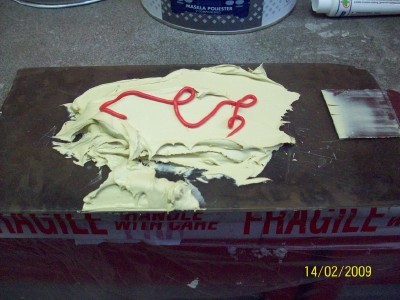
and pour in some resin to keep everything from moving around....
when the resin dries, redrill the hole, insert the bolts and bolt it
all up, which leaves it looking like so....
after that was done it was on to sanding all the little bits and bobs....
and then, finally, just one panel left to finish the prep work.
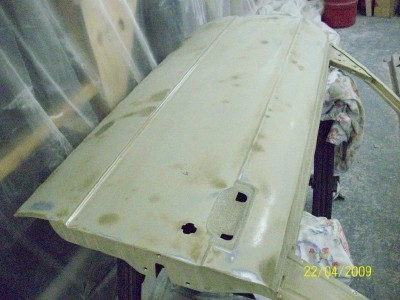
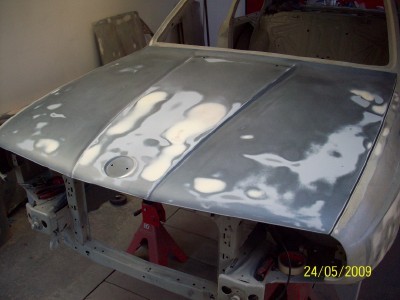
The bonnet...
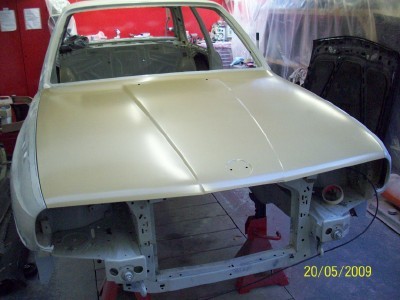
this had been dipped along with the shell and because of this
the bonder that bonds the skeleton to the bonnet skin was long
since dissolved which left the bonnet feeling fairly flexible and weak'
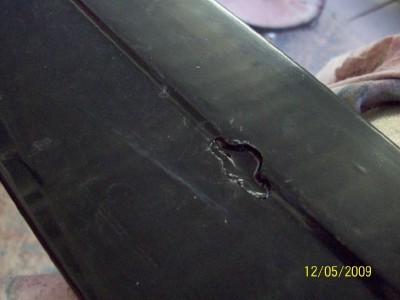
You could feel some new dents on the surface courtesy of SPL,
the most noticeable of which was this one....
Still, how bad could they be, few hours and all this would be finished....
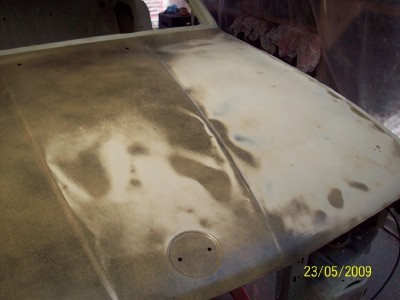

It looked like the whole bloody circus had just marched over it!
I couldn't fill all them dents, the front tyres would burst under the
weight of the filler.
So,
dial tone,
"hello, that BMW?, can I have the parts department please"
"hello parts, can you give me a price for an e30 bonnet please"
.
.
.
"no you must have misheard me I only need the price for one please"
.
.
"HOW MUCH"
.
.
. dial tone
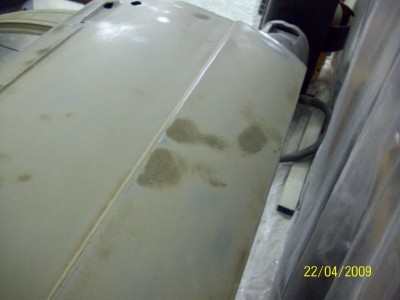
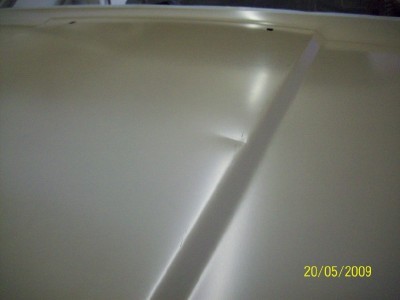
one secondhand bonnet later...
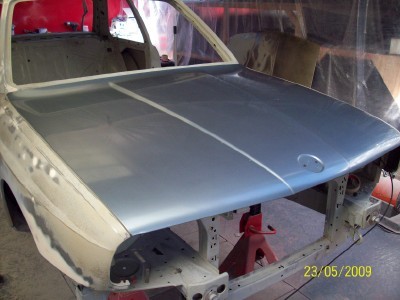
nice and clean, no rust, very little stone chipping, and most importantly
no evidence of previous circus marching....
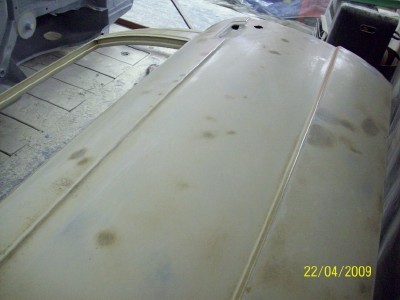
quick block sand with 320 grit revealed only some small dents...
and some nudge marks across the front from some over zealous
closing of the bonnet....
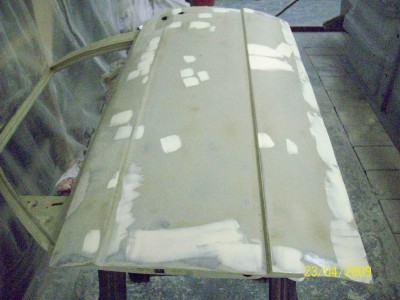
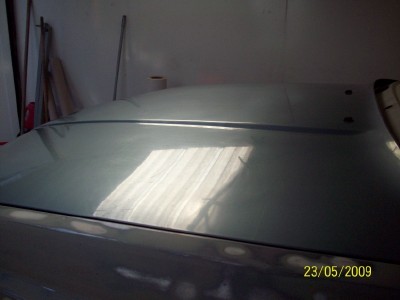
an hour had them filled and sanded....
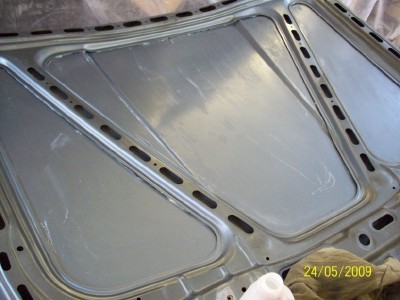
and then on to underneath. As this bonnet was from a 325 it had
the sound proofing glued on as opposed to the m3's clipped on mat.
A steam cleaning took care of the heavy sound proofing but this
still left the glue residue...

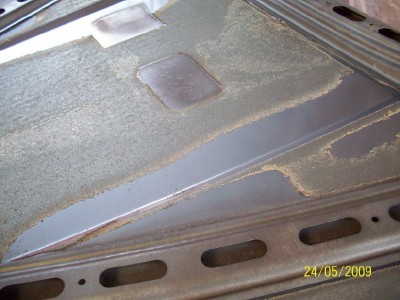
an hour with thinners and a scotch pad got the bonnet clean and
me stoned from the fumes....
which was convenient as it helped block out the pain from having
to sand every inch of the underneath....


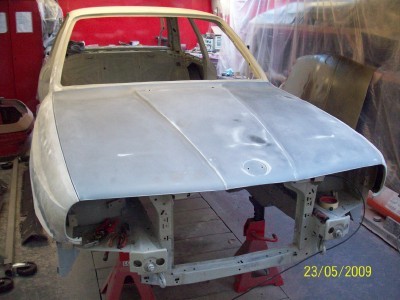
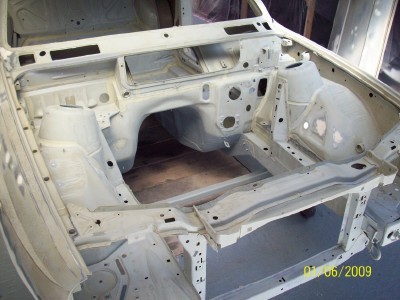
after that, a quick sand of the boot, interior and the engine bay.
Spent a little more time in the engine bay getting all the seam sealer
sanded smooth, I don't like the factory finish brush marks look.
and then finally it was time to get ready for some primer.
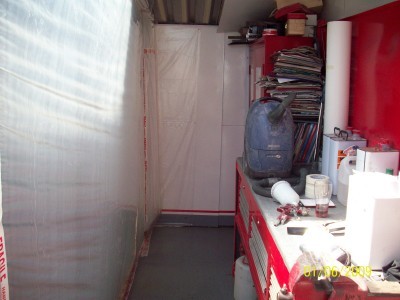
Only problem was the garage was an inch thick in dust and
someone had filled it with various crap over the last 12 months
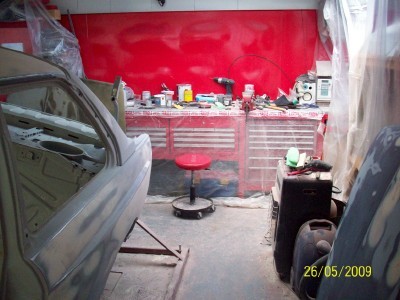
a quick wipe of a rag later....
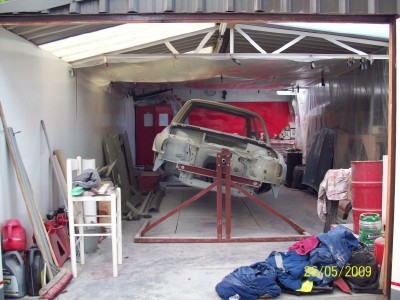
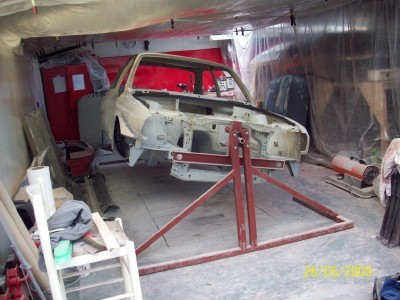
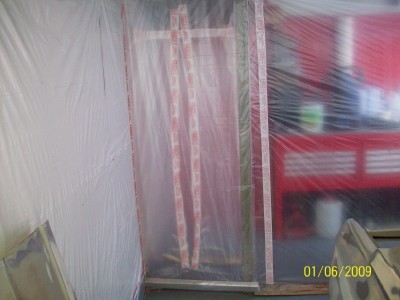
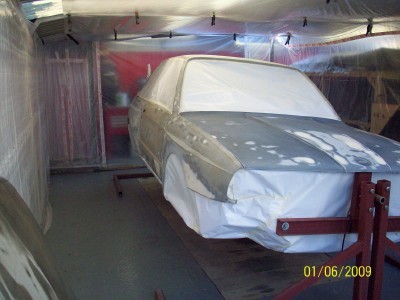
and the expert installation of the "Spray booth 3000"
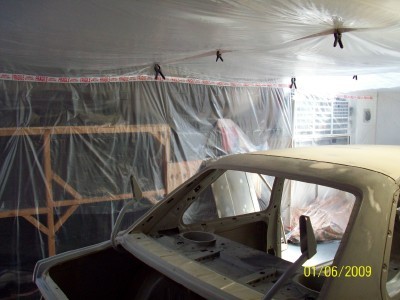
complete with NASA spec airlock....
car was put back on wheeled dolly during cleaning and
wheeled outside to have the dust blown out of all the cracks and
crevices (neighbours really love me now, and I even offered to
do their washing again for them, no pleasing some people).
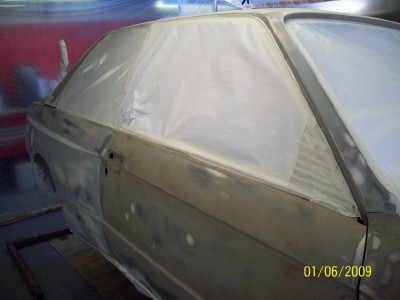
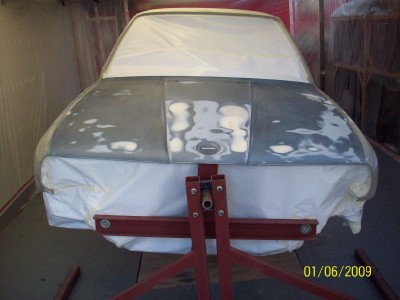
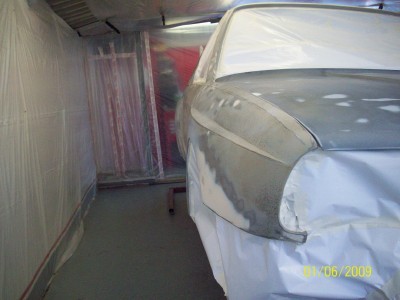
With the place now clean and the car back in we could start taping up
the shell....
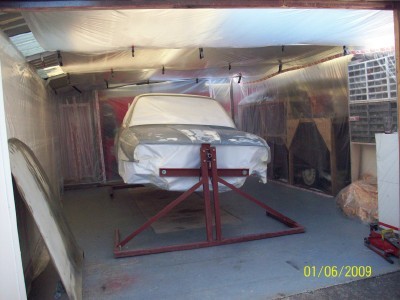
the first coating of filler primer is only going on the large panel
surfaces, so everything else gets taped up......


STAY TUNED
Last edited by x-works on Sat Mar 05, 2016 11:12 am, edited 6 times in total.
-
gazm3
- E30 Zone Addict
- Posts: 3323
- Joined: Sun Jan 09, 2005 11:00 pm
Post
Mon Jun 08, 2009 9:42 pm
Most impressive as usual.
With regards to the standard wing mirrors, is it possible to get A1 finish in that they dont dismantle?.
Cheers Gareth.
-
fuzzy
- He who sleeps with "Gingers"
- Posts: 14351
- Joined: Sat Jun 04, 2005 11:00 pm
- Location: melbourne Australia
Post
Mon Jun 08, 2009 9:58 pm
is this being done in your house garage?
-
shazE30
- E30 Zone Camper
- Posts: 1050
- Joined: Thu Apr 20, 2006 11:00 pm
Post
Mon Jun 08, 2009 10:16 pm
I don’t know how I have missed this thread some awe inspiring work...I have only admiration for your perseverance keep it up
-
Jozi
- E30 Zone Addict
- Posts: 3076
- Joined: Thu Nov 22, 2007 11:00 pm
- Location: Dublin, Ireland
Post
Mon Jun 08, 2009 10:20 pm
Great write up again xworks.
Garage looks no different than when I was there :p
You painting it yourself?
-
E30Mark
- E30 Zone Team Member
- Posts: 8107
- Joined: Sun Jan 09, 2005 11:00 pm
- Location: Wimborne, Dorset
Post
Mon Jun 08, 2009 10:37 pm
You bloody hero! looking lovely.
-
Rich_W
- E30 Zone Addict
- Posts: 2932
- Joined: Mon Jan 10, 2005 11:00 pm
Post
Tue Jun 09, 2009 5:52 pm
nickso wrote:i'm full of admiration for all of this time consuming work and i dont want to sound negative but isnt this all going a little too far?
most folk aren't going to notice if its got a wee dent below the bumpstrip. you could still have a very nice car and keep your sanity/bank account in one piece without all this hassle.
Good point.
I suggest you cut off your penis. 99.9999% of folk aren't going to notice.

But I can't see you doing it anyway.

As X Works clearly is doing this more as a project. It's a case of if a jobs worth doing...
-
Gortour
- E30 Zone Team Member
- Posts: 9025
- Joined: Sat Sep 23, 2006 11:00 pm
- Location: Poole, Dorset
Post
Tue Jun 09, 2009 8:04 pm
Rich_W wrote:nickso wrote:i'm full of admiration for all of this time consuming work and i dont want to sound negative but isnt this all going a little too far?
most folk aren't going to notice if its got a wee dent below the bumpstrip. you could still have a very nice car and keep your sanity/bank account in one piece without all this hassle.
Good point.
I suggest you cut off your penis. 99.9999% of folk aren't going to notice.
But I can't see you doing it anyway.
Quality comment.

Currently slumming it in an E46 Touring
-
Benho
- E30 Zone Regular
- Posts: 503
- Joined: Sat Dec 15, 2007 11:00 pm
- Location: Southend
Post
Tue Jun 09, 2009 8:45 pm
i just read the whole thing. fucking awesome!
-
x-works
- E30 Zone Regular
- Posts: 332
- Joined: Thu Mar 10, 2005 11:00 pm
- Location: Ireland
Post
Thu Jun 11, 2009 5:53 pm
Thanks for the all the kind words lads. I know the posts
are a bit long winded at the moment, but hopefully it gives an
idea of why the build is taking as long as it is. Hopefully all
the effort in the bodywork will show up in the end product.
Should be moving on to more interesting stuff soon.
nickso
most folk aren't going to notice if its got a wee dent below the bumpstrip.
you could still have a very nice car and keep your sanity/bank account in one
piece without all this hassle.
fair point, and truth be told your not the first
person thats suggested this to me. On the bank balance side of
things the cost of doing all this bodywork is very very little in the
overall budget, filler, guide coat, and sandpaper doesn't add up
to an awful lot. On the sanity side however, it can become a real
pain in the arse and you do sometimes feel as if it's going to take
forever and a day and true a lot of people mightn't notice a
small dinge left here of there. But, the reason I decided to go at
it like this was to see how good I could manage to get it. I love
watching some of them shows on discovery like American Hotrod
and seeing how they get the bodywork spotless and then think
to yourself I'd love to be able to do that, well, the only way your
ever going to learn is giving it a go and see how close you get.
Mightn't come up flawless this time round but I dare say I'll learn a little in the process.
DanThe
Do you hate the car yet?
somedays I hate the car, other days I hate
individual panels but almost all days I hate sanding.
gasm3
With regards to the standard wing mirrors, is it possible to get A1 finish
in that they dont dismantle?
We've painted a few of them now and I can't say I've ever noticed
a problem, but any we've ever done were only
being resprayed a similar colour, ie. mirrors were originally
white and are resprayed white, but on the V6 e30 one of the
mirrors were painted red in the motorsport striping and was
originally white and I don't remember spotting any obvious
parts that stood out.
fuzzy
is this being done in your house garage?
unfortunately due to the global recession at the moment we've
had to restructure our whole pan-European operations, with the
result that we've taken the decision to move production to a
more cost effective environment. (yes it's been built in the garden shed)
Jozi
You painting it yourself?
Howya Jozi, we're doing all the primer work and
probably going to do the black inside, in the boot, engine bay and
the the underneath, then she's going out to have the exterior
professionally painted by a proper painter in an oven.
Last edited by x-works on Fri Jun 12, 2009 5:07 pm, edited 2 times in total.
-
Alex
- Married to the E30 Zone
- Posts: 22665
- Joined: Fri Feb 11, 2005 11:00 pm
- Location: Johannesburg, South Africa
Post
Thu Jun 11, 2009 8:41 pm
First time ive seen this thread and i must say your work is amazing
all the best with the rest of the work

-
nickso
- E30 Zone Addict
- Posts: 4396
- Joined: Sat Jul 23, 2005 11:00 pm
- Location: Go do that voodoo that you do so welllllllll!!
Post
Fri Jun 12, 2009 12:27 am
Rich_W wrote:nickso wrote:i'm full of admiration for all of this time consuming work and i dont want to sound negative but isnt this all going a little too far?
most folk aren't going to notice if its got a wee dent below the bumpstrip. you could still have a very nice car and keep your sanity/bank account in one piece without all this hassle.
Good point.
I suggest you cut off your penis. 99.9999% of folk aren't going to notice.
But I can't see you doing it anyway.
As X Works clearly is doing this more as a project. It's a case of if a jobs worth doing...
lol i only commented because im in the middle of my own never ending rebuild nightmare and its not going to look anywhere near as good as this.
'88 e30 328i M52 track bint.
-
Jhonno
- Homo Hair
- Posts: 20362
- Joined: Mon Jan 10, 2005 11:00 pm
- Location: FLAT, FLAT, FLAT!!
-
mattyb
- E30 Zone Regular
- Posts: 754
- Joined: Sat Oct 06, 2007 11:00 pm
- Location: gateshead
Post
Fri Jun 12, 2009 10:07 am
top work there youve just inspired me to get on with mine, need to hire a garage first tho.