My E30 S50 Track car

Discuss general engine, turbo and supercharger conversions in this section

Moderator: martauto

Reeeedish
E30 Zone Newbie
E30 Zone Newbie
Posts: 51
Joined: Sun Aug 17, 2008 11:00 pm
Location: Bristol
Contact:

Tue Aug 19, 2008 1:39 am

Hi Guys, Ive been lurking in the background for a while so thought I should sign up and start a fresh project.

End of 07 / start of 08 I built myself a 320i to use in the Production BMW Cup. (I really should do a project thread/topic on that some time).
Image Image

Image Image

Image Image

Image Image

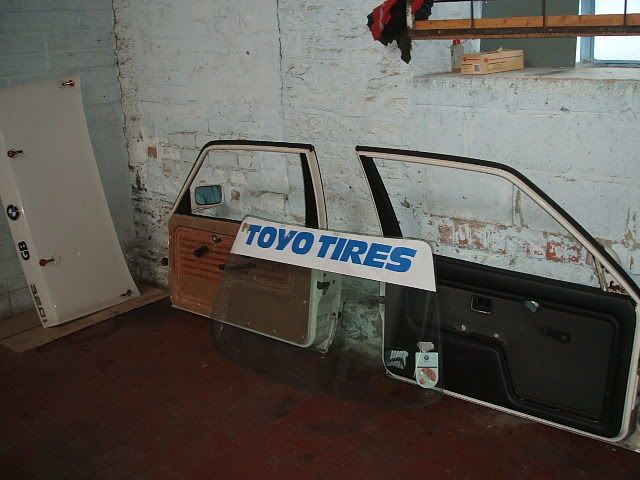
Then the re-fit could begin. If it wasn't new, it was refurbished!

Image

Image Image

Image Image

Image Image

Image Image

Image Image

I did 2 races (both Brands Hatch) and was hooked with the E30 from then on. Got back from our annual Nurburgring trip a few weeks ago and was really eager for more power. The car handles absoloutely fantasticly (with only 126bhp M20B20 pushing it along) but on the long (back) straighter sections between Bergwerk and Steilstrecke it really struggles. Plus on the faster UK circuits like Castle Combe (home circuit) and Thruxton, it really suffers also.

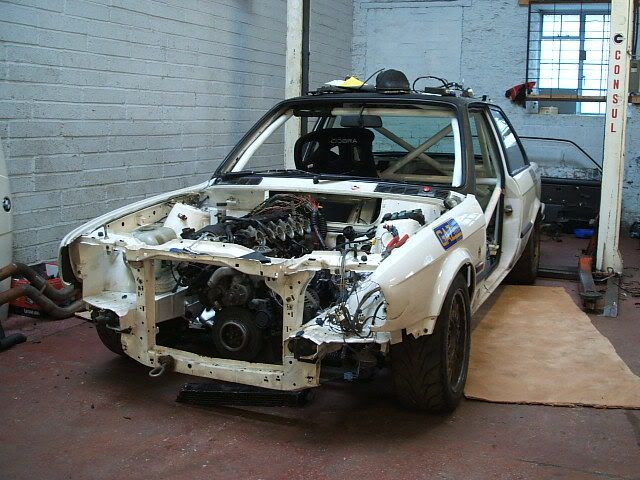
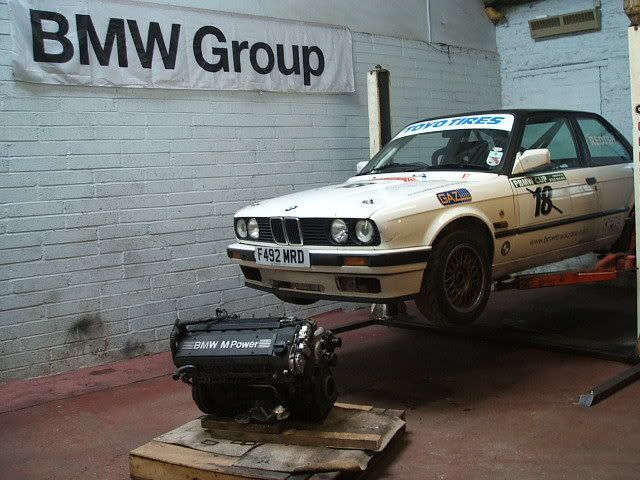
So the decision was made to go S50.
Its been something i'd been planning for a few years now when I aqquired this S50B30 donor. I started playing about with it (small time) back in 2006 but didnt get far at all and then lost interest (as it was a basic 320i then rather than a sorted track/race car now) so instead went forward with a 535i spt & E28 M535i which I both used for general track days and drift days.
E34 535i spt:
Image

and an E28 M535i:
Image

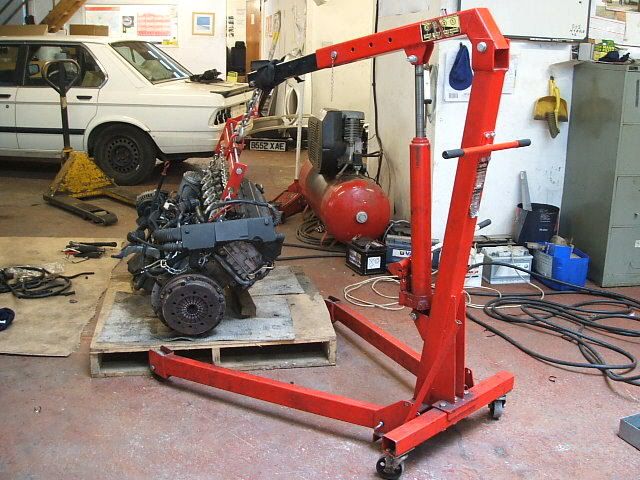
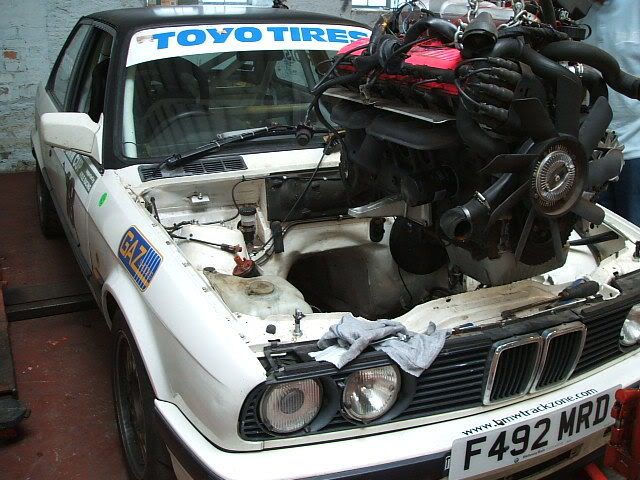
Anyway, on with the S50...........

I have to say that at the moment I am only doing this to test the engine as it turns out I bought it from a complete crook who is very well known for messing people about with parts and also owing people money when it comes to deals. So I dont trust the guy or the engine to be honet. I've never heard it run myself so don't want to go to a huge amount of effort fitting everything perfectly and pristinely if the engine turns out to be knocking its knackers off!
If everything's ok then it will quickly go together for a Castle Combe shakedown on the 6th Sept and mabe 1 other trackday in Oct. Then the winter months will see a major shell/engine/running gear overhaul again where everything will either be refurbished or replaced.

So if you wonder why i'm doing things in a strange order, it's because i'm only test running the engine at the moment. But I can already see a few issues........LOL.......


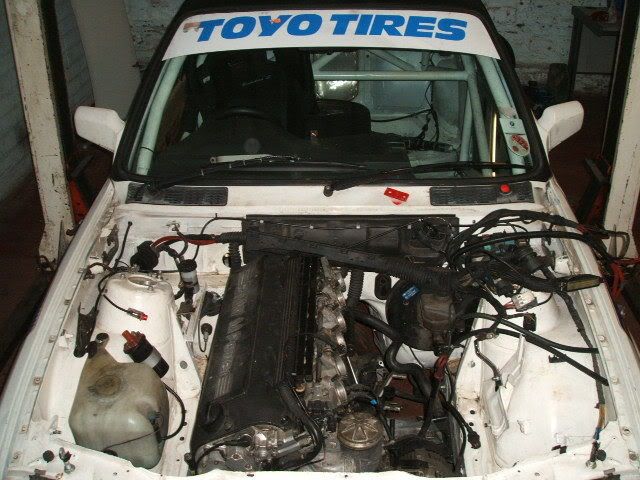
Saturday 16th August:

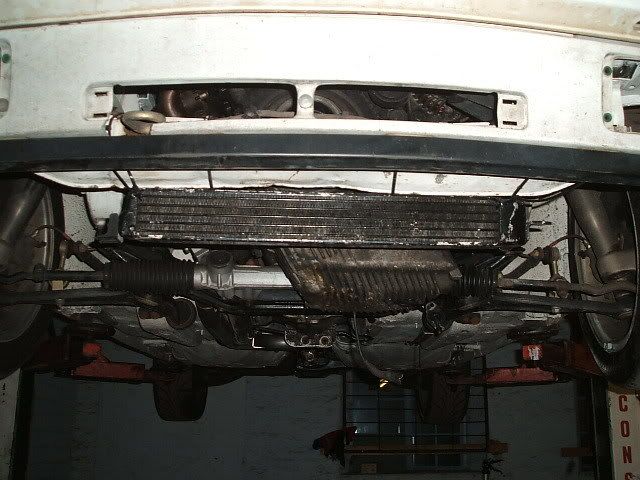
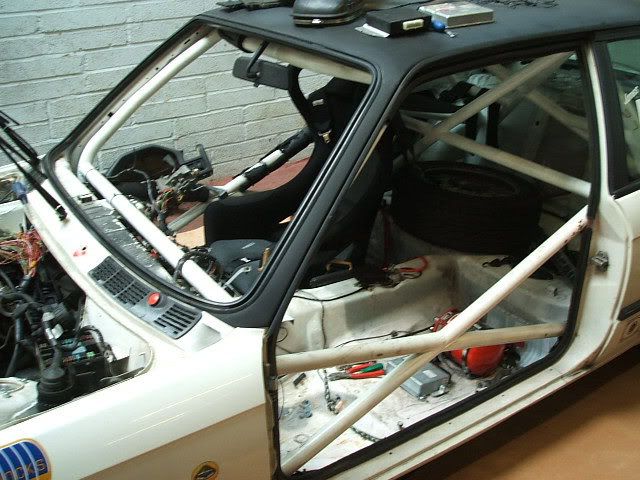
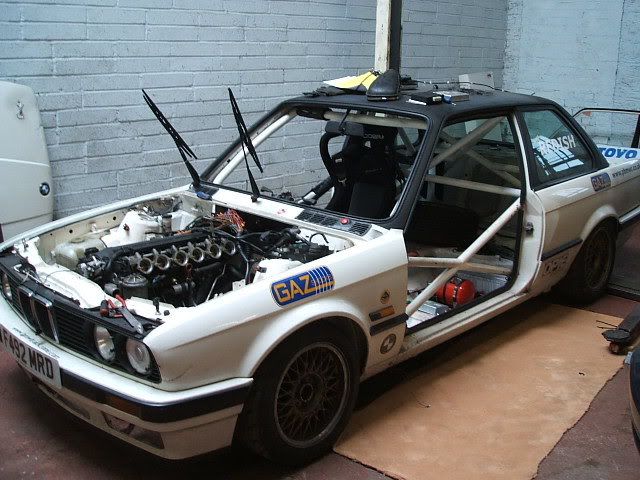
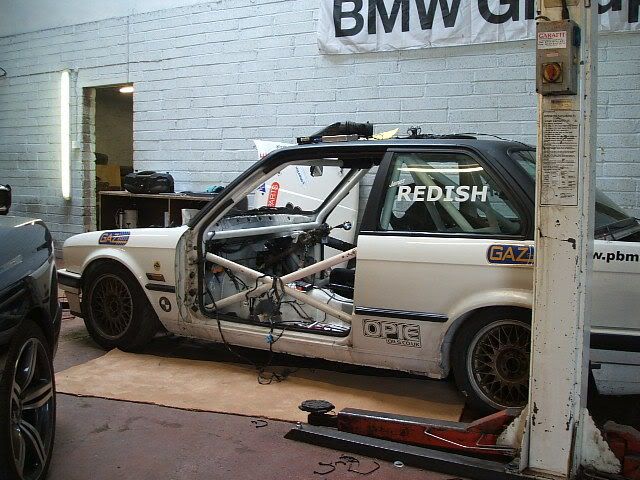
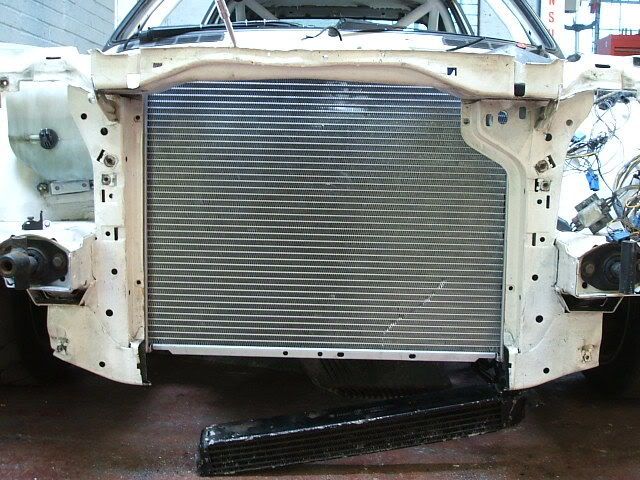
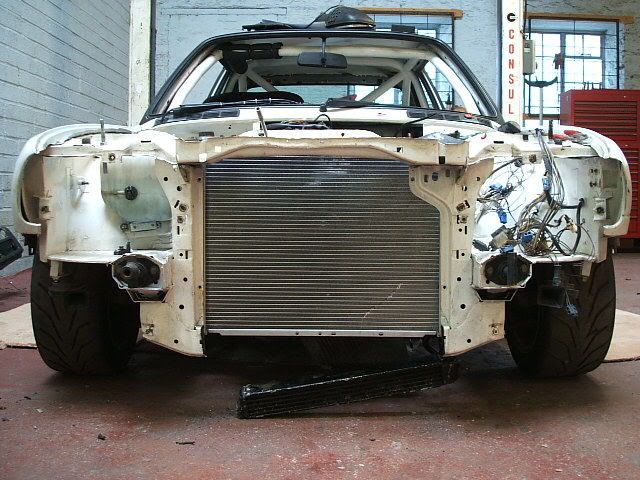
On the ramp she goes:
Image
Image

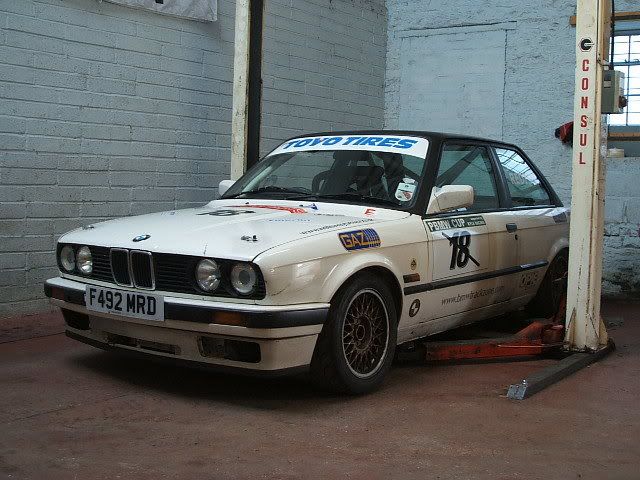
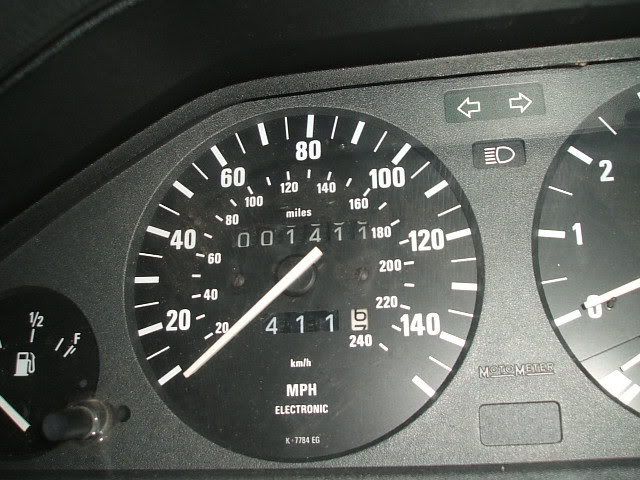
I'd done 1,411 miles since the rebuild (finished in early April) - 170 ish were on track and then the other 1240 ish was on the Nurburgring round trip early August:
Image

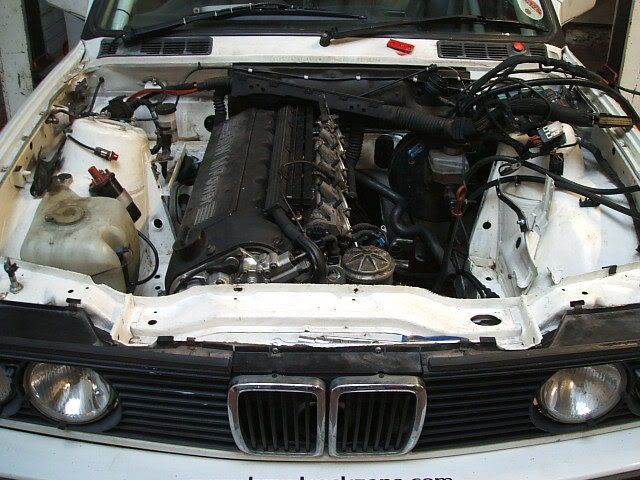
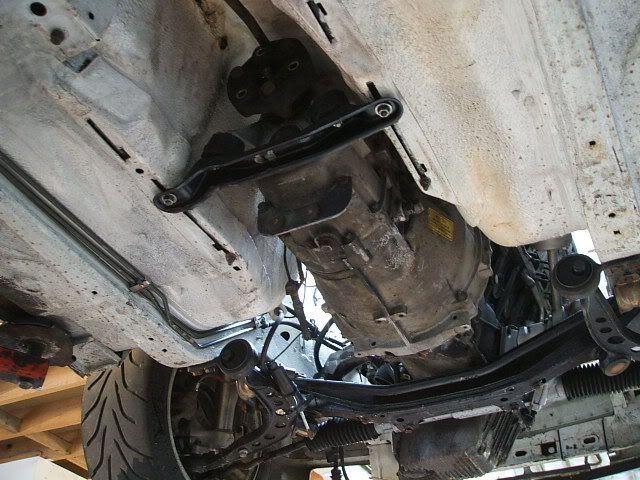
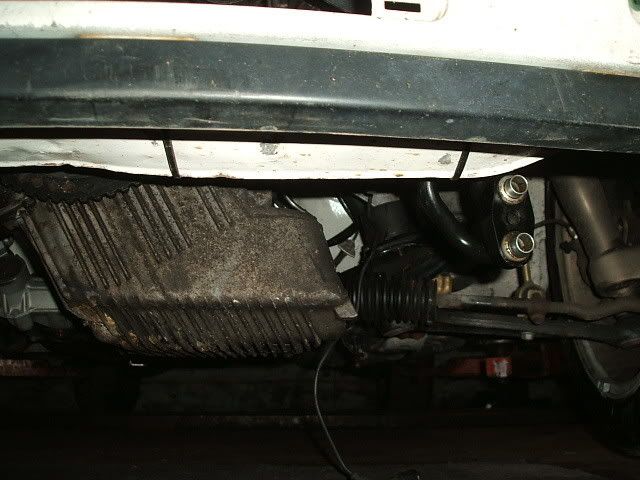
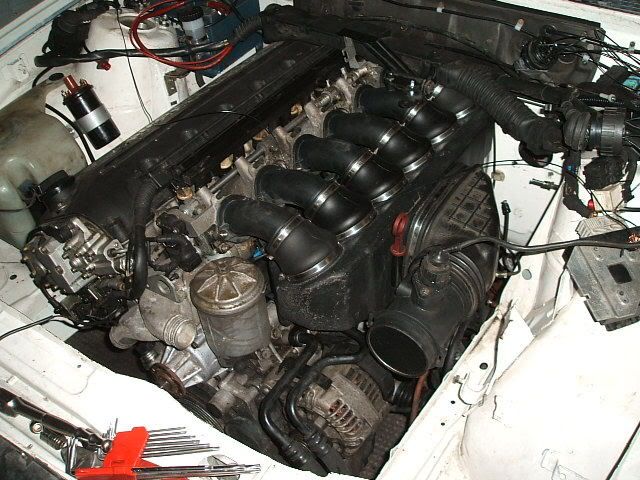
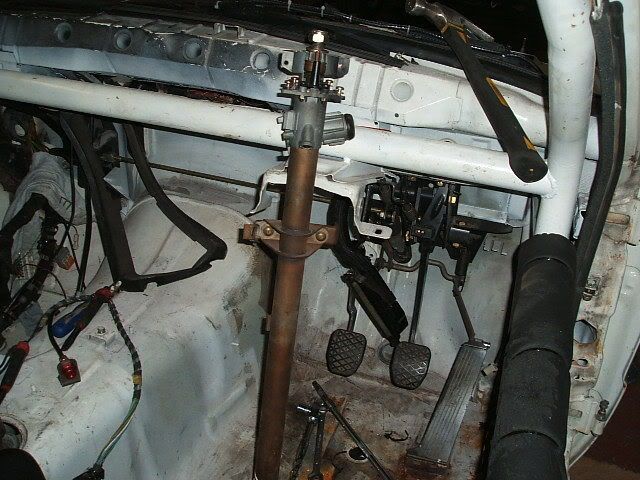
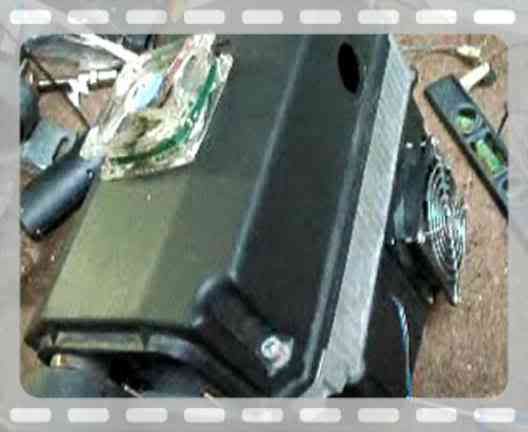
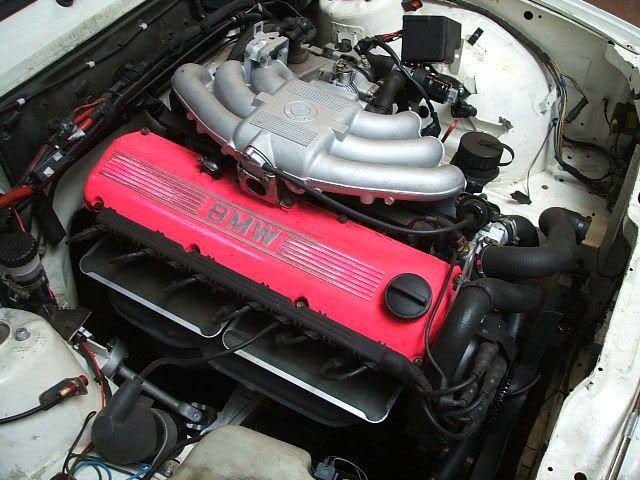
M20 setup before removal:
Image
Image
Image
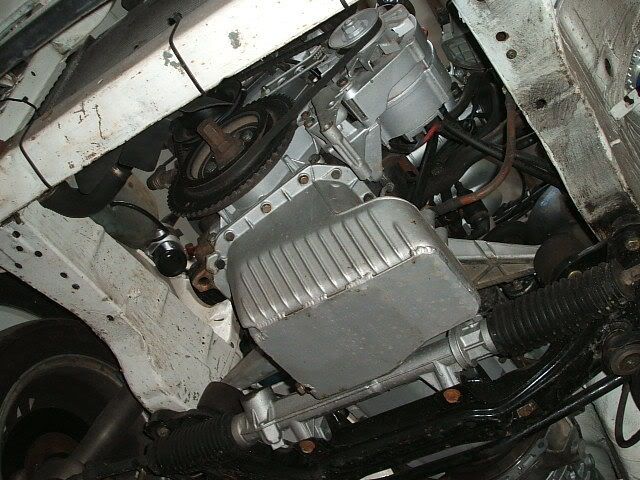
Excuse the bright pink rocker cover (I was testing colours :D )
Image

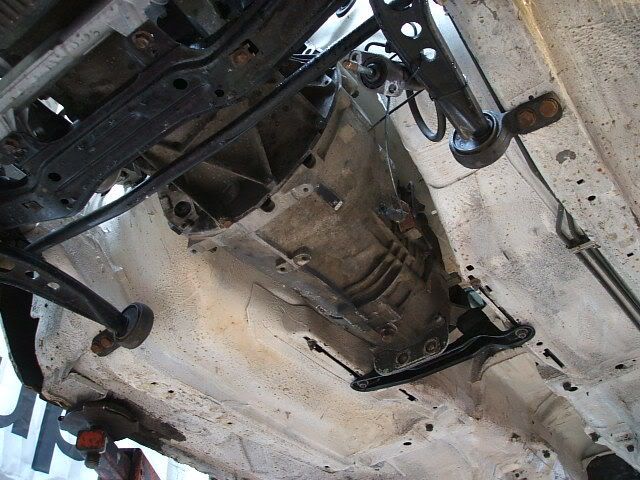
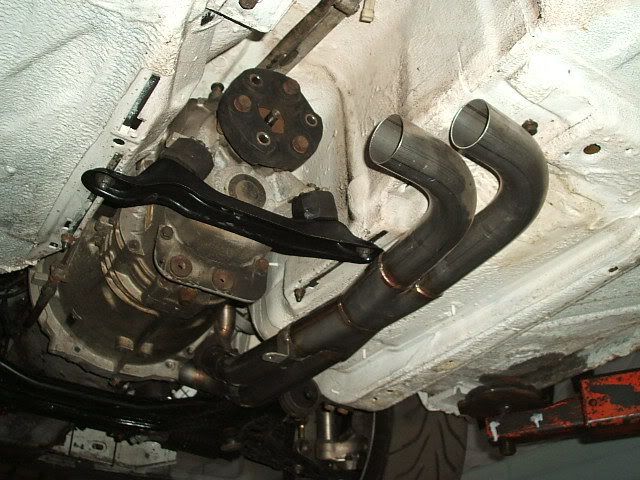
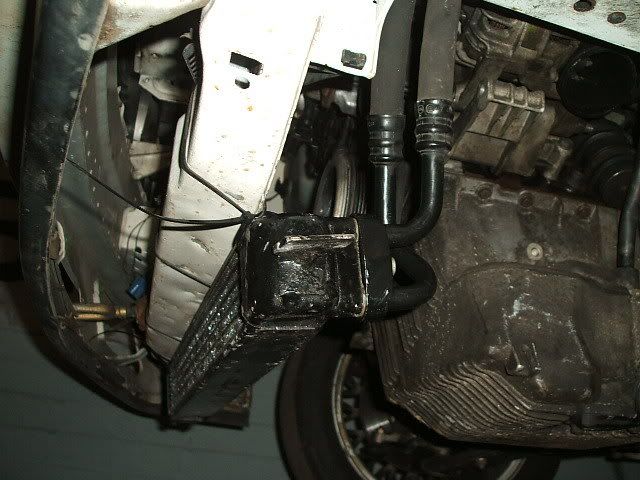
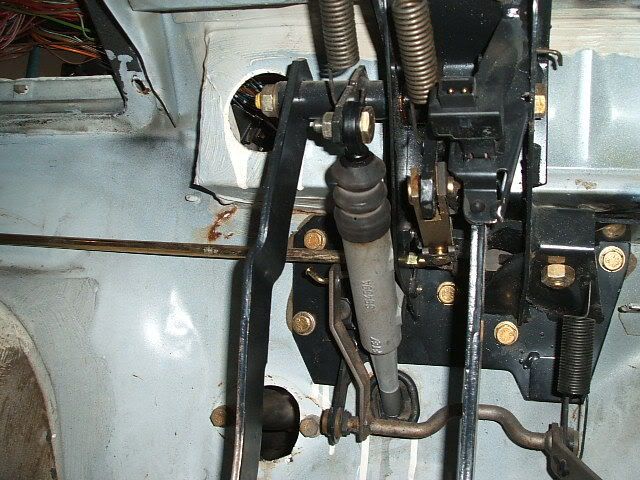
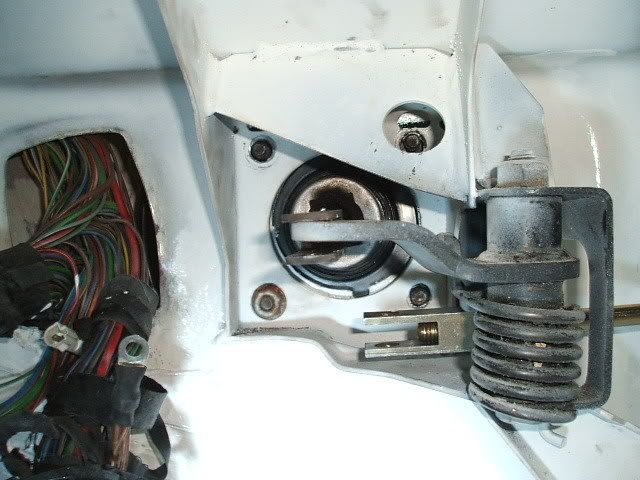
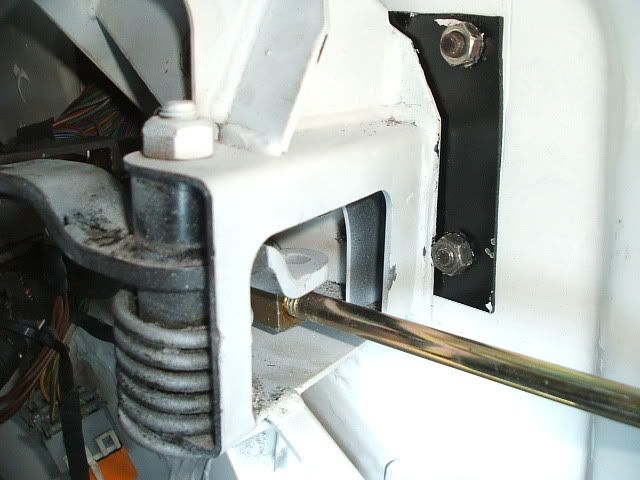
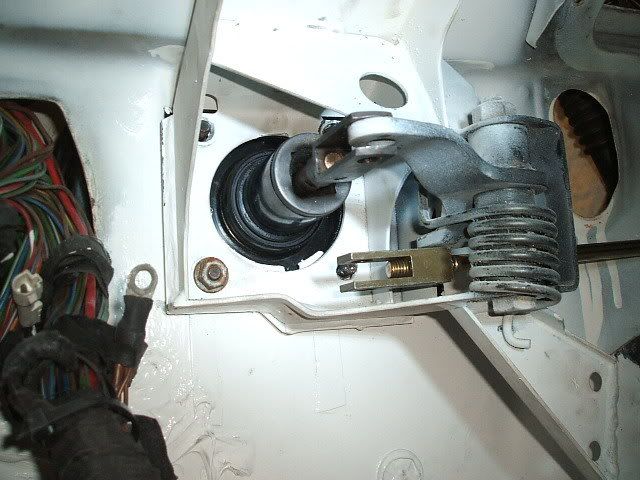
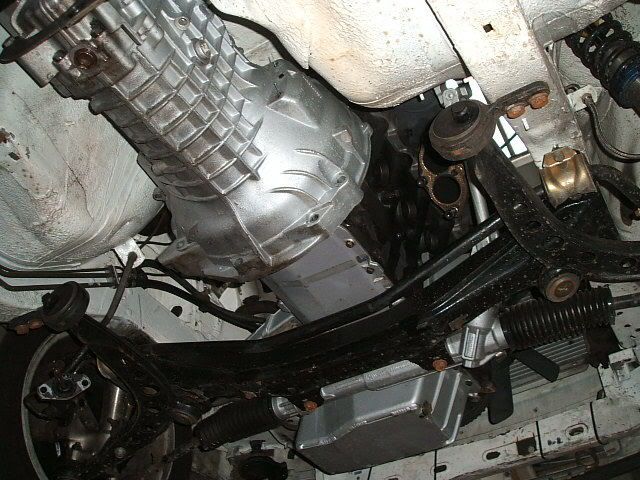
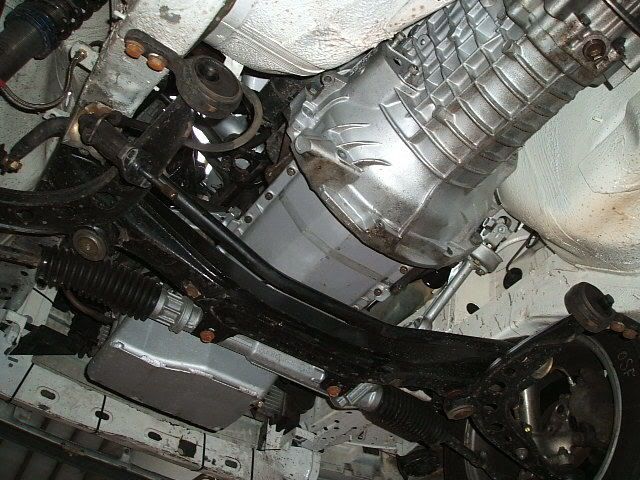
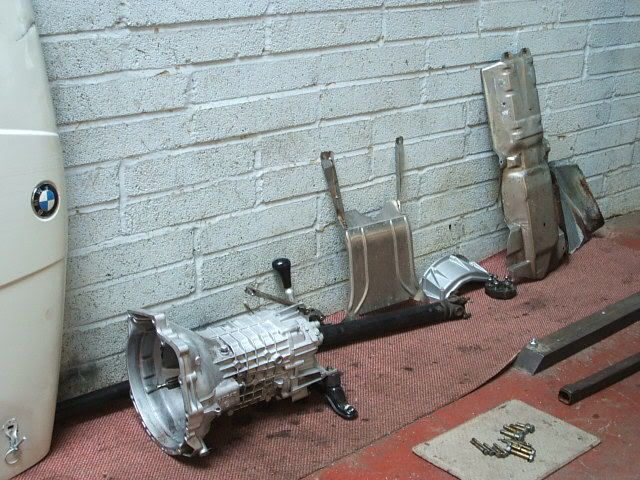
Gbox, prop, heatshields, gear selection setup etc off:
Image

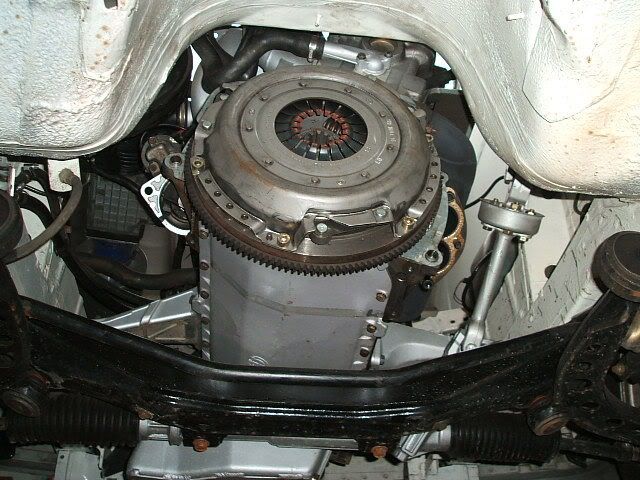
Gearbox out: Clutch still nice and new
Image

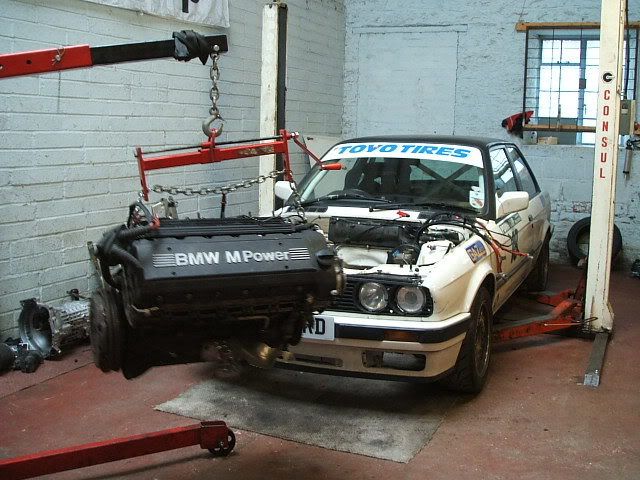
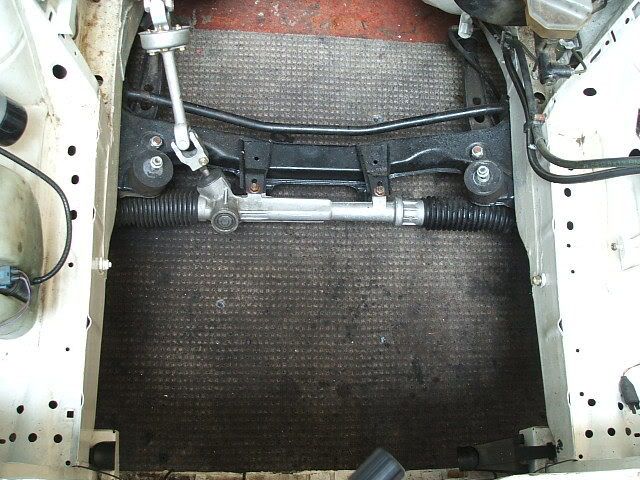
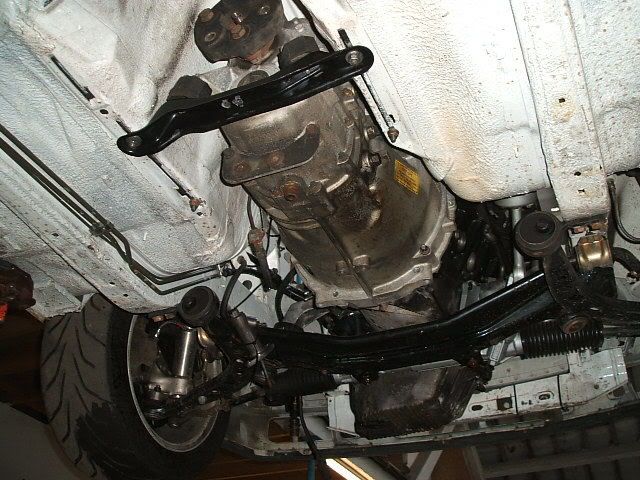
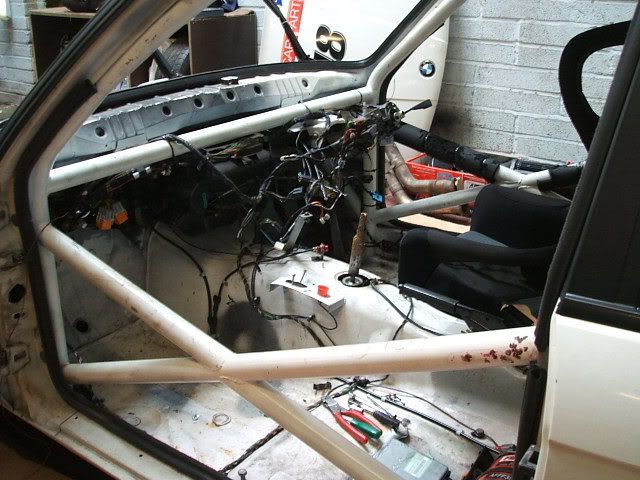
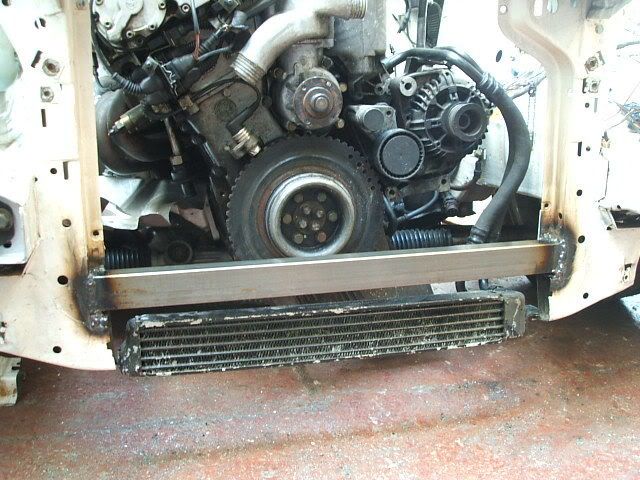
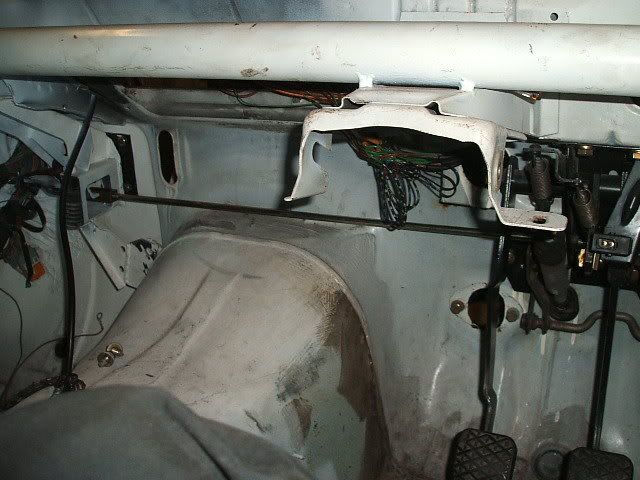
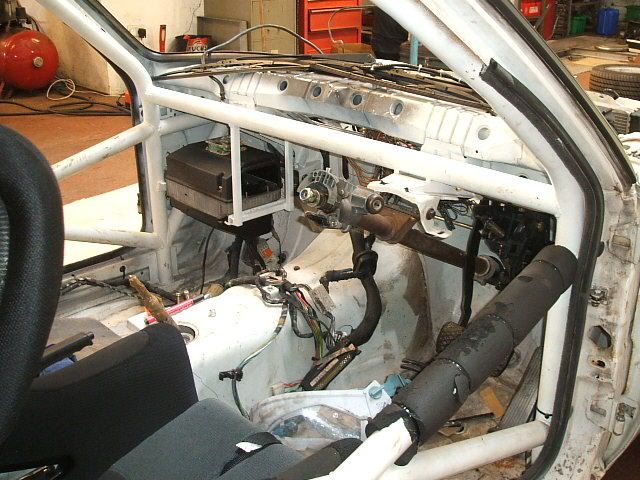
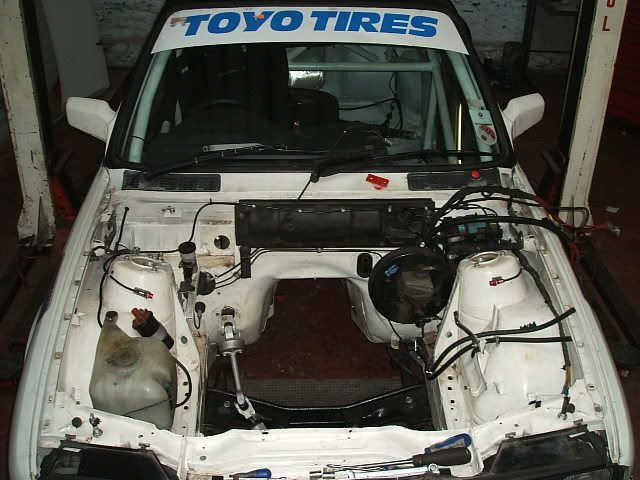
Time to pull the M20 running gear out:
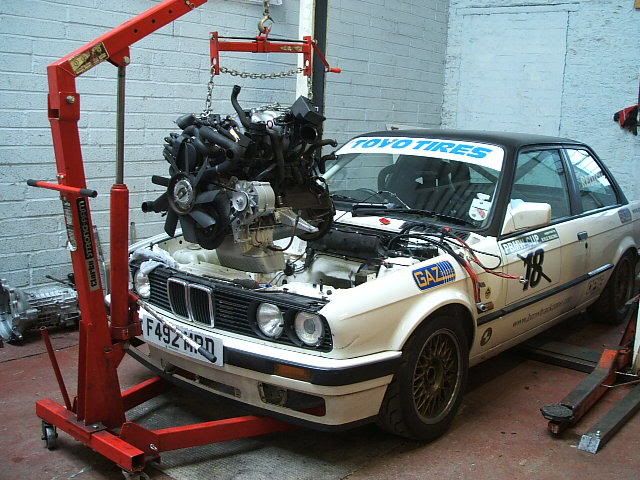
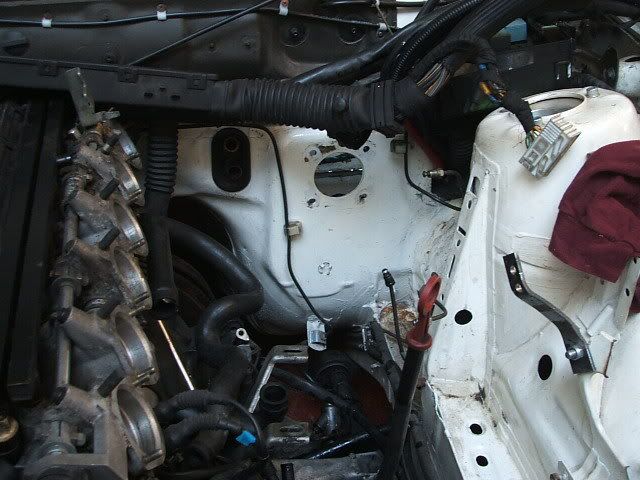
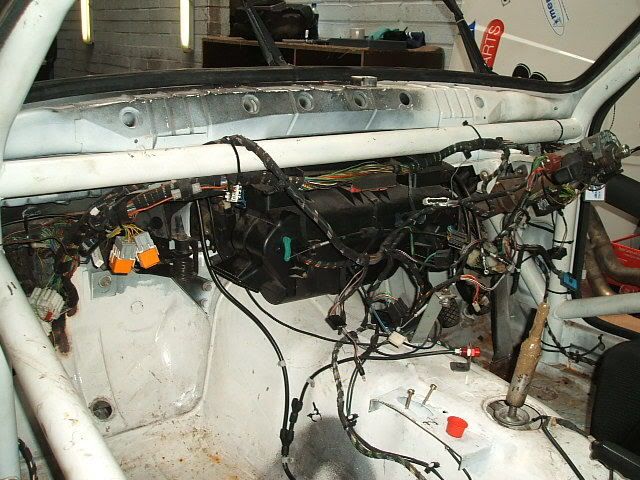
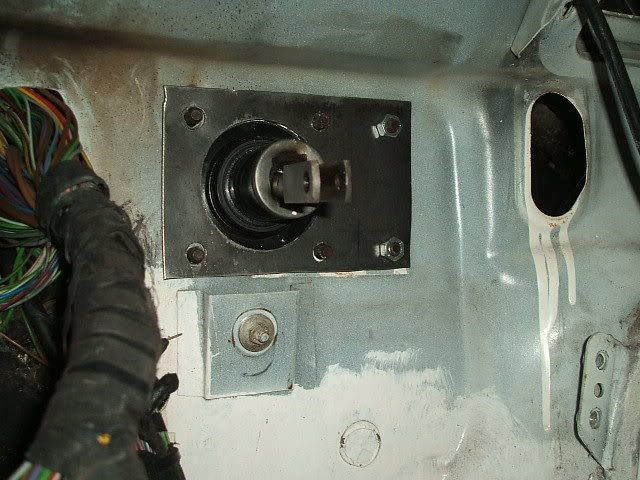
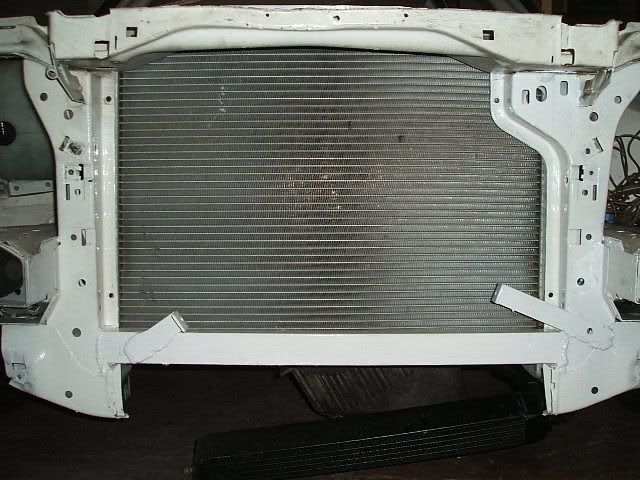
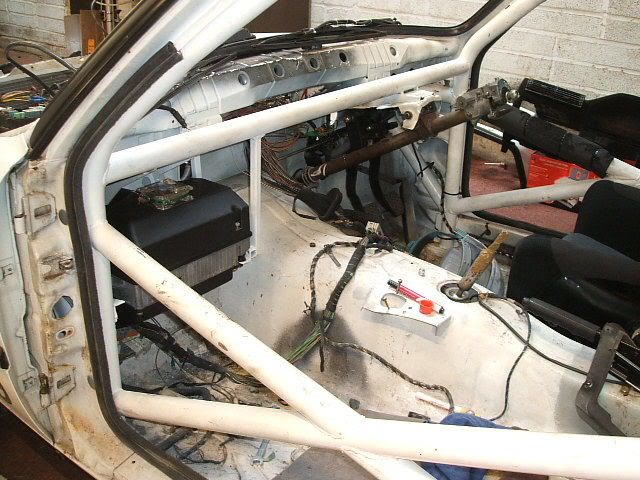
Image
Image
Image
Image

Empty bay:
Image

--------------

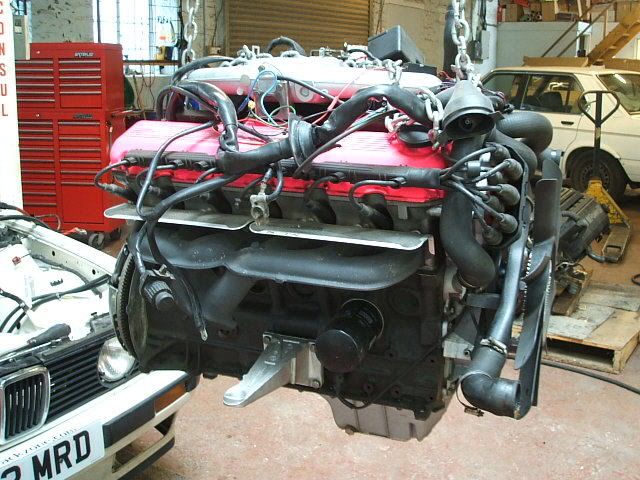
I'd already swapped the M3 sump and oil pump pick up pipe for the E34 M50 version back in 2006 when I got the engine. Also replaced the waterpump due to front end damage :roll: . Had to re-loom it because the idiot that removed it just cut every part of the loom rather than unplugged it. Also I removed the air con pump, bracket and the air emission pump and main pipework.

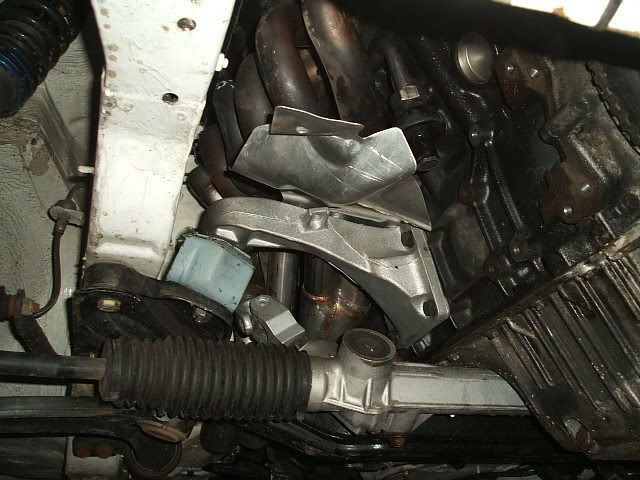
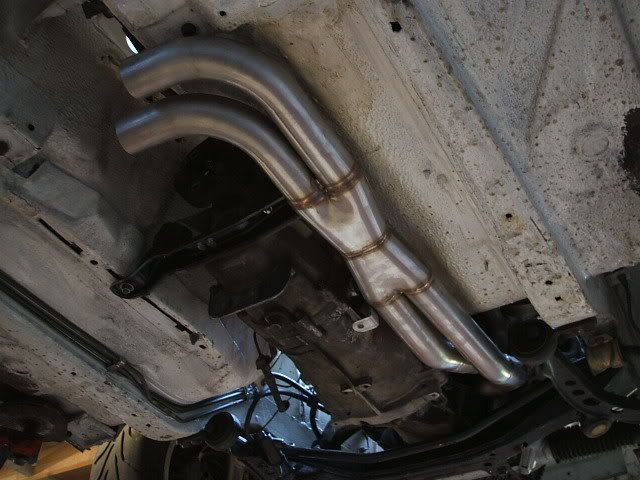
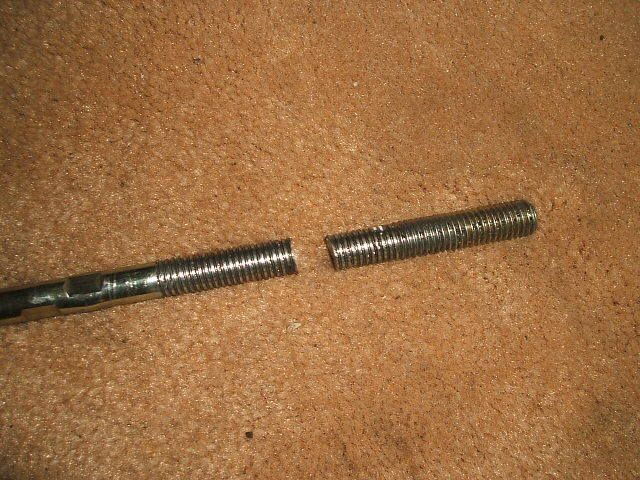
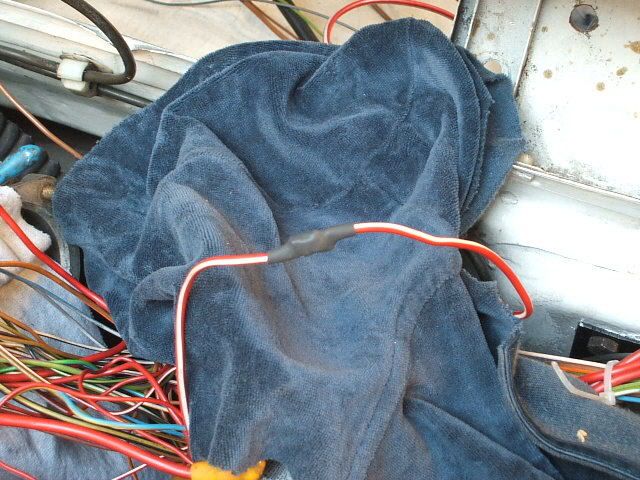
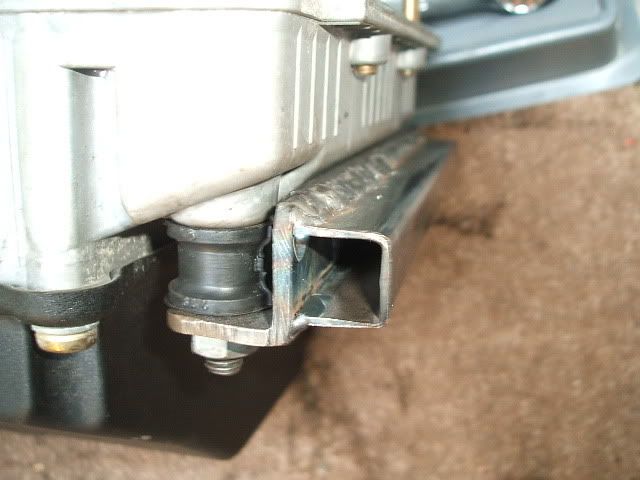
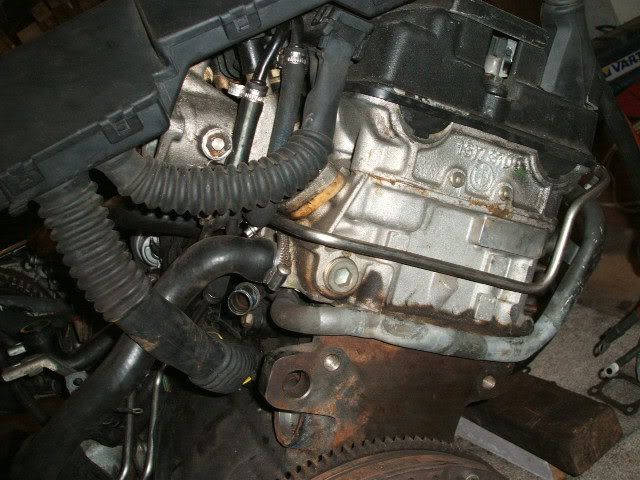
I had to modify the dipstick tube as the sump 'drop' is now at the front of the engine the dipstick has to move up with it. But then clashes with the vanos oil pressure accumulator. So a quick blast with the oxy-acetylene and some choice bends sorted the dipstick tube out:
Image
Image

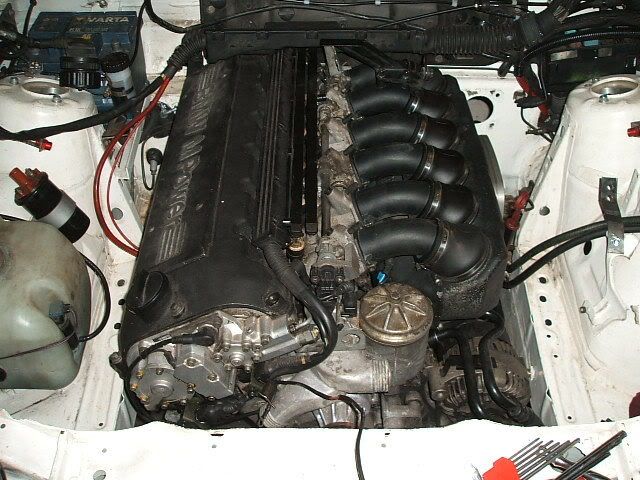
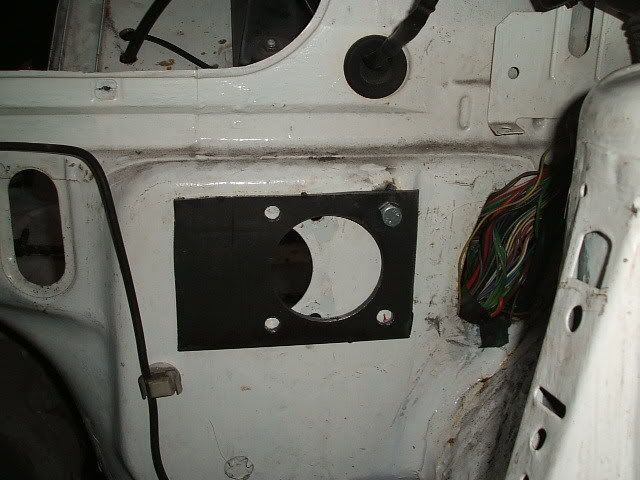
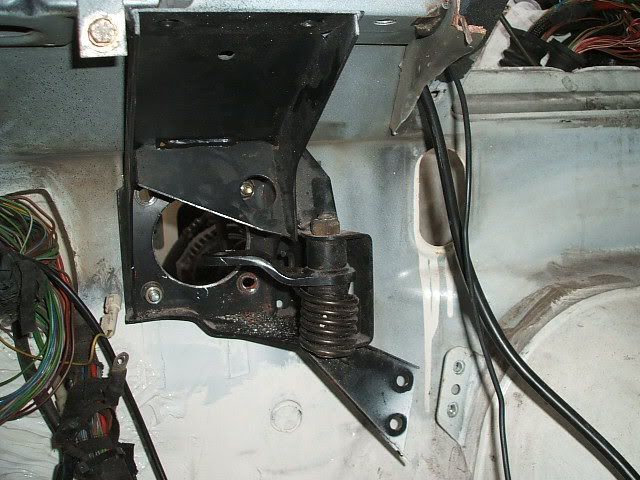
This is where I can see 2 possible problems (I'd very much appreciate any E30 S50 veterans to comment and maybe shed some light on this :) ).......
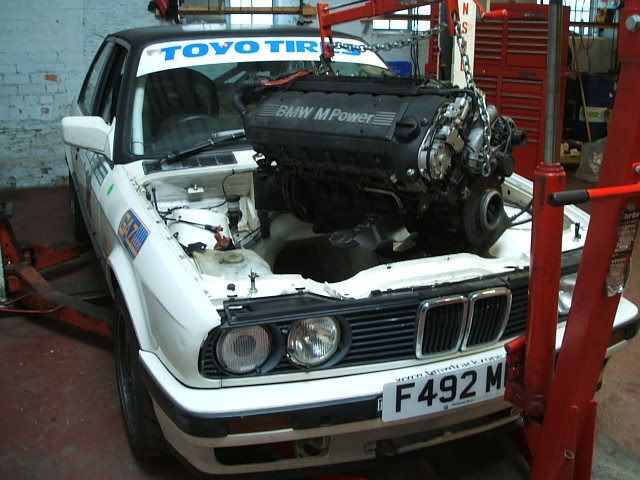
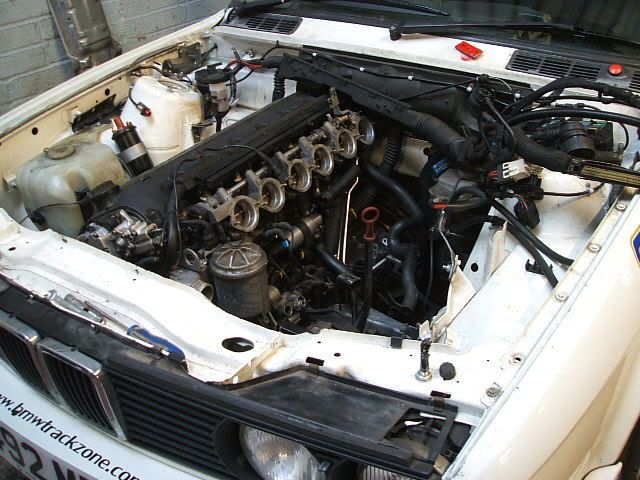
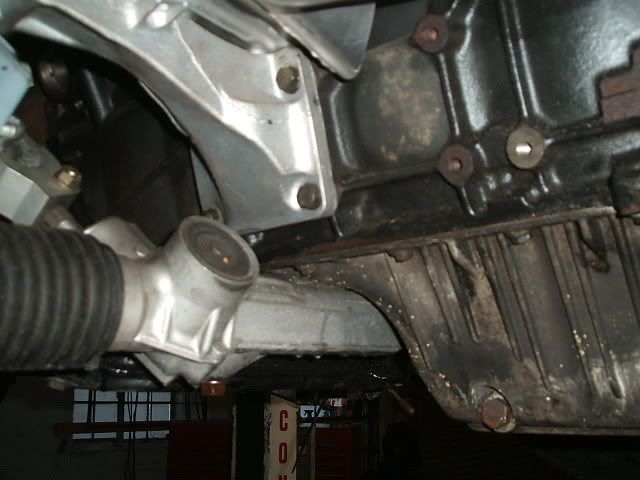
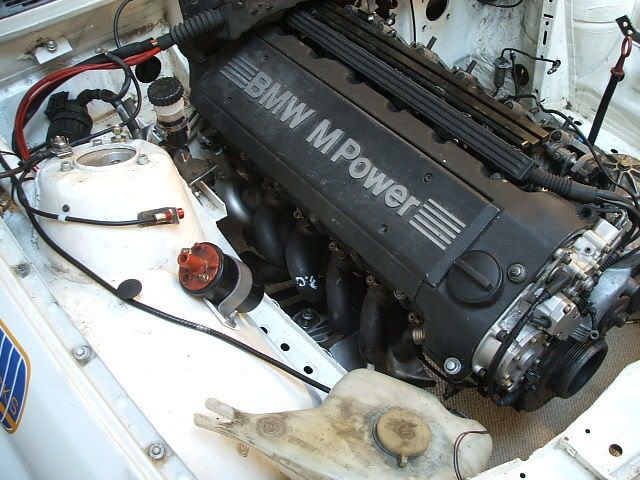
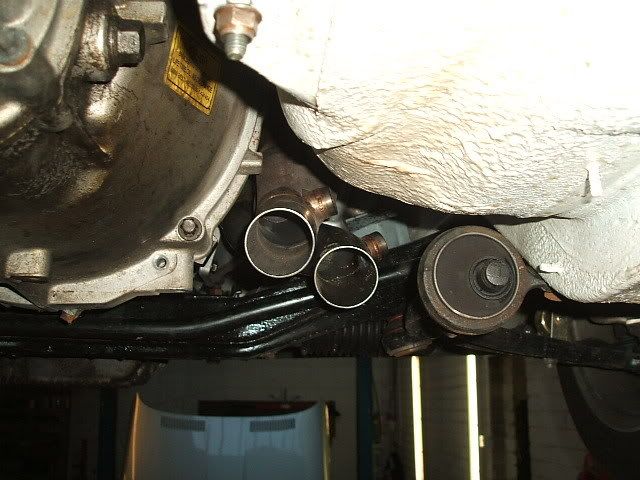
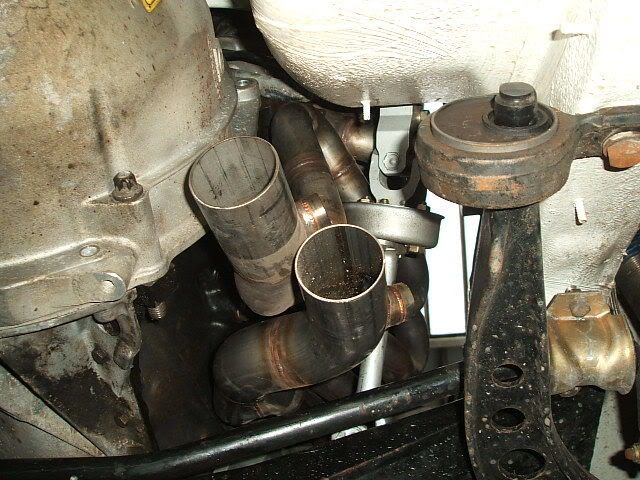
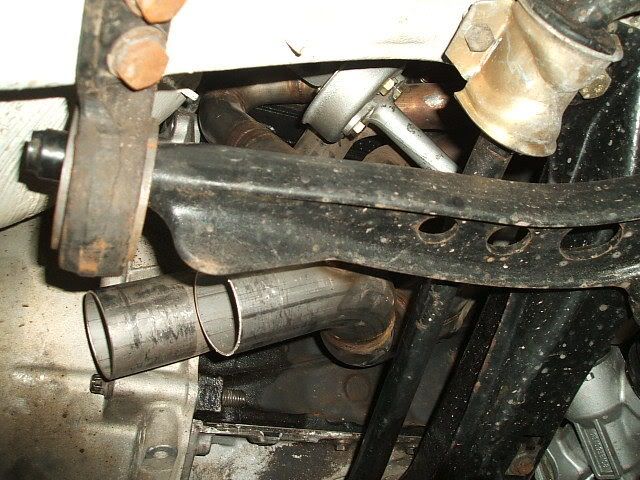
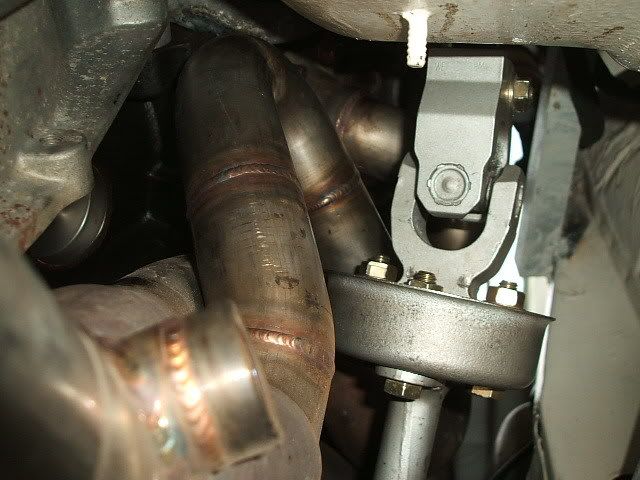
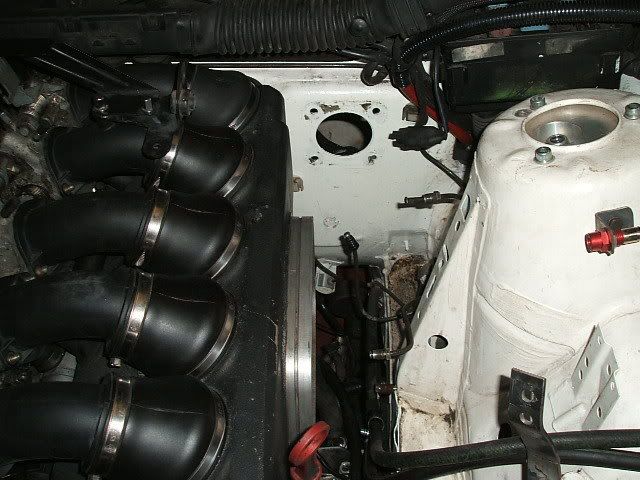
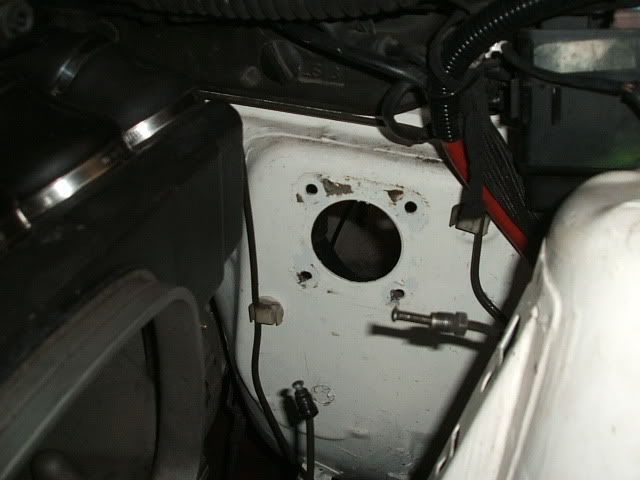
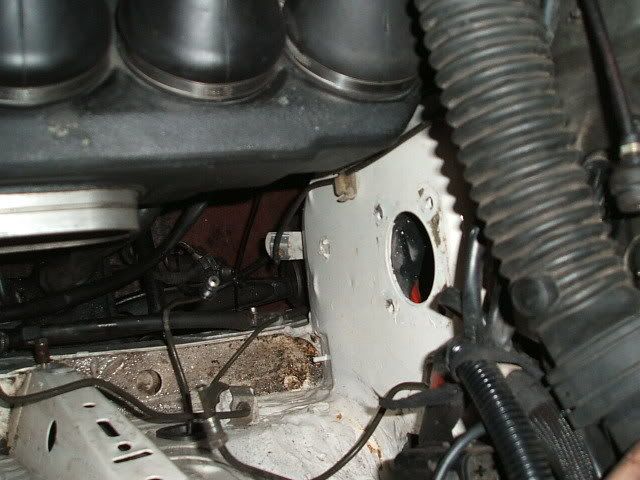
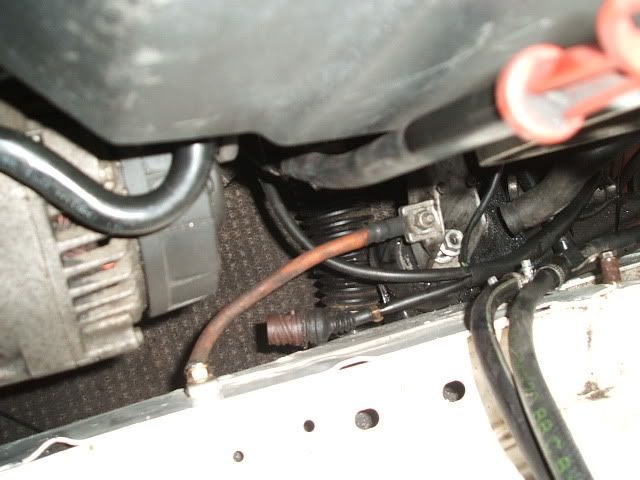
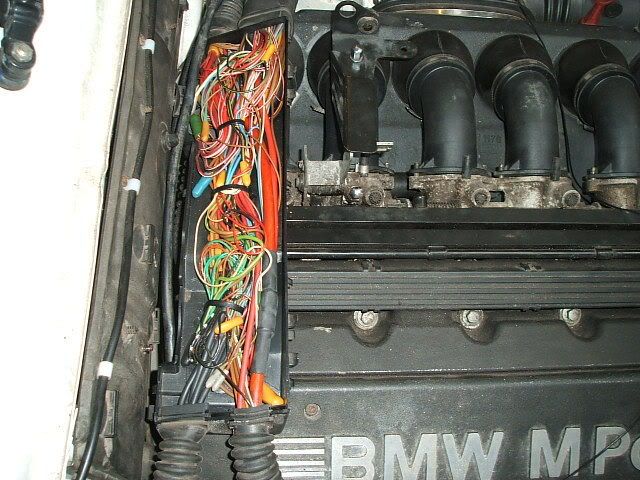
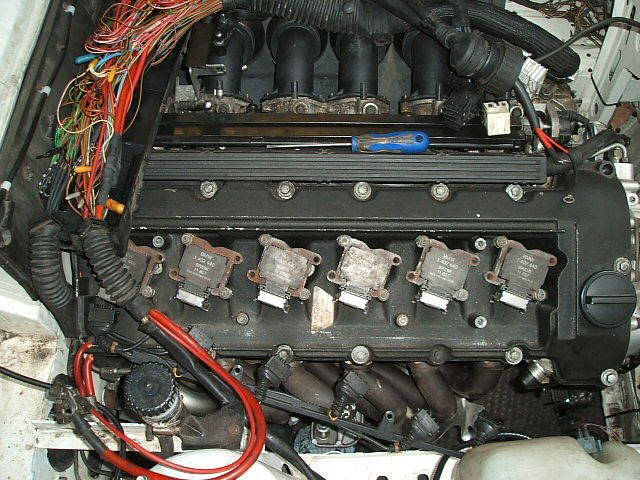
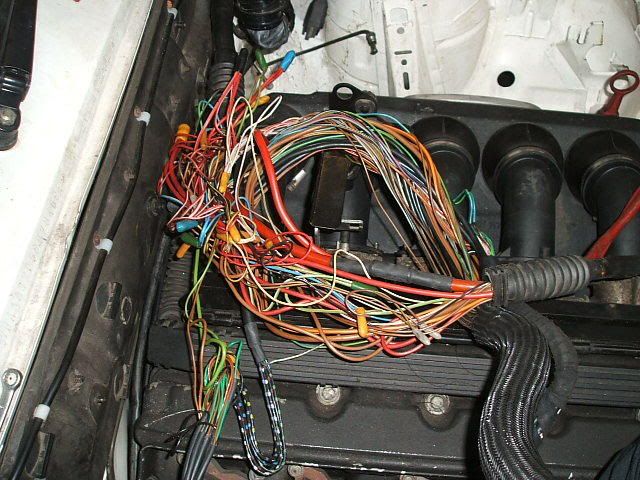
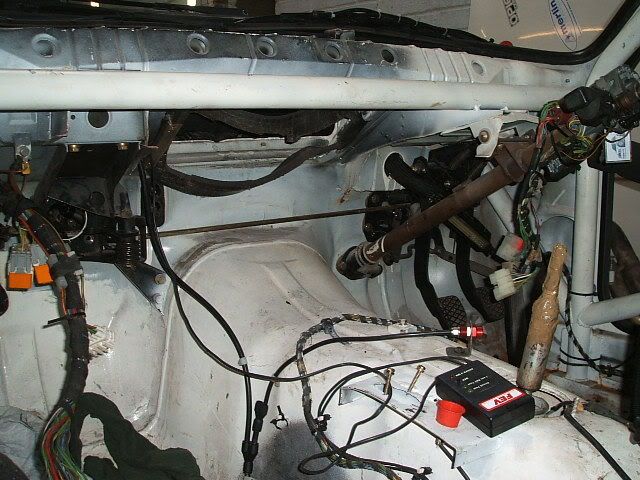
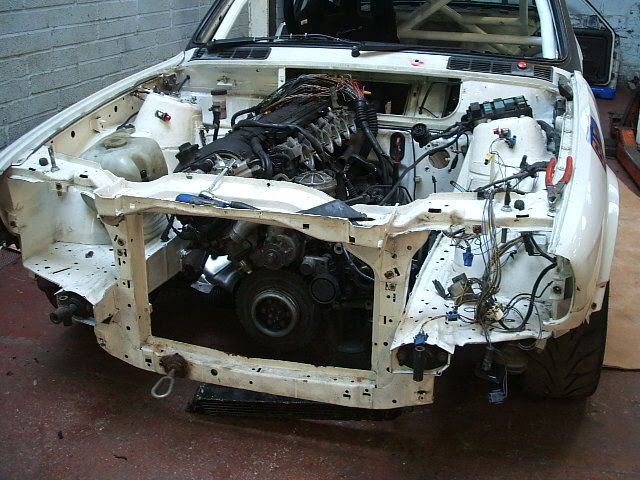
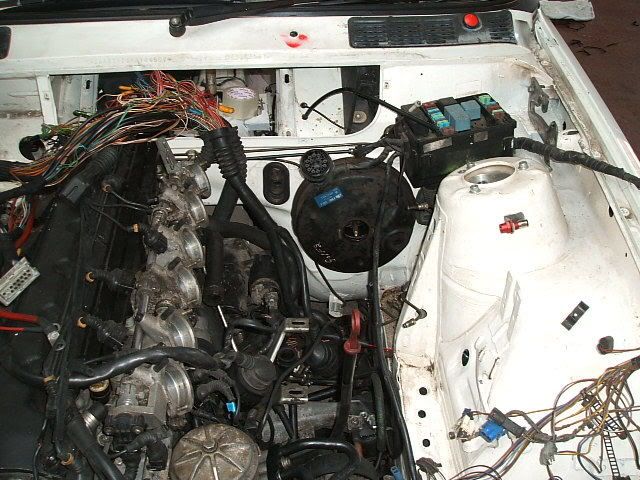
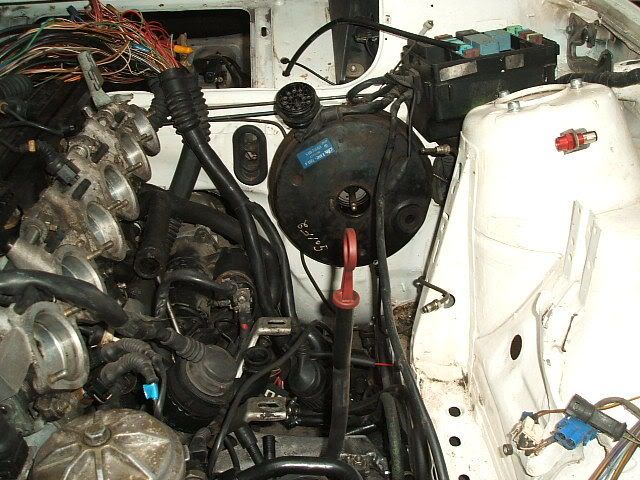
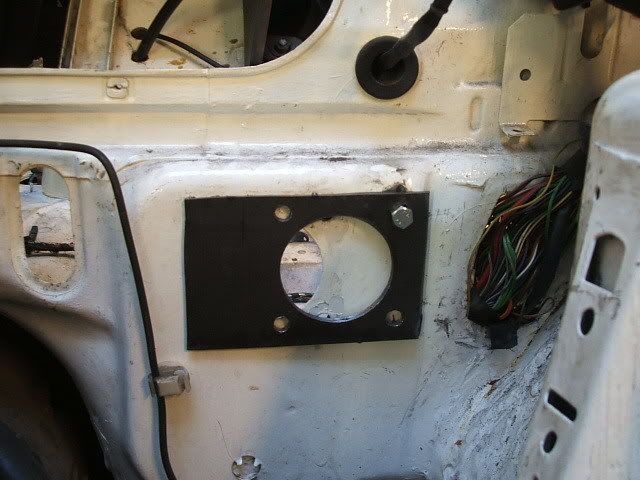
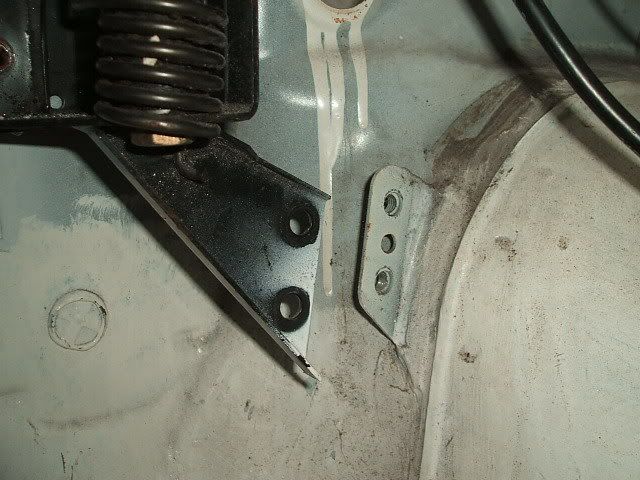
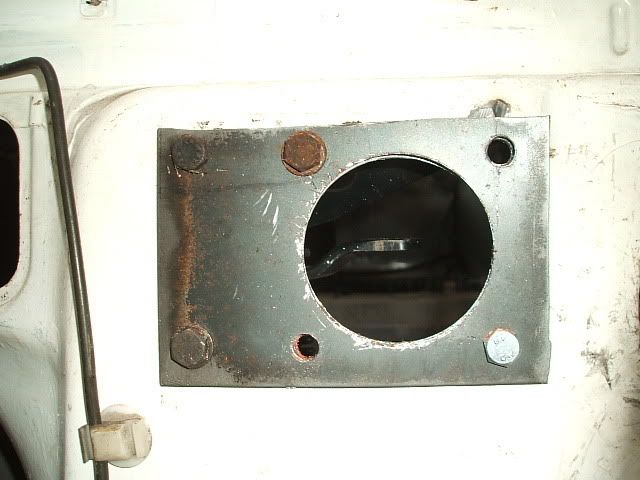
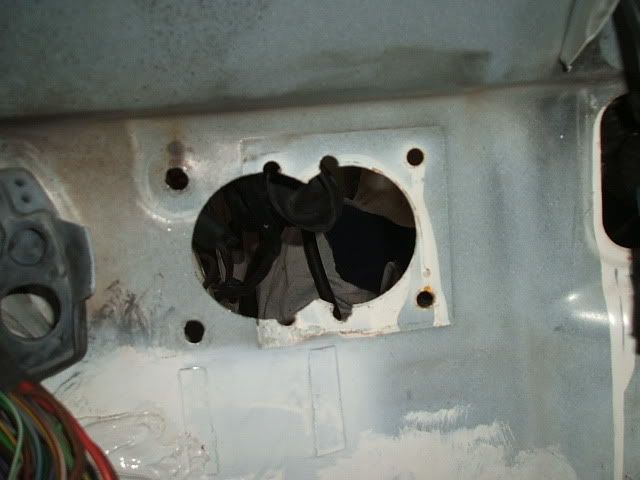
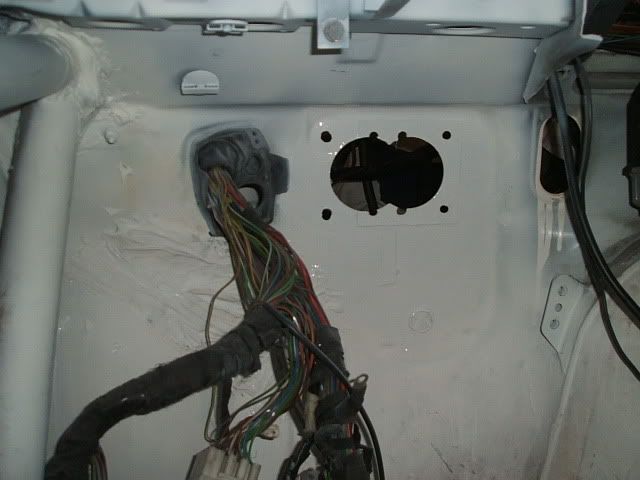
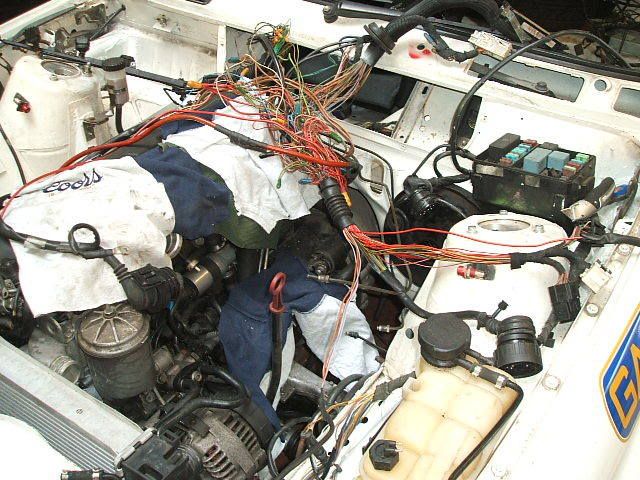
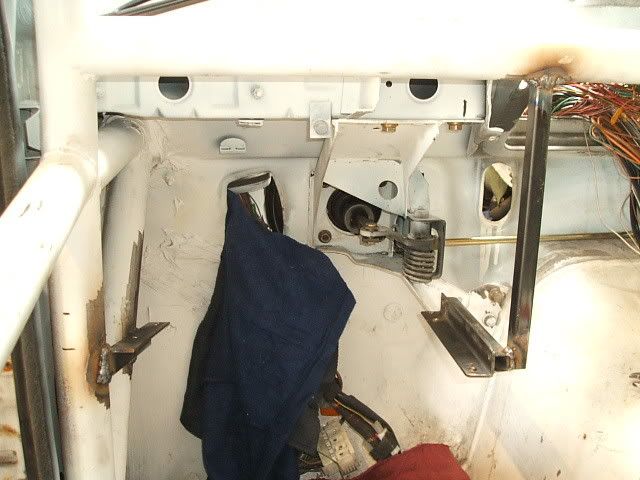
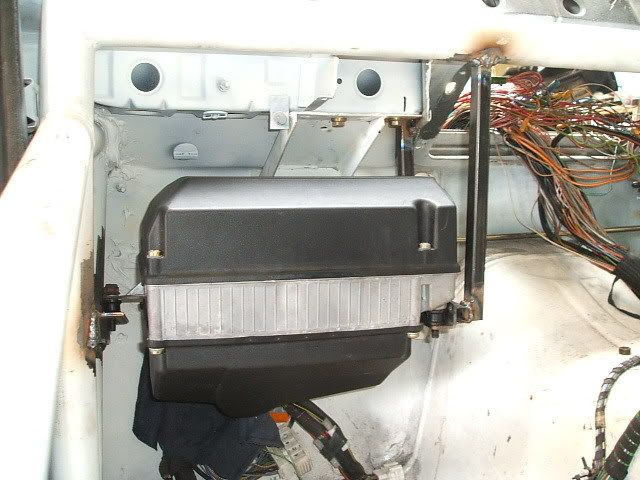
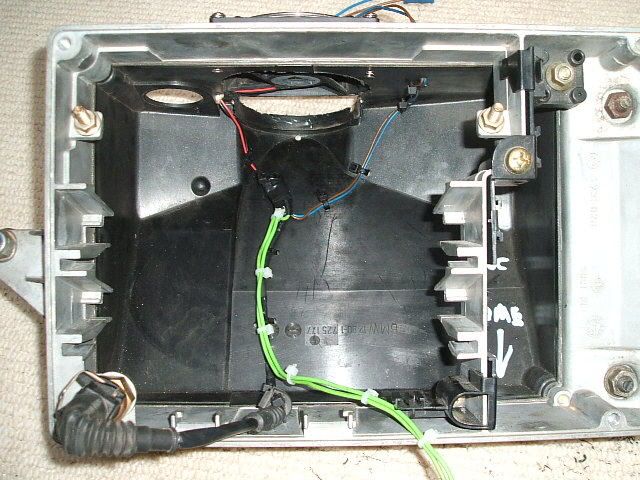
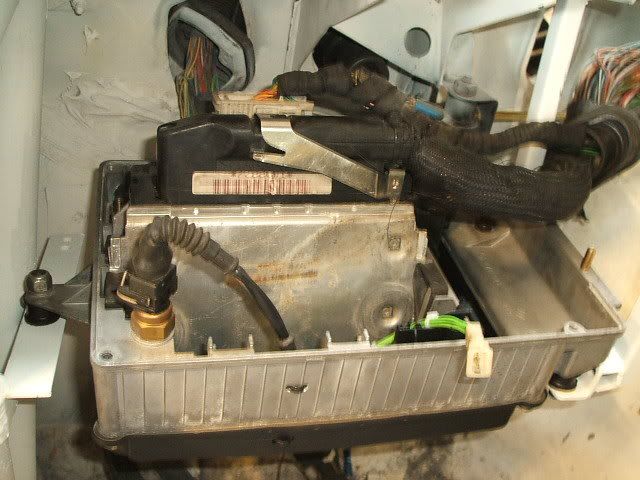
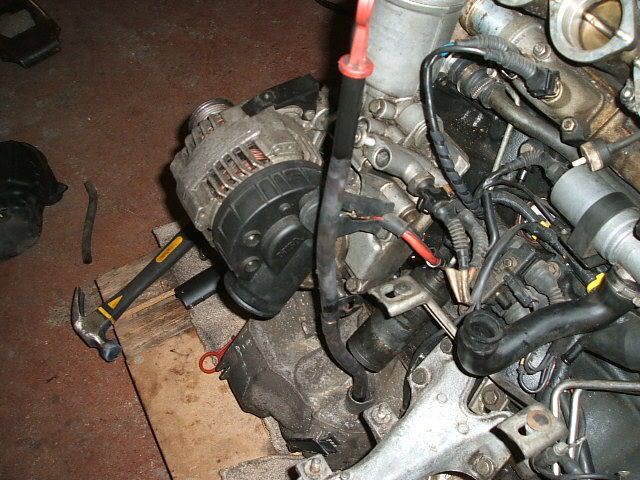
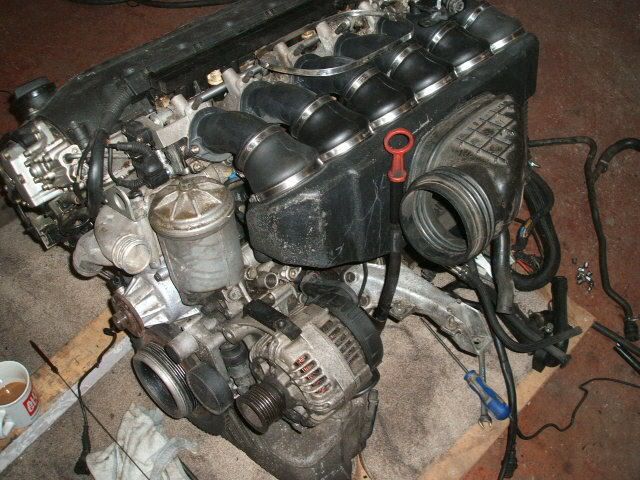
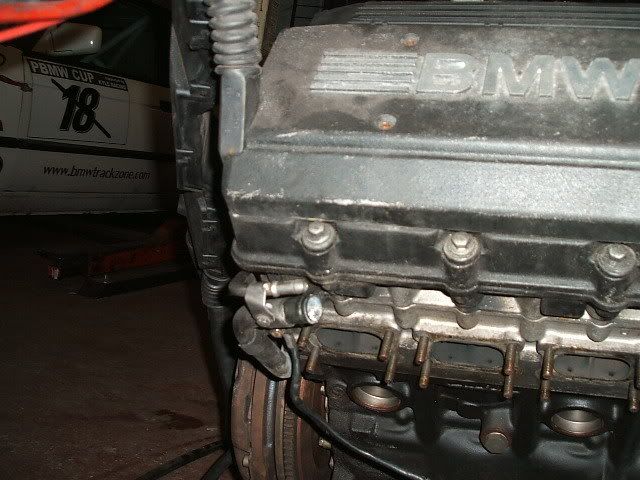
The engine came from a LHD 1993 3.0 convertible. It's the LHD bit that is the issue as they use a different coolant water rail which goes along the block underneath the throttle bodies towards the bulk head of the car. I beleive this should connect up to the coolant expansion bottle (which must be in a different place on the LHD models) as my coolant water rail doesn't stop at the bulk head but carry's on around the back of the head and comes out on the exhaust manifold side just above cylinder no'6 (as if the coolant expansion tank should be where the E30 4 pot battery tray is:
Image
Image
Image
Image

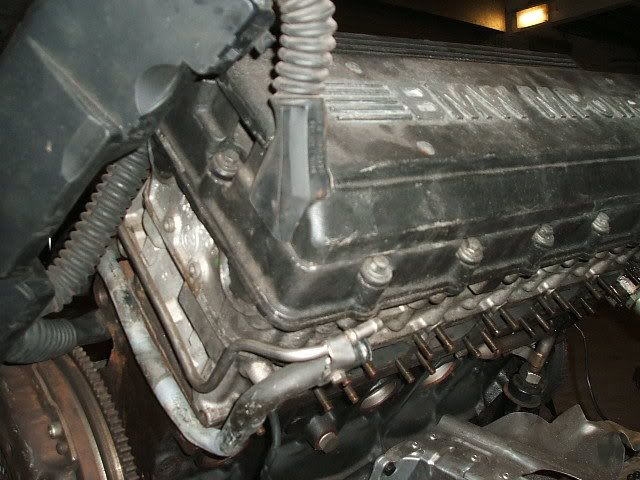
Can anyone shed some light on if it would be easier to get it setup with the UK coolant pipework so I can use the expansion tank in the original Mk2 E30 location of the NSF inner wing (like some of you guys have)?

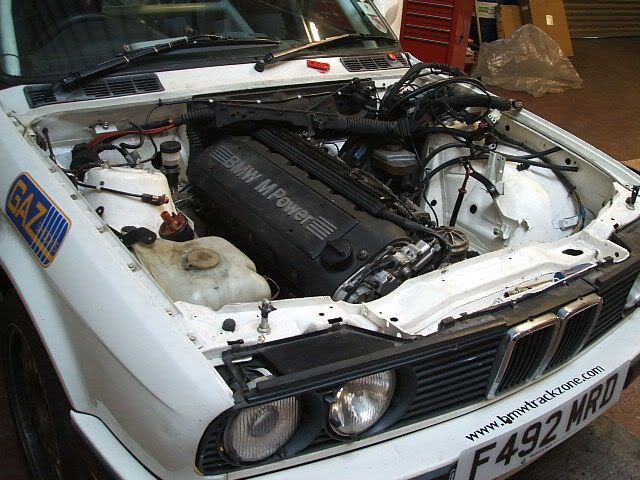
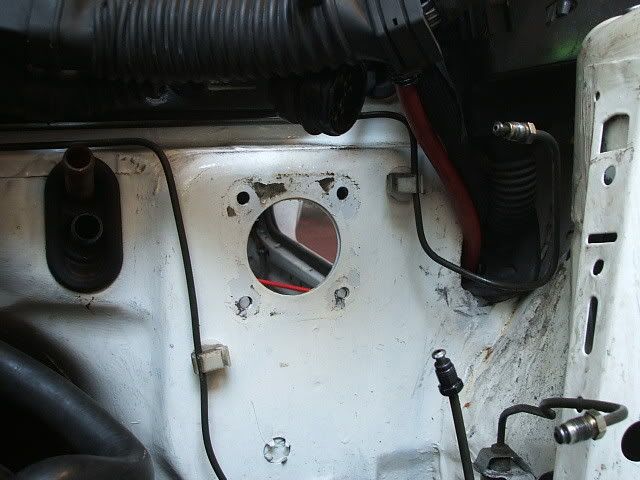
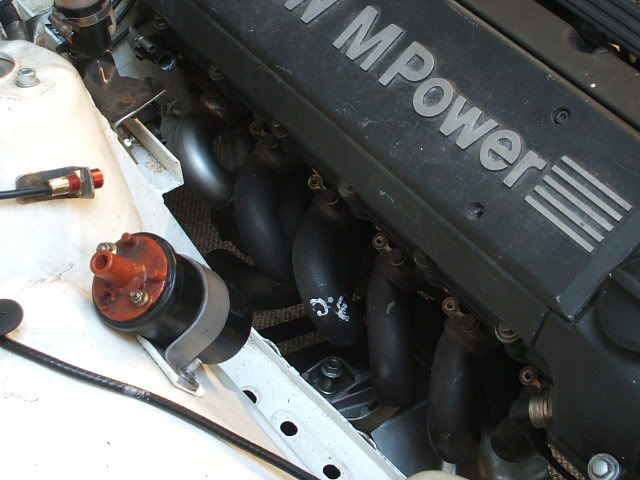
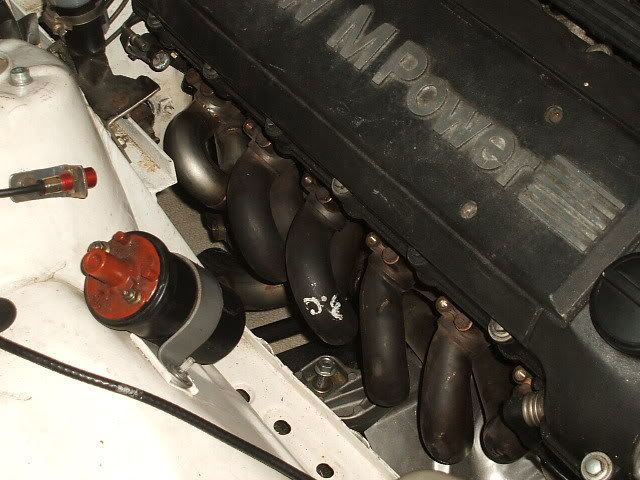
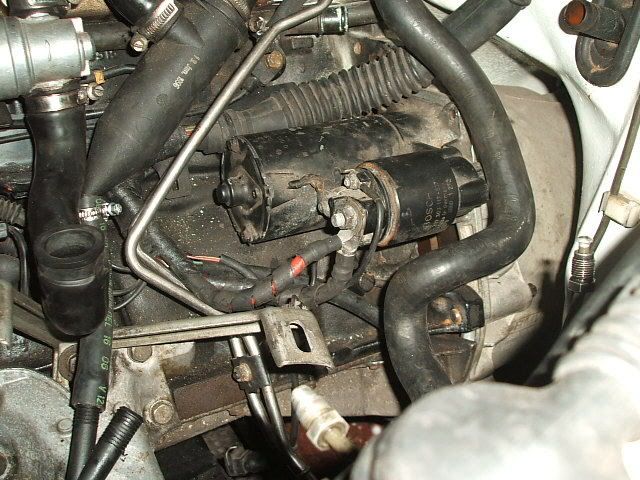
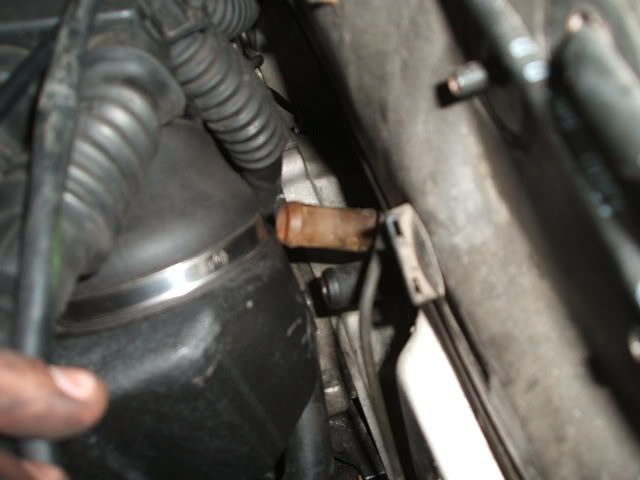
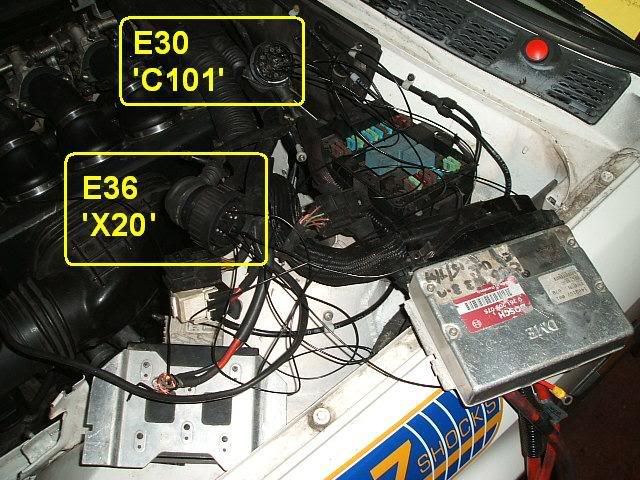
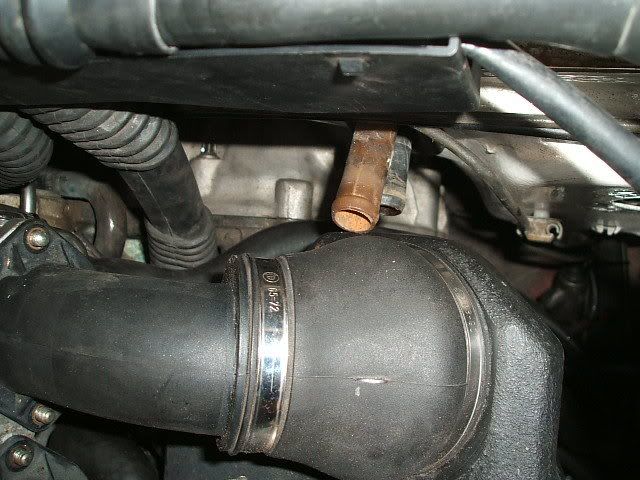
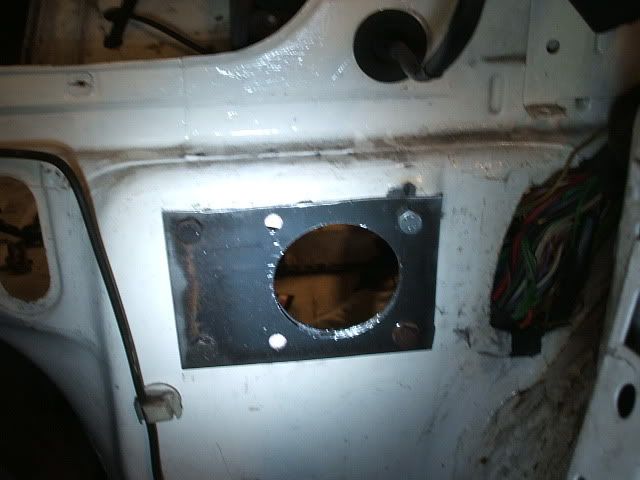
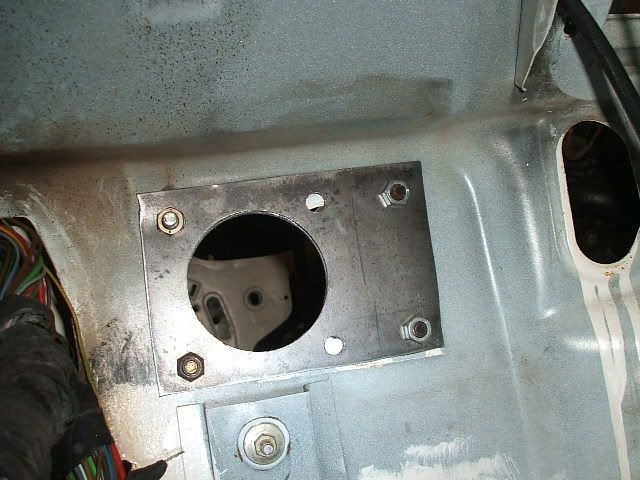
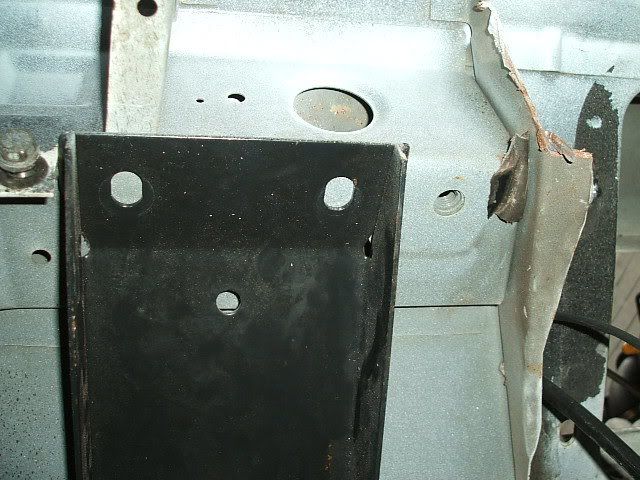
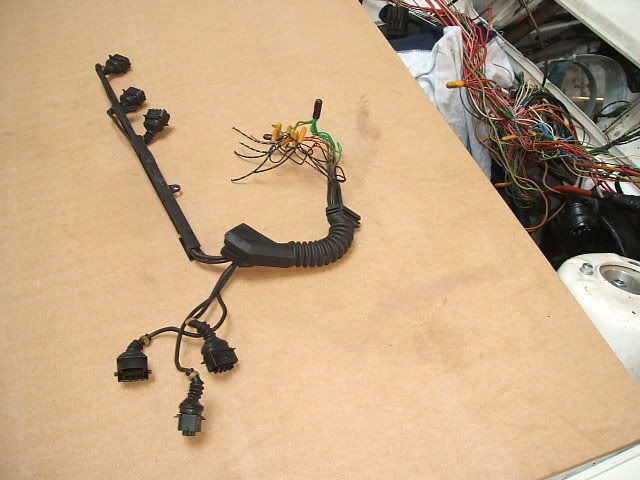
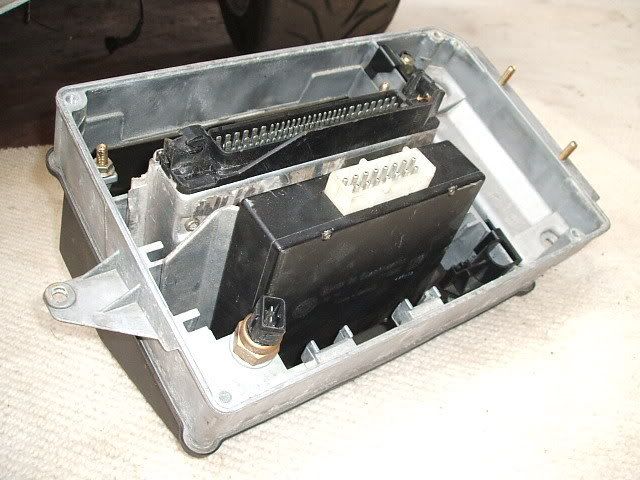
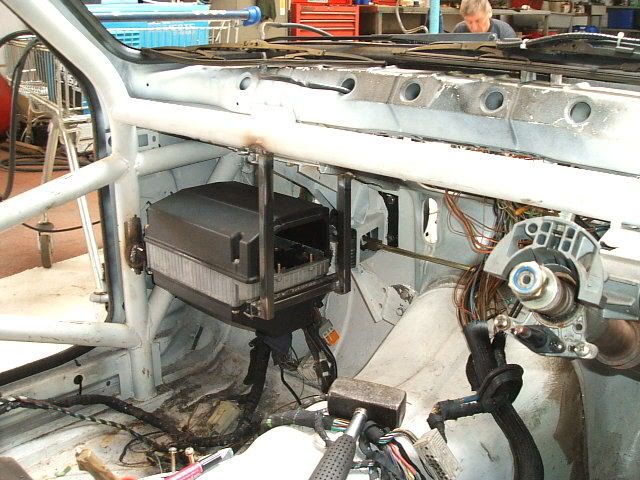
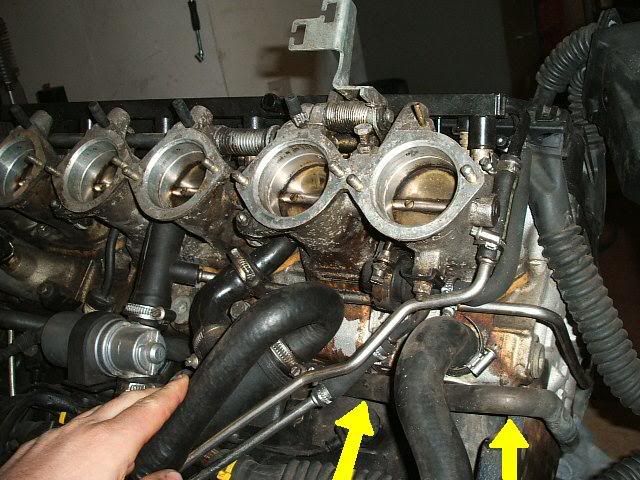
Also the other issue I see is related again to the LHD setup where the upper idle control valve pipe has a pipe coming out of it (half way up) which on mine follows that coolant pipe and travels around the back of the head and finishes above cylinder no' 6 on the exhaust side (chrome pipe, identicle to the fuel pipes) *see pictures above*
Whereas on the UK spec'd S50B30, it seems to come out of the ICV upper pipe and turn downwards and go down the block past the rear of the engine mount and then in to what I can only make out to be the fuel tank breather valve? But mine doesn't have this fuel tank breather valve?

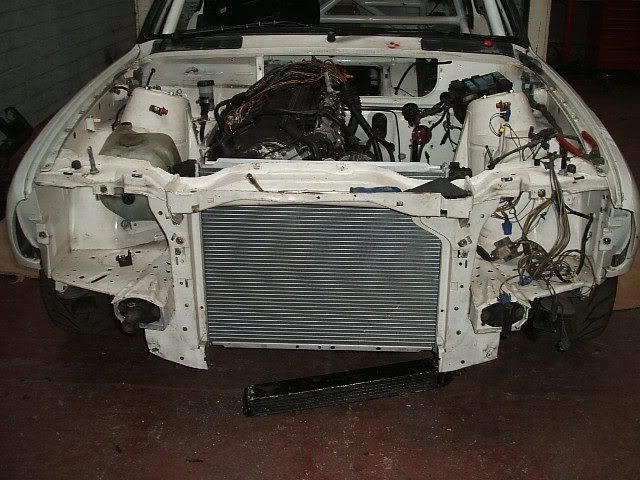
Thats Saturday anyway:
Image

Thanks for reading,
James :D
Andy325i
E30 Zone Addict
E30 Zone Addict
Posts: 4052
Joined: Mon Jan 10, 2005 11:00 pm
Location: Avon
Contact:

Tue Aug 19, 2008 2:04 am

Great work James, will have to come down and have a look

Andy
Image
M50B25NonVanos & M52B28Vanos Heads for sale. Pm Me.
Theo
Old Skooler
Old Skooler
Posts: 10735
Joined: Wed Jun 01, 2005 11:00 pm
Location: Kent

Tue Aug 19, 2008 9:07 am

I saw the car at the Ring in August, didn't twig that it was owned by a zoner.

I'm just wondering about the wisdom of using an s50 in an out and out track car. Don't E36 owners try and swap to the dual pick up from an m3 evo in order to avoid oil starvation? Perhaps it's worth modifying the E34 sump to increase capacity?
jaistanley
E30 Zone Addict
E30 Zone Addict
Posts: 2517
Joined: Tue Jan 18, 2005 11:00 pm
Location: Coventry and Essex

Tue Aug 19, 2008 12:46 pm

You sir have created a fantastic thread and a lovely car.. Awesome.

As for the sump thing, perhaps a couple of baffles and some foam will prevent the surge? To be on the safe side.

As for your problem of having the coolant pipes coming out on the wrong side.. You are correct that the RHD ones come out on the other side. I can see if I can dig out a picture presently.

I would actually be interested in swapping the coolant rails/pipes with you as I have a rhd S50B32 engine from an ZMCoupé going in my car but want to mount the expansion tank in the E30 batery tray and that looks like a neat sollution! I want to move the abs unit in my car also and fit the standard BMW airbox. Having the coolant expansion tank in the std E30 location hinders that. PM me if you are intereested mate. Only proviso being that those pipes need to fit in my car/on my engine but it looks like they will?

[edit] Does this help?:

Image

Jai
Last edited by jaistanley on Tue Aug 19, 2008 1:02 pm, edited 1 time in total.
Image
ric325i
E30 Zone Squatter
E30 Zone Squatter
Posts: 1961
Joined: Tue Apr 04, 2006 11:00 pm
Location: Gateshead

Tue Aug 19, 2008 12:58 pm

great work! cant help with the coolant pipes but this looks like a perfect project 8)
Image
User avatar
zimmerbimmer1
BMW Parts Meister
Posts: 2250
Joined: Sat May 19, 2007 11:00 pm

Tue Aug 19, 2008 3:14 pm

speak to old_skool he fitted that pipe to his conversion, If i remember correctly, and located the expansion tank to where the battery usually goes.
Image
Reeeedish
E30 Zone Newbie
E30 Zone Newbie
Posts: 51
Joined: Sun Aug 17, 2008 11:00 pm
Location: Bristol
Contact:

Tue Aug 19, 2008 7:04 pm

@ Andy325i: yeah pop in mate and say hello!

@ Theo325: Yes I was at the ring a few weeks ago. Saw plenty of E30's about and a coupe of white ones (obviously one of them was you!) Shame we didn't catch up, but plenty of time for that.
Yes I have heard of some hardcore users going for the Evo setup (which I beleive can be added to the original S50 sump with ease) But obviously not in the current E34 sump. A larger capacity on the side would definitely be something to look at. Thanks for the info! :D

@ Jai: I've followed your project along with a few others like Old_Skool_2002, Buster, JMC330i + others, which gives me inspiration to get back into the S50 route.
Your picture is really helpful so thanks for that. The coolant pipe for RHD cars is something I think i'd be more happy with.
I could well be interested in doing a swap with the coolant pipe. Your route will be great if using ABS and the original airbox - you'll have loads more room with the coolant expansion tank in the battery tray.
I'm thinking of mounting an E32 ECU box in that battery tray (if it will fit) with a very small cooling fan. Unless I can be bothered (or have to) alter the engine wiring harness to swap the ECU plug over the the drivers side and then into the cabin.
Only problem that could arise is that the car my engine came from was in a front end shunt and the engine got pushed back very slightly which put 2 dents in that coolant transfer pipe in question (behind the head). I've got them to an extreme temperature with oxy-acetylene and tried to beat them out as best as possible (felt like an iron monger LOL). They pass water and have no cracks, but are not perfect. If your looking for a perfect version then I would say that a genuine new part is the best option. (about £45 I think).
Let me know your thoughts. Thanks for your help so far. :D

@ ric325i: thanks mate!

@ zimmer: Many thanks, I'll have a word with him to clarify, but I think its just like you said - coolant expansion tank ends up in the battery tray area.

Cheers :D
James
Reeeedish
E30 Zone Newbie
E30 Zone Newbie
Posts: 51
Joined: Sun Aug 17, 2008 11:00 pm
Location: Bristol
Contact:

Tue Aug 19, 2008 7:32 pm

Sunday 17th August:

I had to make up a different route from the Oil Seperator drain to get into the sump (as the sump 'drop' is now at the front of the engine unlike the original S50 sump where it 'drops' at the rear of the engine).
So I found a pipe that would do the job and it rests in a great position where it can drain into the sump. Just need to drill & tap the sump now and add a connector piece:
Image

I still have a fair bit of work to do to the engine before I can attempt to start it up but I just wanted to get it in the car to check things out. If it all works out ok and the engine is fine then I will proceed. (remember, I've not heard this engine running and think it could be a bad one).

Time to lift it in:
Image
Image
Image

In and sat on the engine mounts nicely:
Image
Image
Image
Image

First thing I can see is that I may not be able to use the manual steering rack. For 2 reasons, first the lack of PAS pump so obviously the poly-vee belt will be far too long. I was planning to get around this by hard mounting a pully wheel where the PAS pump would be so I can use the original poly-vee belt and keep the corrent shape and tension on the belt. BUT... as the manual steering rack uses the front mounting holes on the cross member, plus seems to sit physically higher than the PAS rack's, it seems to be about 2mm from the sump. This could be an issue unless I can lower the rack by a few more mm's.
Manual rack I use with the M20:
Image

Sump very close to the manual rack (but not actually touching):
Image

So, end of Sunday:
Image

James :D
E30BeemerLad
Married to the E30 Zone
Posts: 16806
Joined: Mon Mar 28, 2005 11:00 pm
Location: Norfolk

Tue Aug 19, 2008 7:45 pm

sweet project, keep the updates

Beats my embarassing lack of progress
patch
E30 Zone Newbie
E30 Zone Newbie
Posts: 100
Joined: Fri Feb 16, 2007 11:00 pm
Location: Basildon Essex

Tue Aug 19, 2008 8:07 pm

Very interesting! nice work well done and very precise I look forward to your updates :cool:
Coffin dodger still driving a
Crusher dodger
glenn
Engine Transplant Services
Posts: 2198
Joined: Sat Jan 29, 2005 11:00 pm
Location: blackwood, south wales

Tue Aug 19, 2008 8:15 pm

an enjoyable read.
looking forward to your update's :cool:
tomson
E30 Zone Addict
E30 Zone Addict
Posts: 3600
Joined: Sun Nov 06, 2005 11:00 pm
Location: Bristol

Tue Aug 19, 2008 11:01 pm

Ahh, Beemer redeemer's workshop, looks good James, its certainly come on since I last saw it, unlike mine !

Are you going to council combe on the 6th mate?

Tom
Reeeedish
E30 Zone Newbie
E30 Zone Newbie
Posts: 51
Joined: Sun Aug 17, 2008 11:00 pm
Location: Bristol
Contact:

Thu Aug 21, 2008 1:53 am

Thanks for the kind words guys :)

Tomson, good to hear from you mate - did I read somewhere that you were doing an S50 too? Your only down the road from me, we should get them out once done.
In fact we should get all the known E30 S50's together.
You've done one as well Glenn haven't you?

Yes, I'll be at Combe on the 6th. Celebration of the 3-series this year as well!

James :D
Reeeedish
E30 Zone Newbie
E30 Zone Newbie
Posts: 51
Joined: Sun Aug 17, 2008 11:00 pm
Location: Bristol
Contact:

Thu Aug 21, 2008 2:03 am

Monday 18th August

Removed the massive E30 brake servo and master cylinder today (so I could test fit the plenum/inlet manifold:
Image
Image

E36 (upper) swapped over for the E30 (lower) gearbox cross-member:
Image

Gearbox flew straight in - very happy with that:
Image
Image
Image

Probably the most expensive bit of my S50 conversion LOL.
But I cannot fault the quality or perfect fit. Both manifold sections fitted within 15mins - ok it costs a lot to buy a fabricated version but it sure saves time and frustration:
Image
Image

Obviously have to remove the steering shaft to fit the manifolds. But the steering shaft fit perfectly back in place and has plenty of clearance all around it:
Image
Image
Image

Underneath the car showing where the manifolds/downpipes finish:
Image

Look at the fantastic flowing bends on pipe no' 6 so it misses the bulkhead, and travels around the steering shaft:
Image
Image
Image
Image

Gear-linkage setup back on (E36 M3 parts fit fine if you use the E30 rear rubber hanging bracket):
Image

Sexy X-pipe test fitted to show where it ends up:
Image

Thats it for Monday night.

James :D
Reeeedish
E30 Zone Newbie
E30 Zone Newbie
Posts: 51
Joined: Sun Aug 17, 2008 11:00 pm
Location: Bristol
Contact:

Thu Aug 21, 2008 3:12 am

Wednesday 20th August

Put the starter in this evening:
Image

My aim for tonight was to crank the engine over and see whats what. So had to fill it with oil which obviously meant fitting the oil cooler and pipework:
Image
I was suprised how well the pipes fitted in an E30 engine bay. Cooler is a little low but only test fitted for now. I'll hard mount it in a better place later:
Image

Image

Image

I wanted to test fit the air collector/plenum/inlet manifold (whatever you want to call it). Fits fine apart from its really close to the heater matrix pipes in the bulk head so might have to shorten them slightly to get the hoses on:
Image

Not much room for the servo. Obviously the E30 servo will not go back in. Golf mk2 1.3 servo is required apparently, along with a specific Audi master cylinder. I think i'm still going to have to move the smaller golf servo over though as not much room at all:
Image

Image

Image

Heater matrix pipes very close to air collector:
Image

I used the original E30 engine earth strap point and attached it to the passenger side engine mount:
Image

Few more little jobs finished on the engine, connected up the pipework for the air connector and also the air sensor in there, fitted the fuel lines, added the air inlet rubber boot (between MAF sensor and air collector - aka 'Ford Transit wing mirror'), also fitted the MAF sensor and double checked connections:
Image

Looking a lot better (complete):
Image

Then it was time for the dreaded wiring! Arrrggghhh I thought :mad:
BUT it turned out very easy indeed. I searched through both the E30 and E36 ETM (Electronic Troubleshooting Manual) and searched for all pages with either (E30) C101 connetcion or (E36) X20 connection detailed. Jotted down the relivent wires and made myself a custom wiring diagram to get my head around it a bit better.
Realised I didn't need much of the rubbish in there, a lot of them seemed to be either for EWS or Air/Con, which i'm running neither.

Anyway, to test the workings out I connected up the basics between C101 & X20 with some simple wires pushed down into the pins:
Image

Thought i'd have a go and see if it cranks over *fingers crossed*. She cranked over perfectly, phew thats 1 relief (remember i've never heard this engine run plus it had some front end damage which I had to sort).
So ok, few more cranks, checked for fuel and oil leaks - all fine. Cranked over again, heard a change in engine note and a bit of a splutter.....
Go on.....
Go on.....
You can do it......

Wayhey - she's alive and kicking! :D

Massive smile on my face as I jumped up and down LOL.

Doesn't idle (as I havent finished blocking those ICV pipes and the air emmission pipework, plus need to tap the sump for oil seperator drain which is all linked to crank-case breathing. But revs ok.
Only problem is now that its so loud (see current exhaust pictures above - just manifolds, no lambdas so open holes, plus only an X-pipe. i.e no silencers) that I cant hear for any knocks.

So shut it straight off after 20 seconds and letting it rest tonight.

I'll have to check it over more thoroughly tomorrow.

Thanks for reading
James :D
Reeeedish
E30 Zone Newbie
E30 Zone Newbie
Posts: 51
Joined: Sun Aug 17, 2008 11:00 pm
Location: Bristol
Contact:

Thu Aug 21, 2008 8:15 am

Very short video or it starting up.
The video doesn't do it justice - it is very loud! :D (Only has a front X-pipe. The exhaust stops at back of gearbox - plus the lambda holes are open)

Image

James :D
Jon_Bmw
Dangerous when thinking
Posts: 7606
Joined: Tue Jan 11, 2005 11:00 pm
Location: Salisbury

Thu Aug 21, 2008 12:37 pm

Well done James. I love the temporary wiring from the c101 to the x20! :)

Should see you down at the coombe on the 6th as well. Are you going to put it on Sheps' rollers? I could be in some french wrongun though :D
Reeeedish
E30 Zone Newbie
E30 Zone Newbie
Posts: 51
Joined: Sun Aug 17, 2008 11:00 pm
Location: Bristol
Contact:

Thu Aug 21, 2008 7:43 pm

Jon_Bmw wrote:Well done James. I love the temporary wiring from the c101 to the x20! :)

Should see you down at the coombe on the 6th as well. Are you going to put it on Sheps' rollers? I could be in some french wrongun though :D
Hi Jon, temp wiring was rather messy wasn't it winkeye . But a good quick test.

Yes, will see you at Combe on the 6th. Might speak nicely to Paul and see if it can be squeezed on :D

James
Reeeedish
E30 Zone Newbie
E30 Zone Newbie
Posts: 51
Joined: Sun Aug 17, 2008 11:00 pm
Location: Bristol
Contact:

Thu Aug 21, 2008 7:46 pm

Thursday 21st August

Didn't go any physical work this evening, but did get a X20 'male end':
Image

Also picked up a Golf Mk2 brake servo:
Image

Image

Image

James :D
User avatar
hoshy
E30 Zone Wiki Guru
E30 Zone Wiki Guru
Posts: 4118
Joined: Tue Jan 18, 2005 11:00 pm
Location: Munich

Thu Aug 21, 2008 8:02 pm

Lovely stuff!
E46 M3 CSL but dreaming of another E30.
DanThe
E30 Zone Team Member
Posts: 28641
Joined: Sat Sep 10, 2005 11:00 pm
Location: Staffs
Contact:

Thu Aug 21, 2008 9:03 pm

Good progress! :D

Hope it turns out to be a decent engine 8)
Reeeedish
E30 Zone Newbie
E30 Zone Newbie
Posts: 51
Joined: Sun Aug 17, 2008 11:00 pm
Location: Bristol
Contact:

Wed Aug 27, 2008 12:47 am

Saturday 23rd August

Started on the wiring today:
Image

Seperated the wiring from the covers (inc coil wiring here):
Image

Image

I didn't really have a plan on where I was going to put the wiring or how and if i was going to un-tangle it. With the air collector fitted, it was pretty much touching the heat-matrix pipes coming out of the bulkhead:
Image

So I then decided to run without heaters/matrix etc etc and loop those pipes together. So the project took a bit of a change of route but it means I can do a few things at once that need sorting anyway.
Like get rid of my very quick (hours before the race) battery cut off setup which is just a mess:
Image

So to get the heater matrix and pipes out, I wanted to take the heater box out as it would be useless, plus extra weight, plus wasted space. But here's where the knock on effect comes into play, to take the heater box out, I need to take the dashboard out, to take the dash out I really should take the doors off (as its a nightmare accessing the cabin with the rollcage and door bars in the way), to get the dash out I need to take the windscreen out (as I mounted the dash first and put a mounting point very close to the screen), various amounts of wiring need to be uncliped and moved out of the way. Also then with some of the loom out the way I can tidy up this awful repair then didnt get treated and started to corrode:
Image

So doors and screen out (much easier to work on now)
Image

Dash out:
Image

Image

Image

Image

Heaterbox still in:
Image

Heaterbox now out:
Image

Also this would make the brake modification job a lot easier. I have to extend or use a longer brake transfer bar and also modify the servo pivot bracket and move it over about 55mm. So with no dash, screen, doors, heaterbox etc etc in the car this makes things a lot better.

Then it was the turn of the front end. Yes I know it seems like i'm going backwards but its all in reason.
Front bumper, lights, grilles, lower valance off:
Image

Image

The reason behind the front panel strip is to test fit the larger E36 M3 radiator and also the E36 M3 oil cooler.
The radiator sits perfectly and no problems there but the oil cooler can only mount in 1 place (if using the M3 cooler, pipes and M3 radiator) and that is directly underneath the radiator. But when in an E30 chassis, the cooler sits (or wants to sit) exactly where the lower part of the front panel is. This is obviously no good as 1, it wouldnt mount, and 2, it would get no air.
So I cut that section out :D
Image

Image

Image


James :)
Reeeedish
E30 Zone Newbie
E30 Zone Newbie
Posts: 51
Joined: Sun Aug 17, 2008 11:00 pm
Location: Bristol
Contact:

Wed Aug 27, 2008 1:57 am

Sunday 24th August

Took the steering column out this morning (5:30am :mad: - couldn't wait to get on with stuff :) ) As I thought it had always had a slight knock (possible one of the steel bearings. Also I wanted to change to snap-off security bolts for the steering column to normal hex bolts:
Image

Once the column was out, it gave better access to remove the brake transfer bar:
Image

I test fitted the front lower valance back on just to check what sort of room I had behind there for my 'modifications':
Image

This is how the oil cooler wants to sit, and as you can see, it would of been right in the way of that lower front panel piece:
Image

Image

Image

Here's that piece placed back in to show how it completely obstructs the oil cooler (the oil cooler is sat in place behind this panel):
Image

Same picture but without the panel:
Image

Obviously i'm not going to leave it like that as some flex would happen I expect. So a 40mm x 27mm rectangle box section (1.5mm) became the new part of the lower front panel (just slight above where the old one was). I welded this in, front back and sides: (also plays a role in my later modification with an electric fan:
Image

Image

Image

I then test fitted the Mk2 Golf servo to make sure the PCD was the same:
Image

Image

Even though the servo is now a smaller golf part, the air collector still hits the servo. So the servo need to be moved across the bulk head (to the passenger side) slightly. After viewing some S50 projects on the E30zone (many thanks guys!) I wanted to move it across 55mm - which seems like an average re-location distance.
I made some plates up (again, after re-viewing some of the guys pictures on the E30 zone) which would go either side of the bulk head and act as a strengthener for the brake pivot bracket.
2 brackets required and they need to be the same. (not a very nice looking pair of brackets, but functional never the less):
Image

I tack welded them together so I could match the 2 whilst measuring and drilling:
Image

Image

This is the brake pivot bracket inside the car on the passenger side. It receives the brake transfer bar from the pedal box and then pivots the motion forward through the bulkhead and into the servo, thus applying braking pressure to the master cylinder, and consiquently onto the brakes / calipers themselfs:
Image

It needs to be moved over 55mm so has to come off first:
Image

Seperated plates which can be test fitted:
Image

2 new 9mm holes were drilled in the bulkhead, 55mm over and the new plates were bolted into a rough position to gauge distancs:
Image

Image

I used a 70mm hole cutter to match the bulkhead with the plates:
Image

Inside view (now the hole cutter has taken out the rest of the material of the bulk head to leave a perfectly round hole for the servo to pass through):
Image

Test fit of the servo in its new position with the air collector -
Very close. But it works!
Image

Image

3mm max clearance I would say:
Image

View from inside, now in its new position 55mm over:
Image

Whilst I had my head in the footwell, I wanted to check where some water was coming in from when it rains heavily. Seems to be a small area underneath where the front triangulation of roll cage exits the bulk head and enters into the engine bay to pick up on the front turrets:
not the neatest job, but I race it - not show and shine it):
Image

So sealed them all up both side front the engine bay side, plus some on the inside:
Image

Image

Image

Image

Also sealed up the mess I was talking about earlier which was a previous bad effort somehwhere in its past years:
Nasty:

Image

Cleaned, brushed, primered and sealed:
Image


James :D
Reeeedish
E30 Zone Newbie
E30 Zone Newbie
Posts: 51
Joined: Sun Aug 17, 2008 11:00 pm
Location: Bristol
Contact:

Wed Aug 27, 2008 2:29 am

Monday 25th August

Today was modifying the brake servo pivot bracket. As i'd moved the mounting hole on the bulk head over by 55mm, it was now 55mm away from its 4 other mounting holes:
Image

G-box tunnel mount:
Image

Passenger side upper dash area (above where the glove box would normally be):
Image

Test fitting the pivot arm:
Image

My first bracket shaped and ready:
Image

Both brackets now ready for welding:
Image

Tacked on into position ready for fully welding:
Image

Upper bracket welded all around, and plug welded in 2 places on the other side:
Image

Image

Upper bracket tacked:
Image

Now welded:
Image

Finished modifications:
Image

Primered for protection before I fit it:
Image

Image


I also primered and then Hammerited(sp?) the new lower front panel section:
Image

So it looks a bit better than bare metal:
Image


James :D
Reeeedish
E30 Zone Newbie
E30 Zone Newbie
Posts: 51
Joined: Sun Aug 17, 2008 11:00 pm
Location: Bristol
Contact:

Wed Aug 27, 2008 2:47 am

Tuesday 26th August

Inside view of the bulkhead with new servo position drilled. You see the reason for sandwich plates now:
Image

Area primered, sealed, and hamerited(sp?):
Image

Primered and painted the servo re-location plates:
Image

Then it was onto finding and installing an electric fan. There isn't room to run a viscous fan so an electric one is needed. Found 1 from an 850ci which was a decent size (14" I think it was):
Image

Test fitted it and make some brackets which I then welded onto the lower front panel (it also mounts in the centre at the top of the front/slam panel):
Image

New fan fitted (yes I did tidy it up with some matt black spray

:wink: ):
Image

Image

Quick video:
Image


James :D
User avatar
DieselMeister
E30 Zone Regular
E30 Zone Regular
Posts: 388
Joined: Sat Nov 12, 2005 11:00 pm

Wed Aug 27, 2008 11:31 am

Awesome work sir :thumb:
Reeeedish
E30 Zone Newbie
E30 Zone Newbie
Posts: 51
Joined: Sun Aug 17, 2008 11:00 pm
Location: Bristol
Contact:

Fri Aug 29, 2008 2:16 am

Thursday 28th August

Some bits turned up from BMW today,
South African spec 'air pump' delete cover, gasket and fixings
Vanos filter and sealing ring
E34 throttle cable and grommet
Exhaust manifold to head nuts (24)
Breather blanks
Cotton reel mount for the air collector
Image

Also the E34 brake transfer bar:
Image

Compared to the shorter E30 one:
Image

Image

As tested, 100mm longer and reaches right into the new mounting area:
Image

So I installed my modified servo pivot bracket:
Image

Showing 1 plate on the inside of the car:
Image

Showing both plates:
Image

Servo fits fine, but does need the VW 8mm hole in the servo push-lever drilling out to a 10mm hole to accept the BMW pivot pins.
Notice the new E34 brake transfer bar too long and poking out even at its shortest setting:
Image

Image

Image

So I extended the thread (cut new) on the right-hand-thread side:
Image

Then measured it and cut off the excess length that I didn't need and was in the way:
Image

Transfer bar, servo pivot bracket, and servo now fitted and connected up. All operating smoothly with hardly and slack that you sometime find in these 'pivot and transfer' brake linkages:
Image

Quick video of the extended brake linkage/setup:
Image


James :D
Theo
Old Skooler
Old Skooler
Posts: 10735
Joined: Wed Jun 01, 2005 11:00 pm
Location: Kent

Fri Sep 05, 2008 12:20 pm

How much was the e34 brake transfer bar?
tomson
E30 Zone Addict
E30 Zone Addict
Posts: 3600
Joined: Sun Nov 06, 2005 11:00 pm
Location: Bristol

Fri Sep 05, 2008 1:15 pm

Theo325 wrote:How much was the e34 brake transfer bar?
Under a tenner when I bought mine Theo....
Theo
Old Skooler
Old Skooler
Posts: 10735
Joined: Wed Jun 01, 2005 11:00 pm
Location: Kent

Fri Sep 05, 2008 1:22 pm

Nice one Tom, in that case sod pissing around trying to get one out in a scrapyard.

BTW, excellent work Reeeedish - really liking the build.
DanThe
E30 Zone Team Member
Posts: 28641
Joined: Sat Sep 10, 2005 11:00 pm
Location: Staffs
Contact:

Fri Sep 05, 2008 6:19 pm

Those bars are a PITA to remove, I ended up selling one for more than it costs new!
User avatar
scotty86d
E30 Zone Newbie
E30 Zone Newbie
Posts: 167
Joined: Wed Nov 16, 2005 11:00 pm
Location: Uxbridge/Brighton

Tue Sep 09, 2008 7:02 pm

A really impressive build so far!!
Jhonno
Homo Hair
Posts: 20362
Joined: Mon Jan 10, 2005 11:00 pm
Location: FLAT, FLAT, FLAT!!
Contact:

Tue Sep 09, 2008 7:13 pm

e34 throttle cable is for M50 conversions dude.. Afaik you need an e36 M3 one which you then shorten
Got cable ties? Get diffin..

Arch roller for hire.

www.zeroexhausts.co.uk

Image
Reeeedish
E30 Zone Newbie
E30 Zone Newbie
Posts: 51
Joined: Sun Aug 17, 2008 11:00 pm
Location: Bristol
Contact:

Sun Sep 14, 2008 5:29 pm

Time to catch up on the last weeks work before I finished it (well had it road/track ready for its first shakedown)

Saturday 30th August

More wiring. I had to decide how to seperate the wiring, and more importantly where I was going to house the ECU(s), relays and how to route them:
Image

So I decided (like a few of you probably did) to cut the coil pack wiring loom so it could be routed better and then I would solder and heatshrink them back together later:
Image

I also had to cut 1 of the 3 main relays so I could un-tangle it. Soldering it back together with heatshrinks:
Image
Image

So i'd decided to put the ECU's inside the cabin and not in the normal place. I wanted them in the passenger side (where the glove box would be).

On the Nurburgring trip (when the M20 was in there) last month, I would suffer from the ECU overheating (couldnt not even touch it with the tip of your finger), plus I didnt mount it very well (cable tied up inside the dash in a hurry) so over rough ground and randomly when hot, it would develope a miss-fire and cause general lack of power issues.

So this time round I wanted to make sure the ECU's would be cool and also supported well so they couldn't move.

Introducing my temperature controlled ECU box :D
Image

Its from an E31 8-series (E32 7ers use it as well). It has a built in temperature sensor (gold in colour, you can see it in the picture above) that turns on at 44 degree's. (simple 2-pin on/off temperature switch).

When used on the E31 and E32 it has a small fan motor and 'intake manifold' which directs air in and out via some openings. But I didnt have room for all that, plus the original fan motor was very small.

Test fitting how to lay the ECU's in what position (also notice the temp sensor):
Image

Image

I had 2 spare CPU fans which were 12v. My first idea was to use them both on the top blowing air inside:
Image

So I measured and drilled the first of my mounts. Its something I plan to be perminant on the race car so I had no worries of welding it in as I dont plan to take it out. Left hand mount welded in place on the left front footwell triangulation:
Image

Then for the right side of the ECU box it had to be a bit more width so the drop down supports from the roll cage would clear the lid going on (and off), also spaced enough to allow the wiring and ECU plugs and relays to enter the box. Bracket I made for the right side of the box:
Image

Drilled and cleaned up:
Image

Originally on the E31 and E32 then are solid mounted in the engine bay. But I wanted a little 'give' so fitted 3 rubber cotton reel mounts to help absorb some energy.

New bracket sat on rubber cotton reel mounts (you can see the clearance issue's here and why I had to add some width to the bracket so it could recieve vertical supports):
Image

Showing the position of the ECU box and its brackets to hold it. (only 1 vertical support on right hand side bracket so far - there will be 2):
Image

James :D
Reeeedish
E30 Zone Newbie
E30 Zone Newbie
Posts: 51
Joined: Sun Aug 17, 2008 11:00 pm
Location: Bristol
Contact:

Sun Sep 14, 2008 7:52 pm

Sunday 31st August

ECU box sat in place whist I welded the 2nd vertical bracket:
Image

Showing the position in the cabin:
Image

Close up:
Image

I changed my plans for the 2 fans (seeing as 1 was a pusher, and 1 was a suction). So the suction fan is going to be mounted on the top (sucting air out of the box):
Image

And the pusher fan (black) would be mounted at the bottom side, pushing air through into the box:
Image

Empty ECU box with some of my wiring ready to be connected up into a mini loom:
Image

ECU box finished and wiring with plug for easy removal. Fan mounted and connected:
Image

Inside view:
Image

Lid off. Plug built in for lid complete removal due to lid fan:
Image

Image

Loom tidyed up and cable tied into position:
Image

Box installed and ECU's plugged in:
Image

Support brackets painted and ECU box installed:
Image

Showing the position in the cabin:
Image

Image

Short video of testing the temperature switch works and both fans come on and more importantly flow air through the box. I didnt realise until I powered it up that the top suction fan is one of those shit LED ones. LOL that will be amusing if im ever out in the dark! :D
Image


James :D
Post Reply