Doing a minor build / restoration or an epic one, post it here
Moderator: martauto
-
x-works
- E30 Zone Regular

- Posts: 332
- Joined: Thu Mar 10, 2005 11:00 pm
- Location: Ireland
Post
Wed Jul 23, 2008 12:10 am
E30 M3 minor rust repair
Hello.
First post on here but I've been reading the forum for quite a while now.
Started doing some minor rust repairs on my e30 a while ago and, well,
it just seemed to go on a little. Here's a few details.....
Bought the car in England a couple of years ago now,
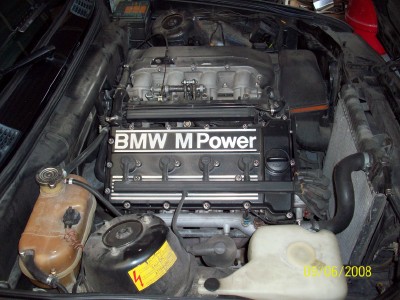
despite the reg plate being 1990 it's actually one of the early M3's (1986).
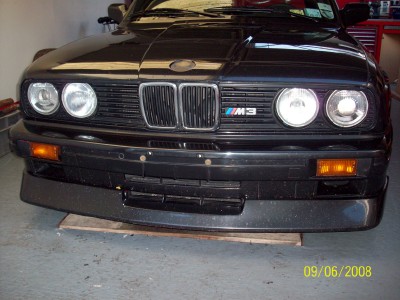
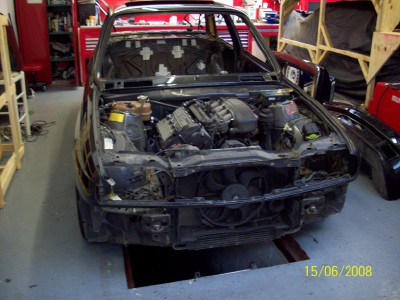
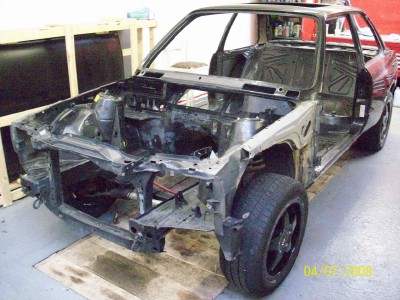
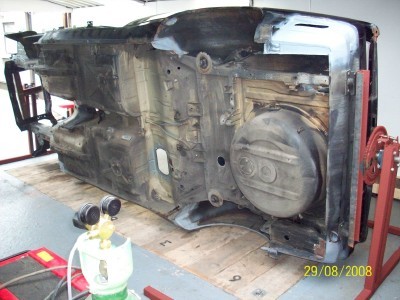
It's a 195bhp with the cat and this is how it looked when I first got it.
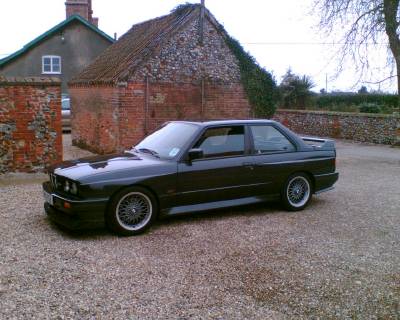
Haven't had much time to do a lot with it in the few years since buying
it apart from some wheels and routine service work. This is how she looked
before taking off the road.

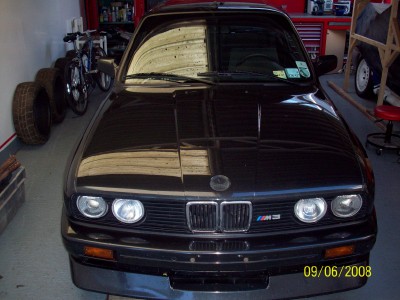
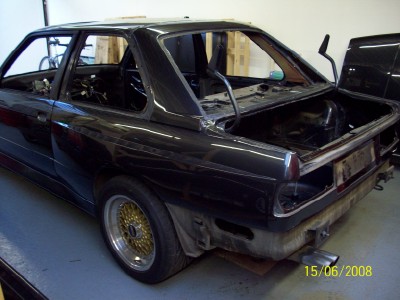
Unfortunately although she looks reasonably clean in the pic's the old saying comes to mind
"good from afar but far from good", reason being the dreaded rust had kicked in and was
starting to munch it's way through the chassis. Also there was quite a few dings around
the body and the front is severly stone chipped for some reason
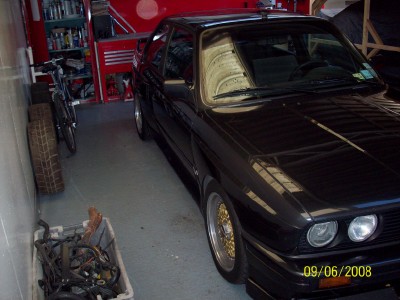
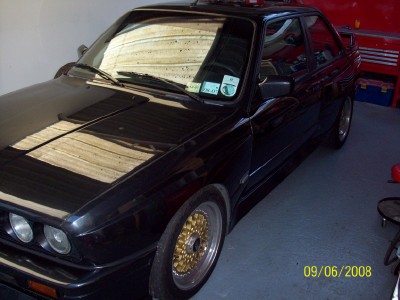
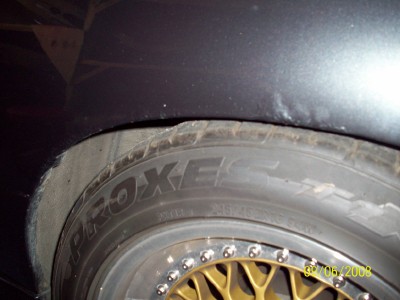
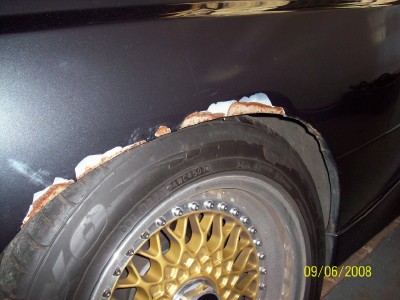
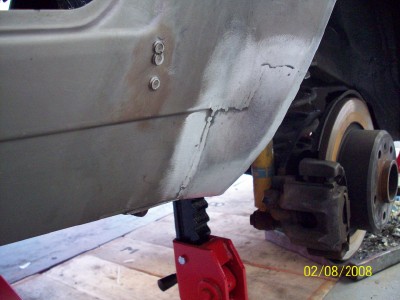
the most noticeable of the rust was on the rear arches where it would appear
somewhere during it's life the rear arches were rolled to accommodate larger wheels
and tyres and poorly done..
So we set about getting the car ready for some small rust repairs....
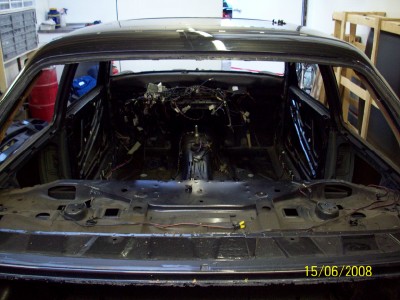
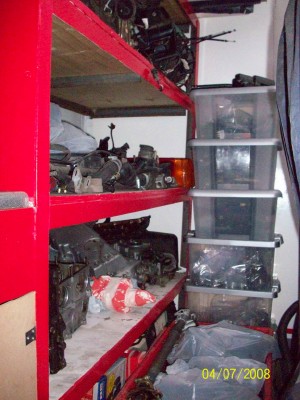
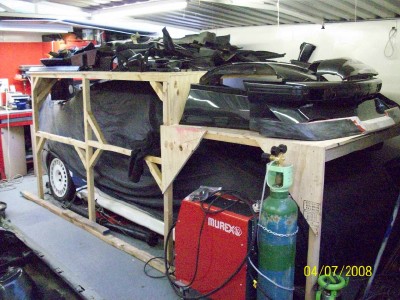
with the amount of stuff coming out of the bm, shelf space was starting to get scarce
so the poor escort has to double up as a fitted wardrobe for the time being ....
right ready to begin......
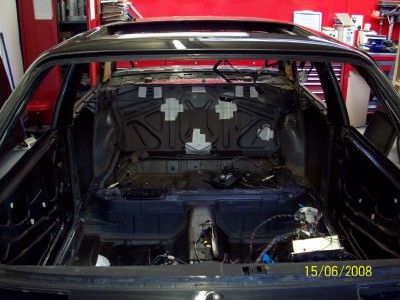
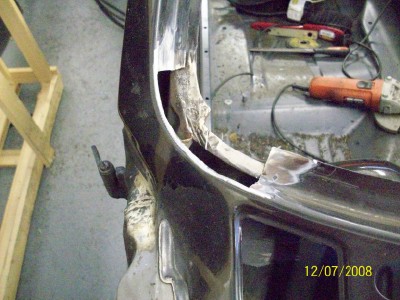
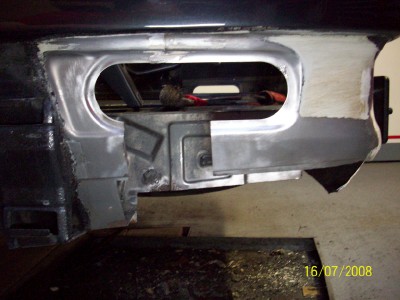
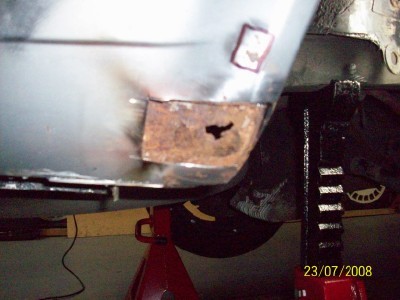
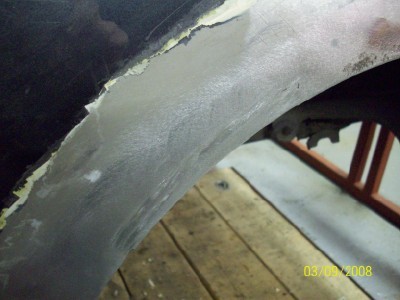
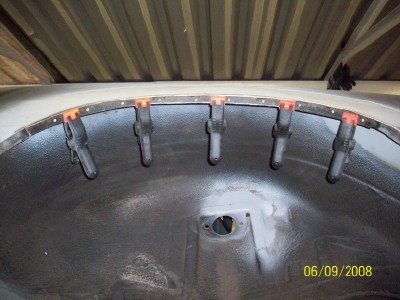
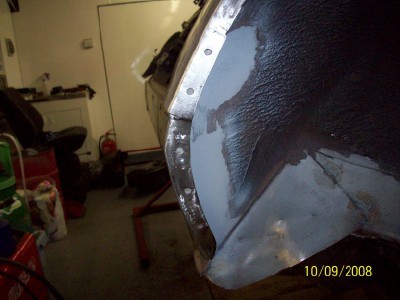
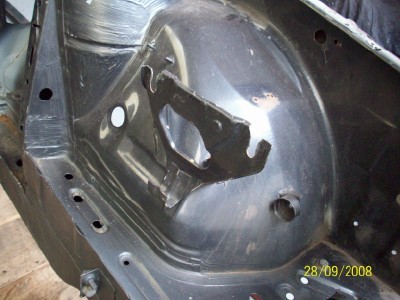
As mentioned the main reason for taking the car off the road was
the rust on the rear arches, but that was far from the least of the
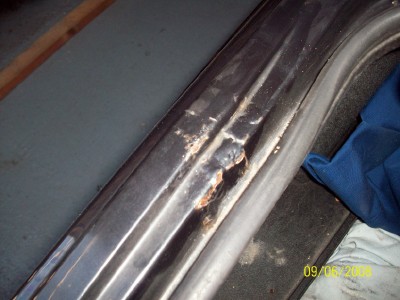
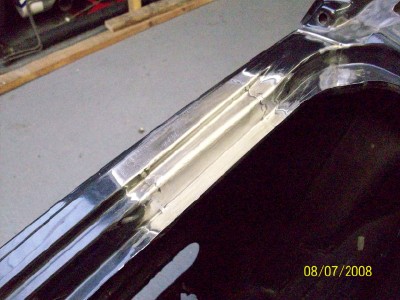
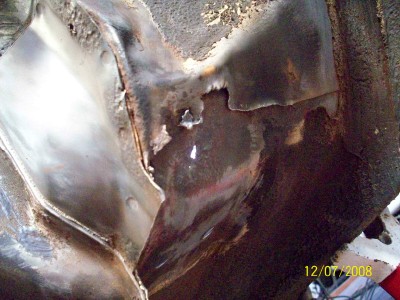
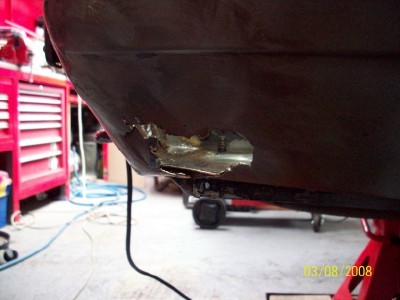
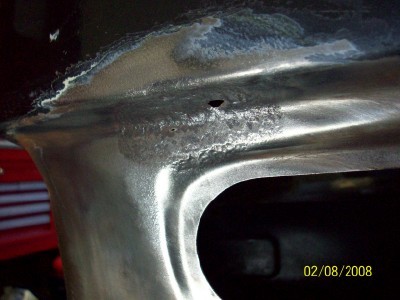
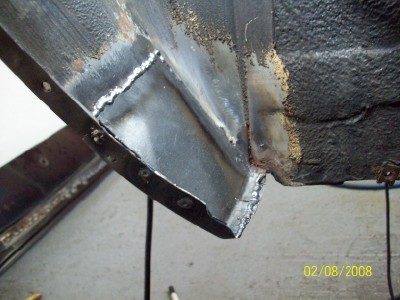
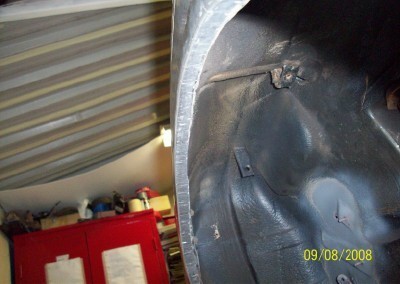
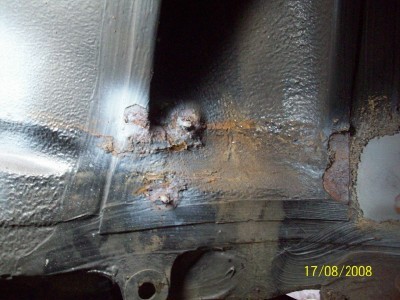
rust problems. First up was some rust on the drivers side of the boot
under where the rubber seal sits.....
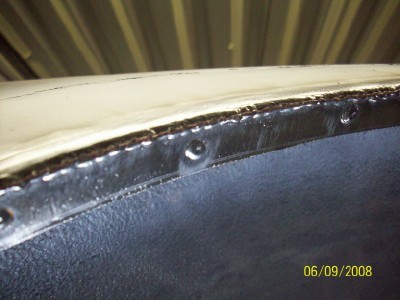
a few years after the car rolled off the production line the rear end
had an unfortunate coming together with a solid object, otherwise
known as a tank slapper. The previous owner had provided all the original
receipts for the main dealer repairs at the time , which showed that it
had a rear drivers side section of the quarter panel changed. Sure enough
real oem confirmed that a replacement section of the rear quarters were
available, and I have to admit that whoever done the repair done it well
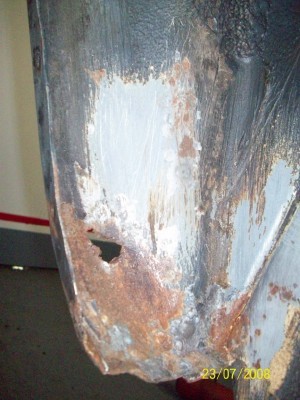
at the time, I certainly couldn't have done better. Unfortunately the ravages of
time(17years) and salty water has taken it's toll on the repair
and while the main part of the repair (the face of the quarter panel) is
still perfect, the sections under the boot lid and under the bumper have
rusted badly.
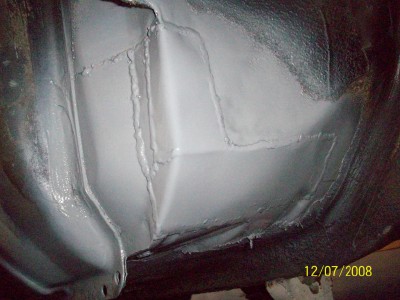
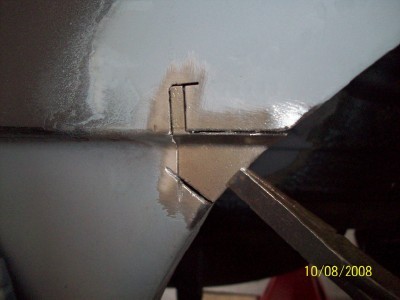
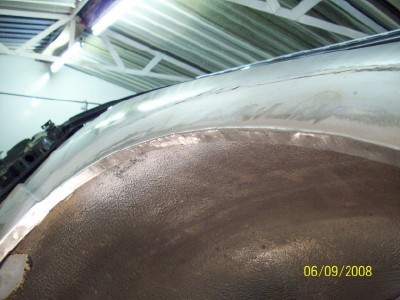
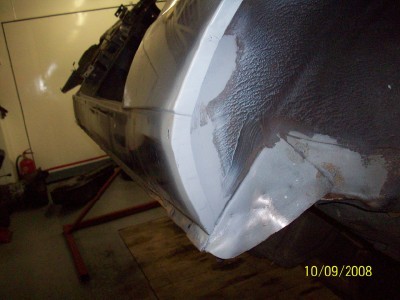
So, first thing is to clean away the paint and see how much metal needs
to come out.....
mark up and cut out the rotten area.....
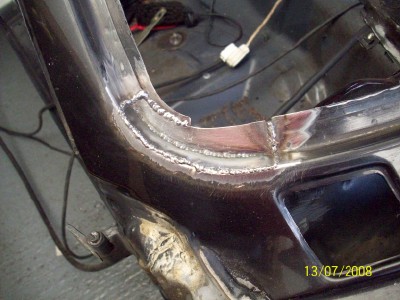
and then make up a replacement section from some shiny new sheet
steel...
and weld it in........
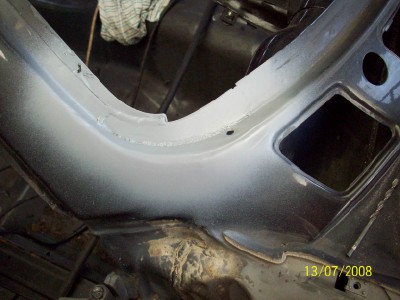
i'm not gifted enough to form and weld in the repairs seemless with the
original panel so the patches are welded in slightly below the surface level
to allow for a small skim of filler to blend the repairs.
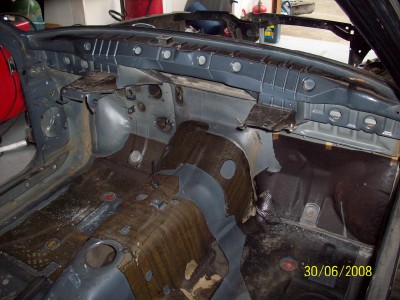
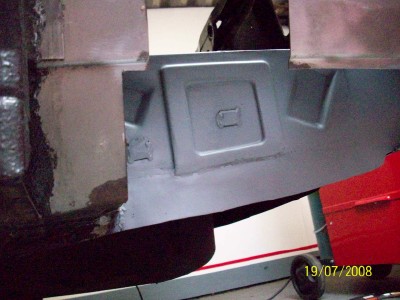
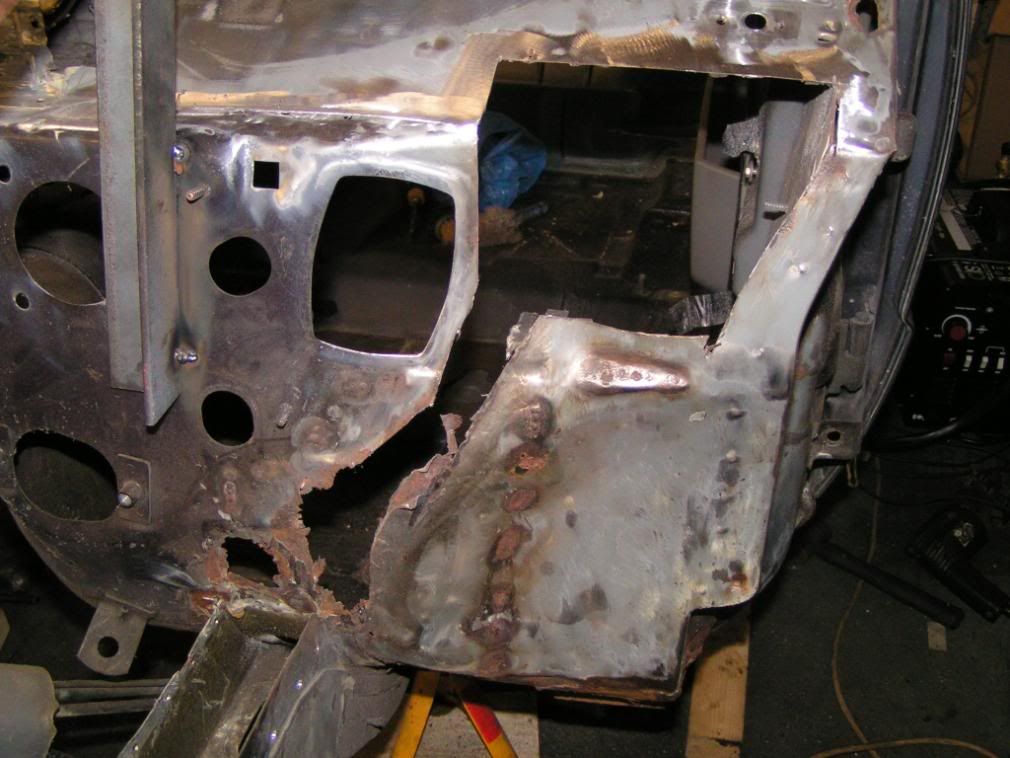
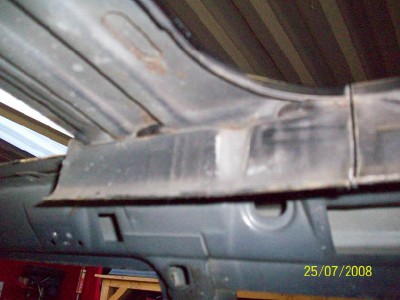
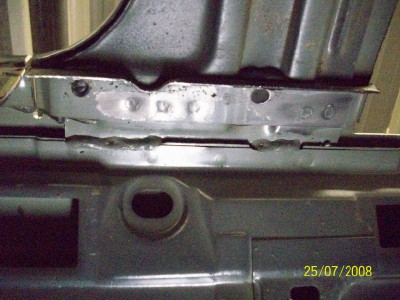
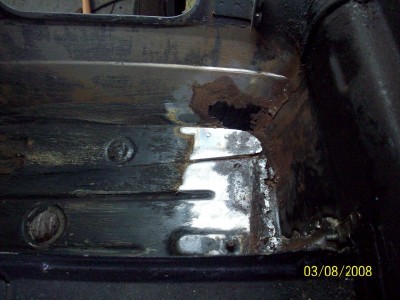
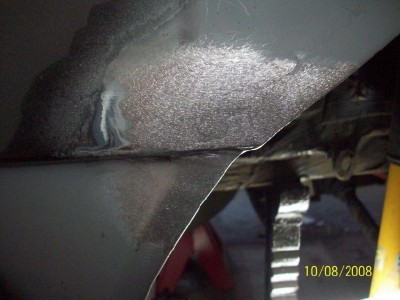
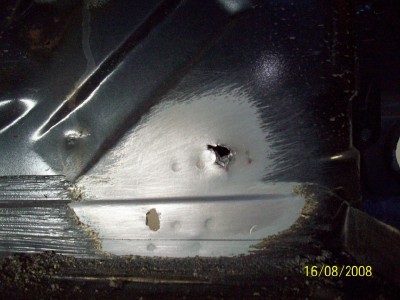
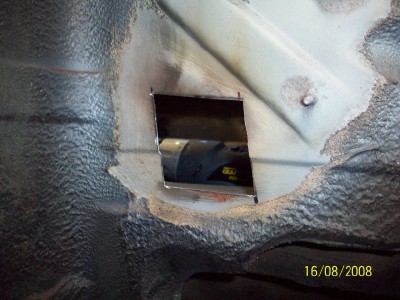
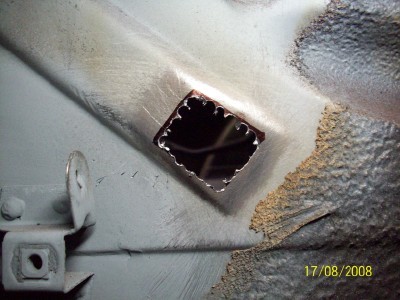
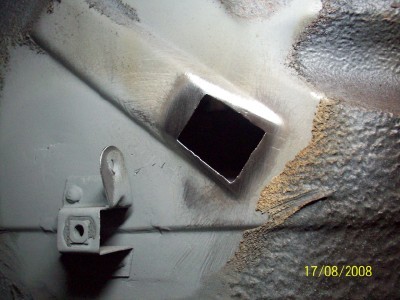
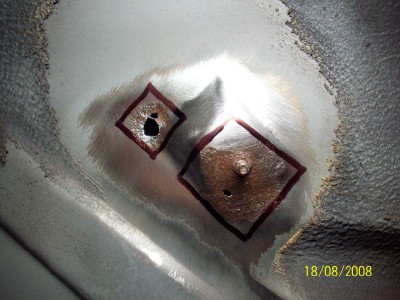
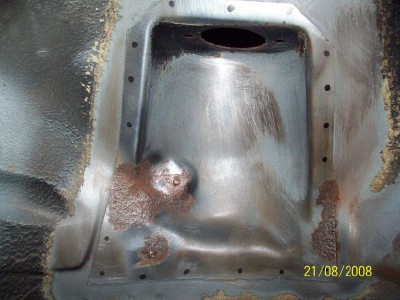
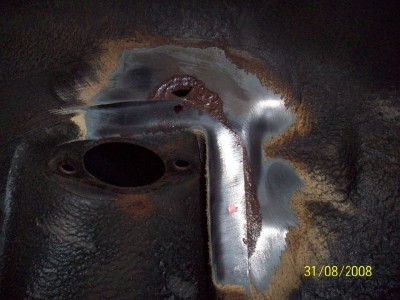
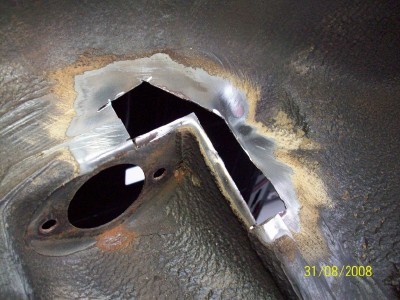
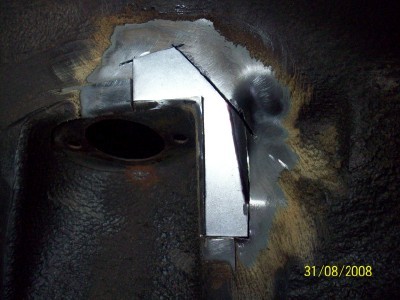
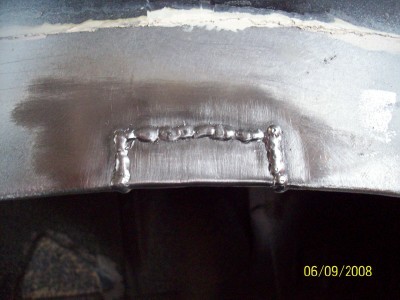
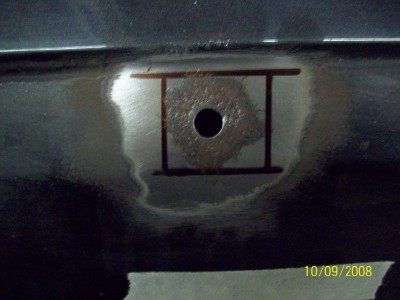
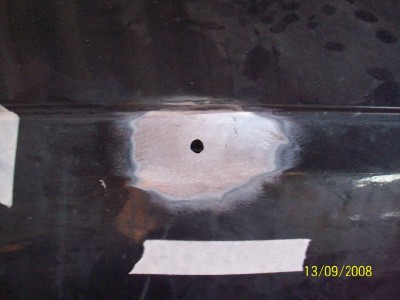
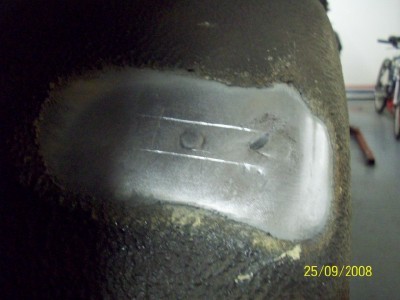
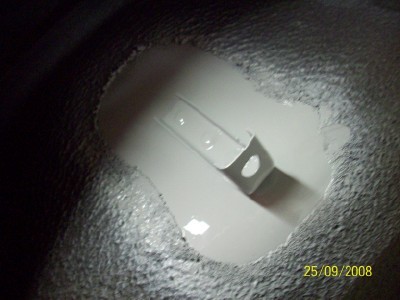
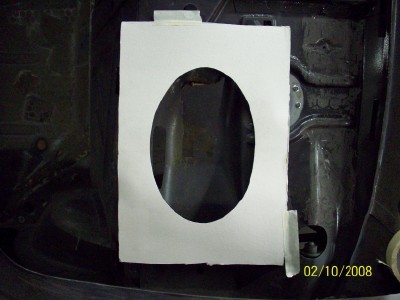
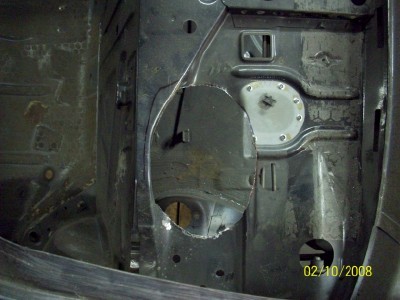
next up was a small hole in the bulkhead under the battery tray about the size
of a cue tip which when wire brushed with the angle grinder opened
up to reveal itself to be a little larger......
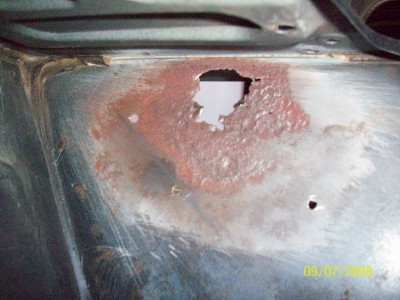
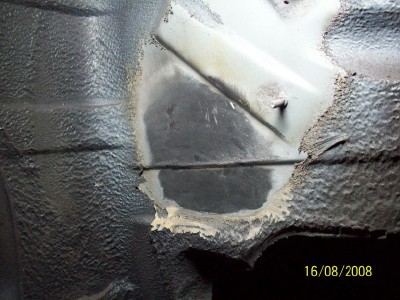
same story again, mark, cut out, make cardboard template, transfer to
metal, tack in place, weld up, sand down welds and apply primer to bare
metal.......
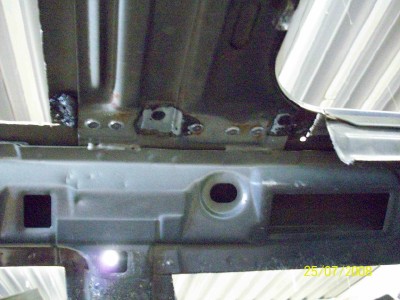
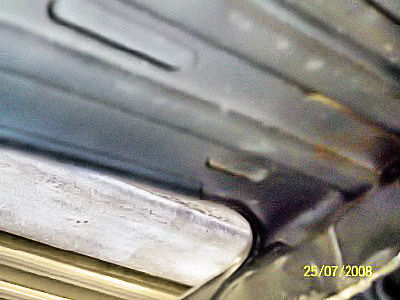
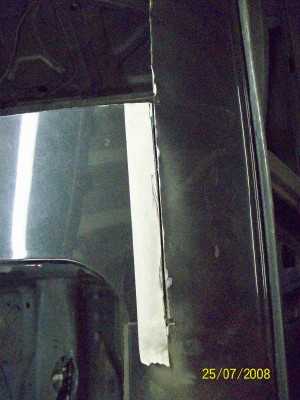
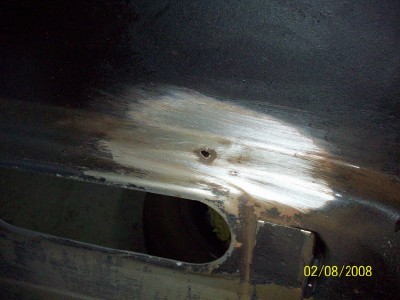
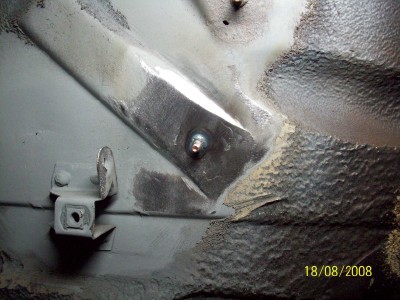
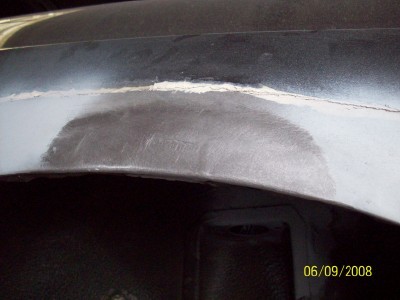
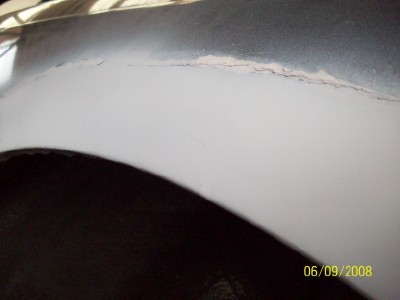
after that it was on to the windscreen scuttle which on the whole was
blemish free, apart from a section on the passenger side at the drain
hole....
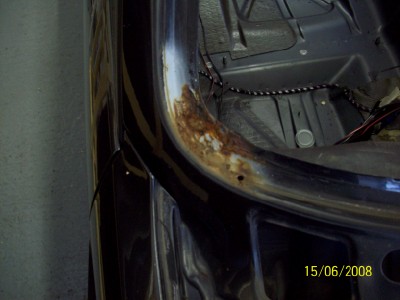
when wire brushed back it was mostly just surface rust, but as access to
view the far side of the panel was poor it was decided to play safe and
cut out and replace.......
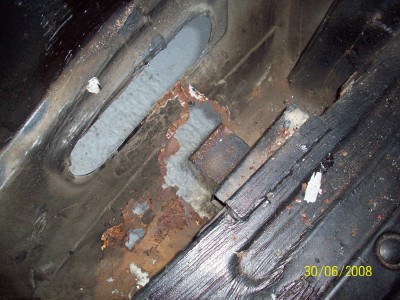
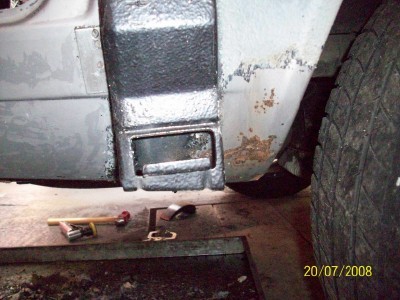
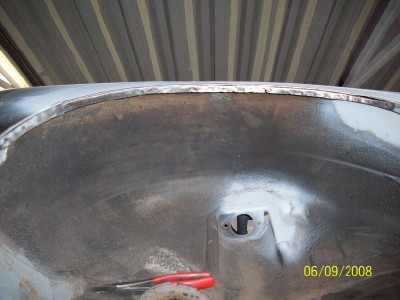
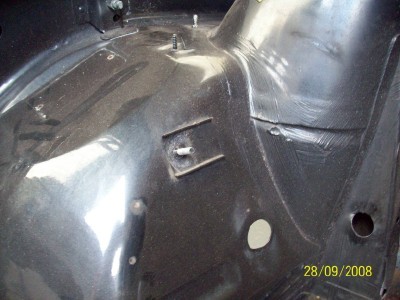
next up the foot wells, having had the carpets out a year ago as a result
of a heater matrix leak I was reasonably confident that she wasn't a
Flintstone mobile and that the floors were still fairly well intact.
And sure enough she still looked presentable from the inside.....
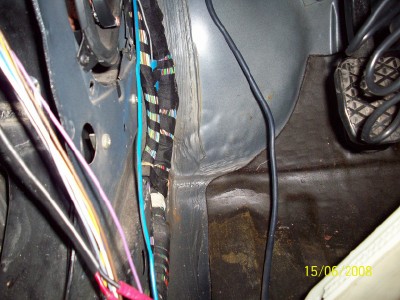
but some routing around underneath revealed some less than pristine
metal, first up was the front of the drivers side inner sill panel, seen here
with the spot welds drilled and section nicked for removal.....
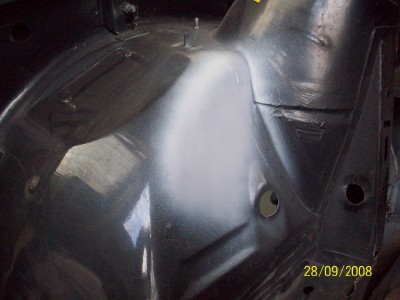
then it was on to the passenger side which was a little more involved.
At some stage the seamsealer had given way around the front jacking
box and allowed the elements in on top of the box section. The box
section was finished......
but thankfully it hadn't taken to much of the floor with it. Again to be
safe anywhere that had signs of even slight surface rust was cut
to make way for new metal......
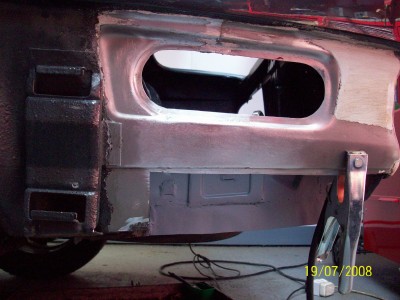
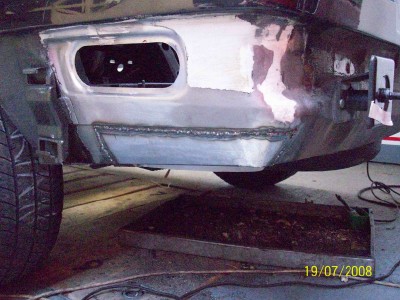
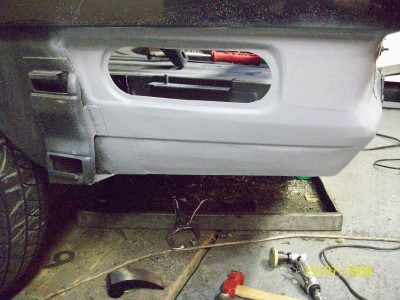
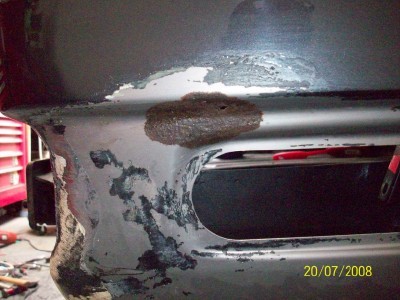
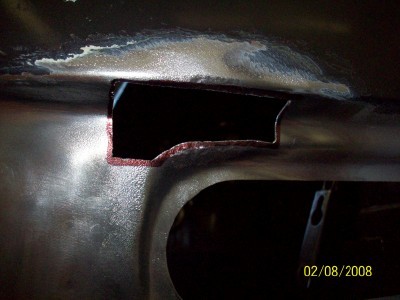
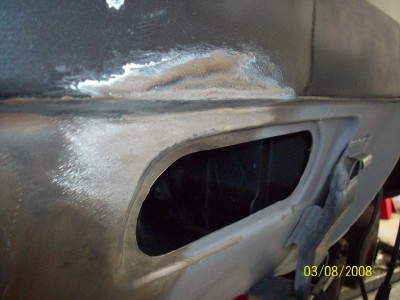
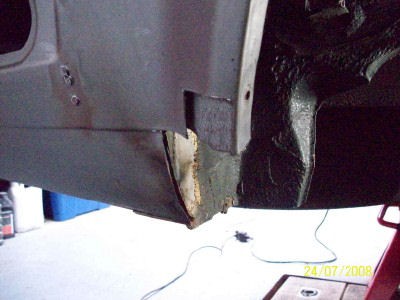
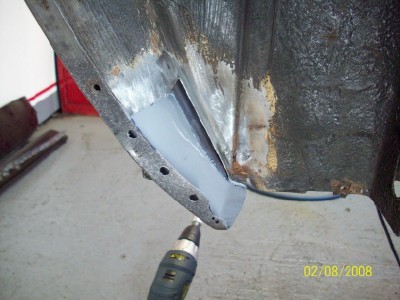
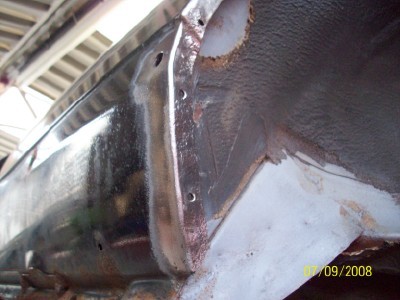
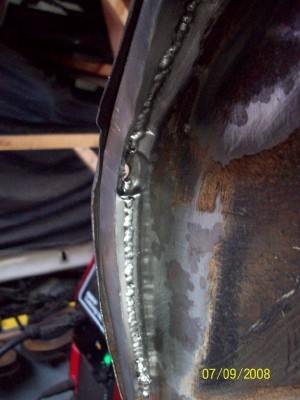
after that it was back again to that rear quarter panel repair and the
rusted section hidden behind the back bumper. Surprisingly we didn't
have to wait for the wire brush to find out the extent of the rust here....
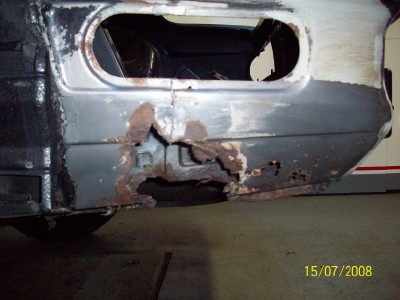
again cut out all that was coloured that expensive shade of browny
orange...
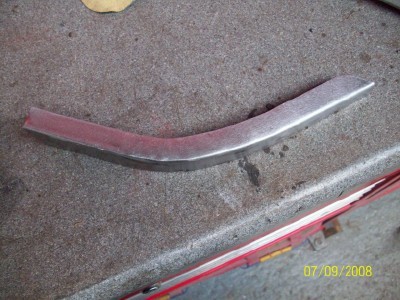
and make up some new pieces to fill up the holes.....
don't mind admitting this one took a few goes to get the bends right...
and thats about where it's up to now. Still plenty of rust to go and
still have to figure out what way to go at the rear arches. Loads of
stuff planed for the rebuild but we'll save that for down the line,
next installment could be fun though, as we attempt to swap a perfectly
good sun roof for a freshly purchased non sunroof roof.....

will she end up a soft top??
.
.
.
STAY TUNED
Last edited by x-works on Fri Mar 04, 2016 9:59 pm, edited 48 times in total.
-
Blitz
- Married to the E30 Zone

- Posts: 11151
- Joined: Mon Jan 30, 2006 11:00 pm
- Location: East London+Basildon
Post
Wed Jul 23, 2008 12:44 am
Exellent stuff, your M3 is lovely.
-
TopSod
- E30 Zone Regular
- Posts: 393
- Joined: Thu May 15, 2008 11:00 pm
- Location: Carlisle
Post
Wed Jul 23, 2008 8:23 am
Good stuff, lots of detail. When's the next update
-
d6dph
- Married to the E30 Zone
- Posts: 12435
- Joined: Sun Aug 14, 2005 11:00 pm
- Location: Tiptree. Essex
Post
Wed Jul 23, 2008 8:51 am
I get the feeling this is going to be another awesome thread.
What's the escort under the M parts? That rear section of the sill almost looks cosworth to my untrained eye.

-
NatDJ
- Dyson deviant

- Posts: 315
- Joined: Tue Mar 11, 2008 11:00 pm
- Location: Essex
Post
Wed Jul 23, 2008 8:54 am
I want that garage! As Dave says......a truely awesome thread in the making. Great work that man!
And yes that is a cossie under the ikea shelving rack!

pretty old white OZ's too. Very nice.
-
Demlotcrew
- E30 Zone Team Member

- Posts: 13329
- Joined: Mon Dec 20, 2004 11:00 pm
- Location: East Anglia
Post
Wed Jul 23, 2008 11:15 am
Very nice Place!
Love the work

-
bmwe30mtech
- Engaged to the E30 Zone
- Posts: 5288
- Joined: Thu Feb 03, 2005 11:00 pm
Post
Wed Jul 23, 2008 11:26 am
Excellent work, and great write up
1988 M3 EvoII, Macau Blue/EvoII trim
1989 325i Sport M Tech II, Diamond Black/Black leather
-
daimlerman
- **BANNED**
- Posts: 15968
- Joined: Mon Feb 27, 2006 11:00 pm
- Location: Grumpy Old Man
Post
Wed Jul 23, 2008 12:04 pm
Once again X-Works is showing his skills,thanks for sharing the effort with us.

Youth is wasted on the young.
-
2_stroke
- E30 Zone Newbie
- Posts: 212
- Joined: Mon Jul 14, 2008 11:00 pm
Post
Wed Jul 23, 2008 12:15 pm
dude next time i get some problem rust im gonna find ya lol great car and a great job love it

-
Jon_Bmw
- Dangerous when thinking
- Posts: 7604
- Joined: Tue Jan 11, 2005 11:00 pm
- Location: Salisbury
Post
Wed Jul 23, 2008 12:15 pm
A garage with a Pit, I WANT!
Your alfa engine e30 was great, so I was expecting good things on opening this thread, I wasn't disapointed.
Well done.
-
MartC
- E30 Zone Newbie
- Posts: 94
- Joined: Wed May 14, 2008 11:00 pm
- Location: Hemel Hempstead
Post
Wed Jul 23, 2008 12:32 pm
Some very good work there mate
Nice tidy welds.
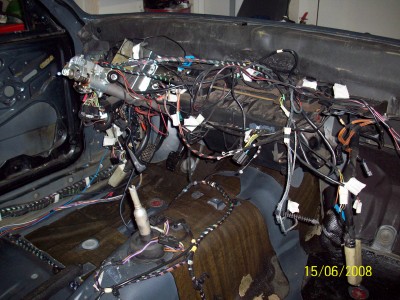
Didn't quite expect to see the car so far stripped down. Isn't it a real pain to get the loom all seated in properly come refit time? And remembering where it all routes
-
bss325i
- E30 Zone Team Member
- Posts: 24532
- Joined: Sat Jan 20, 2007 11:00 pm
- Location: London/Surrey
Post
Wed Jul 23, 2008 6:43 pm
Excelent work there!
-
RJB6
- E30zones oldest newbie
- Posts: 306
- Joined: Mon Jan 10, 2005 11:00 pm
Post
Wed Jul 23, 2008 9:21 pm
Hi, did you expect the rust to be that bad in places? I can see that your doing a excellant job,but as I found out that getting rid of the rust is the easy bit the hard work is yet to come.Remembering where everything goes

keep up the good work.
Roy
-
ShakeyC
- E30 Zone Regular
- Posts: 785
- Joined: Sun Apr 29, 2007 11:00 pm
Post
Wed Jul 23, 2008 10:25 pm
You definately do not do half jobs, think this maybe another epic
-
maxfield
- Old Skooler

- Posts: 15185
- Joined: Sat Nov 26, 2005 11:00 pm
- Location: Mansfield
-
Simon13
- The longest resto in the world !
- Posts: 22697
- Joined: Mon Jan 10, 2005 11:00 pm
- Location: Camberley, Surrey don't u know
Post
Wed Jul 23, 2008 10:42 pm
Wow, some hero action going on here! Nice metal work.
You going aircon retro fit and binning the sunroof with all it's potential rust issues then?
-
x-works
- E30 Zone Regular
- Posts: 332
- Joined: Thu Mar 10, 2005 11:00 pm
- Location: Ireland
Post
Thu Jul 24, 2008 5:39 pm
Cheers for the kind words lads,
@ Topsod
next update will come when either we get something worth showing
finished or make a spectacular balls of something, either way shouldn't be
to long.
@ d6dph
well spotted, it a wrc shell converted to rwd, n/a opel engine,
ford sequential gearbox. Started that one 5 years ago, should be finished
any day now. 
@ MartC
Going to try and trim as much unnecessary weight as possible out
of the car on the way back and this hopefully will include redoing the looms
to only include exactly what is needed. Lot of wiring in there thats redundant.
Found a tracker system under the rear parcel shelf that'll
never be used, they don't work over here. As for routing it all neatly so
it looks right, sure isn't that why they fit carpets over it.
@ RJB6
I knew she had a fair bit lurking in there, and having stripped a
fair few shells before you kinda learn to expect it I suppose. The only thing we
tend to be nervous about is finding bent chassis, or finding out your
pride and joy used to actually be two peoples pride and joy, now lovingly
welded together.
@ Simon13
No actually just hate sunroofs, and the extra weight involved.
Would have felt a bit better if the roof was rotten, but as Murphys law
would have it, it's spotless.
Cheers...
Last edited by x-works on Mon Jan 26, 2009 10:25 pm, edited 2 times in total.
-
bigbird76
- E30 Zone Regular
- Posts: 571
- Joined: Sat Feb 16, 2008 11:00 pm
- Location: Swansea Wales UK
Post
Fri Jul 25, 2008 5:39 pm
x-works
I see your fusebox is out as there is no wiring left in your car, Im sure you know but check the area around and under that area, if you peel off the seamsealer you might find a nasty surprise there,Also under the scuttle in the heater area corners etc. Im currently doing the same work as you are with my Evo II and i had to cut out and replace some of the bulkhead on my M3 due to this problem.
Goodluck with it
Leigh
-
x-works
- E30 Zone Regular
- Posts: 332
- Joined: Thu Mar 10, 2005 11:00 pm
- Location: Ireland
Post
Mon Jul 28, 2008 10:02 pm
Thanks for the heads up Leigh, going to have a good poke around
at the fuse box and see if theres anything lurking. You seem to be
doing a fairly comprehensive job on yours, best of luck with it.
Front bulkhead seems to be a fairly common place for "surprises"
doesn't it.
Last edited by x-works on Mon Jan 26, 2009 10:25 pm, edited 1 time in total.
-
x-works
- E30 Zone Regular
- Posts: 332
- Joined: Thu Mar 10, 2005 11:00 pm
- Location: Ireland
Post
Fri Aug 01, 2008 12:26 am
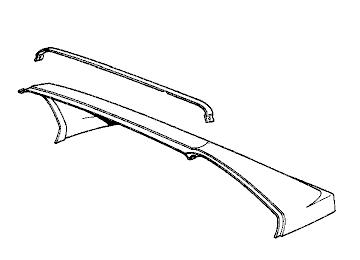
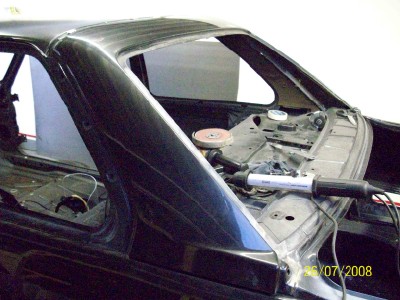
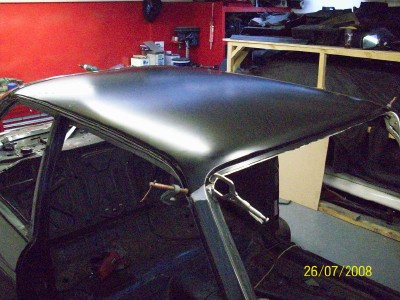
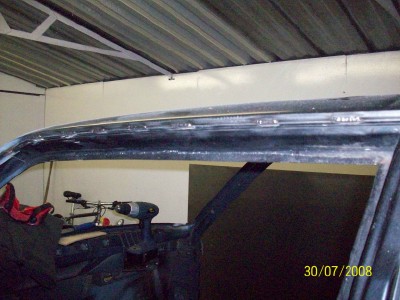
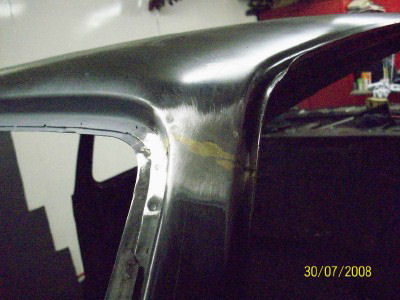
We managed to get some progress done since the last post, the main
item being the attempt to change the roof. When originally setting out to
look for an M3 in the begining I had wanted one without a sunroof
but this proved all but impossible to find at the time so instead I settled for
a car with one. (which I bought off a member on here, howya steve if your
still tuned in!). So when planning this rebuild I decided that if so much work
was going to be done to the shell, changing the roof wouldn't add much more
effort, plus it'd get rid of a nice bit of weight to.
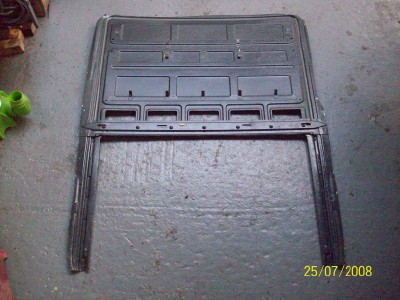
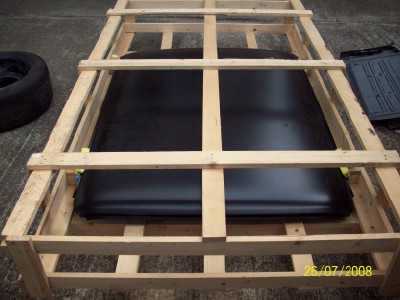
So after buying the roof skin from the local dealer, which is the same skin
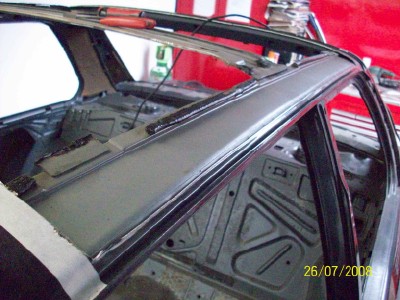
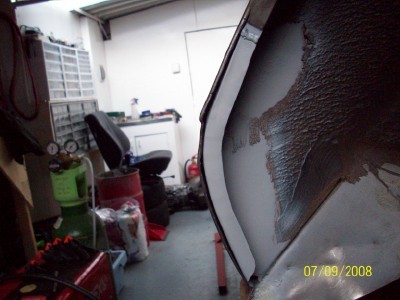
as any other e30, we set about seeing what was involved in changing it.
From studying the parts diagrams it appeared that the rear roof addition
could be removed by drilling some spot welds to get access to the roof below
it.....
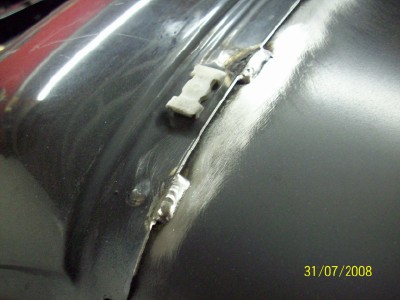
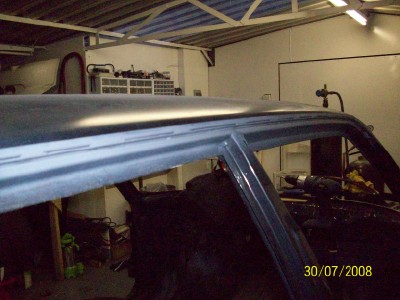
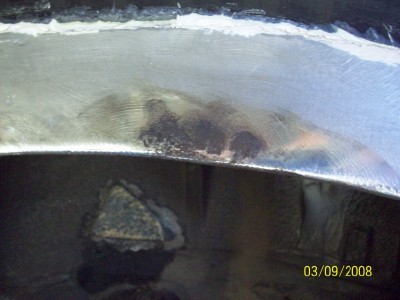
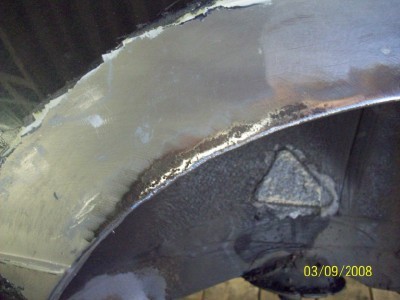
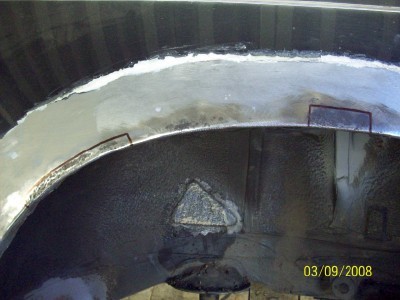
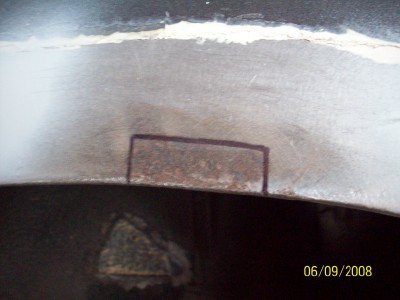
however when we started to clean around this panel to reveal the spot
welds that would have to be drilled we discovered that not only was the
panel a bit bigger than we had expected but it was also brazed in
places (i've outlined the panel in red to try and show a bit clearer what is
all one panel)........
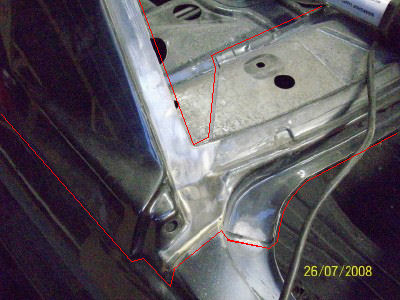
and it continued all the way over to the other side.......
we hadn't minded the taughts of drilling out the spot welds around the
windscreen lip and the ones across the roof, but, in having to heat the panel
up to remove the braze and then removing the whole section across the
parcel shelf we were fairly sure we'd f**k the panel up,
which takes on a little more significance when your told the panel is no
longer available to buy. So instead we decided to do it like this.
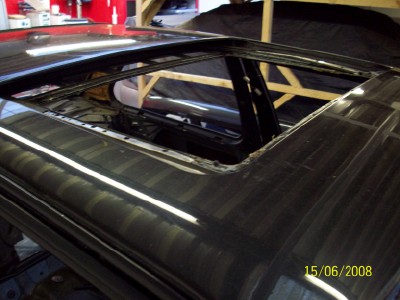
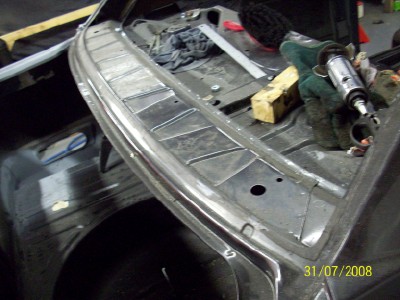
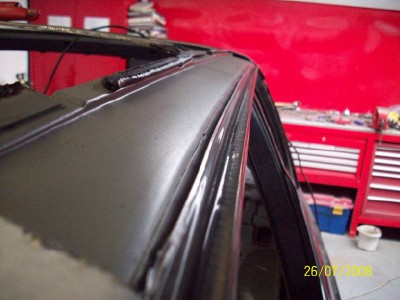
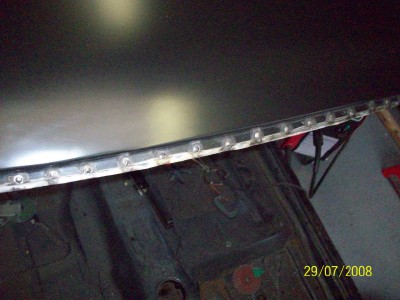
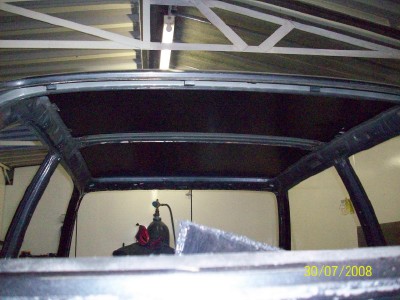
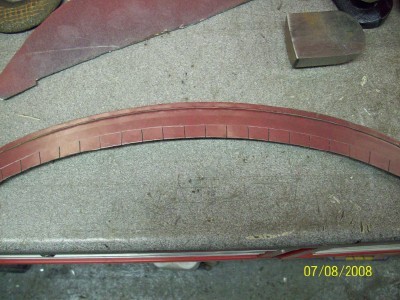
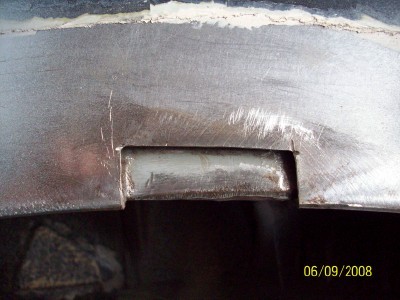
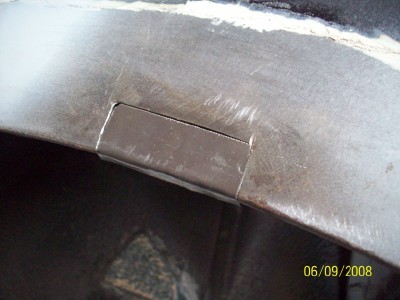
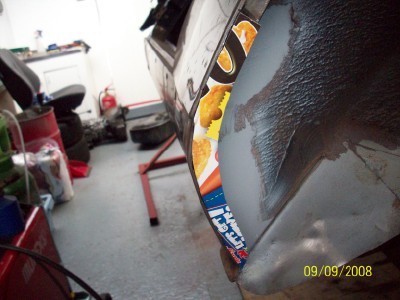
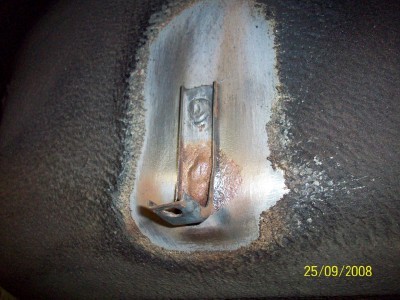
first up cut out the lower section of the sunroof tray.....
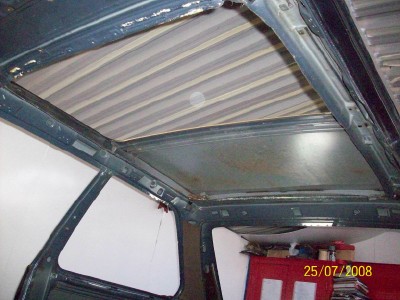
which allows a good view of the brace that runs across the roof right
behind the sunroof opening. This had to stay, as cutting this out leaves
the roof very very flexible.
next up cut out the roof behind this brace......
which allows better access to carefully trim the metal off the brace.....
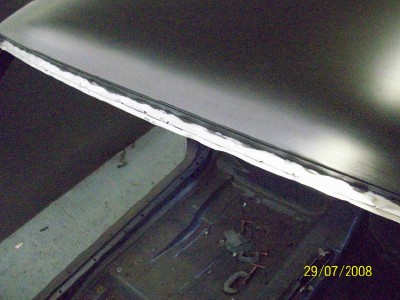
the sidewalls of the sunroof tray were still stuck to the brace and while
they at first glance look as if they are just bonded to it......
they are in fact spot welded to it.......
so drill the spot welds and carefully prise it free....
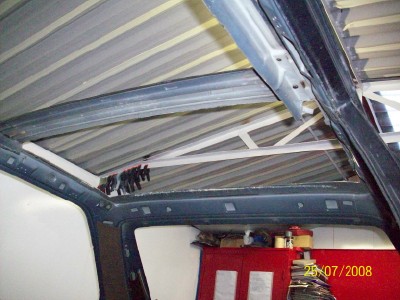
next up, the roof skin at the rear of the sunroof hole rolls in around
this brace.....
and the lip was buffed with the angle grinder untill the lip could be broken off without doing any damage to the brace. With everything now disconected underneath from the brace all that remained was to remove
the roof skin from above it. Two carefull cuts......
and then peal the skin off.....
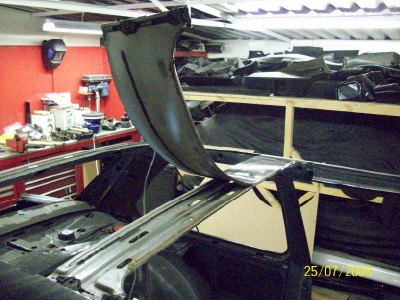
revealing the roof brace....
with that done a few more carefull cuts were made to remove the side bits
of the roof skin.....
the reason why we needed to be carefull with the cuts was the roof
skeleton was only a few mm below the roof skin and we didn't want to
touch it.
with the skin cut down to the drain gutters on the side of the roof, these
were then buffed down with the angle grider to the flat mating surface,
ready for the new skin to sit on top (sorry lost the pic).
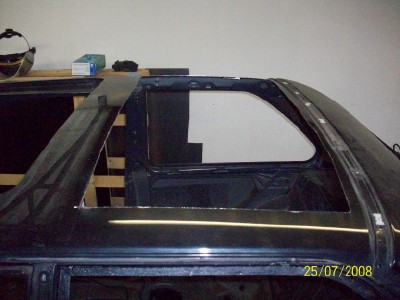
The last remaining piece of skin was the front section which involved
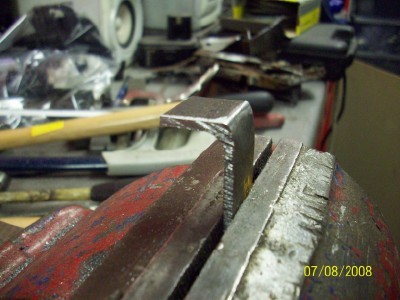
drilling out the spot welds around the windscreen lip and cutting it off....
the original roof is brazed on at the top of the front windscreen pillars
and this was removed by getting out the gas bottles and melting the braze
again to allow the last little bit of skin to be pulled off.....

after stopping for a brief smoke and whats reffered to in medical terms
as a sh*te attack when the realisation kicked in that I'd just cut a
perfectly good roof off my M3 ,  we moved on swiftly.
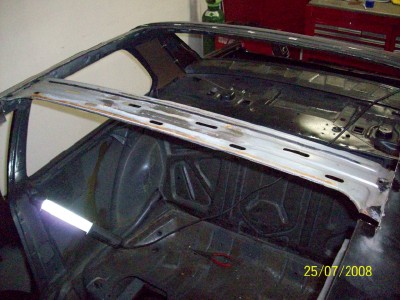
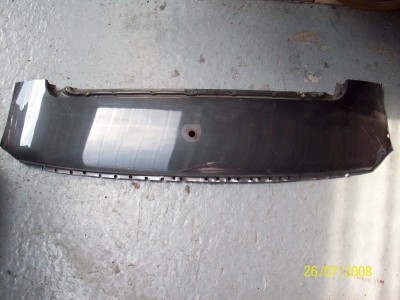
remove the new roof from it's fancy crate.....
and then offer up the roof to see how it fits. As said earlier we had decided not
to remove the rear panel which concealed a couple of inches
of the roof skin and instead decided to cut and weld the roof here instead.
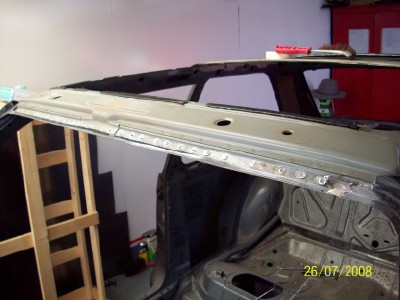
First up mark the roof to trim off the overhang....
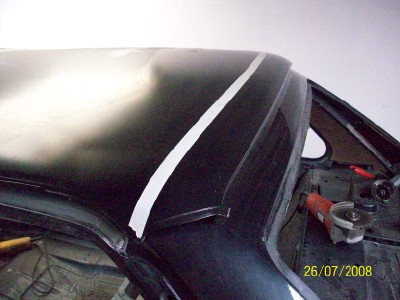
and then refit the roof skin to see if we'd measured right.....

thankfully we did, and the roof sat nicely in place as we had left an inch
of the old skin protruding out and had joggled this down allowing the
new roof to sit on top of it......
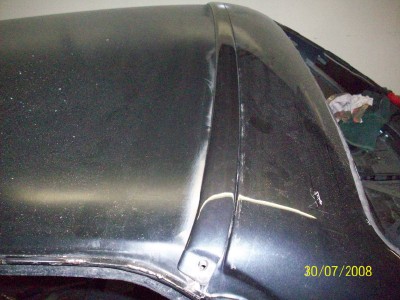
next up was to trim the "A" pillar joins and get them sitting right.....
a couple of laps around the car buffing down metal to ensure the roof
was sitting snuggly before welding started......
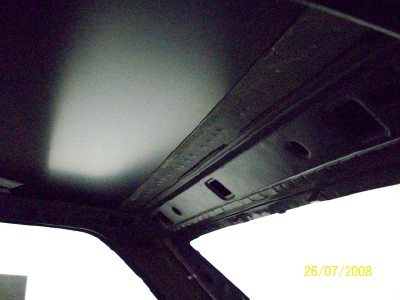
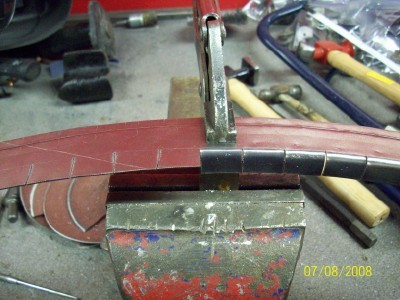
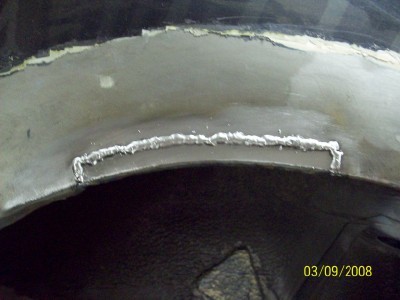
and then we started welding at the rear first working our way forward,
after each weld was done it was quickly quenched with a wet rag to try
stop the heat from soaking into the roof skin and warping it.....
ideally it would have been nice to use a spot welder for this but we don't
have one and after pricing a decent one decided that it wasn't worth
buying one just for this job, so mig it is.....
the nice part about this run of welds is that theres a nice little brace
that sits on the roof which conceals everything.....
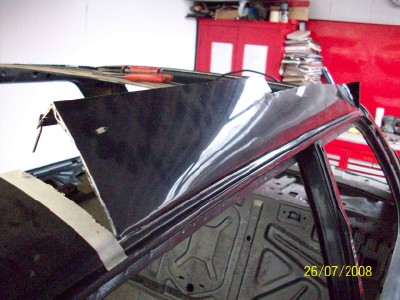
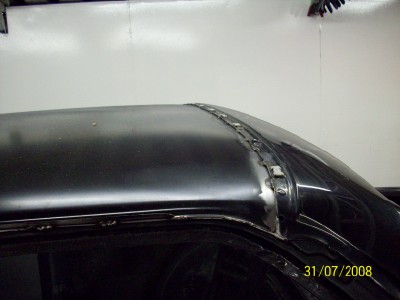
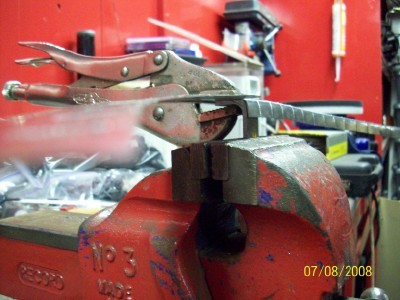
we then moved on to the sides, on the original roof the gutters appear to
be continously roll welded, I've no idea whats required to replicate this
and hassard a guess that the equipment required would cost the same if
not more than the spot welder, so, mig welder at the ready we ran a
bead of weld an inch long every few inches........
and buffed them down flush when finished so the black rail trim pieces
will fit back over.......
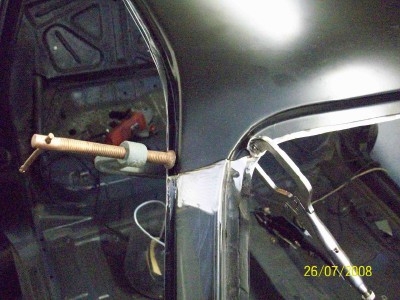
next up was drill and plug weld around the front windscreen lip.....
and finally braze up the "A" pillar joints.....
and hey presto, no sunroof.....
thank f**k thats done, not that we were ever nervous of making a balls
of it you understand 
hope to tackle the rear arches next.
.
.
.
STAY TUNED
Last edited by x-works on Fri Mar 04, 2016 10:06 pm, edited 10 times in total.
-
e30bmlover
- Ac Schnitzer prophet
- Posts: 5352
- Joined: Sun Sep 11, 2005 11:00 pm
- Location: Playing on the ring road!!!
Post
Fri Aug 01, 2008 12:48 am
jesus christ man! thats allot of work right there! keep it up
-
MartC
- E30 Zone Newbie
- Posts: 94
- Joined: Wed May 14, 2008 11:00 pm
- Location: Hemel Hempstead
Post
Fri Aug 01, 2008 6:43 am
I think you should now be refered to as Fruit Loop

hats off though mate, it all looks like good work
Couple of things I don't understand, how do you run such a nice long bead of weld without it starting to blow through? and did you end up cutting the old roof gutter off? Looks like the new roof skin comes with a gutter in place
-
x-works
- E30 Zone Regular
- Posts: 332
- Joined: Thu Mar 10, 2005 11:00 pm
- Location: Ireland
Post
Mon Aug 04, 2008 2:10 pm
the welds aren't continuous they're spotted ie. do a spot every inch over and over again till
you have a continuous line welded. Theres probably a better way of doing it but it works for
me.
The roof gutter was cut off, and the bottom of the gutter was buffed down with the grinder
till there was just the mating surface (lower panel) left for the new roof gutter to sit on.
Unfortunately although I thought I had a picture of this, the camera seems to have ate it 
Last edited by x-works on Mon Jan 26, 2009 10:27 pm, edited 1 time in total.
-
bmwbreaker
- E30 Zone Newbie
- Posts: 148
- Joined: Sun Jan 08, 2006 11:00 pm
Post
Mon Aug 04, 2008 4:37 pm
top work mate, looking forward to more updates

-
gazm3
- E30 Zone Addict
- Posts: 3323
- Joined: Sun Jan 09, 2005 11:00 pm
Post
Mon Aug 04, 2008 4:52 pm
Wow, very good work indeed.
Great read and quality update.
-
cassa-d
- E30 Zone Newbie
- Posts: 235
- Joined: Sun Jul 06, 2008 11:00 pm
- Location: Kent
-
x-works
- E30 Zone Regular
- Posts: 332
- Joined: Thu Mar 10, 2005 11:00 pm
- Location: Ireland
Post
Fri Aug 22, 2008 10:36 pm
Got a bit more done since last post.
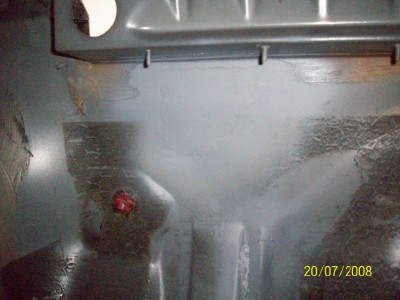
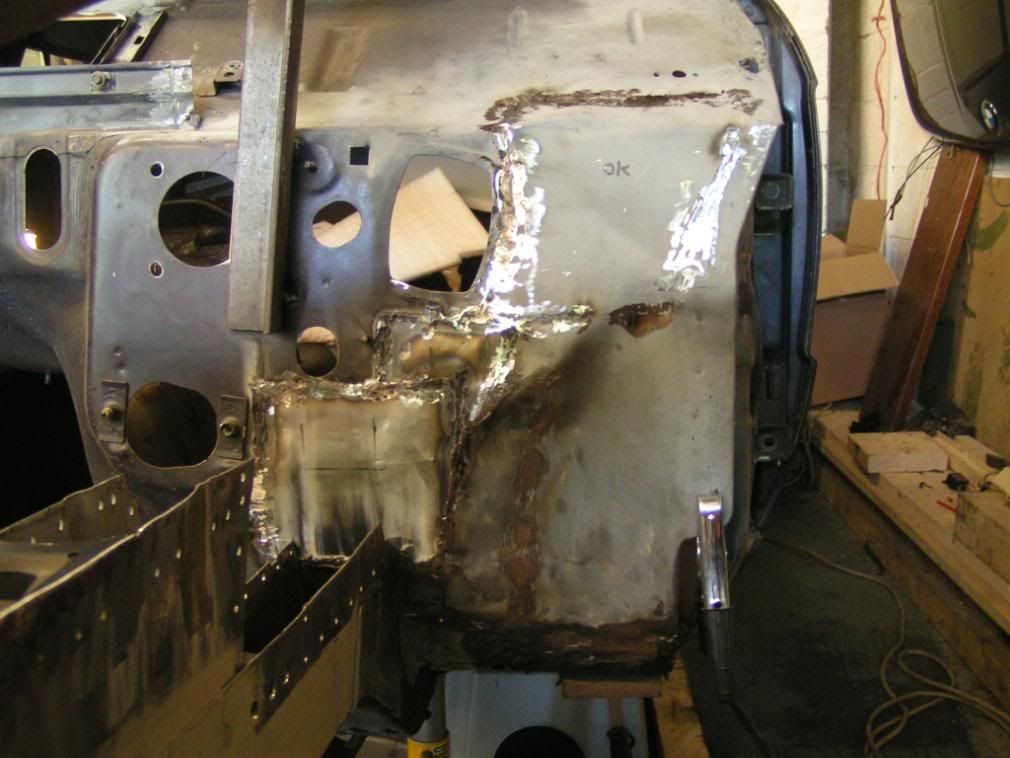
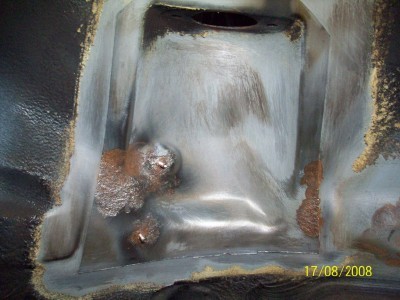
First up was to sort out the battery box on the passenger side.
Thankfully it wasn't as bad as the other side, but it was still far from
perfect, that'd be far to easy.....
when cleaned up fully it wasn't to big....
but it had also spread to the battery box floor aswell....
so out with the grinder....


and make up the replacement pieces, weld in and grind down neat.....

next up was a little bubble just above this, which when paint stripped
revealed this.....
no idea how that one started? anywho, it wasn't too bad from the inside....
but with the outside wire brushed you could see it had to go....
so, cut out....
make up piece and weld in and clean up.....
was shifting along at a nice pace at this stage and could see only one
more little piece on this section, lovely, get this finished tonight....
aaah fu*k.....
the rust had actually started from the inside wheel arch skin and spread
to the outer panel as they run quite close together......
so, all together now.... cut
fabricate.... (like that word?, sounds real fancy for beating the shit out
of a piece of steel till it roughly resembles the bit you hacked off)
fab and weld inner skin (it's now "fab" instead of fabricate, with the
amount of bloody rust popin up on this thing i'm going to be typing that
word alot).....
not getting to carried away cleaning the welds flush on this one, it's
behind the bumper and behind the bumper bracket.....

if someone sees it, it should mean i've just run over them, in which case
they're unlikely to tell anybody about it.
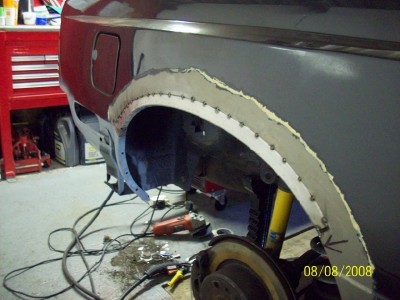
right enough of that micky mouse crap, time to start hackin the arch off.
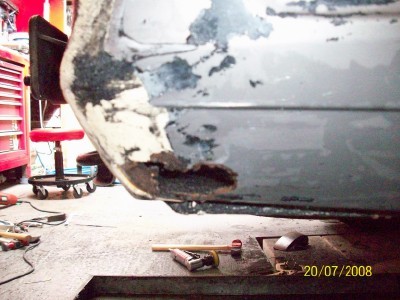
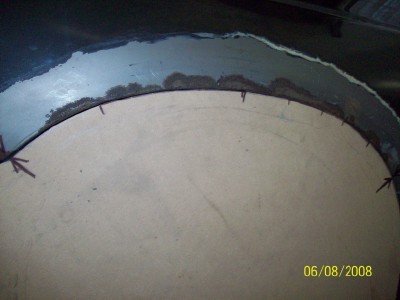
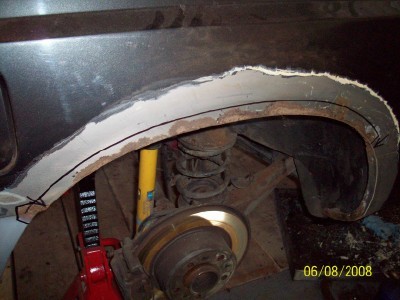
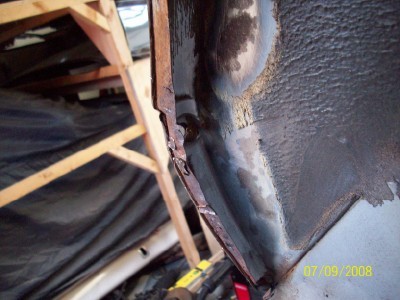
With the paint stripped off you could see how far the rust had spread up....
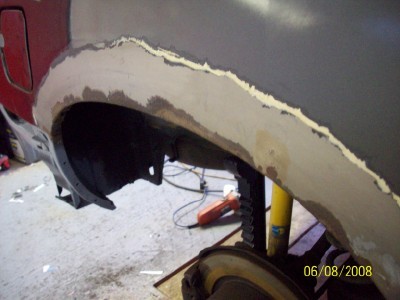
and although the main face of the arch hadn't holed through with the rust,
the lip inside when bent back down from the ""PROFESSIONAL"" arch
rolling job, looked to be totally shot to bits.....
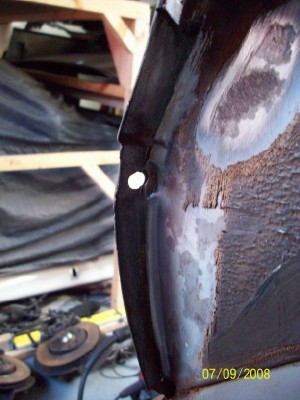
reckoned that since the outside skin was this bad most probably the inner
skin would be shite too and both would probably need cutting back. I then
realised with both bits going to be cut away I was going to need a template
of some sort to help form the new arch metal in to the same shape. So
before cutting anything I bent up and cut a bit of mdf to act as a guide....
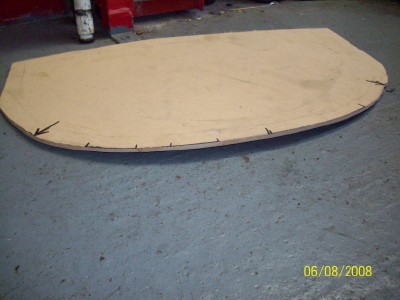
with that done it was time to mark up what had to go.....
and then chop it out to reveal a pleasant suprise....
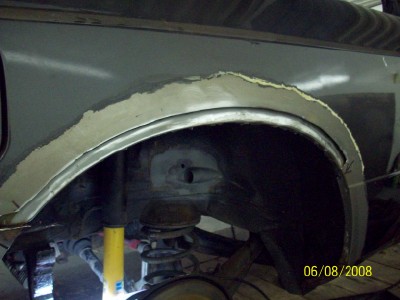
the inner skin was untouched by the brown pox, even the lip cleaned up
with a slight wire brush, marvelous, see that, if this was an Italian car the
bloody axle probably would have fell out on that last cut. These Germans
know what their at.
anywho, now that you could see what need to be replaced we could get on
with making up the replacement piece.
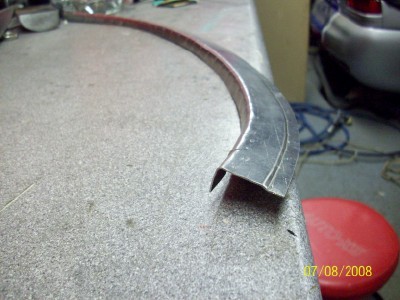
Draw up a piece from the bit that was cut off....

leaving 10mm above the piece to tuck in behind the original skin, and
20mm below the piece to roll under for the arch lip....
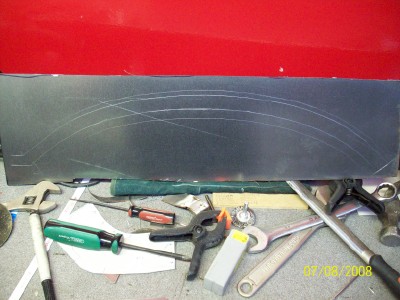
we picked up this tool a few years ago and it's fairly handy for pieces
like this, think it's called a "joggler", probably wrong though, don't blame
me if they start laughing at ya when you ask for one down the tool shop.....
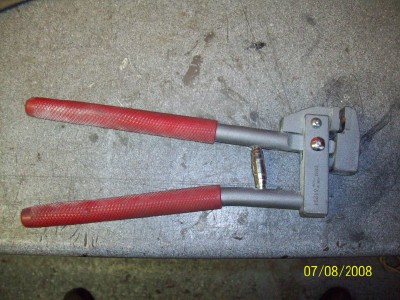
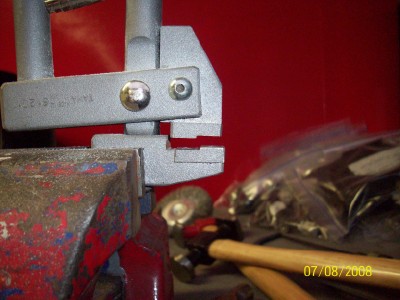
and when you look at it up close you can see the teeth which bends the
metal are shaped to bend it so the new piece runs up behind the
original piece.....
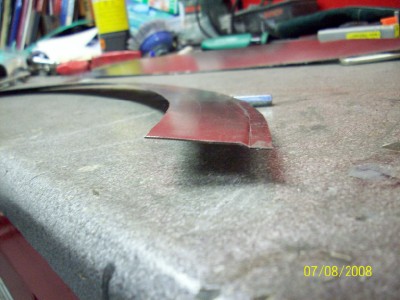
like so.....
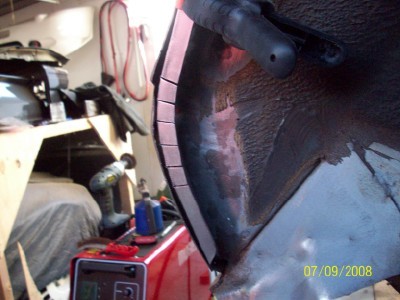
next was to cut a few slits in it to allow the 90 degree bend for the lip on
the bottom of the arch....
and after studying the other arch you could see that the bend wasn't a
sharp 90degree but a little curved, so we made a little dolly piece to
bend the metal over....
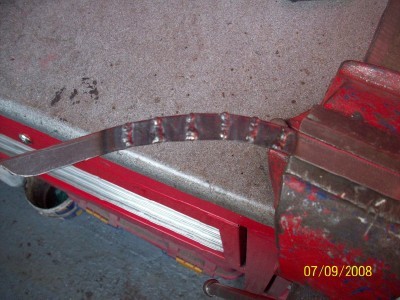
and then bent it piece by piece......
which left it looking like this....
the last thing to do was drill a few holes in the lip so it could be plug
welded to the inner arch lip....
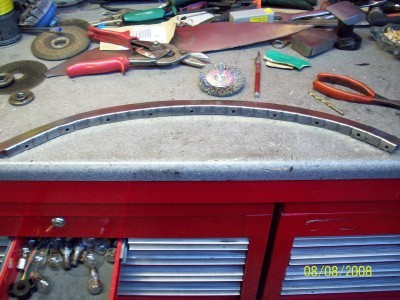
and then start the long process of weldin it in, bit by bit.....
spot by spot, till it's one continuous line of weld.....
and when it's finished grind the welds down smooth....

and weld the two lips together and all the little slits....
it's not 100% perfect, up close you can see where metals been added in,
nothing a light skim of filler won't hide though, isopon, the life blood of
many a bodger.
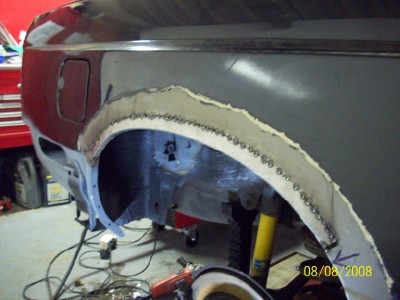
with that done there was just a little piece at the back of the arch which
was left....
time to move inside the wheel arch then, on the whole the main metal work
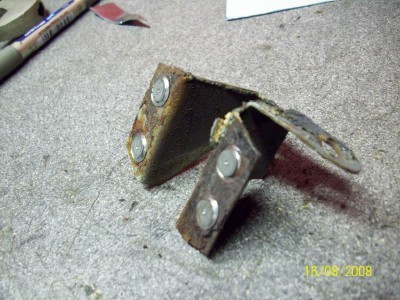
looked ok in there, but anywhere there was a bracket or something
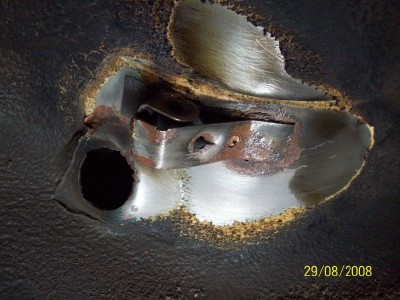
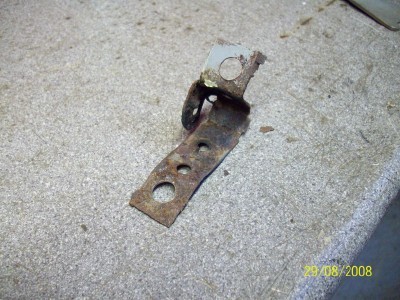
sticking out had caught the pox, such as this little lad which supports
the plastic wheel arch liner....
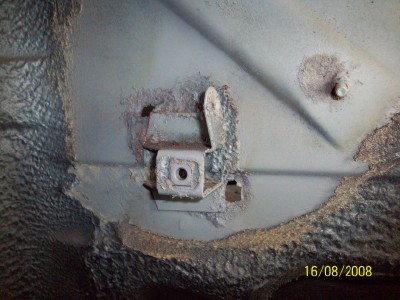
when viewed from the inside it had actually holed through the panel....
so off with the bracket and cut.....
copy and paste....
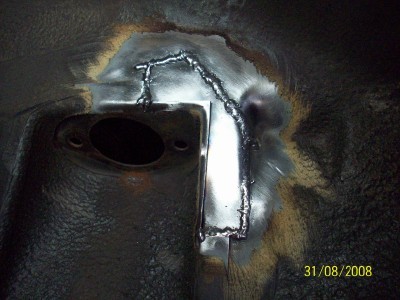
bracket it's self wasn't to bad and cleaned up grand to go back on again...
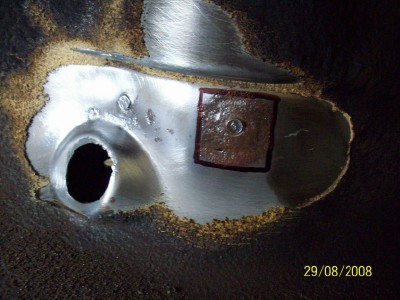
next up was the little cover that runs over the fuel tank breather pipes
in the arch and if the other parts of the shell had caught the pox this bit had
contracted the plague. Heres what it should look like.....
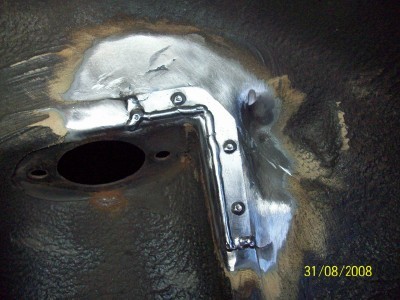
and here's what's left intact of the old one once removed, the differences
are quite subtle at first glance, but those with a keen eye should be able
to tell the two apart....
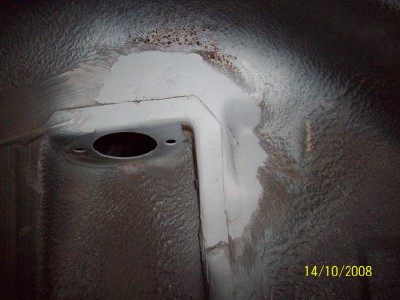
unfortunately while the cover was an easy swap, the bit's the cover rested
against and had got infected took a little more effort.....


had hoped this next bit would be available from the dealer as a replacement
panel.....
but after checking with realoem and then the dealer it appears that the
shock tower pictured only comes with the whole inner wheel arch liner.
So she'll get the cut and paste job to.
And that's where we're at at the moment, have to go now as it's taken that long to post this up
the fu*kin cars probably started rusting again.....
STAY TUNED
Last edited by x-works on Fri Mar 04, 2016 10:26 pm, edited 4 times in total.
-
x-works
- E30 Zone Regular
- Posts: 332
- Joined: Thu Mar 10, 2005 11:00 pm
- Location: Ireland
Post
Tue Oct 14, 2008 10:05 pm
Been a while since the last update, reason being we've had some engine woe's, a bit hard to understand when your cars just a bare shell, but alas it was not the M3 engine that was the cause for grief. Instead it was the turn of the 325 I bought to get me around while the M was off the road that decided it was time she had some attention too.
For a while now I've been the proud owner of an environmentally friendly "biofuel" 325. She run's on both petrol and water, but when she started to use more water than petrol there was no avoiding it any longer. Work had to pause on the M to sort the head gasket on the 325.
Thankfully the few gaskets needed for the 325 didn't amount to much and the job was a quick one, however the other half of Xworks motorsport didn't quite fair out quite so lucky when his engine decided to let go at the same time. It took a lot more funds and effort to get this kitten purring
again....
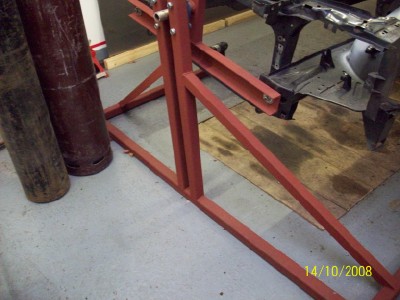
with the engine woe's out of the way we were able to return to the BM again and something we've been meaning to get around to for a few years now. All the shells we've worked on in the past we've usually
rolled over on to some old tires to gain access to underneath, and while this has worked ok, it's not very elegant and an ability to hold a shell at a different angle while working on it can be very helpful. So, some box,
angle, tube, channel and a pair of housed bearings led to the creation of this....
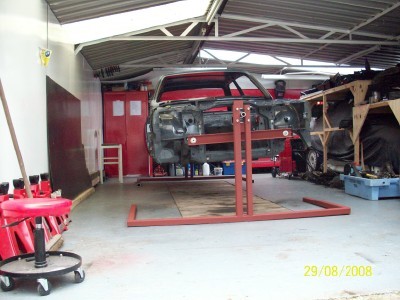
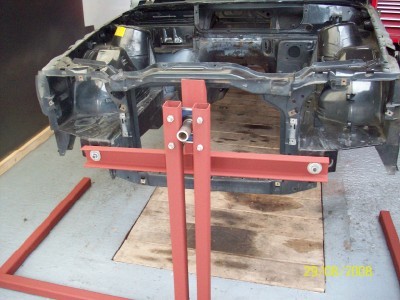
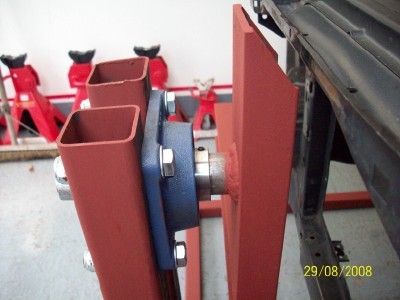
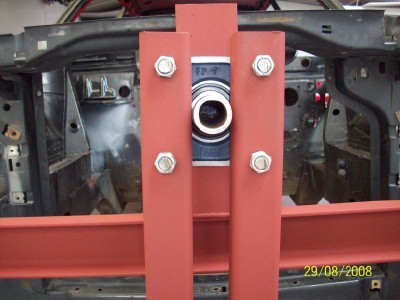
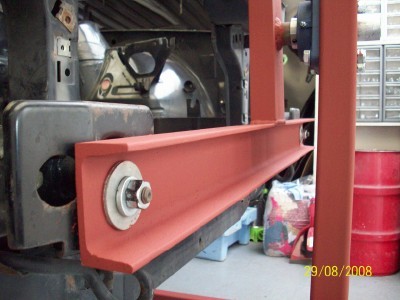
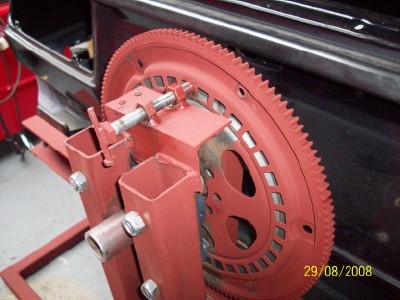
the spit is designed for the weight of a bare shell and it can be rotated with one hand. Both front and back stands are identical, bar the locking mechanism welded to the rear stand to hold the shell at the desired angle. We used an automatic driveplate as it had a circle of holes allready in it and saved us having to make up and dill a plate.
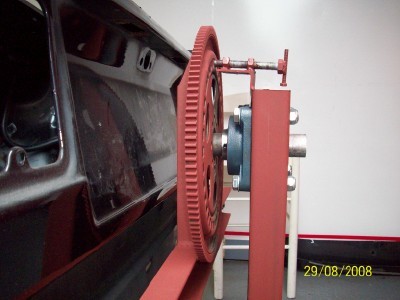
the uprights of the spit were made just tall enough to rotate the shell 90 degrees as seen below....
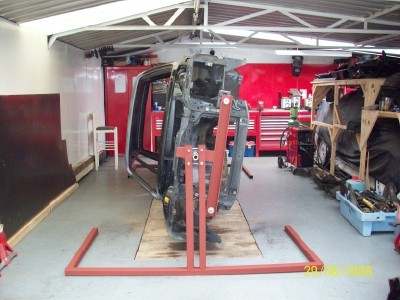
it has worked out very handy and both of us agreed we should have made one years ago, especially when the metal and bearings needed to make it only costed around €140.
one slight modification we made to it when up and running was the addition of 2 outriggers front and back. As we found the shell had an irritating habit of rocking ever so slightly back and forward when you were sanding or wire brushing along the axis of the spit. The outriggers
cured this.

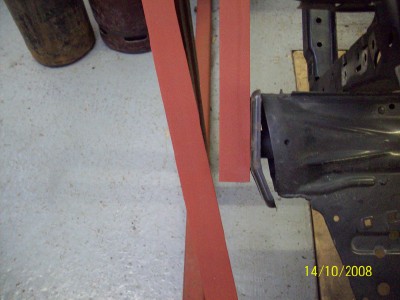
if anyone tuned in decides they're going to build one for themselves in the future I've drawn up a few measurements in the link below that may help.
http://www.xworksmotorsport.com/m3%20bu ... 282%29.JPG
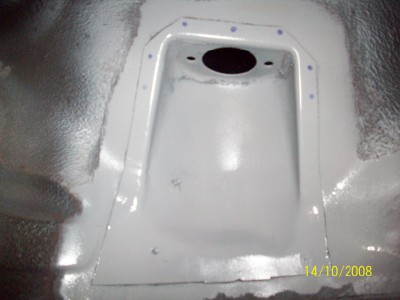
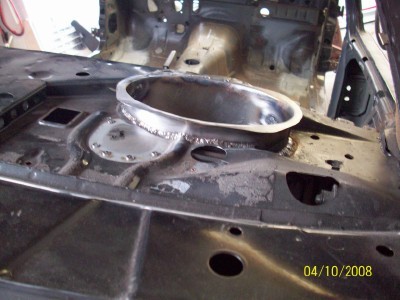
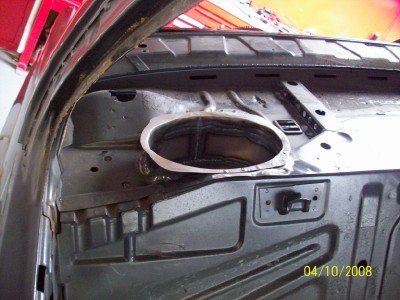
with the spit finished it was back to the shell and where we left off last post. The passenger side rear shock tower. As mentioned earlier the shock tower isn't available as a separate piece, only as a part of the
whole wheel arch inner skin. So after a cut and paste this was the end result......
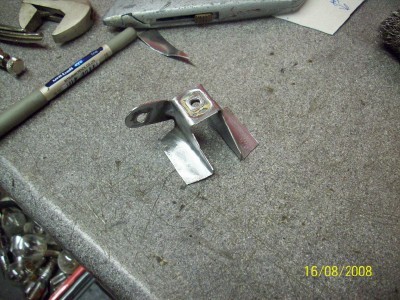
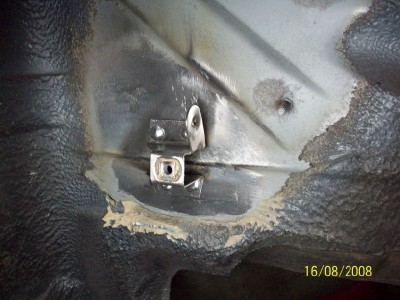
the only thing left to finish in this arch was a small bracket at the top of it, which was fairly well gone.....
thankfully with the bracket removed it hadn't done much damage to the arch skin....
the bracket however was kaput....
so make a new bracket.....
and repair the arch skin before rewelding the bracket left it looking
fine again....
After this it was on to the arch the other side, starting again with the shock tower. This time the actual tower itself was fine, but instead the arch skin right behind it had let go.....
2 choices, either crawl into the boot and cut and repair the skin fromin there, or, cut a piece of the shock tower out of the way to do the repair from the outside.....
innar skin repair piece.....
welded.....
shock tower piece remade and rewelded.....
cleaned up and a lick of primer......
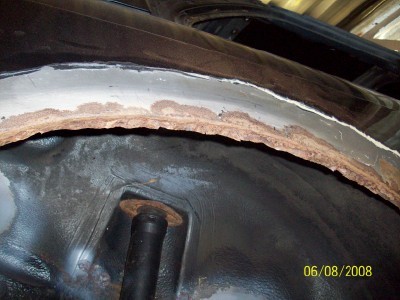
After that it was on to the arch itself. Thankfully it wasn't as bad as the far side when cleaned up.....
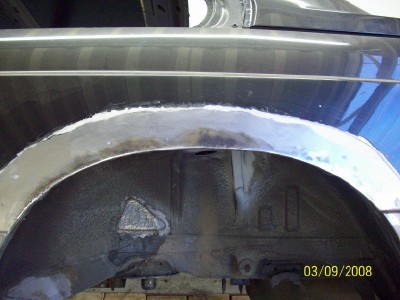
two small sections needed replacing......

then on to the lip itself. Again the outer lip once unrolled was wasted but the innar lip was fine once wire brushed.......
so new lip made up and clamped in ready for welding.......
next up, further down the arch where the side skirt sits over.
When wire brushed up it looked ropey......
So off it came to reveal the source of the problem, the innar skin
so off it came too.....
inner piece made first......
and then the outer piece.......
next up one of the holes on the sill where the side skirt clips
go through was looking the worse for ware......
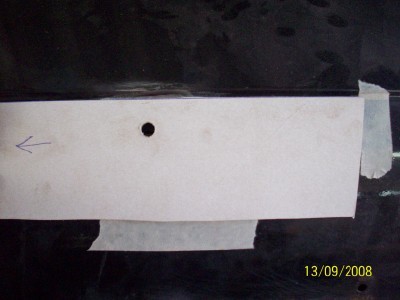
before cutting it out time was taken to make a template of the
holes position. The last thing you want to have to do when reassembling
a freshly painted car is to have to file or redrill new holes in the nice
paintwork. So a few bits of tape as markers and a bit of cardboard with
the holes position marked on it......
with the piece cut out it now became a bit awkward to offer up and
trim the new piece as there is no access to the inside of the sill. A nail
came to the rescue.....
and then offer up the template back into position to get the exact
position of the hole.....
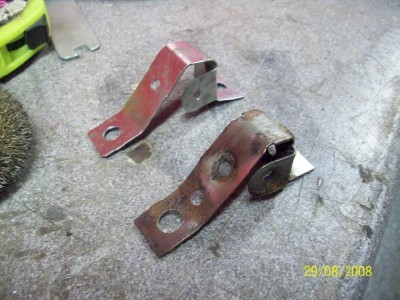
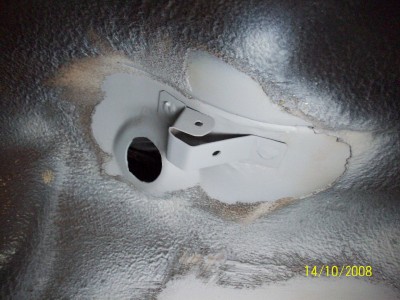
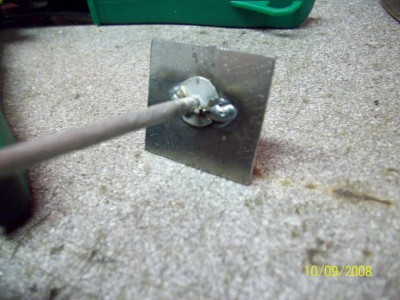
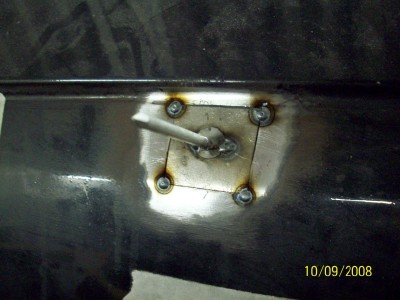
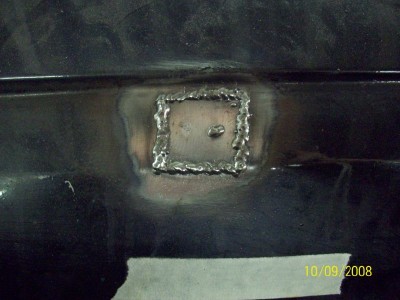
next a few more brackets on the outside of the spare wheel well
needed replacing.....
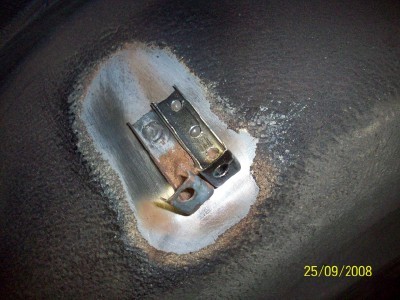
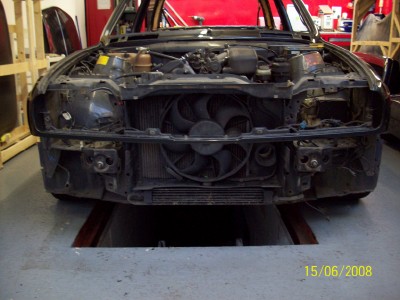
after which a few brackets were removed from the engine bay that
won't be needed down the line......

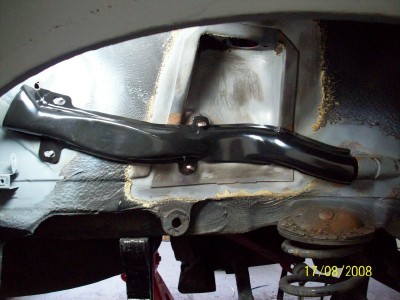
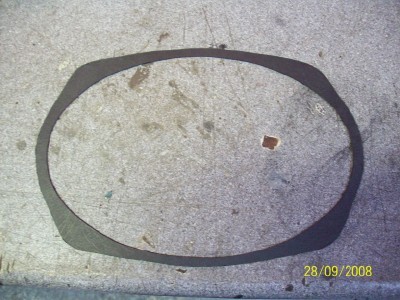
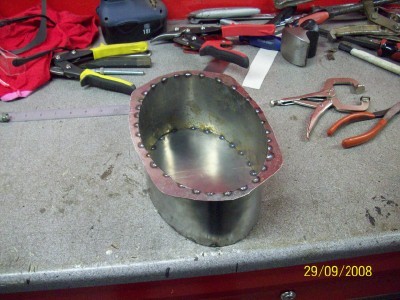
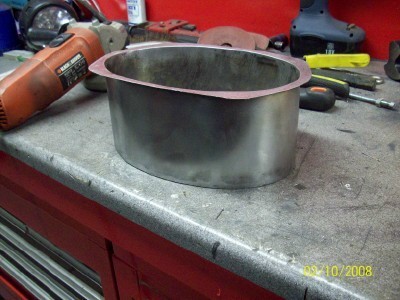
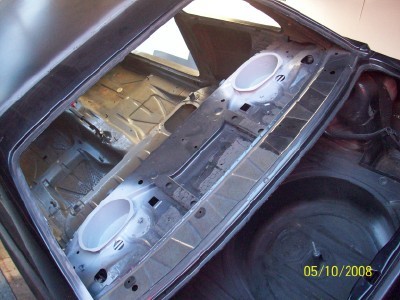
and finally a modification which probably won't be to everyone's
tastes. When I bought the car it had a nice set of rear speakers sitting
on the rear parcel shelf, but, the sound was poor because of no real
box to enclose them in the parcel shelf.
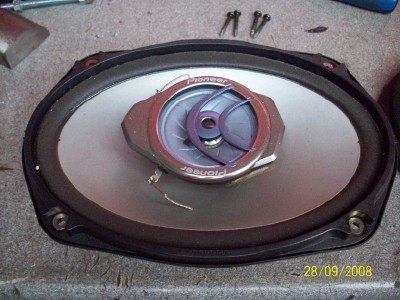
So...... (lovers of originality look away now!)

and thats about it for now, thankfully the end of the rust repair is
near, which means it's nearly time for a 500mile round trip to give the
shell a bath at the premises of SPL.....
(which turned out to be a decission years later I'd much regret)
.
.
.
STAY TUNED
Last edited by x-works on Fri Mar 04, 2016 10:29 pm, edited 6 times in total.
-
c1alpina
- E30 Zone Newbie
- Posts: 51
- Joined: Tue Sep 02, 2008 11:00 pm
- Location: Wigan
Post
Tue Oct 14, 2008 11:11 pm
fantastic work, like the pics and the write up..
.. wish i had a garage as big as yours haha..
-
tomson
- E30 Zone Addict
- Posts: 3598
- Joined: Sun Nov 06, 2005 11:00 pm
- Location: Bristol
Post
Tue Oct 14, 2008 11:23 pm
Fantastic write up!
Are outer arch repair panels NLA from BMW for an M3 then, or did they never make them?
-
Jhonno
- Homo Hair
- Posts: 20362
- Joined: Mon Jan 10, 2005 11:00 pm
- Location: FLAT, FLAT, FLAT!!
Post
Tue Oct 14, 2008 11:27 pm
Wow!! I am liking your work here!
-
nickso
- E30 Zone Addict
- Posts: 4396
- Joined: Sat Jul 23, 2005 11:00 pm
- Location: Go do that voodoo that you do so welllllllll!!
Post
Wed Oct 15, 2008 1:05 am
x-works wrote:
nice work. your welding ability makes me sick.

i did this very repair tonight myself, no pics of mine as my welding is shit.

out of interest what goes in the round hole in the pic? mine is just a blank piece of metal, which was handy as i bashed it flat to make it easier to fit my significantly bigger plate fit better.
-
Morat
- E30 Zone Team Member
- Posts: 8943
- Joined: Thu Feb 09, 2006 11:00 pm
- Location: The Peoples Republic of Yorkshire
Post
Wed Oct 15, 2008 9:40 am
Amazing.. the ability to recreate whole sections of car is fantastic.
Oh - and you REALLY hate sunroofs!!
E30 Touring 0.35 cD - more slippery than prison soap
Praise the Lard... and pass the dripping!
-
greentouring
- E30 Zone Camper

- Posts: 1345
- Joined: Sat Mar 17, 2007 11:00 pm
Post
Wed Oct 15, 2008 2:07 pm
Very interesting! Enjoying this informative thread
-
Rich_W
- E30 Zone Addict
- Posts: 2932
- Joined: Mon Jan 10, 2005 11:00 pm
Post
Wed Oct 15, 2008 2:39 pm
Brilliant work! Absolute talent for it.


