Replacing Rear Subframe Bushes
| Suspension | |
The back end of the E30, including the Drivetrain and the Brakes, are all mounted to one piece of metal known as the Rear Subframe. The subframe is held in place with two bolts, cushioned with rubber bushes.
Over time, these bushes will perish and fail, leaving you with sloppy suspension, four-wheel steering and some very suspicious knocking sounds. To get your driving experience back to how BMW intended, it may be required to replace these bushes. Here's how.
Contents
Removal
Note: Subframe is shown removed from vehicle in some photos. It is easier to replace the bushings with the sub frame still mounted in the car. Sub frame was removed for photographic clarity only.
An example of a torn out body mount. A mount damaged like this will cause an extreme knocking when shifting or hitting bumps.

Raise and support rear of vehicle. Do not place jack stands on sub frame, use the jacking points on side of body.
Remove the two 6 mm Allen head bolts from reinforcement plate (green arrows) and 22 mm nut from supporting bolt (red arrow).

Remove rear seat base by pulling straight up.
Place rag over head of supporting bolt to prevent it flying. Use a long punch and hammer, knock supporting bolt up into car.

Pull sub frame down from floor, if necessary, rock sub frame back and forth to break loose any corrosion by inserting a long punch or rod into the bushing.
If necessary, use a chisel or punch to knock bushing away from edge of bore in sub frame. (Bottom of sub frame shown)

The Official Way to get the bushes out is with the appropriate BMW tools. If you don't have these, have a look at the alternatives.
Place BMW Special Tool # 33 3 111 on top of rubber mount.
Thread BMW Special Tool # 33 3 107 into 33 3 111 through bushing.

Thread shaft from BMW Special Tool # 00 8 550 onto threaded end of # 33 3 107. Place legs of 00 8 550 in gaps of bushing flange.

Tighten 32 mm nut on shaft to extract bushing.
Installation
Clean bore of sub frame and bore in vehicle floor, where the aluminum center of the bushing locates. Align grooves in new bushing with dimples in sub frame bore.
Lubricate bushing with plain or soapy water. Do not use silicone fluid or any other form of lubricant that does not evaporate.
Place BMW Special Tool # 33 3 113 on top of sub frame and screw in # 33 3 103 through bushing. Place Tool # 33 3 112 on base of bushing and screw on nut # 33 3 103.

Tighten 24 mm nut until bushing is fully seated in sub frame. Allow tool to sit, tightened, on bushing for at least 10 minutes to ensure bushing remains seated.

Coat aluminum core of bushing with anti-seize lubricant to prevent it seizing to the floor of the car.
Place large flat washer on new bushing, jack sub frame into position and re-install bolt through floor.
Install support plate, screw in Allen head bolts until almost tight, then install and tighten 22 mm nut. After nut is tight, finish tightening Allen head bolts.
Alternatives
It's great having all the right tools for the job, just as BMW intended. For most of us though, that's simply not going to happen, so we've made a list of the other methods for removing and refitting the Subframe Bushes.
Fire
One of the most satisfying ways of getting the old rubber out is simply to burn them away. Bare in mind that this method should ONLY be used with the subframe removed from the car, and located a significant distance from the car. Doing this in situ is risking certain death, since the subframe bolts directly under the petrol tank.
Once the rubber has been burned away, the metal sleeve of the outer bush can be cut away with a hacksaw blade.
Hole Saw
A hole saw mounted to an electric drill can be offered up to the bush from underneath, after the centre bolt has been removed. Ideally, two sizes will be used.
After removing the bottom plates and centre bolts, remove the bulk of the rubber with two deep hole saws; one that just fits inside the outer steel sleeve, and one that just fits over the alloy centre. Then push a 10 mm steel rod up into the alloy centre and wriggle it gently over and back. Hopefully, the whole lot will come free from the body without breaking up.
Drill
If you don't have a set of hole saws, some basic long drill bits can be used to go up into the rubber. If working from underneath, just drill upwards into the rubber. If the first hole represents 12 o'clock, drill a hole the other side of the centre shaft at 6 o'clock. Then 9 and 3 o'clock, and so on, working your way round until you have separated the inner aluminium core from the outer metal sheath.
With the inner part removed, you should then be able to use a hacksaw blade to remove anything left.
Refitting
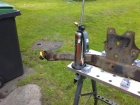
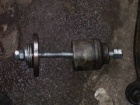
To pull the new bushes into the subframe, a pulling tool can be made with basic hardware items, MacGuyver style.
The tool is made from threaded bar, two large washes, a number of small padding washers and a nut on each end. The "cup" is made from anything to hand, including a large socket (22mm+). By gently turning the nuts, the washers should pull the bush into place, at which point the tool can be dismantled and removed.
Part Numbers
| Item | Part Number | Model |
|---|---|---|
| Sub frame bushing | 33 31 1 129 144 | all except 325iX |
| Sub frame bushing | 33 31 1 128 990 | 325iX |
| Flat washer for top of bushing | 33 33 2 225 797 | M3 |
| Flat washer for top of bushing | 33 33 1 130 485 | 325iX |
| Flat washer for top of bushing | 33 33 1 127 496 | All others |
| Allen head bolt for support plates | 33 31 1 129 676 | All |
The Rear Subframe Bushes are one small part of all the bushes on the car. See the complete list of bushes.


