Difference between revisions of "Convert a pre-facelift to a facelift"
Grrrmachine (talk | contribs) (New page: '''Converting from Metal Bumpers to Plastic''' Author: Jordan Sarette ''copied from R3Vlimited, all copyright lays with the original author'' The aim of this guide is convert your rustin...) |
Grrrmachine (talk | contribs) m |
||
| (4 intermediate revisions by the same user not shown) | |||
| Line 7: | Line 7: | ||
Before you foolishly start on this project, I want you to all know how involving and skillful a conversion this is. It requires in depth fabrication, modification, material forming and some electrical work. This is not something most people can, or should attempt. If you are not sure that you possess the skills to properly pull the conversion off, then leave it to the professionals. No one likes halfass fitted body parts. | Before you foolishly start on this project, I want you to all know how involving and skillful a conversion this is. It requires in depth fabrication, modification, material forming and some electrical work. This is not something most people can, or should attempt. If you are not sure that you possess the skills to properly pull the conversion off, then leave it to the professionals. No one likes halfass fitted body parts. | ||
| + | [[Image:finished2.jpg|thumb|right|400px|Facelift bumpers fitted to a pre-facelift E30]] | ||
| + | __TOC__ | ||
=Parts= | =Parts= | ||
| − | * | + | *Facelift [[Front_Valance|Front valance]] |
| − | * | + | *Facelift complete front plastic [[Bodywork#Bumpers|bumper]] |
| − | * | + | *Facelift complete rear plastic [[Bodywork#Bumpers|bumper]] |
| − | * | + | *Facelift front indicator connector (pair) clipped 1ft back into the harness |
*(optional) 88+ brake duct and ducting | *(optional) 88+ brake duct and ducting | ||
*(optional) 88+ under tray | *(optional) 88+ under tray | ||
| Line 38: | Line 40: | ||
=Removal= | =Removal= | ||
| − | First things first. You will have to remove the stock aluminium bumpers on your [[E30]]. Along with them the rubber shrouds, bumper shocks, and front | + | First things first. You will have to remove the stock aluminium bumpers on your [[E30]]. Along with them the rubber shrouds, bumper shocks, and [[Front_Valance|front valance]]. The front bumper is easiest; there are 2 bolts on each frame rail that secure the bumper shock to the frame, they should be 13mm. Remove them on both sides, and pull the bumper off the car. Disconnect the side marker and turn signal connectors at this time. The front shrouds are all held on by many 8mm screws, locate and remove them all. Now is a good time to remove your headlight and kidney grills. The front valance is held on with a assortment of fasteners, most of which 8mm screws, locate and remove. |
With the front bumper related parts are off the car, move to the rear. | With the front bumper related parts are off the car, move to the rear. | ||
Latest revision as of 06:16, 27 April 2012
Converting from Metal Bumpers to Plastic
Author: Jordan Sarette copied from R3Vlimited, all copyright lays with the original author
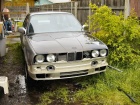
The aim of this guide is convert your rusting, pitted and downright offensive chrome bumpers to the later plastic equivalents.
Before you foolishly start on this project, I want you to all know how involving and skillful a conversion this is. It requires in depth fabrication, modification, material forming and some electrical work. This is not something most people can, or should attempt. If you are not sure that you possess the skills to properly pull the conversion off, then leave it to the professionals. No one likes halfass fitted body parts.
Parts
- Facelift Front valance
- Facelift complete front plastic bumper
- Facelift complete rear plastic bumper
- Facelift front indicator connector (pair) clipped 1ft back into the harness
- (optional) 88+ brake duct and ducting
- (optional) 88+ under tray
- Assortment of small and medium sized screws, nuts, bolts, and washers
- Assortment of wire crimps
- Electrical tape or heat shrink tubing
Tools
- 3/8" Ratchet with short extension
- Complete metric socket and wrench set
- Flathead screwdriver
- 10mm allen wrench socket
- 1 pint plastic filler (Bondo)
- 2 pint fiberglass resin
- 1 sq. ft. woven fiberglass cloth
- Assorted sandpaper grits (100,220,400,600)
- Random Orbit Sander
- Dremel with assorted sanding drums, and grinding stones
- Multimeter or test lamp
- Wire crimpers
Removal
First things first. You will have to remove the stock aluminium bumpers on your E30. Along with them the rubber shrouds, bumper shocks, and front valance. The front bumper is easiest; there are 2 bolts on each frame rail that secure the bumper shock to the frame, they should be 13mm. Remove them on both sides, and pull the bumper off the car. Disconnect the side marker and turn signal connectors at this time. The front shrouds are all held on by many 8mm screws, locate and remove them all. Now is a good time to remove your headlight and kidney grills. The front valance is held on with a assortment of fasteners, most of which 8mm screws, locate and remove.
With the front bumper related parts are off the car, move to the rear.
The rear bumper is a bit harder. each shock is mounted to the frame rail with 2 13mm bolts. 3 of which are accessed from under the car, and the final one from in the trunk. In addition to these there are also 1 more 13mm bolt per shock, about 8-10inches down the frame rail. The passenger side bolt is easy to reach, but the drivers side one is up and under the muffler. you *can* reach it without removing the muffler, just be persistent. After all 6 bolts are removed, pull the bumper off the car. Remove all the rubber shrouds at this time, they are held on by a assortment of fasteners, most of which 8mm screws, locate and remove.
Tuck any dangling turn signal or side marker wiring into the holes they come from, you will want those out of the way. All of which you have removed so far is now basically useless, although i would save the bolts etc just in case. It never hurts to have a box of spare hardware.
Front Bumper
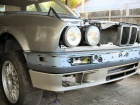
Now comes the first step of the reconstruction. Take your 88+ front valance and fit it to the front of your e30. This panel is a direct bolt on part, no modification is needed to the valance. However you will need to remove both tow loops on the front of your car. Use a hacksaw, or a cutoff wheel. Whatever works best for you.
Use the hardware you removed to fit this back onto the car. Bolt the front bumper brackets to the side of the valance/fender. It should be fairly simple to figure out where and how given their shape. They mount with 2 10mm screws, with large washers. These brackets securely hold the bumper to the side of the car when you slide it on.
Grab both front bumper shocks (the plastic bumper ones) and bolt them on. Each use 2 13mm bolts. The shock with the threaded hole (for the tow loop) goes on the passenger side of the car.
Ease the bumper onto the bumper shocks, and into the side brackets, slide it in until it is flush. To reduce the gaps at the top, or to even them out you will need to adjust the height of the side brackets, and the shocks. To adjust the side brackets just slightly loosen the mounting screws, with the bumper mounted, then move it as needed, and retighten. Adjust the shocks as needed in the same manner.
Once proper gap alignment is achieved you can wire up the turn signals. Splice the old wires from your harness into the new wiring you got from a donor car. The wire colors *should* be the same so just match them up and crimp them. Wrap this connection on heat shrink tube, or electrical tape for safe keeping. If by chance the wires are different colors, determine which is the turn signal and which is the parking lamp by turning the car on, and signaling in that direction.
If your parking lights, and turn signals now function properly you may tuck the wires back, and bolt up the bumper. Bolt the bumper in place using the 2 10mm allen head bolts. Push the bolts into the hole under the bumper, and wiggle it until it goes all the way up and in. then tighten it.
Rear bumper
Now that the front bumper is completed the hard part of the conversion can be worked on. the hard part being the fitment and trimming of the rear bumper. Followed by fabrication of new end caps, secure mounts, and the trimming and downsizing of the side bumper trim.
To mount the rear shocks at the proper height level you will need to slot each bolt hole on both sides 1in above the center of the original hole. To do this use a Dremel with a grinding stone, or a side cut bit. The square shock hole will also need to be rounded off at the top to allow the shock full travel. I used a aggressive cut bastard file for this. But it can also be done with the Dremel.
Once the holes are fully slotted bolt the bumper shocks on. Plastic bumper shocks only use 2 bolts, they do not make use of the 3rd hard to reach bolt in the frame rail. Only tighten the shock bolts finger tight as next you need to fit the bumper. Slide the bumper on the shocks, and thread the 2 10mm bolts up and in, tightening them. Now push up on the bumper until it is flush with the fenders and rear panel on the top. Have a assistant tighten the shock bolts for you while you hold it flush. What you are doing right now is setting the gap. Make it as big or as little as you please, if the gap is too big and the shocks will not push up anymore, more slotting may be required.
Once desired gap is achieved hold up the drooping sides of the rear bumper, and take a look at where they meet the fender well. The bumper sticks into the fender well about 1/2inch. Tape the bumper up where it belongs if needed and using a Sharpie mark the area of the bumper to be trimmed. Basically what you want to do is follow the arch of the wheel well on the bumper with the Sharpie. Repeat this for the other side of the car. Be exact! and make a mental note about the line. do you need to cut all the marker off? or stop at it? Following me still? good onward!
Unbolt the rear bumper and remove it. Set it on a large, flat bench. remove the bumper molding and start cutting off the unwanted material with the Dremel until its very close to the line. Place the bumper back onto its shocks, and bolt it up again. tape the ends again if needed, and sit down aside one of the wheel wells with the Dremel in hand. Does the bumper still protrude into the wheel well? if so take this time to trim it down with a sanding bit on low speed. trim until it is perfectly in line. Repeat for the other side. Once again remove the bumper, and set it on the bench.
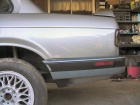
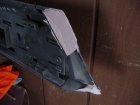
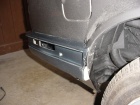
Now it is time to fabricate the end caps that will fill the large gap between the lower rear valance and the bumper. This cap will be about 1/4in wide up top, and nearly 1in wide down bottom. There are no templates for this part, it is up to you to fabricate them both. For my end caps I used 1/8in ABS plastic, roughly the same thickness as the bumper itself. Hold your plastic up to the bumper (while mounted in place on the car) and mark it with a Sharpie as to where it needs to be cut out. After it is cut out sand it down slowly to a perfect fit. Then take the perfect end cap, and use it as a stencil on another slab of plastic to make one for the other side. Once both fit perfectly again removed the bumper and set it on the bench.
Both end caps now need to be glued to the bumper. For this you should use a epoxy. Glue them in the place they should be inside the bumper end, and tape them so they stay in place. Let the glue FULLY SET UP as per the directions on the epoxy product box. I would recommend you let it dry overnight. When the glue has full cured remove the tape and test fit the bumper. If it needs trimming do so now, if all is well then remove it and await the next stage.
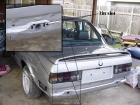
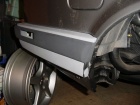
Now you need to round the sharp edges your trimming has created, use sandpaper to match the roundness of the rest of the bumpers lines. Now is also a good time to spread a thin layer of plastic filler (Bondo) over the surface of the end cap, as to smooth it properly. Also create a rounded bottom corner brace with the filler, refer to pictures for this. Allow the filler to cure, then sand it down and shape as needed. Apply another coat and smooth for perfection. Scruff the insides of your end caps, along with the surrounding insides of your bumper with 100grit sand paper. Lay 2-3 layers of fiberglass in the back. This fiberglass will serve to provide structural integrity to your end caps. When laying the fiberglass be sure to go heavy on the resin, more (to a point) is always better. Avoid puddling of excess resin, but make sure it is fully impregnated.
That should just about do it. Secure the front of the rear bumper to the body using bolts. Make use of the holes already in the rear valance. Mount the bolts under where the molding would be so they are hidden.
Snap the rear bumper molding back on.
Rear bumper trim
Now that you have trimmed down and fitted the rear bumper you will no doubt notice that the bumper trim doesn't exactly fit anymore. There are many ways one could go about trimming it down, but this is how I did it.
I wanted to preserve the factory angled cut and whatnot at the fender well end of the trim.
Start by snapping the rear of the side trim in. In the front you will have several prongs that cannot snap in because of the shortened bumper. Remove them. Measure back from the end of the trim about 2 inches and mark a straight line vertically on the trim. Cut the trim on this line. Set the small portion with the end cap aside for now.
Now you need to cut down the larger length of the side trim. I ended up removing about 1/2 inch from it. You will have to remove a bit, then put the end cap back in place and repeat until it all lines up well.
Once it lines up well carefully line the 2 parts up and glue them in place. Personally I don't like waiting for glue, so I use a soldering iron to melt and "weld" the plastic together. Go ahead and put a couple "tack welds" on the front face to make it strong enough to work on. After the glue has dried, or the plastic has cooled remove the trim from the bumper.
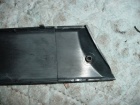
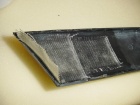
Scuff the back of the trim with 100grit sand paper, or a 3M scuff pad. Then you can if you want "weld" the entire back seam with a soldering iron like I did. After it cools mix up some fiberglass resin and lay down 1 layer of fiberglass cloth. Look at my pictures for size/shape help. This is a good time to build up the end cap extender, again look at my pictures for this. Make the extender longer then needed then trim it down once you test fit it on the car.
Once everything is test fit and lines up well go ahead and sand down the front face and the end cap. Mix up some plastic filler and spread it around on the front seam, any deep scratches, and on the front of the end cap extender. My pictured example clearly illustrates this step. After the plastic filler has had ample time to cure sand it down and block it out. A second coat may or may not be required depending on how accurate you are. Minor trimming may also be required on the rear face of the side trim to make it seat in the channel just right.
Once all the fabrication and bodywork is done go ahead and prime it, wet sand the whole part, then paint it black. I recommend SEM Trim Paint 39143 BLACK for this.

