325i Touring resto thread - damp footwells

General E30 related discussions -
Please put technical questions in E30 Tech Help forum below

Moderator: martauto

Grrrmachine
E30 Zone Wiki / Team Member
Posts: 8043
Joined: Sat Feb 09, 2008 11:00 pm
Location: Warsaw, Poland

Fri Aug 10, 2012 5:27 pm

Reclaimed the roof lining from a scrapper; probably the only black electric sunroof touring headlining in Poland, considering how long it took to find. Yours sir for 40 quid.

During the resto, I've been smoking around in the in-law's second car, a manky gold Nissan Almera. They've politely asked for it back so I've only got it till the end of the month, by which time the Touring really needs to be back on the road. I won't miss the blandwagon, but I really need to pull out all the stops to get an MOT in time.

I don't care if the MOT man sees the runs in the paint and that the sideskirts are missing, but I still need all the electrical and mechanical stuff to work, and that means attacking the engine bay loom.

The engine loom itself was fine, but all the other wiring was a mess. The previous owners had chopped into it at random for alarms, third-party horns, aftermarket foglights and even a second washer pump for some odd reason, so every single plug needed cutting off and starting afresh.

Image

But everything at the front of the car uses those special BMW-specific 2.5mm plugs. And BMW want four quid EACH per plug, so 8quid a pair or 120 quid for the whole engine bay, since there's 15 things to plug in. Fook that, take some wire cutters to a scrapyard E36 and get as many as you can for 50p each.

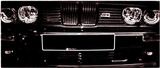
Then spend the whole day on the floor with the soldering iron, tongue poking out like a spastic doing algebra, trying to work out which plug is the horn and which is the foglights. I also took the time to switch the headlights over to relays for a potential high-watt system later on (that's the blue wire in the pic) with a fused link straight from the battery (red wire on the inner wing).

Image

And finally! I can see the light!
Grrrmachine
E30 Zone Wiki / Team Member
Posts: 8043
Joined: Sat Feb 09, 2008 11:00 pm
Location: Warsaw, Poland

Sat Aug 18, 2012 2:30 pm

Reassembly time! Back in May, the car was a freshly painted shell, but a little bit bare...

Image

So it was time to dust off the screwdrivers and get some panels back on the car. Arse end first:

Image

The bumper got scuffed in storage, but nothing a bit of wet-and-dry won't fix.

Then moving round the car, the doors and wings went on. One of the wings was a NOS aftermarket one which needed a bit of fettling to line up properly, but it's all in place now. All the panel gaps will need adjusting later, but for now I'm just glad everything's there.

Image

And finally I plopped the bonnet on. This was one of the first panels I painted, and it had had a post-paint autopsy (some 1200-grit sanding) to assess the level of orange peel, which is why it looks flat here

Image

And a fully-populated, if dusty, engine bay.

Image

The only things left to paint are the rear window trims and the petrol flap, plus a tiny spot repair on the front valance which is why it's not fitted yet. And the whole car needs a good hose-down, plus I'll probably repaint one door sometime in the future, but as a first respray, I'm well chuffed :D I'm getting worryingly close to MOT time!

Are there any mods who can move this to the Photo Gallery?
Grrrmachine
E30 Zone Wiki / Team Member
Posts: 8043
Joined: Sat Feb 09, 2008 11:00 pm
Location: Warsaw, Poland

Sat Oct 06, 2012 5:34 pm

It's ROADWORTHY!

I got the car to a stage we shall call First Assembly, which means all the panels are on and the majority of the trim is fitted. And it looks like this:

Image

The eagle-eyed among you will notice the paint-colour disparity between the doors and the rest of the car. This only became evident when everything was bolted together. Even though I bought all my paint from the same supplier using the same product, it seems that one can came out lighter. I want to blame my own (lack of) skills, thinking that I mixed it incorrectly, but subsequent spraying of the petrol flap seems to confirm that one batch of the paint doesn't match the rest, so there's more painting to do in the new year. But for now I'm enjoying the 2.5 engine too much to care.

Image

Despite the harlequin paint style, and the lack of power to the door loom, and a dozen other little niggles, the car and I rolled on down to the local MOT station for our checkup. Over here you need a special test to confirm engine replacement, so I told the examiner what I wanted. He spent a cursory amount of time looking at the car, we had a good old chat about smokey old motors being allowed on the modern motorways, then he stamped my log-book and that was that. The car is now officially a 325i again with a 2.5 litre engine. Woo hoo!

Image

With daylight fading, I went for a jetwash over the road to get all the garage dust and grime off. And here's the Black Pearl sparkling in the sunshine:

Image

Panel gaps all need adjusting, and the bargain replacement wing I got isn't such a bargain - the fitment is atrocious, so I'll be replacing that at some point and then I can spray the doors and wing all in one go to avoid colour problems. Right now though, let's just appreciate the contras between the old...

Image

and the new

Image

The road trip to England is in three weeks. Wish me luck 8)
Jos
E30 Zone Camper
E30 Zone Camper
Posts: 1104
Joined: Mon Jan 17, 2005 11:00 pm
Location: Belfast

Sun Oct 07, 2012 12:49 pm

Legend mate, total legend!
'89 Touring - slightly rippled with a rusty underside
'94 e36 tree climber
G-Bear
E30 Zone Squatter
E30 Zone Squatter
Posts: 1632
Joined: Wed Mar 12, 2008 11:00 pm
Location: Hertfordshire

Mon Oct 08, 2012 6:09 am

Looking excellent. Good spirit not to let the doors bother you. Life's a journey... even in paint pots. I remembering being advised in the past when I sprayed a car to mix all the tins as they always varied in tone..

All that hard work is going to make for a very enjoyable drive to England.
Rav335uk
E30 Zone Meets/Events Team
Posts: 27985
Joined: Wed Jan 19, 2005 11:00 pm
Location: Mad mad mad
Contact:

Mon Oct 08, 2012 8:38 am

Well Done, that's alot of work :D
Image
If you Got "Haters",Then your doing something Right!
CR24v??? Where's it all gone?? LOL
User avatar
tommygoldy
E30 Zone Newbie
E30 Zone Newbie
Posts: 90
Joined: Sat Sep 29, 2012 11:00 pm
Location: North London

Mon Oct 08, 2012 9:52 pm

Nice work. I'll keep my eyes peeled when you come over to the UK...
User avatar
Jozi
E30 Zone Addict
E30 Zone Addict
Posts: 3076
Joined: Thu Nov 22, 2007 11:00 pm
Location: Dublin, Ireland

Mon Oct 08, 2012 9:54 pm

Missed this until now! Must feel great having her all back together after all the hard work you put in!

The paint could be down to painting in different stages and having different conditions for curing or even different thickness's? Either way, it's better than scratched panels with rot in them.
e30Passion
E30 Zone Newbie
E30 Zone Newbie
Posts: 232
Joined: Wed Jun 20, 2012 11:00 pm
Location: Netherlands

Fri Dec 13, 2013 7:04 pm

Holy Crap!!

Just read this thread for the first time and im just astonished by the amount of dedication! Respect for even attempting! I would've probably thrown in the towel after day one.

You sir are, indeed, an absolute legend! Wow with a deep bow.
Grrrmachine
E30 Zone Wiki / Team Member
Posts: 8043
Joined: Sat Feb 09, 2008 11:00 pm
Location: Warsaw, Poland

Fri Dec 13, 2013 8:35 pm

Then I should probably update the thread a little bit...

Almost as soon as the car was done it was time to switch to winter tyres, so the Alpina rims could come off for a renovation. They're not real Alpinas though, they're 15" replicas by OZ, which are still extremely rare to come across.

I had the rubber removed and paid a media blaster to take all the manky old paint off, so they were bare:

Image

Then they got filled with alu-fibreglass filler, primered and sprayed Polaris Silver:

Image

Then the piece de resistance - I did the centres in pure black. Finished them off with a new set of Toyo Proxes in 205/50R15, and bolted them to the car, like so:

Image

Much smarter looking 8)
User avatar
BHadley
E30 Zone Regular
E30 Zone Regular
Posts: 902
Joined: Sun Sep 06, 2009 11:00 pm
Location: Newton abbot, Devon
Contact:

Fri Dec 13, 2013 9:48 pm

Just read this thread, very intensive work and you said you where an novice? Very impressive!
User avatar
Rob_farmer
E30 Zone Newbie
E30 Zone Newbie
Posts: 204
Joined: Tue Sep 10, 2013 11:00 pm
Location: Latvia

Sun Jan 12, 2014 1:07 pm

Just read whole thread. What can I say? F*** crazy/awesome! You are very brave to resurrect this dead E30. I take my hat off to you sir :)
I`m driving E30, 1989, 325i, 4 door. Restoring 1990, 4 door.
G-Bear
E30 Zone Squatter
E30 Zone Squatter
Posts: 1632
Joined: Wed Mar 12, 2008 11:00 pm
Location: Hertfordshire

Sun Jan 12, 2014 5:46 pm

Alpinas are looking good.

I put a semi fresh (two new two with a few thousand miles on) set of Proxes on a month ago or so. Very pleased with them. Scary how you can get used crap things, never realised how awful the old tyres were until I put new/better ones on. On the weekly drive up to Nottingham and back I saved on a bit of fuel too.

Touring's looking great.
TPS
E30 Zone Team Member
Posts: 13121
Joined: Fri Mar 06, 2009 11:00 pm
Location: Hampshire

Sun Jan 12, 2014 5:59 pm

Looking Good
Image
1991 325i Touring Alpine White II
1994 318i Touring Sterling Silver
User avatar
Royalratch
E30 Zone Addict
E30 Zone Addict
Posts: 4921
Joined: Sat Oct 21, 2006 11:00 pm
Location: London

Thu Oct 30, 2014 2:52 pm

Much respect dude.
Gert_8
Married to the E30 Zone
Posts: 11304
Joined: Mon Dec 08, 2008 11:00 pm
Location: In your back passage faster than a rat up a drainpipe!

Thu Oct 30, 2014 5:19 pm

I don't know how I managed to miss this, but just read through all the pages. Amazing work grrr!! :)
Image
PONY, 2013 - "Anyway span 360 degrees hitting the kerb and giving the old man two fingers as I was spinning like Michael Schumacher would
Grrrmachine
E30 Zone Wiki / Team Member
Posts: 8043
Joined: Sat Feb 09, 2008 11:00 pm
Location: Warsaw, Poland

Sat Nov 08, 2014 3:06 pm

Cheers for the support guys :D

Time to revist this. It's been three years since I welded up the front jacking points, and I started noticing a damp footwell. I did the talcum powder trick around the heater pipes with no luck, so I had the dreaded feeling it was coming in from underneath.

I started removing the carpet, and as I wiggled the accelerator pedal free I felt the whole floor move. Uh-oh...

Image

The tinest hole allowed water to soak in, and the sponge under the carpet trapped it there until the whole pedal mount rotted away. So it was out with the Dremel...

Image

Who doesn't love a good gape pic?

Image

Then in with a new plate

Image

then spatter some birdshit weld around it, and plonk a new fabricated pedal mount on top. You can't buy these from BMW.

Image

Slather on some seam sealer on both sides

Image

Then coat it with Hammerite

Image

The keen-eyed will note the funny purple colouring on the rest of the floor. That's an anti-rust epoxy coat to treat the other little blisters in the floorpan. It's not a permanent repair but it'll buy the car a few more years, and if they finally rot out it'll be time for a whole new floorpan anyway.

I'm not 100% certain the water source was around the pedal, although directly underneath is a mount for the the engine bay soundproofing, which had also rotted away. However, it could also have been the plastic bungs further back in the floor (which also got a dose of seam sealer) or a very slow leak from the heater matrix. I'll have to dry out the car to confirm though, which may take months :-x
User avatar
Royalratch
E30 Zone Addict
E30 Zone Addict
Posts: 4921
Joined: Sat Oct 21, 2006 11:00 pm
Location: London

Sun Nov 09, 2014 5:13 pm

:cool:
Post Reply