E30 M3 minor rust repair (few finished pic's)

Doing a minor build / restoration or an epic one, post it here

Moderator: martauto

Post Reply
Nay
Channel Island Crew
Channel Island Crew
Posts: 3988
Joined: Wed Aug 13, 2008 11:00 pm

Fri Jun 12, 2009 12:35 pm

I seem to be having problems holding my jaw up..........


When I get a house of my own with space to do this... exactly what I want to do.

Probably get as far as striping the whole car down, sand a few panels, and leave it. Hell, I got bored sanding down my spoiler... But this inspiring work and with all the effort your putting into it I really hope (more for your sanity) that it works out in the end. :D

Top work fella, and I can't believe I have looked over this thread for soo long (looked and posted a long time ago, just caught back up!)

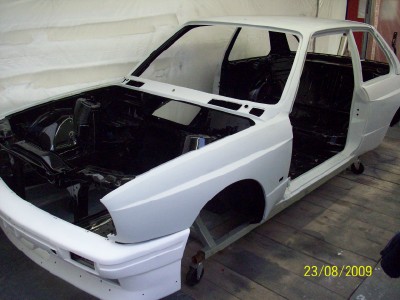
I would love to do this to an M3, but even a sport (has to be a Tech1) would be worth this effort.

Keep up the good work and I know more and more people on here are going to be dedicated to following your work! :Thumbs:

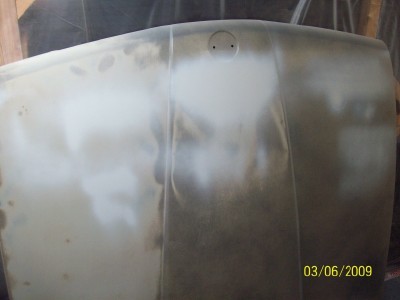
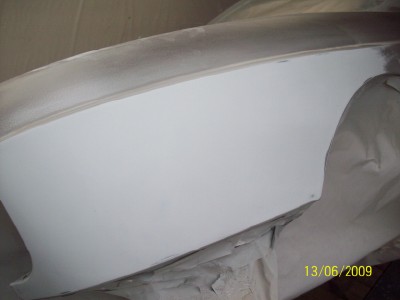
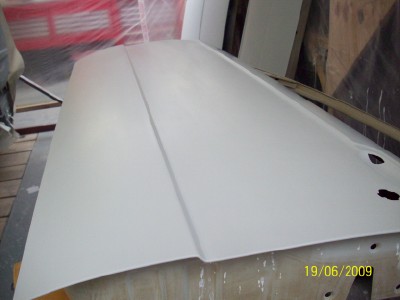
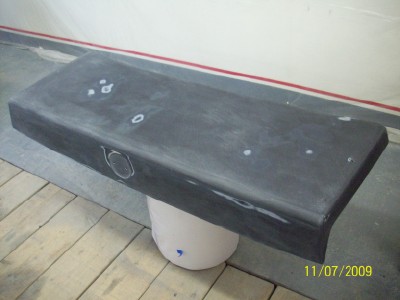
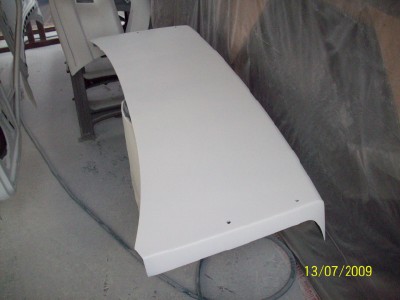
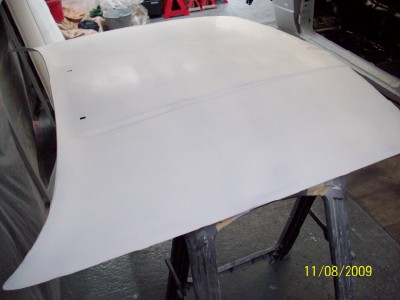
BTW, how much was the bonnet? :chuckle: I had a very similar call with the GPD recently for pistons and rings for my engine/rebuild project. Ouch. :mad:
Image

Uni is killing the project.
User avatar
BadMoonRising
E30 Zone Regular
E30 Zone Regular
Posts: 283
Joined: Sun Aug 31, 2008 11:00 pm
Location: Bristol

Fri Jun 12, 2009 8:58 pm

Great work, great read.

You're not married are you? :D
E30Gheko
E30 Zone Addict
E30 Zone Addict
Posts: 3789
Joined: Sun Sep 28, 2008 11:00 pm
Location: Wirral

Sat Jun 13, 2009 4:19 pm

I always look forward to every update on this. You guys never fail to impress! Really take my hat off to your patience with the sanding. I reckon this should actually be a better M3 than one that left the factory!

Best thread on the zone! keep it up and I can´t wait to see this puppy painted and starting to turn back into a car again! 8) 8)
User avatar
Leemc2009
E30 Zone Regular
E30 Zone Regular
Posts: 370
Joined: Sat May 16, 2009 11:00 pm
Location: St. Ives, Cornwall

Thu Jun 25, 2009 3:18 pm

Updates please :D
x-works
E30 Zone Regular
E30 Zone Regular
Posts: 332
Joined: Thu Mar 10, 2005 11:00 pm
Location: Ireland
Contact:

Wed Aug 26, 2009 11:22 pm

managed to get a small bit done again since the last post,
so, roll a fat one or crack open a beer cause here comes the boring details.

As it finished up in the last post the car was taped up and ready for
filler primer. As you may have noticed from the previous pic's only
the large surface area's were getting a coating of the filler primer,
and the reason for that is as follows. From my limited understanding
of bodywork there's 3 main types of filler or to put it another way
3 different layers of crap you can plaster on the outside of your car
in an attempt to get it as smooth as possible. Taking them in order of
thickness they are, first, isopon, filler, bondo, call it what you will, it's
the stuff you've seen me shovel on to the car already. Then there's stoppers
which we'll get to in a while and finally theres filler primer, which we're
about to spray on now.

Filler primer is much the same as normal primer it's just applied alot
heavier to build up a thicker coat. The reason for using filler primer?
Although the fillers was block sanded down smooth the shell is still not
smooth enough for the top coat yet, the spraying and sanding of the filler
primer will get it the last step. Plus, unlike metal, filler is porous and
will absorb some paint, if the shell was just given a quick coat of primer
and then top coat the paints can sometimes sink down on the filler spots
leaving your beautiful pride and joy looking like it was sprayed
by a blind man with aerosol cans in a force 9 hurricane.
(may be a slight exaggeration).

And this is how it went, after the car is taped up all the panels are given a quick rub down
with this stuff. It's called panel wipe or pre-cleaner and is a weak version
of standard thinners. It should clean off any crap that could react with
the paint going on...

Image

with the car now clean and ready to go theres one small job to do before
painting and thats set up somewhere to clean the gun and mixing pots
after your finished. The items used are, 1 gallon can of standard thinners
to clean with, tools for dismantling the gun, some rags, a scotch pad
and an empty can for the dirty thinners. The professional work bench
pictured below should be available from your local snap-on dealer.


Image

the reason for setting up the cleaning area before hand is, from past
experience, once you are finished spraying, the paint in and on the various
tools you've used tends to dry and harden quite quickly. Should you
wish to take a more laid back approach to cleaning up afterwards then
these are the only tools you will require....

Image

then back in to the "spray booth" itself. While spraying in a confined
space the paint fumes and overspray will start to build up and the need
will arise to extract these somehow. This will require the use of a highly
expensive, state of the art, high volume air extraction and filtration unit.
Unfortunately on the day I visited the local hardware store to purchase
this they had just sold out, so, instead I've ended up with a 6 inch
fan which would struggle to suck a fart from a fly's arse. This coupled to
the length of flexible hosing you see below would be our state of the art
extraction system....

Image

Image

on a clear starry night, if you look just right at the correct angle, you
can just about make out the little hole in the ozone above my house.

Once suited, booted and masked up the last preparation before mixing
the paint can be done and it's the application of this stuff....

Image

you've no idea where i'm going with this one have you? Let me explain.
A long while ago after spraying the interior on an orange rally car I became
acutely aware that the piece of your face not covered by the gas mask can become
covered in a light coating of the paint your using as it blows back off the area your
spraying. When that colour is orange and you spend the next several days looking
like an Umpa-lumpa from Willy wonka's chocolate factory it focuses the mind on
finding a solution. Hence, the Vaseline, spread a little on exposed face to avoid this....

Image

the compressor is placed outside so the noise of it doesn't drive you insane...

Image

and the shell is given a final wipe over with a "tac rag". (Lint free rag
with some sticky gue coated on them so all the tiny dust crap sticks
to it rather than your car)...

Image

Then on to the paint itself, I know nothing about paint, but as this is
the internet and 50% of what you read on it is lies and the other 50%
bullshit, I will attempt to maintain the high standard.
The stuff below is what makes up 2 pack paint, on the left 4 litres
of filler primer, in the middle 5 litres of 2 pack thinners (which is
different to standard thinners) and on the right 1 litre of 2 pack
hardner....

Image

which shall be mixed in to this old paint pot....

Image

with the aid of this....

Image

it's a paint stick. Basically a graduated ruler which lets
you mix 4 parts of this with 1 part of that without
having to guess...

Image

one side is for top coat which is usually 2 parts colour to
1 part hardner with 10% thinners.
And the other side is for primer's as most primers are mixed
4 parts primers to 1 part hardner and up to 1 part thinners
depending on how thick/thin you want it, like so.....

paint...

Image

hardner....

Image

and then thinners, by which stage you should have messed enough all
over your hands to make using a camera impossible.
When stirred up and mixed well, it's poured in to the spray gun....

Image

through these paper filters to catch any little crap that'll clog the gun...

Image

Image

then hook it up to the air line and spray like the clappers. It can be
helpful to have an old panel in the booth so you can practice the
technique of getting runs in your paint so that you have it mastered
when you turn your attention to the shell...

Image

the results of which came out looking like this....

Image

Image

Image

Image

Image

Image

after spending the guts of a year working on a mutli coloured shell it's
actually nice to see it all one colour again, even if it is grey.

After the paint has had time to dry and settle it's on to the application
of this stuff...

Image

It's a powder guide coat as opposed to the aerosol type one used
earlier. The main difference being that the spray on one will help
show up dips and bumps in the panel work while sanding, while this stuff
will show up everything till the surface is sanded completely flat.
The bottom part contains the coating which is like lead pencil dust,
while the top half is the sponge you use to apply it....

Image

pick a panel....

Image

and start rubbing it on....

Image

and if you look closely you'll see just how far from perfect the nice
coating of primer is....

Image

what you can notice is that paint doesn't go on silky smooth but rather
builds up like a coating of millions of minuscule little snow flakes leaving
a sort of orange peal effect. The other thing you can notice is the remaining
scratches from the 80 and 120 grit sanding. So, with the whole panel
covered in guide coat....

Image

it's out with the long sanding blocks again and together with some
320 grit sand paper it's back to everybody's favourite pastime.
More f**king sanding....

Image

Image

the 320 grit is fairly fine grit paper and blocks are being used fairly
lightly compared to earlier but there's still a bit of scope to flatten
out any small imperfections as you can see there's a nice thickness
of paint to work with...

Image

to illustrate this, the rear quarter panel was showing up a lot of scratch marks
left over from the earlier 80 and 120 grit paper....


Image

and as this is blocked down you can see the marks slowly starting
to go.....

Image

first the lighter 120 marks go, just leaving the deeper 80 grit....

Image

and after some more rubbing they go too, and if you've applied enough
coatings of the filler primer you'll get them out before breaking through
to the metalwork underneath. (we used 2 heavy coats)....

Image

at this stage it's probably worth pointing out that if your planning on
having a go at something like this then buy, build or rob yourself
a spit. Being able to turn the car to any angle you want to make
yourself more comfortable while sanding is priceless.
Sanding is a horrible enough job without adding a broken back into
the equation.

Image

Image

with the shell done the doors and bonnet get the same treatment....

Image

Image

Image

Image

Image

the other thing that gets a little attention is the edges of the panels.
The more paint you have on the edge of a panel the greater the
chance that when you whack it off something a large chip will come
off it. You might notice that with a door or bonnet that has been
resprayed over the original paint work that when it gets stone chipped
the flakes are usually fairly large as opposed to an edge that only has
the normal amount of paint on it, which when chipped usually flakes
a much smaller chip. So, all filler primer is removed from the edges...

Image

Image

and thats where we leave it for tonight cause I can't be arsed typing
up any more of this waffle. Tune in tomorrow night for more heart
stopping action.
Last edited by x-works on Sat Mar 05, 2016 11:20 am, edited 1 time in total.
User avatar
hoshy
E30 Zone Wiki Guru
E30 Zone Wiki Guru
Posts: 4118
Joined: Tue Jan 18, 2005 11:00 pm
Location: Munich

Wed Aug 26, 2009 11:38 pm

Words fail me. This is Zone gold material if ever I saw it!

Honestly - I almost cream myself everytime I imagine how this car will end up.

I just hope some fuck doesn't ditch it on the first track day :)
E46 M3 CSL but dreaming of another E30.
E30Gheko
E30 Zone Addict
E30 Zone Addict
Posts: 3789
Joined: Sun Sep 28, 2008 11:00 pm
Location: Wirral

Thu Aug 27, 2009 12:53 am

another :drool: from me. Absolute legendary effort.
Jon_Bmw
Dangerous when thinking
Posts: 7606
Joined: Tue Jan 11, 2005 11:00 pm
Location: Salisbury

Thu Aug 27, 2009 1:05 am

I have always thought that people who just lock cars up in garages/museums and don't use them must be mental. But with the effort gone into this one, it does make you think twice. Is it actually too nice to use?

Nah!!! I'm sure you'll rag it good. :)

It is good to see you still have a sense of humour after all of that work. Your updates always make pleasant reading :gay:
Hellbound
E30 Zone Camper
E30 Zone Camper
Posts: 1144
Joined: Fri Aug 07, 2009 11:00 pm
Location: South Wales

Thu Aug 27, 2009 3:18 am

It's 2am and I'm reading this instead of watching porn... winkeye
DanThe
E30 Zone Team Member
Posts: 28641
Joined: Sat Sep 10, 2005 11:00 pm
Location: Staffs
Contact:

Thu Aug 27, 2009 9:53 am

Hellbound wrote:It's 2am and I'm reading this instead of watching porn... winkeye
Your obviously a deviant :)
goosiegander
Zonegoose
Posts: 2544
Joined: Sun Nov 19, 2006 11:00 pm
Location: East Anglia

Thu Aug 27, 2009 10:03 am

DanThe wrote:
Hellbound wrote:It's 2am and I'm reading this instead of watching porn... winkeye
Your obviously a deviant :)
Maybe that could be one of the qualifiers for zone gold? -the 2am sans porn test lol!

Fuc*ing epic thread! :D
Morat
E30 Zone Team Member
Posts: 8943
Joined: Thu Feb 09, 2006 11:00 pm
Location: The Peoples Republic of Yorkshire

Thu Aug 27, 2009 12:50 pm

OCD is for winners!

Great job, great thread. I'm in awe :)
E30 Touring 0.35 cD - more slippery than prison soap :)

Image
Praise the Lard... and pass the dripping!
Nay
Channel Island Crew
Channel Island Crew
Posts: 3988
Joined: Wed Aug 13, 2008 11:00 pm

Thu Aug 27, 2009 2:00 pm

8O

Loving the work still. This will be a very stunning car 8)
Image

Uni is killing the project.
x-works
E30 Zone Regular
E30 Zone Regular
Posts: 332
Joined: Thu Mar 10, 2005 11:00 pm
Location: Ireland
Contact:

Thu Aug 27, 2009 9:41 pm

carrying on from where we left off last night, and it's on to the final of
our 3 types of fillers. With the heavy fillers on and filler primer done and rubbed
down it's time to break out the stoppers.
After rubbing down the black guide coat on the shell and separate panels
it's not uncommon to find some little tiny holes in the surface of the
filled area. These are tiny little air bubbles that sometimes get trapped in the
fillers as your spreading it on, and will show through the final top coat if
not dealt with. Kinda hard to see them they're so small but since I can't
figure out how to use the zoom on the camera your just going to have to
shove your face up close to the monitor...

Image

Image

Image

along with these tiny holes, block sanding the guide coat also showed
up a few larger blemishes that would also have to be dealt with....

Image

Image

Image

Image

The last few larger one's shown above can be filled with a thin covering of fillers,
but theres no point trying to fill the tiny pin holes with fillers, it just won't fit.
So, we use this stuff....

Image

as you can see by the label 3M have decided to call it "Acryl Red Putty"
probably cause they couldn't charge you enough if they just called it "stoppers".
Basically it's just a very fine, runny, light form of normal fillers that
has the advantage that it'll fit into any little scratch or pin hole. You can
buy it in a tin or a tube like above. The tube seems to be handier for the
simple reason that this stuff already has the hardner premixed in it, so
the minute it's exposed to the air it starts to go off. With the tube you can
take a little out at a time but the tin version seems to go hard after only
opening it a few times. Then again I'm not exactly the fastest worker.
So, squirt a little out to use...

Image

and apply it to the one or two pins holes on the car along with the
thin coat of fillers for the bigger blemishes....

Image

Image

well maybe a little more than one or two holes...

Image

if you ware spectacles it helps to clean them before this job or you
may use half the tube before realising it's dirt on your glasses not
pin holes on the car...

Image

the stoppers goes off fairly quickly and can be sanded away usually
within 10 minutes. As it's so fine and light it sands much the same as
the primer, so just gently rubbing it with some 320grit takes away the
excess....

Image

to leave just the little bit filling the pin holes...(you'll have to take my word on it)

Image

the larger bits of normal filler take another small covering of guide coat
and a light block sanding again to get them down flat....

Image

Image

and with all that done around the shell and separate panels the bodywork
is finally as flat as we can get it.....

Image

it's then time to clean up the....

Image

and start taping up for final coating of primer....

Image

as everything now needs to be coated fully in primer it's decided to break
it down in to three sessions. First the underneath, inside, engine bay and
boot and then later the outside and finally the doors and bumpers and other stuff.
We decided to do it like this because theres just so much square footage
of bodywork to be sprayed on the car it would be hard not to get overspray
on panels that were starting to dry while your just getting around to
spraying the area next to it. Plus with our magnificent, money no object,
extraction system there was a good chance one of us would probably die
from toxic fumigation.
Got to spend a little time being precise taping the car up before hand as
any paint that gets under it and on to the other half will show up when
you spray over it later....

Image

Image

1 inch tape around all the edges first....

Image

Image

Image

Image

and then with that done, roll out the paper and fill in the gaps....

Image

Image

Image

Image

Image

quick once over with pre-cleaner, a swift wipe of the tac-rag, slop
some paint together, fire it into the gun, and splatter it out on to the
shell, leaves it looking like this....

Image

Image

Image

again handy having it on the spit for this part as you can turn it to any
angle to help getting all the nooks and crevices inside and underneath....

Image

Image

Image

Image

Image

Image

and when that was finished and dried the paper is whipped of and
everything that was sprayed is now taped off ready for the second
half to start....

Image

the window and door jams are all taped from the inside so as to
allow full coverage right out to the edges....

Image

Image

Image

there is however one danger to watch out for when
taping a car up from the inside....

Image

with all that done the final thing was to hang some paper down from
the sills of the car. This is not to avoid overspray on the underneath
of the car, thankfully we're not quite that anal, but instead to stop
and spray travelling under the car and landing on freshly painted
panels the far side....

Image

Image

a wipe, tac, mix and splatter later....

Image

Image

Image

Image

Image

Image

Image

Image

with the shell now fully primered we could move attention to the other
bits, bumpers, doors, spoilers etc. However to do this the shell would have
to go outside to make room, and we were worried that extreme temperatures
of the Irish summer season might literally warp the metalwork!
Yeah, as usuall it had been pissing rain solid for a week now....

Image

alas, just as we were about to abandon work on the M and start
building an ark, the clouds broke and the sun shone through long
enough to allow us to get this done.

a few lengths of steel....

Image

spit dismantled....

Image

Image

one short length of steel bolted to each spit stand...

Image

Image

and some pimp daddy chain...

Image

allows us to hang the panels up for spraying like so....

Image

Image

Image

and some string from the rafters hangs the spoiler and mirrors.
(spoiler worked out grand like this, mirrors were a disaster,
imagine trying to spray an old grandfather clock pendulum, whilst moving,
and you'll get the picture, you live and you learn)....

Image

the rest of the stuff went on what ever we could find to prop them up...

Image

Image

started to run out of suitable props at this stage so had to borrow the
neighbours wheelie bin.....

Image

had to be careful with that and tape it up good and proper as he's
already fairly suspicious as to why the grass in his back garden
has turned a funny shade of primer grey.

bumper plugs are removed and done separately so as to allow the
primer under where they shall sit....

Image

Image

and thats it, the last of the stuff to be primered.....

Image

wipe, tac, mix, splatter and ta-daaaa....

Image

Image

Image

Image

Image

Image

Image

Image

join us tomorrow evening to find out how things turn out as we
take a turn to the darker side and start applying the Jet black.

join us tomorrow evening to find out how things turn out as we
take a turn to the darker side and start applying the Jet black.
Last edited by x-works on Mon Mar 07, 2016 7:16 pm, edited 1 time in total.
Alex
Married to the E30 Zone
Posts: 22666
Joined: Fri Feb 11, 2005 11:00 pm
Location: Johannesburg, South Africa

Thu Aug 27, 2009 9:44 pm

:cool: :cool:
clarko74
Old Skooler
Old Skooler
Posts: 1578
Joined: Sat Mar 05, 2005 11:00 pm
Location: Kent

Thu Aug 27, 2009 10:05 pm

very :cool:

Fantastic thread, can't wait to see it after the final coat.
clarko74
Image
dano0
E30 Zone Regular
E30 Zone Regular
Posts: 708
Joined: Sun May 13, 2007 11:00 pm
Location: swindon

Thu Aug 27, 2009 10:19 pm

nice work are you painting it now or are you still sending it off to be easy baked ?
definite zone gold has my vote
E30Gheko
E30 Zone Addict
E30 Zone Addict
Posts: 3789
Joined: Sun Sep 28, 2008 11:00 pm
Location: Wirral

Thu Aug 27, 2009 11:09 pm

8O 8O

I nominated this for zone gold months ago!!

Gripping stuff, sooo lookin forward to seein some black go on! 8) 8)
Mayze
E30 Zone Regular
E30 Zone Regular
Posts: 648
Joined: Mon Sep 10, 2007 11:00 pm
Location: Wirral

Fri Aug 28, 2009 12:45 am

I'm looking forward to the next couple of days installments.

I'm learning as this thread goes along ive just bought a spray gun some 2k thinners, clear and a can of diamond black the tech 1 kit is getting sprayed this weekend.

This thread is better that most of the guides ive found on the net so far.

Keep up the good work and I hope the weather gets better for you.
Image
E30Mark
E30 Zone Team Member
Posts: 8107
Joined: Sun Jan 09, 2005 11:00 pm
Location: Wimborne, Dorset

Fri Aug 28, 2009 1:05 am

I can smell / taste the paint from here 8)

Hope the top coats go well.
1 & 2 bed flats in Bournemouth areas, with parking
PM for details
User avatar
JamesF
E30 Zone Newbie
E30 Zone Newbie
Posts: 6
Joined: Thu Aug 27, 2009 11:00 pm

Fri Aug 28, 2009 1:09 am

Speechless!

Amazing! :eek:

As said above, you can learn so much from what you've posted, great job on all accounts 8)
Nay
Channel Island Crew
Channel Island Crew
Posts: 3988
Joined: Wed Aug 13, 2008 11:00 pm

Fri Aug 28, 2009 11:48 am

Pure, pure porn... I mean gold! :D


As above I'm sure many people reading this will learn soo much about respraying. I'm really tempted to do it myself, but I think I'll leave that to the pros... who blatently wont do that good a job!

I'm being to contemplate offering to make a custom website for your car and its build, as if you keep this up right untill the car is done... it will be not only one of the top resto's out there but a guide for everyone on how to do it. Only a small payback for the amount people can learn from this :D


Btw, just re-remembered the title! All this for some minor rust :D
Image

Uni is killing the project.
User avatar
ROC
E30 Zone Regular
E30 Zone Regular
Posts: 615
Joined: Mon Aug 29, 2005 11:00 pm
Location: Northants

Fri Aug 28, 2009 12:01 pm

Great stuff, very enjoyable read/pictures.

Not trying to be a boring sod but you do know how toxic 2 pack paint is without a properly filtered booth/air fed mask?
Morat
E30 Zone Team Member
Posts: 8943
Joined: Thu Feb 09, 2006 11:00 pm
Location: The Peoples Republic of Yorkshire

Fri Aug 28, 2009 3:58 pm

I bet white is starting to look like a tempting colour at this point :)
E30 Touring 0.35 cD - more slippery than prison soap :)

Image
Praise the Lard... and pass the dripping!
Nay
Channel Island Crew
Channel Island Crew
Posts: 3988
Joined: Wed Aug 13, 2008 11:00 pm

Fri Aug 28, 2009 5:00 pm

Morat wrote:I bet white is starting to look like a tempting colour at this point :)
Until he starts applying black! 8)
Image

Uni is killing the project.
x-works
E30 Zone Regular
E30 Zone Regular
Posts: 332
Joined: Thu Mar 10, 2005 11:00 pm
Location: Ireland
Contact:

Fri Aug 28, 2009 11:47 pm

We had decided right from the start of this project that the car would
be going out to have it's top coat applied by a professional. The
reasons for this were:
a) i wanted the top coat and lacquer to be baked in an
oven to get the finish as hard as possible.
b) i wanted the finish to be fly free, ie. nothing stuck to the
outside of the shell but paint, no dust, no flies, no stray pigeons.
c) perhaps most importantly of all I wanted it painted by a
professional. We've sprayed quite a bit so far on this car and quite
a few rally cars in the past and in a moment we'll also be spraying some black
to the interior and underneath of this one. But, there's a world of difference
between spraying primer and spraying top coat. Spraying primer is fairly
straight forward and your always going to be sanding it before the next
coating anyway so the finish doesn't have to be mint. But top coat can go
t*ts up in the blink of an eye if you haven't got enough experience to spot
the signs that all is not well. After this much effort to prep it, I want the top
coat to be as good as it can be and for that to happen it needs to be
painted by someone with a lot more experience than me.

That said, I'll be f**ked if i'm going to let someone else have all the fun, we
were going to paint as much black as we could first.
With the whole car now primered the bits we were going to paint black
next would need to be sanded/ flattened. For the interior and boot we
used these.....

Image

above is a 180 grit soft sanding block and below is a 220 grit
sanding pad. They're much quicker to use than normal sheets of
wet and dry paper and they'd do just fine to give a quick lick to the
interior....

Image

the engine bay was a different story though. I'd spent a lot of time
already sanding parts of the engine bay smooth and sanding down
the seam sealer flat as I wanted the bay to look as good as the
outside of the car. So now the primer in here was going to have to be
guide coated and wet sanded with 600grit to get it mirror flat. Only
the turrets, wheel tubs, chassis legs and front slam panel got this
treatment. Not bothering going this far on the bulkhead as it'll be
covered by the oem soundproofing.....

Image

and with that eventually finished it was time to shoot a couple of
coats of blackness....

Image

very happy with how it came out, interior took it very well...

Image

the boot, as always,was a pure pig to do but came out well too.
For anyone who's curious as to why a boot's a pig to spray, get yourself
an empty kellogs conflakes box, stick your head inside it and then
shove an aerosol can in there aswell and try to spray the inside of the box.
You'll get the idea pretty quick.

Image

underside came out pretty sweet to....

Image

Image

and then the engine bay, would all that extra sanding pay off???

Image

it looked like all that extra effort was worth while, the majority of
the bay was silky smooth...

Image

all except that is, the f**king turret's and wheel tubs which was the
main part I wanted to get right....

Image

I'd like to say I took this discovery in a cool and collective manner,
but the truth is passers by outside had to cover there young children's
ears for quite some time. What had happened was we had sprayed
the underside of the car first and some overspray had blew up in to
the engine bay and settled on the turrets. Unawares of this we then
flipped the shell over and started spraying the engine bay. You could
see it showing through as we were spraying but there wasn't a lot we
could do then, so we finished and let it dry to see what it would look like....

Image


It's not terrible, but it's not what I wanted either. And the irony of it is
it's only on the turrets and wheels tubs, the only part thats really noticable
when everything refitted to the bay. So, what to do? well if you've read
this far you've probably a good idea. After leaving the paint to fully
cure the effected areas were wet sanded back down again with 600grit.
Didn't have to go right back to the primer to get it flat although the areas
do look grey in the pictures...

Image

Image

each side was sanded back to a line or crease in the bodywork
as it was going to have to be taped off to be resprayed and
you don't want nasty tape/paint lines standing out.....

Image

So to also help blend in the resprayed parts, instead of just normally
taping off the area, the masking tape was rolled like so....

Image

and then placed snug up against the seam....

Image

and another strip of tape softly over it to stop the roll unfurling....

Image

and repeat until all the area is done....

Image

Image

the thinking behind this is that if you just taped it normally you'd get
a noticeable line where the paint builds up against the edge of the
tape, whereas this way some of the paint will fade in under the roll
and if all goes well, make the line unnoticeable.
With that done the rest of the shell needed to be taped up....

Image

Image

Image

and then mix a small bit of paint, spray it on, say 3 decades of the rosary
and slowly open one eye to see if it's come up good....

Image

yipidy f u c k i n g doda....

Image

Image

with that little episode over it was time to move on to the final
preparation of the exterior and remaining panels for top coat.
The reason this wasn't sanded along with the interior is if any
overspray crept through the masking you could end up 15 pictures
back up again and in serious need of sedation. Quick mask up
to stop the nice black paintwork getting messed up by the coming
wet sanding....

Image

Image


and then head to toe every last square inch of bodywork left in
primer gets powder guide coated and wet sanded with 600grit wet
and dry paper....

Image

no scratches or blemishes to worry about this time just the need to
get the primer as mirror flat as possible, any top coat can only be
as flat as whats underneath it....

Image

bit of washing up liquid in the water helps the sanding go a little easier
and cleans any stray contaminants off the panels as you go...

Image

this....

Image

took...

Image

forever....

Image

and...

Image

a day...

Image

or 3 weeks to be precise....

Image

but there is a small reward, with everything sanded so smooth
you could now catch the light and see reflections on the panels
and see how flat it'll look when black....

Image

Image

Image

Image

Image

Image

and then with nothing left to do, the time had finally come for the
top coat to go on. How was the black going to look? Would it
come out ok? Was all this effort going to pay off?.....

Image

Image

And i'd dearly love to be able to tell you all, but the simple truth is,
we just delivered the shell to the bodyshop this morning and it'll be
an agonising few weeks before we get to see the finished article.

But at least now you know how I feel.....

Last edited by x-works on Mon Mar 07, 2016 7:21 pm, edited 1 time in total.
E30Gheko
E30 Zone Addict
E30 Zone Addict
Posts: 3789
Joined: Sun Sep 28, 2008 11:00 pm
Location: Wirral

Sat Aug 29, 2009 12:36 am

Absolutely inspiring. A joy to watch this develop into what must surely be one of the most desirable E30 M3's in existence. Hats off. Incredible dedication. :cool:
User avatar
m42sport
E30 Zone Newbie
E30 Zone Newbie
Posts: 47
Joined: Sat Jan 26, 2008 11:00 pm

Sat Aug 29, 2009 12:36 am

WOW!!!! I wonder what it would cost to restore to the quality you have done.
Image
User avatar
hoshy
E30 Zone Wiki Guru
E30 Zone Wiki Guru
Posts: 4118
Joined: Tue Jan 18, 2005 11:00 pm
Location: Munich

Sat Aug 29, 2009 11:31 am

Good luck with the top coat - I'm sure she'll come back perfect mate.
E46 M3 CSL but dreaming of another E30.
User avatar
gooner1
Out humping Reindeer
Posts: 13280
Joined: Fri Apr 14, 2006 11:00 pm
Location: Northampton.For my sins.

Sat Aug 29, 2009 11:51 am

x-works, Awesome is a very overused word on here. but in this case it is totally apt. :drool:
Image
bmwe30mtech
Engaged to the E30 Zone
Posts: 5288
Joined: Thu Feb 03, 2005 11:00 pm

Sat Aug 29, 2009 11:57 am

Amazing work, and it's clearly all paying off. Im always checking this thread for updates, truely inspiring. A real 'blank canvas' restoration.
1988 M3 EvoII, Macau Blue/EvoII trim
1989 325i Sport M Tech II, Diamond Black/Black leather
Falkster
Engaged to the E30 Zone
Posts: 5787
Joined: Fri Sep 30, 2005 11:00 pm
Location: Yorkshire

Sat Aug 29, 2009 4:05 pm

I have a little dribble every time I look at the new pics!
Image
User avatar
corkie
E30 Zone Addict
E30 Zone Addict
Posts: 2151
Joined: Thu Feb 21, 2008 11:00 pm
Location: Hertfordshire

Sat Aug 29, 2009 9:38 pm

:bow:
e30
shazE30
E30 Zone Camper
E30 Zone Camper
Posts: 1050
Joined: Thu Apr 20, 2006 11:00 pm

Sun Aug 30, 2009 12:08 am

I hope all goes well and the standard of the top-coat is to your satisfaction because from your devotion and commitment to the project you seem like the type who could murder someone, I know I would :D
Image
Nay
Channel Island Crew
Channel Island Crew
Posts: 3988
Joined: Wed Aug 13, 2008 11:00 pm

Tue Sep 01, 2009 2:18 am

Would you be up for some commission work? :lol:

Awesome is an understatement. "Epic" suits this thread better.

So whats the ETA on the top coat?
Image

Uni is killing the project.
Post Reply