My Track Car Build, Spanning past 3 years

Log / show off your build here.

Moderator: martauto

Motorhole
E30 Zone Addict
E30 Zone Addict
Posts: 2395
Joined: Tue Jul 12, 2005 11:00 pm
Location: Cheshire

Tue Mar 19, 2013 4:13 pm

About time I put up a build log. I have a few photos I have collected over the years, so I'm going to upload them to this thread bit by bit. The gist is, I started off with very little mechanical experience and little more than spanners, screwdrivers and a socket set. I am now nearing completion of this M52 track car build and my knowledge - and toolkit - have expanded considerably.

It's not open chequebook by any means - I've scavenged parts as and when I've been able, but I've not cut costs on key items. I'm also limited to about 10 hours work a week at best and I abandoned it for 6 months in 2011 to save for a trip to NZ. I work in a 3x8 metre garage a few miles from my house with nothing but a little 3.2 kW generator for company when need be. So it's taken bloody ages and it's tested my faith and resolve many, many times. But now it's getting there.

So - elements and finances have been against me and my car is a little rough round the edges. But hopefully this will provide a little inspiration to people in a similar position and hopefully it's going to go like hell...not looking forward to all the teething problems once I get it running though...I'm sure you guys will be here to help, as you always have.

So, this is how it all started: a breakup with a girl, some spare cash in my back pocket and then - a tired, but solid and clean 318i lux that I picked up for around £800 at the beginning of 2009:

Image

Image

Image

Image
Motorhole
E30 Zone Addict
E30 Zone Addict
Posts: 2395
Joined: Tue Jul 12, 2005 11:00 pm
Location: Cheshire

Tue Mar 19, 2013 5:15 pm

In the common words of many, "I didn't mean to go this far!"

As was the case with this.

The early days - I stripped the interior and binned the Clifford alarm/immobiliser that was causing me so many problems and rocked about in it like that for a couple of months!

Image
Image
Image
Image
Image
Image

First ever experience with auto electrics! But reading wiring diagrams isn't so bad. The Germans know how to wire a car logically.

Image
Image
Image

Then I got the combined feelings of fear and regret that I'd taken a perfectly good E30 and ruined it.

It was time to quickly move on before these feelings consumed me.
Motorhole
E30 Zone Addict
E30 Zone Addict
Posts: 2395
Joined: Tue Jul 12, 2005 11:00 pm
Location: Cheshire

Tue Mar 19, 2013 5:36 pm

So it was time to really crack on.

Now, I decided to commit myself to taking the car off the road and doing an engine swap. I had an LS1 in mind at the time, so I thought a welded cage and some stitch welding around key seams wouldn't go amiss.

It was about this time that I got my garage.

Image

And the stripping began in earnest.

Image
Image
Image

This did nothing to quell the dread that I'd ruined a nice car. So still thinking that further progress might be the cure - or just that the more work I did, the less I thought about it - out came the engine & box.

Image
Image
Image
Image

It was at this point, I began to have serious doubts about how to put things back together :o:
Driftben
E30 Zone Camper
E30 Zone Camper
Posts: 1144
Joined: Sun Sep 28, 2008 11:00 pm
Location: Westgate on Sea

Tue Mar 19, 2013 8:41 pm

mine started off with a break up with a girl too matey........ a stripped E30 with a M60 power plant and im still single and broke haha.

hows progress?
Image
6pot wilwoods front
4pot Porsche rear
89 E30 stripped running a 6speed V8
Twin Turbo M60 in progress
User avatar
Mikey_Boy
E30 Zone Regular
E30 Zone Regular
Posts: 996
Joined: Sun Mar 16, 2008 11:00 pm
Location: Cheshire - trying to avoid the bling!

Wed Mar 20, 2013 7:59 am

^^^^^ Super work - looking forward to seeing more pictures! :thumb:
Motorhole
E30 Zone Addict
E30 Zone Addict
Posts: 2395
Joined: Tue Jul 12, 2005 11:00 pm
Location: Cheshire

Wed Mar 20, 2013 8:21 am

Thanks chaps! Will add a couple more 'chapters' today.

@Driftben

I reckon first trackday will be early this summer :) Although I am no longer single - current missus isn't keen on the project at all but she humours me to some extent.

Your M60 E30 looks ace. Have you driven it yet with the compact shafts and smaller output flanges? Any probs?
Motorhole
E30 Zone Addict
E30 Zone Addict
Posts: 2395
Joined: Tue Jul 12, 2005 11:00 pm
Location: Cheshire

Wed Mar 20, 2013 10:12 am

At this stage, it was time to do a rust recon! This came out surprisingly favourable. There were a few bits and bobs, but nothing majorly structural or not easily fixed with some MIG and steel. So I needed to get a quote for the stitch welding and rollcage installation and I took some photos of the rust to get these included too. I also wanted the sunroof welding up for good measure.

Driver's footwell:

Image

Under the arch liner, rear nearside arch:

Image

Arch lips on both rear arches:

Image

Couple of small patches on the sills:

Image
Image

So I got a quote from Northwest RS centre that I was happy with, to do all the work plus a blowover in the paint booth and the shell went on holiday for a couple of weeks.

Image
Driftben
E30 Zone Camper
E30 Zone Camper
Posts: 1144
Joined: Sun Sep 28, 2008 11:00 pm
Location: Westgate on Sea

Wed Mar 20, 2013 10:37 am

Haha yep you will be hard pushed to find a lady who likes projects/cars as much as you do.
Probably why I'm still single.

Anyway, I haven't driven with the E36 drive shafts just yet but I'll be taxing it this week so will be this week I'll give you a update on that.
I'm hoping it will be Aok so I can then concentrate on other areas which need finishing up for the good weather trackday season.

Good progress though and just out of interest how much was the quote for abit of rust prevention and a blow over if you don't mind me asking?
Image
6pot wilwoods front
4pot Porsche rear
89 E30 stripped running a 6speed V8
Twin Turbo M60 in progress
Motorhole
E30 Zone Addict
E30 Zone Addict
Posts: 2395
Joined: Tue Jul 12, 2005 11:00 pm
Location: Cheshire

Wed Mar 20, 2013 11:00 am

I'd spoken with the head honcho at the RS Centre beforehand and had a look at the Escorts, Fiestas and Capris in their workshop. Was really impressed with the quality of their welding and build work.

But they had never worked on an E30 before! Here's what they did to mine.

Sunroof welded up with a section of Capri roof skin:

Image
Image

Sunroof tray stayed in though, unfortunately. In my early days of learning and naivety, I didn't realise the benefits of cutting this out! Merely a minor annoyance, but we all know how these can add up (more on minor annoyances later!)

They stitch welded the front and rear inner wings and turrets:

Image
Image
Image

They cut out rusty metal and replaced with new. In the process, they subtly flared the rear arches. They cut off the old arch lips, added new ones with some extra metal and stitch welded the seam between inner and outer wings.

Image
Image
Image

And they custom made a 6-point welded rollcage from CDS tubular steel, with harness bar.

Image
Image

Following the blowover, my car was left looking like this:

Image
Image
Image
Image
Image
Image

Okay, so onto more minor annoyances.

As I have already said, I knew little about all this stuff when I started and blown away by my shiny new motor, I didn't thoroughly check the work that had been done. Now, I am both happy, but also a little unhappy - working on the car since has given me a real good look at the work.

Sunroof job, roll-cage and welding, metalwork - they are all top notch jobs. It's the little things that annoy me. The inner lip of the arch was not smooth and half was rolled, half wasn't. Paint finish over the stitch welding wasn't quite right and I've had to wirebrush some of this back and re-do and the colour doesn't match 100%. Where the welding heat had caused underseal to peel off (e.g. rollcage floor plates), or where it had been removed - it hadn't been re-done. Minor annoyances. Anyway, I've since gotten round to addressing most of these, but the half-rolled arches created a little bit more of an issue I've only recently come across. So more on this later!
Motorhole
E30 Zone Addict
E30 Zone Addict
Posts: 2395
Joined: Tue Jul 12, 2005 11:00 pm
Location: Cheshire

Wed Mar 20, 2013 11:25 am

Driftben wrote:Haha yep you will be hard pushed to find a lady who likes projects/cars as much as you do.
Probably why I'm still single.

Anyway, I haven't driven with the E36 drive shafts just yet but I'll be taxing it this week so will be this week I'll give you a update on that.
I'm hoping it will be Aok so I can then concentrate on other areas which need finishing up for the good weather trackday season.

Good progress though and just out of interest how much was the quote for abit of rust prevention and a blow over if you don't mind me asking?
It's not so much the lack of love for cars, more the disproportionate amount of money that gets spent! Still - most of it's been spent now, not much in the way of expensive parts left.

As for the blowover, that was done for £800 - but that was nearly 3 years ago.
Motorhole
E30 Zone Addict
E30 Zone Addict
Posts: 2395
Joined: Tue Jul 12, 2005 11:00 pm
Location: Cheshire

Wed Mar 20, 2013 5:44 pm

I now turned my attention to suspension.

My plan was to do a full 5-stud conversion. My reasoning behind this at the time was that I would gain extra track, get big brakes and essentially have E30 M3 front geometry for a fraction of the cost of E30 M3 parts and a big brake kit. It's not quite turned out like that - more on that later on down the line - but this is how it started.

I sourced some E36 318ti rear arms and got a camber/toe adjustable beam from DanThe. I was also lucky to get a 2nd hand but unused set of E36 compact Koni coilovers for a good price. And I got an entire car set of Powerflex poly bushes 2nd hand but unused. So at this stage, I had a set of coilovers plus everything I needed for 5-stud, save for the E36 M3 Evo front arms, kingpins and adjustable top mounts, for little more than £700.

I set about removing the rear end.

Image
Image
Image
Image

Sadly, I managed this and needed a new subframe pin :(

Image

Bushes, E46 rear top mounts and Black Diamond braided brake lines:

Image

Good as new rear beam after I'd pushed in the Powerflex bushes:

Image

Quality work from DanThe, as always.

Image
Image

318ti rear trailing arms:

Image
Image
Image
Image
Image
Image
Image

New rear t-piece brake lines made up:

Image

Koni adjustable rear dampers ready with E46 rear top mounts:

Image

Before installing, I made sure rear wheel wells were well and truly wire brushed, painted and undersealed:

Image
Image
Image

Then onto installation - forgot to mention, new handbrake cables went into this too :)

Image

Note the brake pipe going through the rear seatbelt hole. This was the original plan but I'm now (as in currently) scrapping this idea.

Image
Image
Image

Note that 318ti driveshafts do NOT fit E30 small-case differential output shafts - hence the bungee cords. A temporary measure. I also did the complete rear beam removal, overhaul and refit as a one man job - with 3 jacks and a bit of patience, it can be done! I was getting a little more cocky with me new-found mechanic's skills and the earlier doubts about being unable to reassemble the thing were beginning to fade. A little.

And I also needed to source some 5-stud wheels to roll the shell on.
rix313
E30 Zone Team Member
Posts: 4939
Joined: Fri Oct 31, 2008 11:00 pm
Location: Silverstone
Contact:

Wed Mar 20, 2013 8:45 pm

Looks mega 8) Looking forward to seeing more.
DanThe
E30 Zone Team Member
Posts: 28640
Joined: Sat Sep 10, 2005 11:00 pm
Location: Staffs
Contact:

Wed Mar 20, 2013 9:15 pm

Its a shame about that sunroof tray, would have taken the cage higher which would be the main benefit. Still a great job on the rest :D
Motorhole
E30 Zone Addict
E30 Zone Addict
Posts: 2395
Joined: Tue Jul 12, 2005 11:00 pm
Location: Cheshire

Wed Mar 20, 2013 9:19 pm

It was about this time I had to park things to save for the excursion to New Zealand. I did get on with a few cheap, simple jobs though. Sourcing some interim wheels, removing the thick bitumen sound deadening and spraying the interior. I also refitted lights, trim pieces etc and plugged all the wires back in for the rear end.

Image
Image
Image

When I got back from New Zealand some 6 months later, it was time to recommence - beginning with the front end. Of course I already had E30 M3 eccentric bushes in Powerflex flavour and E36 Compact coilovers, so I just needed to source E36 M3 Evo front wishbones, kingpins and brakes. I got the wishbones, kingpins and carriers for about £100 iirc and decided to buy a pair of remanufactured calipers (brakes international) and new Mintex discs, which set me back about £240 all in - I got a very good deal on the calipers. So a complete 5-stud conversion complete front rebound and height-adjustable colivers and rebound adjustable rear shocks for not much more than a grand :D In this case, taking my time allowed me to sit and cherry pick parts as and when they popped up, which has saved me a bit in the long run.

In addition to all the 5-stud crap, I got an E46 clubsport rack off DanThe along with one of his splined shafts and 1 E34 UJ. I got the other E34 UJ off Ebay for the silly price of £15. Some people still don't know what they are worth...

Anyway, onto the build! Firstly, fitting the rack with fresh E30 track rod ends. I sourced jubilee clips from B&Q for the boots.

Image
Image
Image

Then, the linkage:

Image
Image
Image

One completed hybrid E30/E34 UJ:

Image
Image
Image

I had some issues with a subframe I sent off to an unnamed zoner to be powdercoated and reinforced. After chasing him up forever, I gave up and just bought one off Ebay, cleaned it up with a wire brush and gave it a lick of paint. I used suitably sized welding spacers as rack spacers - 15 mm did the job perfectly. I pressed the bushes into the lollipops and then onto the wishbones and bolted the whole lot together. With a liberal wire brushing, painting and undersealing of the front wheel wells first!

E36 M3 Evo Wishbone:

Image

Coilovers fitted with E36 M3 Evo kingpins.

Image

I then replaced the Koni top-hats with the roller-bearing ones that came with these camber-adjustable top mounts from NP-Team:

Image

Subframe and wishbones fitted. I later binned what was left of that poxy heat shield.

Image
Image

Steering rack fitted:

Image

And then coilovers, minus brakes. I fit the brakes later on.

Image

Slight clearance issues with the E46 offset wheels! Hence the cheapo 3mm spacers in the previous pic, again purchased only as an interim measure to roll the shell around. But of course, this factored into my choice of offset for my actual wheels later on.

Image

Photo of my car with 3 wheels in the air, supported by just one axle stand! Wouldn't work underneath the car like this of course, but a nice demonstration of rigidity :)

Image

Then there's the E36 M3 brake calipers and carriers...

Image

...with HUGE pistons - 50 pence piece added for scale.

Image

I've actually only just fitted these - and as the project is still a month or two off, I'm refraining from buying pads until I have to to avoid any contamination. Discs are going to need a quick run over with the wire brush before it sees action.

Anyway, this is how the arrangement sat on the E46 wheels:

Image
Image

Incidentally, those wheels are now on Ebay with 4 days left if anyone is interested!

It was at this point I ran into issues with the E36 5-stud setup. Although I don't have any of the serious wheel centering problems or contact with chassis rails on full lock, as others have occasionally reported, I have noticed the following:

1) Despite using all the right bits, castor might still be within stock E30 spec (yet to confirm - but it looks okay), it is still not up to E30 M3 spec.

2) Scope for negative camber isn't that great. Even with the top mounts on full neg.

Okay, it will be easier to tell for sure once the engine is in and I've done the alignment proper. And there are other ways to increase scope for camber - shims between the bottom kingpin and strut mount for one. But the acid test will be in how it drives. For the moment I'm trying to remain optimistic.

Going back to where I was with the project - the diff is up next

:)
Driftben
E30 Zone Camper
E30 Zone Camper
Posts: 1144
Joined: Sun Sep 28, 2008 11:00 pm
Location: Westgate on Sea

Wed Mar 20, 2013 11:25 pm

Again good bit of progress matey, I'm currently running the exact same 5stud setup as yourself with z3 offset wheels and I have slight contact issue with the tyre and possibly the inner arch on full lock but I do have the ride height quite low.
Iv had mine round a track and it's a very good precise ride but still need to finalise the geometry.
Image
6pot wilwoods front
4pot Porsche rear
89 E30 stripped running a 6speed V8
Twin Turbo M60 in progress
Motorhole
E30 Zone Addict
E30 Zone Addict
Posts: 2395
Joined: Tue Jul 12, 2005 11:00 pm
Location: Cheshire

Thu Mar 21, 2013 1:32 pm

Thanks Ben, it's good to know that someone else has been down the same route and finds it alright! I have the same issue as you - now I've fitted my actual wheels (17x8J ET29), the tyres rub the plastic arch liner slightly on full lock, at the back of the arch. If they are rubbing, ideally it should be the front of the arch! But as I say, alignment is currently way out and the front axle doesn't have the weight of an M52 sat on it yet.

So back to the project - at this point, the sheer amount of cost and effort required for an LS1 swap had frightened me off and I'd settled on an M52 just to get the car up and running and get a few trackdays under its belt. I decided that an LSD would be the determining factor in what gearbox I was going to use. I looked at various aftermarket options from Quaife, Kaaz and Gripper but the most cost effective option was to get a used E30 item and get it rebuilt by Gareth, our zone resident diff specialist.

Then this Z3M diff popped up. It didn't have a backplate - the seller had already sold that on as they go for good money themselves - but it allegedly had only 15,000 miles on it and for the price, it was worth a punt. Worst case was, I'd just end up getting Gareth to rebuild it anyway.

Image

I got a standard medium case diff backplate off Sskoda for 15 squids and got a new gasket, new fill/drain plugs and a new set of casing bolts. I already had the poly diff bush from my earlier mass bush purchase :)

Image
Image
Image

So, all eager and excited again, I trundled my diff under the car...
Image

...and an hour or so of vigorous jiggling and swearing later, I had it securely bolted into place, only to find this:

Image

:(

Of course 318ti driveshafts flanges don't fit Z3M diff output flanges. So I want home in a grump and had a think about things. What was required was 318ti diff output flanges - some research assured me that these would fit but what kind of person sells used diff output flanges without a diff? I didn't want to pay big money to get them from BMW, especially as there wasa real scenario of the not fitting. But a used diff was going to set me back £70-£80 too. Enter a nice American chap from E30Tech who mailed me a pair. Arrived within 6 days and cost not much more than £50 including shipping. Win. So I pulled the flanges from the Z3M diff and replaced them with these. The smaller ones on the left are the 318ti flanges.

Image

At first, I wasn't sure they would fit:

Image

But it just turned out they were a snug fit.

Image

Back to here again:

Image

More vigorous jiggling and swearing and everything lined up nicely:

Image

Then I found out that the M10 hex bolts and spreader plates from the E30 didn't fit the 318ti driveshafts and flanges. So I went on realoem, got the part number for what turned out to be M8x40 items for the 318ti and orderd a set of those with the associated spreader plates. Again, all keen and excited I went to bolt things up and found I was missing an E15 torx socket from my socket set. In fact I found out that pretty much every torx socket set sold in the UK is missing an E15 torx socket. A 10mm 6-sided socket can finger tighten them but can't exert any real torque. I f*cked off paying £15 to get an E15 off ebay, delivered from the states, and ordered some high tensile M8x40 mm hex bolts instead for about £6 delivered.

Finally, my diff was in position and properly torqued up.

Image
Image

If I thought all that was a saga, the brakes are up next... :cry:
Bela
E30 Zone Newbie
E30 Zone Newbie
Posts: 157
Joined: Mon Jul 05, 2010 11:00 pm

Thu Mar 21, 2013 1:57 pm

Excellent project and progress
milescook
E30 Zone Camper
E30 Zone Camper
Posts: 1283
Joined: Thu Jan 13, 2011 11:00 pm
Location: The 'bran of Cwm
Contact:

Thu Mar 21, 2013 2:19 pm

Haha i get deja vous reading bits of this! Yeah brakes aren't funny... Especially when the unions melt in your spanner :-( i've learnt some lessons!
The story so far... http://www.cookracing.co.uk/

Also please help the race budget by watching some videos :) https://www.youtube.com/cookracinguk
Motorhole
E30 Zone Addict
E30 Zone Addict
Posts: 2395
Joined: Tue Jul 12, 2005 11:00 pm
Location: Cheshire

Thu Mar 21, 2013 7:16 pm

Brakes. Rarely is something accidentally c*cked up so severely than in a modified braking system. Deliberate bodges occur in everything else but at least if the hundreds of forum threads/posts I have read are to be believed, lots of people undertake 'upgrades' to their brakes and then complain that they are sh*te. I sincerely hope I'm not going to fall into this camp!

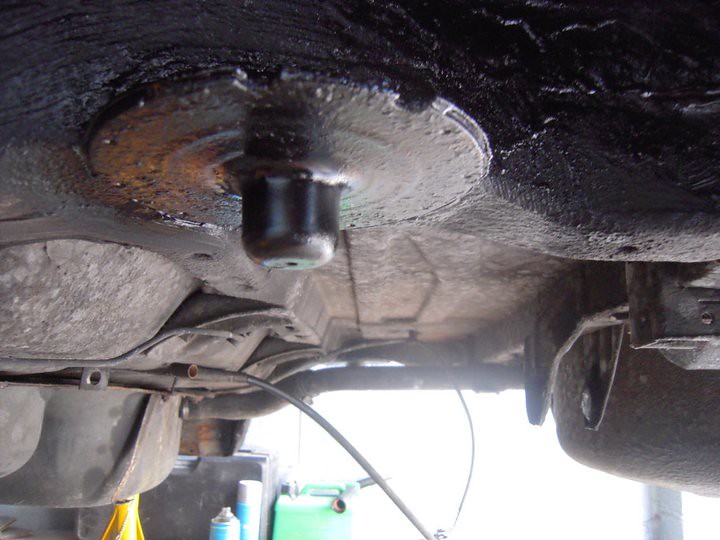
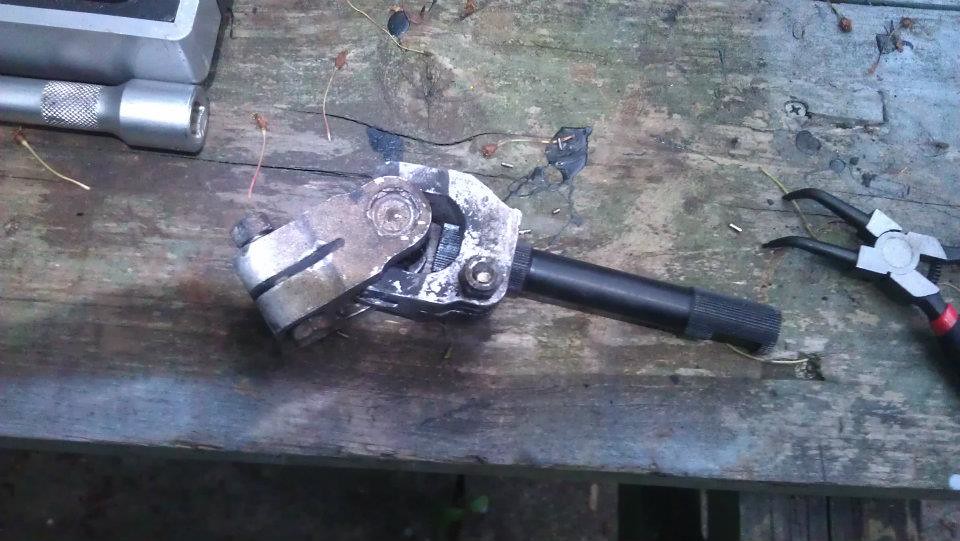
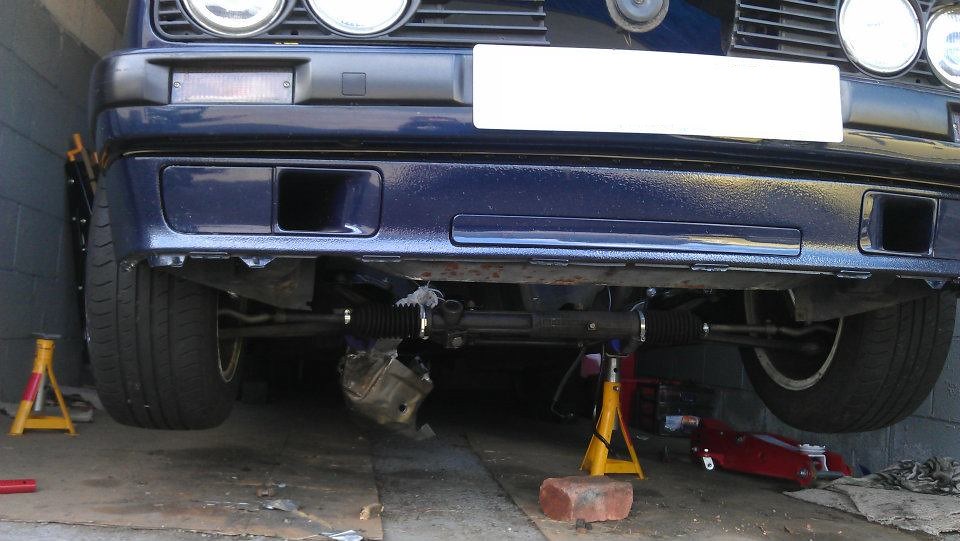
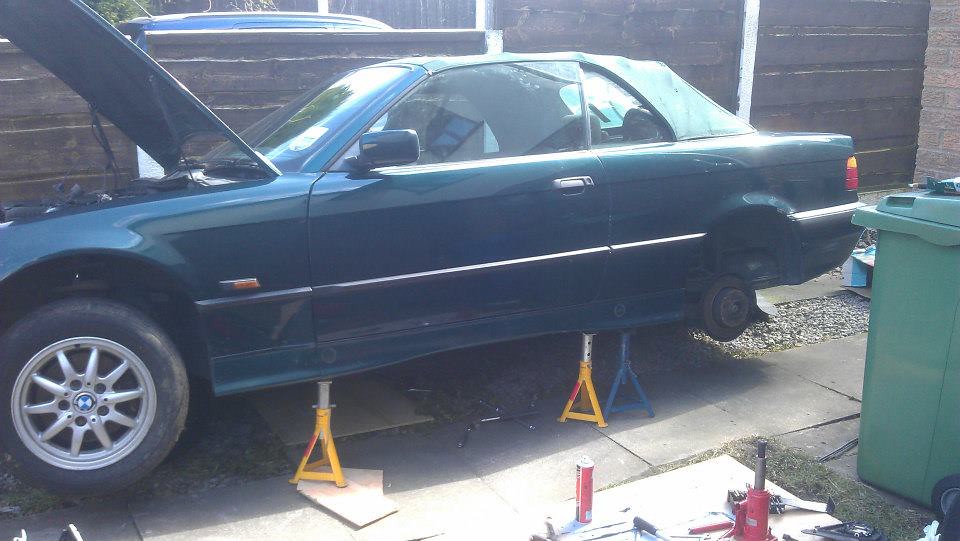
So, as most of us know, the E30 servo is a big old thing and to fit pretty much anything other than a stock E30 engine or another 4-banger (e.g. SR20, YB), something needs to be done about clearance between the servo and the engine. There are 3 solutions:
1) Relocate the servo. I have seen them moved to the front of the engine bay or to the passenger footwell.
2) Fit a smaller servo. I.e. Clio, VW Polo etc.
3) Remove the servo and make up for the loss of assistance in some other way - or not.

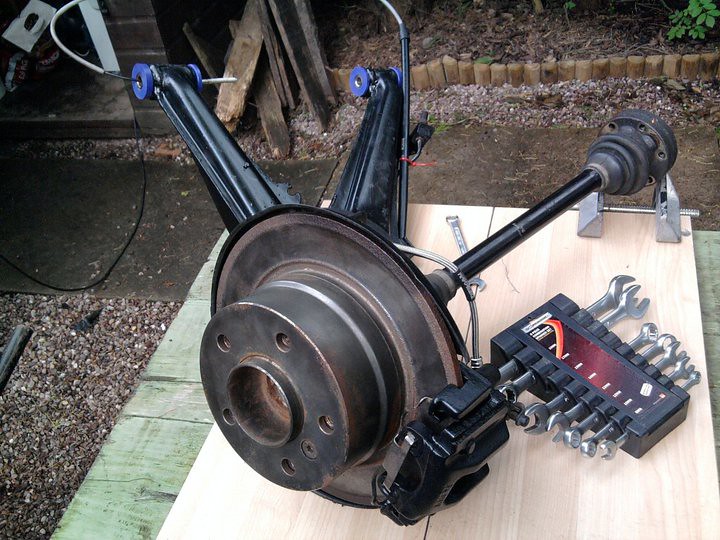
My original plan was to go the common Clio servo route. Well documented, easy, cheap. But this plan was flawed in that my 5-stud setup had calipers at the front with the biggest pistons known to man and calipers at the back with titchy little pistons. This meant that the back brakes would be doing pretty much nothing, even when braking really hard. All I would be doing would be paying for new rear discs and pads twice a year as they rusted to nothing from lack of use. So, if I wanted to make the most of my brakes, I had little option but to go for a full aftermarket pedal box. I don't know how many of you have considered this option, but it's not cheap! My heart sank.

So I looked at various options from the universal ones from the likes of Tilton and OBP, bespoke E30 ones and even Mk1/2 Escort ones - as these are significantly cheaper. I thought if I could get one of these, I could hoik it down to the local engineering shop and get it modified to fit into the stock E30 pedal box holes.

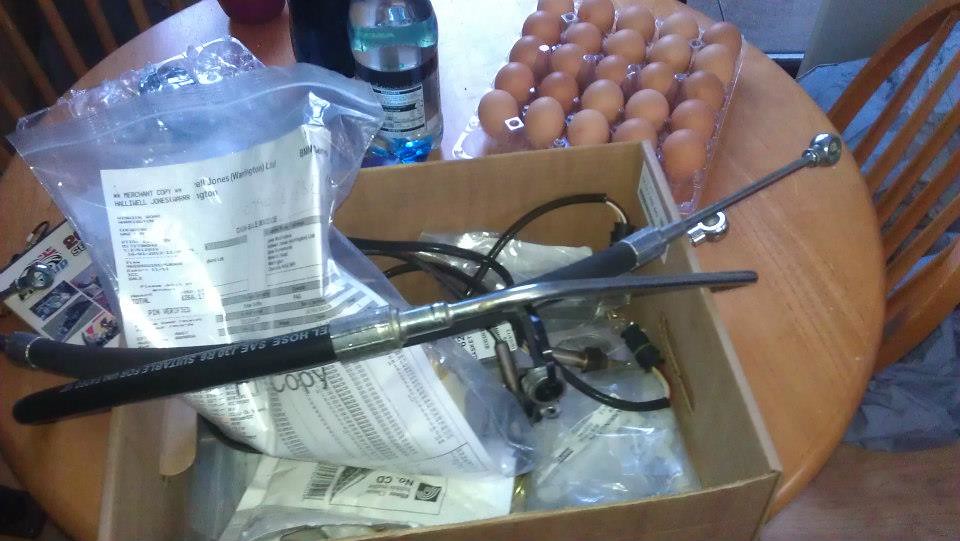
Again, being in no rush here, I took my time considering options and then my favourite kind of part popped up in the for sale section here. A 2nd hand unused one. Moreover, it was the bespoke E30 floor-mounted pedal box from OBP, complete with cylinders, reservoirs, feed lines, bias bar and remote adjuster. That's about £650 worth of kit brand new. I got it for less than half that :cool:

Image

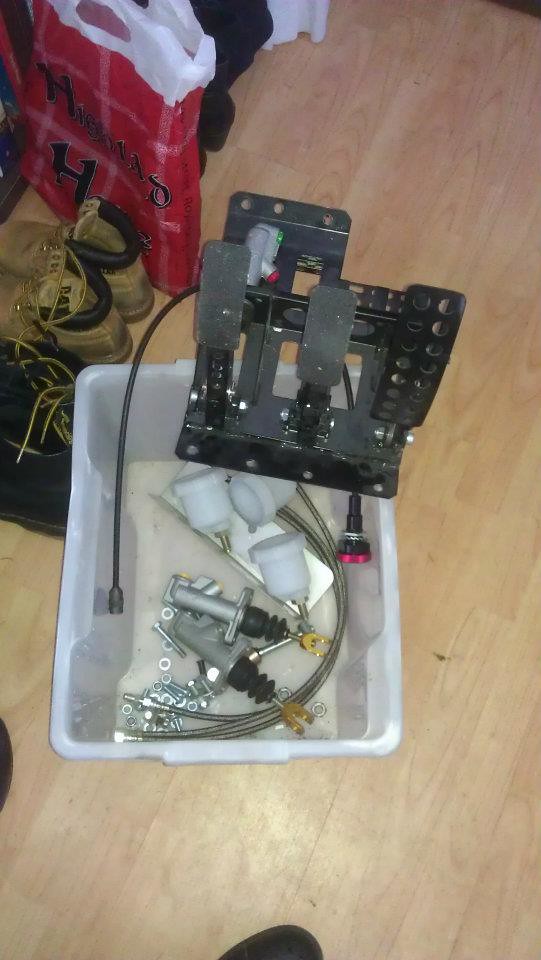
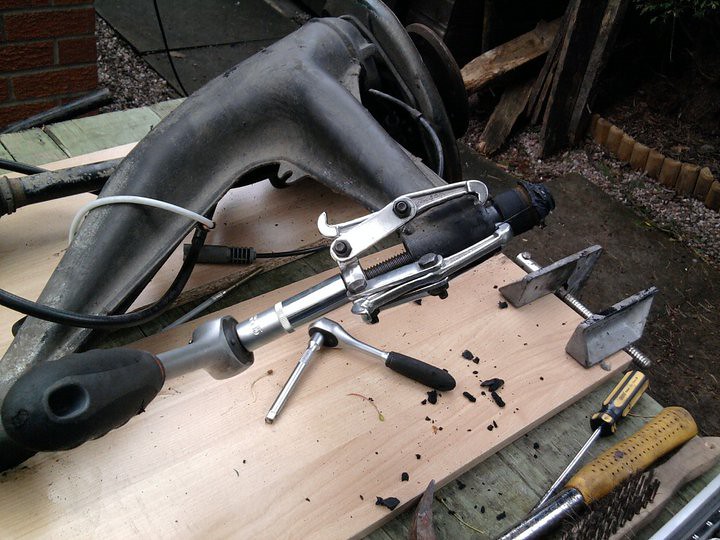
Now unused stuff is all fair and well, but as I didn't know how long the master cylinders have been sitting around for and in what conditions, I didn't want to take any risks. So I whacked these ones on Ebay as untested and bought some new Wilwood ones, in the sizes calculated by a spreadsheet I got checked by Geoffbob. Sizes I now forget. Anyway, the clutch m/s I ordered based on the size of the stock E36 item (as I would be using an E36 clutch slave cylinder). I then proceeded to bolt the lot together, excluding the throttle pedal for now. Lots of PTFE lube was used.

Image
Image

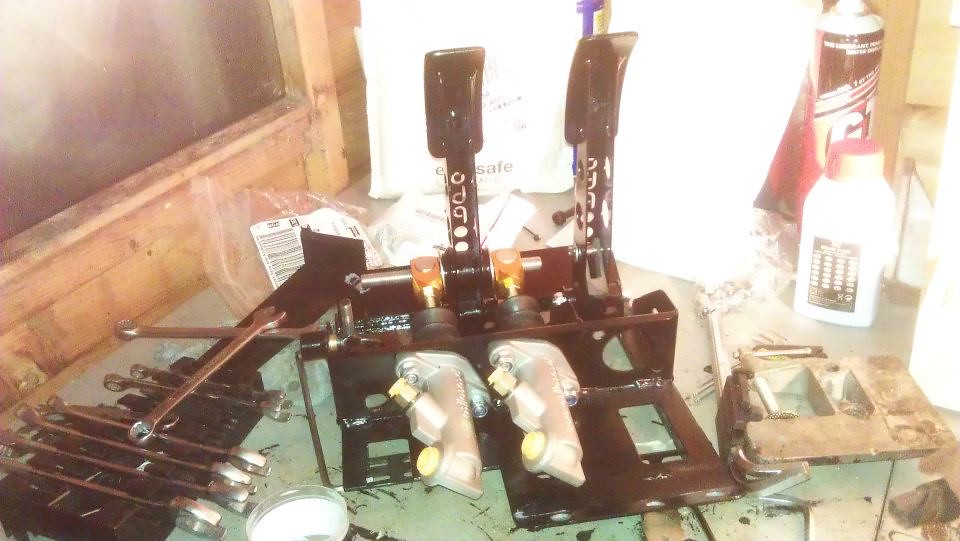
Following recommendations from various documents I read, I fitted large washers either side of the bias bar spherical bearing and made sure the clearance of the pivots from the washers was no more than 2 mm yet allowed plenty of free movement.

[imghttp://farm9.staticflickr.com/8385/8570849163_f01fed99b6_b.jpg[/img]

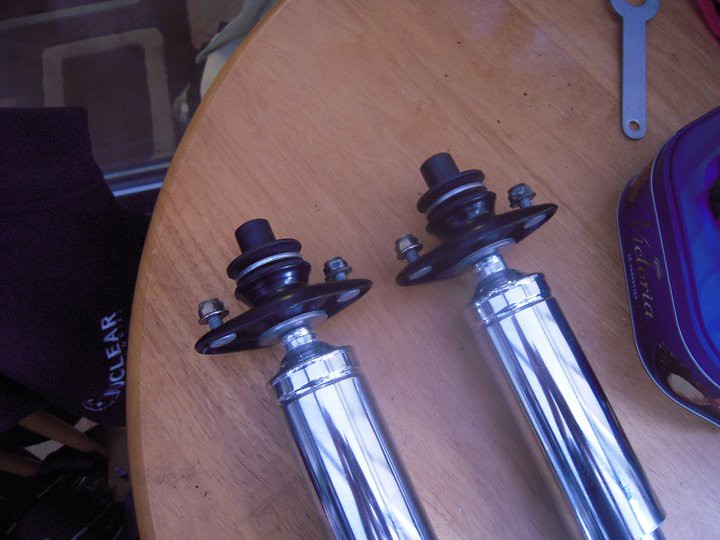
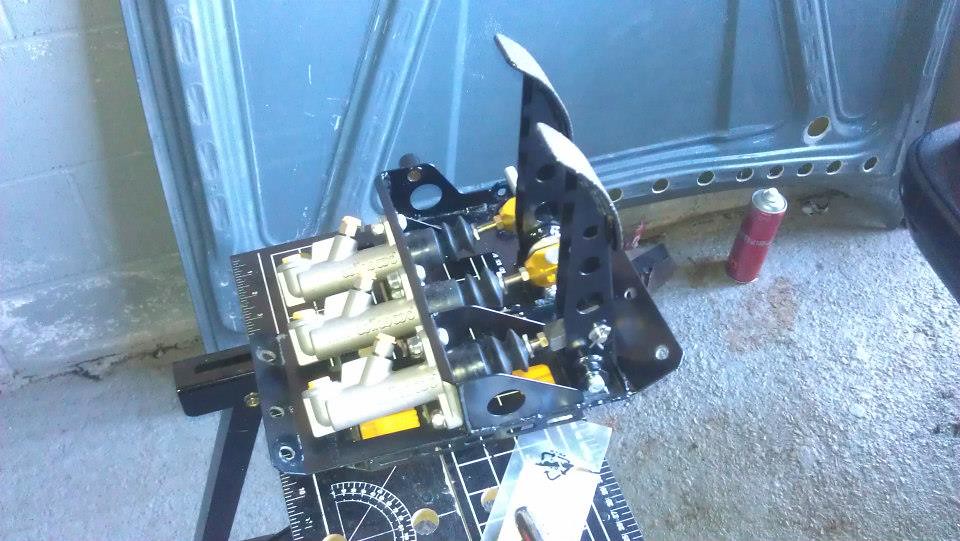
Ready to go in the car:

Image

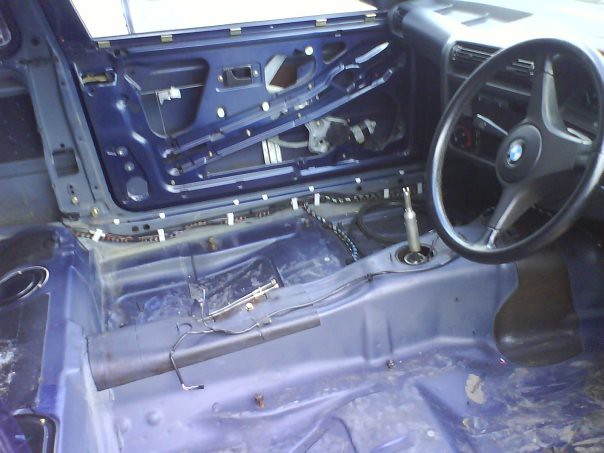
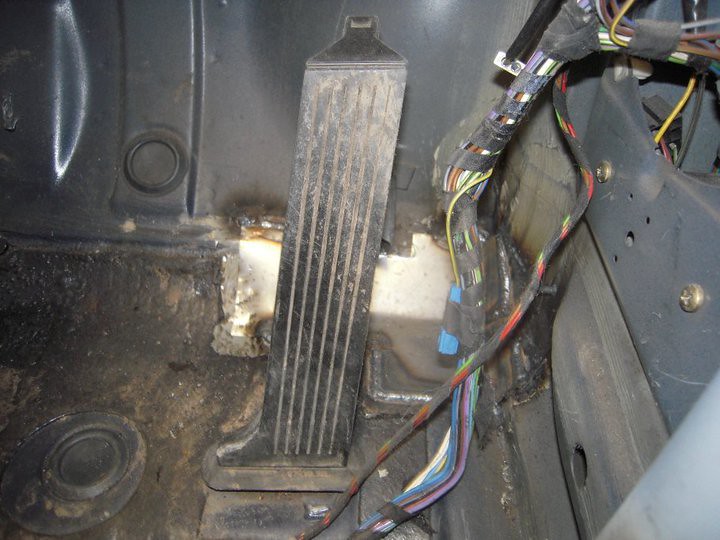
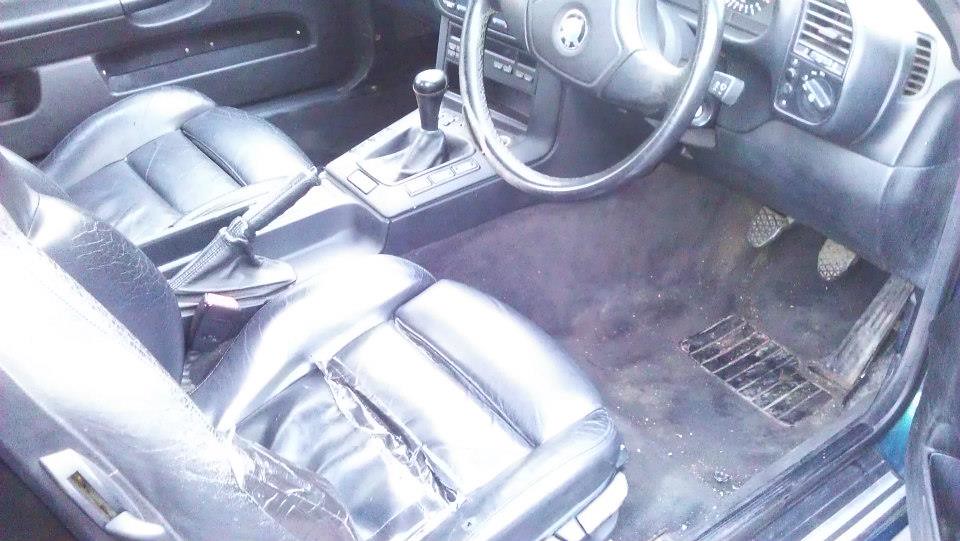
This didn't go to plan either. The f*cker wouldn't fit right, no matter what I did! I even resorted back to OBP's engineering drawings and measured all the angles - but no, the pedal box was fine. Then on closer examination, I found that there was a tiny dent in the floorpan, beneath where the throttle pedal had been mounted. This was sufficient to throw the fitment off completely and I guess it had been caused by numpty tyre fitters using the 'jacking pads' to lift the car. Anyway, some panel beating later, it was nice and flat and the pedal box fitted snugly. I could now brace myself to drill holes in the floorpan to fit it. If you've never done this before, it's a nervy moment! But I measured again and again and knelt and prayed and the holes drilled right. I then made some spreader plates to go underneath the floorpan out of 2mm x 30mm bright steel bar.

Image
Image
Image
Image
Image

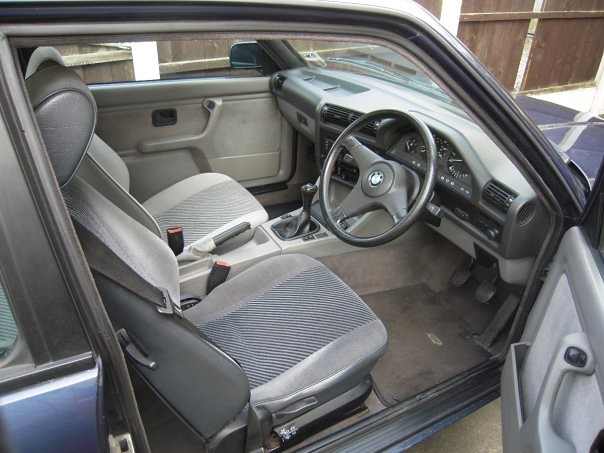
I used low-profile hex bolts so there nothing to catch my heels on in the car and skateboard grip tape to protect the footwells.

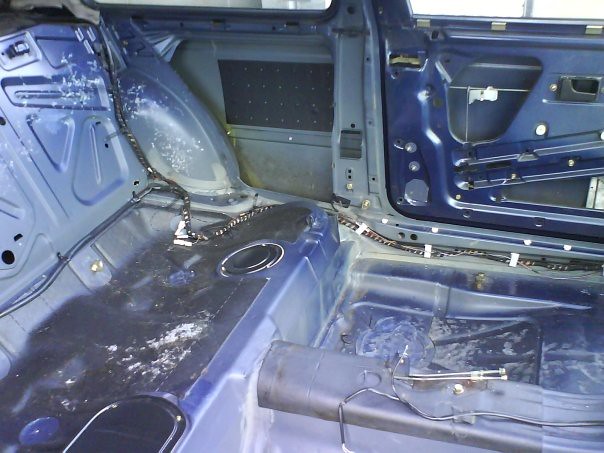
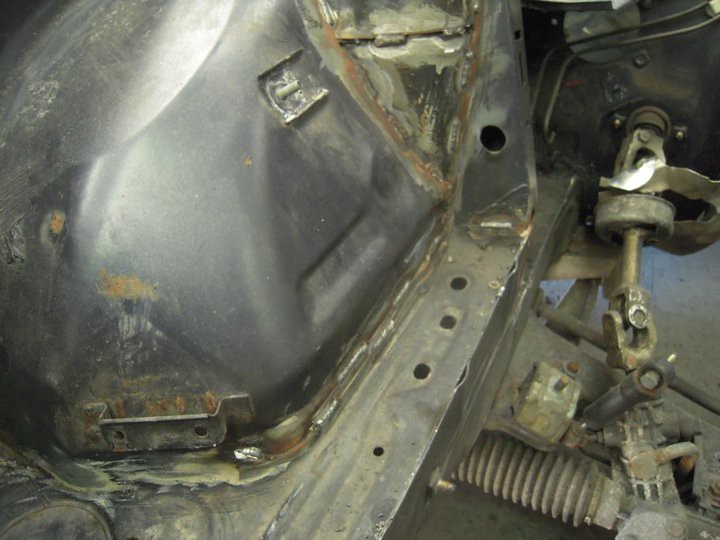
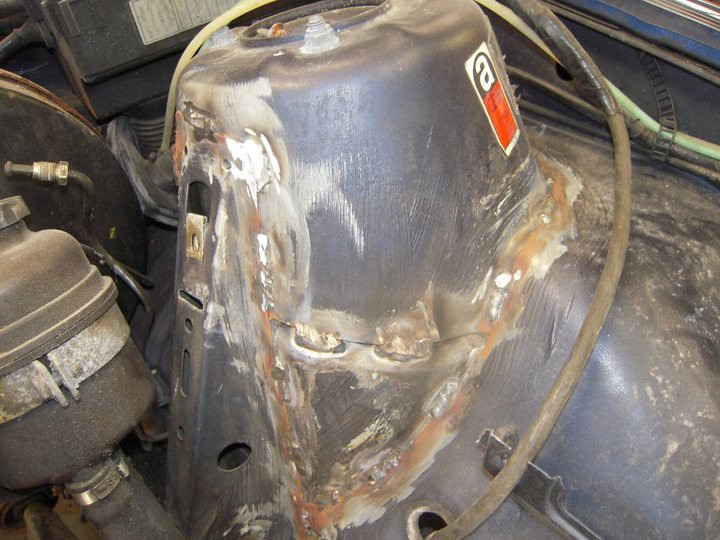
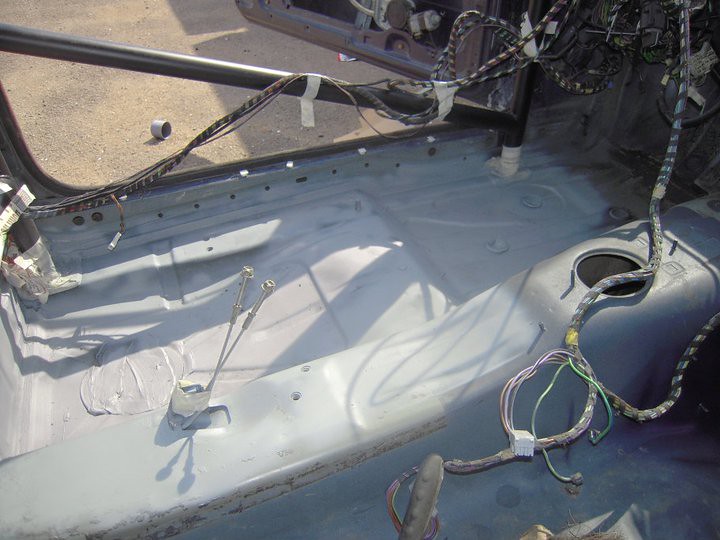
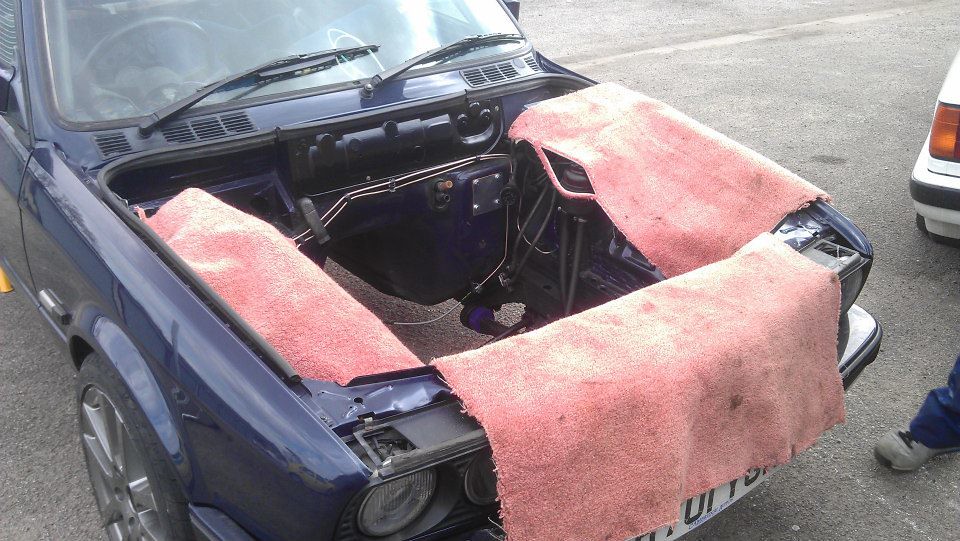
Next job was to figure out how I was going to route my brake lines. With the stock pedal box, master cylinder and servo gone, I had to do everything from scratch. First up was to cover the now obsolete gaping holes in the firewall. I did this with a sheet of 1 mm aluminium, some pop rivets (more chassis drilling *sigh*) and some gasket sealant. I made a card template, with holes marked in for the brake lines and then cut the ally piece.

Image
Image

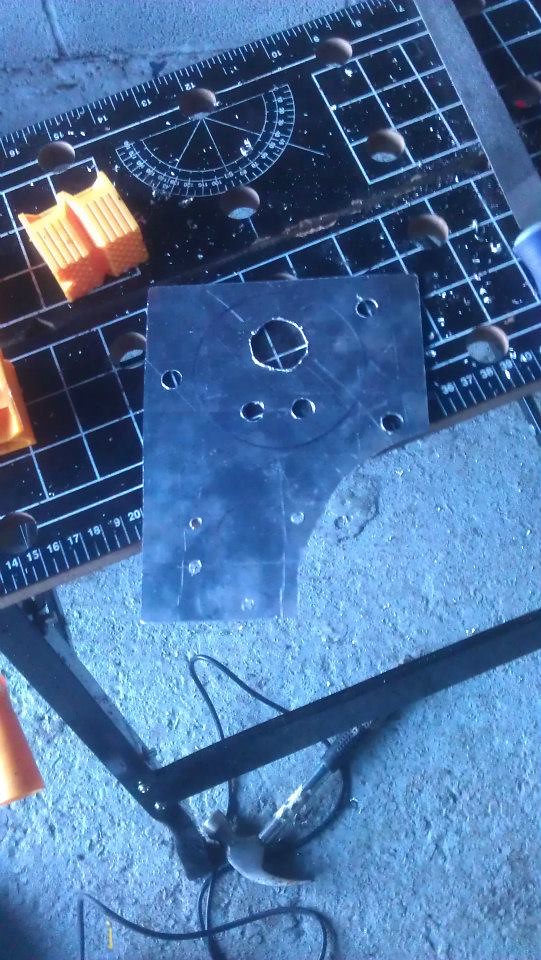
The bolts you see are M8 bolts that fit into the stock pedal box bolt holes - minimised the number of holes I needed to drill for pop rivets!

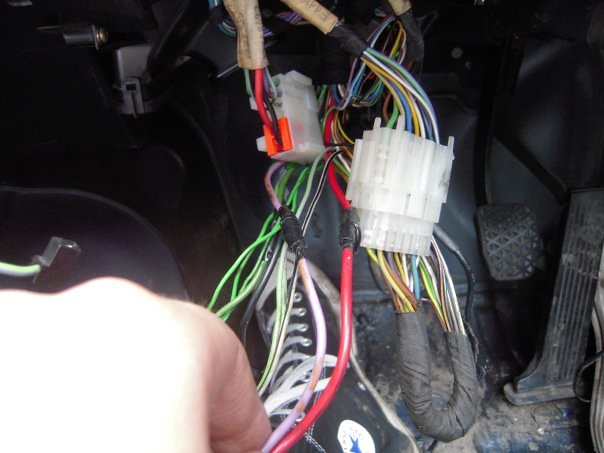
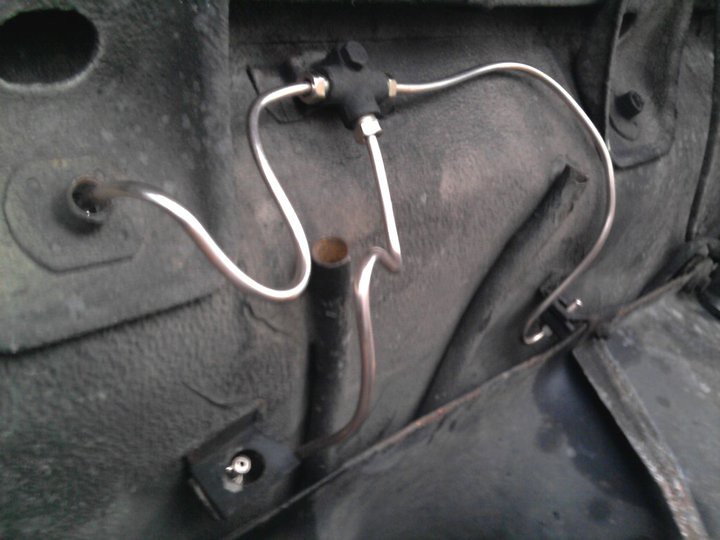
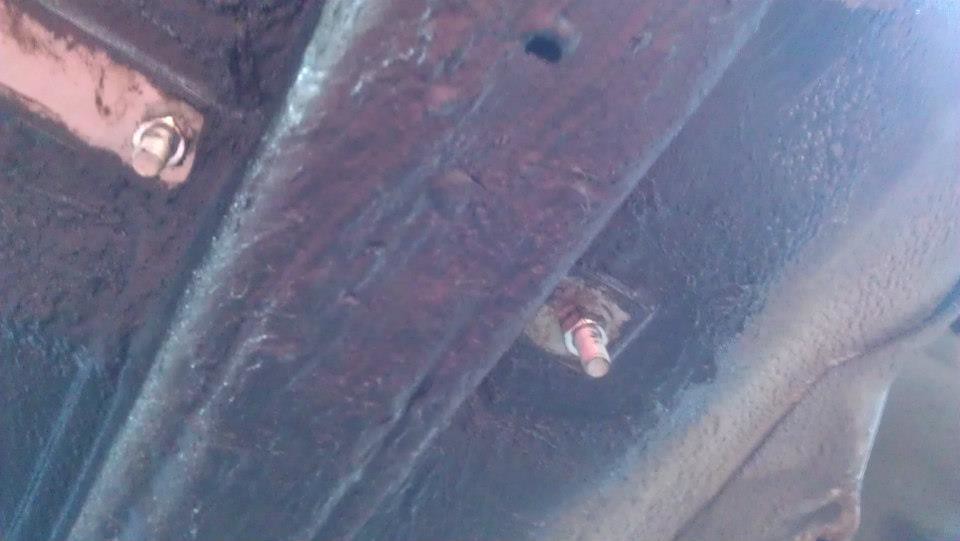
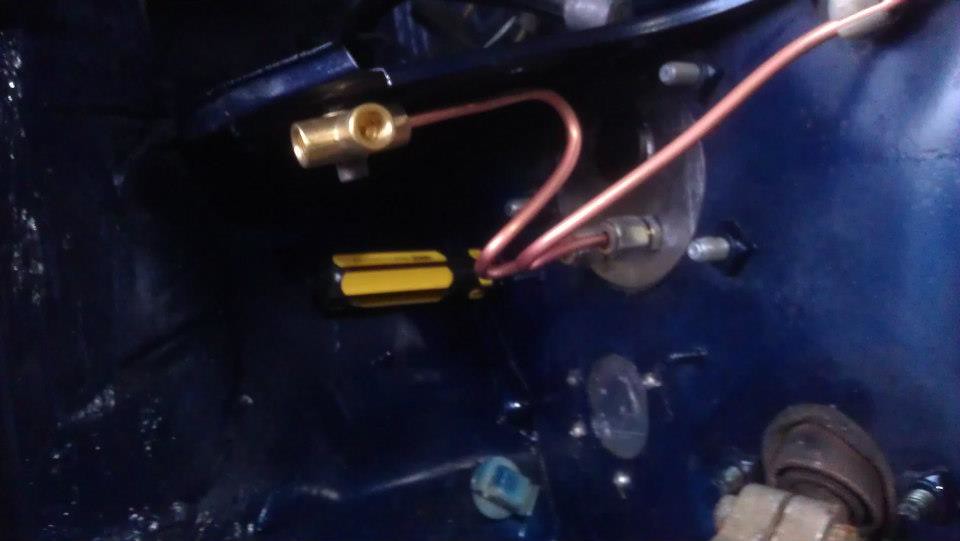
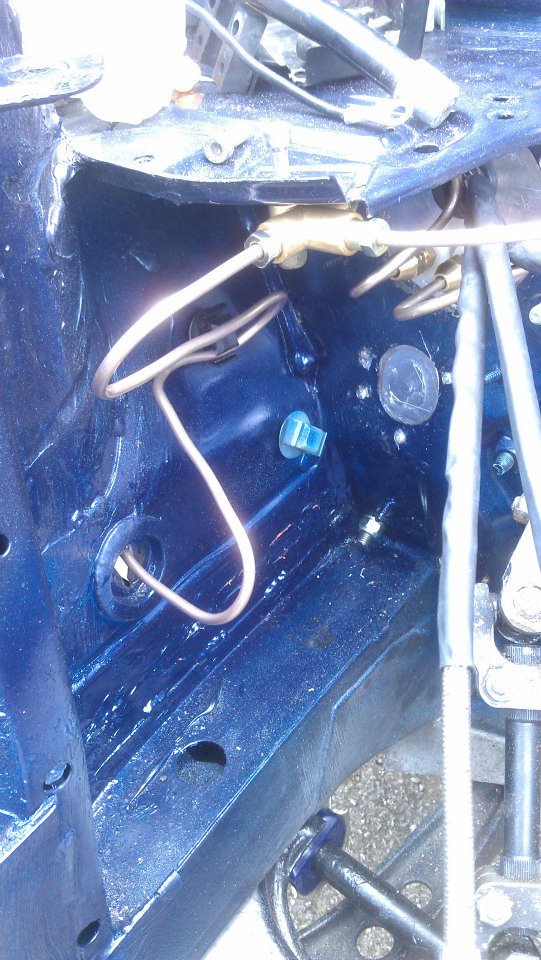
I then fitted some bulkhead brake fittings for front brakes and clutch (rear would run through the car), a grommit for the flexi-lines to the reservoirs and a 'custom' mounting point for the t-piece to mount the hydraulic brake light switch.

Image

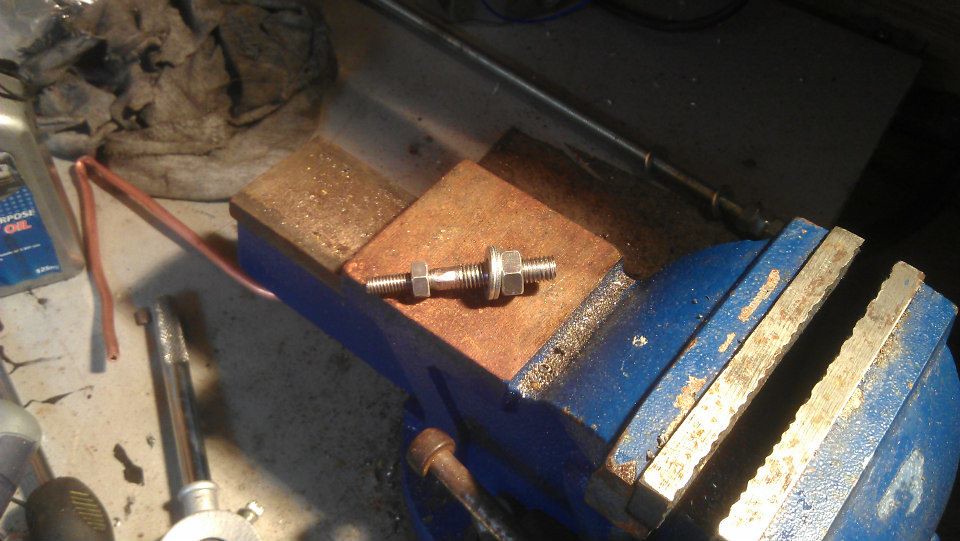
The stock pedal box holes are M8 - but an M8 bolt wouldn't fit in the t-piece. So I cut a bit off a piece of M8 threaded bar and turned it down using a file and my grinder. I then gut an M6 thread onto the thinner bit and the T-piece bolted up just fine to this.

Image

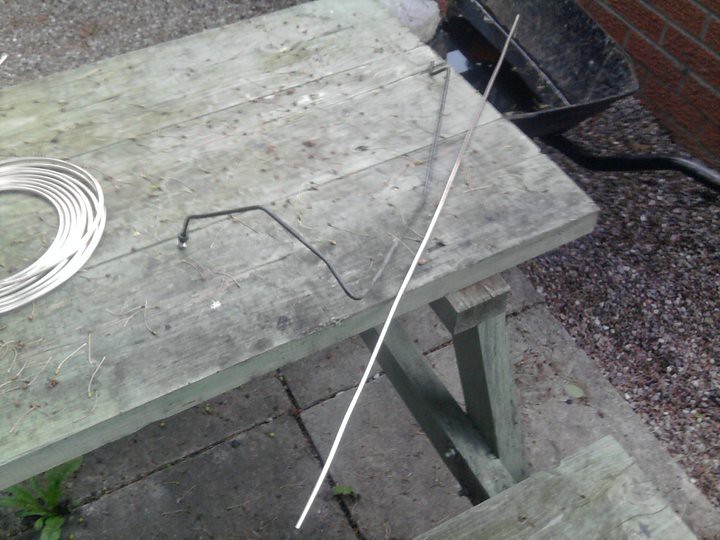
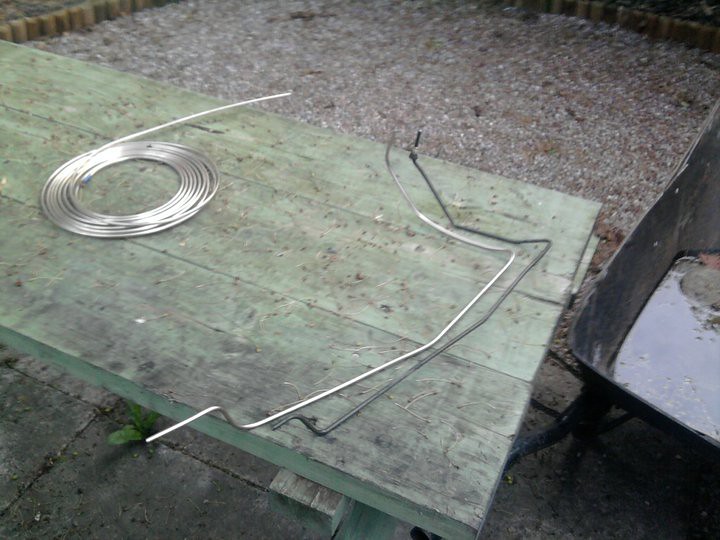
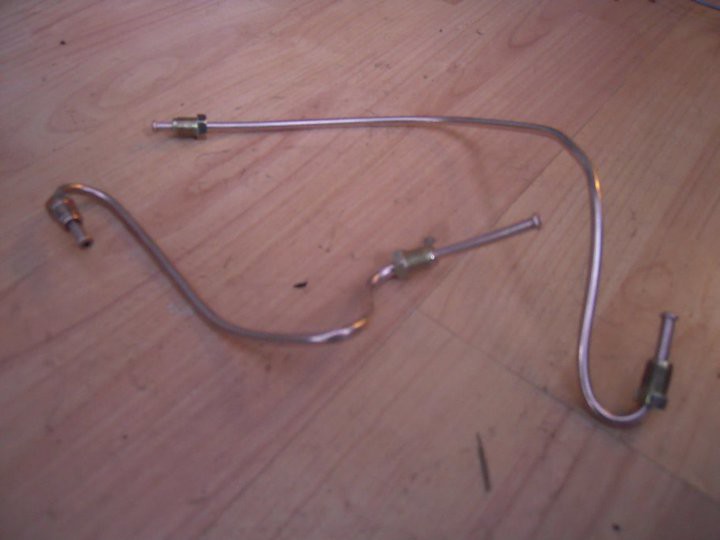
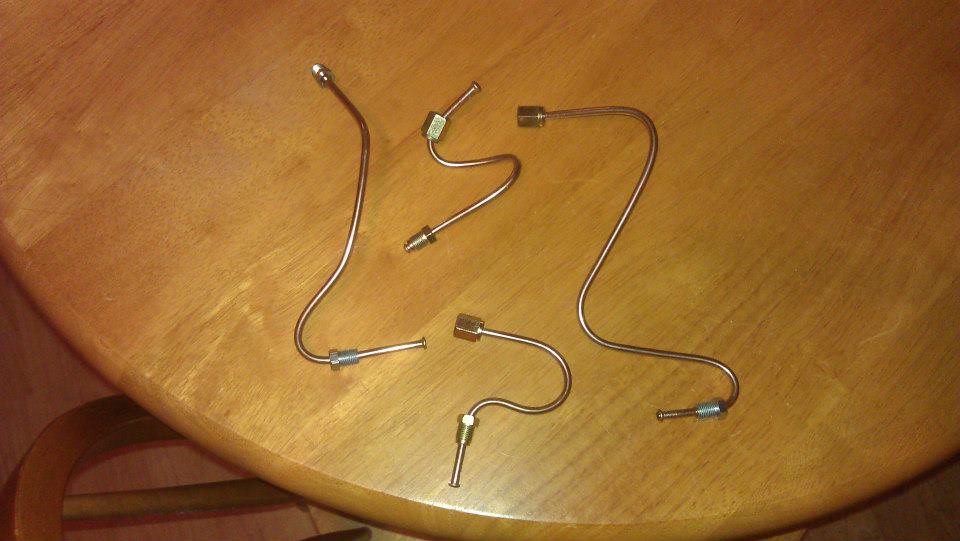
So, first I decided how I was going to route my front brakes and to make sure I got it right, I made dummy lines up with cheap copper first.

Image
Image
Image
Image
Image

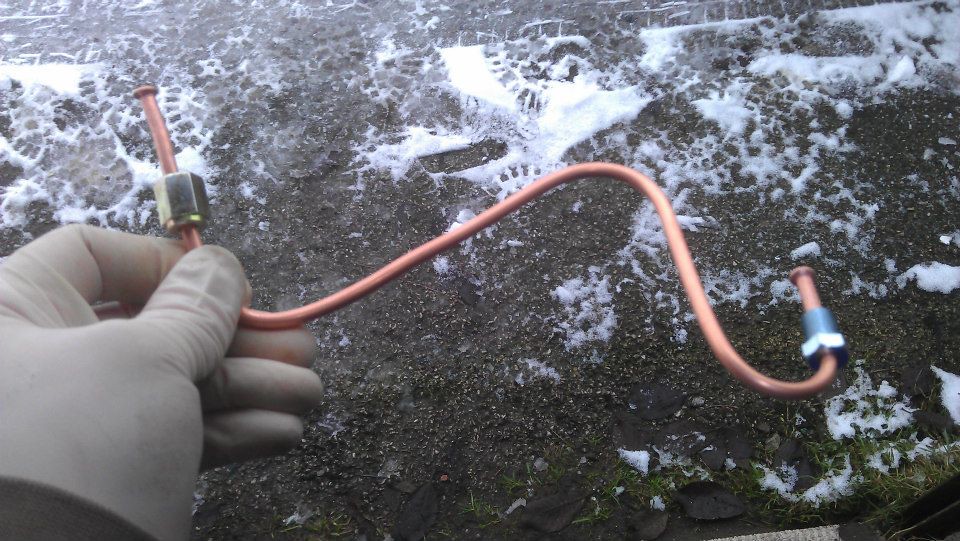
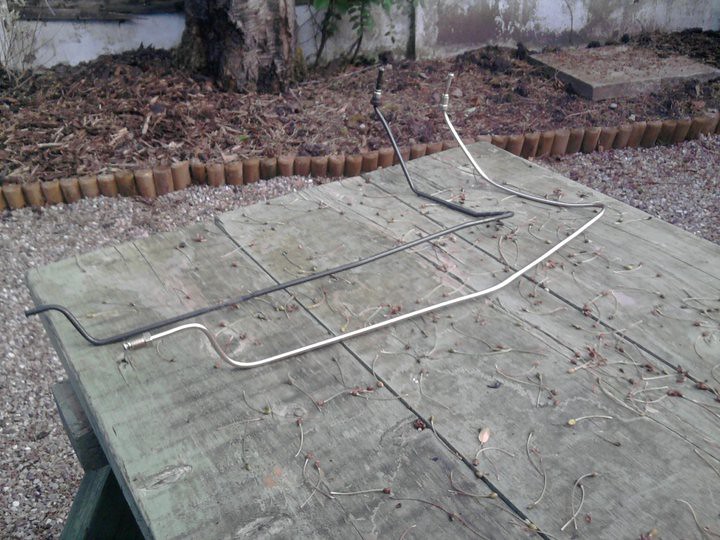
Then I used these as patterns and started to make nice kunifer lines.

Image
Image
Image
Image

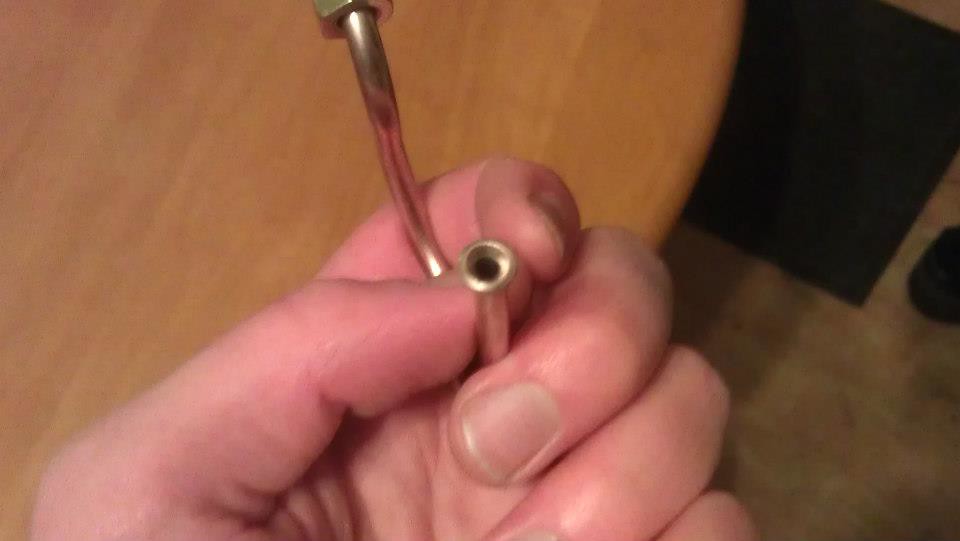
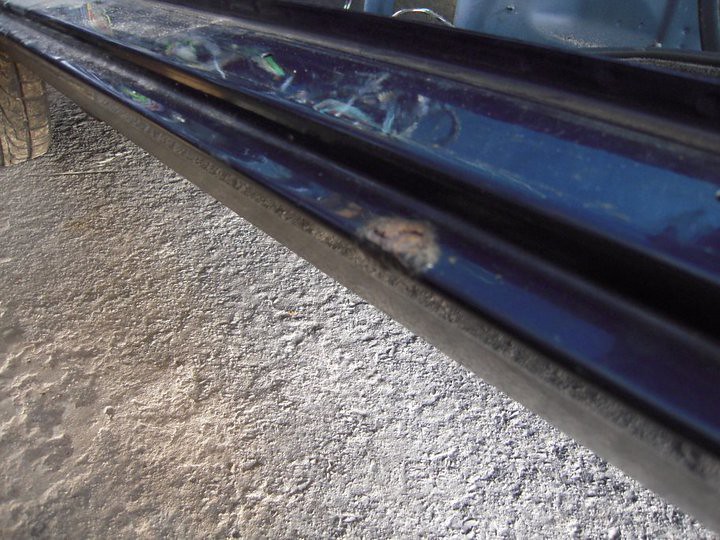
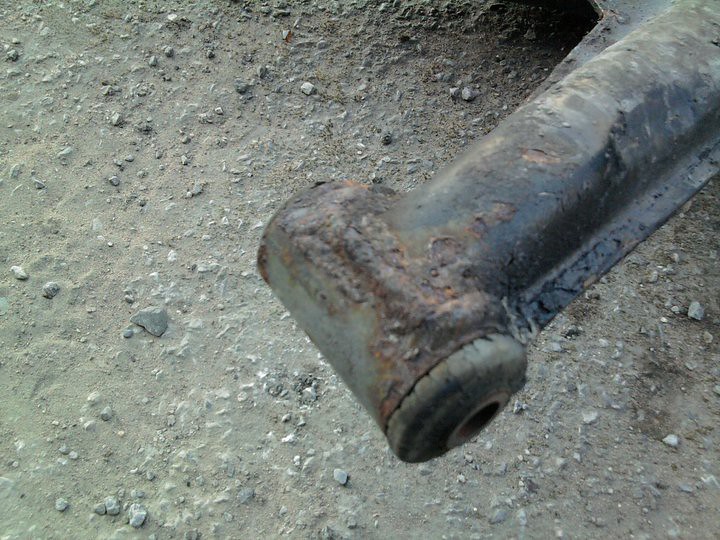
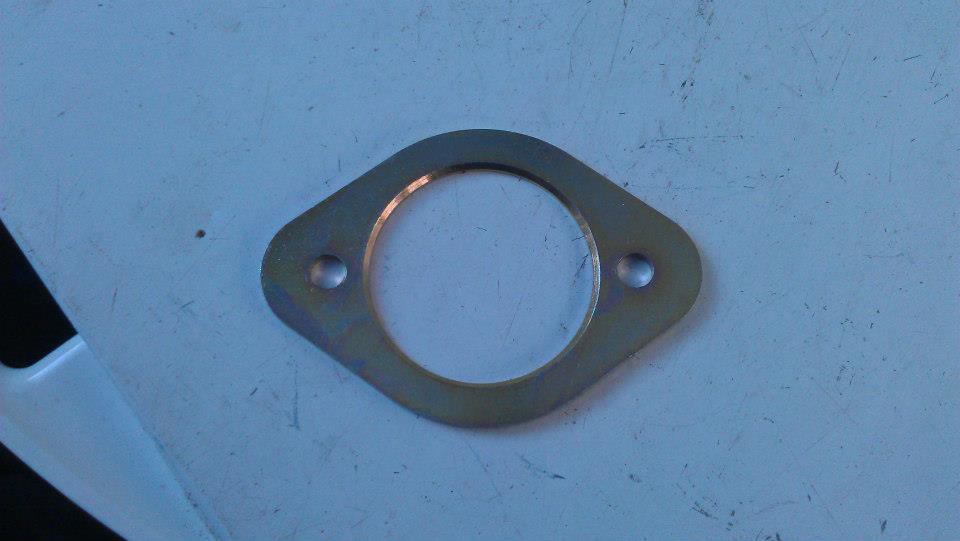
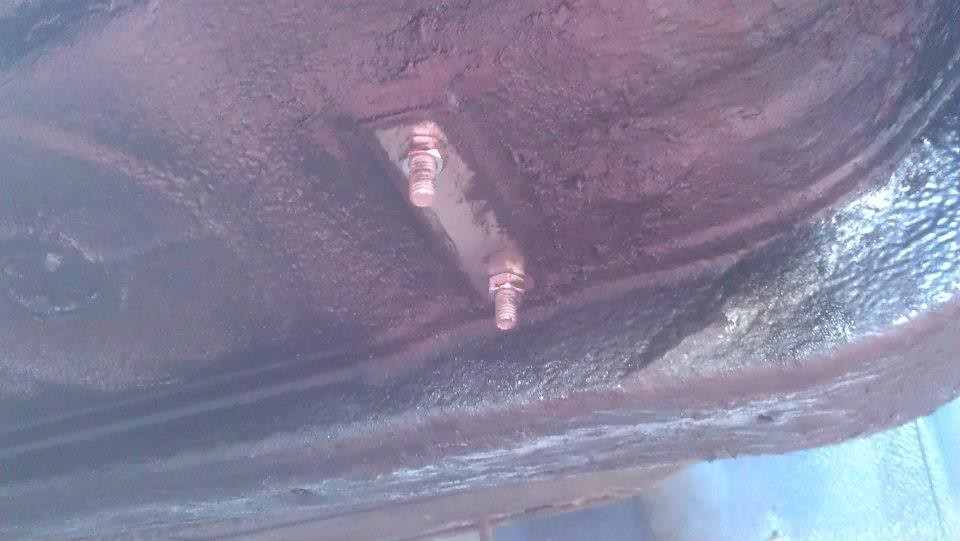
But once again, there was a problem. The problem was with the bulkhead fittings. They just didn't feel right when I torqued them up. When I undid them and inspected what was left of my flare, I saw this.

Image

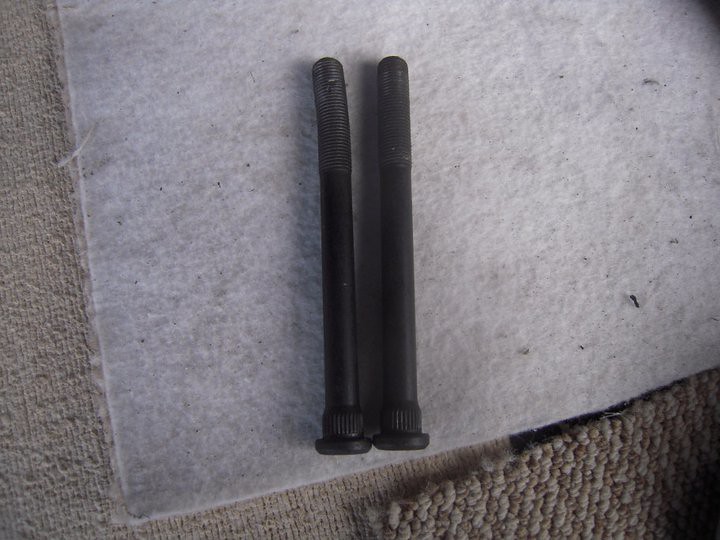
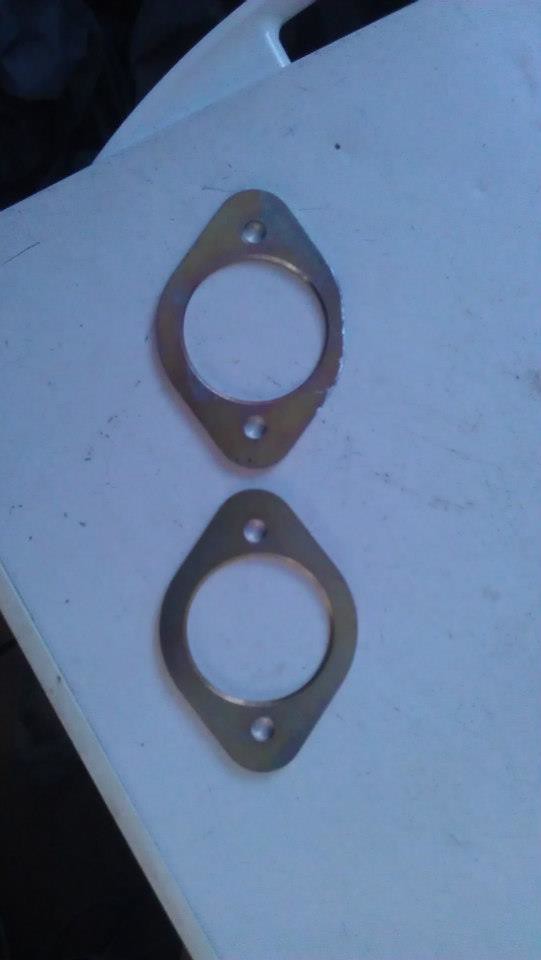
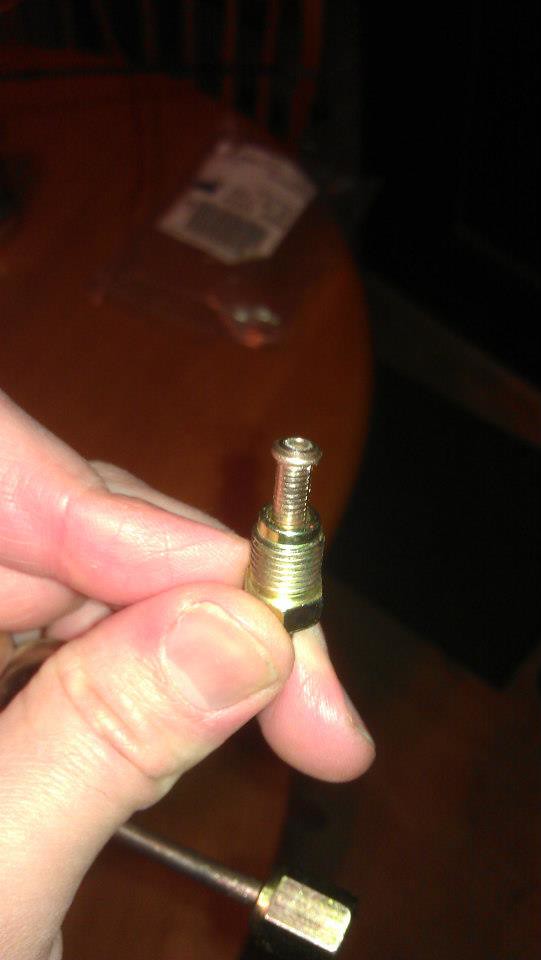
The male part of the fitting was cutting into the flare rather than sitting inside of it. I was scratching my head for a week over this then I just decided to order some bulkhead fittings from a different supplier - Rally Design. When the new ones arrived and I compared them, this is what I saw:

Image

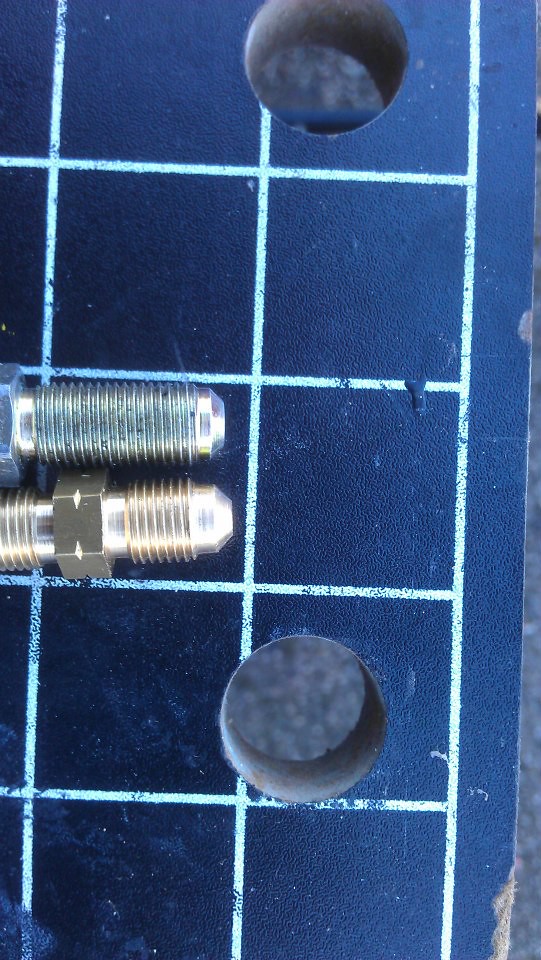
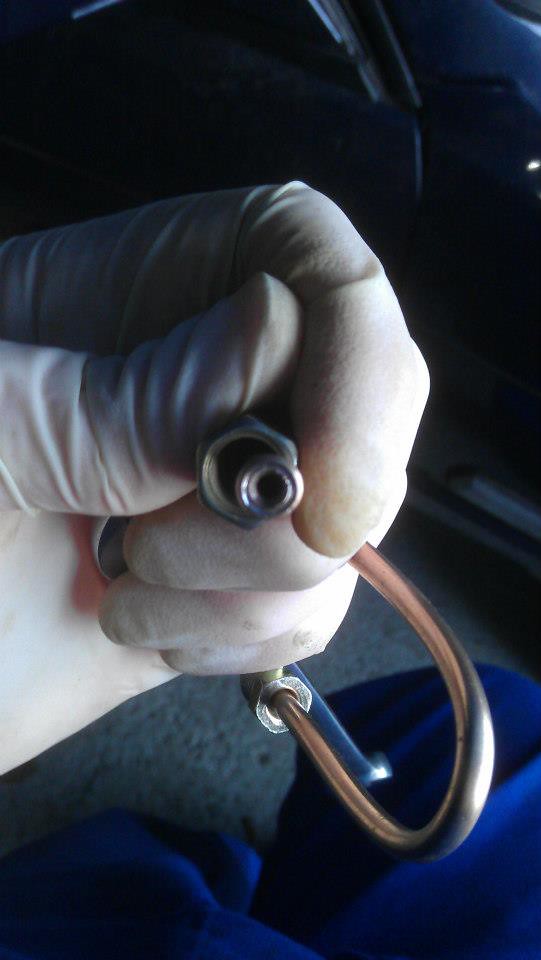
The old one is on top - the new one is on the bottom. Looks like the originals were for 1/4" pipe to me and not 3/16". Either way, with the new fittings in place, everything went together like Meccano.

Image
Image
Image

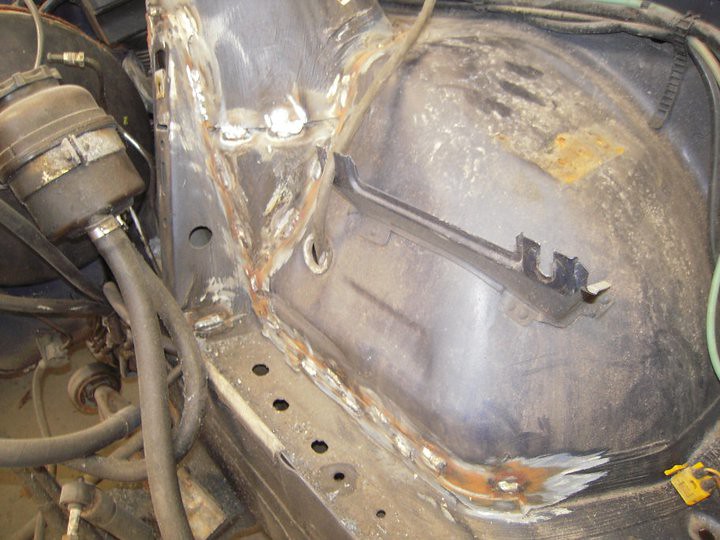
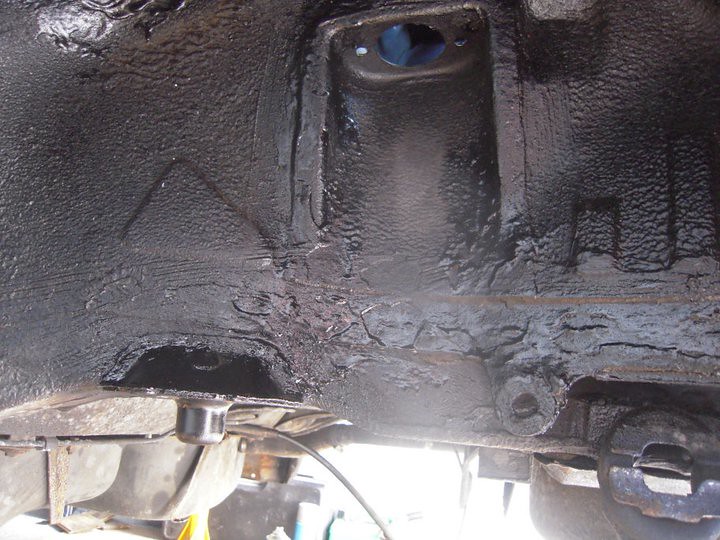
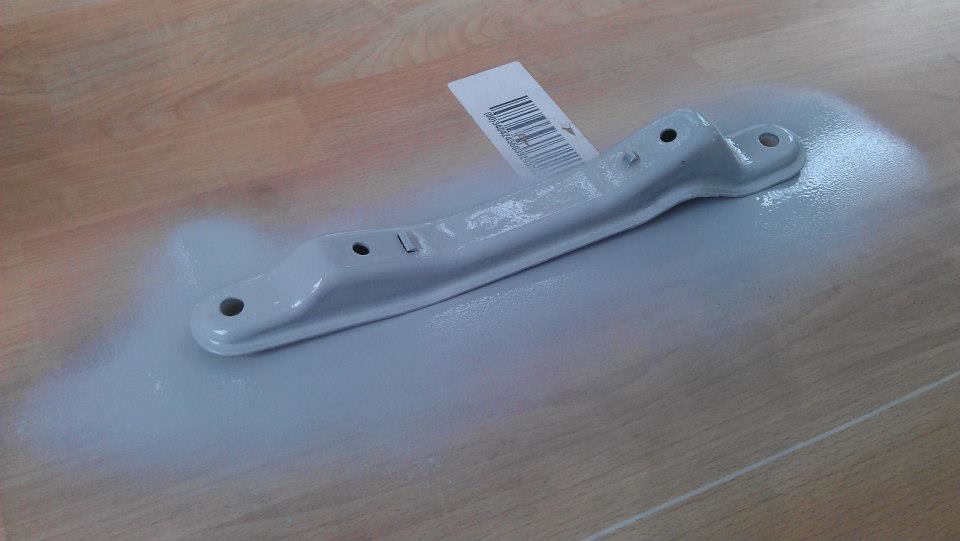
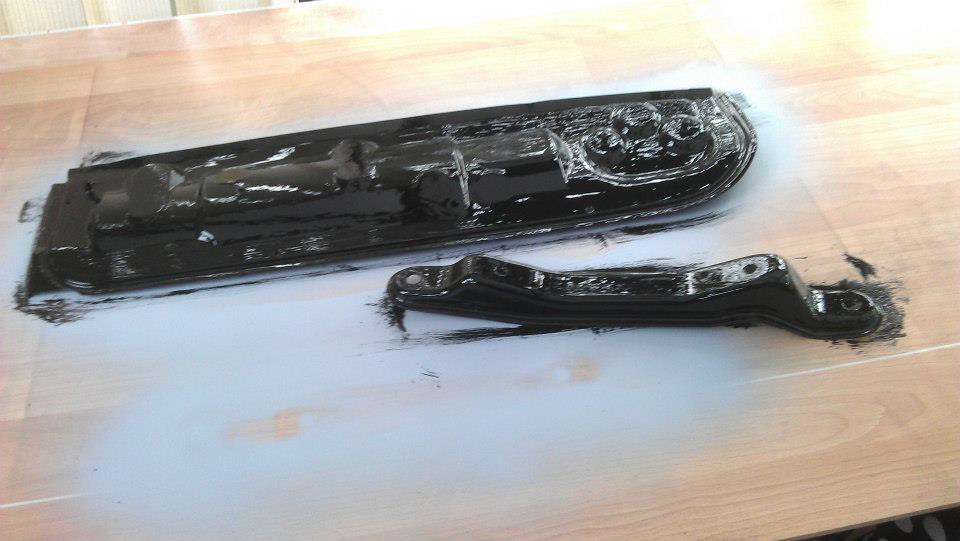
I also stripped the heater panel of sound deadening and gave it a coat of satin black, along with the gearbox cross-member.

Image
Image
Image

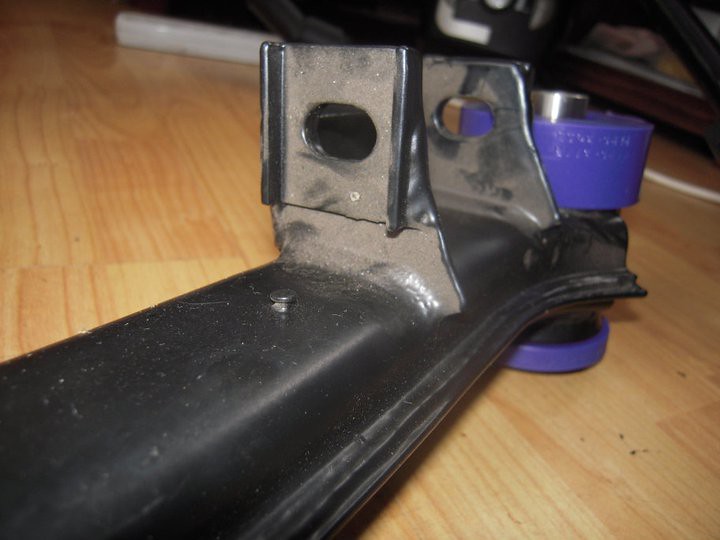
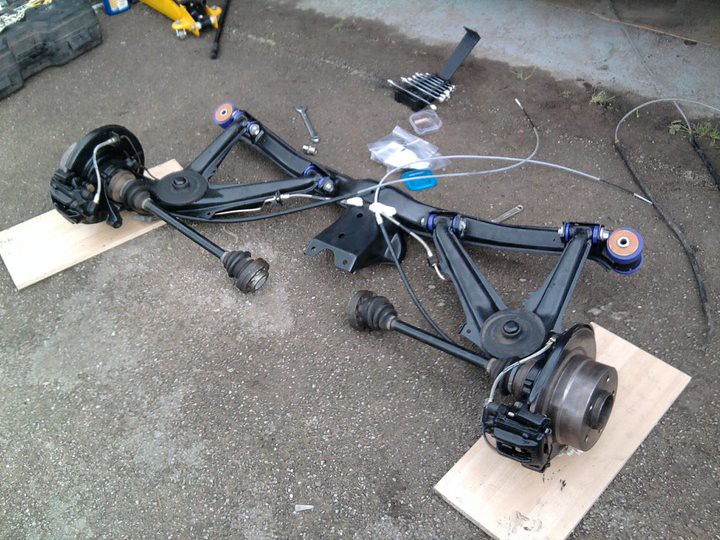
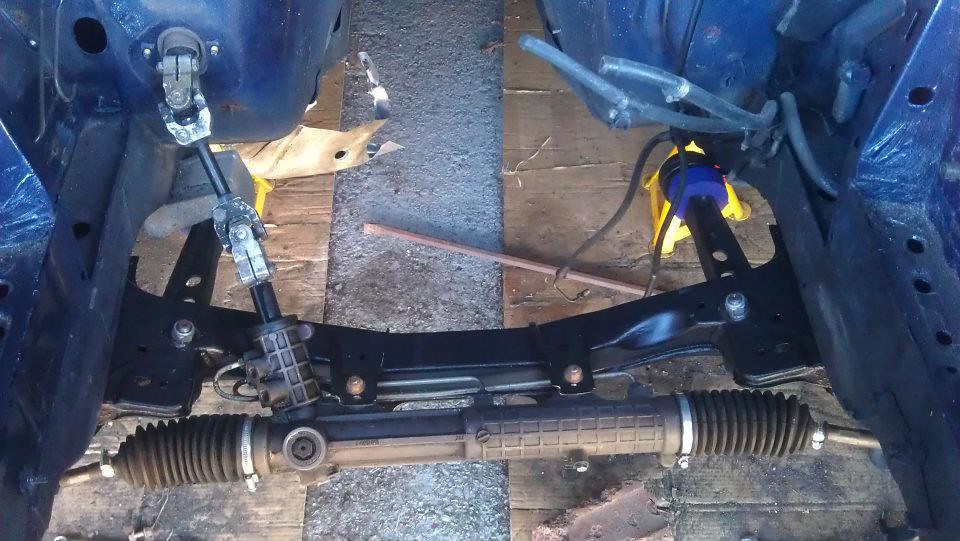
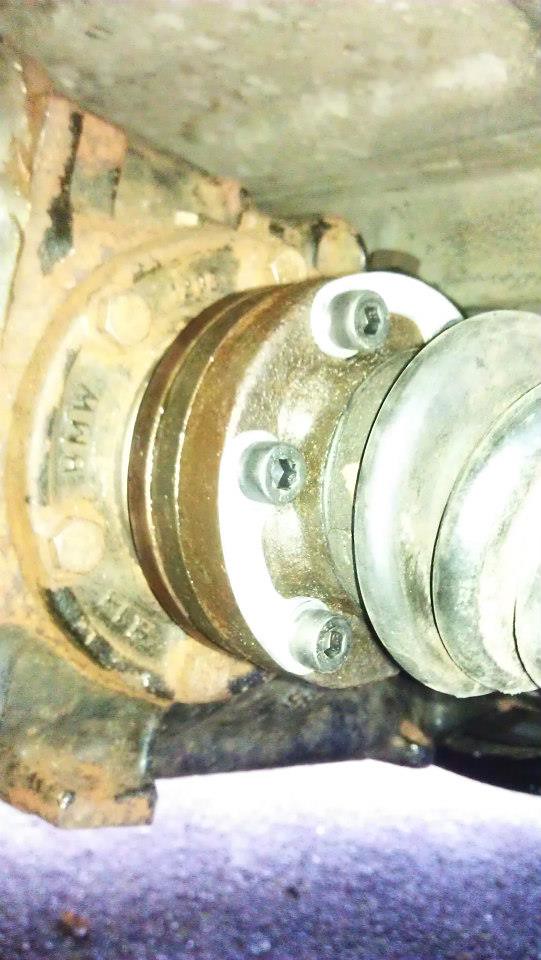
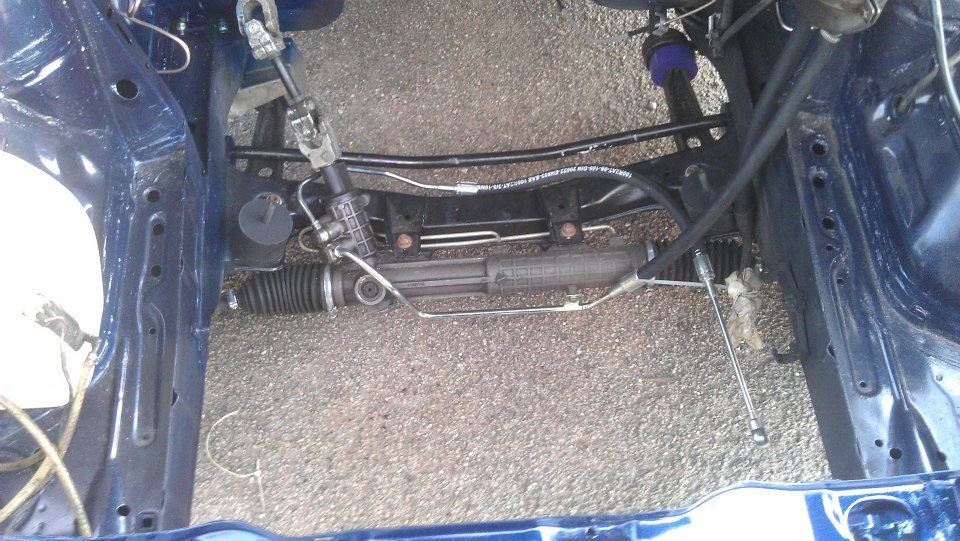
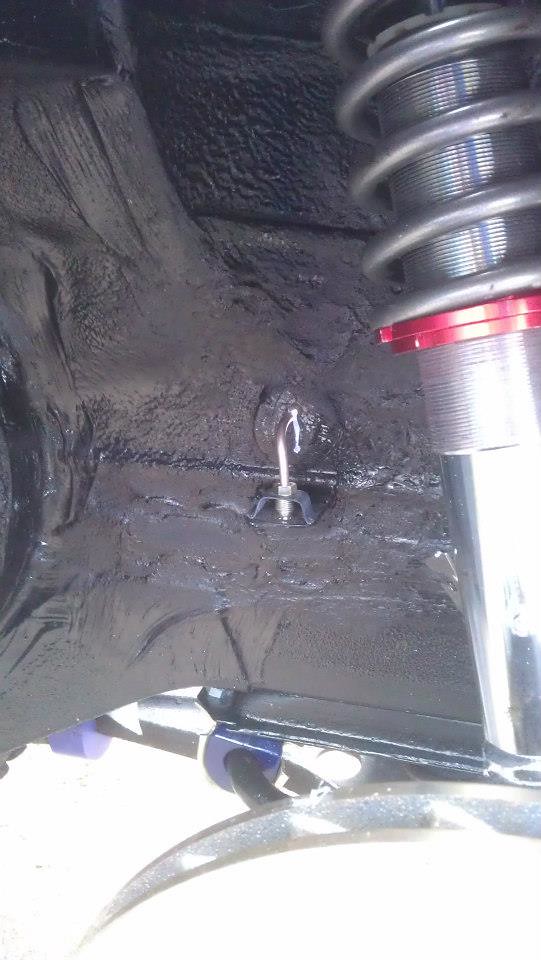
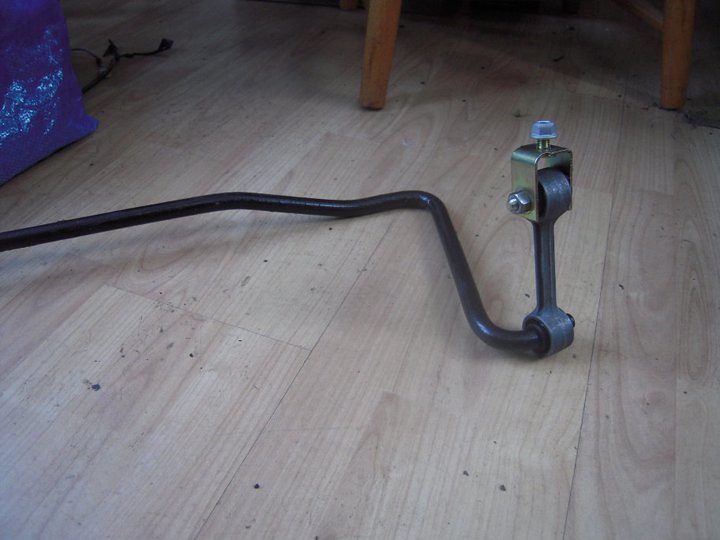
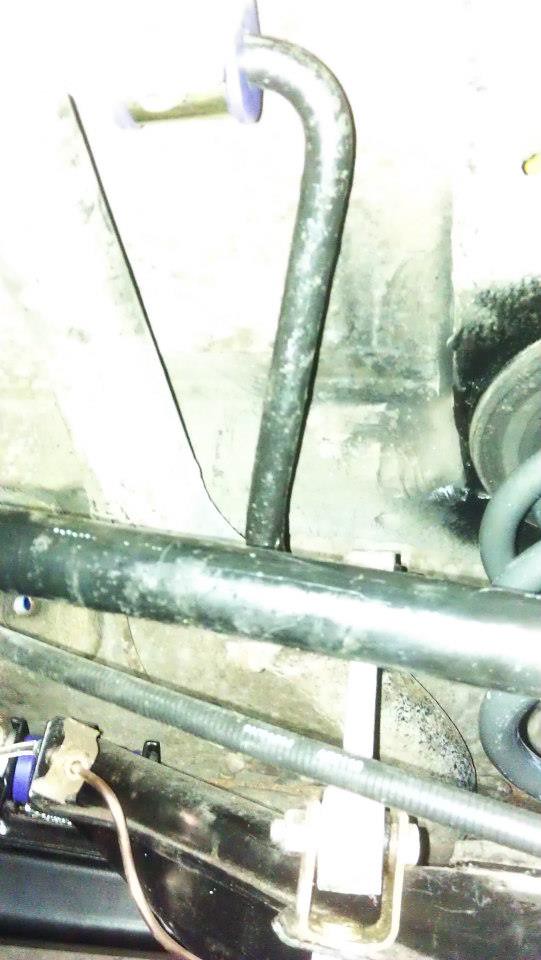
And I managed to fit my anti roll bars. A 14 mm rear ARB (325i) and a 22.5 mm (iirc) front ARB from a 325i Cab.

Image
Image

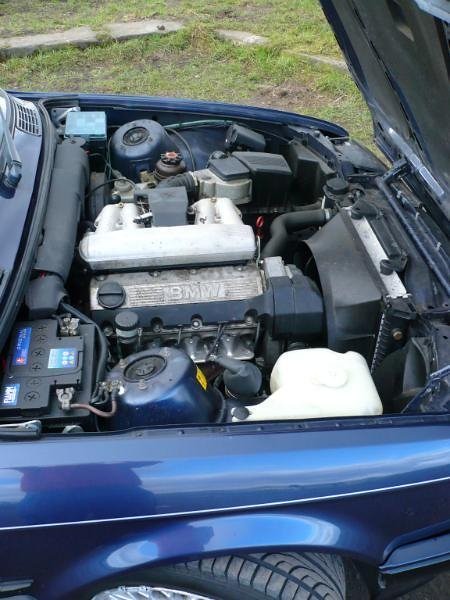
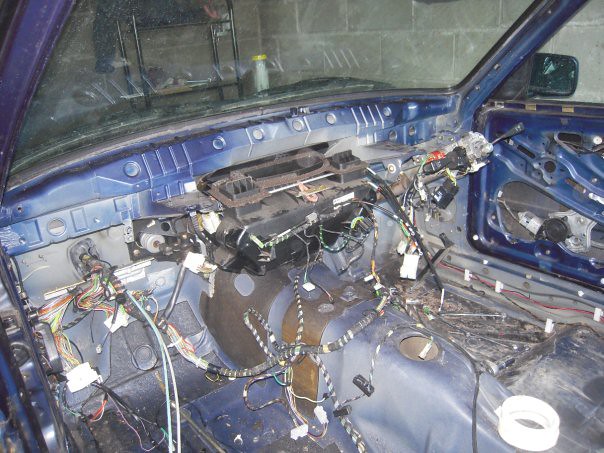
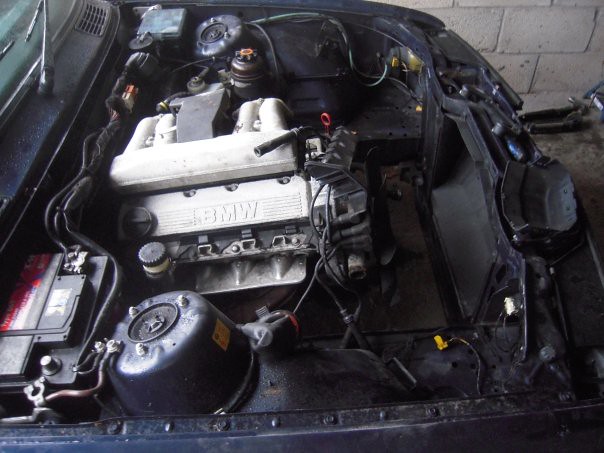
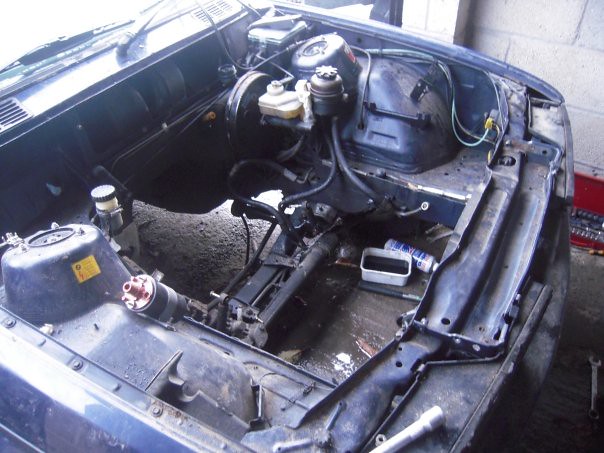
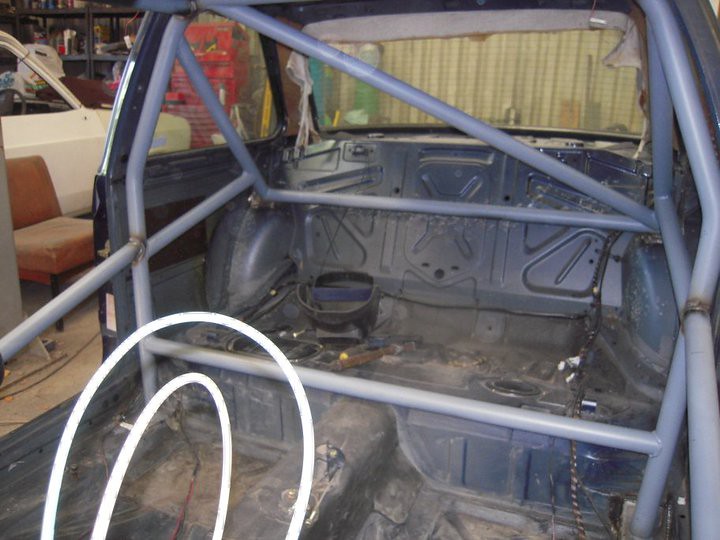
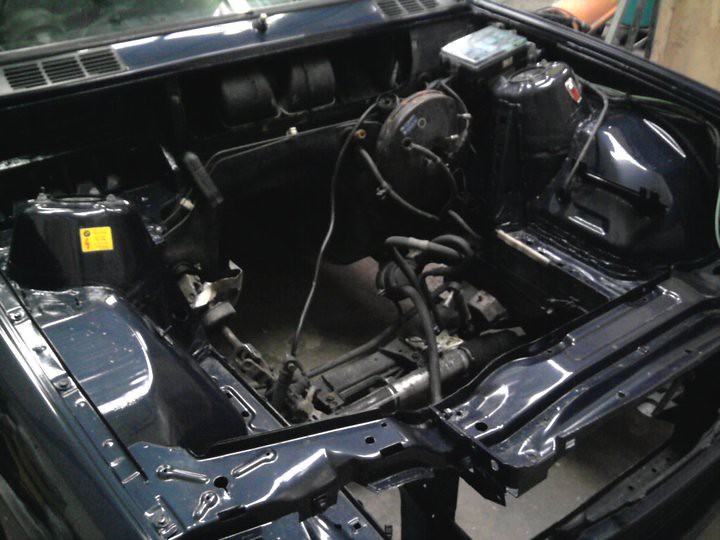
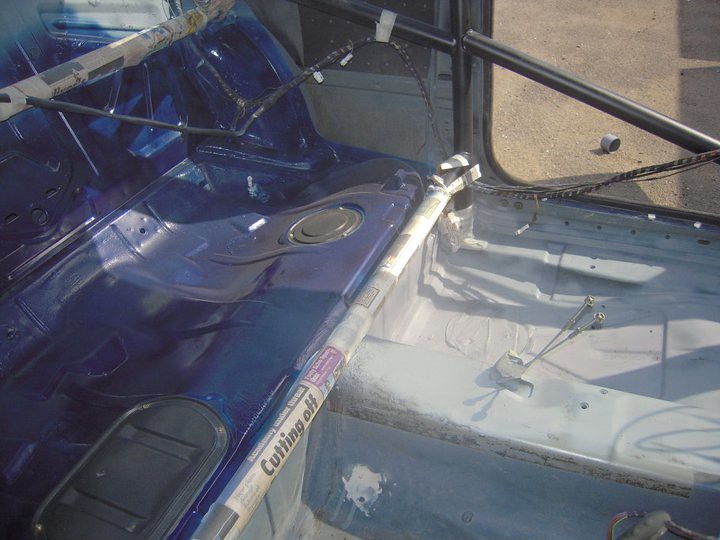
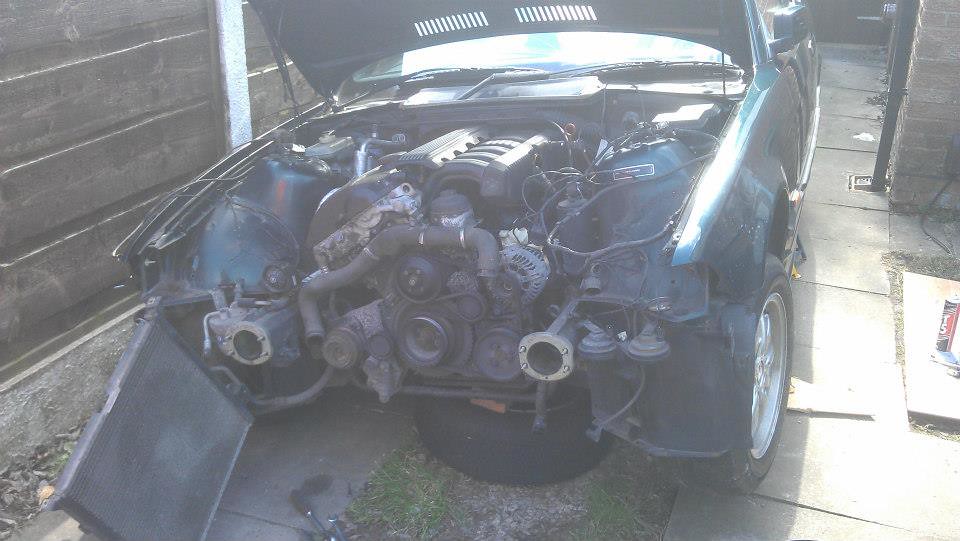
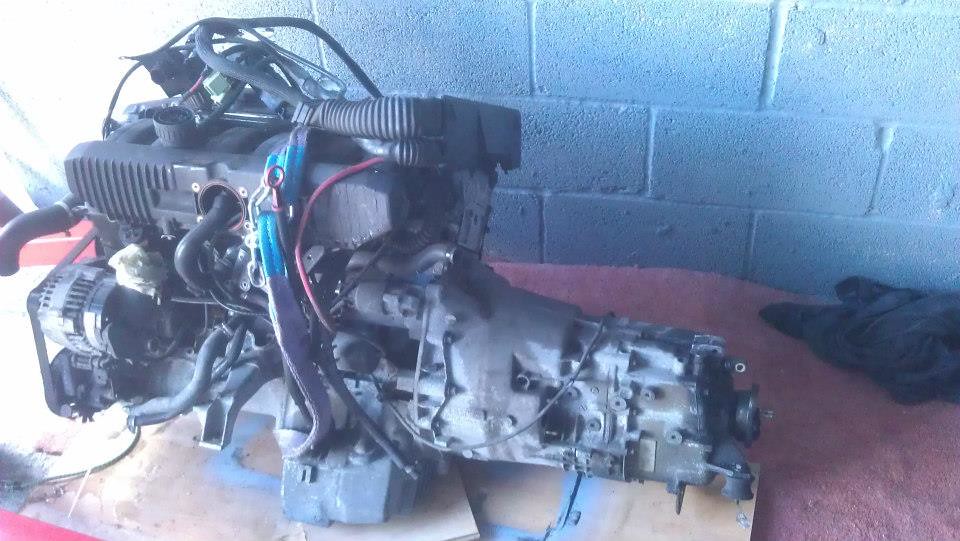
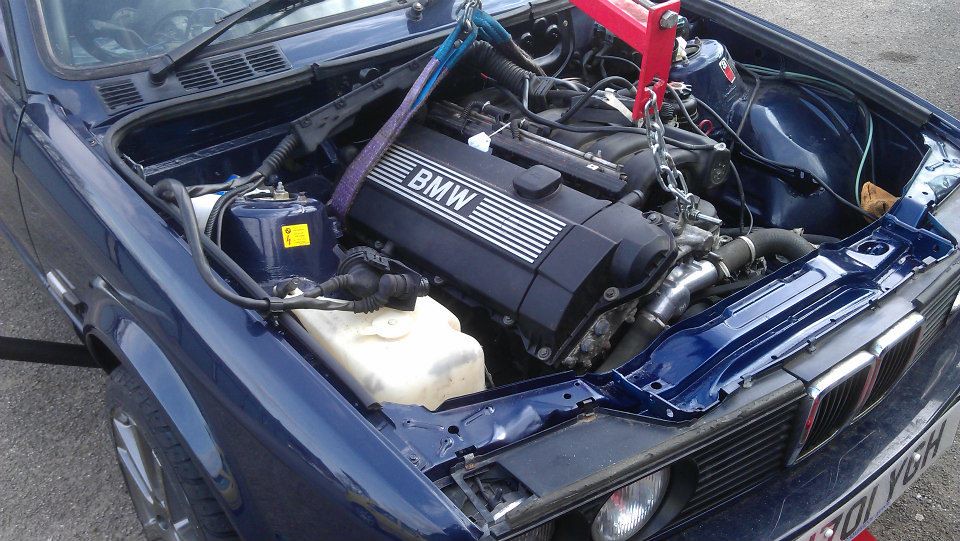
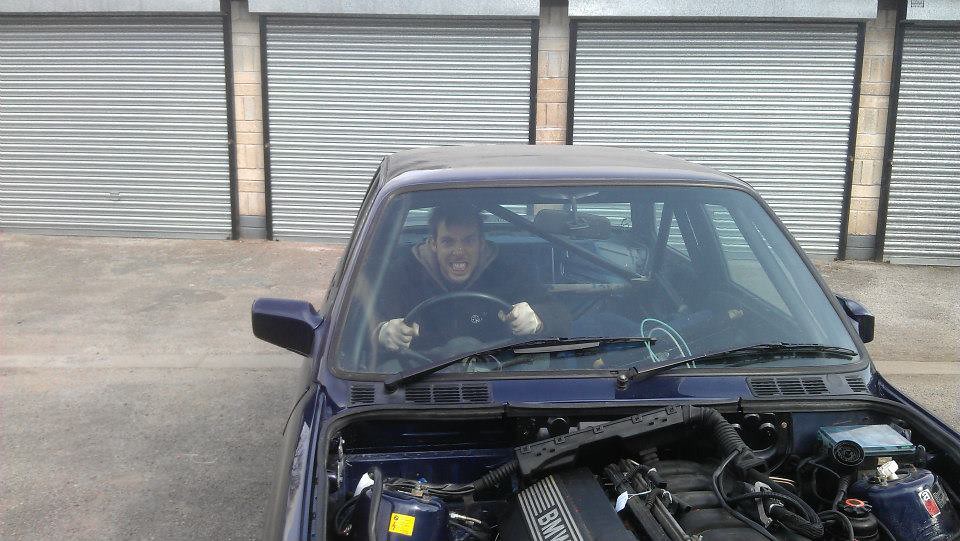
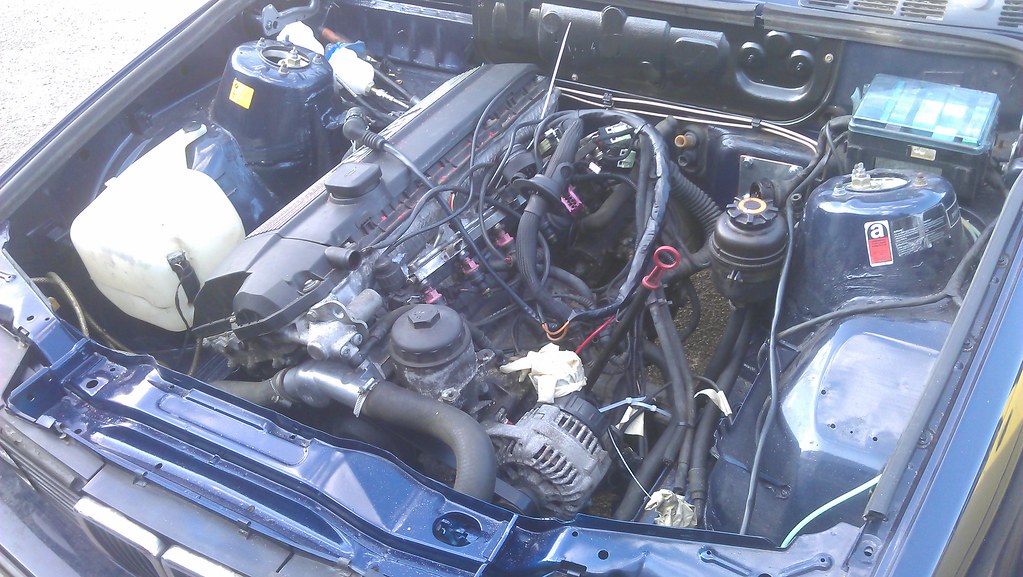
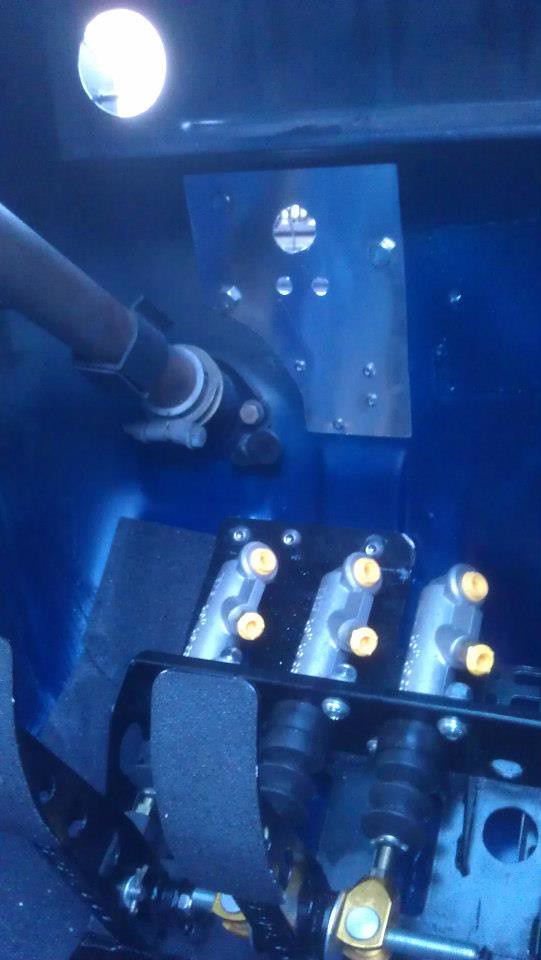
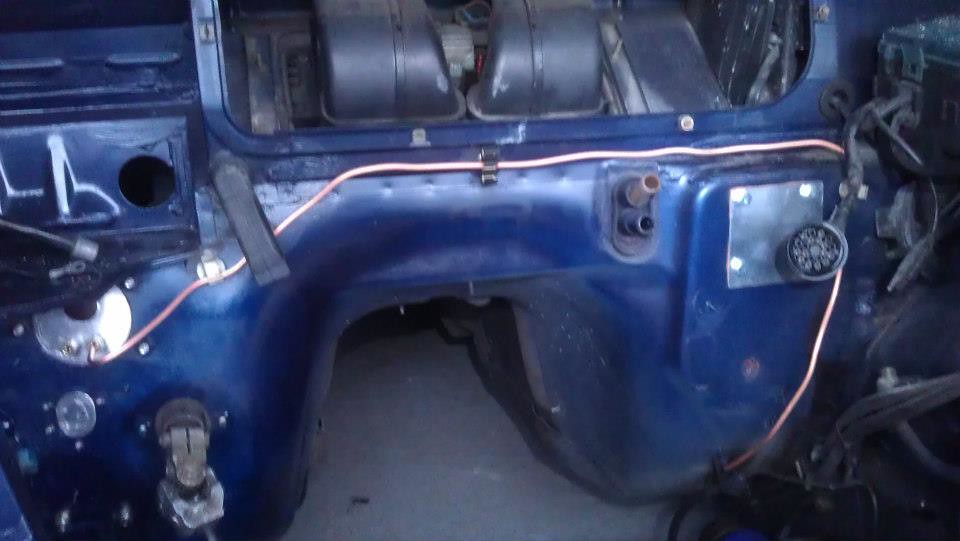
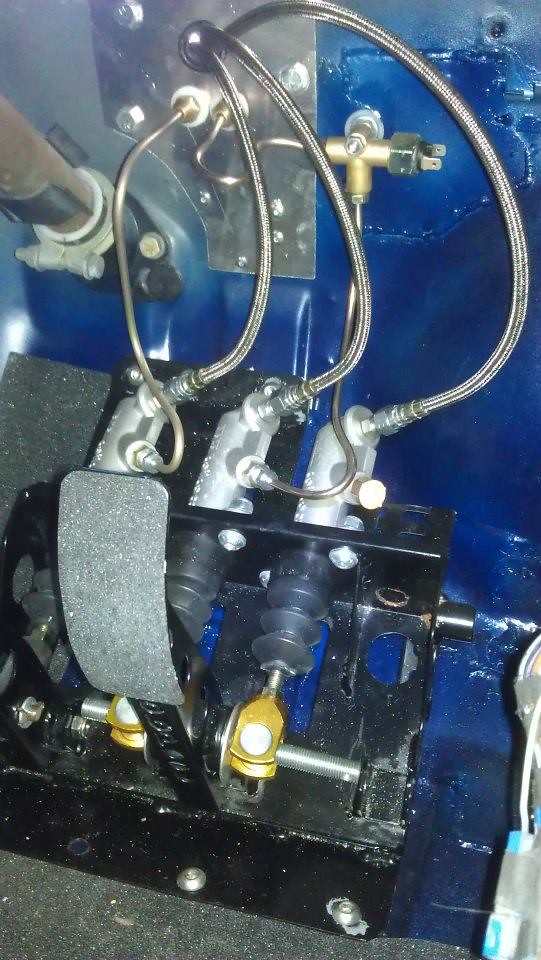
And all of this means, as of a few weeks ago, my engine bay looks like this:

Image

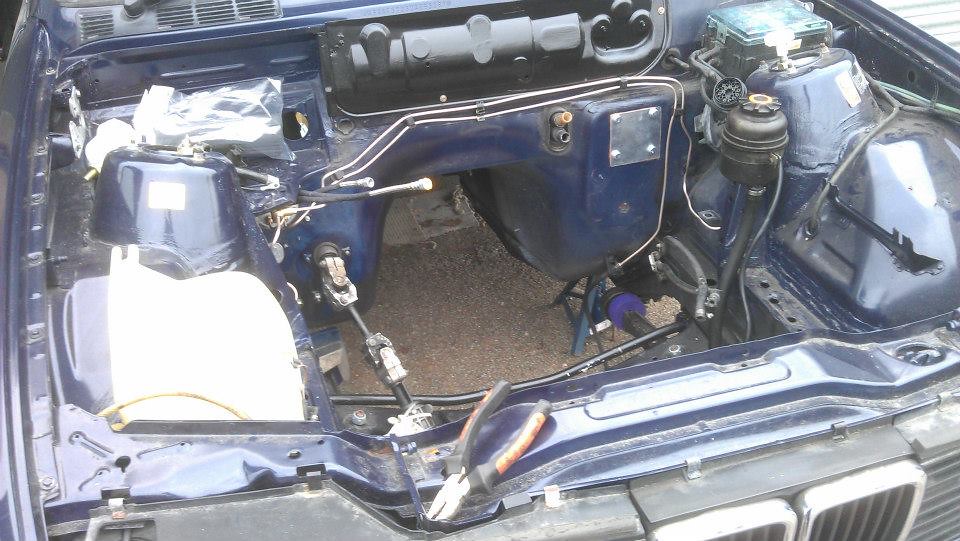
I do still need to do the front-rear brake line. But next chapter will skip back in time a few months again to cover some of the other bits I've picked up.
User avatar
Mikey_Boy
E30 Zone Regular
E30 Zone Regular
Posts: 996
Joined: Sun Mar 16, 2008 11:00 pm
Location: Cheshire - trying to avoid the bling!

Thu Mar 21, 2013 9:21 pm

Loving this thread!! 8)
Motorhole
E30 Zone Addict
E30 Zone Addict
Posts: 2395
Joined: Tue Jul 12, 2005 11:00 pm
Location: Cheshire

Fri Mar 22, 2013 12:38 pm

Thanks again guys. It's encouraging that no-one has chipped in yet to say that I've royally f*cked anything up.

So while the diff and brake sagas were ongoing and progress was a little slow, I was still cherry picking various bits and pieces off the zone and from Ebay and various other sources.

I got a used double-skin fibreglass bonnet from zerocool -who incidentally is a top man - for the measly sum of £50. I estimated that it would just about fit in the back of my Fabia, but when I got to South Cumbria to collect it, I realised that I estimated wrong. Some bubble wrap and some bungee cords and a very slow drive home ensued, but got it back in one piece. I also noticed when driving with the boot open, my Fabia vRS sounds frickin' ace! Turbo whooshes and hisses and allsorts coming from the exhaust. It drowned out the diesel clatter from the front, that's for sure.

Anyway...

So, I hole-drilled and primed the bonnet when I got it back.

Image
Image

I also managed to source a pair of bucket seats and 6-point harnesses. These are out of date items ripped out of Uniroyal fun cup race cars - it was the son of the series organiser who was selling them on. They are in very good nick, the seats match my car and again, I got them for a very good price. They arn't a matching pair; one's a Sparco and the other is a Toora, but they are pretty close.

Image

Then I had to source the actual wheels I was going to use. I'd resigned myself that 17"s were going to be the way forward, due to the E36 M3 brakes. Measuring up with the E46 wheels fitted and a little bit of number crunching suggested that for 8J wheels, I would need offset of between 27-32 if I didn't want to use spacers.

Enter MSW 22s in anthracite grey. 17", 8J, ET29, 5x120, and £380 for four with 40% off RRP.

Image
Image

They arn't exactly E30 style, but they are the right size and in budget. Before I got tyres, I had a quick check for clearance:

Image

It was going to be close. I was thinking 225/45/17s for tyres, but as I was going to be using trackday tyres and these are often a little wider than the stated width, I opted for 215/45/17s for now. I could always go wider later if there was room.

Federal RS-R trackday tyres fitted and balanced:

Image

And I sourced a donor car! The most important bit. £450 of damp 328i convertible turdage. But it ran, it ran well, and it was MOTd.

Image
Image
Image
Image

I was initially suspect of the 101,000 miles on the odo, given the state of the thing. But 3 owners from new on the V5 and the condition of some of the mechanical bits I've been ripping off it are now suggesting the mileage might be genuine! What wasn't in such good condition was the oil.

Image

Nevertheless, it didn't smoke and pulled like a train. So I gave all this cr*p a good clean and replaced the rocker cover with new gaskets in the hope a few flushes of fresh oil once it's running again will sort it all out.

Next post will bring everything up to date

:D
Motorhole
E30 Zone Addict
E30 Zone Addict
Posts: 2395
Joined: Tue Jul 12, 2005 11:00 pm
Location: Cheshire

Fri Mar 22, 2013 4:54 pm

As mentioned earlier, the half-rolled arches came back to bite me. And this is where.

I had to roll the rear arches completely so that the wheels and tyres would be sure to clear under hard cornering. So I went out and purchased an arch roller. This hurt as it's £100 for a tool I'm going to use once - but I justified it in that I'd get a good chunk of that back when I sold it on.

So I borrowed a heat gun and went at my rear arches.

Image

I rolled the arches perfectly without cracking the paint. However I forgot about the fibreglass skim that was under the fresh paint on the arch lip. This DID crack. So now I have the nasty job of scraping the arch lips back to bare metal, re-skimming and repainting. Potentially with paint that won't match 100%. Minor annoyance. I tell myself it doesn't matter - it's a budget track slag - it just has to resist the tinworm. But in the back of my mind, I can't help feeling that it matters a little bit. To me. Anyway, that job can wait, as I have more important things to do in the coming weeks.

In order to prevent potentially gay mismatching laser blue paint on the bonnet, I just sprayed it satin black to match the cage and the wheels. 2 coats black + 2 coats laquer. I brush painted the underside, also satin black, so now it just needs the paint cutting in then the bonnet fittings, washer jets and bonnet badge fitting.

Image

The car is looking rather dusty at the moment as it's been in the garage for nearly 2 years since it's blowover! But it will be treated to a wash soon enough. The masking tape on the door just stops me bashing the crap out of it against the garage wall.

So I collected all the bits I needed to service the M52 and fit the lightened M20 flywheel, M20 starter and M20 clutch kit to the E36 ZF box. BMW have also earned some hard money from me in the way of various nuts, bolts, fittings, fuel pipes and other bits and bobs. It all adds up!

Image

Eggs don't feature in the build - they belong in my digestive tract.

And my car currently looks like this.

Image

Perhaps the wheels are a little big for the E30, but as I said I needed these to clear the brakes. Might look better with the weight of the engine and 'box in there too and it squats down a bit. I need to find a way to either stop the slight tyre contact with the plastic on full lock or increase castor. I've read the Treehouse Racing control arm bushing could move the wheel forward another 10 mm or so in the arch? That would be more than sufficient.

The engine and 'box go in Easter weekend. Between now and then, I have some rear shock reinforcing plates to go on and I need to dress a few bits of the engine bay - namely underneath the radiator mount, that didn't get attention at blowover time.

Can't wait to get the thing running :x
davethegoat
E30 Zone Regular
E30 Zone Regular
Posts: 455
Joined: Fri Oct 28, 2011 11:00 pm

Fri Mar 22, 2013 5:47 pm

Cool build! :thumb: The 17's will look much better when the suspension's dropped a bit. (I've fitted 18's to mine :eek: and they're fine! :D I've also got RSR's. Proper tyres for the money, I can't wait to try them out properly!

Cheers. Dave. :D
Motorhole
E30 Zone Addict
E30 Zone Addict
Posts: 2395
Joined: Tue Jul 12, 2005 11:00 pm
Location: Cheshire

Mon Apr 01, 2013 12:33 pm

Bank holiday weekend! The time for the engine swap was upon me. I'd collected lots of parts in preparation for the big day - various new fittings, engine and gearbox mounts, stuff to refresh the gear linkage, M52 service parts, exhaust manifolds and downpipes etc etc...

Exhaust manifolds and downpipes were the ones made by the Zone's own DanThe. I drove down to a snowbound Cannock to pick these up:

Image
Image

Random box of bits from BMW and PacerPete, including some of DanThe's high-pressure power steering pipes. And more eggs.

Image

I also picked up some cheapo Z3M type rear strut tower reinforcement plates - £9.90 a pair on Ebay. They needed a tickle with the grinder to fit snugly - but ultimately, steel plates are steel plates right?

Image
Image

And with all the bits and a complete donor to hand, the swap began. In order to get it all done in good time over the weekend, I employed the help of Ian (aka Silverfang on here) and Will (aka Renrut on ppcmag.co.uk). Silverfang, as a motorsport engineering graduate and long-time daily E30 driver brought a mass of experience to the project and Will had an engine crane and a 4x4 for transporting the engine and 'box - and he's more than handy with the spanners too.

On Good Friday, we attacked the donor car, got the engine to my lockup and left it there for the night.

Image
Image
Image
Image
Image

On Saturday, Renrut had to leave us, but Silverfang hung around and we cracked on with doing the M20 flywheel and starter conversion and replacing key items on the engine and gear linkage.

Image
Image

Difference between the M52 dual-mass flywheel and a lightened M20 flywheel:

Image

Crank spigot with everything removed:

Image

Then we got to this little fooker!

Image

This is a spacer that goes between the flywheel and crank - it's an M20 item - and it didn't fit! I can only assume it was from an auto M20 and not a manual - nevertheless, the centre bore was 2mm diameter too small and one of the holes for the flywheel bolts was too small for a little spigot thingy. I didn't have the pleasure of time here - with a borrowed engine crane and only one weekend with guaranteed help, it had to be done now. We had to somehow make this spacer work. So we opened up the middle slightly with a drill and grnding stone - it took time but it worked. The bolt hole on the other hand was a nightmare. It had to be opened to 14.5 mm. So we bought a HSS drill bit locally and tried that - to no avail. These spacers are made out of very very hard steel and it shaved the flutes right off the drill bit! We had to resort to using a conical grinding stone to open it up bit by bit. 2 hours later, we were done and it fitted snugly, like it was the correct part!

Image

While I was *rsing about with the spigot hole, Silverhang had gotten on with changine the thermostat, thermostat housing, water pump and refreshed the gear linkage with new bushes and clips. We were then ready to but the engine and box back together with a new E30 325i clutch.

Image
Image
Image

We fitted a new slave cylinder and refilled the gearbox with oil and we were good to go! I also realised I forgot to mention the E34 M50 sump and pickup we fitted - but yeah, thet's there too. Along with a brown temp sensor. With everything now ready to drop into the car, we called it a day and went home for refreshments and movies.

Easter Sunday, the engine went in.

We fitted the high pressure steering pipes first as this would be much easier with the engine out.

Image

Then we jacked the car up as high as we could at the back to get as much angle as possible, to help the gearbox into the tunnel. Then we found that the legs of the engine crane wouldn't fit under the front bumper. B*llocks. SO we lowered the car to the ground again, removed the front wheels and jacked the coilovers up as high as they would go. Another problem solved, onto take 2. I used some old carpet to protect the paint and we got on with dropping it in:

Image
Image

Clearance is bloody tight at the front - but it went in first time. Almost vertical to begin with, then slowly level out, lower, level out, lower until the box sat nicely in the transmission tunnel.

Image

We aligned up the engine mounts, bolted the gearbox on place (only mod was to drill out the holes in the cross-member for the E21 gearbox mounts as these use an M10 thread as opposed to the E30 M8 ones). We patted ourselves on the back for a job well done.

Image
Image

Silverfang headed home, but then I spotted something we missed!

Image

I loosened off the opposite mount and jacked the engine arm up on a bottle jack. This gave me enough clearance to slip it into place and we were laughing. Engine in!

I still have the propshaft to do as well as wiring and cooling but the back of this project is broken now. I'll post progress in getting it running over the next few weeks.
Silverfang
E30 Zone Regular
E30 Zone Regular
Posts: 937
Joined: Fri Dec 23, 2005 11:00 pm
Location: Northampton

Mon Apr 01, 2013 7:20 pm

Bit of an epic weekend that was. I spent 3 and a half hours just trying to GET there on the M6 :mad: :x

Still, well worth the trip and we did break the back of it, I hope to see this running by the end of May! :D If you're ever down Silverstone way, might have to trouble you for a sneeky go winkeye
BMW and Opel, both RWD, both german, both good fun
http://www.clockservicing.co.uk/ For any clock repairs try here.
rix313
E30 Zone Team Member
Posts: 4939
Joined: Fri Oct 31, 2008 11:00 pm
Location: Silverstone
Contact:

Wed Apr 03, 2013 6:51 pm

Motorhole wrote: Image
Saw this picture on Ian's Facebook didn't realise was the same car.

Was up Cheshire over the weekend for the first BGT race :)
Motorhole
E30 Zone Addict
E30 Zone Addict
Posts: 2395
Joined: Tue Jul 12, 2005 11:00 pm
Location: Cheshire

Wed Apr 03, 2013 8:27 pm

BGT? Oh right, British GT. Do you work in the industry then? Small world, innit? :D
rix313
E30 Zone Team Member
Posts: 4939
Joined: Fri Oct 31, 2008 11:00 pm
Location: Silverstone
Contact:

Wed Apr 03, 2013 9:23 pm

Aye not Britons Got Talent lol!
Motorhole
E30 Zone Addict
E30 Zone Addict
Posts: 2395
Joined: Tue Jul 12, 2005 11:00 pm
Location: Cheshire

Tue Apr 16, 2013 3:44 pm

Not been much progress on this of late, mainly due to lack of time. However I have done a few bits and bobs, but this post is picture-light I'm afraid!

First up, I pulled the 328i prop centre-bearing to fit the new E30 one. Then decided I would replace the two dust caps and circlip while I was at it, but the dust caps are back order parts and I'm currently waiting for these to arrive. I also order a new prop donut, so by the time I've sorted the c*ck up on the flywheel (more on that in a bit), I will be able to bolt all this stuff right up.

Secondly, I originally intended to sort the wiring myself. But when I looked at the donor car, I was overcome with a sudden urge to take a cr*p. Good thing about taking a cr*p is it gives you time to think, so I came to the quick conclusion that although I probably could spend 50 hours of my time learning and sorting out the wiring and get it at least 80% right first time, it would just be easier to find some cash and pay DanThe for one of his plug and play solutions and get it 100% right first time, whilst spending a fraction of the time. So I now have the loom and he's currently sorting me out with an electric fan loom too. I also picked up a used 325i exhaust from him for a reasonable £40 - I plan to take this to an exhaust shop and have a single pipe backbox drafted onto it so I don't need to cut the valence and to maintain more of a 'sleeper' appearance.

Thirdly, I re-fitted the bumper strips to the doors. It was raining, so I didn't want to work outside. This was easy. But it does instantly improve the look of the car as I no longer need the masking tape down the edges of the doors to protect them. I could've done a little more work on Saturday I guess, but I owed a mate a favour for helping me out with the engine swap. So I helped him return the partially restored shell of his MG Midget to the horizontal, tidy his garage and then trial fit the 1400 k-series that is going in it. A good deal of cutting, welding and customised parts are required! Fitting a FWD Rover engine into a rear wheel drive MG with a RWD Ford gearbox in the middle is an altogether more challenging prospect than an M52 E30.

So back to my car and the aforementioned c*ck up. A well regarded zoner kindly sent me a pm last week to inform me I'd misunderstood the term 'spacer' (Part 10) on this parts diagram:

Image

It is in fact a washer for the flywheel bolts. This explains why it took so much pikey machine shop work to make it fit! Sadly, I've never seen a clutch and/or flywheel before so I made a classic error of reading too much into RealOEM where it was unclear and proceeding without checking. So I've sourced another unmolested 'spacer' so that, weather allowing, I can take the engine and gearbox out again and refit the flywheel properly. While I'm at it, I will be replacing the chipped p/s pump pulley, the aux belt and replacing a new standard 88-deg thermostat with another new 80-deg thermostat, based on advice on here. I'll also probably do the engine loom while it's out as that will make it a lot easier.

Thankfully, my glacial progress on this project has saved me a little bit here as wiring/cooling havn't been connected up yet meaning removing the engine and box again shouldn't be too much of a ballache. Hopefully I'll have more to report next week!
Last edited by Motorhole on Tue Apr 16, 2013 10:40 pm, edited 1 time in total.
DanThe
E30 Zone Team Member
Posts: 28640
Joined: Sat Sep 10, 2005 11:00 pm
Location: Staffs
Contact:

Tue Apr 16, 2013 6:51 pm

1400 K series? Sounds completely pointless to me! :o
Motorhole
E30 Zone Addict
E30 Zone Addict
Posts: 2395
Joined: Tue Jul 12, 2005 11:00 pm
Location: Cheshire

Tue Apr 16, 2013 10:46 pm

DanThe wrote:1400 K series? Sounds completely pointless to me! :o
Surprisingly, its still more than double the power of the old, heavy, fragile 1500 that was in there before and it should cost pennies to run. Plus there's always the option for an 1800 further down the line.

Given how much he has to spend on caterham/frontline bits to make it work in a rwd application with a Sierra box though does make me wonder if an M42/M44 would be a better solution. Doesn't seem to have been done before....

To give the k its dues though - it weighs f*ck all. Can lift it off the pallet by hand!
DanThe
E30 Zone Team Member
Posts: 28640
Joined: Sat Sep 10, 2005 11:00 pm
Location: Staffs
Contact:

Tue Apr 16, 2013 10:58 pm

To be fair they are not a bad lump, the problem seems to be that nobody can put them together properly, including the cocks on the production line.
1800 or nothing though IMO :D
Motorhole
E30 Zone Addict
E30 Zone Addict
Posts: 2395
Joined: Tue Jul 12, 2005 11:00 pm
Location: Cheshire

Sun Apr 21, 2013 5:19 pm

So this weekend, I cracked on with sorting out my balls-up with the flywheel and 'spacer'. The weather on Saturday was quite fine and perfect for the job, although this time I had no mechanically minded aides to help me out. I did still have willing assistants though (colleagues from work paying an interest in my project!), which is not so bad. Sometimes when your craning engines in and out, all you need are a few spare sets of eyes and hands to help you out.

So I started nice and early, getting to the garage by 8.15am. My first two helpers turned up about 9am and by about 10.30 am, we had the engine and box out on the deck again.

I split the engine and box and wasted no time in taking apart the clutch and flywheel assembly. I removed the spacer I'd wrongly situated on the crank output flange and refitted the flywheel CORRECTLY with a new 'spacer' in the CORRECT place!

Image
Image

With everything amended and the engine and gearbox back together, slave cylinder and starter motor all replaced, we ate Burger King and my first two colleagues departed. I started cracking on with some other jobs I had to do - little things that I might as well tackle with the engine out. I replaced my 88-degree thermostat with an 80-degree one and fitted a new power steering pump pulley (the old one was chipped) and auxiliary drive belt.

Image
Image

While I was doing this, my next helper turned up. This poor fellow reminds me of myself when I started this project 3 years ago. Barely understanding the difference between a ratchet and a spanner. But, I was grateful for his help and between us, we cracked on. We fitted the modified manifolds, provided by DanThe - they look real good. They run pretty much as close to the engine and box as can be gotten away with to get maximum clearance to the steering linkage.

Image
Image
Image

We then removed the inlet manifold and detached the engine loom completely. We began plugging in the nut-ache saving loom I purchased from DanThe. With most of this done, we craned the engine back home and called it a day.

Image

And here's the clearance from the manifolds to the linkage. Looks closer than it really is in the pics, due to the angle but they never get closer than about 20 mm. i.e. plenty of room,

Image
Image

I ended up finishing at about 6pm. So not a bad day's work at all really for one spanner-wielding noob and 3 rookie assistants.

During the week, I put the E30 centre-bearing onto the E36 prop. I was initially confused by this prospect as it is said the E30 bearing should be fitted 'backwards' onto the E36 prop - but of course the bearings only fit one way! On closer inspection, the reason was obvious. The join on the E36 prop is the opposite side of the bearing from the E30 prop, so the bearing and housing face the opposite way. So this all became perfectly clear. Fitting the bearing the 'right' way on the E36 prop means that it's facing the opposite direction it would if it were fitted the 'right' way on an E30 prop.

Pulling the old one off was easy, but putting on the replacement front dust cap just seemed impossible. No amount of heat or pressure would get it on - even to the point that the zinc coating started peeling from the heat! So in the end I tried driving it on with the bearing. This worked, to a point, until the dust cap refused to go any further and it just bent, ending up jammed against the rubber outer rim around the bearing. So it had to be pulled off again. This was the resulting state of the part.

Image

Coming to the conclusion that this dustcap wasn't going on without a press and the proper shaped tool, I did a spot of comparative research between the E36 and E30 centre-bearing assemblies/parts. It turns out the rubber rim on the E36 bearing is ever so slightly smaller rim diameter, so the dustcap could probably be pressed on with the bearing. Also, there is no dustcap of this sort on the E30 propshaft!

Image

Conclusion?

Run without this dustcap for now and see what happens. Without it, the bearing, rear dustcap and retaining circlip went together easy as pie.

Image
Image
Image

And there we are until next weekend folks, when I will mostly be fitting the prop, doing a hose audit (to order some silicon replacements) and finishing up the engine wiring.
scott180gtb
E30 Zone Camper
E30 Zone Camper
Posts: 1251
Joined: Thu Mar 26, 2009 11:00 pm
Location: Yorkshire

Sun Apr 21, 2013 8:12 pm

Skills

I'm doing the same conversion over the coming winter.

Just out of interest how much was the cage work?

P.m if you prefer

Should be a weapon on the track :cool:
Cars

2007 VW Caravelle 2.5 TDI 250 bhp 550 NM
1989 325i Sport Gone :(
2003 E46 320d Touring
1998 E36 M3 EVO Track Toy
1996 E36 328i Sport welder-up project
Motorhole
E30 Zone Addict
E30 Zone Addict
Posts: 2395
Joined: Tue Jul 12, 2005 11:00 pm
Location: Cheshire

Sun Apr 21, 2013 9:26 pm

Thanks mate. Yeah, hope so :) Still frightened I'm going to be underwhelmed when I drive it. Hope that's not the case.
Post Reply