
Production BMW Build 320 - RACING!
Moderator: martauto
-
milescook
- E30 Zone Camper

- Posts: 1285
- Joined: Thu Jan 13, 2011 11:00 pm
- Location: The 'bran of Cwm
I did wonder on the way! Fortunately I'd badly half put one in already which they to remove 
The story so far... http://www.cookracing.co.uk/
Also please help the race budget by watching some videos https://www.youtube.com/cookracinguk
Also please help the race budget by watching some videos
-
milescook
- E30 Zone Camper
- Posts: 1285
- Joined: Thu Jan 13, 2011 11:00 pm
- Location: The 'bran of Cwm
After an awful lot of effort trying to get one bush in, I resorted to a persuading device. Unfortunately this damages the alloy core and wasted a bush. So I admitted defeat, bought a replacement and popped to my local garage. It took them less than 15 minutes! So there's a top tip...
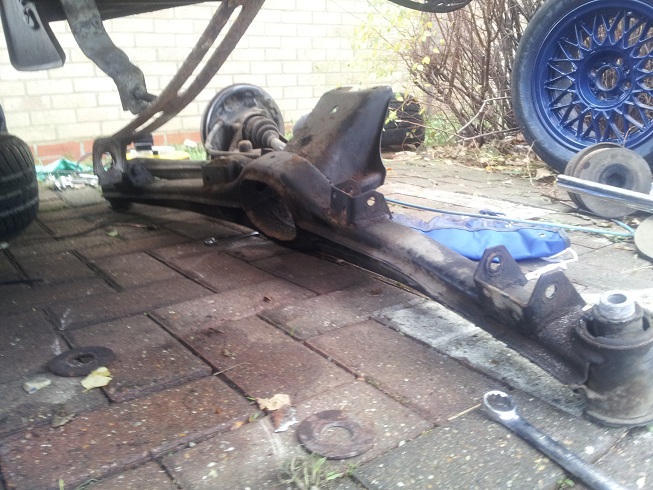
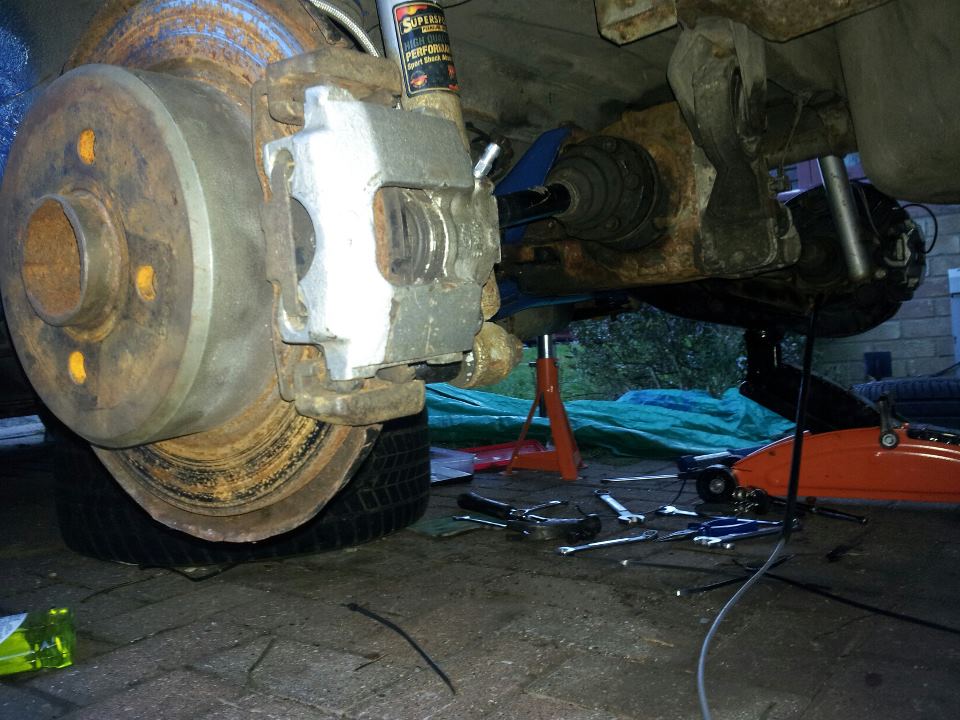
Next step was to remove the old subframe. With the help of a tame race mechanic, the result is below!
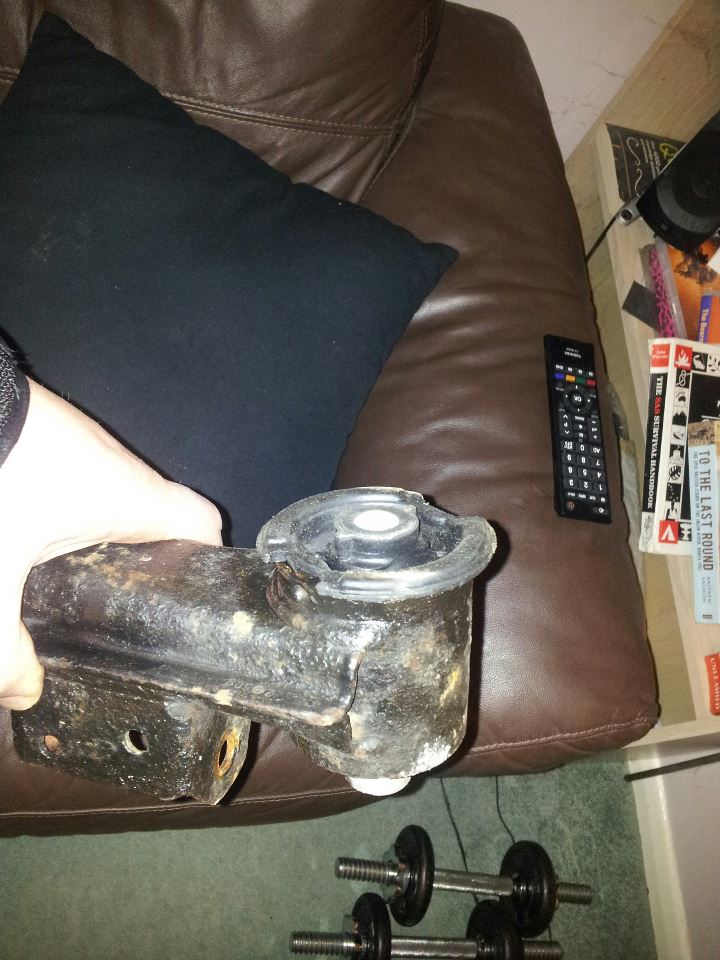
The right side came down okay, the left not so, so we took off the trailing arm and really went to town on it. Part of the alloy bush insert ripped off in the process, but we sorted that.These things do corrode to the body after 20 years.
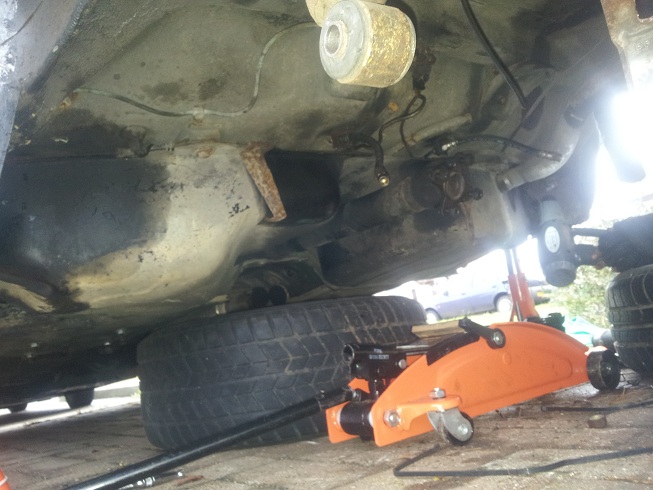
The rear of the car looks a bit weird now. The only troubles we had was one backing plate bolt decided to be circular inside instead of hex, so I had to drill it out. Fortunately the plate spins vertically after persuasion allowing room for the subframe to slip passed. Another drama:
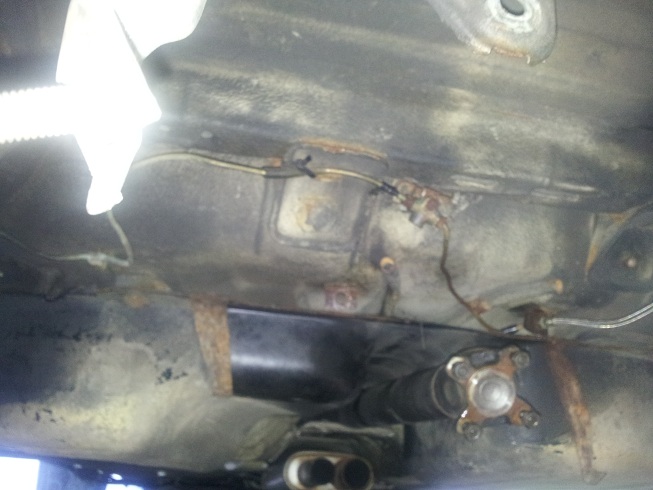
The T section pf the rear brakes used to have a small connecting pipe that sharply bent towards the flexible subframe hose. Unfortunately whatever ham fisted mechanic had "replaced" this section had bent the pipe so much it's probable that the car had very limited rear brakes. So a new one is being made up before the subframe can go back on.
Slightly annoyingly, the subframe that is ready to go back on, is from a touring which as it turns out, doesn't have an exhaust mounting bracket like mine. But nothing that can't be fixed... oh and heat guns - my saying of that day - are very much under rated! Not quite as good as oxy torches, but still pretty awesome at persuading bolts off.
Next step was to remove the old subframe. With the help of a tame race mechanic, the result is below!
The right side came down okay, the left not so, so we took off the trailing arm and really went to town on it. Part of the alloy bush insert ripped off in the process, but we sorted that.These things do corrode to the body after 20 years.
The rear of the car looks a bit weird now. The only troubles we had was one backing plate bolt decided to be circular inside instead of hex, so I had to drill it out. Fortunately the plate spins vertically after persuasion allowing room for the subframe to slip passed. Another drama:
The T section pf the rear brakes used to have a small connecting pipe that sharply bent towards the flexible subframe hose. Unfortunately whatever ham fisted mechanic had "replaced" this section had bent the pipe so much it's probable that the car had very limited rear brakes. So a new one is being made up before the subframe can go back on.
Slightly annoyingly, the subframe that is ready to go back on, is from a touring which as it turns out, doesn't have an exhaust mounting bracket like mine. But nothing that can't be fixed... oh and heat guns - my saying of that day - are very much under rated! Not quite as good as oxy torches, but still pretty awesome at persuading bolts off.
Last edited by milescook on Sun May 06, 2018 11:01 pm, edited 1 time in total.
The story so far... http://www.cookracing.co.uk/
Also please help the race budget by watching some videos https://www.youtube.com/cookracinguk
Also please help the race budget by watching some videos
-
rix313
- E30 Zone Team Member

- Posts: 4967
- Joined: Fri Oct 31, 2008 11:00 pm
- Location: Silverstone
Nothing we could have done would have got that bolt free. I wish I took a photo of the removal process. I took it to the fab shop and got the oxy acetylene torch on it. The thing was glowing and caught fire before it came free enough to undo lol.
Heat gun and vise grips were the saviour tools of the day!
Heat gun and vise grips were the saviour tools of the day!
-
milescook
- E30 Zone Camper
- Posts: 1285
- Joined: Thu Jan 13, 2011 11:00 pm
- Location: The 'bran of Cwm
...them and bacon sarniesrix313 wrote:Nothing we could have done would have got that bolt free. I wish I took a photo of the removal process. I took it to the fab shop and got the oxy acetylene torch on it. The thing was glowing and caught fire before it came free enough to undo lol.
Heat gun and vise grips were the saviour tools of the day!
Few weeks till i get chance to fit the new beam and arms. Then she's back on the road.
The story so far... http://www.cookracing.co.uk/
Also please help the race budget by watching some videos https://www.youtube.com/cookracinguk
Also please help the race budget by watching some videos
-
milescook
- E30 Zone Camper
- Posts: 1285
- Joined: Thu Jan 13, 2011 11:00 pm
- Location: The 'bran of Cwm
Right, won't ramble as I'm too tired, so some pics of today's work:

Rebuilt the brakes and installed the new handbrake cable.

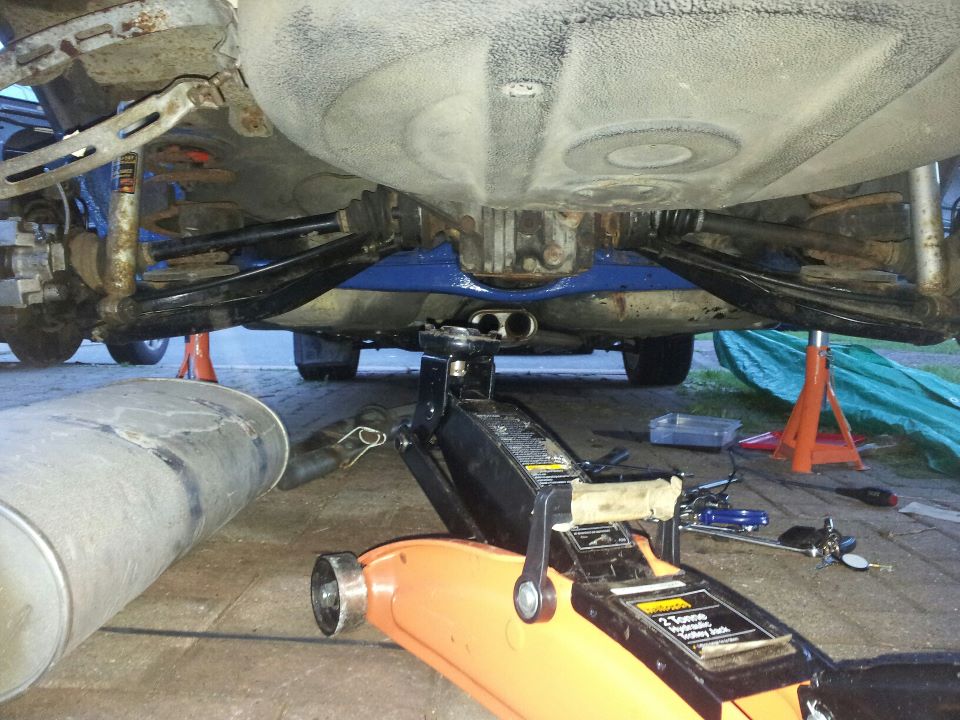
Wondered how I was going to crack lifting the whole thing. Building the beam and diff and trailing arms and lifting whole quickly seemed a dumb idea.

So I put the beam in place, and lifted up the diff to it - very tricky and it hurts when it falls on your hand...got there in the end tho. And yes - blue hammerite on the subframe. And a new brake pipe section - cheers Rich!

Even trickier is man handling a trailing arm and hub in to the correct position on the subframe.
Afer 3.5 hours, I got one arm sorted! Realised the spring rubbers are the wrong way round. Oh well no biggee, easy to change.
Tomorrow, t'other side, brake system and fluid change plus bleeding, exhaust, handbrake, and mini test drive on my road. Very exciting...
Rebuilt the brakes and installed the new handbrake cable.
Wondered how I was going to crack lifting the whole thing. Building the beam and diff and trailing arms and lifting whole quickly seemed a dumb idea.
So I put the beam in place, and lifted up the diff to it - very tricky and it hurts when it falls on your hand...got there in the end tho. And yes - blue hammerite on the subframe. And a new brake pipe section - cheers Rich!
Even trickier is man handling a trailing arm and hub in to the correct position on the subframe.
Afer 3.5 hours, I got one arm sorted! Realised the spring rubbers are the wrong way round. Oh well no biggee, easy to change.
Tomorrow, t'other side, brake system and fluid change plus bleeding, exhaust, handbrake, and mini test drive on my road. Very exciting...
Last edited by milescook on Mon Dec 15, 2014 8:38 pm, edited 1 time in total.
The story so far... http://www.cookracing.co.uk/
Also please help the race budget by watching some videos https://www.youtube.com/cookracinguk
Also please help the race budget by watching some videos
-
milescook
- E30 Zone Camper
- Posts: 1285
- Joined: Thu Jan 13, 2011 11:00 pm
- Location: The 'bran of Cwm
Sunday was almost the finishing touch....
At this point, the driver's side trailing arm is not actually attached... nearly 3 hours of getting very angry, as the arm would catch on the bush metal inserts slightly and not go in! In the end I bent the outside of the bracket in the middle just enough to slide the other side in. Very knackering on your own and possibly the worst job on the car so far
Eventually, the whole lot was attached. Think I had some lunch to celebrate. Tis hard work this car work malarky.
One question I do have, is my exhaust is meant to hang off the beam, where as this beam doesn't have the mounting point. Perhaps it's touring specific. Any suggestions? E.g leave it suspended just by the back box, buy a new bracket and fix it to xyz etc?
Afterwards I started on the handbrake cables. Not sure exactly how they route? I do need a second replacement as the only one that came with the arms was missing a metal stopper. Not great as undoing and redoing the drums is hard enough in my living room!
But got there in the end! Ran out of daylight sadly, so it will stay on the axle stands 1 more week, It will be a moment to savor when it's actually on it's wheels again! I'll be pumping the new brake fluid in, bleeding the brakes with my new brake bleeding gadget I've had for months.
Last edited by milescook on Sun Aug 07, 2016 8:58 pm, edited 1 time in total.
The story so far... http://www.cookracing.co.uk/
Also please help the race budget by watching some videos https://www.youtube.com/cookracinguk
Also please help the race budget by watching some videos
-
redcar

- E30 Zone Squatter

- Posts: 1610
- Joined: Wed Jul 20, 2011 11:00 pm
- Location: Hertfordshire
Your beam doesn't appear to have the exhaust mounting point. You will need it.
What exhaust are you going for? I replaced all of the standard mounting system with poly exhaust hangers so the exhaust doesn't move around that much. I guess you'll have to weld a new bracket on to your subframe to suspend the exhaust.
What exhaust are you going for? I replaced all of the standard mounting system with poly exhaust hangers so the exhaust doesn't move around that much. I guess you'll have to weld a new bracket on to your subframe to suspend the exhaust.
-
milescook
- E30 Zone Camper
- Posts: 1285
- Joined: Thu Jan 13, 2011 11:00 pm
- Location: The 'bran of Cwm
Yeah that's really wierd - how did the car the beam came off hold the exhaust? I've looked all over the wiki and google and can only see the beam for the middle part...?
Anyway, braved the cold and finalised the back! Hurrahh....that was around 4-5 hours work today but it's scary and great to at last finish the whole rear beam bushes job, and the disc conversion.
Really painful top tip - I usually do any nuts up tight as I go along. However, when I came to bleed the left rear brake, I was pumping forever with the one man kit, pumping the brake pedal and still getting loads of air. Sadly when I looked under the car I saw why... a puddle of brake fluid.
Firstly the hose connecting to the trailing arm was way too loose, so tightend that. Tried again. To my utter horror, I saw that the same hose was not tight enough going to the brake pipe. This was seriously bad news, as the beam is in the way. I had images of having to take the whole lot back off again, after 2 weekends of putting it back on... Fortunately, you can just about get two spanners in front of the beam, so I nipped the connection tight - very tricky with no room and baltic cold hands! But no more leaking.
I'm still getting what seems to be air though, so I tried the other (driver's) side. This was much simpler. (Possibly because a fellow zoner did part of that side for me....) I bled the fronts - much simpler as they also have one way speed bleeder valves. I will go back to the left rear, when I actually have the correct size spanner too. It's a 7mm bleed valve for some reason.
The suspension looks very low and odd on one side, but thinking about it the old trailing arms and beam plus trolley jack are in the boot.
And there we go! She's back on 4 wheels. Very carefully moved it back and forth, worryingly it seemed to snag and go up slightly.. balls!!! What have I done.... Clearly something catastrophic like the drum brakes are on back to front, or the driveshafts are getting snagged, something's broken etc. I'm very worried at this point.
Raised the back on the diff and put in to first gear, okay so the wheels are moving fine - right faster than left but all ok. So what's going on?
Turns out the wheel chocks were still in front of the front wheels
So after (removing the chocks and) very carefully trying the brakes and steering (which is now much nicer with new fluid I replaced several months back!), I carefully edged on to the cul de sac, literally 20 metres then reversed back. All seems ok. Job done! Sort of...
Next, need to sort out the other handbrake cable, nice and cheap - I'll do that next month. Then I'll clean the interior back up, as there's been lots of rusty parts sat there. I also need to sort out the exhaust mounting more importantly - perhaps a welding job for a garage same time as MOT? I've got the original mount from the other beam it just needs to be attached to this new one. I'm also going to update the chap I bought the car from - he wanted me to keep him posted, and I dare say he might be impressed
Anyway, braved the cold and finalised the back! Hurrahh....that was around 4-5 hours work today but it's scary and great to at last finish the whole rear beam bushes job, and the disc conversion.
Really painful top tip - I usually do any nuts up tight as I go along. However, when I came to bleed the left rear brake, I was pumping forever with the one man kit, pumping the brake pedal and still getting loads of air. Sadly when I looked under the car I saw why...
Firstly the hose connecting to the trailing arm was way too loose, so tightend that. Tried again. To my utter horror, I saw that the same hose was not tight enough going to the brake pipe. This was seriously bad news, as the beam is in the way. I had images of having to take the whole lot back off again, after 2 weekends of putting it back on... Fortunately, you can just about get two spanners in front of the beam, so I nipped the connection tight - very tricky with no room and baltic cold hands! But no more leaking.
I'm still getting what seems to be air though, so I tried the other (driver's) side. This was much simpler. (Possibly because a fellow zoner did part of that side for me....) I bled the fronts - much simpler as they also have one way speed bleeder valves. I will go back to the left rear, when I actually have the correct size spanner too. It's a 7mm bleed valve for some reason.
The suspension looks very low and odd on one side, but thinking about it the old trailing arms and beam plus trolley jack are in the boot.
And there we go! She's back on 4 wheels. Very carefully moved it back and forth, worryingly it seemed to snag and go up slightly.. balls!!! What have I done.... Clearly something catastrophic like the drum brakes are on back to front, or the driveshafts are getting snagged, something's broken etc. I'm very worried at this point.
Raised the back on the diff and put in to first gear, okay so the wheels are moving fine - right faster than left but all ok. So what's going on?
Turns out the wheel chocks were still in front of the front wheels
So after (removing the chocks and) very carefully trying the brakes and steering (which is now much nicer with new fluid I replaced several months back!), I carefully edged on to the cul de sac, literally 20 metres then reversed back. All seems ok. Job done! Sort of...
Next, need to sort out the other handbrake cable, nice and cheap - I'll do that next month. Then I'll clean the interior back up, as there's been lots of rusty parts sat there. I also need to sort out the exhaust mounting more importantly - perhaps a welding job for a garage same time as MOT? I've got the original mount from the other beam it just needs to be attached to this new one. I'm also going to update the chap I bought the car from - he wanted me to keep him posted, and I dare say he might be impressed
Last edited by milescook on Sun Aug 07, 2016 8:59 pm, edited 1 time in total.
The story so far... http://www.cookracing.co.uk/
Also please help the race budget by watching some videos https://www.youtube.com/cookracinguk
Also please help the race budget by watching some videos
-
redcar
- E30 Zone Squatter
- Posts: 1610
- Joined: Wed Jul 20, 2011 11:00 pm
- Location: Hertfordshire
Seen a few e30a without their exhaust mounted at the beam point. Mostly due to broken rubber or a dodgy aftermarket exhaust which simply won't line up with the mount on the beam. It's silly though as it's an essential point to stop up and down movement of the exhaust!
-
taylorspug

- E30 Zone Newbie

- Posts: 70
- Joined: Mon Aug 27, 2012 11:00 pm
- Location: Haywards Heath, Sussex
Good work. Nice to see you are even braving the cold to get things done! With regard to the air you are still getting in one brake line, maybe try just cracking the bleed nipple off and leaving it open for a bit, sometimes especially when a line has been dry for a while, gravity is the best thing for it.
Dan.
Dan.
E30 2.5l M20 race car. Just coming out of a 4 year hibernation/restoration.
-
milescook
- E30 Zone Camper
- Posts: 1285
- Joined: Thu Jan 13, 2011 11:00 pm
- Location: The 'bran of Cwm
cheers will give the a go.did notice one of my lines wasn't tight that won't help! Will resume tomorrow.
Today i fitted the second new handbrake cable and thanks to the outstanding zone wiki squared away my handbrake e so it now works beautifully! Tightened prop shaft and drive shafts and drove to the bottom of the estate road about just enough time to get to 2nd before hitting ye brakes. All feels well so far i just need to get the old drum trailing arms out the boot and sold! Feels great to awake the slumbering beast
Fixed a weird headlight indicator issue via an earth behind left headlight. Now i just have a few bits for mot end ot the month. Secure the battery better, two tyres, fix rear demister, passenger window not working and need to fabricate some cheap door cards. Wow getting there!
The story so far... http://www.cookracing.co.uk/
Also please help the race budget by watching some videos https://www.youtube.com/cookracinguk
Also please help the race budget by watching some videos
-
milescook
- E30 Zone Camper
- Posts: 1285
- Joined: Thu Jan 13, 2011 11:00 pm
- Location: The 'bran of Cwm
Got the other brake bled after too easily snapping my Gucci 35 quid tool from demon tweaks .... in the end my neighbour lent me his 3 quid pipe with a valve on it, and helped me for good measure!
Been very busy today, all day. I've done a lot of tidying up. Fitted a battery bracket, and fashioned a door card from some plastic sheeting I bought againfrom DT. Upsettingly the mirror switch sires get caught on the window as it goes up and down. Oh well. Will try and work out a new solution...
So that should see me through the MOT Wednesday - fingers crossed. Other jobs today included the new windscreen washer solution. As my bonnet comes off I've diverted the washer pipes up through the scuttle area and cable tied it to the drivers side wiper. Works a charm! The check panel is glued in place as is the new location for the horn.
I gave the inside a good clean and tidy up, cable tied some wires together, bolted the ECU in place on the transmission tunnel - there's a handy bolt hole there for the centre console I think. Got my electrical cut off sticker t last, also good.
Tomorrow I need a new wiper blade, one reverse light is out, I'll pump up the tyres, check all lights once more, I may flush the old coolant out and I still have new front control arm lolipops with powerflexr bushes to fit. So I may do that.
More pics tomorrow!
Last edited by milescook on Sun Aug 07, 2016 9:01 pm, edited 1 time in total.
The story so far... http://www.cookracing.co.uk/
Also please help the race budget by watching some videos https://www.youtube.com/cookracinguk
Also please help the race budget by watching some videos
-
milescook
- E30 Zone Camper
- Posts: 1285
- Joined: Thu Jan 13, 2011 11:00 pm
- Location: The 'bran of Cwm
Just to add, I went over and checked everything I could think of for the MOT. Lights, wiper blades, dashboard lights. Some like the parking brake need a tap to work!
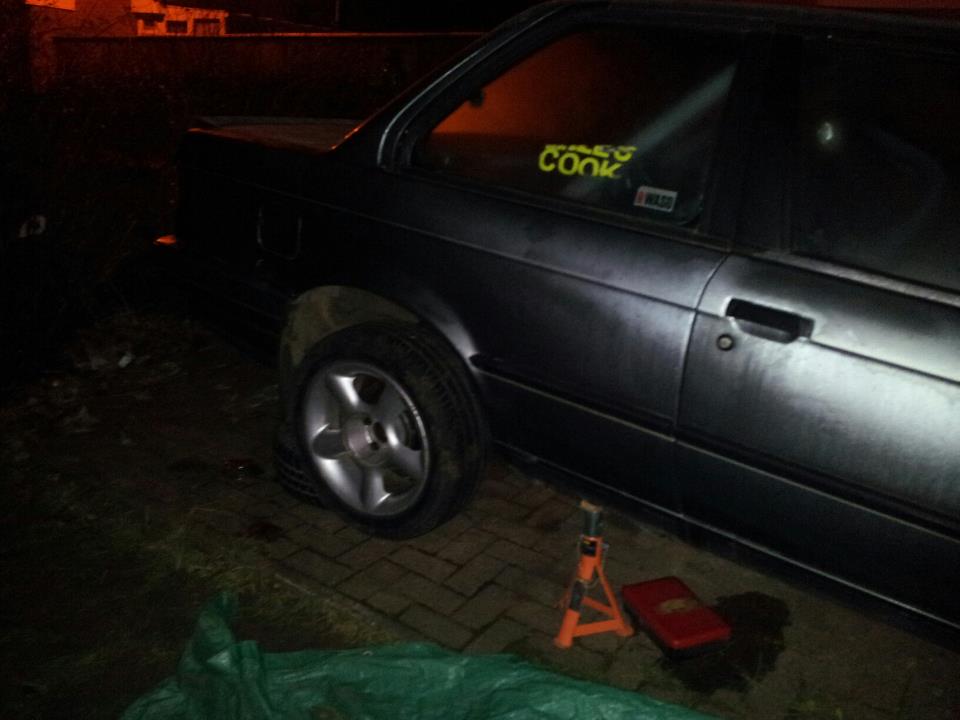
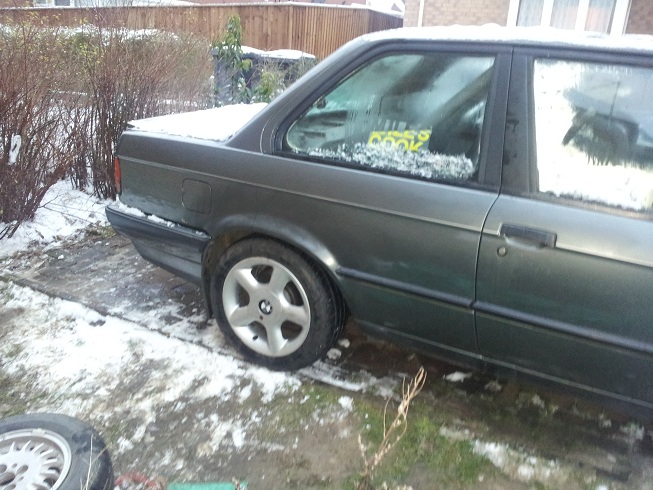
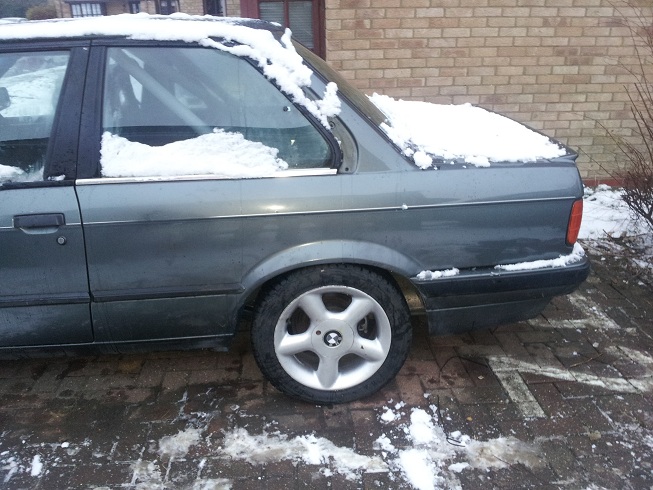
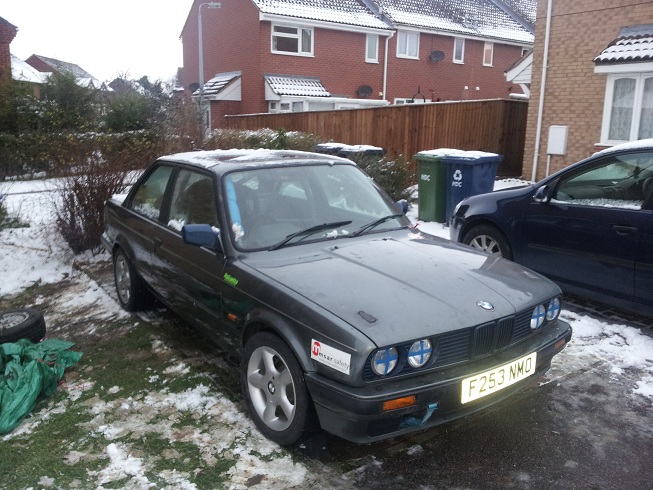
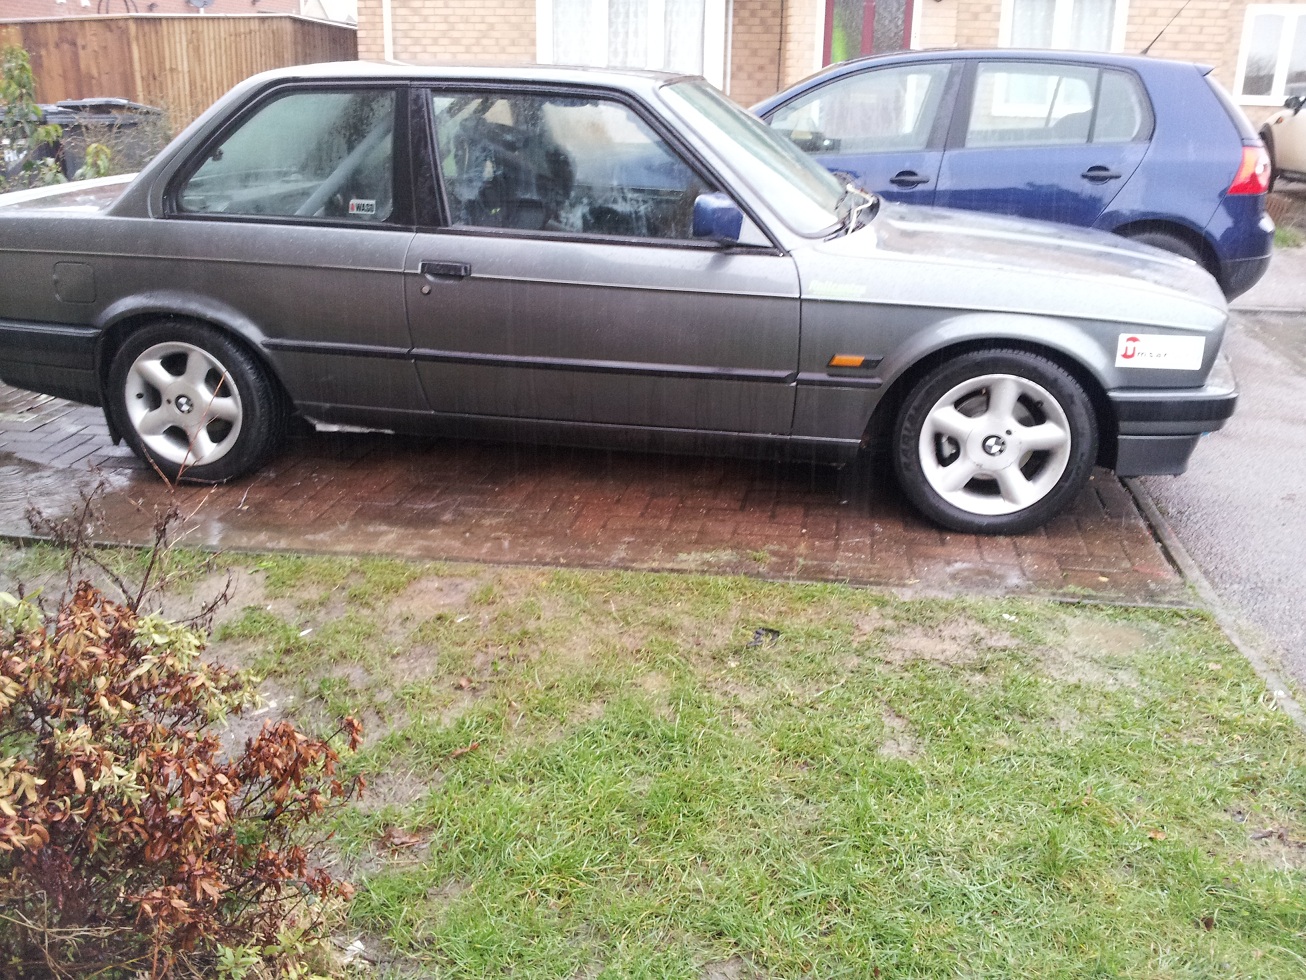
Here she is before the MOT Wednesday.

Here she is before the MOT Wednesday.
Last edited by milescook on Sun Aug 07, 2016 9:02 pm, edited 1 time in total.
The story so far... http://www.cookracing.co.uk/
Also please help the race budget by watching some videos https://www.youtube.com/cookracinguk
Also please help the race budget by watching some videos
-
Demlotcrew
- E30 Zone Team Member
- Posts: 13329
- Joined: Mon Dec 20, 2004 11:00 pm
- Location: East Anglia
Looking good,
Do you have anything on the end of the screen wash hose?
Do you have anything on the end of the screen wash hose?

-
milescook
- E30 Zone Camper
- Posts: 1285
- Joined: Thu Jan 13, 2011 11:00 pm
- Location: The 'bran of Cwm
Just the wiper...
What did you have in mind, are there nozzles I could buy? Intersting throught I hadn;t considered. To be honest I just cut it at an angle and it works a charm. Saving weight and all that - you'd be a big fan I'm sure
What did you have in mind, are there nozzles I could buy? Intersting throught I hadn;t considered. To be honest I just cut it at an angle and it works a charm. Saving weight and all that - you'd be a big fan I'm sure
The story so far... http://www.cookracing.co.uk/
Also please help the race budget by watching some videos https://www.youtube.com/cookracinguk
Also please help the race budget by watching some videos
-
Demlotcrew
- E30 Zone Team Member
- Posts: 13329
- Joined: Mon Dec 20, 2004 11:00 pm
- Location: East Anglia
I just see it not being that efficient at speed. Most of the screen wash will be pushed off the screen.
I think there are 'clip on' jets that you can buy that sit on the wiper arm, might be a better solution?
My other thought was that the MOT tester might get upset if his testing station gets soaked!
I do love a weight reduction! But the original jets are still on the bonnet
Andrew
I think there are 'clip on' jets that you can buy that sit on the wiper arm, might be a better solution?
My other thought was that the MOT tester might get upset if his testing station gets soaked!
I do love a weight reduction!
Andrew
-
Demlotcrew
- E30 Zone Team Member
- Posts: 13329
- Joined: Mon Dec 20, 2004 11:00 pm
- Location: East Anglia
A quick ebay search returned this.
http://www.ebay.co.uk/itm/1x-Triple-Was ... 51a7bb977b
Just a shame the input nozzle is on the wrong side.
Andrew
http://www.ebay.co.uk/itm/1x-Triple-Was ... 51a7bb977b
Just a shame the input nozzle is on the wrong side.
Andrew
-
milescook
- E30 Zone Camper
- Posts: 1285
- Joined: Thu Jan 13, 2011 11:00 pm
- Location: The 'bran of Cwm
Nice, might treat myself to one. Sod the testing station, just give me my cert Will test on the way to the garage...
The story so far... http://www.cookracing.co.uk/
Also please help the race budget by watching some videos https://www.youtube.com/cookracinguk
Also please help the race budget by watching some videos
-
Demlotcrew
- E30 Zone Team Member
- Posts: 13329
- Joined: Mon Dec 20, 2004 11:00 pm
- Location: East Anglia
-
DanThe
- E30 Zone Team Member
- Posts: 28649
- Joined: Sat Sep 10, 2005 11:00 pm
- Location: Staffs
You dont need reverse lights or parking brake light for the MOT if you didnt know
I used blades similar to this for the washers - http://www.ebay.co.uk/itm/JAGUAR-XJE-XJ ... 20ce6b3402
I used blades similar to this for the washers - http://www.ebay.co.uk/itm/JAGUAR-XJE-XJ ... 20ce6b3402
-
Demlotcrew
- E30 Zone Team Member
- Posts: 13329
- Joined: Mon Dec 20, 2004 11:00 pm
- Location: East Anglia
Even better!DanThe wrote:You dont need reverse lights or parking brake light for the MOT if you didnt know
I used blades similar to this for the washers - http://www.ebay.co.uk/itm/JAGUAR-XJE-XJ ... 20ce6b3402
-
milescook
- E30 Zone Camper
- Posts: 1285
- Joined: Thu Jan 13, 2011 11:00 pm
- Location: The 'bran of Cwm
Ta!DanThe wrote:You dont need reverse lights or parking brake light for the MOT if you didnt know
I used blades similar to this for the washers - http://www.ebay.co.uk/itm/JAGUAR-XJE-XJ ... 20ce6b3402
The story so far... http://www.cookracing.co.uk/
Also please help the race budget by watching some videos https://www.youtube.com/cookracinguk
Also please help the race budget by watching some videos
-
milescook
- E30 Zone Camper
- Posts: 1285
- Joined: Thu Jan 13, 2011 11:00 pm
- Location: The 'bran of Cwm
Amazing news... passed the MOT!!! First time driven for a year and a half, I only had an advisory on the tyres. Bad wobble coming to the garage doing about 50 (goes away when going faster), guess the wheels are out of balance But wow...
The story so far... http://www.cookracing.co.uk/
Also please help the race budget by watching some videos https://www.youtube.com/cookracinguk
Also please help the race budget by watching some videos
-
Demlotcrew
- E30 Zone Team Member
- Posts: 13329
- Joined: Mon Dec 20, 2004 11:00 pm
- Location: East Anglia
So whats the plan now?
-
milescook
- E30 Zone Camper
- Posts: 1285
- Joined: Thu Jan 13, 2011 11:00 pm
- Location: The 'bran of Cwm
hmmm... reckon i might go racing got some gaz suspension lined up and then some control tyres.need to know what that bloody wobble is first tho
The story so far... http://www.cookracing.co.uk/
Also please help the race budget by watching some videos https://www.youtube.com/cookracinguk
Also please help the race budget by watching some videos
-
Demlotcrew
- E30 Zone Team Member
- Posts: 13329
- Joined: Mon Dec 20, 2004 11:00 pm
- Location: East Anglia
Well you must let us know, who ever can make should come and support you
-
milescook
- E30 Zone Camper
- Posts: 1285
- Joined: Thu Jan 13, 2011 11:00 pm
- Location: The 'bran of Cwm
Ta bud! will post here the next lot of adventures. after tyres and suspension will book some track time for a shakedown .
The story so far... http://www.cookracing.co.uk/
Also please help the race budget by watching some videos https://www.youtube.com/cookracinguk
Also please help the race budget by watching some videos
-
taylorspug
- E30 Zone Newbie
- Posts: 70
- Joined: Mon Aug 27, 2012 11:00 pm
- Location: Haywards Heath, Sussex
Good stuff- things go so much quicker once the car is up and running again! Another option regarding the washers- if you ever happen to see a Citroen BX in the scrappy (hit and miss now I know!), they have a wiper arm which comes complete with a multi-holed washer spray bar. Its bloody brilliant- gets really good coverage on the entire screen. Only small issue is they only have 1 wiper- so you will need 2 Citroen BX's.....
E30 2.5l M20 race car. Just coming out of a 4 year hibernation/restoration.
-
rix313
- E30 Zone Team Member
- Posts: 4967
- Joined: Fri Oct 31, 2008 11:00 pm
- Location: Silverstone
Top new man weldone.milescook wrote:Amazing news... passed the MOT!!! First time driven for a year and a half, I only had an advisory on the tyres. Bad wobble coming to the garage doing about 50 (goes away when going faster), guess the wheels are out of balance But wow...
-
milescook
- E30 Zone Camper
- Posts: 1285
- Joined: Thu Jan 13, 2011 11:00 pm
- Location: The 'bran of Cwm
The story so far... http://www.cookracing.co.uk/
Also please help the race budget by watching some videos https://www.youtube.com/cookracinguk
Also please help the race budget by watching some videos
-
milescook
- E30 Zone Camper
- Posts: 1285
- Joined: Thu Jan 13, 2011 11:00 pm
- Location: The 'bran of Cwm
Right got stuck into the clutch this weekend. Decided to do a small job halfway through, which turned out to waste most of my day - more on that later.
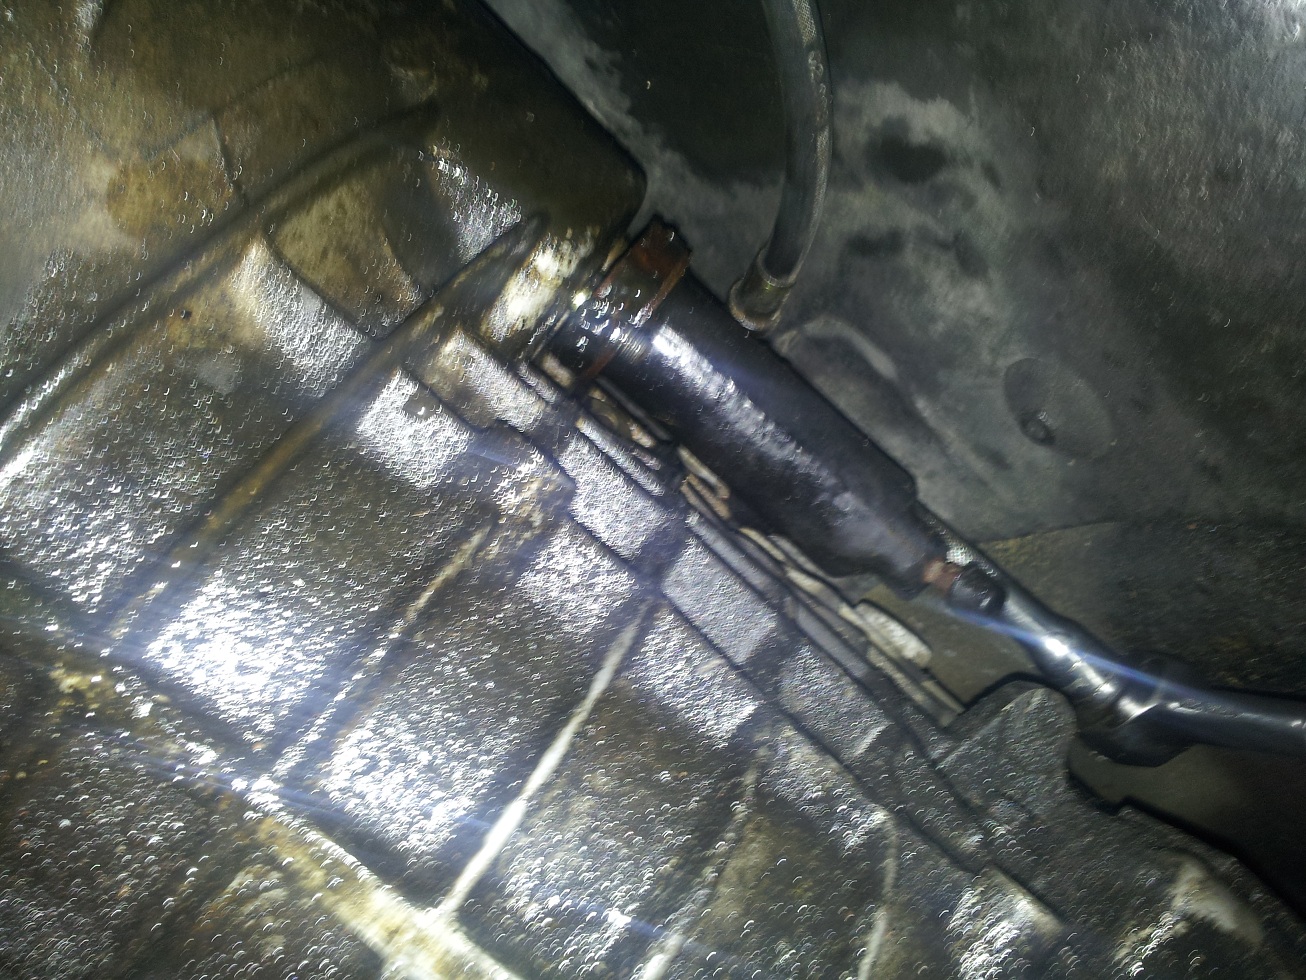
Basically, found the car seemed very eager to move forward. By the third gear change I relised something was amiss when I struggled to change gear. The next change into first at a roundabout to go, didn't happen at all. So stuck my hazards on, and had an emergency crisis meeting with myself to determine what to do next. Woman beeps behind me beckoning me to go, so I stick my hand put the window and wave her past. Still fiddling trying to get in gear she beeps again waving frantically. I'm fairly certain that's the universal signal for "go passed me I've broken down", obviously someone needs to tell the dozy mare... Anyway, had a brainwave, switched off the engine then put her in first and started up. Got me home. The pedal was completely limp, so I was thinking surely there was something between the clutch pedal and clutch instead of fluid, like air!
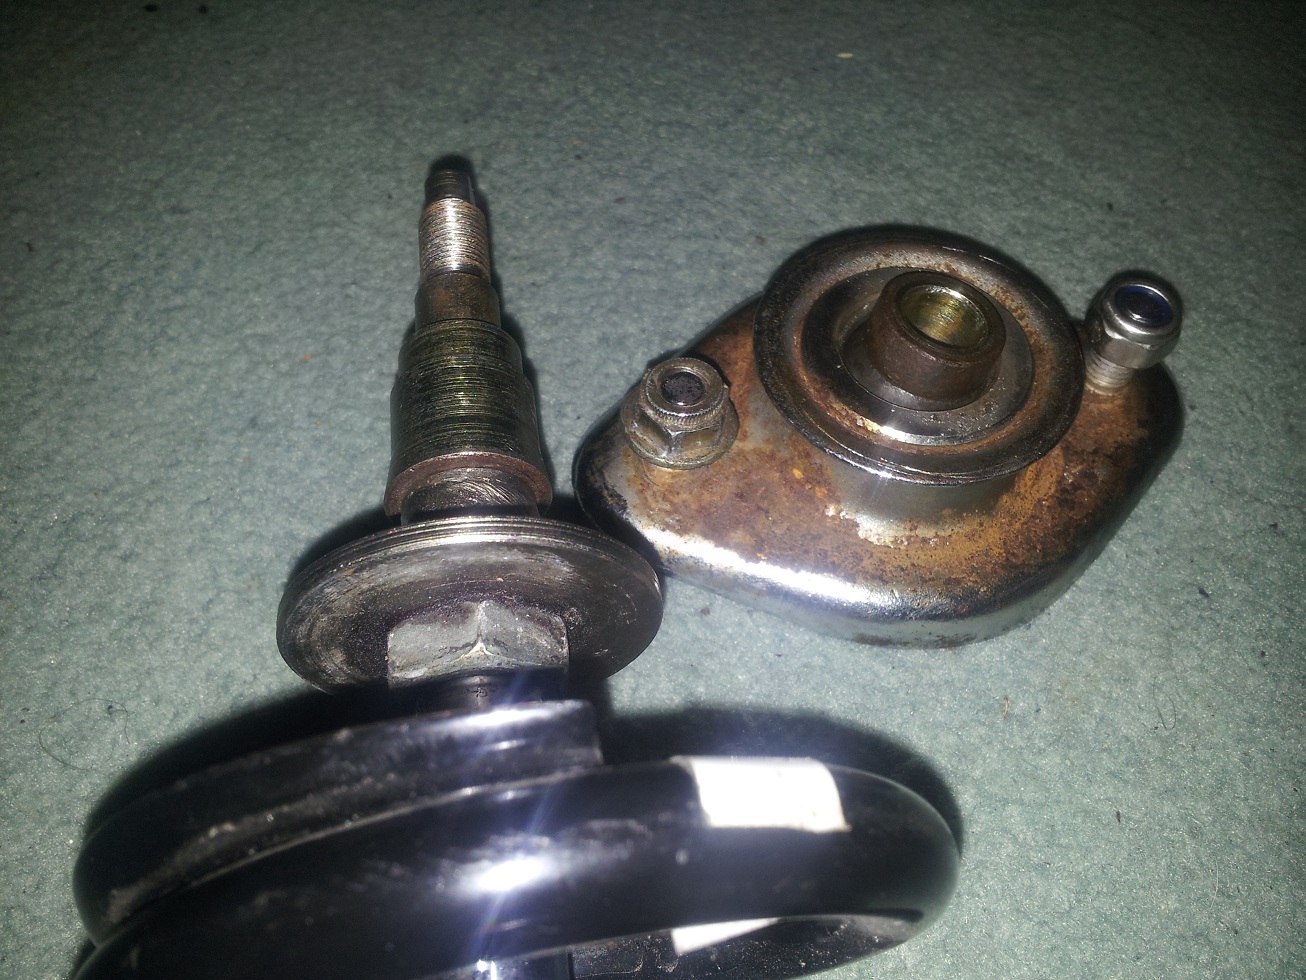
A diagnosis back home and some advice from the e30zone, showed the issue was likely to either be the slave cylinder or master. The master is on the clutch pedal, and showed no signs of leaking. In fact, digging through the car's history (of which there are a hell of a lot of Sewell of Bishop Stortford reciepts!), showed it being replaced 30 thousand miles earlier. So looked at the slave which is attached to the gearbox, and found a fair bit of fluid near it. Put a bit more fluid in the reservoir and pushed the clutch pedal (completely lifeless) a few times, and sure enough more fluid dripping from the gearbox. So a quick trip to eurocarparts later and a new cylinder ready to go on. It has a stubborn brake union nut so plenty of heat, WD40 and a11mm flared spanner coupled with a hammer to shock it a bit, and off it came. It's easier to take the cylinder and hose off together than trying to get the hose off the cylinder in your hand.
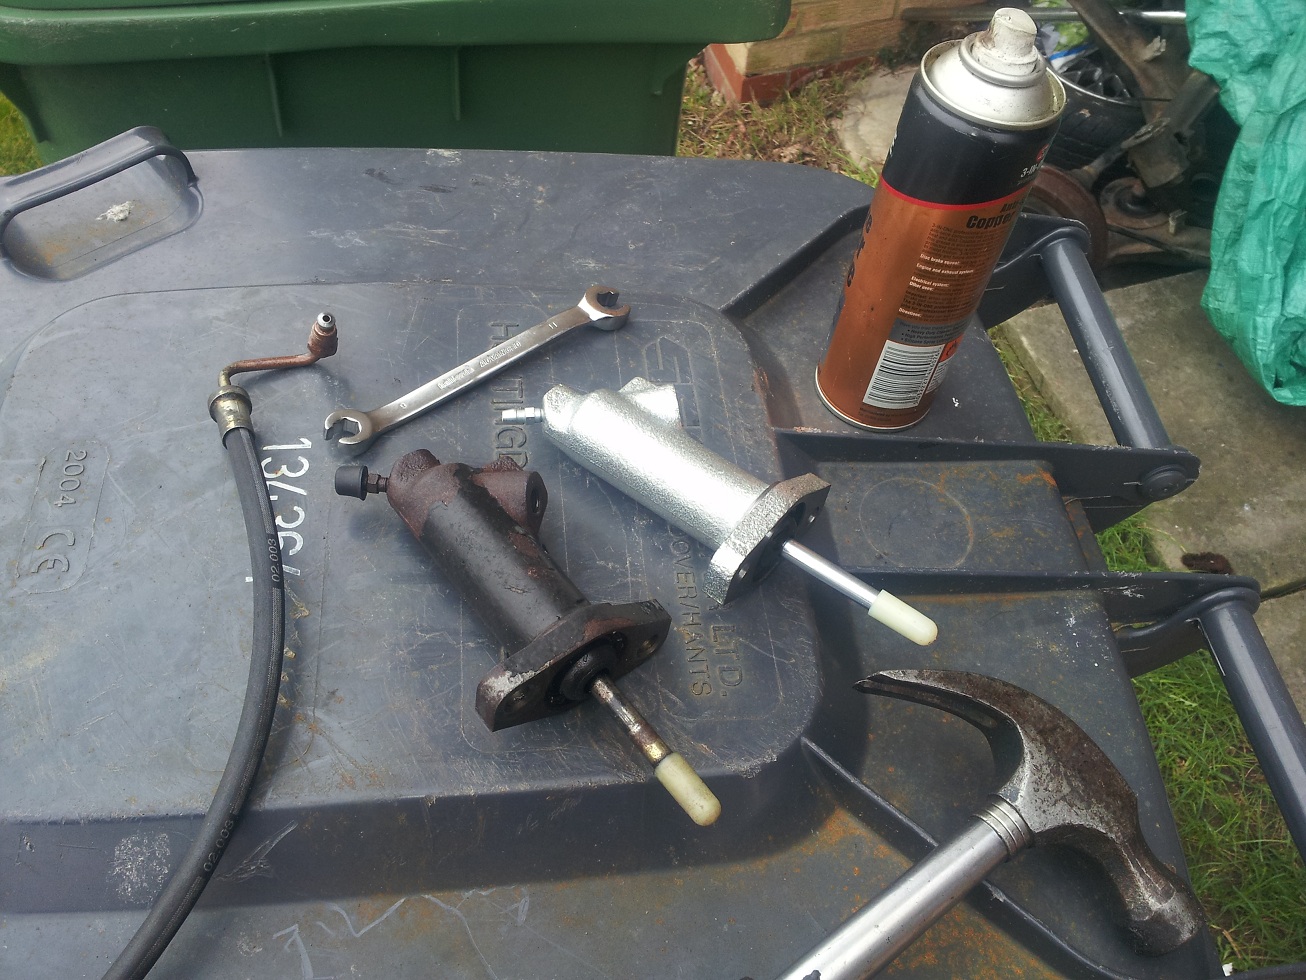
The above picture tells you what you need to know: here's the old vs new cylinder, use a flare spanner on the union nut, shock the spanner with a hammer, and spray some copper grease on the new nut to help in the future. Bled the system, eventually. When the fluid is bubble less, tightened up the bleed valve, it was a relief to feel the pedal go hard again! A quick test revealed a working clutch once more, and a nice easy gear change.
Then there was the "little" job I thought I'd tackle. I bought some powerflex wishbone bushes a while back and it was time to fit them. What a drama....
Basically, found the car seemed very eager to move forward. By the third gear change I relised something was amiss when I struggled to change gear. The next change into first at a roundabout to go, didn't happen at all. So stuck my hazards on, and had an emergency crisis meeting with myself to determine what to do next. Woman beeps behind me beckoning me to go, so I stick my hand put the window and wave her past. Still fiddling trying to get in gear she beeps again waving frantically. I'm fairly certain that's the universal signal for "go passed me I've broken down", obviously someone needs to tell the dozy mare... Anyway, had a brainwave, switched off the engine then put her in first and started up. Got me home. The pedal was completely limp, so I was thinking surely there was something between the clutch pedal and clutch instead of fluid, like air!
A diagnosis back home and some advice from the e30zone, showed the issue was likely to either be the slave cylinder or master. The master is on the clutch pedal, and showed no signs of leaking. In fact, digging through the car's history (of which there are a hell of a lot of Sewell of Bishop Stortford reciepts!), showed it being replaced 30 thousand miles earlier. So looked at the slave which is attached to the gearbox, and found a fair bit of fluid near it. Put a bit more fluid in the reservoir and pushed the clutch pedal (completely lifeless) a few times, and sure enough more fluid dripping from the gearbox. So a quick trip to eurocarparts later and a new cylinder ready to go on. It has a stubborn brake union nut so plenty of heat, WD40 and a11mm flared spanner coupled with a hammer to shock it a bit, and off it came. It's easier to take the cylinder and hose off together than trying to get the hose off the cylinder in your hand.
The above picture tells you what you need to know: here's the old vs new cylinder, use a flare spanner on the union nut, shock the spanner with a hammer, and spray some copper grease on the new nut to help in the future. Bled the system, eventually. When the fluid is bubble less, tightened up the bleed valve, it was a relief to feel the pedal go hard again! A quick test revealed a working clutch once more, and a nice easy gear change.
Then there was the "little" job I thought I'd tackle. I bought some powerflex wishbone bushes a while back and it was time to fit them. What a drama....
Last edited by milescook on Sun Mar 22, 2015 6:10 pm, edited 1 time in total.
The story so far... http://www.cookracing.co.uk/
Also please help the race budget by watching some videos https://www.youtube.com/cookracinguk
Also please help the race budget by watching some videos
-
milescook
- E30 Zone Camper
- Posts: 1285
- Joined: Thu Jan 13, 2011 11:00 pm
- Location: The 'bran of Cwm
The next job was powerflex wishbone bushes. I bought eccentric ones which the M3 had, which push the wishbone in some sort of direction that gives sharper handling. The poweflex bushes however are much thicker push the entire wishbone forward, increasing castor.
The old lolipops came out ok, I just jigsawed (ahem) carefuly through the rubber, pulled off the lolipop and sawed through the metal ring left on the wishbone. This eventually came off and job was nearly done - so I thought.
The bushes go one easily enough, they come with indentations to go over the wishbone as they are much thicker like so:

As you can see though, now the bracket won't line up. There's a bit of advice on this, from soaking the bushes in boiling water, smacking them with a hammer and wood, taking out the ball joint first to give you more wiggle room. I did see one top tip (again on the e30zone!) to use a special device called a 'tweaky bar'. This specialist device (an old screw driver, threaded bar etc), allows you to pry the bracket into place against the holes. Do the inside one first, then push the outside one back again and off you go. Took me most of a day getting nowhere before finding this tip!
It's obvious with the wheels in the air how much more castor you have, not massively back on the ground.
It's like the suspension strut is being used a bit more horizontally, which helps with high speed apparently. No complaints from me, as I went for my first road shakedown, a proper blast on a quiet road for the first time since my titting about with bushes, rear beams etc. Wow, it's far better! No rear wheel trolley steering, I just need some decent tyres to really get the full benefit, but it's a fantastic improvement.
The old lolipops came out ok, I just jigsawed (ahem) carefuly through the rubber, pulled off the lolipop and sawed through the metal ring left on the wishbone. This eventually came off and job was nearly done - so I thought.
The bushes go one easily enough, they come with indentations to go over the wishbone as they are much thicker like so:
As you can see though, now the bracket won't line up. There's a bit of advice on this, from soaking the bushes in boiling water, smacking them with a hammer and wood, taking out the ball joint first to give you more wiggle room. I did see one top tip (again on the e30zone!) to use a special device called a 'tweaky bar'. This specialist device (an old screw driver, threaded bar etc), allows you to pry the bracket into place against the holes. Do the inside one first, then push the outside one back again and off you go. Took me most of a day getting nowhere before finding this tip!
It's obvious with the wheels in the air how much more castor you have, not massively back on the ground.
It's like the suspension strut is being used a bit more horizontally, which helps with high speed apparently. No complaints from me, as I went for my first road shakedown, a proper blast on a quiet road for the first time since my titting about with bushes, rear beams etc. Wow, it's far better! No rear wheel trolley steering, I just need some decent tyres to really get the full benefit, but it's a fantastic improvement.
Last edited by milescook on Sun Mar 22, 2015 6:11 pm, edited 2 times in total.
The story so far... http://www.cookracing.co.uk/
Also please help the race budget by watching some videos https://www.youtube.com/cookracinguk
Also please help the race budget by watching some videos
-
Demlotcrew
- E30 Zone Team Member
- Posts: 13329
- Joined: Mon Dec 20, 2004 11:00 pm
- Location: East Anglia
Topic moved in here
-
milescook
- E30 Zone Camper
- Posts: 1285
- Joined: Thu Jan 13, 2011 11:00 pm
- Location: The 'bran of Cwm
Cheers Andrew.
Over the weekend I got stuck in to my coilovers starting with the backs (sorry rears - still in rugby mode!). I bought used gaz golds with top mounts from the E30 zone and got plenty of after sales advice. The biggest time consumer was working out where the sleeves went, either top mount end or bottom bolt end. It turned out both and the chap found the bottom sleeves and replacement bolts posted them in great time.
Here's how I thought they should go-
HOWEVER, its best to use the bigger sleeve spacer at the top.
This is the top mount and test fit without sleeves - still working out what goes where at this point!
And then...
There's a lot of talk around the rears needing helper springs or something, so the damper when fully extended goes back to it's original position. I found it lowers just fine. The spring does rub slightly this side so I will be getting some offset top mounts to clear the spring away from the body, and selling the old ones.
The rears in total I managed to finish either side of 6 hours of 6 nations rugby in a day, even with a bit of stomach "issues". So the rears are dead simple. The fronts however... not so.
My lesson learnt for that day however was to set the ride hieght correctly on the coilovers before lowering the car off the stands! I thought I'd gone I thought for plenty of height, but I'd actually gone for not a lot of height misjudging where the collars should have been So when I lowered the car, I had a bit of a shock as the jack was stuck and the wheels were on their arches. So I sorted that and went for practically the maximum height (properly) I could go which is still quite low for me!
This actually shows after me completing the fronT driver's side as well as both rears. From this angle at least it looks done And yes of course I worked through the rain, to a point.
I went for a tenatitive test drive, after going back and forth on the road, to ensure all was well. At this point just the rears have been changed. When I got up to speed it was massively obvious how much more communicative the rear is. I went over some speed bumps to make sure everything was bolted on properly, played with the throttle and brakes and all was well. Interestingly on a wet road, wow the rear wheels are easier to light up now! It's instant wheelspin! No wonder you hear about inboard springs a lot for these track cars.
Over the weekend I got stuck in to my coilovers starting with the backs (sorry rears - still in rugby mode!). I bought used gaz golds with top mounts from the E30 zone and got plenty of after sales advice. The biggest time consumer was working out where the sleeves went, either top mount end or bottom bolt end. It turned out both and the chap found the bottom sleeves and replacement bolts posted them in great time.
Here's how I thought they should go-
HOWEVER, its best to use the bigger sleeve spacer at the top.
This is the top mount and test fit without sleeves - still working out what goes where at this point!
And then...
There's a lot of talk around the rears needing helper springs or something, so the damper when fully extended goes back to it's original position. I found it lowers just fine. The spring does rub slightly this side so I will be getting some offset top mounts to clear the spring away from the body, and selling the old ones.
The rears in total I managed to finish either side of 6 hours of 6 nations rugby in a day, even with a bit of stomach "issues". So the rears are dead simple. The fronts however... not so.
My lesson learnt for that day however was to set the ride hieght correctly on the coilovers before lowering the car off the stands! I thought I'd gone I thought for plenty of height, but I'd actually gone for not a lot of height misjudging where the collars should have been
This actually shows after me completing the fronT driver's side as well as both rears. From this angle at least it looks done
I went for a tenatitive test drive, after going back and forth on the road, to ensure all was well. At this point just the rears have been changed. When I got up to speed it was massively obvious how much more communicative the rear is. I went over some speed bumps to make sure everything was bolted on properly, played with the throttle and brakes and all was well. Interestingly on a wet road, wow the rear wheels are easier to light up now! It's instant wheelspin! No wonder you hear about inboard springs a lot for these track cars.
Last edited by milescook on Sun Mar 22, 2015 6:12 pm, edited 4 times in total.