
I'd say first off, find out what the compression height should be, that's the major thing they cocked up on mine, and if I'd just put it all together, the pistons would've spanked the 'head first time I got to high enough revs.
Next up, measure and calculate the CR you've ended up with. Hopefully it'll be what you asked for, but it's well worth knowing.
For mine, I was very lucky indeed and found out purely by chance than a diesel crank would do away with the compression height problem and also drop the CR to 8.1:1, but of course I shouldn't have had to chance it with a random crank, they should've been right in the first place!
Rotrex M42 Build - 285bhp little update
Moderator: martauto
-
Turbo-Brown
- Boost Junkie
- Posts: 4705
- Joined: Tue Feb 15, 2005 11:00 pm
- Location: Aldershot, Hants
-
tim_s

- E30 Zone Squatter

- Posts: 1661
- Joined: Thu Feb 03, 2005 11:00 pm
- Location: Bristol/London
The incorrectly supplied oil ring rail had an excessive end gap - like 100 thou or something, I gave up measuring as it was so large  Sadly I had the rings gapped for me as I didn't fancy doing it with a file, so assembled the engine with this ring which caused some oil use and required a rebuild. Kinda my own fault for not double-checking the gapping I had done by my machinist who had clearly just checked one oil ring rail and not bothered with the rest (fairly reasonable I suppose!).
The TotalSeals seemed like a bit of a pita to me. They took a right thrashing to get to bed in etc and all the precautions to run them in properly were a bit much. So this time I've built mine up with the normal (pro-seals).
This is all sounding rather negative though, I'd re-iterate that really my experiences with these pistons are pretty good, they make great power and are a great fit, TEP have been quite helpful etc.
I didn't have anywhere near as major a cock-up as Alex had, the pin height, CR and valve reliefs were spot on - the pistons are really good. Hopefully because your requirements are simpler they won't balls them up. I'd be shocked if they got the pin height wrong as they're not altering it from factory, plus they managed to get mine right for the diesel crank. CR is certainly worth checking though, again mine was spot on. Makes great compression when tested too which is reassuring.
Alex, did TEP offer to sort yours out? Just interested in terms of aftersales, I found them much more helpful pre- than post-sale.
2.1 318is, MS, LPG. 200bhp, 175ft/lbs GONE!
Boxster, e46 m3, e36 sport touring and alpina B3 3.0
-
Turbo-Brown
- Boost Junkie
- Posts: 4705
- Joined: Tue Feb 15, 2005 11:00 pm
- Location: Aldershot, Hants
The trouble I had was that I bought them when I had the cash, and then built the engine a year later so I didn't even bother to ask them.
If I'd have bothered to look up the compression height when they turned up, I'd have seen straight away that the pistons were wrong though
If I'd have bothered to look up the compression height when they turned up, I'd have seen straight away that the pistons were wrong though
-
BaldBimmer
- E30 Zone Newbie

- Posts: 14
- Joined: Wed Oct 25, 2006 11:00 pm
Nice work!!!
I'm thinking of going FI on my E30 M42 after going over yours and other threads on here. Looking forward to the next update!!
I'm thinking of going FI on my E30 M42 after going over yours and other threads on here. Looking forward to the next update!!
-
appletree
- E30 Zone Addict

- Posts: 3479
- Joined: Fri Jan 20, 2006 11:00 pm
- Location: Retford
Cheers Bald bimmer, boosted M42s are great fun
Small update,
Head has now been washed and debured in the water ways and been rebuilt i'm much happier with how clean it is now
Ive had these ARP head studs laid round for a bit but only just got the head back to be able to try them in it and see if they will fit.
As ARP don't do i M42 "kit" i took abit of a gamble and ordered a set of E36 m50b25 headstuds from arrow performance £145+vat, this just means i'll have a few extra studs, nuts and washers left over which ait a problem
Kit part number - 201-4302
Description - BMW M50 2.5L 6 CYL 12PT HSK
Its here!
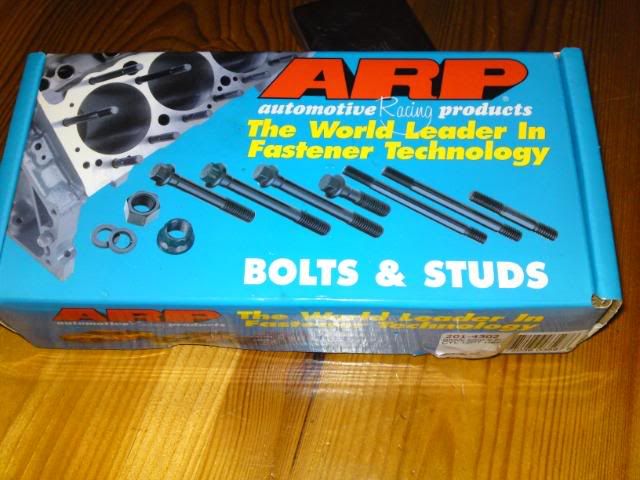
Whats inside the box?
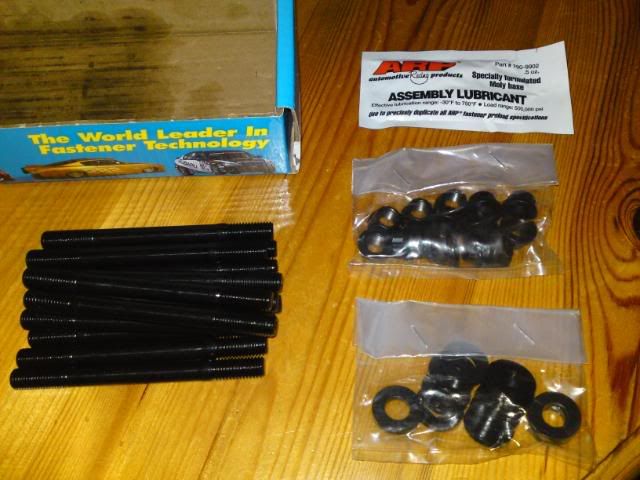
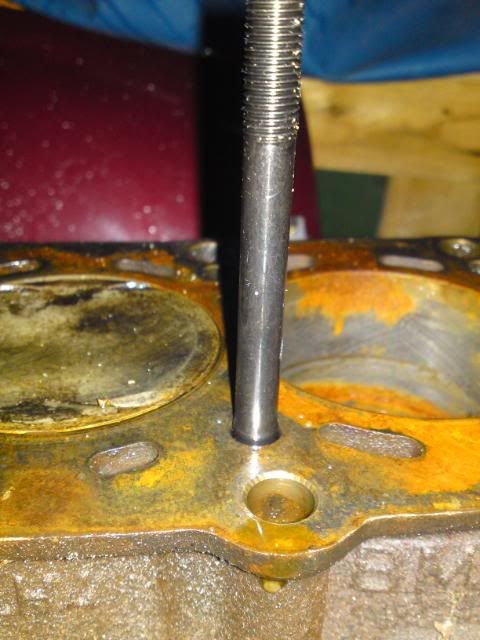
So i test fitted a stud in a spare block i had outside, there are quite deep recess's in the block so the stud shoulder will sit nicely below the block hight.
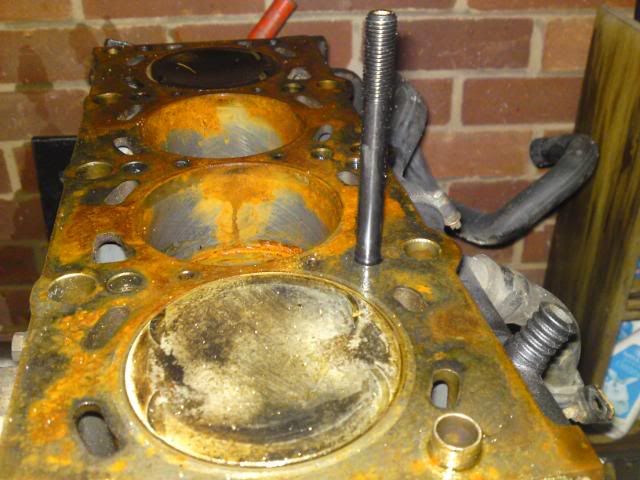
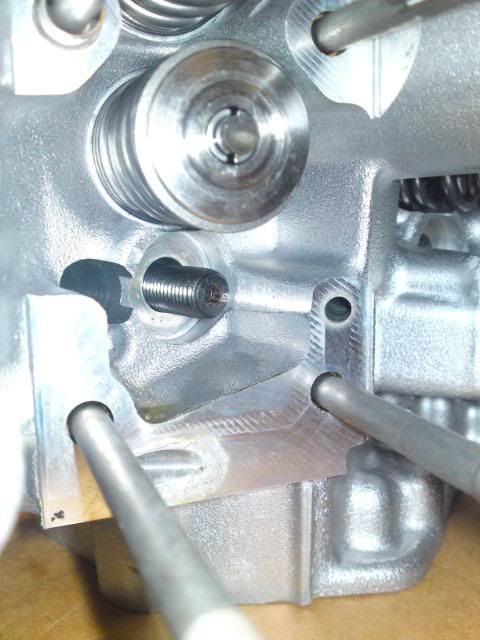
Heres the stud roughly in position, i'm leving abit extra for the headgasket as i didnt have one to hand to test fit.
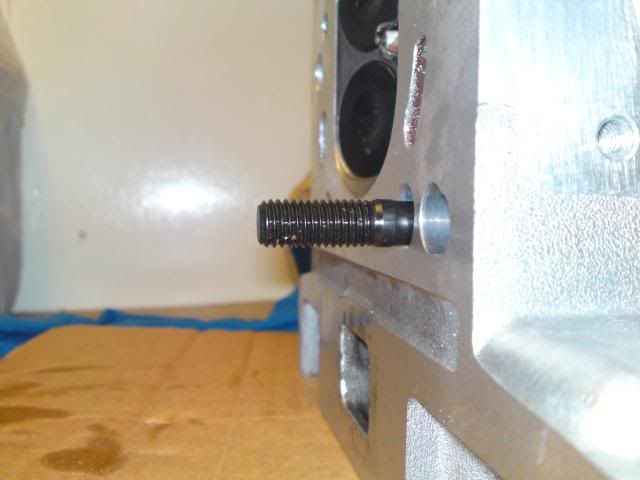
heres whats sticking through the other side, looks to be plenty of room for the nut and washer.
Small update,
Head has now been washed and debured in the water ways and been rebuilt
Ive had these ARP head studs laid round for a bit but only just got the head back to be able to try them in it and see if they will fit.
As ARP don't do i M42 "kit" i took abit of a gamble and ordered a set of E36 m50b25 headstuds from arrow performance £145+vat, this just means i'll have a few extra studs, nuts and washers left over which ait a problem
Kit part number - 201-4302
Description - BMW M50 2.5L 6 CYL 12PT HSK
Its here!
Whats inside the box?
So i test fitted a stud in a spare block i had outside, there are quite deep recess's in the block so the stud shoulder will sit nicely below the block hight.
Heres the stud roughly in position, i'm leving abit extra for the headgasket as i didnt have one to hand to test fit.
heres whats sticking through the other side, looks to be plenty of room for the nut and washer.

You should never underestimate the predictability of stupidity
M42 Supercharged 285bhp + M3 6speed box
-
tim_s
- E30 Zone Squatter
- Posts: 1661
- Joined: Thu Feb 03, 2005 11:00 pm
- Location: Bristol/London
yeah dude I have ARP head studs in mine, m50 should be fine. They work fine, bit annoying that you can't really get the nuts in with the cam carriers in place, but as yours doesn't have the cams in place that's no biggy. Other small prob is I quite like dropping the head on/off with the front guides in place - not possible with studs unless you put the studs in afterwards! What torque are you going to tighten them to? Got the 2.1 running again yesterday, am a happy boy, sooo much quicker than the 1.9 and it's not even run in yet!
2.1 318is, MS, LPG. 200bhp, 175ft/lbs GONE!
Boxster, e46 m3, e36 sport touring and alpina B3 3.0
-
rix313
- E30 Zone Team Member

- Posts: 4968
- Joined: Fri Oct 31, 2008 11:00 pm
- Location: Silverstone
Everything work first time ok Tim?
-
tim_s
- E30 Zone Squatter
- Posts: 1661
- Joined: Thu Feb 03, 2005 11:00 pm
- Location: Bristol/London
pretty much dude! wired the oil pressure switch into the temp gauge and vice versa - not the first time either, and has a touch of an oil leak that i can't figure out i think, nothing too serious though. Is driving really nice and smooth, v quick too! did bristol - london today in it.
2.1 318is, MS, LPG. 200bhp, 175ft/lbs GONE!
Boxster, e46 m3, e36 sport touring and alpina B3 3.0
-
appletree
- E30 Zone Addict
- Posts: 3479
- Joined: Fri Jan 20, 2006 11:00 pm
- Location: Retford
Not realy sure what torque, there was some instructions but i havent read them yet, i would have thought that theres no reason why they cant be tightend th same as on the M50, after all the engines are pritty simular in materials and construction
You should never underestimate the predictability of stupidity
M42 Supercharged 285bhp + M3 6speed box
-
tim_s
- E30 Zone Squatter
- Posts: 1661
- Joined: Thu Feb 03, 2005 11:00 pm
- Location: Bristol/London
What do they reckon for the m50 dude? I did mine to 65ft/lb. Need to pull the cover and check their torque, apparently after heat cycling the engine you're sposed to verify. What a pain! I'll check compression and take a look at the plugs while I'm at it so I spose it will be of some use.
2.1 318is, MS, LPG. 200bhp, 175ft/lbs GONE!
Boxster, e46 m3, e36 sport touring and alpina B3 3.0
-
appletree
- E30 Zone Addict
- Posts: 3479
- Joined: Fri Jan 20, 2006 11:00 pm
- Location: Retford
So will you have to take the cams out to check there torque? cant think how it all looks in place.
The instructions i got say nothing about re torquing after a full heat cycle although i have read that on the net.
STEP 1 - 32ft lbs
STEP 2 - 90 degrees
STEP 3 - additional 90 degrees
if you use this method there obviously theres no way you can check how tight they are after a heat cycle
turbo rob on the M42 club sent me some torques that he did his to so i'll dig them out.
You should never underestimate the predictability of stupidity
M42 Supercharged 285bhp + M3 6speed box
-
appletree
- E30 Zone Addict
- Posts: 3479
- Joined: Fri Jan 20, 2006 11:00 pm
- Location: Retford
Originally Posted by rob_e30
We are using the ARP studs and ARP does have torque recommendations for our motors. We typically torque the head in 3 steps with 20 minutes of resting time between upping the torque value. I think last time we set 30, 60, 70 as the ARP setting is 68ft-lbs. We did a rebuild in the off season and only needed piston rings.
We are using the ARP studs and ARP does have torque recommendations for our motors. We typically torque the head in 3 steps with 20 minutes of resting time between upping the torque value. I think last time we set 30, 60, 70 as the ARP setting is 68ft-lbs. We did a rebuild in the off season and only needed piston rings.
You should never underestimate the predictability of stupidity
M42 Supercharged 285bhp + M3 6speed box
-
tim_s
- E30 Zone Squatter
- Posts: 1661
- Joined: Thu Feb 03, 2005 11:00 pm
- Location: Bristol/London
Thanks for that Matt. Sweet, I think I'm pretty much fine where I am then. I did 30Nm then the highest my small torque wrench can do - about 50ft/lbs iirc, then went for final torque and went around twice to confirm!
I can get my 12mm socket down in between the cam carriers, but I wouldn't bank on being able to, mine's pretty skinny and it's v tight! It was the ARP nut itself that wouldn't go in easily with the carriers in place.
I can get my 12mm socket down in between the cam carriers, but I wouldn't bank on being able to, mine's pretty skinny and it's v tight! It was the ARP nut itself that wouldn't go in easily with the carriers in place.
2.1 318is, MS, LPG. 200bhp, 175ft/lbs GONE!
Boxster, e46 m3, e36 sport touring and alpina B3 3.0
-
appletree
- E30 Zone Addict
- Posts: 3479
- Joined: Fri Jan 20, 2006 11:00 pm
- Location: Retford
Is that using a 1/2" drive or a 3/8" drive tim?
Did you do 30ft/lb then run it up to temp it up then 50+ or 50+ run it up to temp then re check?
I would have thought that arp would offer torque figure along side a angle figure.
Ive tried to use ARP's web site to find a torque value like rob has said and found a 68ft/lb figure but it's for mains caps as far as the part number goes.
http://www.arp-bolts.com/Tech/TechTorque.html
Dont know were he got the info from but i know he's run like that for a season in a race situation so it must be ok. but still, i'd like a answer in black and white
Maybe i'll see them at autosport/pistonheads and ask the salesman
You should never underestimate the predictability of stupidity
M42 Supercharged 285bhp + M3 6speed box
-
tim_s
- E30 Zone Squatter
- Posts: 1661
- Joined: Thu Feb 03, 2005 11:00 pm
- Location: Bristol/London
3/8" matt! Nah didn't run it up to temp until it was at final torque, i think that's wise! I went off of what I roughly knew it should be, not really sure from where! I guess have used ARP studs in a few other engines and always gone for around this figure, I think MM use a similar figure with their bolts etc. Even when installing standard bolts using the torque angle, I always used to do a quick check at 60-65ft/lbs just to confort myself!
Do ARP have a torque angle specified for these then?
Do ARP have a torque angle specified for these then?
2.1 318is, MS, LPG. 200bhp, 175ft/lbs GONE!
Boxster, e46 m3, e36 sport touring and alpina B3 3.0
-
appletree
- E30 Zone Addict
- Posts: 3479
- Joined: Fri Jan 20, 2006 11:00 pm
- Location: Retford
A package with a Click-N-Ship® label created on usps.com containing the following information is scheduled to be shipped on 01/21/2010.
From:
STEVE NELSON
TOP-END PERFORMANCE
7452 VARNA AVE
N HOLLYWOOD CA 91605-4010
You should never underestimate the predictability of stupidity
M42 Supercharged 285bhp + M3 6speed box
-
appletree
- E30 Zone Addict
- Posts: 3479
- Joined: Fri Jan 20, 2006 11:00 pm
- Location: Retford
There here, finaly!!!
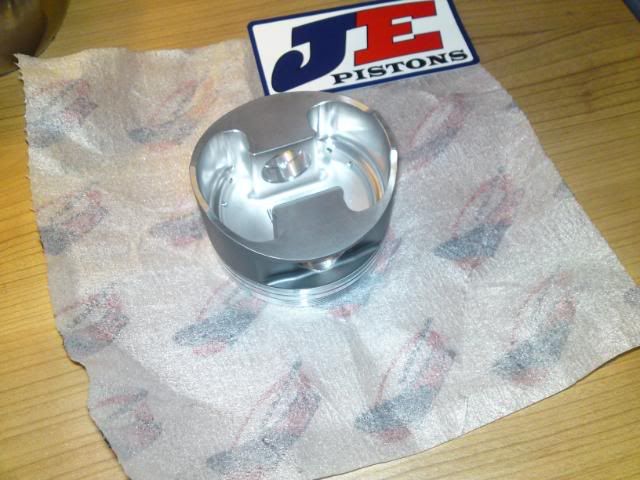
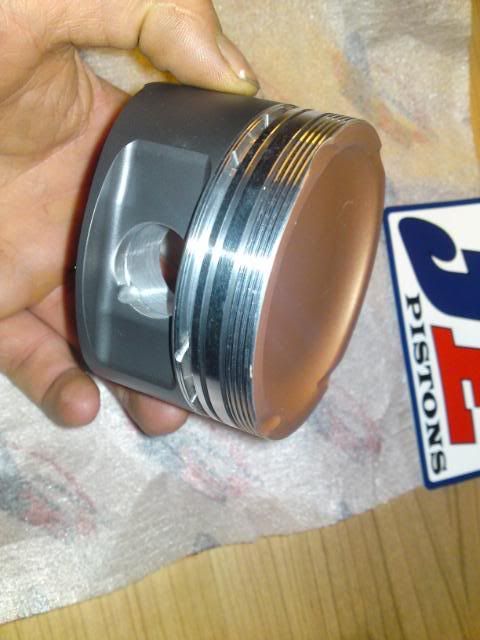
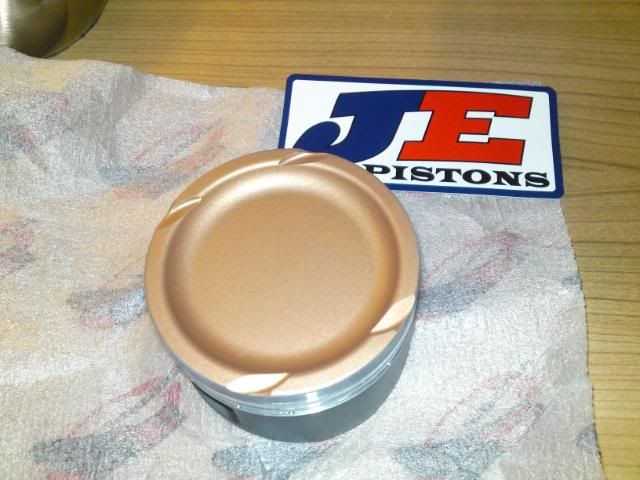
So here they are in all there glory.
-Ceramic coated crowns
-Moly coated skirts
-Contact reduction grooves
-Heavy duty wrist pins
-Pro seal rings
So here they are in all there glory.
-Ceramic coated crowns
-Moly coated skirts
-Contact reduction grooves
-Heavy duty wrist pins
-Pro seal rings
You should never underestimate the predictability of stupidity
M42 Supercharged 285bhp + M3 6speed box
-
rix313
- E30 Zone Team Member
- Posts: 4968
- Joined: Fri Oct 31, 2008 11:00 pm
- Location: Silverstone
They look nice  Whats next then you sending them off to the chap to fit them?
-
appletree
- E30 Zone Addict
- Posts: 3479
- Joined: Fri Jan 20, 2006 11:00 pm
- Location: Retford
Ya, i'am after some ARP mains cap bolts now, just looking in to weather the M50/2 or S50 kit would do the job, if any one has a standard M50 old streched set spare after a rebuild they could sent me to offer up i'd be intrested in it for a few beer tokens
You should never underestimate the predictability of stupidity
M42 Supercharged 285bhp + M3 6speed box
-
GeoffBob
- Forced Induction Specialist
- Posts: 1843
- Joined: Tue Apr 28, 2009 11:00 pm
And very nice they are too !!

"It is amazing how many drivers, even at the Formula-1 level, think that brakes are for slowing the car down." - Mario Andretti
-
appletree
- E30 Zone Addict
- Posts: 3479
- Joined: Fri Jan 20, 2006 11:00 pm
- Location: Retford
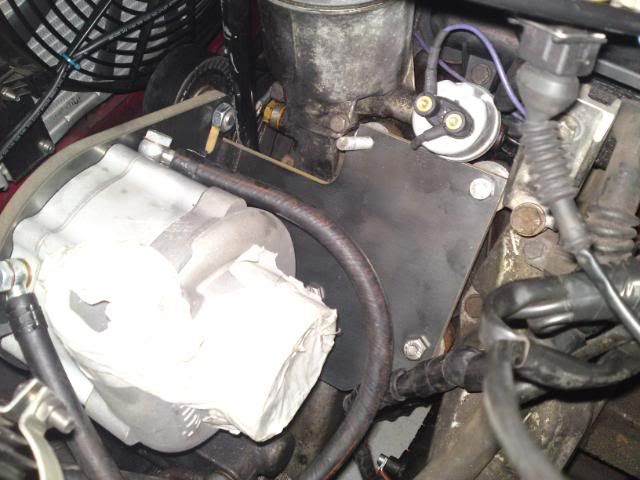
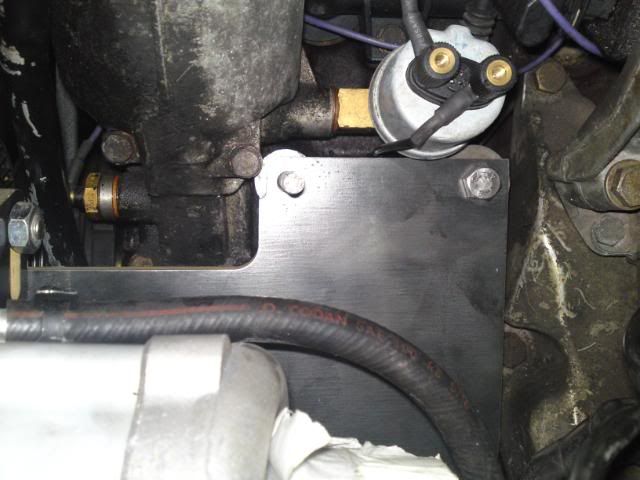
So ive been quite busy over the last week or two, firts off ive designed a new superchar bracket.
The main reasons for this is that ive never thought the origonal one was as neat as it could be, it was made for the purpose of getting me going with the rotrex and proving that it all worked well which it did, i alsoincorperated a large amount of movement in the tensioner to allow me to be able to keep the belt tight even
if i had to change pullys from 100mm to a 80mm say at the rolling road, the problem with this is that i had
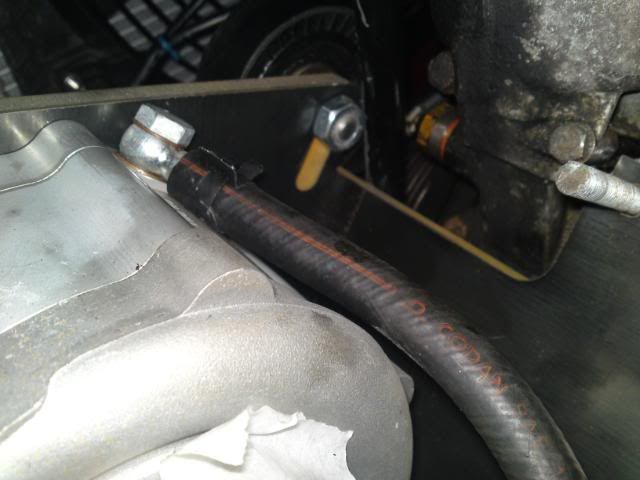
to space the PAS pump pully off to allow the tensioner to use the same space as the standard belt would run.
This new design would only have enough ovent for tensioning on the current size pully but could also be used with different size pully but using different spacers between the bracket and the block. easy enough but abit arkward as its a tight space and abit fiddily.
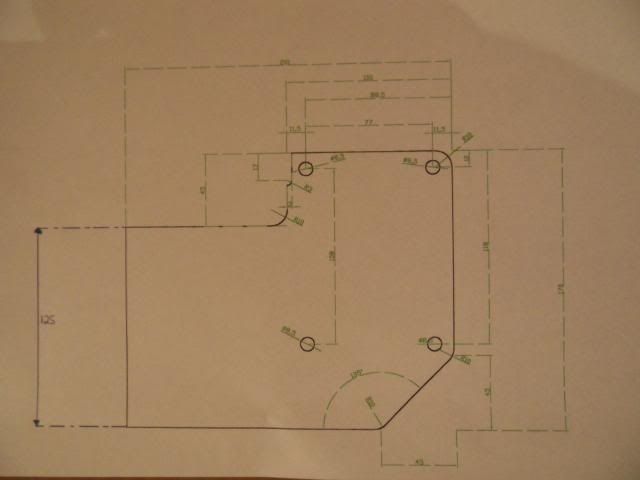
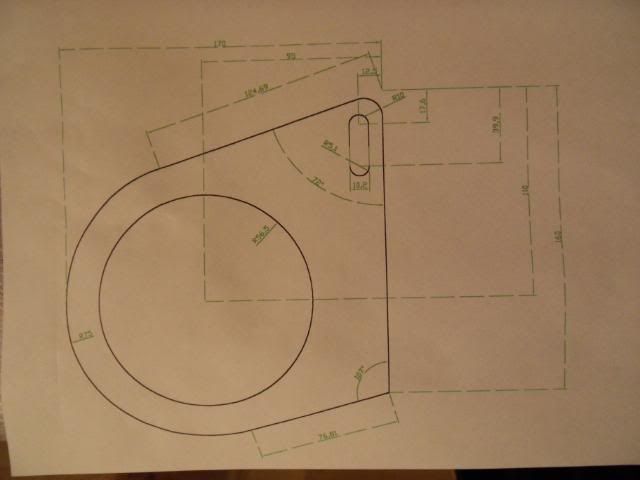
heres the new design drawn out on auto CAD at work.
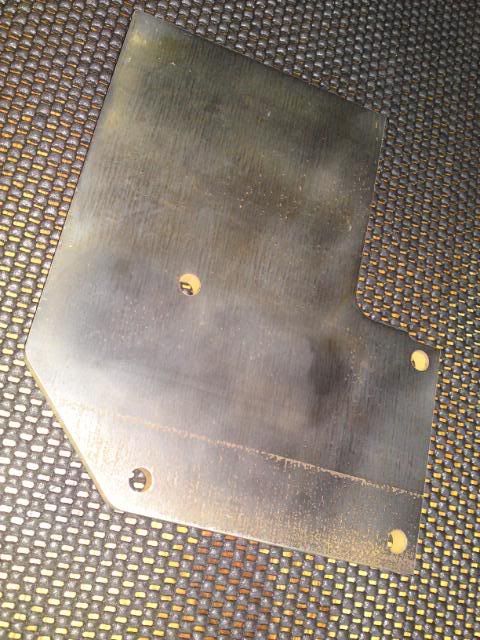
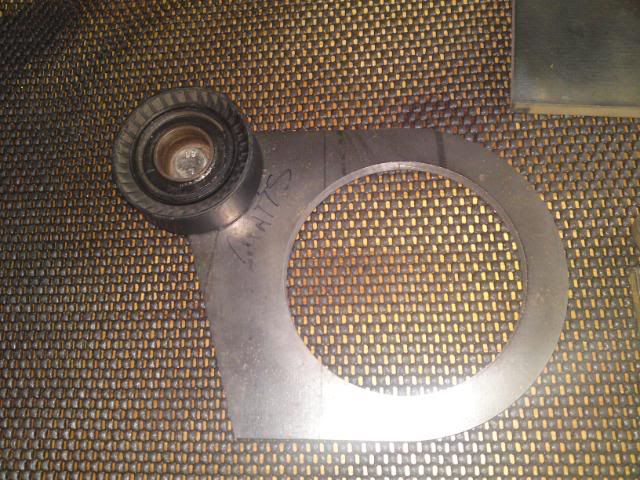
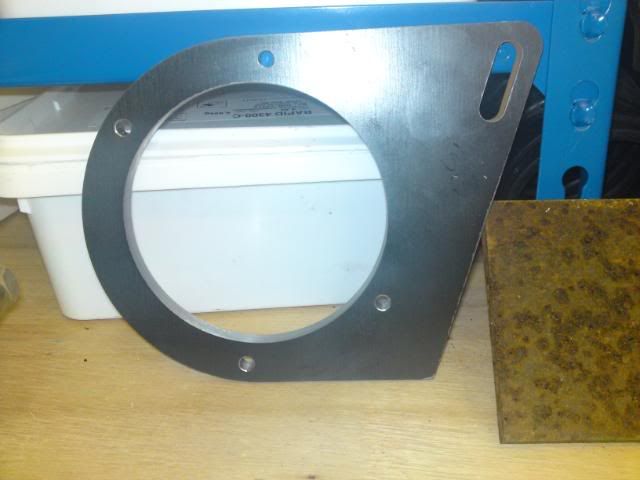
This plate has stayed pritty much the same just had some of the corners rounded off and the corner chopped off the bottom.
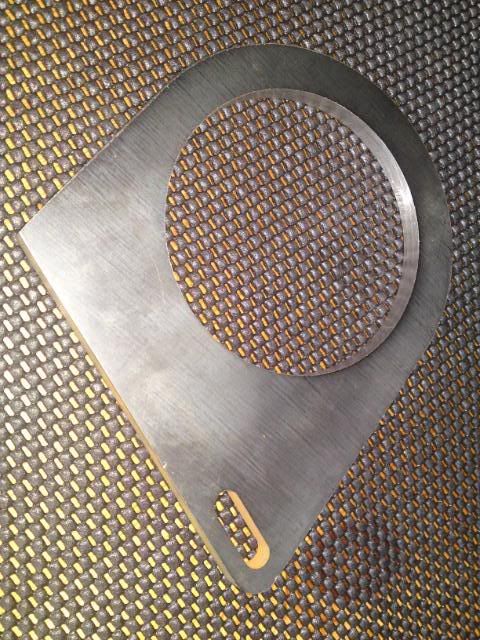
This plate has changed abit in the way its had a tab added at the top to allow the tesioner to be bollted to the front supercharger plate, the slot allows the belt to be tensioned.
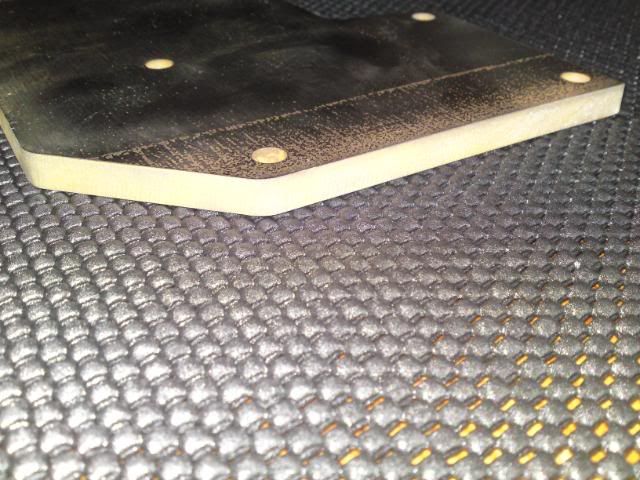
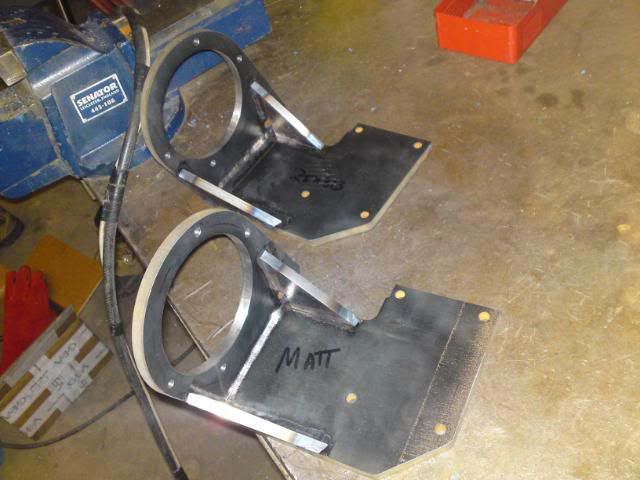
I Spoke to a local engineering firm who do machining jobs for us at work and asked if they would be able to get the plates water cut from 10mm mild steel plate. i sent the guy the drawing as he said they should be no problem for them to do the work.
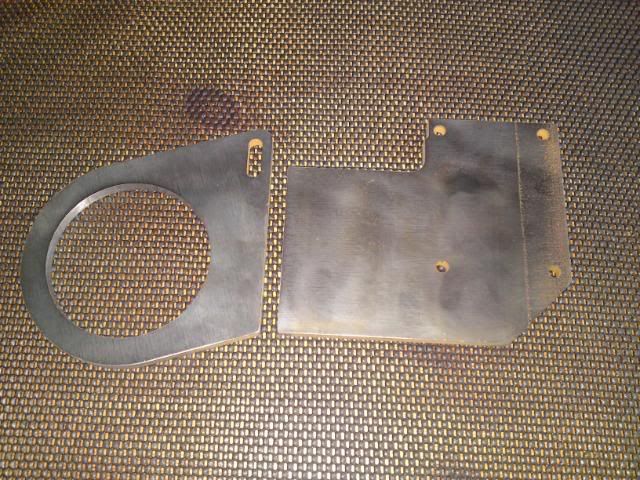
week later the plates came to work, i had two sets made up one for me one for rich 313. they seam to be very well done, good finish, flat and to exactly the drawing i supplied.
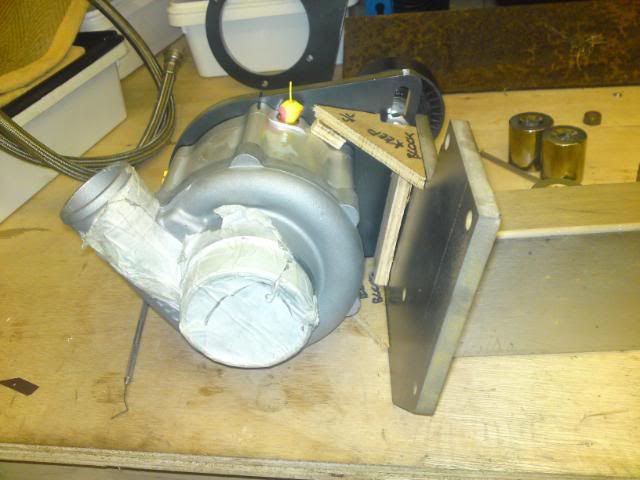
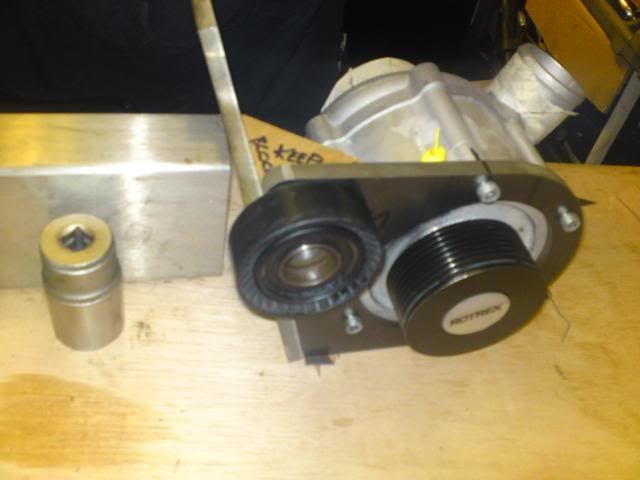
Here is a rough idea of how the tensioner will mount
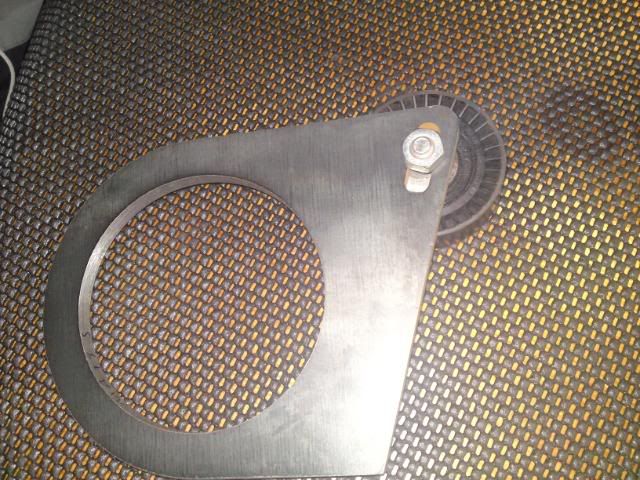
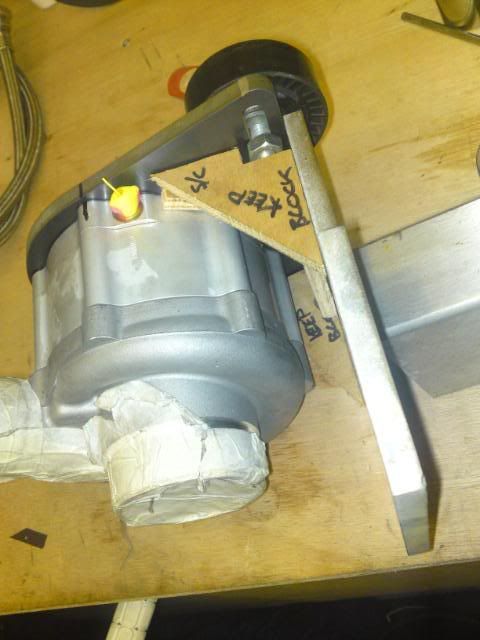
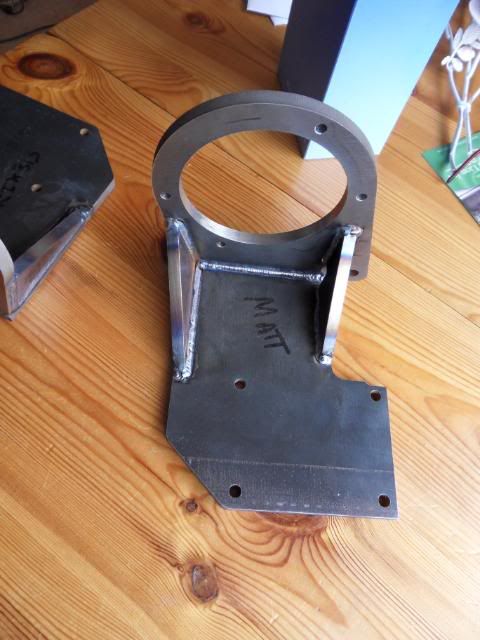
Heres the new plates in place not bolted togeather just the weight of the charger is keping it altogeather.


on this bracket ive decided to weld it up rather than nut an bolt it like last time so i needed to start making the sections to weld in the corners of the brackets to make it strong enough. but before i could do this but i needed to know where the supercharger mounting holes would need to go, so i worked i out and drill mine and rix313's
Worked out were i wanted the braces to go, the hole for the tensioner nut will be in the bracket but i'm not using a nut , instead ill use a small plate that will slide againt the block side bracket so you dont need to hold the
nut with a spanner.
here's the wooden brackets mocked up.
Next was to find out some metal to make the braces out of.
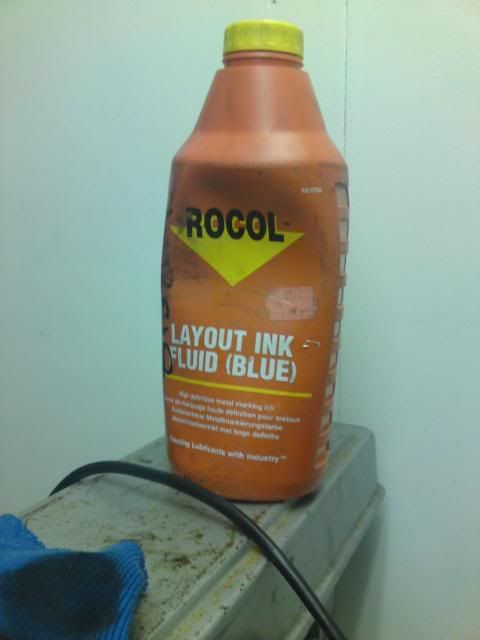
Also got some marking out blue. brilliant stuff for marking out metal work jobs!
Will update once ive got it all welded up, and fitted.[/quote]
The main reasons for this is that ive never thought the origonal one was as neat as it could be, it was made for the purpose of getting me going with the rotrex and proving that it all worked well which it did, i alsoincorperated a large amount of movement in the tensioner to allow me to be able to keep the belt tight even
if i had to change pullys from 100mm to a 80mm say at the rolling road, the problem with this is that i had
to space the PAS pump pully off to allow the tensioner to use the same space as the standard belt would run.
This new design would only have enough ovent for tensioning on the current size pully but could also be used with different size pully but using different spacers between the bracket and the block. easy enough but abit arkward as its a tight space and abit fiddily.
heres the new design drawn out on auto CAD at work.
This plate has stayed pritty much the same just had some of the corners rounded off and the corner chopped off the bottom.
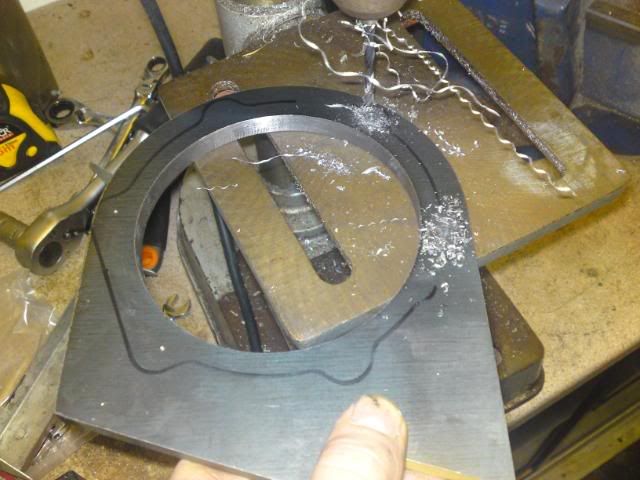
This plate has changed abit in the way its had a tab added at the top to allow the tesioner to be bollted to the front supercharger plate, the slot allows the belt to be tensioned.
I Spoke to a local engineering firm who do machining jobs for us at work and asked if they would be able to get the plates water cut from 10mm mild steel plate. i sent the guy the drawing as he said they should be no problem for them to do the work.
week later the plates came to work, i had two sets made up one for me one for rich 313. they seam to be very well done, good finish, flat and to exactly the drawing i supplied.
Here is a rough idea of how the tensioner will mount
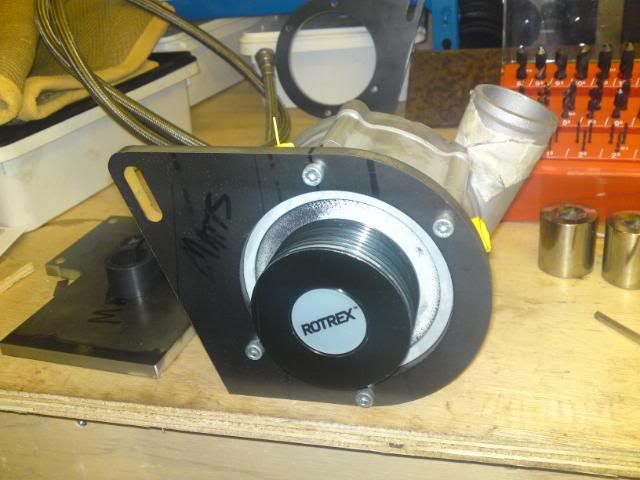
Heres the new plates in place not bolted togeather just the weight of the charger is keping it altogeather.
on this bracket ive decided to weld it up rather than nut an bolt it like last time so i needed to start making the sections to weld in the corners of the brackets to make it strong enough. but before i could do this but i needed to know where the supercharger mounting holes would need to go, so i worked i out and drill mine and rix313's
Worked out were i wanted the braces to go, the hole for the tensioner nut will be in the bracket but i'm not using a nut , instead ill use a small plate that will slide againt the block side bracket so you dont need to hold the
nut with a spanner.
here's the wooden brackets mocked up.
Next was to find out some metal to make the braces out of.
Also got some marking out blue. brilliant stuff for marking out metal work jobs!
Will update once ive got it all welded up, and fitted.[/quote]
Last edited by appletree on Sun Feb 14, 2010 7:53 pm, edited 1 time in total.
You should never underestimate the predictability of stupidity
M42 Supercharged 285bhp + M3 6speed box
-
appletree
- E30 Zone Addict
- Posts: 3479
- Joined: Fri Jan 20, 2006 11:00 pm
- Location: Retford
Cant see why these pics arnt working, they are all there and are under the same title in photo bucket.
seam to be having a problem copying and pasting to!
seam to be having a problem copying and pasting to!
You should never underestimate the predictability of stupidity
M42 Supercharged 285bhp + M3 6speed box
-
stonesie
- E30 Zone Addict
- Posts: 3277
- Joined: Sat Jan 07, 2006 11:00 pm
- Location: Doncaster
Quote Removed...
Try that
Try that
Last edited by stonesie on Sun Feb 14, 2010 8:16 pm, edited 1 time in total.
-
appletree
- E30 Zone Addict
- Posts: 3479
- Joined: Fri Jan 20, 2006 11:00 pm
- Location: Retford
Cheers! what was wrong? i'am having trouble copying and pasting, when i click on the picture to ad the [img] code the page scrolls up and it selects the entire post as soon as i click in the box, ive added it to the website problems baord.
i had to wright the [img] codes in blind on the the above pics so probly missed somthing
i had to wright the [img] codes in blind on the the above pics so probly missed somthing
You should never underestimate the predictability of stupidity
M42 Supercharged 285bhp + M3 6speed box
-
appletree
- E30 Zone Addict
- Posts: 3479
- Joined: Fri Jan 20, 2006 11:00 pm
- Location: Retford
Cheers, stonesie dont knpow if you want to remove you quote so we dont have the pics twice, ive copied your quote and added it to my origonal post
thanks
thanks
You should never underestimate the predictability of stupidity
M42 Supercharged 285bhp + M3 6speed box
-
stonesie
- E30 Zone Addict
- Posts: 3277
- Joined: Sat Jan 07, 2006 11:00 pm
- Location: Doncaster
Removed,
You had them arranged like this..
[img]
Image url[/img]
I just closed the gap between the image tag and the url
I cant wait to see this finished, thought it was awesome with the Eaton charger but this looks even better
You had them arranged like this..
[img]
Image url[/img]
I just closed the gap between the image tag and the url
I cant wait to see this finished, thought it was awesome with the Eaton charger but this looks even better
-
rix313
- E30 Zone Team Member
- Posts: 4968
- Joined: Fri Oct 31, 2008 11:00 pm
- Location: Silverstone
Looks pretty that Can't wait to get mine 
Out of interest how much does it weigh?
Out of interest how much does it weigh?
-
appletree
- E30 Zone Addict
- Posts: 3479
- Joined: Fri Jan 20, 2006 11:00 pm
- Location: Retford
Not sure rich, probly about the same as the old one you have, if not a little lighter. they arnt going to break any time soon, slightly over engineer'd even by my standards
You should never underestimate the predictability of stupidity
M42 Supercharged 285bhp + M3 6speed box
-
rix313
- E30 Zone Team Member
- Posts: 4968
- Joined: Fri Oct 31, 2008 11:00 pm
- Location: Silverstone
Good job I took the interior out the car then  LOL
LOL
Nah looking forward to seeing the finished products
Nah looking forward to seeing the finished products
-
appletree
- E30 Zone Addict
- Posts: 3479
- Joined: Fri Jan 20, 2006 11:00 pm
- Location: Retford
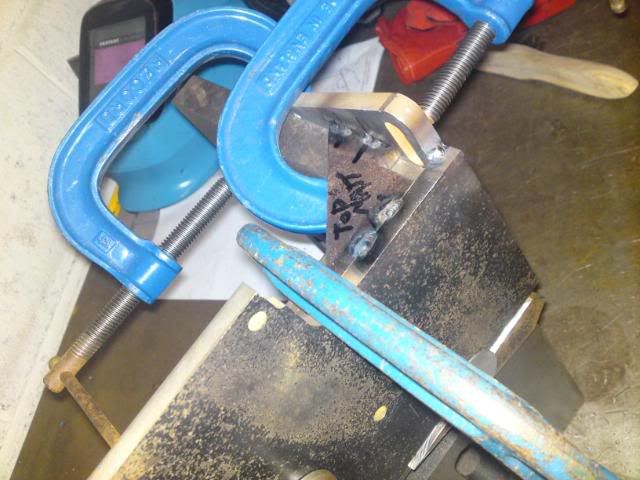
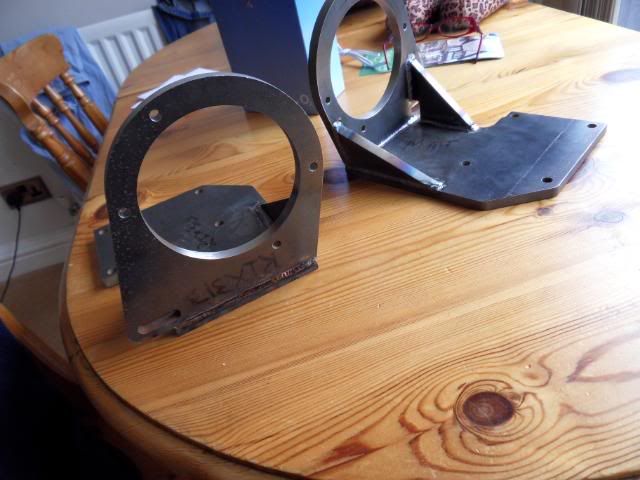
Did abit more on the brackets yesterday, looked in to how to clamp them up, these were my first ideas
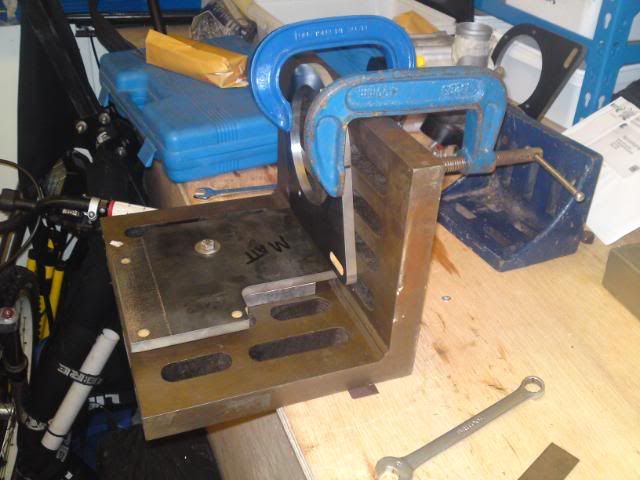
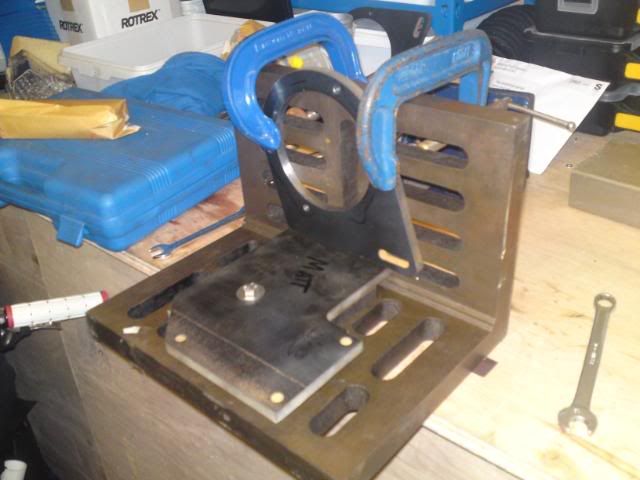
think i'am now going to swop the angle plate around and use the out side of the plate instead, hopeing to have both pairs of plates tacked up ready for a mate to weld up next week, so fingers crossed they should be done for next week end
think i'am now going to swop the angle plate around and use the out side of the plate instead, hopeing to have both pairs of plates tacked up ready for a mate to weld up next week, so fingers crossed they should be done for next week end
You should never underestimate the predictability of stupidity
M42 Supercharged 285bhp + M3 6speed box
-
GeoffBob
- Forced Induction Specialist
- Posts: 1843
- Joined: Tue Apr 28, 2009 11:00 pm
Looking good Matt.
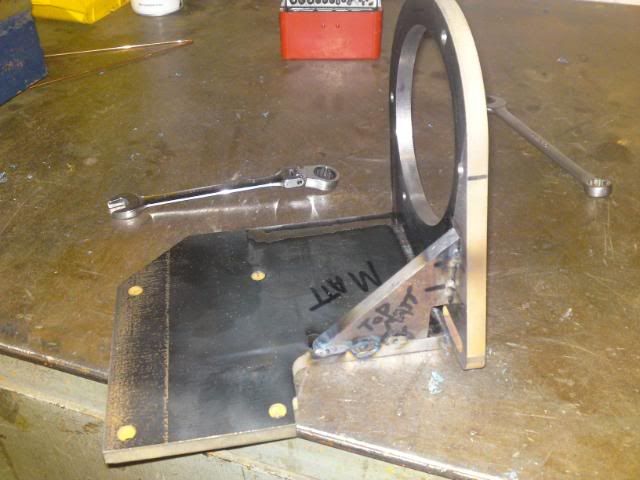
Will you be including the two wooden triangular bits (fillets) shown above labelled "SC keep block" in your final assembly?
Not to interfere, but would suggest that you do as fillets will be required to prevent the two main 90' plates from flexing relative two each other. Don't underestimate the tension on that belt when you are putting 35hp through it, as it will tend to displace the S/C if it can.
Pop around quick and I'll do that welding for you
"It is amazing how many drivers, even at the Formula-1 level, think that brakes are for slowing the car down." - Mario Andretti
-
appletree
- E30 Zone Addict
- Posts: 3479
- Joined: Fri Jan 20, 2006 11:00 pm
- Location: Retford
Geoff, ya i will be keeping the fillets on the plate corners, i just removed them to take the pictures on the angle plate .
I'm trying to keep the plate as ridged as possible while its welded, the trouble is getting it square with enough clamps on it and still being able to get in with the torch to welded it.
I know what you mean with the tensioner, ive had no trouble with the last two setup i did but this one is slightly different to the others
I'm not going to just use a standard M10 nut on the other side of the tensioner pully i'm making a sliding plate that will slide against the block side of the bracket so you dont need to use a spanner to adjust the tensioner just a allen key on the pully side, this setup should mean theres a good surface area of the "nut" to clamp the tensioner in place.
and if this still doesnt work i was thinking of putting a M6/8 bolt through the top of the slot to push down on the tensioner bolt.
Thanks for the offer of welding Geoff i'll call in on my way back from the shops later
You should never underestimate the predictability of stupidity
M42 Supercharged 285bhp + M3 6speed box
-
appletree
- E30 Zone Addict
- Posts: 3479
- Joined: Fri Jan 20, 2006 11:00 pm
- Location: Retford
Think i may have found my fortie, TIG welding thick plate is great fun compaired to welding thin wall pipe like i'm used to, lots of time to make the weld and no chance of blowing through
Not saying the welds i did were very strong like, but they seam ok and once the insides been fully welded by someone who knows what hes doing the brackets will be bomb proof
First job was to stich weld the front of the two plates togeather and then a little tack on the back corner to help keep it square.

The two plate stiched along the front.
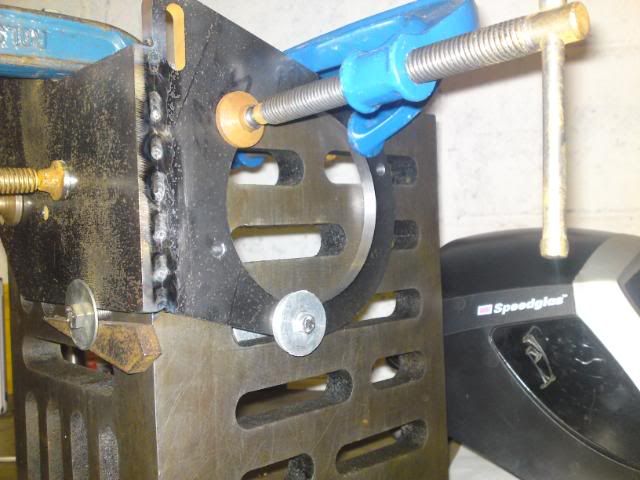
Tacking the top gusset in palace, not the easyest place to weld with all the G-clamps in the way
Top gusset plate tacked in place.
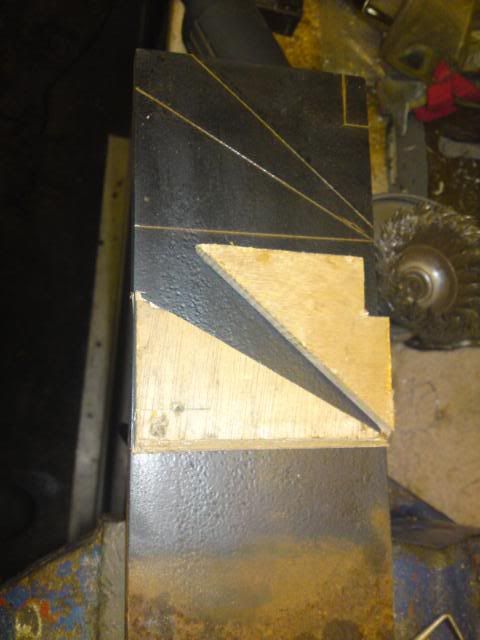
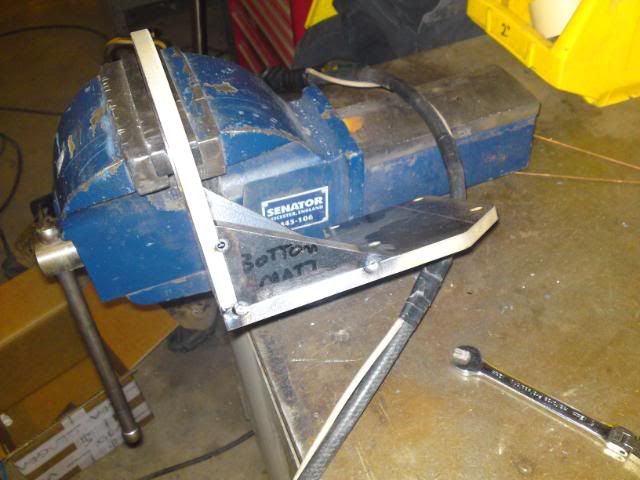
Half way through welding and the plate is still very square, not the best square to show it but tthe only one i could find in the welders shop as they are all on site, still, shows that the angle plate did its job
The slight dark gap in the middle of the rule part of the square isn't the plate warping its the hole for the charger pully to go through, it just looks like a gap because of the camera angle

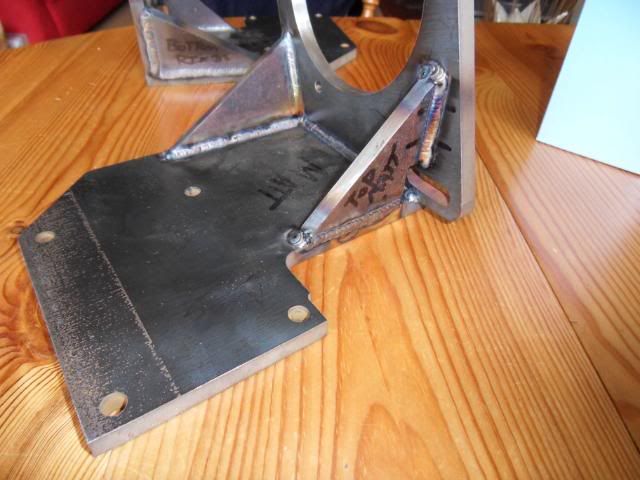
Welding the bottom piece in, i put a tack in each corner before stitch welding it on the out side, getting the plate to sit in the correct angle was a real ball ache and i burnt my fingertips as i couldn't feel the edge if i had the big welding gloves on
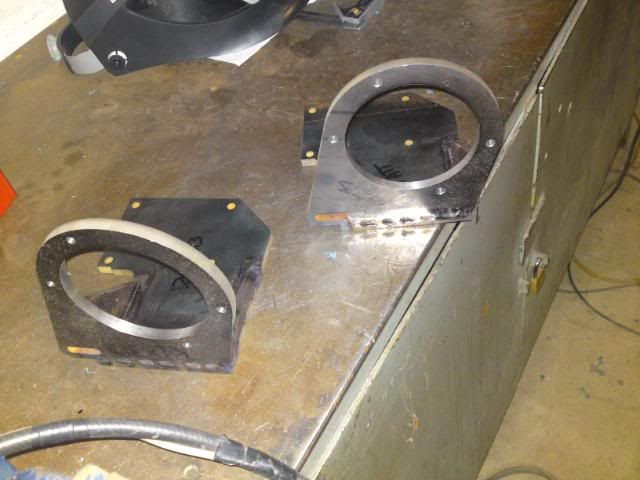
The finished plates all tacked up on the out side ready to be welded fully on the inside, both a square and have turned out excellent

Not saying the welds i did were very strong like, but they seam ok and once the insides been fully welded by someone who knows what hes doing the brackets will be bomb proof
First job was to stich weld the front of the two plates togeather and then a little tack on the back corner to help keep it square.
The two plate stiched along the front.
Tacking the top gusset in palace, not the easyest place to weld with all the G-clamps in the way
Top gusset plate tacked in place.
Half way through welding and the plate is still very square, not the best square to show it but tthe only one i could find in the welders shop as they are all on site, still, shows that the angle plate did its job
The slight dark gap in the middle of the rule part of the square isn't the plate warping its the hole for the charger pully to go through, it just looks like a gap because of the camera angle
Welding the bottom piece in, i put a tack in each corner before stitch welding it on the out side, getting the plate to sit in the correct angle was a real ball ache and i burnt my fingertips as i couldn't feel the edge if i had the big welding gloves on
The finished plates all tacked up on the out side ready to be welded fully on the inside, both a square and have turned out excellent
You should never underestimate the predictability of stupidity
M42 Supercharged 285bhp + M3 6speed box
-
GeoffBob
- Forced Induction Specialist
- Posts: 1843
- Joined: Tue Apr 28, 2009 11:00 pm
Yeh, TIG welding is a huge amount of fun. you'll find warpage/distortion to be more of a problem with stainless, although (I think it goes without saying) you have to know what you are doing with mild-steel too.
Looking good Matt, well done.
Looking good Matt, well done.
"It is amazing how many drivers, even at the Formula-1 level, think that brakes are for slowing the car down." - Mario Andretti
-
appletree
- E30 Zone Addict
- Posts: 3479
- Joined: Fri Jan 20, 2006 11:00 pm
- Location: Retford
Got the brackets welded up on saturday by a freind at work, he's done a realy good job, they aint going no where!
They've stayed very square to which is realy good as they have had a good bit of heat in them
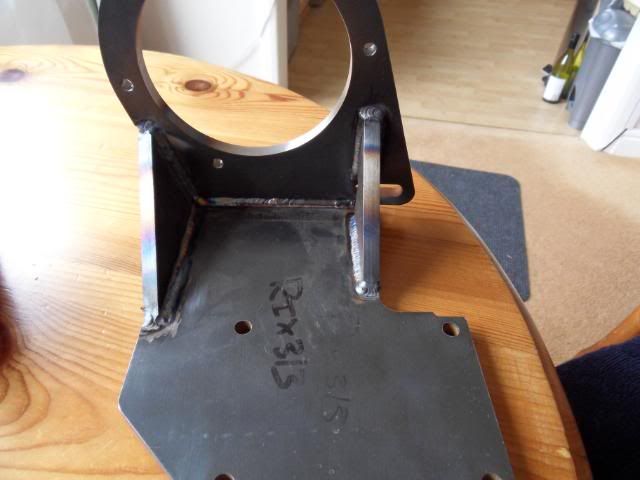
They've stayed very square to which is realy good as they have had a good bit of heat in them
You should never underestimate the predictability of stupidity
M42 Supercharged 285bhp + M3 6speed box