Twin Seq. Dry sumping for beginners :D

Discuss general engine, turbo and supercharger conversions in this section

Moderator: martauto

Turbo-Brown
Boost Junkie
Posts: 4705
Joined: Tue Feb 15, 2005 11:00 pm
Location: Aldershot, Hants
Contact:

Mon Jun 28, 2010 8:12 am

Been at a wedding most of the weekend so not got as much done as I'd have liked, but the good news is that the first trial of resin infusion seeeeeeems to've worked :)

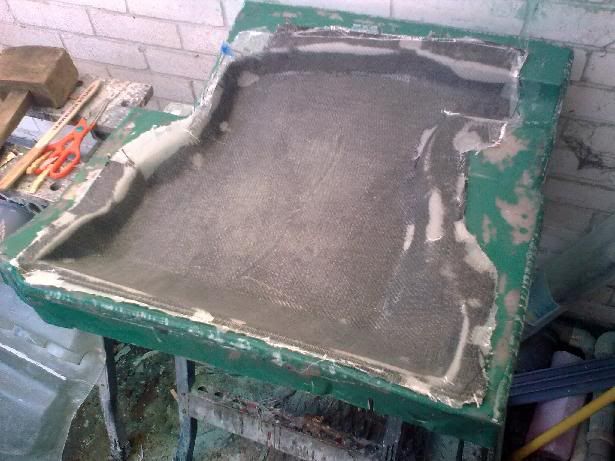
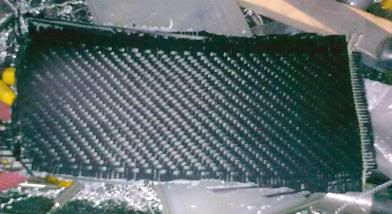
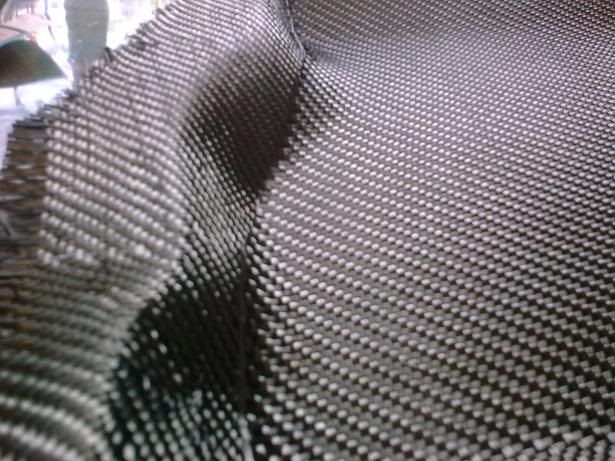
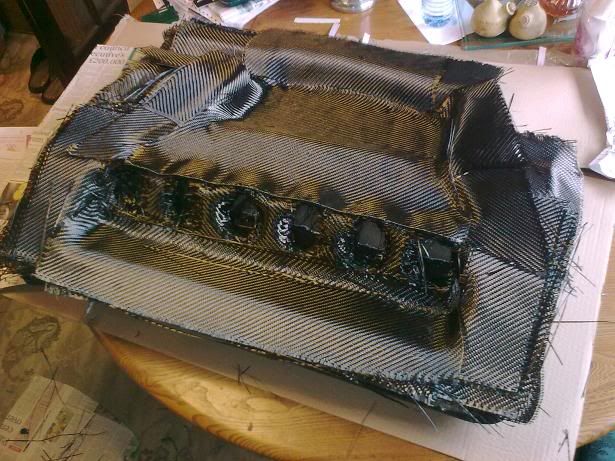
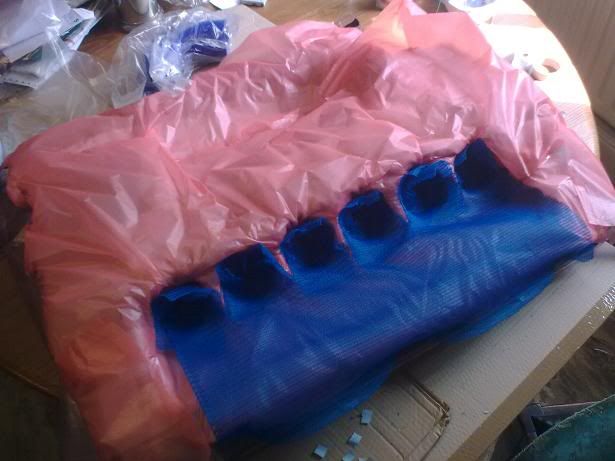
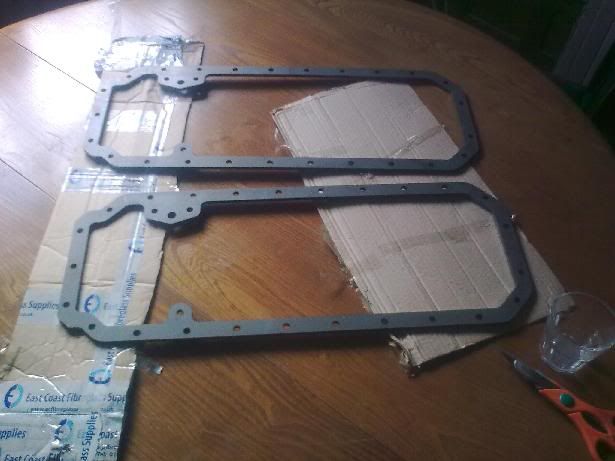
Started off by extending the infusion mesh to the edges of the flanges and putting the vacuum channel in place:

Image


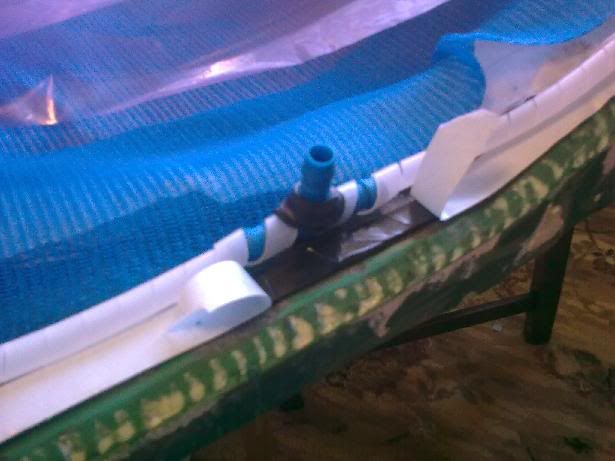
Then run bagging tape around the flange too:

Image


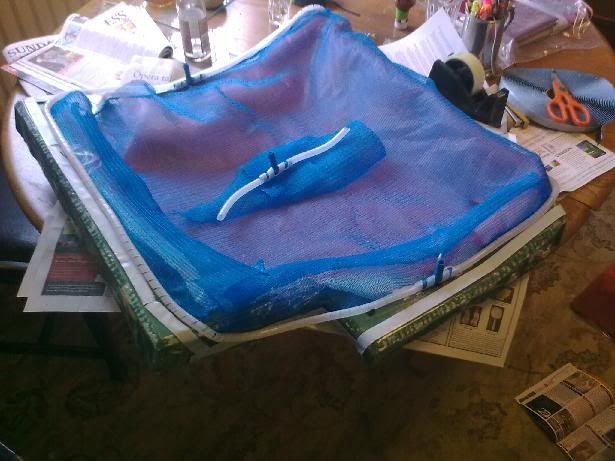
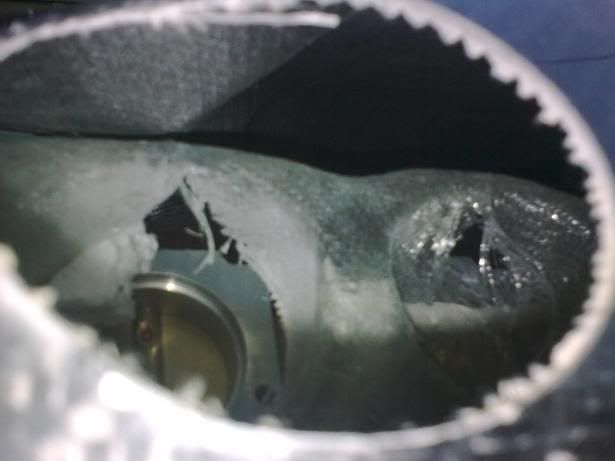
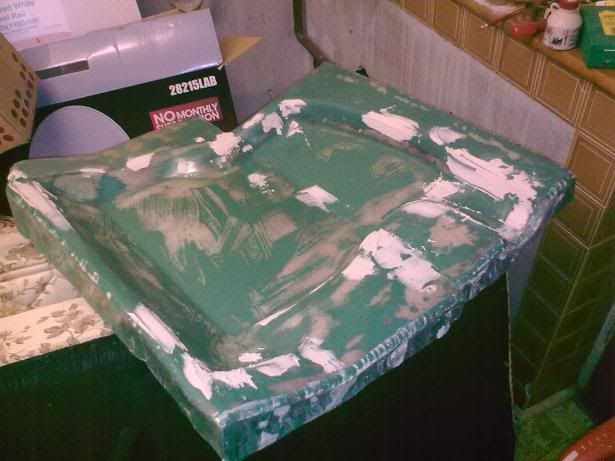
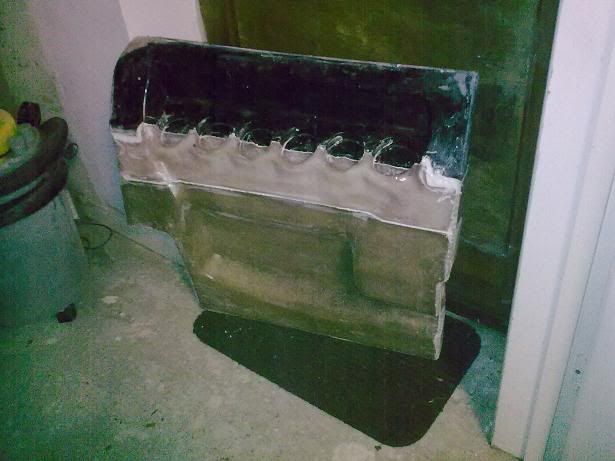
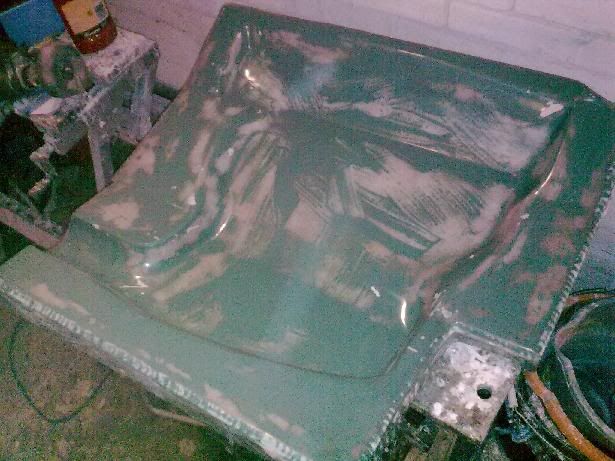
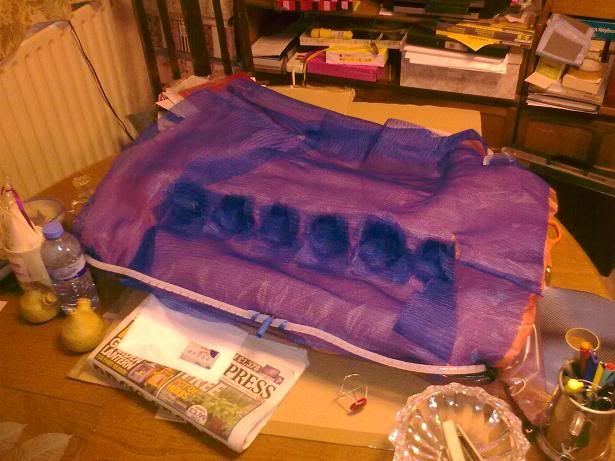
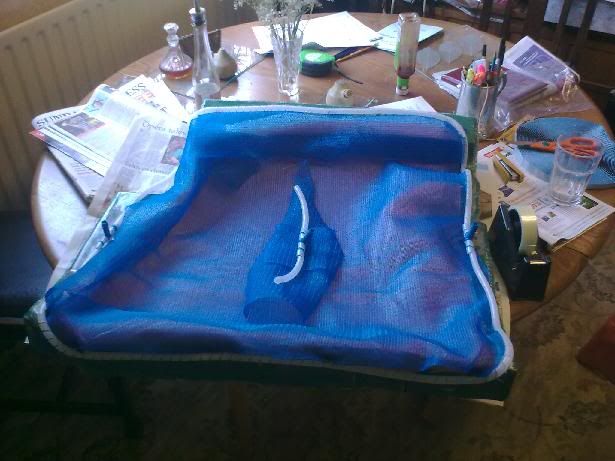
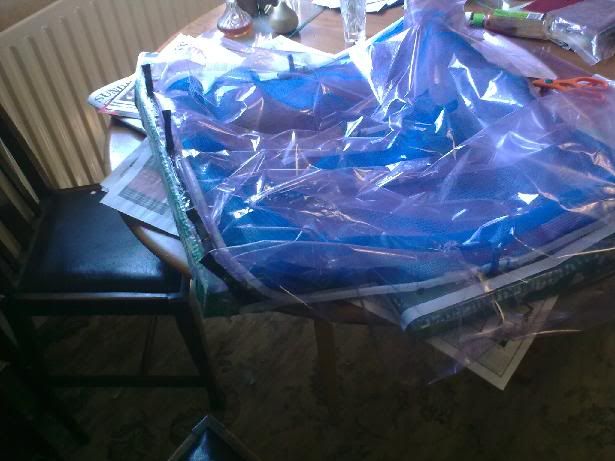
Before starting to bag the assembly. The bagging film was about 50% larger than the mold and this extra needs to be taken up with the pleats you see along the sides, otherwise it won't make full contact with the mold under vacuum:

Image


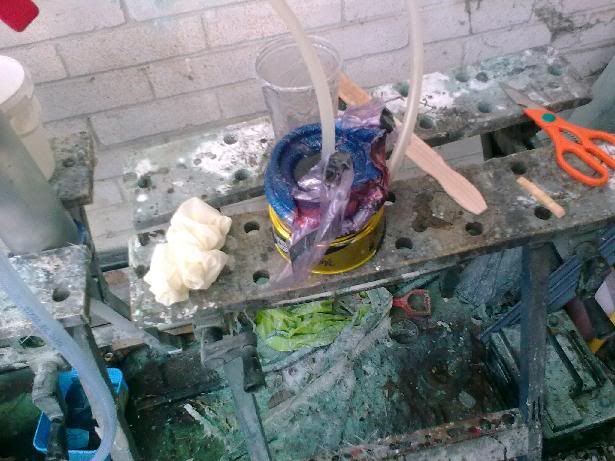
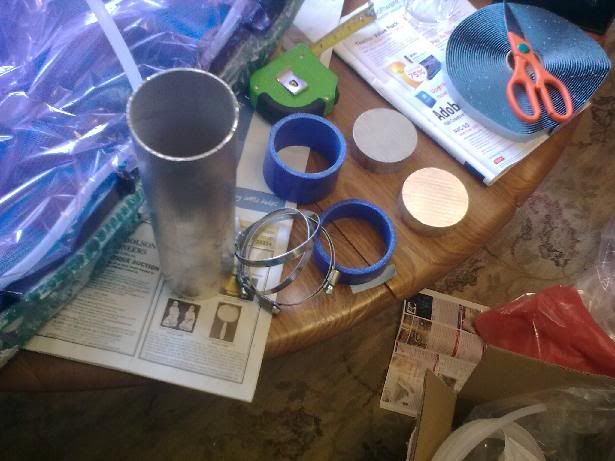
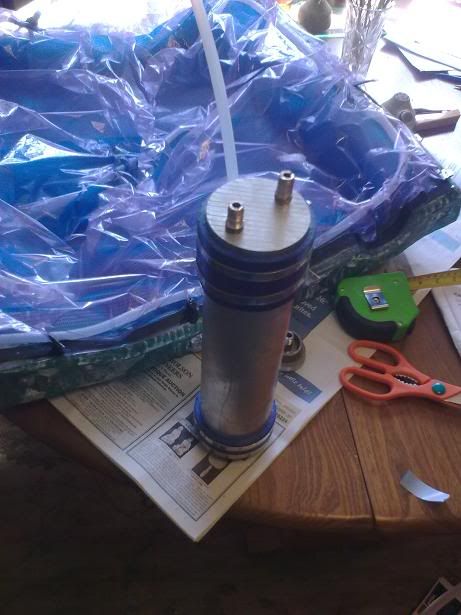
Having got that far, thoughts turned to the need for a vacuum tight catch-pot. Cobbled this together using a length of 3" alu tube, two discs of ali, a couple of hose joiners and some jubilee clips.

Image


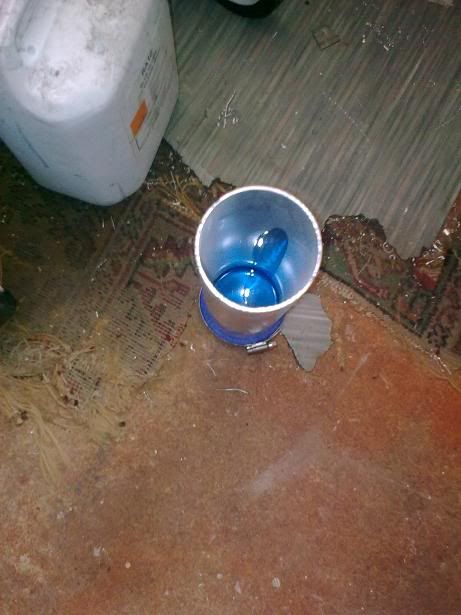
It needed some hose connections on top, and something to stop the resin from sticking inside so, poured some PVA release agent in and gave is a slosh around:

Image


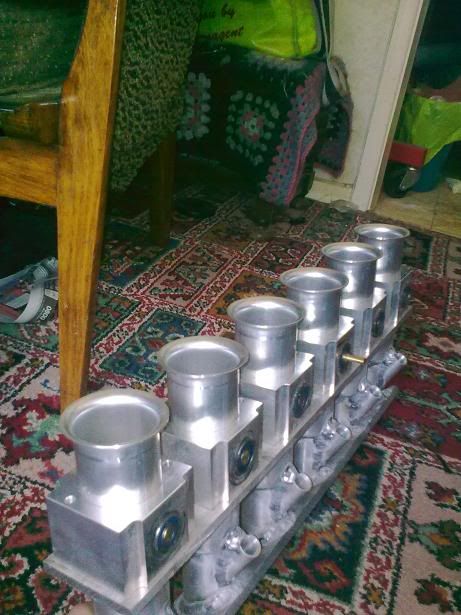
And got on with machining the hose tails:

Image


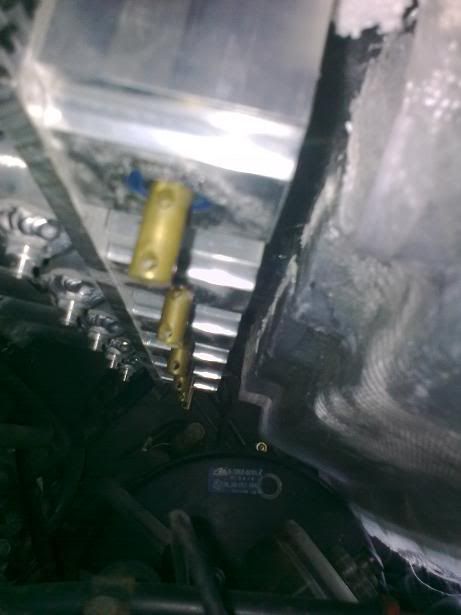
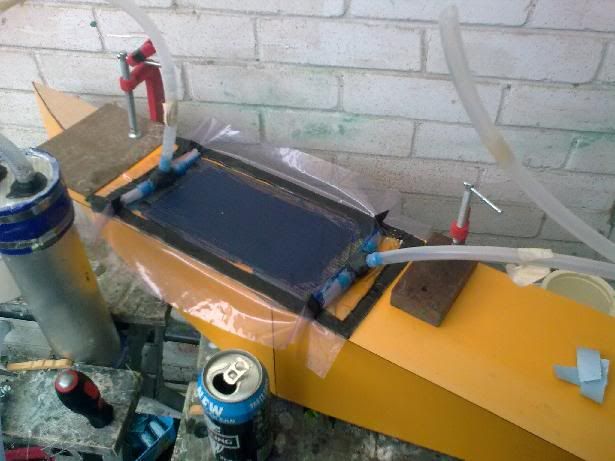
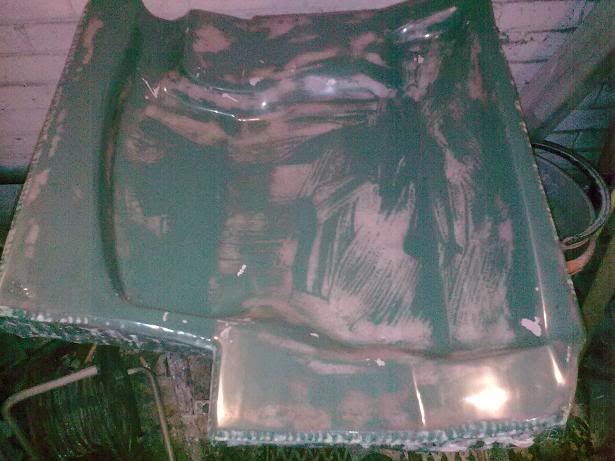
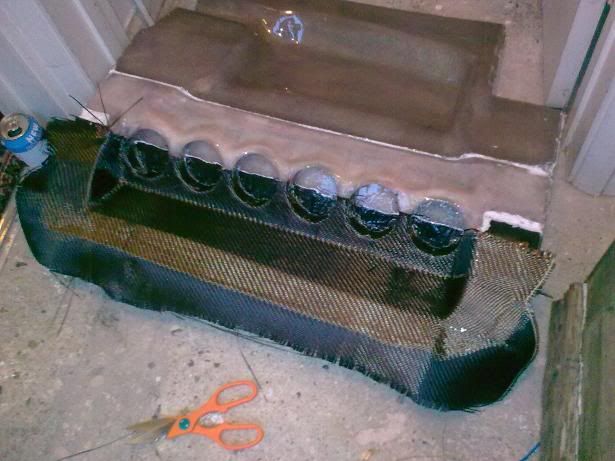
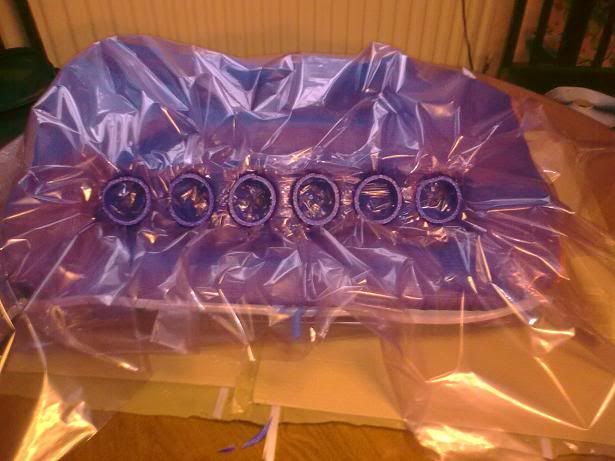
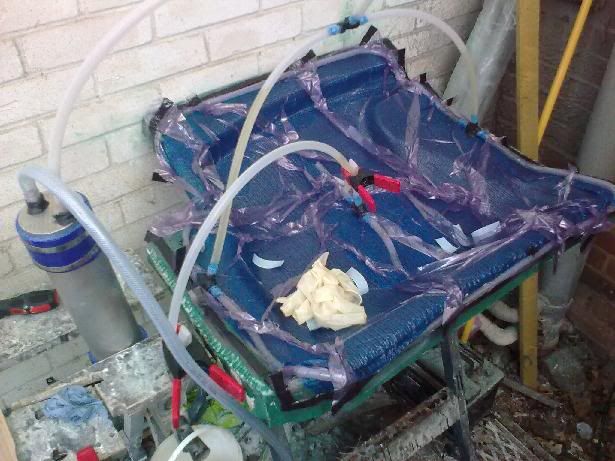
And after all that, it's time to connect up all of the feed and vac hoses and check for the many leaks there'll be :lol:

Image


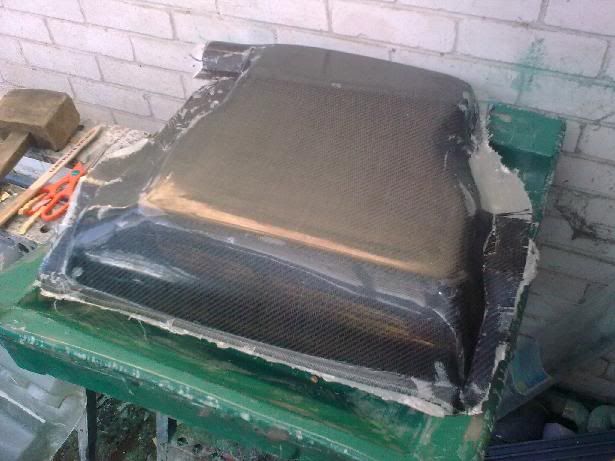
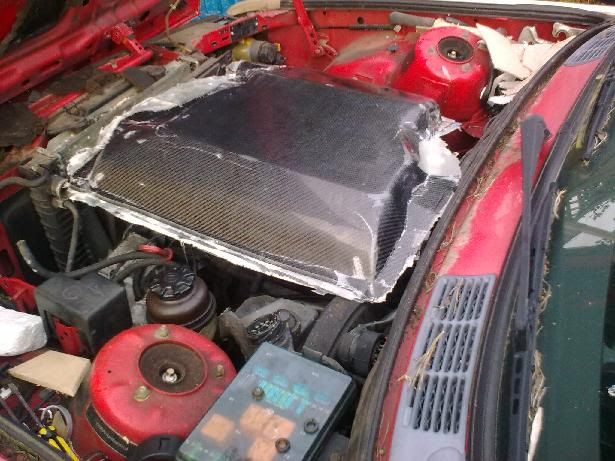
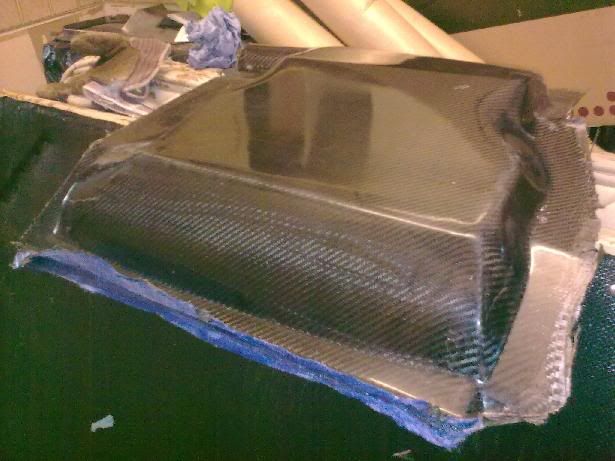
After the leaks are all sorted, you can infuse the resin and, before the feed pot runs dry, clamp off the feed line:

Image


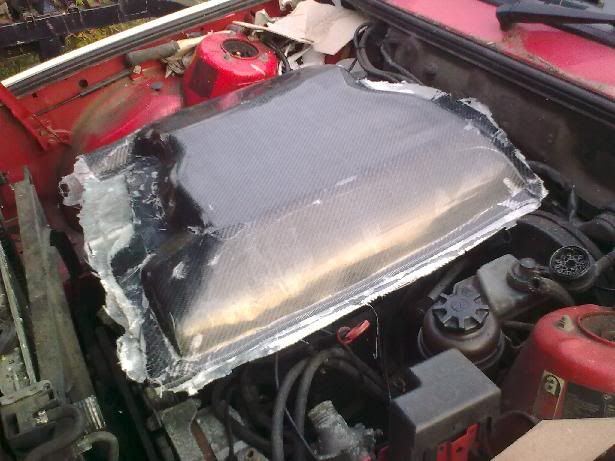
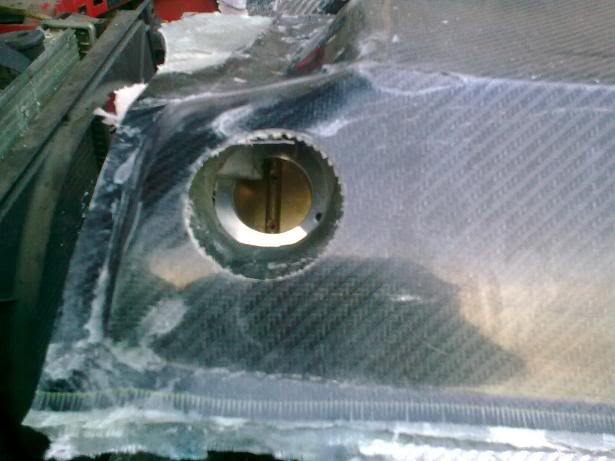
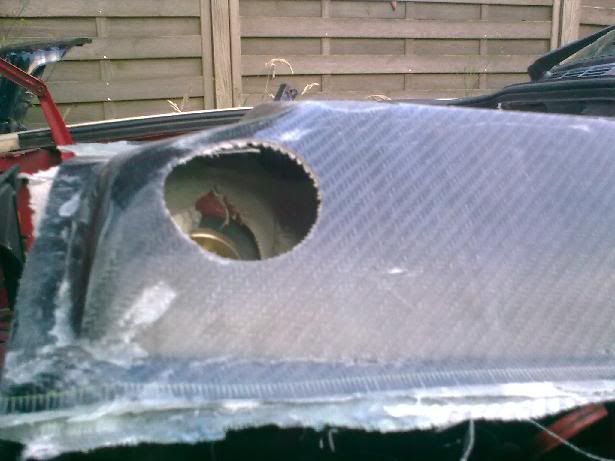
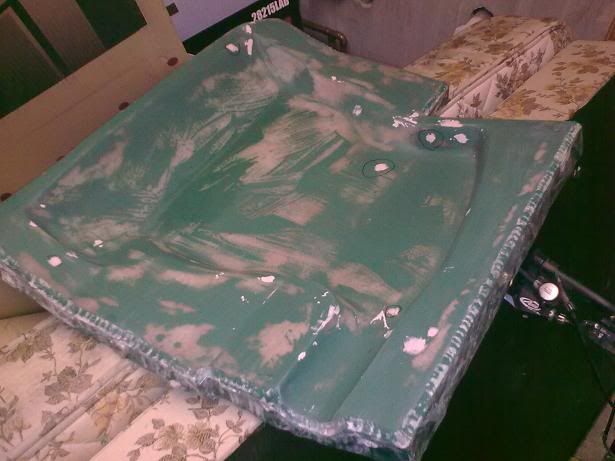
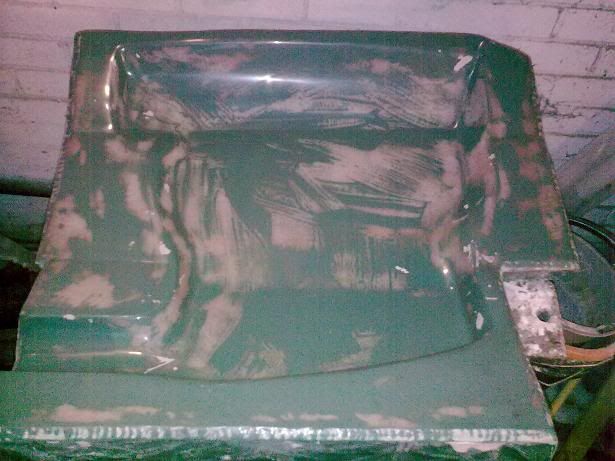
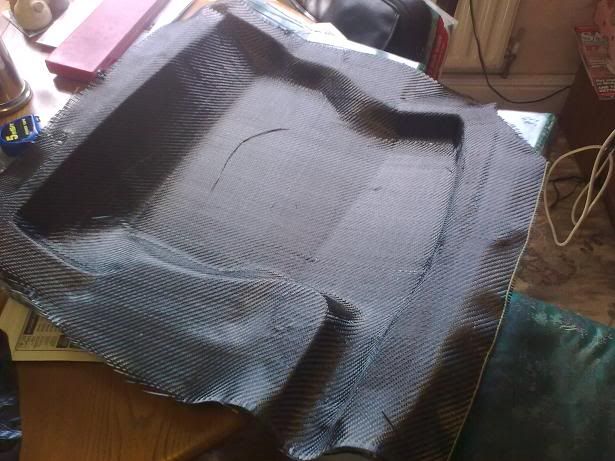
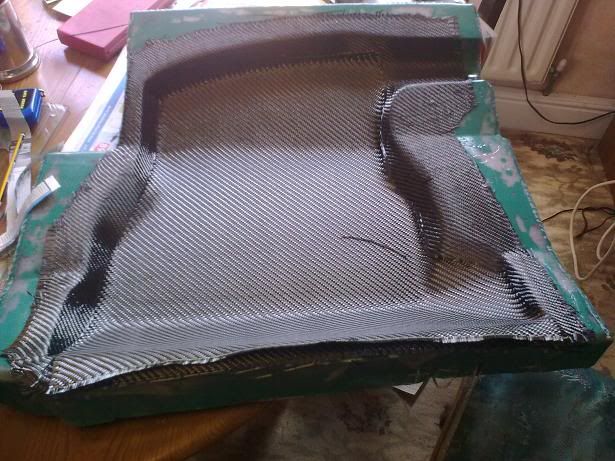
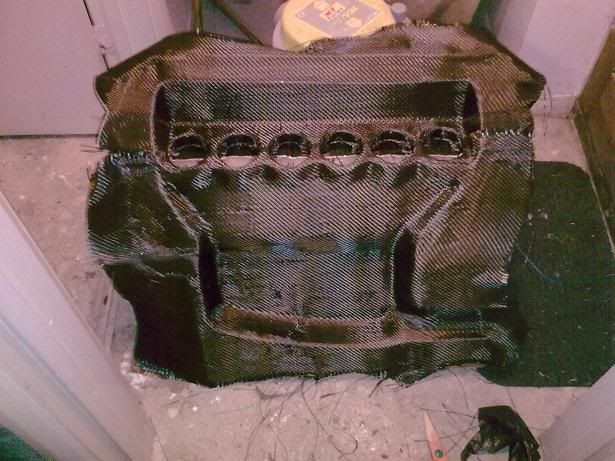
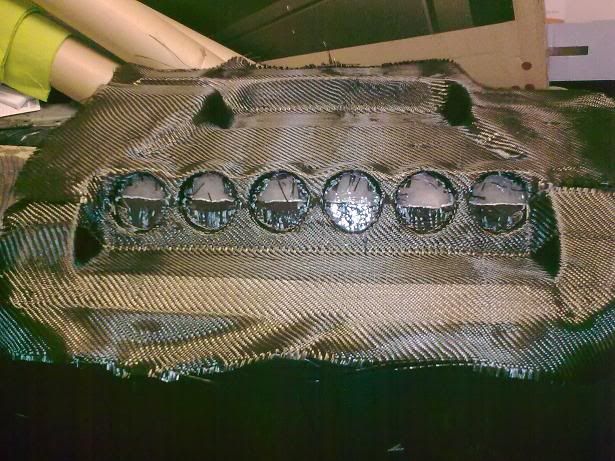
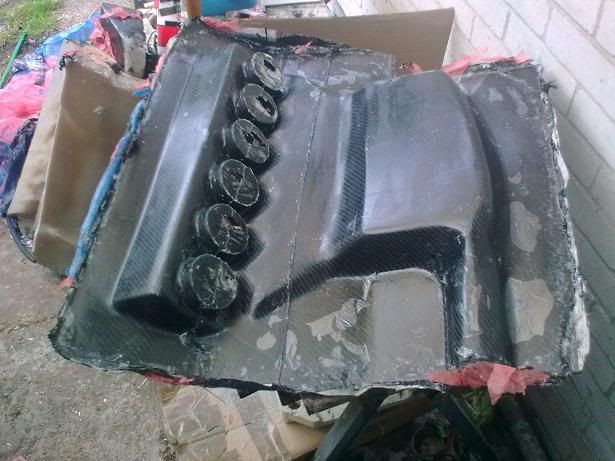
The process of infusing this molding which is 3ply thick and roughly 0.7mx0.7m took literally 5 minutes. It then took a further 3 hours for the resin to gel so I'd recommend mixing a trial batch of resin to check for gel times if you're doing this yourself :)

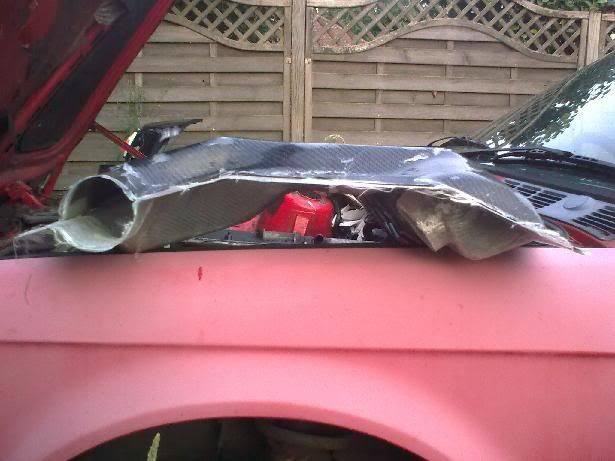
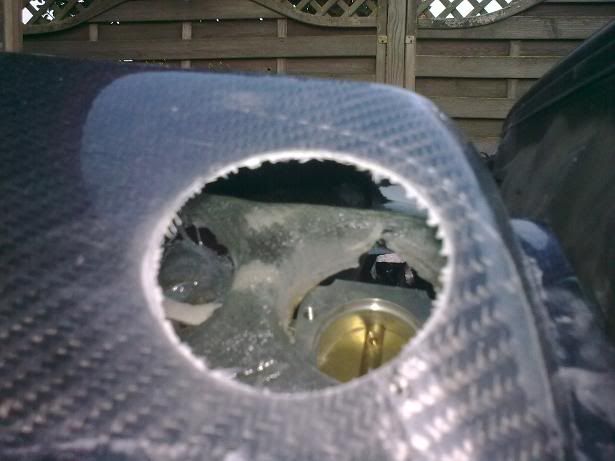
The scary part comes tonight where I take the part from the mold and see how it turned out! :eek:
325i Twin Turbo (until 10am 01/12/07 :( )

www.air-in.co.uk free M20 exhaust and inlet flange
m_jermyn
E30 Zone Team Member
Posts: 4208
Joined: Sat Mar 14, 2009 11:00 pm
Location: Sydney Australia Mate

Mon Jun 28, 2010 10:50 am

Is it ready yet?

You are such a tease
Turbo-Brown
Boost Junkie
Posts: 4705
Joined: Tue Feb 15, 2005 11:00 pm
Location: Aldershot, Hants
Contact:

Mon Jun 28, 2010 1:29 pm

Probably, it needs leaving a good 24 hours before you can strip it from the mold though.

Can't wait to get home tonight and see what's what! :D
325i Twin Turbo (until 10am 01/12/07 :( )

www.air-in.co.uk free M20 exhaust and inlet flange
Turbo-Brown
Boost Junkie
Posts: 4705
Joined: Tue Feb 15, 2005 11:00 pm
Location: Aldershot, Hants
Contact:

Tue Jun 29, 2010 7:56 am

Hmmmm, well! Some lessons learned!

First of all, you need to be absolutely sure the reinforcements have gone into all the corners or the unsupported gel will just break off.

Second, using wax and then a PVA release agent would've been a good idea as I had to wrestle this out of the mold and both the part and the mold sustained damage in the process :(

All the white areas are where the part has delaminated as a result of being levered at.

Image


And the phone photo covers up some white areas on top where the reinforcement isn't in contact with the gel. It also disguises the cracks in the part:

Image


However, chin up and all that! This was intended to be a cheap dry run and the part is still useful for checking fit under the bonnet.

Image


A worthwhile experiment all told :D
325i Twin Turbo (until 10am 01/12/07 :( )

www.air-in.co.uk free M20 exhaust and inlet flange
Turbo-Brown
Boost Junkie
Posts: 4705
Joined: Tue Feb 15, 2005 11:00 pm
Location: Aldershot, Hants
Contact:

Wed Jun 30, 2010 8:08 am

Thought I'd have another quick go at resin infusion last night, this time on something a bit smaller:

Image


Curiosity got the better of me this morning and I unpacked the bag, but didn't have time to try getting it out of the mold before going to work:

Image


Also had a trial fit of the dummy cooler :D

If you squint, you can kind of imagine how it's gonna look when it's all done:

Image

Image

Image

Image


Once the massaging of my ego was over and done with, it was onto the more serious task of fitting the throttles again:

Image


Offering up the cooler:

Image


And drilling some huuuge holes in it so I could measure for the trumpet lengths:

Image

Image

Image

Image


Away from tonight until Sunday unfortunately, but gonna have a good go at repairing the mold, giving it some more wax and also a coat of PVA and then trying again with the infusion :D
325i Twin Turbo (until 10am 01/12/07 :( )

www.air-in.co.uk free M20 exhaust and inlet flange
march109
Engaged to the E30 Zone
Posts: 6632
Joined: Sun Aug 20, 2006 11:00 pm
Location: Bournemouth
Contact:

Wed Jun 30, 2010 10:14 am

Hmmm, PVA and release wax, what wax are you using?

Is it possible the mould would be better as a two piece?
325i Tech 1 Touring, breaking.

2.5 high comp. M20, 3.64 LSD, Fully undersealed, Spax springs & Bilstein shocks, s/s exhaust, Alpina rep wheels and more.
Turbo-Brown
Boost Junkie
Posts: 4705
Joined: Tue Feb 15, 2005 11:00 pm
Location: Aldershot, Hants
Contact:

Wed Jun 30, 2010 1:33 pm

It's what the supplier I use recommends believe it or not. I've done it before actually, when I made that boot lid skin, works a treat!

The mold has baaaaaags of draft angle so don't think it's that causing problems, but there are a few areas where the mold has lost chunks of gel onto the part!

I use Meguiars Mirrorglaze No8 :D
325i Twin Turbo (until 10am 01/12/07 :( )

www.air-in.co.uk free M20 exhaust and inlet flange
e30_Turbo
Boost Junkie
Posts: 3158
Joined: Mon Jan 10, 2005 11:00 pm
Location: East Anglia

Thu Jul 01, 2010 7:25 pm

Nice Alex :D

Was wondering how long e30 shell mould might take :mad:
Image
march109
Engaged to the E30 Zone
Posts: 6632
Joined: Sun Aug 20, 2006 11:00 pm
Location: Bournemouth
Contact:

Fri Jul 02, 2010 9:12 pm

e30_Turbo wrote:Nice Alex :D

Was wondering how long e30 shell mould might take :mad:
Realistically its doable, but you'd have to SVA the car after using it.

And Aaaaaarrrrrghhhh I'm out of 120 grit paper. I'm out of 1 inch brushes, I'm even out of epoxy, bloody hell where does it all go?
325i Tech 1 Touring, breaking.

2.5 high comp. M20, 3.64 LSD, Fully undersealed, Spax springs & Bilstein shocks, s/s exhaust, Alpina rep wheels and more.
User avatar
Coyote_ar
E30 Zone Newbie
E30 Zone Newbie
Posts: 108
Joined: Mon Jan 07, 2008 11:00 pm
Location: Argentina

Sat Jul 03, 2010 6:46 am

dude, that is just plain sick. alex, you are the man! :D
Turbo-Brown
Boost Junkie
Posts: 4705
Joined: Tue Feb 15, 2005 11:00 pm
Location: Aldershot, Hants
Contact:

Tue Jul 06, 2010 8:09 am

:lol: think a whole shell might take a while, and it'd be bendy as hell too :D


Have been having a back-to-basics play this week.

Made a very simple, 5 ply flat panel and was meticulous about sealing the pipes to the bag, the bag to the mold and so forth.

Not very wisely, I used surfboard resin instead of infusion resin. The surf resin juuuuust made it across the panel before gelling, but the end result is beautiful.

Image


Also, started to repair the top part mold:

Image

And have sealed the bottom half's molds together:

Image


Had a measure of the finished flat panel to see how thick it is. Turns out that 200g carbon fibre compresses down quite a way, giving just 1.6mm thickness when finished. Think it's time to invest in some heavier weight cloth when the time comes to make the final parts.
325i Twin Turbo (until 10am 01/12/07 :( )

www.air-in.co.uk free M20 exhaust and inlet flange
m_jermyn
E30 Zone Team Member
Posts: 4208
Joined: Sat Mar 14, 2009 11:00 pm
Location: Sydney Australia Mate

Tue Jul 06, 2010 12:03 pm

Looks good Alex, all the hard work will pay off in the end matey.
march109
Engaged to the E30 Zone
Posts: 6632
Joined: Sun Aug 20, 2006 11:00 pm
Location: Bournemouth
Contact:

Tue Jul 06, 2010 12:17 pm

Carbon Fibre is starting to do my nut in.

Been working on some skinned parts for a week or two now while trying to program a new online shop and leaving the lappy every 3 hours for my garden is seriously peeing me off.

Got some more consumables arriving today and some new cutting blades. Then its time to mould something and hit up the vacuum infusion.
325i Tech 1 Touring, breaking.

2.5 high comp. M20, 3.64 LSD, Fully undersealed, Spax springs & Bilstein shocks, s/s exhaust, Alpina rep wheels and more.
Turbo-Brown
Boost Junkie
Posts: 4705
Joined: Tue Feb 15, 2005 11:00 pm
Location: Aldershot, Hants
Contact:

Wed Jul 07, 2010 8:06 am

:lol: Can't be arsed skinning things in CF any more! Takes forever to do nicely and the money's crap.

I'd recommend doing lots of little trials with resin infusion. The importance of sealing the bag perfectly can't be overstated!

Here's that little test card I did the other day:

Image

Thinking I might cut a strip out of it and compare it to a strip of ali the same thickness to see how they stand up to some simple bending tests.

Also made some progress (again) on the mold for the top. Should get that done and polished tonight ready for release treatment. Gonna be 3 coats of wax and two of PVA release.

Image


Then, gonna put the clear-coat in, but this time with a peel ply backing.

The peel leaves a rough, textured surface which grips dry CF quite well so hopefully I'll be able to get the reinforcement to stick into the corners this time :)
325i Twin Turbo (until 10am 01/12/07 :( )

www.air-in.co.uk free M20 exhaust and inlet flange
march109
Engaged to the E30 Zone
Posts: 6632
Joined: Sun Aug 20, 2006 11:00 pm
Location: Bournemouth
Contact:

Wed Jul 07, 2010 11:28 am

Got to say alex I'm a big fan of the surfboard resin, if you can get it to work the look is unbeatable and to top it off its usually UV resistant too, so will protect the CF when exposed to sunlight.

Skinning parts is doing my nut in, but equally the trouble I'm having isn't replicating the outside of an interior part but instead the inside fixing points, so when you want to do interior parts its frankly a massive pain in the ass either way, though I suppose at least if I made a decent mould I could knock out hundreds of them.

Problem is so far its all small volume type stuff. Got to email you this week too, the programming work I'm doing at the moment is a online shopppling cart system, once its done and handed over to the client I'll be changing it and looking for a way of making some money from it myself. winkeye

What vacuum pump are you using and where did you source yours too, as you know I got the kit one, which frankly wasn't actually a bad price, I'm wondering if I need to get a larger capacity one for large parts too.

Would love a workshop to build an autoclave in though!
325i Tech 1 Touring, breaking.

2.5 high comp. M20, 3.64 LSD, Fully undersealed, Spax springs & Bilstein shocks, s/s exhaust, Alpina rep wheels and more.
Turbo-Brown
Boost Junkie
Posts: 4705
Joined: Tue Feb 15, 2005 11:00 pm
Location: Aldershot, Hants
Contact:

Thu Jul 08, 2010 8:10 am

I like the stuff too, but it's definitely too thick to infuse anything but small components with :D

Know what you mean about the internal fixing tabs and the like, think molding the outer skin and then bonding on the inner tabs is the only realistic way to do it isn't it?

Pretty sure we've both got the exact same pump, mine came from eastcoast fibreglass (as always! :lol: ) It took literally no time at all for it to infuse my 0.7m x 0.7m cooler, so I reckon it'll handle a bonnet easily enough :D


Have polished the mold!.....again!

Image

Image

Image


Tonight, it's waxing and PVAing time! :D
325i Twin Turbo (until 10am 01/12/07 :( )

www.air-in.co.uk free M20 exhaust and inlet flange
goosiegander
Zonegoose
Posts: 2544
Joined: Sun Nov 19, 2006 11:00 pm
Location: East Anglia

Sun Jul 11, 2010 7:04 pm

Excellent work!

Definatly interested in the direct replacement sunroof!

btw this thread is epic :D
Turbo-Brown
Boost Junkie
Posts: 4705
Joined: Tue Feb 15, 2005 11:00 pm
Location: Aldershot, Hants
Contact:

Mon Jul 12, 2010 8:03 am

Cheers dude, gonna take a little while until they're ready unfortunately though :(


Hooray! Actually managed to make something useful this weekend!

Had a think about where I went wrong with the last cooler casing and why the reinforcements hadn't pulled into the corners. To cut a long story short, if you have too complex a shape, you need to make it up of little bits rather than one big piece of cloth.....with one exception!

First off, stick down the outer skin. This can be in one piece as it's being held firmly in place on some cured but still slightly tacky resin (this is 200g / m^2)

Image


Next, start filling the mold with smaller bits of cloth which need only go maybe 10-20mm around corners (this is 650g / m^2):

Image

Image


T'other thing I'd noticed was lots of air bubbles getting into the system, so came up with this method of sealing the bag to the connectors:

Image

More tape is put on top of the bag and to seal the hose in place too.


And here's the result:

Image

Very pleased with it indeed, especially the PVA release agent which meant the bare minimum of persuasion was needed to get the part to spring out of the mold :D
325i Twin Turbo (until 10am 01/12/07 :( )

www.air-in.co.uk free M20 exhaust and inlet flange
User avatar
baptie0
E30 Zone Regular
E30 Zone Regular
Posts: 624
Joined: Tue Sep 25, 2007 11:00 pm
Location: lochinver,scotland.

Mon Jul 12, 2010 11:34 am

Well done, that looks great :cool:
m_jermyn
E30 Zone Team Member
Posts: 4208
Joined: Sat Mar 14, 2009 11:00 pm
Location: Sydney Australia Mate

Mon Jul 12, 2010 12:42 pm

Well its about time isnt it? :P
Turbo-Brown
Boost Junkie
Posts: 4705
Joined: Tue Feb 15, 2005 11:00 pm
Location: Aldershot, Hants
Contact:

Fri Jul 16, 2010 7:53 am

After a couple of false starts on the bottom half of the cooler, finally managed to get things rolling last night :D

Not sure I can be bothered to resin infuse this one, but might have a change of heart if I can find a little more time.

Last nights efforts were just to put a coat of heat resistant resin in the PVAd mold and then start putting the first layer of CF in:

Image

Image

Image


Luckily, it's mostly hidden so the scrunched up bit of weave over the back there shouldn't be too noticable :D
325i Twin Turbo (until 10am 01/12/07 :( )

www.air-in.co.uk free M20 exhaust and inlet flange
User avatar
MarkT
E30 Zone Regular
E30 Zone Regular
Posts: 922
Joined: Thu Oct 27, 2005 11:00 pm
Location: Thames Ditton

Sat Jul 17, 2010 8:38 am

Really enjoying this thread :D

What's next on the agenda?
E30 340i project in progress now 328 turbo
Breaking '97 728i Auto box, tubular manifolds and other morsels.
For sale E34 M50 sump, pick up and dip stick. PM for de
Turbo-Brown
Boost Junkie
Posts: 4705
Joined: Tue Feb 15, 2005 11:00 pm
Location: Aldershot, Hants
Contact:

Mon Jul 19, 2010 8:13 am

Toot-diddle-oooot!

TRUMPETS! :D

Image
325i Twin Turbo (until 10am 01/12/07 :( )

www.air-in.co.uk free M20 exhaust and inlet flange
march109
Engaged to the E30 Zone
Posts: 6632
Joined: Sun Aug 20, 2006 11:00 pm
Location: Bournemouth
Contact:

Mon Jul 19, 2010 10:05 am

Are you using heat resistant resin for the whole cooler? What sort of clarity does it give for use on 'show' parts?
325i Tech 1 Touring, breaking.

2.5 high comp. M20, 3.64 LSD, Fully undersealed, Spax springs & Bilstein shocks, s/s exhaust, Alpina rep wheels and more.
Turbo-Brown
Boost Junkie
Posts: 4705
Joined: Tue Feb 15, 2005 11:00 pm
Location: Aldershot, Hants
Contact:

Mon Jul 19, 2010 5:08 pm

I've used a heat resistant outer clear coat, which is actually pretty darned clear as long as it's not too thick. Not as clear as surf board resin, but not as agressive or gloopy either.

The infusion resin is reasonably heat resistant anyway, and will give key areas an internal fire retardant coat too, i.e. where the cooler is fairly close to the big turbo and where it's in line to get some spitbacks from the throttles.
325i Twin Turbo (until 10am 01/12/07 :( )

www.air-in.co.uk free M20 exhaust and inlet flange
Turbo-Brown
Boost Junkie
Posts: 4705
Joined: Tue Feb 15, 2005 11:00 pm
Location: Aldershot, Hants
Contact:

Mon Aug 02, 2010 8:16 am

Some more lessons learned these last couple of weeks.

1) Resin infusion and multi-part molds need careful planning. You have to be veeeeery careful to get the mold parts to seal together reliably.
2) If a vac bag bridges too badly, it'll go off pop!

On the 3rd attempt to seal the back of the mold at the moment, which involved bagging up as normal, realising it didn't seal, then bagging up the whoooooole thing. Seems to be working this time :)

In other news: To prevent myself getting bored with all the CF stuff, I measured up the sump and have ordered two flanges in steel.

I was gonna use the ali original sump, but it's gonna be a pain to weld and keep flat and so forth.

Also, it occured to me that I need a rigid method of mounting a windage tray, the pump itself, the pickups, inlets and outlets and all that kind of thing so one of the flanges will have all this gubbins welded on, and the outer one will carry the sump pan itself :)
325i Twin Turbo (until 10am 01/12/07 :( )

www.air-in.co.uk free M20 exhaust and inlet flange
m_jermyn
E30 Zone Team Member
Posts: 4208
Joined: Sat Mar 14, 2009 11:00 pm
Location: Sydney Australia Mate

Mon Aug 02, 2010 8:23 am

Alex,

It just accured to me that you have been doing this since 2007...

Hurry up all ready :D

Mike
Turbo-Brown
Boost Junkie
Posts: 4705
Joined: Tue Feb 15, 2005 11:00 pm
Location: Aldershot, Hants
Contact:

Tue Aug 03, 2010 8:02 am

:lol: Yeah I know, but there have been prolonged periods where I've not touched it at all. Another one of which is around the corner as I'm about to become a homo-ner......probably.


Anyway, before getting a house and becoming all domesticated, infused the bottom half of the cooler casing last night.

Not especially confident as there were loooots of little bubbles being pulled through the mold, despite the two bags and sealed seams!

Next lesson is that multi part molds need to go in one big bag I think.

Here's all the stuff being loaded into the mold:

Image

Image

Image

Image


And it's all spending the day in my new, very high-tech curing oven today:

Image

Otherwise known as the back seat of the car on a sunny day :) If it'll kill a dog, it'll cure a composite :)
325i Twin Turbo (until 10am 01/12/07 :( )

www.air-in.co.uk free M20 exhaust and inlet flange
Speedtouch
Old Skooler
Old Skooler
Posts: 14060
Joined: Tue Feb 14, 2006 11:00 pm
Location: Canterbury

Tue Aug 03, 2010 11:44 am

That middle shot looks like a druggies' paraphanalia :wink:
///M aurice
ECU Upgrade EPROM Chips, £40 posted within the UK. Note these are not Zone chips.
viewtopic.php?f=6&t=279421
Turbo-Brown
Boost Junkie
Posts: 4705
Joined: Tue Feb 15, 2005 11:00 pm
Location: Aldershot, Hants
Contact:

Wed Aug 04, 2010 8:01 am

Can see the Daily Mail headlines now: "Drug dealers read the Express! We ask; should it be banned?"


It's come out alright! :D

Was a bit nervous that being quite rigid, the part might not release from the mold, but it was a fairly painless process!

More lessons learned from these resin infusions:
1-Wear riggers gloves when releasing components as the shards of resin will tear your hands to ribbons.
2-DEFINITELY wear goggles when working on releasing a component from the mold! Things like the infusion mesh require a lot of force to remove them from the laminate in some instances with the consequence that when they do let go, they throw razor sharp scales of resin into the air. Was very glad of my goggles yesterday!

Anyway, without further ado here's the underside! The big patches are the PVA release agent and will peel / wash straight off:

Image


And the inside. White strakes are peel-ply :)

Image
325i Twin Turbo (until 10am 01/12/07 :( )

www.air-in.co.uk free M20 exhaust and inlet flange
m_jermyn
E30 Zone Team Member
Posts: 4208
Joined: Sat Mar 14, 2009 11:00 pm
Location: Sydney Australia Mate

Thu Aug 05, 2010 10:20 am

So whats next from here?
Turbo-Brown
Boost Junkie
Posts: 4705
Joined: Tue Feb 15, 2005 11:00 pm
Location: Aldershot, Hants
Contact:

Fri Aug 06, 2010 8:06 am

Ooh, had a delivery yesterday!

Was surprised by how quickly these were made, and how reasonably priced they were too, considering some of the quotes I had!

Image

So the next few of things to be working on are making my new flat habitable (it's a bit skanky at the moment) the sump, and also making up the internal structure for the charge cooler :)
325i Twin Turbo (until 10am 01/12/07 :( )

www.air-in.co.uk free M20 exhaust and inlet flange
gareth
E30 Zone Team Member
Posts: 11009
Joined: Tue Jan 11, 2005 11:00 pm
Location: hastings, east sussex

Fri Aug 06, 2010 3:57 pm

ooh, nice profiles! :D
who did them? Water jet cut? :cool:
Sole founder of Fe2O3-12V it's a lifestyle
Image
LSD rebuilding / modification services provided, PM for details
Speedtouch
Old Skooler
Old Skooler
Posts: 14060
Joined: Tue Feb 14, 2006 11:00 pm
Location: Canterbury

Fri Aug 06, 2010 11:28 pm

Congratulations on the flat purchase! I did that 10 years ago, and it's still an ongoing project :roll:
///M aurice
ECU Upgrade EPROM Chips, £40 posted within the UK. Note these are not Zone chips.
viewtopic.php?f=6&t=279421
Turbo-Brown
Boost Junkie
Posts: 4705
Joined: Tue Feb 15, 2005 11:00 pm
Location: Aldershot, Hants
Contact:

Mon Aug 09, 2010 8:01 am

The profiles were courtesy of Laser Profiles in Poole :)

They're just laser cut from 6mm steel plate.

Don't think my flat's big enough to take 10 years to do up. Did manage to blast through a couple of walls, take out the old microbore central heating.....and our lass found this behind the wall paper in the spare room:

Image
325i Twin Turbo (until 10am 01/12/07 :( )

www.air-in.co.uk free M20 exhaust and inlet flange
Post Reply