
Simon
Yeah its a Eta donk and it is filthy isnt it lol?
I will get all angry on that converter this arvo, if a bit of violence is what it needs then its gonna get it..
I also looked on the underside of the head and there is the slightest little mark where something might of made impact with it, however like you said I would of thought the head would be rooted if it did that to a piston.. After all the head is alloy and the pistons are steel.
The head is a normal 200 head, the numbers I posted a pic of are on the block underneath the inlet manifold..
Mike
m_jermyns build *motor in*
Moderator: martauto
-
m_jermyn
- E30 Zone Team Member

- Posts: 4208
- Joined: Sat Mar 14, 2009 11:00 pm
- Location: Sydney Australia Mate
-
Simon13
- The longest resto in the world !
- Posts: 22697
- Joined: Mon Jan 10, 2005 11:00 pm
- Location: Camberley, Surrey don't u know
so 885 head going back on then with 2.5 inlet?
-
m_jermyn
- E30 Zone Team Member
- Posts: 4208
- Joined: Sat Mar 14, 2009 11:00 pm
- Location: Sydney Australia Mate
Simon yep a 885 head and inlet , just waiting on someone to send me the stuff I payed for some time ago...
-
m_jermyn
- E30 Zone Team Member
- Posts: 4208
- Joined: Sat Mar 14, 2009 11:00 pm
- Location: Sydney Australia Mate
Simon thanks for the advice mate, worked wonders. I attacked the torque converter like a gorilla and it came off.
Found something interesting yesterday.
And this number was stamped on the block just above the LHS engine mount.
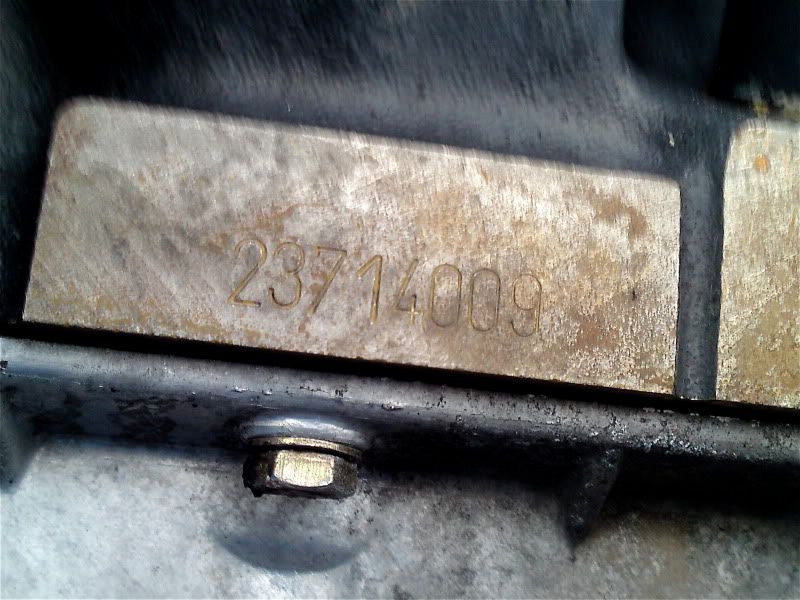
Whats this mean?
Mike
Found something interesting yesterday.
And this number was stamped on the block just above the LHS engine mount.
Whats this mean?
Mike
-
Simon13
- The longest resto in the world !
- Posts: 22697
- Joined: Mon Jan 10, 2005 11:00 pm
- Location: Camberley, Surrey don't u know
thats the engine number i expect
-
B7
- E30 Zone Team Member
- Posts: 15846
- Joined: Tue Feb 13, 2007 11:00 pm
- Location: Surrey / West Sussex
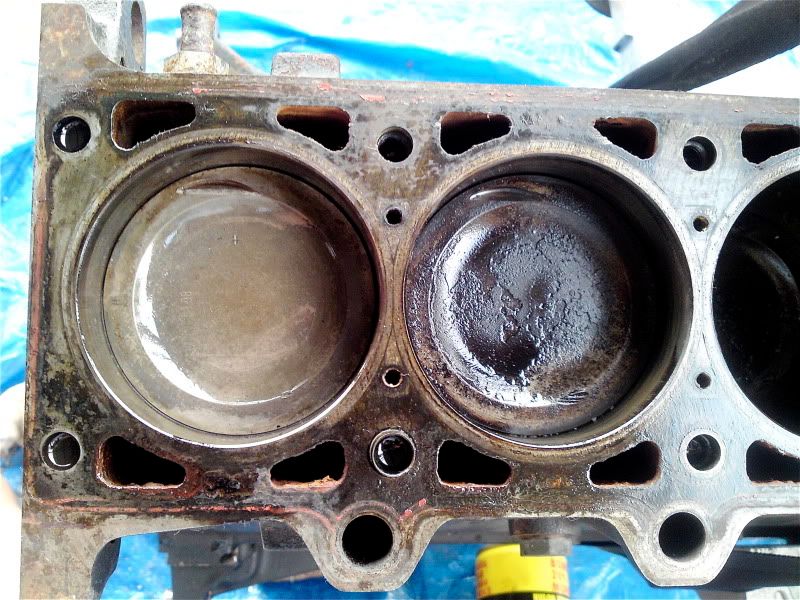
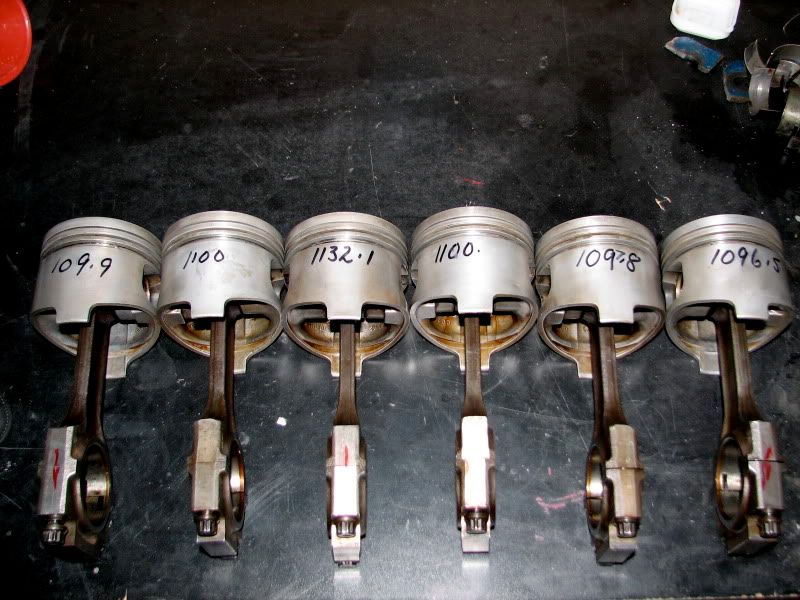
For a start the pistons will not be steel. they will be alloy. That No.3 has seen valve / piston contact at some point I would suspect and i'd be fitting a new slug in that bore to be honest.
Thats deffo the engine number and should tally with the original documents for the donor car.
That head (although a bit black) looks just looks liek carbon build up to me. I'd say the blackness on the head is more like the short start ups it probably saw before the final strip down. My last 2.5 was the same.
However, the piston crowns (Esp no.5) look a bit oily. They always do this more towards 4 5 and 6 due to the higher heat temps at that end. I'd suspect this is more down to valve stem Oil seals than rings though.
B7's Motto. "If it's French, BURN IT!!!!!!"
-
m_jermyn
- E30 Zone Team Member
- Posts: 4208
- Joined: Sat Mar 14, 2009 11:00 pm
- Location: Sydney Australia Mate
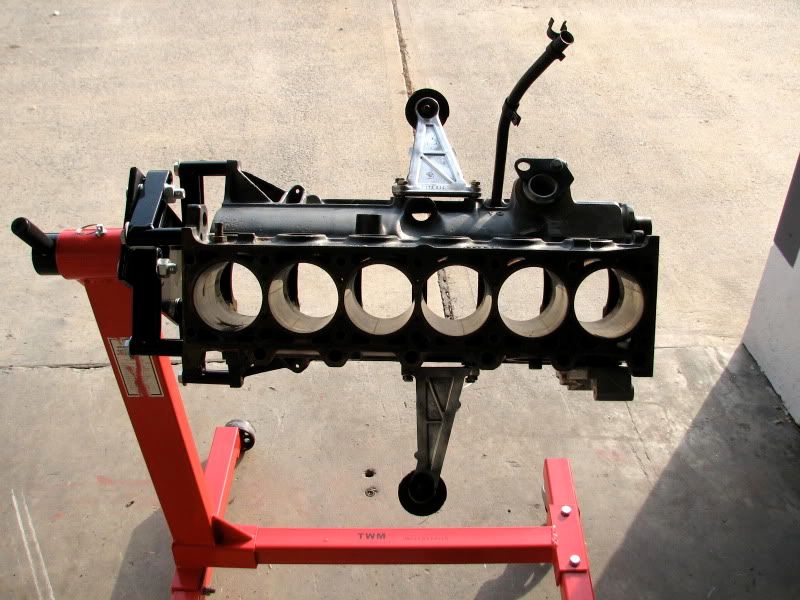
Well started to strip the short motor down today... First job was to get it on a stand..
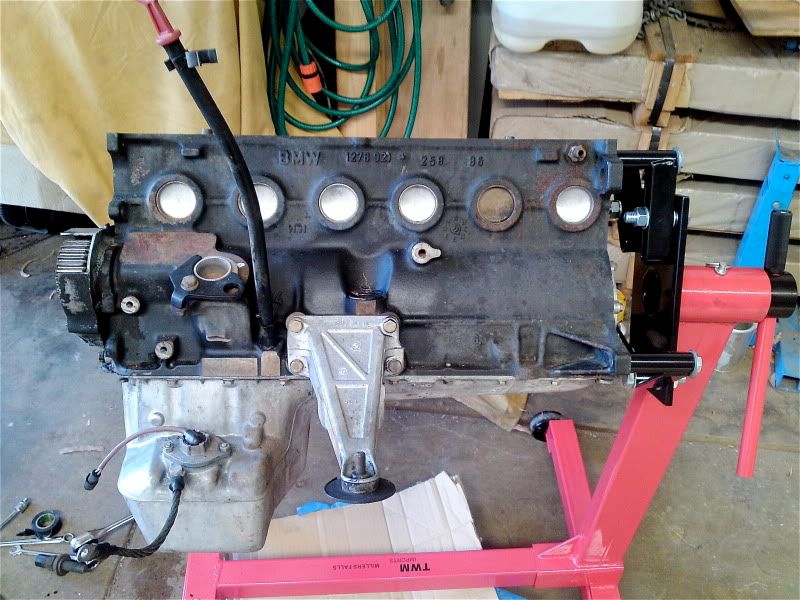
I pulled off all the pulleys, alternator, power steering pump and sump..
Had to go do some work after this so not much got done today..
Mike
I pulled off all the pulleys, alternator, power steering pump and sump..
Had to go do some work after this so not much got done today..
Mike
-
m_jermyn
- E30 Zone Team Member
- Posts: 4208
- Joined: Sat Mar 14, 2009 11:00 pm
- Location: Sydney Australia Mate
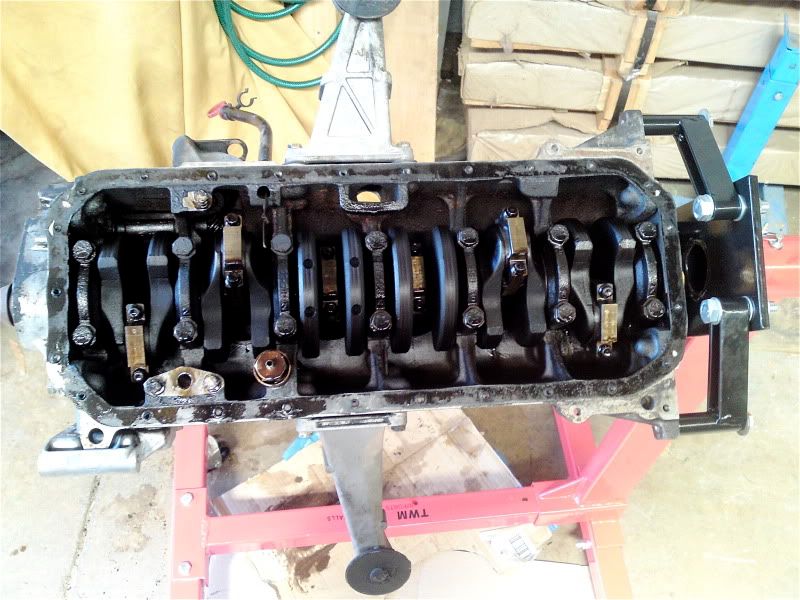
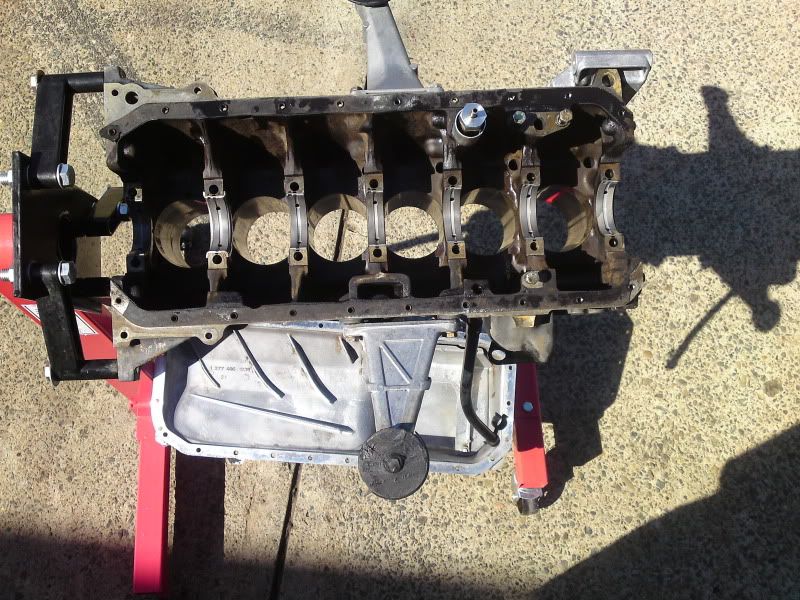
Motor fully stripped out now and cleaning of part begins.... How do you clean the carbon off the pistons?
Anyway the block is so clean you can eat off it... I used a mix of degreaser and kerosene 50/50.... Some one suggested it to me.. I gotta say I did not believe it would work much better then degreaser alone... Look at the sump! Its gleaming, before I tried the mix of degreaser and kero the sump was black.... Thats after i spent a hour on it with degreaser alone.
I mentioned to someone I wanted everything chemically cleaned and they told me im wasting my time it will come back still dirty..
I dont argue with someone who has built more motors then I have had dinners..
The block got 2 coating of the magic mix and a brush and it is absolutely grease and oil free.. You could wipe a tissue on the block and have no oily residue..
Anyway pic.
-
m_jermyn
- E30 Zone Team Member
- Posts: 4208
- Joined: Sat Mar 14, 2009 11:00 pm
- Location: Sydney Australia Mate
Not much been happening at the moment but cleaning of parts...
A complete M20B27 motor in bits...
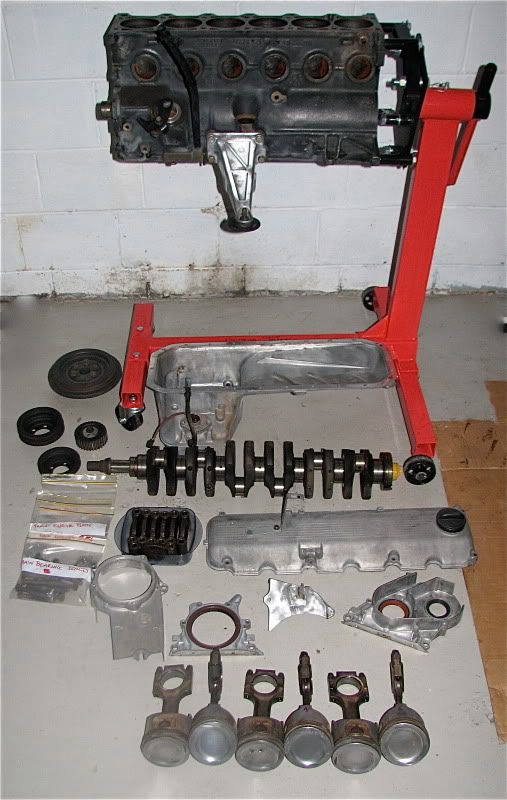
Some shiny pistons... I got a little carried away with the cleaning
All I am waiting for now is a flywheel, clutch kit So I can balance the motor. Then all I need is welsh plugs, bearings, rings and a few other bits and pieces and then the block can be assembled ..
Then we do the head..
Mike
A complete M20B27 motor in bits...
Some shiny pistons... I got a little carried away with the cleaning
All I am waiting for now is a flywheel, clutch kit So I can balance the motor. Then all I need is welsh plugs, bearings, rings and a few other bits and pieces and then the block can be assembled ..
Then we do the head..
Mike
-
tomson
- E30 Zone Addict

- Posts: 3600
- Joined: Sun Nov 06, 2005 11:00 pm
- Location: Bristol
Looking good 
-
Simon13
- The longest resto in the world !
- Posts: 22697
- Joined: Mon Jan 10, 2005 11:00 pm
- Location: Camberley, Surrey don't u know
Isn't kerosine aeroplane fuel? must cost dollars!! although i want some as it does the trick of cleaning it seems
-
m_jermyn
- E30 Zone Team Member
- Posts: 4208
- Joined: Sat Mar 14, 2009 11:00 pm
- Location: Sydney Australia Mate
I dont know if its aeroplane fuel but I got it at the hardware, cost $10 for 5 litres so about 5 pound... I wired wheeled the block yesterday so it will be painting ti,e aswell..
Mike
Mike
-
B7
- E30 Zone Team Member
- Posts: 15846
- Joined: Tue Feb 13, 2007 11:00 pm
- Location: Surrey / West Sussex
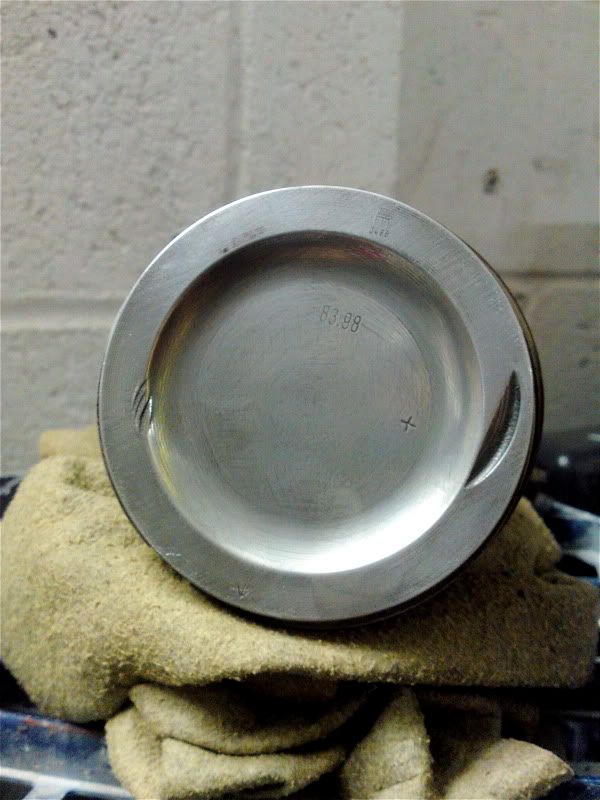
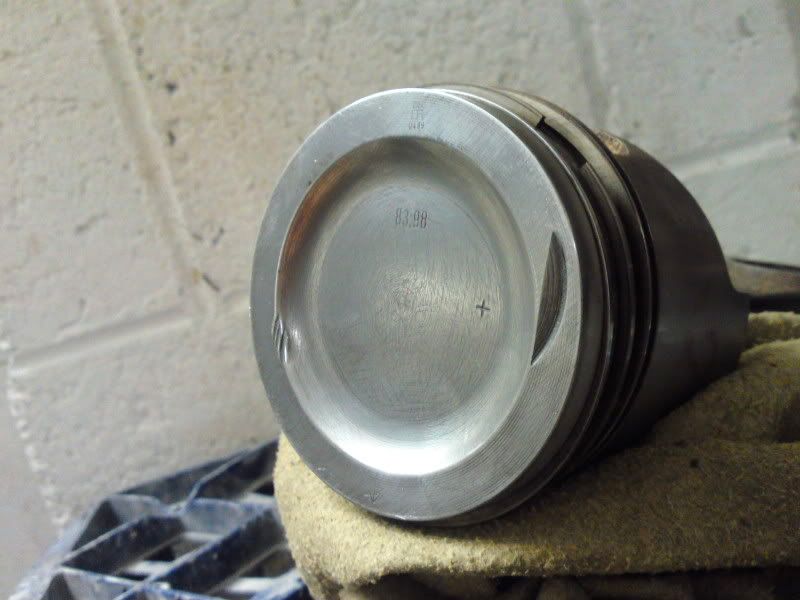
That pistons seen valve action as well. Opposite the inlet valve machining the exhaust has hit 3 times.
Looks mighty clean now. Something very medicinal cleaning parts i think
Looks mighty clean now. Something very medicinal cleaning parts i think
B7's Motto. "If it's French, BURN IT!!!!!!"
-
m_jermyn
- E30 Zone Team Member
- Posts: 4208
- Joined: Sat Mar 14, 2009 11:00 pm
- Location: Sydney Australia Mate
B7 Yeah all of the pistons have had a little valve damage, The previous owner was a wannabe rev head and the stock eta heads only have one valve spring not a double set up.. I suspect its suffered a little valve float..
I think my new head will be getting some brand new springs..
Mike
I think my new head will be getting some brand new springs..
Mike
-
m_jermyn
- E30 Zone Team Member
- Posts: 4208
- Joined: Sat Mar 14, 2009 11:00 pm
- Location: Sydney Australia Mate
Still cleaning down engine parts, also been painting the alternator, starter, engine covers and cam cover.
Rocker cover done in aluminium *spelling* with polished raised bits... Was going to do it in black or dark grey but I think the engine bay looks a little dark... Besides im going for more of a stock look.

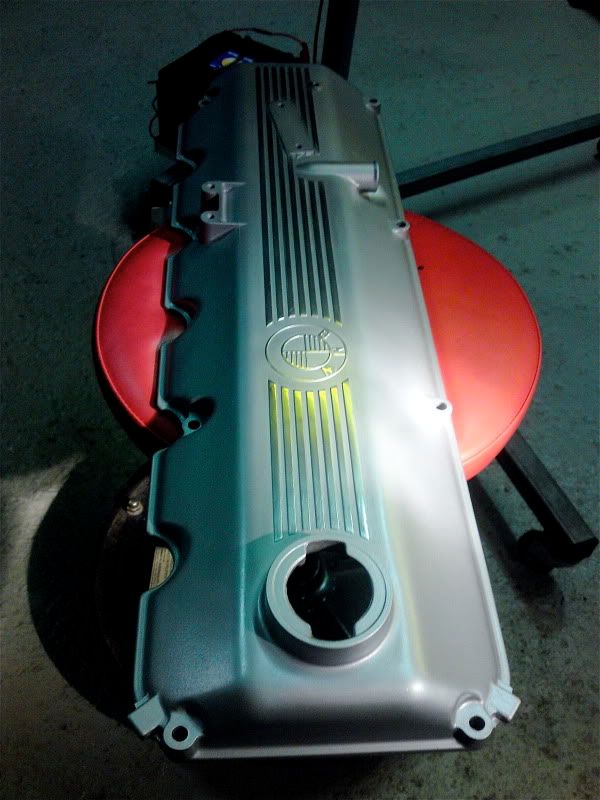
What you think?
Mike
Rocker cover done in aluminium *spelling* with polished raised bits... Was going to do it in black or dark grey but I think the engine bay looks a little dark... Besides im going for more of a stock look.
What you think?
Mike
-
gooner1

- Out humping Reindeer
- Posts: 13280
- Joined: Fri Apr 14, 2006 11:00 pm
- Location: Northampton.For my sins.
Kerosene is just another word for Paraffin, the old Heating oil.

-
Simon13
- The longest resto in the world !
- Posts: 22697
- Joined: Mon Jan 10, 2005 11:00 pm
- Location: Camberley, Surrey don't u know
ah i see my old man uses paraffin on his bike stuff
-
Tedswagon
- E30 Zone Addict
- Posts: 2195
- Joined: Sun Nov 23, 2008 11:00 pm
- Location: Edinburgh
Doing a brillian job. I'd guess this might be a bit late but there is a wiki on here for a head strip and rebuild. Also one for setting valve clearances. I just found them last night!
http://www.e30zone.net/e30zonewiki/inde ... inder_Head
http://www.e30zone.net/e30zonewiki/inde ... M20_engine
http://www.e30zone.net/e30zonewiki/inde ... inder_Head
http://www.e30zone.net/e30zonewiki/inde ... M20_engine
E30 316i auto coupe build thread here viewtopic.php?f=25&t=273035
-
m_jermyn
- E30 Zone Team Member
- Posts: 4208
- Joined: Sat Mar 14, 2009 11:00 pm
- Location: Sydney Australia Mate
I will be using the wiki when it comes time to do the head..
-
m_jermyn
- E30 Zone Team Member
- Posts: 4208
- Joined: Sat Mar 14, 2009 11:00 pm
- Location: Sydney Australia Mate
Got me a flywheel today... Its off a 323i and this means I can get to balancing the motor now... I have given up on finding a ETA flywheel and this will just have to do.... I will have to do a motronic upgrade too..
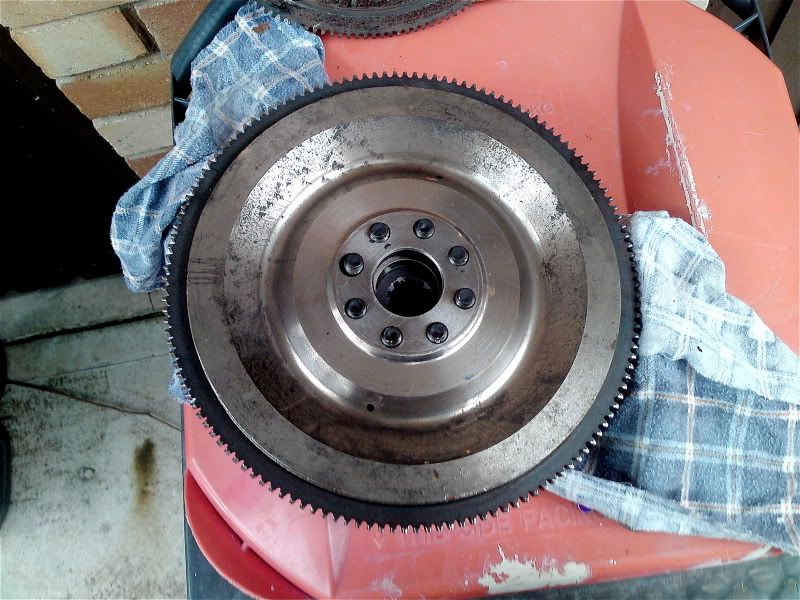
And I got the clutch and pressure plate thrown in...
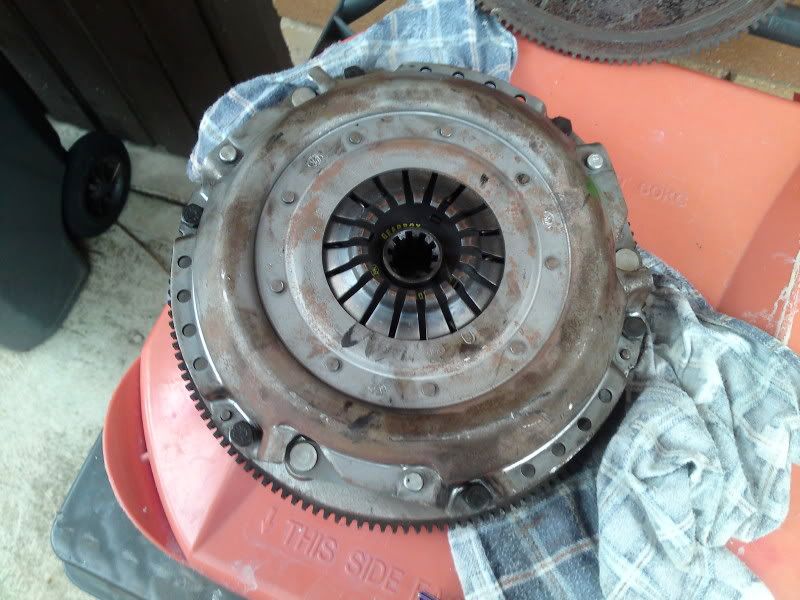
And I got the clutch and pressure plate thrown in...
-
Simon13
- The longest resto in the world !
- Posts: 22697
- Joined: Mon Jan 10, 2005 11:00 pm
- Location: Camberley, Surrey don't u know
your flywheel looks exactly the same as a 2.0 and 2.5 fly. Whats the crack with a eta flywheel then? its not some dual mass sh!te is it?!
-
m_jermyn
- E30 Zone Team Member
- Posts: 4208
- Joined: Sat Mar 14, 2009 11:00 pm
- Location: Sydney Australia Mate
Gday Simon,
The flywheel I got is a 323I one and I weighed it today at 8.415kgs... Yeah I am told my eta one will be a dual mass pooper... I had to get one for the build anyway and was looking for a eta one with the rare as rocking horse poo timing marker on it but I gave up as there just isnt any around now...
I had to get a normal one and will have to upgrade the motronic as the 323 one does not have the marker on it..
-
m_jermyn
- E30 Zone Team Member
- Posts: 4208
- Joined: Sat Mar 14, 2009 11:00 pm
- Location: Sydney Australia Mate
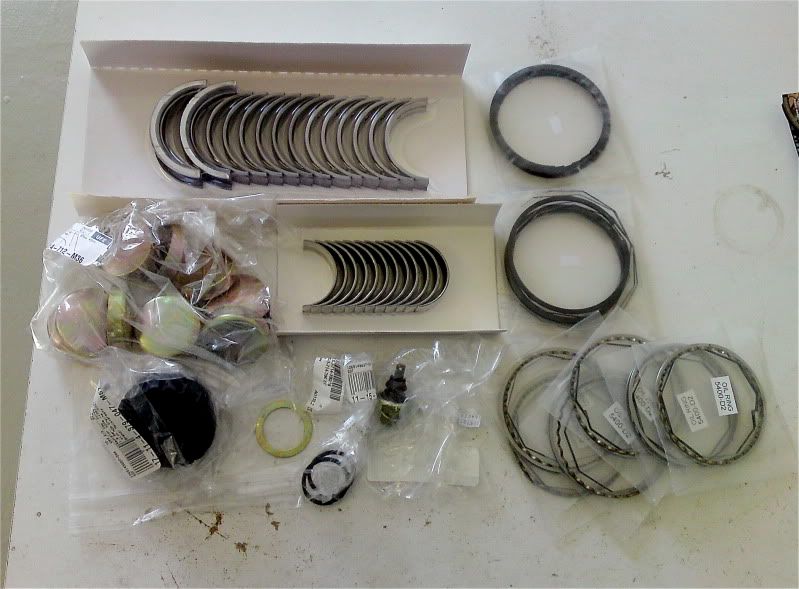
These bit came last week
New rings, main & rod bearings, oil sensor, radiator cap, welsh plugs and various washers... This sees the bottom end complete with all brand new parts..
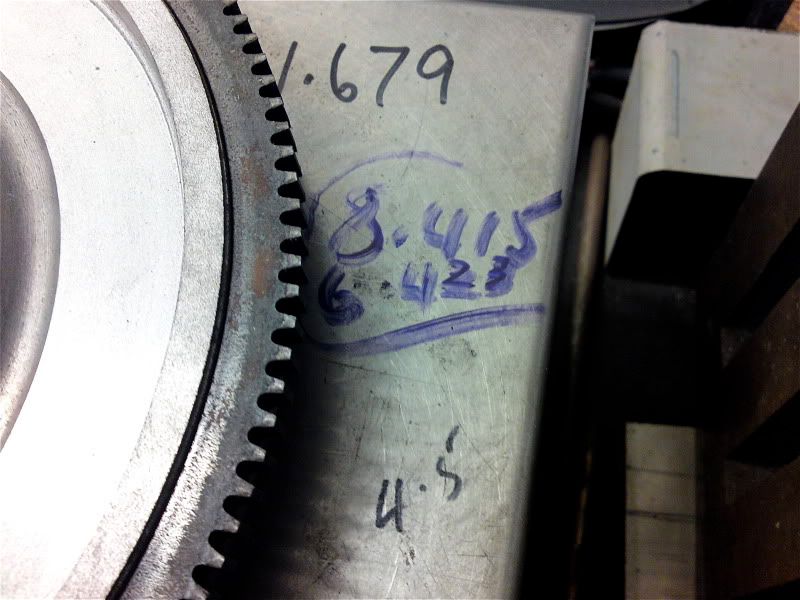
Machined the flyweel today...
Before..

After..
As you can see the weight has been taken out off the very most possible edge.. I left the just a tiny bit on the edge so there is something for the ring gear to bind too.. I didnt want to make it too thin here but its around 5mm taken off the very edge.
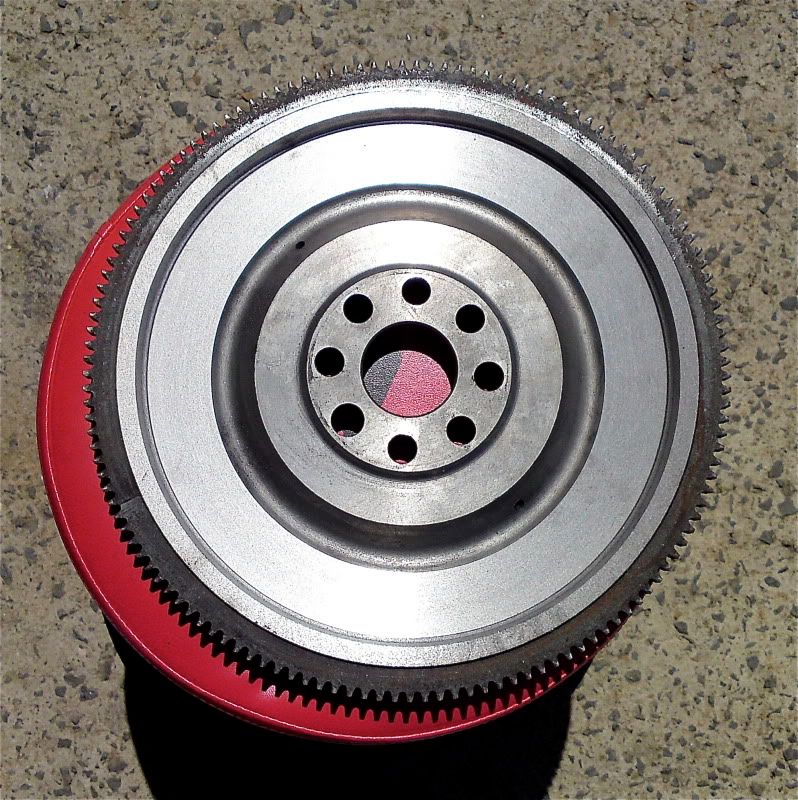
Here is the weights of the flywheel before and what it is now 8.415 - 6.423.. I could of taken more but this is no race car just a spritely road car..
Thats it for now hope to get a little bit more done this week.
Mike[/img]
New rings, main & rod bearings, oil sensor, radiator cap, welsh plugs and various washers... This sees the bottom end complete with all brand new parts..
Machined the flyweel today...
Before..
After..
As you can see the weight has been taken out off the very most possible edge.. I left the just a tiny bit on the edge so there is something for the ring gear to bind too.. I didnt want to make it too thin here but its around 5mm taken off the very edge.
Here is the weights of the flywheel before and what it is now 8.415 - 6.423.. I could of taken more but this is no race car just a spritely road car..
Thats it for now hope to get a little bit more done this week.
Mike[/img]
-
m_jermyn
- E30 Zone Team Member
- Posts: 4208
- Joined: Sat Mar 14, 2009 11:00 pm
- Location: Sydney Australia Mate
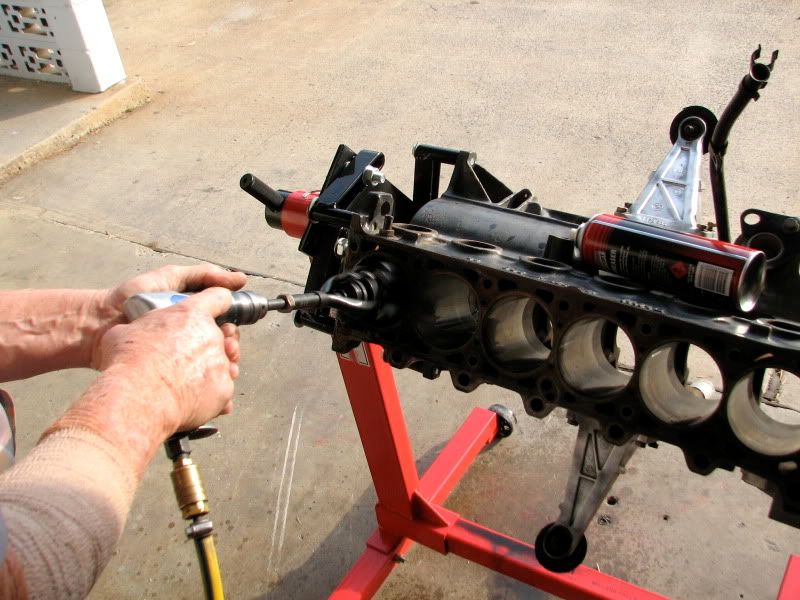
Finally got around to doing some work on the motor today... Started off by balancing the crank.... Fair way out of balance by the way, was expecting more from a BMW.. This got us thinking that maybe they balance them with the flywheel on... With the flywheel bolted to the crank this did improve things somewhat so we went from there.. Once the crank and flywheel were balanced then we did it with the pressure plate..
Let the pics do the talking..
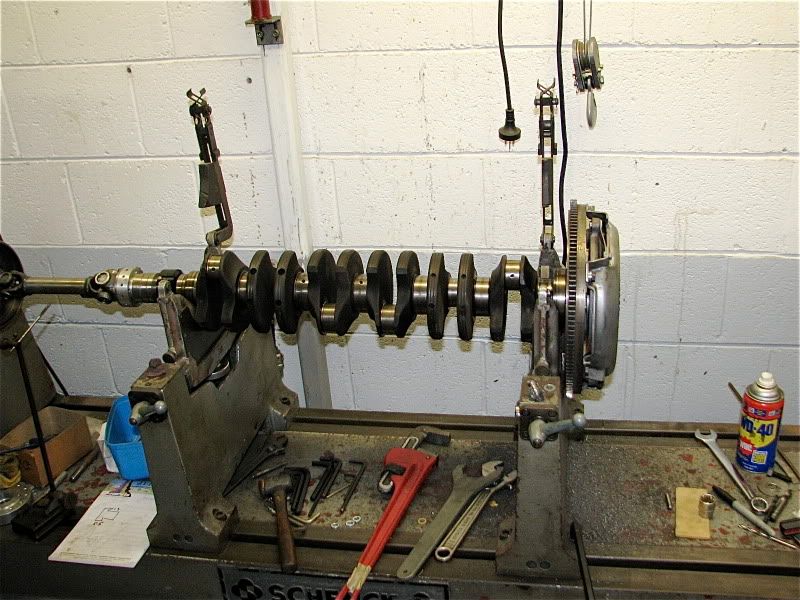
Crank on the balancer
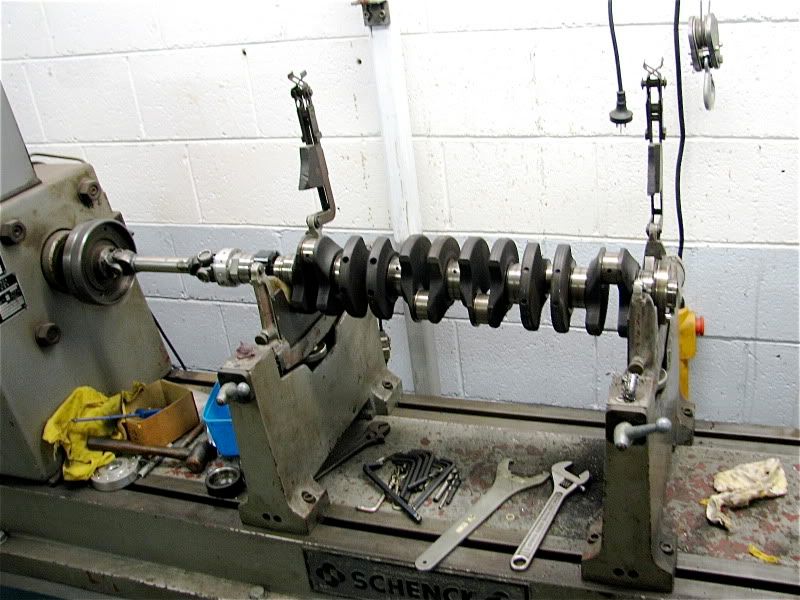
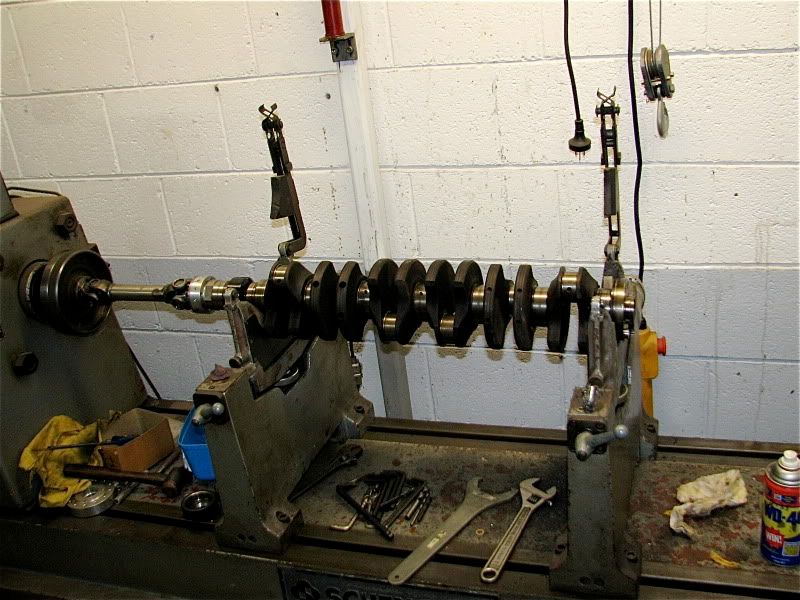
Added the flywheel
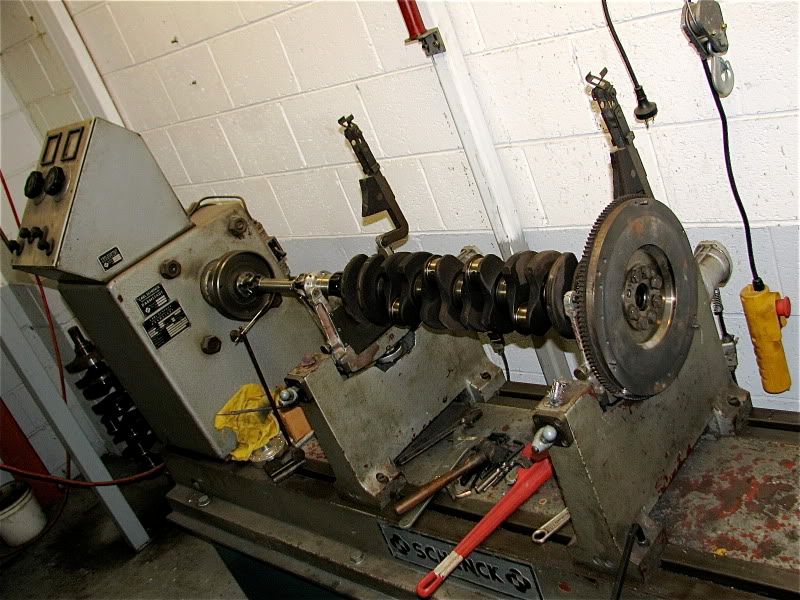
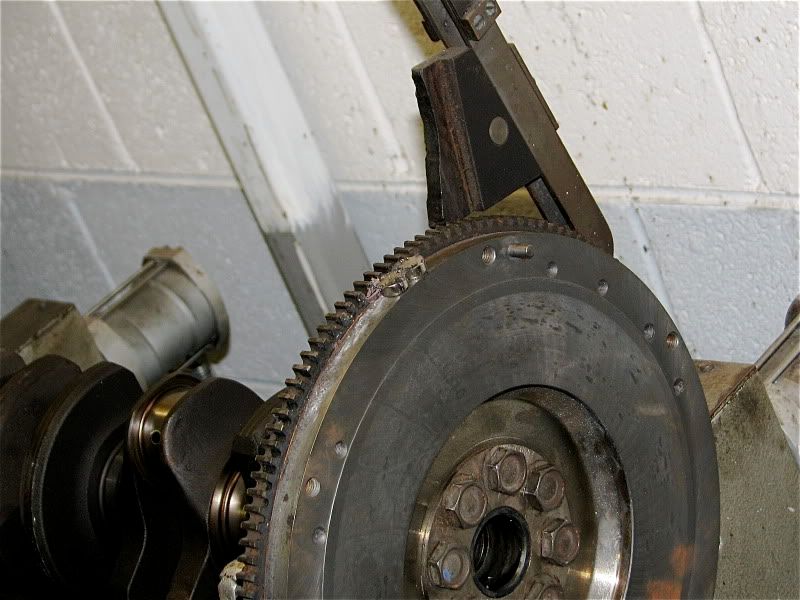
Close up of the flywheel... You can see the holes drilled in it for balancing, these were all factory balancing holes by the way we have not drilled any yet.. Note also the magnets these go on the light side to see if the extra weight makes any difference before we take some weight out of the heavy side.
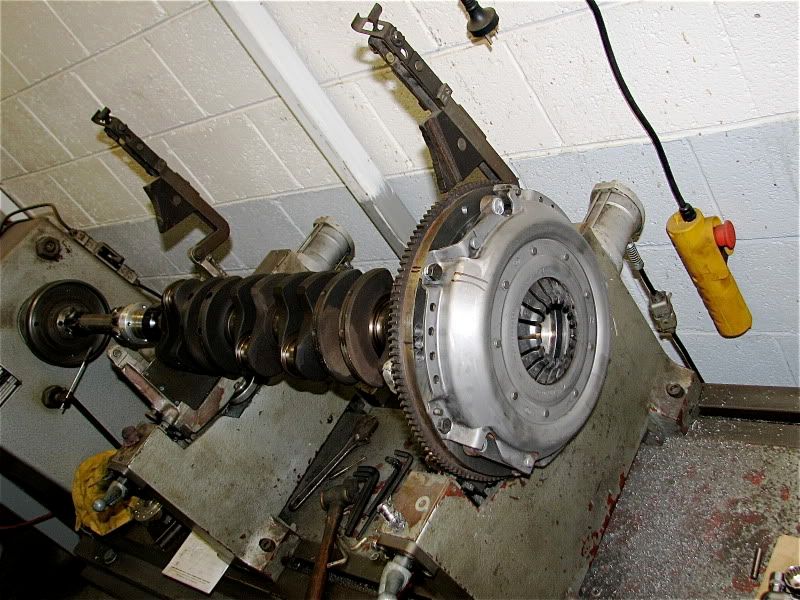
Once the crank and flywheel are balanced the pressure plate is added... The pressure plate already had some balance marks in it from factory and it was almost spot on.
Should be weighing all the pistons and rods during the week completing the balancing and also honing the block.. Then I can put it all back together..
Mike
Let the pics do the talking..
Crank on the balancer
Added the flywheel
Close up of the flywheel... You can see the holes drilled in it for balancing, these were all factory balancing holes by the way we have not drilled any yet.. Note also the magnets these go on the light side to see if the extra weight makes any difference before we take some weight out of the heavy side.
Once the crank and flywheel are balanced the pressure plate is added... The pressure plate already had some balance marks in it from factory and it was almost spot on.
Should be weighing all the pistons and rods during the week completing the balancing and also honing the block.. Then I can put it all back together..
Mike
-
Royalratch

- E30 Zone Addict
- Posts: 4921
- Joined: Sat Oct 21, 2006 11:00 pm
- Location: London
Smart stuff - you in the trade?
-
DanThe
- E30 Zone Team Member
- Posts: 28649
- Joined: Sat Sep 10, 2005 11:00 pm
- Location: Staffs
Ive had a few cranks balanced and they have all been out by more than expected, the guy who did them told me he did a load of M5 cranks (S38) for a tuning company and they were all way out of balance!
I also had the flywheel/cover plate done at the same time
Good job
I also had the flywheel/cover plate done at the same time
Good job
-
m_jermyn
- E30 Zone Team Member
- Posts: 4208
- Joined: Sat Mar 14, 2009 11:00 pm
- Location: Sydney Australia Mate
Royalratch.. I am no mechanic mate or machinist for that matter but I am in the automotive trade paint/panel.. A few doors down from where I work there is a very clever man that builds all sort of things, he is a aircraft engineer.. I have watched him balance cranks before and he volunteered to do mine.. Ide be a idiot not to take him up on it. 
DanThe... I honestly thought a BMW would be alot better then others but I guess not.. It will be silky smooth now though.
DanThe... I honestly thought a BMW would be alot better then others but I guess not.. It will be silky smooth now though.
-
m_jermyn
- E30 Zone Team Member
- Posts: 4208
- Joined: Sat Mar 14, 2009 11:00 pm
- Location: Sydney Australia Mate
Small update...
Weighed all the pistons on monday.. Not enough difference in their weights to worry about... works out to be around 3% in difference and then when you combine it with the weight of the crank flywheel and pressure plate it is more like .03%
Then started to hone the block..
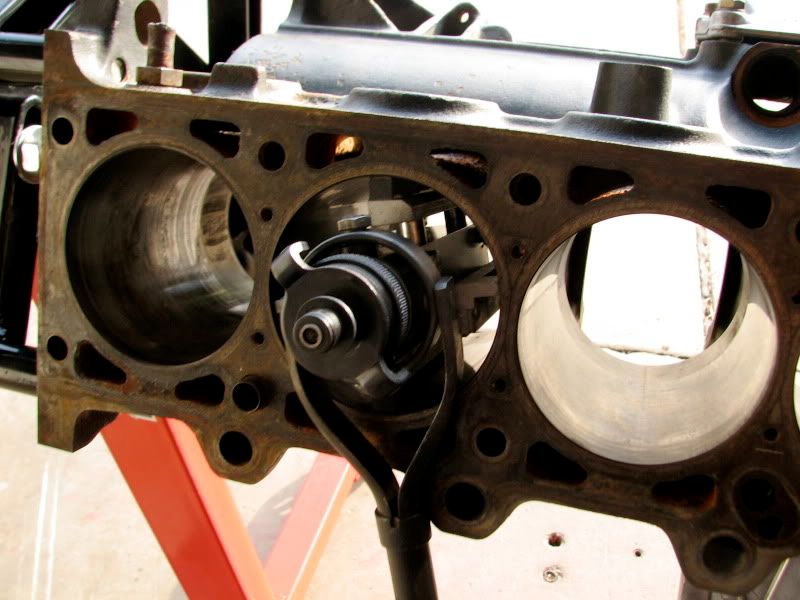
But then we found this... Rust in the bore that actually pitted
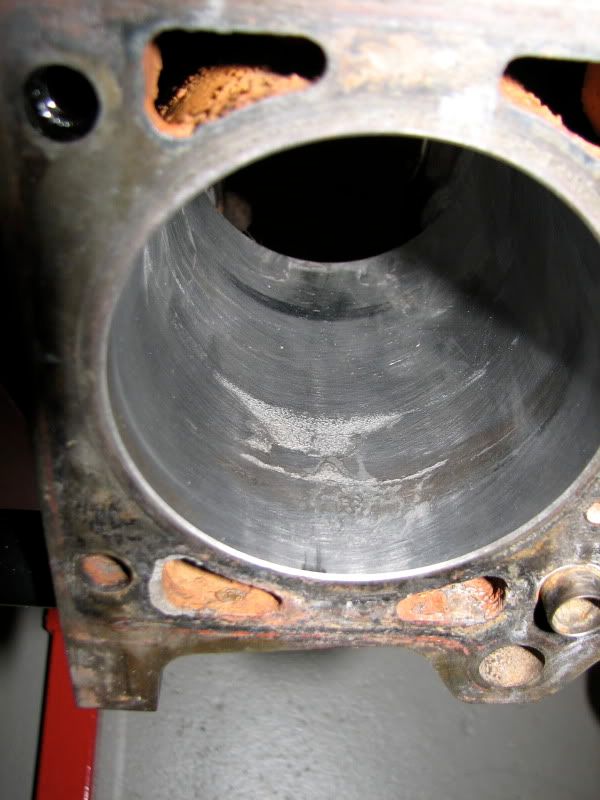
This means I have to get that bore sleeved... Bugger $300 more to spend
Weighed all the pistons on monday.. Not enough difference in their weights to worry about... works out to be around 3% in difference and then when you combine it with the weight of the crank flywheel and pressure plate it is more like .03%

Then started to hone the block..


But then we found this... Rust in the bore that actually pitted

This means I have to get that bore sleeved... Bugger $300 more to spend
-
MillRat
- E30 Zone Newbie

- Posts: 249
- Joined: Mon Dec 07, 2009 11:00 pm
- Location: Santiago, Chile
Ouch that sucks after all that effort.
1mm over-bore is the only solution
Did someone say 3.0L stroker...?
1mm over-bore is the only solution
Did someone say 3.0L stroker...?

Cheers,
Michael.
-
m_jermyn
- E30 Zone Team Member
- Posts: 4208
- Joined: Sat Mar 14, 2009 11:00 pm
- Location: Sydney Australia Mate
Yeah I did think about oversized pistons but at $250 each that ends up to be $1500 then a rebore on all 6 cylinders its mighty expensive... THe cheapest way out is a sleeve where they bore out the cylinder and the drop a new sleeve in it, and then bore it back to 84mm OEM... This way I can retain the same pistons..
-
Royalratch
- E30 Zone Addict
- Posts: 4921
- Joined: Sat Oct 21, 2006 11:00 pm
- Location: London
The rust in the waterways isn'y an issue?
-
m_jermyn
- E30 Zone Team Member
- Posts: 4208
- Joined: Sat Mar 14, 2009 11:00 pm
- Location: Sydney Australia Mate
No not rings I mean pistons..... £135 for each piston and x that by 6 then add the cost of boring every cylinder to fit a oversized piston and then you can add the cost of oversize piston ring set..
http://www.pelicanparts.com/bmw/catalog ... htm#item23
And I am not talking about rust in the waterways.. Look closely at the bore and you can see pitting in it , this is why it needs to be sleeved or bored to get rid of the pitting.. Sleeving is the cheaper option
http://www.pelicanparts.com/bmw/catalog ... htm#item23
And I am not talking about rust in the waterways.. Look closely at the bore and you can see pitting in it , this is why it needs to be sleeved or bored to get rid of the pitting.. Sleeving is the cheaper option
-
Royalratch
- E30 Zone Addict
- Posts: 4921
- Joined: Sat Oct 21, 2006 11:00 pm
- Location: London
Lol.
My Piston Ring is my sig.
I know you were talking about the bores, I'm talking about the waterway channels in the block - they look quite rusty and wondered for this is an issue or how they can be cleaned.
My Piston Ring is my sig.
I know you were talking about the bores, I'm talking about the waterway channels in the block - they look quite rusty and wondered for this is an issue or how they can be cleaned.
-
m_jermyn
- E30 Zone Team Member
- Posts: 4208
- Joined: Sat Mar 14, 2009 11:00 pm
- Location: Sydney Australia Mate
I feel like a dick now lol bahahaha... The rust in the waterways can be removed by chemically cleaning the block... They dip it in some solution im told and it comes up minty.. I am told though it wont be a issue but I will probably do it anyway..