
Jozi's m52 touring - Rebuilding has started
Moderator: martauto
-
Rav335uk
- E30 Zone Meets/Events Team

- Posts: 27985
- Joined: Wed Jan 19, 2005 11:00 pm
- Location: Mad mad mad
Moonroof????

If you Got "Haters",Then your doing something Right!
CR24v??? Where's it all gone?? LOL
-
Jozi

- E30 Zone Addict

- Posts: 3076
- Joined: Thu Nov 22, 2007 11:00 pm
- Location: Dublin, Ireland
Not a moon roof. Kinda thing neither a touring or cabby got and you don't need at all ;)

-
G-Bear
- E30 Zone Squatter

- Posts: 1632
- Joined: Wed Mar 12, 2008 11:00 pm
- Location: Hertfordshire
Looking good 
Shiny undercarriage's rock.
Shiny undercarriage's rock.
-
Jozi
- E30 Zone Addict
- Posts: 3076
- Joined: Thu Nov 22, 2007 11:00 pm
- Location: Dublin, Ireland
Going to be a shame to drive it and get it dirty :pG-Bear wrote:Looking good
Shiny undercarriage's rock.
My engine is going to let down the whole lot if I don't get it cleaned as well as the rest!
-
Jozi
- E30 Zone Addict
- Posts: 3076
- Joined: Thu Nov 22, 2007 11:00 pm
- Location: Dublin, Ireland
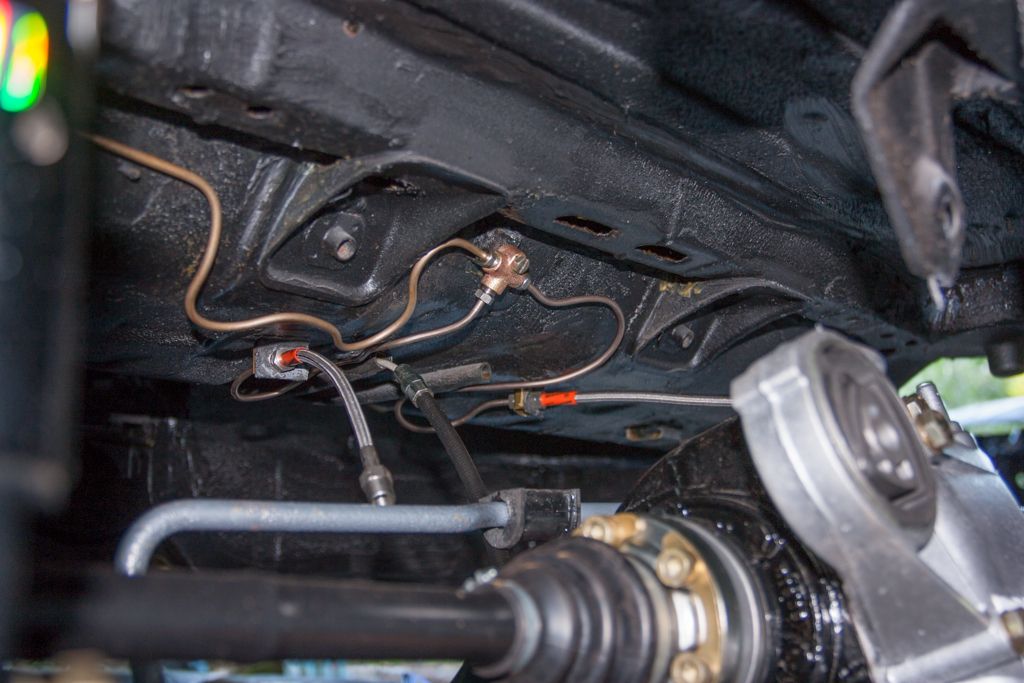
Slowly but surely things are coming together. I spent the last 4 days or so doing the brake and fuel lines.
I didn't enjoy these 2 jobs at all and hope not to have to do them for a long time! I used kunifer hardlines all round with stainless braided lines and also stainless brake nuts.
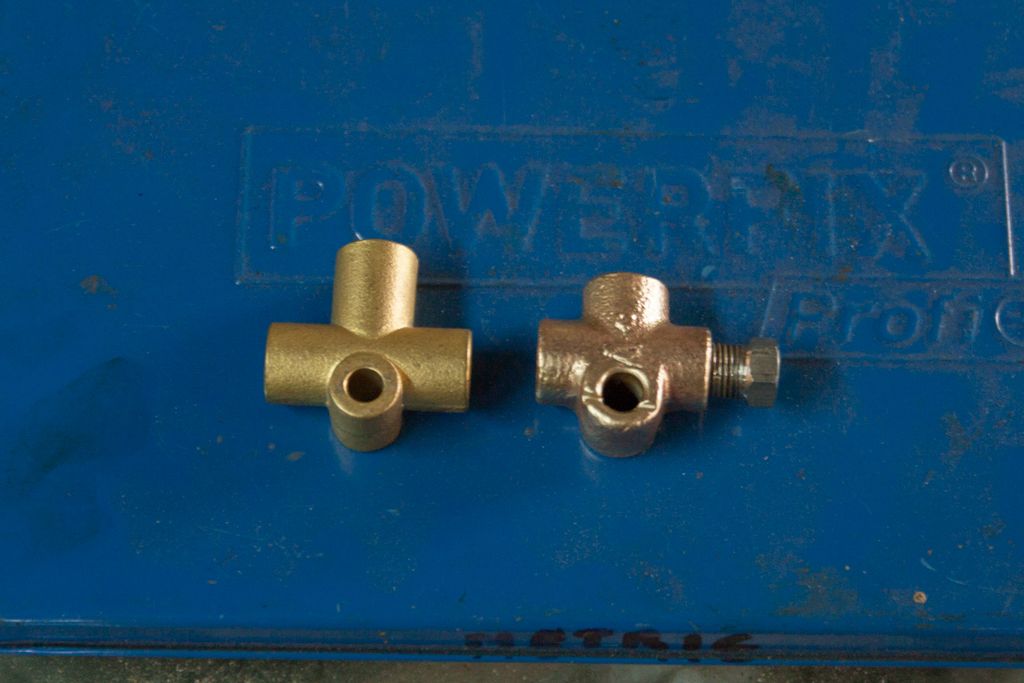
I had bought a new T-Piece which turned out to be imperial so I atacked the old one with the angle grinder and used it, should be fine anyway.
Lines at the rear of the car
Few small problems When I mocked up my ABS relocation I must have used the E30 servo, which I think isn't as deep as the Clio one
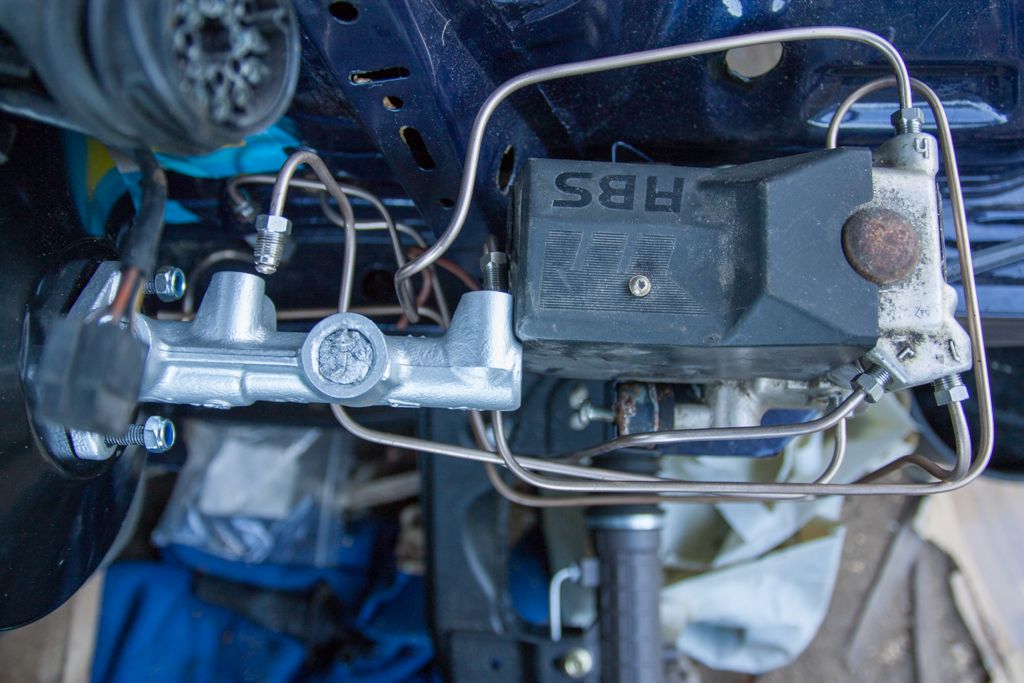
With everything tightened up properly there's maybe 2mm between the two, might just have to shave a corner of the abs cover!
I also have a problem with the servo and a brake line clip getting in the way of each other
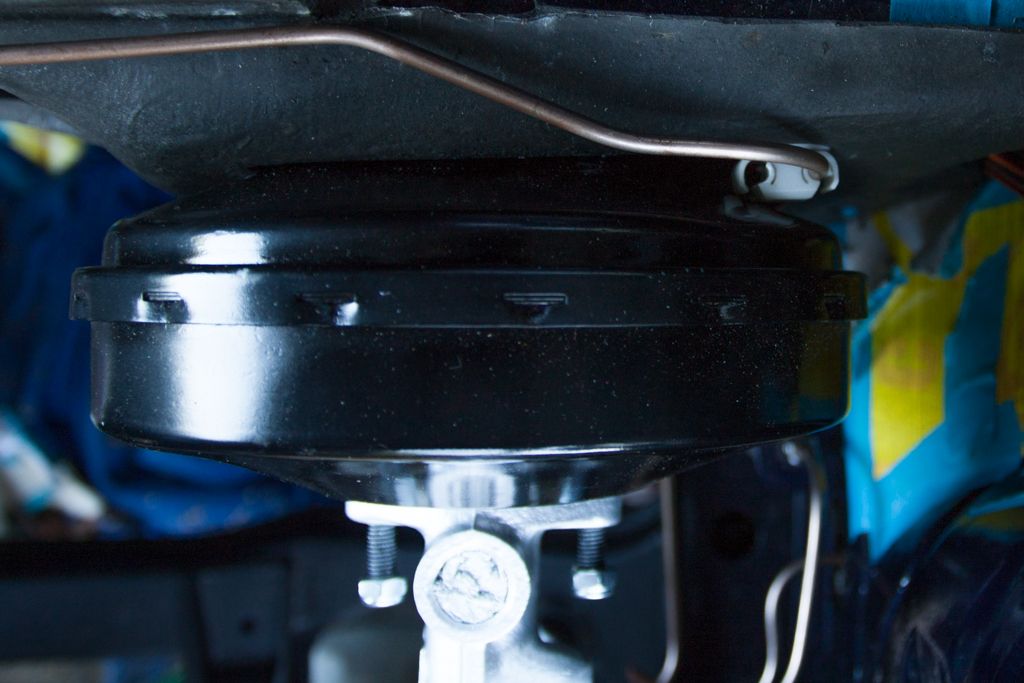
Dent the servo or shave a little of the clip? If I space the servo out I might not be able to bolt it up and it will foul the ABS unit.
Another problem noticed when doing the brake lines is that my diff isn't centred, is this normal, should I be worried? I couldnt seem to move it to the centre when I tried.
I also got the fuel lines installed but no pics apparently, just need to trim them in the back and by the tank next tiem I'm home.
Anyone know can the tank go on with the subframe in place or does it need to come off?
I'm also missing the 2x pipes that are supposed to run over the top of the tank if anyone has them?
I didn't enjoy these 2 jobs at all and hope not to have to do them for a long time! I used kunifer hardlines all round with stainless braided lines and also stainless brake nuts.
I had bought a new T-Piece which turned out to be imperial so I atacked the old one with the angle grinder and used it, should be fine anyway.
Lines at the rear of the car
Few small problems
With everything tightened up properly there's maybe 2mm between the two, might just have to shave a corner of the abs cover!
I also have a problem with the servo and a brake line clip getting in the way of each other
Dent the servo or shave a little of the clip? If I space the servo out I might not be able to bolt it up and it will foul the ABS unit.
Another problem noticed when doing the brake lines is that my diff isn't centred, is this normal, should I be worried? I couldnt seem to move it to the centre when I tried.
I also got the fuel lines installed but no pics apparently, just need to trim them in the back and by the tank next tiem I'm home.
Anyone know can the tank go on with the subframe in place or does it need to come off?
I'm also missing the 2x pipes that are supposed to run over the top of the tank if anyone has them?
-
G-Bear
- E30 Zone Squatter
- Posts: 1632
- Joined: Wed Mar 12, 2008 11:00 pm
- Location: Hertfordshire
Did you go for dealer fuel lines if new?
Nice to see more pics
Nice to see more pics
-
Jozi
- E30 Zone Addict
- Posts: 3076
- Joined: Thu Nov 22, 2007 11:00 pm
- Location: Dublin, Ireland
Nah bought a roll of kunifer of ebay and it was enough to do 3x lengths, I kinked the 1st one by accident.G-Bear wrote:Did you go for dealer fuel lines if new?
Nice to see more pics
I've an email in my inbox with prices for all the rubber ones, I think I'll probably get fuel hose from ash its fluero lined or something.
-
Demlotcrew
- E30 Zone Team Member

- Posts: 13329
- Joined: Mon Dec 20, 2004 11:00 pm
- Location: East Anglia
The pinion on the differential is to one side, the case is central, nothing to worry about  good effort with the build, looks great!

-
Rav335uk
- E30 Zone Meets/Events Team
- Posts: 27985
- Joined: Wed Jan 19, 2005 11:00 pm
- Location: Mad mad mad
Get your parcel OK then Brendan?? 
If you Got "Haters",Then your doing something Right!
CR24v??? Where's it all gone?? LOL
-
Jozi
- E30 Zone Addict
- Posts: 3076
- Joined: Thu Nov 22, 2007 11:00 pm
- Location: Dublin, Ireland
Cheers. I had a few others tell me it was normal. Diff is bolted up again, subframe just needs the plates bolting to the sills. Rear arb also on, had to file oit one of the holes for the arb mount.
Also started rebuilding the callipers, rears are done but i think i need new slider pins for the front.
Will get some pics up after the weekend.
Rav, sure did, sent you a msg on whatsapp last week but you must npt have got it?
Also started rebuilding the callipers, rears are done but i think i need new slider pins for the front.
Will get some pics up after the weekend.
Rav, sure did, sent you a msg on whatsapp last week but you must npt have got it?
-
Demlotcrew
- E30 Zone Team Member
- Posts: 13329
- Joined: Mon Dec 20, 2004 11:00 pm
- Location: East Anglia
I think I have a brand new rebuild kit for the girling callipers, if I remember they have new pin bolts in them?
-
appletree
- E30 Zone Addict
- Posts: 3482
- Joined: Fri Jan 20, 2006 11:00 pm
- Location: Retford
Sure most kits come with the sliders, I was looking at them on ebay last week.
Nice to see all the new bits going togeather a treat, mines at a similar stage to yours on the rear, did you buy the drive shaft rebuild kits off bmw?
Nice to see all the new bits going togeather a treat, mines at a similar stage to yours on the rear, did you buy the drive shaft rebuild kits off bmw?

You should never underestimate the predictability of stupidity
M42 Supercharged 285bhp + M3 6speed box
-
Jozi
- E30 Zone Addict
- Posts: 3076
- Joined: Thu Nov 22, 2007 11:00 pm
- Location: Dublin, Ireland
They might be ok bit theres little shine of them. I rebuilt them a year or so before the car came of the road but never got sliders with the kit. They are 13quid a pair on ebay with new boots. The seals looked as new which os why i reused them again.
I shoukd have got the cv boots of bmw! I went through a few different sets i got from my local motor factors but none fit. The ones I fitted came of ebay, febi and unknown brand but they fit unlike the others i got.
Its nice working on the car knowing parts are going back on but its taking far to long getting to the point where i can put wheels on and roll it out for a much needed wash!
-
Jozi
- E30 Zone Addict
- Posts: 3076
- Joined: Thu Nov 22, 2007 11:00 pm
- Location: Dublin, Ireland
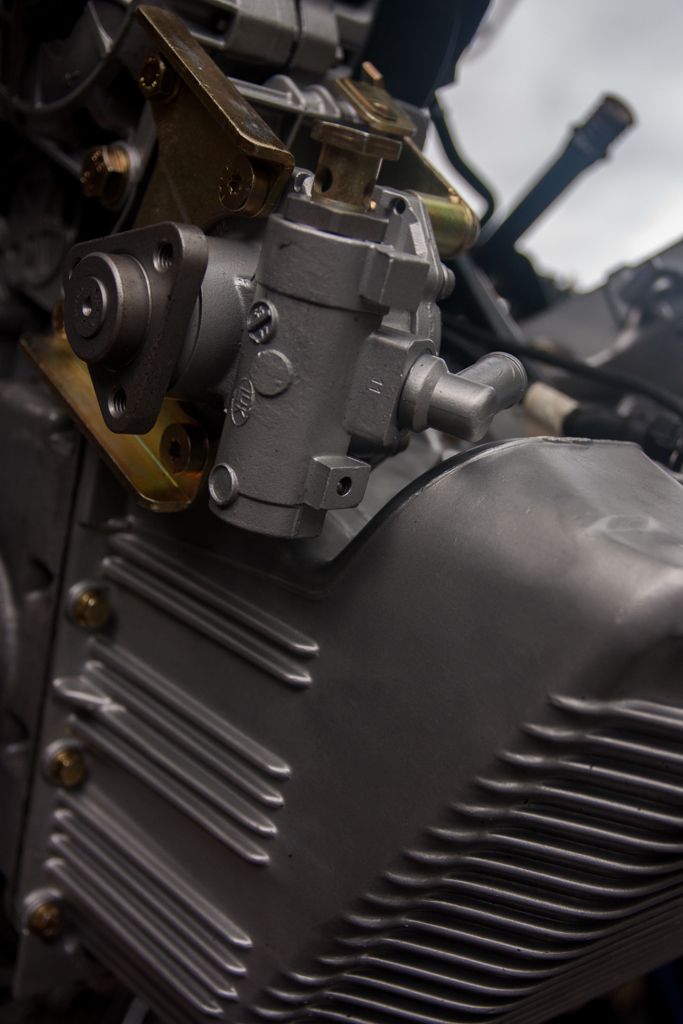
Small update, started cleaning the engine today, with looking about as good as I think I'll get it without stripping it all down and getting everything vapour blasted or using some other method to clean alloys.
I used Frost Ali-Clean to clean everthing after a de-greasing. While it does work it doesn't seem to get it spotless, the rough area's come up better than the smooth areas. You also need to protect the alloy again or it will corrode in no time, I'm using ACF-50 after hearing good things about it.
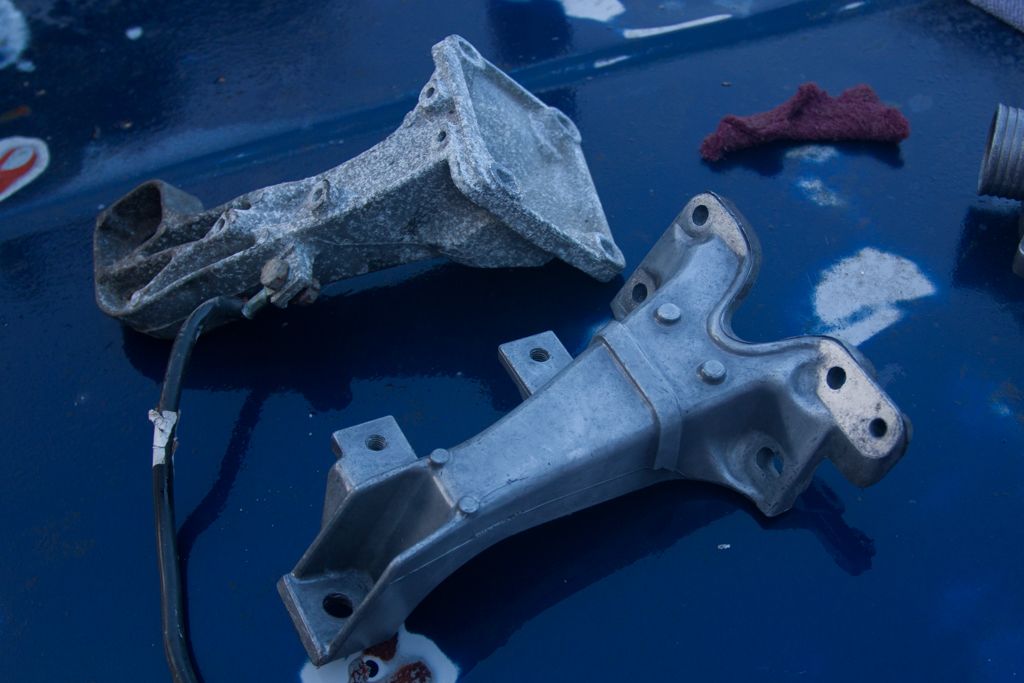
Before and after for one of the engine arms
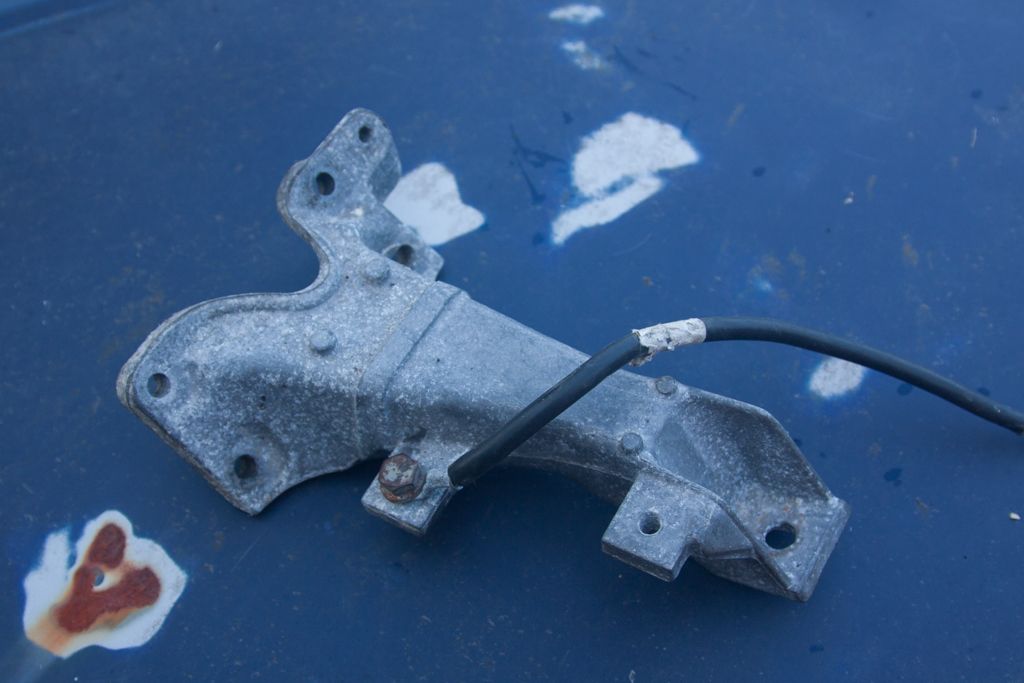
And just an after from the engine, it wasn't bad (started cleaning it before) but it had a bit of white corrosion over most of it.
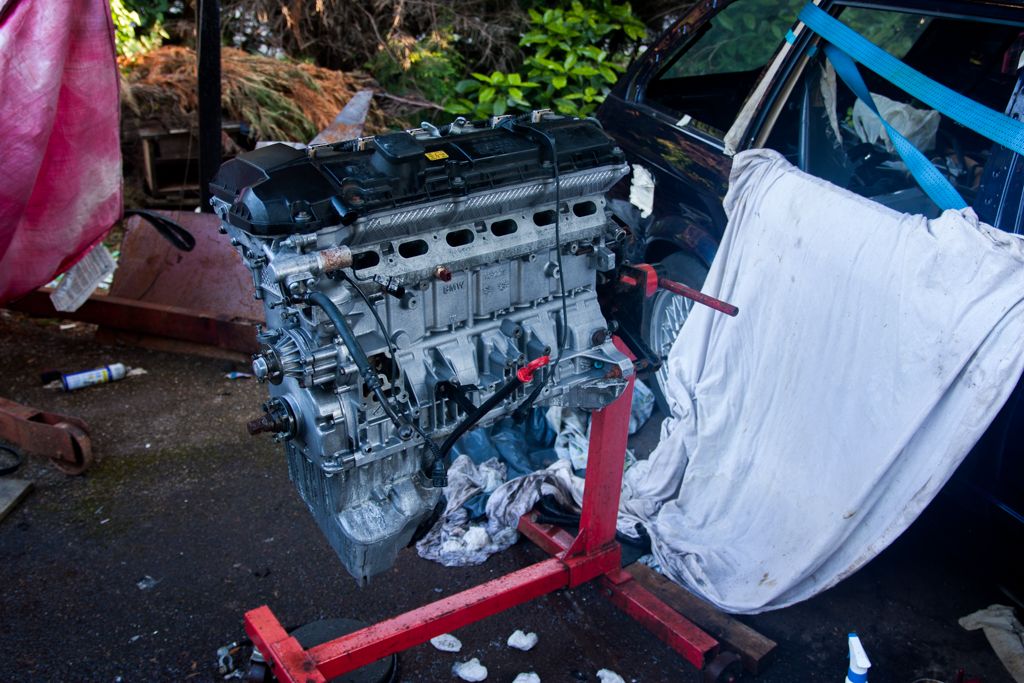
The exhaust side came up much better then the intake side. I'm debating doing the stat housing, oil filter housing, alternator and a few other parts myself or getting them vapour blasted.
I used Frost Ali-Clean to clean everthing after a de-greasing. While it does work it doesn't seem to get it spotless, the rough area's come up better than the smooth areas. You also need to protect the alloy again or it will corrode in no time, I'm using ACF-50 after hearing good things about it.
Before and after for one of the engine arms
And just an after from the engine, it wasn't bad (started cleaning it before) but it had a bit of white corrosion over most of it.
The exhaust side came up much better then the intake side. I'm debating doing the stat housing, oil filter housing, alternator and a few other parts myself or getting them vapour blasted.
-
appletree
- E30 Zone Addict
- Posts: 3482
- Joined: Fri Jan 20, 2006 11:00 pm
- Location: Retford
The exhaust side looks like new!
You should never underestimate the predictability of stupidity
M42 Supercharged 285bhp + M3 6speed box
-
Jozi
- E30 Zone Addict
- Posts: 3076
- Joined: Thu Nov 22, 2007 11:00 pm
- Location: Dublin, Ireland
Came up real well and only the nct guy will ever see it!
-
russ325i
- E30 Zone Newbie

- Posts: 141
- Joined: Sat Feb 19, 2005 11:00 pm
This is looking great Jozi, you're really taking this seriously - it'll be well worth it in the end so keep up the good work!
-
Jozi
- E30 Zone Addict
- Posts: 3076
- Joined: Thu Nov 22, 2007 11:00 pm
- Location: Dublin, Ireland
Thanks Russ!russ325i wrote:This is looking great Jozi, you're really taking this seriously - it'll be well worth it in the end so keep up the good work!
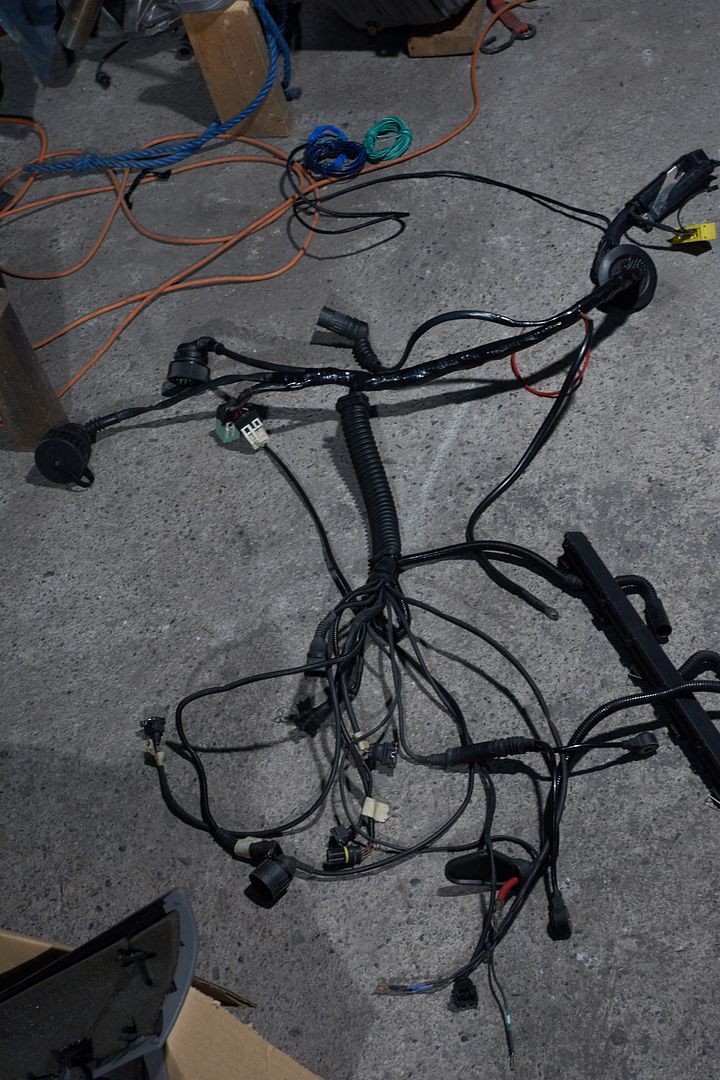
Gave the inside of the car a bit of a clean last weekend and started on the loom.
I did my best to keep it all neat when removed from the old car and I rolled up each loom run after I put it into the new shell. It didn't work out though
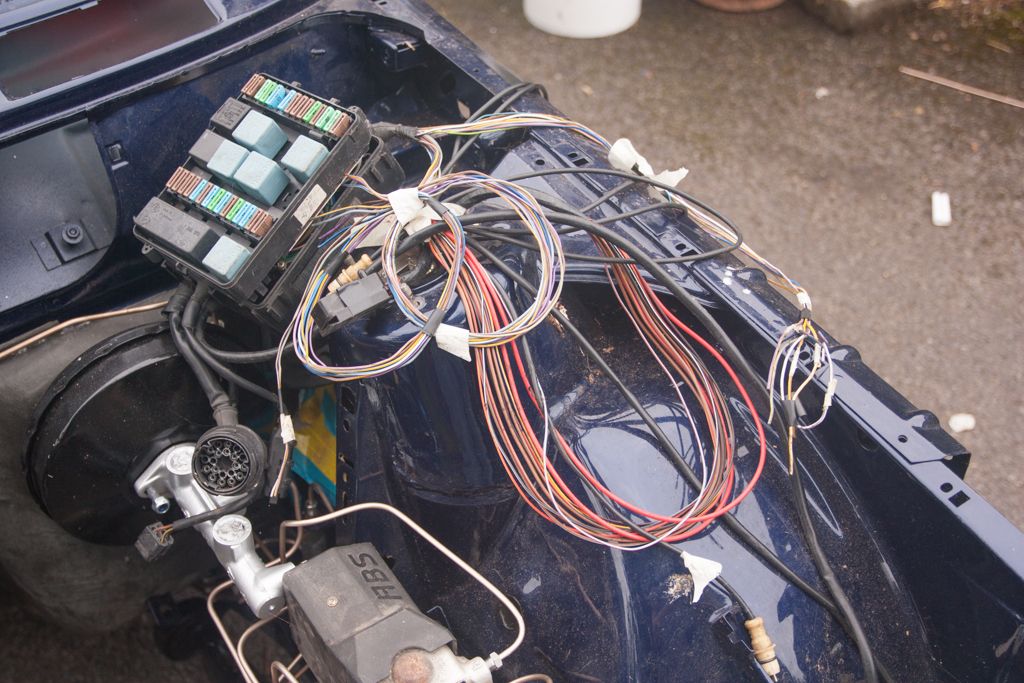
The rear end for the most part is in, it need clipping together here and there but it should all be in the right place.
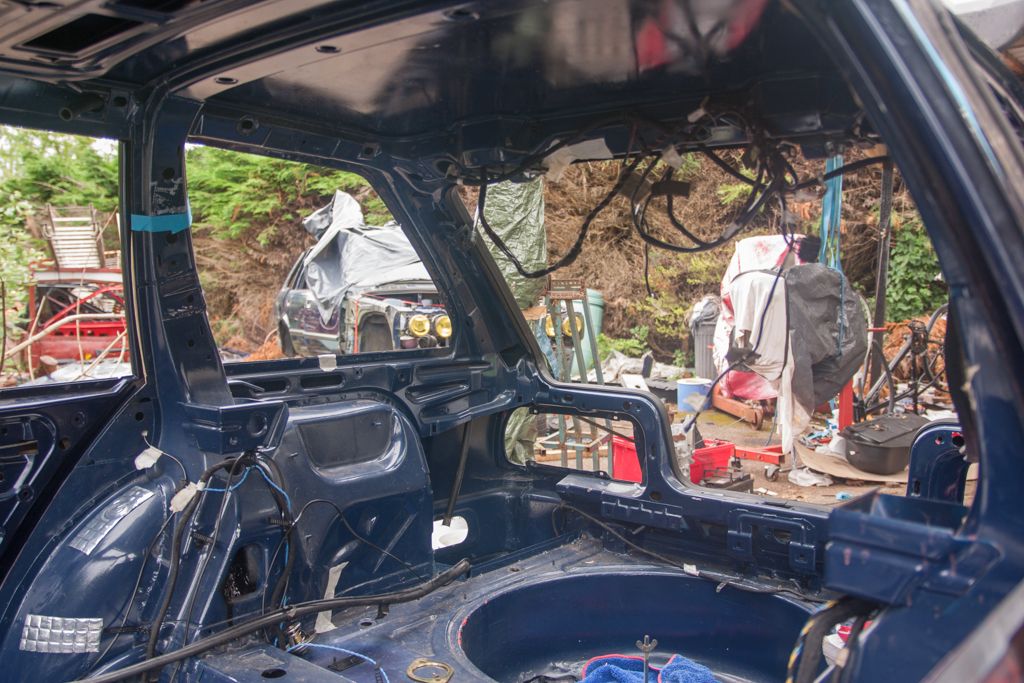
Front is still a bit of a mess, looms run where they should but arent tied down with anything clips or what not.
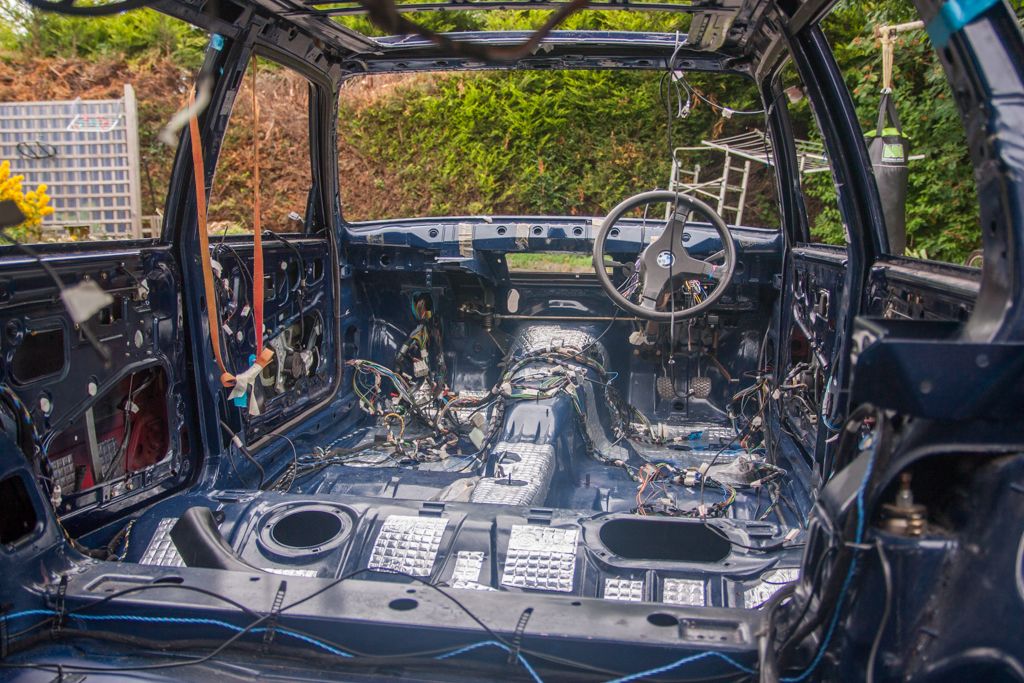
I'll try sort out this mess and work from there next time
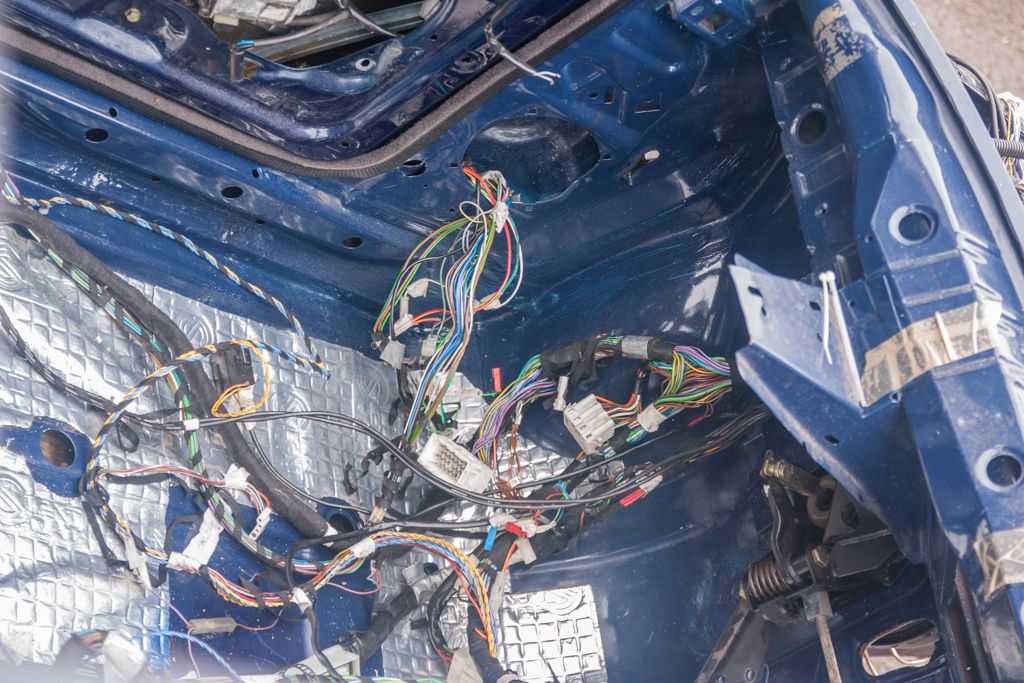
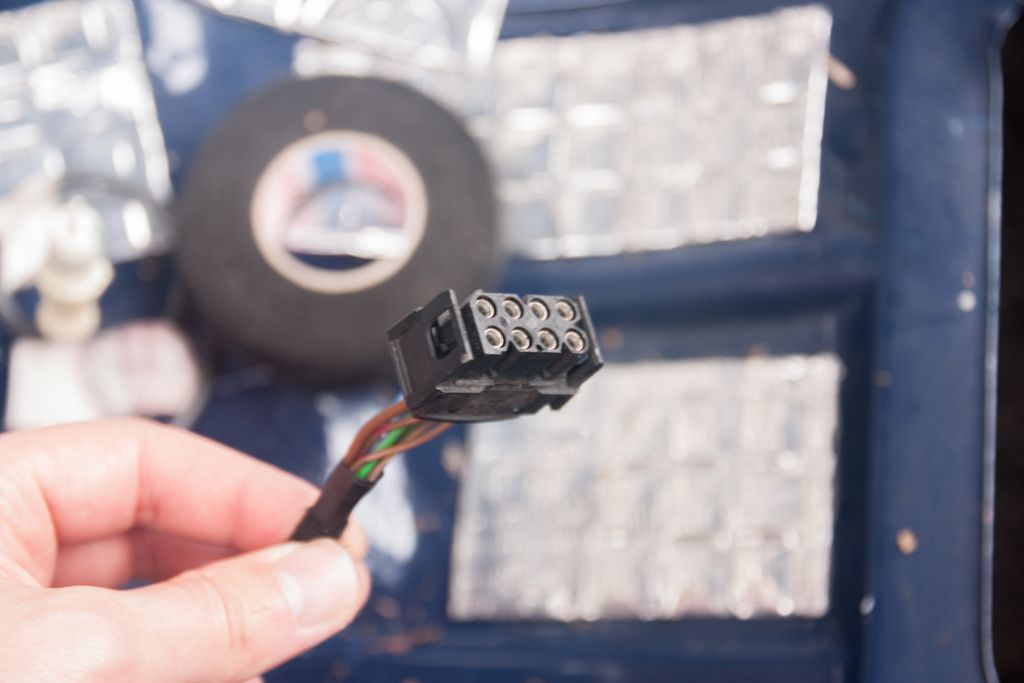
Few things I'm unsure of, are these bullit connectors meant to be there, they both have a wire coming out of them with a connector on the end
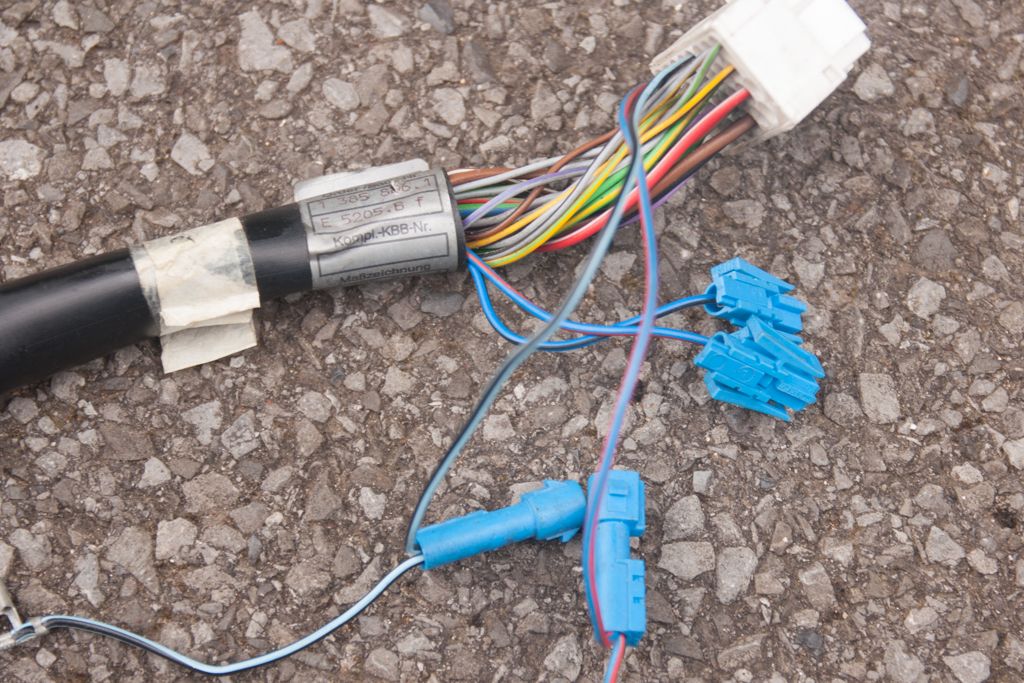
This plug is close to the fuel tank under the rear bench, driver side, I've not got a clue what it plugged into anymore?
Does anyone know which way BMW routed the battery to boot cable in the 324 or 325ix tourings? Should there be anything other than the standard wiring cover and what happens the wires running along the rear arch behind the trim panel?

This mess here will also need tidying up over the next few weeks
-
Jozi
- E30 Zone Addict
- Posts: 3076
- Joined: Thu Nov 22, 2007 11:00 pm
- Location: Dublin, Ireland
Not much to update really, have kinda lost a bit of interest for different reasons. Forgot I had these photo's on my camera.
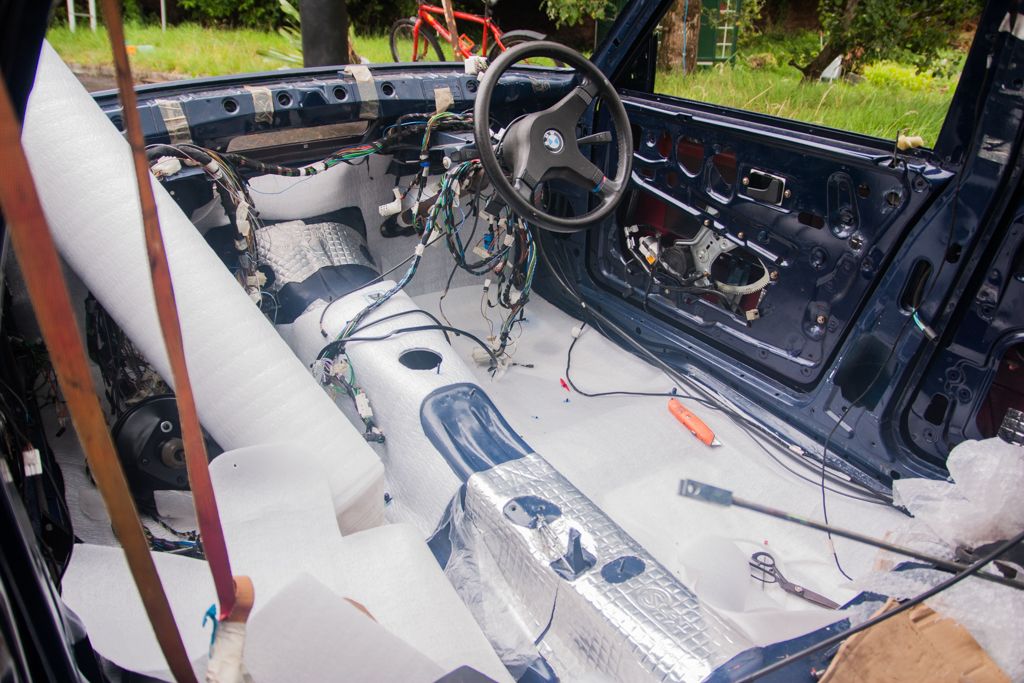
The white stuff is just carpet underlay which I'll be using as a decoupling layer between the car body and the sound deadening I'm using. I'm not sure if I'll be covering everything but at least I'll be doing behind the dash, under the rear seats and the boot area.
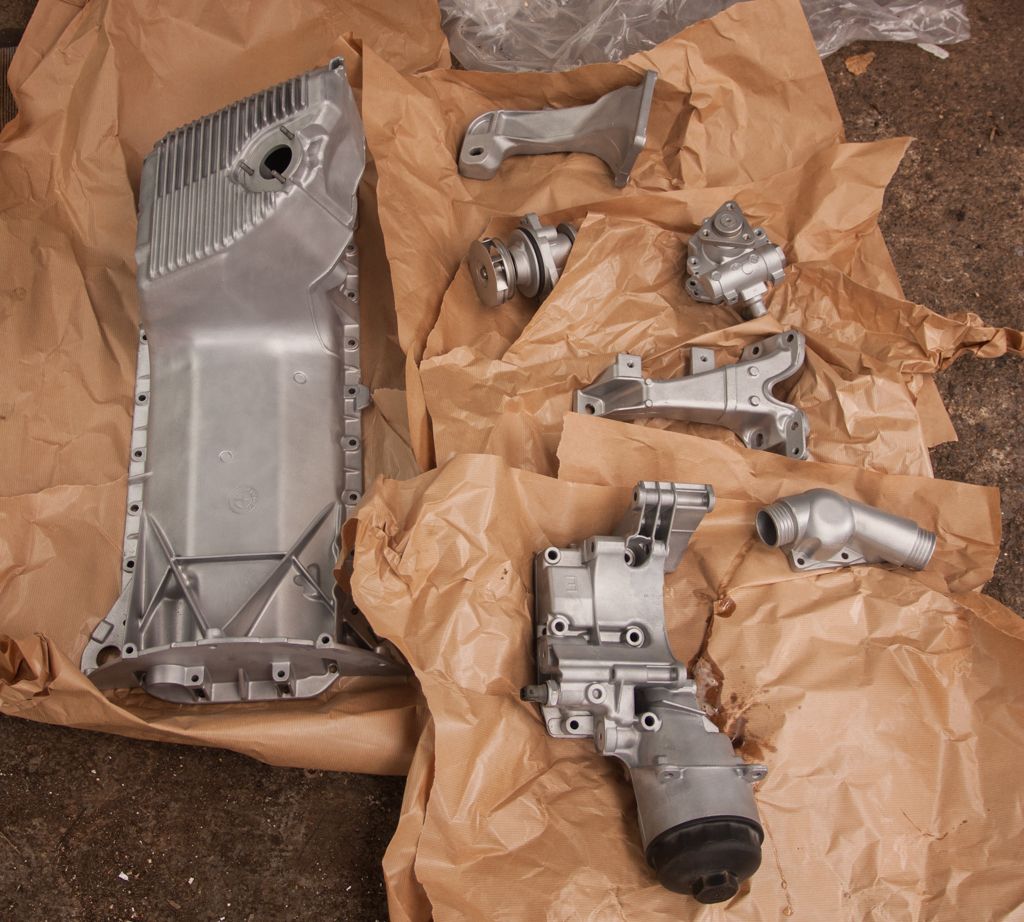
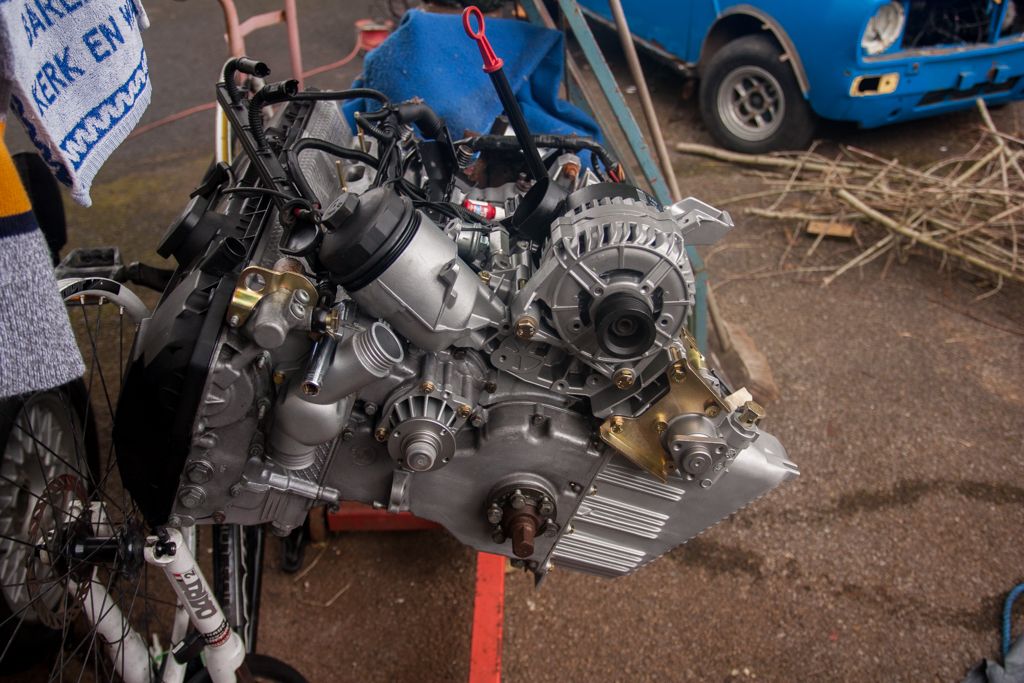
I also had a few parts from the engine vapour blasted, they look as good as new if not better! I have them all well soaked in ACF50 which should keep them from getting corroded again!
Anyone looking to use/buy reinforcement plates for on a touring, they need a little modification to be made fit.
The white stuff is just carpet underlay which I'll be using as a decoupling layer between the car body and the sound deadening I'm using. I'm not sure if I'll be covering everything but at least I'll be doing behind the dash, under the rear seats and the boot area.
I also had a few parts from the engine vapour blasted, they look as good as new if not better! I have them all well soaked in ACF50 which should keep them from getting corroded again!
Anyone looking to use/buy reinforcement plates for on a touring, they need a little modification to be made fit.
-
Neilios
- E30 Zone Regular

- Posts: 302
- Joined: Sat Feb 23, 2013 11:00 pm
- Location: Consett Co. Durham
I have been looking at the reinforcing plates for my touring, was looking at making some for the underside and welding in and linking it into the inside of the tower and up the wheel arch but not decided yet, anyone else done it?
-
Jozi
- E30 Zone Addict
- Posts: 3076
- Joined: Thu Nov 22, 2007 11:00 pm
- Location: Dublin, Ireland
I'd say the touring rear is much more reinforced already what with the sedans, they don't come with the extra bits welded to the tower.
-------------------------------------------
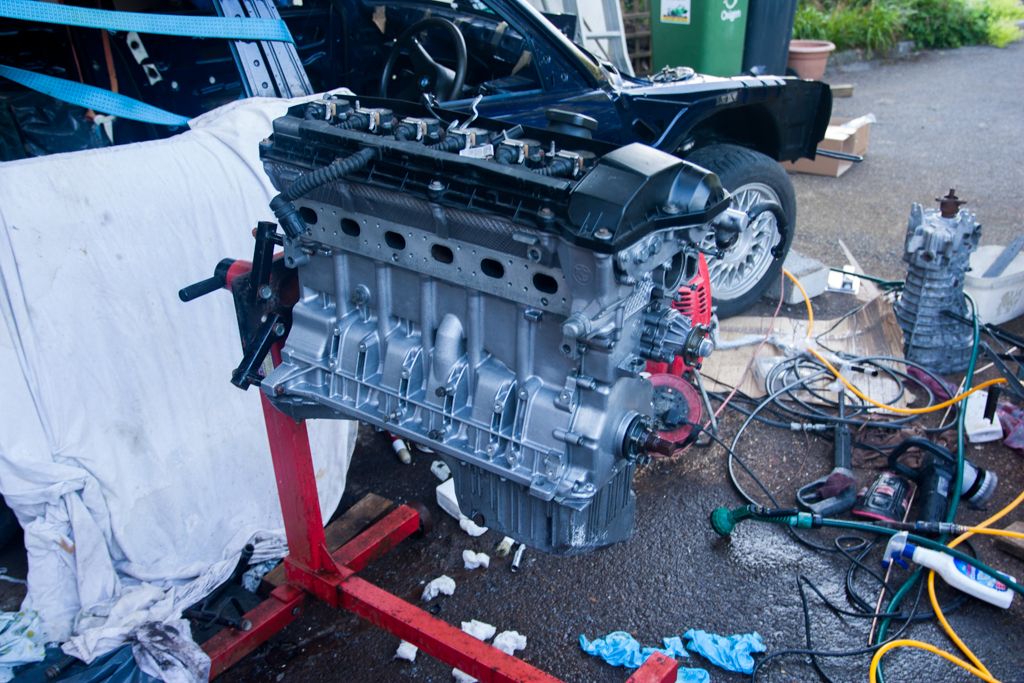
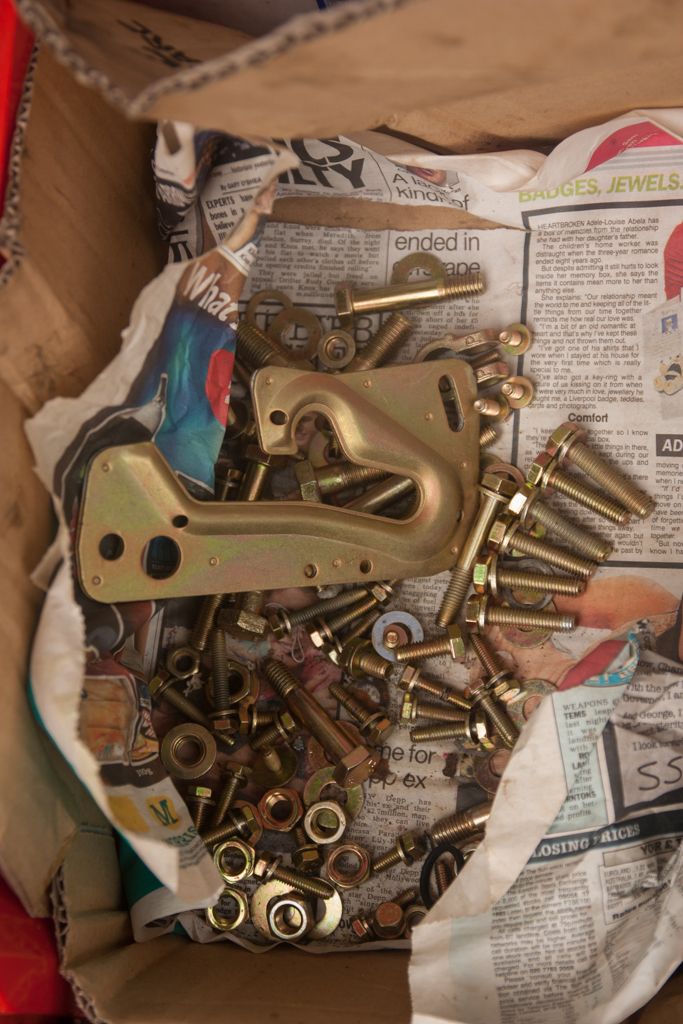
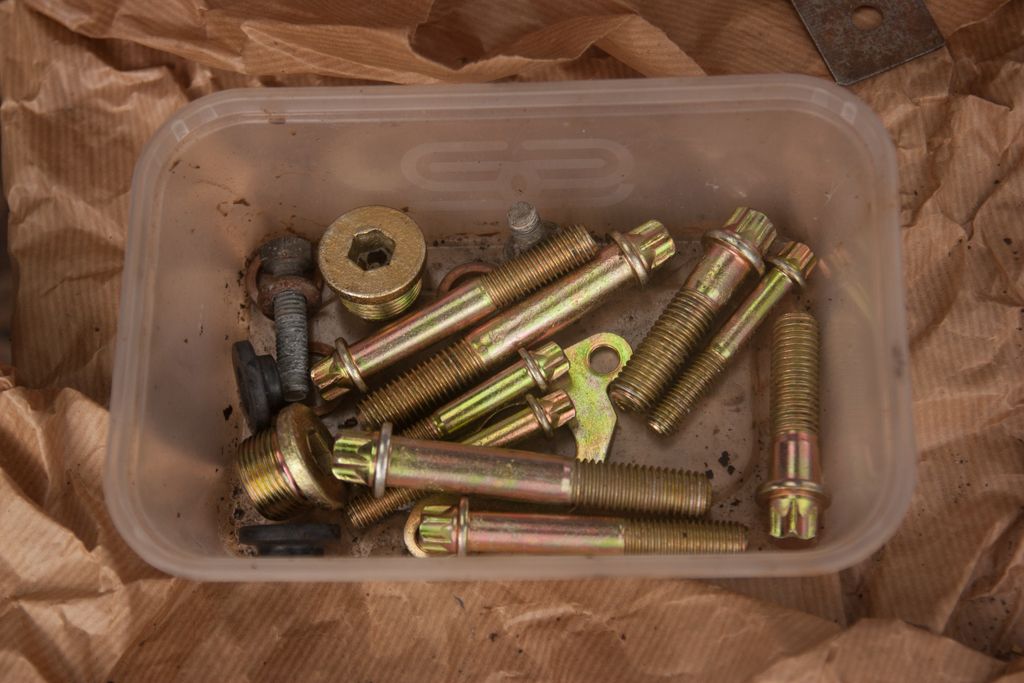
Things have been quiet on the touring front for the last while. After a few setbacks and holdups I finally got bolting up some of the vapour blasted parts. While those were being done I also had what ever brackets and nuts/bolts I could find sent of for powder coating and zinc plating (the later being one of the holdups...)
Still piecing things back together bit by bit, loom is just loosely sitting on the engine
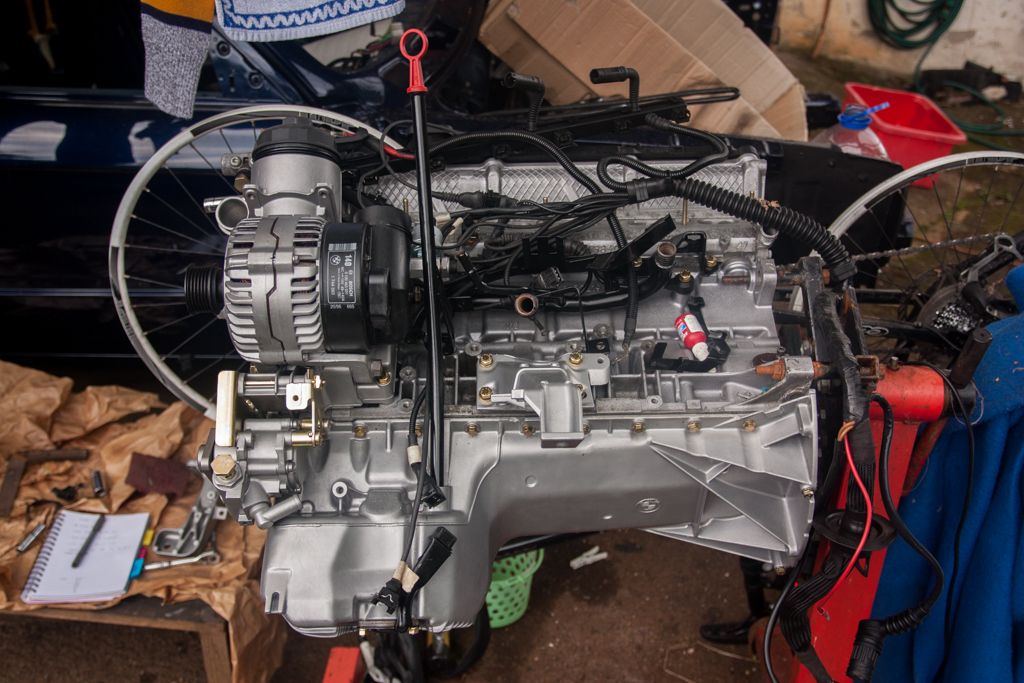
Never mind the grubby bolts for the damper thing, they will be replaced with shorter ones after it gets a clean up.
All the alloy bits came up like new
I thought the PS pump was black it was that dirty when I got it
New water pump and stat housing also got a quick clean as they had gone white from sitting up the last year
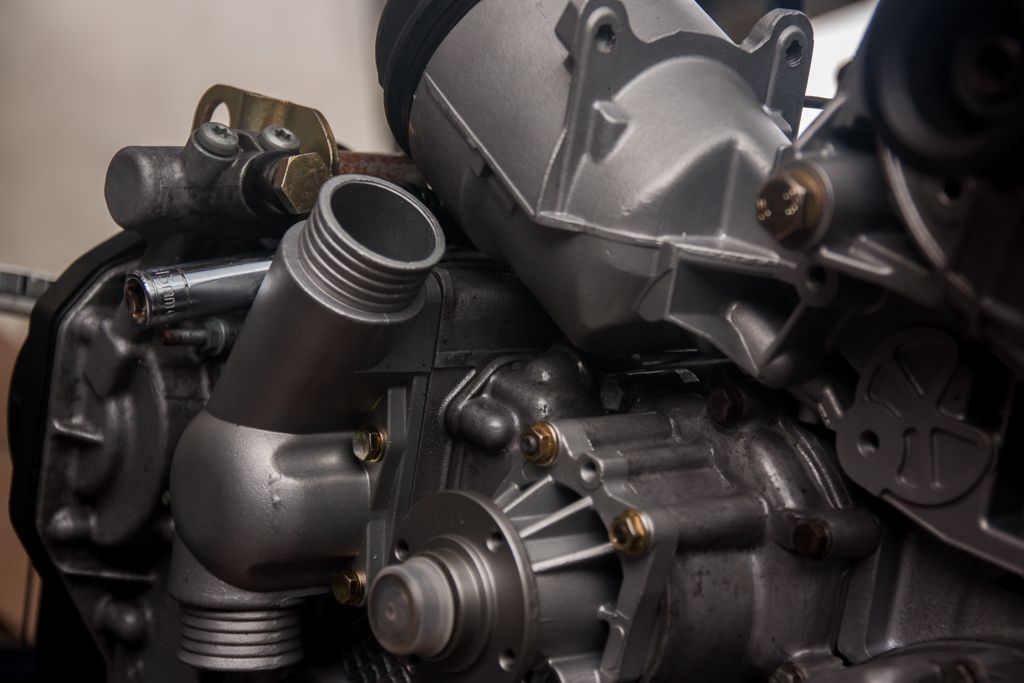
Replated studs
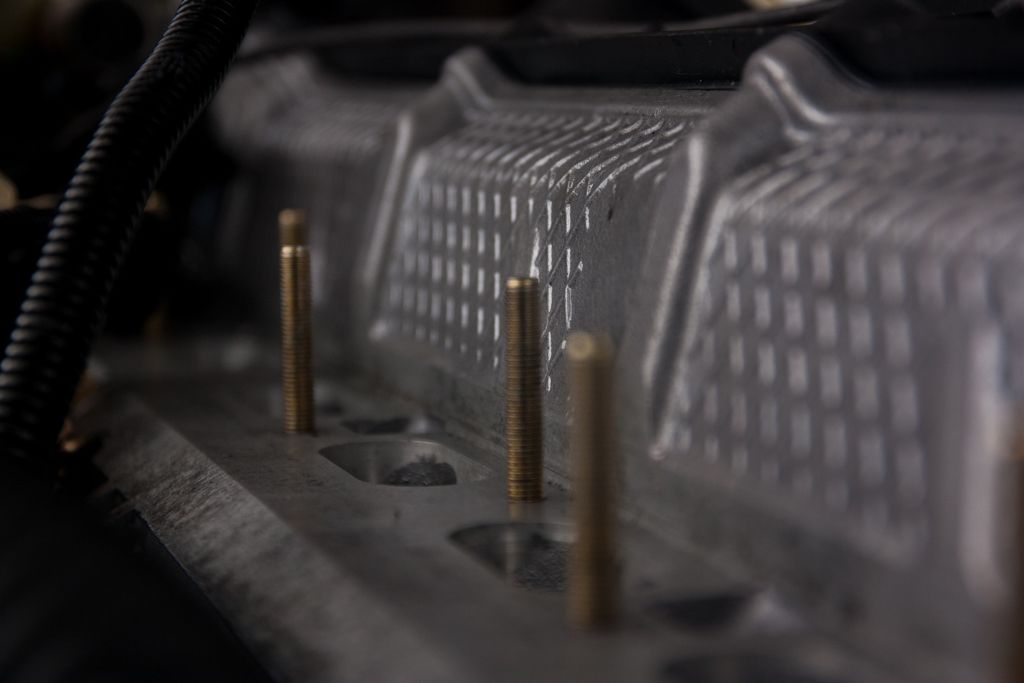
Some of the other bits I had plated

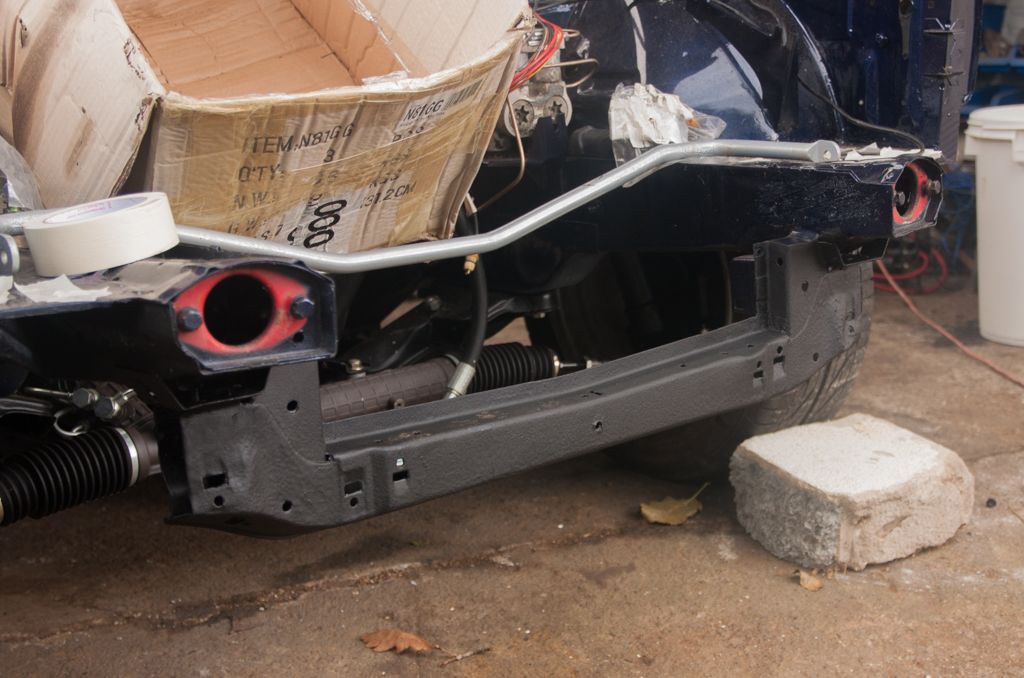
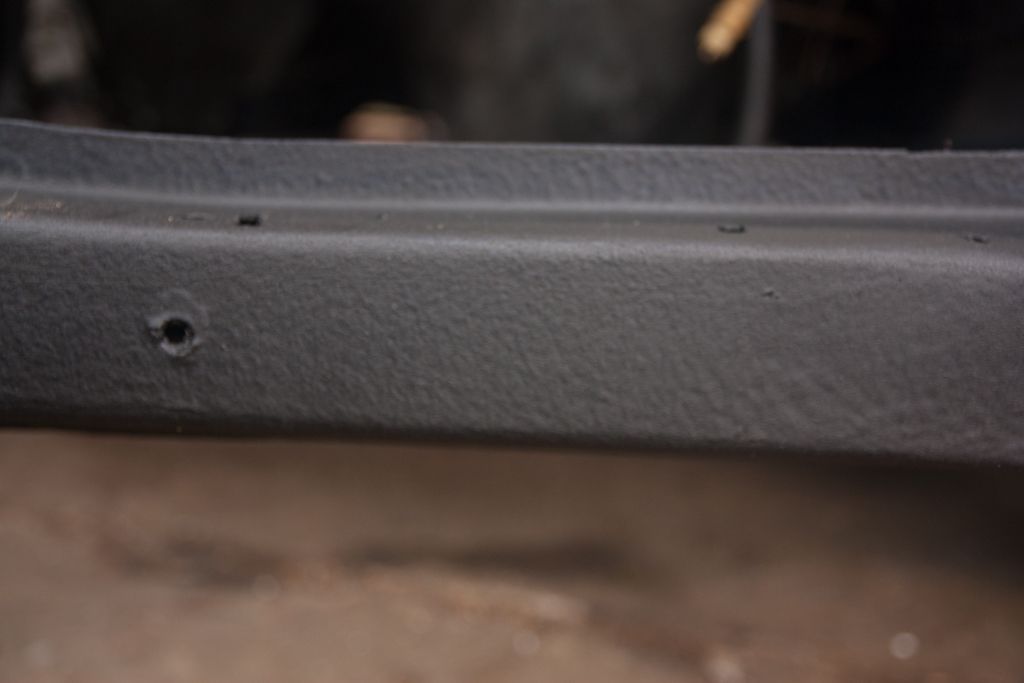
Also undersealed the front crossmember with Bilthamber UB. I previously used this in the arches and brushed it on, for what ever reason I didn't think of it at the time but using a roller gives it a slightly nice looking finish.
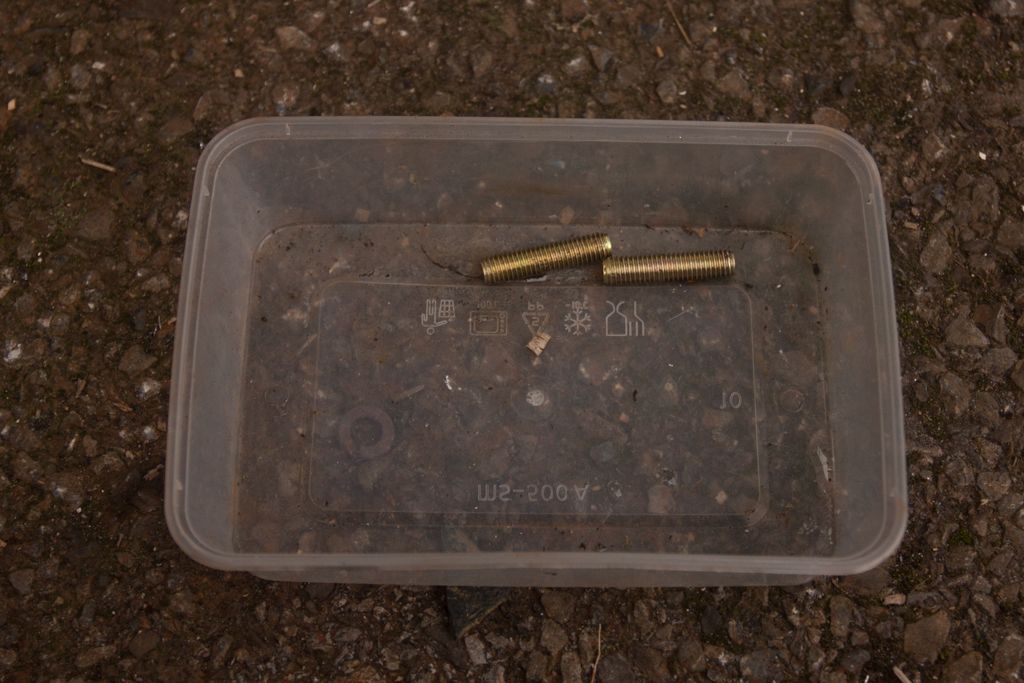
Anyone know where these two studs belong?
-------------------------------------------
Things have been quiet on the touring front for the last while. After a few setbacks and holdups I finally got bolting up some of the vapour blasted parts. While those were being done I also had what ever brackets and nuts/bolts I could find sent of for powder coating and zinc plating (the later being one of the holdups...)
Still piecing things back together bit by bit, loom is just loosely sitting on the engine
Never mind the grubby bolts for the damper thing, they will be replaced with shorter ones after it gets a clean up.
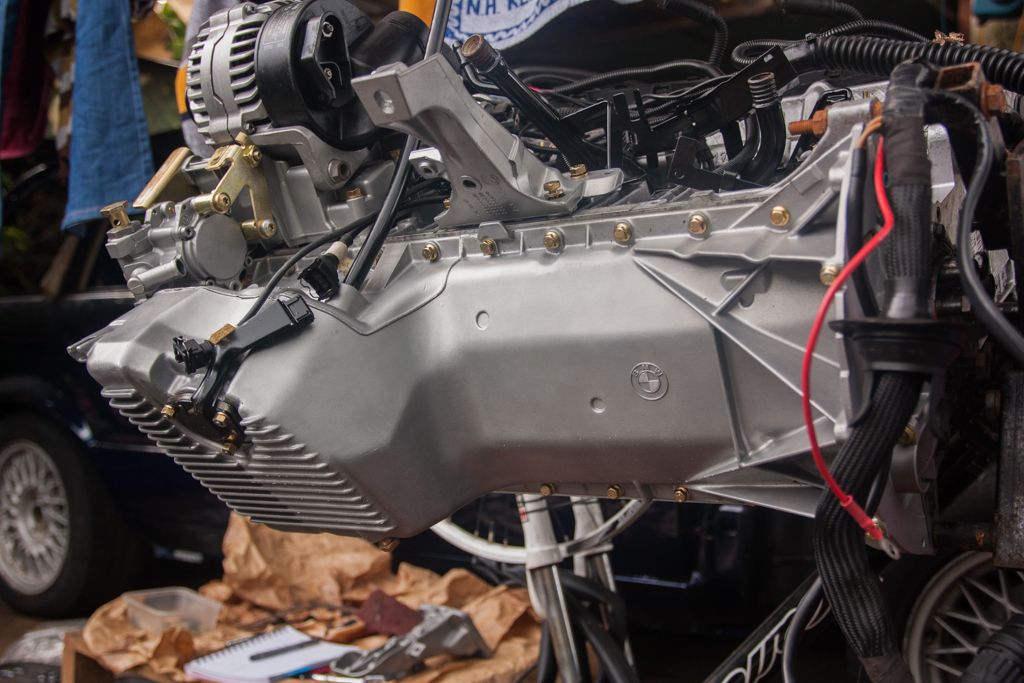
All the alloy bits came up like new
I thought the PS pump was black it was that dirty when I got it
New water pump and stat housing also got a quick clean as they had gone white from sitting up the last year
Replated studs
Some of the other bits I had plated
Also undersealed the front crossmember with Bilthamber UB. I previously used this in the arches and brushed it on, for what ever reason I didn't think of it at the time but using a roller gives it a slightly nice looking finish.
Anyone know where these two studs belong?
-
russ325i
- E30 Zone Newbie
- Posts: 141
- Joined: Sat Feb 19, 2005 11:00 pm
Wow, those bits you had blasted look incredible - the whole engine looks brand new. Just the kind of attention to detail I expected! Hopefully you manage to regain your interest in it soon, it'd be a shame not to get this one finished for sure.
-
appletree
- E30 Zone Addict
- Posts: 3482
- Joined: Fri Jan 20, 2006 11:00 pm
- Location: Retford
You must be on the home stretch no all the paints done your just botting bits back on, an hour here and there will soon make a big difference 
You should never underestimate the predictability of stupidity
M42 Supercharged 285bhp + M3 6speed box
-
Jozi
- E30 Zone Addict
- Posts: 3076
- Joined: Thu Nov 22, 2007 11:00 pm
- Location: Dublin, Ireland
The vapour blasting really came out better than expected, it wasn;t cheap though (I forget what he charged but more than expected) would love to have the whole engine rebuilt and blasted like that but not gonna happen this time.
It's a bit more enjoyable bolting stuff on and the bit of undersealing didn't take as long as I was expecting either (not that I did a lot of it) I even had mostly clean hands bolting the bits together :p
It will get done, hopefully on time for the new year!
It's a bit more enjoyable bolting stuff on and the bit of undersealing didn't take as long as I was expecting either (not that I did a lot of it) I even had mostly clean hands bolting the bits together :p
It will get done, hopefully on time for the new year!
-
appletree
- E30 Zone Addict
- Posts: 3482
- Joined: Fri Jan 20, 2006 11:00 pm
- Location: Retford
Thats my plan too, get roof welded on in oct, painted in nov/dec then rebuild ready for next year although you have abit more than me to rebuild lol, keep the pics coming
You should never underestimate the predictability of stupidity
M42 Supercharged 285bhp + M3 6speed box
-
Jozi
- E30 Zone Addict
- Posts: 3076
- Joined: Thu Nov 22, 2007 11:00 pm
- Location: Dublin, Ireland
A wee bit the good thing is that its mostly bolting things together and some lose end here and there with the odd bit of preparing parts before bolting them on.
Must keep an eye on your thread when doing the roof. Also just noticed your sig , 285hp
Must keep an eye on your thread when doing the roof. Also just noticed your sig , 285hp
-
Jozi
- E30 Zone Addict
- Posts: 3076
- Joined: Thu Nov 22, 2007 11:00 pm
- Location: Dublin, Ireland
I had these little guys made recently and decided to try them out after a few modifications so they would fit.
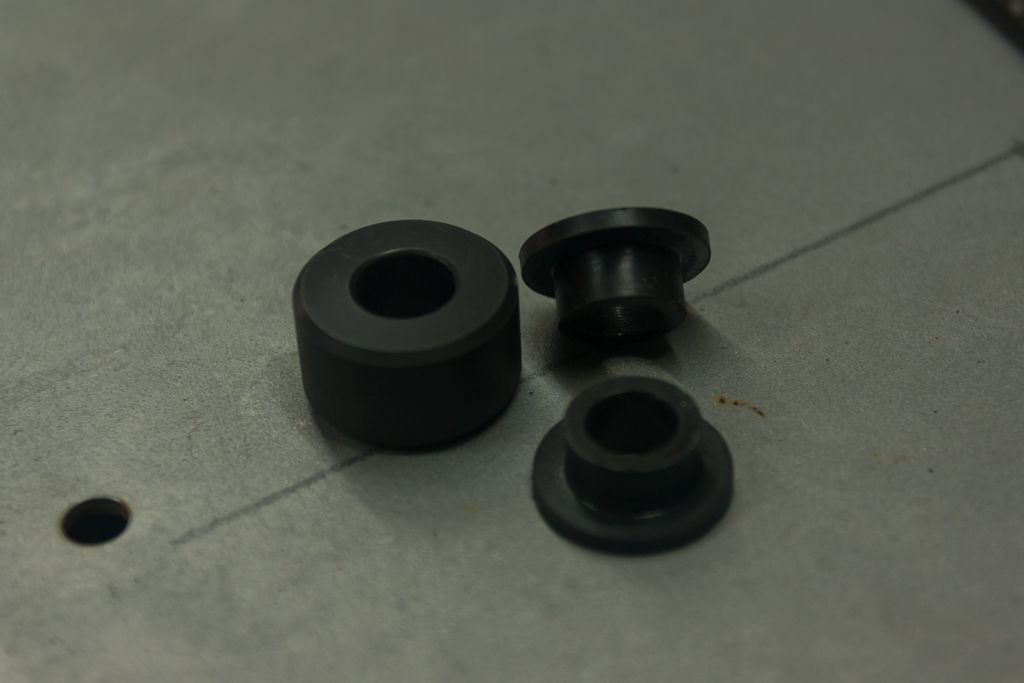
The old shifter linkage has had everything removed from it and all will be replaced with new parts before it goes back into the car again.
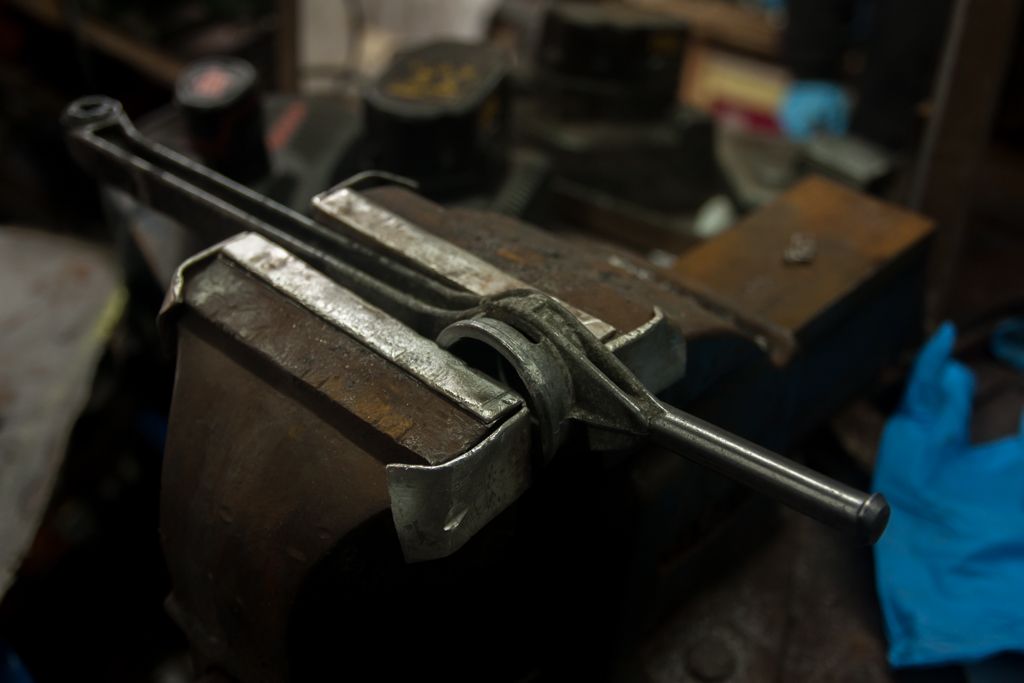
For the bush to fit you need tile file of the little bits sticking out so the bush will slide on
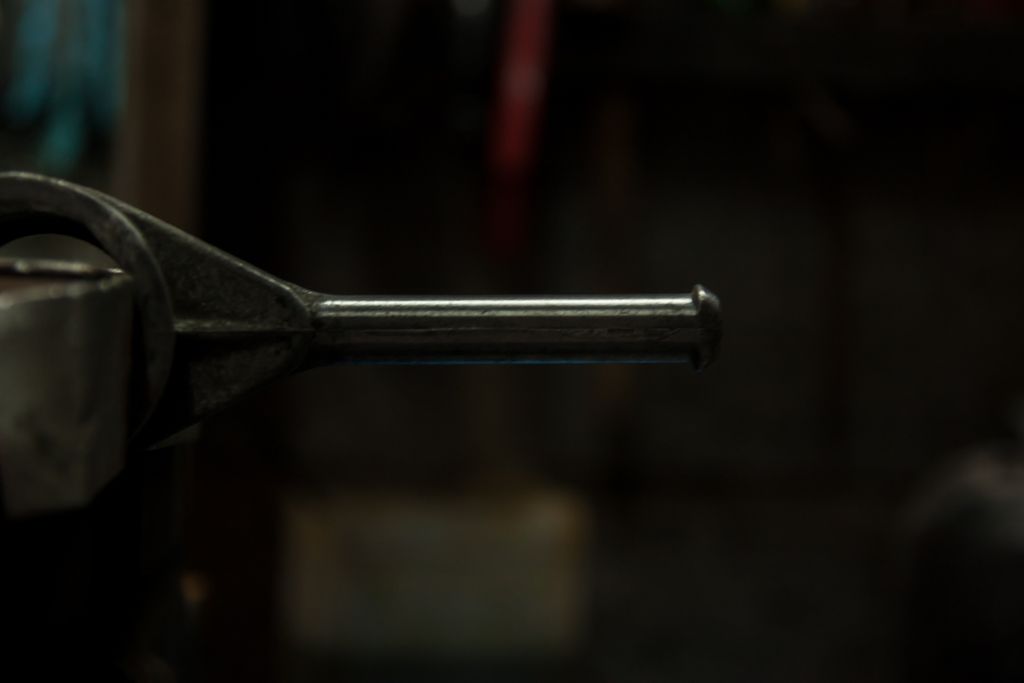
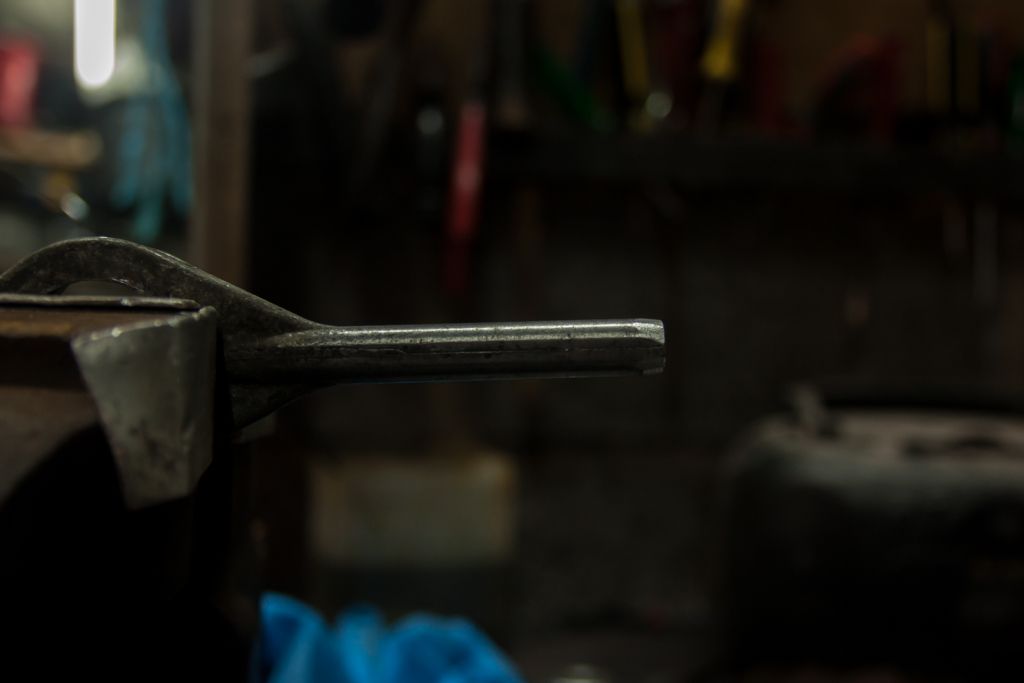
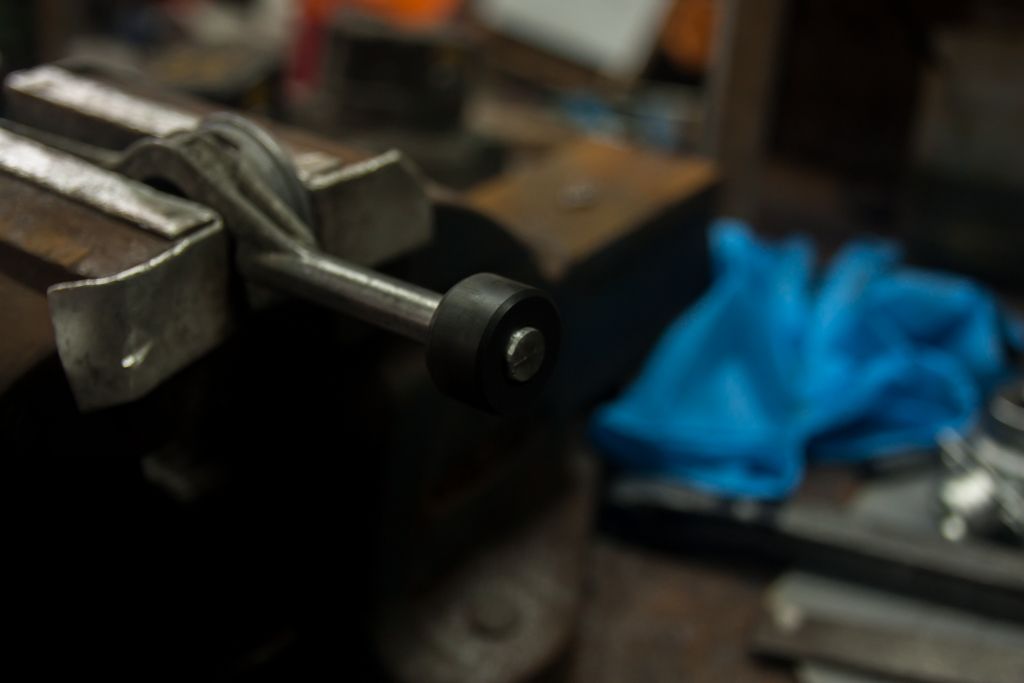
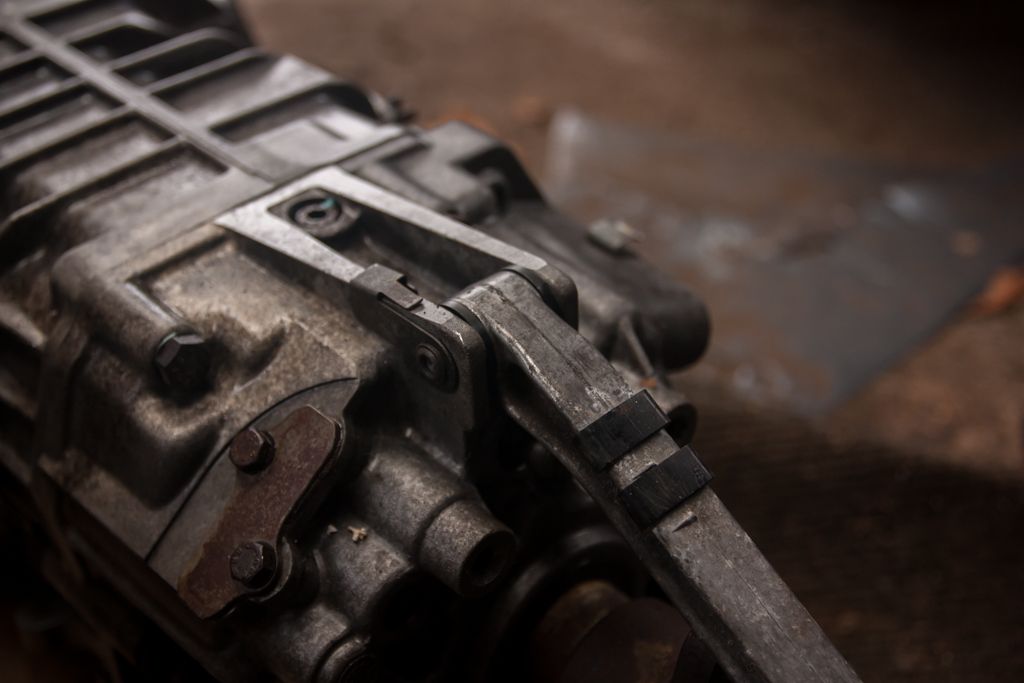
Here's where the whole lot goes
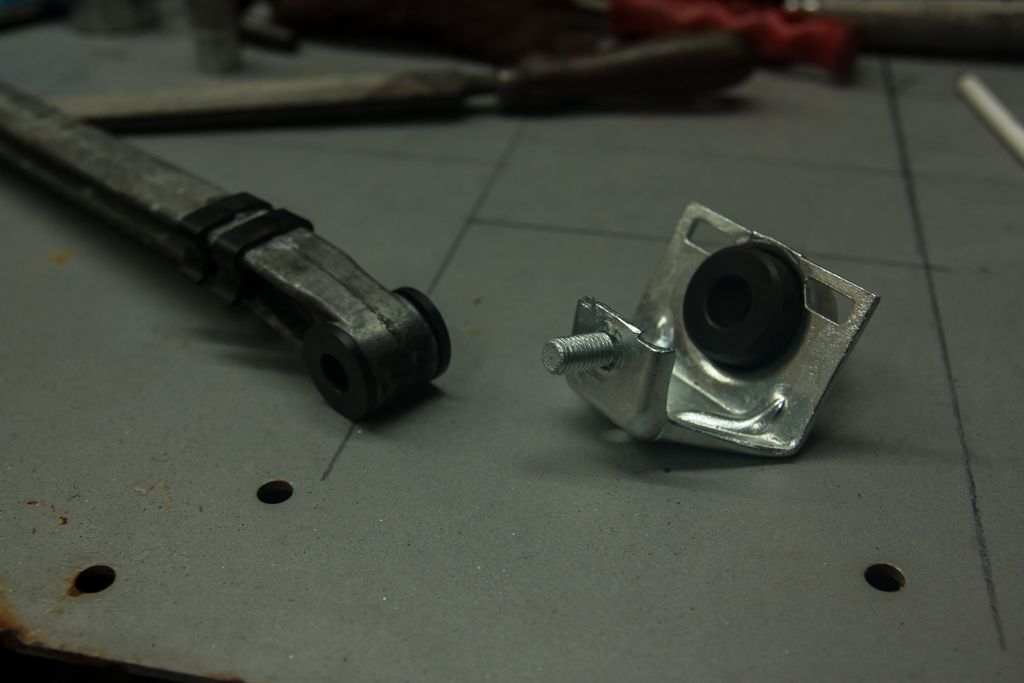
I've got some spare delrin that I might use to make up some more parts if theres enough interest?
The old shifter linkage has had everything removed from it and all will be replaced with new parts before it goes back into the car again.
For the bush to fit you need tile file of the little bits sticking out so the bush will slide on
Here's where the whole lot goes
I've got some spare delrin that I might use to make up some more parts if theres enough interest?
-
Rav335uk
- E30 Zone Meets/Events Team
- Posts: 27985
- Joined: Wed Jan 19, 2005 11:00 pm
- Location: Mad mad mad
Interdasting Brendan.
What is the damage on the bushes?
What is the damage on the bushes?
If you Got "Haters",Then your doing something Right!
CR24v??? Where's it all gone?? LOL
-
Jozi
- E30 Zone Addict
- Posts: 3076
- Joined: Thu Nov 22, 2007 11:00 pm
- Location: Dublin, Ireland
Not sure yet, need to find out what it will set me back if I get him to make more.Rav335uk wrote:Interdasting Brendan.
What is the damage on the bushes?
-
Jozi
- E30 Zone Addict
- Posts: 3076
- Joined: Thu Nov 22, 2007 11:00 pm
- Location: Dublin, Ireland
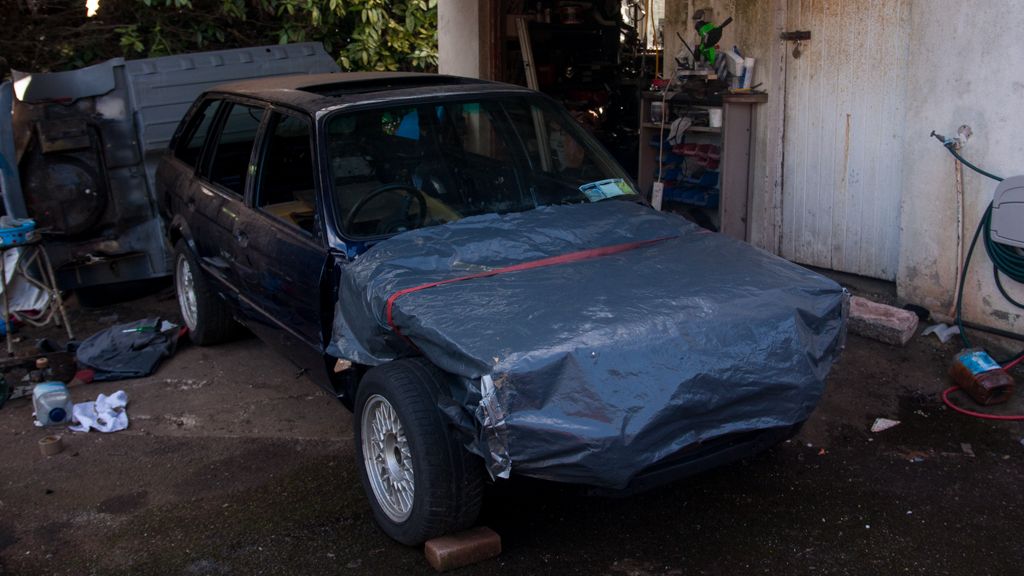
This thread is long over due an update! Not much has happened this year between it being to cold, no interest/motivation and not going home most weekends to work on the touring not a lot has happened!
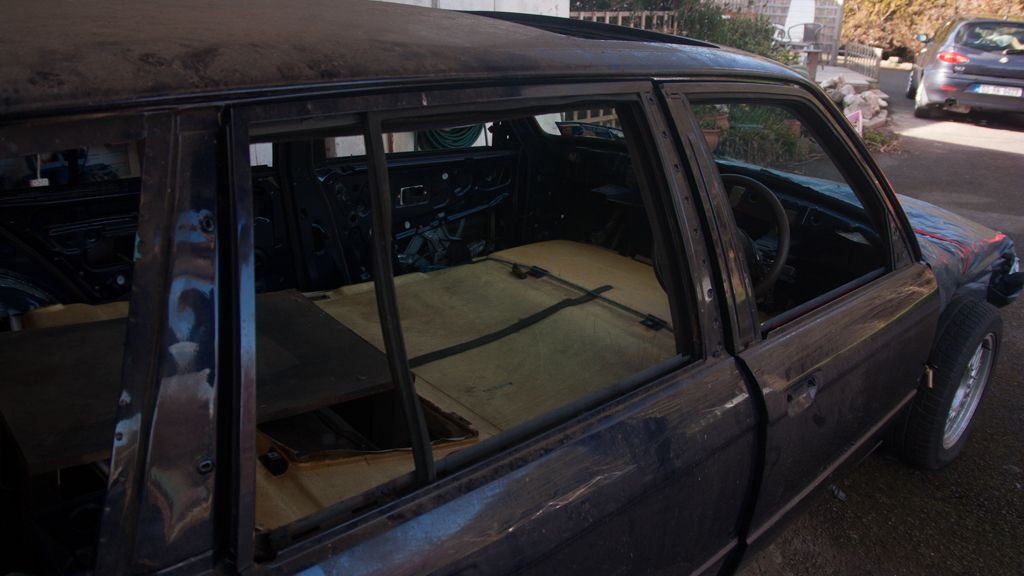
The good news is the touring now looks like this:
Few bits stored inside for transport:
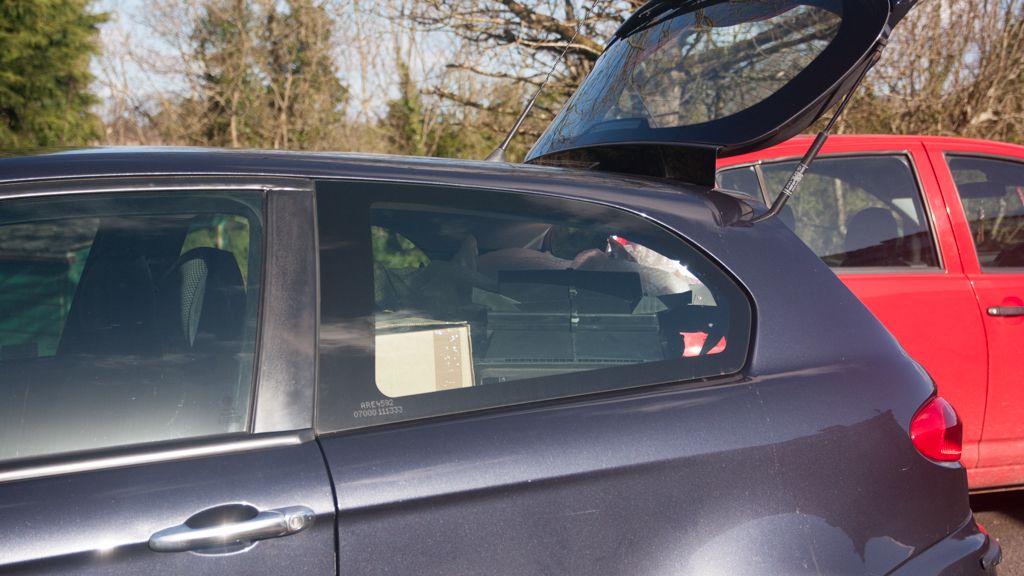
An E30 equipped Alfa 147:
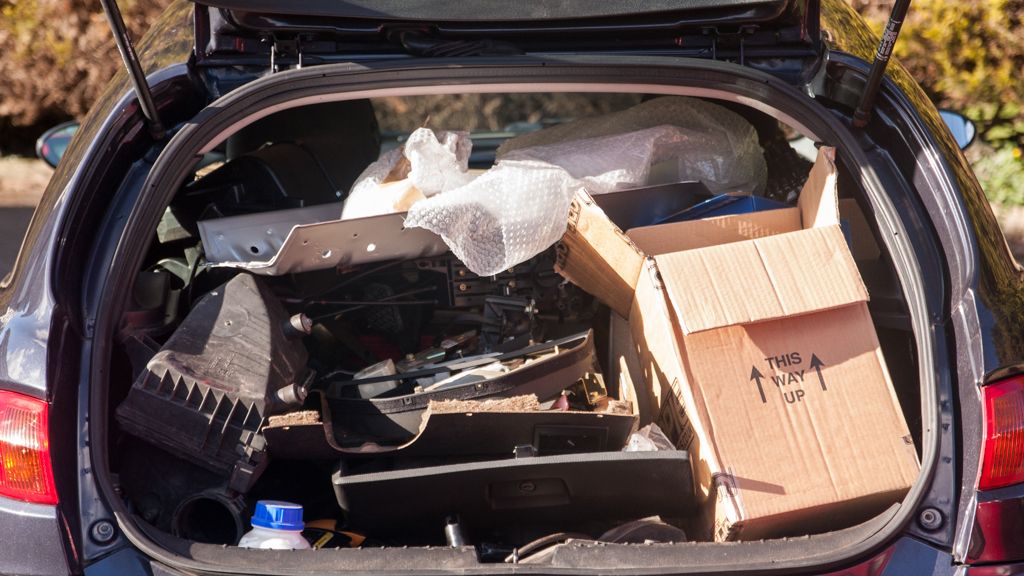
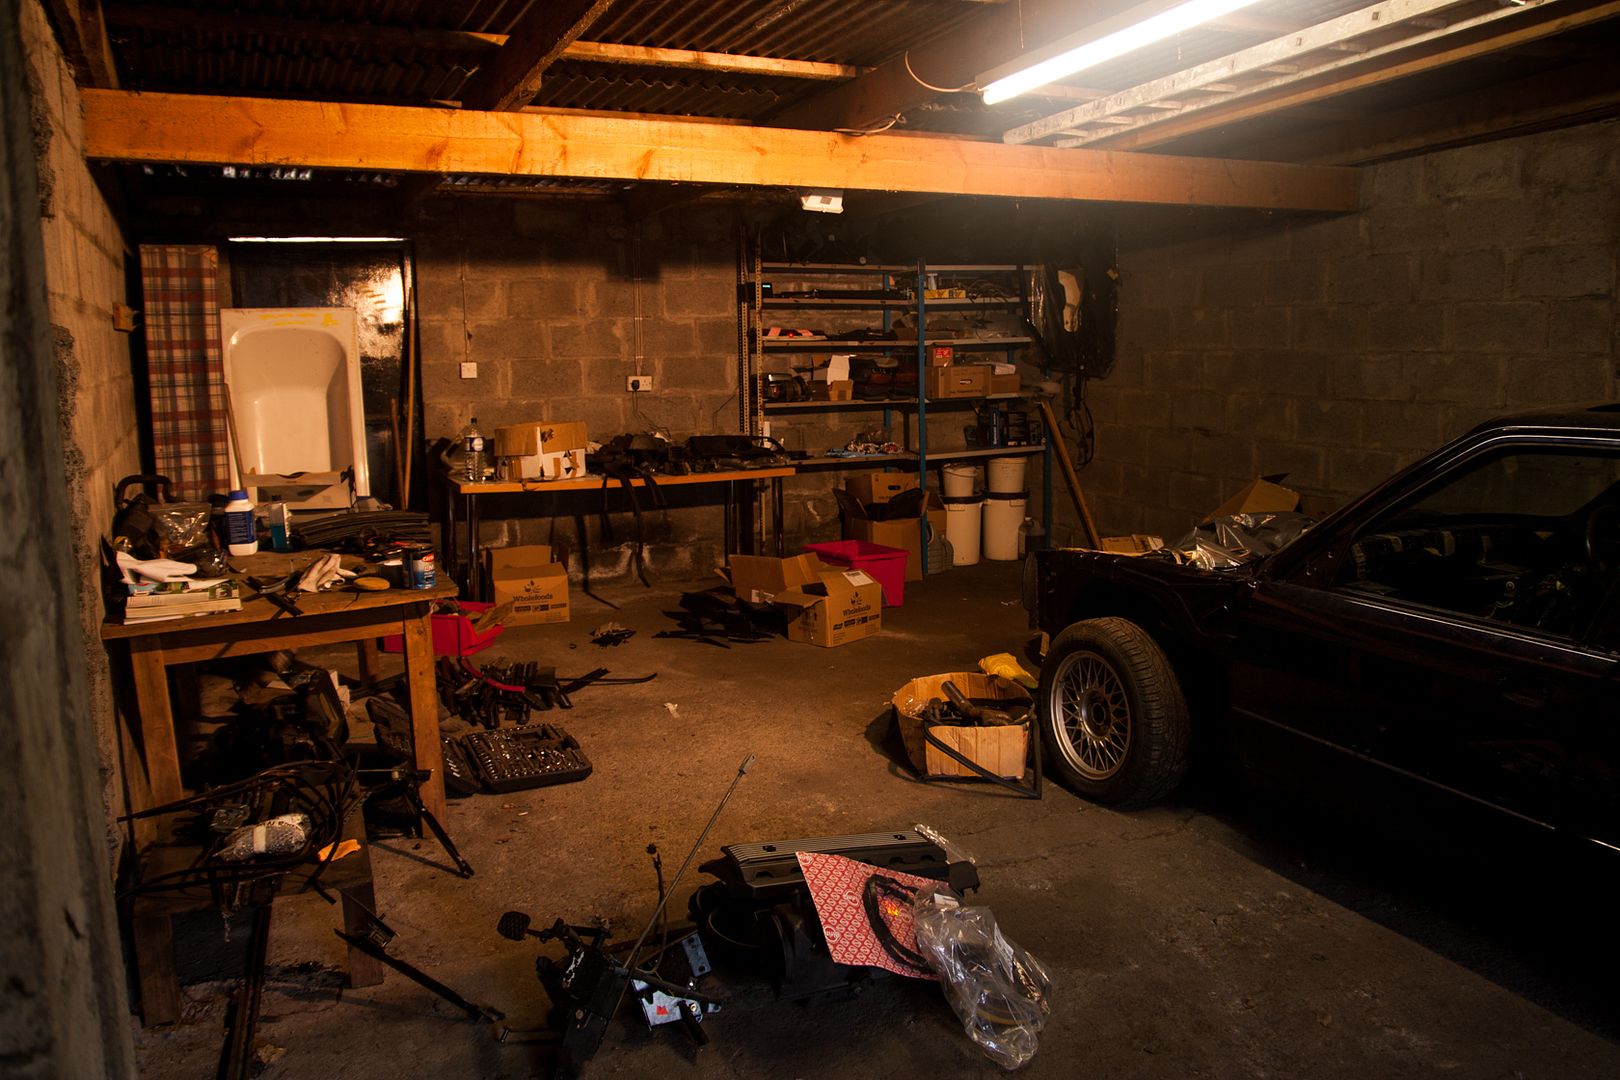
A few weeks ago myself and a member e30owners got ourselves a shed, it's only about 15-30mins drive depending on traffic from where I live in Dublin. The past two weekends I've (with a lot of help from the brother) done a bit of tidying up around and gathered parts and so far done two runs with the Alfa stashed full of E30 parts. I still need to get the E30 trailered down (proving to be expensive or difficult) which I hope to sort this week or asap so I can get cracking on.
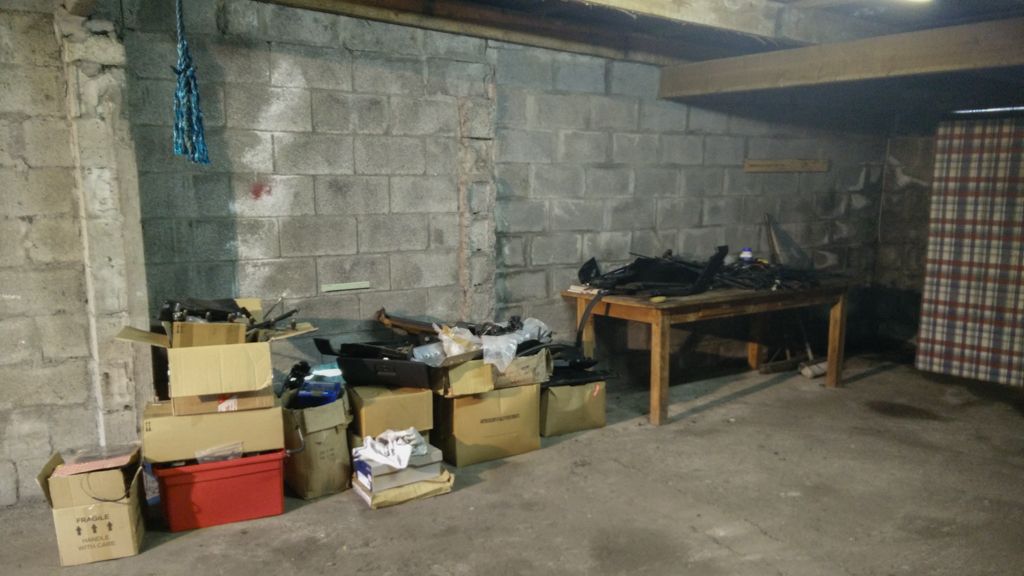
"Storage room" is slowly turning back into a spare bedroom:
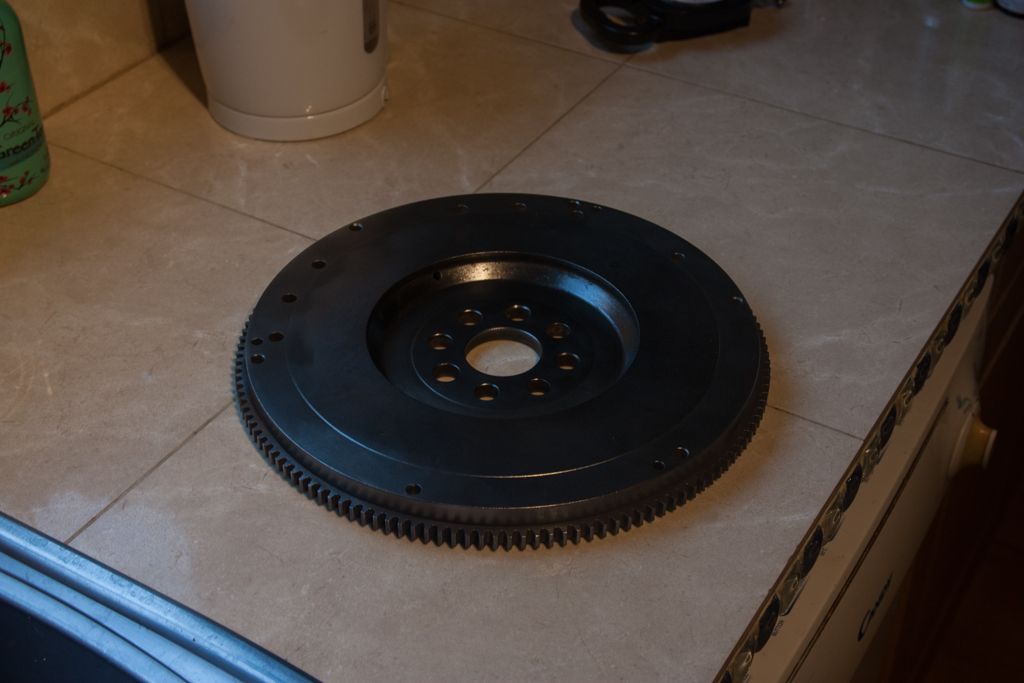
Few pics I found which I hadn't up loaded yet from last December, some other little bits and pieces have been done but nothing major.
E30 323i (I think) flywheel I got a few years ago, had it skimmed ages ago, needed a little cleaning with a wirebrush.

There isn't much I can do with out the touring being here other than some small bits and pieces in preparation. Started polishing the glass this evening, plan is to get them nice and clean and then treat them with some sort of rain repellent on the outside and anti fog on the inside.
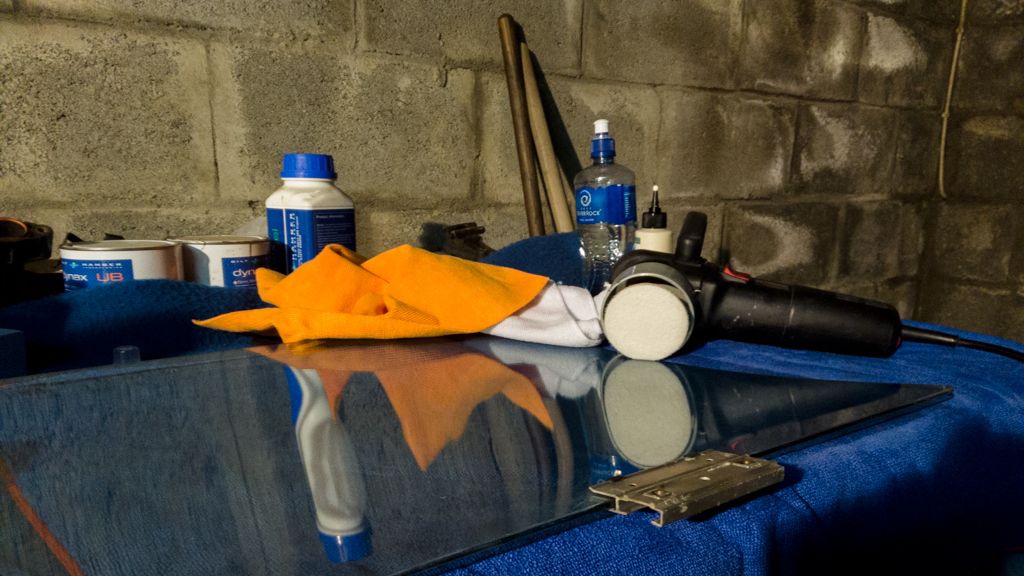
Once the glass is all polished and coated my first priority is to get it all fitted and wash her cause it looks nasty!
The good news is the touring now looks like this:
Few bits stored inside for transport:
An E30 equipped Alfa 147:
A few weeks ago myself and a member e30owners got ourselves a shed, it's only about 15-30mins drive depending on traffic from where I live in Dublin. The past two weekends I've (with a lot of help from the brother) done a bit of tidying up around and gathered parts and so far done two runs with the Alfa stashed full of E30 parts. I still need to get the E30 trailered down (proving to be expensive or difficult) which I hope to sort this week or asap so I can get cracking on.
"Storage room" is slowly turning back into a spare bedroom:
Few pics I found which I hadn't up loaded yet from last December, some other little bits and pieces have been done but nothing major.
E30 323i (I think) flywheel I got a few years ago, had it skimmed ages ago, needed a little cleaning with a wirebrush.
There isn't much I can do with out the touring being here other than some small bits and pieces in preparation. Started polishing the glass this evening, plan is to get them nice and clean and then treat them with some sort of rain repellent on the outside and anti fog on the inside.
Once the glass is all polished and coated my first priority is to get it all fitted and wash her cause it looks nasty!
-
appletree
- E30 Zone Addict
- Posts: 3482
- Joined: Fri Jan 20, 2006 11:00 pm
- Location: Retford
Nice to see an update, was wonderimg how this car was coming on the other day!
You should never underestimate the predictability of stupidity
M42 Supercharged 285bhp + M3 6speed box
-
Jozi
- E30 Zone Addict
- Posts: 3076
- Joined: Thu Nov 22, 2007 11:00 pm
- Location: Dublin, Ireland
Ive slowly been getting motivation back, especially now that I got the shed. I just need to bit the bullet and part with 250euro and get it reappeared down.
-
Jozi
- E30 Zone Addict
- Posts: 3076
- Joined: Thu Nov 22, 2007 11:00 pm
- Location: Dublin, Ireland
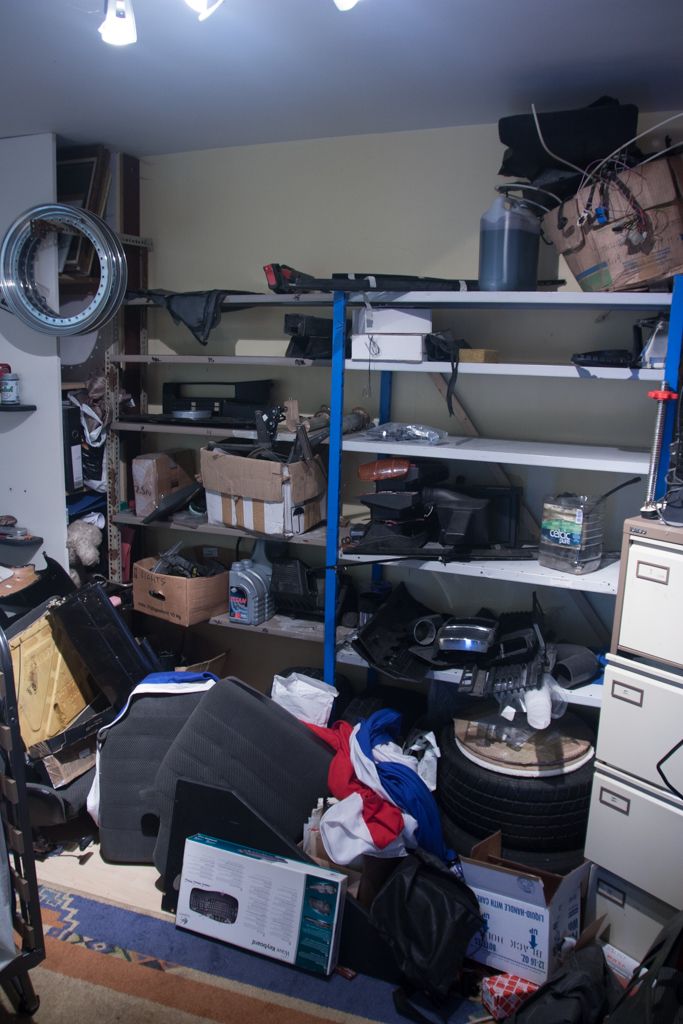
Not much of an update but have started unpacking all the boxes and sorting through everything and trying to keep it organised on the rack or in boxes. I might get it all put away over the weekend and then I can get back at working on the touring again.
-
Jozi
- E30 Zone Addict
- Posts: 3076
- Joined: Thu Nov 22, 2007 11:00 pm
- Location: Dublin, Ireland
Not really made much progress, been working to much and not spending time at the touring since the summer.
At some point last year I started extending all the wires running around the engine bay, I wanted to hide them as much as possible but not go to crazy.
Using an old loom I extended all the wiring with the same color cable. Then came to my senses after realizing I potentially had up to 3x solder joins that could fail and went ahead and ordered a load of cables and various crimps so I could tack this mess:
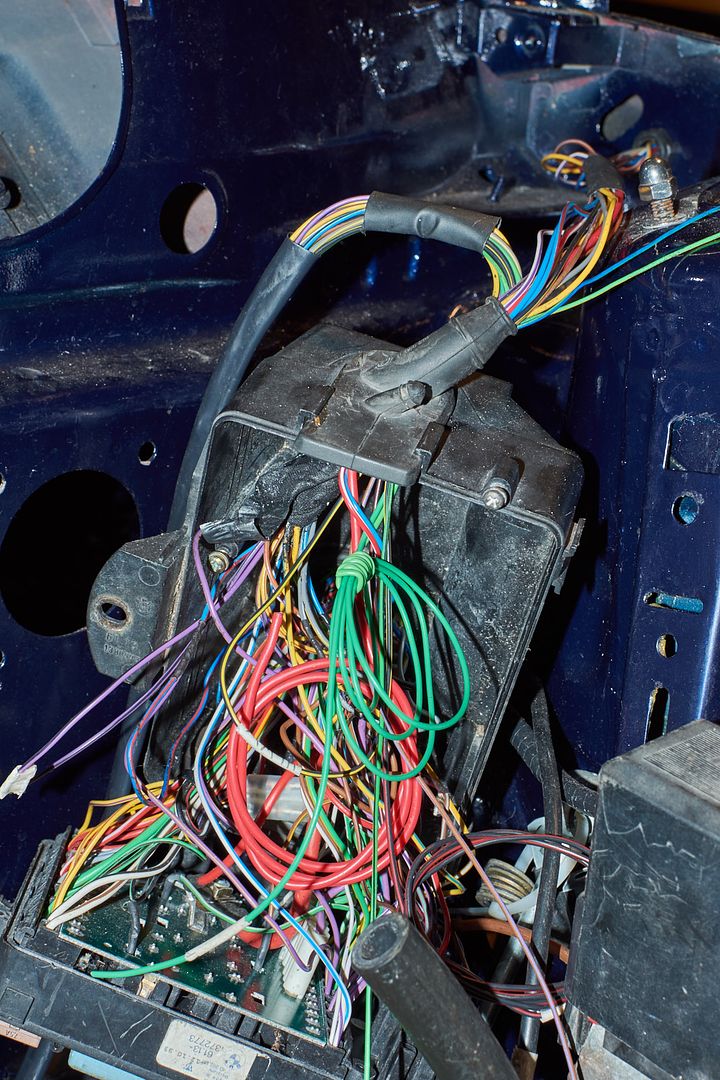
In the end I pulled all the original cables going to fuses and replaced them with extra long new cables with the right ends crimped on and sloted back in place. A few cables ran into the car and those were solder joined inside the fusebox and had some heatshrink applied.
The plan was to separate all the wiring going to the passenger and driver side and route them both separately as can be seen below:
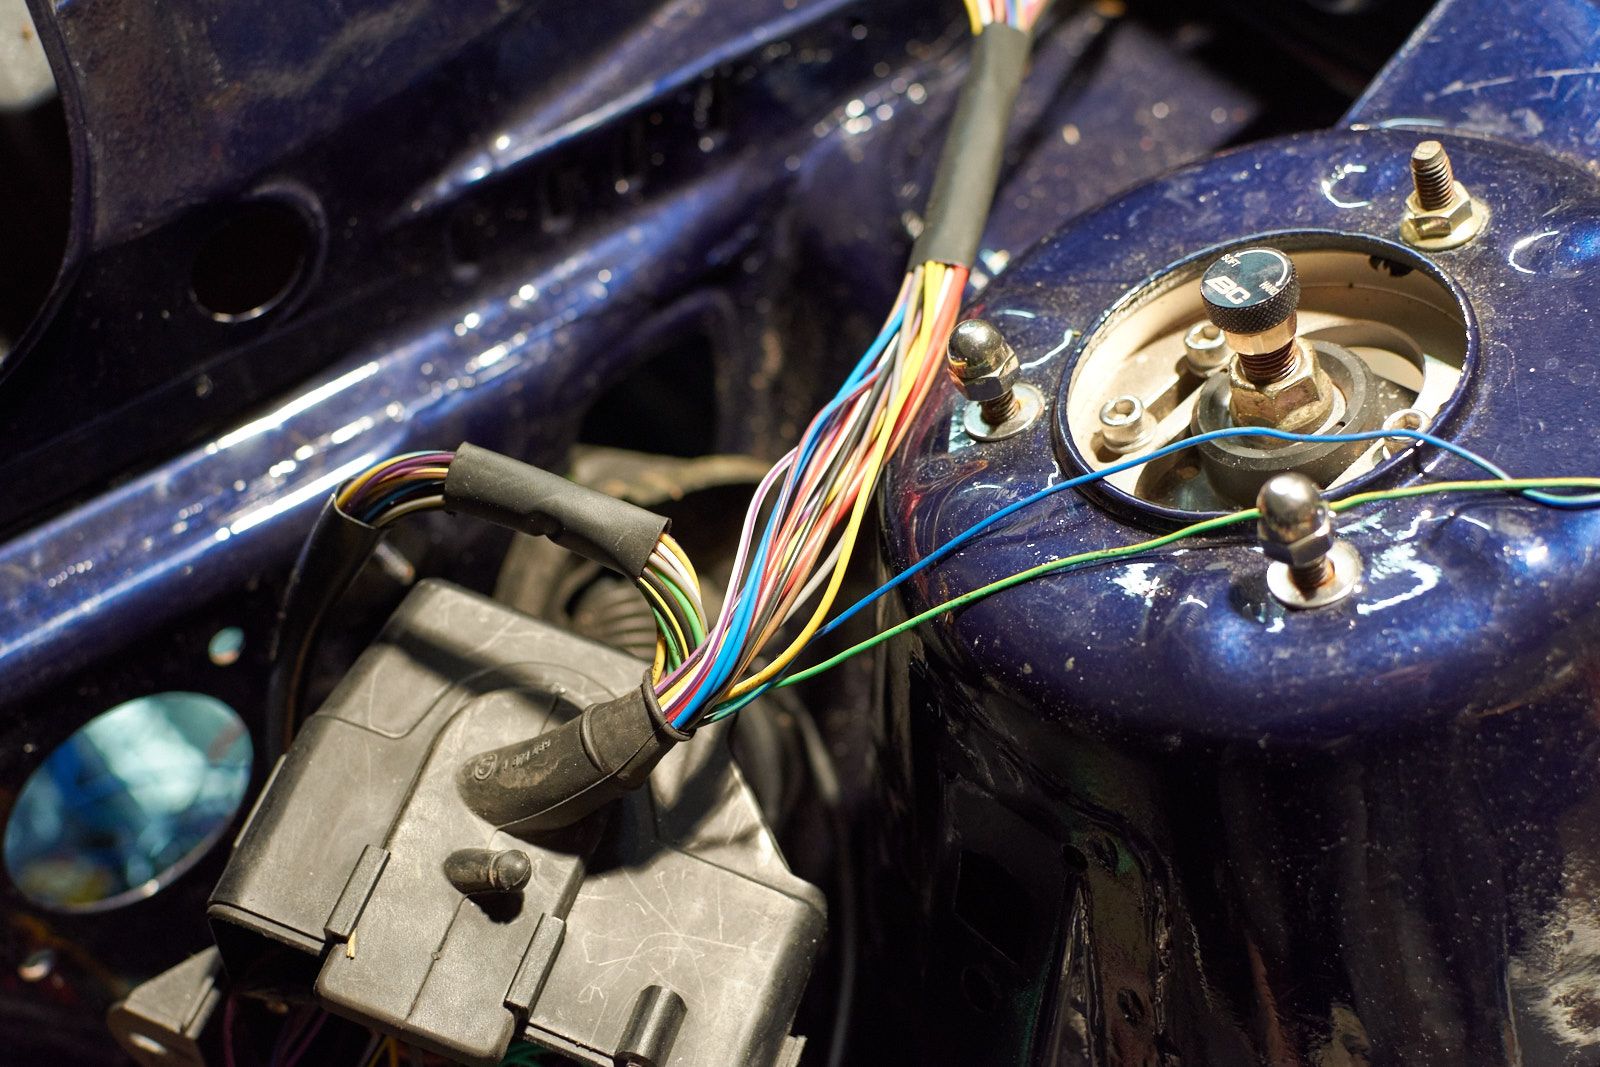
That was then stuffed through a pair of holes into conduit on the inner wings and routed to the front of the car where it exits under the front slam panel on either side
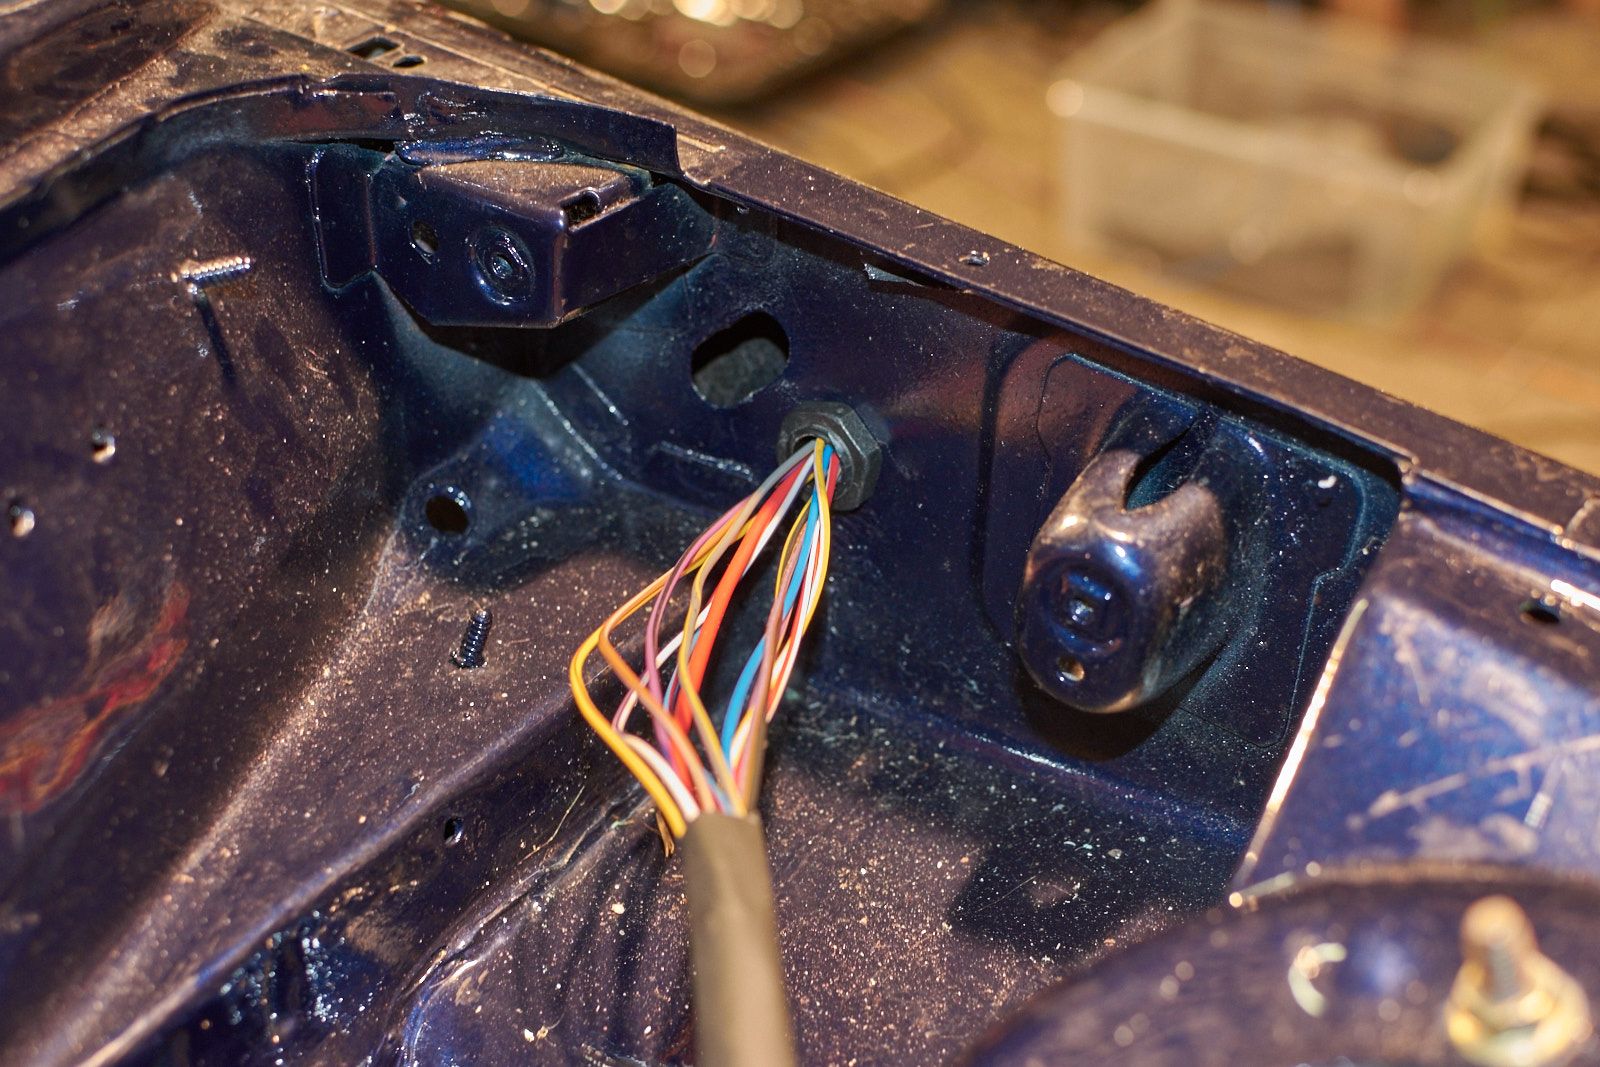
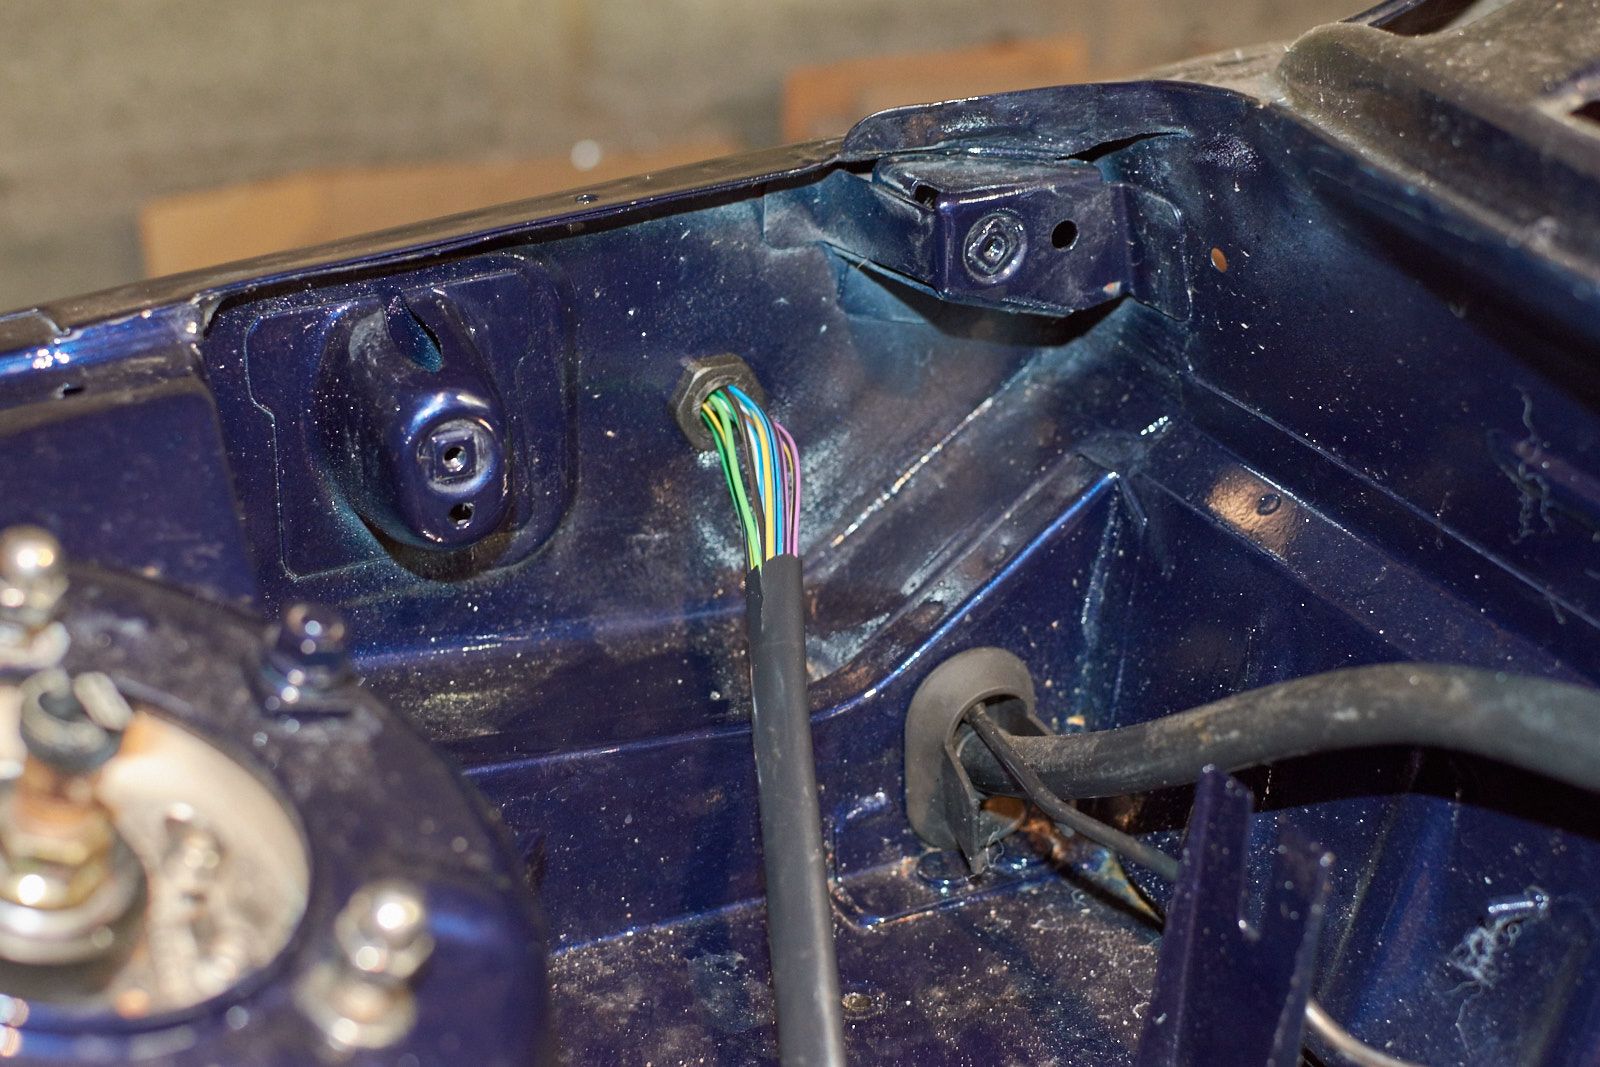
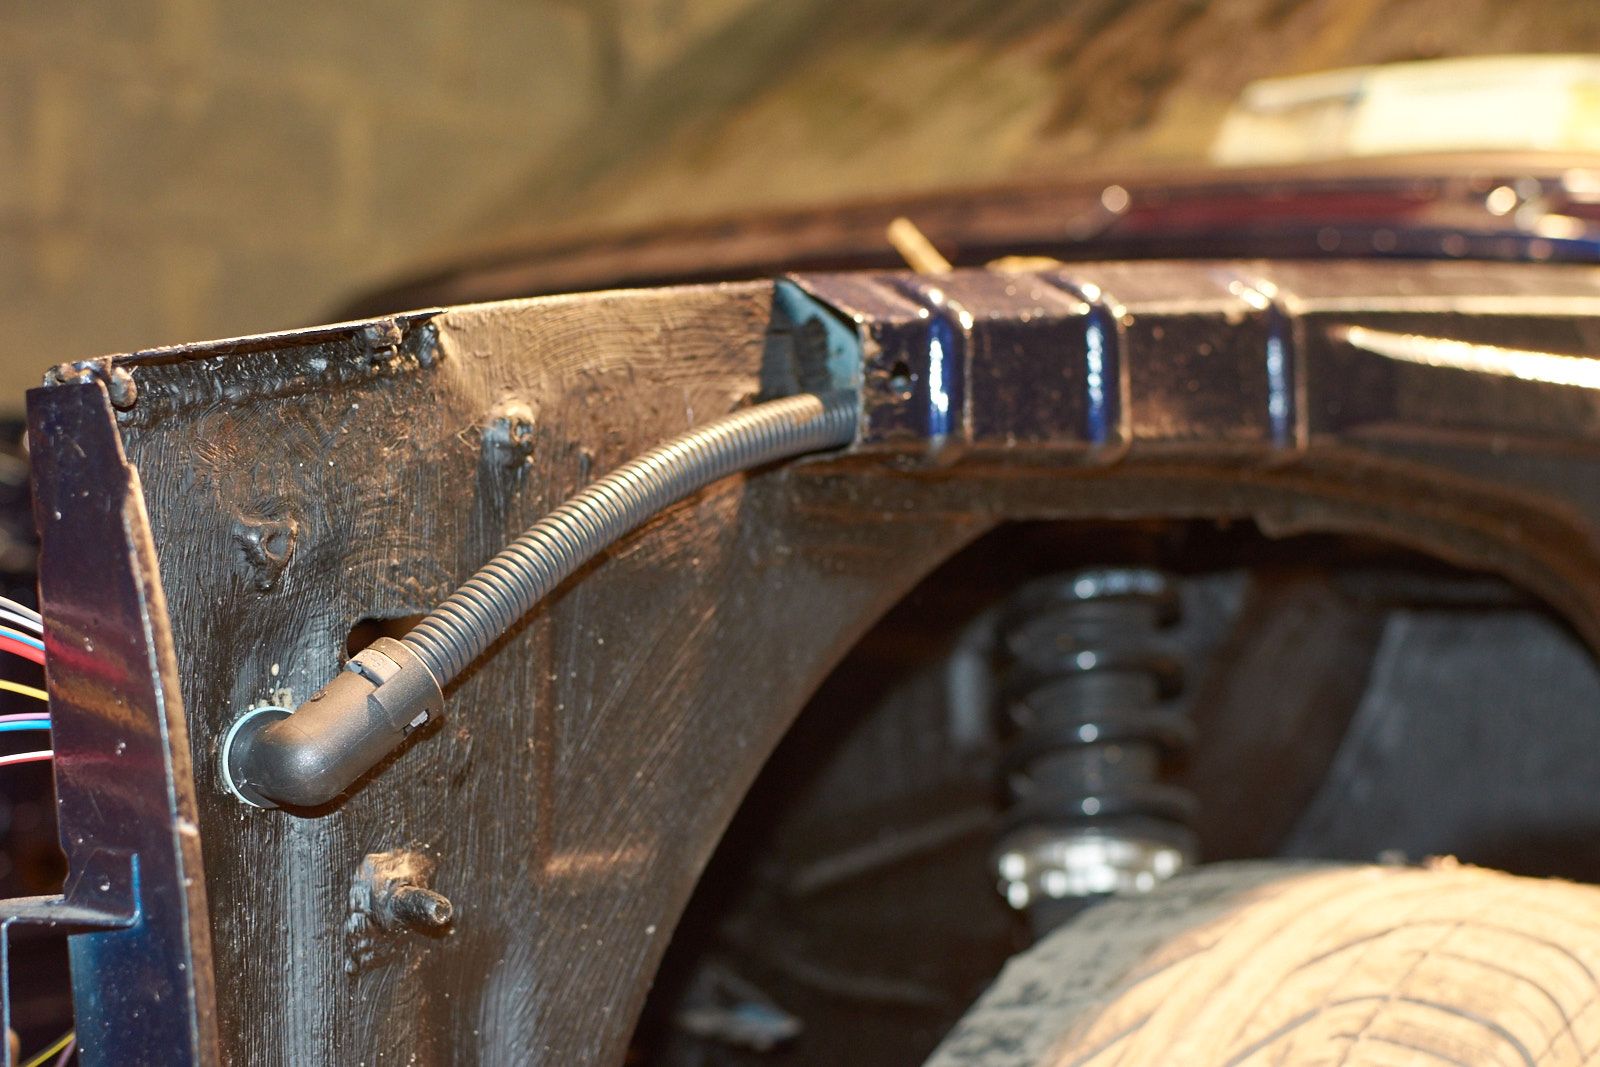
Conduit and 90deg elbow I used on both ends to protect it from the elements as much as possible (apparently the elbows are water proof)
This all took me months and many weekends, everytime I spent a couple hours at it most of the time was spent re-tracing my steps and making sure I didn't miss any cables or got things mixed up. Eventually I pulled it all through the conduit which turned out to quite difficult! I pulled out all the wires and after speakign to a friend he recomended I use wire pulling lube That took a bit to arrive but it made everything about 100x easier. In the event I missed a wire I left one long redundant wire in the loom which runs to/from the fuse box so I could tape wire to this and pull it through if I have to (which I have with a few cables since).
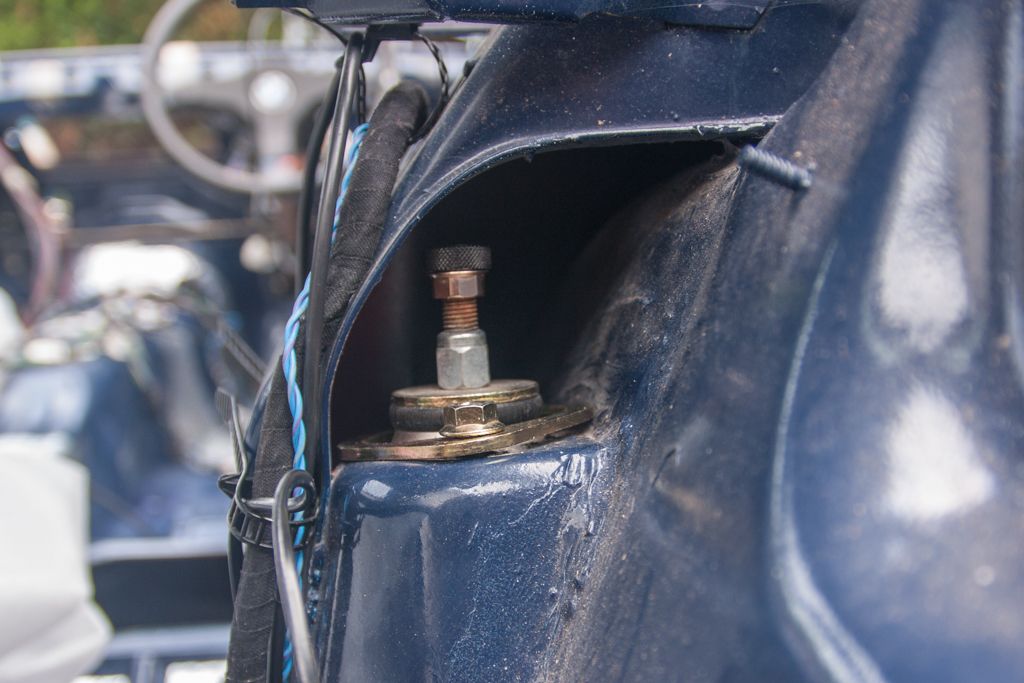
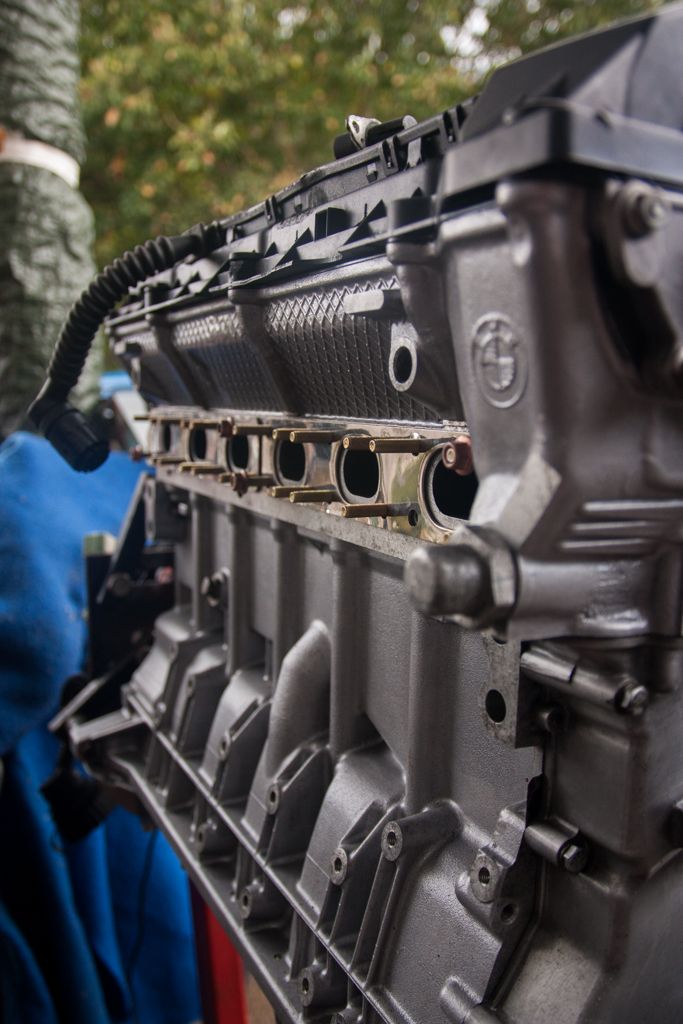
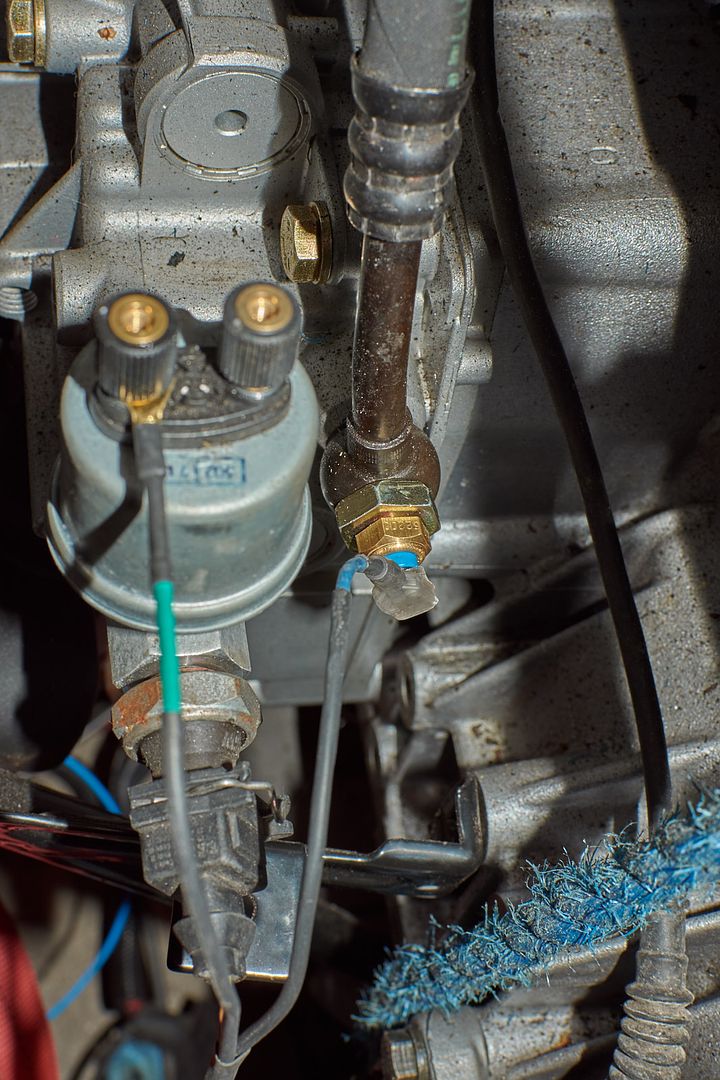
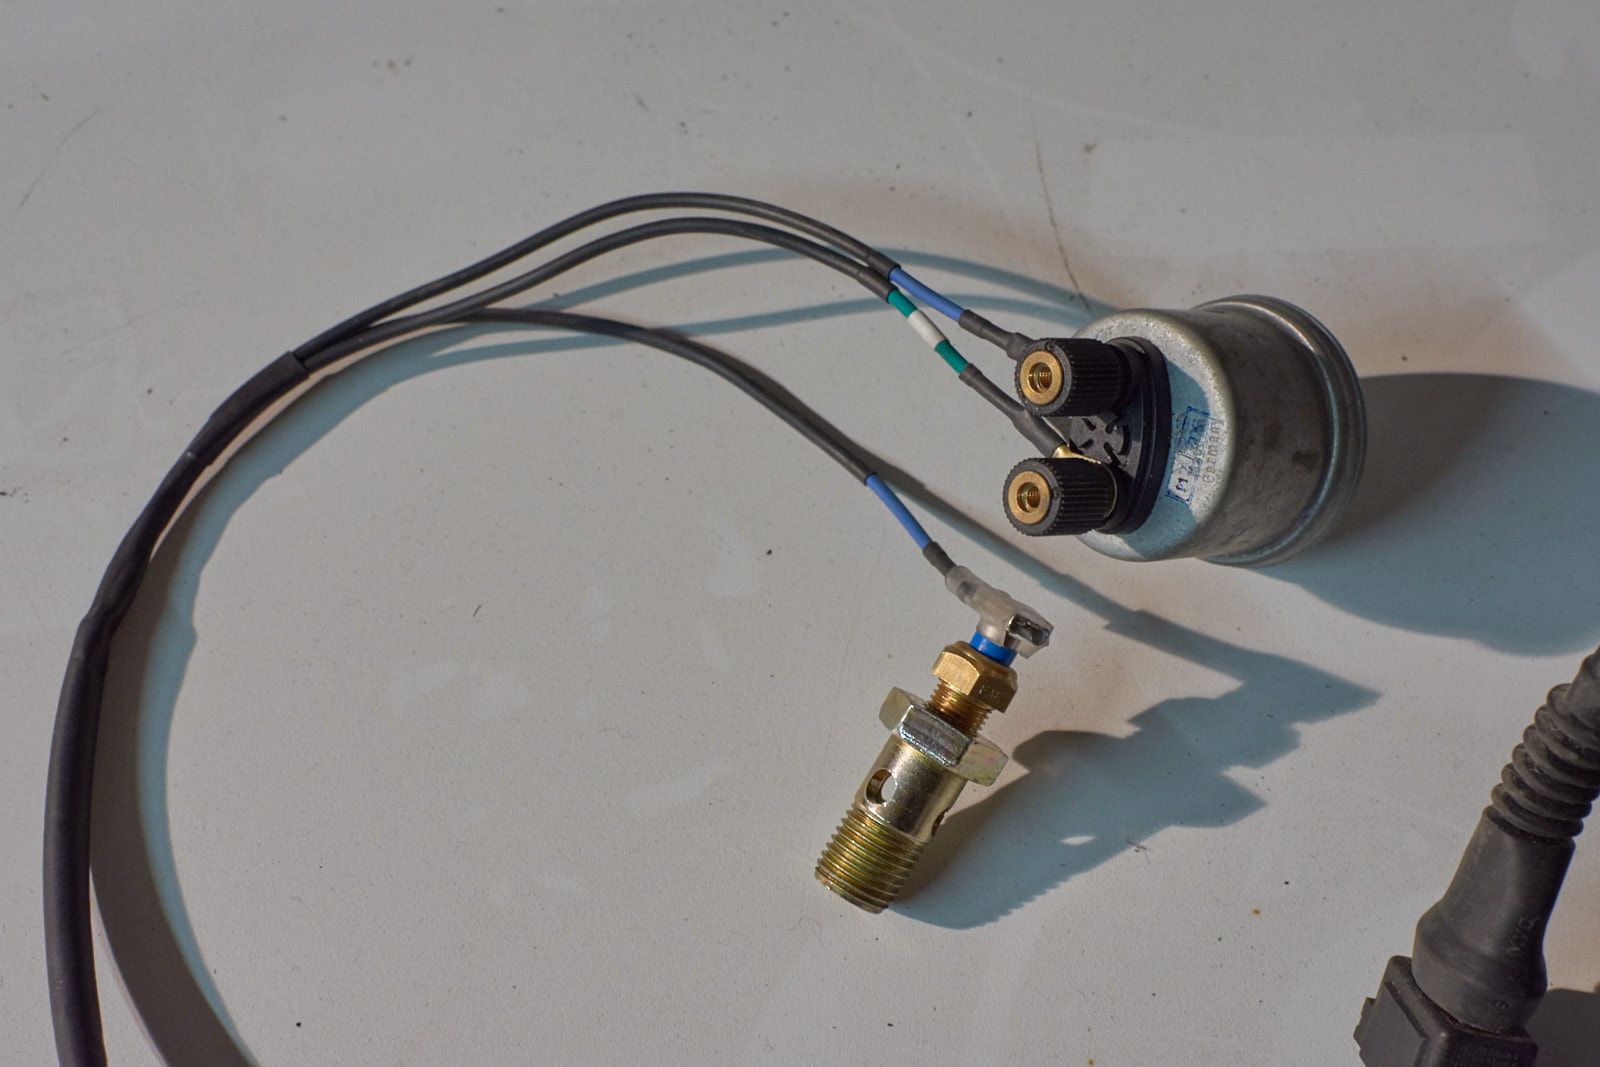
I'm also fitting VDO gauges which needed wiring up neatly. Not liking many of the t-pieces and adapters and what not available I ended up drilling a hole in one of the vanos banjo bolts and threading it for the temp sender. The pressure sender is still on an extension/adapter but at least I now don't have another adapter on this for temp. Both wires were fed through the engine loom, crimped and I used some heatshrink to color code the wires, pics below of it in place:
And the bit of engine loom I fed both wires through:
Over the weekend I'll probably undo all the above after realizing the second terminal on the pressure sender is for a warining light, which I might as well also make use of.
Thats all for slow progress
At some point last year I started extending all the wires running around the engine bay, I wanted to hide them as much as possible but not go to crazy.
Using an old loom I extended all the wiring with the same color cable. Then came to my senses after realizing I potentially had up to 3x solder joins that could fail and went ahead and ordered a load of cables and various crimps so I could tack this mess:
In the end I pulled all the original cables going to fuses and replaced them with extra long new cables with the right ends crimped on and sloted back in place. A few cables ran into the car and those were solder joined inside the fusebox and had some heatshrink applied.
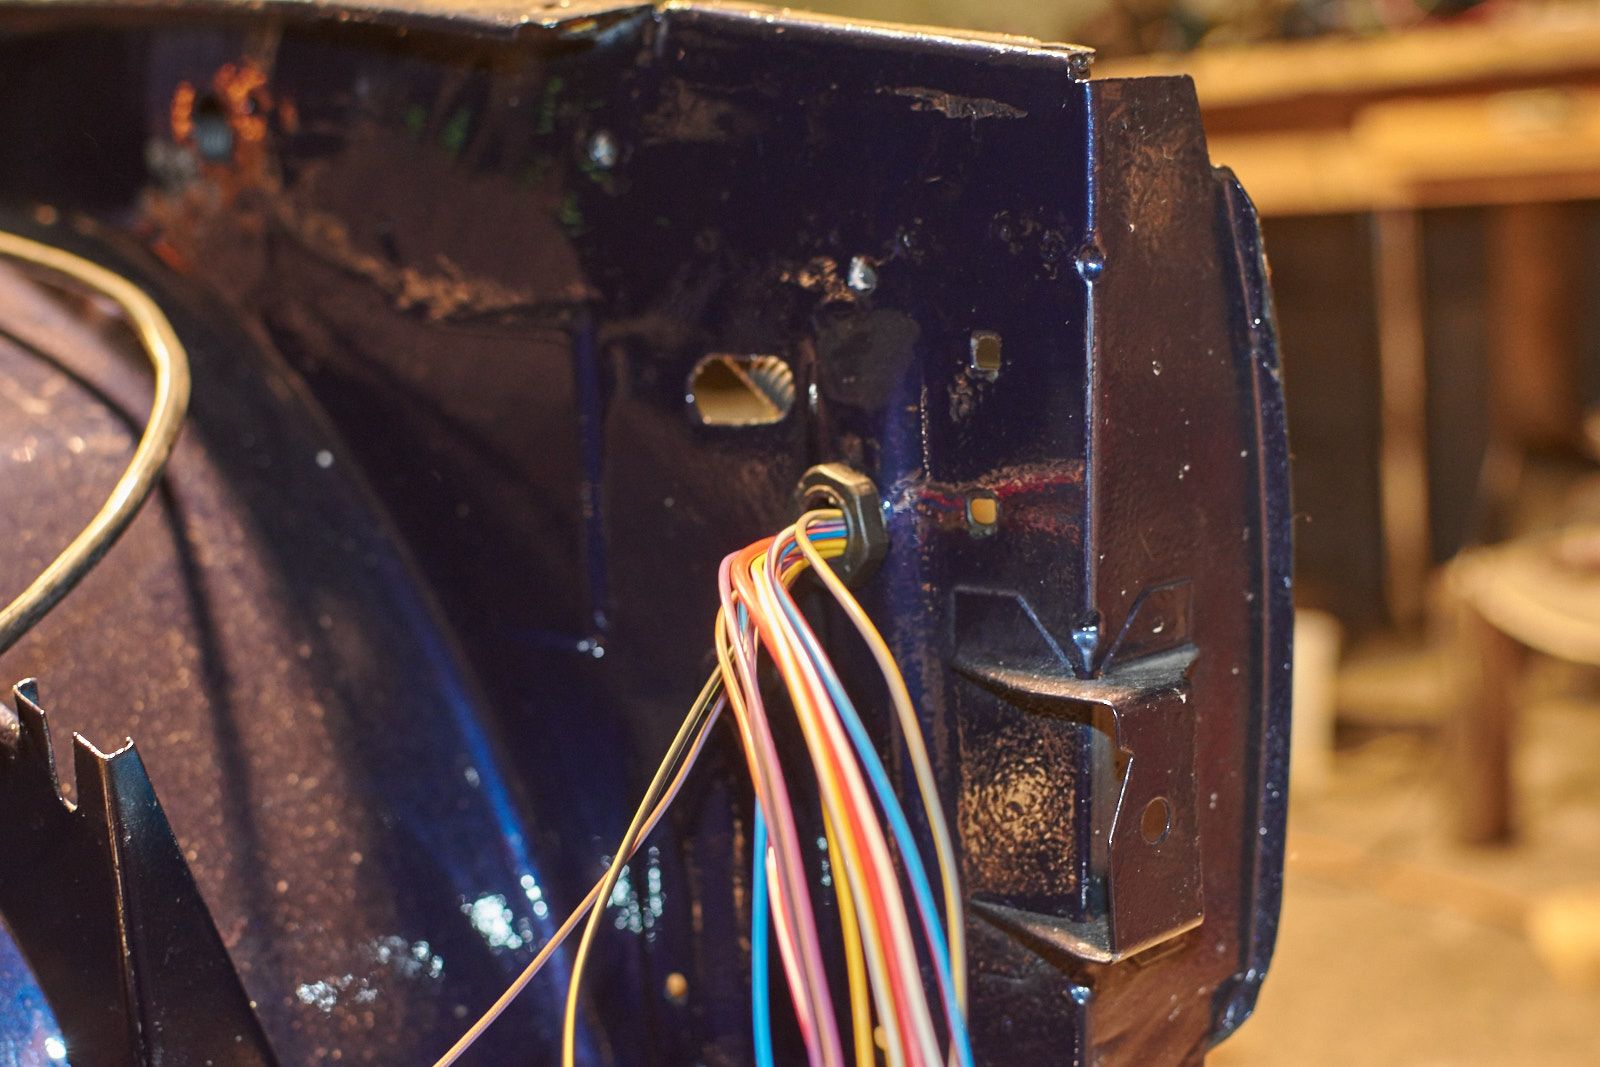
The plan was to separate all the wiring going to the passenger and driver side and route them both separately as can be seen below:
That was then stuffed through a pair of holes into conduit on the inner wings and routed to the front of the car where it exits under the front slam panel on either side
Conduit and 90deg elbow I used on both ends to protect it from the elements as much as possible (apparently the elbows are water proof)
This all took me months and many weekends, everytime I spent a couple hours at it most of the time was spent re-tracing my steps and making sure I didn't miss any cables or got things mixed up. Eventually I pulled it all through the conduit which turned out to quite difficult! I pulled out all the wires and after speakign to a friend he recomended I use wire pulling lube
I'm also fitting VDO gauges which needed wiring up neatly. Not liking many of the t-pieces and adapters and what not available I ended up drilling a hole in one of the vanos banjo bolts and threading it for the temp sender. The pressure sender is still on an extension/adapter but at least I now don't have another adapter on this for temp. Both wires were fed through the engine loom, crimped and I used some heatshrink to color code the wires, pics below of it in place:
And the bit of engine loom I fed both wires through:
Over the weekend I'll probably undo all the above after realizing the second terminal on the pressure sender is for a warining light, which I might as well also make use of.
Thats all for slow progress
-
Jozi
- E30 Zone Addict
- Posts: 3076
- Joined: Thu Nov 22, 2007 11:00 pm
- Location: Dublin, Ireland
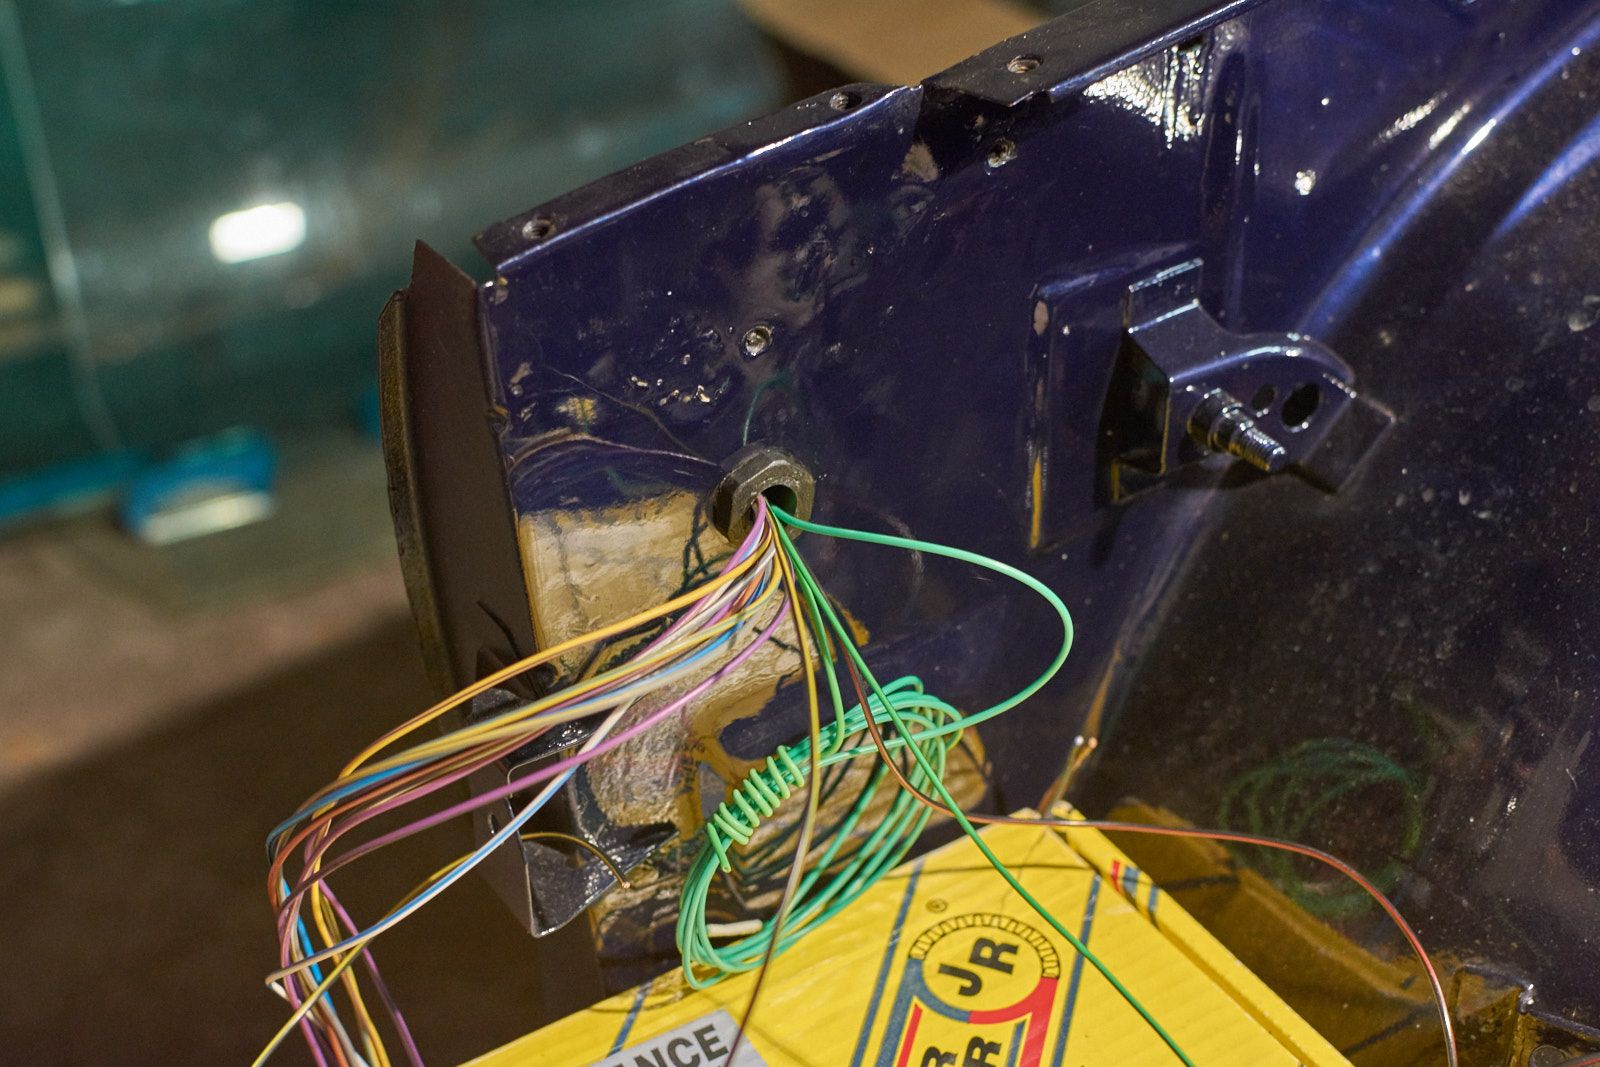
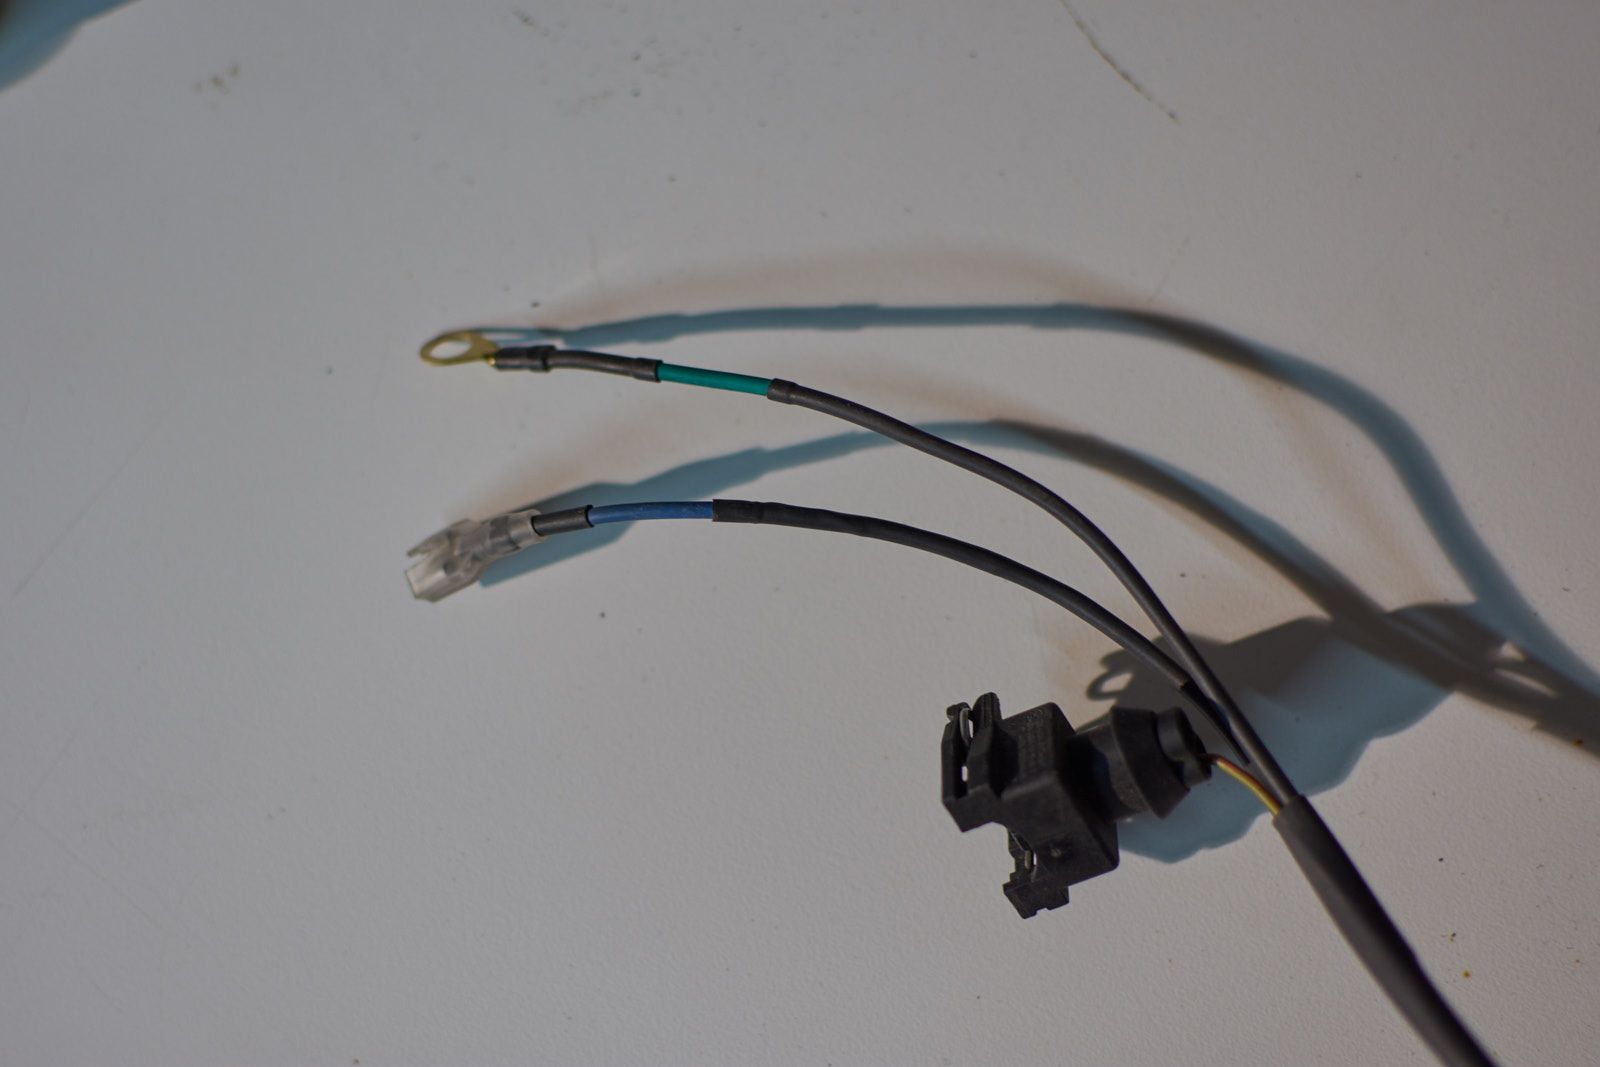
Pulled the pair of wires for the gauges senders today and re-did them on their own with a new third wire added in for warning light.
And engine loom all taped up again with the extra wires branching of just before the ecu plug
And engine loom all taped up again with the extra wires branching of just before the ecu plug