
very nice work , i am undertaking a similar restoration and am cutting and re -welding exactly the same areas and a few extra for good measure !!! ran out of gas today so on hold till my sister raids the pub
i can see your doing a thorough job and may intend on doing the suspension later (its un-painted ) but i found rust on both the strut tops where the strut bearing mounts to the chassis - might be worth checking ?
1989 316i M52 Restoration
Moderator: martauto
-
jimmyspeed
- E30 Zone Regular

- Posts: 848
- Joined: Sat Sep 08, 2007 11:00 pm
- Location: riding a wagon wheel west
-
DanThe
- E30 Zone Team Member

- Posts: 28647
- Joined: Sat Sep 10, 2005 11:00 pm
- Location: Staffs

-
dsiingh

- E30 Zone Newbie

- Posts: 91
- Joined: Tue Apr 03, 2007 11:00 pm
This looks crazy man, I wonder how much it would cost if you was paying someone else! Wish I had this kind of skill 
-
G-Bear
- E30 Zone Squatter

- Posts: 1632
- Joined: Wed Mar 12, 2008 11:00 pm
- Location: Hertfordshire
Excellent work.. Haven't the time read it all right now, just scanned through the two pages. Very refreshing, threads like these... Did I mention; excellent work.
-
Jozi
- E30 Zone Addict

- Posts: 3076
- Joined: Thu Nov 22, 2007 11:00 pm
- Location: Dublin, Ireland
Loving the metal work and repairs on this! Not seen those clamps before, could have come in handy on my own resto!
What are you using/doing on the inside of any panels you repaired, like the section on the inner wing by the fuse box?
What are you using/doing on the inside of any panels you repaired, like the section on the inner wing by the fuse box?

-
Andeep
- E30 Zone Newbie
- Posts: 228
- Joined: Sat May 16, 2009 11:00 pm
- Location: Hertfordshire
Thanks for the kind comments guys.
The backside of any metal that gets welded in gets a few coats of weld thru primer. The area will also be sprayed with cavity wax to prevent rust.
The backside of any metal that gets welded in gets a few coats of weld thru primer. The area will also be sprayed with cavity wax to prevent rust.
-
DaveyB
- E30 Zone Regular
- Posts: 399
- Joined: Wed Oct 07, 2009 11:00 pm
Awsome progress

Wanted Nothing atm
-
dirtee-herbert

- E30 Zone Regular
- Posts: 327
- Joined: Sat Apr 23, 2011 11:00 pm
- Location: Keighley, West Yorkshire.
patching up like a true pro. amazing work Andeep! cat wait to see more.
-
Andeep
- E30 Zone Newbie
- Posts: 228
- Joined: Sat May 16, 2009 11:00 pm
- Location: Hertfordshire
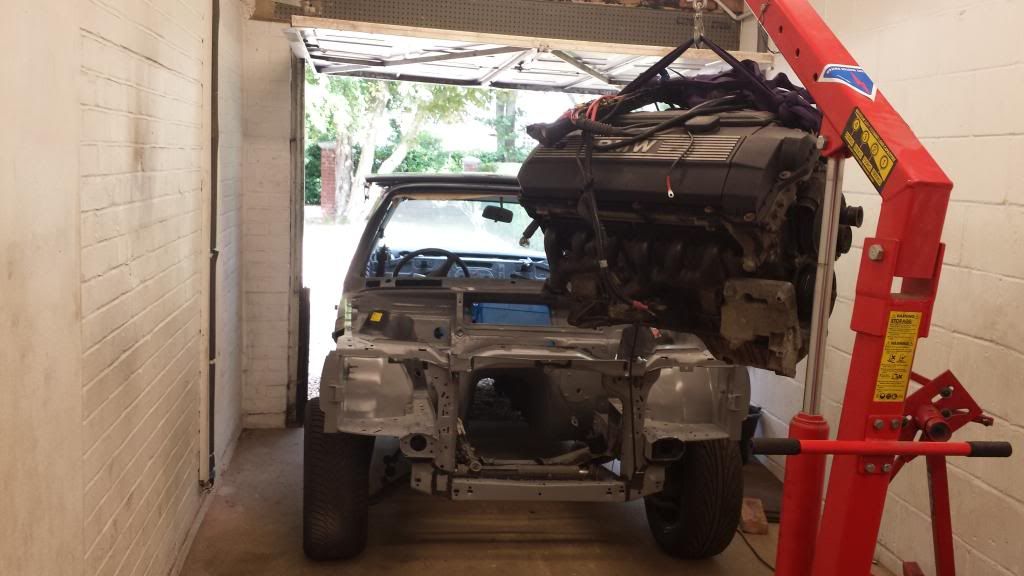
Some slow progress:
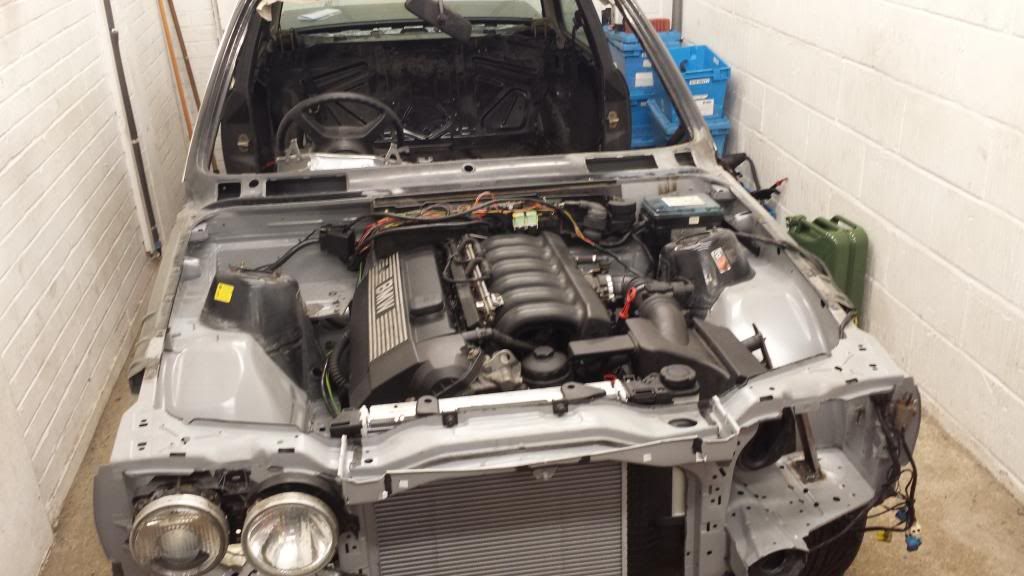
Need to get the engine in and running so that I can fab/weld any brackets that it may need and weld up any unused holes in the engine bay. Once its all running, it will pull it out so I can finish off the restoration work on the rest of the car and finally get everything painted.

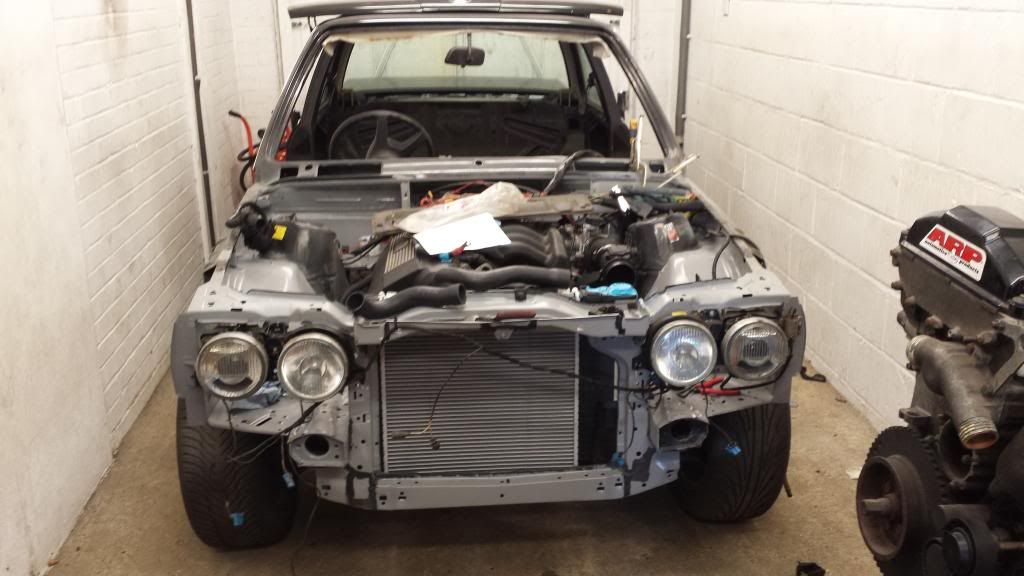
New Nissens 328i air-con spec rad:
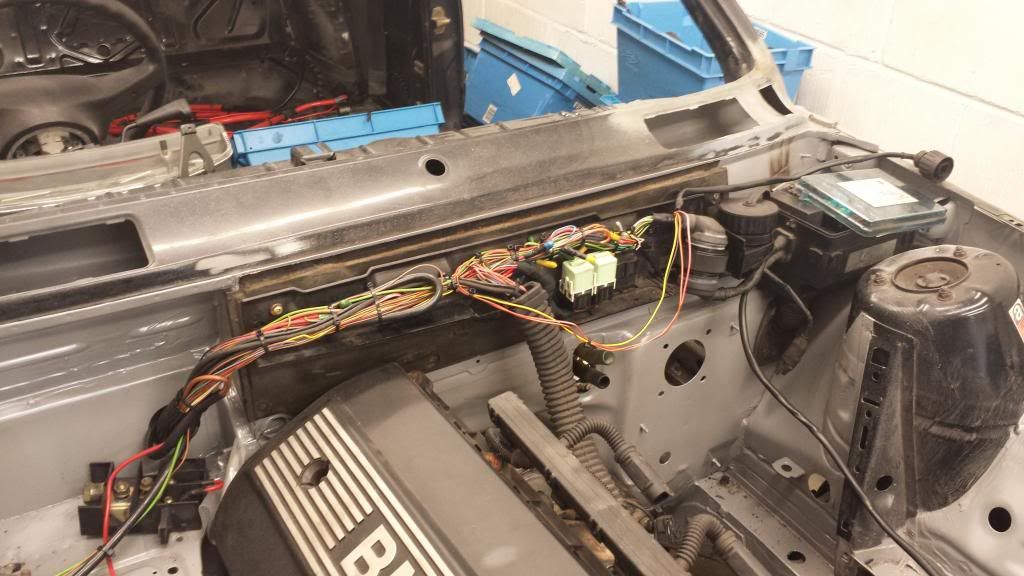
Started connecting the interior loom:
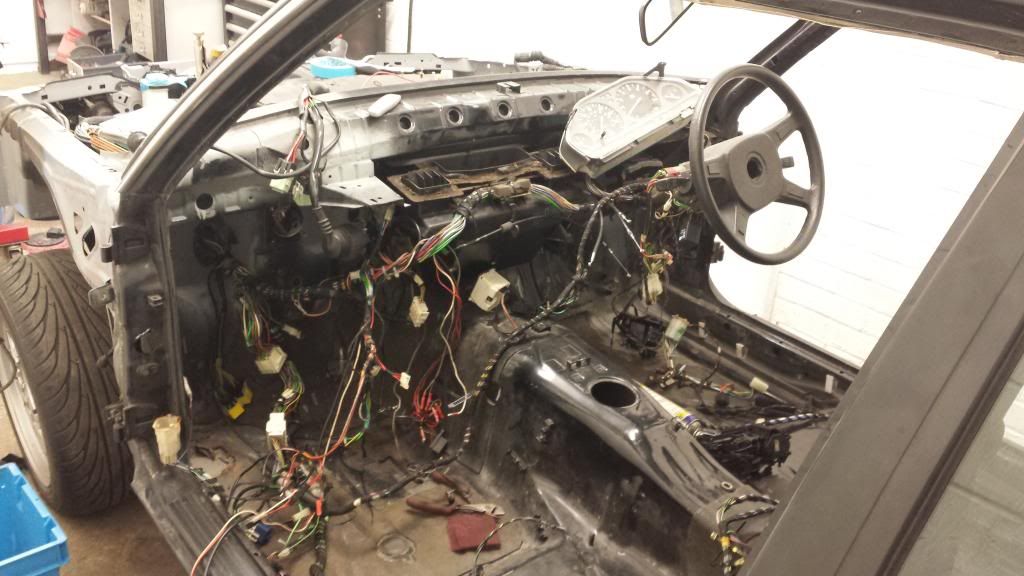
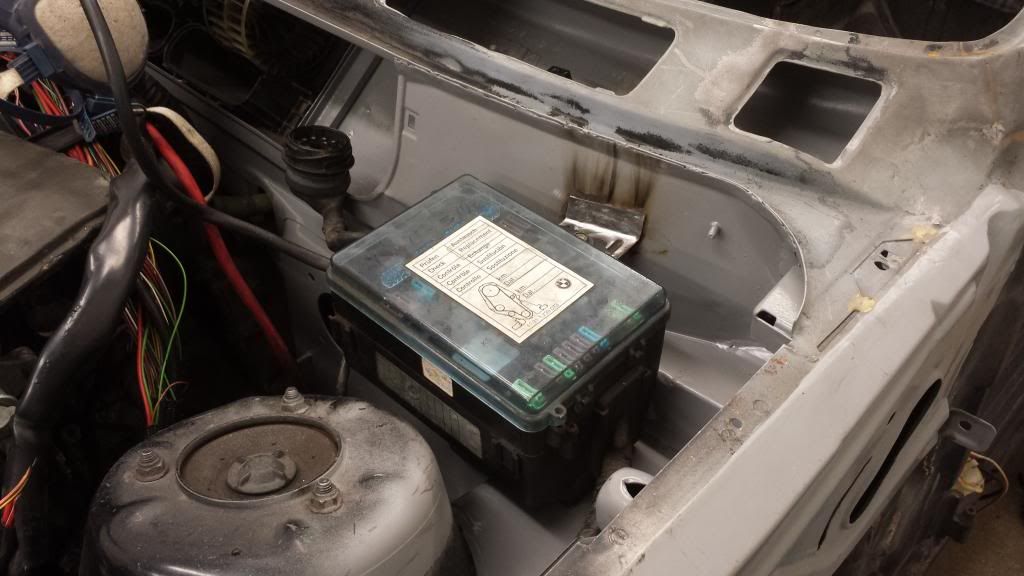
Fusebox mounted:
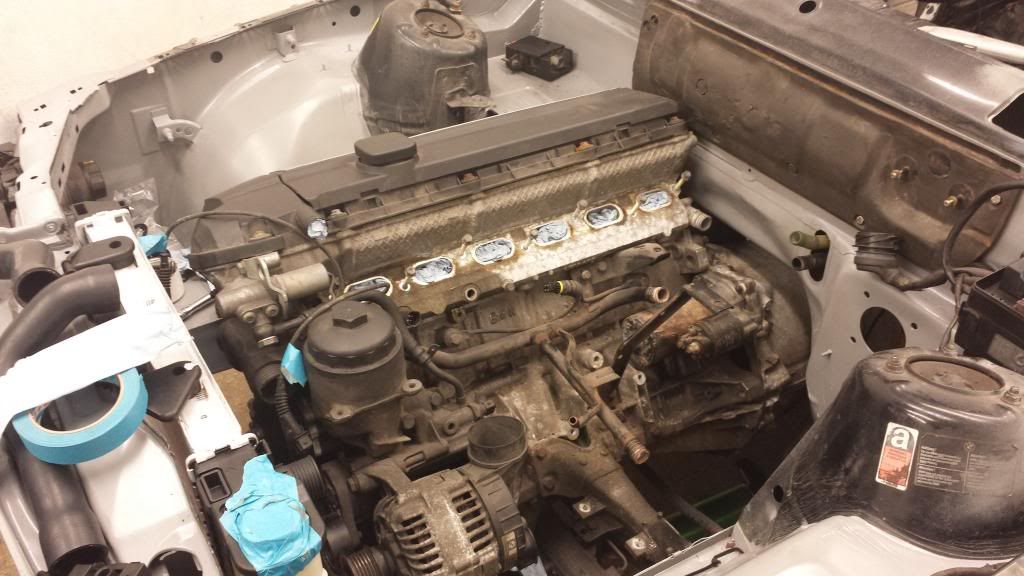
Inlet and loom removed:
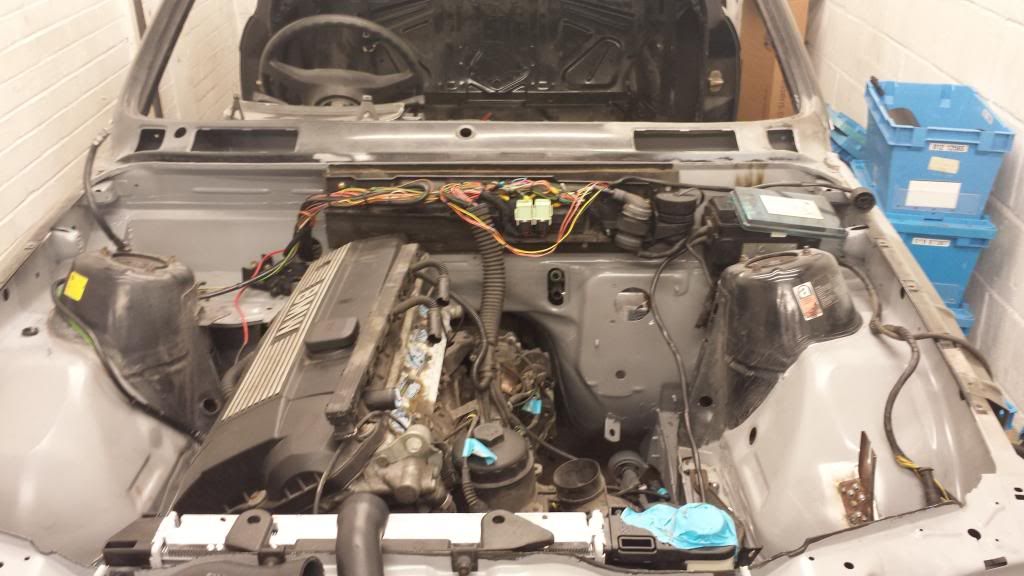
All wired up (fingers crossed!):
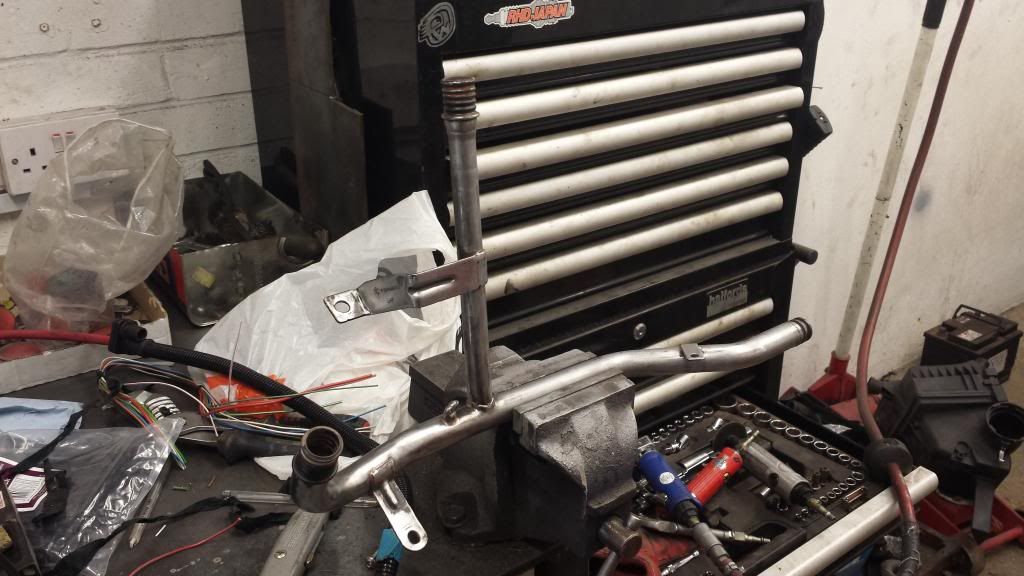
Also welded up the throttle body heater hose on the metal coolant line:

Cleaned it up and keyed. Will spray a few coats of epoxy and 2k black:
ECU has been sent off to be remapped for the M50 inlet and manifolds sent off to be modified
Need to get the engine in and running so that I can fab/weld any brackets that it may need and weld up any unused holes in the engine bay. Once its all running, it will pull it out so I can finish off the restoration work on the rest of the car and finally get everything painted.
New Nissens 328i air-con spec rad:
Started connecting the interior loom:
Fusebox mounted:
Inlet and loom removed:
All wired up (fingers crossed!):
Also welded up the throttle body heater hose on the metal coolant line:
Cleaned it up and keyed. Will spray a few coats of epoxy and 2k black:
ECU has been sent off to be remapped for the M50 inlet and manifolds sent off to be modified
-
Andeep
- E30 Zone Newbie
- Posts: 228
- Joined: Sat May 16, 2009 11:00 pm
- Location: Hertfordshire
E30 lives again:
[youtube][/youtube]
The noise is just the extractor fan.
Need to sort out a few bits, also it wants to stall when coming down to idle from a raised RPM, I put this down to it having a lightened flywheel and having no clutch at the moment.
Very loud without an exhaust!
[youtube][/youtube]
The noise is just the extractor fan.
Need to sort out a few bits, also it wants to stall when coming down to idle from a raised RPM, I put this down to it having a lightened flywheel and having no clutch at the moment.
Very loud without an exhaust!
-
AndyZippy
- E30 Zone Regular
- Posts: 319
- Joined: Tue Apr 24, 2012 11:00 pm
- Location: Glastonbury, UK
Top job man, absolutely top job. 
-
Andeep
- E30 Zone Newbie
- Posts: 228
- Joined: Sat May 16, 2009 11:00 pm
- Location: Hertfordshire
Not much of an update.
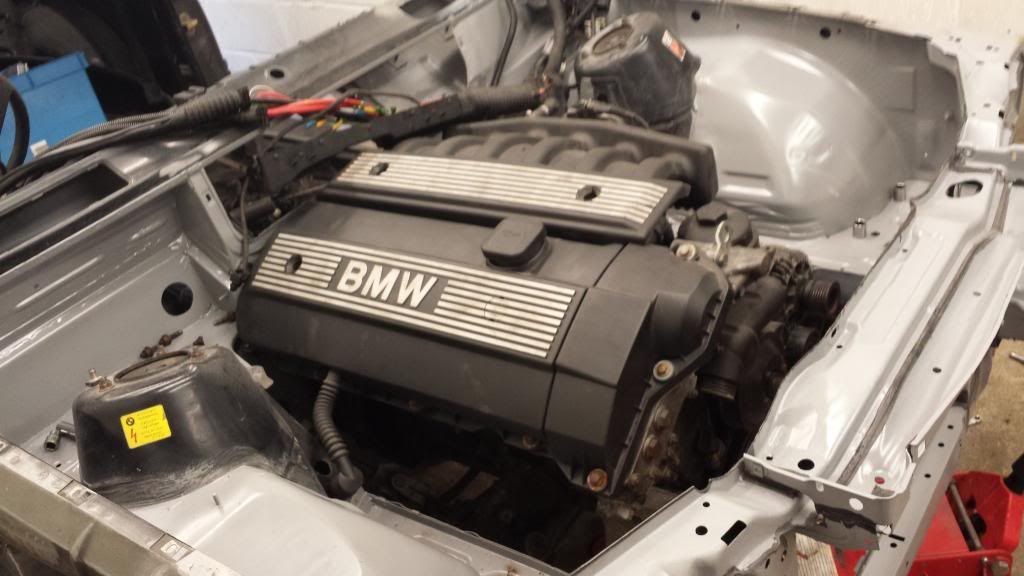
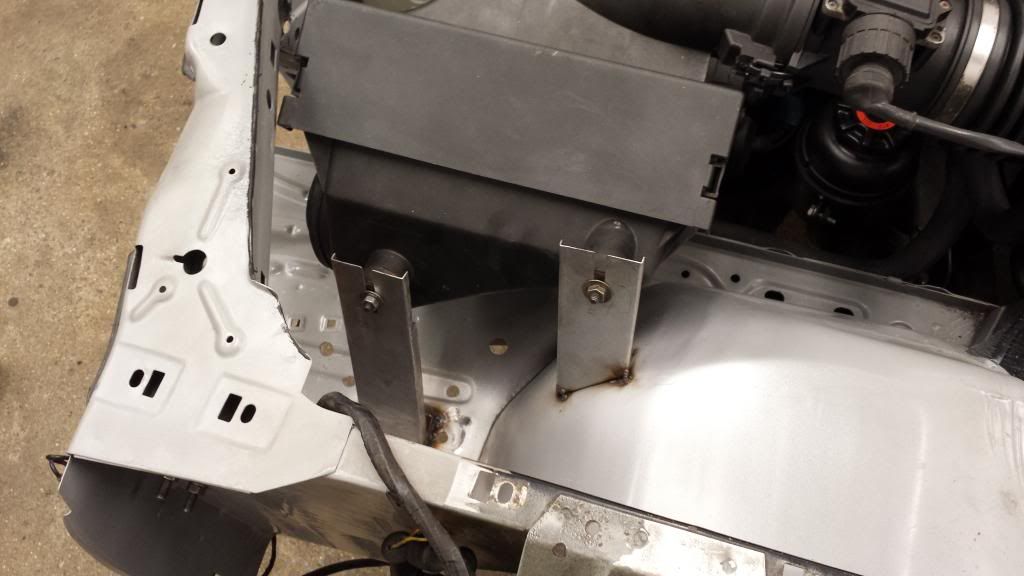
Put the M50 inlet on, properly routed the ICV and breather pipes so they look OEM, installed E30 rear battery relocation.
Also built some brackets to mount the airbox:
Put the M50 inlet on, properly routed the ICV and breather pipes so they look OEM, installed E30 rear battery relocation.
Also built some brackets to mount the airbox:
-
Andeep
- E30 Zone Newbie
- Posts: 228
- Joined: Sat May 16, 2009 11:00 pm
- Location: Hertfordshire
I think this thread is well overdue for an update! I have been very busy with university and now a new job so the car sat around for a while, but I'm hoping to get a move on and finish this project...
So the next job was to build a rotisserie so that I can turn the car at any angle to properly attack all the rust.
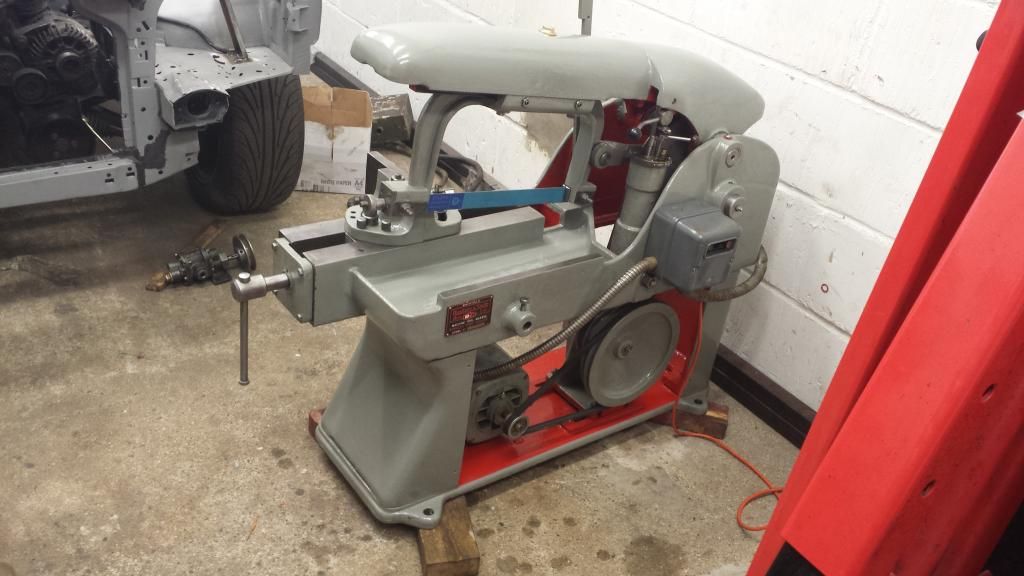
I bought a Qualters and Smith power hacksaw which was build in the 1950s and weighs about 300kg:
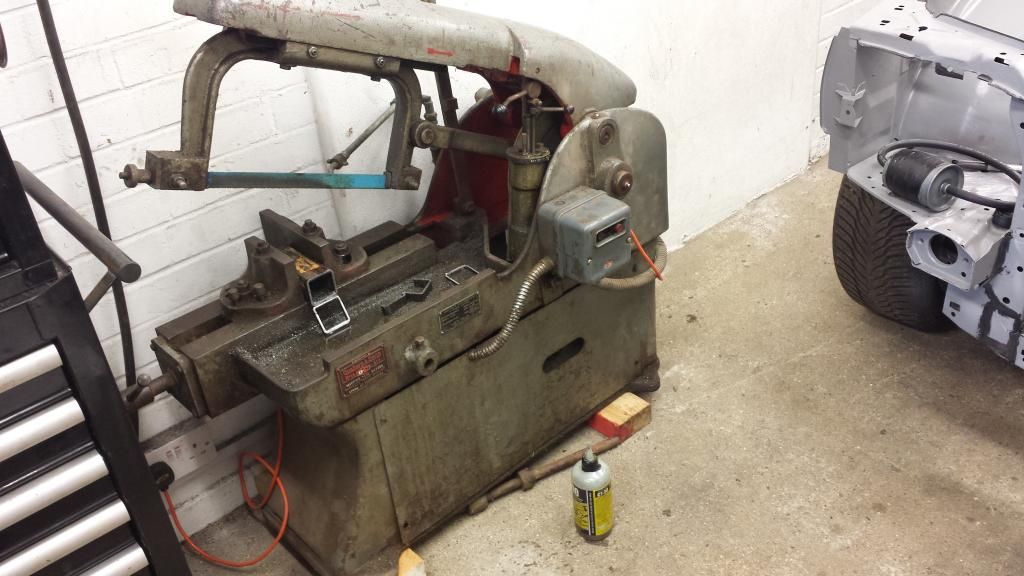
It was in perfect mechanical condition but it was a bit rough due to its long life as a peice of industrial equipment. I therefore stripped it down completely, removed all the old paint, epoxy primed and painted it in its original colour. As well as this I serviced the bearings, belts and suds pump:
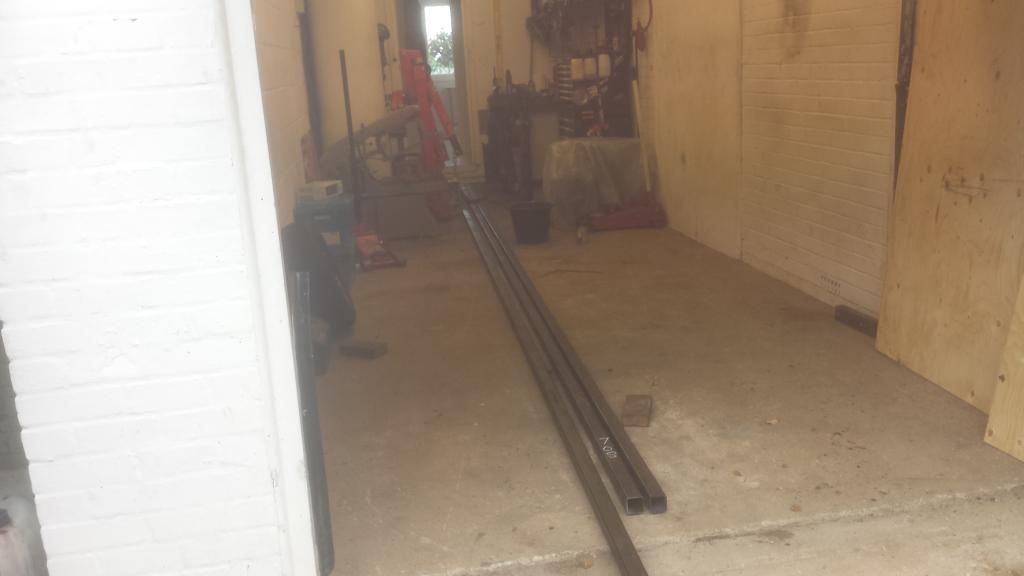
Box section:
A video of it in action:

Front section:
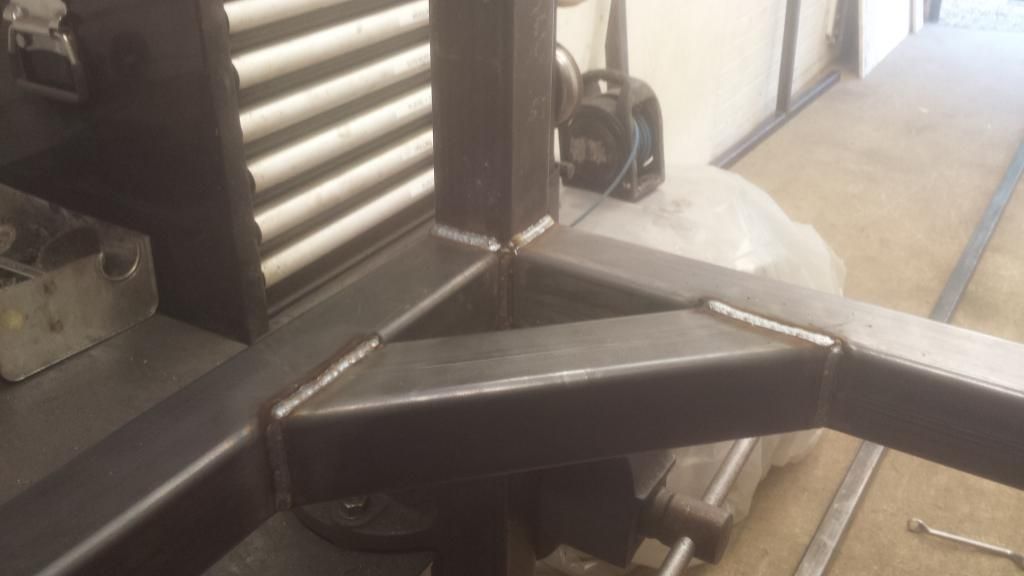
Some welds:
Rear:
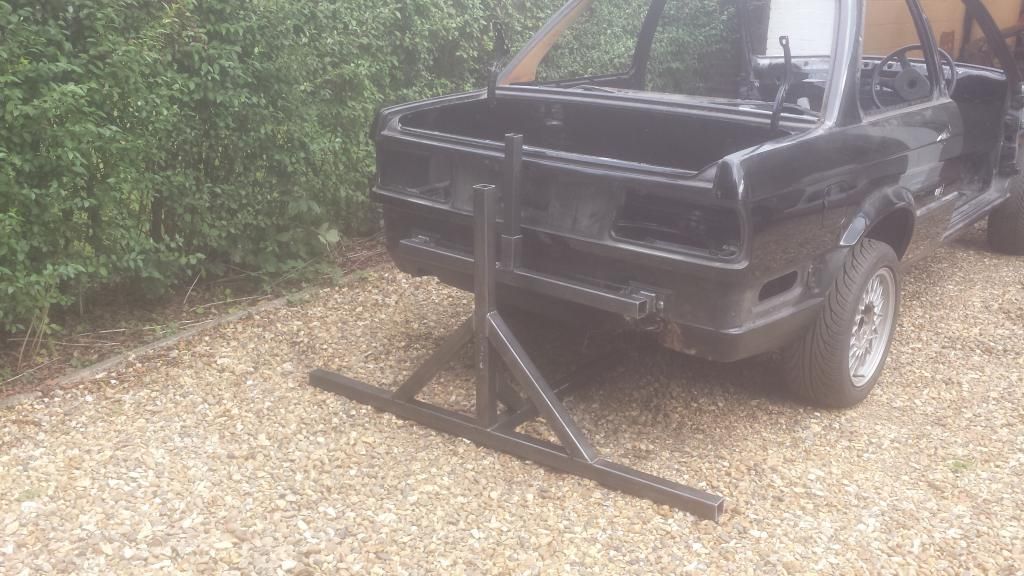
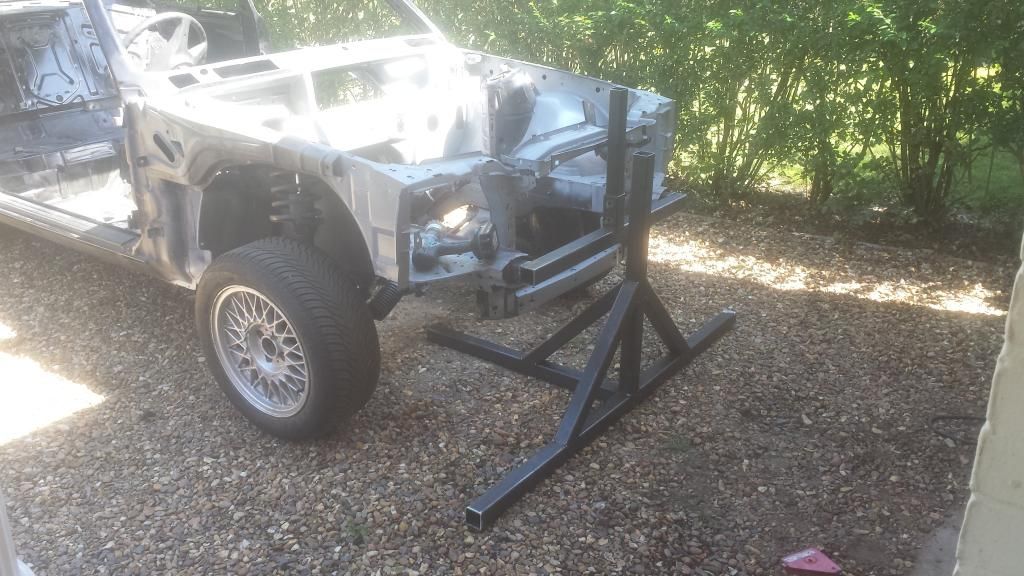
All done and working as it should:
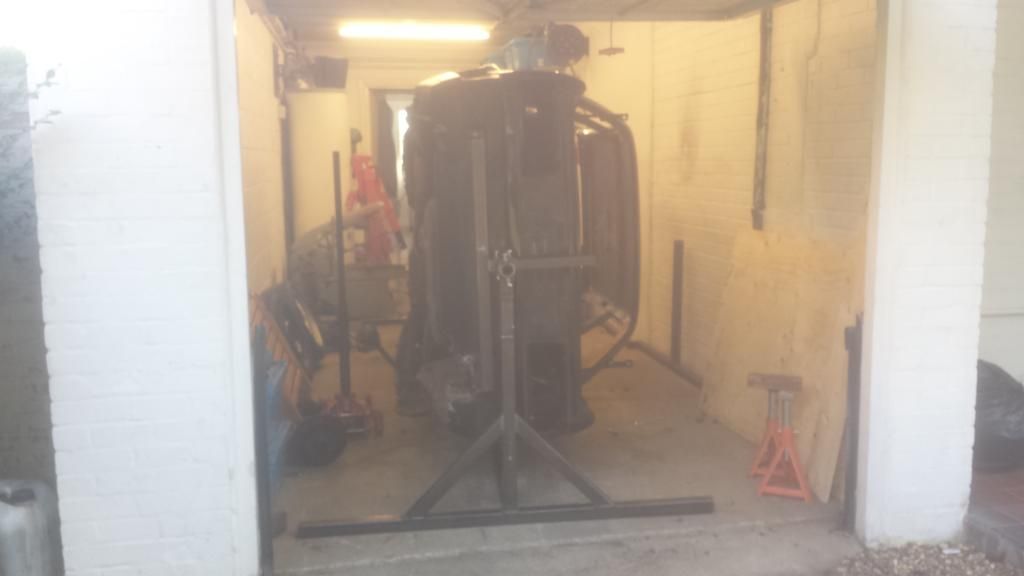
So the next job was to build a rotisserie so that I can turn the car at any angle to properly attack all the rust.
I bought a Qualters and Smith power hacksaw which was build in the 1950s and weighs about 300kg:
It was in perfect mechanical condition but it was a bit rough due to its long life as a peice of industrial equipment. I therefore stripped it down completely, removed all the old paint, epoxy primed and painted it in its original colour. As well as this I serviced the bearings, belts and suds pump:
Box section:
A video of it in action:
Front section:
Some welds:
Rear:
All done and working as it should:
-
jimbom30cab
- Tech 1 freak
- Posts: 7634
- Joined: Mon Oct 12, 2009 11:00 pm
- Location: in the garage
Proper Engineering there, Fred Dibnah would be proud. Nice welds also, perfect in fact.
-
Andeep
- E30 Zone Newbie
- Posts: 228
- Joined: Sat May 16, 2009 11:00 pm
- Location: Hertfordshire
There were a few bits of rush in the nearside wheel arch.
Cut out and weld through primer applied:
Patch panel formed:
Welded in and ground down:
Some rust behind the brake line bracket:
Bracket removed, patch welded in:
Ground down and bracket plug welded back on:

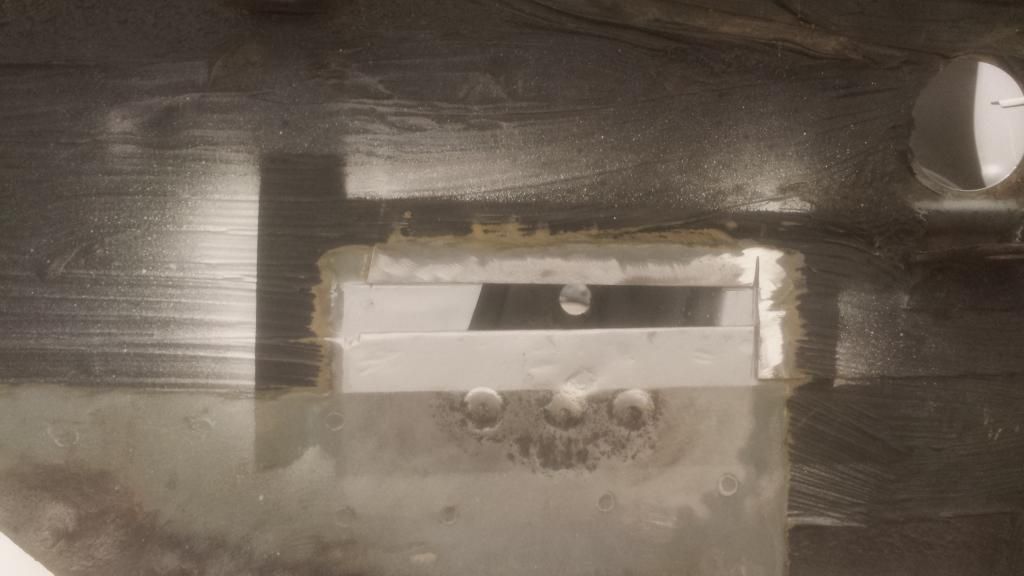
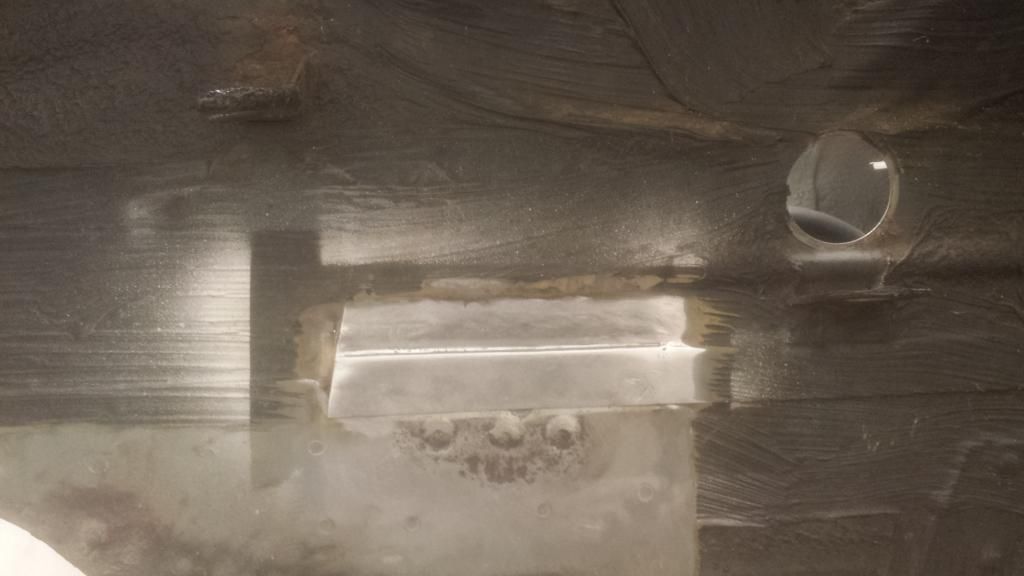
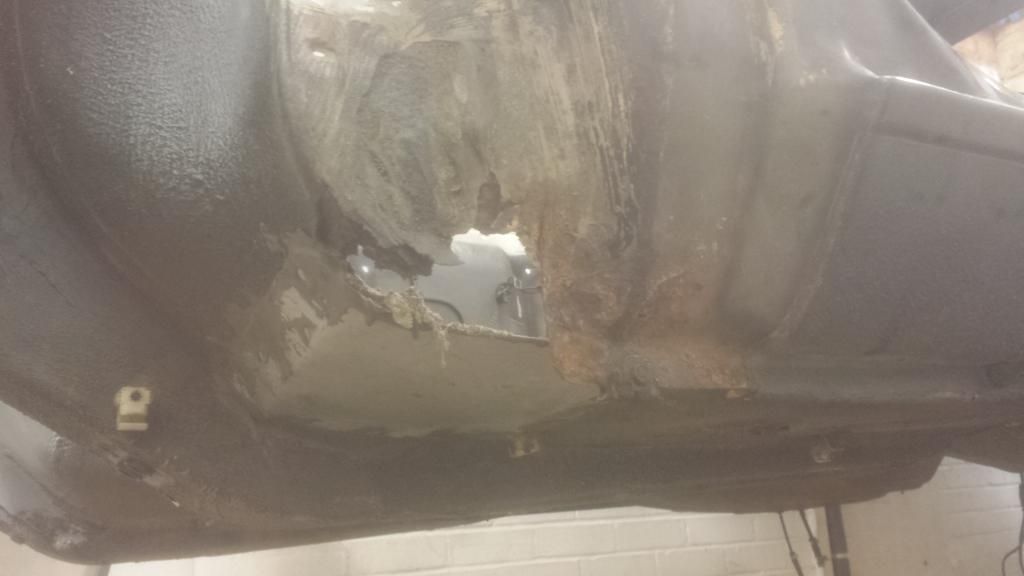
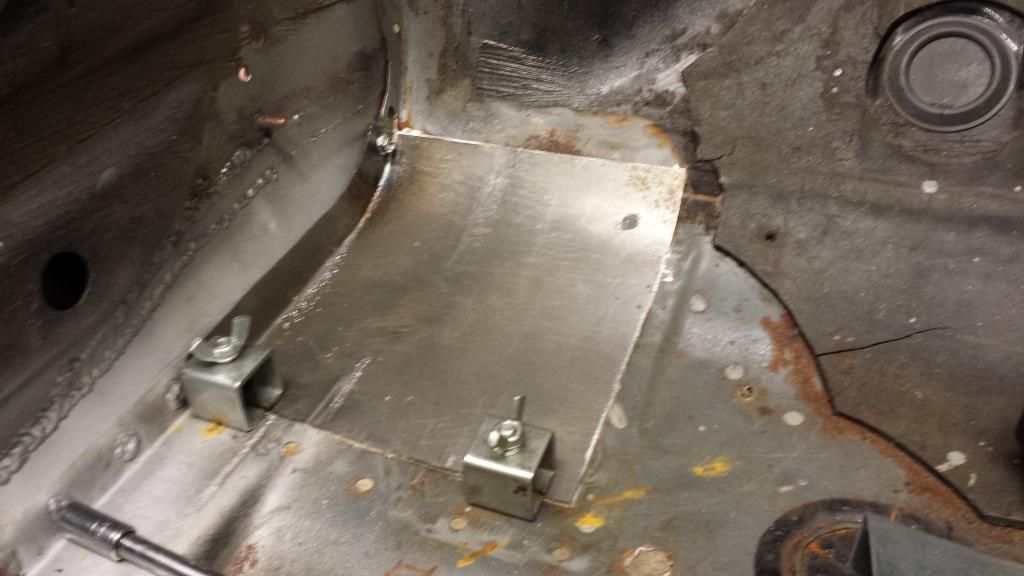
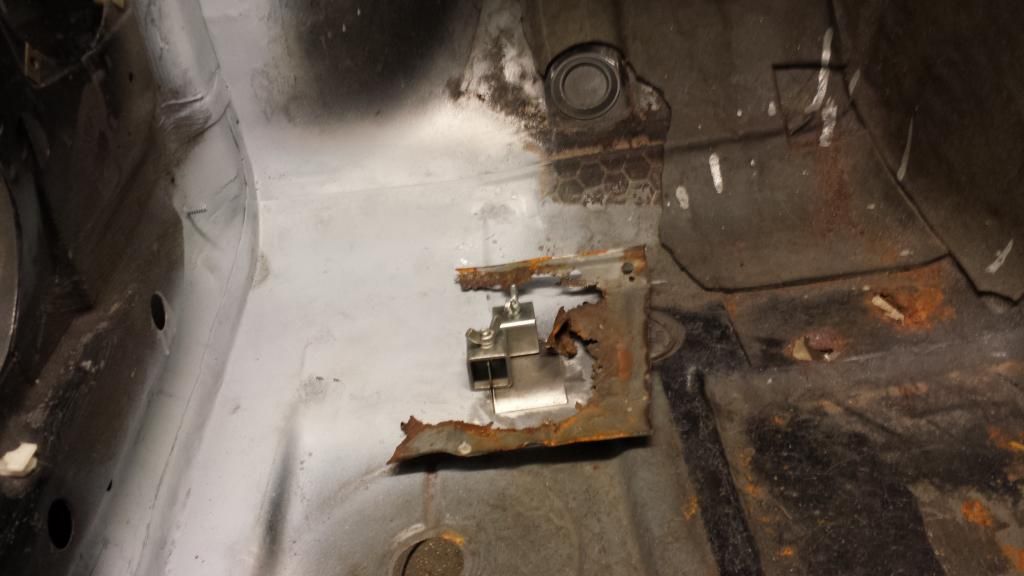
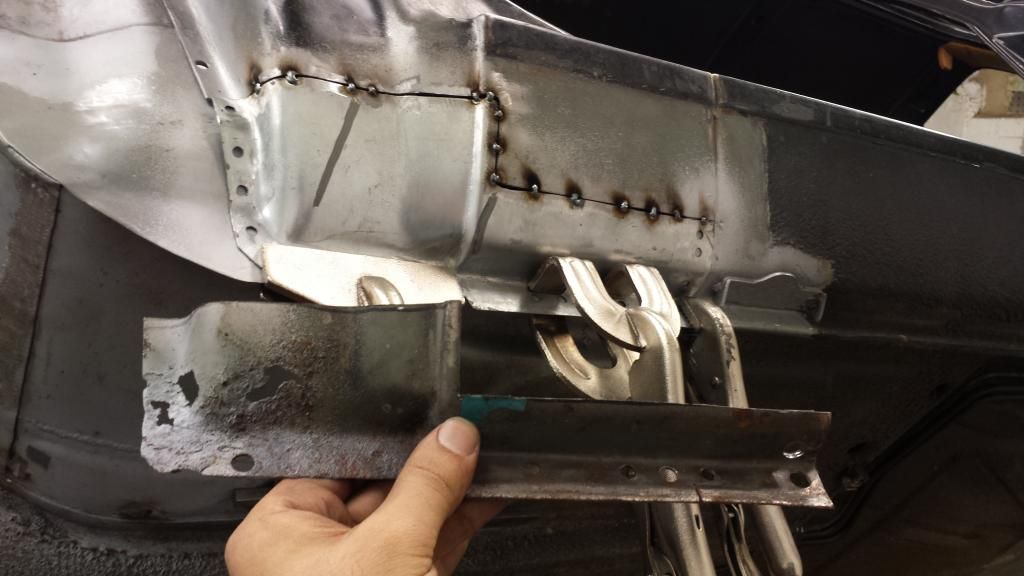
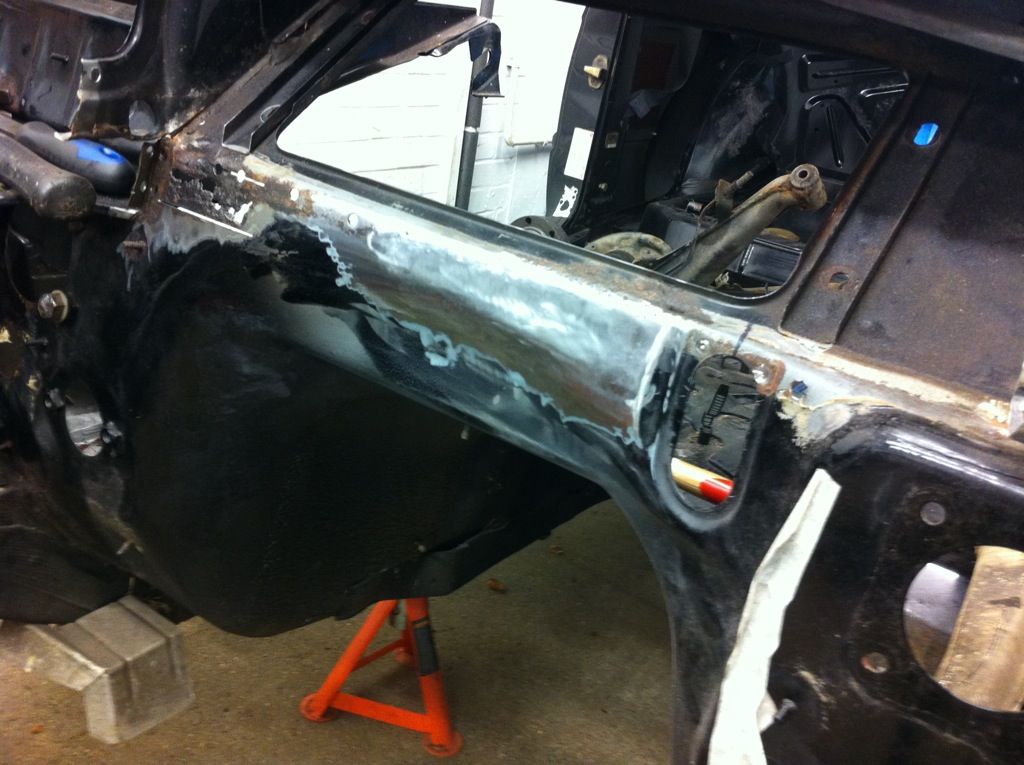
The next major area to sort was the passenger side footwell/jacking pad. This was completely rusted through and the due to the scuttle also being rusted, this let a lot of water through to the floor. At some point someone had attempted to bodge it by riveting on some alumimium plate and filled the area with expanding foam. As a result the floor was shot, so was all the skins of the sill in that area:
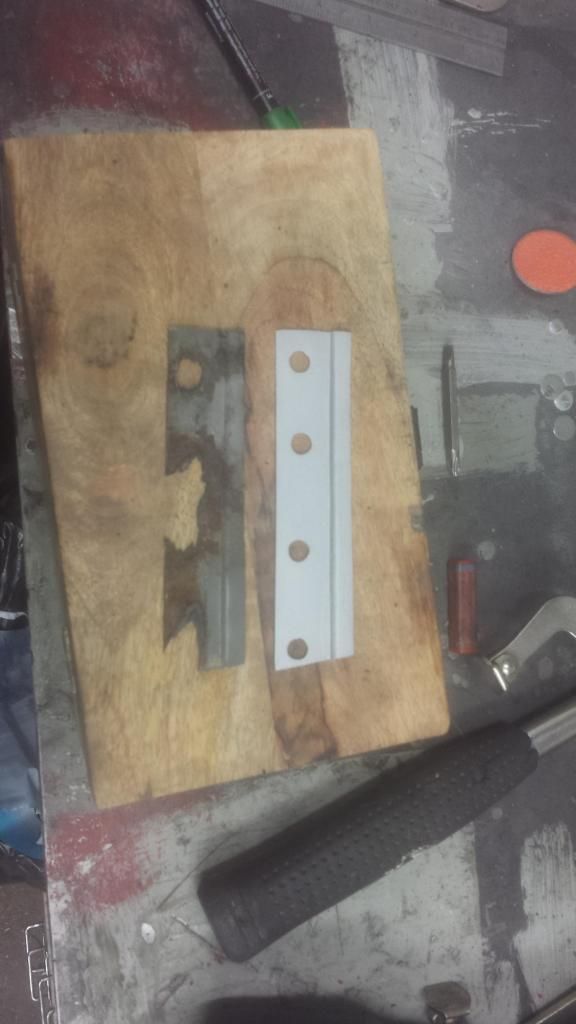
It was cut out and I started forming patches to sort the sill skins:
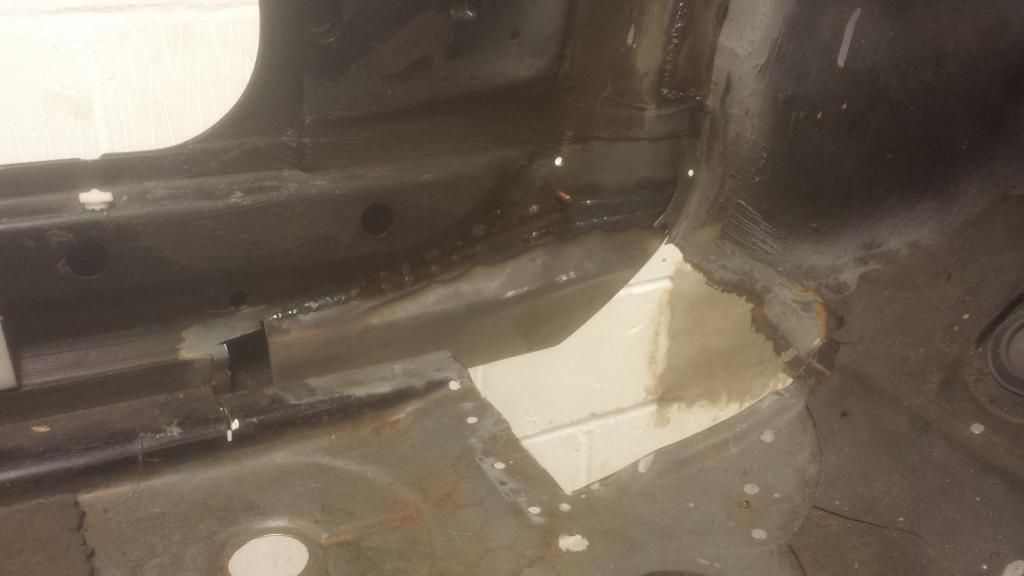
Floor panel formed:

Welded:
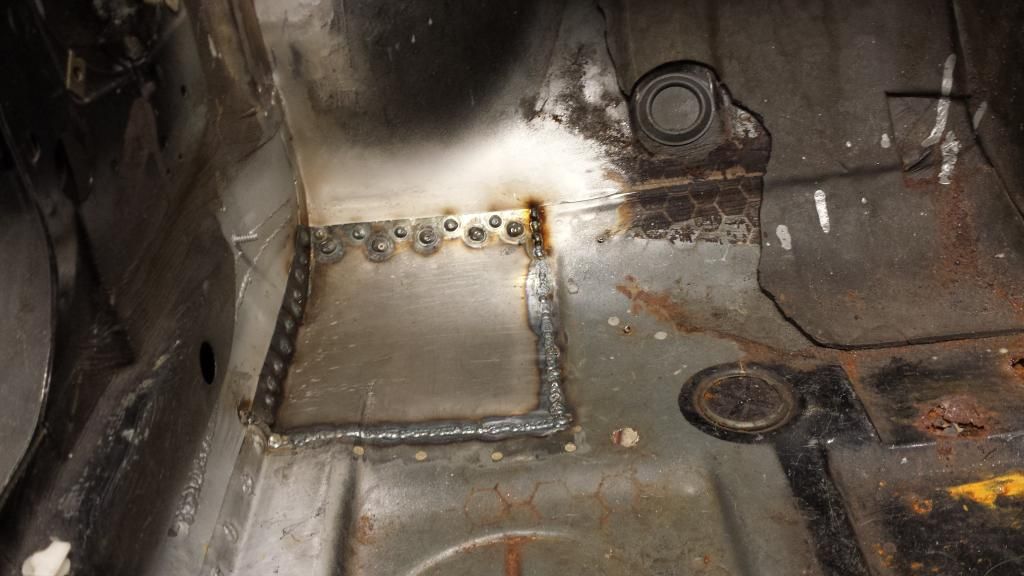
Ground down:
With the orignal floor piece that was cut out:
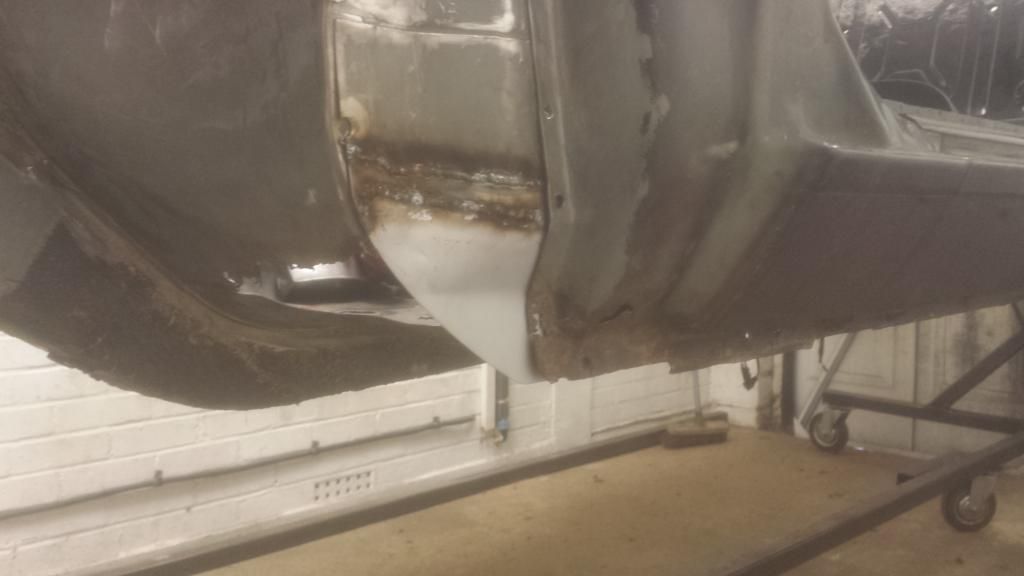
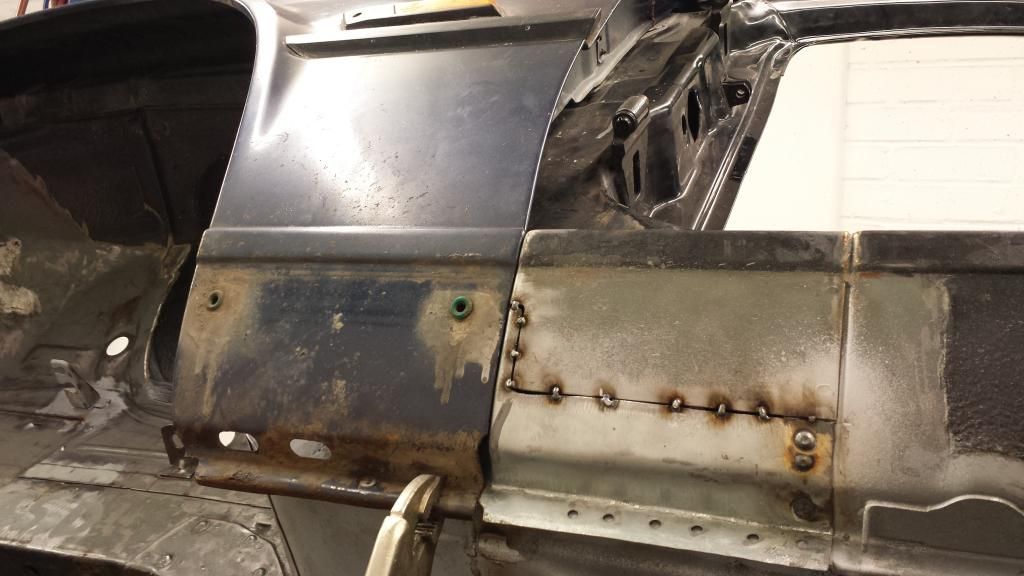
I bought an aftermaket sill panel from Carz2 so that I could chop the outer sill it and use that for a perfect fit. The stamping was okay, it took a lot of adjustment to get it to fit perfectly:
Wing panel gap is retained:
Ground down:
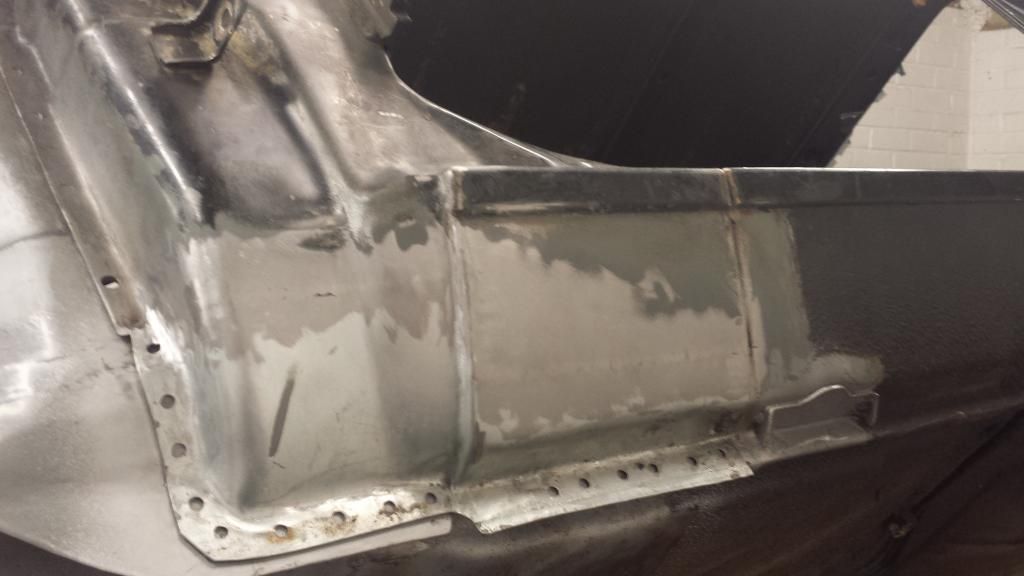
Rattle can etch to stop surface rust:
Cut out and weld through primer applied:
Patch panel formed:
Welded in and ground down:
Some rust behind the brake line bracket:
Bracket removed, patch welded in:
Ground down and bracket plug welded back on:
The next major area to sort was the passenger side footwell/jacking pad. This was completely rusted through and the due to the scuttle also being rusted, this let a lot of water through to the floor. At some point someone had attempted to bodge it by riveting on some alumimium plate and filled the area with expanding foam. As a result the floor was shot, so was all the skins of the sill in that area:
It was cut out and I started forming patches to sort the sill skins:
Floor panel formed:
Welded:
Ground down:
With the orignal floor piece that was cut out:
I bought an aftermaket sill panel from Carz2 so that I could chop the outer sill it and use that for a perfect fit. The stamping was okay, it took a lot of adjustment to get it to fit perfectly:
Wing panel gap is retained:
Ground down:
Rattle can etch to stop surface rust:
-
G-Bear
- E30 Zone Squatter
- Posts: 1632
- Joined: Wed Mar 12, 2008 11:00 pm
- Location: Hertfordshire
I've seen one of those power hacksaws in action.. a beautiful machine, nice purchase..
-
325ftmfw
- E30 Zone Newbie
- Posts: 34
- Joined: Mon Dec 01, 2014 11:00 pm
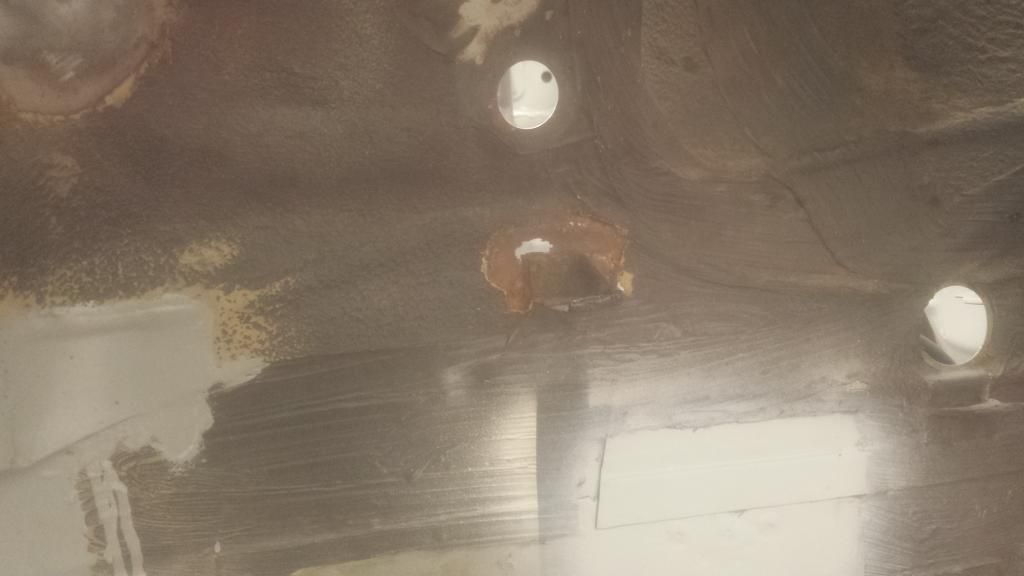
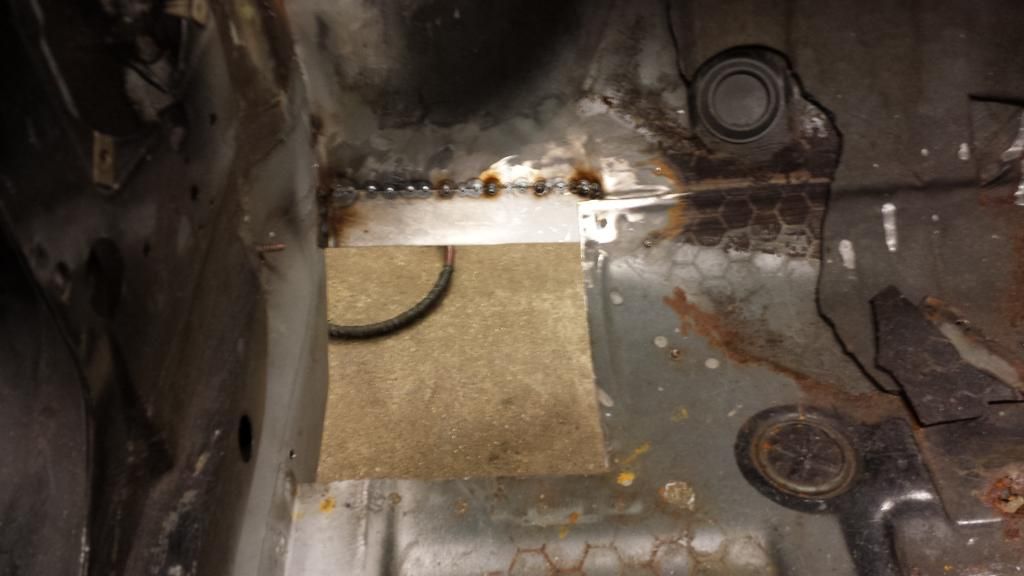
With this one - where the hole is next to the tunnel and you have a bit of rust showing on the top RH corner
where you've drilled out the spot weld. Could you see that rust before you cut out that section? or was it a suprise after it was removed
I cut my section out up to the top LH corner, and there was no rust on that bit.

now wondering if I should keep going, I couldnt see any sign of rust around that area, but if yours looked good at that point as well then I may keep going.
ie.

love your work so far by the way. I bet grinding down all those welds is making your floor very sharp haha.
-
Andeep
- E30 Zone Newbie
- Posts: 228
- Joined: Sat May 16, 2009 11:00 pm
- Location: Hertfordshire
To be honest I can't really remember if there was rust there. With any car there probably is going to be rust where 2 pieces of metal overlap and are spot welded together. They don't apply any form of weld through primer on overlapping areas, and when the car is dipped the coating sometimes doesn't flow between the seams.325ftmfw wrote: With this one - where the hole is next to the tunnel and you have a bit of rust showing on the top RH corner
where you've drilled out the spot weld. Could you see that rust before you cut out that section? or was it a suprise after it was removed
I guess there would be no harm in having a look behind it, but then you could say that for every lapping seam in the car. Best thing to combat any future rust is epoxy the metal and then seam seal over it with a PU seam sealant.
-
appletree
- E30 Zone Addict
- Posts: 3482
- Joined: Fri Jan 20, 2006 11:00 pm
- Location: Retford
Great work, love all the fabrication pics! Keep them coming.
My dad's got a similar power hacksaw and they are very useful thing indeed.
My dad's got a similar power hacksaw and they are very useful thing indeed.

You should never underestimate the predictability of stupidity
M42 Supercharged 285bhp + M3 6speed box
-
325ftmfw
- E30 Zone Newbie
- Posts: 34
- Joined: Mon Dec 01, 2014 11:00 pm
cheers mate, yeh I'm laying down the epoxy on everything!
Had a good sticky beak last night and it looks mickey mouse. But as you say, where do you draw the line to pulling shit apart
Had a good sticky beak last night and it looks mickey mouse. But as you say, where do you draw the line to pulling shit apart
-
jimbom30cab
- Tech 1 freak
- Posts: 7634
- Joined: Mon Oct 12, 2009 11:00 pm
- Location: in the garage
Great work there and very impressive fabrication. Good stuff !!
-
Andeep
- E30 Zone Newbie
- Posts: 228
- Joined: Sat May 16, 2009 11:00 pm
- Location: Hertfordshire
Small update.
Finished welding all the plug welds and filling any voids:
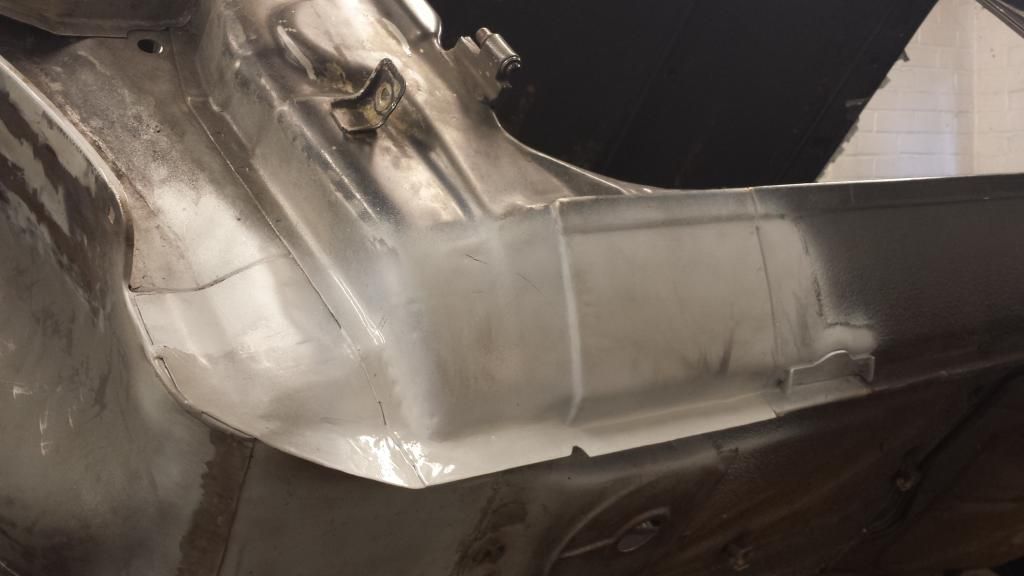
Ground down all the welds on the underside:

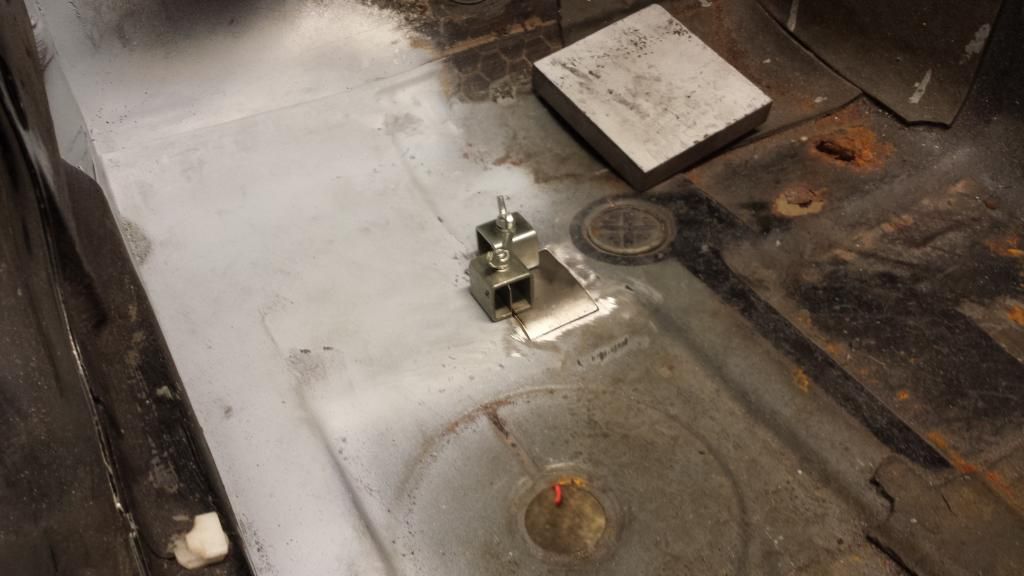
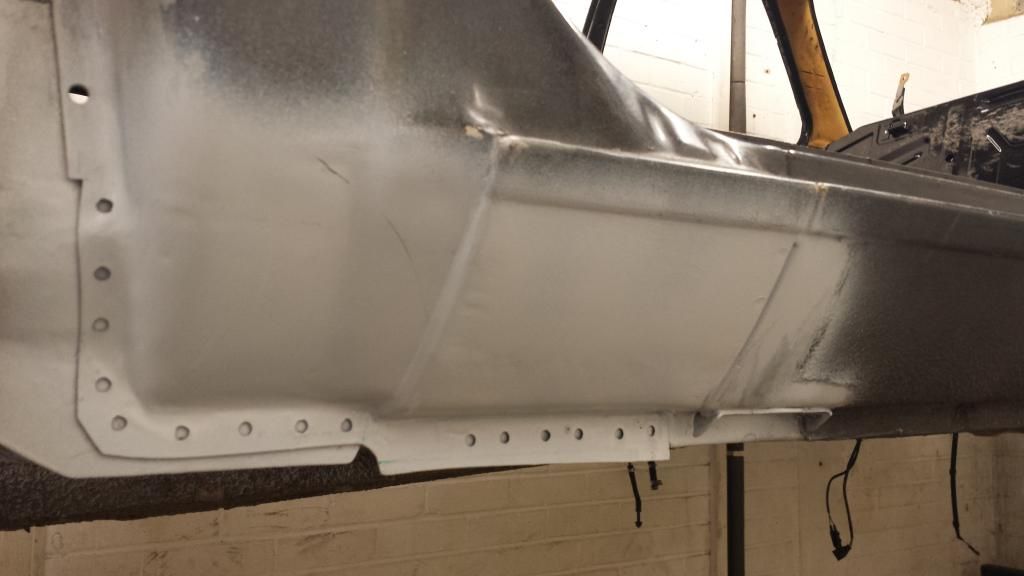
Then trimmed the sill panel to make it the same as OEM:
Will never know this has had any welding
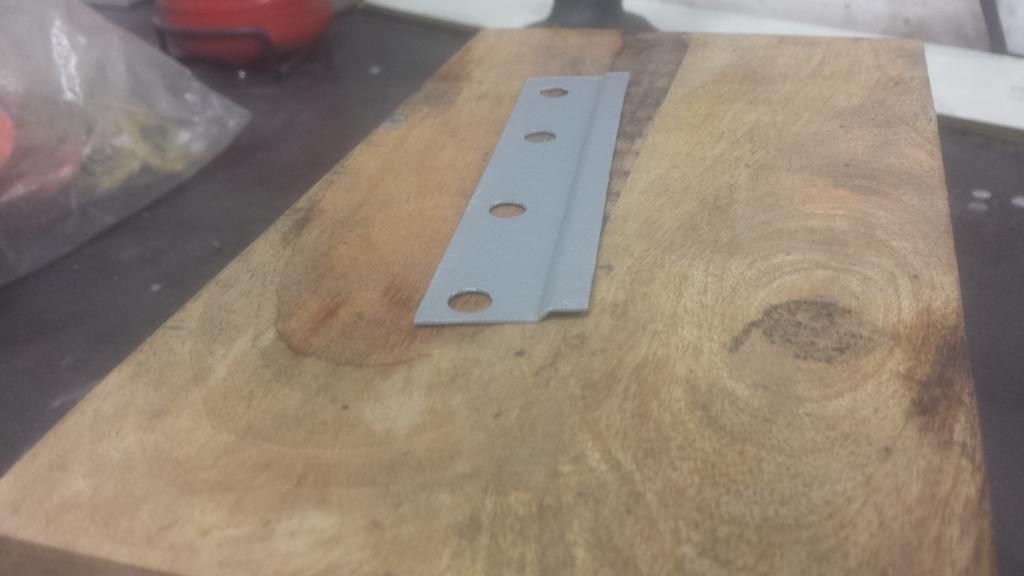
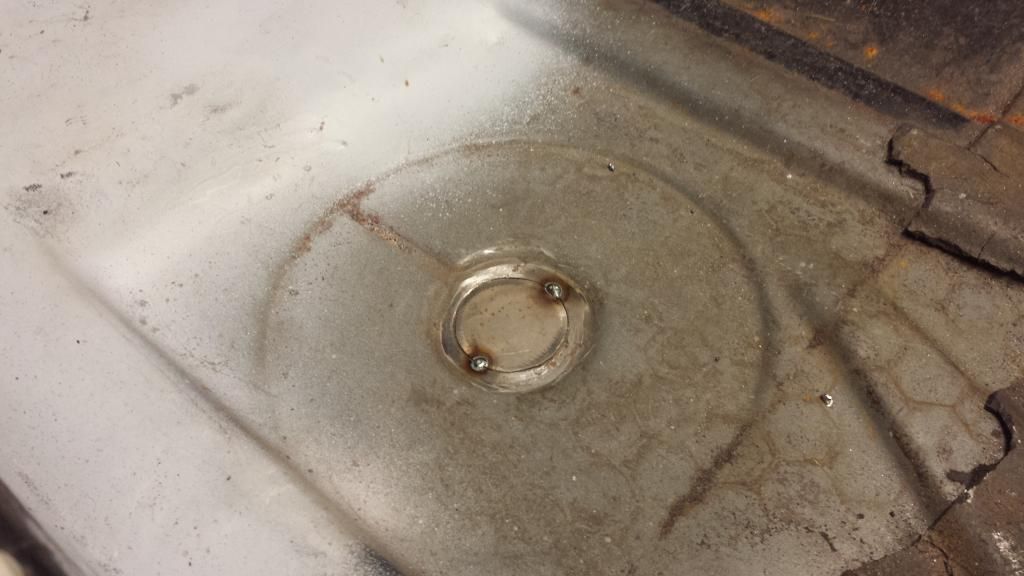
Next was to weld up this one instead of using the oem bung which is just another place to water to creep into:
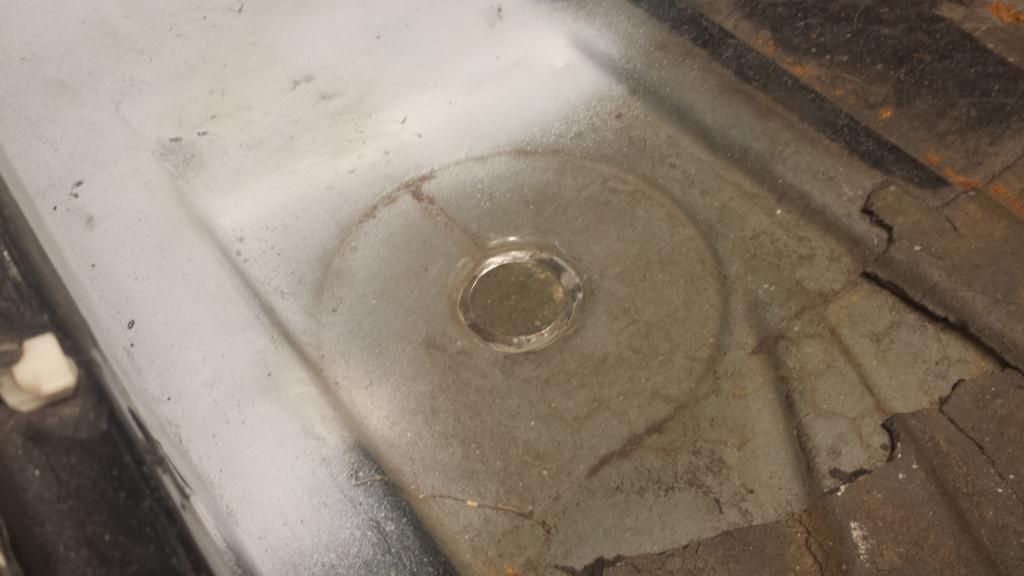
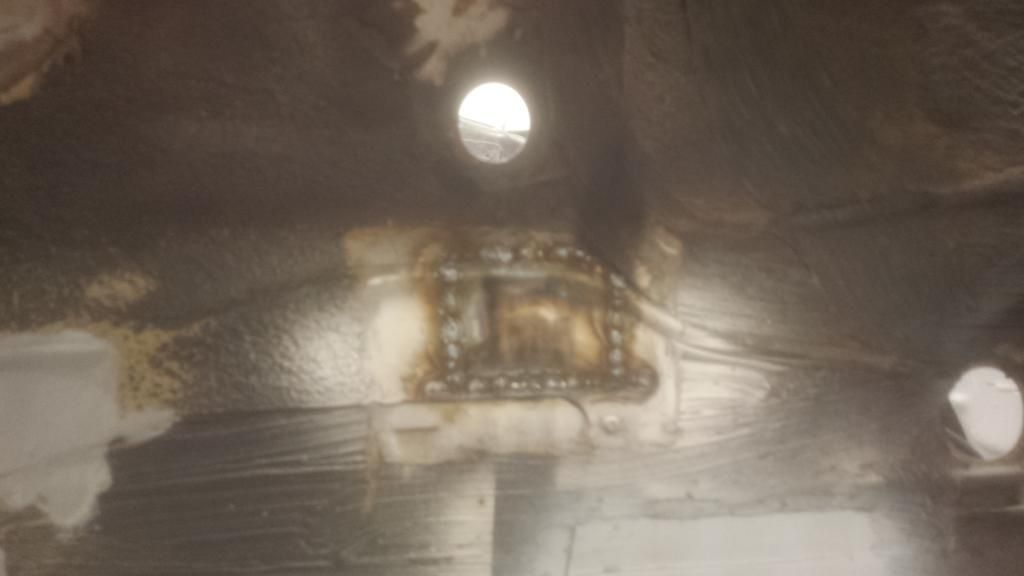
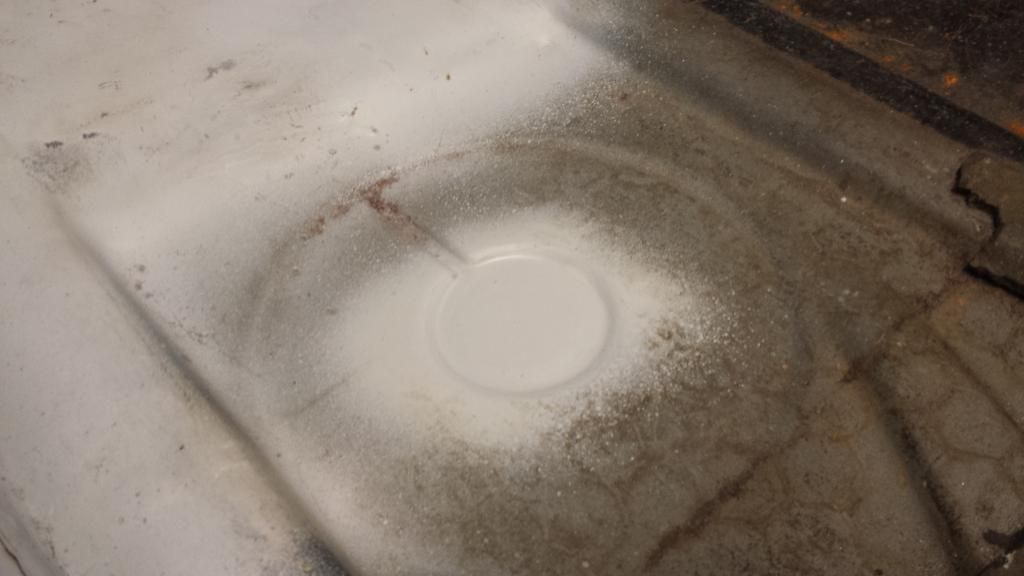
Tacked in:
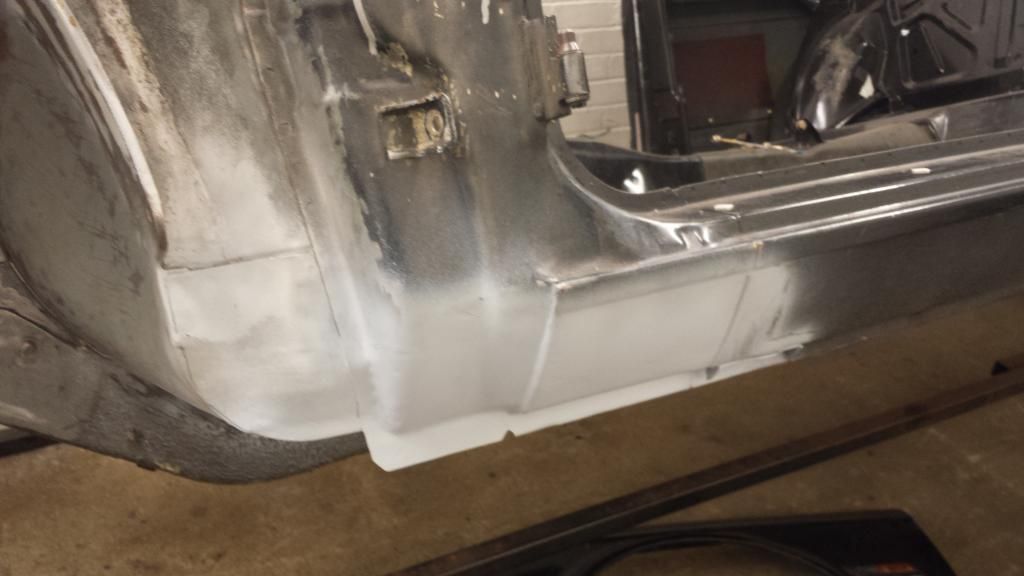
Welded in and ground back:
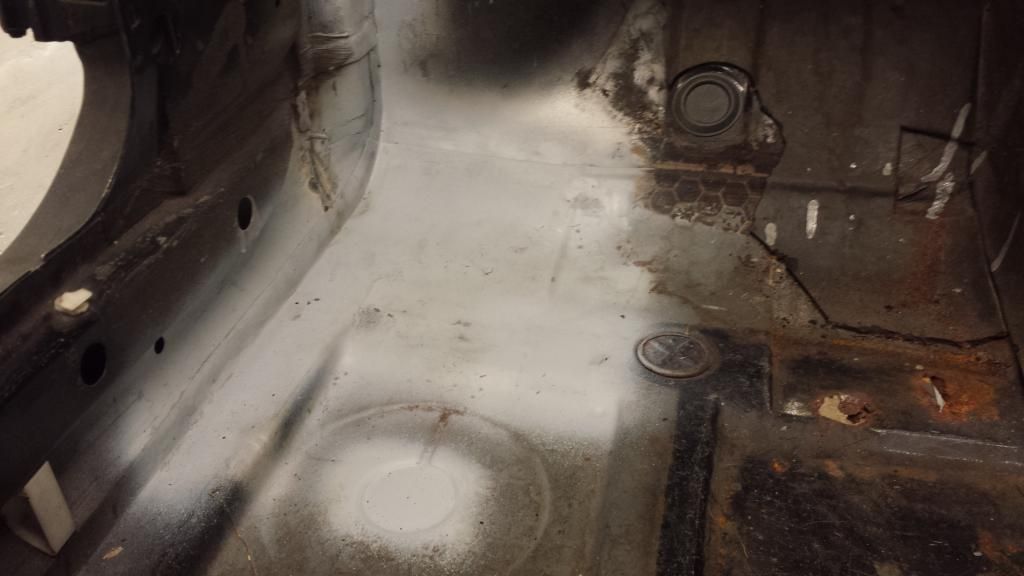
Thats that corner of the car sorted:
Next bit is to grind off the etch primer and media blast an areas that need it so I can epoxy it all to seal it permanently.
Finished welding all the plug welds and filling any voids:
Ground down all the welds on the underside:
Then trimmed the sill panel to make it the same as OEM:
Will never know this has had any welding
Next was to weld up this one instead of using the oem bung which is just another place to water to creep into:
Tacked in:
Welded in and ground back:
Thats that corner of the car sorted:
Next bit is to grind off the etch primer and media blast an areas that need it so I can epoxy it all to seal it permanently.
-
oli_125
- E30 Zone Newbie
- Posts: 15
- Joined: Fri Nov 09, 2012 11:00 pm
Amazing work man ! Big fan of your fabrication skils
-
e30Passion
- E30 Zone Newbie
- Posts: 232
- Joined: Wed Jun 20, 2012 11:00 pm
- Location: Netherlands
Make that 2!oli_125 wrote:Amazing work man ! Big fan of your fabrication skils
-
Ashley1995

- E30 Zone Newbie
- Posts: 91
- Joined: Tue Jun 03, 2014 11:00 pm
- Location: Surrey
Welding is something i would love to learn, and you make it loo so easy. A work of art even.
Keep it up
Keep it up
-
brettski
- E30 Zone Camper

- Posts: 1046
- Joined: Mon Jan 10, 2005 11:00 pm
- Location: stafford
Great work! 
-
Fal_325i
- E30 Zone Camper
- Posts: 1261
- Joined: Sun May 21, 2006 11:00 pm
- Location: Bucks
Any chance of doing this kind of work on other peoples cars?
You'll make some money, I'm first in line by the way.
You'll make some money, I'm first in line by the way.