Jozi's m52 touring - Rebuilding has started

Show off your pride and joy here

Moderator: martauto

User avatar
Jozi
E30 Zone Addict
E30 Zone Addict
Posts: 3076
Joined: Thu Nov 22, 2007 11:00 pm
Location: Dublin, Ireland

Thu May 26, 2011 8:59 pm

Thanks baz, got lots to be doing over the next while (god knows how long!)

Image
Image

Most of it just needs sanding down and I'll start painting them tomorrow, the disc back plates need a coat of primer to the other side which I'll get done later.

Callipers are mostly striped down, have to get some rear ones, thinking I'll try either high temp paint of calliper paint on the brakes - the hammerite didn't fair out to well with 6 months driving.
User avatar
Jozi
E30 Zone Addict
E30 Zone Addict
Posts: 3076
Joined: Thu Nov 22, 2007 11:00 pm
Location: Dublin, Ireland

Sun Jun 05, 2011 7:29 pm

The above has since all been painted and put in the storage room where it will stay until it is needed and new bushes can be put in and the lot put back together.

A bag full of parts turned up last wed, mostly clips and brackets, little things and lots of them

Image

And this
Image

And Ciaran (David Prentice) also sent me two of these:
Image

All of the above has been sorted into a case with little compartments, I put the part no's in with them just incase I need to find where something goes.

Also spent some time polishing my wheels today :dance:

Did one wheel a few weeks ago
Image
Image
Image
Image

And I washed the other 3 last night, polished one and finished polishing the other 2 this afternoon.
Image
Image
Image
Image

I'm not quite happy with them :eek: I want them shinier! But I don't think it's possible by hand polishing? All the wheels have minor imperfection but I can live with that, they were 2nd hand after all and in pretty sweet condition. One of the caps came of when I was washing it, will double sided tape it back on when the car is ready.

And the little bit of work under taken on the shell...


I was all most ready to start welding in the inner arch when I decided to cut out what started as a 1cent sized hole to the back of the arch, you can just about see it in this pic:
Image

That little small hole got a lot bigger after looking at the seam to the underside of the cill, I'm not even finished cutting here, not yet anyway
Image

I'm making up a piece to close of the tail end of the cill so I can drill the hole for the subframe bracket, then will cut out some more. Kinda struggling to make it the same as what it used to be and very tempted to cut from the blue shell, which isn't 100% either, it's the step that I'm struggling with
Image

I'll get it the next time I go at it!
E30BeemerLad
Married to the E30 Zone
Posts: 16806
Joined: Mon Mar 28, 2005 11:00 pm
Location: Norfolk

Sun Jun 05, 2011 7:36 pm

Nice work mate, keep plugging away at it.
Dezzy
CR24v it's a lifestyle
Posts: 11974
Joined: Thu May 15, 2008 11:00 pm
Location: Middlesbrough

Sun Jun 05, 2011 8:23 pm

Well dont they look nice :cool:
Image
Co Founder of CR24vTM By Invitation Only. Absolutely no riff raff!!!
Duke137
Married to the E30 Zone
Posts: 7207
Joined: Sat Aug 29, 2009 11:00 pm

Sun Jun 05, 2011 10:01 pm

Holy fook. Great job!
How do you pronounce 'either'? I say 'either', but some say 'either'. Either is correct.
User avatar
Jozi
E30 Zone Addict
E30 Zone Addict
Posts: 3076
Joined: Thu Nov 22, 2007 11:00 pm
Location: Dublin, Ireland

Thu Jun 16, 2011 10:27 pm

Small update on the sill repair now that my photobucket works again.

I had made this piece up, what now seems, ages ago
Image

At some point last week I decided the previous repair job to the cills wasn't good enough and so I cut it out again to start fresh.

I had to do 2 attempts at making this piece up. First I forgot about the step in the seam, second time I forgot about the little bit poking out with the hole in it and decided to just weld a piece on to it rather than make it a 3rd time :o
Image

With that made up following the sill profile pretty closely the piece I made previously turned out not to be made to follow the cill as closely :mad: Then this happened :D And a new piece was made up, I made two pieces (one for either side) after deciding I will probably do the same on the other sill once this is finished
Image

I had to remake the stepped seam, which was something like this but slightly different
Image

Figured the easiest way was to make the sill piece and weld on the seam that steps out, much easier said than done! Between the 1st piece above and the final repair piece it took me four and a half attempts to make it! Forth ettampt in pic:
Image

I remade the sill piece as it wasn't matching the longer repair piece again :o At this point I decided to fold a piece of steel matching the bend in the sill and weld the seam to the under side of this.
Image

With the two parts welded together the bit behind the seam (not shown in the pic) was cut away and I still have to fold the end of it to follow the line of the arch, bit it all fits and I have the same made for the far side.

With that done I started on making up the piece to fill this side of the arch
Image

Which ended up looking like this not so long ago
Image

I did my best to get something that resembles the rib in the panel and also need to cut out and weld in the drain piece
Image

And this is where I am at now, 3 pieces made up to close of the cill and make it good again. All 3 pieces need some trimming before I can weld them in, I don't want to weld them in until I have the rear subframe in place so I can drill the holes for the support bracket, to do that I need to get the bushes pressed in first.
Dezzy
CR24v it's a lifestyle
Posts: 11974
Joined: Thu May 15, 2008 11:00 pm
Location: Middlesbrough

Thu Jun 16, 2011 10:43 pm

Look's like a quality repair mate :cool:
Image
Co Founder of CR24vTM By Invitation Only. Absolutely no riff raff!!!
Rav335uk
E30 Zone Meets/Events Team
Posts: 27985
Joined: Wed Jan 19, 2005 11:00 pm
Location: Mad mad mad
Contact:

Thu Jun 16, 2011 10:56 pm

Good work Jozi :D
Image
If you Got "Haters",Then your doing something Right!
CR24v??? Where's it all gone?? LOL
DanThe
E30 Zone Team Member
Posts: 28641
Joined: Sat Sep 10, 2005 11:00 pm
Location: Staffs
Contact:

Thu Jun 16, 2011 11:04 pm

Hero graft that is 8)
User avatar
Jozi
E30 Zone Addict
E30 Zone Addict
Posts: 3076
Joined: Thu Nov 22, 2007 11:00 pm
Location: Dublin, Ireland

Thu Jun 16, 2011 11:09 pm

Thanks guys! I had to walk away from the lot a few times making up the cill piece, went wrong so many times! It was worth it in the end though!

Dezzy: I think it might have been you who posted a link to a thread on retro rides about making panels, learned a bit from that in the sense that things look easier once you know how it's done :thumb:
Dezzy
CR24v it's a lifestyle
Posts: 11974
Joined: Thu May 15, 2008 11:00 pm
Location: Middlesbrough

Thu Jun 16, 2011 11:14 pm

I would love to take the praise mate but it was Lee (E30bemmerlad) a CR24v brother i think 8)
Image
Co Founder of CR24vTM By Invitation Only. Absolutely no riff raff!!!
User avatar
mercdriver
E30 Zone Regular
E30 Zone Regular
Posts: 814
Joined: Mon May 30, 2011 11:00 pm
Location: Derby

Thu Jun 16, 2011 11:47 pm

Top dedication that is mate! Keep it up, can't wait to see it completed! Great thread, given me room for thought and some great techniques with regards to remaking the screw tips built into the chassis etc.

10/10 for effort and enthusiasm 8)
I'll check with the manager
User avatar
Jozi
E30 Zone Addict
E30 Zone Addict
Posts: 3076
Joined: Thu Nov 22, 2007 11:00 pm
Location: Dublin, Ireland

Fri Jun 17, 2011 12:50 am

Might have been, I can't remember really, except for spending 2 evenings reading through it :o:

Thanks Mercdriver, can't wait to see the end of this!

Here's the thread http://retrorides.proboards.com/index.c ... 135&page=1 well worth a read!
rallygaz
E30 Zone Regular
E30 Zone Regular
Posts: 307
Joined: Mon Mar 15, 2010 11:00 pm
Location: Essex m8

Fri Jun 17, 2011 9:15 am

sorry m8 your name isnt leepu by any chance 8O thats a whole lotta choppin !! good luck will be an impressive touring im sure! :cool:
BAZE30
E30 Zone Newbie
E30 Zone Newbie
Posts: 65
Joined: Sun May 08, 2005 11:00 pm
Location: Wicklow, Ireland

Fri Jun 17, 2011 10:13 am

Great work Jozi! :cool:
User avatar
Jozi
E30 Zone Addict
E30 Zone Addict
Posts: 3076
Joined: Thu Nov 22, 2007 11:00 pm
Location: Dublin, Ireland

Sat Jun 18, 2011 3:01 pm

rallygaz wrote:sorry m8 your name isnt leepu by any chance 8O thats a whole lotta choppin !! good luck will be an impressive touring im sure! :cool:
Hehe, I'm trying to keep it looking nice ;)

Started cutting out the last jacking point yesterday afternoon, it looked a bit iffy and also lonely being the last one left on the sills
Image

Glad I cut it away as there was rot developing on the back of the sill and floor panel. The rotten metal cut out:
Image
Image

Floor panel and back of the cill welded up and given a lick of paint:
Image
Image

And the sill all patched up and also given a lick of paint.
Image
Them blobs aren't where I blew holes at all... I swear... :o:

Getting my stuff together and of to the Big meet :cool: will come back and grind down the welds after the weekend and get back to the rear cill on both side. Feels like there's not much left to do body wise D :
User avatar
Jozi
E30 Zone Addict
E30 Zone Addict
Posts: 3076
Joined: Thu Nov 22, 2007 11:00 pm
Location: Dublin, Ireland

Sun Jun 19, 2011 11:02 pm

Got these today

Image

Hopefully get them welded this week
Coops90
E30 Zone Regular
E30 Zone Regular
Posts: 994
Joined: Sun Oct 21, 2007 11:00 pm
Location: Sheffield

Mon Jun 20, 2011 8:38 pm

What coilovers are they captain?
Malachite uber alles
User avatar
Jozi
E30 Zone Addict
E30 Zone Addict
Posts: 3076
Joined: Thu Nov 22, 2007 11:00 pm
Location: Dublin, Ireland

Tue Jun 21, 2011 1:06 am

Their BC racing ones

I got a nice delivery from DHL this morning, came wrapped up in a deck chair box
Image
Courtesy of DanThe from here, will be another while before they are going on an engine, well cheffed with the turn around time I think it took just over a week between sending my manifold and this coming back to Ireland, top notch guy another big thumbs up from me for Dan :thumb:

I also got the struts taken apart today, offcourse the plate on the locking nut broke clean of :o The other one was grand and came of with a little bit of persuasion. This is the bottom sleeve of the coilovers which is pushed over a 50mm stub left on the struts and then welded.
Image

Also courtesy of Dan, I got these void fillers ages ago. Got the bush pushed in yest at the big meet by SeanMul from E30owners. I hope to get that bolted up tomorrow and get started on filling the big gap that was left on the sill after I got carried away
Image
User avatar
Jozi
E30 Zone Addict
E30 Zone Addict
Posts: 3076
Joined: Thu Nov 22, 2007 11:00 pm
Location: Dublin, Ireland

Sat Jun 25, 2011 6:55 pm

Got a bit done earlier, Started closing of the end of my sill.

Pic of it from the inside before welding
Image

And the inside of the sill all welded up
Image

Thats about it progress wise. I fitted the rear beam and lines everything up, all seems good, the panel above might need a little massaging to get it to butt up against the outer sill panel but all will be good :thumb:
TouringMatt
E30 Zone Camper
E30 Zone Camper
Posts: 1188
Joined: Mon Jan 10, 2005 11:00 pm
Location: Not where i should be

Sun Jun 26, 2011 2:56 pm

Quality read 8)

Keep up the good work :thumb:
User avatar
Jozi
E30 Zone Addict
E30 Zone Addict
Posts: 3076
Joined: Thu Nov 22, 2007 11:00 pm
Location: Dublin, Ireland

Sun Jun 26, 2011 11:12 pm

Did a bit of welding and grinding on the sill, look for more rust in around the engine bay/scuttle, had a look at how the wheels will sit and then had enough of todays bit of work, was fun though :D

Image
:cool:
aj_mckay
E30 Zone Squatter
E30 Zone Squatter
Posts: 1782
Joined: Sun Nov 11, 2007 11:00 pm
Location: Winchester

Mon Jun 27, 2011 3:41 pm

That photo would've been awesome if you hadn't chopped the dude's head off...!
User avatar
Jozi
E30 Zone Addict
E30 Zone Addict
Posts: 3076
Joined: Thu Nov 22, 2007 11:00 pm
Location: Dublin, Ireland

Mon Jun 27, 2011 4:42 pm

He had a headache anyway :P
User avatar
Jozi
E30 Zone Addict
E30 Zone Addict
Posts: 3076
Joined: Thu Nov 22, 2007 11:00 pm
Location: Dublin, Ireland

Wed Jul 13, 2011 9:08 pm

Small up date from the few bits done recently/few weeks ago.

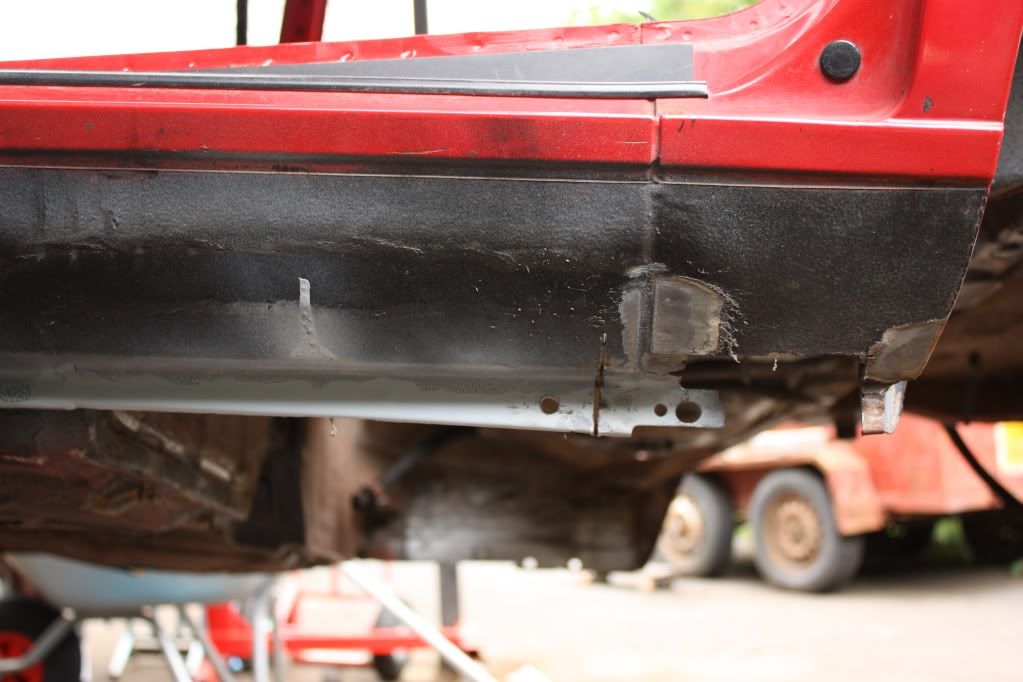
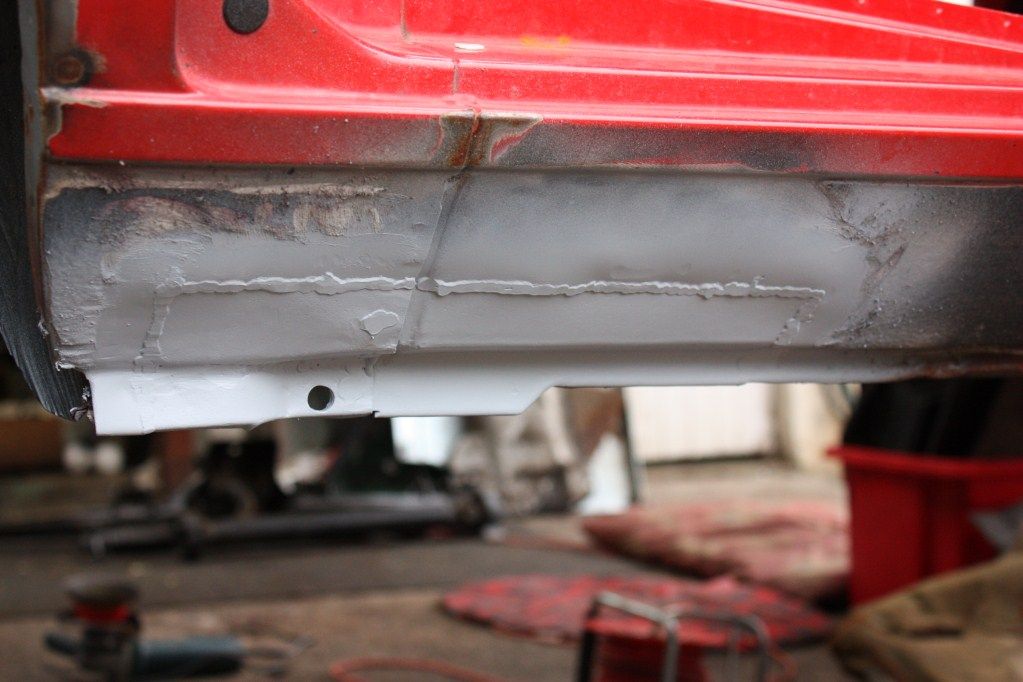
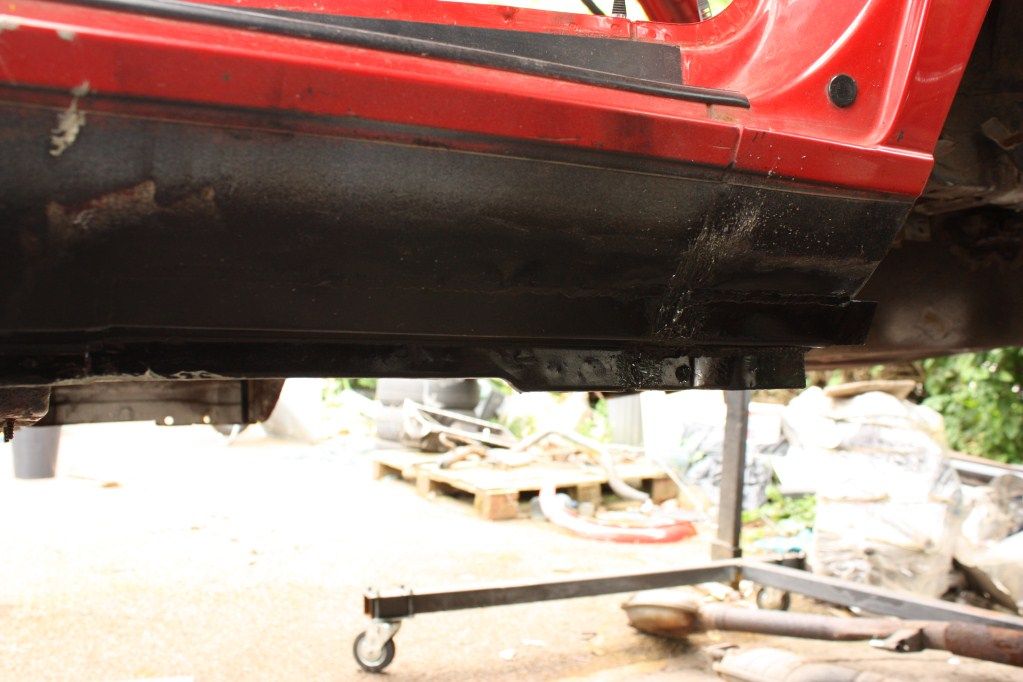
I got the sills all patched up and ground the welds down a little early last week.
Image
Image

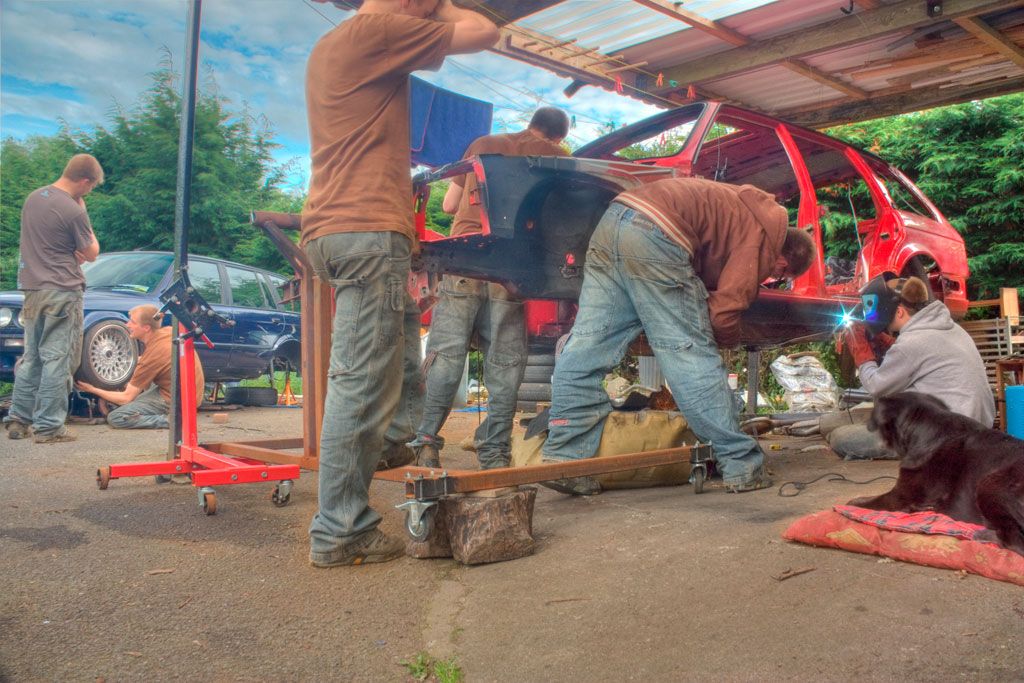
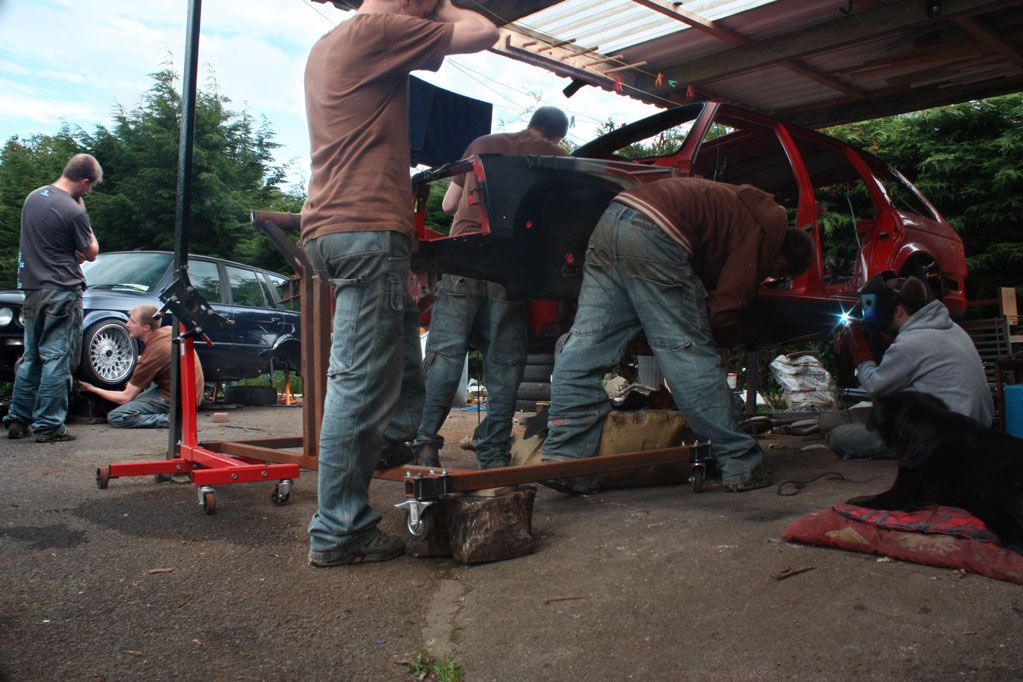
I spent some time trying to get the new inner arch panel in, was a pain to get in and even worse again to get it out so I could get it all prepped and good to go for welding:
Image
Image

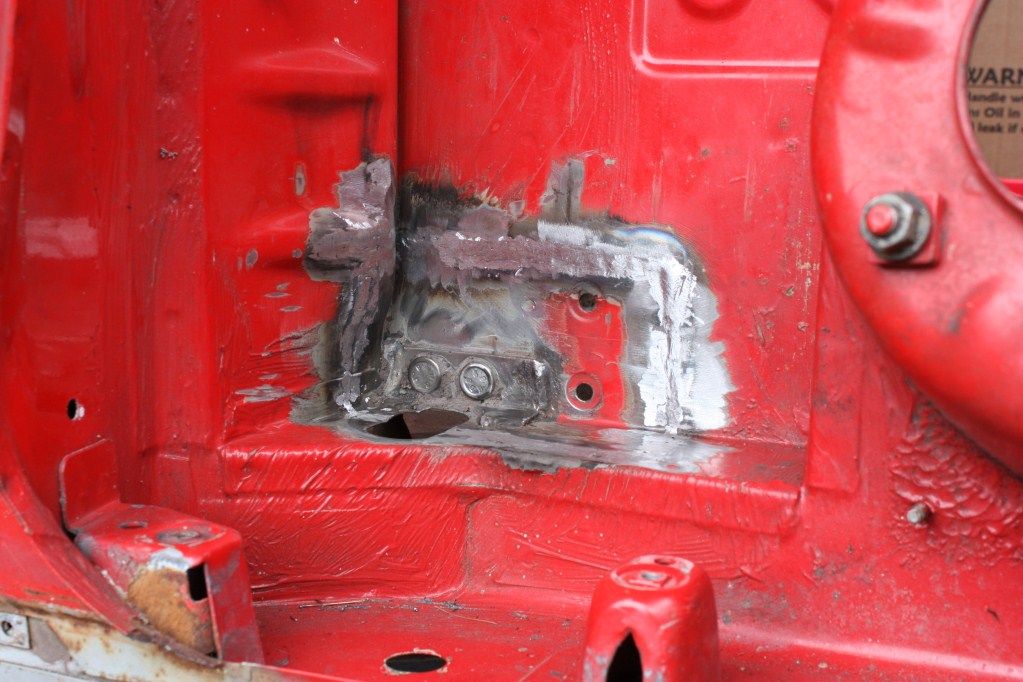
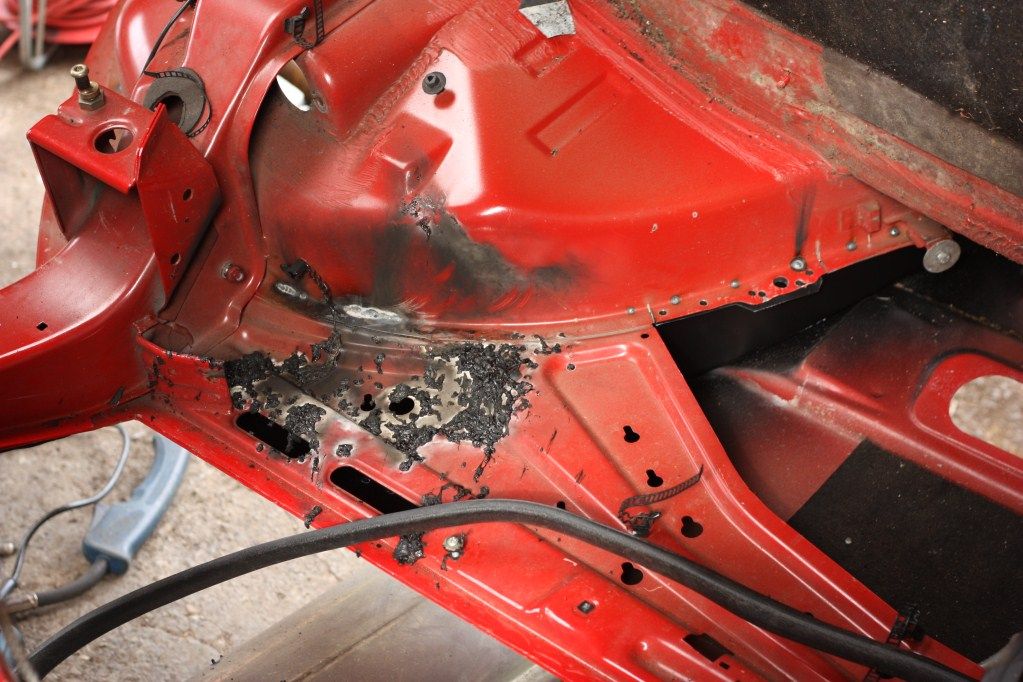
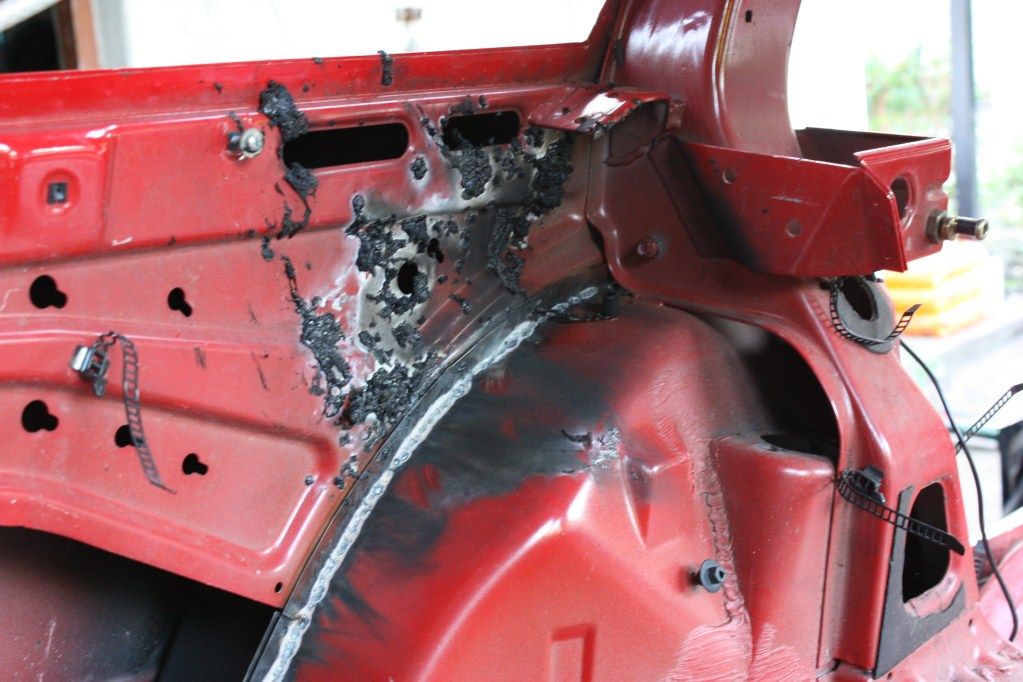
Welding away when I notice flames inside the car when looking through the shock topmount hole :eek: 
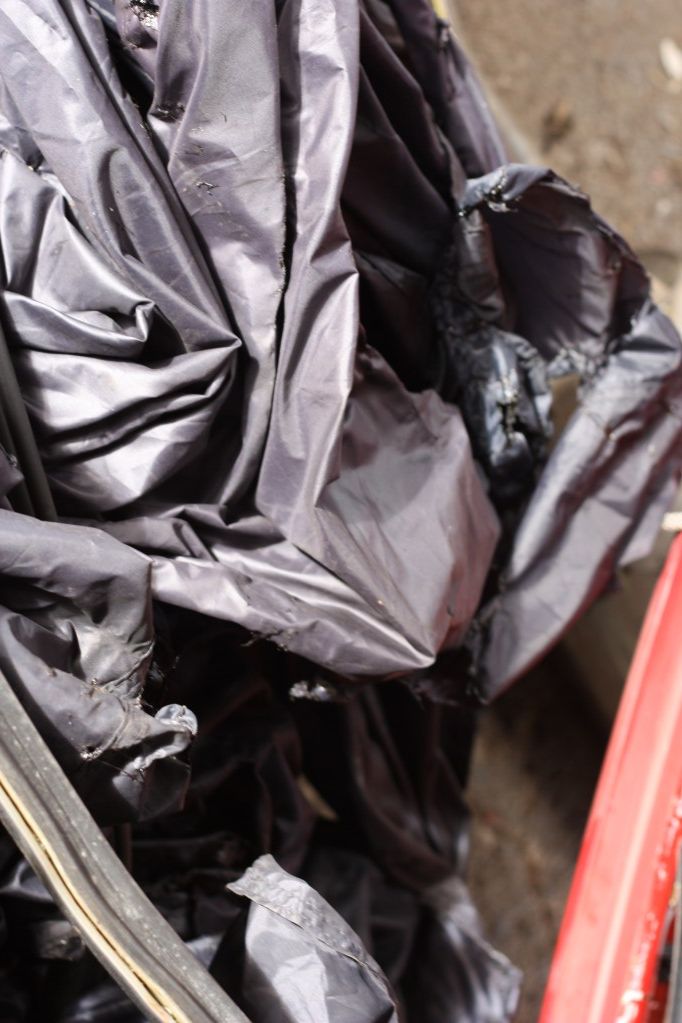
I had left the cover in the boot area of the touring. It's pretty highly flamable! A burnt finger, some nylon drips in the boot and project touring was saved from burning to the ground
Image

The cover is worse than what is in this pic!
Image

Welding the inner arch in was a pain, worst welding so far, I won't be surprised to find lots of holes after I grind the welds down a little. Not fully finished it yet and didn't get pics cause it started to rain and I tidied all up. Should see this finished tomorrow and I'll move on to the next bit of rust.

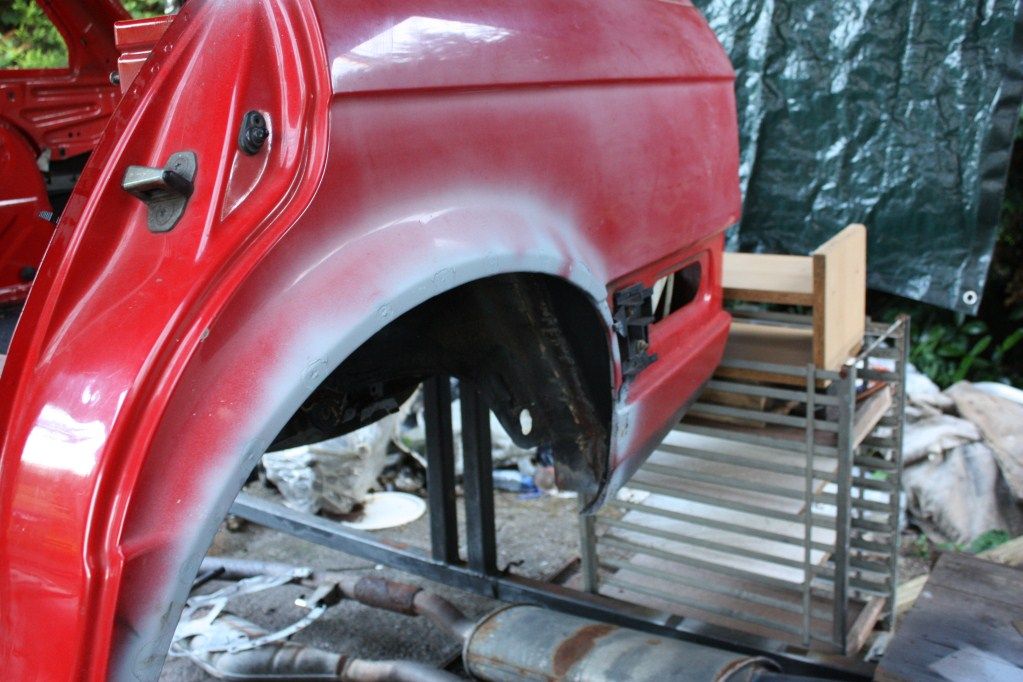
Re-did my photoshoped image, I like this better:
Image

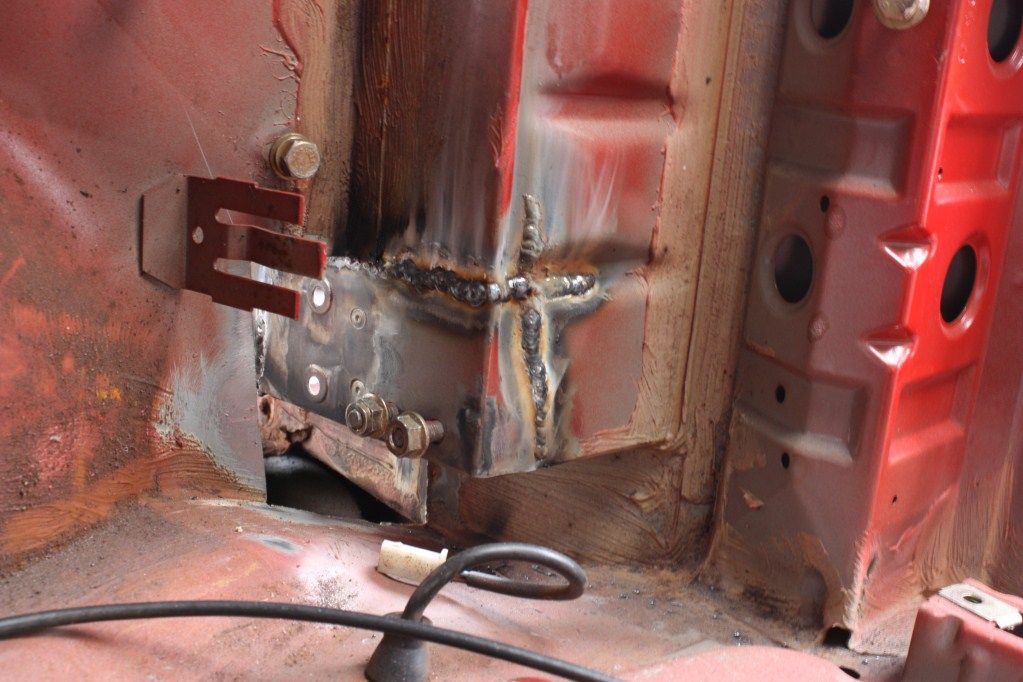
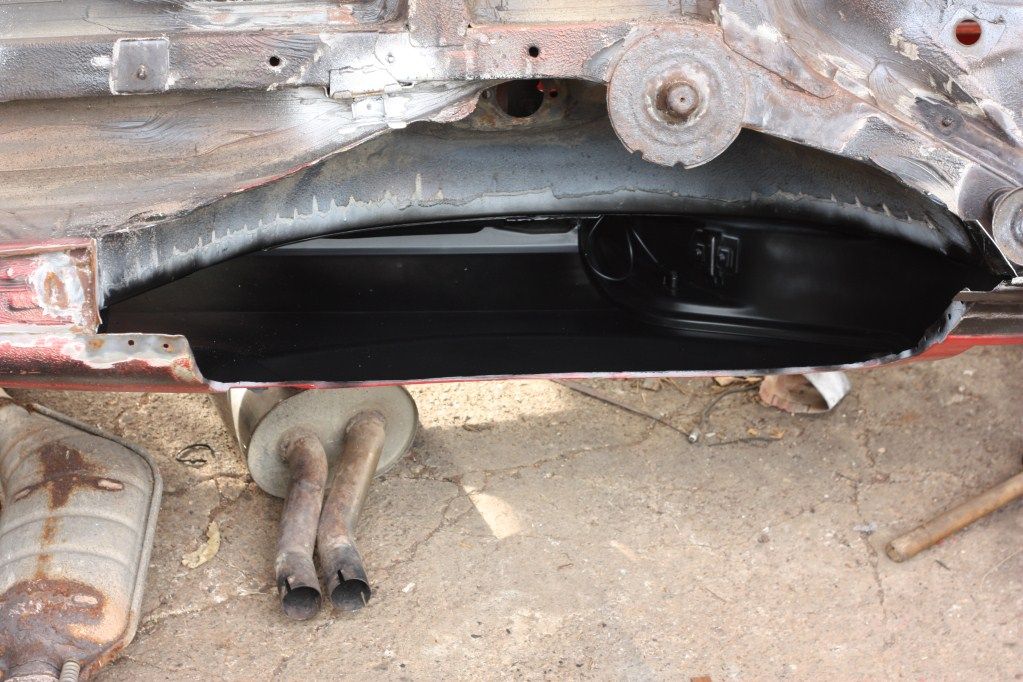
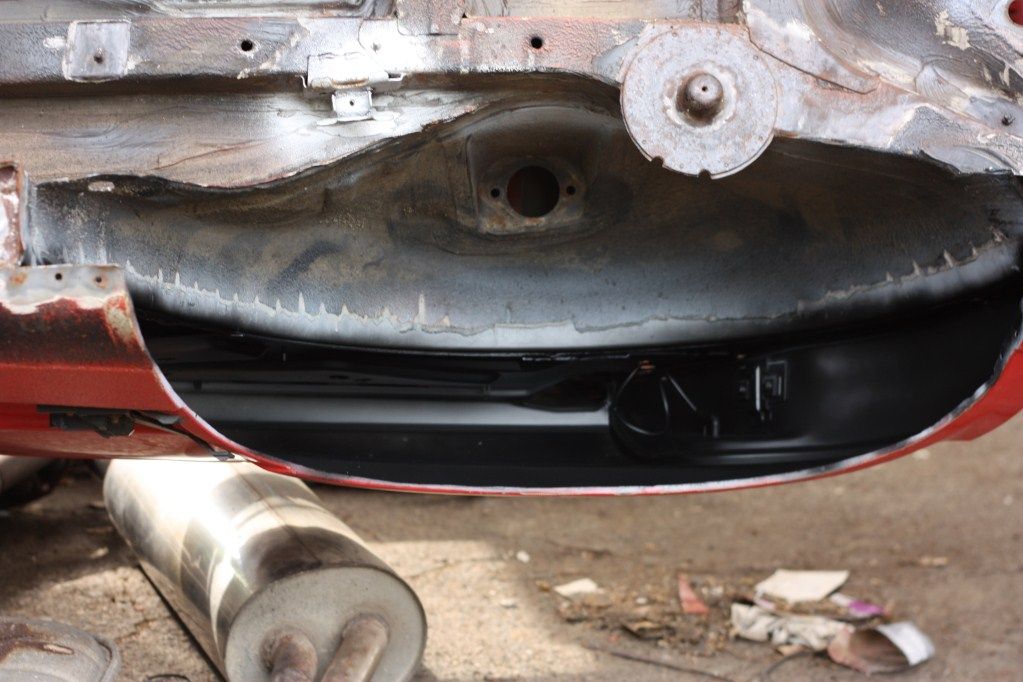
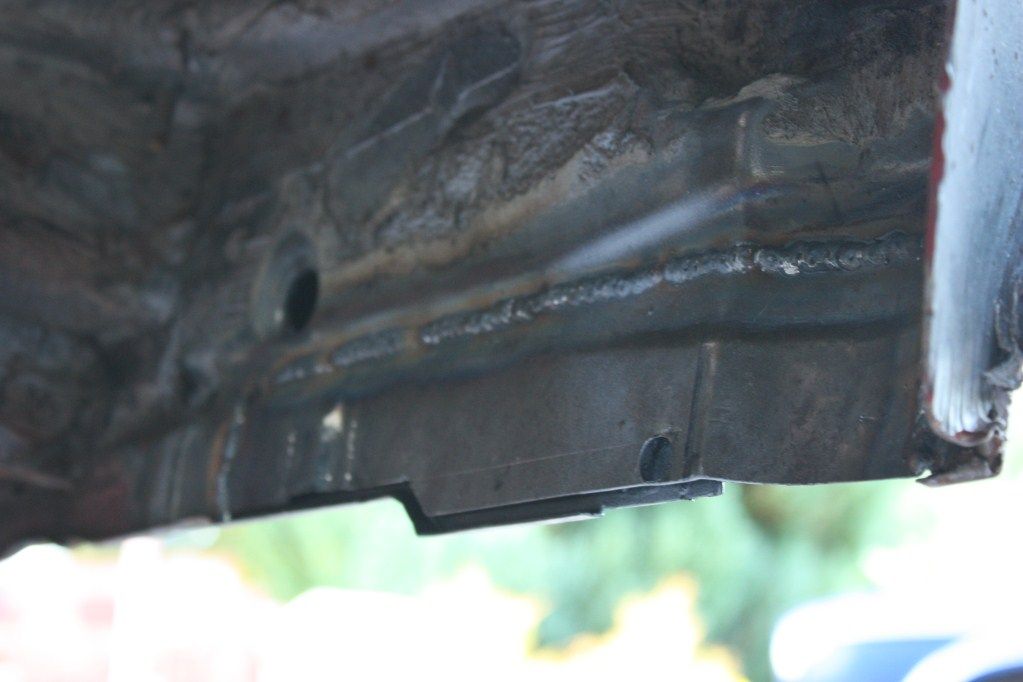
Some pics of the inner arch I welded up, still a bit of tidying up to do on it, the fire damage on the inside :p
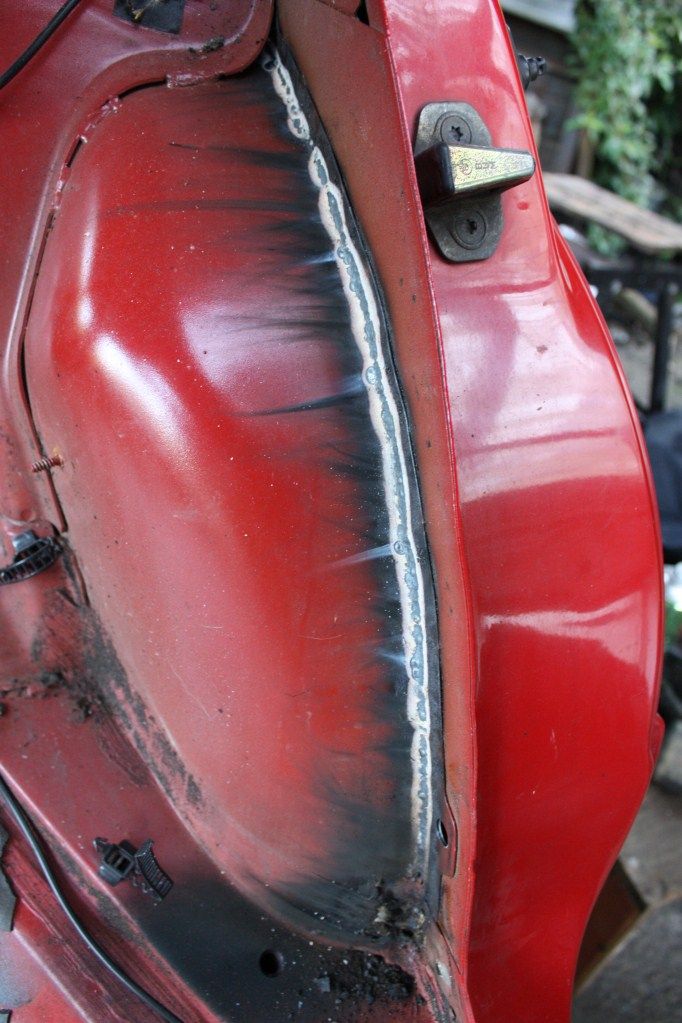
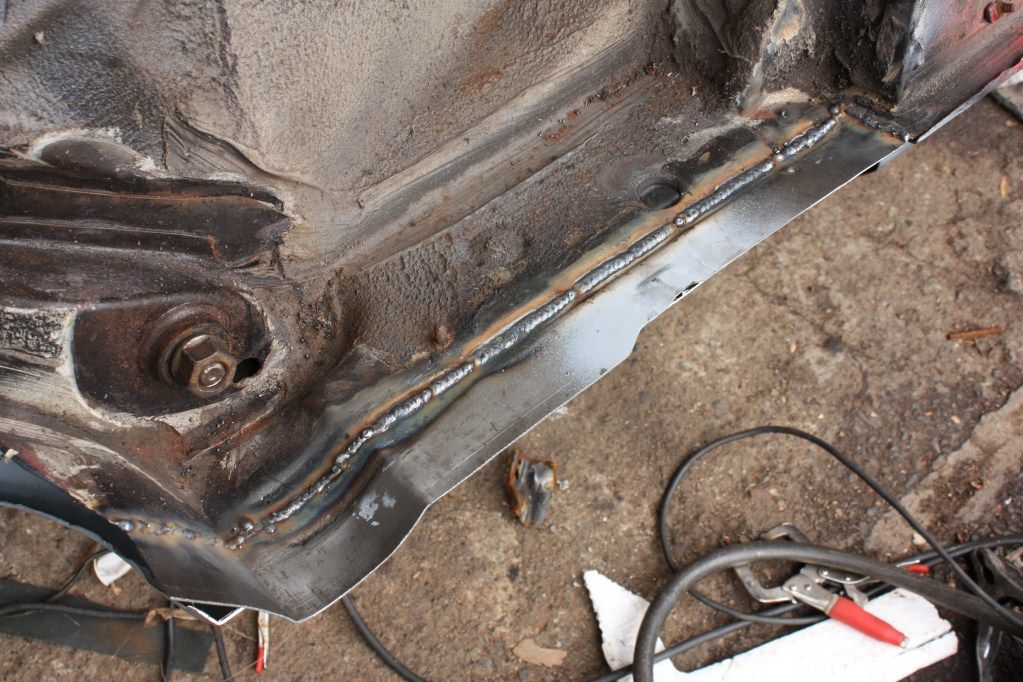
Image
Image

Inner arch:
Image

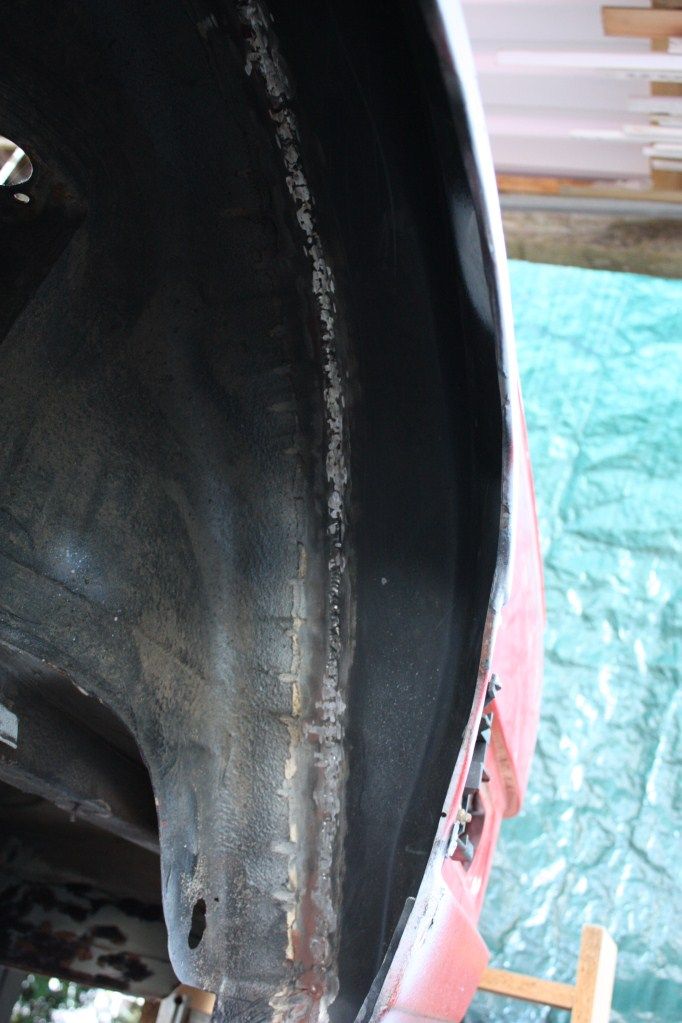
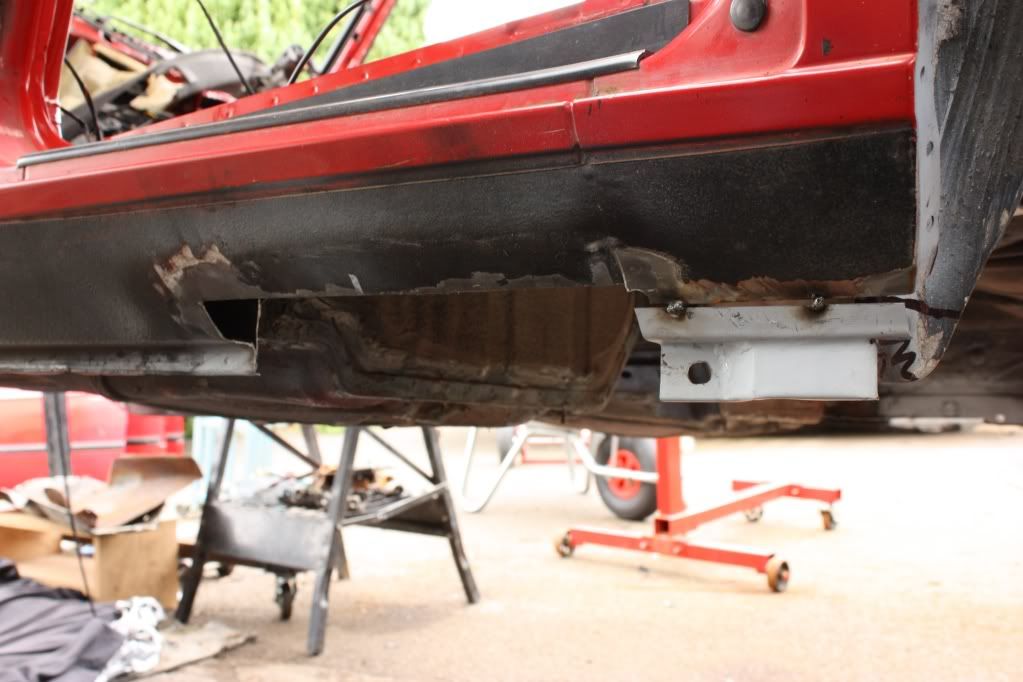
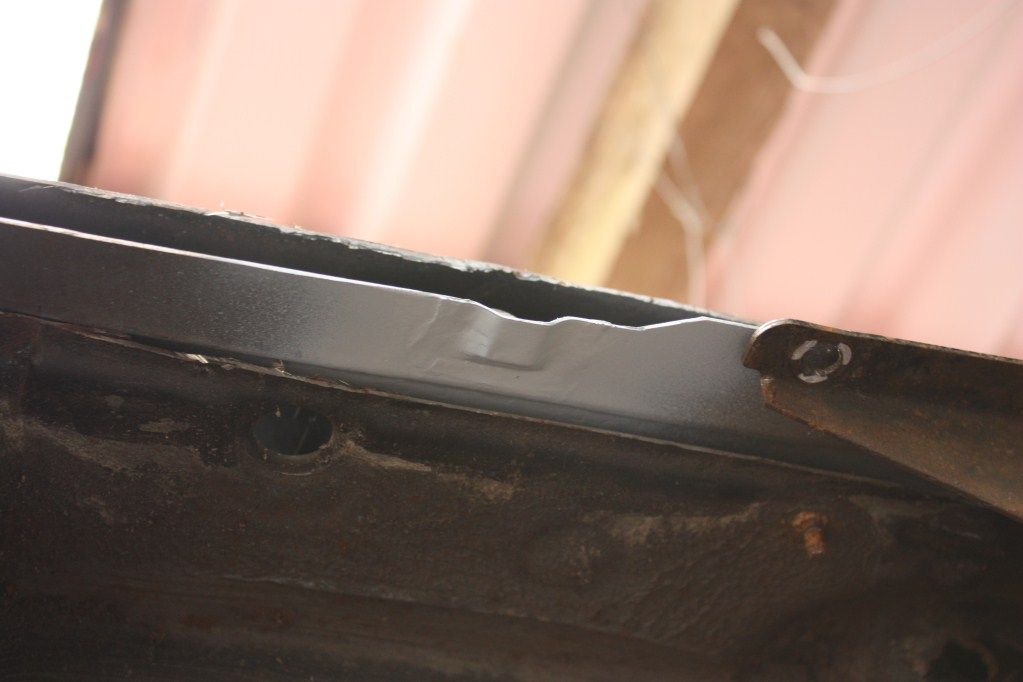
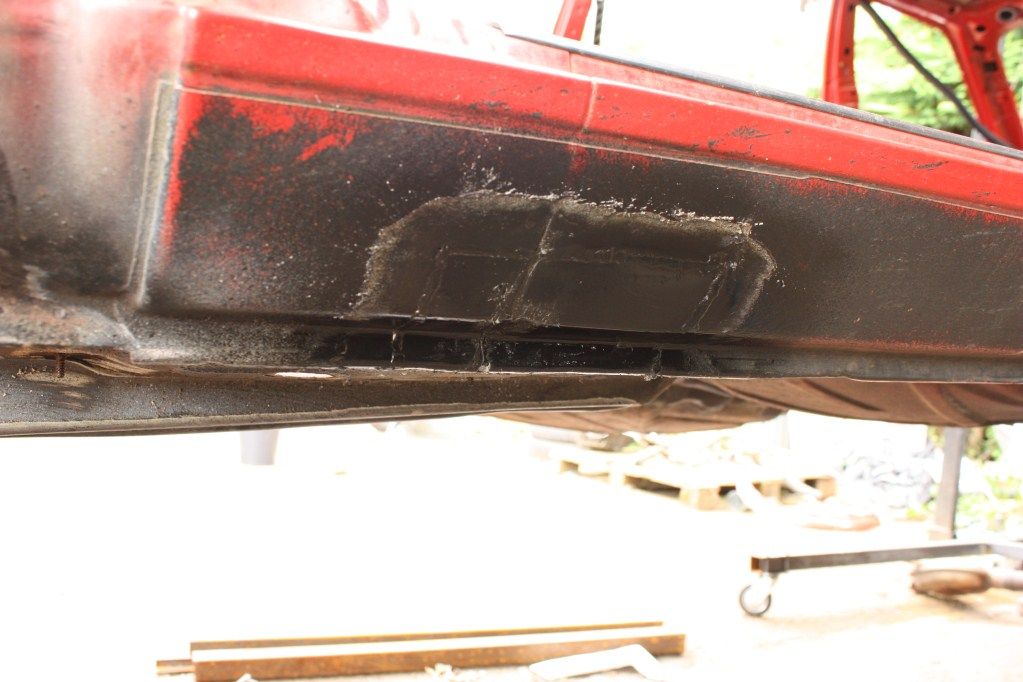
Outer arch needs a little tidying up before paint:
Image

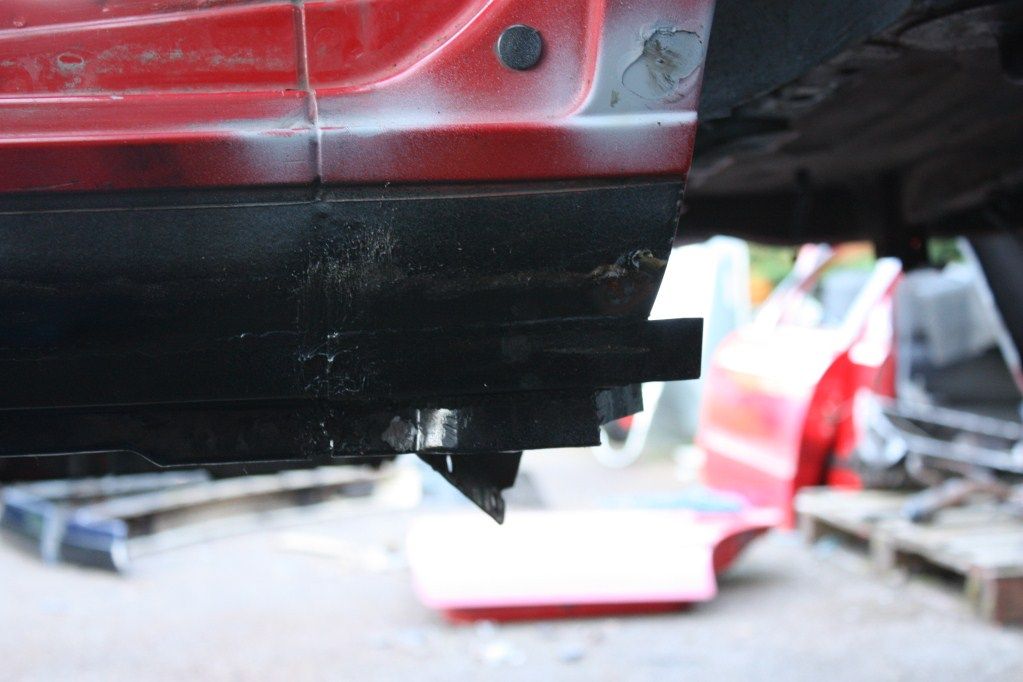
Just need to finish the end of the sill where it meets the inner arch:
Image

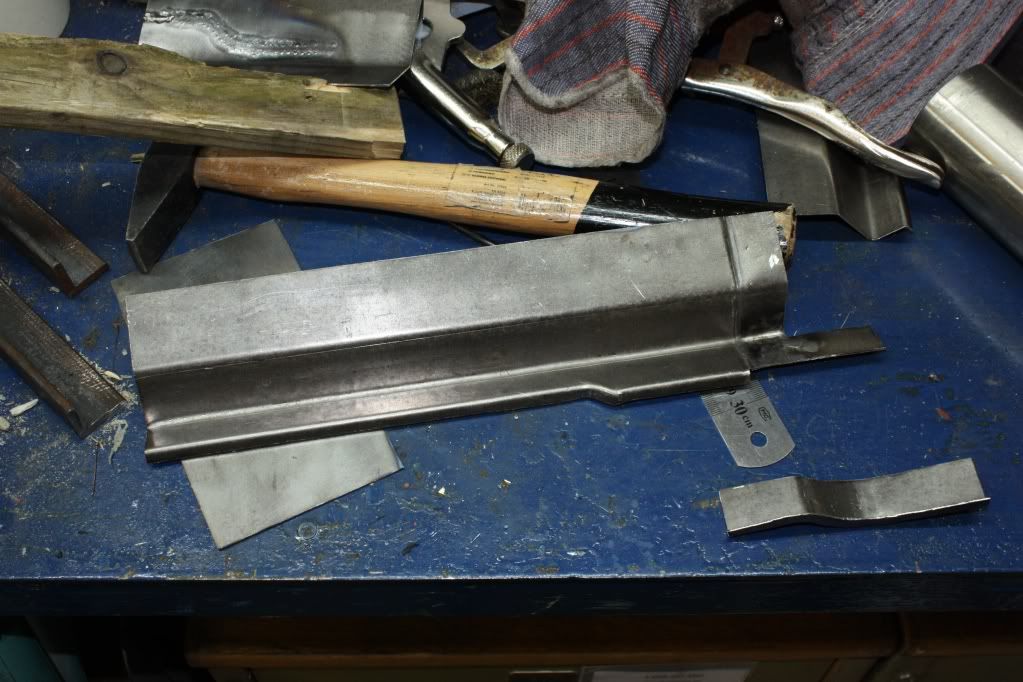
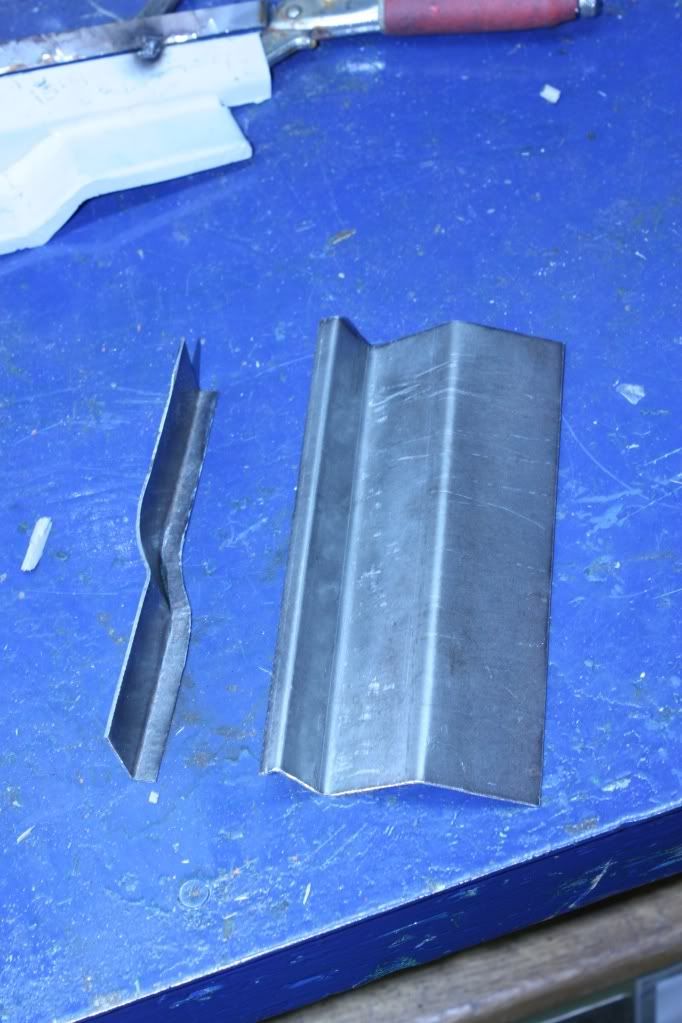
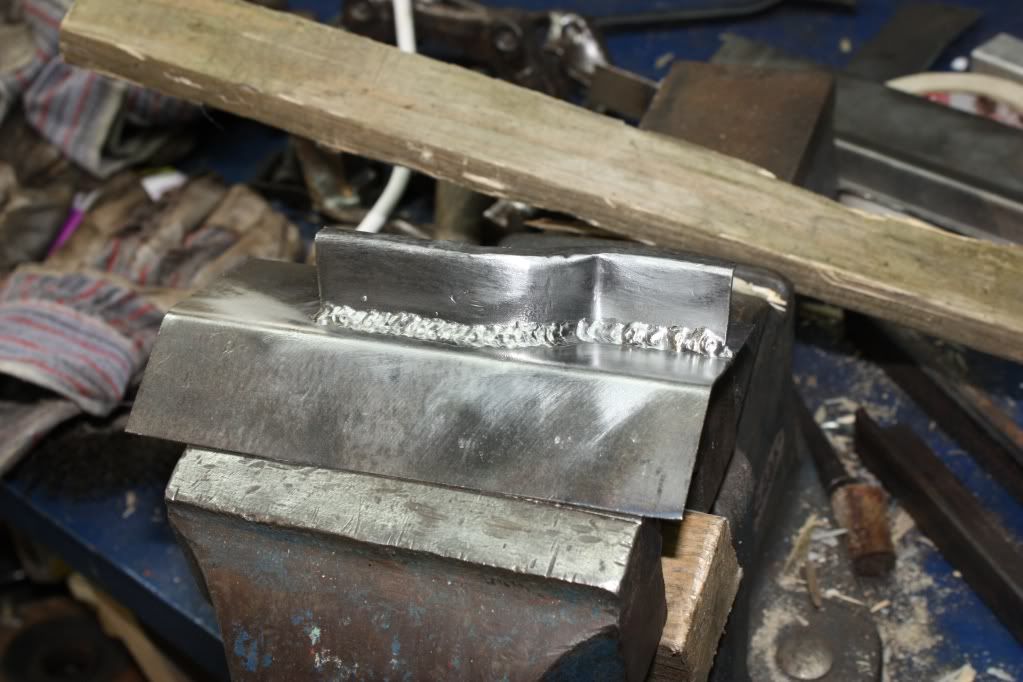
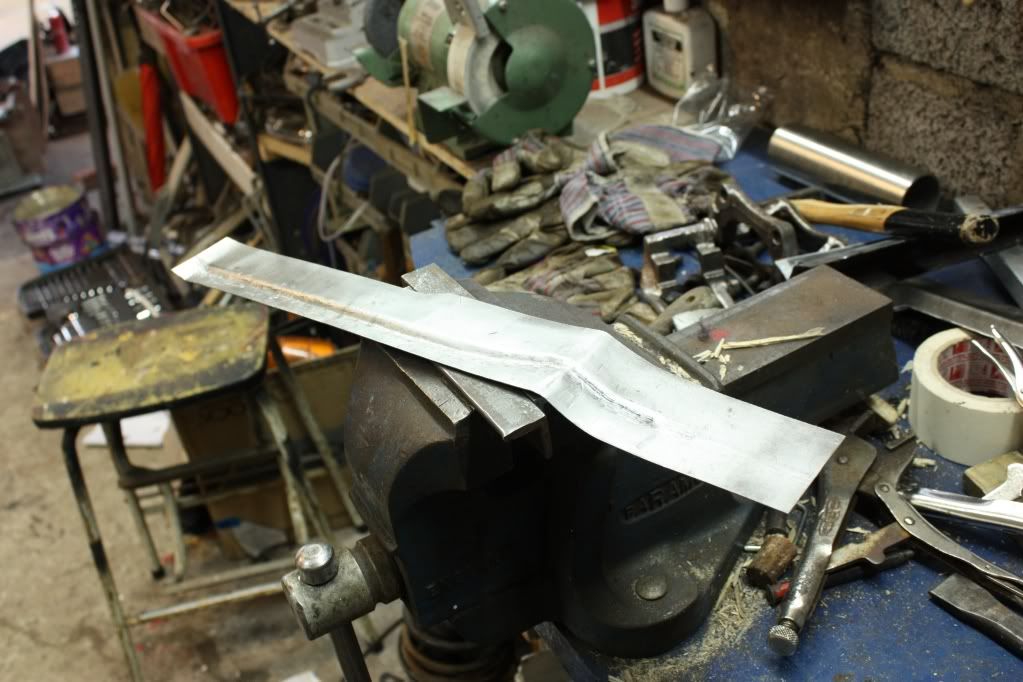
Started on the other sill late Monday, pretty much the same as before only this time I got the 3 pieces made up in the space of 2 evenings! I had the last piece made up, trimmed it a little and it didn't fit anymore, was also not quite 100% so doing it over.
Image
Image

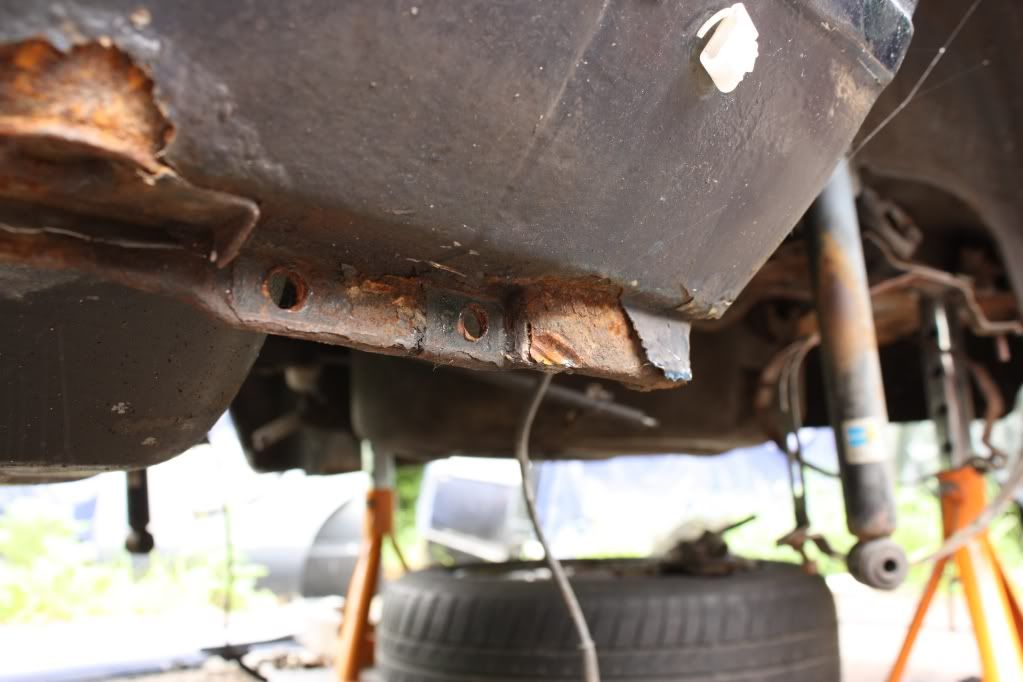
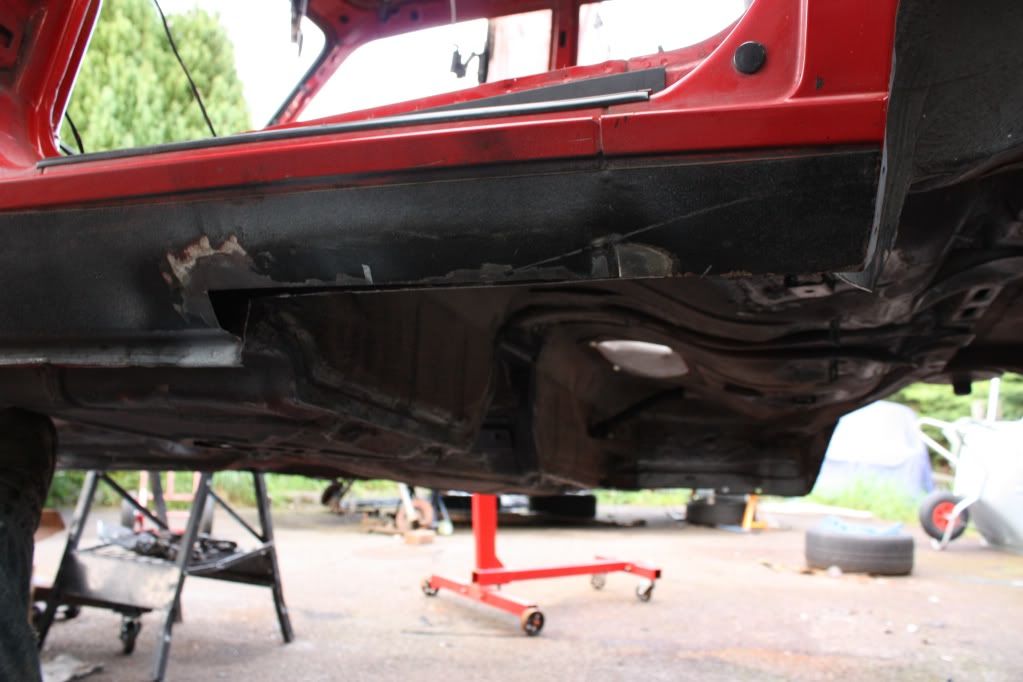
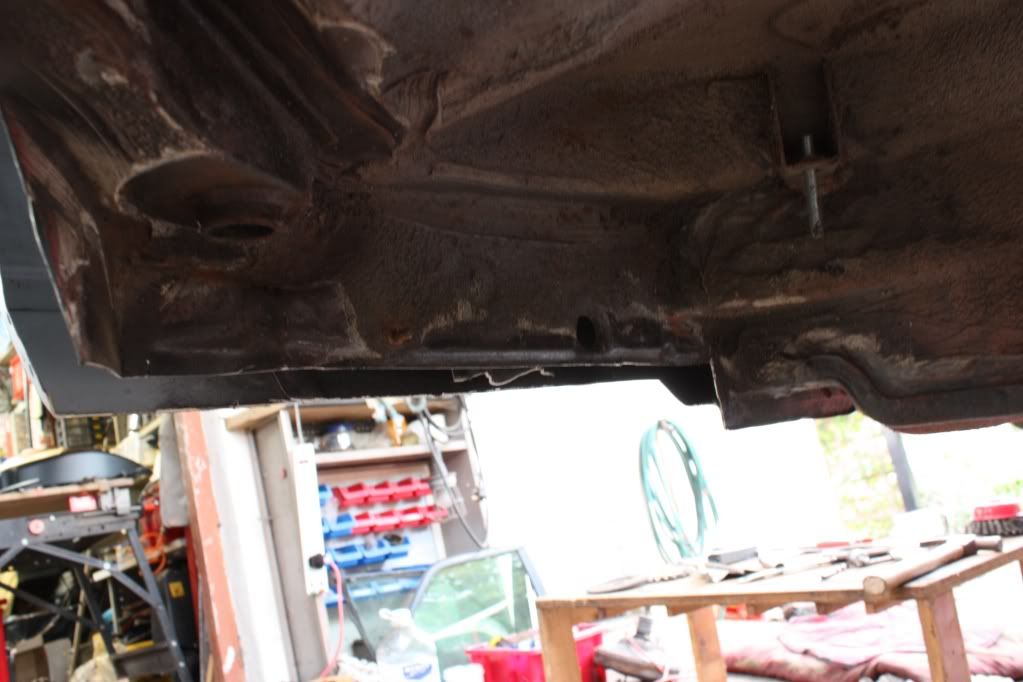
I had a bit of a poke around the car after realising the above piece wasnt gonna fit, something to cheer me up. Found somemore rust that needs plating up or tidying, unless I find more again the end is in sight :mad:

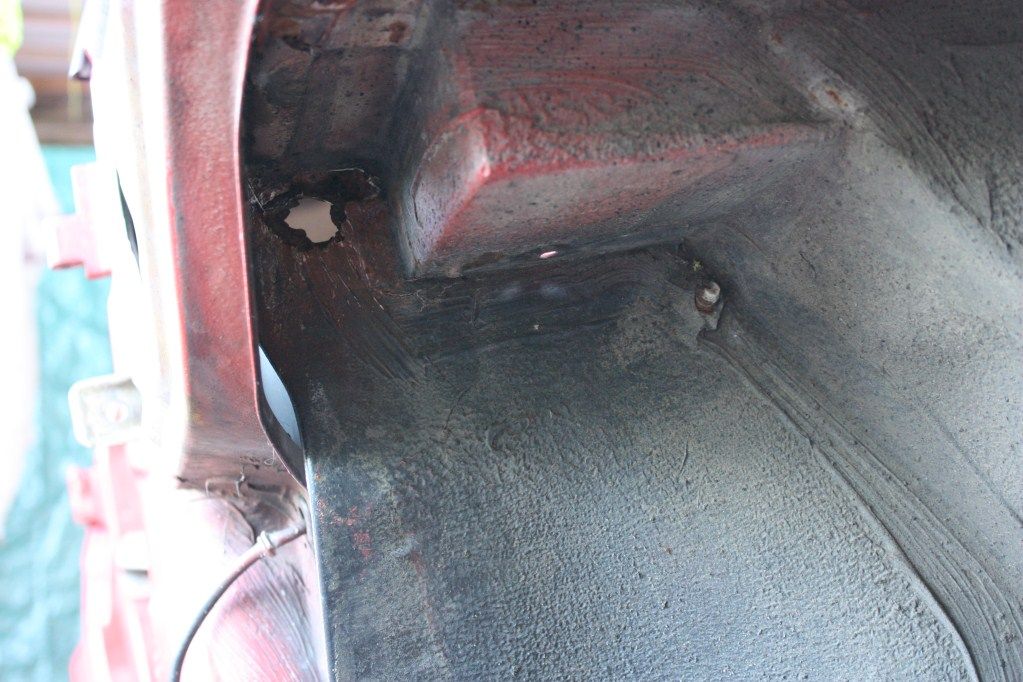
Rear inner arch, looks to be only surface rust, luckily
Image

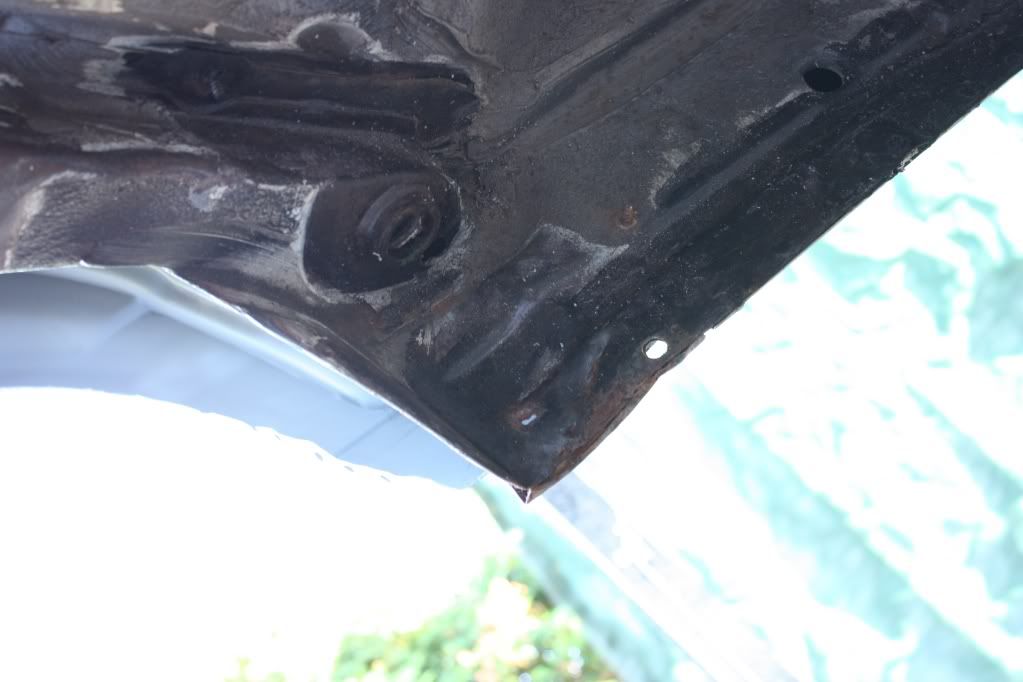
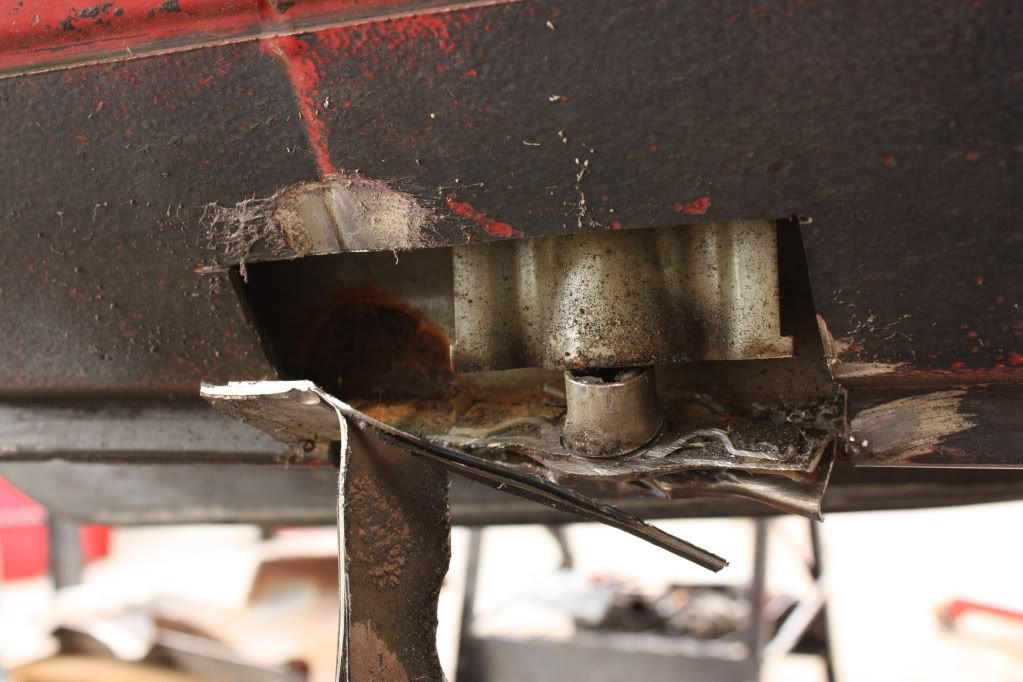
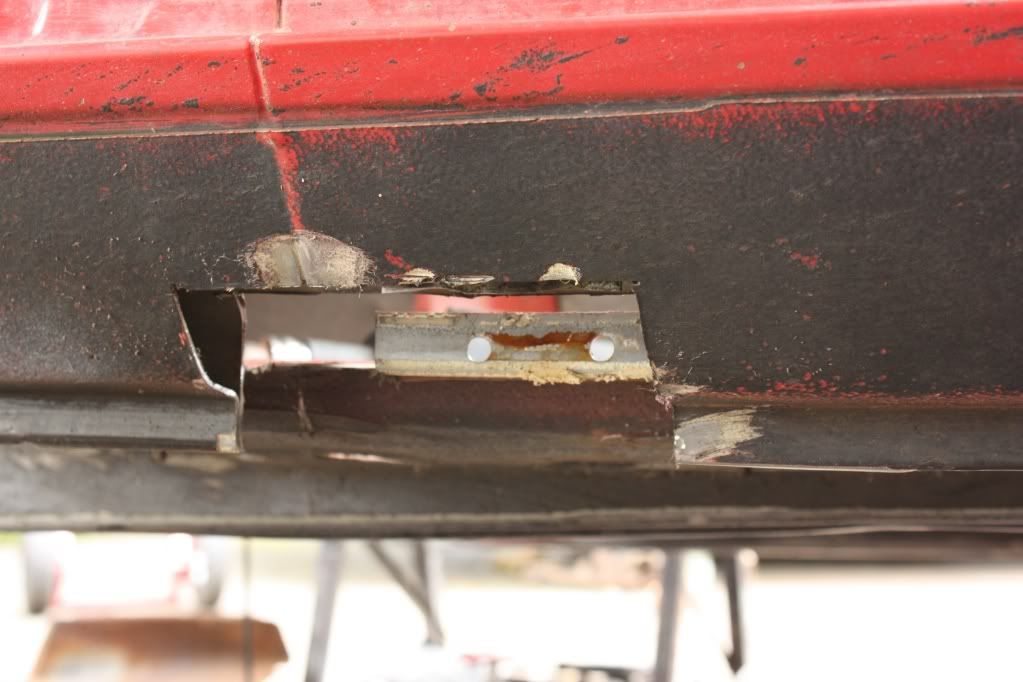
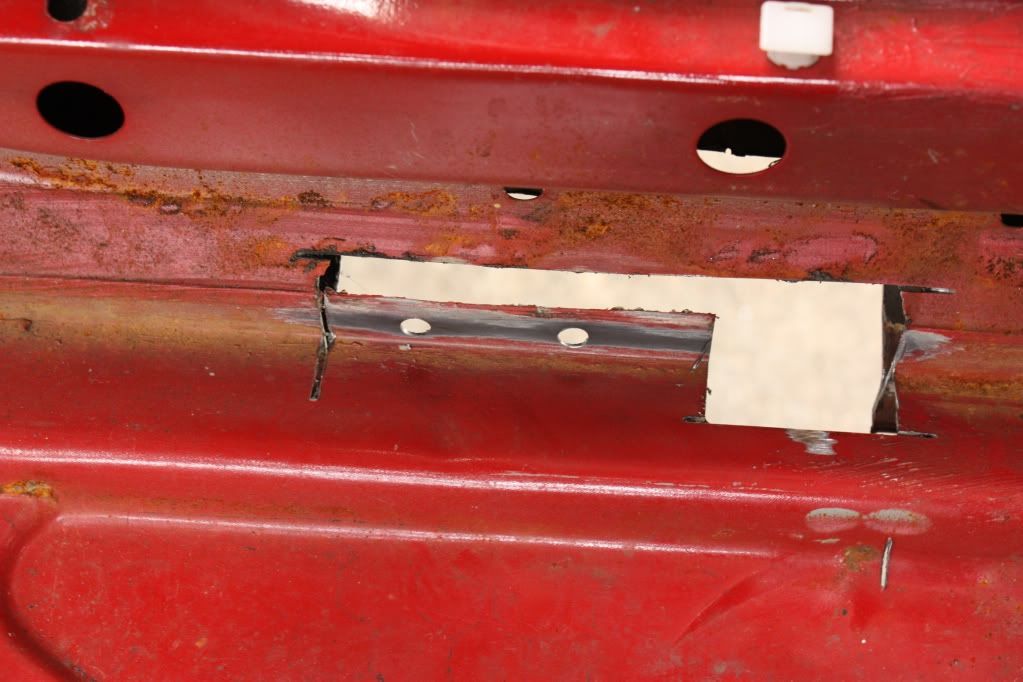
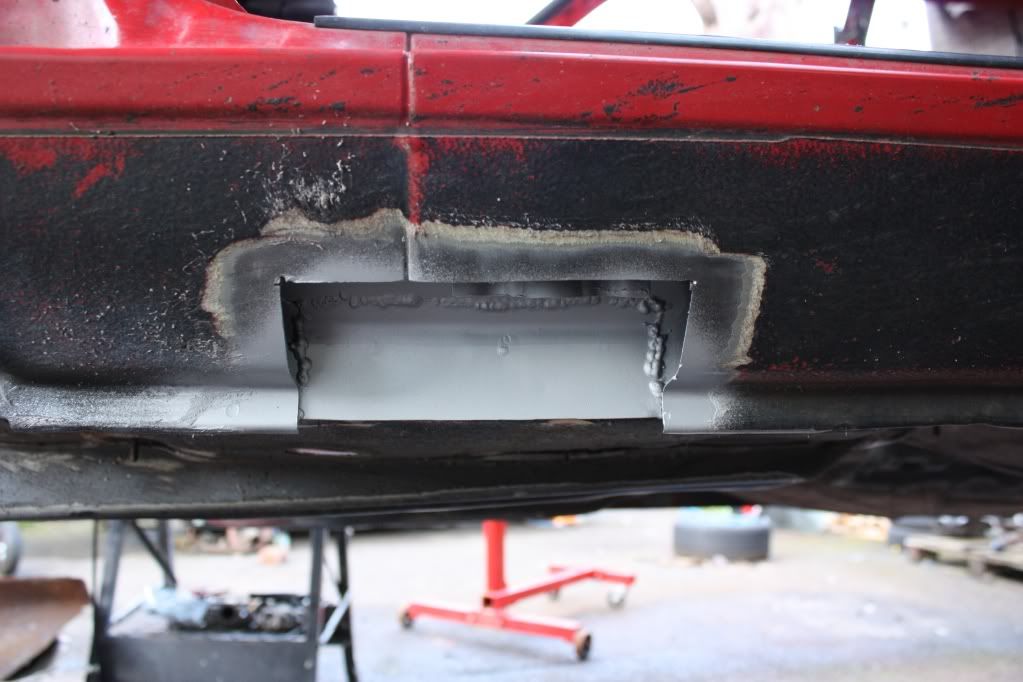
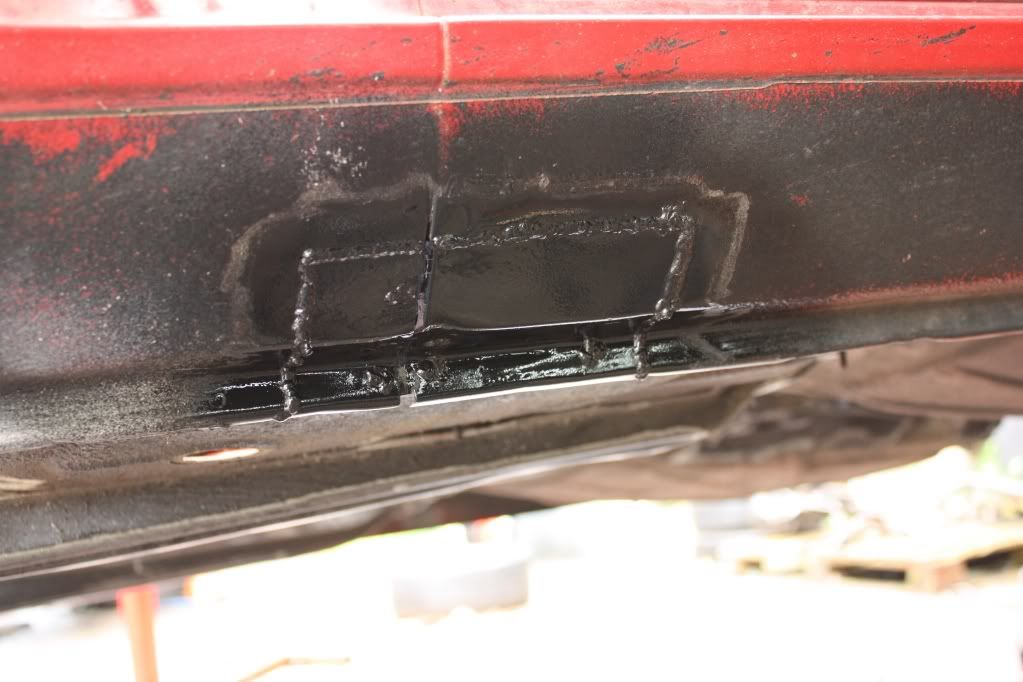
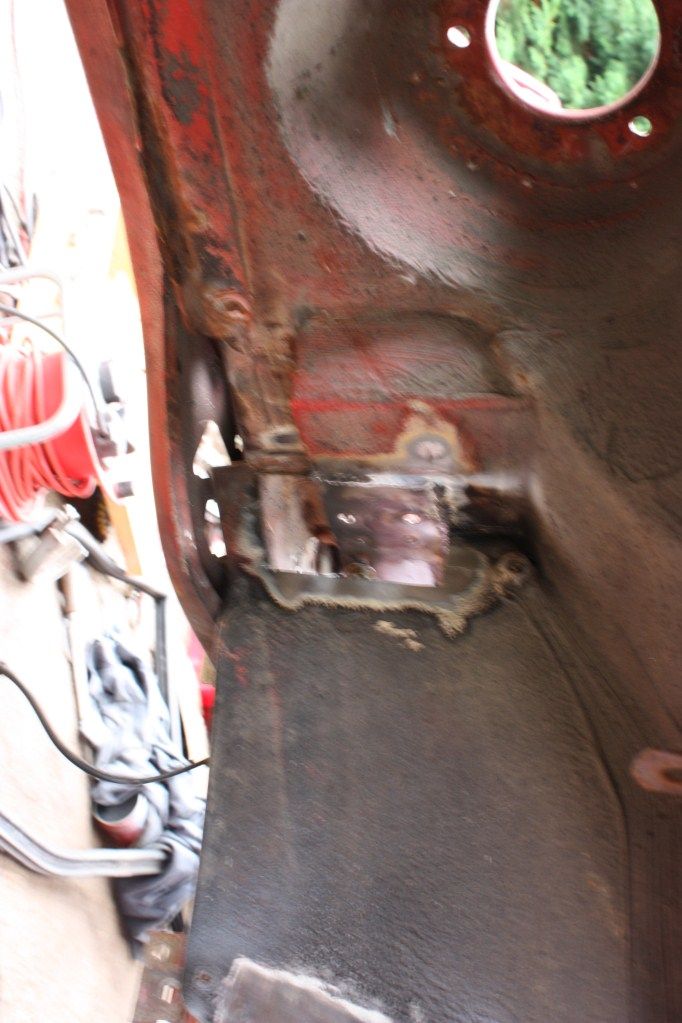
Tailgate lock area, not sure what to do with this here:
Image
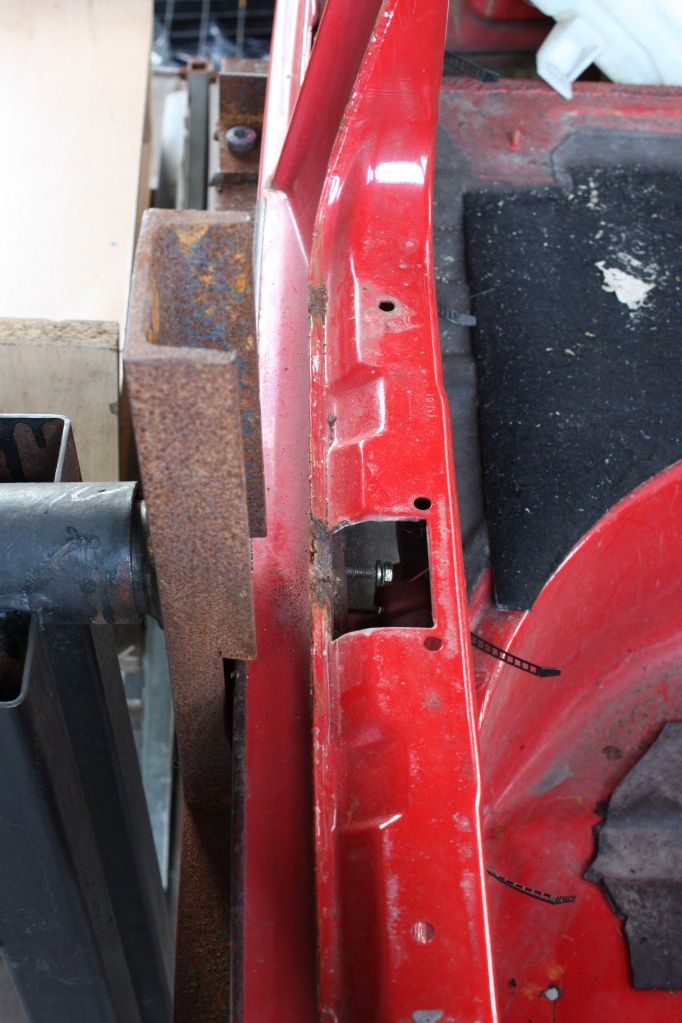
Maybe cut out the same from the other touring?

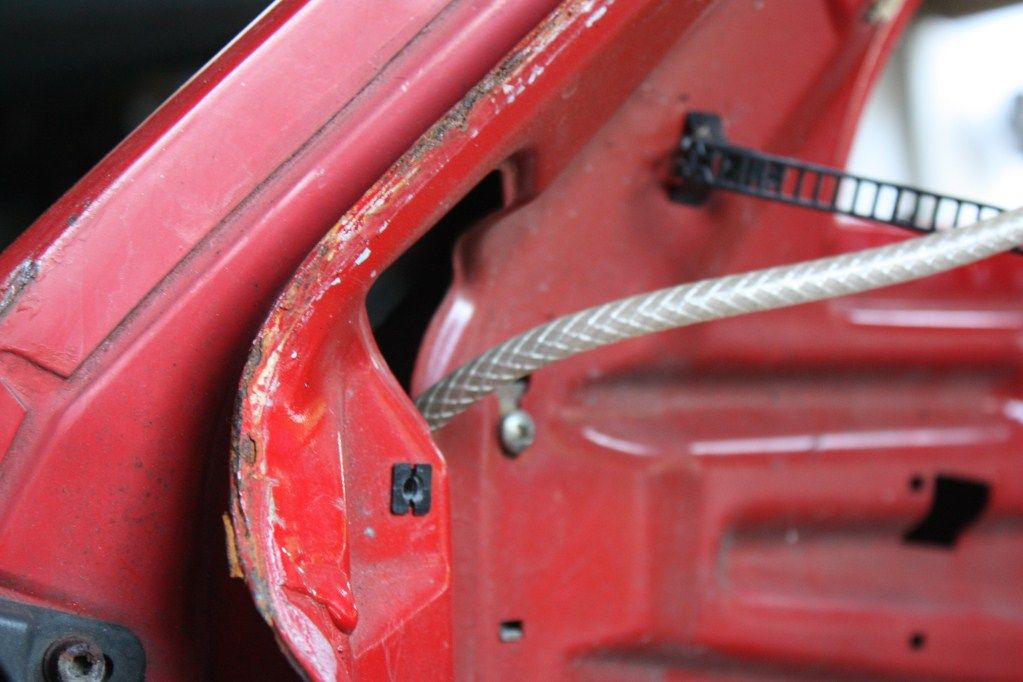
Similar cracked paint/surface rust on both sides, stress cracks?
Image

The seam for the boot rubber, bit scabby looking :(
Image

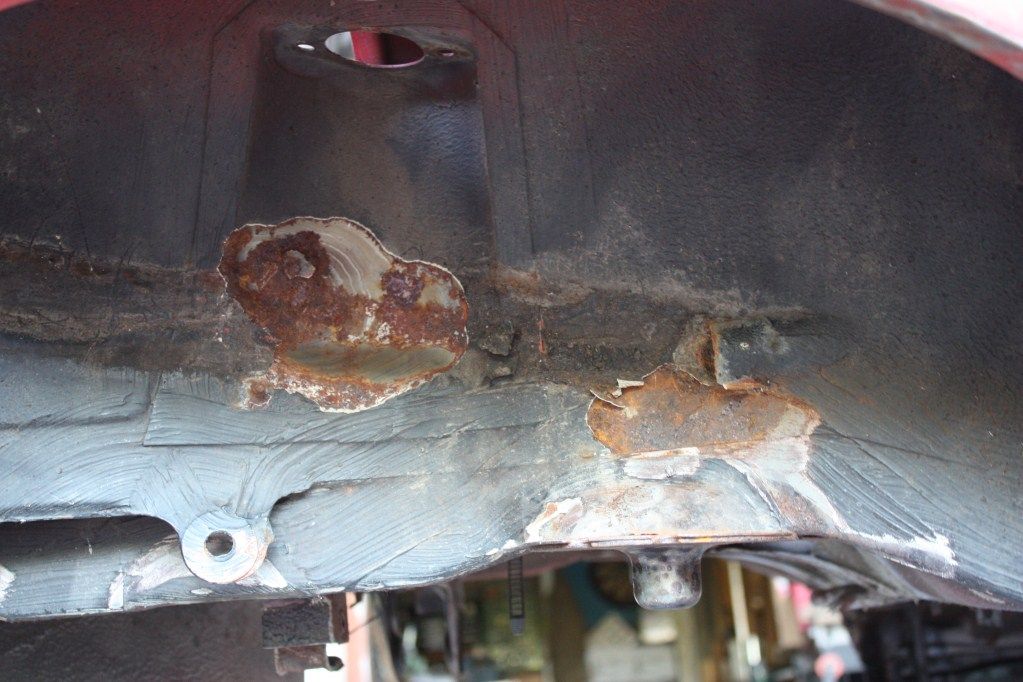
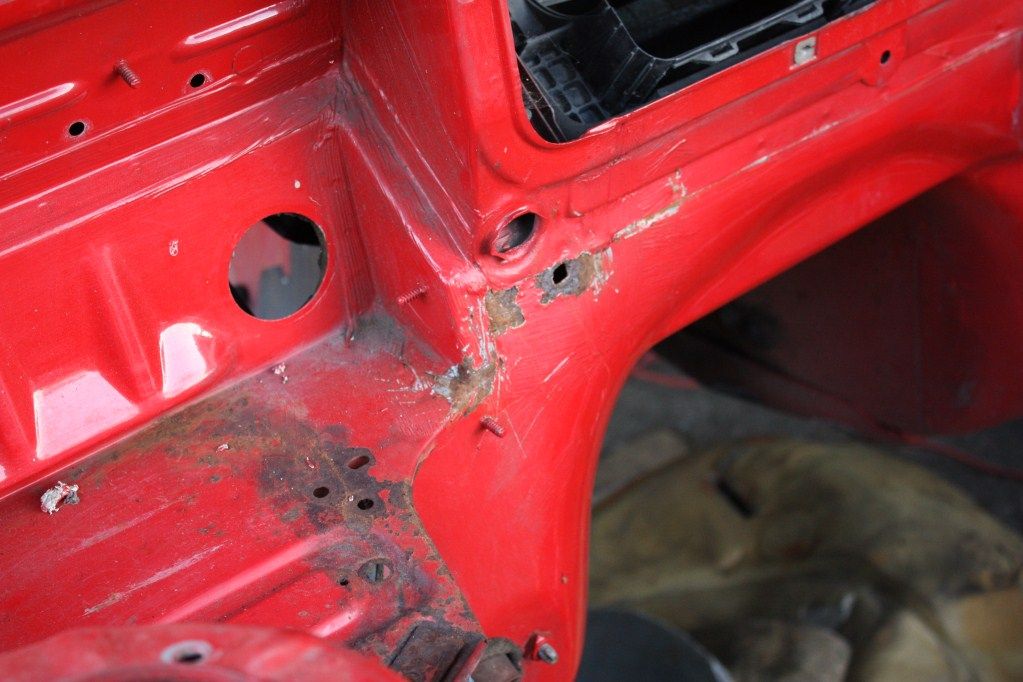
Driver side arch under the battery tray:
Image

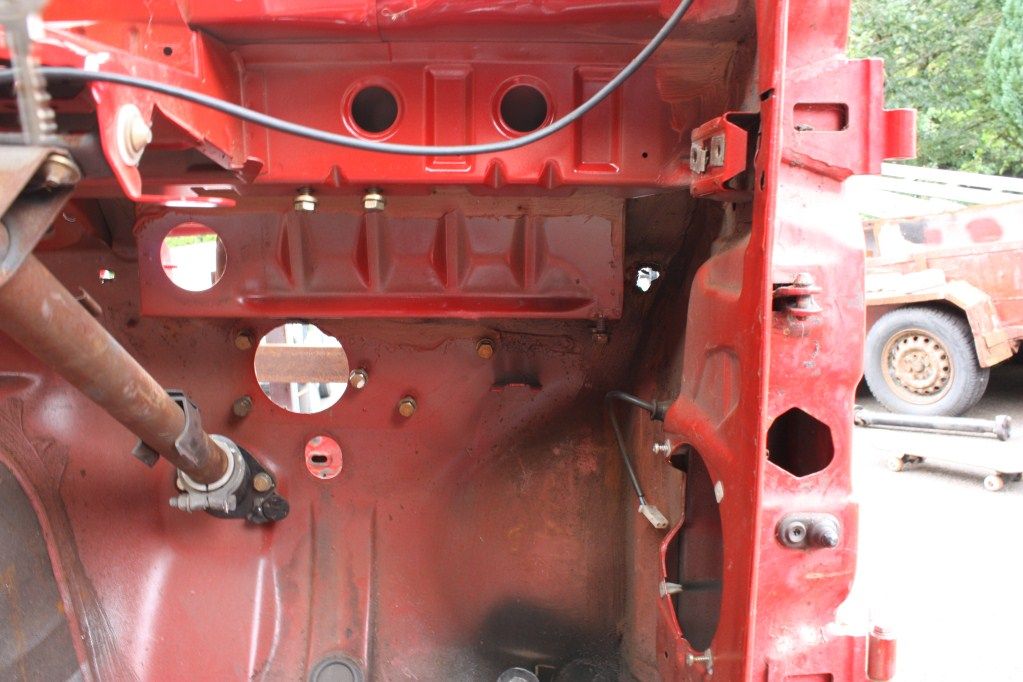
Battery tray area, all looks to be surface rust with the exception of 2 holes on the bulkhead:
Image

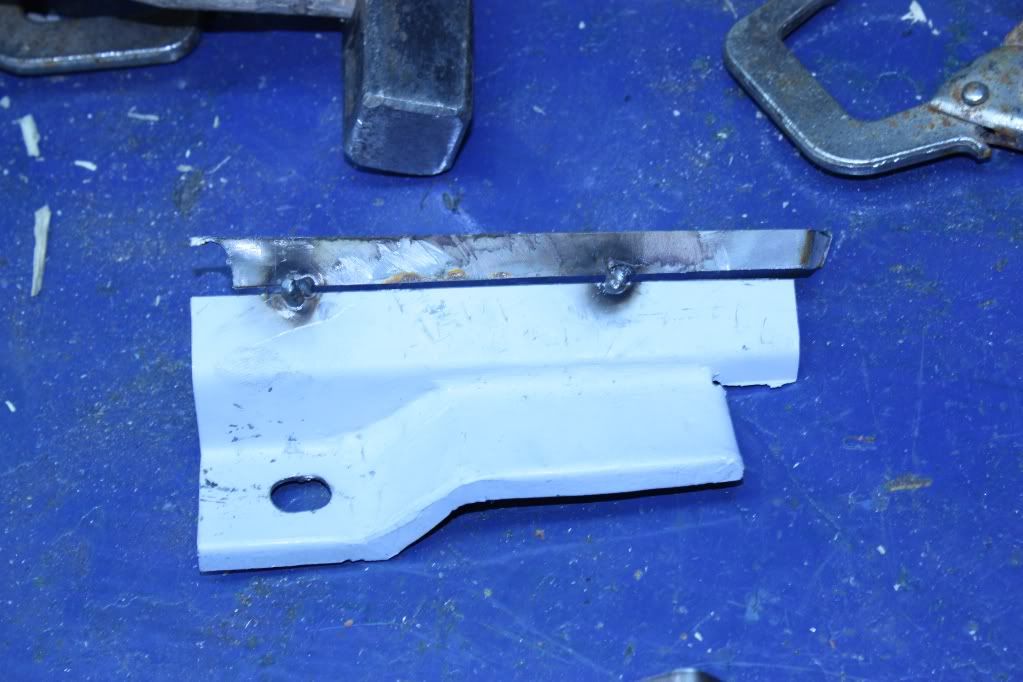
Bracket for fusebox, might cut out the one from the blue touring:
Image
TouringMatt
E30 Zone Camper
E30 Zone Camper
Posts: 1188
Joined: Mon Jan 10, 2005 11:00 pm
Location: Not where i should be

Wed Jul 13, 2011 9:21 pm

Image

Get/got this too, similar on the C pillar
DanThe
E30 Zone Team Member
Posts: 28641
Joined: Sat Sep 10, 2005 11:00 pm
Location: Staffs
Contact:

Wed Jul 13, 2011 9:52 pm

Thats some dedication youve got there! Keep it up :D
User avatar
rob0r
E30 Zone Regular
E30 Zone Regular
Posts: 639
Joined: Tue Apr 03, 2007 11:00 pm

Thu Jul 14, 2011 12:06 pm

Great effort!
User avatar
Jozi
E30 Zone Addict
E30 Zone Addict
Posts: 3076
Joined: Thu Nov 22, 2007 11:00 pm
Location: Dublin, Ireland

Thu Jul 14, 2011 9:58 pm

Thanks lads, I've come this far with it, I might as well go more far!

Touringmat, must be stress cracks. My C pillars were ok on this shell but have started on my other touring. I seen beardymat mention he cuts a slit in them and welds them up, this was in datourers thread.

Anyhow, I spent a few hrs at it again today, finally got the sill closed up again :) Had to remake the last piece again, not perfect but close enough
Image

I want to start buikding up the rear beam tomorrow or over the weekend and so decided to give the discs a clean up. Pity I don't have before pics of them, 6+ months of sitting up without use made them look nasty, cleaned up well though
Image
Vier
E30 Zone Newbie
E30 Zone Newbie
Posts: 22
Joined: Sun Sep 30, 2007 11:00 pm
Location: "Vila Nova de Gaia" Portugal

Mon Jul 18, 2011 1:27 pm

Some really hard work to go ahead. Keep it up.
____________________________
Some of my stuff
http://Www.VierPrJt.Pt.Vu
User avatar
rob0r
E30 Zone Regular
E30 Zone Regular
Posts: 639
Joined: Tue Apr 03, 2007 11:00 pm

Fri Jul 22, 2011 12:32 pm

Any further progress with the BC coilovers? I'm very interested to see how they turn out. What are the rear BCs like, are they a true coilover?
User avatar
Jozi
E30 Zone Addict
E30 Zone Addict
Posts: 3076
Joined: Thu Nov 22, 2007 11:00 pm
Location: Dublin, Ireland

Fri Jul 22, 2011 12:40 pm

No where near fitting the coils unfortunately :( The rears aren't true coilovers, their a spring on a perch and the strut can also be adjusted for height (similar to the front but without the spring).

---EDIT---

A friend drove a nother E30 this week with BC's fitted and he was impressed by them, said they felt really good on the road.
User avatar
Jozi
E30 Zone Addict
E30 Zone Addict
Posts: 3076
Joined: Thu Nov 22, 2007 11:00 pm
Location: Dublin, Ireland

Wed Jul 27, 2011 6:33 pm

Was having a bit of a wtf am I doing all this for this week because of a little awkward to get at hole under the dash around the battery tray. I'm quite close to finishing though, a few more holes, a repair to the sunroof tray and a good amount of tidying up before she's ready for paint. :cool:


Anyhow... I got a little more stripped of the car, not that there's much left
Image
Image
Image

Had to get rid of the pedal box and heater matrix??? to get at the most awkward place to be repairing a hole :mad:
Image

And the same hole from inside the wheel arch
Image

As much as I tried, I couldn't get at it enough to cut it out. To top it of I found some more rust under the battery tray inside the car, to the left of the hole above. This afternoon I went at it again and ended up cutting through the battery tray, cutting the rusted metal of it and welding part of the tray back in, with this being the result after some grinding and dremmeling
Image

I'll have to get the welder out again and close up the few little holes you can see and then get the filler out and smooth it all of a little so it's nice again.

Tomorrow I'll finish closing up the original rusty hole with some clean metal, pics from inside the car and inside the wheel arch
Image
Image
retroboyo
E30 Zone Regular
E30 Zone Regular
Posts: 459
Joined: Mon Oct 30, 2006 11:00 pm

Sun Jul 31, 2011 6:01 pm

A brilliant thread, thanks for sharing your work on here
User avatar
Jozi
E30 Zone Addict
E30 Zone Addict
Posts: 3076
Joined: Thu Nov 22, 2007 11:00 pm
Location: Dublin, Ireland

Thu Aug 11, 2011 11:44 pm

Thanks Retroboyo.

Little to update for this week. I made a final (I hope) to-do list last week after this one it's paint prep, it's mostly of the stuff I posted further back. Started removing all the seamsealer around the engine bay, few little surprises lurking that I have started cutting out.

I got a little distracted Tue, went shopping for nuts and bolts and got nearly everything I was looking for for under the car, subframe bolts, calliper bolts and various other nuts and bolts. I also picked up my rebuilt 3.74 lsd with 40% lock, while there I got to take a M52 moredoor for a spin after I took a Alpina C2 2.7 for a spin :D The Alpina drove very nice and the M52 felt noticeably quicker (4.1 diff), I can't wait to drive this touring of mine!! Also cut a frotn panel from a scrap car which I hope to fit in such away that it can be removed by undoing some bolts (and removing the rad, lights, wiring, bumpers, valance.... is there any point in it??).

I spent today and yesterday refurbing my callipers (and cleaning up the rear callipers), took some pics, but not enough, for a tutorial if anyone is interested?

Front:
Image

Rear
Image

Rear piston seals and bushes are new, I re-used the front ones which I rebuilt about 6-8months before I parked up the touring.

Started cleaning up the base of the front struts, managed to damage some of the powder coating so that all got rubbed down and will be primered and painted in the morning.
Post Reply