
Goosie's S50 Moredoor, 'Ring action
Moderator: martauto
-
pukar
- E30 Zone Addict

- Posts: 2225
- Joined: Tue Sep 08, 2009 11:00 pm
looking shiny as heck! the paintwork looks bootiful!

-
goosiegander
- Zonegoose
- Posts: 2544
- Joined: Sun Nov 19, 2006 11:00 pm
- Location: East Anglia
Thanks Atul!pukar wrote:looking shiny as heck! the paintwork looks bootiful!
I did get a couple of shots of the decals in the preceeding pictures feel free to add them to your thread

-
retroboyo
- E30 Zone Regular

- Posts: 459
- Joined: Mon Oct 30, 2006 11:00 pm
It's nice to see an E30 getting so much love, good job you didnt sell it before
-
goosiegander
- Zonegoose
- Posts: 2544
- Joined: Sun Nov 19, 2006 11:00 pm
- Location: East Anglia
Yes indeed Dude,retroboyo wrote:It's nice to see an E30 getting so much love, good job you didnt sell it before
Must say i've been a lot happier since the fresh bbs' went on.
The S50 is pretty good as well
-
goosiegander
- Zonegoose
- Posts: 2544
- Joined: Sun Nov 19, 2006 11:00 pm
- Location: East Anglia
A few pictures of hibernation:
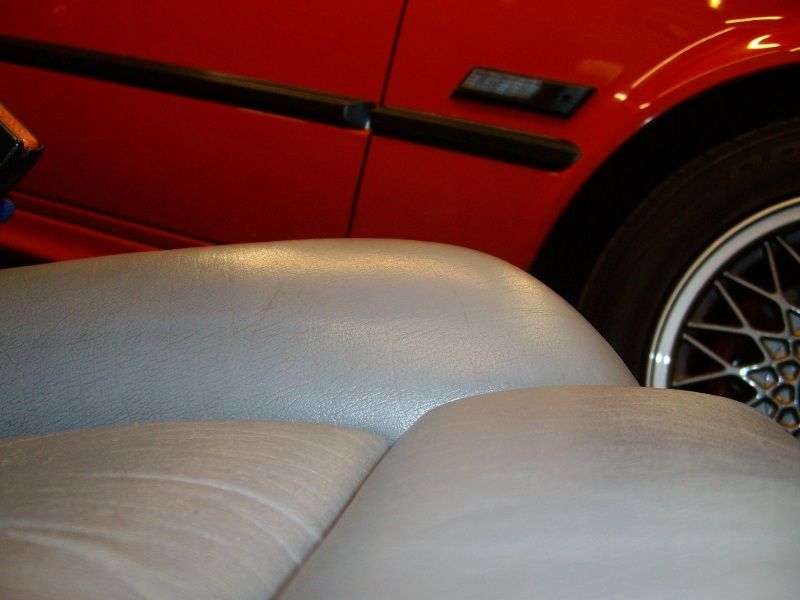
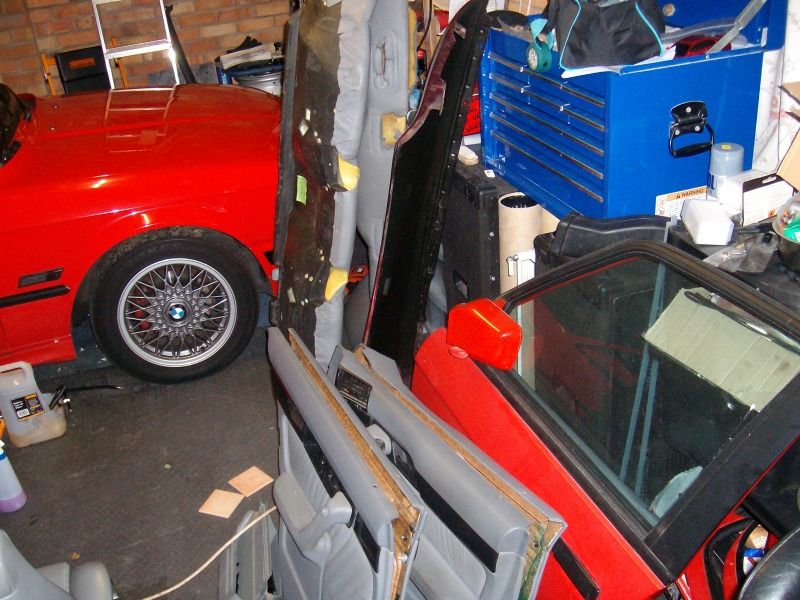
And one without all the crap with another pass of the bonnet and drivers wing with the polisher
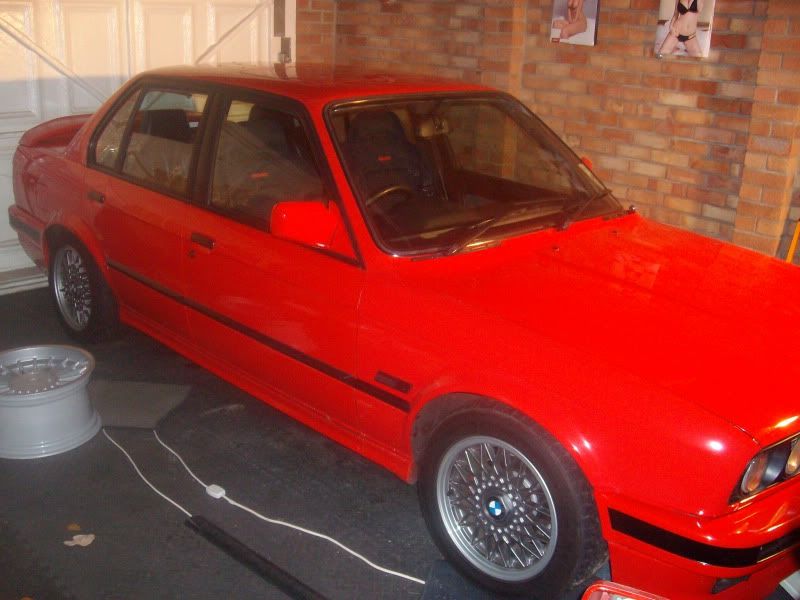
And one without all the crap with another pass of the bonnet and drivers wing with the polisher
-
retroboyo
- E30 Zone Regular
- Posts: 459
- Joined: Mon Oct 30, 2006 11:00 pm
I wish my red E30 looked as red as yours 
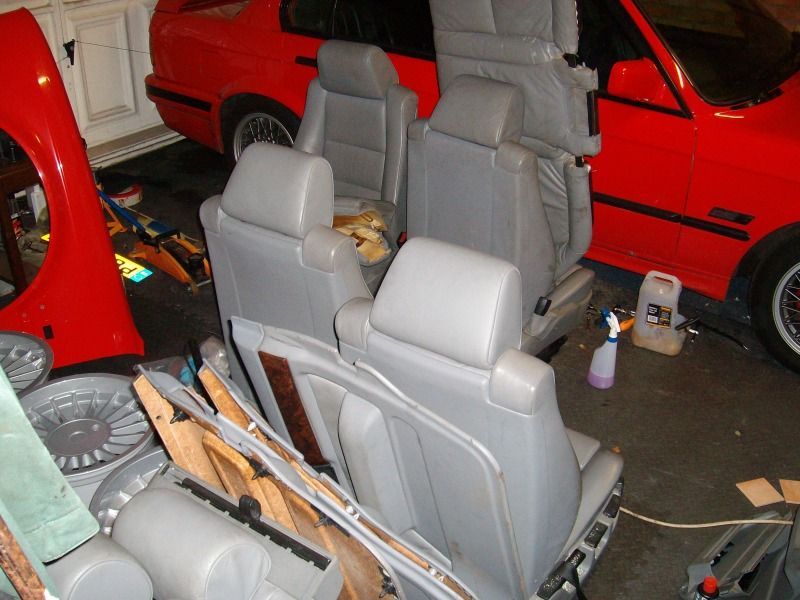
Are those seats M3 jobbies
Are those seats M3 jobbies
-
goosiegander
- Zonegoose
- Posts: 2544
- Joined: Sun Nov 19, 2006 11:00 pm
- Location: East Anglia
Similar to but not the same as sport evo recaros dude,retroboyo wrote:I wish my red E30 looked as red as yours
Are those seats M3 jobbies
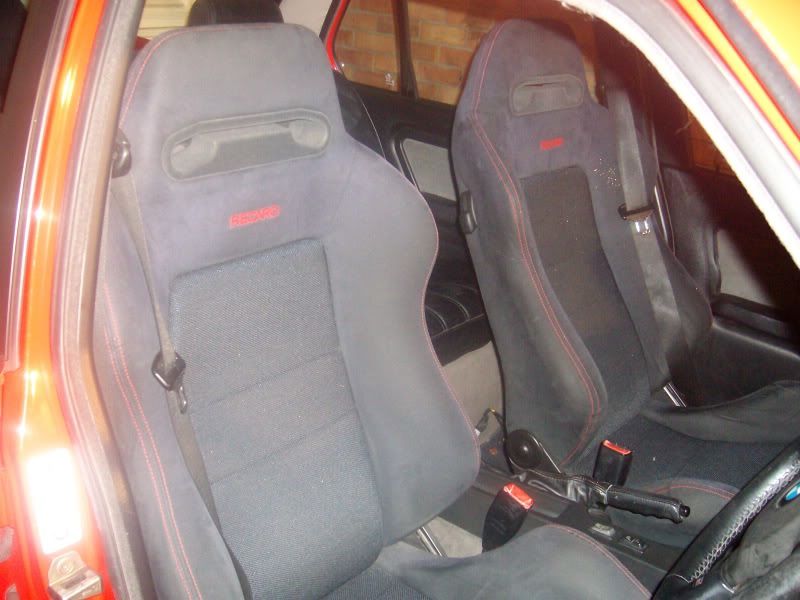
The upper outer bolster shape is slightly more rounded,
These are now wired in with the factory seat heating loom as well
-
goosiegander
- Zonegoose
- Posts: 2544
- Joined: Sun Nov 19, 2006 11:00 pm
- Location: East Anglia
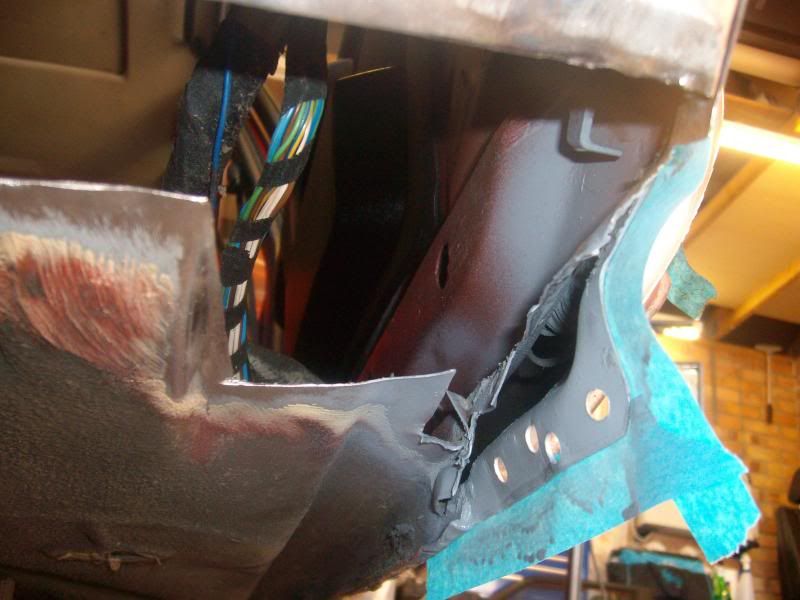
Well the new wing wasn't going to put itself on so up on axle stand and an opportunity to go all anal on the front inner arches

A quick blast with my new favourite homo toy the steamer revealed a very nice original finish,

Sans rust
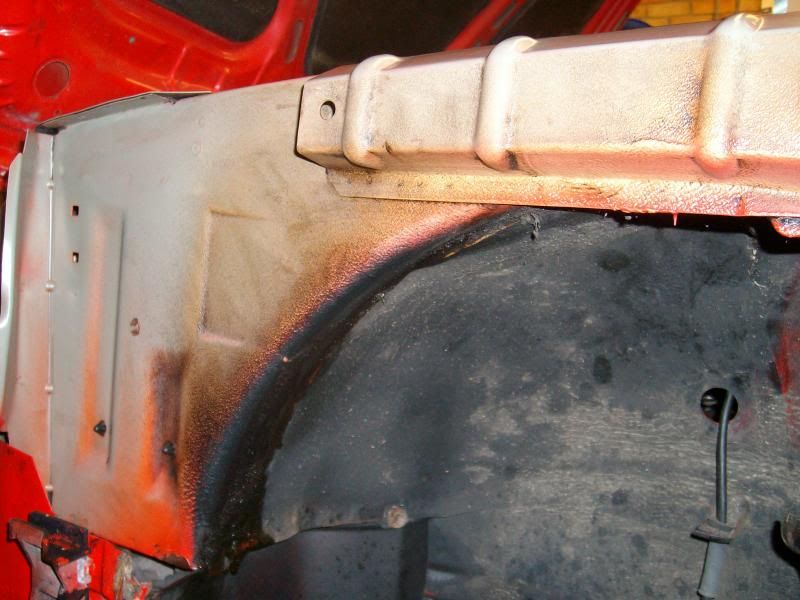
Factory finish for Brilliant red cars was satin black in the arches and everything else body/underseal colour from the assembly plant pictures i've seen...
Now i'll need to clean the bay again but fu*k it...
And now well coated in Bilt hamber's finest clear drying corrosion wax
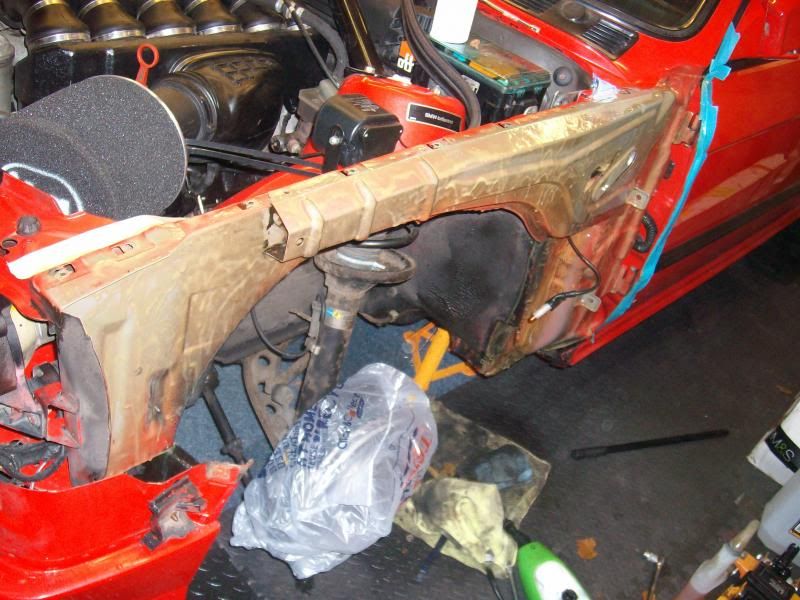
just the wing to coat now and once its on it can be polished up,
Further pictures to follow
A quick blast with my new favourite homo toy the steamer revealed a very nice original finish,
Sans rust
Factory finish for Brilliant red cars was satin black in the arches and everything else body/underseal colour from the assembly plant pictures i've seen...
Now i'll need to clean the bay again but fu*k it...
And now well coated in Bilt hamber's finest clear drying corrosion wax
just the wing to coat now and once its on it can be polished up,
Further pictures to follow
-
spook
- League two here we come !!!
- Posts: 7587
- Joined: Sat Aug 19, 2006 11:00 pm
- Location: portsmouth
Nice engine 

-
goosiegander
- Zonegoose
- Posts: 2544
- Joined: Sun Nov 19, 2006 11:00 pm
- Location: East Anglia
Thanks Chris!
I've made some bad calls with BMW ownership in the past,
...the S50 was not one of them
I've made some bad calls with BMW ownership in the past,
...the S50 was not one of them
-
goosiegander
- Zonegoose
- Posts: 2544
- Joined: Sun Nov 19, 2006 11:00 pm
- Location: East Anglia
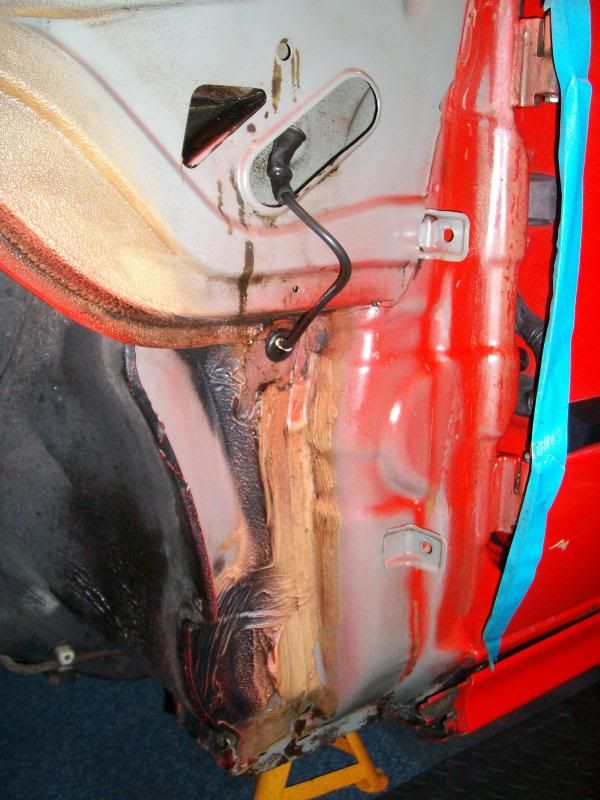
Well turns out it needs patching for the MOT...
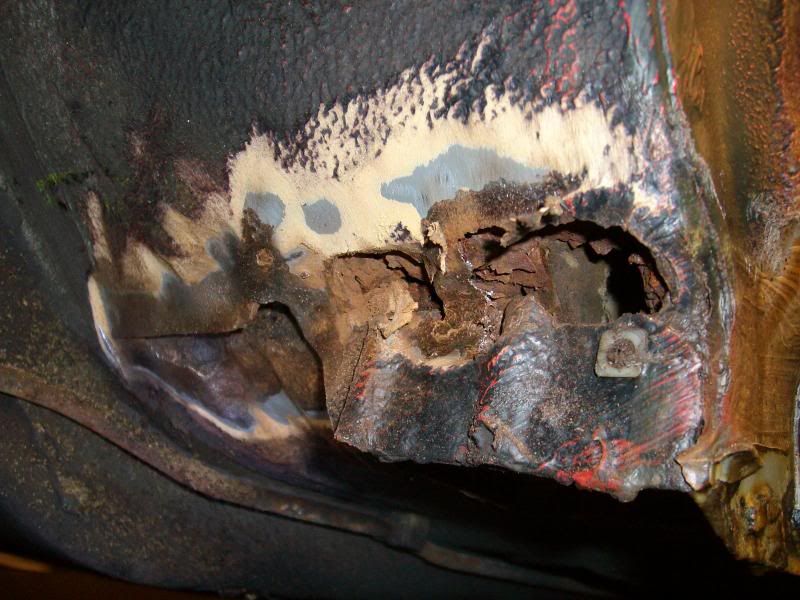
Oh Dear...
Oh Dear...
-
The_Diddler
- Love it up the more door !
- Posts: 3619
- Joined: Tue May 27, 2008 11:00 pm
- Location: Tamworth, Staffs Lovely!!!!!!
Real your pain buddy, being there, sucks don't it.....goosiegander wrote:Well turns out it needs patching for the MOT...
Oh Dear...
-
goosiegander
- Zonegoose
- Posts: 2544
- Joined: Sun Nov 19, 2006 11:00 pm
- Location: East Anglia
Yep its a bitch, so I invested in some MIG kit and started learning...The_Diddler wrote:Real your pain buddy, being there, sucks don't it.....goosiegander wrote:Well turns out it needs patching for the MOT...
Oh Dear...

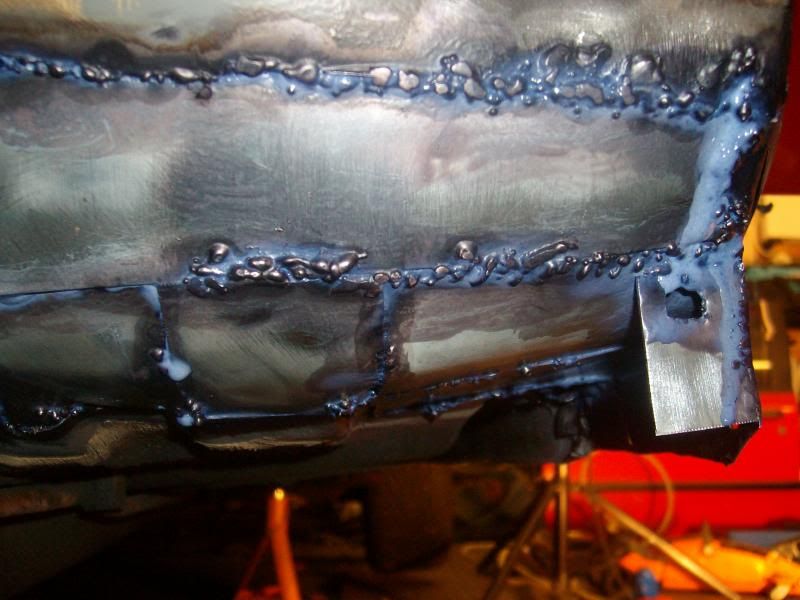
Titanic spec...
Cutting and pasting,
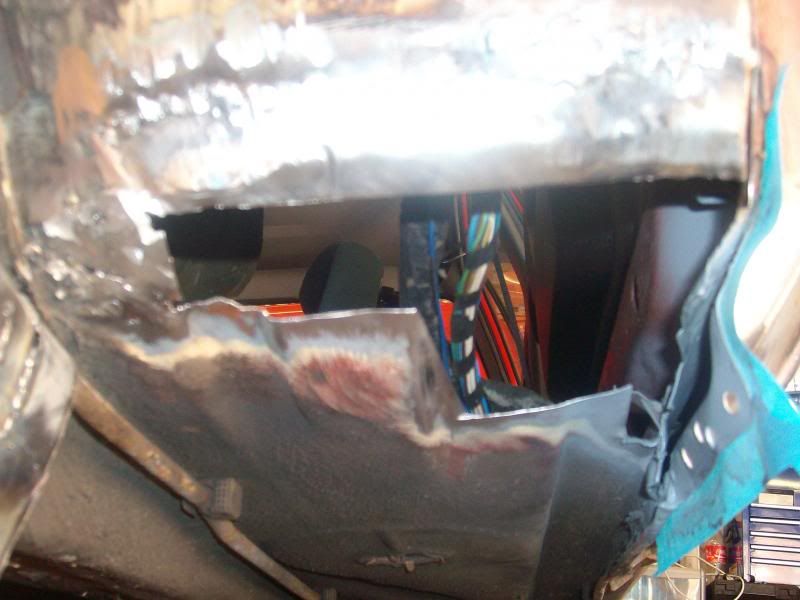
Etchweld applied

Spot and seam welding
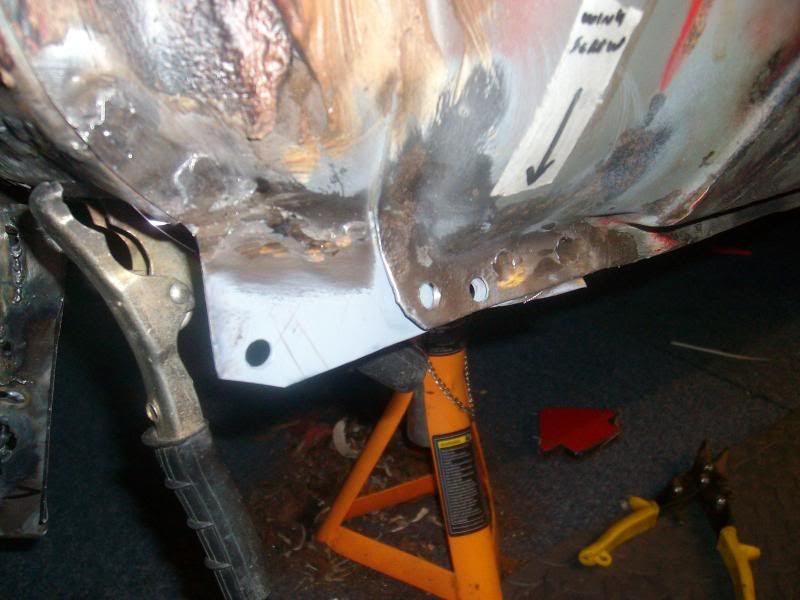
And slightly more solid/tidy
More to do but i'm getting better with each section, very satisfying
-
retroboyo
- E30 Zone Regular
- Posts: 459
- Joined: Mon Oct 30, 2006 11:00 pm
Good effort there getting it sorted yourself
-
Andy325i
- E30 Zone Addict
- Posts: 4052
- Joined: Mon Jan 10, 2005 11:00 pm
- Location: Avon
Looking great dude Can you tell us more about the etch weld? Guessing you apply it then can still weld it?

M50B25NonVanos & M52B28Vanos Heads for sale. Pm Me.
-
scott180gtb
- E30 Zone Camper

- Posts: 1251
- Joined: Thu Mar 26, 2009 11:00 pm
- Location: Yorkshire
Goosie
Are you putting the pad back on ???
From the pics you look like you have caught it before the grot spreads right down the inner sill.
Grind it, Cut it, Burn it, Weld it.
Skills!
Are you putting the pad back on ???
From the pics you look like you have caught it before the grot spreads right down the inner sill.
Grind it, Cut it, Burn it, Weld it.
Skills!
Cars
2007 VW Caravelle 2.5 TDI 250 bhp 550 NM
1989 325i Sport Gone
2003 E46 320d Touring
1998 E36 M3 EVO Track Toy
1996 E36 328i Sport welder-up project
2007 VW Caravelle 2.5 TDI 250 bhp 550 NM
1989 325i Sport Gone
2003 E46 320d Touring
1998 E36 M3 EVO Track Toy
1996 E36 328i Sport welder-up project
-
retroboyo
- E30 Zone Regular
- Posts: 459
- Joined: Mon Oct 30, 2006 11:00 pm
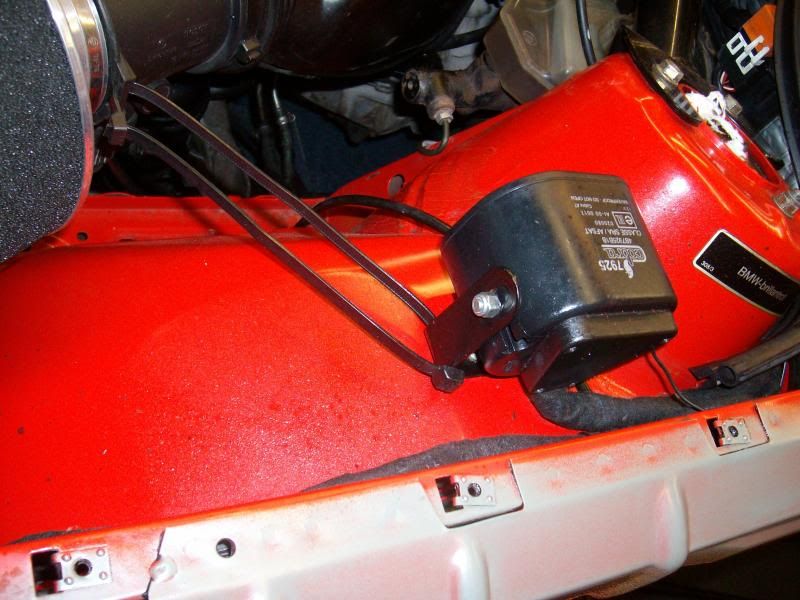
What is that pipe that runs down the chassis rail you can see in the pics, mine looks very rusty
-
goosiegander
- Zonegoose
- Posts: 2544
- Joined: Sun Nov 19, 2006 11:00 pm
- Location: East Anglia
Cheers Retroboyo!Andy325i wrote:Looking great dude
Thanks Andy
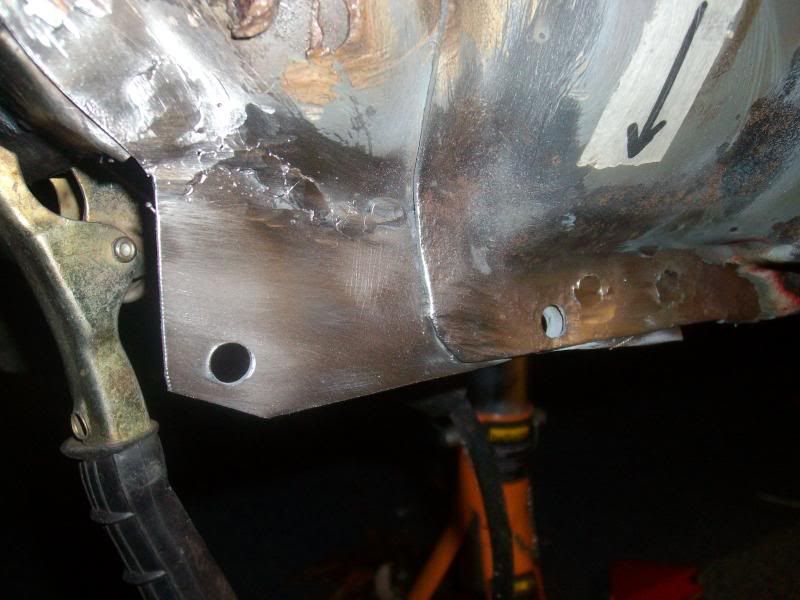
Check out the bilt hamber laboratories webpage, its an anti corrosive etch primer that can still be welded on top of without conductivity issues, I've brushed back the outer face in the last picture above for a coat of electrox zinc primer...
-
goosiegander
- Zonegoose
- Posts: 2544
- Joined: Sun Nov 19, 2006 11:00 pm
- Location: East Anglia
That should be the fuel tank breather pipe duderetroboyo wrote:What is that pipe that runs down the chassis rail you can see in the pics, mine looks very rusty
-
goosiegander
- Zonegoose
- Posts: 2544
- Joined: Sun Nov 19, 2006 11:00 pm
- Location: East Anglia
Indeed Scott,scott180gtb wrote:Goosie
Are you putting the pad back on ???
From the pics you look like you have caught it before the grot spreads right down the inner sill.
Grind it, Cut it, Burn it, Weld it.
Skills!
The fucking pad was incubating...
Cut out the spot welds and brushed it back and it was untouched so it can go back up albeit with proper protection this time!
Wish it hadn't taken as much of the rest of the car with it as it did!
-
retroboyo
- E30 Zone Regular
- Posts: 459
- Joined: Mon Oct 30, 2006 11:00 pm
Thanks. It can look a bit daunting after cutting it out, but you'll get a great sense of satisfaction once you have put it back with clean steelgoosiegander wrote:That should be the fuel tank breather pipe duderetroboyo wrote:What is that pipe that runs down the chassis rail you can see in the pics, mine looks very rusty
-
goosiegander
- Zonegoose
- Posts: 2544
- Joined: Sun Nov 19, 2006 11:00 pm
- Location: East Anglia
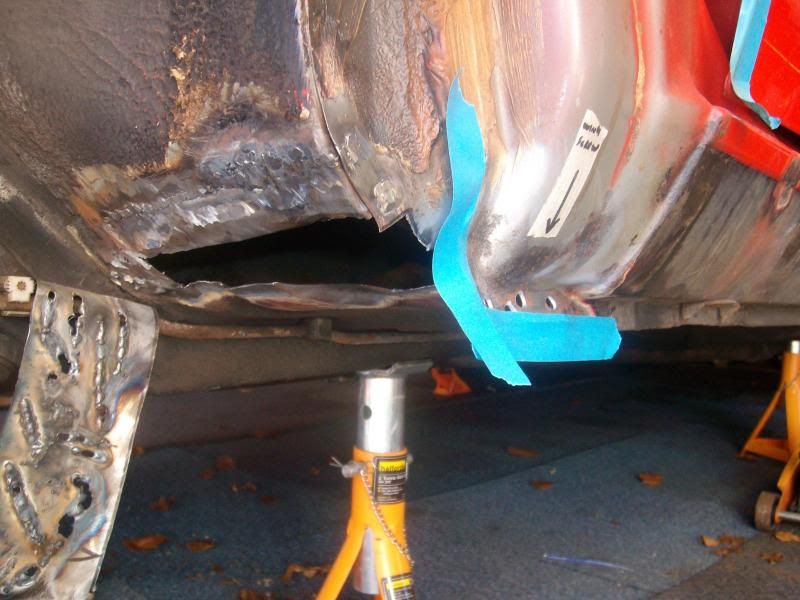
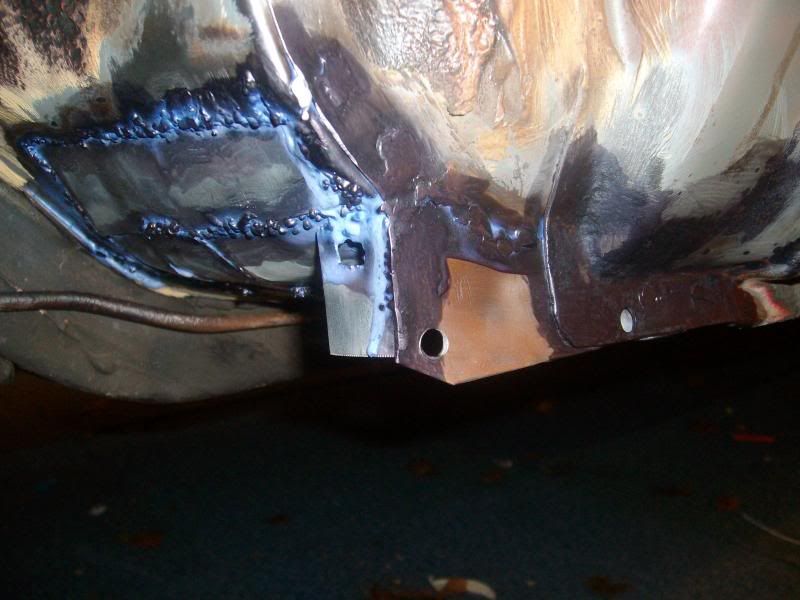
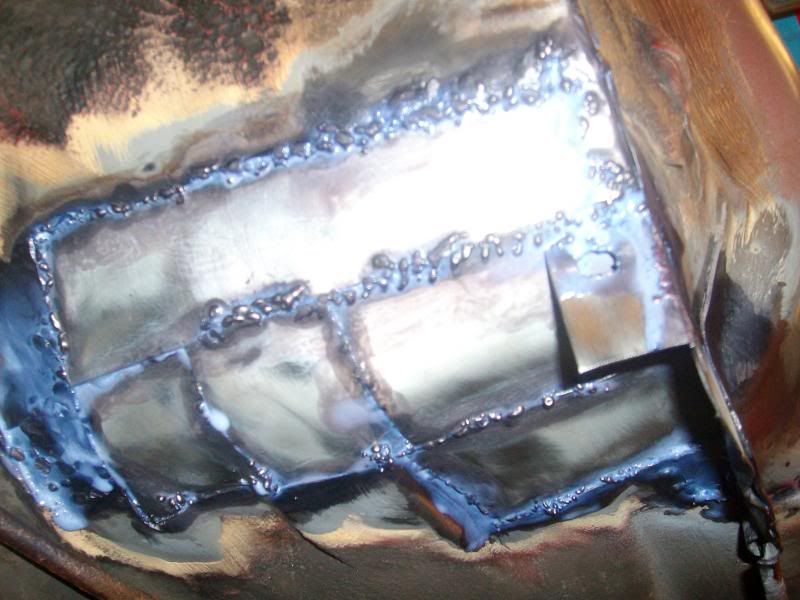
And with the wave of a MIG:retroboyo wrote:Thanks. It can look a bit daunting after cutting it out, but you'll get a great sense of satisfaction once you have put it back with clean steelgoosiegander wrote:That should be the fuel tank breather pipe duderetroboyo wrote:What is that pipe that runs down the chassis rail you can see in the pics, mine looks very rusty


Birdshit welds but it withstood the sledgehammer test,
Nearly done
-
retroboyo
- E30 Zone Regular
- Posts: 459
- Joined: Mon Oct 30, 2006 11:00 pm
Pics no working for me Goose
-
BenHar

- E30 Zone Addict
- Posts: 3081
- Joined: Sun Jul 11, 2010 11:00 pm
- Location: Reigate, Surrey
goosiegander wrote:And with the wave of a MIG:retroboyo wrote:Thanks. It can look a bit daunting after cutting it out, but you'll get a great sense of satisfaction once you have put it back with clean steelgoosiegander wrote: That should be the fuel tank breather pipe dude
Birdshit welds but it withstood the sledgehammer test,
Nearly done
-
retroboyo
- E30 Zone Regular
- Posts: 459
- Joined: Mon Oct 30, 2006 11:00 pm
Thanks BenHar
Looking good and 1000% better than that rust. You've definitely got natural talent with that magic wand you have bought.
this guy did a really good write up on welding and grinding if you are interested
http://retrorides.proboards.com/index.c ... 35&page=11
Looking good and 1000% better than that rust. You've definitely got natural talent with that magic wand you have bought.
this guy did a really good write up on welding and grinding if you are interested
http://retrorides.proboards.com/index.c ... 35&page=11
-
goosiegander
- Zonegoose
- Posts: 2544
- Joined: Sun Nov 19, 2006 11:00 pm
- Location: East Anglia
Thanks!
Zinc and seam sealer this morning, more pictures shortly
Zinc and seam sealer this morning, more pictures shortly
-
tomislav
- E30 Zone Squatter

- Posts: 1633
- Joined: Thu Nov 29, 2007 11:00 pm
- Location: Faversham, Kent
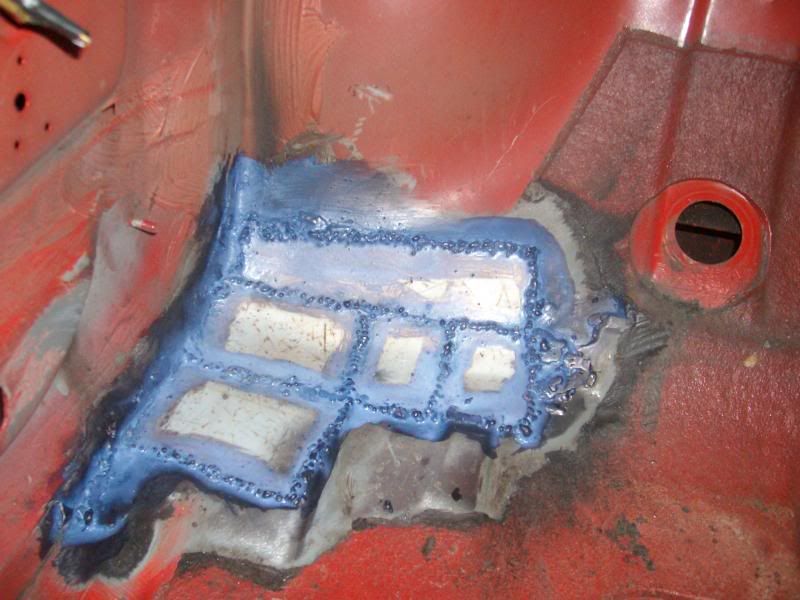
Just out of interest, why 5 patches?
'Assumption is the mother of all f**k ups'
-
goosiegander
- Zonegoose
- Posts: 2544
- Joined: Sun Nov 19, 2006 11:00 pm
- Location: East Anglia
Because my fabrication skills are sh*t Sir!tomislav wrote:Just out of interest, why 5 patches?
-
goosiegander
- Zonegoose
- Posts: 2544
- Joined: Sun Nov 19, 2006 11:00 pm
- Location: East Anglia


Getting there...
-
Rav335uk
- E30 Zone Meets/Events Team

- Posts: 27985
- Joined: Wed Jan 19, 2005 11:00 pm
- Location: Mad mad mad
I take it you didn't want to grind the welds back then 

If you Got "Haters",Then your doing something Right!
CR24v??? Where's it all gone?? LOL
-
pacerpete
- E30 Zone Team Member

- Posts: 18168
- Joined: Sun Jan 23, 2005 11:00 pm
- Location: Iver heath. South bucks.
Rav335uk wrote:I take it you didn't want to grind the welds back then
Foook that. Lumpy = more weight !
Last edited by pacerpete on Wed Apr 17, 2013 9:50 pm, edited 1 time in total.
-
goosiegander
- Zonegoose
- Posts: 2544
- Joined: Sun Nov 19, 2006 11:00 pm
- Location: East Anglia
It was never going to be pretty, in a couple of years and after far more practice i'll dig it all out and make it look nice, for now its strong enough and wont rust unlike the repair offered by the local MOT bandits, Lowestoft is the fooking wild west, check the news!pacerpete wrote:Rav335uk wrote:I take it you didn't want to grind the welds back then
Foook that. Leave them lumpy = more weight !
-
retroboyo
- E30 Zone Regular
- Posts: 459
- Joined: Mon Oct 30, 2006 11:00 pm
I found some MOT welding on the weekend in the drivers foot well. Shocking work, Im going to have to cut it all out just to find some good metal to weld to
-
goosiegander
- Zonegoose
- Posts: 2544
- Joined: Sun Nov 19, 2006 11:00 pm
- Location: East Anglia


Jobbed... sh*t, but solid sh*t
-
tomislav
- E30 Zone Squatter
- Posts: 1633
- Joined: Thu Nov 29, 2007 11:00 pm
- Location: Faversham, Kent
Thats a fair point i suppose lol.goosiegander wrote:Because my fabrication skills are sh*t Sir!tomislav wrote:Just out of interest, why 5 patches?
Just done the exact same to mine on the drivers side, got a much bigger hole than you tho and gonna need more patches!!
'Assumption is the mother of all f**k ups'