

I know, and I should have done but I didn't think I'd have been leaving it for more than a day. Still took a good while for it to go off a little, the area with the 5 holes was still soft, bit's had dried up around the little bracket though. It's not easy to apply evenly and heavy! Smaller brush is in order next time!rrs wrote:If you cover the deox gel with cling film it doesn't dry out.
Jozi's m52 touring - Rebuilding has started
Moderator: martauto


No nasty side effects from it being in contact with your fingers then? I guess it's non toxic so prob be ok. I've loads more to use it on, gonna be lots of fun 
Sound! I'll use what ever I can to get the stuff applied next time 
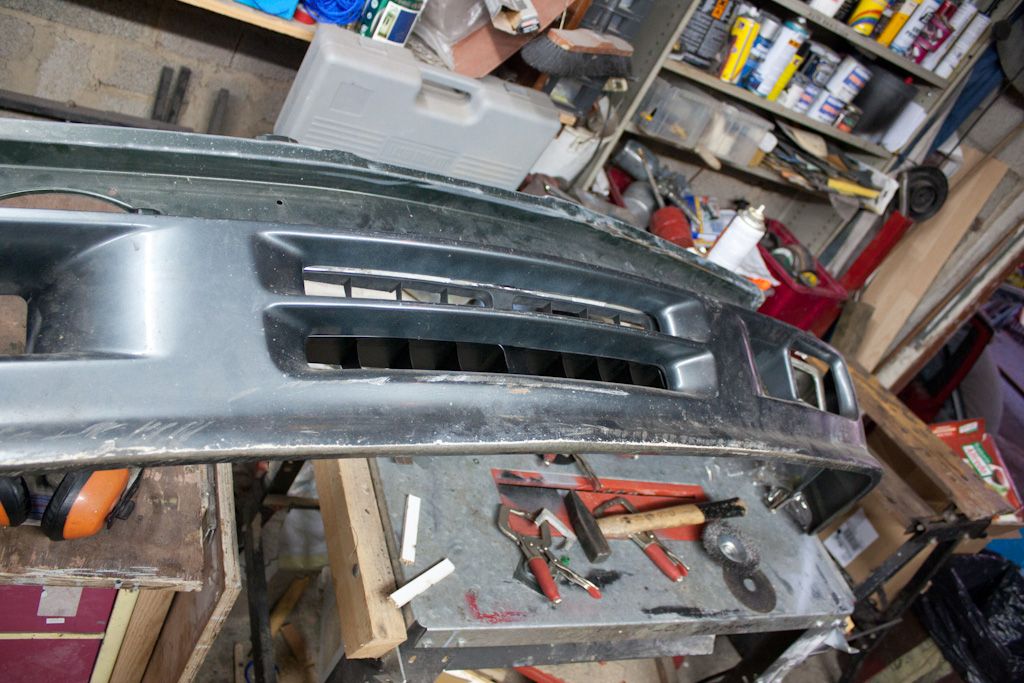
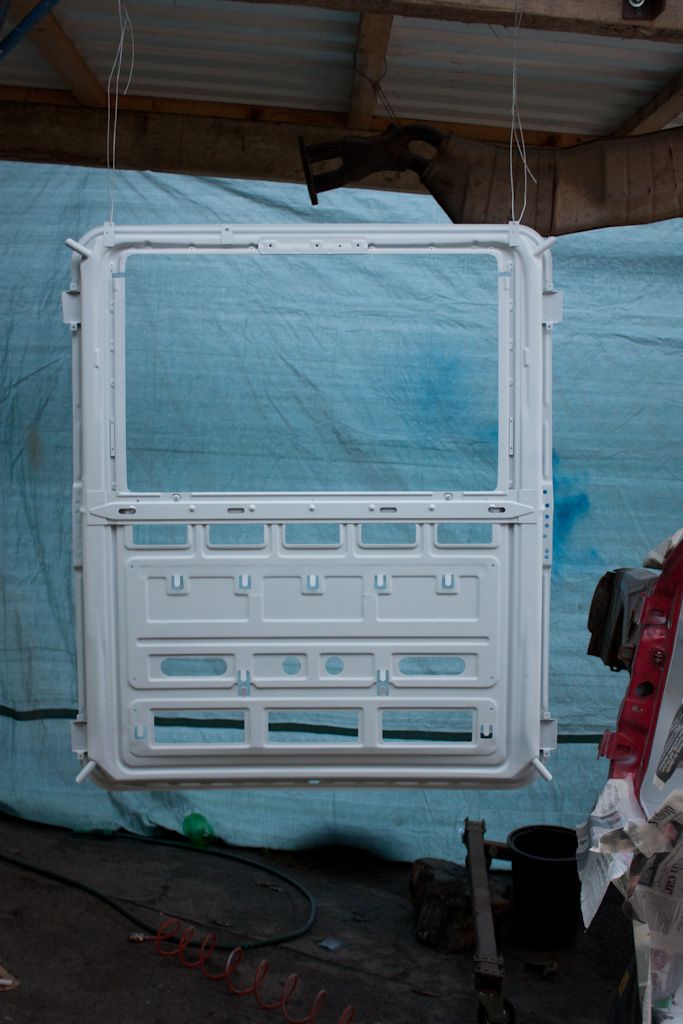
Got the other side of the panel painted up, looks good as new again!
Painted another door, this time Mauritius blue with 5% (5gr per 100 gr of paint) metallic added.
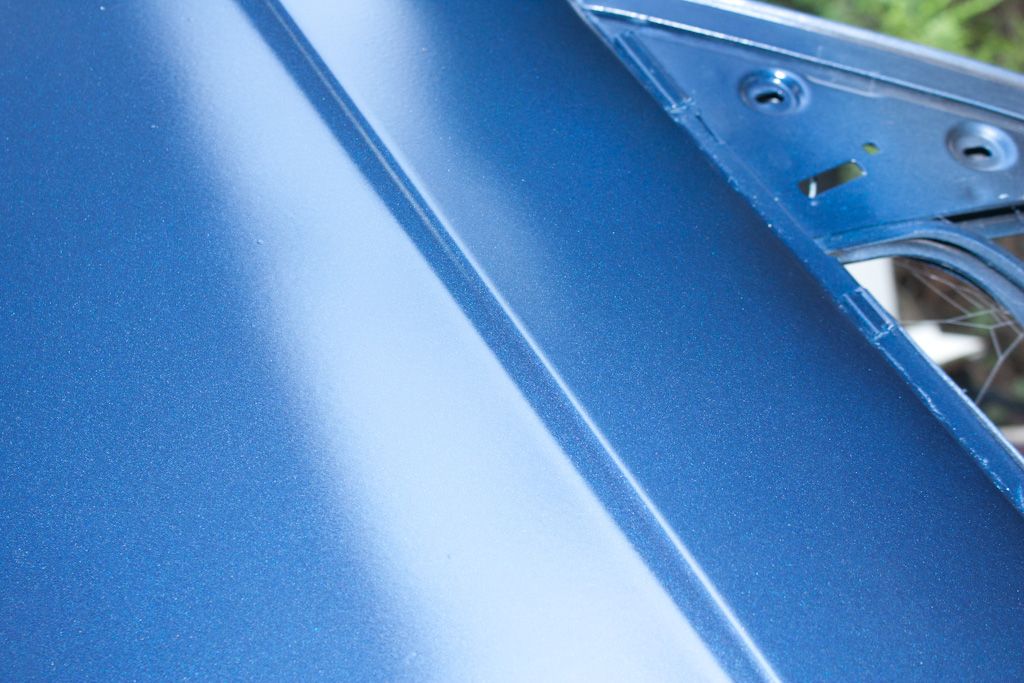
It looks a bit light, which was to be expected with the extra metallic flake.
Painted another door, this time Mauritius blue with 5% (5gr per 100 gr of paint) metallic added.
It looks a bit light, which was to be expected with the extra metallic flake.
Love the flake in it but agree it should be darker brendan

It's a little lighter in the pic than it is in reality because of how the light fell on the panel. I put the door beside the car earlier and it's a good bit lighter than what Mauritius blue should be. The metal flake is in silver paint, would need more blue to compensate for lightening it, I guess.
Dan, never considered Lazer. It was always going to be a respray in Mauritius Blue, then I got the red shell and started thinking about other colours but always keep going back to blue
Dan, never considered Lazer. It was always going to be a respray in Mauritius Blue, then I got the red shell and started thinking about other colours but always keep going back to blue
Nothing major to update, to cold to work outside on the shell. Got a few small things done indoors:
These weren't really dirty to begin with but they got cleaned during the week, had a before pic but it looks now different
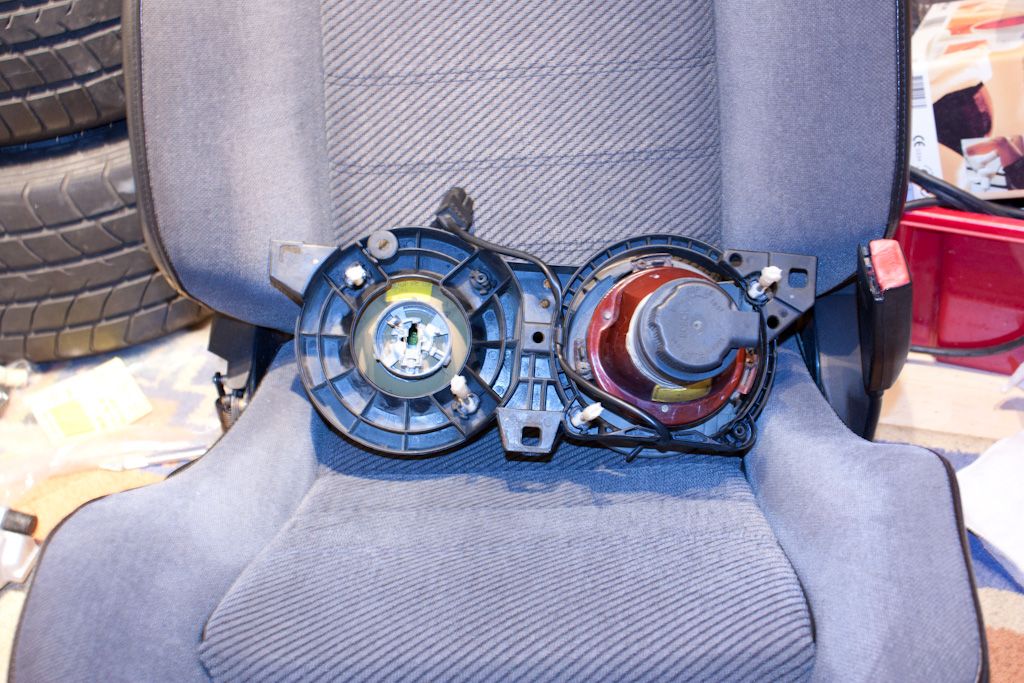
Started building up my lights, some of the Lamin-x needed trimming, new adjusters (I used an adjuster in place of the broken leveling control thing), just the rings to paint or powder coat silver and sort out the wash/wipe for them
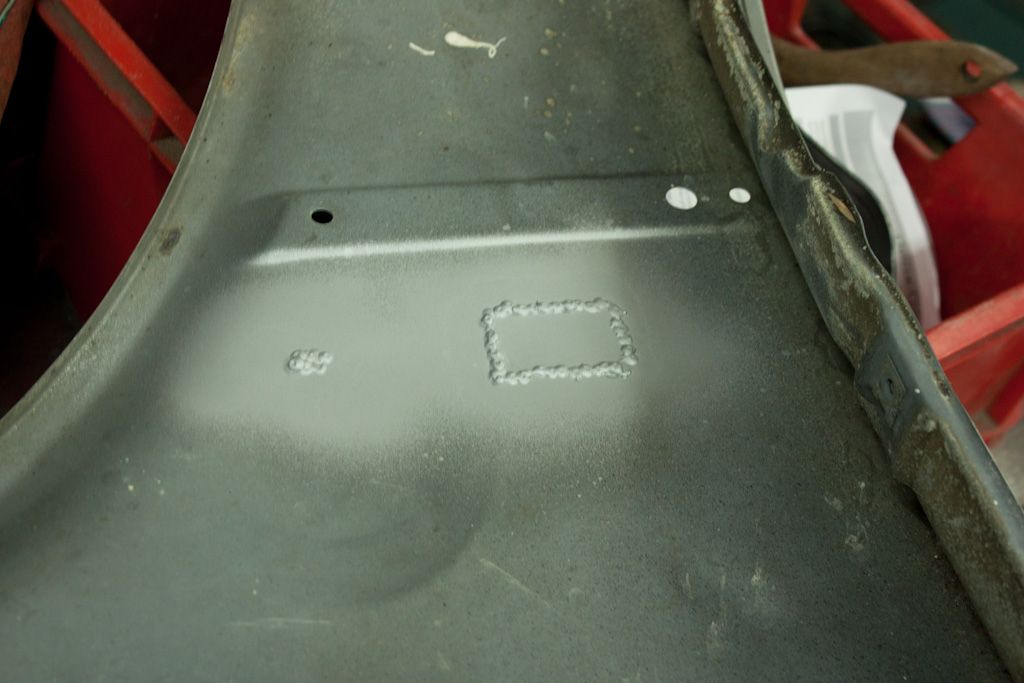
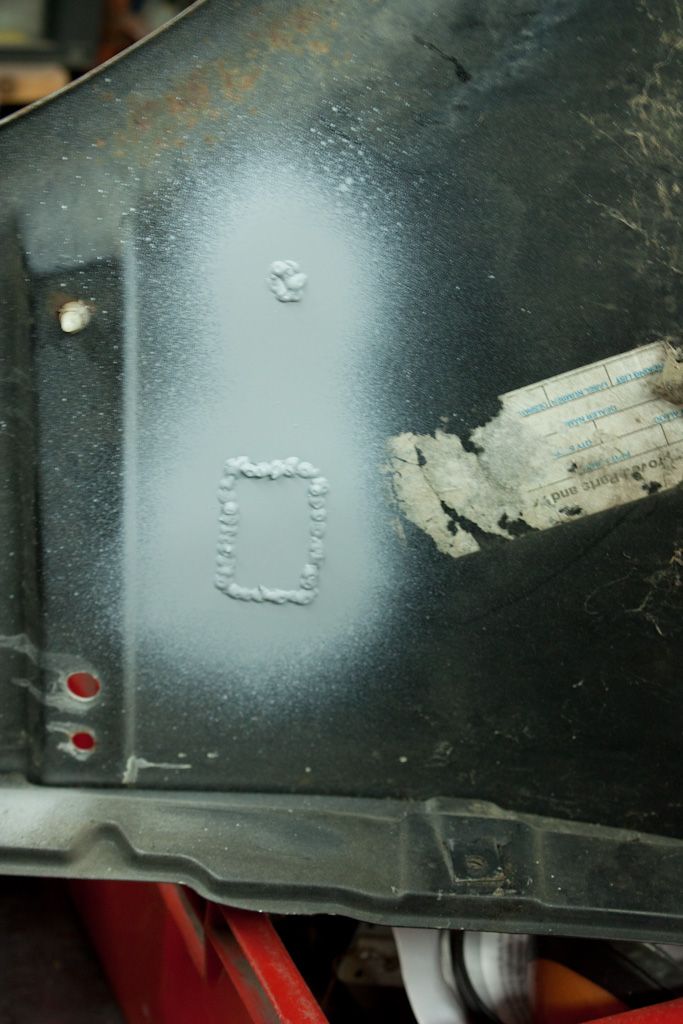
Decided yesterday I was going to delete the side markers, made up plates and welded them in


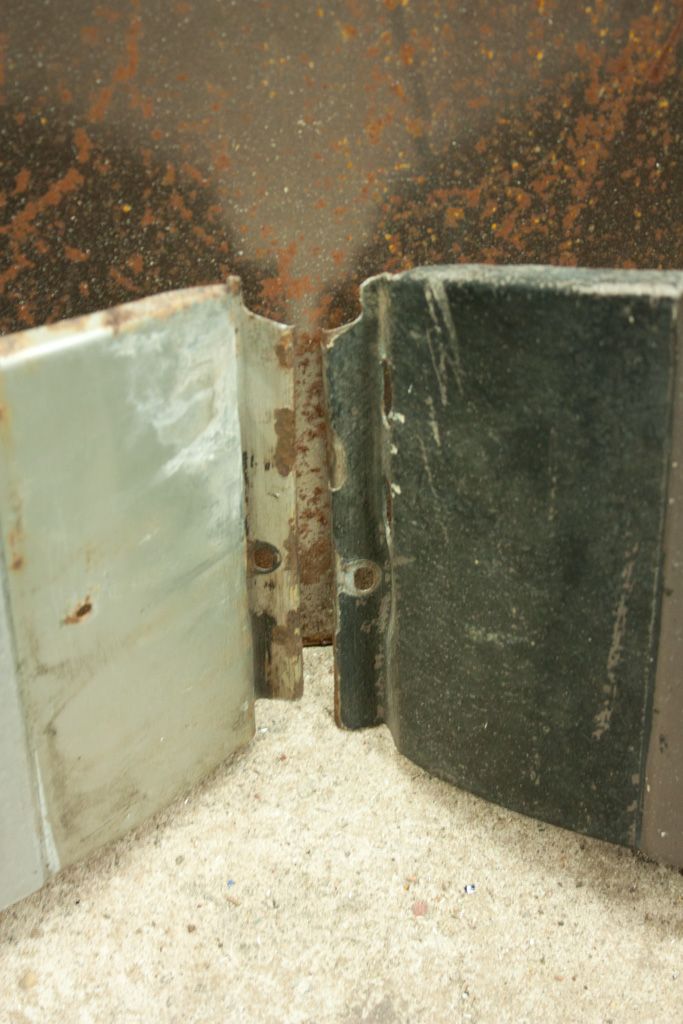
I must have gone to fast even though it took me ages cause both panels warped a little Hopefully my bodywork man can sort that out.
Also straightened out the bottom edge of both wings
There's a little rust on both of them to sort out, then I'll paint the inside of them and get some stonechip or underseal on them.
These weren't really dirty to begin with but they got cleaned during the week, had a before pic but it looks now different
Started building up my lights, some of the Lamin-x needed trimming, new adjusters (I used an adjuster in place of the broken leveling control thing), just the rings to paint or powder coat silver and sort out the wash/wipe for them
Decided yesterday I was going to delete the side markers, made up plates and welded them in
I must have gone to fast even though it took me ages cause both panels warped a little
Also straightened out the bottom edge of both wings
There's a little rust on both of them to sort out, then I'll paint the inside of them and get some stonechip or underseal on them.

I was thinking of getting that done for my side repeaters and knock something together to whip out for when the mot is due. Distortion in that looks very small I'm sure it'll take a decent panel beater a few to get that perfect again 

I doubt it's a big job for them, lots more like it around the rest of the car I've the key holes to do as well, will do them even slower!
Thanks Parkin. Progress is a bit slow due to cold weather (and laziness).
wile your feeling lazy jozi have a look at my tidy up job on my tourer
no were near as involved as your project
i am just trying to make an old motor tidy with out spending any money (tight arse northerner)
http://www.e30zone.net/modules.php?name ... 73#2183573
no were near as involved as your project
i am just trying to make an old motor tidy with out spending any money
http://www.e30zone.net/modules.php?name ... 73#2183573
I got a little bit done today, sprayed up a door in another blue colour, looks good so far. I'm going to try do as much as I can in the shed over winter, today wasn't to cold either which was nice.
First update of the year, nearly a year since I started properly 
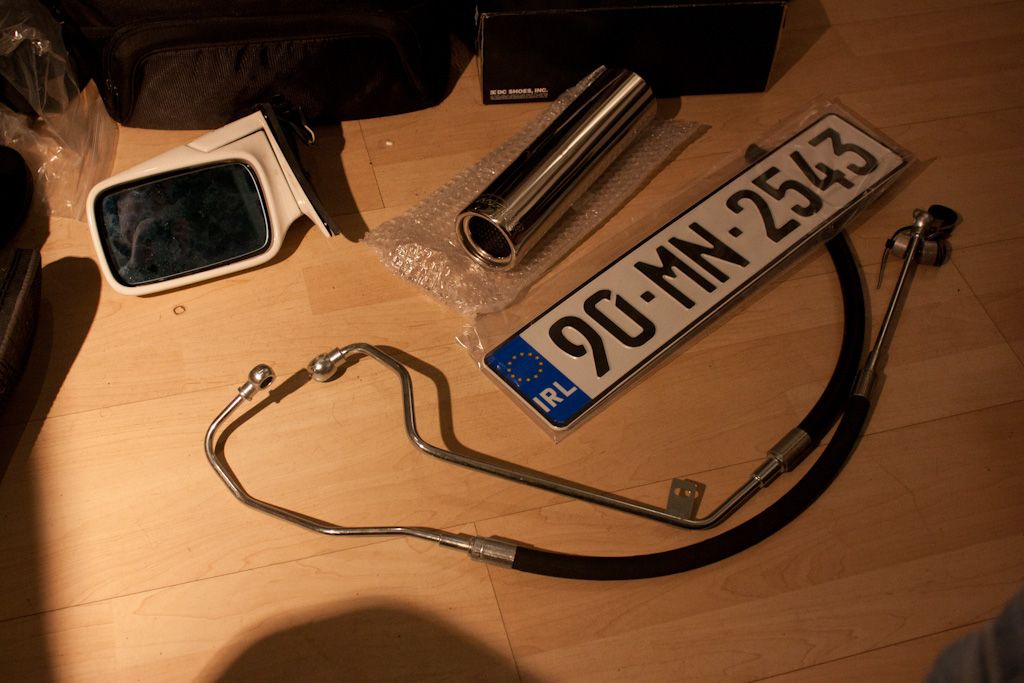
Some new parts arrived (most of it from DanThe - highly recommended) PAS pipes, Engine & Fan loom as well as heated mirrors, m52 airbox, Scorpion exhaust tips and new plates (from santy)

Recently discovered that the top slot in a air-con valance was just open/empty, didn't like this so I cut the middle and end bits from the slot of an old valance and got to work.
I can now fit 2 air-con grills
Not that you will really see them with the tec2 apron on
Will have to order another one as the 2nd one I have can only be held on with zip ties.
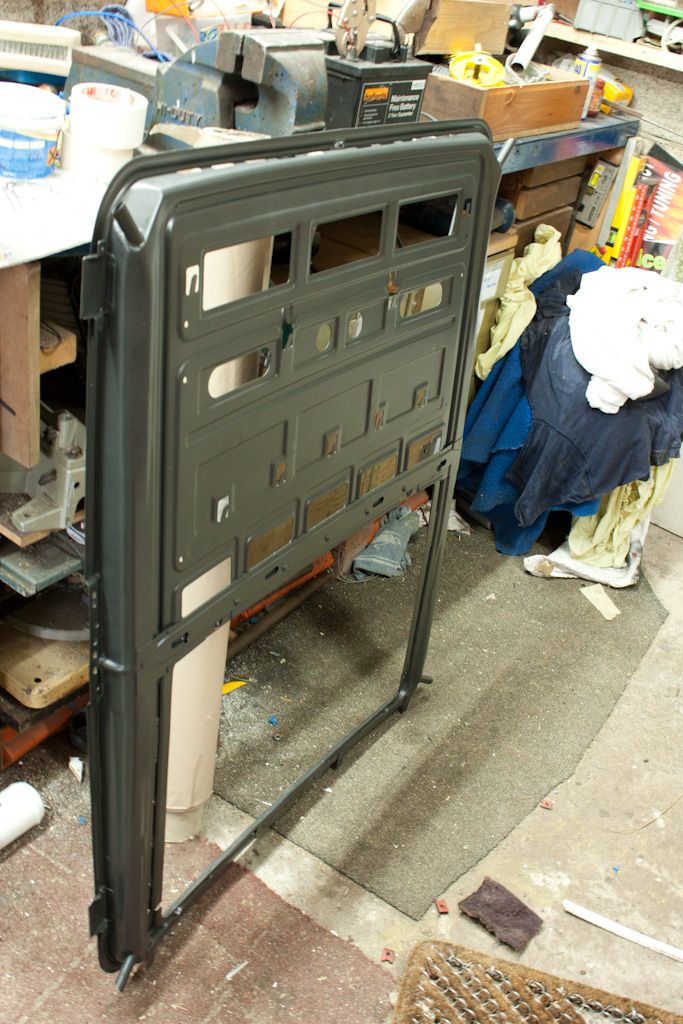
Also got the key holes welded up (actually, my brother did them both)
With my brother back I'm hoping things will move a little faster, might even get a few mini's road worthy and a mini project finished as well :dance:
Some new parts arrived (most of it from DanThe - highly recommended) PAS pipes, Engine & Fan loom as well as heated mirrors, m52 airbox, Scorpion exhaust tips and new plates (from santy)
Recently discovered that the top slot in a air-con valance was just open/empty, didn't like this so I cut the middle and end bits from the slot of an old valance and got to work.
I can now fit 2 air-con grills
Not that you will really see them with the tec2 apron on
Will have to order another one as the 2nd one I have can only be held on with zip ties.
Also got the key holes welded up (actually, my brother did them both)
With my brother back I'm hoping things will move a little faster, might even get a few mini's road worthy and a mini project finished as well :dance:

No problem, glad to hear it was of use to someoneJhonno wrote: Your sunroof cassette write up was very handy btw! Cheers for that!
Back to the touring, not sure what I've been at since the last update
 Have a load of panels ready for some primer and then some paint and then underseal/stonechip for the wings and possible the valance.
My brother brought his mini home so he's no longer of any addition to me :p He's hoping to get various parts of his project (mostly his roof which was left without paint a year ago) cleaned up and ready for some primer. I'm hoping I can get my interior sorted so all can be painted at once.
Got started on removing all the sound proofing. Most of it came of handy-ish, a bit of heat with a heat gun and then a spatula to remove it.
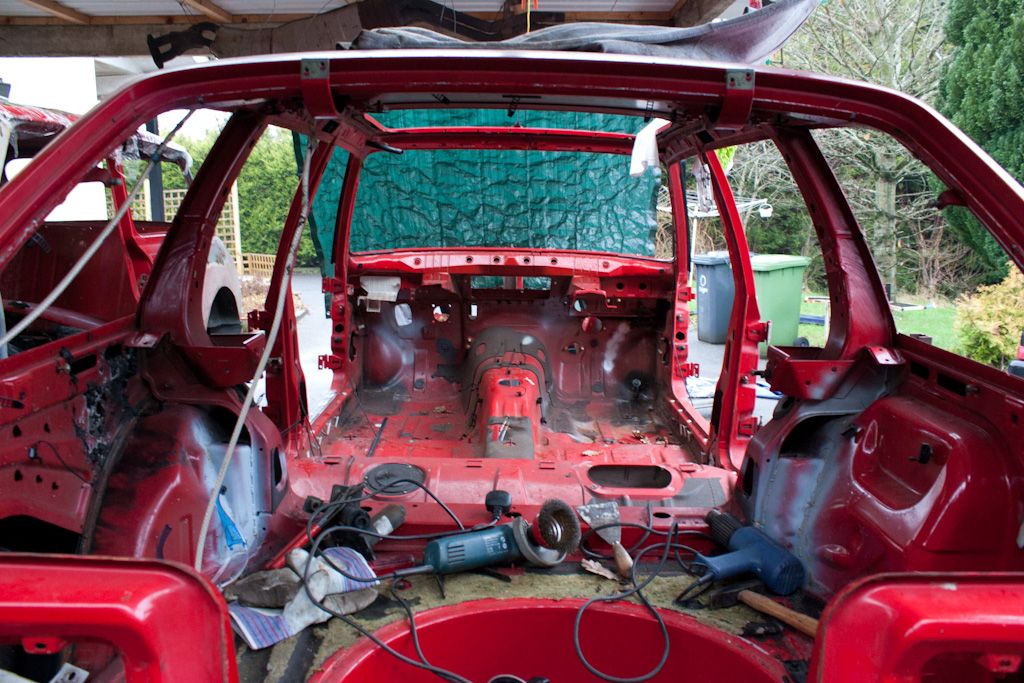
Couple hrs later
Most of it came of fine with the exception of the boot floor, it must be different stuff here, heating it just made it soft.
There looked to be some rust around the bumper mounts on the back of the valance, spit of, bolts cut of and only some chipped paint and a little bit of surface rust. When the spit is back on I'll start cleaning back the roof skin for painting and the rest of the interior.
It's also nearly a year since the first of the resto pics were taken

Still enjoying this as much every time I read an update,
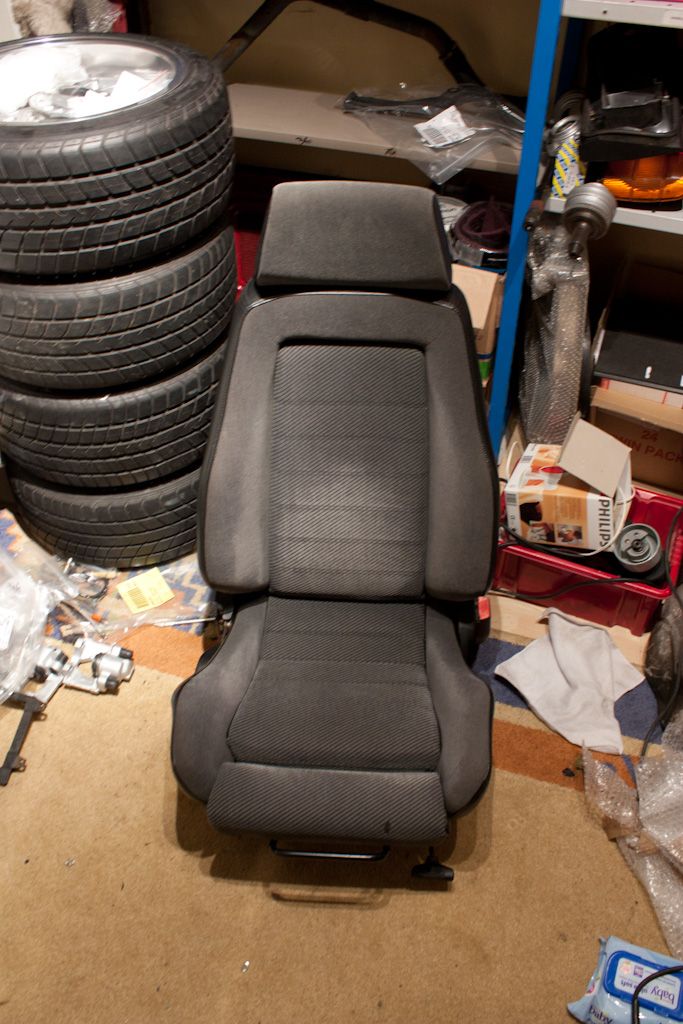
Love the wheels, can't wait to see them on,
Will you use proper sound proofing panels (BMW) or aftermarket when you refit the interior ??
Love the wheels, can't wait to see them on,
Will you use proper sound proofing panels (BMW) or aftermarket when you refit the interior ??
Gone, but not forgotten !!
I'm not sure yet. I looked into properly soundproofing the car and getting a nice speaker, sub and amp setup. But it's really expensive to go all out on sound proofing! Thinking of getting silent coat 2mm sound proofing and sticking it on where bmw had it and seeing how that does the job.
Was looking for a image when I spotted this:
Maybe this JuneE30BeemerLad wrote:This June?
I got all the clips grommits etc removed from the interior, just the bonnet cable and some plugs left. Going to start cleaning up everything tomorrow, few little patches to tidy up and a small bit of welding. Roof needs a good strip down to clear of the rust left from the tray (none of which has started at the roof skin), some burnt plastic to clear as well and hopefully get something painted soon
Also got the lend of an arch roller, not really a clue how to use it properly. Got the lip folded up and the hump on the inner arch flattened. Does anyone know how much the suspension allows the wheel to travel up into the arches? I can just about tuck the rim in behind the arch before the tire rubs.
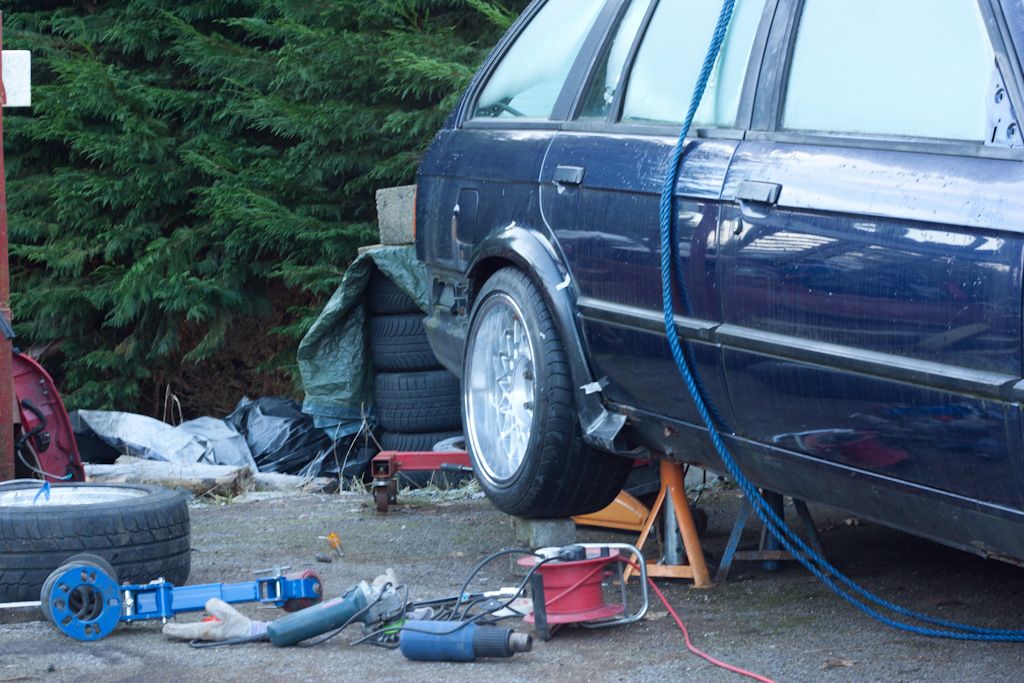
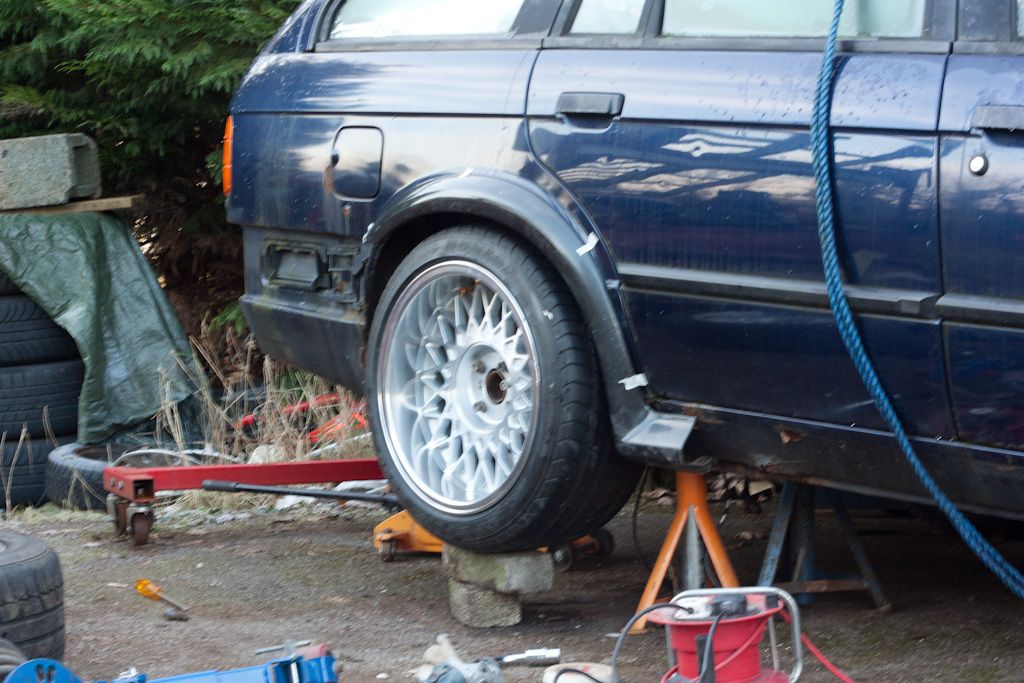
225/40 tires.
Also got the lend of an arch roller, not really a clue how to use it properly. Got the lip folded up and the hump on the inner arch flattened. Does anyone know how much the suspension allows the wheel to travel up into the arches? I can just about tuck the rim in behind the arch before the tire rubs.
225/40 tires.
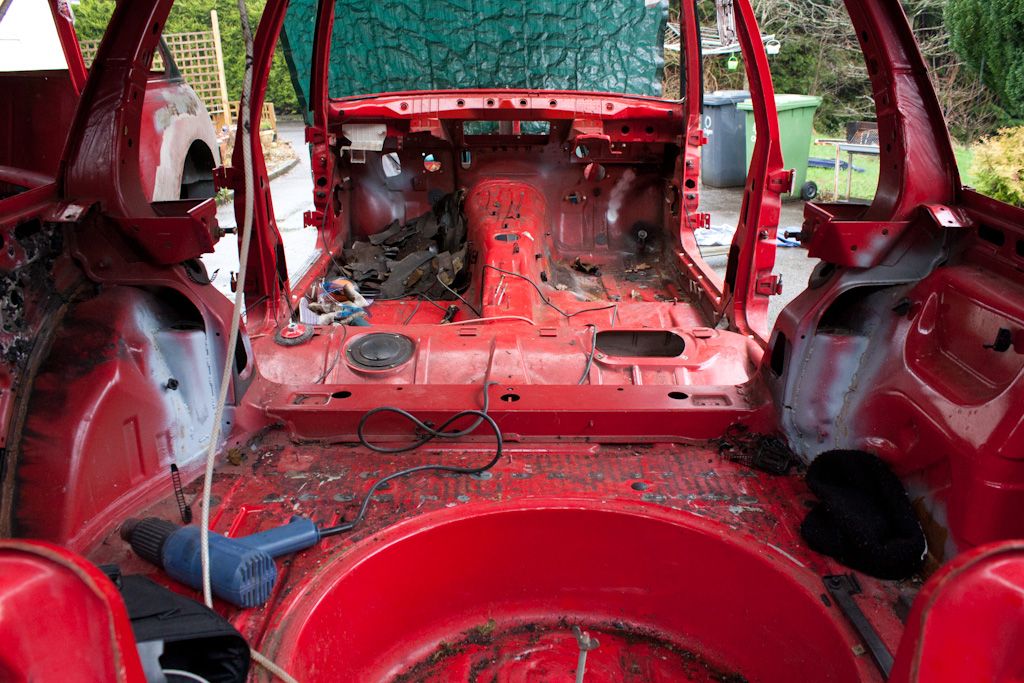
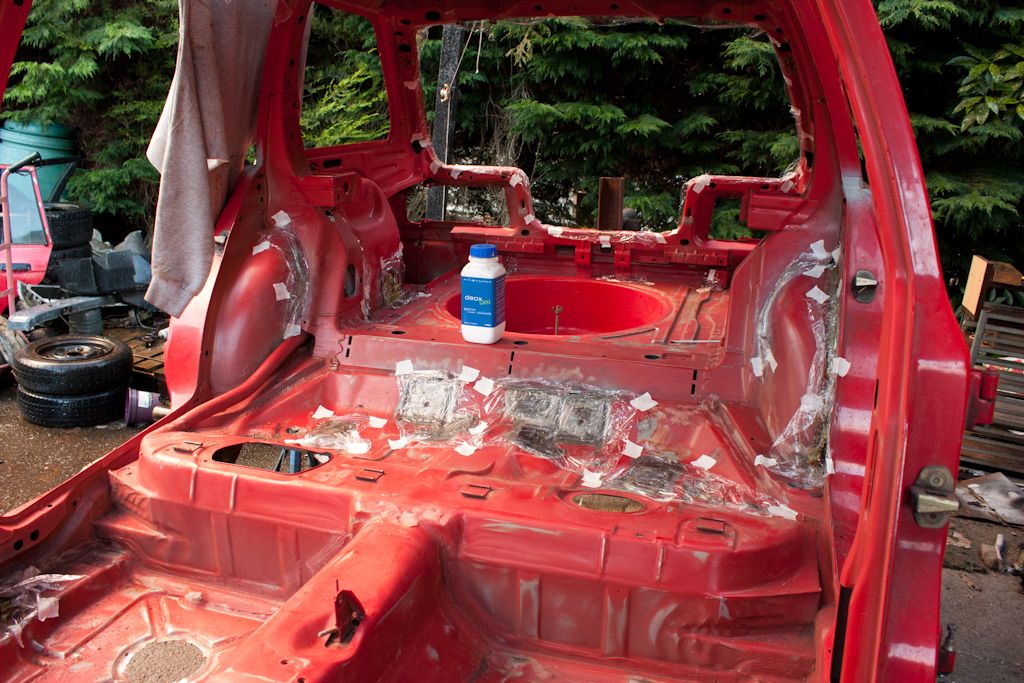
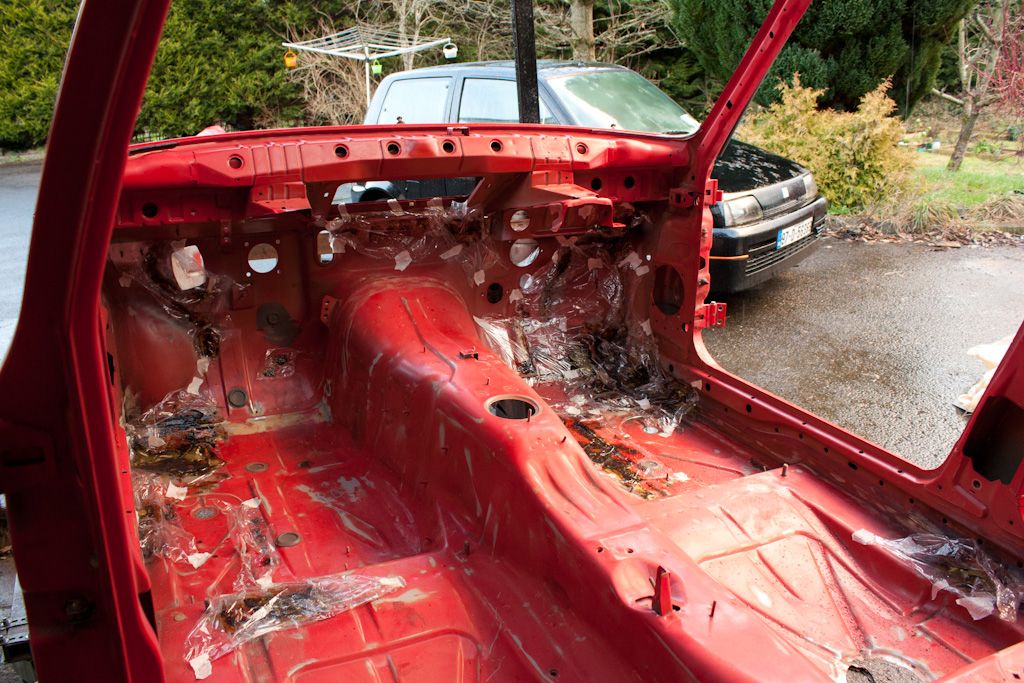
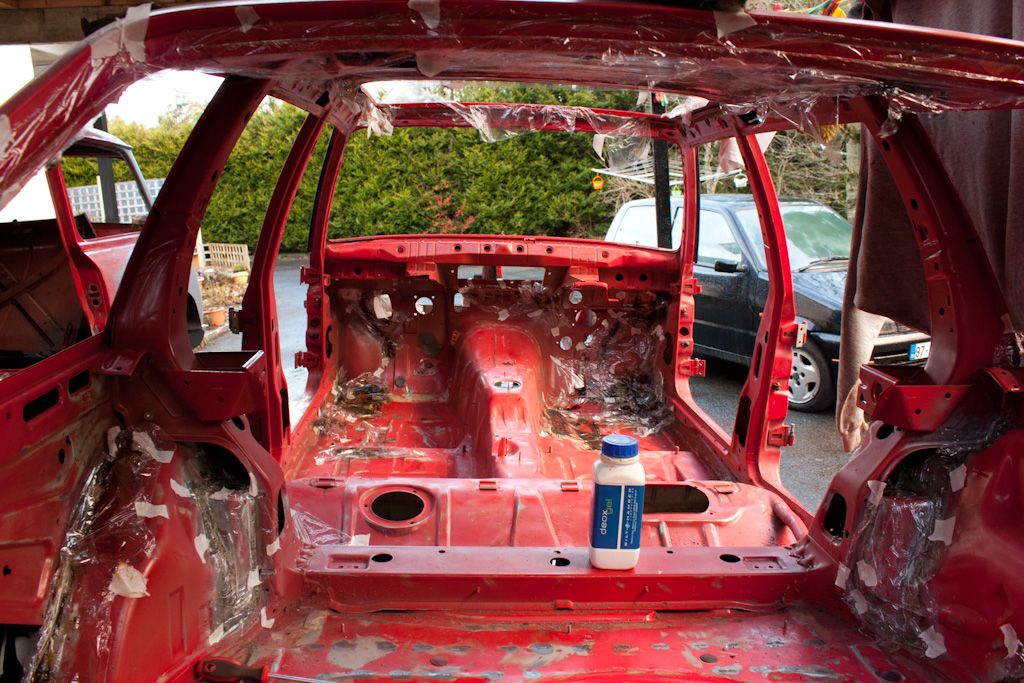
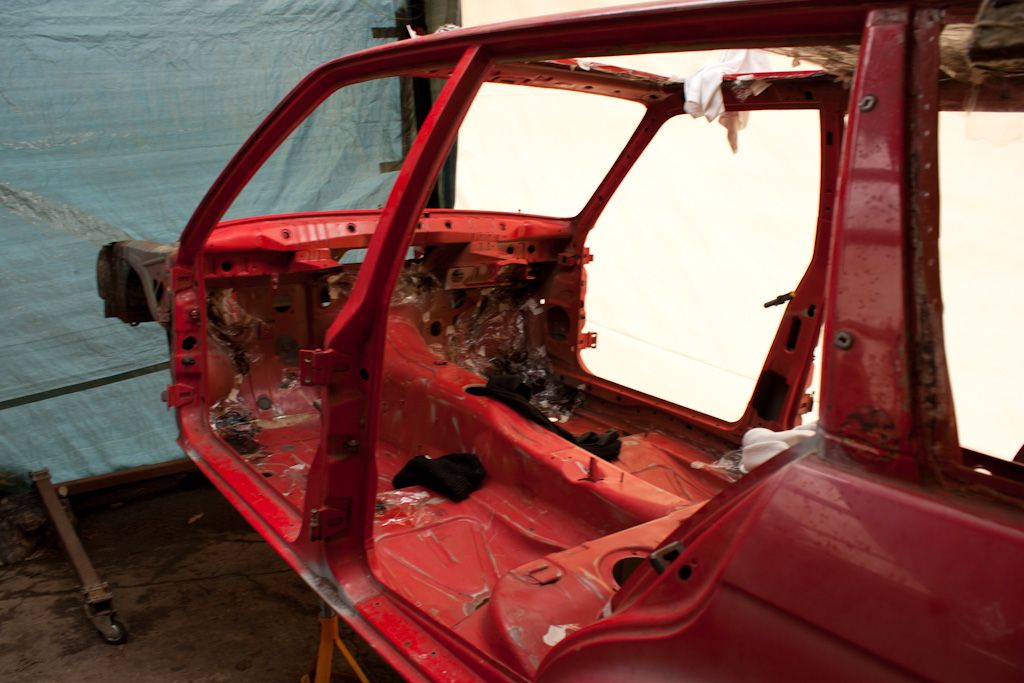
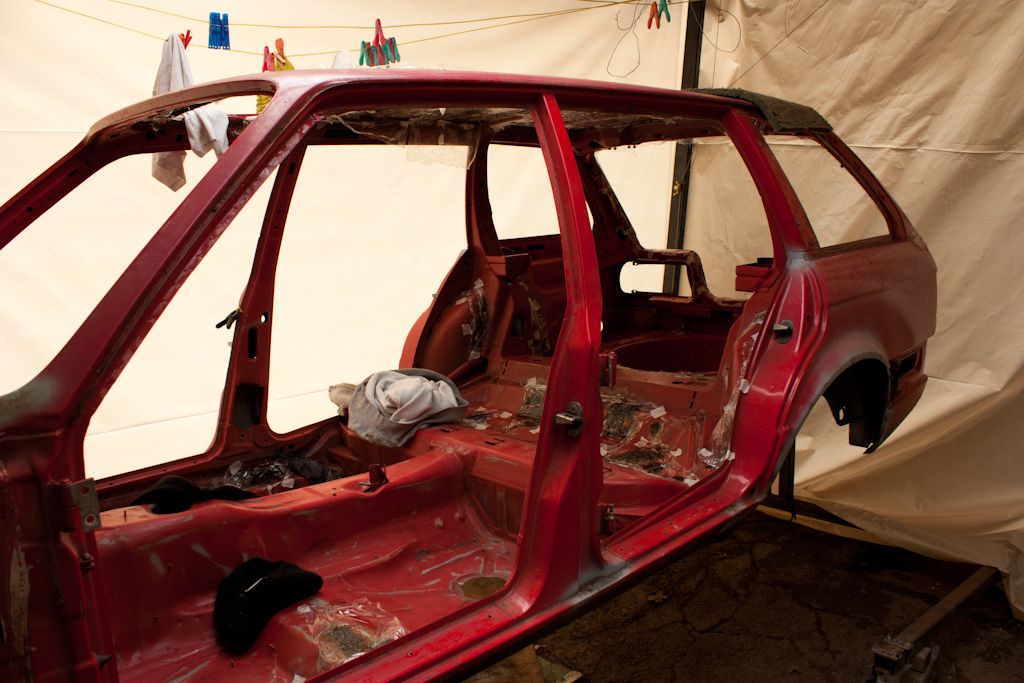
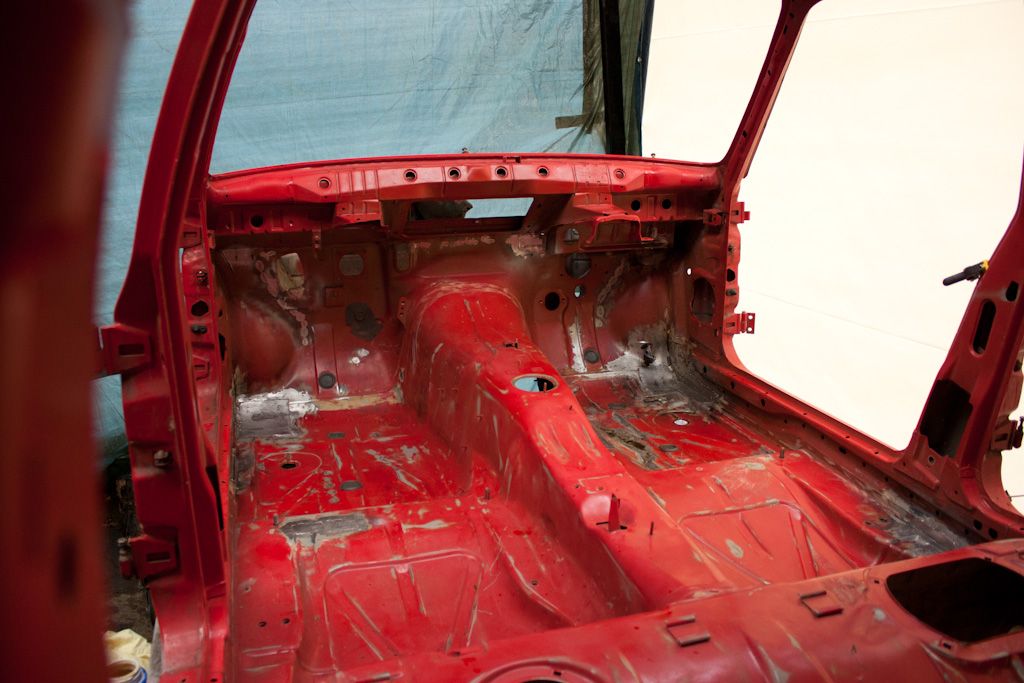
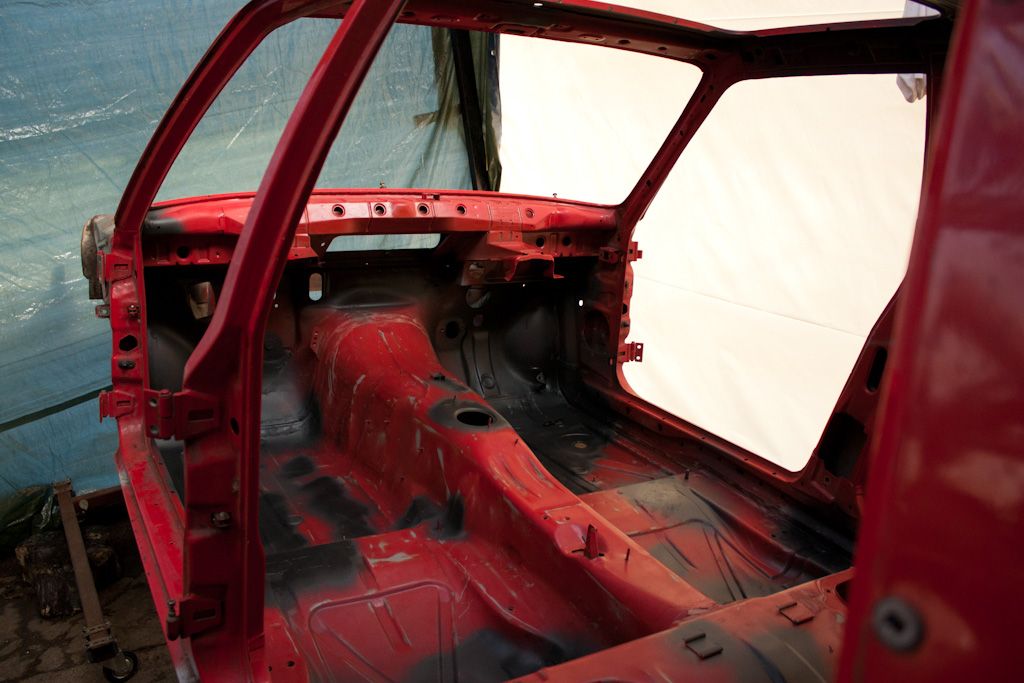
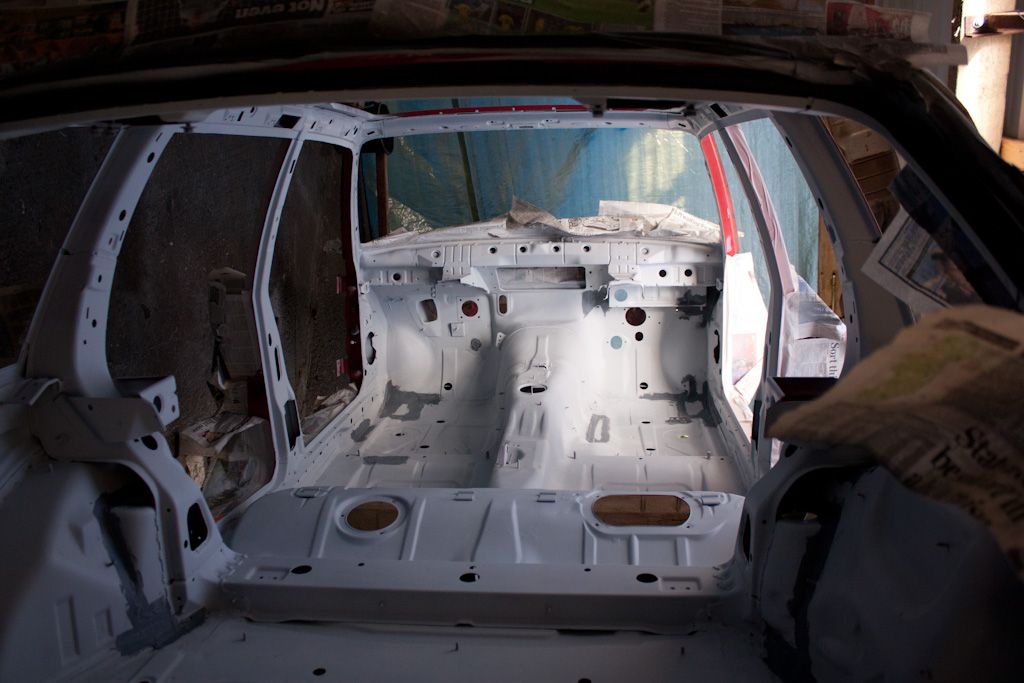
Little bit of progress made this week with the aim being to get the interior painted up (hopefully next week). I started out rubbing down the whole interior during the week, 5 or so afternoons later and the whole floor, boot, pillars and firewall have all been rubbed down with a scotch bright pad. I cleaned back all welded area's so the cheap crappy paint or primer was gone, any scabby area's, surface rust etc all cleaned up and treated with some Deox gel. Because the gel hardens out after awhile I covered it all up with cling film. The boot area was by far the biggest pain to do so far! Lots of shite left over from the sound deadening, dirt and grime all clung to the paint, was messy cleaning it all up and took by far the longest!
Rear seat and boot area:
Footwells and firewall:
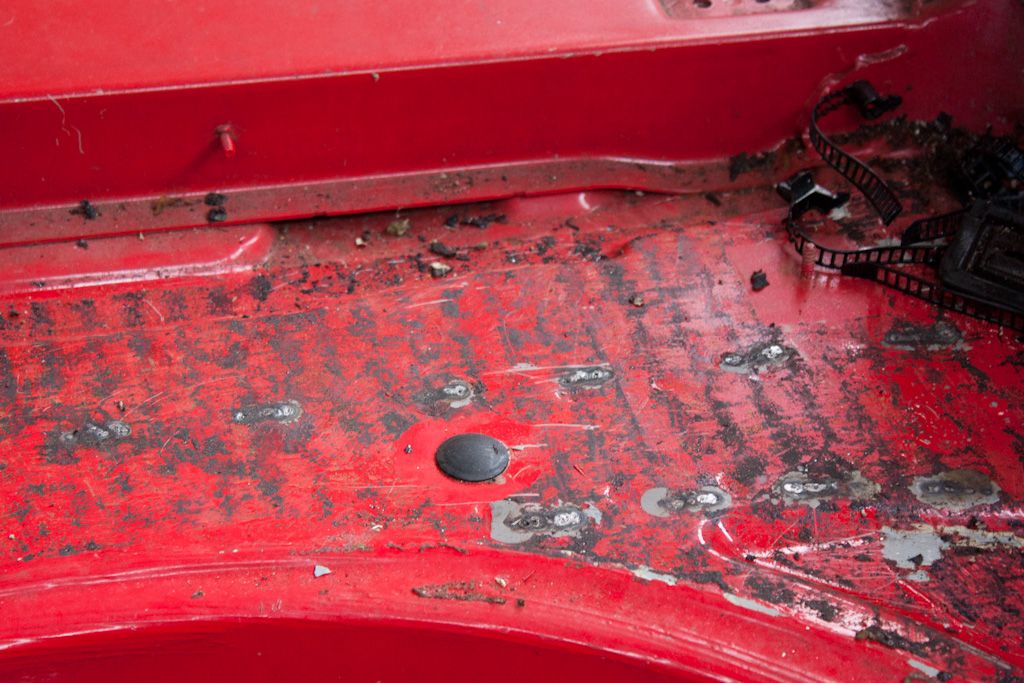
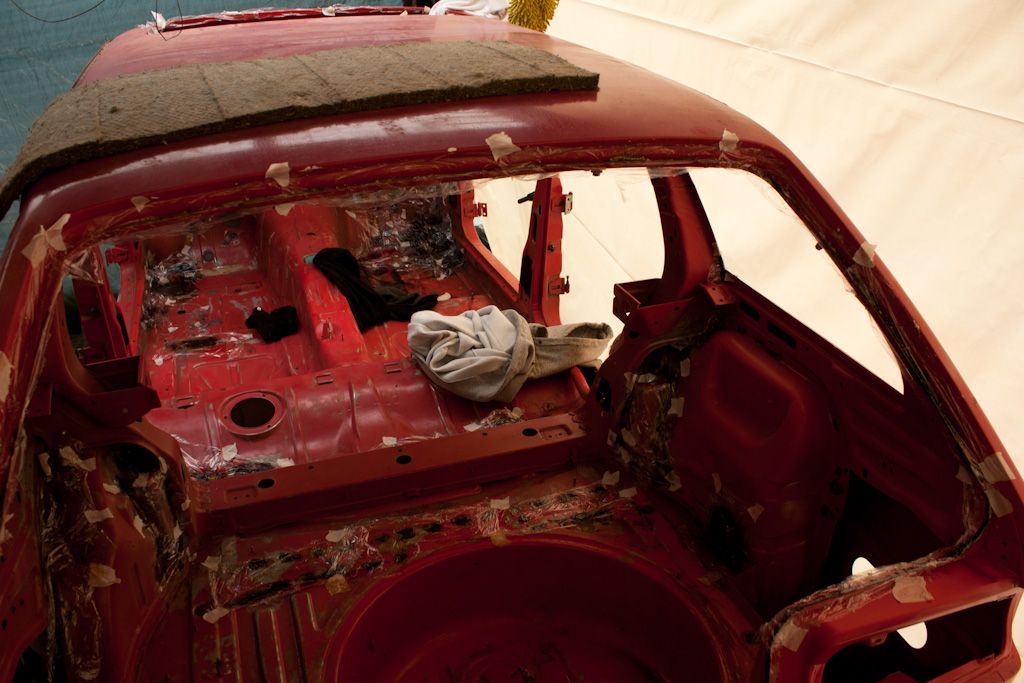
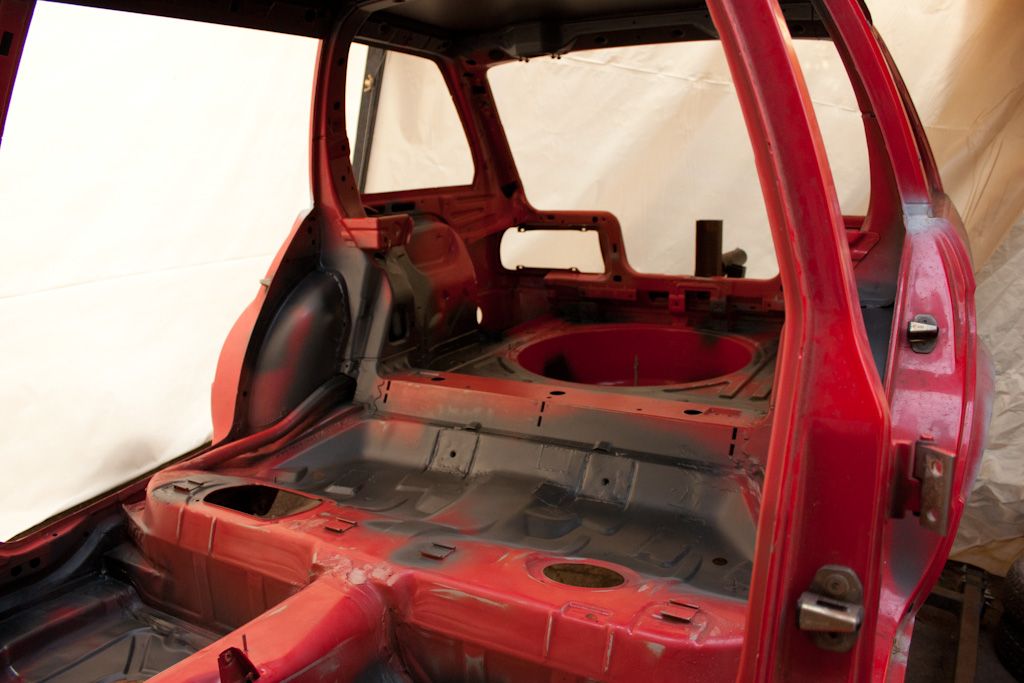
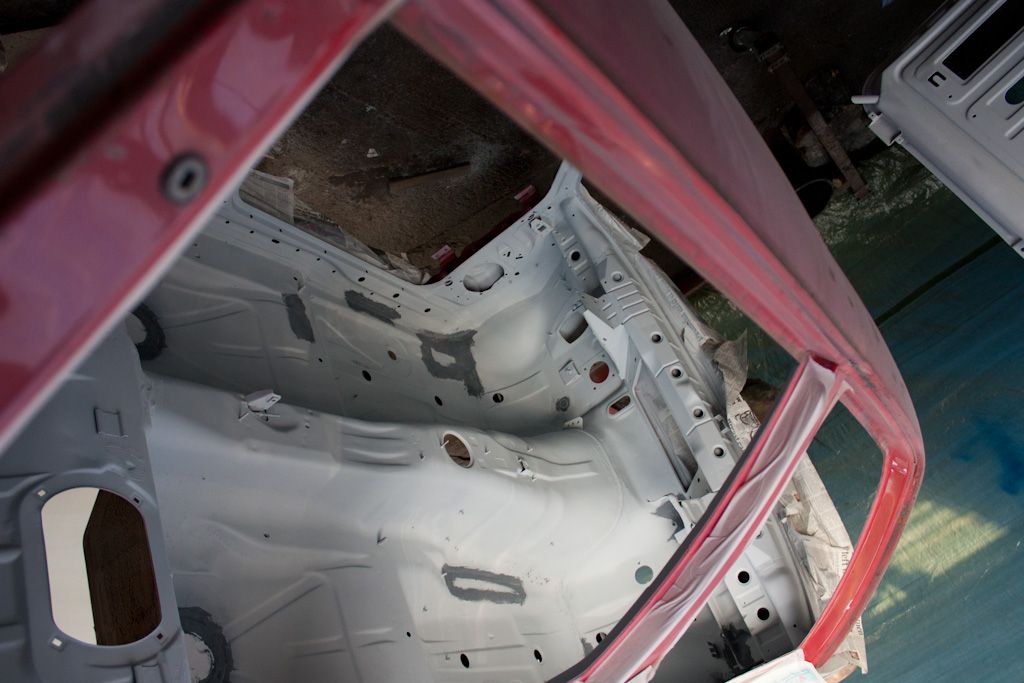
Found loads of scabby paint around the tailgate under the rubber seal, all cleaned back and deox gel applied:
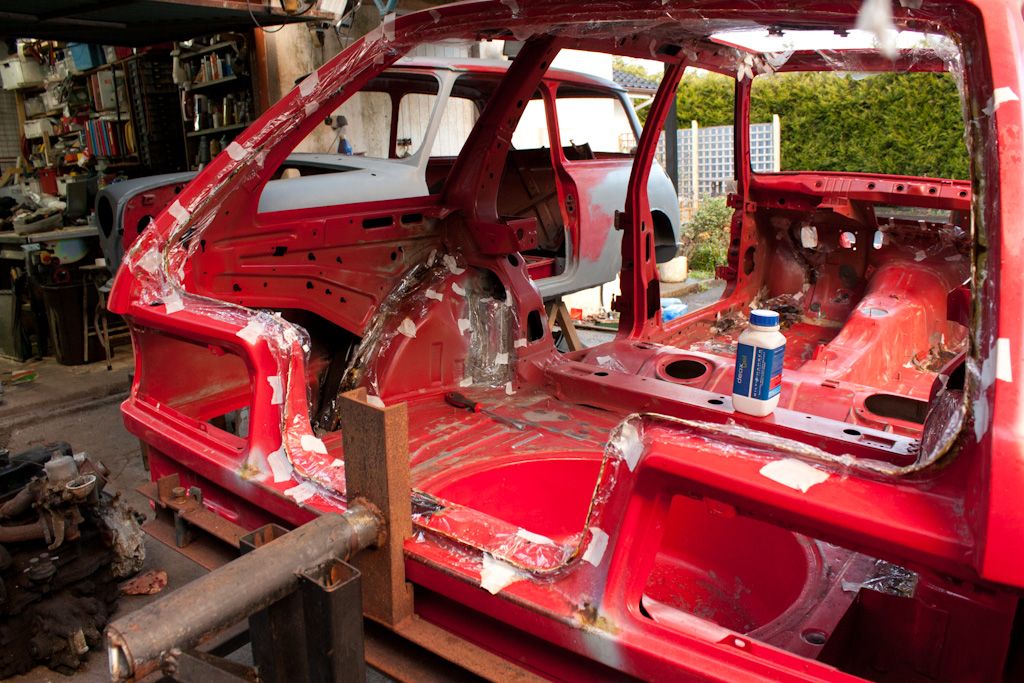
Loads of cling film in the boot, mostly welded area's from seam welding
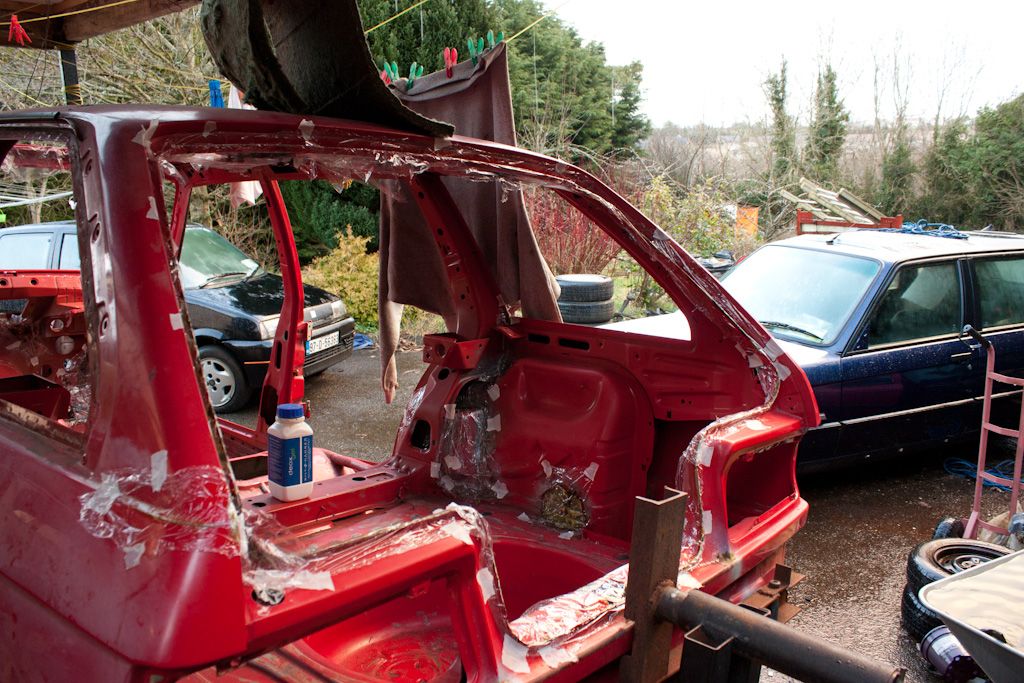
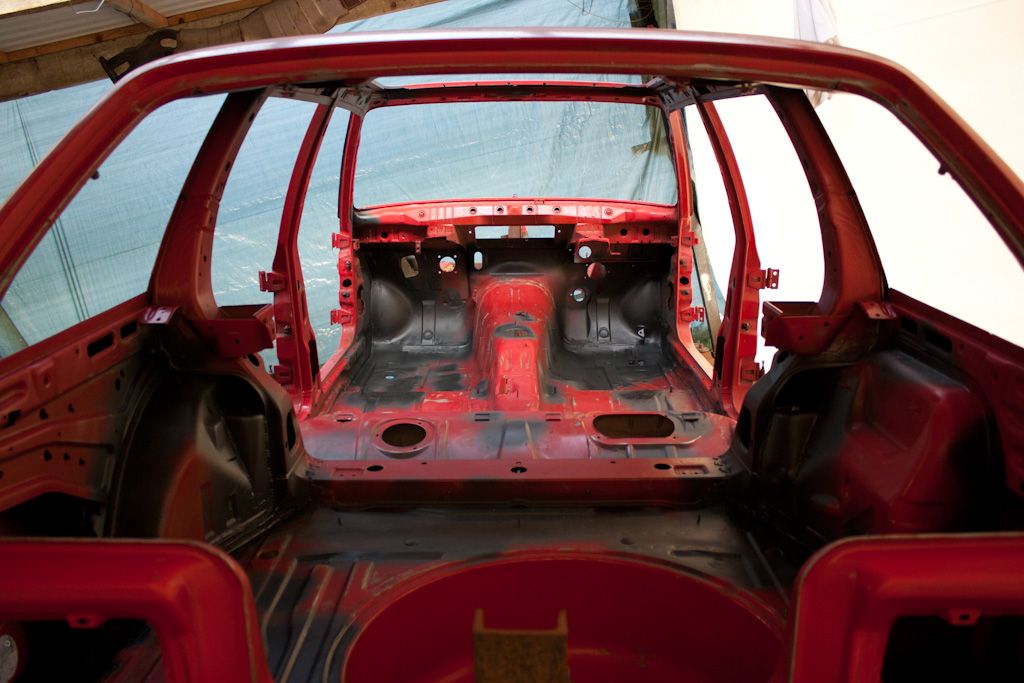
The roof got a quick going over with the wirebrush and gel applied
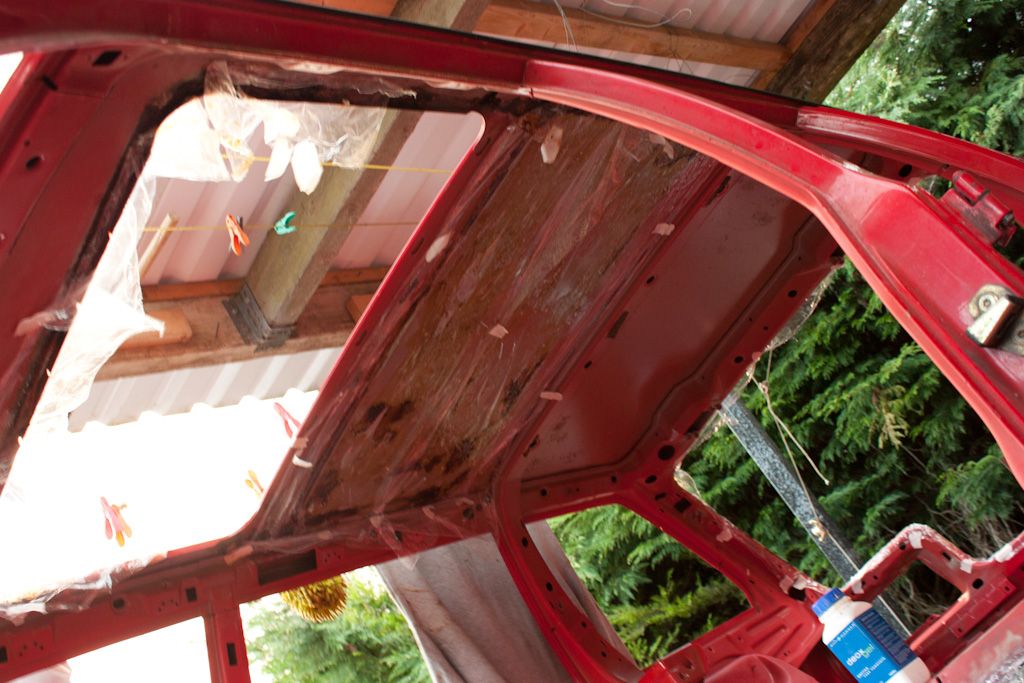
The roof and lower edge are the only area's not rubbed down yet, I need to clean back the gel and treat what ever surface rust I find before rubbing this down and then thats the whole interior done. Want to make damn sure the roof skin is 100% clear from corrosion before it gets painted and the sunroof panel put back in. Hopefully paint next week, have some blue paint to go on, still deciding on a colour for outside.
Rear seat and boot area:
Footwells and firewall:
Found loads of scabby paint around the tailgate under the rubber seal, all cleaned back and deox gel applied:
Loads of cling film in the boot, mostly welded area's from seam welding
The roof got a quick going over with the wirebrush and gel applied
The roof and lower edge are the only area's not rubbed down yet, I need to clean back the gel and treat what ever surface rust I find before rubbing this down and then thats the whole interior done. Want to make damn sure the roof skin is 100% clear from corrosion before it gets painted and the sunroof panel put back in. Hopefully paint next week, have some blue paint to go on, still deciding on a colour for outside.
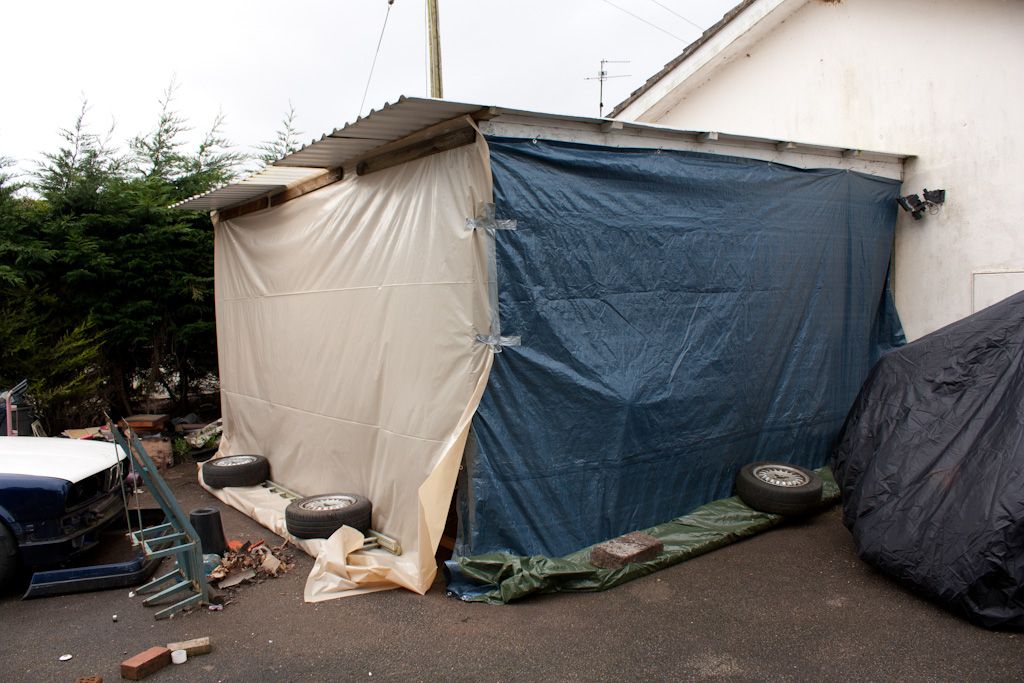
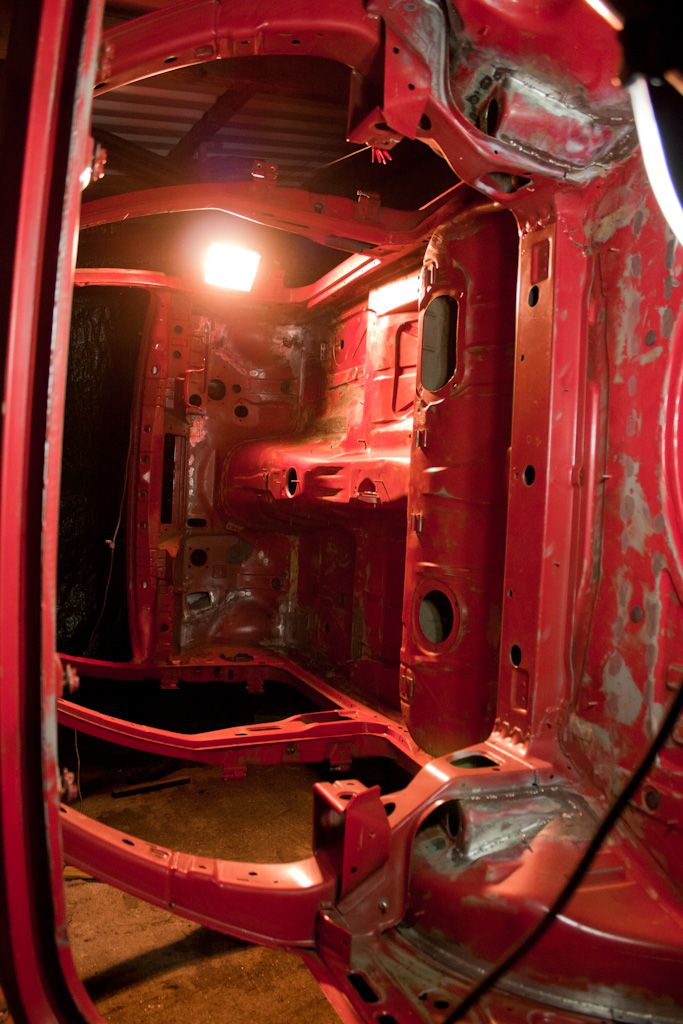
Plan was to get the interior painted up this weekend and so Friday morning was spent collecting a heater and closing of the lean-to as as to create a spraying area.
Next up was to remove all the cling film from all over the interior and clean of the deox gel
Scuff the bare metal and wipe it all down before paint
At this point we (I actually got help of mate after a year of asking him to help out :dance:) were at it for most of the day and finally around 7 got all the bare metal primered
Except around the tail gate and a few other area's which I had forgotten or couldn't see with the little light we had, I got those area's primered yesterday. Also got started on giving everything a quick rub and wiping/cleaning every bit of the interior in preparation for primer, which didnt happen because my hardener had gone off and I couldnt mix it with the primer
I should get this done tomorrow after I get some more primer and hardener. Then seam seal all panel joins and get the interior painted :dance:
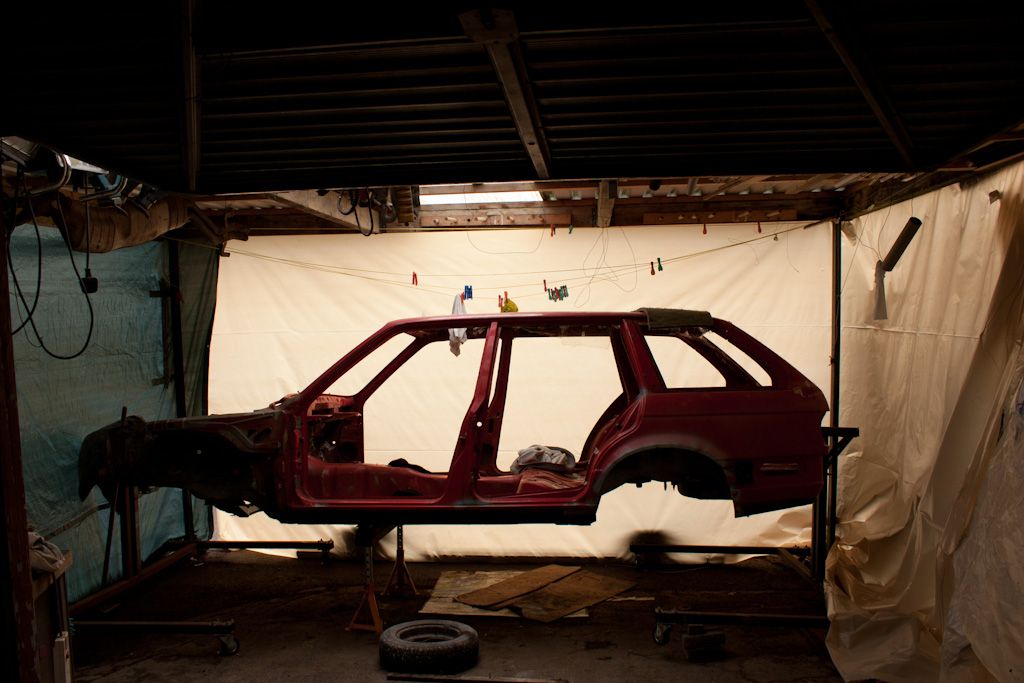
FINALLY some visible progress!!!
Took a bit longer than I expected but I finally got the interior complete in primer :dance: Had a bit of hassle with the compressor, it's a bit to small for painting. Had to do short bursts or there wouldn't be enough pressure to keep going, got there in the end anyway :dance:
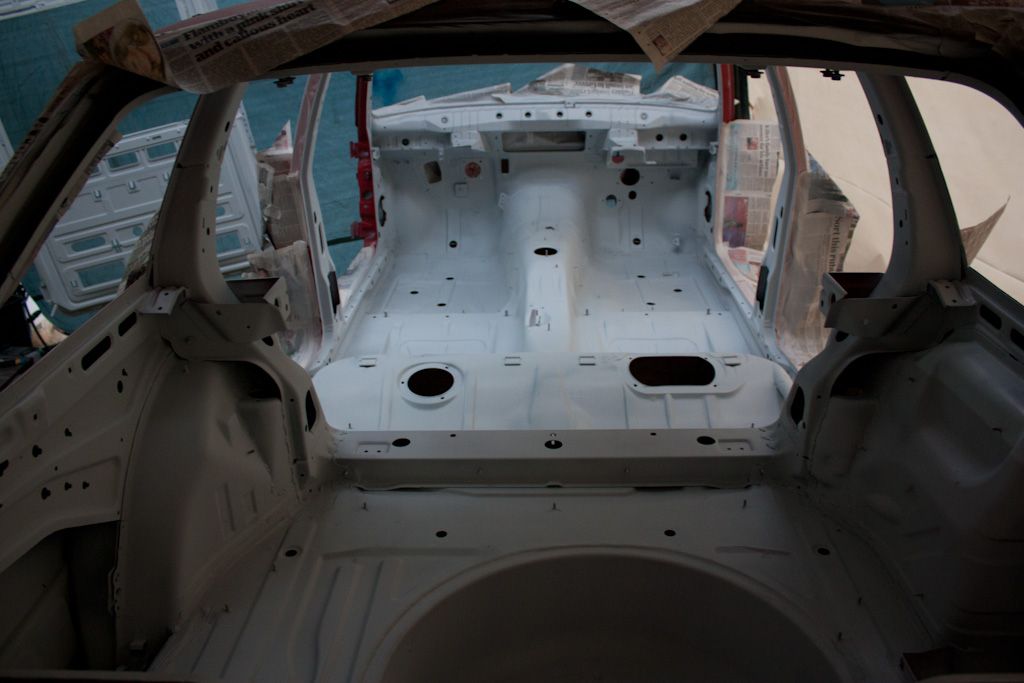
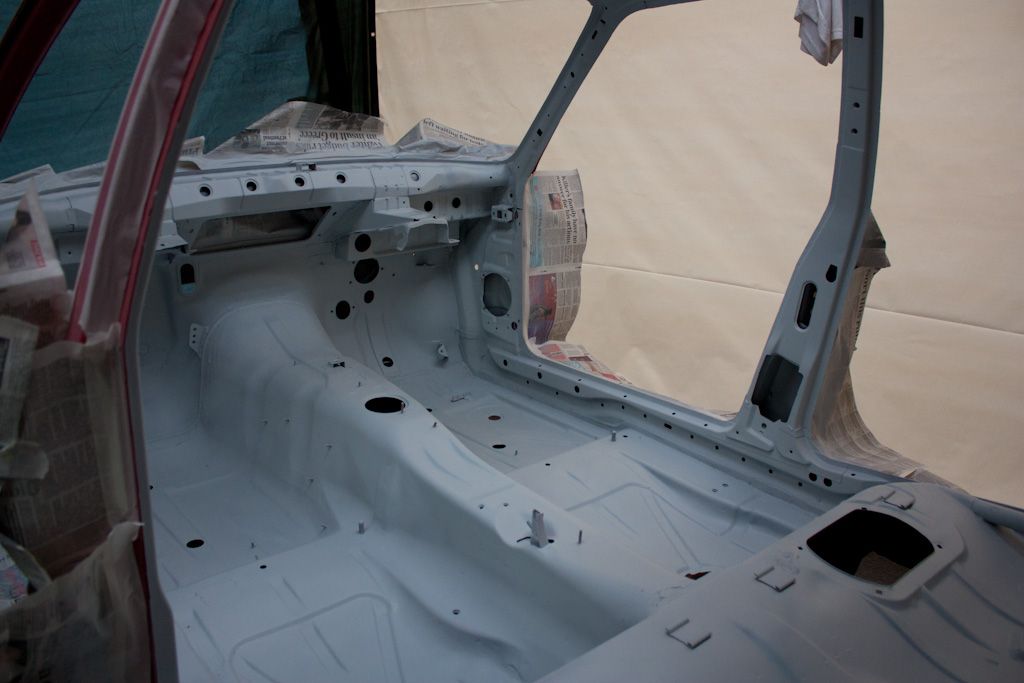
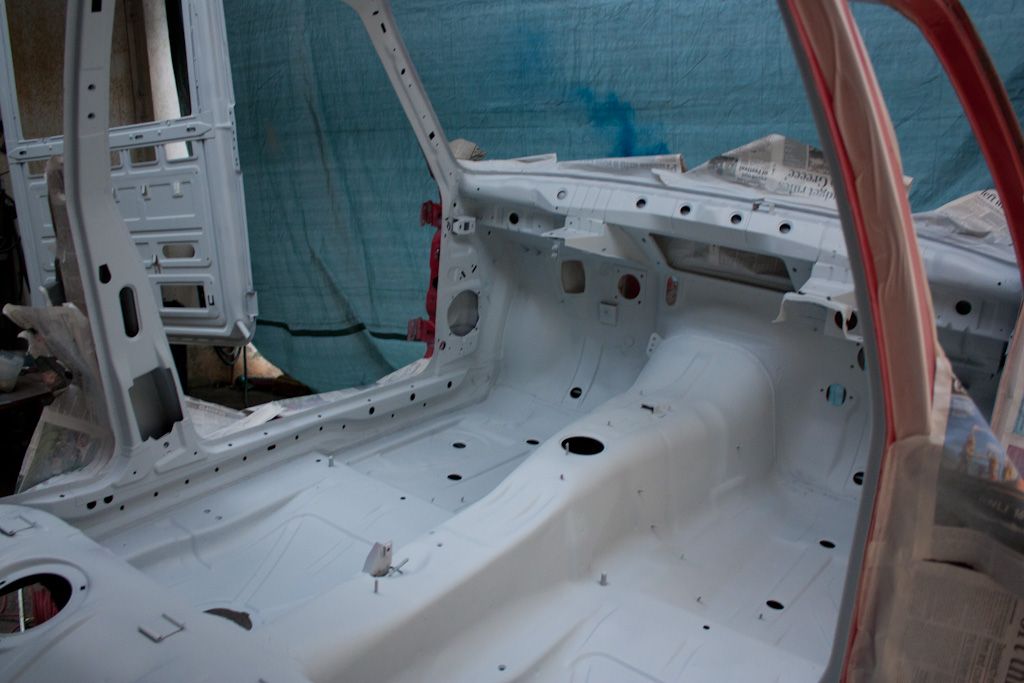
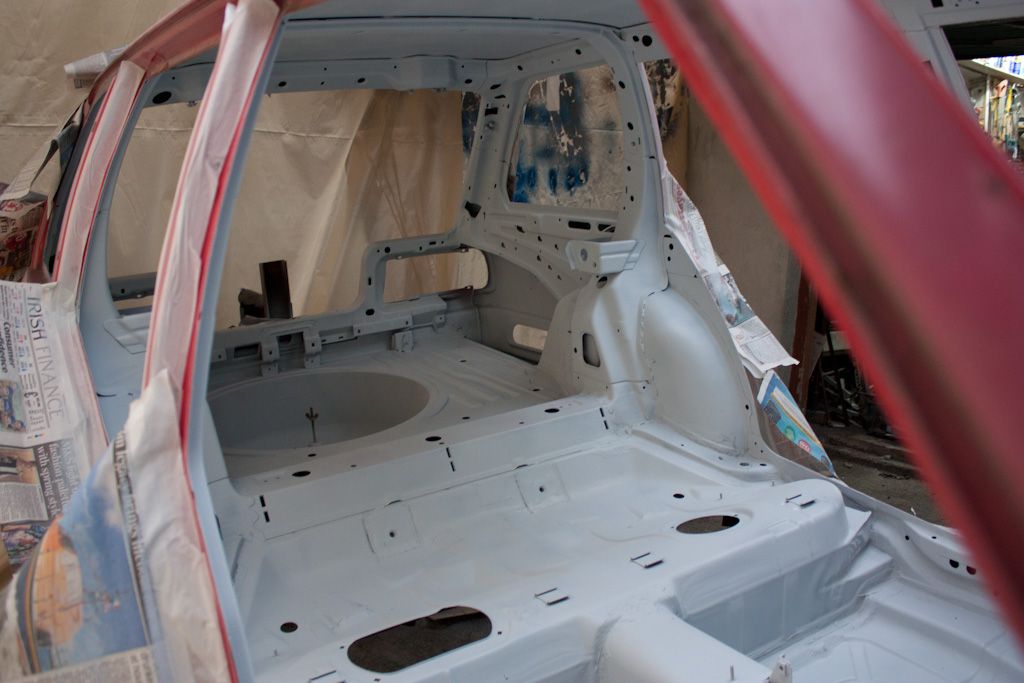
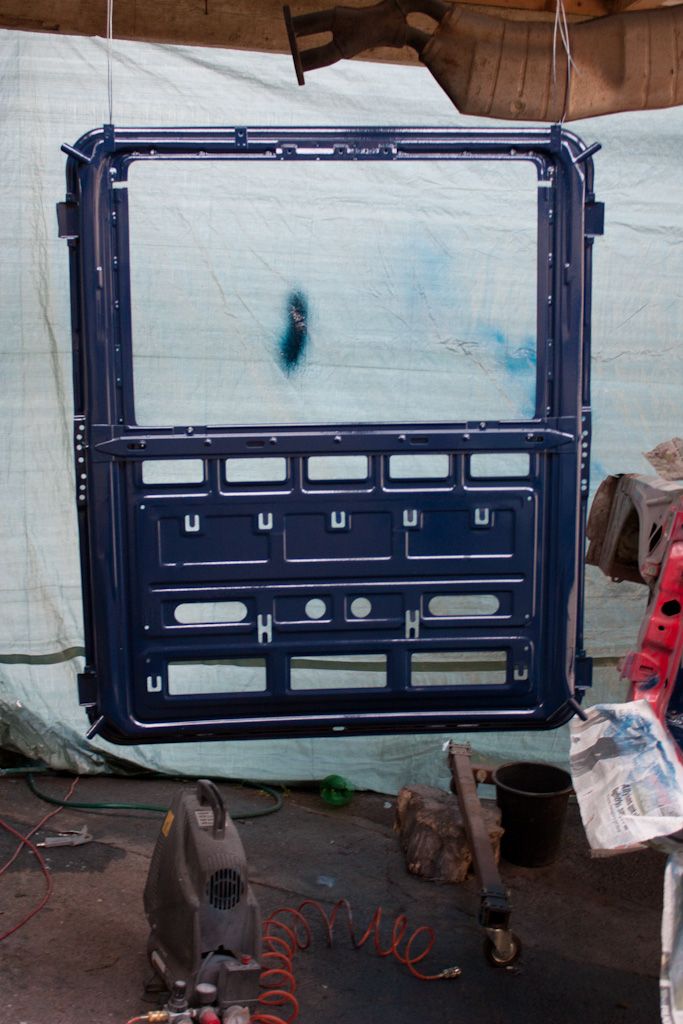
Also got the sunroof panel primered
Took a bit longer than I expected but I finally got the interior complete in primer :dance: Had a bit of hassle with the compressor, it's a bit to small for painting. Had to do short bursts or there wouldn't be enough pressure to keep going, got there in the end anyway :dance:
Also got the sunroof panel primered
Top effort! To have kept plugging away with this massive project deserves credit. I'd have lost interest ages ago.
Well done for doing it all yourself as well! It just goes to shows that if you get your hands dirty, get stuck in and ask questions as you go. The results can be impressive. Even if it's your first project on this scale.
Hats off!
Well done for doing it all yourself as well! It just goes to shows that if you get your hands dirty, get stuck in and ask questions as you go. The results can be impressive. Even if it's your first project on this scale.
Hats off!

Co Founder of CR24vTM By Invitation Only. Absolutely no riff raff!!!
Thanks Dezzy, it's been a learning experience thats for sure and I'm still not there yet. I'm pretty sure I gave up quite a few times over the past year, I just keep coming back for more. Really want it done for this summer and to drive the f00ker!
Thats going to be tight IMO. There is a sh1t load of work putting that back together, never mind M52ing it as well!Jozi wrote:Thanks Dezzy, it's been a learning experience thats for sure and I'm still not there yet. I'm pretty sure I gave up quite a few times over the past year, I just keep coming back for more. Really want it done for this summer and to drive the f00ker!
Good luck though. I hope you do it!
Co Founder of CR24vTM By Invitation Only. Absolutely no riff raff!!!
Don't be saying that! I've all the time in the world to work at it. Hopefully it's ready for paint in a few weeks, while it's being painted I'll work on the conversion and start stripping everything from the old touring. It sounds so easy
Definitely, also one of the reason I got started on this and left some of the other crap for a bit. That and because myself and the bro were going to aim for painting his mini and my interior at the same time, he gave up though.DanThe wrote:Now the grot is gone and once its wearing nice fresh paint you will be enjoying the work more
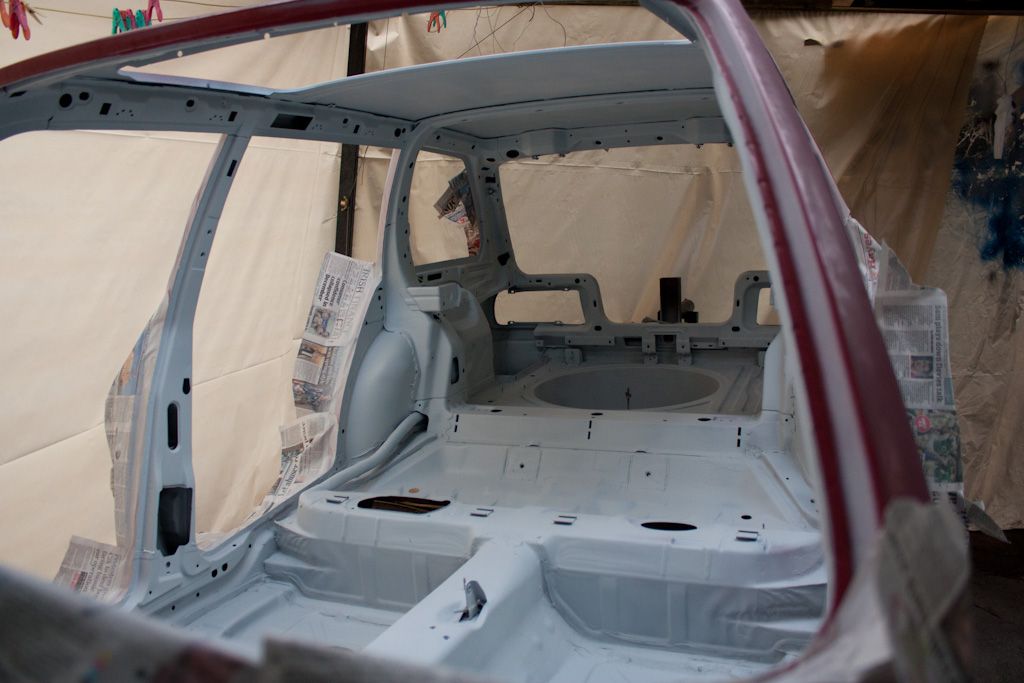
I slapped on some seam sealer yesterday and let it go a little hard over night and today got started on painting the shell :dance:
Sealer:
Painted:
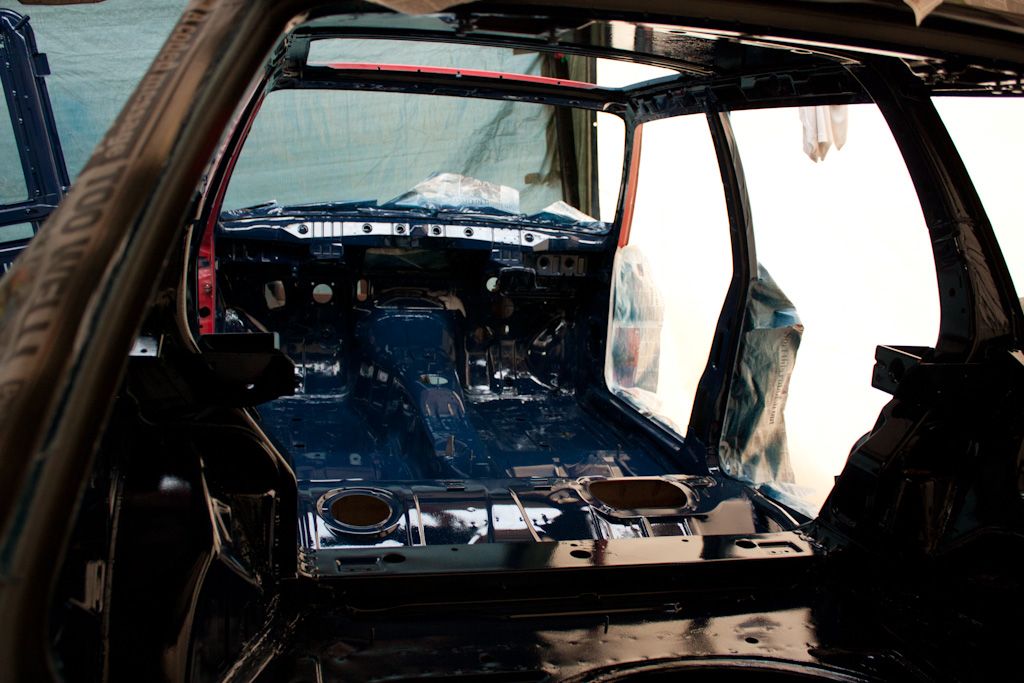
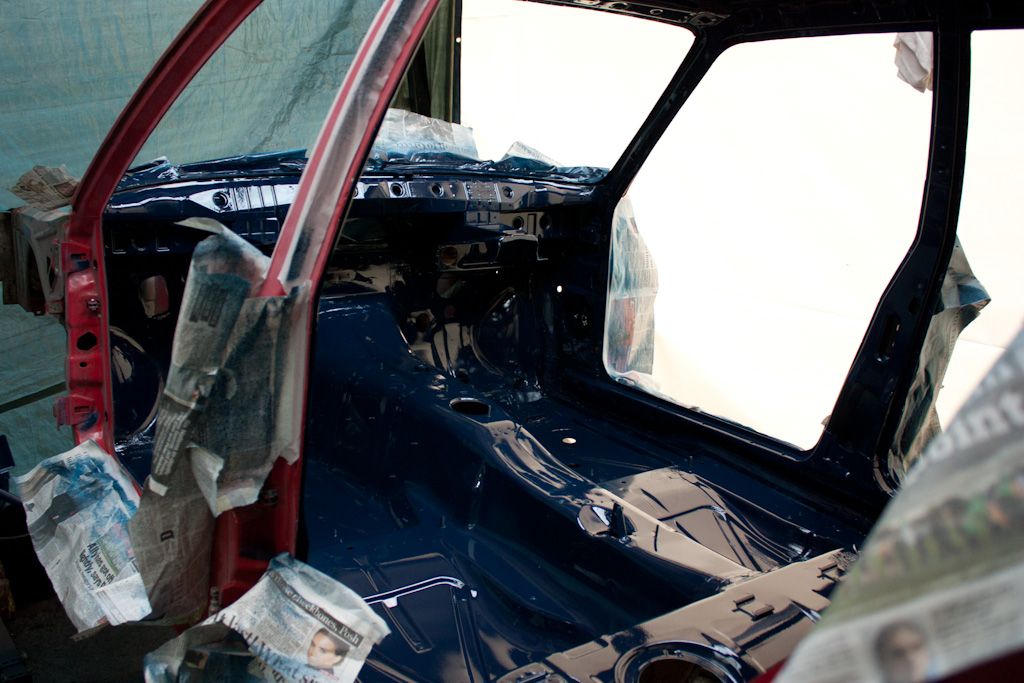
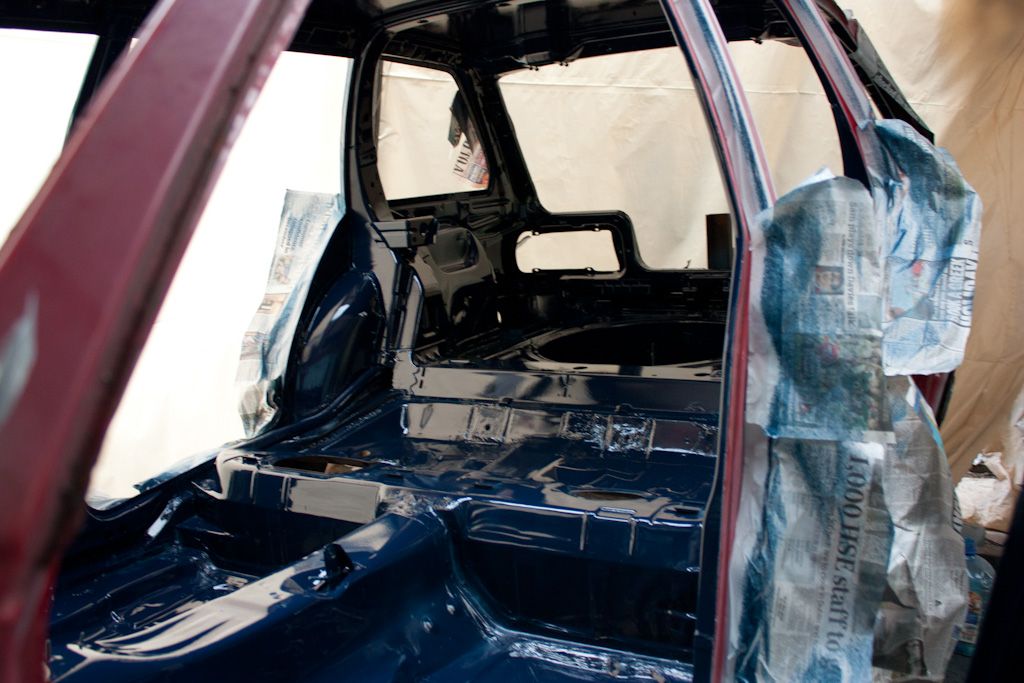
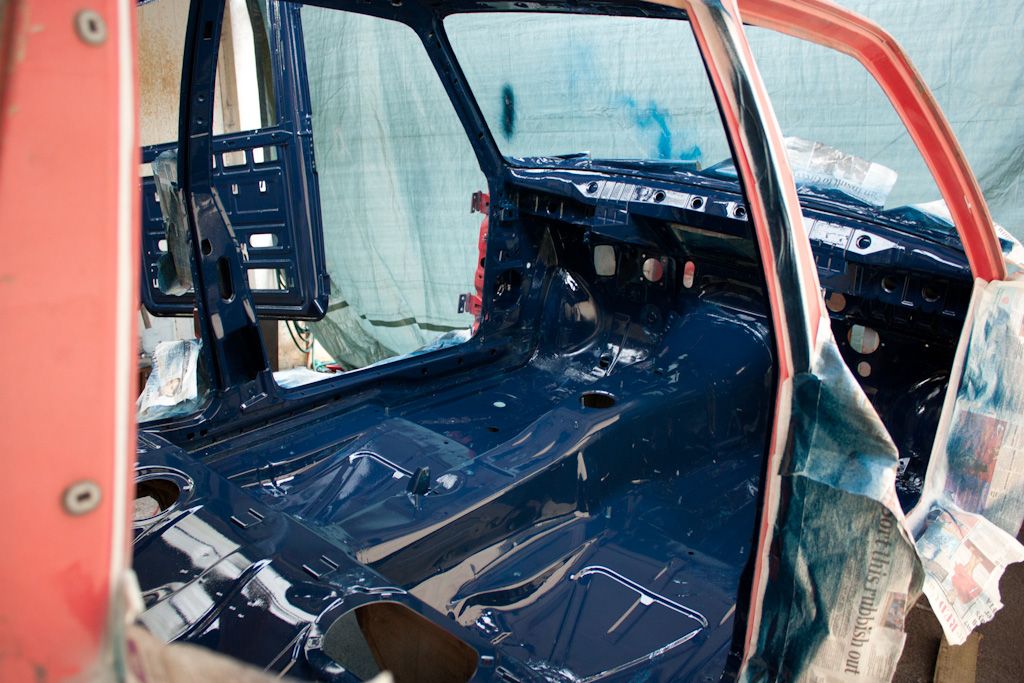
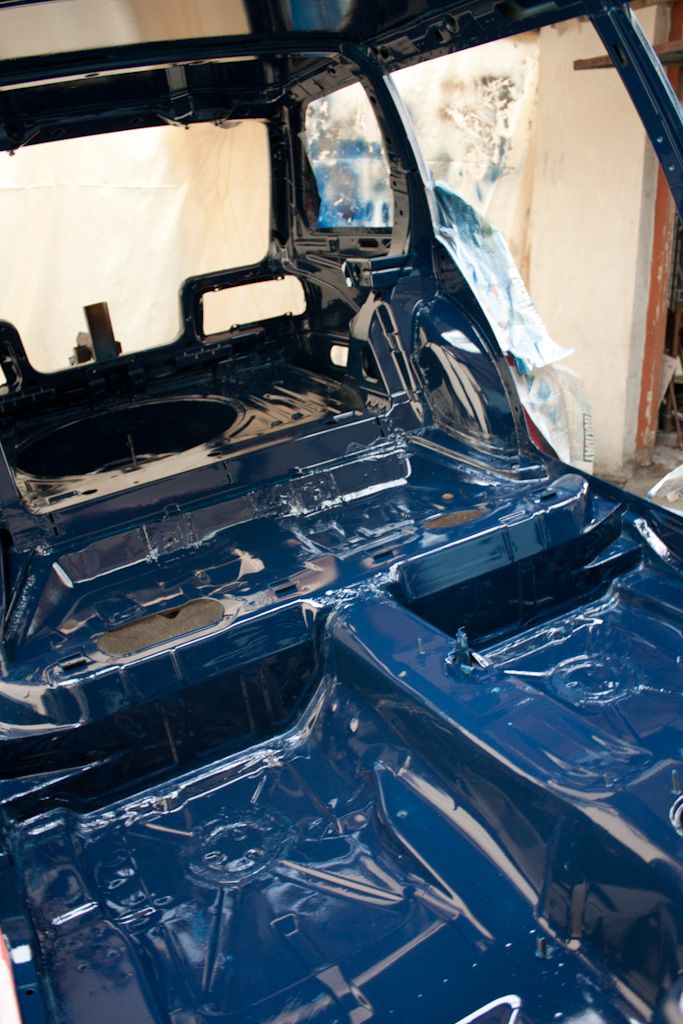
It went on a bit heavy but at least it's blue now :dance: :dance: It's not Mauritius blue, it's some sort of commercial type paint he mixed up to be similar to Mauritius blue.
Sealer:
Painted:
It went on a bit heavy but at least it's blue now
 :dance: :dance: It's not Mauritius blue, it's some sort of commercial type paint he mixed up to be similar to Mauritius blue.