m_jermyns build *motor in*

Show off your pride and joy here

Moderator: martauto

m_jermyn
E30 Zone Team Member
Posts: 4208
Joined: Sat Mar 14, 2009 11:00 pm
Location: Sydney Australia Mate

Fri Jul 16, 2010 10:48 am

Today I had a little spare time and thought I would fix a dent from a branch that fell from the tree the other week.. To fix this dent it required me to remove the headlight grill...

I saw some surface rust in the headlight mounts, bugger cant have that as I wont sleep thinking about it. This is as rusty as they get here in sunny Australia 8)

The rusty bracket
Image

Selection of wire wheels, rust converter and scotchbrite
Image

Most the surface rust gone
Image

Bit of paint
Image

Re assembled
Image

Assembled and cavity waxed so it will never rust again (hard to see the wax)
Image

Back in place with cavity wax on the front too.
Image

Now I have to do the other side

Mike
CHR1S1990
E30 Zone Camper
E30 Zone Camper
Posts: 1121
Joined: Fri Mar 14, 2008 11:00 pm
Location: Blackpool

Sat Jul 17, 2010 9:58 pm

Today I had a little spare time and thought I would fix a dent from a branch that fell from the tree the other week
very nice work mate. did you get round to the dent after alllll that rust? winkeye
Image
m_jermyn
E30 Zone Team Member
Posts: 4208
Joined: Sat Mar 14, 2009 11:00 pm
Location: Sydney Australia Mate

Sun Jul 18, 2010 1:07 am

Yeah dent fixed in about 5 minutes, Did a big job on the E30 this weekend, pics to come...
poolnoodle
E30 Zone Squatter
E30 Zone Squatter
Posts: 1786
Joined: Sat May 24, 2008 11:00 pm
Location: Hobart, Tasmania, Australia

Sun Jul 18, 2010 1:14 am

Looking good Mike, makes me want to strip down my 2.3 for some TLC....hmmm, need a bigger house first, can't have two cars "in progress" simultaneously.....M10 first then I'll progress to M20 :D
'83 Bronzit 323i (mmmm, chrome)
'74 Polaris 2002 (mmmm, retro)
'89 Delphin 535i (mmmm, waft waft)
User avatar
AlpineAde
E30 Zone Team Member
Posts: 3829
Joined: Sun Feb 25, 2007 11:00 pm
Location: Melbourne, Australia

Sun Jul 18, 2010 5:34 am

Mike, where'd the headers come from? They look a little like the units a guy from Victoria pieces together....
m_jermyn
E30 Zone Team Member
Posts: 4208
Joined: Sat Mar 14, 2009 11:00 pm
Location: Sydney Australia Mate

Sun Jul 18, 2010 6:23 am

Ok last weekend I sat on my ass and did nothing...... I almost died of boredom, so this weekend I made sure I had something to do.

Chromie up on a hoist.... Why you say?
Image

For a little spring cleaning, gotta say looks pretty good under here for a 23 year old car... BMW did a great job on these things.
Image

Drivers side rear wheel well
Image

Passenger side rear wheel well
Image

As good as this is its not up to standard and I want this bugger to last another 23 years. Out comes the degreaser and high pressure hose.

The result is this.
Image
Image

Now look at that just the way it rolled off the factory floor gleaming and not a single little bit of rust anywhere to be seen.. I bet you UK boys and girls are jealous right? This really shows you what salt does to cars.

But still not content with this, I came armed with this.
Image

Its vehicle underbody spray that protects against stone chips and also provides a water proof barrier.

First job was to mask everything up... Didnt take any photos of this as its a little boring.

First up was the drivers rear wheel well..
Image
Image
(whats this thing for hiding under the cover?)
Image

Passenger rear wheel well..
Image

Boot floor and Spare wheel well..
Image

Various shots
Image
Image
Image

Rear end now complete....
Image

Stay tuned for the next under floor update the front.. Wont be next week as it my birthday.. (hopefully I get my Friggen parts im waiting for.. Now wouldnt that be a nice bday present)

Mike
bobbin1982
E30 Zone Squatter
E30 Zone Squatter
Posts: 1508
Joined: Mon Mar 23, 2009 11:00 pm
Location: Norwich,Norfolk

Sun Jul 18, 2010 11:17 am

This reminds me i really need to strip my ynderseal off and apply with new as its all peeling of like rubber...

Excellent thread mate , I love a thread with inspiration


Andy
Driving my digger!!!!
E30BeemerLad
Married to the E30 Zone
Posts: 16806
Joined: Mon Mar 28, 2005 11:00 pm
Location: Norfolk

Sun Jul 18, 2010 11:34 am

Damn your climate, why can't my turd be like that underneath

Resto/rebuild threads are the best
m_jermyn
E30 Zone Team Member
Posts: 4208
Joined: Sat Mar 14, 2009 11:00 pm
Location: Sydney Australia Mate

Sun Jul 18, 2010 11:30 pm

Thanks for the positive comments guys.
Blitz
Married to the E30 Zone
Posts: 11155
Joined: Mon Jan 30, 2006 11:00 pm
Location: East London+Basildon

Mon Jul 19, 2010 1:15 am

I want to clean my underside. Just need a ramp and a pressure washer.
poolnoodle
E30 Zone Squatter
E30 Zone Squatter
Posts: 1786
Joined: Sat May 24, 2008 11:00 pm
Location: Hobart, Tasmania, Australia

Mon Jul 19, 2010 7:20 am

Blitz wrote:I want to clean my underside. Just need a ramp and a pressure washer.
+1
The job doesn't sound like much fun on axle stands :mad:
'83 Bronzit 323i (mmmm, chrome)
'74 Polaris 2002 (mmmm, retro)
'89 Delphin 535i (mmmm, waft waft)
Greeny
E30 Zone Regular
E30 Zone Regular
Posts: 706
Joined: Sun Oct 29, 2006 11:00 pm
Location: Llangollen, North Wales

Mon Jul 19, 2010 10:51 pm

I did this on my cabby and ended up blowing a hole in my fuel tank, not a good day, althought it meant i could replace the rear beam bushes and the brake pipe over the tank.
Image
Gone but not forgotten.
('92 325i Cabriolet)
m_jermyn
E30 Zone Team Member
Posts: 4208
Joined: Sat Mar 14, 2009 11:00 pm
Location: Sydney Australia Mate

Sun Jul 25, 2010 2:33 am

Well it was my Birthday yesterday saturday... Rather then sit back and bask in my excellence I decided I should do a bit more on the chromie.

So time for another clean underneath to get any new crud off that formed since last week and also to go over any spot I may of missed.

I was also alway that the jacking points were a little crushed so I would be fixing them aswell. However I forgot to take a before photo... They were crushed alot more then I thought. Why they call them jacking points I have no idea, no E30 should be jacked up from these.

Drivers rear was the only one I got a before pic off... It was the least damaged aswell.
Image

I have started to straiten the drivers front
Image

Bit of bending here and there. Its far easier to pull them strait and start again. This makes sure you can get all the surface rust out. If you dont straiten it you will get left over rust in the corners.
Image

Now bending the angle back into it.... I have cleaned up the surface rust with some wire wheels, seaweed disks and dioxidine.
Image

After this it got a prime and seal. (forgot to take a pic)

And now it gets some chip guard to finish the job
Image
Image

Passenger front

Before
Image
After
Image

Rear was pretty much the same process

Was everything is clean the masking begins
Image

End result..
Image

Last thing to do is clean under the fuel tank... You can see I have done one side above.. I also have to clean the rear cradle cross members and anything else that looks mucky.

I will be doing under the front wheel arches next week.

By for now
:D
poolnoodle
E30 Zone Squatter
E30 Zone Squatter
Posts: 1786
Joined: Sat May 24, 2008 11:00 pm
Location: Hobart, Tasmania, Australia

Sun Jul 25, 2010 10:02 am

Damn I need a vehicle hoist :?
'83 Bronzit 323i (mmmm, chrome)
'74 Polaris 2002 (mmmm, retro)
'89 Delphin 535i (mmmm, waft waft)
Alex
Married to the E30 Zone
Posts: 22666
Joined: Fri Feb 11, 2005 11:00 pm
Location: Johannesburg, South Africa

Sun Jul 25, 2010 12:53 pm

poolnoodle wrote:
Blitz wrote:I want to clean my underside. Just need a ramp and a pressure washer.
+1
The job doesn't sound like much fun on axle stands :mad:
i did that with axel stands, i got very wet :(
Ollie_bwoii
Married to the E30 Zone
Posts: 8695
Joined: Sat May 17, 2008 11:00 pm
Location: Northampton

Sun Jul 25, 2010 12:55 pm

Nothing is fun with a jack and axle stand's. :cry:

Lovely work though Mike, a very tidy shell. 8)
Eddie25
E30 Zone Newbie
E30 Zone Newbie
Posts: 37
Joined: Fri Dec 29, 2006 11:00 pm
Location: Gloucestershire

Sun Jul 25, 2010 3:14 pm

Superb. Love the attention to detail on this car. My sills have been bent at some point in the past as well so i think i will be giving this a go. :thumb:
m_jermyn
E30 Zone Team Member
Posts: 4208
Joined: Sat Mar 14, 2009 11:00 pm
Location: Sydney Australia Mate

Fri Jul 30, 2010 11:50 am

Ok Been doing a little bit with the engine lately.

I had to go out and buy another 325i inlet manifold as the one I purchased more then a year ago from a zoner has not yet arrived :banghead:

Anyway moving on. :cry:

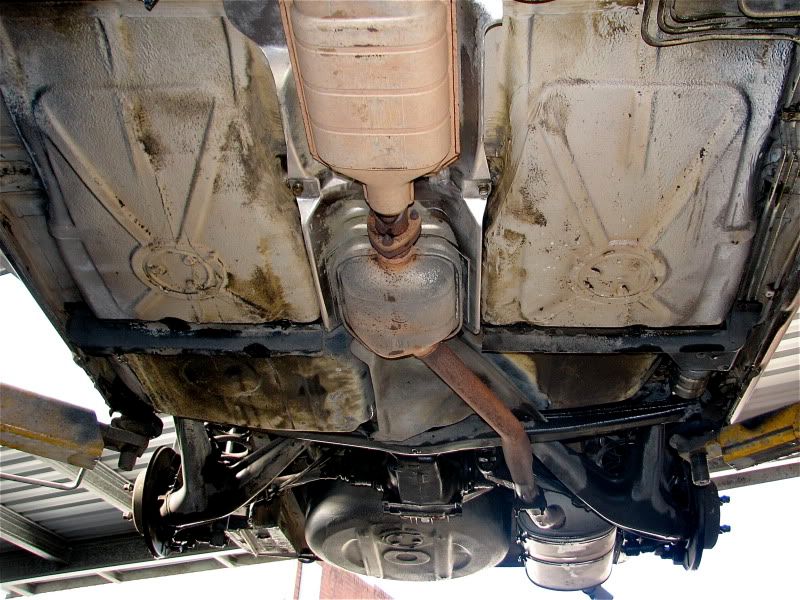
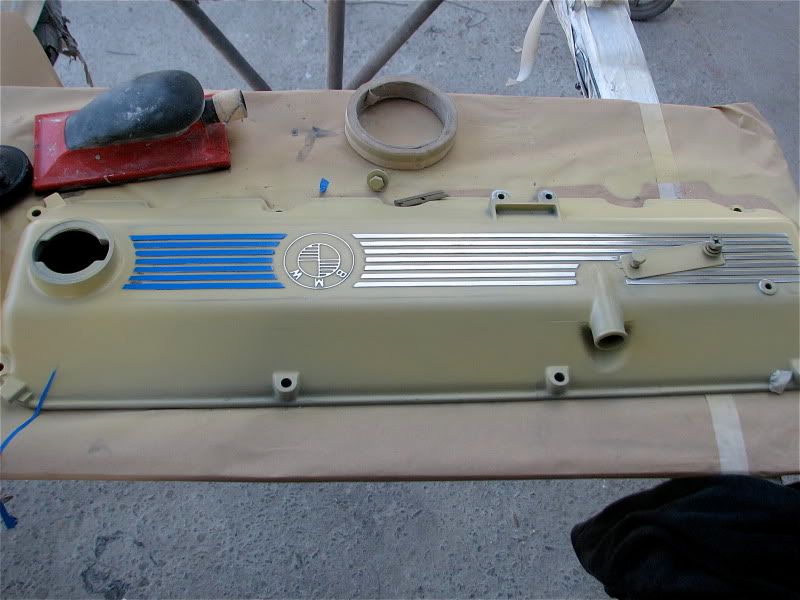
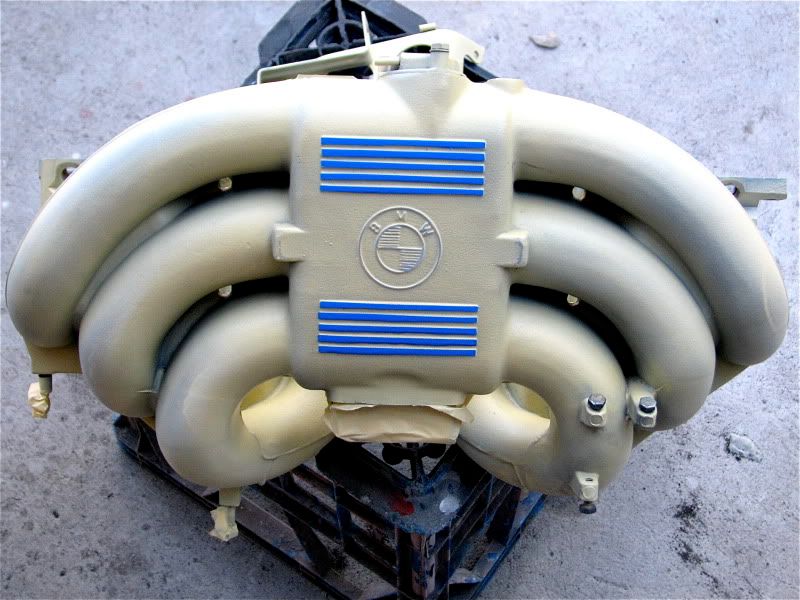
This thing was filthy when I got it and it looked like it had been floating around in the gulf of mexico. Oil was dripping out of it everywhere.

The 325i inlet manifold
Image

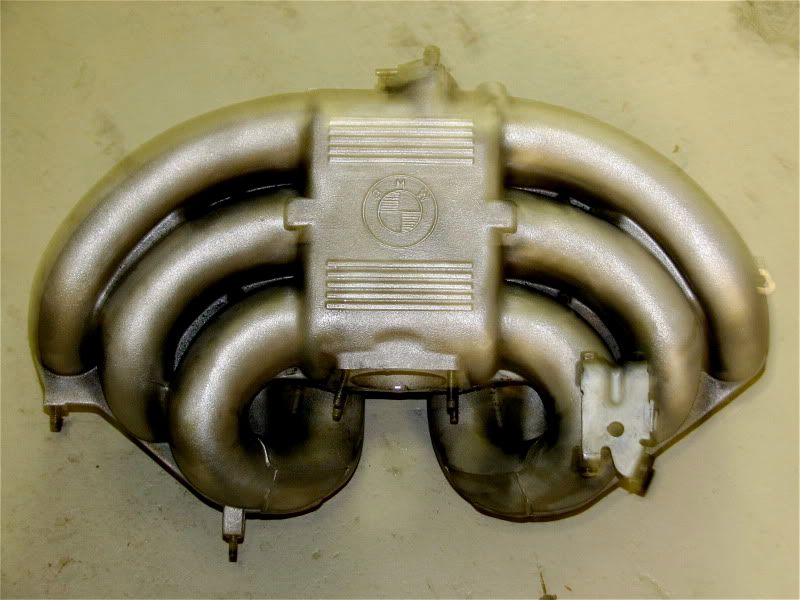
Look at the difference between the 325i manifold and the other manifold.

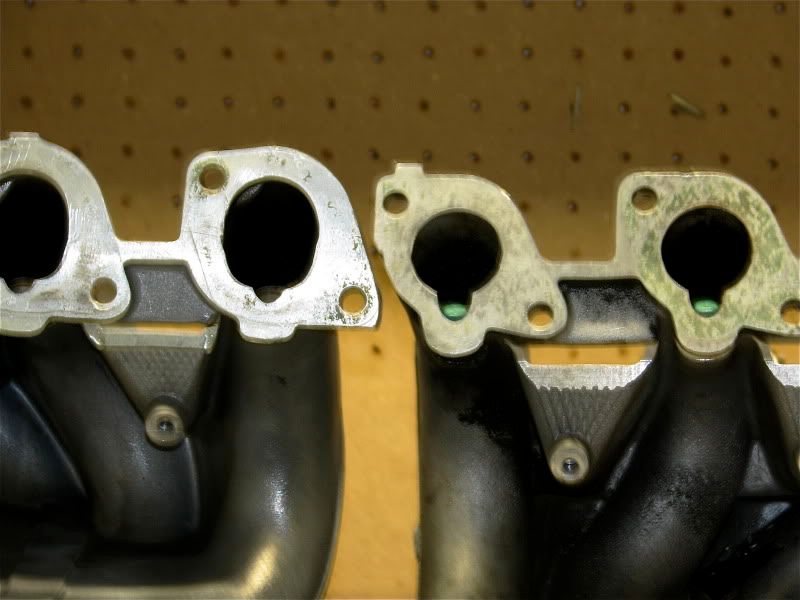
Throttle body mount...... 325i on the bottom or the big hole.
Image

Inlet ports...... Yep the 325i one is the big one on the left.
Image

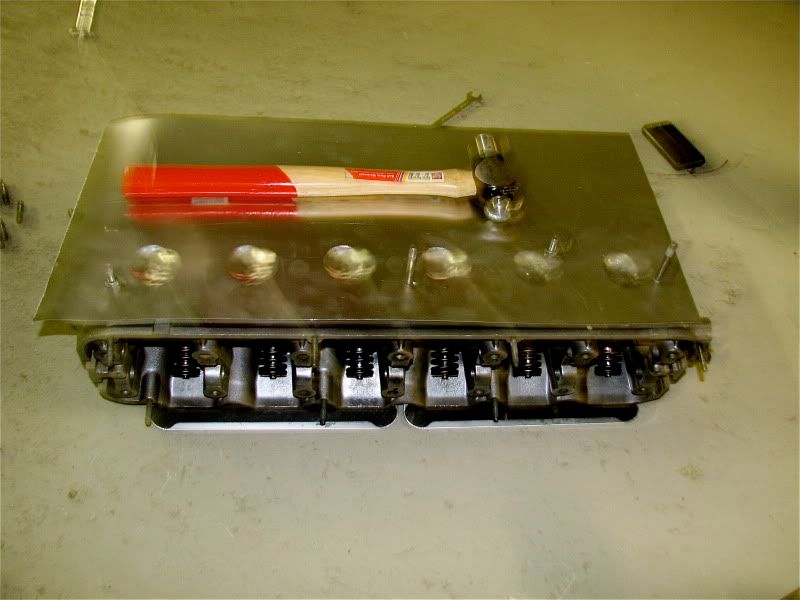
Now we move onto port matching the head to the manifold, Here I have got a thin piece of sheet aluminium 0.5mm that I have drilled a few holes into to locate with the head studs. I have then got a ball pein hammer and rolled it into the ports to make something like a cast of the ports.
Image

Now I have to cut out the little egg cups I have created.
Image

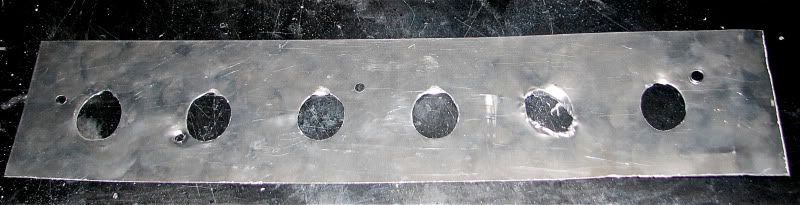
Now I place it back on the head to make sure its correct.
Image

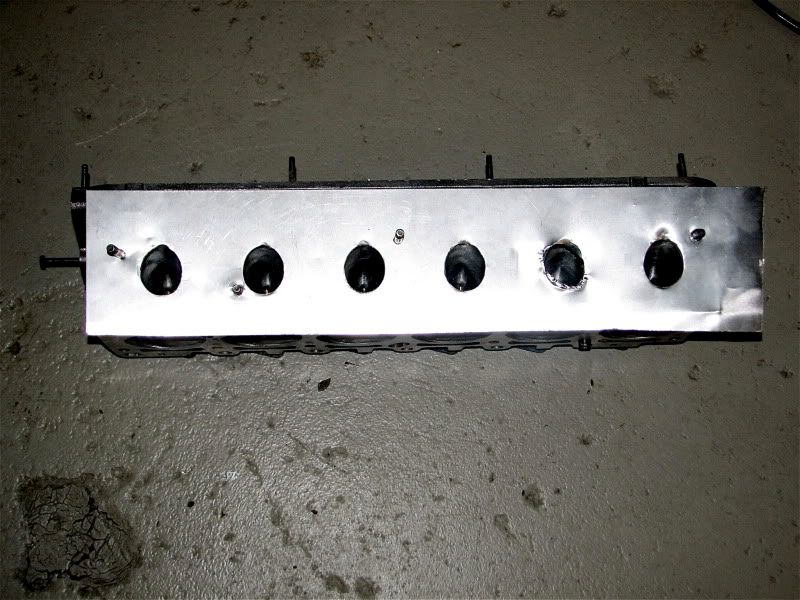
It all matched up as exactly as it should except the mangled one where the die grinder decided to buck back and attack me.. So we transfer it to the inlet manifold.
Image

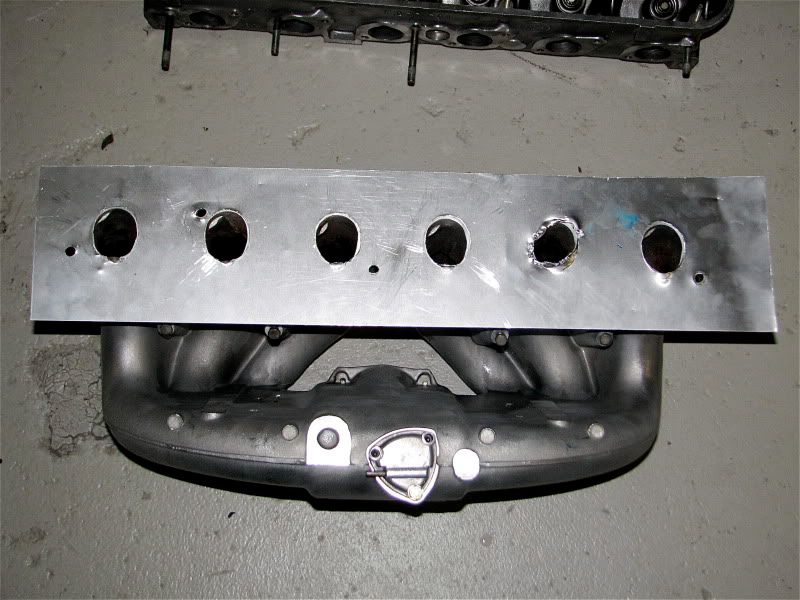
Well what do you know, it seams the ports on the 325i inlet manifold are a exact match to the ports on the 731 head... Strange this is as I thought I would definitely have to open the ports in the head to match the port on the manifold...

This is a bit weird because the LARGER 885 head is being restricted by the 325i inlet manifold so it begs the question what is the point in the 885 head if its strangled for air?

Either way this is good news for me as now I dont have to port match everything together as BMW already did it for me.. :D

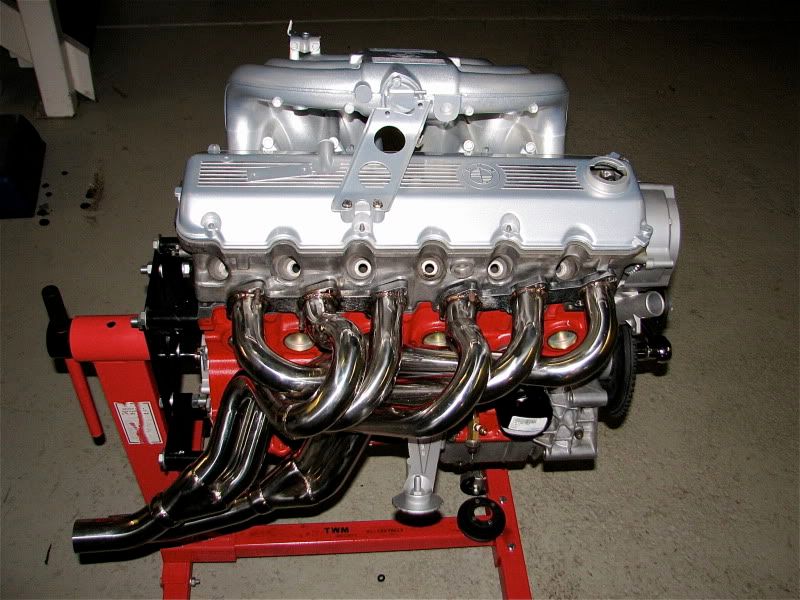
Now that that is out of the way I can move onto assembling the head.
Image

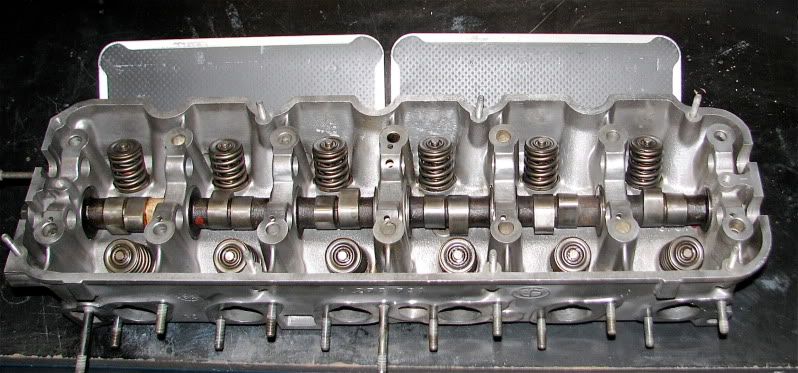
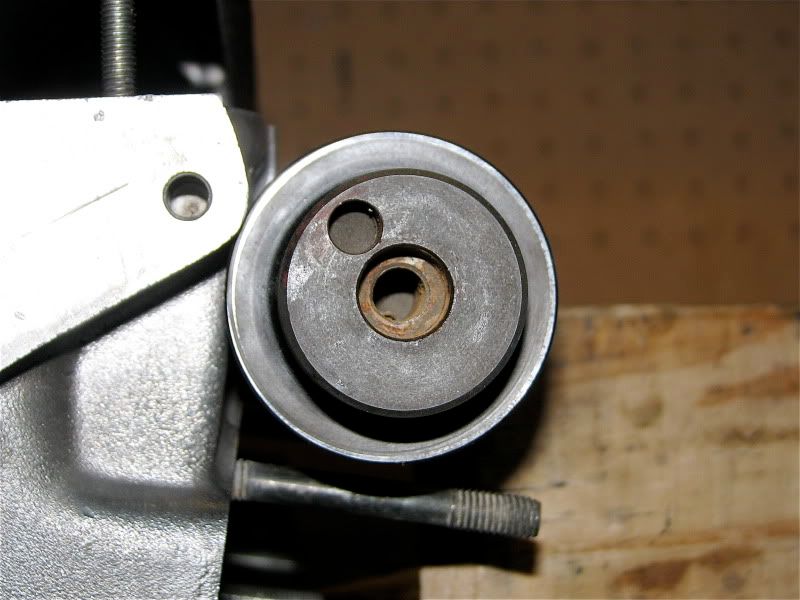
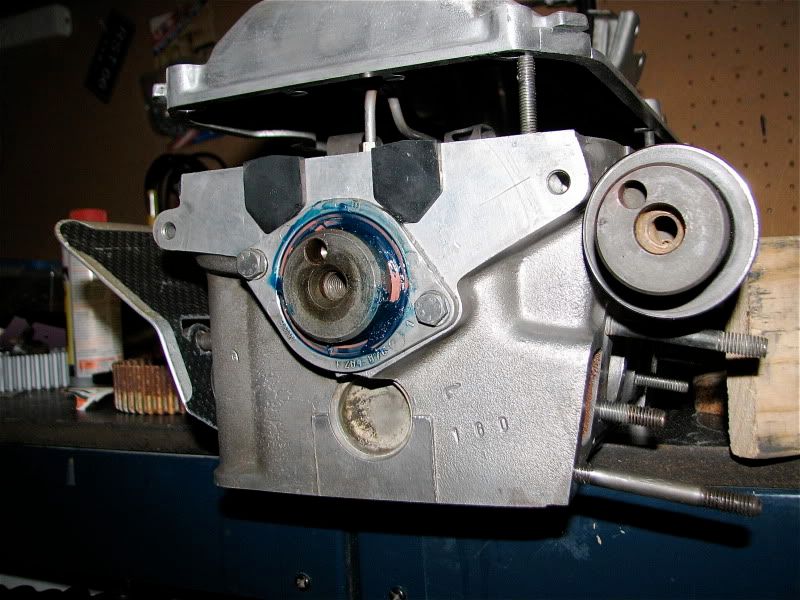
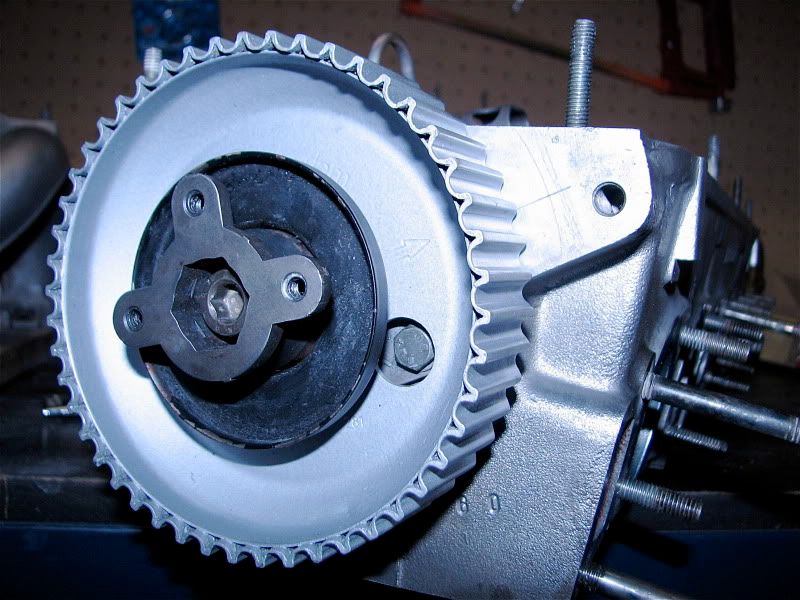
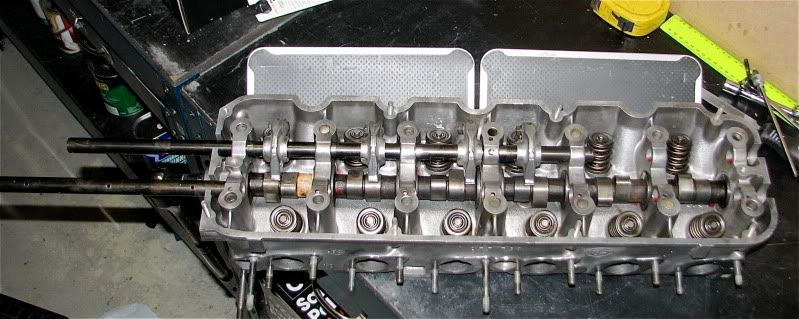
Time to slide in the rocker shafts and mount the rockers.
Image

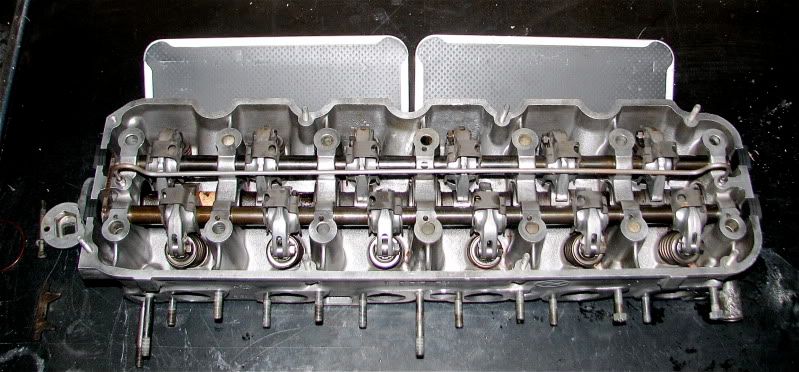
The cam seal.. Pretty important to get this bit right as if its a little out or the seal gets damaged then there will be a oil leek.. That would really suck as it would be a ass to fix.
Image

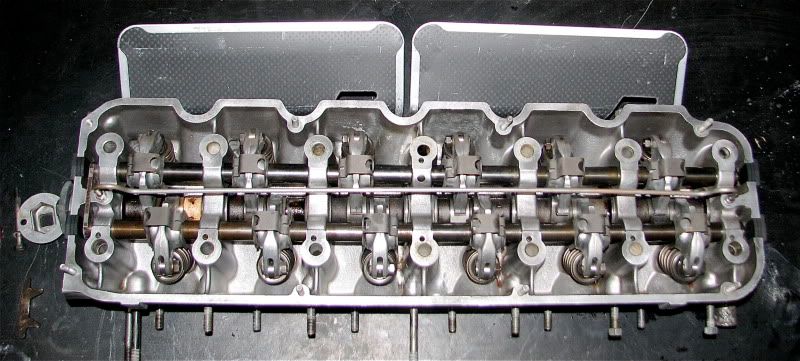
Head is all together now looking sweet. Its a bit fiddly but a few hours later.
Image
Image

Thats it for this weeks update

Mike
m_jermyn
E30 Zone Team Member
Posts: 4208
Joined: Sat Mar 14, 2009 11:00 pm
Location: Sydney Australia Mate

Mon Aug 02, 2010 8:49 am

Well I hit a little snag today and I am not very happy about it. :cry:

It seems that not all m20 cams are the same.. There is a small difference and its got to do with how old the motor is... As we all know the M20's that where in the 323i E30's had the dizzy off the side of the block and the new M20's have the dizzy up on the head.

So there is 2 types of pulleys

Here is the 2 types of pulley mounts.

Image

The one on the left is from the 323I dizzy on the side motor... The one on the right is every other E30 with the dizzy on the head.. The thing with the 3 small holes in it thats resembles a three leaf clover is the dizzy mount

Now you can see the 2 holes in the front of the cam. The big hole is for the bolt that holds the pulley on, the smaller hole is for a locating dowel and ensure the pulley only goes on one way..

Image

On the back of the Dizzy mount is a lug that slides into the big hole above where as the 323i cam has a smaller tapered big hole that wont allow the dizzy mount to locate on the cam shaft...

You can kind of see the difference, the one in the head has the tapered hole and the one on the right does not...

Image

All this means that I cant get the pulley onto the head with this cam.... :cry: After a few hours of putting together the head I find this right at the end...

Now its either strip the head and have the hole enlarged in the cam, or what I am hoping for is the machinest can bore out the hole with out removing the cam.. (fingers crossed)

Or option 3 is find another cam with the correct hole..

And no I cant use the cam on the right as that is the original Eta cam and its not suitable for what I am doing.. (to small)

Just when I thought this engine building stuff is not really that complex. Its the little stupid things that you miss.

Mike
m_jermyn
E30 Zone Team Member
Posts: 4208
Joined: Sat Mar 14, 2009 11:00 pm
Location: Sydney Australia Mate

Mon Aug 02, 2010 8:56 am

On another note something made me very happy today..... I got a package from New Zealand :skip:

And in it was this...

Image

Take not of how many Kms are showing :P :P :P

The package also had a small bracket in it thats not nearly as exciting so I didnt take a pic..

Cheers to Willnz for sending me the package, you are the greatest :notworthy: :jesus:
StuBeeDoo
Engaged to the E30 Zone
Posts: 6756
Joined: Sat Feb 05, 2005 11:00 pm
Location: Up My Own Arse

Mon Aug 02, 2010 9:16 am

m_jermyn wrote:the ports on the 325i inlet manifold are a exact match to the ports on the 731 head... Strange this is as I thought I would definitely have to open the ports in the head to match the port on the manifold...
Am I reading this right?? :?
You're saying that the 325i manifold is already a match with the 731 ports without any machining?
I need to do some investigating here - I've got a spare 731, spare 325i inlet manifold and a new set of gaskets.
I wish I'd checked this for myself before building my engine instead of taking people's word for it. :roll:

I'm away out to the garage now.
This is why I no longer drive an E30......

Image
m_jermyn
E30 Zone Team Member
Posts: 4208
Joined: Sat Mar 14, 2009 11:00 pm
Location: Sydney Australia Mate

Mon Aug 02, 2010 9:40 am

You are reading that 100% correct, it surprised me aswell.

I was sure I would have to take out some material from the head but not so....

The funny thing is BMW never fitted the 325i inlet to a 731 head but it fits perfect.

Mike
StuBeeDoo
Engaged to the E30 Zone
Posts: 6756
Joined: Sat Feb 05, 2005 11:00 pm
Location: Up My Own Arse

Mon Aug 02, 2010 10:45 am

OK, so this is what I found. IMHO, a little relieving to the roof of the port will be required, but not as much as I was lead to believe. I'd read various reports of anything from 1mm to 3+mm all round the periphery.

Surprisingly, the manifold needs a little off the floor of the runner as well. Although, I suppose a small step would reduce back flow (if there is any).


Image

Image

Question now is, is it safe to relieve the 'head with it still on the engine? Stuffing oily rags in the ports to catch the swarf, or something like that.
I had been thinking about cutting-up 320i and 325i manifolds and getting bits welded together to get the 325i TB to fit the 320i manifold to fit 100% properly. Looks like relieving the inlet ports and fitting the 325i manifold is the easier option providing I don't have to take the 'head off the engine again.
This is why I no longer drive an E30......

Image
m_jermyn
E30 Zone Team Member
Posts: 4208
Joined: Sat Mar 14, 2009 11:00 pm
Location: Sydney Australia Mate

Mon Aug 02, 2010 12:40 pm

To be honest mate I dont think that tiny bit of metal will make any difference at all...

I have heard of people stuffing oily rags down there to do this and as long as you are careful I cant see a problem... Its like one draw of the file and the metal will be gone.. Its amazing how close they are hey?

I will have another look at mine tomorrow and post some pics for you..

Mike
m_jermyn
E30 Zone Team Member
Posts: 4208
Joined: Sat Mar 14, 2009 11:00 pm
Location: Sydney Australia Mate

Sat Aug 07, 2010 8:05 am

Ok I got my little problem with the cam fixed. I took it to the machinest and he simply milled it out a bit...

As you can see I got the cam pulley on now.. :D

Image
m_jermyn
E30 Zone Team Member
Posts: 4208
Joined: Sat Mar 14, 2009 11:00 pm
Location: Sydney Australia Mate

Sat Aug 07, 2010 8:16 am

This weekend I decided I should get some engine parts painted. I cant screw the rest of the motor together until they are painted.

So we have the cam cover.. Yes this is the second time I have done this as I was not really happy with it last time. Here I have it in etch primer and I have polished the raised ribs. I hate masking...

Image

Here it is based up and the fine line tape (blue tape) has been removed.

Image

And now it gets some clear over the whole lot.. Out side in the sun.

Image

Now we move on to the inlet manifold... Well to be honest I did them at the same time. Masked up the polished bits

Image

And fully painted gleaming in the sun.

Image

Its alot brighter then anticipated but it does look nice... I want it to look original under the bonnet but leaving the cast alloy would mean it would eventually turn yellow at some time so I thought I would paint it silver that way it would last forever.. I couldnt help myself in polishing the raised bits.

Thats it for this weekend.

Mike
poolnoodle
E30 Zone Squatter
E30 Zone Squatter
Posts: 1786
Joined: Sat May 24, 2008 11:00 pm
Location: Hobart, Tasmania, Australia

Sat Aug 07, 2010 9:17 am

Looking good Mike - the inlet manifold and cam cover are two jobs I need to do...'02 is taking up all my time now.
I was thinking black wrinkle finish with polished highlights but I like the look of yours - more original :? Don't really want ot have to strip everything if I'm not happy with results. Might need to source a spare cam cover to experiment on.
'83 Bronzit 323i (mmmm, chrome)
'74 Polaris 2002 (mmmm, retro)
'89 Delphin 535i (mmmm, waft waft)
Alpina99
E30 Zone Camper
E30 Zone Camper
Posts: 1000
Joined: Sat Nov 17, 2007 11:00 pm
Location: Portsmouth

Sun Aug 08, 2010 8:16 am

Love reading this thread, each time something new is added I just start again at the beginning,
Nice work, keep the updates coming,
:D
Gone, but not forgotten !!
m_jermyn
E30 Zone Team Member
Posts: 4208
Joined: Sat Mar 14, 2009 11:00 pm
Location: Sydney Australia Mate

Sun Aug 08, 2010 9:00 am

Thanks guys getting positive comments helps with the motorvation :P
User avatar
Royalratch
E30 Zone Addict
E30 Zone Addict
Posts: 4921
Joined: Sat Oct 21, 2006 11:00 pm
Location: London

Mon Aug 09, 2010 12:56 pm

Nice detail on all the work.
shimsheemer
E30 Zone Regular
E30 Zone Regular
Posts: 533
Joined: Sun Oct 08, 2006 11:00 pm
Location: South

Mon Aug 09, 2010 6:36 pm

I neeeeeeeeeeed a cam cover and inlet manifold just like that...

...does anyone know if there's a chap on here that still does this? If I remember right there used to be a guy that did it?...

Lovely in the silver, sweet work!
Image
StuBeeDoo
Engaged to the E30 Zone
Posts: 6756
Joined: Sat Feb 05, 2005 11:00 pm
Location: Up My Own Arse

Mon Aug 09, 2010 7:03 pm

I wish I had had the enthusiasm (and the time) to detail my engine parts when I did my rebuild. All my engine got was a good clean.
I've got a spare cam cover and inlet manifold here that I've got good intentions of painting....... Getting 'round to doing it is going to be the hardest part. Trouble with me is that all the time the bonnet's shut, it's out of sight, out of mind.

Chapeaux au loin dude. :notworthy:
This is why I no longer drive an E30......

Image
User avatar
toby
E30 Zone Addict
E30 Zone Addict
Posts: 3609
Joined: Thu Aug 11, 2005 11:00 pm
Location: Kent

Mon Aug 09, 2010 11:18 pm

Chuffed for you that the pulley on the end of the camshaft! Thanks for an enjoyable read.
Image
m_jermyn
E30 Zone Team Member
Posts: 4208
Joined: Sat Mar 14, 2009 11:00 pm
Location: Sydney Australia Mate

Wed Aug 11, 2010 12:16 pm

Just a teaser,

couldnt help myself I had to have a look what it would all look like :P

Image
Image

Mike
poolnoodle
E30 Zone Squatter
E30 Zone Squatter
Posts: 1786
Joined: Sat May 24, 2008 11:00 pm
Location: Hobart, Tasmania, Australia

Wed Aug 11, 2010 12:39 pm

Sweet :cool: :cool:
That really looks the nuts Mike. Hope those extractors go in OK.
You are inspiring me to get to work on my engine bay again - ordered a new coolant expansion tank today. Might have to get started when it arrives - nothing like having two cars that you can't drive sitting in the garage :mad:
'83 Bronzit 323i (mmmm, chrome)
'74 Polaris 2002 (mmmm, retro)
'89 Delphin 535i (mmmm, waft waft)
Post Reply