
Non sunroof roof skin swap - Back on the road!
Moderator: martauto
-
appletree
- E30 Zone Addict

- Posts: 3482
- Joined: Fri Jan 20, 2006 11:00 pm
- Location: Retford
Thanks for the link, have you done yours? Can they be riveted back together or is there another way?

You should never underestimate the predictability of stupidity
M42 Supercharged 285bhp + M3 6speed box
-
appletree
- E30 Zone Addict
- Posts: 3482
- Joined: Fri Jan 20, 2006 11:00 pm
- Location: Retford
So got the call yesterday morning to say my car was ready to collect but that the car would no longer start.
The car had been stud for a year and it was a little reluctant to start the first time anyway but it did start and idle.
Anyway went around last night and to see it and see if it would start which it did first time although only sounded like it was running on three so i stopped it to check if a lead had come loose or anything, which it hadn't but when i tried to start it again there was nothing, not even a click!!
So i posted in the tech help about it and today i went around in the van to try and jump it as i though the battery may have been a duff.
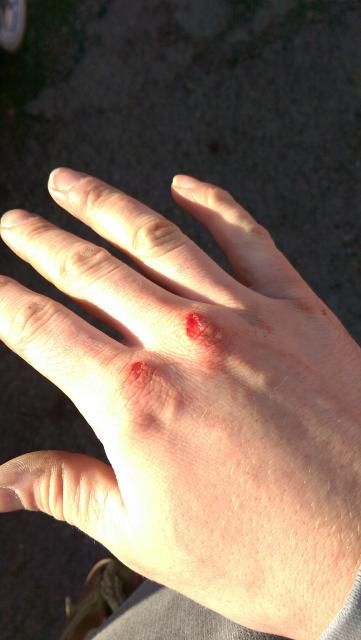
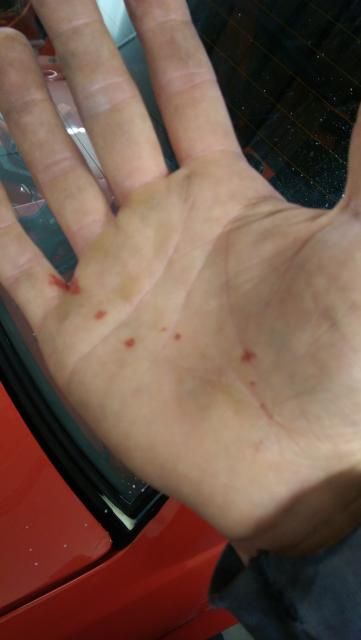
Again it started but on what sounded like only two cylinders. After a check of everything i tried it again and it turned over but wasn't even trying to fire. so i whipped a coil off and took the first plug out to find it soaked and sooted up, after a clean i tried again but haddn't turned over the car with the plugs out so it was still flooded really, in a rush i started to take the plugs out again and slipped on the last one and took the skin off my knuckles on the ribs of the cam cover. Ouch!!! and it was bloody freezing.
After this it started on two, then three and with a few revs picked up 4. so thought i'd take it for a quick blast around the ind est, BBBBBBBBBBBBBRRRRRRRRRRRRRR down the road and got to the "T" junction at the end and F000000K NO BRAKES!!!8O
The "No brakes only hand brake" sticker i put on the steering wheel two weeks ago had been removed and i had totally forgot, Managed to haul it up in time though before the end of the road but, not in a rush to do that again.
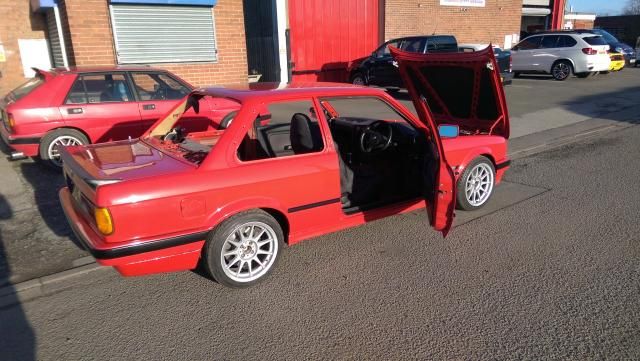
Some pics of the car
In the sun next to a Lancia from the Isle of Man whats in for some work.
Back in the garage
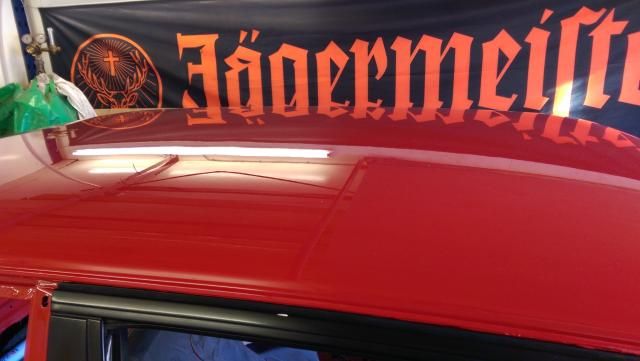
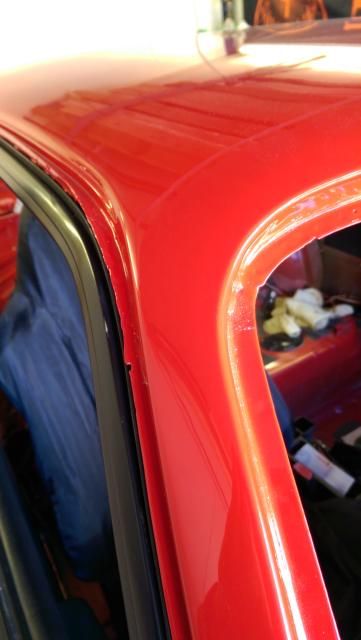
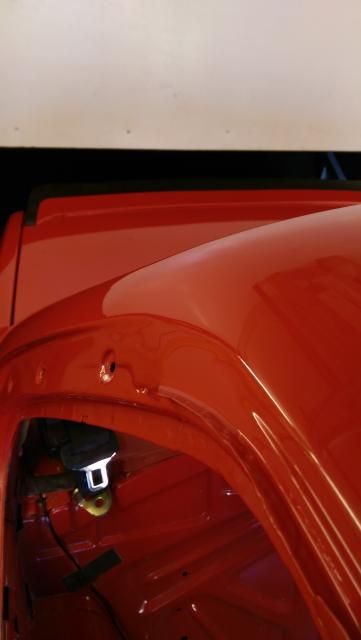
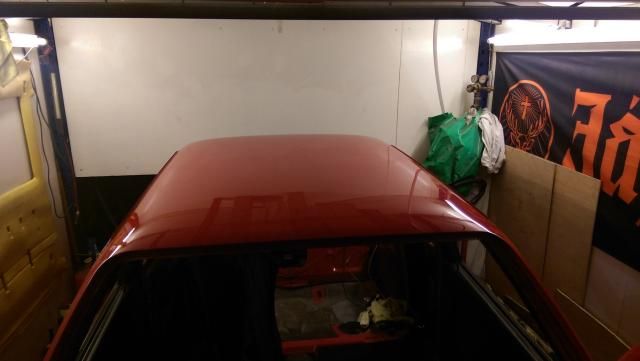
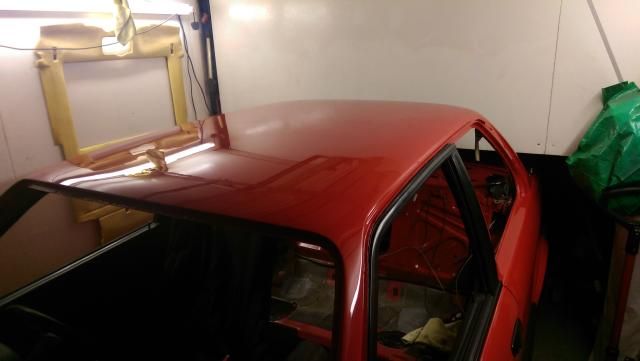
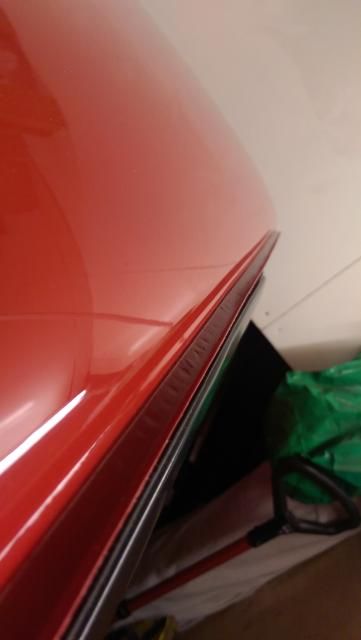
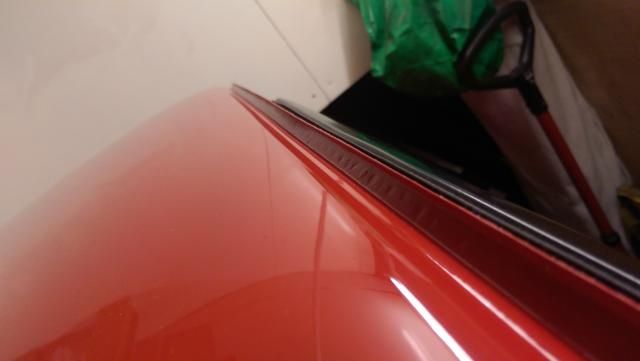
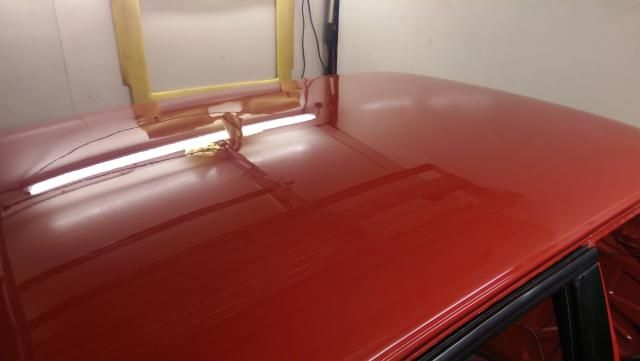
Well happy with the work, to say Me an my dad have changed the skin without any background in body work the out come is excellent and only with a very critical eye would you find any issues which are only small at that.
For anyone that's interested the roof, rear valance and two sets of mirrors set me back £600 including trailering the car to and from my house
Has anyone got any tips on new paint care? How long do i need to wait till i can wax and seal it?
The car had been stud for a year and it was a little reluctant to start the first time anyway but it did start and idle.
Anyway went around last night and to see it and see if it would start which it did first time although only sounded like it was running on three so i stopped it to check if a lead had come loose or anything, which it hadn't but when i tried to start it again there was nothing, not even a click!!
So i posted in the tech help about it and today i went around in the van to try and jump it as i though the battery may have been a duff.
Again it started but on what sounded like only two cylinders. After a check of everything i tried it again and it turned over but wasn't even trying to fire. so i whipped a coil off and took the first plug out to find it soaked and sooted up, after a clean i tried again but haddn't turned over the car with the plugs out so it was still flooded really, in a rush i started to take the plugs out again and slipped on the last one and took the skin off my knuckles on the ribs of the cam cover. Ouch!!! and it was bloody freezing.

After this it started on two, then three and with a few revs picked up 4. so thought i'd take it for a quick blast around the ind est, BBBBBBBBBBBBBRRRRRRRRRRRRRR down the road and got to the "T" junction at the end and F000000K NO BRAKES!!!8O
The "No brakes only hand brake" sticker i put on the steering wheel two weeks ago had been removed and i had totally forgot, Managed to haul it up in time though before the end of the road but, not in a rush to do that again.
Some pics of the car
In the sun next to a Lancia from the Isle of Man whats in for some work.

Back in the garage


Well happy with the work, to say Me an my dad have changed the skin without any background in body work the out come is excellent and only with a very critical eye would you find any issues which are only small at that.
For anyone that's interested the roof, rear valance and two sets of mirrors set me back £600 including trailering the car to and from my house
Has anyone got any tips on new paint care? How long do i need to wait till i can wax and seal it?
You should never underestimate the predictability of stupidity
M42 Supercharged 285bhp + M3 6speed box
-
Speedtouch
- Old Skooler

- Posts: 14099
- Joined: Tue Feb 14, 2006 11:00 pm
- Location: Canterbury
Looks great. What a nightmare that would have been, if you'd not managed to stop in time! 
///M aurice
ECU Upgrade EPROM Chips, £40 posted within the UK. Note these are not Zone chips.
viewtopic.php?f=6&t=279421
ECU Upgrade EPROM Chips, £40 posted within the UK. Note these are not Zone chips.
viewtopic.php?f=6&t=279421
-
maxfield
- Old Skooler
- Posts: 15186
- Joined: Sat Nov 26, 2005 11:00 pm
- Location: Mansfield
I know the sinking feeling all to well when you put your foot on the pedal and there is nothing there!
Roof looks good
Will probably be tackling this soon at the same time I got a cage.
Roof looks good
Will probably be tackling this soon at the same time I got a cage.

-
jimbom30cab
- Tech 1 freak
- Posts: 7634
- Joined: Mon Oct 12, 2009 11:00 pm
- Location: in the garage
Great work there, a proper job and a job well done
Respect !!
Respect !!
-
sweep
- Married to the E30 Zone
- Posts: 10112
- Joined: Sat Mar 15, 2008 11:00 pm
- Location: spares & repairs in sheffield
Brilliant matt faith is now restored 
-
appletree
- E30 Zone Addict
- Posts: 3482
- Joined: Fri Jan 20, 2006 11:00 pm
- Location: Retford
Thanks lads, I cant wait to start bolting bits back on over the Christmas break and give the rest of it a good polish as it has lost some of its shine where its been in the garage with sheets and dust all over it and get it looking like a car again.
Last edited by appletree on Sat Dec 20, 2014 7:11 pm, edited 1 time in total.
You should never underestimate the predictability of stupidity
M42 Supercharged 285bhp + M3 6speed box
-
DanThe
- E30 Zone Team Member

- Posts: 28647
- Joined: Sat Sep 10, 2005 11:00 pm
- Location: Staffs
Excellent work Matt, looks fantastic 
-
Kos

- E30 Zone Team Member
- Posts: 15546
- Joined: Tue Jul 12, 2005 11:00 pm
- Location: London / Cyprus
Nice one
If they painted it with water based paint and good quality lacquer you'll be fine waxing it. If anything the body shop probably finished it off with a machine glaze.
If in doubt ask them.
One thing though, don't use a car cover ! They do trap moisture and this will set of micro blistering !!
If they painted it with water based paint and good quality lacquer you'll be fine waxing it. If anything the body shop probably finished it off with a machine glaze.
If in doubt ask them.
One thing though, don't use a car cover ! They do trap moisture and this will set of micro blistering !!
PUKAR DESIGNS - Reproduction BMW Decals Labels Sticker & Number Plates
www.pukardesigns.com
www.facebook.com/pukar.designs/
IG Pukar.Designs
www.pukardesigns.com
www.facebook.com/pukar.designs/
IG Pukar.Designs
-
appletree
- E30 Zone Addict
- Posts: 3482
- Joined: Fri Jan 20, 2006 11:00 pm
- Location: Retford
Thanks Kos, not sure what paint they used to be honest, they did buff it and pretty sure he said they had put some wax on, wouldn't a cotton cover be ok?
The garage does have a dehumidifier it in the winter
The garage does have a dehumidifier it in the winter
You should never underestimate the predictability of stupidity
M42 Supercharged 285bhp + M3 6speed box
-
Kos
- E30 Zone Team Member
- Posts: 15546
- Joined: Tue Jul 12, 2005 11:00 pm
- Location: London / Cyprus
A cotton/dust cover should be fine
None of this heavy "rain proof" bollocks. They cause more harm than good
None of this heavy "rain proof" bollocks. They cause more harm than good
PUKAR DESIGNS - Reproduction BMW Decals Labels Sticker & Number Plates
www.pukardesigns.com
www.facebook.com/pukar.designs/
IG Pukar.Designs
www.pukardesigns.com
www.facebook.com/pukar.designs/
IG Pukar.Designs
-
TPS
- E30 Zone Team Member
- Posts: 13121
- Joined: Fri Mar 06, 2009 11:00 pm
- Location: Hampshire
Thats a very good job

1991 325i Touring Alpine White II
1994 318i Touring Sterling Silver
-
appletree
- E30 Zone Addict
- Posts: 3482
- Joined: Fri Jan 20, 2006 11:00 pm
- Location: Retford
Despite the snow ive been in the garage today doing abit to move things forward.
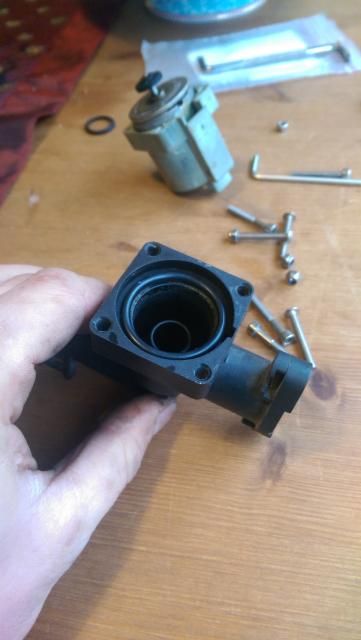
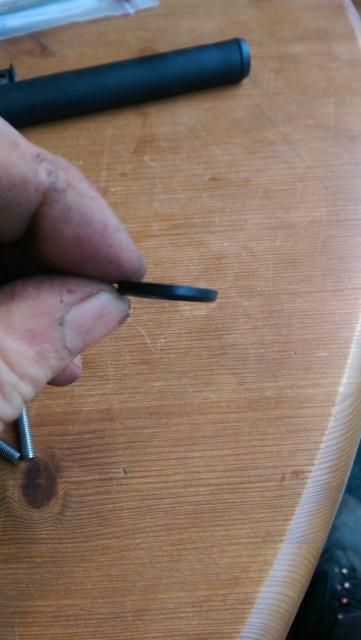
As there was a small amount of crustyness around the heater valve and as the carpet was out I decided to change the orings.
Pleased i did.
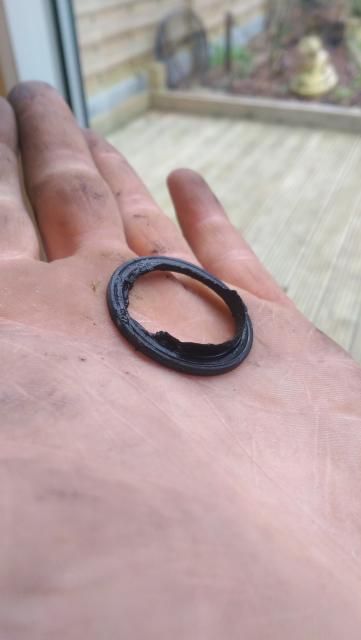
Main oring around the solinoid, don't think this would have lasted much longer.
New one fitted
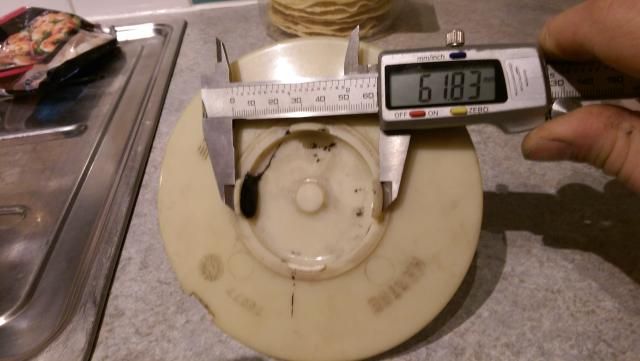
Others were flat to so these were replced, didn't have time to oreder these from bmw before winter so used some from an oring kit, real oem says size 17.12mm and my oring kit says the same so i guess the thickness will also be the same as a standard oring. To double check i restricted the outlet and piped up the hise pipe to it for a test, all ok.
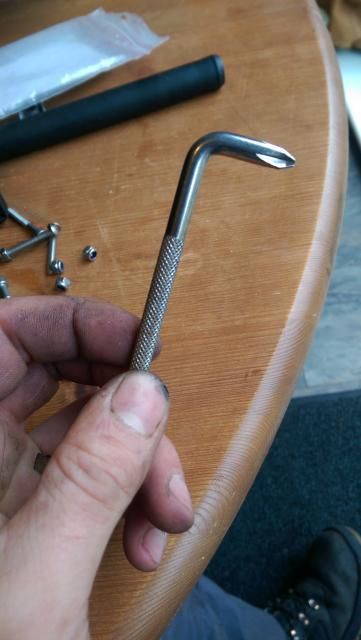
If you have ever done this job you wll appreciate how much time this tool saves!
Sorry, no picture but fitted the dyed black carpet
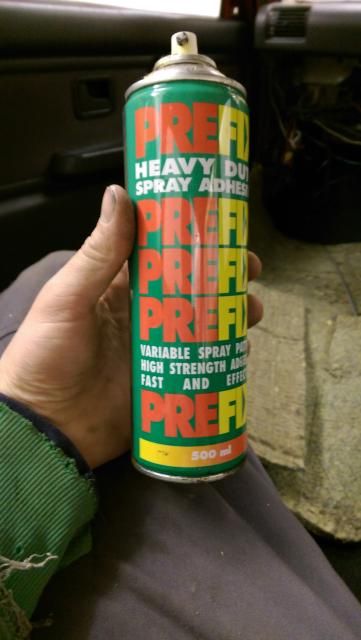
Then moved on to the roof lining.
Started by adding some sound deadening to the roof, used the heat gun to make sure it was stuck down propperly.
3 on the front, 2 on the back.
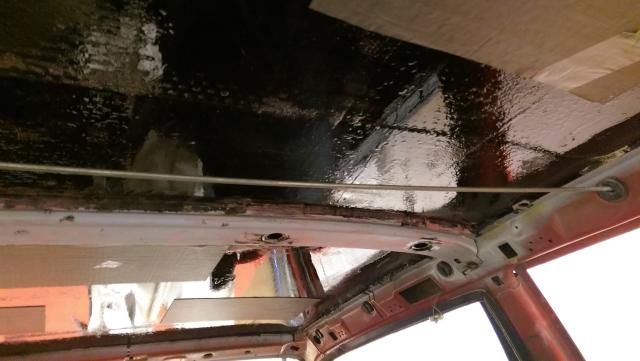
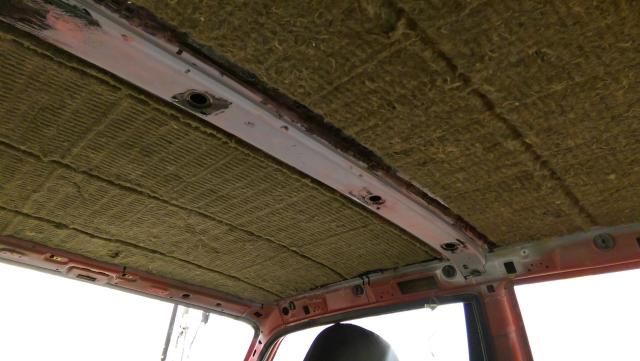
Then looked to getting the foam/hairy stuff stuck to the roof sounds easy but you have to line up the old ridges in the material with the bungs in the roof frame, easier said than done with a floppy sheet of material covered in glue so i fitted one of the metal rods from the headliner so it was held in place and then used some 3M mounting spray glue to hold it all up which worked really well dispite the cold temperature.
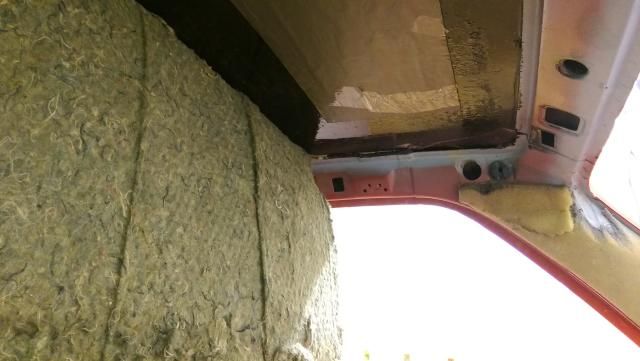
Reapeat for the front.
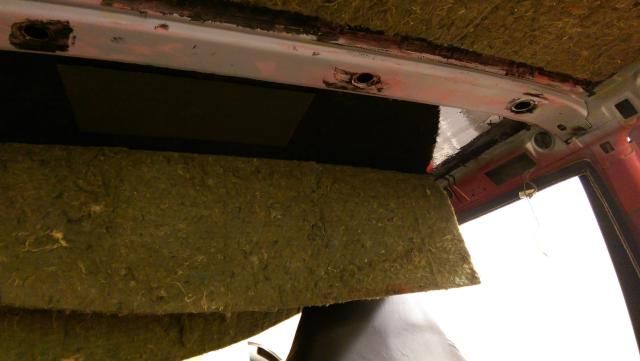
Had abit of a heart stopping moment when I saw the bung near the roof brace was nearly on top of each other, I didnt measure the roof brace when i seperated it from the skin so guessed it from pictures and made it eaqual length from the front but luckily once the foam suff is installed it all worked out ok.
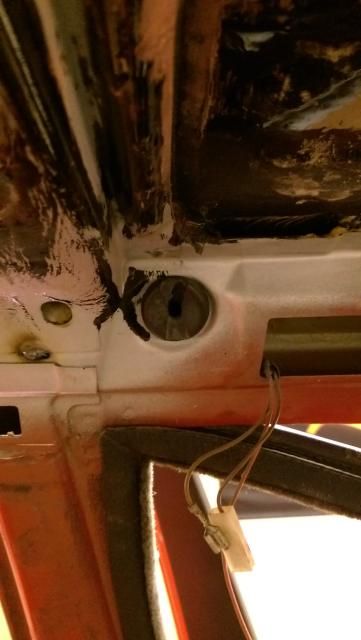
Job done.
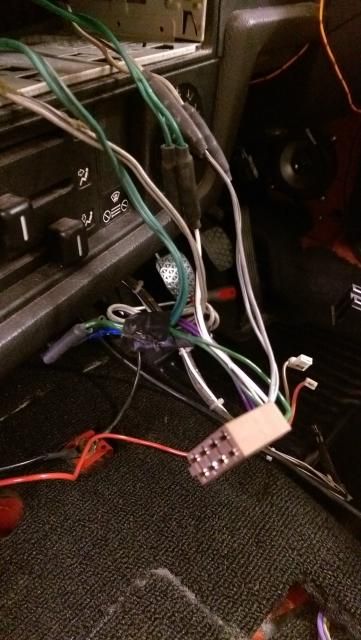
Then made a start on some off the wiring under the glove box.
Started out like this.
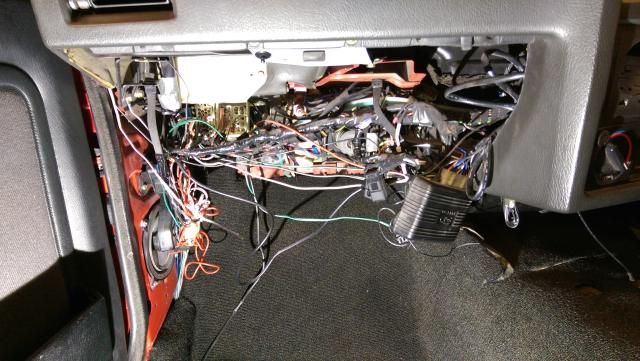
Started by tiding up all the alarm wiring, most of it was bunched up where it was to long so worked my way the shortening all these so there a more appropriate length.
Shortened the loom for my wide band lambda by around 50cm qq
Also started on the stereo wiring, i had used the main power to splice into to power the gauges and the whole lot was connected with straight connetors where an ISO plug had been grafted on the old wiring at some point makeing the wiring to long and bulky so i have removed the plug and oreded just the pins so i can shorten the wire crimp on new plugs and rebuild the plug with out joiners which will be nice.
Thinking i might re run all the speaker wires too as they dont seam to run correctly and are slightly short.
Away removed all this.
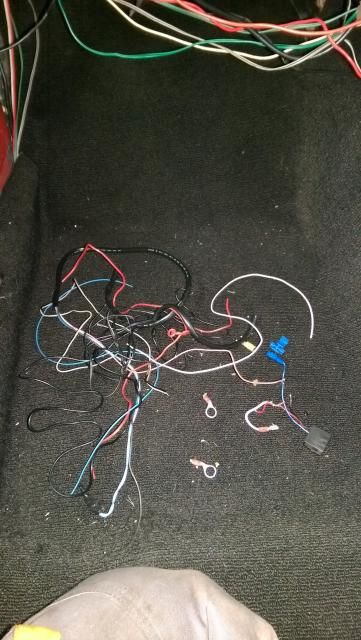
Still work in progress but looking better, have ordered some loom tape so i can wrap all the speaker cables up once there done.
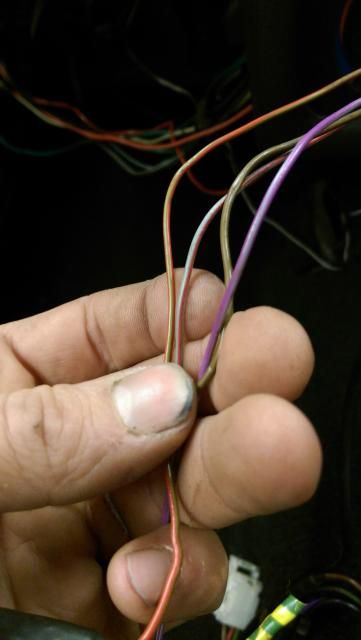
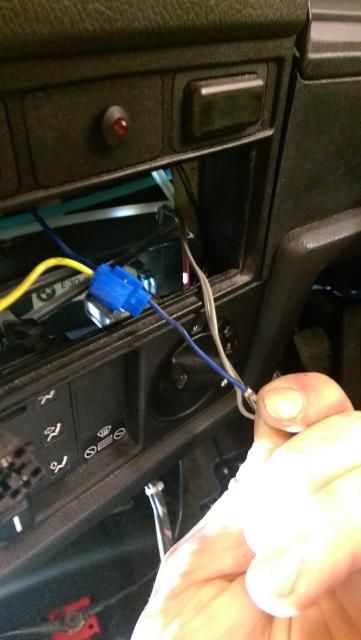
Lastly, found this red and gray cable loose which seams to run with the stereo earth, switched live and livecbut what is it?
As there was a small amount of crustyness around the heater valve and as the carpet was out I decided to change the orings.
Pleased i did.
Main oring around the solinoid, don't think this would have lasted much longer.

New one fitted

Others were flat to so these were replced, didn't have time to oreder these from bmw before winter so used some from an oring kit, real oem says size 17.12mm and my oring kit says the same so i guess the thickness will also be the same as a standard oring. To double check i restricted the outlet and piped up the hise pipe to it for a test, all ok.

If you have ever done this job you wll appreciate how much time this tool saves!

Sorry, no picture but fitted the dyed black carpet
Then moved on to the roof lining.
Started by adding some sound deadening to the roof, used the heat gun to make sure it was stuck down propperly.
3 on the front, 2 on the back.

Then looked to getting the foam/hairy stuff stuck to the roof sounds easy but you have to line up the old ridges in the material with the bungs in the roof frame, easier said than done with a floppy sheet of material covered in glue so i fitted one of the metal rods from the headliner so it was held in place and then used some 3M mounting spray glue to hold it all up which worked really well dispite the cold temperature.


Reapeat for the front.

Had abit of a heart stopping moment when I saw the bung near the roof brace was nearly on top of each other, I didnt measure the roof brace when i seperated it from the skin so guessed it from pictures and made it eaqual length from the front but luckily once the foam suff is installed it all worked out ok.

Job done.

Then made a start on some off the wiring under the glove box.
Started out like this.

Started by tiding up all the alarm wiring, most of it was bunched up where it was to long so worked my way the shortening all these so there a more appropriate length.
Shortened the loom for my wide band lambda by around 50cm qq
Also started on the stereo wiring, i had used the main power to splice into to power the gauges and the whole lot was connected with straight connetors where an ISO plug had been grafted on the old wiring at some point makeing the wiring to long and bulky so i have removed the plug and oreded just the pins so i can shorten the wire crimp on new plugs and rebuild the plug with out joiners which will be nice.
Thinking i might re run all the speaker wires too as they dont seam to run correctly and are slightly short.
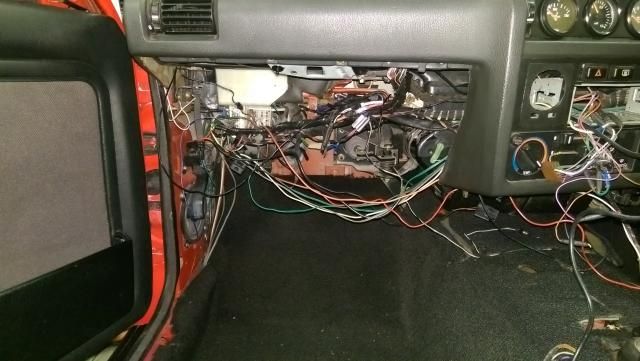
Away removed all this.

Still work in progress but looking better, have ordered some loom tape so i can wrap all the speaker cables up once there done.

Lastly, found this red and gray cable loose which seams to run with the stereo earth, switched live and livecbut what is it?

Last edited by appletree on Tue Dec 30, 2014 8:38 am, edited 1 time in total.
You should never underestimate the predictability of stupidity
M42 Supercharged 285bhp + M3 6speed box
-
bss325i
- E30 Zone Team Member
- Posts: 24536
- Joined: Sat Jan 20, 2007 11:00 pm
- Location: London/Surrey
Great work Matt!
Red/grey is from the light switch as an input to the radio to dim the display when the lights are switch on.
Red/grey is from the light switch as an input to the radio to dim the display when the lights are switch on.
-
appletree
- E30 Zone Addict
- Posts: 3482
- Joined: Fri Jan 20, 2006 11:00 pm
- Location: Retford
Thanks Barry, so that would appear to be A6 on this diagram then.
http://upload.wikimedia.org/wikipedia/c ... ut.svg.png
http://upload.wikimedia.org/wikipedia/c ... ut.svg.png
You should never underestimate the predictability of stupidity
M42 Supercharged 285bhp + M3 6speed box
-
bss325i
- E30 Zone Team Member
- Posts: 24536
- Joined: Sat Jan 20, 2007 11:00 pm
- Location: London/Surrey
-
appletree
- E30 Zone Addict
- Posts: 3482
- Joined: Fri Jan 20, 2006 11:00 pm
- Location: Retford
Thanks Barry will look into that.
More wiring today, started out thinking ill just do the speaker wiring, so off to Halfords for 9am to buy 15m of speaker cable, picked up some of there super flexible .75mm stuff.
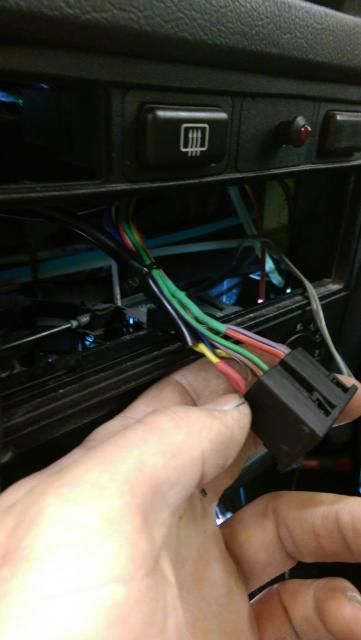
Started out by cutting this abomination off.
There seamed to be join after join and there was another two joins as the cables went down the sills.
With all that ripped out i refitted my AEM wideband gauge and shortend the cable by around 1m, I did the power supply yesterday but this was the actual loom to the probe.
The below was the sleeved with heat shrink.
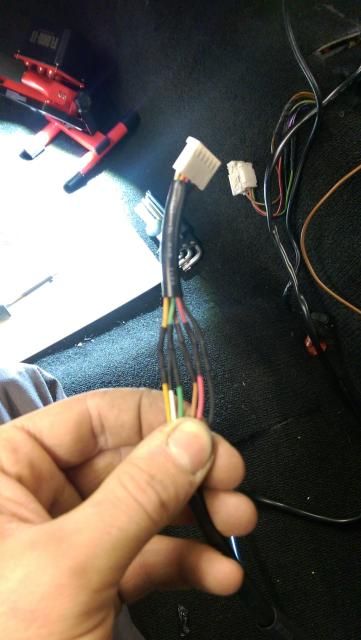
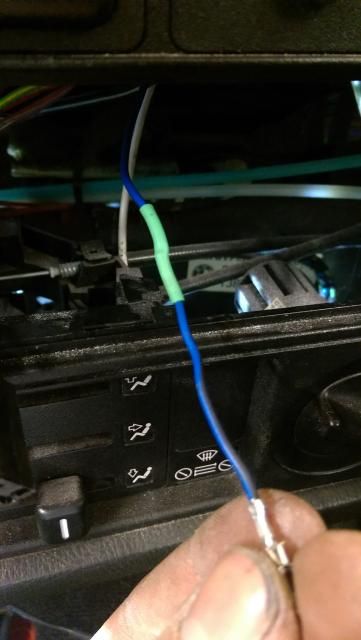
Whilst messing with the speaker cables found this hanging around spare...
This was spliced into the main power for the stereo then to an LED then to a cut off cable
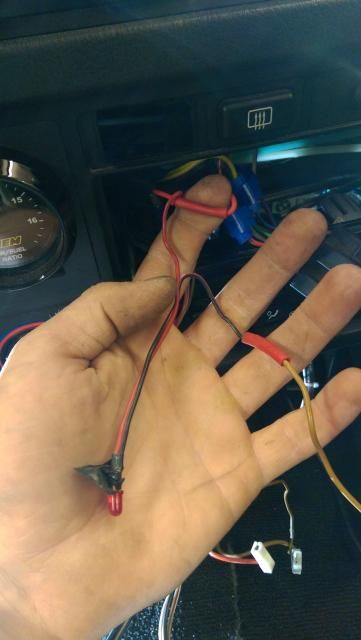
Following this back lead to this, scotch block central!!!
The red connector which goes to the scotch block is spliced into the hazard switch constant live but then from that tiny cable and scotch block its 'T'd into two fuse holders one 30amp and one 5amp, not sure if that is an incorrect fuse but cant see what would need 30 amp on the alarm either way its worked fine sofar.
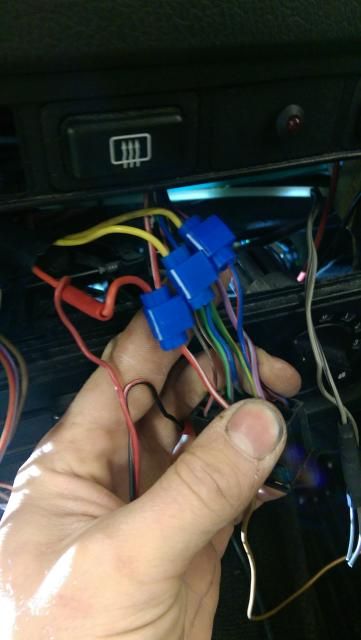
As i'm not sure about the best way to fit an alarm and tap into things i decided to keep some of the wiring but do it a better way.
So this is how i did it.
Remove sotch lock and pin from the plug
Heat shrink over the old scotch lock area, luckily my heat shrink went over the plug to.
Carfully unpick the plug wher it grips the cable outer, remove some outer, tin, solder, grip both cable ends and heat shrink the lot, then re fit the pin to the plug.
I then sleeved the two flying leads and soldered them back to the alarm.
The power i didn't reconnect but I'm going to run a dedicated feed from the battery to it.
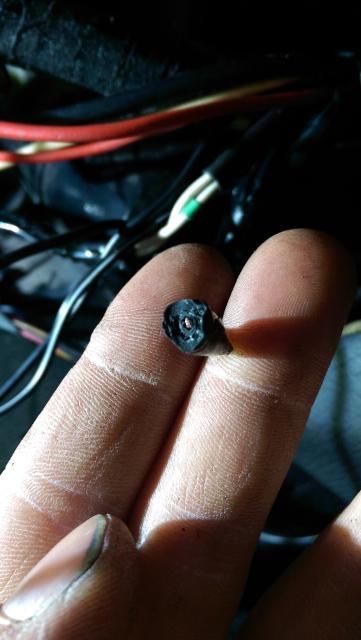
For the alarm fitters work its safe to say he falls into 90% of all other alarm fitters as complete cow boys however this last wire I found took the biscuit.
I had already undone some of the electrical tape he had cacooned the 2.5mm cable in.
You can nearly count the rings.....
End result is i now have all new speaker wires and a glove box that shuts!
More wiring today, started out thinking ill just do the speaker wiring, so off to Halfords for 9am to buy 15m of speaker cable, picked up some of there super flexible .75mm stuff.
Started out by cutting this abomination off.

There seamed to be join after join and there was another two joins as the cables went down the sills.
With all that ripped out i refitted my AEM wideband gauge and shortend the cable by around 1m, I did the power supply yesterday but this was the actual loom to the probe.
The below was the sleeved with heat shrink.

Whilst messing with the speaker cables found this hanging around spare...
This was spliced into the main power for the stereo then to an LED then to a cut off cable

Following this back lead to this, scotch block central!!!

The red connector which goes to the scotch block is spliced into the hazard switch constant live but then from that tiny cable and scotch block its 'T'd into two fuse holders one 30amp and one 5amp, not sure if that is an incorrect fuse but cant see what would need 30 amp on the alarm either way its worked fine sofar.
As i'm not sure about the best way to fit an alarm and tap into things i decided to keep some of the wiring but do it a better way.
So this is how i did it.
Remove sotch lock and pin from the plug

Heat shrink over the old scotch lock area, luckily my heat shrink went over the plug to.

Carfully unpick the plug wher it grips the cable outer, remove some outer, tin, solder, grip both cable ends and heat shrink the lot, then re fit the pin to the plug.

I then sleeved the two flying leads and soldered them back to the alarm.
The power i didn't reconnect but I'm going to run a dedicated feed from the battery to it.
For the alarm fitters work its safe to say he falls into 90% of all other alarm fitters as complete cow boys however this last wire I found took the biscuit.
I had already undone some of the electrical tape he had cacooned the 2.5mm cable in.
You can nearly count the rings.....
End result is i now have all new speaker wires and a glove box that shuts!

You should never underestimate the predictability of stupidity
M42 Supercharged 285bhp + M3 6speed box
-
appletree
- E30 Zone Addict
- Posts: 3482
- Joined: Fri Jan 20, 2006 11:00 pm
- Location: Retford
Just alittle update.
Bought some of these to rewire the head units wires.
Couldn't find them else were and don't know what exact type they are but there £6 for 10 off ebay and meant I could do a propper job.
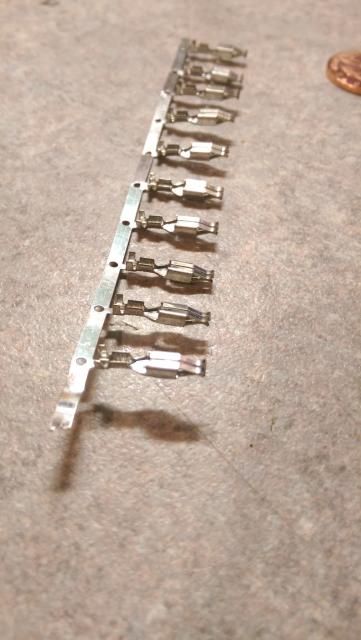
Crimped
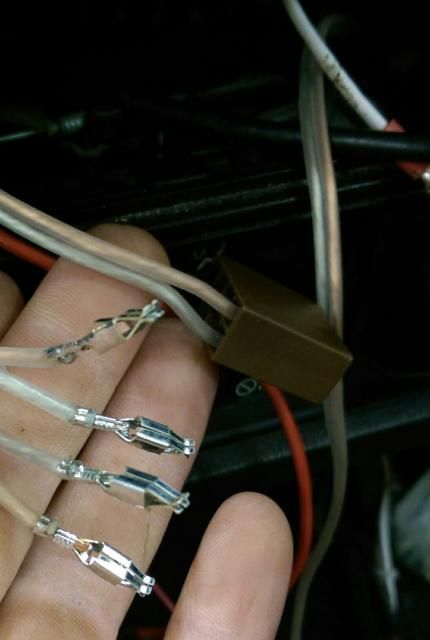
All sorted, much neater.
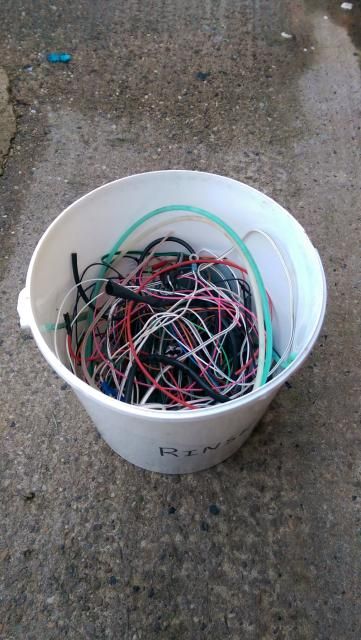
The final amount of crap wiring I cut out from under the dash.
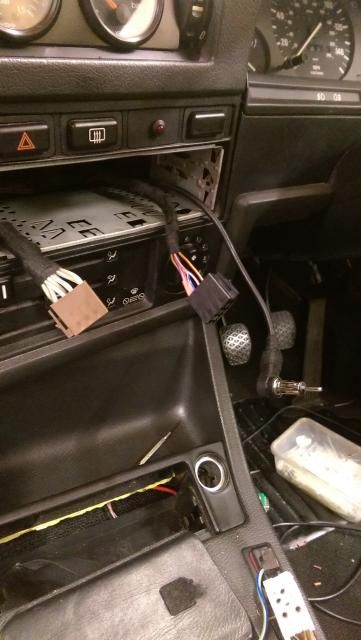
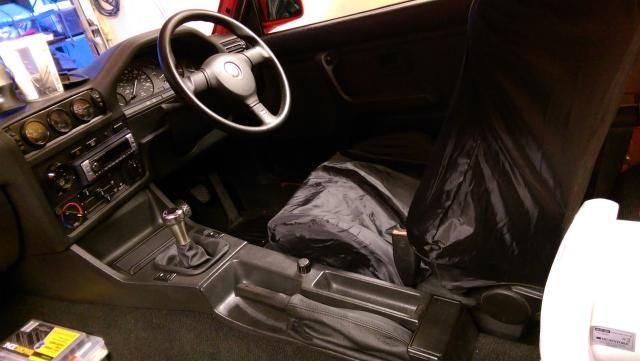
Re-fitted the centre consol and my new leather gear and handbrake gaitors, just need to keep an eye out for a leather handle now.
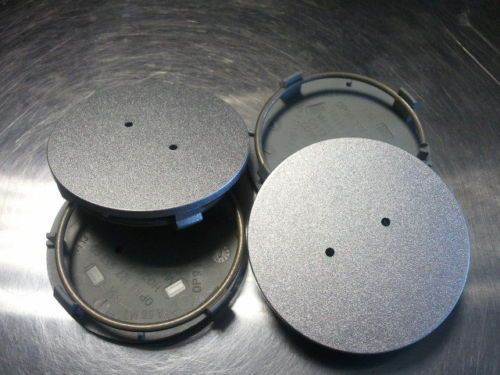
Next little project is to try and fix my Hartge center caps, they were all good when they came off but after sitting in the garage for a few months with the metal spring pushing out one or two of the tabs have snapped off.
Plan is to snap the other tabs off, carefully machine out the centre alittle and then glue/bond in a plain centre like the one below.
Bought some of these to rewire the head units wires.
Couldn't find them else were and don't know what exact type they are but there £6 for 10 off ebay and meant I could do a propper job.

Crimped

All sorted, much neater.

The final amount of crap wiring I cut out from under the dash.

Re-fitted the centre consol and my new leather gear and handbrake gaitors, just need to keep an eye out for a leather handle now.

Next little project is to try and fix my Hartge center caps, they were all good when they came off but after sitting in the garage for a few months with the metal spring pushing out one or two of the tabs have snapped off.
Plan is to snap the other tabs off, carefully machine out the centre alittle and then glue/bond in a plain centre like the one below.


You should never underestimate the predictability of stupidity
M42 Supercharged 285bhp + M3 6speed box
-
appletree
- E30 Zone Addict
- Posts: 3482
- Joined: Fri Jan 20, 2006 11:00 pm
- Location: Retford
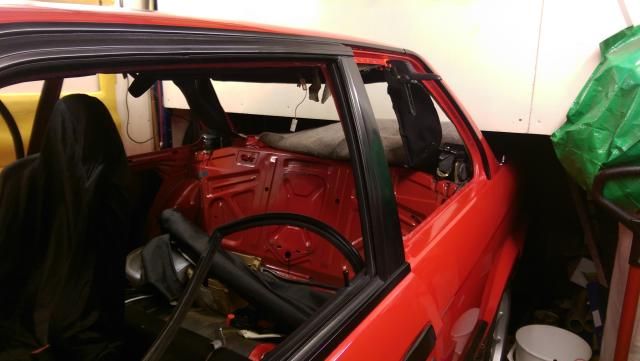
So after the best part of a year searching the last part of the non sunroof swap puzzle landed yesterday.
A non sunroof black sport headlineing.

Minor problem being that as my car is a lowly 318is it didn't come with a check control over head panel but luckily I got that with the headlinder to so that will cover up the hole where the wing mirror goes, it's not damage it just seams they cut a bigger hole for some reason.
So started fitting it last night and hopefully will finish it today at some point.
used these plastic clamps to centralize it first then started folding over the edges and gliding them down with double sided tape.

Starting to take shape after fitting some of the strum.
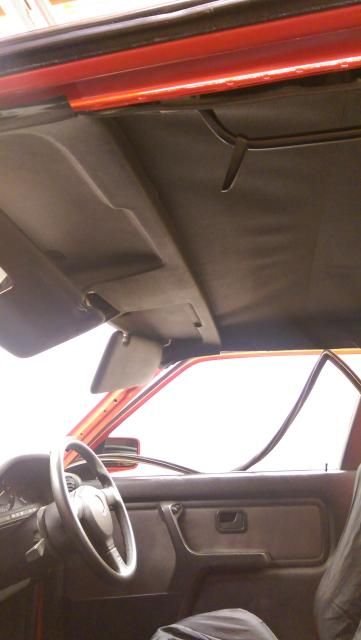
Front half done
A non sunroof black sport headlineing.

Minor problem being that as my car is a lowly 318is it didn't come with a check control over head panel but luckily I got that with the headlinder to so that will cover up the hole where the wing mirror goes, it's not damage it just seams they cut a bigger hole for some reason.

So started fitting it last night and hopefully will finish it today at some point.
used these plastic clamps to centralize it first then started folding over the edges and gliding them down with double sided tape.


Starting to take shape after fitting some of the strum.

Front half done


You should never underestimate the predictability of stupidity
M42 Supercharged 285bhp + M3 6speed box
-
Kedge
- Old Skooler
- Posts: 7702
- Joined: Thu Jan 13, 2005 11:00 pm
- Location: Leicestershire
Top workmanship as usual Matt!
I've the same issue with my headlining but I haven't got the check/visor panel and it is bugging me. However having the check panel there but not working would bug me as well, you planning on wiring that up?
I've the same issue with my headlining but I haven't got the check/visor panel and it is bugging me. However having the check panel there but not working would bug me as well, you planning on wiring that up?
-
Jozi

- E30 Zone Addict
- Posts: 3076
- Joined: Thu Nov 22, 2007 11:00 pm
- Location: Dublin, Ireland
Good work as usual.
I could try find a normal overhead panel from a 4cyl that doesn't have the check control? Or do these not exist without the sunroof buttons?
I could try find a normal overhead panel from a 4cyl that doesn't have the check control? Or do these not exist without the sunroof buttons?

-
Kedge
- Old Skooler
- Posts: 7702
- Joined: Thu Jan 13, 2005 11:00 pm
- Location: Leicestershire
Yep, you got it Brendan.bid have gone for one of those and blanking the button holes would be more bare able but I think they're also shaped differently due to the sunroof opening?
-
Jozi
- E30 Zone Addict
- Posts: 3076
- Joined: Thu Nov 22, 2007 11:00 pm
- Location: Dublin, Ireland
Your right they probably are, I think there's a lip on them that goes into the opening for the sunroof. Its probably a rare thing finding a non sunroof version!
-
appletree
- E30 Zone Addict
- Posts: 3482
- Joined: Fri Jan 20, 2006 11:00 pm
- Location: Retford
There are non sun roof and sunroof check panels there are also blanks fpr the check control hole however only ever seen one for sale on an an American forum. There also a check panel with just a light for seatbelt warning.
Dave I have as it happens a mint sunroof over head check panel and another non sunroof check control panel but it has a small amount of bubbling in the corner under the visor. Let me know if your interested. Also have my dyed black non sunroof headlineing and my mint original sunroof headlineing for sale if anyone is interested.
Dave I have as it happens a mint sunroof over head check panel and another non sunroof check control panel but it has a small amount of bubbling in the corner under the visor. Let me know if your interested. Also have my dyed black non sunroof headlineing and my mint original sunroof headlineing for sale if anyone is interested.
You should never underestimate the predictability of stupidity
M42 Supercharged 285bhp + M3 6speed box
-
appletree
- E30 Zone Addict
- Posts: 3482
- Joined: Fri Jan 20, 2006 11:00 pm
- Location: Retford
4 cyl cars with manual sunroof had a full headliner with no check panel.Jozi wrote:Good work as usual.
I could try find a normal overhead panel from a 4cyl that doesn't have the check control? Or do these not exist without the sunroof buttons?
4 cyl cars with electronic sunroof had a overhead check panel with blank or seatbelt warning but no check control screen with the buttons.
6 cyl cars manual or electronic sunroof had a check control panel as far as I have seen although there may well be a few exceptions, sure someone will know for sure bit the above seams to be the most common combination.
Blank with only seatbelt warning.

But I have seen a blank even with out a seat belt warning
You should never underestimate the predictability of stupidity
M42 Supercharged 285bhp + M3 6speed box
-
Kedge
- Old Skooler
- Posts: 7702
- Joined: Thu Jan 13, 2005 11:00 pm
- Location: Leicestershire
I wonder whether #3 on this pic is the blank for the check control panel.....

If you're in no rush to move the non-sunroof one on I might be interested. It's not a screen out job to fit them is it? Just rely on the sun visor to hold the front, right?
If you're in no rush to move the non-sunroof one on I might be interested. It's not a screen out job to fit them is it? Just rely on the sun visor to hold the front, right?
-
Kedge
- Old Skooler
- Posts: 7702
- Joined: Thu Jan 13, 2005 11:00 pm
- Location: Leicestershire
If the seatbelt warning is blank like that as well it'd be worth a look as well if they can be bought cheaply.
-
appletree
- E30 Zone Addict
- Posts: 3482
- Joined: Fri Jan 20, 2006 11:00 pm
- Location: Retford
Might well be the blank ya.
No screens out , it's just held in by the sun visors and the door seal, there is also an extra rubber for around the rear view mirror to get which I'm missing currently.
No screens out , it's just held in by the sun visors and the door seal, there is also an extra rubber for around the rear view mirror to get which I'm missing currently.
You should never underestimate the predictability of stupidity
M42 Supercharged 285bhp + M3 6speed box
-
appletree
- E30 Zone Addict
- Posts: 3482
- Joined: Fri Jan 20, 2006 11:00 pm
- Location: Retford
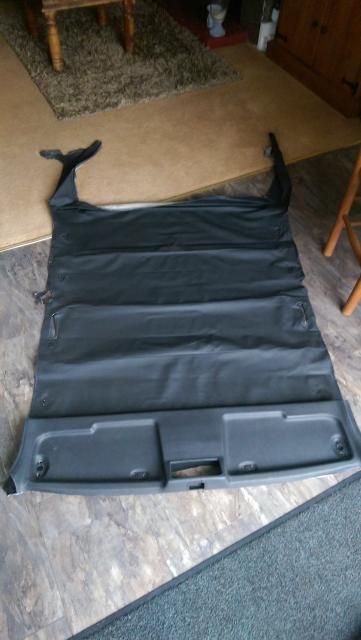
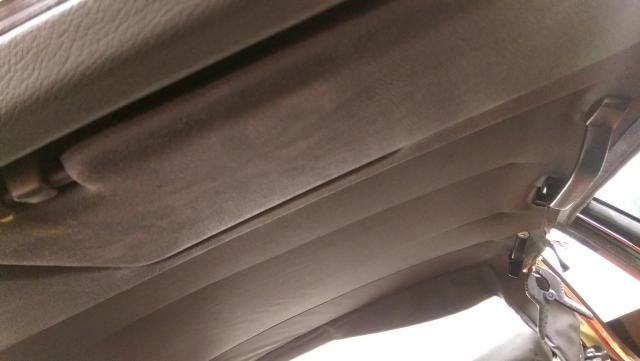
Bit more done today started doing the back section of the headliner.
Clamps to hold it place again while the double sided had chance to stick.

Just need to remove the quater light again and tighten up the material in that top corner.
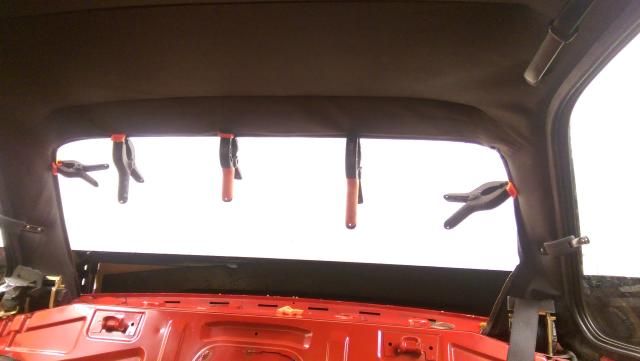
Then fitted the screen and made this tool to put the seal piece in.
Bit of cut off coat hanger bent into shape.
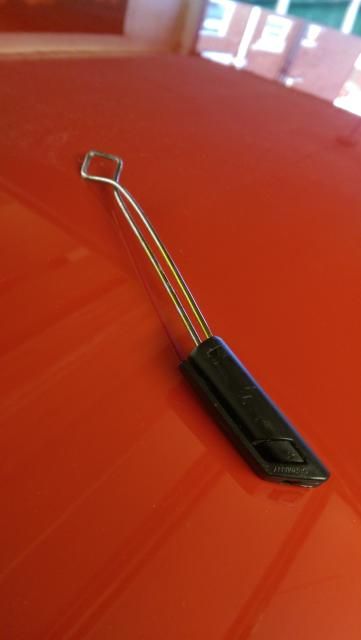
Why the pen lid?
The ends were very sharp, quick learner me
Tool in action, found that using a lite mist of autoglym vynal and rubber care worked really well.
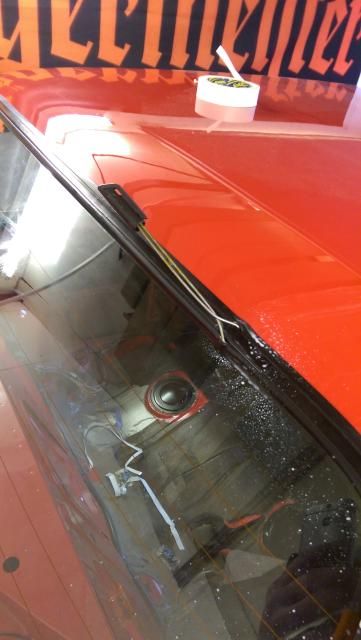
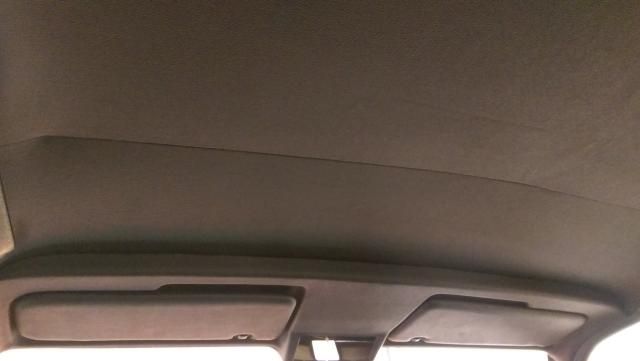
Back and front both done.
Ive miss placed the joint cover and the corner covers but the front looks like to bigger gap, is there something I've done wrong?
Clamps to hold it place again while the double sided had chance to stick.

Just need to remove the quater light again and tighten up the material in that top corner.

Then fitted the screen and made this tool to put the seal piece in.
Bit of cut off coat hanger bent into shape.

Why the pen lid?
The ends were very sharp, quick learner me

Tool in action, found that using a lite mist of autoglym vynal and rubber care worked really well.

Back and front both done.

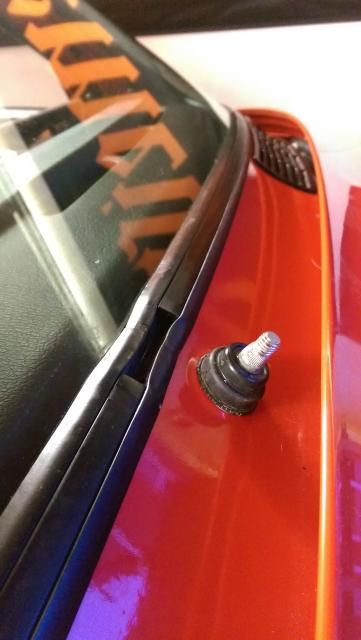
Ive miss placed the joint cover and the corner covers but the front looks like to bigger gap, is there something I've done wrong?
You should never underestimate the predictability of stupidity
M42 Supercharged 285bhp + M3 6speed box
-
appletree
- E30 Zone Addict
- Posts: 3482
- Joined: Fri Jan 20, 2006 11:00 pm
- Location: Retford
Matts dad here the insert has relaxed and shortened whilst not fitted you need to remove it to somewhere warm and then pull it, you need either a friend or a g clamp to hold the other end LOL
You should never underestimate the predictability of stupidity
M42 Supercharged 285bhp + M3 6speed box
-
shedrool83
- Old Skooler
- Posts: 4395
- Joined: Thu May 10, 2007 11:00 pm
- Location: Dundee Scotland
My insert for the front srceen is the same when i refitted it recently.The gap is big enough for 2 joint covers now. 

-
trojen
- E30 Zone Newbie

- Posts: 94
- Joined: Fri Apr 02, 2010 11:00 pm
- Location: West Midlands
appletree wrote:4 cyl cars with manual sunroof had a full headliner with no check panel.Jozi wrote:Good work as usual.
I could try find a normal overhead panel from a 4cyl that doesn't have the check control? Or do these not exist without the sunroof buttons?
4 cyl cars with electronic sunroof had a overhead check panel with blank or seatbelt warning but no check control screen with the buttons.
6 cyl cars manual or electronic sunroof had a check control panel as far as I have seen although there may well be a few exceptions, sure someone will know for sure bit the above seams to be the most common combination.
Blank with only seatbelt warning.
But I have seen a blank even with out a seat belt warning
A Friend of mine has a 318is with the electric sunroof panel without the check control cut out and no blanks used. obviously no check control on a 4 pot.
i can only find the manual equivalent online below. its the same only with the electric button instead of the manual winder hole. strangely it has the arial on the roof the same as the tourings too......


318is
316i Touring
-
appletree
- E30 Zone Addict
- Posts: 3482
- Joined: Fri Jan 20, 2006 11:00 pm
- Location: Retford
That's odd, my IS had a manual roof but with no overhead panel and the winder just sat in the roof. What year is your friends?
Appletree senior sorting me out again
Appletree senior sorting me out again
Last edited by appletree on Sun Jan 11, 2015 8:57 pm, edited 1 time in total.
You should never underestimate the predictability of stupidity
M42 Supercharged 285bhp + M3 6speed box
-
Kedge
- Old Skooler
- Posts: 7702
- Joined: Thu Jan 13, 2005 11:00 pm
- Location: Leicestershire
My old iS with a manual sunroof didn't have the panel either, mine was an 04/90 build.
-
appletree
- E30 Zone Addict
- Posts: 3482
- Joined: Fri Jan 20, 2006 11:00 pm
- Location: Retford
Mines 7/90 iirc
What happened to your old IS?
What happened to your old IS?
You should never underestimate the predictability of stupidity
M42 Supercharged 285bhp + M3 6speed box