mike's 324d, a "lil" chunk of rust.

Show off your pride and joy here

Moderator: martauto

Post Reply
User avatar
winchester
E30 Zone Newbie
E30 Zone Newbie
Posts: 69
Joined: Fri Feb 25, 2011 11:00 pm
Location: Norway. Yes, the place with all the retards.

Thu Jan 19, 2012 10:18 pm

Hey again! I bought myself a new E30 after I scrapped my old E36 beater December 27th. Pretty spontanious buy, but what the heck, diesels are rare up in this hood and just the crank alone is worth more than I gave for it, so I thought - eh, why not give it a shot at a worthy life. :mrgreen:

Update 1:
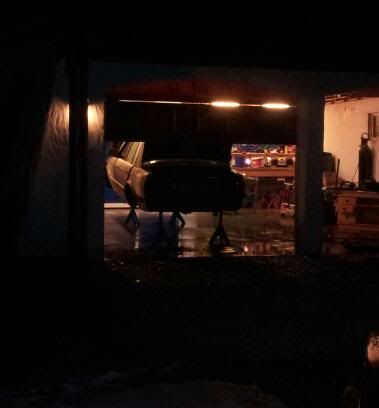
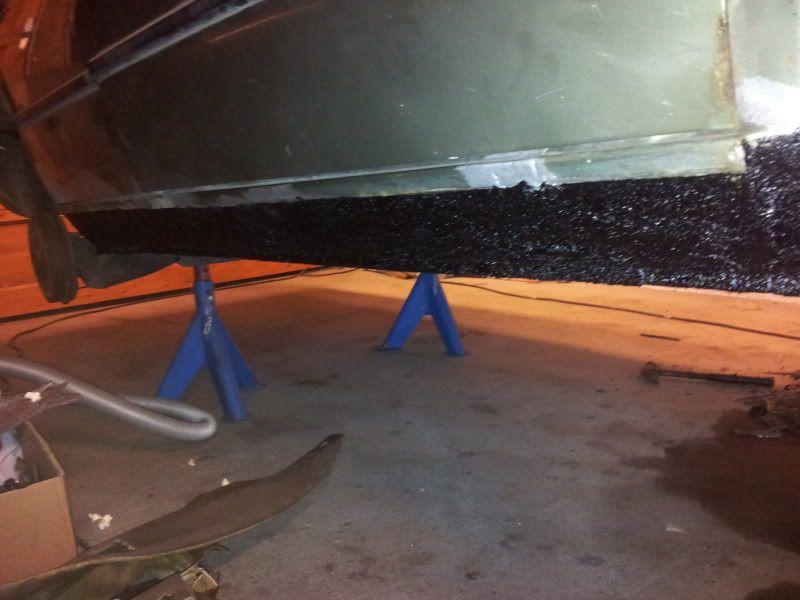
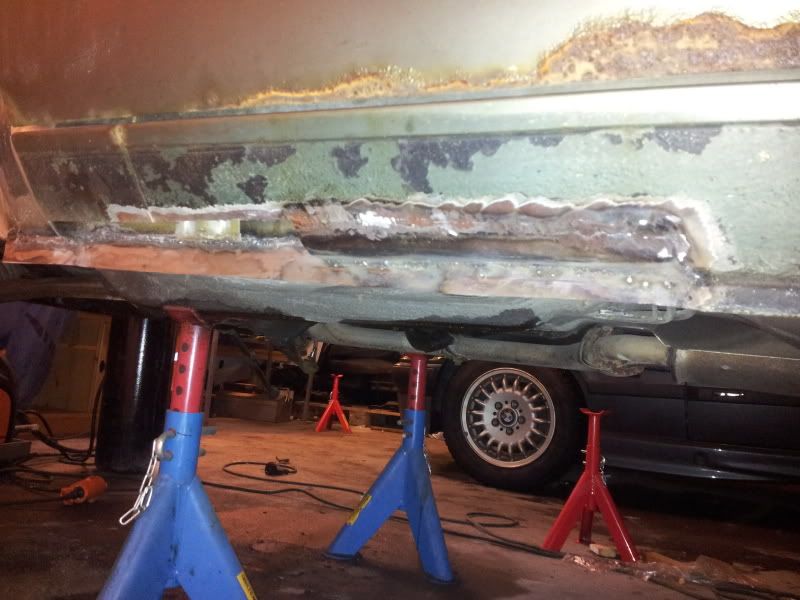
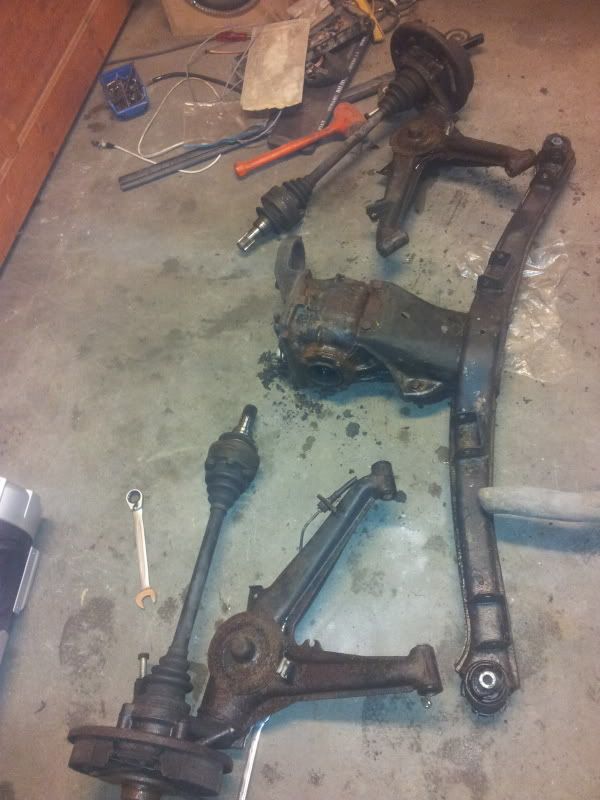
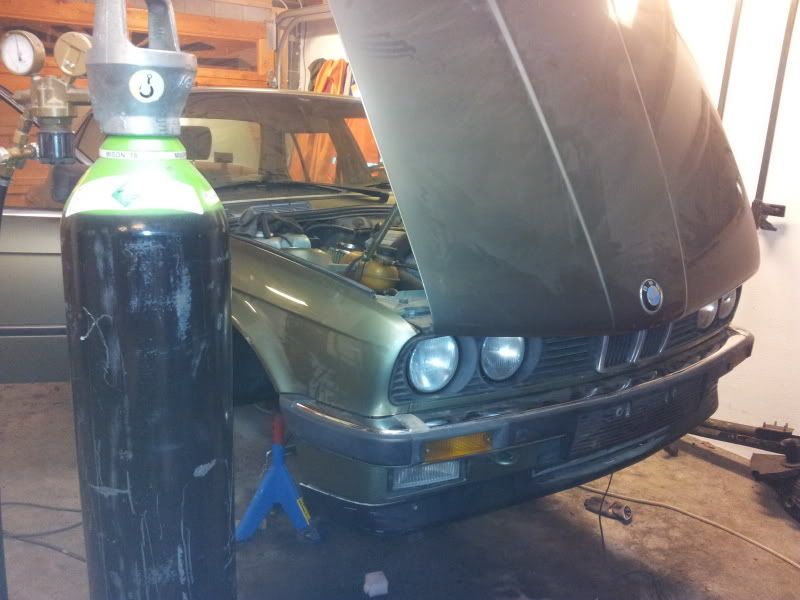
The first thing to do was to get it up on jack stands, rip off the fenders and pull out the interior to check how old uncle Rust had treated this car over the years of abusing since 1999.

Funny how the service booklet just stopped in 2000. From 1987 through 1999 the car lived a wonderful life in Germany, oil changes, filter changes, spark plugs, routine checks and everything is all stamped in there. The color of this car is SmaragdgrÃan Metallic, which is a rare color I've never seen on any E30 in Norway as of yet, and I've seen quite a few.

Image

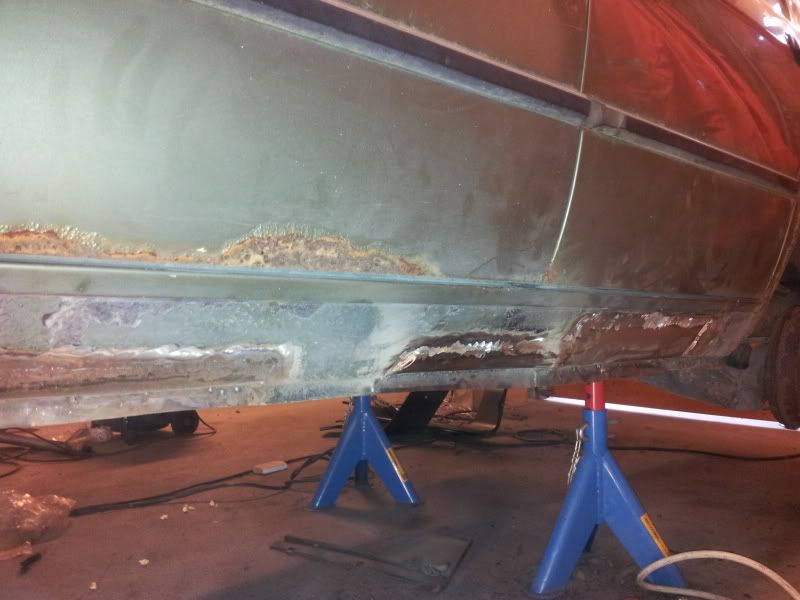
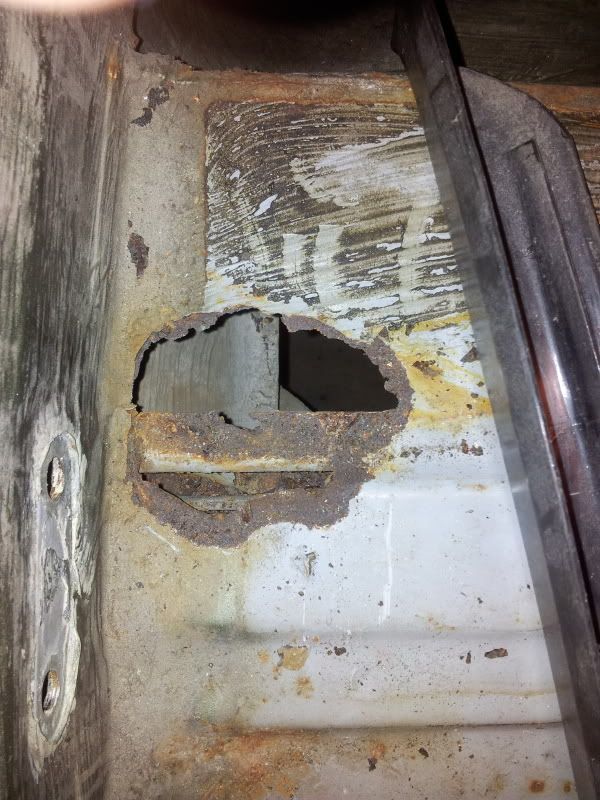
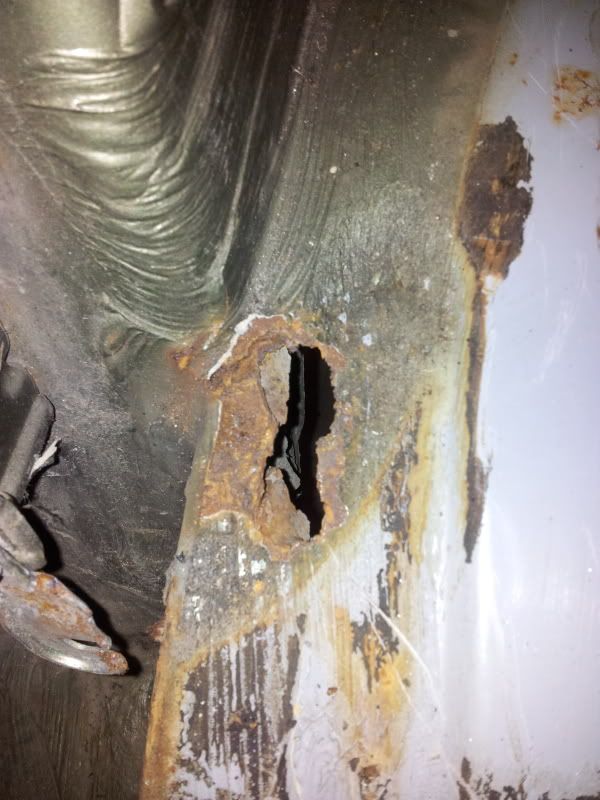
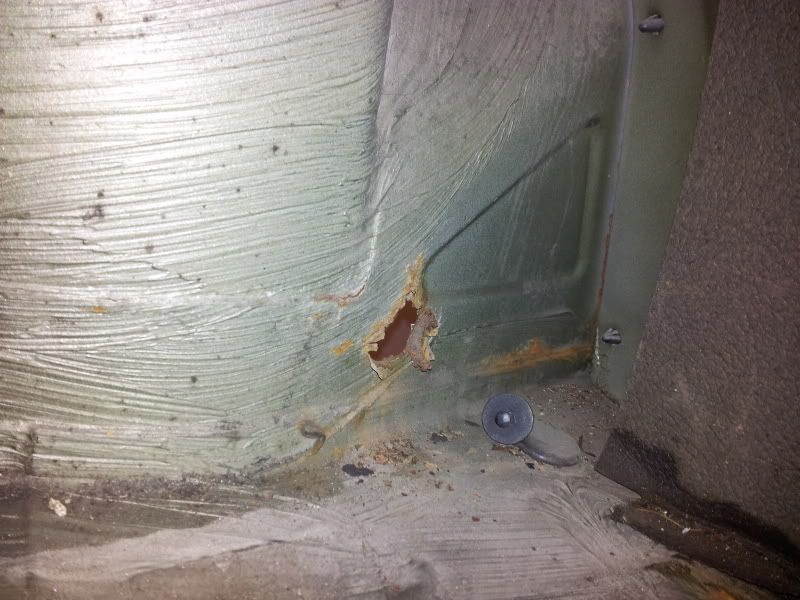
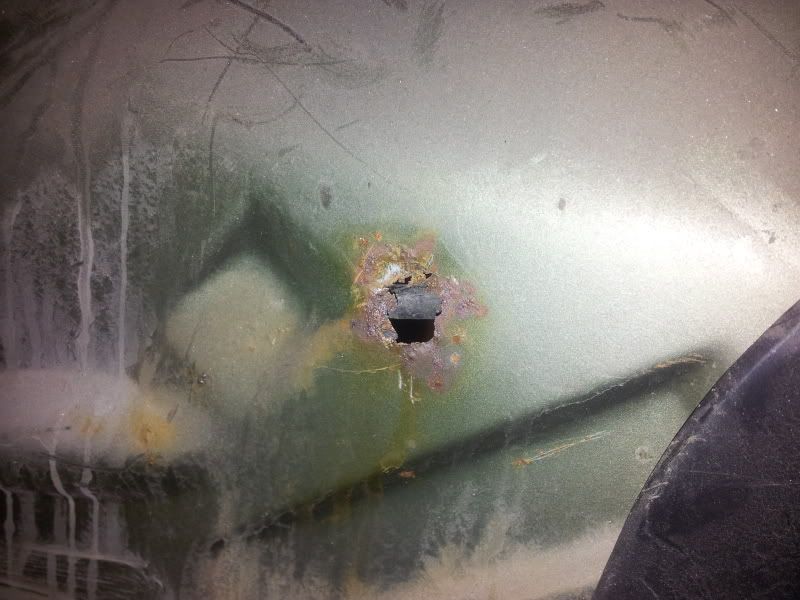
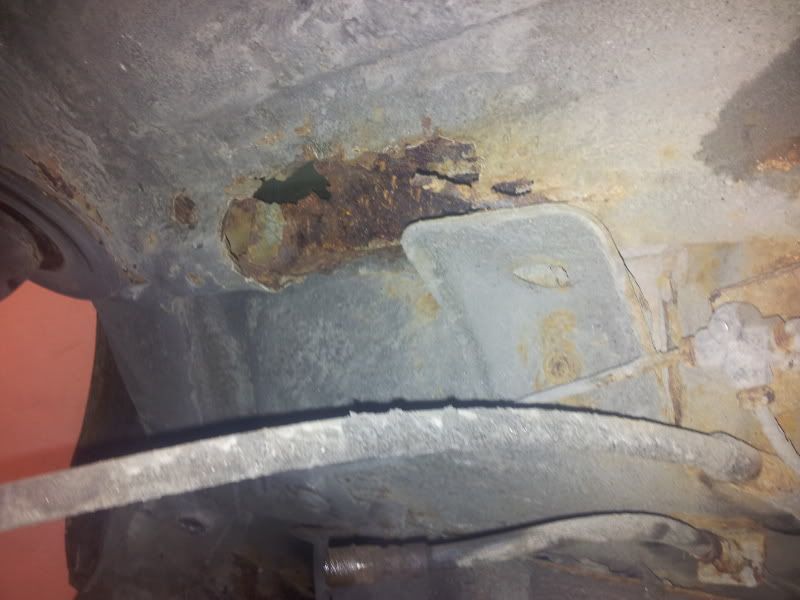
And hoy! We hit gold instantly! Or wait, that's rust, fuck. Well at least there's a lot of go-- shit, rust on this old Bayerische masterpiece.

Image

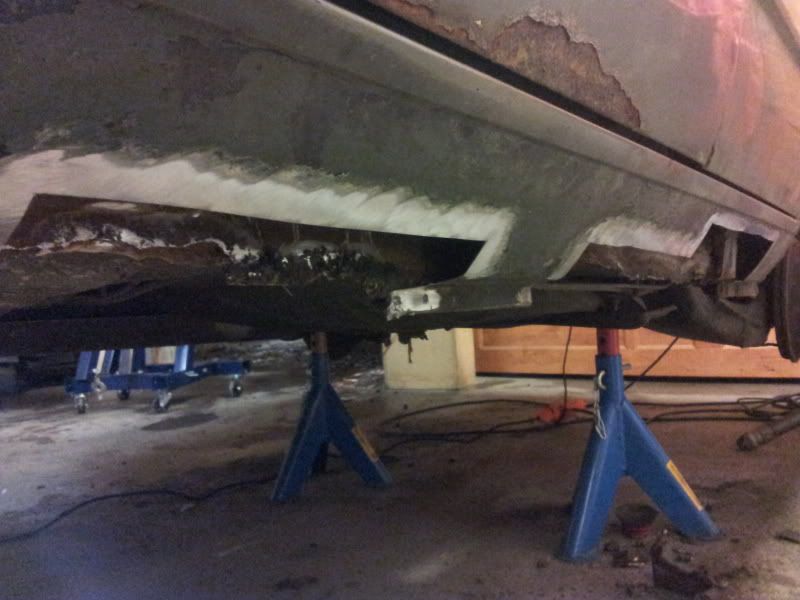
Oh, seems like we hit some more rust, time to keep digging!

Image

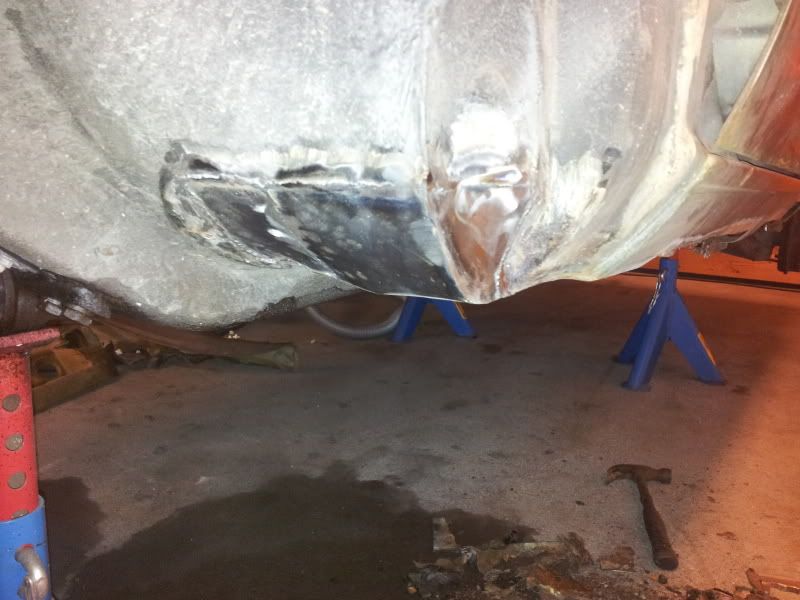
And kept digging I did. Cut out most of the rust that evening and grinded to bare metal around them, ready to weld. But I didn't stop there, I welded and finished up five of the holes that day. And if you'd like to ask, yes, this was on New Year's Eve, 12 hours of welding throughout the night. No party party, only worky worky. To say the least, I'm not going to be as picky about this car as I was with my other E30, cause that took a lot of time that I unfortunately do not have at the moment.

Image
Image
Image

Had to rebuild the entire jack point, it went surprisingly well seeing as this is my first time welding these thin sheets.

Image

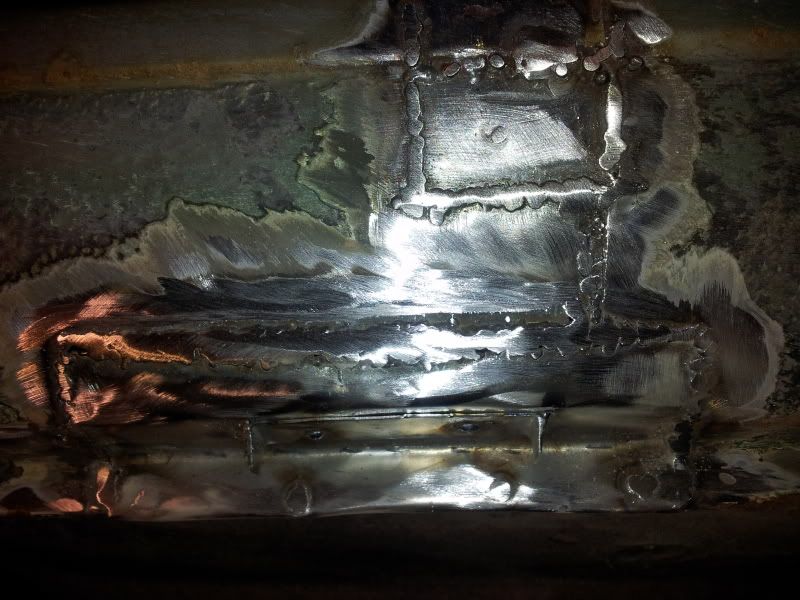
One hole to go on the passanger side of the car, and then I'll prime it and put some good ol' underbody tectyl on it. I also ordered new front brakes and braking pads, plus some other inconsequential parts.

Update 2:
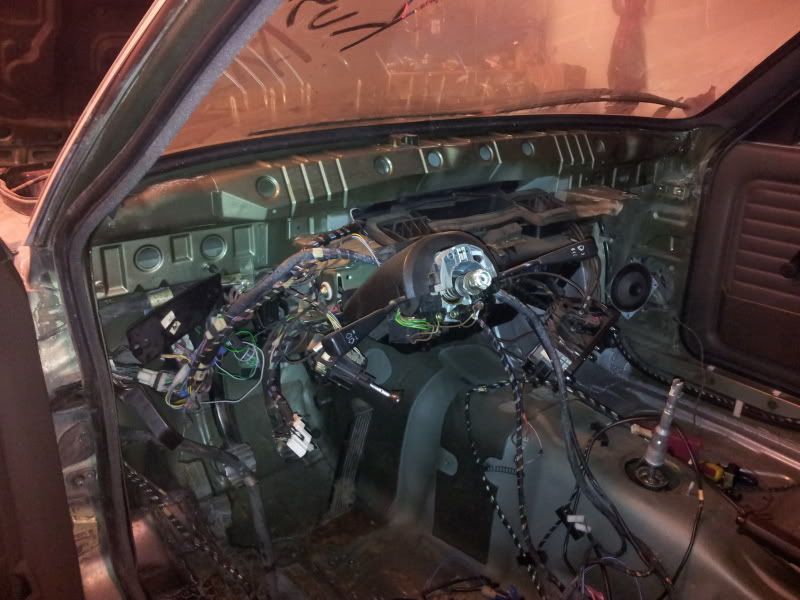
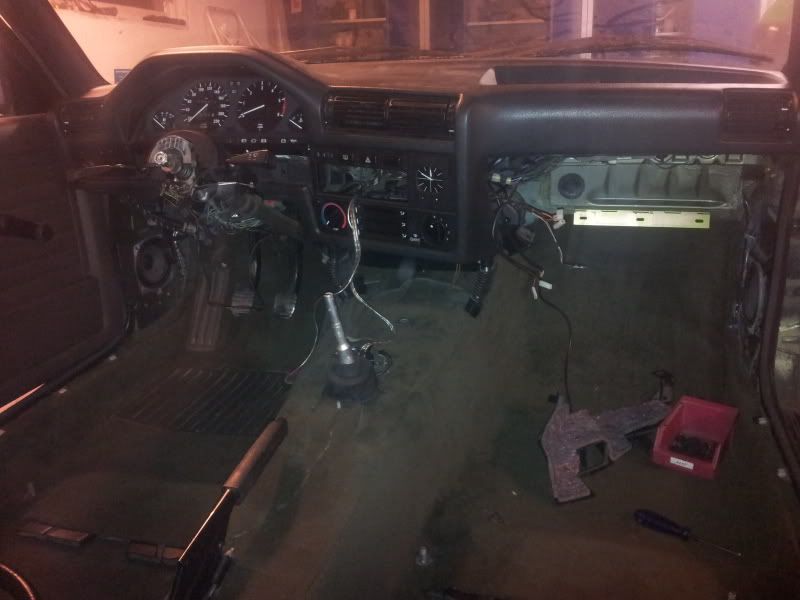
Today I took some more crappy pictures, got the dashboard out since the previous owner apparently let a friend cut out some pieces of the plastic surface, leaving large uncovered areas which looked like shit. The new dash (I got one extra when I bought the car) will be mounted as soon as I'm done welding and priming the driver's side of the car.

I'm going to get some welding done today and hopefully I'll get to sandblast the struts if the sandblaster is available. They'll be primed and painted and new dampers will be installed as the current ones leaked as a high maintenance prostitute from Poland.

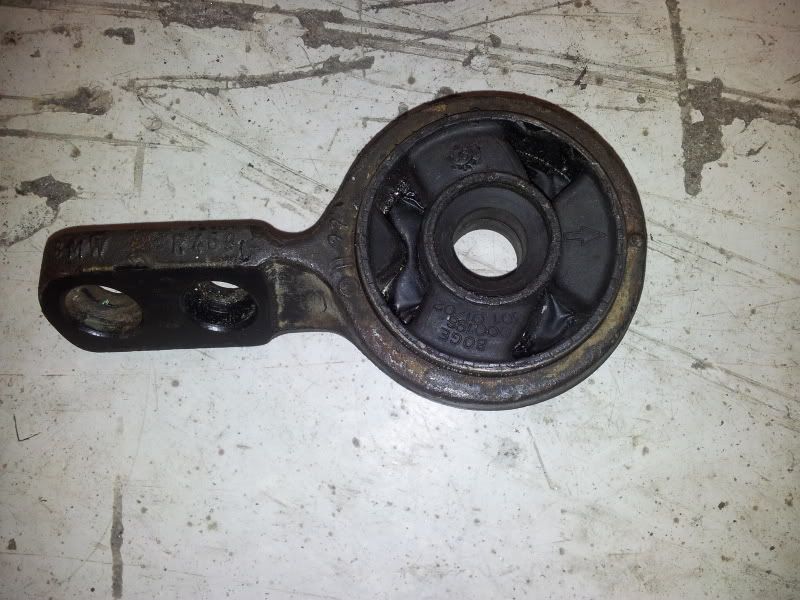
The right front trailing arm inner ball joint also needs to be replaced.


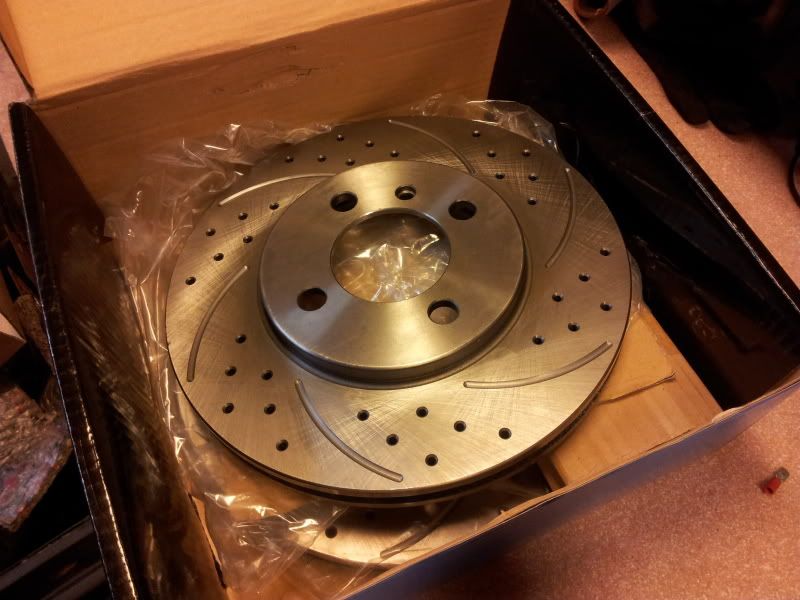
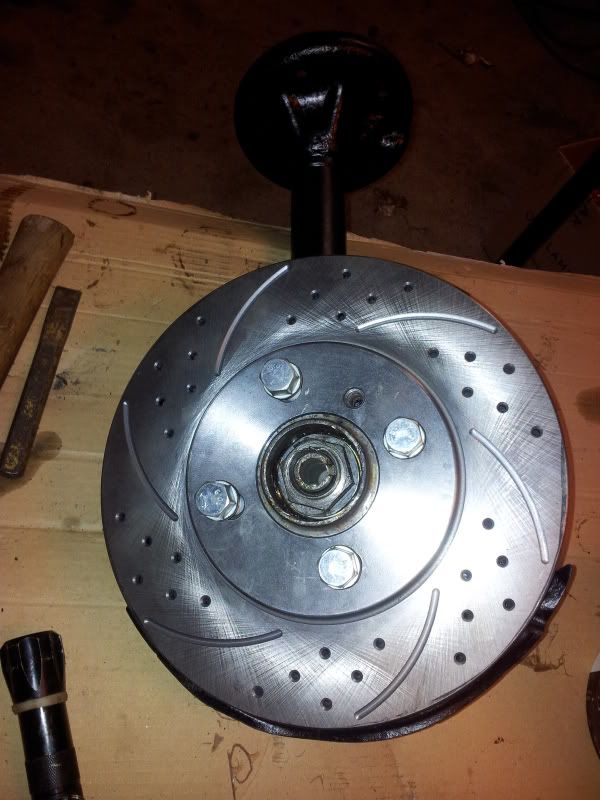
A lovely pic of the overkill brakes for a 86 hp car, haha.

Image
Image
Image
Image

Rear wheel arches cut out, 2002 Turbo flares bought and should arrive in the mail shortly.

Image

Image
Image

Update 3:
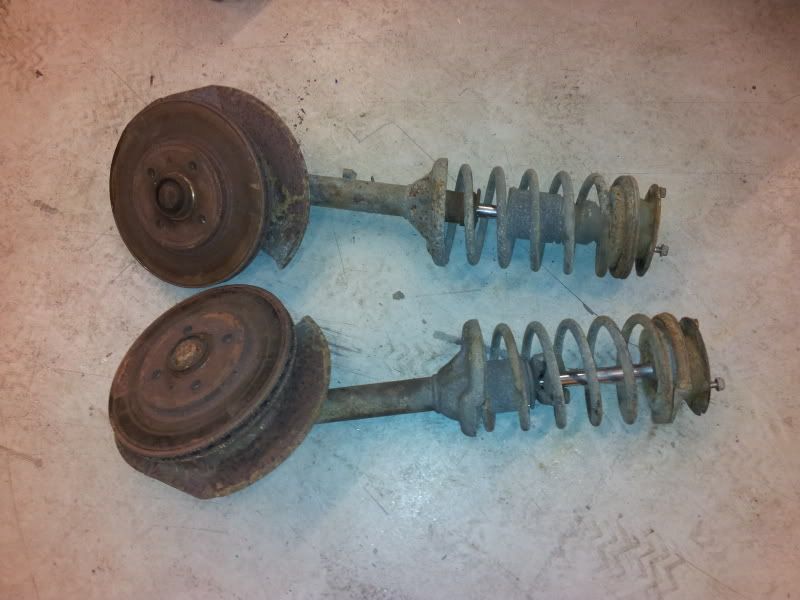
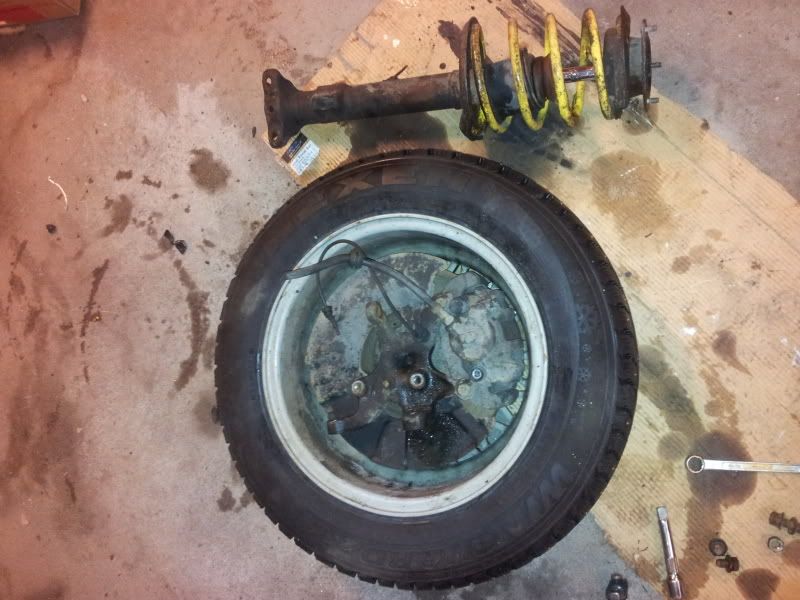
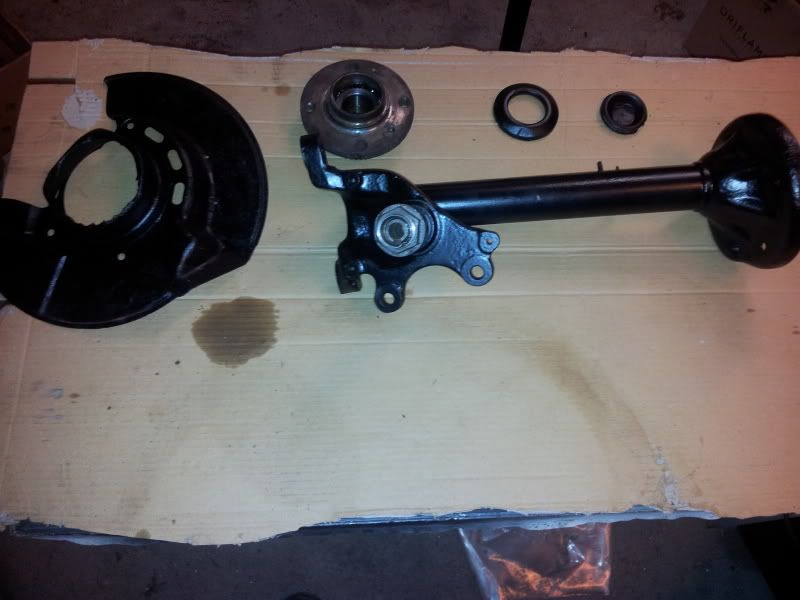
As I dismantled the struts I noticed the calipers were toast. The cylinder is rusted stuck, and there was just no way of getting it to move, even under high pressure, so new ones must be obtained.

Some pictures of the struts getting a makeover...

Image

Sandblasted the fuck out of them, so they should be good to go for a round of primer.

Image

And voila, primed and ready to get a layer of paint on them. O! how I love it when parts gets a refurbishment.

Image

All painted and ready to be put together again, all that's missing now is some new dampers. Since this is supposed to be an economic build, I don't feel like wasting cash on buying new ones due to the high prices in Norway, nor do I feel like putting one of my lowering kits on it since that won't go through the inspection without TÃaV-papers, plus some extra controls which costs more money.

Image

Starting to look like something again, we'll get there soon!

Image
ImageImage

Holes man, holes...

Image

Passenger side all done, rejoice! We're making progress, finally.

Image

My idiotic friend, happy to have just mounted new strut bars in the engine compartment and trunk.

Image

Update 4:

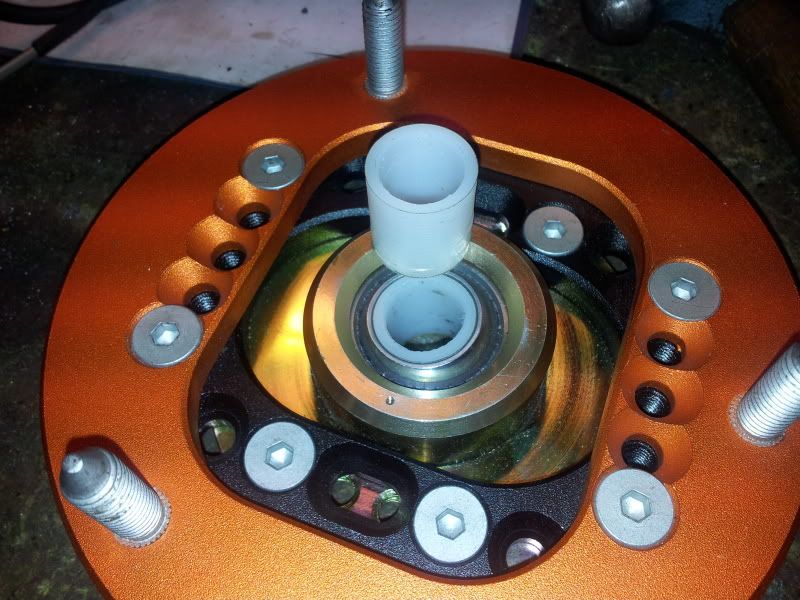
A small update for today. Used the lathe to make some sleeves for my younger brothers K-sport camber plates, as he was foolish enough not to listen to me when he ordered. The diameter bearing hole was too large, hence the need for sleeves. They fitted neatly, made them out of nylon. Also had to drill new holes in his strut towers to make these fit, as the bolt pattern was different from the original.

Image

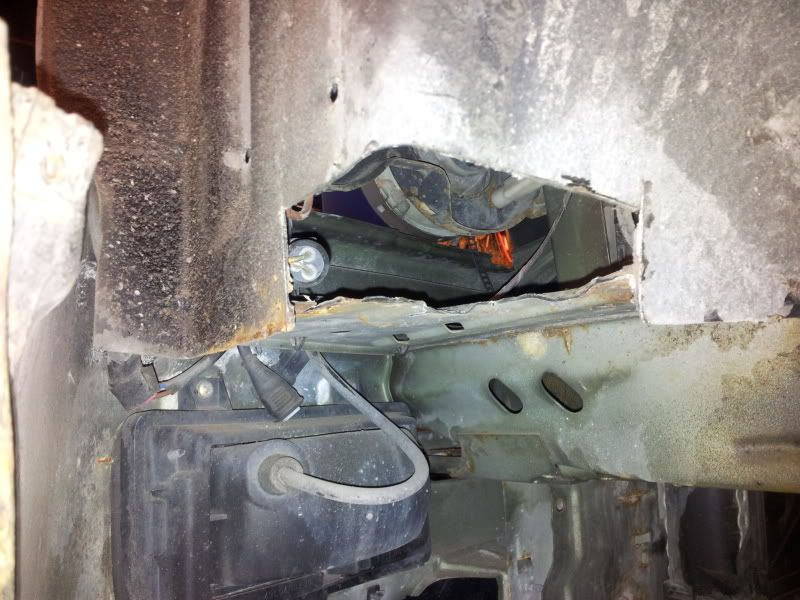
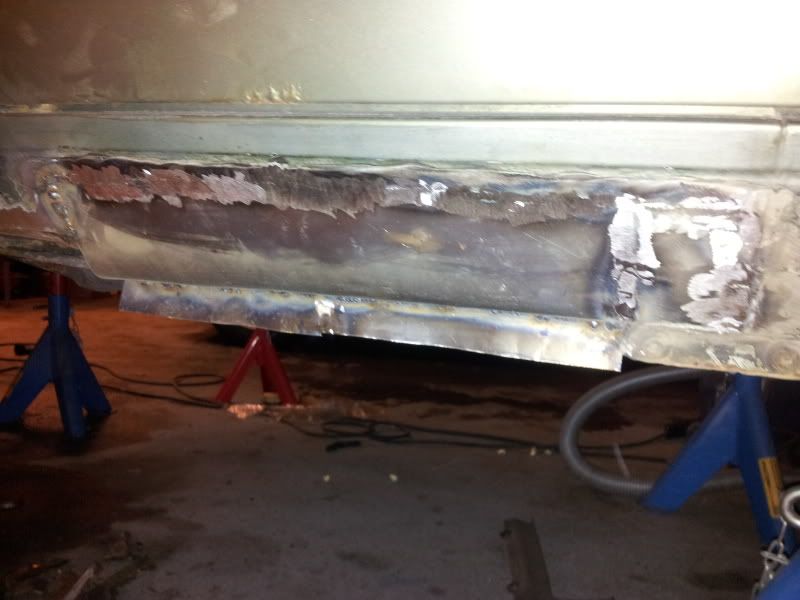
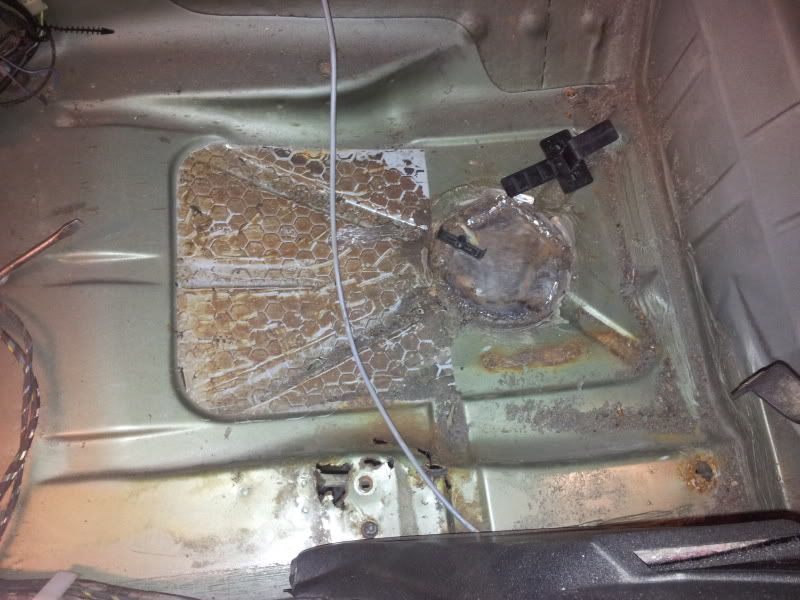
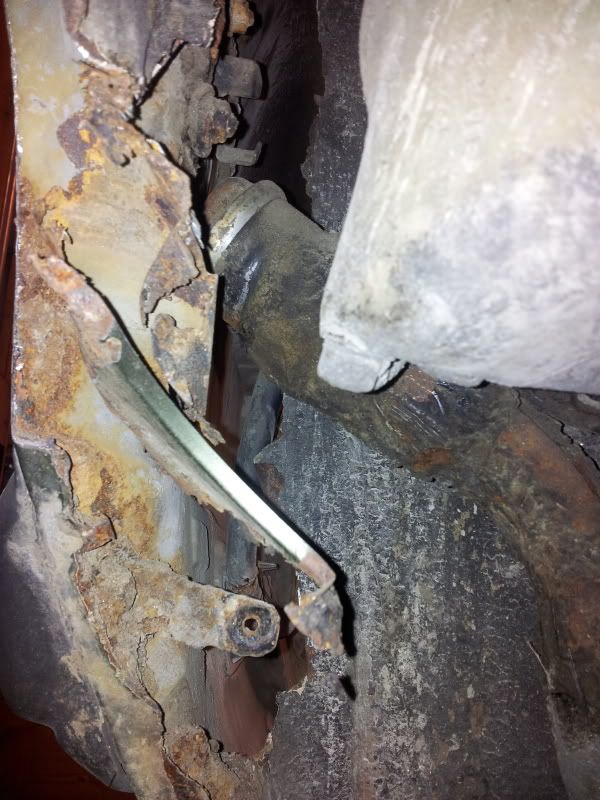
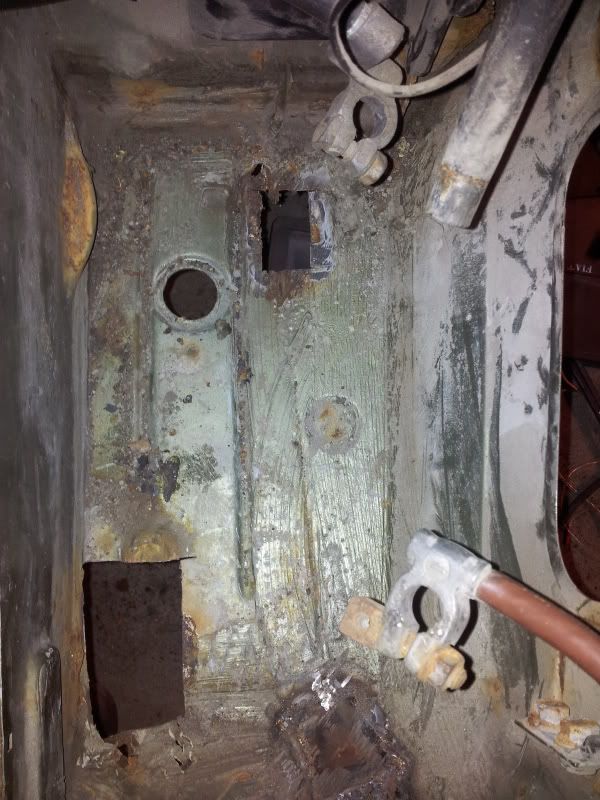
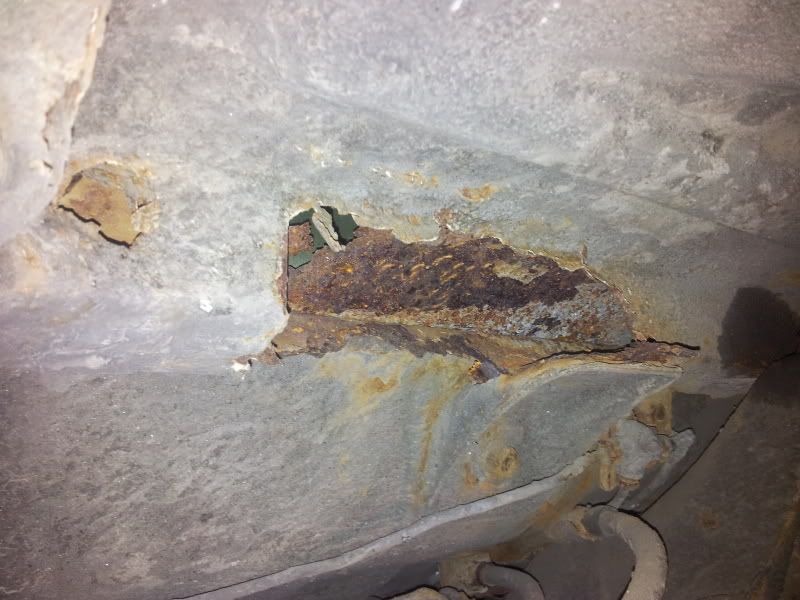
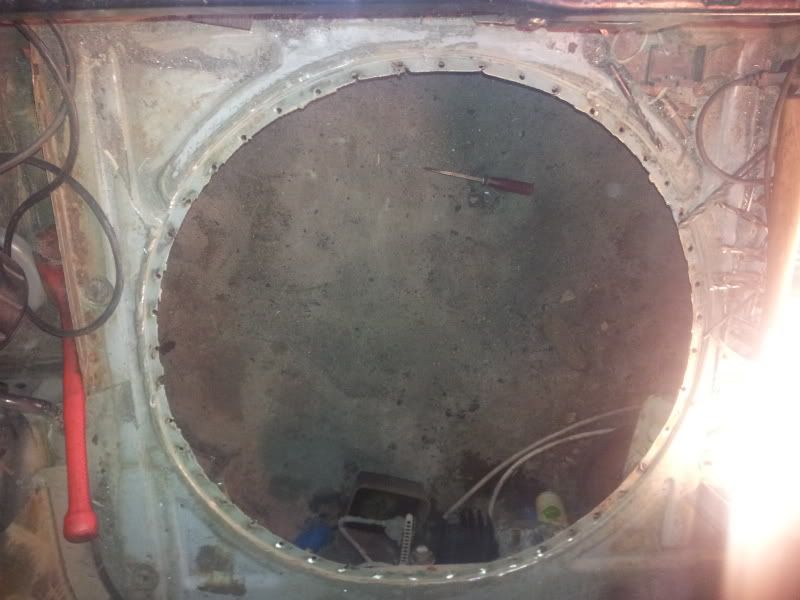
So back to my chunk of rust. I had no idea the E30 was delivered stock with a sandbox, this must be some foolishness added by the previous owner, dooh. Tons of sand. The sinner? Yes, a fairly large hole through the wheel house and directly into the trunk. That is going to be a pain in the ass to weld.

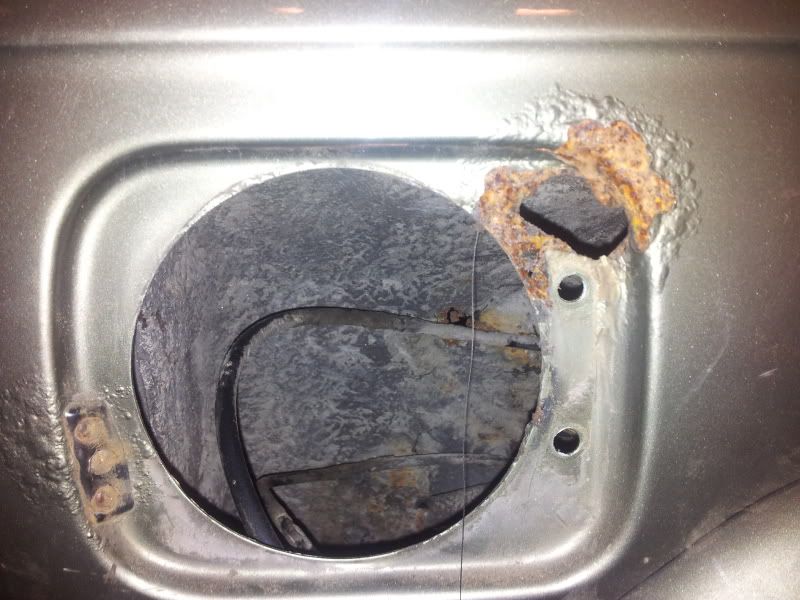
Also found this peculiar looking fellow, looks like some kind of a breathing device, perhaps for old batteries? I have no idea, at least it had a factory stock hole in the tray there which it was mounted in. Apparently I also have sentral locking on the tank lid, neat feature for such an old car, rather simple though.

Image

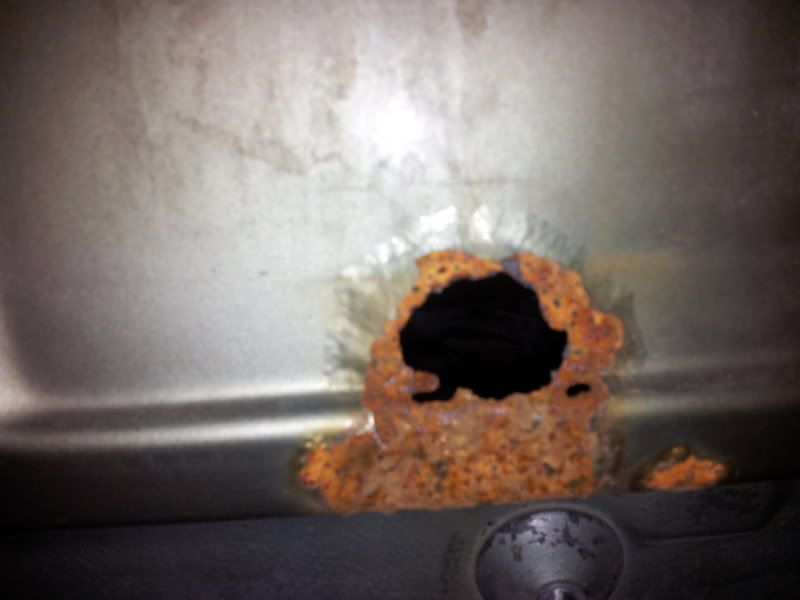
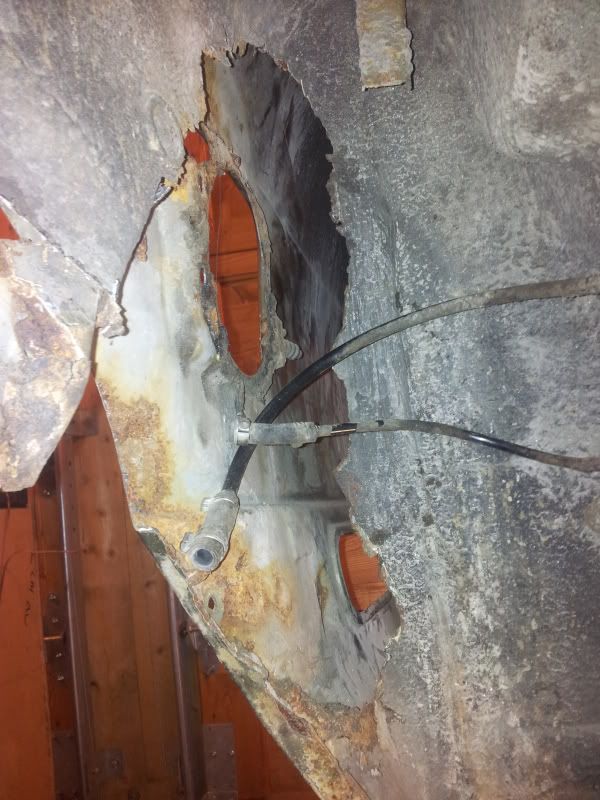
Here you see the largest rust hole on the car. My friend named it The Kraken, and to be honest - it deserves the nickname. I'll save this one for last, definitely. I'll have to remove the gas fill pipe and the breather tank to get a good view of it, hopefully it's fixable.


Image

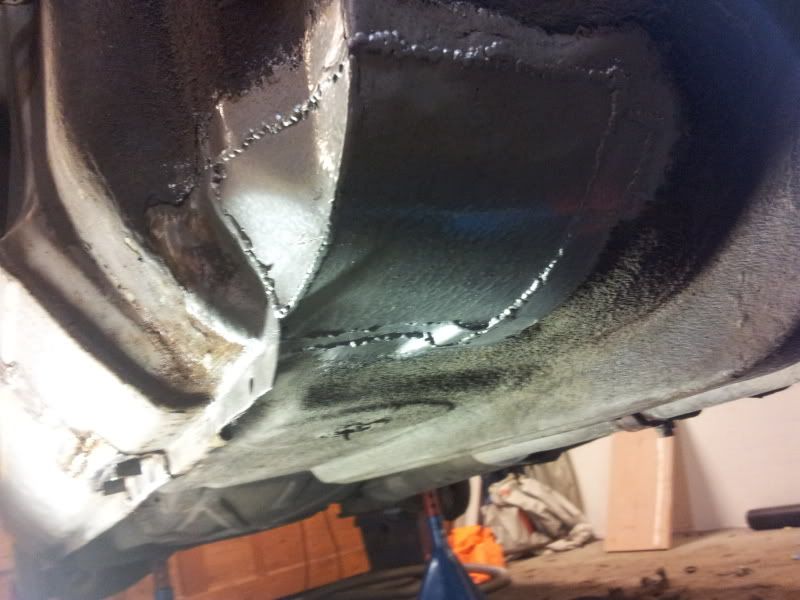
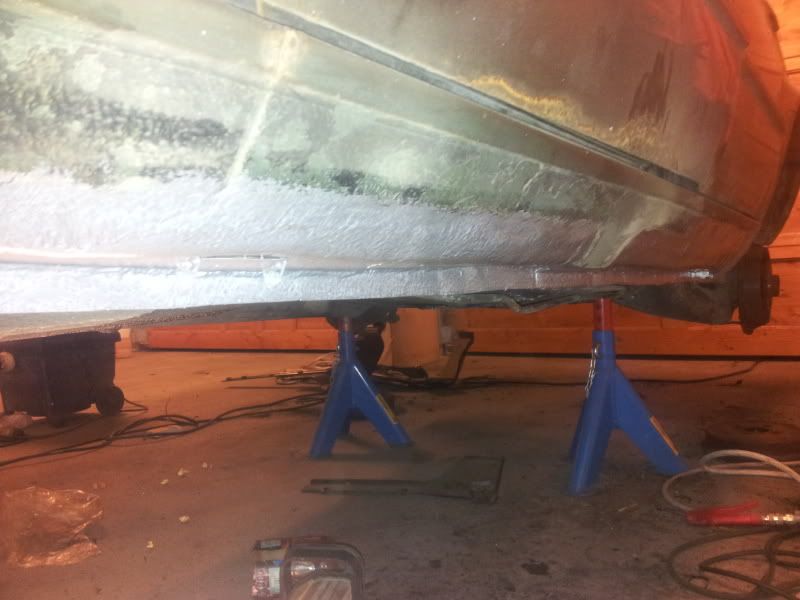
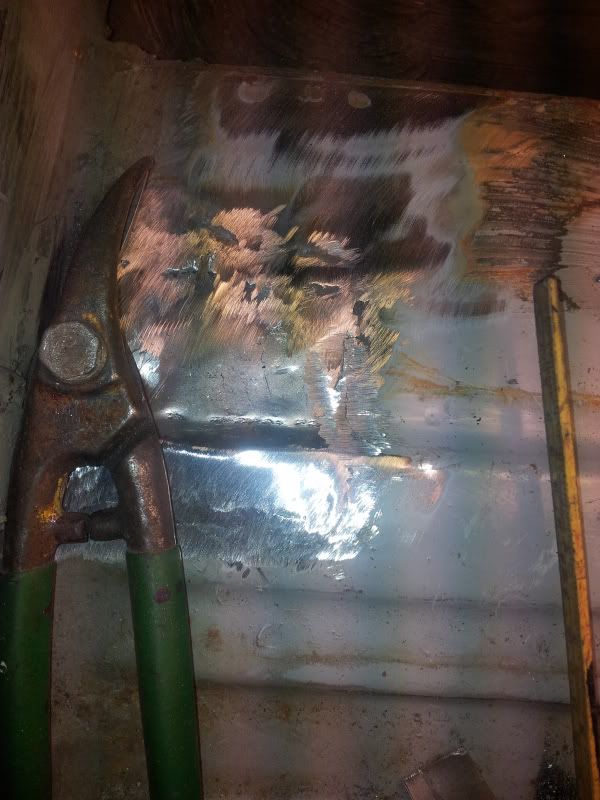
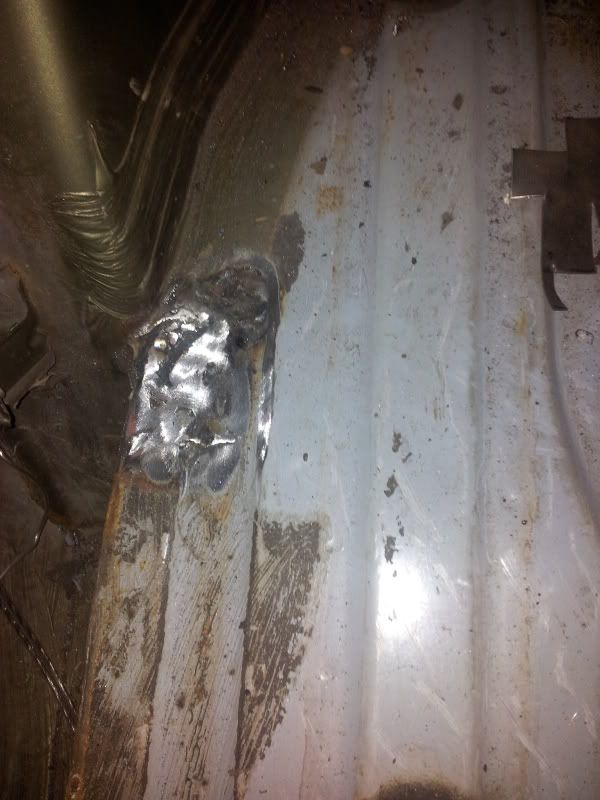
Got both these holes welded, now I'll need to weld some reinforcement to the seat mount on the underside, then I'll patch up what's left and fill it with tectyl oil on the inside and tectyl on the outside.

Image

Also welded this quickly last night.

Image

Update 5:
Got a few things done since last time, you'll have to see for yourself.

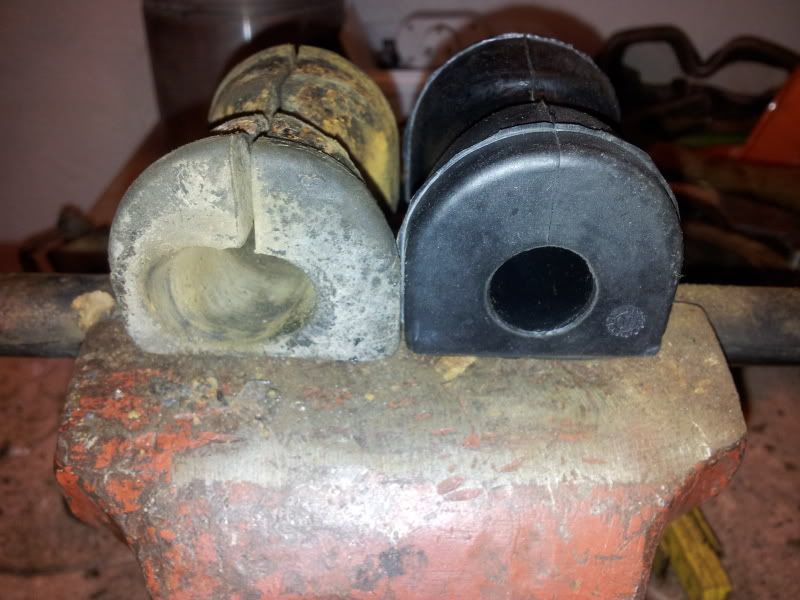
Old vs new sway bar bushings.

Image

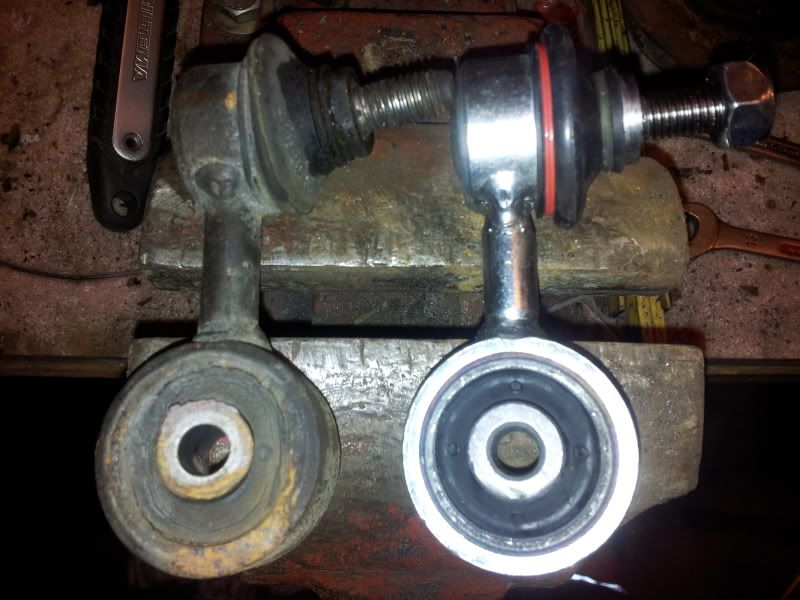
Old vs new sway bar end-link.

Image

Pulled the trailing arm of my E36 to "borrow" a ball joint, but obviously that one was busted too. Ordered a new one immediately.

Image

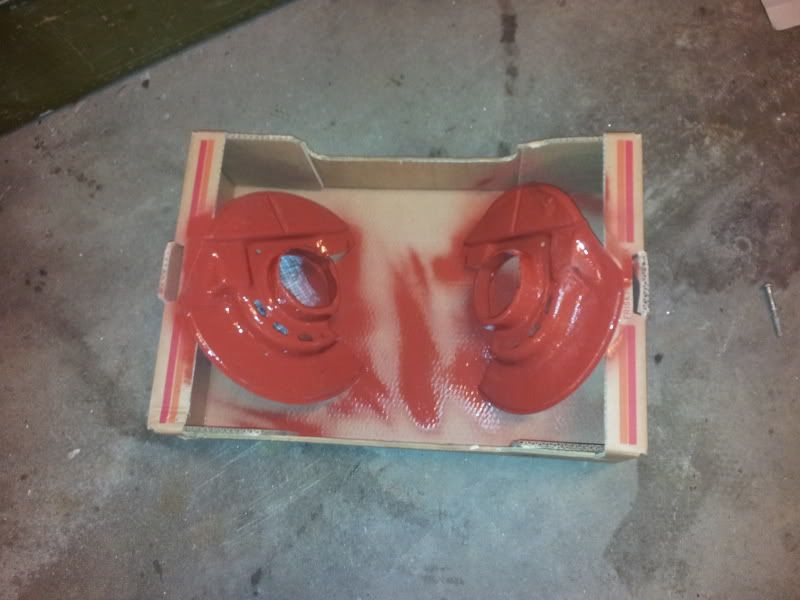
Primed the dust shields.

Image

New trailing arm bushing.

Image

Struts almost complete, just lacking the dampers.

Image
Image

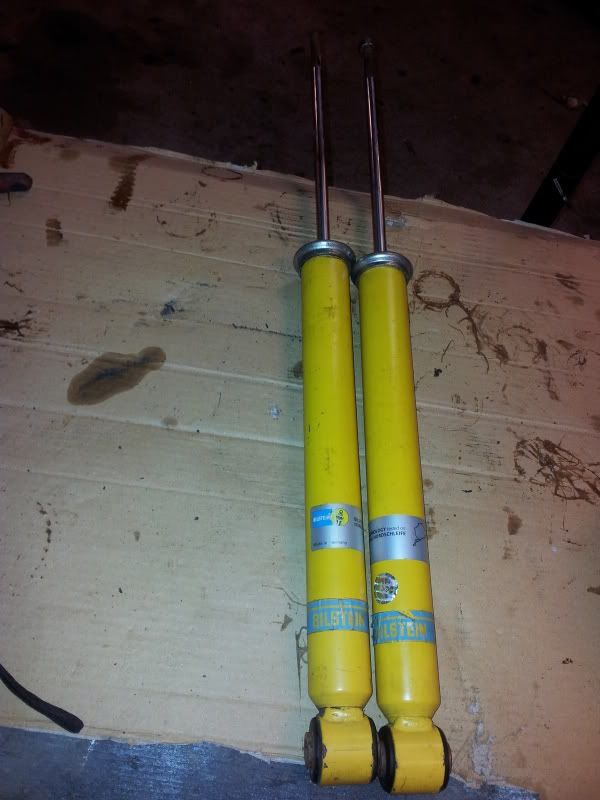
Haha, crappy rear dampers exchanged with some good condition Bilsteins. New tower bearings will be inserted.

Image

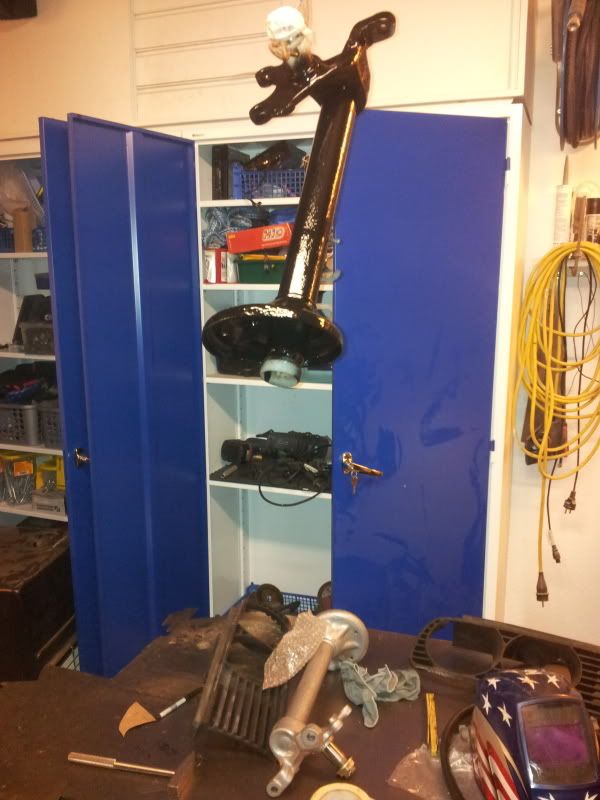
Wooh, it's a miracle. It's finally done. Must say that took some time, but not half as much as I expected. Spent some welding gas and thread though.

Image

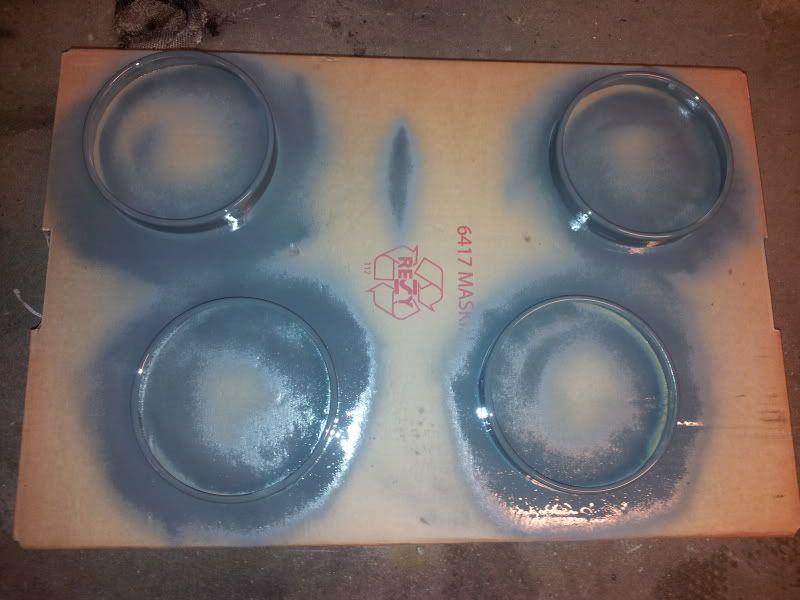
And voila, primed it too.

Image

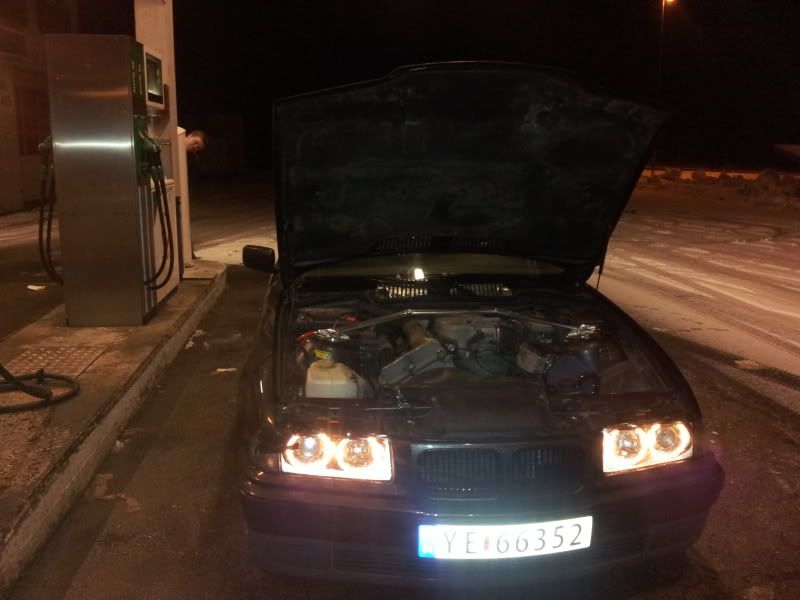
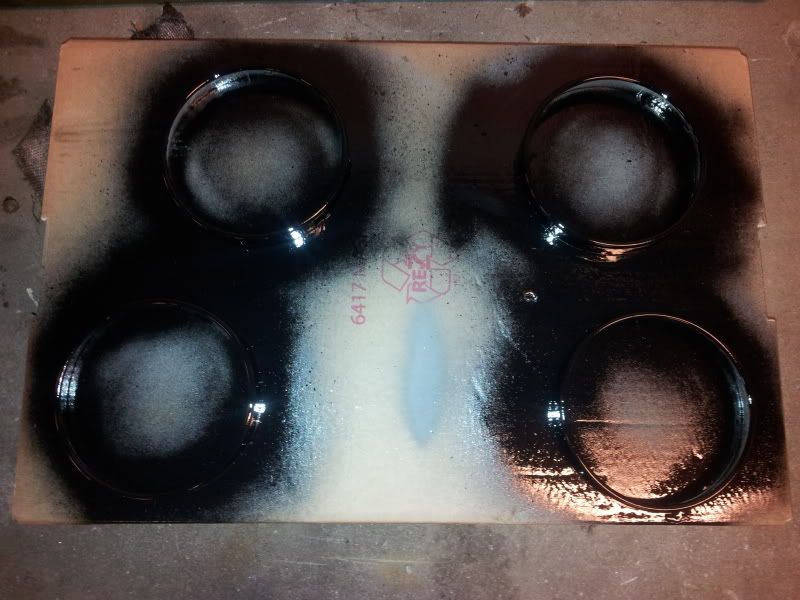
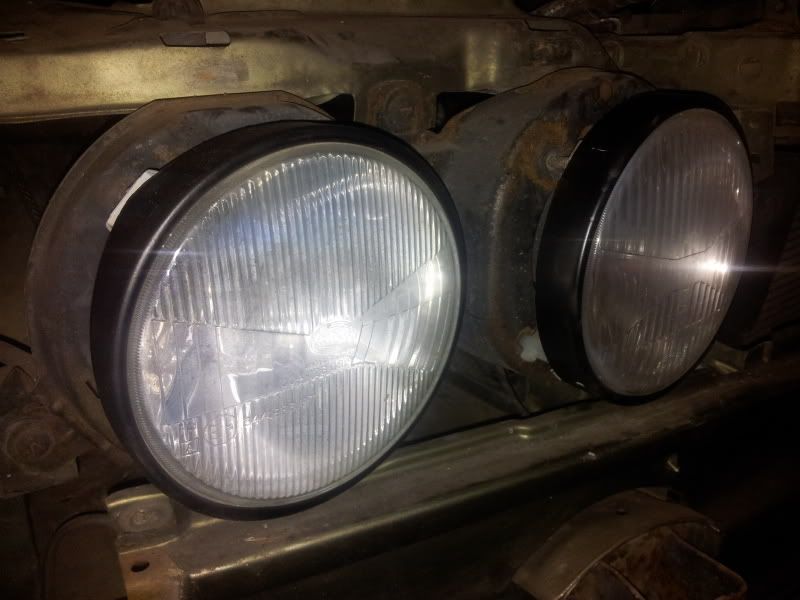
Painted the headlight rings black.

Image
Image
Image

Sway bar finally mounted again, man that was a pain in the ass to get up there with new bushings. That piece of crap stock holder was so rusty it bent too easily, so once I got it locked in position it snapped right out again. Now it sits nicely though, after some jacking and hammering.

Image

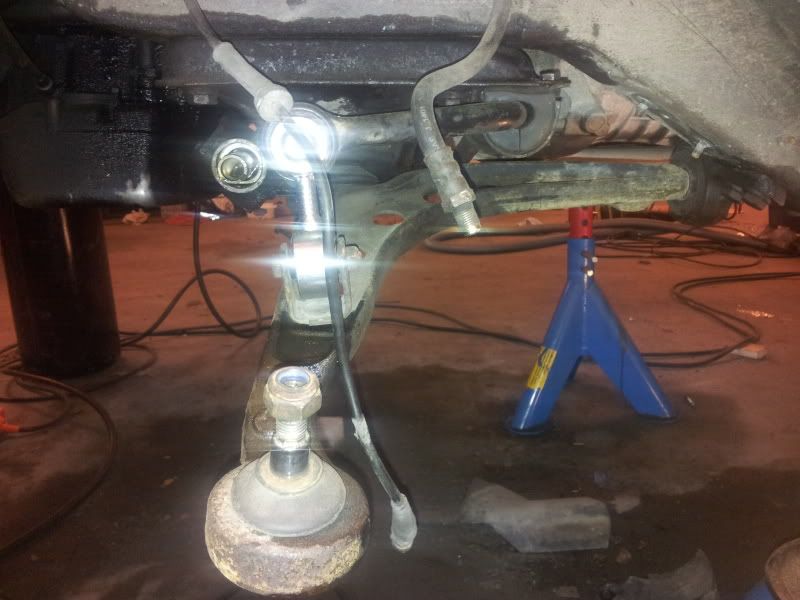
New inner tie rod and end will be mounted soon. Seems as almost all ball joints were rusted on this car, sweet deal! Some rusty pictures.

Image
Image
Image
Image
Image

Update 6:
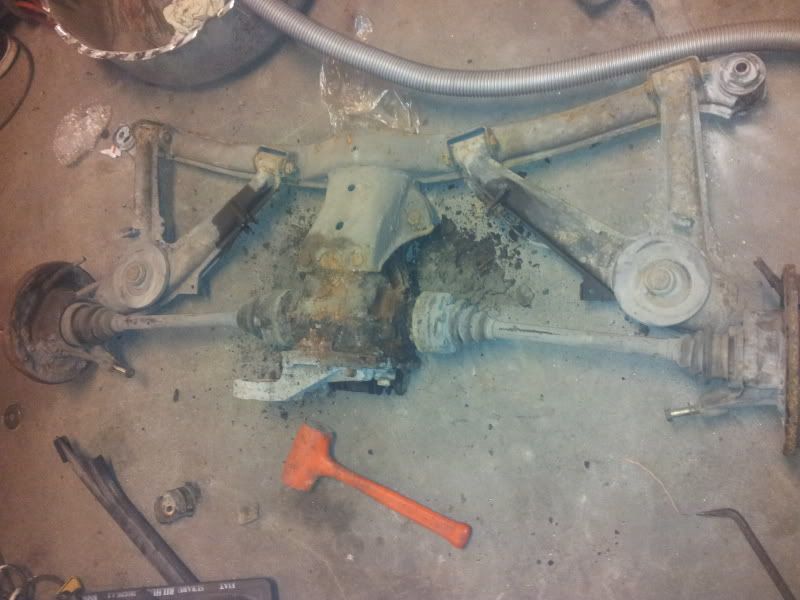
The rear axle is hanging by the differential bushing alone now because I decided I'd bore the reserve wheel well out, since it's of no use to me, plus more space underneath the car = Win in every scenario. I'll replace it with an aluminium plate or a sheeth metal plate with some reinforcements.

Image
Image

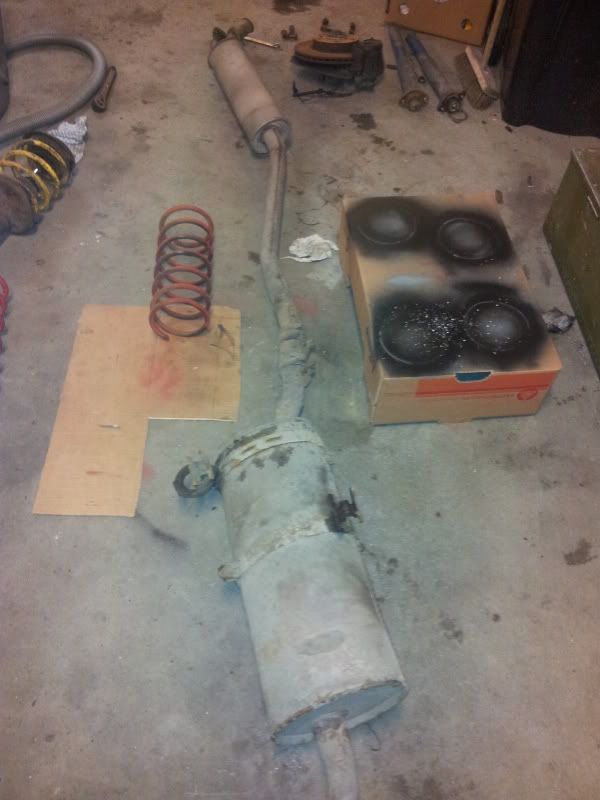
Exhaust pulled out, ugh, how dirty.
Image
Image

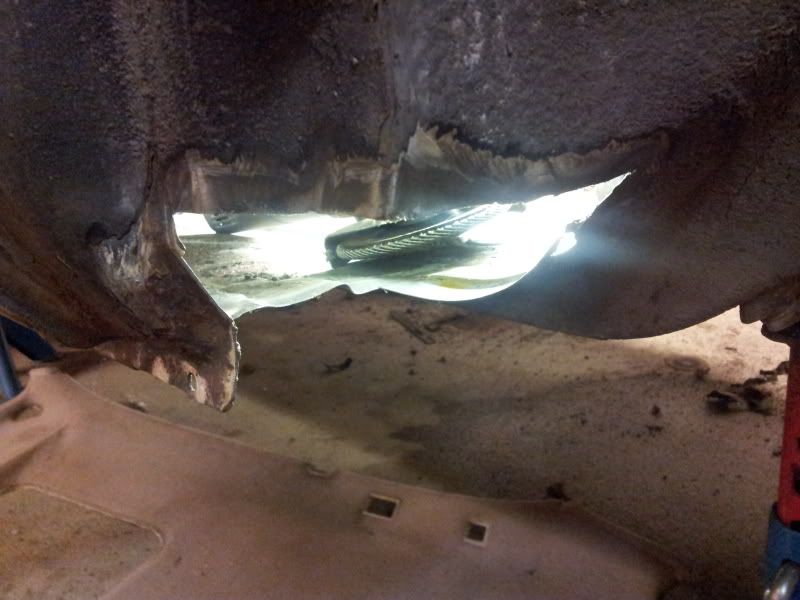
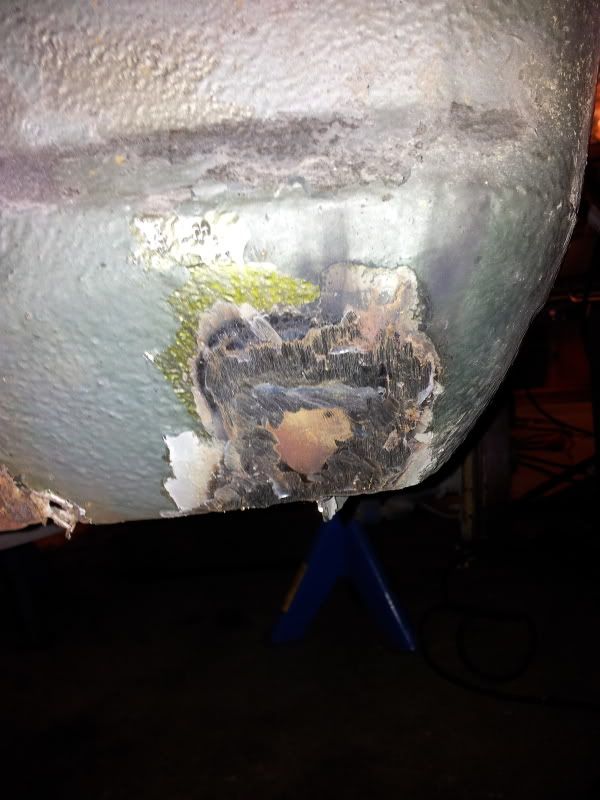
This is the reason I had to pull the rear axle down. Rusty piece of shit, here I was welding the so to speak last rust hole I had left, and then this one showed up. Good job ruining a perfect streak.

Image

From down under. I just touched it and it crumbled into pieces of rusty dust.

Image

The more I searched, the more I found...

Image
Image

Yay...

Image

Wow, this was a lot bigger than expected. This should be fun!

Image

Update 7:
Got some small shit done today too.

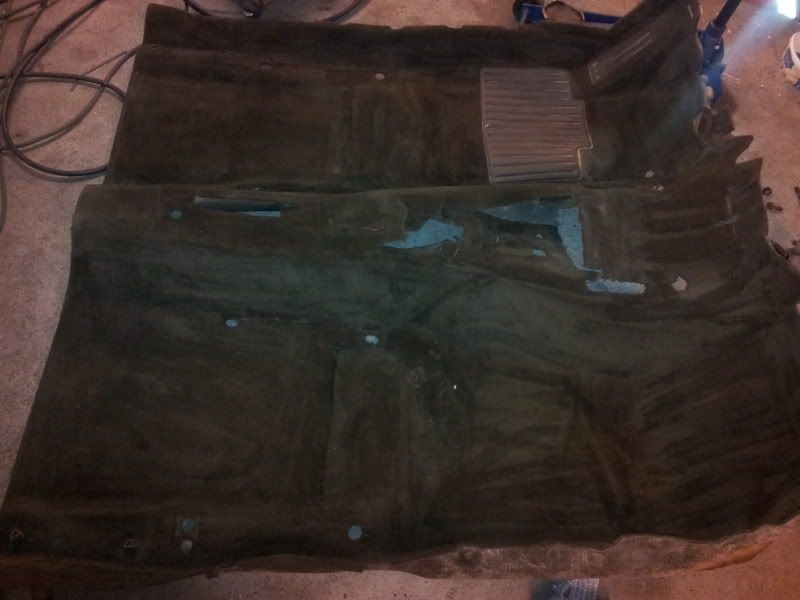
Interior carpet getting cleaned before it's put back in.

Image

Removed. Bye, useless metal.

Image

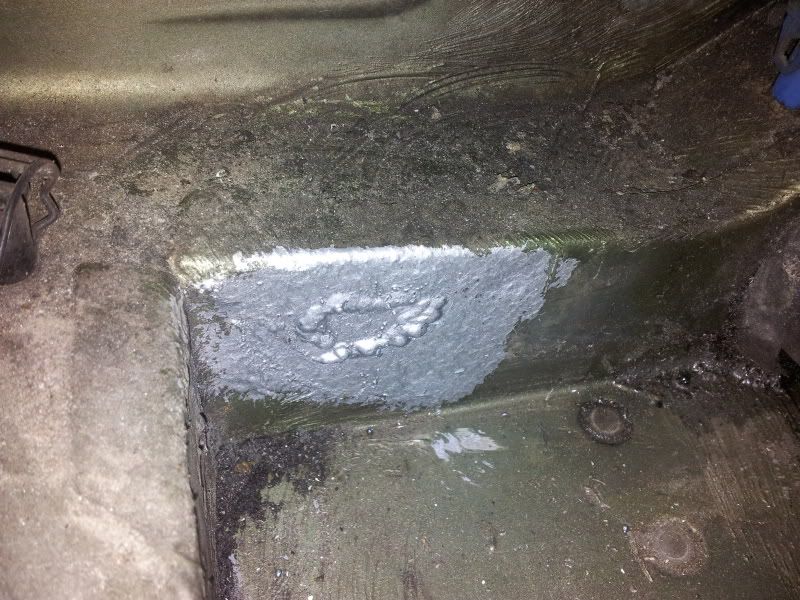
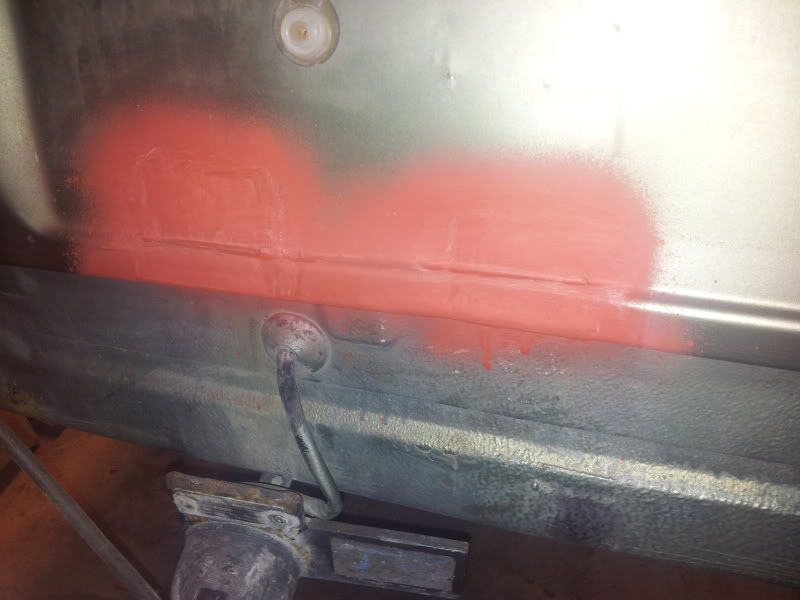
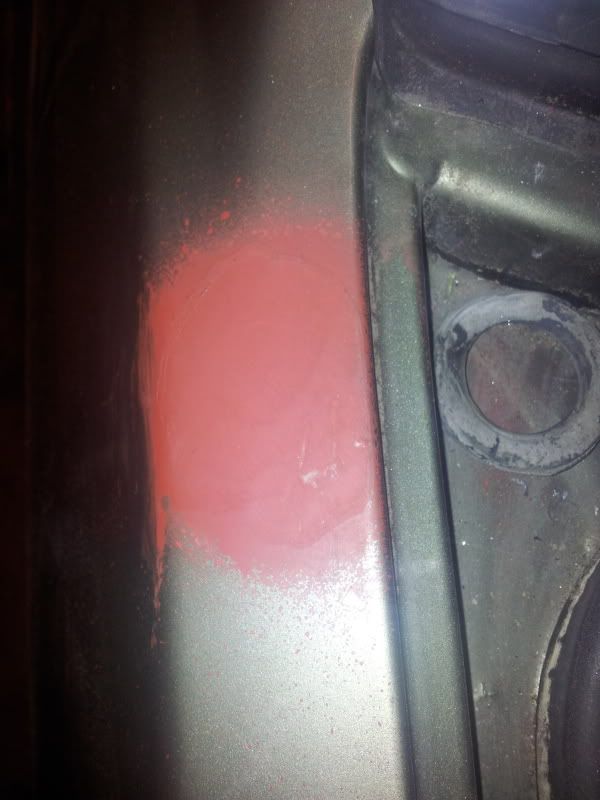
Some holes waiting for some filler and paint.

Image
Image

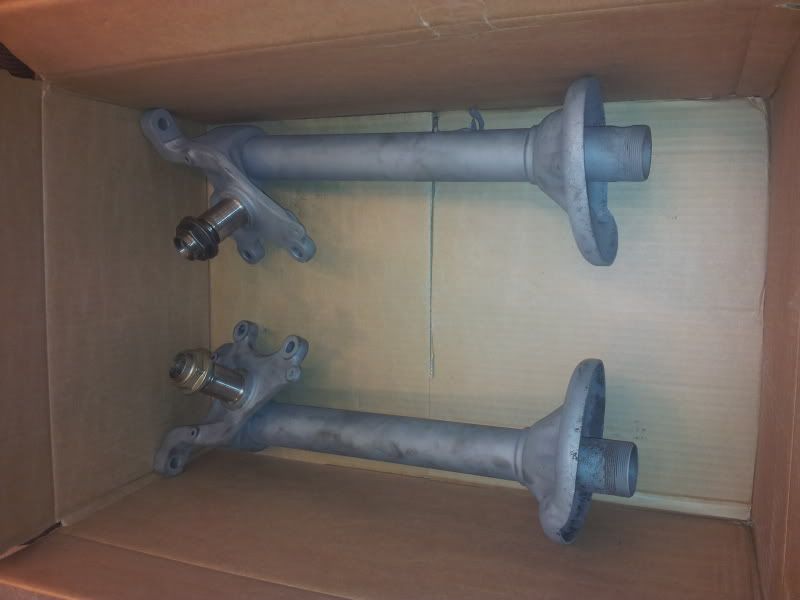
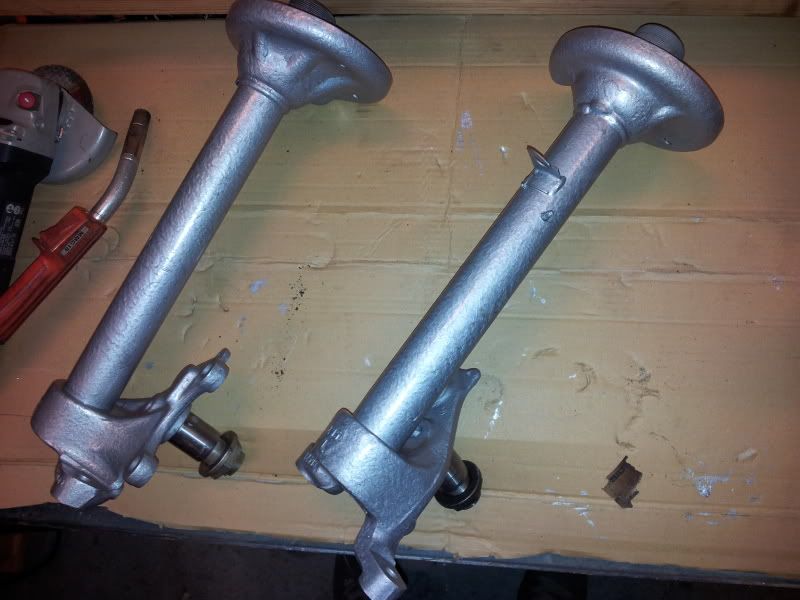
Dirty rear axle. Washed it to remove all the sand, then I'll grind it down tomorrow. All the bushings looks intact except from the differential one, so I'll use the lathe again and make up 10 bushings in nylon, so I have some backup/sell some.

Image
Image

Put the dashboard and carpet back in, plus wired all of the electrics. I've always heard this is such a hard and time consuming job, but it was a breeze when I found the correct entry angle for the dash.

Image

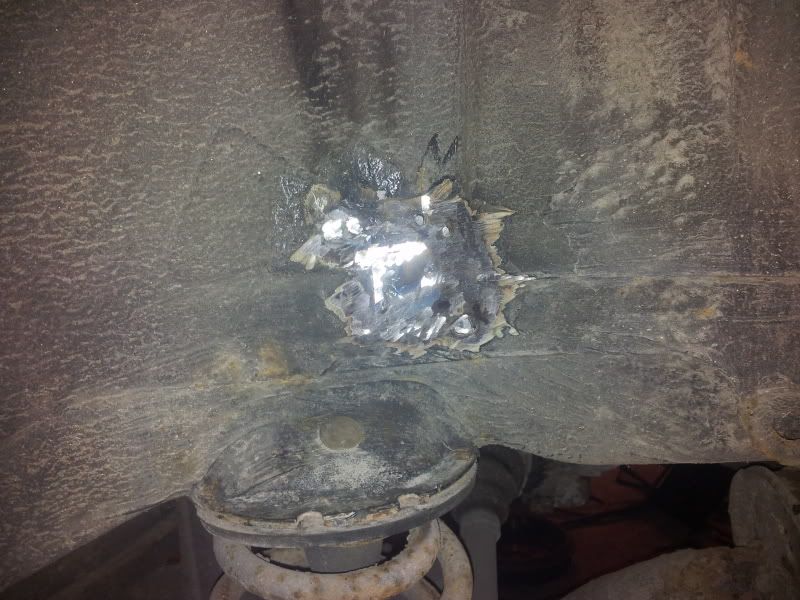
I hate this particular hole.

Image

Got the rest of the interior in today, I'll mount the seats and put the carpet lists on after I've filled the sides with tectyl oil.

Image

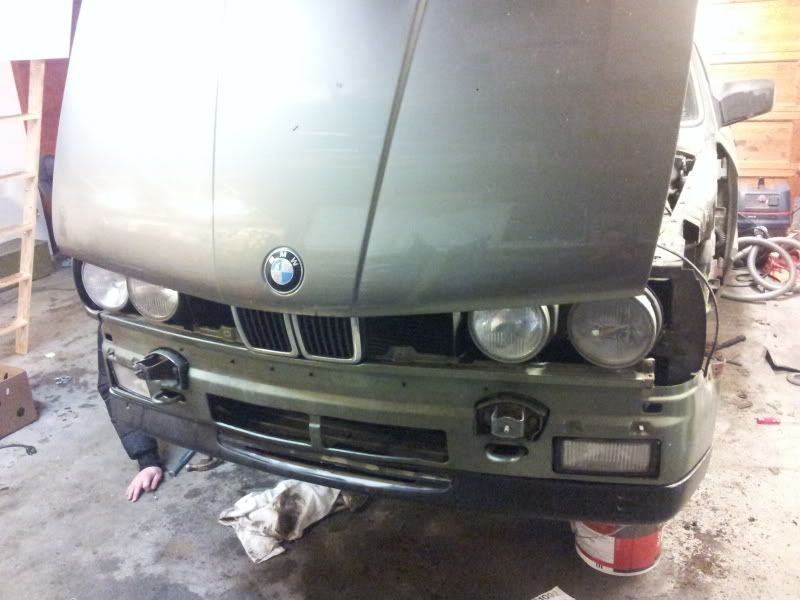
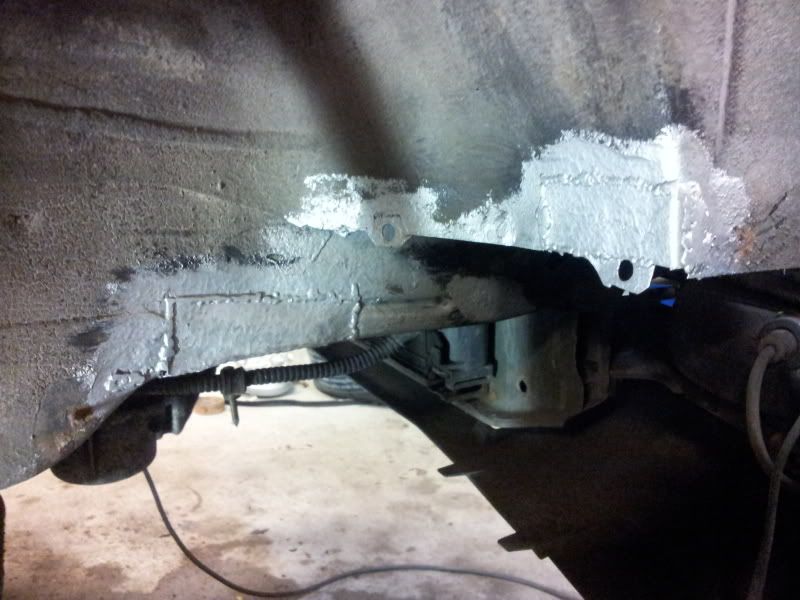
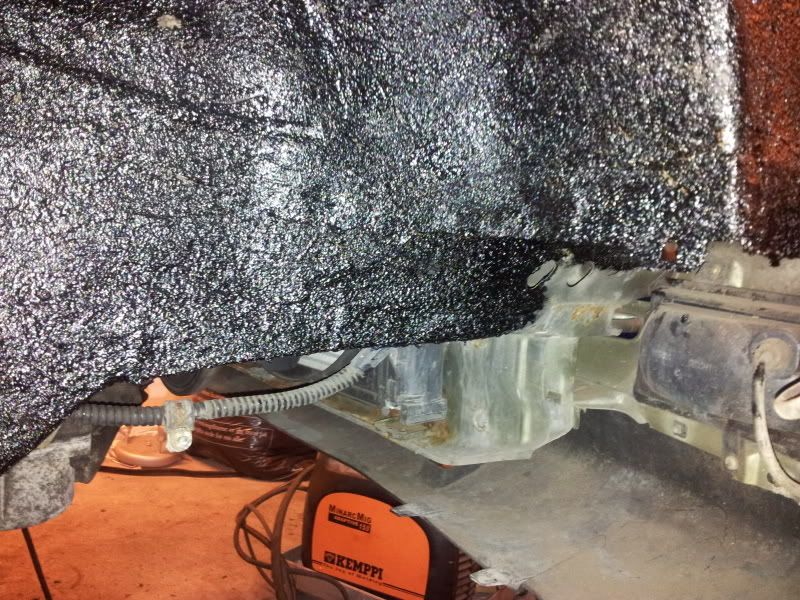
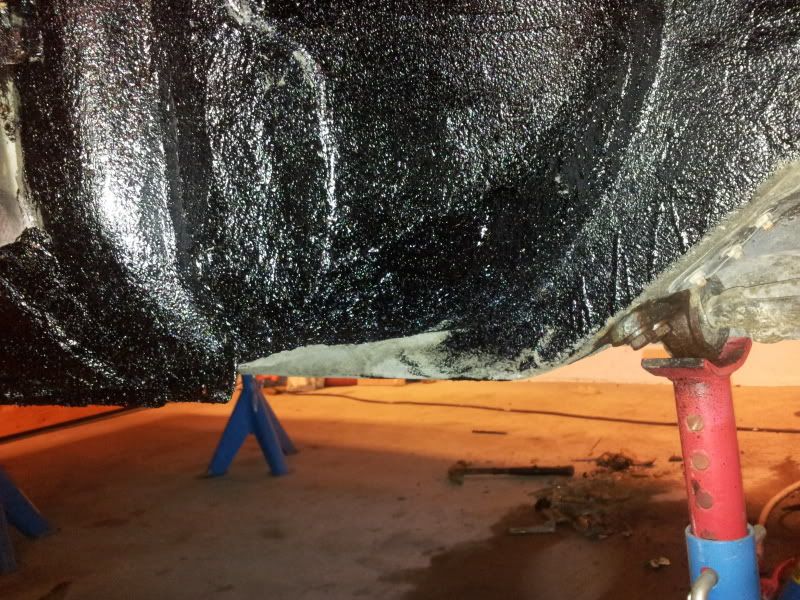
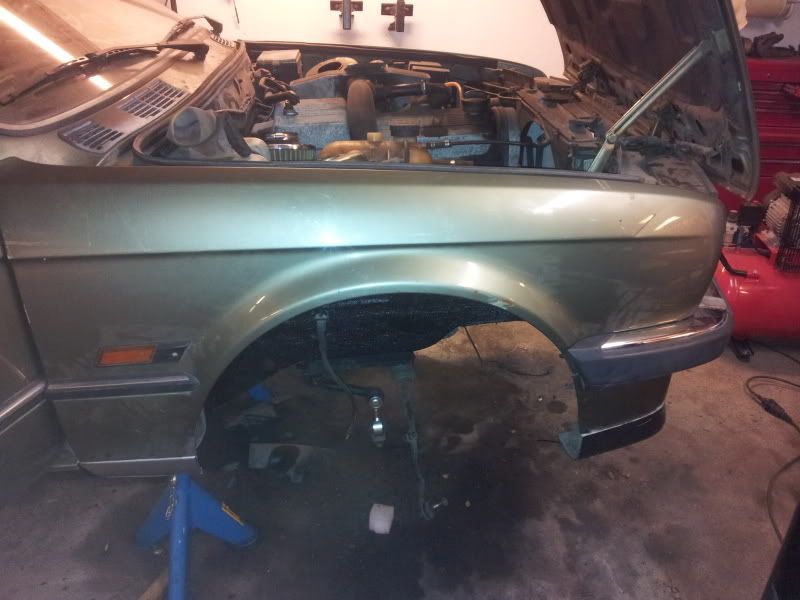
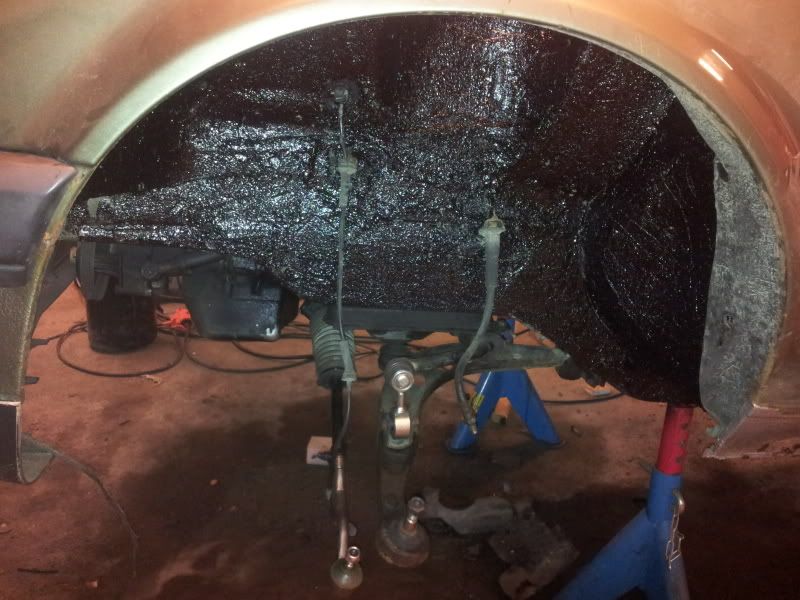
Mounted the front fenders, the inner plastic houses, the front bumper and the complete tie rod. Also put some tectyl on the left wheel house.

Image
Image
Image

Over and out for now, Rust Garage.
Alex
Married to the E30 Zone
Posts: 22666
Joined: Fri Feb 11, 2005 11:00 pm
Location: Johannesburg, South Africa

Thu Jan 19, 2012 10:22 pm

Looking good, Nice to see another one saved :)
DanThe
E30 Zone Team Member
Posts: 28641
Joined: Sat Sep 10, 2005 11:00 pm
Location: Staffs
Contact:

Thu Jan 19, 2012 11:04 pm

Hero! Nice to see you removing rust for a change :D
Ajsingh
E30 Zone Addict
E30 Zone Addict
Posts: 2378
Joined: Sun Mar 28, 2010 11:00 pm
Location: West Laaaandaan init! / Milton Keynes

Thu Jan 19, 2012 11:16 pm

The fact u dine it all yourself is great!

Well done mate!
E30 Crazy!
User avatar
winchester
E30 Zone Newbie
E30 Zone Newbie
Posts: 69
Joined: Fri Feb 25, 2011 11:00 pm
Location: Norway. Yes, the place with all the retards.

Thu Jan 19, 2012 11:37 pm

Thanks guys. :D Haha, Dan, got that right! :mrgreen: The front brake calipers are on their way, and the 2002 Turbo flares are in the mail waiting for me to pick them up. I'll sandblast the brakes this weekend hopefully and get them done, and I'll rummage the internet for some original dampers, as well as locally. This is one tough cookie to fix, so I'll do my best, but this won't be a show car, so the finish is not going to be dumbfounding, haha.

If I'm not going to sell it, I'll slam dunk it on some JOM coilvers and put a set of BBS RS replicas on it, plus a friend already offered me to buy a complete original 324 turbo build, so that might be fun, and it will most certainly increase the value of the car.

Stay tuned for more shitty updates! :mad:

A picture taken last night after cleaning up the garage.

Image
Last edited by winchester on Fri Jan 20, 2012 12:24 am, edited 1 time in total.
tonybtonyb
E30 Zone Addict
E30 Zone Addict
Posts: 3580
Joined: Wed Jun 13, 2007 11:00 pm
Location: essex

Fri Jan 20, 2012 12:24 am

Great work mate most people would have given up by now but not you good luck to you keep us posted nice to see another one saved :cool: :cool:
They don't make bm's like this anymore!..They should.
Image
User avatar
winchester
E30 Zone Newbie
E30 Zone Newbie
Posts: 69
Joined: Fri Feb 25, 2011 11:00 pm
Location: Norway. Yes, the place with all the retards.

Fri Jan 20, 2012 12:25 am

Thanks mate, I will definitely try to keep you updated. :)
Kedge
Old Skooler
Old Skooler
Posts: 7702
Joined: Thu Jan 13, 2005 11:00 pm
Location: Leicestershire

Fri Jan 20, 2012 12:32 am

Good effort saving that!! Cool colour!
Image
'86 Polaris 316 M20B28 Rebuild
Instagram - Kedge85
User avatar
winchester
E30 Zone Newbie
E30 Zone Newbie
Posts: 69
Joined: Fri Feb 25, 2011 11:00 pm
Location: Norway. Yes, the place with all the retards.

Fri Jan 20, 2012 10:01 am

Cheers mate! :)
Z3I
E30 Zone Addict
E30 Zone Addict
Posts: 3504
Joined: Tue Apr 25, 2006 11:00 pm
Location: By Brooklands, in the sunny south.

Fri Jan 20, 2012 10:25 am

What a great thread to read! All that rust makes me shiver, I would have walked away from it after the first 10 mins, well done for having the confidence (and skills) to do it.

I think that I've got one of the cleanest E30s there are, but seeing how much rust can hide away from sight, I'm just wondering now how much I have in mine. :?
Selection of BMW hardtops available, please ask!
Duke137
Married to the E30 Zone
Posts: 7207
Joined: Sat Aug 29, 2009 11:00 pm

Fri Jan 20, 2012 10:35 am

Great thread but I would have been tempted to powdercoat the parts you painted after all that effort.

Loving the colour of the car :cool:
How do you pronounce 'either'? I say 'either', but some say 'either'. Either is correct.
User avatar
Daryll
E30 Zone Squatter
E30 Zone Squatter
Posts: 1996
Joined: Mon Feb 14, 2005 11:00 pm
Location: Essex
Contact:

Fri Jan 20, 2012 11:05 am

Great work, all that hard graft will pay off when you've got a rust free motor. Keep it up fella. :cool:
@e30_daryll
Jhonno
Homo Hair
Posts: 20362
Joined: Mon Jan 10, 2005 11:00 pm
Location: FLAT, FLAT, FLAT!!
Contact:

Fri Jan 20, 2012 11:10 am

Nice work.. Keep it up! :cool:
Got cable ties? Get diffin..

Arch roller for hire.

www.zeroexhausts.co.uk

Image
Tom_Maverick
E30 Zone Camper
E30 Zone Camper
Posts: 1343
Joined: Wed Aug 25, 2010 11:00 pm
Location: Brighton

Fri Jan 20, 2012 12:32 pm

love it.. so glad to see an old shed welded up rather than fragged! :D
Image
User avatar
Rich320I
E30 Zone Camper
E30 Zone Camper
Posts: 1272
Joined: Tue Dec 06, 2011 11:00 pm
Location: Worcester

Fri Jan 20, 2012 1:05 pm

Totally agree Tom, must admit though im probably abit to sentimental over old cars I hate seeing anything broken up! Id hate to add up the money iv ”˜invested’ into rusty fords over the years! Suppose I can just start investing in rusty BMWs. Great work on this by the way as others have said lovely to see it saved :D
User avatar
winchester
E30 Zone Newbie
E30 Zone Newbie
Posts: 69
Joined: Fri Feb 25, 2011 11:00 pm
Location: Norway. Yes, the place with all the retards.

Fri Jan 20, 2012 3:26 pm

Thanks for the support guys, it really boosts my motivation to keep on going. :) I am far too sentimental over old E30's, but what the heck - it's a lovely chassis and they're a breeze to drive when proper maintenance has been executed, so why not.

I just picked up the rear 2002 Turbo flares, looks great. I'll have to modify them a tad though, since they're originally meant to sit on 2-doors, not 4. Duke, I would've powdercoated them if this was going to be a show car, but since it's not I don't think it's worth it.

I'm contemplating on buying a complete set of rear and front subframes and trailing arms, to reinforce and modify, then I'll use the lathe and milling machine to make some custom adjustment for camber and toe, plus caster in the front, then ship it off to powdercoating. I'll use the late model E30 DTM arms for inspiration if I'm doing it. Parts like that can stay in the basement as long as they want, because they'll never lose their value to me at least.
User avatar
winchester
E30 Zone Newbie
E30 Zone Newbie
Posts: 69
Joined: Fri Feb 25, 2011 11:00 pm
Location: Norway. Yes, the place with all the retards.

Sat Jan 21, 2012 12:47 am

Yet another slacking day today, so I'll try to get some work tomorrow before Captain Morgan is on the menu! :beer: I ordered new e-brake wires, new brake hoses for the rear, some new parts for the front struts and some small bits and pieces. Also picked up the fender flares today, of course I forgot to take a picture. :x
User avatar
Wobbzgurka
E30 Zone Newbie
E30 Zone Newbie
Posts: 16
Joined: Mon Apr 20, 2015 11:00 pm
Location: sweden

Thu Apr 30, 2015 6:33 am

great work!
User avatar
bimanut
E30 Zone Camper
E30 Zone Camper
Posts: 1194
Joined: Thu Oct 30, 2008 11:00 pm
Location: Warrington

Thu Apr 30, 2015 8:27 am

Looking forward to the arch action :D
Image
User avatar
Cypriotgeeza
E30 Zone Addict
E30 Zone Addict
Posts: 3024
Joined: Sat Apr 04, 2009 11:00 pm
Location: Under a bonnet somewhere..

Sat May 09, 2015 11:15 am

you guys do realise the last update to this was in 2012? :mad:

The car is probably sitting in your kitchen as the new toaster or kettle you just purchased! :snigger:
Check my M30 build threads:
Project Frankenstein: viewtopic.php?f=25&t=194154
Headgasket: viewtopic.php?f=55&t=165704
Clutch issues: viewtopic.php?f=55&t=172482
Instagram: www.instagram.com/Cypriotgeeza
Post Reply