My 325i turbo build-bring on the boost (video inside)

Show off your pride and joy here

Moderator: martauto

User avatar
Lurch320i
E30 Zone Regular
E30 Zone Regular
Posts: 517
Joined: Fri Jan 15, 2010 11:00 pm
Location: Wallasey, Merseyside

Sun Nov 16, 2014 11:29 am

So I think its about time to document my build. This was over the course of 3/4 years so I didn’t do one sooner as id end up forgetting about it and not updating it due to some pretty big gaps between progress
The first year was purely just gathering parts and maybe a few tinkering sessions

During this process ive gone from a single fella owning a red but more pink 1990 320i se to being engaged (some may remember my poll thread asking if I should get a standalone ems or a ring) and having 3 kids while getting myself a 1989 325i sport.
Anyway enough chit chat lets get on with it.

This is what it all started with, my first e30 bought while I was 19
Image[/URL]
Pity it was only a 2.0 but still good fun

The turbo Idea came from my mate with a 1996 imported impreza wrx that we both modified to push out 330bhp, he said it’d be funny if we both had 2.0 turbos, so off I wet collecting parts for a low boost build after reading so many threads both on here and a few others, most were the old school bodge jobs that had rrfpr and tweaked afm’s
I got myself a cheap ass Chinese manifold and a few other bits like a turbo, intercooler and 24lb injectors from the states
Image
Image
Image
Image

Poor e30
Image
After reading so many things I bought myself a M20B25 later low compression engine complete to dump in with the turbo
Image
Stripped it down
Image
Fitted cheap ass manifold
Image

Painted and manifold installed
Image
Image

I thought progress was going quite well but sadly my grandmother passed away, she lived in cornwall and I live near Liverpool so the bmw had to go to fund the trip down to the funeral
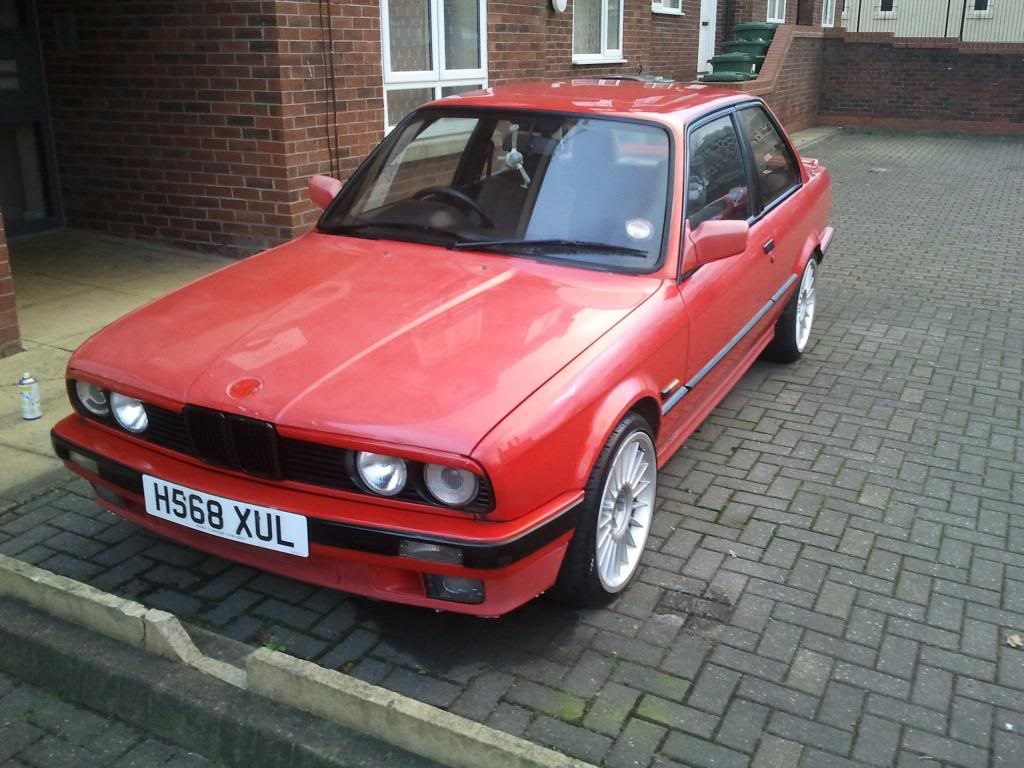
But to my good graces I got another E30 a couple of weeks later after I sold a few of the turbo bits and another car I had but this was a fantastic buy
1989 325i sport with 137k miles on
Seen better days but not all that bad
Image

Bought it and I was on my way like a kid in a candy shop again
I gained some motivation again started to repair the damage on the car
Image
But I had a bigger surprise when on my birthday morning my misses gave me a big box, little did I know that it would be the start of this restoration and turbo build
Want to see whats in the box? Course you do
Image
She was a crafty bitch and actually contacted a fellow zoner behind my back and bought it.

So the build was back on but this time I wanted to do it properly not bodged, I started gathering parts again but better this time around, One zoner in particular was like an agony aunt for me answering so many questions and helping me source so many vital parts (you know who you are, if you want credit just say so and I’ll name and shame you)
Bigger holset h1c turbo
Image
067 clubsport rack
Image
Alloy 2.5inch intercooler
Image
3 inch stainless downpipe
Image
Braided oil feed line with adaptor for m20 block
Image
Megasquirt MS2 V3.0 ECU
Image
MS bespoke loom
Image


I was so excited I started fitting stuff way before I should have
Image
Image
while the manifold was off I changed all the studs in the head for stainless
Image

So it gets to winter and the progress stops because the car is outside and its far too cold and wet to work on it.
Christmas morning comes and yet again my misses proves shes one in a million by giving me yet another amazing present in the form of this bad boy
Image
Yes it’s a chinese GT35 but itll do, ive read good and bad things so I decided ill give it a shot
Test fitted it
Image
Image

Laid up for the winter and gathered more parts but I also had a big shock
Someone broke into the yard I stored the car at and decided it’d be a good idea to smash the rear window
Image
B**TARDS!!!!
Luckily within 20 mins of putting a wanted add up, in true zone spirit I was offered 3 screens so I chose one from a reputable breaker on here
Image
Image
Image

Decided while I was doing the screen I thought id polish the car and clay bar the paintwork
Image
Image
Image
Spare is on the front due to a flat tyre

I then started thinking in every different direction about what parts to get
I got myself some 440cc bosch green giants
Intercooler boost pipes and silicone couplers
Gauge pod and gauges
Image
Image
Image
An10 Turbo oil drain kit
Image
Oil filter relocation kit and oil cooler
Image
E30 Fuel pump modified with E36 M3 pump unit
Image
New inlet manifold to clean and paint black to fit the 440’s to and drop in all in one
Image Image

But then I thought about how to stop the B**CH when she’ll have more power and the brakes were already quite inadequate (hence the front end damage)
I thought id try and make my own kit using skyline calipers front and rear and a few smart decisions with discs
But after a lot of messing about with grinders, burrs and drilling discs to fit, I decided to go with something tried and tested
BMW E34 540i calipers front and rear
Scored the front brackets first all the way from germany
Image
These were designed to be used with the above caliper and an audi 312mm disc
Picture from google to compare the calipers
Image
Difference between stock e30 disc and audi one
Image
Front calipers after a quick scrub, paint and rebuild
Image
Image
Havent done rears yet
This leads me on to a bet I had with a mate that it wouldn’t be running be a certain date, I had a cambelt, waterpump, thermostat and rad change to do. More on this later but I didn’t have much time left to do it in.
My camera on my phone decided it didn’t like being dropped so I didn’t get any pics of the cambelt install. While it was stripped down I also cleaned and painted the cam belt covers and pullys etc
While I was working at the front end I also decided to fit the intercooler to see how itd look
Cheeky tub
Image
Stripped the front end
Image
Saw this
Image
But carried on regardless
Image
Image
Image
Image
Image
Put the valance back on but it wouldn’t fit so had to chop a few places
Image
First of many cuts. Trim fit remove trim fit remove, I was trying to keep the mounting point hence the ball ache
Image
Doesn’t look like it but the intercooler is behind there
Image
painted the rocker cover Image

basically the bet consisted of a few beer tokens if I could make the engine start and run, drive across my works yard, stop at the other end and make the return journey.
On the day before the deadline with a fresh jerry can of fuel and a nice battery this happened
http://vid1299.photobucket.com/albums/a ... 8691vu.mp4
bear in mind this is the first time it has ran in about two years. I think that’s quite nice ïaŠ
after warming up I had a big shock. The engine had decided that it didn’t like the oil I had chosen so it dumped it onto the floor underneath the car
Luckily I caught it before it did any damage, I traced it to my remote oil filter kit. In all my haste the braided lines were not fully tight so I cleaned it up and tightened the lines
Then after a double and triple check including bleeding the water system I did this
http://vid1299.photobucket.com/albums/a ... sez0vk.mp4

I WON THE BET

After driving it with the new calipers, discs, pads and fresh fluid all round the pedal was so squishy and lack of feel
I figured the master cylinder would be way too small for the 60mm front pistons so I got myself a E32 735i double chambered servo with 25mm master cylinder
Image
Image

During this servo swap I noticed a bit of orange powder fall as I was taking the glove box out
After a bit of poking about at the tiny hole I found this
Image
I thought while im there ill go on a rust hunt as I already knew there were a few small patches
Drivers footwell
Image
Passenger footwell
Image
Under the passenger front seat
Image

My heart sank so much I debating selling up and going back to my roots in vws but a few mates convinced me to grow a set of balls and get it welded up so started looking into what I needed and started buying the supplies
Just before I found all that I bought all the stuff I need to build the exhaust
3m of 3 inch stainless steel pipe
3 inch mandrel bends
2x 3 inch self locating v band kits
Stainless welding gear
But one trouble was my turbo was a Garrett 5 bolt outlet but my downpipe was a 3 inch v band so I ended up buying an adaptor from the states
Waited 3 weeks for it to arrive and it’s a work of art, comes with the gasket, v band clamp and flange for the dowpipe
I couldn’t resist so to try and make myself feel better I fitted it to the turbo the to the manifold with all new stainless hardware to avoid rusting ïaŠ also had to modify the dowpipe and cut 3 inches from it to fit
Image

I also bought a clutch just the other day, XTD stage 3 6 puc from another zoner, cant wait to get that in
Image

Well that’s where I am as of today, skint and so much more work to do, I do have a cost list of what ive spent but im not going to publish it incase my misses sees it haha
Im sure ive missed so much out and a lot of photos as I didn’t want to bore people too much

I will update it when I make some progress but winter is stopping me

Any advice or what I should do is welcome, but please can all A**holes stay away
Last edited by Lurch320i on Tue Sep 01, 2015 7:03 pm, edited 6 times in total.
leeparkes
Married to the E30 Zone
Posts: 9538
Joined: Thu Jan 03, 2008 11:00 pm
Location: Black country

Mon Nov 17, 2014 12:06 am

Love DIY Turbo builds, good luck with it! :cool:
Cypriotgeeza wrote:I done both my mates in my old 318is
felt so proud,even tried it with a E30 325i and got put in my place.. :o:
jimbom30cab
Tech 1 freak
Posts: 7634
Joined: Mon Oct 12, 2009 11:00 pm
Location: in the garage

Mon Nov 17, 2014 12:26 am

Great thread, looking forward to watching this build, top work also !!
User avatar
Lurch320i
E30 Zone Regular
E30 Zone Regular
Posts: 517
Joined: Fri Jan 15, 2010 11:00 pm
Location: Wallasey, Merseyside

Mon Nov 17, 2014 12:35 am

Thanks guys

I'm ok with the oily bits but the megasquirt is where I'm baffled
If anyone is any good at tuning that can guide me through it or even has a base tune that I can work of I would greatly appreciate it

Progress will proberbly be slow due to the cold and wet weather but I'll do my best to crack on with it
jimbom30cab
Tech 1 freak
Posts: 7634
Joined: Mon Oct 12, 2009 11:00 pm
Location: in the garage

Mon Nov 17, 2014 12:42 am

Keep at it mate, little and often and soon you'll be there :)
User avatar
Lurch320i
E30 Zone Regular
E30 Zone Regular
Posts: 517
Joined: Fri Jan 15, 2010 11:00 pm
Location: Wallasey, Merseyside

Mon Nov 17, 2014 12:53 am

I'll try Jim but having 3 little rugrats is very time consuming and expensive so unfortunately the e30 doesn't get the attention she deserves
User avatar
Lurch320i
E30 Zone Regular
E30 Zone Regular
Posts: 517
Joined: Fri Jan 15, 2010 11:00 pm
Location: Wallasey, Merseyside

Mon Nov 17, 2014 1:21 am


User avatar
scoobydo
E30 Zone Newbie
E30 Zone Newbie
Posts: 175
Joined: Wed Oct 30, 2013 11:00 pm
Location: Essex

Mon Nov 17, 2014 1:25 pm

Subscribing, I need to make changes to my downpipe. Where did you get yours from? I was looking at 5 bolt to open throat for wastegate there are various different types.
User avatar
Lurch320i
E30 Zone Regular
E30 Zone Regular
Posts: 517
Joined: Fri Jan 15, 2010 11:00 pm
Location: Wallasey, Merseyside

Mon Nov 17, 2014 1:34 pm

I got my downpope from ross2009 when he parted out his turbo setup
I've had to tweek it a bit to fit mine but nothing too bad

I went with that adaptor as I already have external wastegate so it blocks off the wastegate hole in the turbine housing :D
User avatar
scoobydo
E30 Zone Newbie
E30 Zone Newbie
Posts: 175
Joined: Wed Oct 30, 2013 11:00 pm
Location: Essex

Mon Nov 17, 2014 5:20 pm

Would the intercooler have more frontal area exposed to airflow if it was flipped 180 degrees. It would then be behind the kidney grills rather than behind the bumper.
User avatar
Lurch320i
E30 Zone Regular
E30 Zone Regular
Posts: 517
Joined: Fri Jan 15, 2010 11:00 pm
Location: Wallasey, Merseyside

Mon Nov 17, 2014 5:35 pm

scoobydo wrote:Would the intercooler have more frontal area if it was flipped 180 degrees. It would then be behind the kidney grills rather than behind the bumper.
Yes your totally right and I did try that but it didn't quite fit, it was touching the bottom of the slam panel so I had to put it there or have the pipework under the bumper supports and block off the brake ducts
I have find another intercooler that fits perfectly behind the kidney grills but the price tag it comes with isn't worth it in my eyes. I've got a pic of it but photobucket doesn't want to play ball today. I've already thrown too much money into it and dying to get it finished
User avatar
scoobydo
E30 Zone Newbie
E30 Zone Newbie
Posts: 175
Joined: Wed Oct 30, 2013 11:00 pm
Location: Essex

Mon Nov 17, 2014 5:40 pm

I got one recently from Toyosports bar and plate should squeeze in there brand new for 58 quids. What is the one you found in case mine dont fit? had a good look through your photobucket keep up the work.
User avatar
Lurch320i
E30 Zone Regular
E30 Zone Regular
Posts: 517
Joined: Fri Jan 15, 2010 11:00 pm
Location: Wallasey, Merseyside

Mon Nov 17, 2014 5:51 pm

Ok photobucket isn't loading at all but I know I have internet because I'm posting in here just fine

That's the intercooler
http://pages.ebay.com/link/?nav=item.vi ... 0965618676

Fits with the end tanks under the headlights and sits underneath the bonnet support
But I just can't justify the cost of it.
I know I'm a tight ass
User avatar
scoobydo
E30 Zone Newbie
E30 Zone Newbie
Posts: 175
Joined: Wed Oct 30, 2013 11:00 pm
Location: Essex

Mon Nov 17, 2014 5:57 pm

thats the one I had my eye on, hopefully the toyo one is a direct copy. See what the post intercooler temps are and if you need to pull timing due to high intake temps then you have an easy fix.
User avatar
Lurch320i
E30 Zone Regular
E30 Zone Regular
Posts: 517
Joined: Fri Jan 15, 2010 11:00 pm
Location: Wallasey, Merseyside

Mon Nov 17, 2014 6:01 pm

If needs be I'll have to put my hand in my pocket and get one
That's the one I want but the postage is a bit stupid when I can get the same thing from the states for less but I just hate paying the customs charges
User avatar
scoobydo
E30 Zone Newbie
E30 Zone Newbie
Posts: 175
Joined: Wed Oct 30, 2013 11:00 pm
Location: Essex

Mon Nov 17, 2014 6:31 pm

I sent a mail to the polish distrbutor about the kit with pipes but they never answered.

below is the one I got
IC5006

Bar and Plate Intercooler Core size: 550mm x 225mm x 64mm
Overall Length 710mm
57mm(2.25'')or 64mm(2.5") Inlet and Outlet
Maximum Pressure: 45psi
Max Horsepower Capacity : 450hp
User avatar
Lurch320i
E30 Zone Regular
E30 Zone Regular
Posts: 517
Joined: Fri Jan 15, 2010 11:00 pm
Location: Wallasey, Merseyside

Mon Nov 17, 2014 6:44 pm

Pipes and silicone on mine are
3x2.5" 90 bends
1x2.5" straight Ali pipe
1x2.5" 45 bent Ali pipe
1x2.5" t piece for dump valve
1x2.5"-2.75" 90 bend
User avatar
scoobydo
E30 Zone Newbie
E30 Zone Newbie
Posts: 175
Joined: Wed Oct 30, 2013 11:00 pm
Location: Essex

Mon Nov 17, 2014 6:54 pm

Your pipe work was looking good on photobucket. It will deffo be better than this effort that was sitting behind the headlight on my car. It has a nice core but airflow and heatsoak major issue.

Image
User avatar
Lurch320i
E30 Zone Regular
E30 Zone Regular
Posts: 517
Joined: Fri Jan 15, 2010 11:00 pm
Location: Wallasey, Merseyside

Mon Nov 17, 2014 9:12 pm

Wouldn't be too bad if that was a water to air cooler but that looks tiny
User avatar
Lurch320i
E30 Zone Regular
E30 Zone Regular
Posts: 517
Joined: Fri Jan 15, 2010 11:00 pm
Location: Wallasey, Merseyside

Mon Dec 01, 2014 8:45 pm

Right we have a little update
Started cutting out the rust to weld nice new metal in but somehow I get the idea god or some higher power doesn't want me to repair it

First of all as I was cutting out the hole under the passenger seat the grinder jumped and decided to chomp it's way through one of the fuel pipes that run along the side of the sill, luckily I'm still here and didn't set the car on fire. If anyone knows what diameter pipe it is as I'll have to make a new pipe.

If this wasn't a sign then the next one surely is

I made the plate (lovely work or art if I do say so myself) and set my mig up, started to weld tacks on and this was fine

Then all of a sudden the wire started jumping and refusing to unspool, I've tracked this down to a sticky trigger. And also my regulator has sprung a leak and is loosing all my gas.

So the welds aren't that nice but I'll grind them down and see what they're like
User avatar
Lurch320i
E30 Zone Regular
E30 Zone Regular
Posts: 517
Joined: Fri Jan 15, 2010 11:00 pm
Location: Wallasey, Merseyside

Thu Dec 04, 2014 5:20 pm

Welds were crap and had very little penetration so I kind of lost my rag at it a bit, decided to do other thins to calm down so I thought what else could I do?
Make the exhaust (more welding a˜­)
Strip the body kit off to look for rust
Start on wheels

I decided I'll hop between jobs to make my mid a bit happier so I voted number 2 and 3
Image
Took the rivets out my fake splits and started sanding the lips

Then stripped the body kit and wings off to do a more through rust hunt as the tech 2 kit tends to hide a lot and by the state of the rest of the car I thought that this isn't going to be good
Image
Image
Image
Image
Image

I was quite surprised that there was only this much orange stuff
I also bought a big bore throttle body to go on my new inlet manifold
Standard one
Image
Big bore one
Image

But I did do something productive

Had to modify the downpipe because it didn't quite fit my turbo
So had to cut off the v band flange, shorten it and then reweld the v band back on
Image
Image

While I was there I also got a shot of my big brakes as I don't think I posted one before
Image

That's it for now but hopefully more tomorrow
User avatar
scoobydo
E30 Zone Newbie
E30 Zone Newbie
Posts: 175
Joined: Wed Oct 30, 2013 11:00 pm
Location: Essex

Fri Dec 05, 2014 12:24 pm

Got a different intercooler CX racing fits nice.

Image

Turbo and downpipe mounted in Position 3 on e30.DE mounts

Image

Twin 2.5 downpipes tight but hopefully have enough clearance now I have given the bodywork a tweak.

Image


Good luck with yours keep us updated
User avatar
Lurch320i
E30 Zone Regular
E30 Zone Regular
Posts: 517
Joined: Fri Jan 15, 2010 11:00 pm
Location: Wallasey, Merseyside

Fri Dec 05, 2014 4:47 pm

scoobydo wrote:Got a different intercooler CX racing fits nice.

Image
That's the cooler I wanted
Where did you get that for and how much was it?
User avatar
scoobydo
E30 Zone Newbie
E30 Zone Newbie
Posts: 175
Joined: Wed Oct 30, 2013 11:00 pm
Location: Essex

Fri Dec 05, 2014 5:58 pm

Cx racing europe they are located in poland. Took 5 days to get here. It was on EBay IC0037 is the model cannot post a link from here as cannot get on Ebay . Think it was around £126 all in. Shame as if you really wanted one could have got a discount as they have make an offer could have gont for 2 for £210 and got them shipped to one address then forward on the item. I am going to grind down the top mounting lug to pus it up another 15 or so mm then I think it will be 100 % in the airflow.
User avatar
Lurch320i
E30 Zone Regular
E30 Zone Regular
Posts: 517
Joined: Fri Jan 15, 2010 11:00 pm
Location: Wallasey, Merseyside

Fri Dec 05, 2014 6:19 pm

Ah that's a bugger
Would of done that but o well what's done is done

I'm sick of the car now
My mig is playing up so doesn't want to weld anything so I'm stick for what else I can get on with so I decided to paint a few bits I had

Big bore throttle body
Image
Brake master cylinder
Image
Rocker cover
Image
Last edited by Lurch320i on Sun Dec 21, 2014 4:13 pm, edited 1 time in total.
User avatar
scoobydo
E30 Zone Newbie
E30 Zone Newbie
Posts: 175
Joined: Wed Oct 30, 2013 11:00 pm
Location: Essex

Fri Dec 05, 2014 6:56 pm

If you weren't so far away from me you could have come and helped me finish mine off :evil:

Much better with 2 of you working on a car moral support and all that.
User avatar
Lurch320i
E30 Zone Regular
E30 Zone Regular
Posts: 517
Joined: Fri Jan 15, 2010 11:00 pm
Location: Wallasey, Merseyside

Fri Dec 05, 2014 7:41 pm

Haha that would of been good
Seems like most zoners are down South or way up north
User avatar
Lurch320i
E30 Zone Regular
E30 Zone Regular
Posts: 517
Joined: Fri Jan 15, 2010 11:00 pm
Location: Wallasey, Merseyside

Sun Dec 21, 2014 4:26 pm

Because it's been cold wet and miserable I haven't really done anything to the car but due to the big holes in it I though it's best if I cover it over
Image
Another reason was I've kind of lost my motivation and seeing it stripped down is doing my head in so this way I don't have to look at it

But I thought while I can't work on the actual car I though if do other bits
Decided to start a refurb on the wheels, they're replica bbs lm's 16x7 with 215/40r16 tyres on them
I like them and they look nice I think but the lacquer on the lips had corroded and so had all the "split rim bolts"

These are fake of course so not actually bolts
They're just splined inserts to make them look like bolts
10 mins and they were out, ordered myself some wet and dry paper of various grades and started working on them
Image

After 400grit
Image
800 grit
Image

I did 1000 and 2000 grit too but didn't get pictures
By this time my fingers were killing me getting in all the little spaces and grooves

After a buff with some autosol metal polish they turned out quite nice
Image

Not the mirror shine I wanted but a million times better than what it was

I'm debating painting them gunmetal grey with the polished lips and getting new "bolts" to stand out
Image
User avatar
Lurch320i
E30 Zone Regular
E30 Zone Regular
Posts: 517
Joined: Fri Jan 15, 2010 11:00 pm
Location: Wallasey, Merseyside

Sun Jan 04, 2015 10:05 pm

I've been pottering about messing with little bits and bobs but finally pulled my finger out and starte the welding repairs
This will be a long road to recovery as I've got quite a bit of work to do
But a question i do have is does anyone know what psi spring this is that's in my wastegate?
Image
User avatar
Lurch320i
E30 Zone Regular
E30 Zone Regular
Posts: 517
Joined: Fri Jan 15, 2010 11:00 pm
Location: Wallasey, Merseyside

Mon Jan 05, 2015 5:41 pm

Updates one the welding side of things, had a good day on it today and the weather stayed dry for me to crack on
I know there's some repeat pics but jus to show before and after

Made it a bit easier by buying myself a new mask as my old one was absolutely battered
Image

Under the passenger seat before
Image
After (I forgot to get a shot from above)
Image

Scuttle was in bad shape
Image
After (just needs a light skin of filler to make it fully smooth)
Image

Started the jacking pad too
Image

Hopefully more this week
Last edited by Lurch320i on Sun Mar 08, 2015 10:56 am, edited 2 times in total.
User avatar
Lurch320i
E30 Zone Regular
E30 Zone Regular
Posts: 517
Joined: Fri Jan 15, 2010 11:00 pm
Location: Wallasey, Merseyside

Mon Jan 19, 2015 10:28 pm

progress has been slow to date because the car is outside and weather has been crap so been trying to keep myself busy
I didn't like the silver rocker cover so stripped it back and decided to go black
Image

then decided to mask off the wheel to paint it
Image
Image

while that was driving I thought id have a go at making the turbo drain line,
I got the kit ages ago but never actually bothered to make it as I wasn't sure how long it'd need to be but anyone who has made some of these lines will know that they are an utter ballache to tighten down without pushing the hose out
with a bit of help from my vice I got the turbo side in
Image

a big problem was when I installed the turbo oil feed, I was tightening it into the oil pressure switch and it stripped the threads in the block and on the ali distribution block (don't ask me how it just did)
So I had two choices
take engine out to send off to be repaired or helicoil it myself

I opted for the later and ordered the helicoil kit and new distribution block that evening, safe to say I was very nervous about doing it as I didn't want any swarf getting into the engine so I took it slow and smooth
Image

It was done and dusted with a big sigh and I could finally say the oil system is nearly done, all im waiting for is the turbo oil drain bung to be welded into the sump but my mate is really busy and I feel bad pestering him

a lot more parts are on the way including rear bulb holders (as mine have gone walkies), a universal washer fluid reservoir, more general supplies to help welding prep and paint

I think that's it for now but once the sump is done and on I can finally start the engine with the turbo bolted on to see it spool :D
User avatar
Lurch320i
E30 Zone Regular
E30 Zone Regular
Posts: 517
Joined: Fri Jan 15, 2010 11:00 pm
Location: Wallasey, Merseyside

Thu Jan 22, 2015 11:19 pm

Managed to get some more work done regarding the brake setup
Ive had a massive headache lately so didn't fancy hammering plates into shape and then welding

Because I've put the E34 calipers on the front and plan to do the rear the standard E30 master cylinder isn't big enough to move enough fluid
everyone just uses the E32 750i MC but I also wanted more assistance to match, also the cost of these MC's are silly now so I saw a thread on an American site that used an E32 735i MC and servo, its still a 25mm MC so should improve the feeling to near stock level

But one problem is that a few mods are needed, the E32 I got mine from had a spacer on the back of the servo. There are two options here
1. use the spacer requires the least mods but the brake fluid resiviour will be right underneath the inlet boot on the m20 and possible fouling
2. Ditch the spacer but then a few mods are needed, these are:
Grind down and shorten the push rod to put the clevis at original level
Open up 2 holes in the bulkhead
Bend the brake lines slightly


I choose number 2 for an original look to the engine bay (besides the obvious turbo)

I wont bore you all with all the pics I took but I have more if anyone else wants to do the same brake swap

opened up holes
Image

Ground down the push rod
Image

Started to make the thread
Image

About an Inch and half cut off, also threaded as far as I dared
Image

remember if your doing this then leave the die wound on before you cut it off so you can then unwind it and clean the threads so the clevis will go on with no trouble

test fit
Image
I was made up that the standard E32 vacuum line was in the perfect place to line up to the E30 system :)

the clevis was the tricky part
I lost the E30 clevis so I used the E32 one but it was way too long so needed trimming and slight mods so please keep your e30 one unless you want some trial and error fitment issues that involves installing ad removing the servo/clevis multiple times
Image

All done apart from take it all apart to paint the servo and bench bleed the MC
Image
User avatar
Lurch320i
E30 Zone Regular
E30 Zone Regular
Posts: 517
Joined: Fri Jan 15, 2010 11:00 pm
Location: Wallasey, Merseyside

Thu Jan 29, 2015 3:33 pm

I'm after some opinions now regarding colour scheme

I have blue silicone hoses for the boost pipes and vacuum hose
and obv polished ali hard boost pipes, I have also painted the inlet mani, rocker cover, strut bar, cam belt covers black and the oil lines are all black too

Is this a little too much black? think a polished rocker cover will break it up?
if so any tips on how to get into all the little areas on the cover to polish?
User avatar
Lurch320i
E30 Zone Regular
E30 Zone Regular
Posts: 517
Joined: Fri Jan 15, 2010 11:00 pm
Location: Wallasey, Merseyside

Sun Mar 08, 2015 11:09 am

Right so I wasn't happy with some of the welding on the front jacking pad so I cut it out and going to start again
Does anyone know in what way the original layers of steel went in?i can see its a 3 skin joint in places but if anyone can tell me how the steel overlaps in places then I can get it seamless so it doesn't look repaired
I'm not bothered about having the original jacking pad there so if anyone has done this repair and has photos of it would they mind showing me so I can plan where the plates are going?
Image

While I was rained off I decided to finish my rocker cover, I ended up going with gloss black and polished logo

I had 10mins spare yesterday so fitted it
Image
Just need to fit this next
Image

Also started the exhaust a week ago as I was sick of rust so needed a break from the mig
Image

Full 3" straight through with v band connections, my exhaust back box is in the post so can't do much more till I recieve that
Post Reply