My diamond shwartz 325i sport makeover!!

Show off your pride and joy here

Moderator: martauto

Post Reply
User avatar
bdbriandonelan
E30 Zone Newbie
E30 Zone Newbie
Posts: 14
Joined: Tue Sep 17, 2013 11:00 pm
Location: galway

Thu Nov 21, 2013 2:54 pm

so ive always wanted an e30 so finally purchased one mid august of this year.
i went with a 1990 325i sport that was in bad need of some major tlc.
it has 150,000 miles on it and came with all the bits, tool kit, owners manual and a full bmw service history up until 2006 (125000 miles) when it left England and went to north Ireland where the trail stops and abuse almost defiantly took place!
rust had set in in usual areas such as front floor pans, rear arches, tailgate, bottom of wings, scuttle roof etc :(.
cloth interior was also badly worn/damaged!!
reason i bought the car is because it was dirt cheap :) and the the running gear was very good. engine, diff and box are all bone dry with not a single drop of oil anywhere, not leaking / burning oil or coolant and no overheating issues.
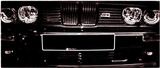
so heres a few pics of it when i got it first
sorry about bad quality

Image

Image

Image

underneath is dirty but dry . .


first day i got it another one was in to the garage for tyres!!

Image


its a real shame the car was abused and let go after 2006 because reading through the service history its obvious the previous owner kept it mint and minded it very well. major work was all carried out at main dealer including head gasket & bolts , timing belt & water pump and regular coolant changes and brake fluid changes!

Image

Image


so before i went spending money and taking things apart i drove the car daily for over a month to fing every little niggely problem. so not surprisingly it dindn't take too long to notice the wipers not working and not very long after that i noticed the heater not working!:mad: these two problems coupled together have a real bad effect and lead to having to drive in the rain with your head out the window in a fully fogged up cab. :mad:
so a wiper motor was first on the list, got one, fitted it and life was made easier! while i was in the general location of the heater motor i noticed the fan wasn't spinning freely so out with it, loads of wd40, loads of elbow grease until spinning freely, new fuse and yet another problem sorted.
next problem was hand brake seized and front ball joint and inner tie rod worn so new shoes and pads in the rear and free out mechanism and full track rod assembly and ball joint in front.
time for a pic or 2 . (sorry for lack of pics, not east remember everything)

Image

Image

next small problem was a bad connection in rear lamps so sandpaper and grease and a tweak with a pliers strengthened contact and solved that one. reverse lights not working yet as i need to fit new switch to gearbox which i have but didn't get around to doing yet.

so thats all the small stuff over, time to ruin every sunday of my winter:laughing:

Image

took it all apart to find and eliminate every speck of rust and it didnt take too long to find it!!

Image

Image

Image

scuttle was rotten bad and had ben stuffed with filler

Image

Image

Image

Image

Image

Image

Image

what looked like a hairy head had been stuffed around both rear arches!!!

Image

so started cutting out holes and doing my least favorite job ever which consists of measuring, cutting and bending endless amounts of times followed by welding and grinding and so on and so on . .

Image

Image

Image

Image

Image

all rust out and time to replace holes with new 1.5mm shiny steel :)

Image

this piece took ages to do . . :mad:

Image

Image

Image

got a new scuttle panel and pillar of bmw, was a pain to get because had to bring in the book with proof of ownership as chassis number is printed on new panel.

Image
Image
Image

this tail piece wasn't easy either. bent the correct angle in a piece, welded it on and then had to weld new piece on to that to act as runner for rubber boot seal.

Image

made up piece for wing as i had no time to source new one and i am tight!!:p

Had to replace bottom piece of both rear inner arches also

Image

Image

Image

Image

Image

now don't shoot me, i know its not the neatest or tidyest bit of fabrication but its underneath the skirts, its structurally strong and water tight and it will be pasted with seam sealer and stone chip guard so its good enough for me

That's pretty much all rust eliminated now. i done a few more typical small bits in the floor that i forgot to take pics of.
Applied seam sealer and stone chip guard sealer to all repaired areas (forgot to take pics of course!!)

Image

Image

boot lid was beginning to rust underneath the silicone type rim around it so wire wheel was out again, cleaned it up, painted and sealed . . and of course forgot to take pic again!!

Image

Image

both rear floor pans were in surprisingly good condition so cleaned them up, welded covers in place, more seam sealer and stone chip guard stuff!!

Image

the car had previously been undersealed so underneath , although its dirty, doesn't need attention. however while i hade the wire wheel in my hand i cleaned a few areas and done them!
Image

underneath rear bumper was done along with inside front quarters, lower wings and sills

Image

Image

Image


so now body is finally good.:dance:
Don't know if i mentioned but car is getting a full respray in its original diamond black and after loads and loads . . . and loads of sanding it is ready and will be getting done within the next 2 weeks (hopefully).
also have a full new scorpion exhaust & manifold gaskets, a black leather re trimmed interior as well as many other goodies laying around to install so until next time wish me luck!! :dance:

also noticed a bit of confusion about the existence of a ''k plate sport'' so to clear that up . . . .
Image
Speedtouch
Old Skooler
Old Skooler
Posts: 14071
Joined: Tue Feb 14, 2006 11:00 pm
Location: Canterbury

Thu Nov 21, 2013 3:07 pm

Quite a brave restoration job. Surprising to see so much rot on a late (1992?) Sport - my 1989 one was as bad, if not worse - mine had gaping holes in the sills under the A-posts, and even rust holes under the rear number-plate!

Image
///M aurice
ECU Upgrade EPROM Chips, £40 posted within the UK. Note these are not Zone chips.
viewtopic.php?f=6&t=279421
User avatar
bdbriandonelan
E30 Zone Newbie
E30 Zone Newbie
Posts: 14
Joined: Tue Sep 17, 2013 11:00 pm
Location: galway

Thu Nov 21, 2013 3:21 pm

my sills are perfect. the car is a 1990 and i had similar rust problems around my number plate lamps also. one was perfect and one needed a new piece welded in which was a pain to make . . which i forgot to take a pic of. . . again . . :roll:
User avatar
Gavla
E30 Zone Squatter
E30 Zone Squatter
Posts: 1586
Joined: Tue Dec 06, 2011 11:00 pm

Thu Nov 21, 2013 4:28 pm

:eek:

I admire you for taking that on. Looking like a good resto, looking forward to seeing the rest.
jmc330i
Engaged to the E30 Zone
Posts: 6621
Joined: Mon Jan 10, 2005 11:00 pm
Location: Somerset

Thu Nov 21, 2013 5:31 pm

Lots of work going on there.... Very brave job indeed 8)


bdbriandonelan wrote:also noticed a bit of confusion about the existence of a ''k plate sport'' so to clear that up . . . .
Image
bdbriandonelan wrote:the car is a 1990
How can a 1990 registered car be a K plate sport? A car can't have a registration that makes it appear newer. The newest plate that car could have is a G plate.
I'd be checking the history carefully as that reg doesn't appear on the dvla search :?
James
'91 325i Sport
'93 318i touring 16v
Speedtouch
Old Skooler
Old Skooler
Posts: 14071
Joined: Tue Feb 14, 2006 11:00 pm
Location: Canterbury

Thu Nov 21, 2013 6:11 pm

Good point! :?
///M aurice
ECU Upgrade EPROM Chips, £40 posted within the UK. Note these are not Zone chips.
viewtopic.php?f=6&t=279421
User avatar
bdbriandonelan
E30 Zone Newbie
E30 Zone Newbie
Posts: 14
Joined: Tue Sep 17, 2013 11:00 pm
Location: galway

Fri Nov 22, 2013 10:16 am

ok so to clear up all this ''k plate'' confusion. i have done my homework and and i even done another history check just now to make sure as yous made me paranoid and THE CAR IS 100% LEGIT!! :D all numbers matching, not reported stolen, scrapped etc . . the plates were changed by a previous owner in 2005 from a g plate to the now pate. i don't know why they were changed (personal preference maybe) but all this was carried out in the correct manner and car is 100% legal and legit. so now at least that's one thing put behind us . . :D
jmc330i
Engaged to the E30 Zone
Posts: 6621
Joined: Mon Jan 10, 2005 11:00 pm
Location: Somerset

Fri Nov 22, 2013 11:25 am

Sorry dude, didn't want to make you paranoid, but you cannot have a K plate on a 1990 registered car. (Also not sure why the reg doesn't appear on a dvla search :? )

There are genuine K plate Sports (at least 1 on here), but they will of been registered from mid 1992.


Keep up the good work though, it nice to see someone trying to save one of these instead of breaking it for parts :(
James
'91 325i Sport
'93 318i touring 16v
User avatar
Rich320I
E30 Zone Camper
E30 Zone Camper
Posts: 1272
Joined: Tue Dec 06, 2011 11:00 pm
Location: Worcester

Fri Nov 22, 2013 11:35 am

isnt that an older style plate though with the six digits,

my sport is on a 6 digit plate, BMA ***S,
jmc330i
Engaged to the E30 Zone
Posts: 6621
Joined: Mon Jan 10, 2005 11:00 pm
Location: Somerset

Fri Nov 22, 2013 11:49 am

Rich320I wrote:isnt that an older style plate though with the six digits,

my sport is on a 6 digit plate, BMA ***S,
BMA ***S is a suffix plate (pre 82 iirc). The plate above is a 6 digit prefix plate. My Sport and touring are both on 6 digit prefix plates.

Just realised the OP is over in Ireland, although I don't know if that makes any difference to the plates available??
James
'91 325i Sport
'93 318i touring 16v
User avatar
Rich320I
E30 Zone Camper
E30 Zone Camper
Posts: 1272
Joined: Tue Dec 06, 2011 11:00 pm
Location: Worcester

Fri Nov 22, 2013 11:55 am

yeah i noticed that after posting :roll: ,

, no idea on how plate transfer works in Ireland, weird like you say bud as that would not be do able here.
Last edited by Rich320I on Fri Nov 22, 2013 12:38 pm, edited 1 time in total.
Speedtouch
Old Skooler
Old Skooler
Posts: 14071
Joined: Tue Feb 14, 2006 11:00 pm
Location: Canterbury

Fri Nov 22, 2013 12:24 pm

Luck of the Irish, innit? :wink:
///M aurice
ECU Upgrade EPROM Chips, £40 posted within the UK. Note these are not Zone chips.
viewtopic.php?f=6&t=279421
Gert_8
Married to the E30 Zone
Posts: 11304
Joined: Mon Dec 08, 2008 11:00 pm
Location: In your back passage faster than a rat up a drainpipe!

Fri Nov 22, 2013 12:33 pm

Subscribed! Good work going on - looking forward to the updates. :D
Image
PONY, 2013 - "Anyway span 360 degrees hitting the kerb and giving the old man two fingers as I was spinning like Michael Schumacher would
User avatar
bdbriandonelan
E30 Zone Newbie
E30 Zone Newbie
Posts: 14
Joined: Tue Sep 17, 2013 11:00 pm
Location: galway

Fri Nov 22, 2013 2:21 pm

ok so i have been in contact with the dvla and the reason i was given for it not popping up on their system was because it was a personalized plate that could have been discontinued or whatever, even though it pops up on motor checks system with the date of the plate being changed. so to avoid further confusion i am going to fill up a v62 form and get it changed back to its original g plate. i was assured by the dvla that the car is fully legit and by putting it back on its original plates i would avoid further confusion or technicalities when it comes to putting it on irish plates . . (or uk forums)
:roll:
so panic over, and time to focus on the car and not its weird plates. :D
jmc330i
Engaged to the E30 Zone
Posts: 6621
Joined: Mon Jan 10, 2005 11:00 pm
Location: Somerset

Fri Nov 22, 2013 2:51 pm

bdbriandonelan wrote:by putting it back on its original plates i would avoid further confusion or technicalities when it comes to putting it on irish plates . . (or uk forums)
:roll:
Just trying to make sure a fellow enthusiast hasn't been done over by buying a car with a dodgy past.
I'm sure it was probably a dvla f*ck up in the past, but if you didn't question it sooner rather than later, I wouldn't put it past them stiffing you in the near future when it comes to sorting it out - (it would be a shame after all the work you're putting into it)
I had no end of trouble with a straight forward plate change last year :x


Keep up the good work and keep the thread update 8)
James
'91 325i Sport
'93 318i touring 16v
User avatar
bdbriandonelan
E30 Zone Newbie
E30 Zone Newbie
Posts: 14
Joined: Tue Sep 17, 2013 11:00 pm
Location: galway

Fri Nov 22, 2013 4:03 pm

jmc330i wrote:
bdbriandonelan wrote:by putting it back on its original plates i would avoid further confusion or technicalities when it comes to putting it on irish plates . . (or uk forums)
:roll:
Just trying to make sure a fellow enthusiast hasn't been done over by buying a car with a dodgy past.
I'm sure it was probably a dvla f*ck up in the past, but if you didn't question it sooner rather than later, I wouldn't put it past them stiffing you in the near future when it comes to sorting it out - (it would be a shame after all the work you're putting into it)
I had no end of trouble with a straight forward plate change last year :x


Keep up the good work and keep the thread update 8)
thanks, ya to be honest it does seem like a dvla f**k up because on the car check sites everything is in order with dates of old plate life and dates of change and new plates life! car is def legit because i have a service history with older plate noted on old services and new plate on new services + i couldn't have ordered the scuttle panel from bmw if the new plate didn't exist or didn't match the vin on their system. either way thanks for looking out for this poor irish man with no clue what so ever how uk plates work!! glad to have it figured and according to dvla i should have no complications atal. :) . . .
Splondike
E30 Zone Addict
E30 Zone Addict
Posts: 2738
Joined: Sun Jan 09, 2005 11:00 pm
Location: Under my bonnet

Fri Nov 22, 2013 4:46 pm

Good luck with it and well done for taking it on :) Looking forward to the progress.
Mark.
User avatar
bdbriandonelan
E30 Zone Newbie
E30 Zone Newbie
Posts: 14
Joined: Tue Sep 17, 2013 11:00 pm
Location: galway

Tue Nov 26, 2013 4:21 pm

right!! time for an update!! as you all know the car is getting a full respray. i work 6 days a week away from home so progress is slow but i had 2 full days off this weekend so i made them as productive as possible!! i had a lot of sanding done prior to this so it was more or less ready for priming!!

all the panels were more or less straight enough so they didnt need a lot of attention. the door was a bit wavy so that got a lot of sanding with the block

Image

paint on lower front bumper was cracked in places so that had to be fully sanded more or less to get cracks out. wasnt the first time the lower bumper was painted either, if you can see the different layers in the pic you will see it had been painted at least 4 or 5 times!!! :eek:

Image

it took for. . . . . ever to do !!!:mad:

Image

next job was to tape up the car and inspect every panel for defects prior to priming it! i also cleaned every surface thoroughly with a cloth and thinners to remove all dust and contaminants.

Image

Image

Image

so now on to the fun part . . . . :)

Image

primed all panels and areas of repair on shell and then went over shell with a very heavy second coat of primer especially over repaired areas.

Image

Image

Image

Image

Image

Image

Image

Image

Image

Image

and of course this fella decided to land on my newly beautifully primed bootlid!:mad:
Image

right so everything is primed and ready for a light sanding.

i got some ''guide coat'' stuff from the local panel beater for sanding the primer. basically how this stuff works is that it is first rubbed onto the primed car with a sponge like applicator. the idea is to sand off the guide coat until it cant be seen anymore. any dimples / hollows in the primer will be seen easily as the sandpaper will not reach the guide coat and therefore it will stand out like a sore thumb. basically you just have to sand the primer until no black spots of the guide coat are left, then you know that you have a perfectly even layer of primer which is ready for paint.

Image
guide coat applied

Image
area of guide coat sanded

Image
i don't know if its very clear but here you can see where guide coat was
lightly sanded. all high spots are white as they are the first spots to get in contact with paper. the panel has to be sanded until these high spots are sanded flush with the low spots (which are the black spots in above pic)

once guide coat is almost completely removed the primer gets an 800 grit hand wet sanding for the perfect smooth finish.

Image

Image

Image

so the body of the car is now fully wet sanded and ready for paint :dance:
all panels skirts and bumpers (which on a sport is a lot) need guide coating and wet sanding and then its on to the local panel beater, i have come this far and i'm not going to chance painting it myself for obvious reasons!! any more sanding would probably be the death of me!!! it will be a while until the next update im afraid as i have alcohol to consume this weekend and i wont be near the car until the weekend after that so until then . . . . :D:D
User avatar
Gavla
E30 Zone Squatter
E30 Zone Squatter
Posts: 1586
Joined: Tue Dec 06, 2011 11:00 pm

Tue Nov 26, 2013 5:27 pm

Cracking job mate.
User avatar
CarbTuner
E30 Zone Newbie
E30 Zone Newbie
Posts: 50
Joined: Thu Nov 28, 2013 11:00 pm

Tue Dec 03, 2013 5:30 pm

Goodness, this is great, I can't wait to see the result! Cheers to that!
You were only supposed to blow the bloody doors off!!!
User avatar
bdbriandonelan
E30 Zone Newbie
E30 Zone Newbie
Posts: 14
Joined: Tue Sep 17, 2013 11:00 pm
Location: galway

Wed Dec 18, 2013 5:29 pm

right! so time for a minor update. The car is currently at the sprayers. i have it fully prepped, wet sanded and masked off and am waiting for him to get around to doing it!
time now to turn my attention to the interior. as the old interior was cloth and ripped i bought a new one of a member on here.
the new interior was recently re trimmed with red piping and is in good condition and it came with black leather door cards! only problem being that there was a hole cut out in them for the manual window winders, so threw them to one side and set about dyeing my grey ones black!! i prefer the carpet centered ones anyways!!

Image

first thing i done was clean surface thoroughly, then rub in dye with sponge as a base coat. i gave it maybe 3 heavy base coats

Image

once everything had a good covering of dye it got a light sanding to flatten surface and then a spray of the dye

Image

once that was done it got sealed with matte leather finish. the carpet parts were also dyed a lot heaver than in these pics! forgot to take pic of finished result :mad: but there'll be pics of it later in the car!!

Image

Image

Image

next job was to dye the carpets and rear shelf. i noticed most people scrub the dye into the carpet but me being lazy put the dye in the spray gun, opened to full pressure and simply sprayed it on.

Image

first coat
Image

last coat
Image

i had more than enough in the 1 L of dye even though the rear shelf swallowed most of it but eventually it was as black as the rest (forgot pic of course)

next job was my new seats which i realized (after buying them) wouldn't function properly. they were all seized up but with the aid of wd40 they came nice and free the way they should be!!
also the gas strut thingys :confused: had lost their gas and wouldn't push the seat up or down or back or forward. . . i guess that just slipped the sellers mind when counting my money .. :rolleyes:
so take apart my new seats, replace gas things with working ones from my old seats, tighten a few screws that the re upholster had forgoton about and now i have a set of fully functional seats with no play what so ever :)

Image

Image

so that's most of the interior sorted, ill have more pics when its in!


next was to fix up my headlamps as the bracket on one of them was all cracked and broke! i had another set sourced but they were not smileys so i just swapped the parts over

Image

Image

finished result
Image

head lamps are now fully functional with all adjusters un seized, greased and working!!

also gave the front grilles and headlamp surrounds a sanding and painted matte black while i was at it

Image

Image

that's about it for now i'm afraid! waiting to get the car back so she can go back together. i have most small jobs more or less done.

hopefully i will have it back this weekend so it can be re assembled during the xmas. a major service and a few minor upgrades are also in the pipeline before she rolls out of the shed so until then . . merry Christmas:):dance:
User avatar
si911t
E30 Zone Regular
E30 Zone Regular
Posts: 634
Joined: Thu Oct 07, 2010 11:00 pm
Location: Lancashire

Wed Jan 01, 2014 12:01 am

Hero!
User avatar
bmwsean
E30 Zone Newbie
E30 Zone Newbie
Posts: 36
Joined: Sun Aug 26, 2007 11:00 pm

Sun Jan 05, 2014 3:26 pm

top work gone into this, cant wait to see it finished, looking great a‘a
User avatar
Fastroad
E30 Zone Addict
E30 Zone Addict
Posts: 2405
Joined: Mon Oct 22, 2007 11:00 pm

Sun Jan 05, 2014 7:18 pm

I like those seats
User avatar
bhups
E30 Zone Regular
E30 Zone Regular
Posts: 510
Joined: Tue Nov 06, 2007 11:00 pm

Sun Jan 05, 2014 10:01 pm

Top work!
Image
User avatar
bdbriandonelan
E30 Zone Newbie
E30 Zone Newbie
Posts: 14
Joined: Tue Sep 17, 2013 11:00 pm
Location: galway

Wed Jan 15, 2014 12:17 pm

right so thanks for all the complements first of all.
got the car back from sprayers and very happy.
it still needs flattening and buffing but overall i'm very pleased with how it came out.
i should have all the panels back tomorrow and then it can start looking like a car again!!:):):)

on the home stretch now . . .
in the mean time ill leave a few (bad quality) pics here. enjoy!:thumb:

Image

Image

Image

Image

Image
:D :D :D :D :) :wink:
Mitchen
E30 Zone Addict
E30 Zone Addict
Posts: 2372
Joined: Mon Jul 15, 2013 11:00 pm
Location: London

Wed Jan 15, 2014 12:37 pm

Great post! Can't wait for the outcome!
1990 320i Coupe SE

viewtopic.php?t=253048
User avatar
dirtee-herbert
E30 Zone Regular
E30 Zone Regular
Posts: 327
Joined: Sat Apr 23, 2011 11:00 pm
Location: Keighley, West Yorkshire.

Wed Jan 15, 2014 4:49 pm

Amazing work. It looks a real credit to your efforts.
looking forwards to the next few post of you piecing it back togeather.
User avatar
bdbriandonelan
E30 Zone Newbie
E30 Zone Newbie
Posts: 14
Joined: Tue Sep 17, 2013 11:00 pm
Location: galway

Thu Feb 13, 2014 3:45 pm

right. so time for another small update. the car is actually more of less finished apart from a few small bits but me being me i dont want anyone to see it until its fully done!;) when i got the car and panels back from sprayer the next job was to flatten and buff the paint work.
unfortunately the process involves more fecking sanding :mad::mad::mad:.

aniways when car is painted few minor imperfections are guaranteed to show up so to find them the panels all need a light 2000+ grit wet sanding. any imperfections or heavy orange peel show up like so

Image

Image

so basically the aim is to focus on these blemishes until they are all uniform and flush with the rest of the panel. obviously any blemishes underneath the top coat of lacquer can not be erased but luckily in my case there was none:)

so a good buff with a rough compound ( i used farclea g3 ) brings it back to a shine

Image

Image

Image

Image

Image

a final buff with a fine compound, a polish and wax are all needed yet but im leaving this until panels are all on and car is fully done and that will be the icing on the cake:)
so started putting her back together. used all new bolts and screws and nuts wherever i could and greased pretty much every possible joint to keep that rust at bay

Image

Image

Image

few more pics for good measure

Image

Image

Image

Image

put my brand new scorpion system on too. straight piped her also ;) and surprisingly enough its not crazy loud. i fitted a 2nd hand manifold which is in great condition with new gaskets, a scorpion down pipe, out with the tig welder and made up two lenghts of stainless for centre section and fitted the new back box. very happy with how it came out :) sounds well too!

Image

so that's about it for another while. next update should be a good one
Speedtouch
Old Skooler
Old Skooler
Posts: 14071
Joined: Tue Feb 14, 2006 11:00 pm
Location: Canterbury

Thu Feb 13, 2014 3:51 pm

Image

I trust that's not normal grease you've applied there? Grease rots rubber, so don't go getting it on the windscreen rubber! :wink:
///M aurice
ECU Upgrade EPROM Chips, £40 posted within the UK. Note these are not Zone chips.
viewtopic.php?f=6&t=279421
User avatar
bdbriandonelan
E30 Zone Newbie
E30 Zone Newbie
Posts: 14
Joined: Tue Sep 17, 2013 11:00 pm
Location: galway

Thu Feb 13, 2014 4:08 pm

nope, i knew some one would pick up on that!! 8) i used 'castrol red rubber grease' . it can easily be picked up at local halfords , motorfactors etc . . . it makes life easier for fitting the windscreen strip also :D
Speedtouch
Old Skooler
Old Skooler
Posts: 14071
Joined: Tue Feb 14, 2006 11:00 pm
Location: Canterbury

Thu Feb 13, 2014 4:58 pm

That's OK then - I'll let you off lightly, this time... :)
///M aurice
ECU Upgrade EPROM Chips, £40 posted within the UK. Note these are not Zone chips.
viewtopic.php?f=6&t=279421
Post Reply