My 325i Cabby Project

Show off your pride and joy here

Moderator: martauto

Post Reply
Gouki
E30 Zone Addict
E30 Zone Addict
Posts: 2262
Joined: Mon Jun 13, 2005 11:00 pm

Thu Jul 28, 2011 10:14 pm

Here's my project. Picked up a '91 E30 325i Cabriolet in lagoon green a few months back. Wasn't my first choice of colour but its starting to grow on me and I had been on the lookout for one for months seen a few which weren't that great till this came up.

It has 4 former keepers, manual gearbox. It has an automatic hood, 12 button OBC, cloth interior and has just over 163,000 miles. Shoes are 15" BBS cross spokes. The car has every single MOT from the beginning. Has loads of history and reciepts for the car. It even has the original bill of reciept when this car was bought for £26,270. The first owner had traded in a 2 year old 325i SE against it and paid the difference!

Bad bits, it needs rear arch work, passenger side being a little worse off.
Both sills have rust, front wings have some rust on the lip.
Rear panel where the tow eye is has some rust.
Exhaust needs a new rubber to hold back in place, currently held by rope.
Electric door mirrors are not functioning.
Electric hood is out of operation.
OBC display panel is quite dim.

Plans are at the moment is to fix the mirror problem, new rubber to hold exhaust back in place, and get the hood converted to manual operation.

Here it is. :)

Image
Image
Image
Image
Image
Image
Image
Image
Image
Image
User avatar
blingsta
Boost Junkie
Posts: 2930
Joined: Fri Jan 27, 2006 11:00 pm
Location: Enfield

Thu Jul 28, 2011 10:35 pm

nice mate... whats the bigger plans? tech 2 kit? or staying standard?
User avatar
blingsta
Boost Junkie
Posts: 2930
Joined: Fri Jan 27, 2006 11:00 pm
Location: Enfield

Thu Jul 28, 2011 10:35 pm

oh, and good idea about reverting to manual roof... i just done that to mine aswell... soooo much better ...
Gouki
E30 Zone Addict
E30 Zone Addict
Posts: 2262
Joined: Mon Jun 13, 2005 11:00 pm

Fri Jul 29, 2011 12:27 pm

As mentioned there is rust issues so I will want a full respray done on the car once I've got the money together so that takes care of that and yep Tech 2 kit would be nice, leathers, decent set of wheels. All in good time :)
Image
Gouki
E30 Zone Addict
E30 Zone Addict
Posts: 2262
Joined: Mon Jun 13, 2005 11:00 pm

Fri Jul 29, 2011 8:15 pm

As mentioned, my rear exhaust had been held on by some tight string to keep it up as the rubber mount had perished and split. Finally got my finger out and sorted it. I was warned pre hand that its tough to get it on the bracket and on the exhaust as there isn't much give and is hard to stretch so here goes.

Ordered an exhaust mount for £5 off ebay, old one on the left
Image

Here's how the exhaust was held on!
Image

Vaseline jelly always come in handy!
Image

Started with putting it around the bracket thats attached to the car, not easy as the space was tight.
Image

Next it was a case of lifting the exhaust up with the trolley jack and pushing to the left to get enough room to get one side on the exhaust bracket. Man it was tough and a complete bitch to do specially you haven't any room to move your hands about in and only so much you can pull apart with your fingers. Luckily my long screwdriver came in handy.
Image

I was so glad that side went on as it wasn't easy at all, then got the other side to slide on after much swearing!
Image

Now sits properly as it should be.
Image

Next I'm gathering all the bits to convert my electric roof to manual operation.
Image
Ollie_bwoii
Married to the E30 Zone
Posts: 8695
Joined: Sat May 17, 2008 11:00 pm
Location: Northampton

Fri Jul 29, 2011 8:54 pm

Rubber hanger needs turning 45 degrees. :D
capri_rob
Married to the E30 Zone
Posts: 9681
Joined: Tue Feb 19, 2008 11:00 pm
Location: South Staffordshire

Fri Jul 29, 2011 9:08 pm

Did you try to fit the exhaust hangers in place with the exhaust still fitted ?? 8O

Its a lot easier if you undo the lower straps, the exhaust will drop enough to allow you space to fit the rubber donuts and upper hangers, trolley jack the exhaust back up into place then refit the lower straps.
Image

e30topless said : Proper BMW's have 4 headlights, last of the run was the E30 and E34/E32 anything after that is just complete shite
Gouki
E30 Zone Addict
E30 Zone Addict
Posts: 2262
Joined: Mon Jun 13, 2005 11:00 pm

Fri Jul 29, 2011 9:45 pm

Ollie_bwoii wrote:Rubber hanger needs turning 45 degrees. :D
Ahh gotcha! :wink:
capri_rob wrote:Did you try to fit the exhaust hangers in place with the exhaust still fitted ?? 8O

Its a lot easier if you undo the lower straps, the exhaust will drop enough to allow you space to fit the rubber donuts and upper hangers, trolley jack the exhaust back up into place then refit the lower straps.
Yep I did! Wish I knew earlier, would have saved on all the swearing. :cry: Still its a learning experience and know for the future now :)
Image
dips346
London Meets Main Man
Posts: 3978
Joined: Fri Jan 14, 2005 11:00 pm
Location: heston/heathrow

Sat Jul 30, 2011 9:13 pm

get a move on lol
Gouki
E30 Zone Addict
E30 Zone Addict
Posts: 2262
Joined: Mon Jun 13, 2005 11:00 pm

Thu Aug 25, 2011 2:48 am

Over the weekend I decided to crack on with wiring up my sound system. Also had to get something in there as well as I had no working radio and god knows hold old the speakers were!

I wired up my old convertible from scratch before so have had experience on how to do it.

Bought two Vibe Slick 2000w amp wiring kits which have a 4AWG power cable, (only need to run the one). Going to run two RCA's, Remotes and loads of speaker cable!

Bought two pairs of Vibe Slick V3 13cm speakers. I went for the Vibes as they had a shallow mounting depth as the E30's don't have much room. Also will be amping these up in the future and they have a decent RMS rating of 70w and at £40 for a pair can't go wrong.

Headunit undecided as of yet as these new ones just look ugly! So in the meantime will be installing a spare Sony unit with USB which will fill the gap for now.

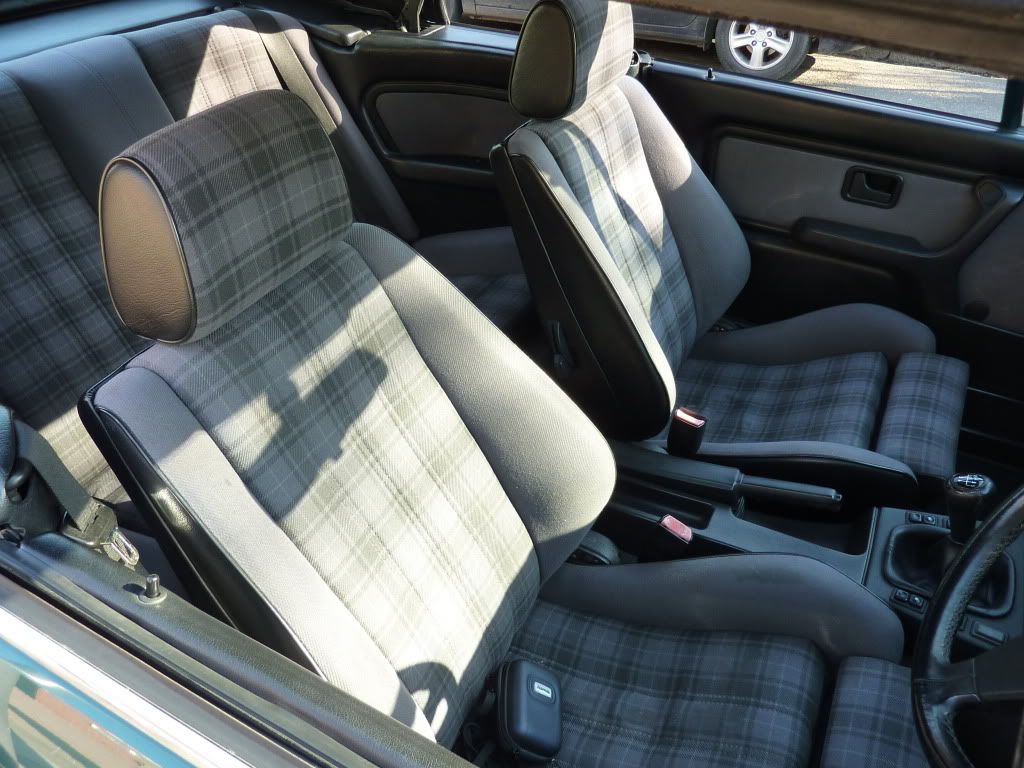
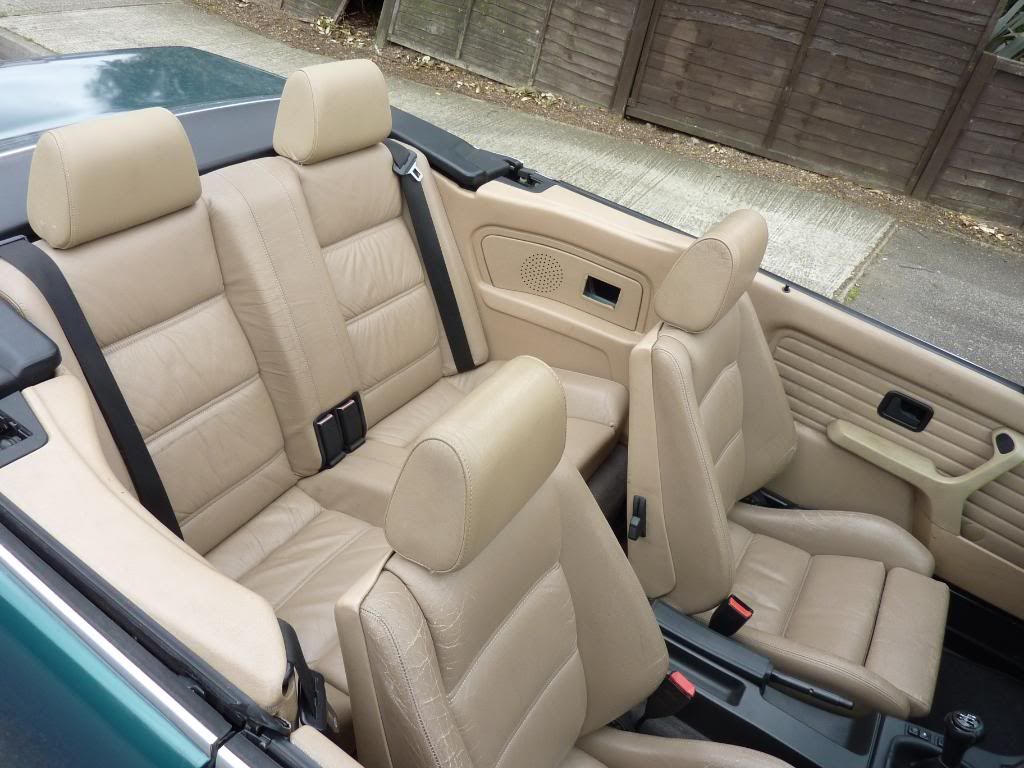
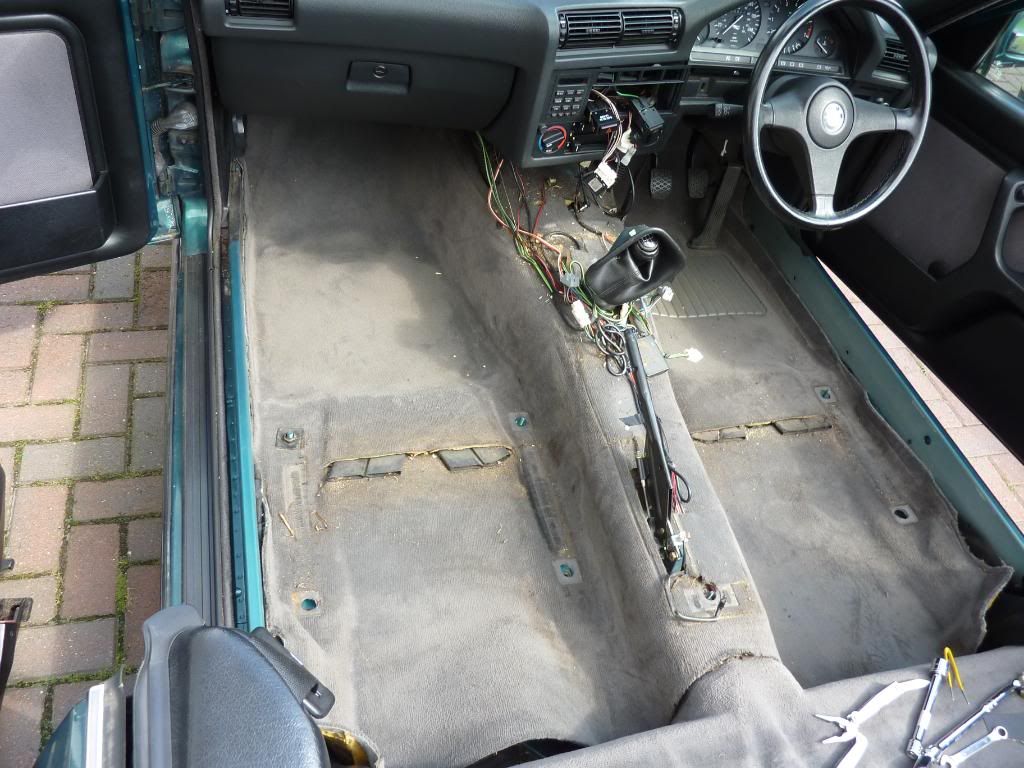
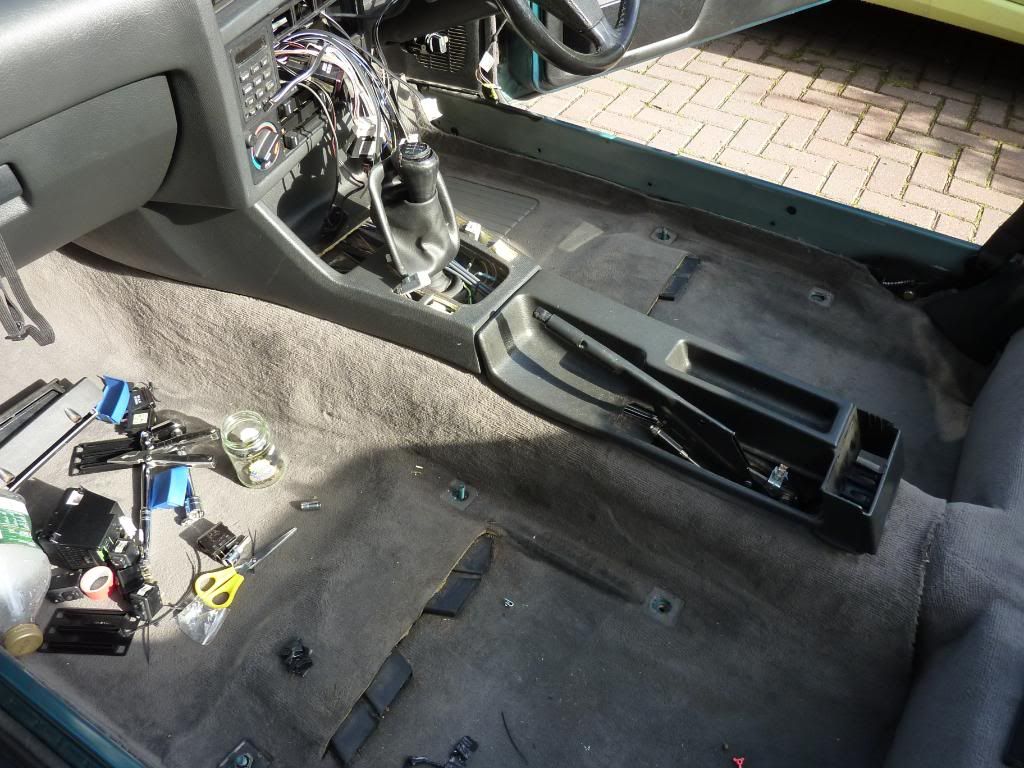
So started off with lifting the rear seat up and took both front seats out pretty straight forward and the side kick panels (A real pain with the clips):
Image
Image
Image

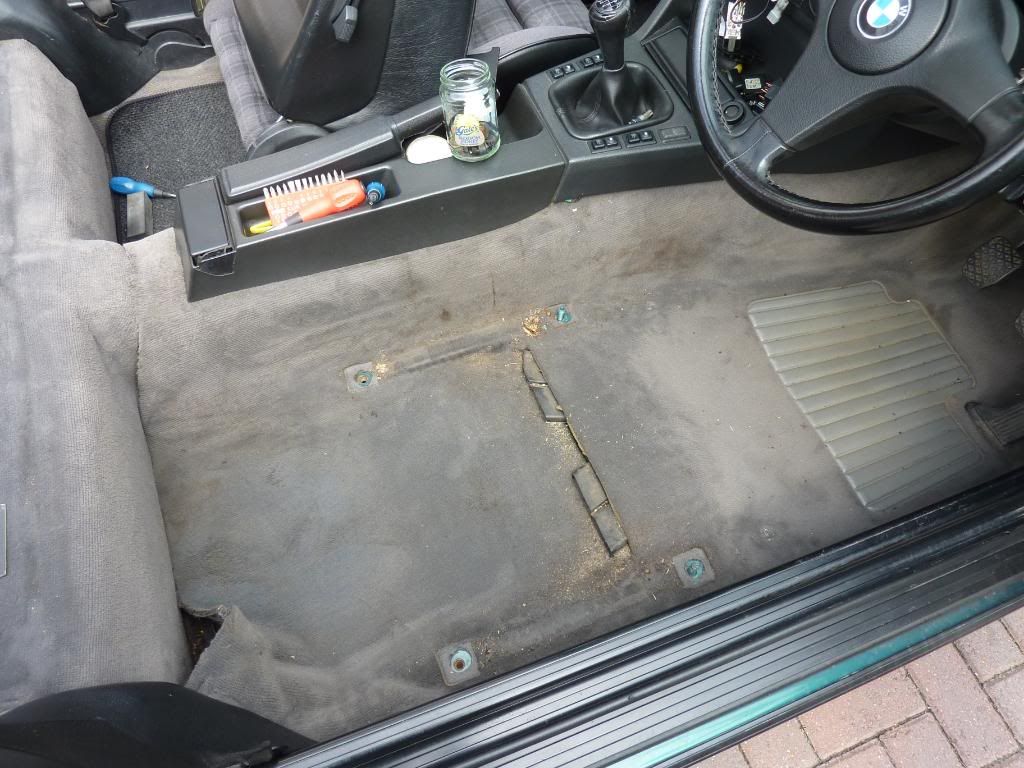
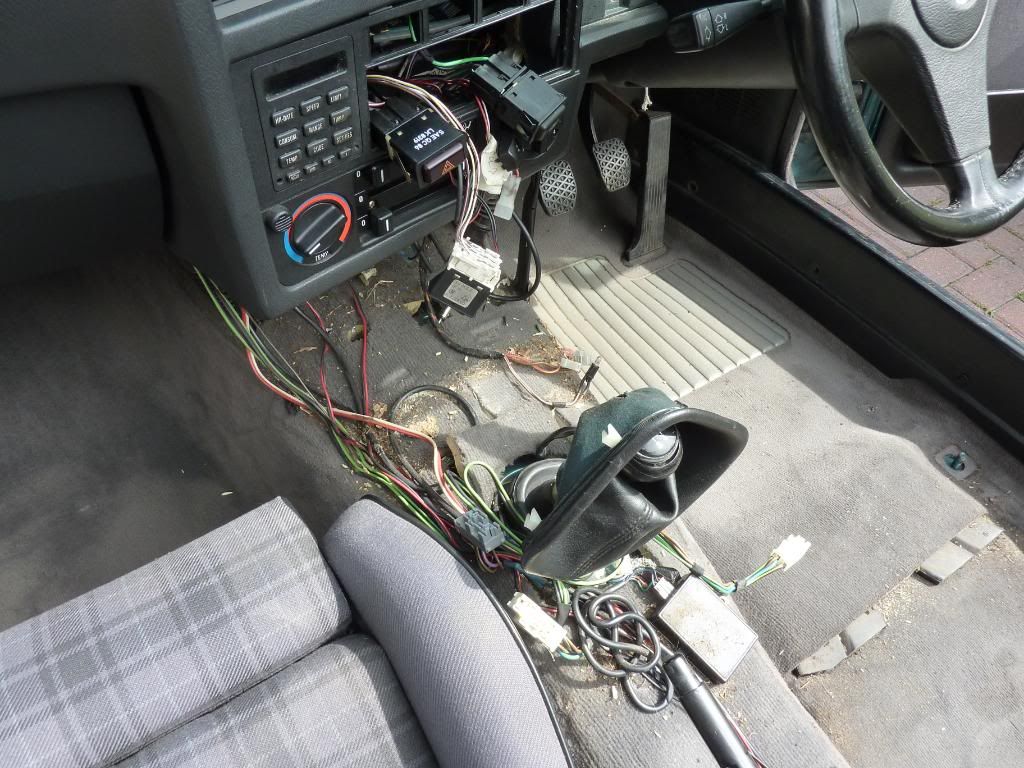
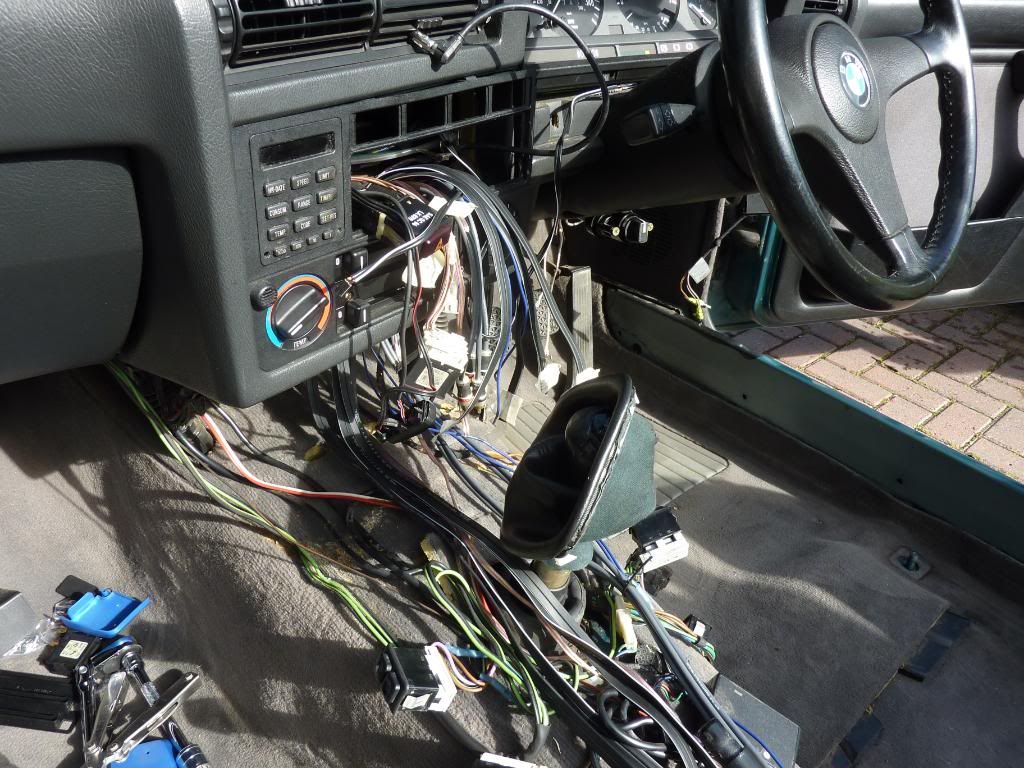
Ripped the centre console out! Gave it all a hoover as well while it was all out.
Image

Found some more rust! :-x
Image
Image

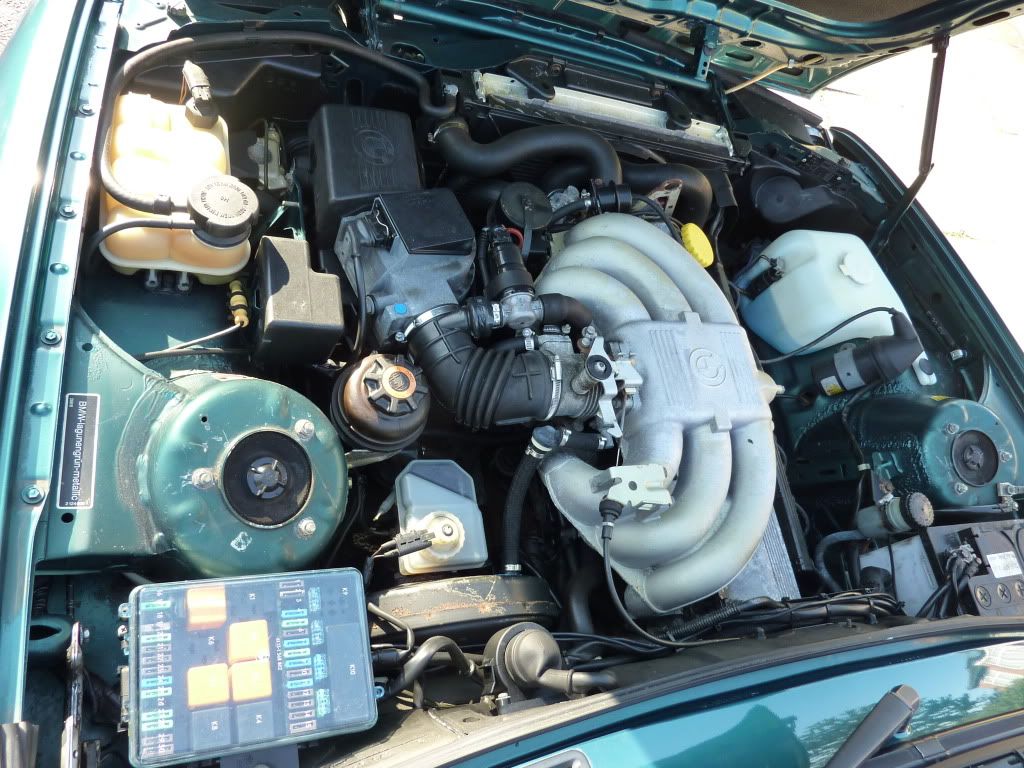
Removed the battery and all the trim:
Image

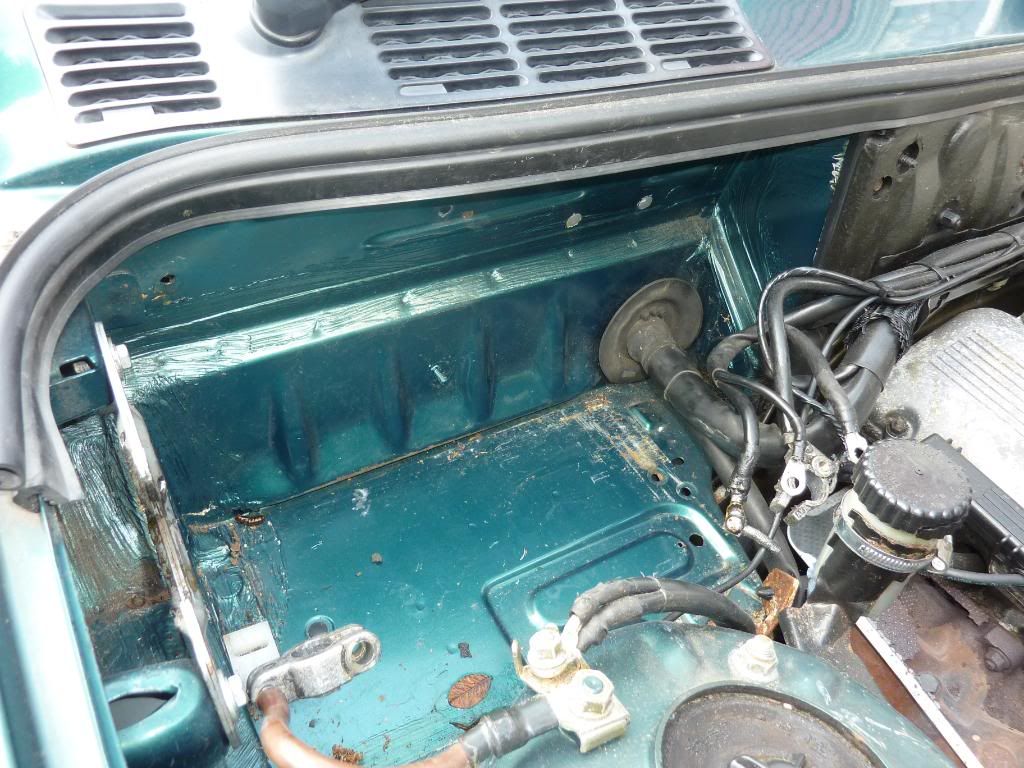
Then made an incision to feed my power cable through the bulkhead and wire fed through into the car:
Image
Image

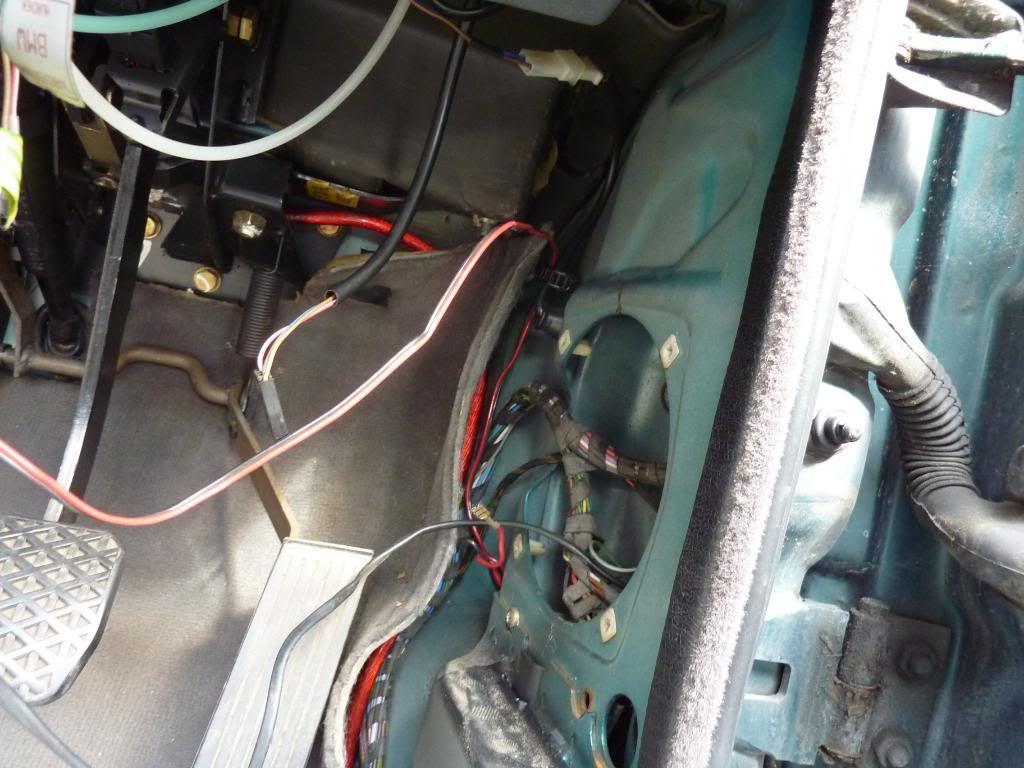
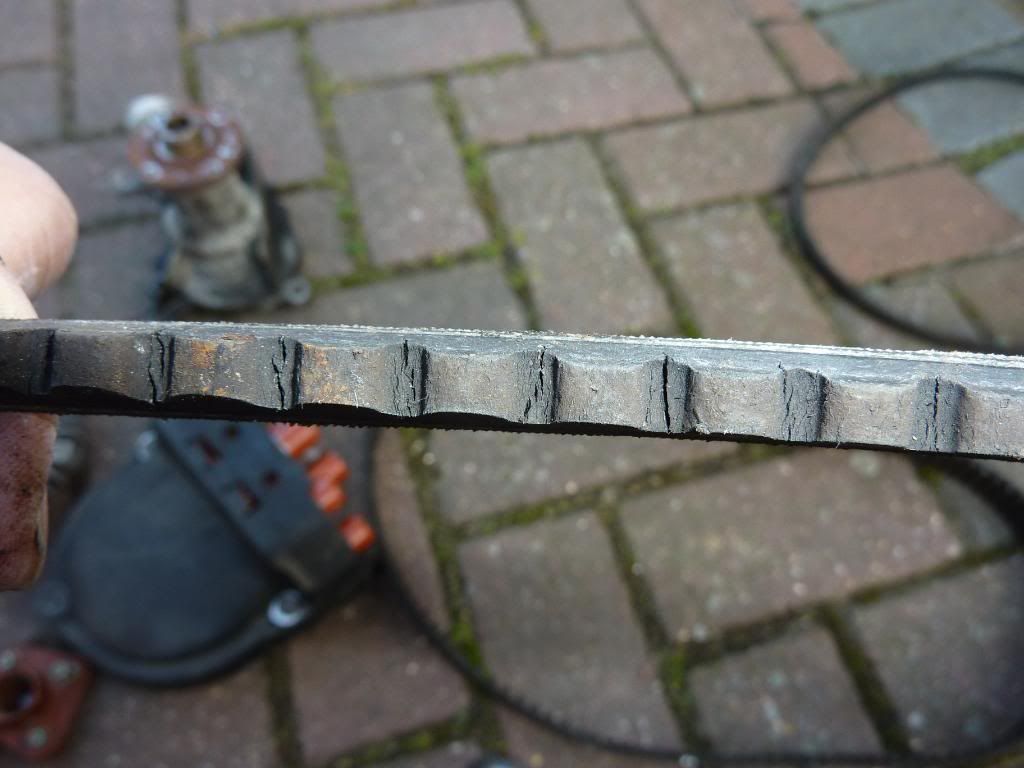
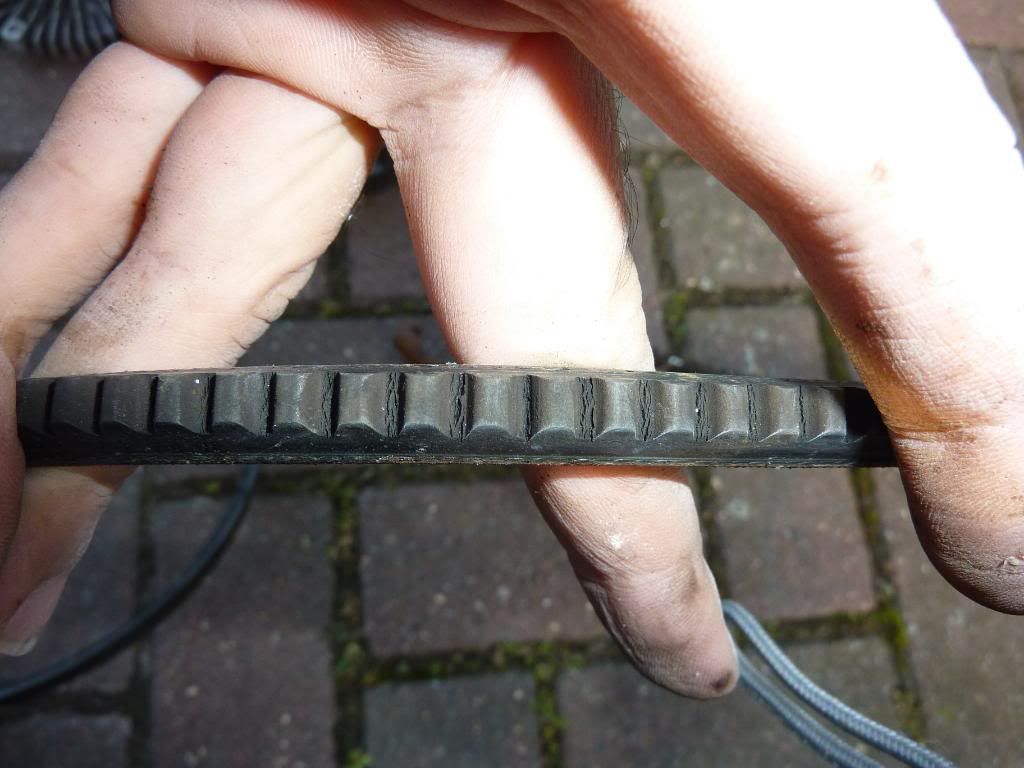
Got the kick panels off and nice crusty old speaker was living there but not for long!
Image

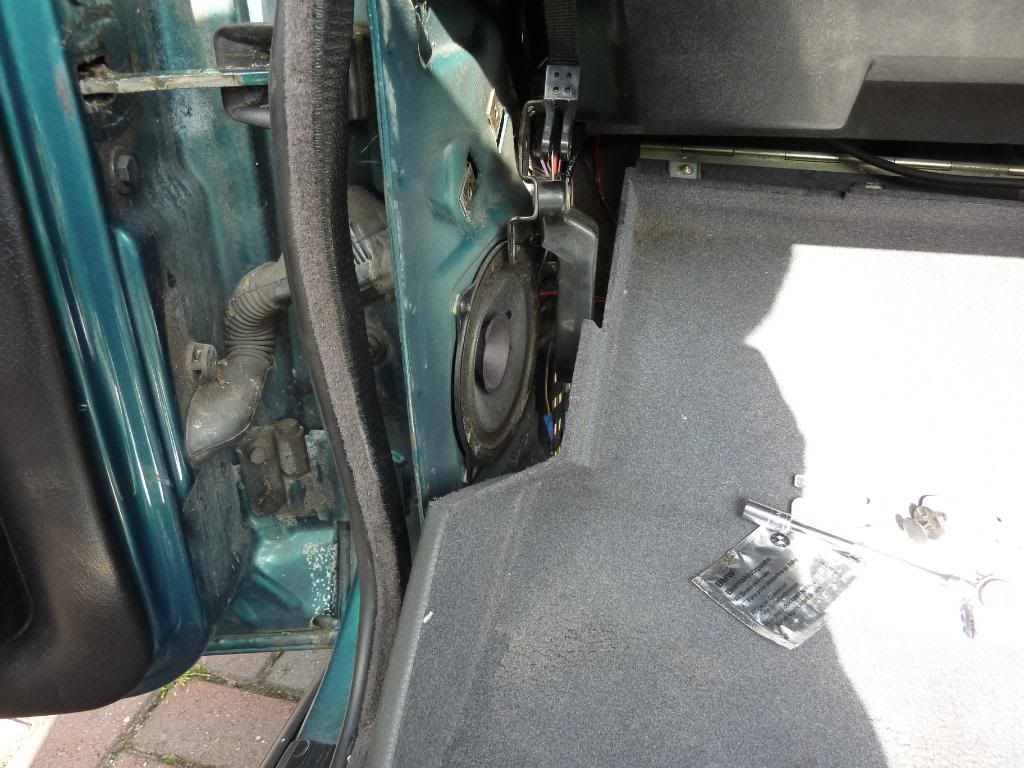
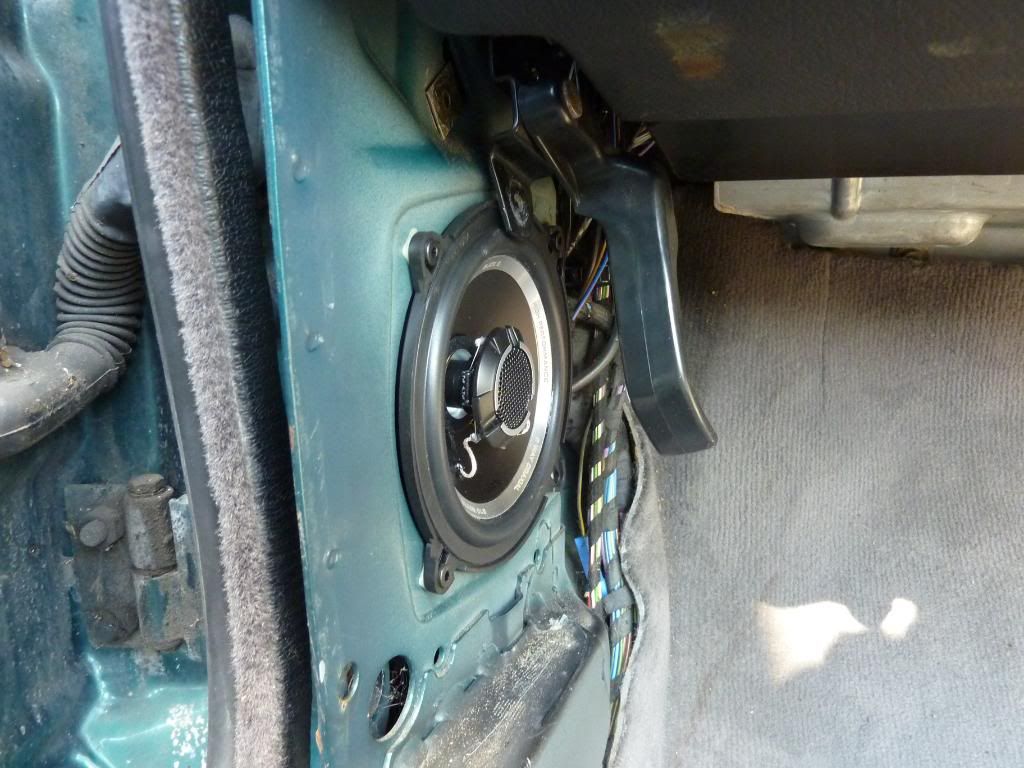
Ripped out the old speaker cables and installed brand new ones. Then started to fit speakers fronts and rear. I was very lucky with the rear as there is hardly much room to accomodate the speaker and was lucky enough to position it so that 3 screws can hold it on.
Image
Image
Image

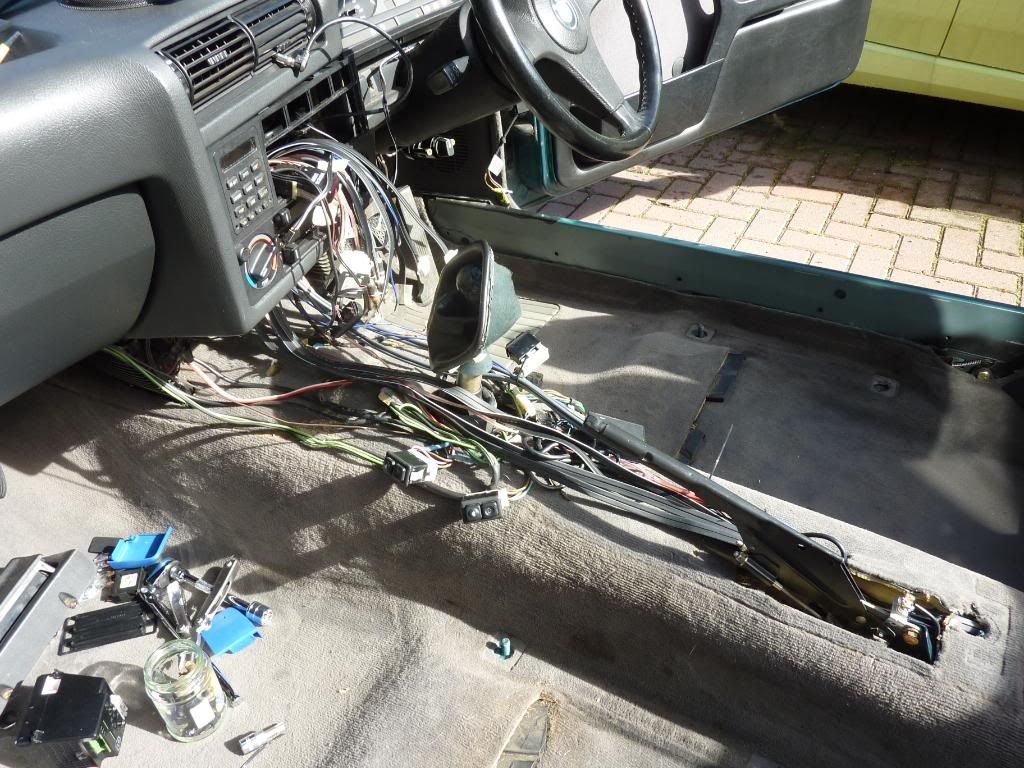
Next it was sorting out spaghetti junction with all the wires, 2 RCA's 2 Remotes, and a bunch of speaker cables! Laid them out through the centre.
Image
Image
Image

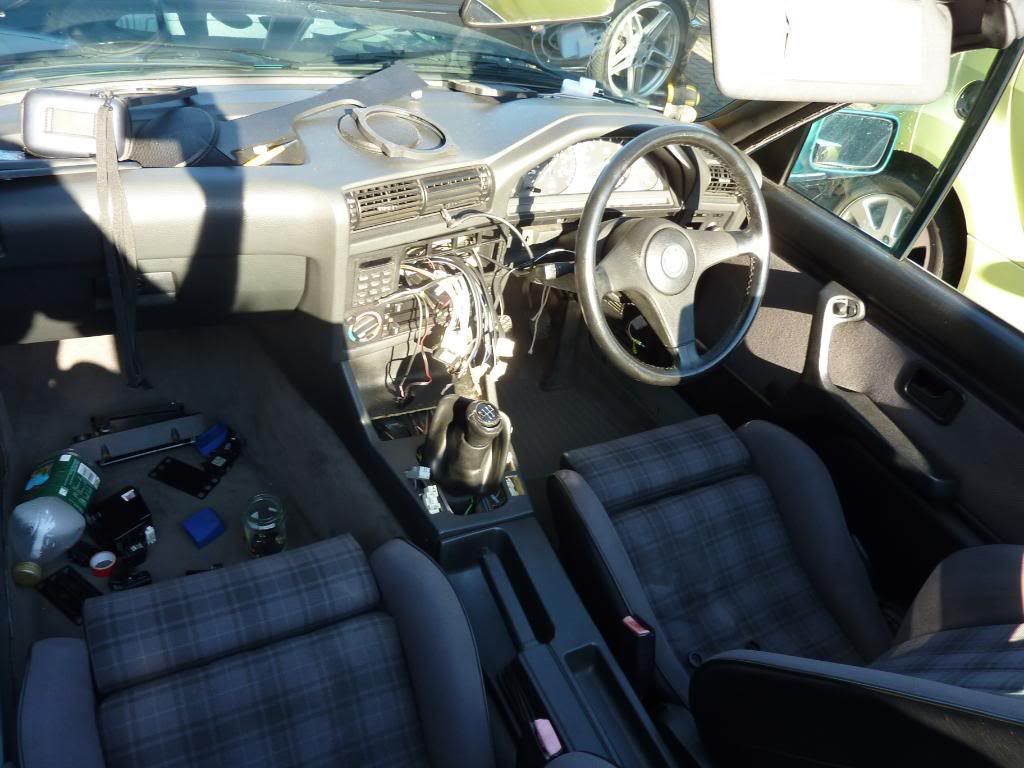
Now to put everything back together!
Image
Image

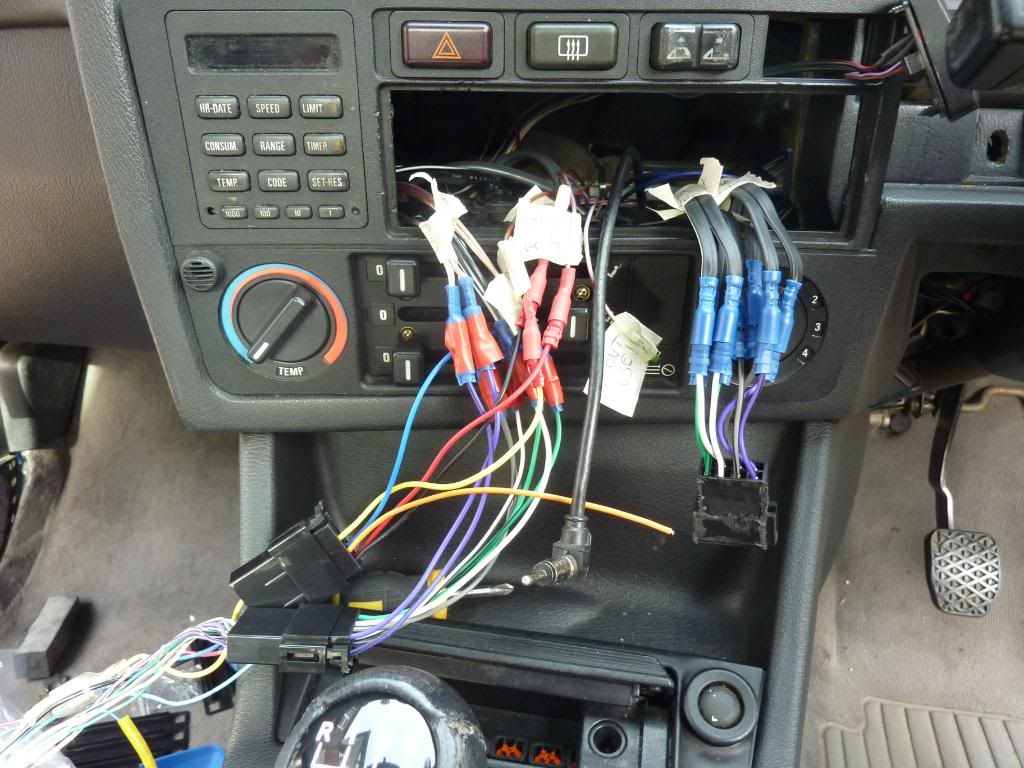
As there was no ISO block connectors to start with I made my own:
Image

Everything all connected, tested to make sure it all works! As you may have noticed there is a ISO connector on the right, this basically is my speaker cable from the boot to the front. What this means is when I do get the amps all I have to do is unplug the ISO speaker connector thats plugged into the HU and plug it into this. It saves me having to run two sets of cable from each speaker, and also if the amp ever blows or malfunctions all I have to do is plug it into the HU iso block again to get sounds to the speakers.
Image

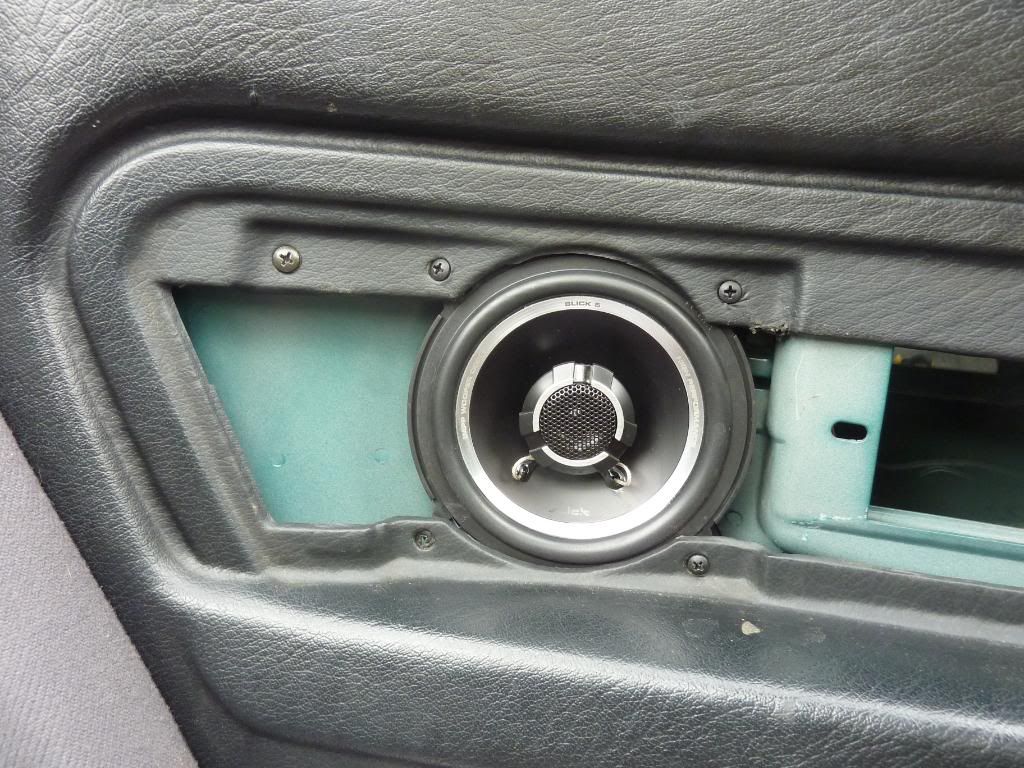
Now put all back together and suprisingly done well not to lose any screws either as it seems to happen to me a lot! Temporary headunit now in place. Played around with it and have to say the speakers are performing very well and have very good clarity. its nice to have some sounds in the car to keep me going!
Image

Job done! God I love working on these old cars! More updates to come soon. :D
Image
User avatar
andyp
True Old Skooler
Posts: 6899
Joined: Sun Jan 09, 2005 11:00 pm
Location: LONDON

Thu Aug 25, 2011 11:07 am

make sure that big grommet with cable in it is fitted back in right, it will need vasaline [as pacerpete will tell you] to slide back in easy, deff crying out for a leather trim
Demlotcrew
E30 Zone Team Member
Posts: 13329
Joined: Mon Dec 20, 2004 11:00 pm
Location: East Anglia

Thu Aug 25, 2011 11:15 am

Ill let Pete take the credit for the Vaseline :eek:
Gouki
E30 Zone Addict
E30 Zone Addict
Posts: 2262
Joined: Mon Jun 13, 2005 11:00 pm

Thu Aug 25, 2011 2:05 pm

andyp wrote:make sure that big grommet with cable in it is fitted back in right, it will need vasaline [as pacerpete will tell you] to slide back in easy, deff crying out for a leather trim
Yeah was bitch to put back in Andy but all good now and defo need leathers, all in good time my friend :wink:
Demlotcrew wrote:Ill let Pete take the credit for the Vaseline :eek:
Lol, hi Andrew! :)
Image
User avatar
Mahmood
E30 Zone Camper
E30 Zone Camper
Posts: 1340
Joined: Mon Jan 10, 2005 11:00 pm
Location: People's Republic of Londonistan

Mon Sep 05, 2011 10:14 pm

I see you're back in the E30 fold. I'll follow this with interest :cool:
dips346
London Meets Main Man
Posts: 3978
Joined: Fri Jan 14, 2005 11:00 pm
Location: heston/heathrow

Mon Sep 05, 2011 10:41 pm

Mahmood wrote:I see you're back in the E30 fold. I'll follow this with interest :cool:
:eek: where the hell have been sir ?
User avatar
Mahmood
E30 Zone Camper
E30 Zone Camper
Posts: 1340
Joined: Mon Jan 10, 2005 11:00 pm
Location: People's Republic of Londonistan

Tue Sep 06, 2011 9:43 am

where the hell have been sir ?
Ha ha...not wanting to hijack this thread but I have been working in various countries. Now in London for while. No E30 though.
Gouki
E30 Zone Addict
E30 Zone Addict
Posts: 2262
Joined: Mon Jun 13, 2005 11:00 pm

Fri Oct 07, 2011 6:08 pm

dips346 wrote:
Mahmood wrote:I see you're back in the E30 fold. I'll follow this with interest :cool:
:eek: where the hell have been sir ?
Innit! Old skool members are back! lol.

New update first the boring bit I know most of you are going to flick through my waffling until you get to the leathers so here goes! :D

Car needed a major service as oil hadn't been changed for a few years as well as the cambelt. Decided to replace a lot of things which were worth doing.

So using ECP's handy 30% discount a while back I bought and replaced the following:

Image

Oil 10W40
Oil Filter
Fuel Filter
Coolant
Spark Plugs
Contitech Cambelt Kit with Pulley
Water Pump
Viscous Coupling
Rotor Arm
Distributor Cap
Auxillary Drive Belts
Wynns Engine Flush

This was the state of my cap, all warn out. Anyone that has never changed one on theirs I'd strongly advise to do it!
Image
Image

Rotor arm seen better days, definitely worth replacing:
Image

These probably have never been replaced as the build dates for the cap was 1991 and the rotor 90! :eek:
Image
Image

Old water pump, coupling and pulley.
Image
Image
Image

Cambelt replaced in time as this was showing signs of wear and had not been replaced for a long time.
Image
Image

Aux drivebelts were the worst each one showing considerable cracks all the way around the teeth.
Image
Image

Next I managed to source an original set of beige leather seats to replace the old. They are also heated but haven't wired these up as of yet and can be done later.

I need to source a drivers side right bolster as this one is ripped so if anyone has one spare let me know. :)

Some pics with the roof down! Goes perfectly with the exterior I think.

More to come!

Image
Image
Image
Image
Image
Image
Image
Post Reply