E30 from Ukraine - "Shadow of Intelligence"

Doing a minor build / restoration or an epic one, post it here

Moderator: martauto

User avatar
The_Glory
E30 Zone Regular
E30 Zone Regular
Posts: 380
Joined: Sun Feb 01, 2015 11:00 pm
Location: Kyiv, Ukraine

Fri Aug 26, 2022 8:33 pm

Body repair_18. Bottom cleaning. (part 2)

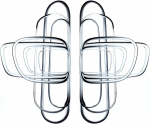
After cleaning the bottom, inaccessible places remained intact - above the rear beam, front supports, and left arches, since the car was on its left side. To get to all these places, you need to remove the beams, and somehow turn the car over. To do this, I took tippers for Lada from a friend and adapted them for the E30. I made such harsh "bumpers"))

Image

Image

Image

Image

Or maybe well, that BBS! ? With such bumpers it will be stronger and more reliable!)))

I screwed these adapters to the tipper instead of the brackets for the Lada, and installed it on the car.

Image

Image

Used the mounting holes of stock bumpers. I made adapters according to my measurements and drawings, but I had to adjust a little more in place. By the way, I'll post the drawings later - maybe someone will come in handy.
The front beam was removed easily and simply, since it was recently removed, but the rear one, at least for the last 11 years, has not been removed ... I had to tinker a little, after which it was removed like this:

Image

The remaining silent blocks had to be drilled out. They simply crumbled into pieces, the lower support of the silent block rotted, and some kind of rubber gaskets were already there. I don’t understand how it didn’t come off on the road and drove without any knocks .... For that, the bolts are like new! )

Image

And now she is completely naked and can be viewed from all sides! )))

Image

Image

The floor in my garage has been "temporary" for many years, and not very even and hard)) Therefore, for insurance, I had to expand the support points on the sides of the tippers, just in case,

Image

Image

and also support the body on the reverse side., since the axis of rotation turned out to be lower than the center of gravity and the roof clearly outweighs the bottom. It was necessary to make the axis of rotation higher by 10-15cm. But not critical - it is reliable, although at first it was scary))

Image

Image

What can I say - a very sensible thing - it is much easier and more convenient to work. Well, this is the result:

Image

Image

Image

Image

Image

Image

I can't believe it, but I did it! ) It remains to clean the front fenders, but there is no sealant, but only bitumen - after cleaning the bottom, it's already like dust for sailors! )))

Now about the sad thing ... on this side, too, there were jambs for welding - little things for fasteners. We welded a hole for the front shield in the arch, the brake pipe studs were welded on the wrong side of the side member, the studs under the rear seat were cut out, patches were put in, and the new studs were not welded, the same with the brackets for the rear brake pipe tee and handbrake cables. In the rear arch there are many holes from the screws on which the fender liner was attached. Luckily no holes or rot were found.
It seems like trifles, but in total there were quite a few of them .... well, we will "finish it" .... More on that next time.
User avatar
The_Glory
E30 Zone Regular
E30 Zone Regular
Posts: 380
Joined: Sun Feb 01, 2015 11:00 pm
Location: Kyiv, Ukraine

Fri Aug 26, 2022 8:48 pm

Body repair_19. Bottom cleaning. (part 3)

Yesterday there was welding again ....)
As I wrote in previous entries, after the bottom was completely cleaned of bitumen and factory sealant, "jambs" and imperfections were discovered that were not visible before. I agreed with a familiar welder, brought welding to my garage and began to eliminate it all. It seems that everything is trifles, but such trifles turned out to be quite a few - they killed for it all day.
So what has been done:
1) Welded holes in the bracket of the right front seat and closed it completely tightly. (collective farm, but less dirt will be collected there)
2) Welded a hole in the floor on the right
3) Welded holes in the rear arch near the filler bracket
4) We moved the lower ear for attaching the rear right arch shield, so it was welded in the wrong place.
5) Instead of a homemade upper ear for the tank, we welded a factory upper bracket in the rear right arch
6) Turned over and welded the muffler bracket correctly
7) Welded in the right place the front studs of the brake pipes, as they were on the wrong side of the spar
8) Welded the rear studs of the brake pipes, which were not
9) Welded a homemade bracket for the tee of the rear brake pipes, which was not
10) Welded the thermal protection studs of the spar and motor shield, which were not
11) Welded a crack on the gearbox tunnel
12) Welded to the bottom with plates tubes of handbrake cables
13) Welded the lower studs of the front fender liner, which were not there, and drilled holes for their front fastening
14) Welded a stud for attaching the battery tray in the rear right niche
15) Welded all the holes from the screws in all the arches
16) We went through all the "suspicious" seams and cleaned them
17) They knocked out the factory plugs for draining condensate from the air conditioner (one, and the other two will need to be drilled after the fact, since there are no plugs in the body, although there are thermal protection), for repeaters in the wings, for wiring the front ABS sensors (and for rear, it is necessary to drill - there are also no plugs)

Image

Image

Image

Image

Image

It seems that everything .... I really don’t want to forget something ... and then drill / weld after painting ...
By the way, I also gave the welder my two rusty hatches in different places - he promised that he would try to make one normal out of them)

Image

Image

The bottom was checked and searched for holes in the light in the twilight)) - like this

Image

In some places, the seams were like constellations in the starry sky))) But now only factory holes are visible - there are no more unauthorized holes in the bottom! )
Although ... after sandblasting they may reappear ... we'll see ...

In the meantime, a week and a half time out - I'm tired even ... I'll go to the sea)
User avatar
fixedwheelnut
E30 Zone Regular
E30 Zone Regular
Posts: 906
Joined: Sun Nov 20, 2005 11:00 pm
Location: South East London

Fri Aug 26, 2022 9:03 pm

Excellent work it's a long slog when you strip them down this far :)
User avatar
The_Glory
E30 Zone Regular
E30 Zone Regular
Posts: 380
Joined: Sun Feb 01, 2015 11:00 pm
Location: Kyiv, Ukraine

Fri Aug 26, 2022 9:18 pm

Body repair_20. Bottom cleaning. (part 4)

So, after a short rest, we will continue from the beginning! ))

I decided to get rid of the self-tapping screws for attaching the body kit, although in the original BBS it is attached in this way. I put riveting nuts in a circle, they are also threaded rivets - M4 stainless steel. Now the body kit will be screwed with M4 screws, also made of stainless steel - I hope there will be no "bugs" around such fasteners, like around self-tapping screws.

Image

Then I decided to change the concept - and put in a very evil crumpled drift suspension! Super stiff, no springs or shocks, 360 degree turn front and rear, very hard rubber with a minimal profile. Then it turned out that with the clearance too much and the car does not pass the height of the garage door! )) I had to drop it, according to the classics) The front track was further expanded, the rear track was shifted back for better handling. Here's what happened:

Image

Image

But seriously, today was, I hope, the final part of cleaning the bottom - sandblasting. But it was necessary to get there somehow, and there is no more suspension on the car. Fortunately, a colleague in the E30 body repair just got these carts free, which he kindly provided me. Igor - thanks!
It’s not very convenient to drag and remove onto a trailer, but it’s better than carrying a body on your hands! ) We loaded in the evening and left early in the morning.

Image

Image

Image

First, to the painter - they removed all external hinged parts, they will be prepared by hand, so as not to spoil the front planes with sandblasting. Then sandblast. They put it on tippers. They removed the "drift" suspension, and the process began!

Image

Image

Image

Image

The result of the process impressed me very much!

Image

Image

Image

Image

Image

Image

... and in some places upset ... (

Put the "suspension" in place, dragged to the trailer, and back to the painter. Today he will cover everything with acidic soil, then with some other soil. And then, do you think there will be painting?... you didn't guess!! )) Then there will be WELDING again!!!! ))) This is fucked up... you can't just take it like that and finish it! )) In addition to those holes that I found myself, after sandblasting, there were more of them! ... The hand does not rise to leave them ...
User avatar
The_Glory
E30 Zone Regular
E30 Zone Regular
Posts: 380
Joined: Sun Feb 01, 2015 11:00 pm
Location: Kyiv, Ukraine

Fri Aug 26, 2022 9:44 pm

Body repair_21. Body primer.

Immediately after sandblasting, on the same evening, or almost night, the body was primed with acid primer, and then with acrylic, or polymer or polyurethane, I don’t remember exactly. By the way, I completely trust the painter in the choice of materials. He painted this car in 99 or 2000 in this "interesting" color, and until 2012 there was no rust on the paintwork - I think this is a very worthy guarantee for painting.
Well, actually, how it looks - it already looks like a whole and beautiful body! ;)

Image

But still not quite whole - I wrote in the previous entry about the holes that were opened by sandblasting.
There is a small hole near the right support on the edge of the battery platform.

Image

On the bottom everything is fine.

Image

Image

Image

Image

Image

But the next problematic place is the holes in the brackets of the rear seat belts and in the transverse beam on which they are welded, and a suspicious place near the left spring plate. As well as small holes at the top of the right rear arch:

Image

Everything in the back is fine.

Image

But on the left on the motor shield there are holes along the welds, although they are not particularly visible:

Image

All is well under the hood around the supports.

Image

Image

With the timing of welding, I somehow didn’t work out initially) ... therefore, all this has not yet been completed ... And the welder still has one door and a hatch cover ... This welding is already finishing me off ....
For that, with the rest of the hinged body parts there is progress - small scratches are puttied, and all this is being prepared.

Image

Image

The roof and part of the rear are already prepared as a first approximation.
On this, while a pause - the painter goes on vacation for two weeks.
During this time, it is necessary to prepare for processing the bottom with a sealant, as well as buy the missing and prepare the one that is, fasteners for attachments of the body.

Far be.

P.S.
When I was on vacation in Odessa in the summer, a friend gave me such a small gift - a cigarette lighter with an unworn "cigarette". Thanks, Tolyan! ;)
Well, you need to buy options, despite all these repairs! And then "break" begins! ))) I bought an original heated mirror just in case. In the winter I will no longer ride, but let it be for the collection! )

Image

Image

Image
User avatar
The_Glory
E30 Zone Regular
E30 Zone Regular
Posts: 380
Joined: Sun Feb 01, 2015 11:00 pm
Location: Kyiv, Ukraine

Sat Aug 27, 2022 9:19 pm

Body repair_22. Bottom processing. (Part 1)

I haven’t written for a long time .... there isn’t a lot of news, but there is still ...
Apparently, even my karma is not right, in terms of body repairs ... maybe the chakras need to be cleared))) Well, it doesn’t work out for me in any way - neither with welding, nor with painting ...) It was planned to finish painting in a maximum of two months, but now three have passed, and the car has not yet been painted ... Partly due to all sorts of force majeure at the painter, and partly all because of the same welding - it was necessary to weld the little things after the sand, but take the car back from -I didn’t want to, and the local welder turned out to be very busy ... As a result, almost two months of downtime ...
And now - I can not fully believe it, but the welding is still completed! ))) I never found a living manhole cover. Therefore, from two rusty covers they made one normal one - they welded mine, parts from a donor one. Since in fact mine turned out to be livelier than the one that I bought. We welded one rear door, as they missed the jamb - a hole in the window mount.

Image

Image

Well, small kosyachki were brewed, and imperfections that surfaced after the sand.
All welding seams are treated with seam sealant. All mounting studs, mounting points for the beams and the gearbox crosshead, and threaded holes are covered with masking tape and temporary bolts. After that there was a "pen test" with several sealants and guns.

Image

Image

Image

We settled on APP polyurethane sealant in two layers.
Normal photos of the finished result on the bottom will be a little later ... Well, maybe this year, I'll paint ...)
In the meantime, quietly, I begin to prepare for a thorough assembly;)
User avatar
The_Glory
E30 Zone Regular
E30 Zone Regular
Posts: 380
Joined: Sun Feb 01, 2015 11:00 pm
Location: Kyiv, Ukraine

Sat Aug 27, 2022 9:31 pm

Build_01. Plan. Fastener preparation.

I think it's time to start a new "series" - "Assembly")

In short, the build plan would be:
1. Put on wheels - suspension and steering.
2. Treatment of all hidden cavities.
3. Vibration isolation (without fanaticism, as it was at the factory)
4. Everything on the bottom - brake pipes, brakes, fuel pipes, tank, shields, protection, etc.
5. Body wiring.
6. Assembling the back.
7. Luke, ceiling.
8. Heater, torpedo with noise insulation and wiring.
9. Doors, door wiring, cards.
10. Noise isolation, carpet, interior parts, seats.
11. Glasses.
12. Transmission - gearbox, cardan, differential, axle shafts.
13. Motor, motor wiring.
14. Exhaust system.
15. Radiator, attachments.
16. Assembly of the front.
17. Body kit and bumpers.
18. Wheels.

Here is such a plan ... with pleasure I will listen to advice and recommendations for assembling. I’m not sure about the 12th point - it’s probably better to put the differential and axle shafts right away with the rear suspension, and the gearbox along with the motor ...

I don’t even want to plan on terms ... how will it go ...)
I will collect very slowly, carefully and accurately. I even came up with an entertainment for myself - assembling as close as possible to the ETK;) I don’t promise full compliance with the ETK, due to the unavailability or inadequacy of the price for some parts)), but I will strive for this! )
Naturally, everything old, down to the nuts and screws, will be washed, cleaned, painted, galvanized, or changed to a new and beautiful one. To paraphrase the classic - Everything should be fine in the car: the body, the engine, the suspension, and the interior! ))

Well, perhaps, let's start - with fasteners.
First of all, I assembled all the fasteners of hinged body elements, and suspensions with a transmission. I soaked each nut and screw in a paint remover, then in a rust converter, and manually cleaned with a soft wire brush, but the effect was not sufficient. Therefore, I decided to go with the "folk method" - citric acid at a concentration of 100 g per 1 liter of water - this is the topic! Cheap, reliable and practical! (c) )) All fasteners were perfectly cleaned of rust after a day of soaking. Some parts soaked for 2-3 days. Then washing in a soda solution, and degreasing with white spirit. This is all very long and troublesome, but beauty requires sacrifice! )
After that, I put everything in bags, signed it, and gave it to a friend for electroplating, or rather, yellow galvanizing.

Image

Image

Image

By the way, Seryoga - thank you again! Nothing was lost and the result is super!
Well, actually, here it is, the result:

Image

Image

Image

Image

This, of course, is not all the fasteners - there will be one more, or even two batches. But this is a little later.
User avatar
The_Glory
E30 Zone Regular
E30 Zone Regular
Posts: 380
Joined: Sun Feb 01, 2015 11:00 pm
Location: Kyiv, Ukraine

Sat Aug 27, 2022 9:39 pm

Body repair_23. Bottom processing. (part 2)

Yesterday I was at the painter's - things are going on, albeit slowly, but still) I expected to see the finished bottom, but it turned out that the readiness was not yet complete ... It remains to process the two left arches, finish some joints, and then go through the second layer . But even now the bottom looks pretty good, as for me:

Image

Image

Image

Image

As for the bodywork, the thresholds, rear fenders with roof racks and the roof are almost completely prepared.

Image

Image

Image

Image

Well, the preparation of the engine compartment and interior began.

Image

I was given a plan to paint the body itself before the New Year - then, after the holidays, hinged body elements. Let's see... Hour "H" of the final choice of color is getting closer, and the torment of choice is more and more...)))


P.S.
While I continue to prepare for assembly - I rake all the boxes, remember where it is, clean / wash all the plastic, prepare / sort fasteners and pieces of iron for electroplating, sandblasting, and painting, make lists of what to buy. But more on that later.
User avatar
The_Glory
E30 Zone Regular
E30 Zone Regular
Posts: 380
Joined: Sun Feb 01, 2015 11:00 pm
Location: Kyiv, Ukraine

Sat Aug 27, 2022 9:47 pm

Club calendar 2020 and color choice...

Annual club calendar entry)

This year, "at the numerous requests of the workers" I had to choose twice, because, as usual - "didn't know / didn't see / didn't hear / stuck / was late")) Despite this, they managed to print the calendar even a few weeks before the New Year.

4 cars from the TOP12 of our festival competition OLD SCHOOL E30 got into the calendar, and the remaining 8 cars by the general vote.

A preview of the entire calendar of the Ukrainian Club BMW E30 for 2020 can be viewed here

My car hit it again, albeit the last of 8 places...

Image

By the way, it is likely that this is her last photo in the calendar in an "interesting color" - it will be a keepsake;)

Image

P.S.
The calendar is no longer available. Who did not have time - he was late! )


P.P.S.
The torment of choosing a color continues ...) I laid out all the color options against the background of an "interesting color" .... and thought - maybe we can leave it ...? )) My children really do not want to change the color of thirty ))

Image

The choice is not easy...

Image

Although there are only original BMW colors from the 90s

Image

Spread beautiful blue...

Image

Which to choose? Blue? Or is it blue?... or is it blue?? No, blue is better...

Image

Image

Image

... but in the sun they are different .... but by car it can turn out even different ....
I'm lost...)
User avatar
The_Glory
E30 Zone Regular
E30 Zone Regular
Posts: 380
Joined: Sun Feb 01, 2015 11:00 pm
Location: Kyiv, Ukraine

Sat Aug 27, 2022 10:16 pm

Build_02. Polishing the taillights.

In general, not quite according to plan, but somehow the taillights came under my arm, and I decided to do even with them ... (I think that there will be quite a few deviations from the plan, depending on finances, time and mood ;) )
Moreover, in the light of the latest prices for "startec", it seems, they do not "shine" for me, either literally or figuratively))
So, back to our (my) taillights. Once, even before me, they were painted over with red varnish, and then the left one changed, and it was either initially blown out with more red varnish, or simply with better varnish - since the difference became more noticeable every year - the right one noticeably faded, and the left one still remained red) Since, I immediately, in a collective farm way, filled them with silicone from the inside (I confess))), so that the water would not flow into the trunk, it was too lazy to remove them - I drove the last couple of years with multi-colored taillights) They looked like this:

Image

From the inside, everything was not bad, but a little dirty. But the sealing gum was already on silicone, and looked very deplorable ...

Image

Started with plastic caps. By the way, I have them with a "bonus" illumination of the trunk - behind the parking lights there is a "window" through which, when the parking lights are on, the trunk is also illuminated - a handy thing.
Even after buying the car, before pouring everything with silicone))), I noticed that the rear fog lights are only in the left headlight, and there is a place for them on the right, but there is no wire - I thought that he "interfered with someone "and they threw it away, and made a homemade contact and wire. It was later that I realized that this was how it should have been in stock, and that two rear fog lights were an option, or some kind of "feature", depending on the configuration. Taking this opportunity, I replaced this contact and wire with the original one from the donor left lamp - now everything is "according to Feng Shui"))
Everything is disassembled very simply - turn the latches, remove the cover, carefully pull out the latches, remove the bar with the lamps, pry and remove the connector housing, then press and pull out the contacts with a thin screwdriver from the outside of the cover, and also pull the contacts out of the connector housing with a screwdriver.

Image

Assemble in reverse order. Before assembly, I painted the bar of the lamps, for beauty, and simply cleaned the covers with fine sandpaper and washed them with chemistry. I did not want to paint - I left it as it was in the factory. Of course, I also cleaned the contacts, although they were already normal.
On the connector body, all the wires are signed by color, and on the cover the type of lamps - therefore, it is difficult to confuse during assembly.

Image

Image

Although it is possible - to my surprise I found that I had 21W lamps in the parking lights, instead of 10W it was too much) Either I forgot about it, or I scored - I don’t remember ..... but now I put the correct lamps.

Image

Lids are ready.
Somewhere I had stickers that were inside the lids - they even fell away from life .... If I find it, I'll stick it)

Image

Let's move on to the lights.
I read on the Internet that the varnish from the lights is easily removed with brake fluid. In principle, there is logic in this - since the brake fluid and paint "undermines". I decided to try it ... But apparently there are different varnishes - after a day of "lotions" from the brake fluid, I did not achieve any effect. None at all. Therefore, I bought more effective materials.

Image

The varnish was removed with sandpaper 240 and 320. On the right, it was easily removed on a dry one, and on the left, the varnish was still more "severe" - there with some water. Then with water circles 400, 600, and manually 400 and 600, and manually 1000. There was no finer sandpaper, so after 1000 I switched to headlight polishing paste in three approaches - one circle and two manually.
I liked the result.

Image

And in the sun, I was so impressed at all - the headlights looked like new! )

Image

Image

But there is also a "minus" - I had to sacrifice the original numbers and logo on the glasses - they were erased to zero ... but it was worth it.

Since I don’t have orange “turns” on my car, I had an idea to tint the lights with a red or black film, but now looking at them I’m thinking .... they seem so beautiful))) ... we’ll see ...

The plastic case was also cleaned and washed.
The fixing nuts and pressure plate have already appeared in the electroplating entry - they are also like new.
It remains to buy original gaskets or cut them yourself on laser cutting - the difference in price is very decent;) I'm still thinking about it...

P.S.
Prepared the second batch of pieces of iron for electroplating. There will also be a third...

P.P.S.
The ghostly plan to paint the body before the New Year failed miserably - but I didn’t really believe in it ...) If only to paint in January ....
User avatar
The_Glory
E30 Zone Regular
E30 Zone Regular
Posts: 380
Joined: Sun Feb 01, 2015 11:00 pm
Location: Kyiv, Ukraine

Sun Aug 28, 2022 7:54 pm

Just a business

For a long time I did not buy good rarities ... and now, before the New Year, I decided to treat myself to a gift! )) I bought myself another business! )) Namely - BMW BAVARIA C BUSINESS - the top-end cassette recorder for the E30 of the last years of production.

Image

In this case, this is the German BECKER, as indicated by the stamp and sticker on the case:

Image

Image

Image

There is an output for antenna diversity, but no output for an amplifier and CD changer.

Image

And here is my previous business) - BMW BAVARIA C BUSINESS RDS - also a top-end cassette recorder for the E30 of the last years of production.

Image

But this is already a Japanese PIONEER

Image

Image

Image

There is also an output for antenna diversity, and besides this, there is also an output for an amplifier

Image

Two businesses for comparison:

Image

Pioneer's design is quite strict and fits perfectly into the interior of the E30.
But I always wanted a BECKER - its design is even stricter and more severe - the Germans after all!

Image

Although, it would be even cooler to put BECKER MEXICO - it was the top one for the E30 before the restyling, but for it you need to redo the connectors on the wiring, and finding it in good condition for sane money is not easy. So I bought this one.

Well, for the sake of interest, I connected a couple of speakers to check and compare them.

Image

Image

Normally, it will be possible to compare the sound, of course, only in a car, but for now, just a superficial comparison in terms of functionality.
Of course, PIONEER has wider functionality - as its name suggests, it already has RDS, so the screen is larger, there is an amplifier output, Dolby B, Dolby C noise reduction. An interesting button backlighting algorithm - only buttons available in this mode are highlighted — i.e. or cassette control or radio control. All buttons are touch-sensitive, the cassette is lifted, its work is softer. Installation without "mine". In addition to the code, there is also some kind of security system diode, but I did not understand how it works. In general - the Japanese! )
But in some ways he is inferior to the German - fewer memory cells for the radio - 6 instead of 10, and, accordingly, not direct code entry. In principle, this is of course trifles.

Why is BECKER better? ... I don’t even know ...) Most likely, only with a more strict design and a rarer arrangement of the cassette receiver - film forward. Well, as I said above - it has 10 "number" buttons, so there is more memory for the radio, and direct code entry. Well, it's German! )
Otherwise, it loses to the Japanese - there is no RDS, a smaller screen, no output to an amplifier, noise reduction is simpler - only Dolby B, mechanical buttons, respectively, more rigid operation of the cassette. I have not yet understood how it is installed, but probably in the "mine" (it's good that I have it, the main thing is that it would fit).

Both radios were available for the E30 in its later years. Which one will I put? .. I haven’t decided yet ... There are still “nuances” for my specific specimens.
For example, a leaky screen on a PIONEER, which I sealed with a black film around the edges, and not at all confident operation of the cassette. I already wrote earlier that I broke it like a fool with a Chinese mp3 adapter cassette.
The BECKER cassette works well, but there is no output to the amplifier, which I bought a long time ago, and the functionality is more modest ...
In general, we will think, we will see ...

P.S.
As you know, miracles happen on New Year's Eve)) I also had a small miracle - I found a small, but sooooo rare thing that I had been looking for for many years! )) About her next time! ;)
User avatar
The_Glory
E30 Zone Regular
E30 Zone Regular
Posts: 380
Joined: Sun Feb 01, 2015 11:00 pm
Location: Kyiv, Ukraine

Sun Aug 28, 2022 8:08 pm

New Year's gift, or a tree under the Christmas tree!

Happy New Year everyone! )

Last time I wrote about my New Year's gift, and I promised to write about another one, which was just miraculously found right before the New Year! )

I’ll start from the very beginning - when buying a car, it was equipped with a momo wooden steering wheel, an original wooden gear knob, and a very rare (as it turned out later) part from a factory wood trim kit - a glove compartment pad.

Image

Since then, for more than 10 years, I have been trying to find the rest of the parts from this kit ... They have long been discontinued, and the tree in the E30 was ordered very rarely, so even in the photo on the Internet, they are rare. For all the time, I only once saw it for sale on eBay, almost at the price of a car)) In a car, it looks like this:

Image

Image

The second time, I saw it in Kyiv at a disassembly, but not the original, but an aftermarket, - on some foreign forum I read that this kit was from the catalog of the tuning company D&W.

Image

This is also natural wood on an aluminum base, like the factory overlays.

Image

Such kits are often found on the E30 from ALPINA.

Image

Image

The difference is in the one-piece lining for the instrument panel and the light switch (probably not very convenient to remove the dashboard with it), the central lining is only on the upper part, and not on the whole, and the side linings are not on the fabric insert, but on the upper part of the door trim for the whole its length.

Now you can buy cheap Chinese kits - vinyl stickers for the entire salon "wood" or any other texture and color.

Image

I had them glued on the ashtray covers and under the air ducts of the torpedo - they look cheap and collective farm, so I immediately took them off. This is not our method! )

So, - flipping through the forum flea market, I can’t believe my eyes - there is an overlay for the light switch and under the dashboard for sale. I call the seller — confirms that this is the original and that they are! My joy knew no bounds! )))

Image

True, then it turned out that the pad for the dashboard had already been bought separately ... ((Who needs it separately - it's not clear ... Suddenly he reads, the one who bought it - I would buy it! ;) In general, I took what was left - a trifle, but Nice! ))

Image

Image

Image

During the search, I found the original EVA instructions for installing interior decor, which says that the glove compartment lining is screwed with two pins - I have it, and all other linings are simply glued with "superglue" to standard interior details. Cheap and cheerful! ))
100% original - visible glued natural wood veneer based on:

Image

The switch pad itself, judging by its number, is ordinary.

Image

It’s also pleasing that only one finish color was available - this somehow simplifies the search for individual elements. They all match in color.

Image

It remains to find the lining under the dashboard and on the door. I don’t really like the central pad and the gearshift lever pad ... But if I find it, I’ll buy it too!

I’ve already thought about hydrographic printing… but haven’t made up my mind yet — we’ll look for it!
User avatar
The_Glory
E30 Zone Regular
E30 Zone Regular
Posts: 380
Joined: Sun Feb 01, 2015 11:00 pm
Location: Kyiv, Ukraine

Sun Aug 28, 2022 8:14 pm

Body repair_24. Bottom processing. (part 3)

Today I visited my thirty. A month and a half has passed since my last visit, but the work has not progressed much .... since the holidays and all that ... The painting plan before the New Year failed miserably, although I didn’t really believe in it) But still, there is progress . One more layer and now the bottom is completely finished, although today I found a couple of small nuances, but they will be eliminated. In the cabin, too, all the seams are treated with sealant - everything seems to be fine there. The hood is almost ready for the sealant - it remains to bring beauty to the visible seams. Only the trunk remained. Then the primer, developing, well, the long-awaited painting. Another month .... well, we'll see ...

Image

Image

Image

Image

Image

Image

Image

Image

Image
User avatar
The_Glory
E30 Zone Regular
E30 Zone Regular
Posts: 380
Joined: Sun Feb 01, 2015 11:00 pm
Location: Kyiv, Ukraine

Sun Aug 28, 2022 8:23 pm

BMW BAVARIA C Electronic

Recently I wrote about buying another original radio - BMW BAVARIA C BUSINESS. And now, after just a couple of weeks, the same seller made me an offer that I could not refuse! ) Namely, he offered to buy at a good price a rather rare original radio tape recorder, in excellent condition, and also from the top line for the E30 line - BMW BAVARIA C Electronic.
Well, I bought it! )

Image

This is also a German BECKER

Image

What does it come with an adapter for older connectors, so that you can connect all my radios without interfering with the wiring.

Image

The adapter is homemade, but made by analogy with the original such adapter. Here is the original ETK number - 65128350189.

Image

Mine looks almost the same as the original, but it will need to be "ennobled" a little and made in the form of a "beam";)

Image

But back to the radio - outwardly the condition is excellent, connected - everything works, everything glows, the radio catches, the cassette plays, rewinds and even the search for songs by pause works. In my opinion, this is the most beautiful E30 regular radio - an excellent balance of rigor and beauty of design, excellent functionality, and it just looks gorgeous in E30! I'm absolutely delighted! ) But not everything turned out to be perfect - the cassette did not want to be removed ... I was even a little upset, and at first I even wanted to return the radio. By the way, the seller immediately agreed to return the money without any problems, although it was not his fault - apparently it’s already very unlikely to find a working cassette mechanics in a 30-year-old radio tape recorder ... But then I thought, talked to my friend, he promised to look at the mechanics and do . I decided to leave it, since this radio tape recorder has another very big "plus" - the output connector for a standard amplifier, into which you can connect an adapter to a "minijack" and get a factory working aux without any intervention in the radio itself! I have already found information on the Internet and a video of how this is done - I will do it, even if nothing happens with the cassette, then there will be AUKS - which is also not bad at all. Or I will collect the wiring for the amplifier, which I also bought a long time ago. We'll see...

And a couple of days later I received from a friend in the E30 club the original instructions for my previous radio BMW BAVARIA C BUSINESS RDS

Image

Serega ConcordDnepr, thank you for the gift!

Image

Image

Image

In general, now I have a wide choice of radio tape recorders for installation - almost the entire top line for the E30. I don’t even know what to put .... or we can change it according to the mood)
User avatar
The_Glory
E30 Zone Regular
E30 Zone Regular
Posts: 380
Joined: Sun Feb 01, 2015 11:00 pm
Location: Kyiv, Ukraine

Sun Aug 28, 2022 8:41 pm

Build_03. Preparation of parts under the bottom

Slowly buying missing parts, and parts that need replacement. According to my plan, first of all I prepare everything that is placed under the bottom - suspension, tank, pipes, all protective shields and soundproofing. But I didn’t start from point 1, but from 4 - it just so happened - since I already sold my old coilovers, and I haven’t quite decided what to put in replacements .... most likely, there will be Eibach Pro-Kit springs, but I still don’t know about the front shock absorbers ... it would be logical to put the same B6 as in the back, but their price is not encouraging .... we’ll see ... Tips and comments on this matter are welcome;)
But back to point 4 - everything that is whole and beautiful is cleaned and washed. I was looking for the rest in the best possible condition, and I have already bought almost everything:

Image

Image

- a tank before restyling of 55 liters, in a state of almost new. There is a question - are there tank fillers with a "valve" inside on the E30? I just have a pipe, but I heard that there is also a valve ...
- muffler thermal shield, absolutely no corrosion
- battery tray - finally, my battery will be properly fixed (by the way, I’ll buy another mounting pin with a bar, and a plastic shield on the arch)
- whole front wheel arch liners (I also bought the front fenders of the arches, it is possible without air ducts)
- noise insulation of the motor shield. For a long time I was looking for her in a normal state .... and to no avail. The price of a new one is too high. And today I was lucky - I bought it, moreover, in Kyiv, in excellent condition, and the left and right parts are generally new!

Image

Image

Taking this opportunity, I also bought excellent sound insulation for a torpedo.

Image

Mine is all torn, and although it is not visible, I don’t want to put this). And this, for contrast, is my old engine shield soundproofing)))

Image

I also bought a whole rear ABS sensor and an internal door handle at the same time (I need to make a list of small things, otherwise I always forget to buy something during disassembly)

I also accidentally found an interesting thing, the existence of which many do not suspect! ) Rubber inserts in the front apron, on the towing loops. I had this only on the back loop, and now there will be a whole set. Although they will be closed by BBS, but let them be for feng shui;)

Image

I also ordered a small list of any new small things, but then a fiasco - everything from my list turned out to be no longer available for order, except for one detail - the wheel key mounting clip - well, at least it pleases))

Image

That's all for now. You also need to buy brake and fuel pipes on the bottom, a shield for tank ventilation hoses in the right rear arch, a rear beam - on mine it turned out that one ear was boiled, although this is not critical, but not aesthetically pleasing)).
The front bumper, or its middle part, is also urgently needed, the state of the chrome is not important, the main thing is that it should be smooth, without dents.

All iron pre-prepared for sandblasting.

Image

Well, I'm getting ready to paint it - now I have such a co /// Mpressor )), and today I bought myself a gift )

Image

Pneumatic tool kit - now it will be easier to wash / clean everything. Well, I'll paint everything myself.

Image

To do this, I began to rake up the trash in the second half of the basement - I will finally make a workshop there separate from the garage. And even sawing, welding, cutting, cleaning, painting near a freshly painted car is not a hunt)
But I will blog about it later.

P.S.
Tomorrow I'm going to the painter, I hope there will be some news.... ;)
User avatar
The_Glory
E30 Zone Regular
E30 Zone Regular
Posts: 380
Joined: Sun Feb 01, 2015 11:00 pm
Location: Kyiv, Ukraine

Sun Aug 28, 2022 8:48 pm

Body repair_25. Preparing the body for painting - putty, primer [/ b]

So, a month has passed, but it has not yet come to painting ...
But the body is already ready for it - it is finally one color, and it already looks beautiful! )

Image

Image

Seam sealant is laid everywhere, everything is puttied, and blown on top with soil, or rather "liquid putty", which will be rubbed to obtain perfectly flat surfaces, and covered with soil.

Image

Image

Image

Image

Image

After that, the control "development", and if everything is smooth and beautiful - finally painting. Soon.... I hope...)

P.S.
Today I bought a new trunk seal, and new front brake lines. Fuel and brake rear, probably, I will make to order. The price of new original ones, as for me, is too much - they seem to be golden ... I also thought about a vacuum brake booster ... can I put a double one from E32? ... since mine still needs to be replaced ...
User avatar
The_Glory
E30 Zone Regular
E30 Zone Regular
Posts: 380
Joined: Sun Feb 01, 2015 11:00 pm
Location: Kyiv, Ukraine

Mon Aug 29, 2022 8:05 pm

Documentation folder

It often happens that rarities are found and bought absolutely spontaneously and by chance) So this time - the other day somewhere in the comments there was a conversation about regular folders for documentation. I never had it in the E30, just as there was no factory documentation - all the instructions and manuals were lost somewhere in the years .... I have long wanted to assemble such a kit, but somehow put it off for later. Well, taking this opportunity, it was useful to study this issue - according to ETK 2009, two folders were available for European E30 (except M3) - leatherette (01 40 0 ​​031 561) and fabric (01 40 0 ​​031 560). They make their way to the E32. In the more recent ETK, for the E30, another version of the folder breaks through - a newer one. Therefore, apparently, all the same, the folders were not tied to a specific model or body, but simply updated after a certain period of time, went to all models, and could still differ, depending on the market. I think so... Therefore, photos of different versions of these folders are googled by the same number. In general, according to some kind of logic, I found a photo of the oldest options, of those that were - and miraculously, the same folder was found for sale at a flea market at a low price)) Although, it looked so-so, but I bought it, certainly! )
I washed it, treated it with a leather cleaner / conditioner - and it turned out like new;)

Image

Image

Image

As far as I understand, the "ribbed" bend was on the older versions. So, we can say that this folder is ideologically correct for the E30! )) Although on it, except for the BMW logo, there is no original ETK number. For that, there is such an interesting inscription:
BRITISH PATENT 2312185

Image

I don’t know what exactly Britain patented there, but photos of similar folders for other car brands are googled by this number)
Bonus, along with the folder, got a card for the head unit code. Very handy, since I recently received an instruction manual for the radio.

Image

Moreover, it turned out so well - the card turned out to be from the same radio as my instruction - BUSINESS RDS. And no one put a code on it - I'll write my own code, and there will be feng shui! ))

Image

Image

There is a start, now you need to collect the entire set of documentation and put it in a folder - for order! )

Image

P.S.
The same seller had a whole "mass" battery cable in stock, which no one wanted to sell to me separately from the kit - in general, I was lucky! )
And soon I will have another rarity for the E30;)
User avatar
The_Glory
E30 Zone Regular
E30 Zone Regular
Posts: 380
Joined: Sun Feb 01, 2015 11:00 pm
Location: Kyiv, Ukraine

Mon Aug 29, 2022 8:21 pm

Double vacuum brake booster E30 (325ix) [/ B]

Literally before I dismantled the car, some problems began with the vacuum booster - I don’t remember exactly, but it seemed that the engine speed started to jump when braking. I then did not begin to understand, and postponed it until the moment of assembly. And now, this moment is already kind of close) Therefore, I decided to just change the vacuum brake booster, since I always didn’t really like its “racing” red color) And in general, he is already very tired. After reading laudatory reviews about the installation of a double vacuum brake booster, I decided, since I have to change, why not put a double one. Although, they usually put it when replacing motors with more modern and powerful ones, but for me it's just such a small "upgrade". Usually they put a vacuum brake booster from newer bodies of the 5th or 7th series. To do this, you need to shorten the stem and cut the thread on it, as well as drill the mounting holes in the body. After painting, I absolutely did not want to drill the body. Therefore, I decided to look for a double vacuum brake booster specifically for the E30. According to the ETK, it was installed only on restyled (after 87) all-wheel drive models 325ix - 34 33 1 161 486. By applicability, the same vacuum brake booster was installed on the E34 M30B30, M5 S38B36, E32 M30B30, and E32 M30B35:
http://bmw-autocats.ru/parts-catalog/34331161486/
This expands the search circle a little, since there are not so many E30 Xs, even restyled ones, and even more so during disassembly. But I was lucky - I found a vacuum brake booster from the E30 325ix. Without thinking twice, I decided to take. There were difficulties with delivery, but thanks to a long-time clubmate E30 YarikM3, everything was resolved - Yarik, thank you! )
Well, actually, I have it.

Image

E30 325ix - and there would be no doubt! )

Image

The manufacturer is not ATE, like my stock one, but Girling.

Image

The sticker is torn off, but there are some marks with red paint, maybe factory ones ...

Image

Brake master cylinder, of course, for ABS, with two outlets.

Image

One exit at an angle, but it will not be difficult to bend the tube. The thread is the same as mine. The connector on the reservoir lid is different, but also not critical - either I will put my own lid on, or I will replace the connector on the wiring if the ATE lid does not fit.
Another difference is in the location of the vacuum hose, it is from different sides, but this is also not at all important - you still need to replace it.

Image

Double is smaller in diameter, but more voluminous, and lighter in weight.

Image

And now, the most important thing.
The distance from the mounting plane to the hole on the rod is the same - i.e. no need to cut the stem and cut the thread on it!

Image

Image

And the best part is that the distance between all four studs is also the same (I measured it with a caliper both along the perimeter and along the diagonals) - that is, a “bolt-on” is placed, without picking the engine shield!

Image

Image

I hope this "upgrade" will have a noticeable effect. Let's see. But we still need to bring beauty, clean / paint.


P.S.
By the way, while I am thoroughly preparing to restore beauty in everything - with my brother they made it from improvised means and materials, sandblasting.

Image

And almost finished making a camera for him.

Image

But the power of my co///Mpressor turned out to be clearly not enough for sandblasting, even despite the fact that I covered it with BMW emblems and M-stripes)))

Image

Therefore, we had to go further - we bought a more powerful compressor.

Image

And again, improvised tools found in the basement came in handy - an old 200-liter hydraulic accumulator and a 3-phase electric motor.

Image

It remains to assemble - I think it should be the norm and sandblast and paint. But more on that when it all works... I hope... )

P.P.S.
As for painting the car, in connection with this global global ass and quarantine, I don’t even know what to expect in terms of timing and in general .... ((
User avatar
The_Glory
E30 Zone Regular
E30 Zone Regular
Posts: 380
Joined: Sun Feb 01, 2015 11:00 pm
Location: Kyiv, Ukraine

Mon Aug 29, 2022 8:34 pm

Build_04. Adsorber

Slowly I continue to prepare the parts for assembly. Today we will talk about a very important detail. Very important for the environment!
To comply with the environmental standards of the 80s of the last century "Euro 2", in addition to the exhaust gas catalyst, an adsorber was also installed in the tank ventilation system. What it is, and how it works in theory and in practice, is described very well and in detail on the Internet.
And in short - this is an activated carbon filter that prevented gasoline vapors from entering the atmosphere. These vapors were collected in the expansion tank, and with the help of a special valve, they entered the intake manifold and were burned. The adsorber is installed (only on E30 with a catalyst) under the hood, near the fuel filter on the left side member. Although, it is considered "eternal", and cannot be replaced according to the regulations, but for 35 years, it certainly got tired) Therefore, I decided to restore it. Ecology is our everything! )
I stripped off the remnants of paint, cleaned it of rust, treated it with a rust converter

Image

At the bottom there was once foam rubber, but it turned into dust. The grid is fixed with core notches in four places. Besides, it's still rusty. Therefore, I had to savagely, but carefully, pick out the grille with a thin screwdriver.

Image

Felt pad under the grate. We take it out and see the same activated carbon.

Image

We pour it out - it stinks, of course, strongly!

Image

Moreover, the one above is darker and even more smelly. Small granules, different shades of black and gray - apparently from the degree of contamination ...

Image

Inside we see a cap with a mesh and another felt pad. We take out the cap, then the rubber ring, then the gasket.

Image

What to do with coal? Change, of course! Gas mask filters are very suitable for this. Buying them is not a problem, although, for example, mine turned out to be already produced in 1967 - apparently, they were well stocked in case of a nuclear war! )

Image

We cut the body in a circle, take out the filter cloth, make an incision in the grid and pour out the coal.

Image

One large filter was not enough. We cut a small one - it turned out to have a different design, and coal fell immediately from the cut.

Image

By the way, based on the design, the filtration quality of a large filter will be better. Granules of Soviet coal are smaller than German)

Image

The case was cleaned from the inside, primed and painted, the felt pads were washed, the mesh cap was washed.

Image

Assemble in reverse order. I blew the body and mesh, put a felt pad, put on a rubber ring with a cap. We check that the cap is held and does not fall out.

Image

Throw in new charcoal. Just enough coal from one large and one small filter. If you take large, then you need two, if small, then five pieces.

Image

We insert the lower felt pad and the grate into place, crimp along the edge with pliers, and re-kern at the same four points. The paint was a little damaged, so I had to tint the bottom.

Image

We insert a new foam rubber and press it with the legs.

Image

As a result, we get a practically new adsorber, again ready to fight for the environment within the framework of Euro 2! )
How do you like that, Greta Thunberg!? ))))))

Image

Well, all the other components of this ecosystem are also ready for installation - an expansion tank, a valve and an adsorber.

Image

I will buy new hoses and pipes along with fuel ones. I will write about this separately later.

P.S.
I bought a few more rarities, about them next time! ;)
User avatar
The_Glory
E30 Zone Regular
E30 Zone Regular
Posts: 380
Joined: Sun Feb 01, 2015 11:00 pm
Location: Kyiv, Ukraine

Mon Aug 29, 2022 8:50 pm

Body repair_26. Development

I can't stand Kirkorov and his songs, but today my mood color is blue! )))
The fact is that today suddenly) the painter called and said - come see the color! I dropped everything and ran! ))
She's already blue! )

Image

The inside is also blue.

Image

Image

Image

The beauty! Walked around her for 20 minutes with an idiotic smile! ))

Image

Image

nice under the hood

Image

Image

Image

The long-suffering roof is even and beautiful)

Image

The bottom is also now with a light blue))

Image

In general, the result of the preparation is excellent - the development did not show any jambs. Literally a couple of small points need to be corrected under the hood and on the thresholds. The painter and I are happy! ) It will "settle" for a few days, and next week it is planned to finish painting.
It's just blue developing acrylic. I finally saw the final color today live on such a "sample"))

Image

The sun is the bomb! Beautiful color - I'm happy with my choice! ;) But let's wait for the final result, then I'll post it in all its beauty, so to speak! )
User avatar
martauto
E30 Zone Team Member
Posts: 6186
Joined: Wed Aug 31, 2005 11:00 pm
Location: leeds

Tue Aug 30, 2022 5:16 pm

Excellant work mate, love the colour :clap: :clap: :clap: :clap:

Mart.
(Swearing is ok in context but using the "Thunberg" word is maybe a bit too strong)


LOL.
Only the E46 cab left now.
Just got too old.
User avatar
The_Glory
E30 Zone Regular
E30 Zone Regular
Posts: 380
Joined: Sun Feb 01, 2015 11:00 pm
Location: Kyiv, Ukraine

Tue Aug 30, 2022 8:12 pm

Thanks.
But this is not the final color, it is simply to identify possible flaws in the preparation of the body surfaces for painting. Fortunately, they were practically not found, so the body will be rubbed and finally painted.

( OK, sorry :) )
User avatar
The_Glory
E30 Zone Regular
E30 Zone Regular
Posts: 380
Joined: Sun Feb 01, 2015 11:00 pm
Location: Kyiv, Ukraine

Tue Aug 30, 2022 9:00 pm

Bucket and rag

Despite the name, the topic is not about a dead car with a fabric interior)
And even, not about washing the car)))

The topic is about quite rare things.
For a long time I have already seen a useful thing in the catalog of accessories for the E30 - a round niche in the spare wheel for any small things (82 12 9 413 175).

Image

Image

Image

The spare wheel is turned "face" down, and a plastic "bucket" is installed inside the disk, which is pressed by the standard spare wheel mount, and, in fact, presses the spare wheel. This, of course, is not as cool as a canister in a spare wheel, but for that it is very practical - now you can use the empty volume of the spare wheel niche and put all small things there.
This is a universal accessory, so it was available for other models of those years - they are listed on the label in the first photo. In 1996, it was replaced by a similar niche, but without a partition (71 11 1 092 276) for E36, E46.
But the ETK gives a "blessing" for its installation and for older machines;)
Can be installed when replacing on an older vehicle
Old part 71 11 9 413 175

http://bmw-autocats.ru/parts-catalog/71111092276/
Therefore, when I saw this niche for sale, I looked at the ETK and bought it. It seems that it should be "correct" for the E30 too)

Image

Image

Image

Image

I tried it on, and then it turned out that it’s not so suitable for the E30 ... at least not on all wheels.
To begin with, we put on a stock spare tire with a metal disk 5Jx14 ET35 - it does not fit in diameter.

Image

Stock metric TRX 365x150TD ET35 - also does not fit in diameter.

Image

O.Z. KING (ALPINA look) 7Jx15 ET13 - slightly out of reach.

Image

BORBET A 7.5Jx16 ET20 - almost fits in... a bit lacking depth of departure...

Image

BORBET A 9Jx16 ET15 - fit! )

Image

It will be necessary to try it on in the car - maybe it will fit with 15 ", the main thing is that it doesn’t rest against the trunk carpet. I just have this wheel for a spare tire. Or look for a spare tire 9 ") We'll see ...
I also saw somewhere that later versions of such a niche from E46 are installed - it completely covers the spare wheel.

Image

Image

But maybe, you also need to measure ...

With the "bucket" clarified - now a rag! )
All models from E12 to E38 could be equipped with a polishing cloth (71 11 1 115 810).
http://bmw-autocats.ru/parts-catalog/71111115810/

It is a soft square napkin in pale blue with the BMW logo in the lower left corner.

Image

Image

The last years of production, its color was more bright blue, and the BMW logo is drawn a little differently - with a fill in a circle.

Image

This napkin was not expensive, but has long been discontinued, and is not available for order. When used for its intended purpose, it wore out and was thrown away like a regular rag. Therefore, now, original napkins are extremely rare, and even in the state of "rags" they cost a lot of money. I met on Ibee for 100 euros or bucks, I don’t remember exactly. Overkill, in my opinion)
In general, I bought a "replica")) I am not very good at different fakes, but if the "replica" is not inferior in all properties and qualities, and corresponds to the original - and is absolutely 100% copy - then this is quite acceptable. I think so ... In this case, it is - a great cloth! ;)

Image

Image

Image

Now I will have two "replicas" on my car - black headlights "hella black" made by hand, similar to the original, and this rag! :)

P.S.
Next time I will write about another very rare rarity - the original one;)
User avatar
The_Glory
E30 Zone Regular
E30 Zone Regular
Posts: 380
Joined: Sun Feb 01, 2015 11:00 pm
Location: Kyiv, Ukraine

Tue Aug 30, 2022 9:19 pm

S850 Additional tank (part 2)

Recently, about 11 years ago)), I already wrote about this option on my machine.
An additional fuel tank was installed as an option on the E30 up to 87 years old with M20 engines, and on M3.
This is the option I have. On the dashboard there is a "display meter" with a scale for 2 tanks, not the same as everyone else - there is a two-part scale, and there is no graduation in liters:

Image

The arrow shows for the most part of the scale a full main tank of 55 liters (in the photo, just almost full). And the second, smaller part of the scale is for an additional 15l tank. In total, the total volume is 70 liters. good stock)
The additional tank naturally has its own level sensor. I just had it in my trunk.

Image

Wiring, of course, under this all also has its own. I didn't have a tank. Googling, I found his photo. It is placed behind the partition of the trunk.

Image

I already have a ski bag there, a rear brace, so after weighing the pros and cons, I decided that I didn’t really need this tank. So I didn't really look for it. There were several options, but either far, or very expensive, or both together) And just the other day, I did buy this tank. Very close, and as it turned out, even a teammate. In new condition - the same as the main tank.
The set includes a tank, a double filler neck and its sealing gum, a level sensor with a connector.

Image

Image

Image

Image

The tank has a special shape for the slope of the trunk partition and its ribs.

Image

Image

Filler neck for two tanks, and, accordingly, with two ventilation outlets. Compared to stock:

Image

Double neck with a metal check valve, unlike my usual one.

Image

For this tank, all the trunk linings are different, except for the rear. Carpet included. This is the problem - I don’t have them, and I have never seen them for sale ... The price of new ones is not encouraging, and only the front is available ...

Image

Image

Maybe I’ll buy it, but the side panels and the carpet can be cut, as a last resort ... we’ll see ...
Here you can see how they look on the M3:

Image

And now the main problem... This is the rare case when the original BMW factory option is installed not with a "bolt-on", but with an additional hemorrhoid! You can see it clearly in the next photo:

Image

Firstly, in the body you need to drill a large hole for the filler neck, since I did not see the plugs there.
Secondly, four corners need to be welded to the floor of the trunk - two for attaching the tank, and two for attaching the skin.
Thirdly, two more brackets for attaching the tank and trim need to be welded onto the trunk bulkhead.
Considering that I will only have a car from painting, there is no particular desire to do all of the above ... therefore, I don’t know ... maybe this tank will remain in the garage, purely for a collection of rarities .... or maybe not .. .we will think .... we will see ...
But the valve in the neck should be! I will change mine to a stock neck with a valve. By the way, I found such a thing in the ETK - 16 11 1 180 157. Despite the mysterious name "Lead-free insert" - this is a plastic valve that is inserted into the neck.

Image

Was put on cars with a catalyst. It turned out that he would not fit into the usual neck. There must be welded a special metal ring for this valve. Although according to the ETK numbers, these necks are the same.
Still on the topic of tanks - in the course of searching, I found a photo of a rare early E30 tank /#1176250_1]16 11 1 176 250[/url]) - were placed only until September 1983. It looks smaller (on the right), but according to the ETK it is 58 liters. On the left, normal for pre-restyled (55l)

Image

P.S.
Taking advantage of the availability of free time, I bring at least some kind of "beauty" in the garage, otherwise I don’t want to put a beautifully painted car in such trash)))
User avatar
The_Glory
E30 Zone Regular
E30 Zone Regular
Posts: 380
Joined: Sun Feb 01, 2015 11:00 pm
Location: Kyiv, Ukraine

Tue Aug 30, 2022 9:38 pm

Build_05. Preparation of parts - rear calipers, head restraints, etc. [/ b]

I continue to prepare the details.
The starter was overhauled two years ago, it works fine, so it was just washed / cleaned and painted.

Image

Painted with aluminum-zinc paint APP.

Image

It turned out beautifully, but in fact, it's kind of like not paint, but primer. It says on it that it can be covered with any paints. What if you leave it like that? It's all the same type, like a zinc coating ... I really like the color and texture. I even thought of painting all the aluminum parts on the motor like this.
I also tried it on sound signals - it also looks great.

Image

Image

When I bought an additional fuel tank, at the same time in the same place, I bought a few more necessary parts:
- the thermostat housing, since the thread was broken on mine in one hole, so I put the nut.
- a whole plastic shield with a bracket in the rear right arch, since a corner was broken on mine and there was no bracket
- a whole (!!) metal shield for tank ventilation hoses in the rear right arch - this is generally an artifact!

Image

And with these details, I noticed an interesting thing - according to the ETK, each of them has one number, but in fact the details have significant differences!
Thermostat housing for M20. Now I have three of them. All three bear the same number 1 265 055.

Image

My one on the far left, with the stamp of 85-86 - without "extra" holes and plugs. But, as I said above, one thread on it is damaged, so I bought another case with whole threads a long time ago, but I never changed it. He is on the far right in the photo. I did not like the "plugs" in the form of bolts on the two additional holes. I don’t know why they were, maybe there were some kind of hoses for the “Jetronic”. Although it is stamped 90-91 years. But somehow not aesthetically pleasing) The third case with the same number, and the stigma of 81-82, but there are even more differences - the sensors are slightly shifted, and there is also a third sensor instead of one plug. The sensor is interesting - not just a temperature one, but also with some kind of "timer". Breaks into the "sharks" - I wonder what he is for?
In general, under one number, in fact three different parts.

Next is a metal shield in the arch. According to the ETC, it has only one number 16 13 1 179 011. Mine rotted into dust, but the remnants of its fasteners remained - 6 studs. I bought a slightly less rotten guard and it ended up being 4 studs. On my donor part from the touring there were also 4 studs, on the forum I also found information about four studs ... Well, I think it means that it seemed to me about 6 studs ... and 4 pieces were welded to me on this shield. And then I accidentally find this almost perfect whole shield, and it has 6 studs! Here they are both:

Image

Judging by the photo, the front part with 4 studs is inserted into the tube, and with 6 studs it is pressed with two more nuts over the tube. Damn... and now I have 4 studs and a shield for 6 studs... and how to fix it now is not clear... cook the studs? It's fucked up with these numbers! ))

Next is a plastic shield in the arch. Since the metal one differs in width and in its rear part, the plastic shields under the same number 1 176 748 are also different! The difference is in the width of the cutout for the metal shield.

Image

My old broken one was under the shield for 6 studs, and the new one for 4. Again, out of place! )
In general, these are trifles, but they add crap during assembly! Be careful, if so! ;)

Thanks to a friend, I now have such beautiful rear calipers:

Image

Image

Thanks again!
I will paint later, when my hands reach the front ones.

Another thanks to a friend for exchanging my "spare" headrests for his houndstooth headrests in excellent condition. Now I have four of them. Someday, I hope, I will collect the whole goose puzzle! )))

Image

And now about the Chinese things)))
I also bought a cover for the car - my garage is very dusty, and the assembly will take a long time) ... I think it will not be superfluous. I took it with a soft cotton lining - it was so in the description) In fact - there is a lining, but they obviously greatly exaggerated about its softness and cottoniness))
Another occasion bought a new emblem with clips and a set of "blades" for clips. Logically, they should have been bought before disassembly, but better late than never)
Well, at the same time, a key strap is probably a handy thing in the summer, when there are not enough pockets in jeans))

Image


P.S.
Today I almost finished the "repair" in the garage and put things in order there) At least some benefit from quarantine! )
User avatar
The_Glory
E30 Zone Regular
E30 Zone Regular
Posts: 380
Joined: Sun Feb 01, 2015 11:00 pm
Location: Kyiv, Ukraine

Tue Aug 30, 2022 10:19 pm

Body repair_27. Be careful, it is freshly painted! )

Finally the body is painted! It hasn't even been a year! )
I chose a color for a very long time and painfully. Or rather, I decided on the color a long time ago - I always wanted a blue E30) But it was difficult with a shade ... The old blue shades were not so much liked, but the new ones are beautiful, but they look good on new cars, but on the E30 they can look not entirely appropriate... Therefore, having reviewed a bunch of photos of different shades, in pictures, on samples, I chose with great difficulty, as it seems to me, the "golden mean"! )
This color is from Individual 1991 - Pur Blau Metallic (253)
Here is now my "teaser" in color, and in all its beauty )

Image

The color, although not from the standard colors for the E30, is from the E30 era - 1991. And it may well be that E30s of the last years of production were painted in it on order, since it is from the "individual" line.
As standard, only BMW Z1s were painted in this color.

Image

It is also in some way E30 in some places)) so this color can be considered correct for E30))
And most importantly, I love it!
After calling the painter, took the trailer and rushed to pick up! ) And that's what I saw - beauty! )

Image

Walked around, looked at with a smile from ear to ear)) Another dream come true idiot! )))
We loaded onto a trailer and drove home.

Image

The weather was as bad as it could be... Contrary to the forecasts, it was raining heavily in the morning. Wanted to pick up in dry weather, but did not work out. The painter strongly did not advise to cover with an awning, so that he would not rub fresh paint on the go, so I had to carry it in the rain. But even in the rain, the color looks great, as for me;) And in the sun it will be generally super!

Image

Image

Image

Image

They dragged it to the garage, wiped it there, blew all the water with air, and dried it.

Image

By the way, in the garage a little put things in order and "beauty") But more on that later, but for now just a photo of painting.

Image

Image

Image

Image

Image

Image

Image

Image

Image

Image

Image

Further plans are as follows - while all the hinged body elements and the body kit are being painted, I need to put it on the wheels, and then again to the painter - we assemble it there, set all the gaps, tint the fixing nuts of the hinged parts, and the final stage is polishing. Must be beautiful! )
User avatar
martauto
E30 Zone Team Member
Posts: 6186
Joined: Wed Aug 31, 2005 11:00 pm
Location: leeds

Wed Aug 31, 2022 5:08 pm

I thought the other colour was great but this is awesome mate :clap: :clap: :clap: :clap:

Mart.
Only the E46 cab left now.
Just got too old.
User avatar
The_Glory
E30 Zone Regular
E30 Zone Regular
Posts: 380
Joined: Sun Feb 01, 2015 11:00 pm
Location: Kyiv, Ukraine

Wed Aug 31, 2022 9:21 pm

Thanks, I like it too)
User avatar
The_Glory
E30 Zone Regular
E30 Zone Regular
Posts: 380
Joined: Sun Feb 01, 2015 11:00 pm
Location: Kyiv, Ukraine

Wed Aug 31, 2022 9:22 pm

Body repair_28. BBS body kit repair, attempt No. 2 (part 1) [/ B]

Almost a year and a half has passed since the first unsuccessful attempt to repair its body kit BBS, but during this time the cracks on it even did not grow themselves ...)) Therefore, there was nowhere to put it off, and something had to be done ... A special Teroson glue gun I never found 9225 (50ml), and the toad still choked to buy it ... Therefore, I decided to try an alternative option - Mannol 9918 2K-PUR glue (30ml). The volume of the cartridge is slightly smaller, but in terms of it it costs almost three times cheaper, and in terms of composition and description it is, in fact, an analogue of Teroson 9225. Another huge plus is that it is packed in cartridges in the form of a double syringe. You don't need to buy any $60 guns and adapters to mix components with it.
I ordered two cartridges to try. Another "plus" was the presence of two nets and a film in the kit.
The anti-silicone and plastic primer remained after the first attempt. Here is the entire set of materials:

Image

I decided to try on the simplest and most inconspicuous place - a small crack at the bottom of the threshold.
Did everything as written in the instructions. I cleaned the paint on both sides, widened the crack and drilled it at the end. Treated with anti-silicone, and then with a primer.

Image

Image

Further, something was written in the instructions, such as this - "glue the film on the front side and the mesh on the inside." No matter how hard I tried, I couldn’t separate the backing from the adhesive film… then I realized that it was not an adhesive film, but just an ordinary piece of film! )) How to glue it - I don’t understand ... I glued it on top with adhesive tape! )

Image

To glue the mesh, as I understand it, you need to immediately use this glue. I cut it out, laid the mesh, fixed the crack with clamps.

Image

Well, in fact, he applied glue and mixed it with a spatula right on the grid, evenly distributing about 5 cm around the crack - as the book says. Not very convenient, but it turned out to be normal.

Image

I warmed it up a bit with a hair dryer, and waited 15-20 minutes. After that, I cut off the excess mesh and glue along the edge. Finished result:

Image

Outside:

Image

I tried to bend, twist, beat in this place - it holds well, no cracks appeared!
We pass to the second threshold.

Image

Here I slightly simplified the technology - instead of a film with adhesive tape, I immediately glued adhesive tape to the front side. After removing the adhesive tape, I also missed the front side a little more.

Image

It turned out well inside too.

Image

Outside, slightly cleaned up - it turned out to be a "monolith". Tugged - I think it should hold up well ...

Image

This is the end of the first cartridge. The expense is not small.
The second cartridge was enough for two symmetrical cracks along the edges of the rear apron.

Image

By the way, near the cracks on both sides there are some kind of metal wire staples - apparently this is a factory reinforcement of these places, something like reinforcement.

Image

Image

Image

The result is excellent

Image

Image

At this point, I ran out of the second cartridge and went to order four more.
User avatar
The_Glory
E30 Zone Regular
E30 Zone Regular
Posts: 380
Joined: Sun Feb 01, 2015 11:00 pm
Location: Kyiv, Ukraine

Wed Aug 31, 2022 9:34 pm

Body repair_29. BBS body kit repair, attempt No. 2 (part 2) [/ B]

In the previous entry, I forgot to say that the BBS body kit is made of polyurethane, so it is not soldered, and it is very poorly glued with ordinary glue for plastic or for bumpers - I checked this a long time ago. A more or less normal result was achieved after connecting the cracks with internal metal linings on flush rivets, followed by filling the cracks from the outside with sealant. But over time, cracks still appeared at the joints. That is why this time I bought a 2-component polyurethane adhesive. This is a material similar in composition, which forms a "monolith" at the joints.
There is an opinion that polyurethane cannot be glued with fiberglass to epoxy with high quality. I will write about this below.

So, I bought four more cartridges of 2-component polyurethane adhesive Mannol 9918 2K-PUR (30ml), and after gaining a little experience, I started to more complex damage. A big crack, or rather a tear, in the rear apron. Fixed the edges with a plate.

Image

Image

Mixing components directly on the mesh is not very convenient, especially if the surface is not in the same plane. Therefore, I began to mix the glue on a piece of tile, and then apply the finished mixture to the grid. So much more convenient. Here's a "yin-yang")

Image

Apply to the grid

Image

The glue is quite liquid, so if you apply it to horizontal and vertical sections at the same time, it starts to flow down. Therefore, on the front apron, I already glued separately horizontal and vertical sections - experience and practice is a great thing! )
Front side - the crack is not completely filled

Image

Additional outer layer to completely fill the crack

Image

Excess will be removed when preparing for painting.
And now, as I promised above, a few words about gluing polyurethane with fiberglass with epoxy resin. Here, opinions are divided into radically opposite ones - some say that it glues well, others that it immediately disappears, since polyurethane is flexible, and fiberglass with epoxy is rigid, so they are not compatible. I myself thought so at first ... So, - I bought this apron in 2008, already glued in one place - just on the BBS factory mark, so it was cleaned and puttied.

Image

The crack is the same size as the second one, and they are located nearby - on the sides of the niche for the towing eye. In this photo on the left you can see the trace of the old repair.

Image

And the repair was made with the help of fiberglass and epoxy!

Image

I don’t know how and from what the second crack appeared - I gave the car to my father and he somehow managed to catch on to something)) But the fact that after a very hard contact with something, the apron was torn in another place “on the live”, and a crack glued more than 10 years ago with fiberglass, located nearby, ten centimeters away, did not suffer at all - it says something! Apparently, you just need to know the right proportions and be able to work with epoxy resin - then there will be a high-quality joint. Even polyurethane.
But back to our sheep. Those. to the front apron.
There was a crack on the sidewall, which I greatly expanded - I thought I overdid it ...

Image

Image

But as it turned out later - it's even better - it was perfectly filled with glue and did not have to be glued on the outside. The glue spread well under the tape.

Image

We remove the adhesive tape

Image

Lightly cleaned

Image

From within

Image

By the way, on this crack I noticed that the glue is semi-transparent to the light, although it seems black.
And finally, the most difficult place remains - a gap along the bottom of the "lip". At first I fixed it with a plate, but it interfered a lot, so I decided to glue it without it. As I wrote above - first the horizontal plane

Image

Then vertical

Image

So much more convenient. And an additional outer layer

Image

From within

Image

On the thinnest places left riveted plates.
By the way, you can see the place of repair from the first attempt nearby. The second attempt turned out to be even neater.
Hope it holds up well.
At this point, I ran out of glue, but there were still some little things left. About them in the next part;)
User avatar
The_Glory
E30 Zone Regular
E30 Zone Regular
Posts: 380
Joined: Sun Feb 01, 2015 11:00 pm
Location: Kyiv, Ukraine

Wed Aug 31, 2022 9:56 pm

Body repair_30. BBS body kit repair, attempt No. 2 (part 3) [/ B]

Let's continue from the beginning! )
In a previous post, I described repairing a BBS body kit using Mannol 9918 2K-PUR 2-component polyurethane adhesive (30ml). The entire scope of work took 6 cartridges. But there are still some little things left - extra holes and a badly damaged mounting side of the front apron.
After the trial installation of the body kit, I prudently circled the necessary holes with a black marker.

Image

Accordingly, all the rest had to be removed. Liquid glue was not very suitable for this, besides, it ended. And then I remembered hot glue. I had black rods, but they did not fit the glue gun in diameter. Therefore, he simply warmed them with a lighter or a burner and covered up the extra holes. Then I cut off the excess and it turned out not bad at all.

Image

Image

Image

I cleaned off the BBS factory mark on the front apron - now it will be clear from the front that this is a rare and original BBS set)

Image

On the front apron, on one side, there was practically no mounting side. With the help of a plastic corner and hot glue, it was possible to restore it.

Image

The front part will still grind in preparation

Image

And now about the "collective farm BBS")) Earlier, I already wrote about an interesting BBS solution with a tow hook. Velcro! )) Collective farm, and only! ))) But here it is, BBS! On self-tapping screws, and on Velcro! )) Well, actually, I decided to repeat the original collective farm))
Finding such a cover is almost impossible, so I took the dimensions, made a 3D model and, after the N-th number of layouts on paper, printed it on a 3D printer. The third time it turned out fine)

Image

Image

But to be honest - it looks so-so ... The difference with the left side is very noticeable ... well, we'll see ...
This concludes the BBS, and move on to the spoilers.

I had the original spoiler installed and a Breyton wing on top of it. If you say that this is a collective farm and bust, then I will answer you - BMW M-Technic II and Zender spoilers have a similar 2-storey structure. This is at least. Seemed like someone else, but I do not remember. I like the way it looks, so I'll leave it that way. But for this you need to put them in order.
The ends of the original spoiler are cut to fit the Breyton wing, and the metal base around the edges is quite badly rotted.

Image

I removed as much of the loose rust as I could. On the one hand, even the mounting stud fell off.

Image

I filled it all with a rust converter, then filled it with hot glue. To do this, I still had to buy a gun for 11 mm rods - a sensible thing, I think it will come in handy more than once for repairing plastic.

Image

Image

And now I will dispel another very popular myth, which says that if you paint the original rubber spoiler, it will eventually crack and peel off. So — this spoiler was painted in 2000. And during this time, the only "jamb" was a slight swelling of the paint, apparently from the ingress of water. You can see it in the photo.

Image

However, not a single crack! Moreover, the coating is still elastic, and it can be torn off like a film!

Image

Again, I repeat - you just need to be able to paint like that! The painter said that it was all about plasticizers, and that he would paint in the same way.

Let's move on to the Breyton wing. This is a pretty rare thing. Is it an original or a replica - I don't know, because in the original their body kits for the E30 were made of fiberglass - just like my rear wing. The quality looks quite like the original ... but it is not known there ...

Image

But I can say for sure that the third brake light is already a self-made "tuning". For which this was cut out.

Image

Maybe I would have left it - it looked not bad, and there was practical use - the diodes still light up before the bulbs in the taillights - this is noticeable visually. But I put the original third brake light, and it turned out too much)) Therefore, I decided to remove it. But I don’t know how to work with fiberglass, so the painter will do it.
The wing, unlike the stock spoiler, is fastened not with studs, but with bolts - there are threaded bushings inside.

Image

Image

Breyton mark

Image

2 in 1 )

Image

And now about the sad ... ((In the evening I put all the plastic in the trunk. Like this.

Image

I put the thresholds on the front apron, which I specially placed vertically so that it would not bend ...

Image

In the morning I went to work, put the car in the parking lot, and in the evening immediately to the painter. I arrived, pulled out the thresholds ... and then, I almost cried ... ((((On the street during the day it was more than +30, in the car it was probably +50 - and the apron, under the weight of the thresholds, caved in by 15 centimeters! I was just speechless ... after all I rushed with him like a fool, 5 years in the garage, so that he would not be scratched or bent anywhere, and then in one day such a fuck!
Horror ... the painter reassured me that everything would be evened out ... but I don't know ... fuck!
On this "optimistic" note on body kit - the end ...
User avatar
The_Glory
E30 Zone Regular
E30 Zone Regular
Posts: 380
Joined: Sun Feb 01, 2015 11:00 pm
Location: Kyiv, Ukraine

Wed Aug 31, 2022 10:07 pm

Build_06. Preparing details - waiting ... [/ b]


Nothing happens to the car during this time - I covered it with an awning so that it would not be covered with dust and wait ....

Image

Image

Mounted parts, apparently, will be painted for a long time - I'm waiting ...
I ordered shock absorbers - I'm waiting ...
I ordered springs - I'm waiting ...
I ordered all sorts of pieces of iron and rubber bands for the suspension - I'm waiting ...
I gave fasteners for galvanizing - I'm waiting ...
With these quarantines, everything is complicated and long ... because of this, and with work, or rather with a salary, the ass has come, now the budget had to be cut, and this will also affect the timing .... in short, everything is somehow complicated and very it takes a long time ... Until I put it on wheels, I can’t assemble body parts and make anticorrosive of all cavities. Noise isolation and wiring is also not a desire to do, so that later it would not be stained with anticorrosive .... That's how one clings to another and even until I can't get off the ground .... ((
But still, there is some news. I bought a whole rear beam and on occasion, I bought a whole and already sanded and painted shield in the rear right arch.

Image

Now I have a choice of three pieces - we'll see .... I recently wrote about their differences

Image

A nice person gave me a whole radiator diffuser because mine was broken at the bottom.
The diffuser is from the E36, but I even thought that it was the same as for the E30 with the M40. But in fact, when comparing them, they turned out to be the same in fasteners, but different in the position of the impeller, relative to the radiator - this can be seen in the photo.

Image

It is unlikely that he will ... but we'll see ...

While there is time, I am engaged in arranging a garage and a workshop. Almost finished sandblasting - here are the results of the first tests - like the norms.

Image

Image

For small parts I bought a special gun

Image

Image

It seems to work, but for large and heavily rusted parts, you still need to finish a large cylinder and make an exhaust hood - there is a lot of dust from it ...

Image

But I will write about this separately when it is ready.
I can’t decide on the suspension painting - sand and paint it myself, but this again delays the time until I finish the big sandblast, or still give it to powder painting ...
Basically, we are waiting...
User avatar
The_Glory
E30 Zone Regular
E30 Zone Regular
Posts: 380
Joined: Sun Feb 01, 2015 11:00 pm
Location: Kyiv, Ukraine

Thu Sep 01, 2022 8:25 pm

Build_07. Fastener preparation. Yellow zinc.

I gave fasteners for electroplating, which I forgot or did not have time to prepare last time.
Prepared in the same way - citric acid - a topic! ) Several details were sandblasted for testing.
Took this beauty in yellow zinc:

Image

Party Gold! ))

Image

Image

Image

Fasteners GUR, something along with the suspension and steering immediately install.

Image

And this is an “extra” fastener, well, like an extra one ... I mean, I don’t know / don’t remember where it came from - I just found it in boxes. But it will come in handy somewhere ... It was very rusty, maybe that's why it turned out with a purple-raspberry tint ... Directly - fasteners of an interesting color! )

Image

And the next batch of pieces of iron is ready for yellow galvanizing.

Image

But there are all the engine compartment glands - it’s still a long way to install the motor, so they’ll wait for now ...
By the way, I made myself a plate according to the types of factory coating of different pieces of iron. It will be necessary to lay out - maybe it will be useful to someone.

P.S.
The springs promised to arrive one of these days, but the shock absorbers are still driving somewhere ...)
User avatar
The_Glory
E30 Zone Regular
E30 Zone Regular
Posts: 380
Joined: Sun Feb 01, 2015 11:00 pm
Location: Kyiv, Ukraine

Thu Sep 01, 2022 8:44 pm

Build_08. Eibach Pro Kit springs and MTS shocks

With this quarantine, the delivery times are simply wild! A set of springs and front shock absorbers drove for almost two months, instead of 1-2 weeks ... But the other day I did arrive!

Image

Eibach Pro Kit spring set with -30/40mm front lowering, -30mm rear. I hope that it will not turn out to be a "jeep", in comparison with my former TA-Techniks c -60 / 70mm sagging springs)) I always wanted these springs, and now, finally, I bought it!
Manufacturer's and seller's stickers included)

Image

Set E2003-140 are springs for BMW E30 with 6-cylinder M20 engines up to 87 years of release (before restyling). Load - front 825 kg, rear 905 kg.

Image

Set E2019-140 are springs for cars after 87 years (restyling). The understatement is similar, but they differ in load - 865 kg in front, 945 kg in the back. That is, they are tougher. And before restyling, they will be higher than indicated, and, accordingly, vice versa - this must be taken into account when choosing.

Eibach Pro Kit E2003-140

Image

Front 2003001VA -30/40 mm

Image

Rear EW2003102HA -30 mm

Image

I really wanted shock absorbers to be included with my rear ones, the same ones - Bilstein B6, but their price did not fit in the budget in any way ... I looked at used ones, but did not dare. In my opinion, the suspension should be bought new. Therefore, I bought similar ones to those that were - they suited me with everything. MTS-Technik with -40/60 mm reduction. I think it should be normal ... but B6 will be sometime later ....;)
Packed them in bags and put in a box with springs.

Image

Mounting nut for pole and stem nut included.

Image

MTS-Technik for flask 51 mm

Image

During this time, more parts for assembling the suspension arrived - lower rubber bands for the front springs, lock washers for the rear hubs, an ABS wire bracket for the rear beam, rear support gaskets, nuts for the rear and front supports. Also bought a set of front bumpers and anthers. Last time, when installing "coilovers", I could not find a fender for such an underestimation for a long time - the stock one is quite long, and the M-Technic is only 15-20 mm shorter (at a not small price only in the original). This is not enough when lowering to -40 mm. Cutting fenders is such a solution - it loses a lot of rigidity at the same time. And that's when I picked up short bumpers from Opel (Cadet, Ascona, Vectra). Since I bought similar shock absorbers, I took the same fenders - MONROE PK004

Image

Here, by the way, old and new for comparison.

Image

It can be seen that even a short bumper shrank, and with a stock long one, the amortization would constantly lie on it.

In general, finally the front suspension can be assembled. Now in the process of sanding and painting beams, levers and racks.
During this time, I also prepared the steering rack, steering column, trapeze wipers, and there are all sorts of small pieces of iron. But about this separately.
It remains to wait until all the silent blocks and bearings on the rear arrive, and it will be possible to assemble the rear suspension. Then roll it to the painter for hanging bodywork. Everything seems to be ready, but I haven't seen it yet...)
By the way, there is a question here - if you press in the rear bearings and hubs, but do not install the gearbox and axle shafts, will it be possible to tow it on a rigid hitch? And that is, there is an opinion that the wheels can fall off along with the hubs))) Are they pressed there with a large interference fit, or are they simply inserted tightly? Or not to risk and carry on a trailer?
User avatar
The_Glory
E30 Zone Regular
E30 Zone Regular
Posts: 380
Joined: Sun Feb 01, 2015 11:00 pm
Location: Kyiv, Ukraine

Thu Sep 01, 2022 9:01 pm

Build_09. Suspension painting

Sanded all suspension parts. Smaller and less rusty parts were sandblasted at home, and very rusty rear levers, a differential had to be taken to an industrial sandblast. For a home-made one, you need either a more powerful compressor, or something to do with the supply of sand - it takes a very long and difficult time to sand. And the hood is needed, otherwise there is a lot of dust ... In general, here is the finished result of sandblasting:

Image

I bought a set for a beginner painter))

Image

I took a two-component epoxy primer, and a two-component glossy black enamel.
I welded crossbars from pipes to the ceiling and made such "garlands" like this)

Image

Image

I screwed the old cornice to make a curtain out of the film, but I did not find hooks for it and scored on it. But in vain .... now everything is covered in dust from soil and paint) And the sand on the floor did not contribute to painting)) We will work on this in the future ... And you need to buy a respirator, otherwise you can catch a "high")
As I said, the rear arms and differential were very badly rusted, and even after industrial sanding they began to show spots of rust in the pores of the cast iron the next day. Therefore, I also cleaned them slightly and blew them with acidic soil.

Image

The same thing with the brake discs - they were blown on top with an aluminum-zinc compound.

Image

Well, everything else is epoxy primer.

Image

Including rear control arms and differential.

Image

And the second layer of soil.

Image

And finally, paint.

Image

Spacers then painted separately in black mat.

Image

I painted with two-component materials for the first time, and indeed with a pulver for the third time in my life, so I painted it, of course, not ideally)) With primer it’s still normal, but with paint it’s more difficult ... it turned out to be somehow too liquid in proportions of 4: 1. Made a lot of smudges, in some places even dripping. In some places I left gaps, mostly from below, since the light is only from above and black paint in the shade, I’m also blind))) Then I had to fix it all with a second layer ... But in the end it turned out quite normal - it’s normal for the suspension! )
Now the entire suspension is painted. Although no, there is no such thing as not to forget something! ) Recently, new protective covers for the rear brake discs arrived - one was painted, and the second was not ... They were in a box, so I forgot to paint them ...
I ordered these casings at the beginning of summer. I couldn't find Klokerholm, so I ordered Bleek. Weeks passed, the order was removed twice, but on the third time it happened! And after almost three months, these casings did arrive. The package contained one painted "Klokerholm", and the second was not painted.

Image

Image

Image

Moreover, the label "Blick" was pasted over the "Klokerholm" label.

Image

Image

I don't know what's the catch, but I got Klokerholm for the price of Blick. Although, there is not a big difference in price, but the logic of the seller is still not clear. An unpainted casing may still be "Blick" - the quality of stamping is very different.

Image

I won’t say that it is completely bad, but on black it is much better - like in the original. Well, we have what we have! (c) I'll paint both and it will be fine. Still waiting for rear bearings and silent blocks...
The other day new tie rods came - now the front can be assembled. This is what I'm finally going to do now! )
Post Reply