
just looked at the pictures yet AGAIN
i can confirm it is the best paint job I have seen in terms of quality. I understand it is due to the painstaking prep. can only imagine how good it looks in the flesh.
Amazing dude. Can't wait to see it outside in the sunlight.
E30 M3 minor rust repair (few finished pic's)
Moderator: martauto
-
shazE30
- E30 Zone Camper

- Posts: 1050
- Joined: Thu Apr 20, 2006 11:00 pm
x-works, anytime you get fed up of the m3 and fancy abit of a change I will be more than happy to send you my cab to restore  awesome finish on the paint job from the pics I bet it looks even better in the metal

-
Demlotcrew
- E30 Zone Team Member

- Posts: 13329
- Joined: Mon Dec 20, 2004 11:00 pm
- Location: East Anglia
Very good effort! and thanks for taking the time to post all the progress!

-
bedumon
- E30 Zone Regular

- Posts: 387
- Joined: Mon Sep 07, 2009 11:00 pm
- Location: Birmingham
Great job mate...paint looks awesome! 
A genuine inspiration to all e30 owners!!
A genuine inspiration to all e30 owners!!
-
beardymat
- E30 Zone Squatter

- Posts: 1979
- Joined: Tue Jun 14, 2005 11:00 pm
- Location: sheffield, city of steel, and rust apparently
now that does look stunning, deffinately a testiment to your patience and eye for quality and a nod to the painter whoever he is as the application looks flawless.
its kinda funny, ive never used a cars reflection to see how wobbly a wall is before as we body men usually do it the other way round but you deffinately have a wobbly wall in your garage,lol
The next bit is always my favourite, seeing it all come back together.
its kinda funny, ive never used a cars reflection to see how wobbly a wall is before as we body men usually do it the other way round but you deffinately have a wobbly wall in your garage,lol
The next bit is always my favourite, seeing it all come back together.
No longer self employed but still available for welding duties.
-
Alpina99
- E30 Zone Camper
- Posts: 1000
- Joined: Sat Nov 17, 2007 11:00 pm
- Location: Portsmouth
Love reading this thread,
Hopefully, it'll find it's way into Zone Gold when finished to make re-reading easier
Hopefully, it'll find it's way into Zone Gold when finished to make re-reading easier
Gone, but not forgotten !!
-
Gortour
- E30 Zone Team Member
- Posts: 9025
- Joined: Sat Sep 23, 2006 11:00 pm
- Location: Poole, Dorset
It certainly will. More than deserving.Alpina99 wrote:Love reading this thread,
Hopefully, it'll find it's way into Zone Gold when finished to make re-reading easier
Currently slumming it in an E46 Touring
-
corkie

- E30 Zone Addict

- Posts: 2153
- Joined: Thu Feb 21, 2008 11:00 pm
- Location: Hertfordshire
should be zone platnum
e30
-
kman82
- E30 Zone Regular
- Posts: 967
- Joined: Mon Sep 22, 2008 11:00 pm
- Location: Oxford
mate, thats incredible!!
-
Chris
- E30 Zone Camper
- Posts: 1093
- Joined: Thu Apr 07, 2005 11:00 pm
- Location: Clacton, Essex
Wow, just read this thread from start to finish, and it is inspiring to read.
Thank you so much for posting throughout the work.
It really is a 'step by step' of how to rebuild an E30.
The car is a testament to your patience and skill. I just cant wait to see it all built up.
Cheers
Chris
Thank you so much for posting throughout the work.
It really is a 'step by step' of how to rebuild an E30.
The car is a testament to your patience and skill. I just cant wait to see it all built up.
Cheers
Chris


-
Dreamracer1

- E30 Zone Regular
- Posts: 609
- Joined: Sat Sep 06, 2008 11:00 pm
- Location: Crymych, Pembrokeshire
Give the guy a break!
He's waiting for his fingerprints to grow back.
He's waiting for his fingerprints to grow back.
E-mail kandkwalden@aol.com, phone 07854043093
Please buy some of the bits off this old 320i!
Please buy some of the bits off this old 320i!
-
dimebag_from_hell
- E30 Zone Camper
- Posts: 1494
- Joined: Sun Aug 27, 2006 11:00 pm
- Location: NORTHERN IRELAND
That is awesome, simply awesome!
You ever in the northern ireland mate? If so let me know, would love to get a look at the m3, perhaps we could make a we photoshoot, your m3 and my sport
You ever in the northern ireland mate? If so let me know, would love to get a look at the m3, perhaps we could make a we photoshoot, your m3 and my sport

"Service to others is the rent you pay for your room here on earth."
-
RotE30
- E30 Zone Regular
- Posts: 350
- Joined: Mon Aug 25, 2008 11:00 pm
- Location: Cardiff
Yeah, not really a fan of the M3 but good work though, you inspired me- I just picked up some aerosol cans from halfords, gonna give my saxo the once over later... after a few ciders.


325i Touring OUT
325i Touring OUT
E36 M3 Evo IN
106 Quicky IN
Still here for the quality advice!
-
dapperdan8001
- E30 Zone Regular
- Posts: 392
- Joined: Thu Oct 01, 2009 11:00 pm
- Location: Concrete Jungle
Thats sum serious work your doing there. The attention to detail is something else. Cant wait to see the m3 finished.
-
Dreamracer1
- E30 Zone Regular
- Posts: 609
- Joined: Sat Sep 06, 2008 11:00 pm
- Location: Crymych, Pembrokeshire
Dont hold your breath dapperdan, he's got a way to go yet!
E-mail kandkwalden@aol.com, phone 07854043093
Please buy some of the bits off this old 320i!
Please buy some of the bits off this old 320i!
-
x-works
- E30 Zone Regular
- Posts: 332
- Joined: Thu Mar 10, 2005 11:00 pm
- Location: Ireland
hope to get the pic's sorted and have an update up by the weekend.
-
noney82
- E30 Zone Camper
- Posts: 1102
- Joined: Thu Apr 27, 2006 11:00 pm
- Location: manchester, stockport
what am amazing project you have undertaken and you have done it to prefection. very nice i love it thank you for sharing, it is an inspiration to all
-
x-works
- E30 Zone Regular
- Posts: 332
- Joined: Thu Mar 10, 2005 11:00 pm
- Location: Ireland
Evening all,
After stripping the removable panels back off the car again and
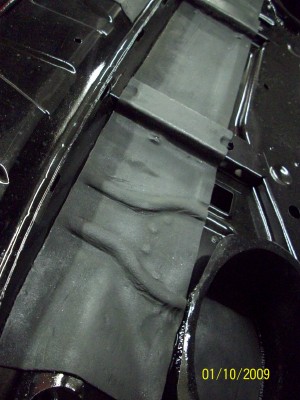
packing them away safely it was on to the next task. Sound deadening.
That sticky black crap thats a ball breaker to get off when your stripping
a car down. Still, going back on should be a walk in the park, he said,
stupidly.
Back at the start of the rebuild I'd thought a bit about this and had
looked into the price and availability of aftermarket products, i.e.
Fatmat and Dynamat, and had considered covering the whole floor
pan to make the inside as quiet as possible. Then I got a chance
to see a sheet of Dynamat in person, and it struck me, this stuff's
heavy. If I cover the whole floorpan with this I'm going to be adding
a fair bit of weight to the car. And on further reflection I don't actually
remember thinking at any stage "sweet jesus this car's a bit noisey in here."
So I decided I'd replicate the original sound proofing instead, as someone
who almost certainly knows a lot more about this than me, had sat down in
the beginning when this car was being designed and decided exactly how
much was needed and where it should go. Plus, a part number search
shows the e30's sound proofing material is still used in all the modern
bmw fleet, so it must be half decent?
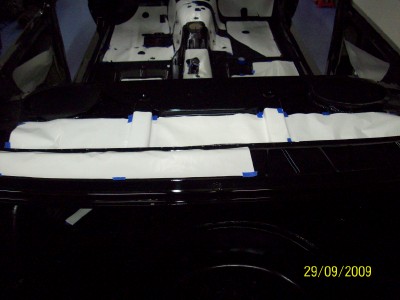
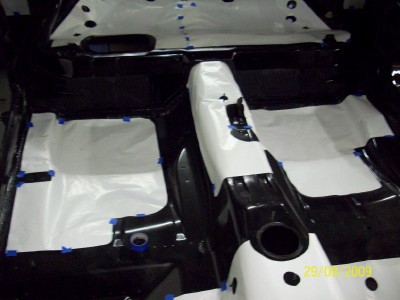
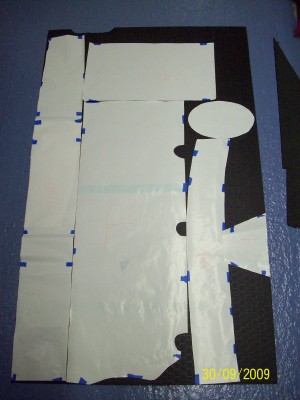
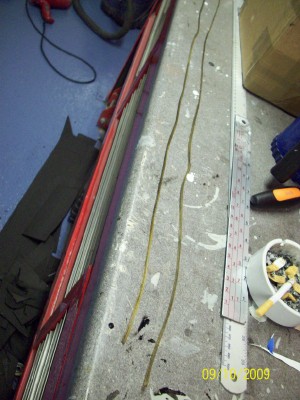
With that decided next thing to do was search through the pictures I'd
taken on disassembly and any other pic's I could find online to make paper
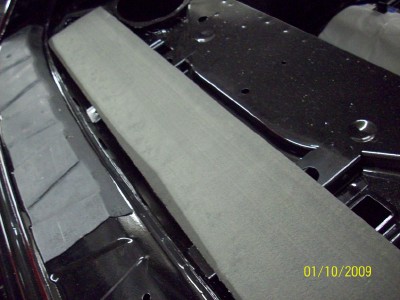
templates of the original shapes. Which came out like this....
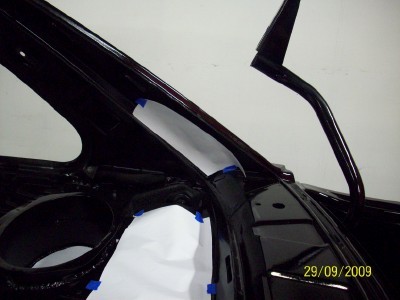
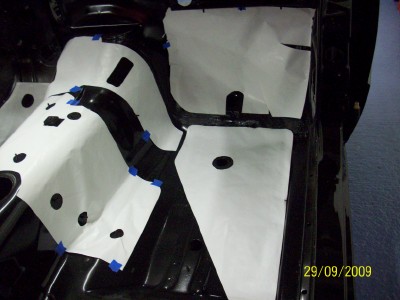
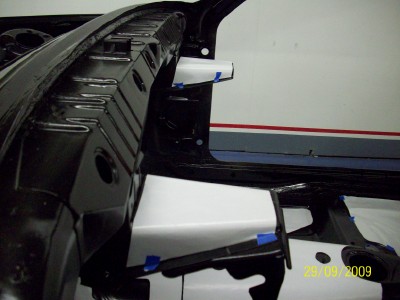
I added in a couple of small extra bits, one either side on the rear
inner wheel arches to help keep down any extra drone from running
wider than standard rear tyres....
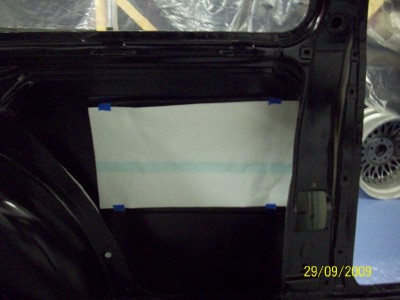
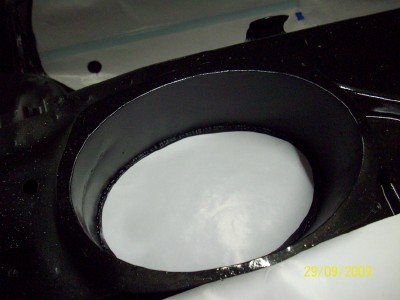
and a little bit at the bottom of each speaker pot....
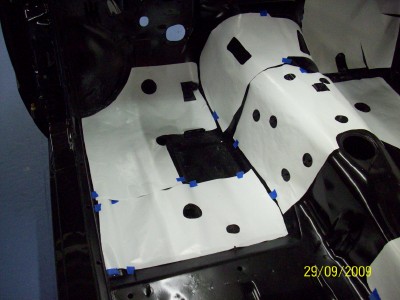
then I ordered up some soundproofing from Bmw. Originally I'd
intended to get 12 of the 50cm X 50cm sheets to do it all, but
upon making the order I was informed that that part number had
been superseded with another part number (pn.51488165271),
and the new one was twice the price. So, I assumed the sheets
were probably twice the size and to be on the safe side went ahead
and ordered 7.
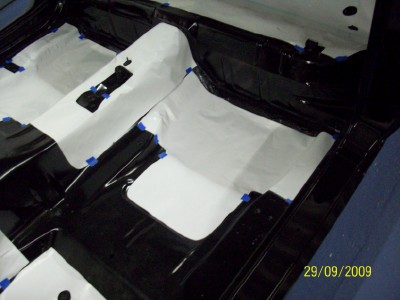
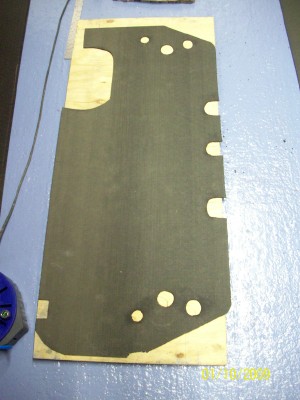
Imagine my suprise when I went to collect it and found I now had
enough to sound proof the starship f*cking enterprise!
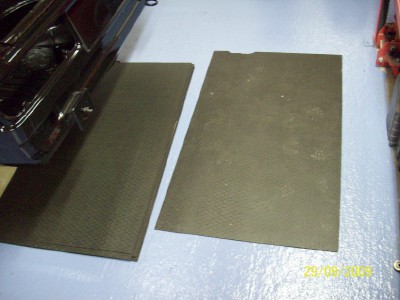
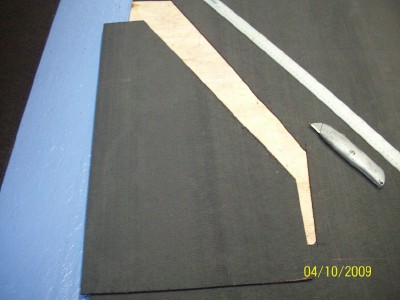
The sheets are a little over 3 times the size of the original part number.
On the bright side I could now cut all the sheets out fully without
having to join bit's together....
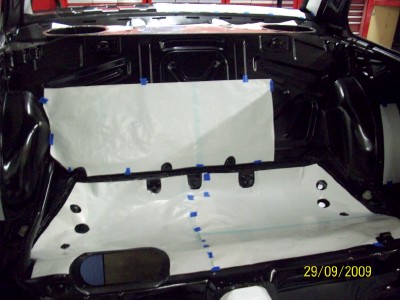
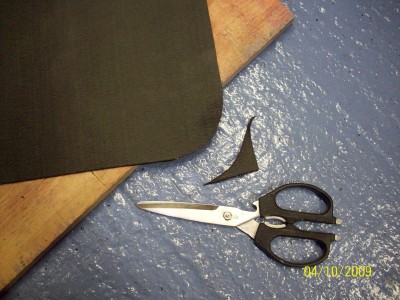
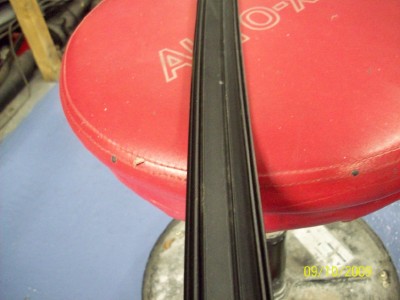
I've seen other pic's on the net of sound proofing and it looked soft
and easy to trim, god only knows what I've ended up with, cause
this stuff's as ridgid as a plank and brittle too.
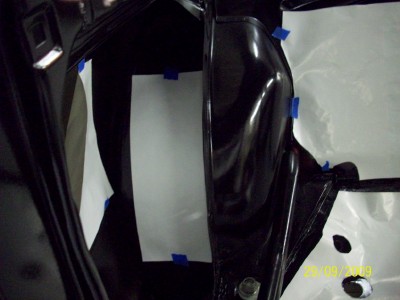
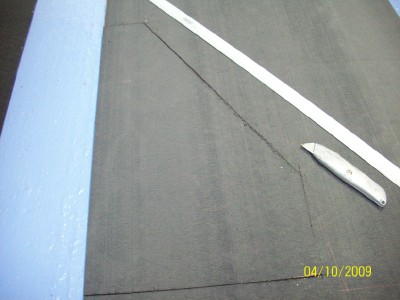
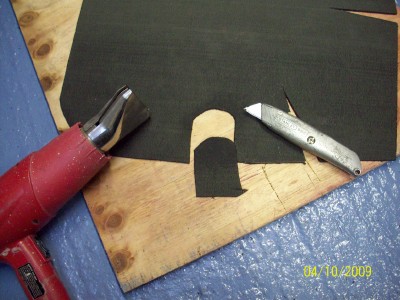
So, templates marked out....
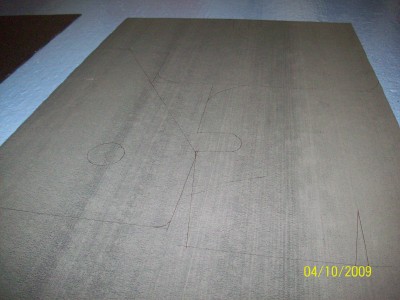
ruler and stanley knife to cut out the straight pieces...
and for curved bits a little heat from a heat gun softens it just nicely
for cutting with a scissors....
With all the bits cut out, next up was to get the body work ready for
them, a quick clean with thinners gets the surface clean of the little
spots of buffing compound scattered throughout the inside of the shell....
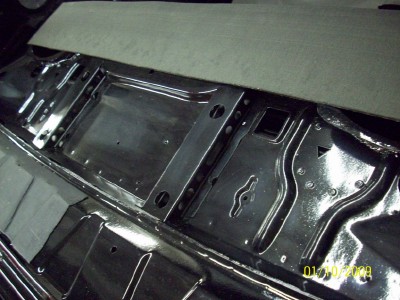
and then lay the sheet in place, see what I mean about rigid....
So, a little help from the heat gun....

and the stuff falls down neatly in to place, but it isn't stuck on yet....
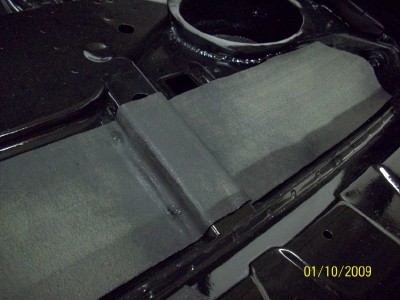
For that it needs to be heated up a little more. Which brings out the
gas blow lamp...
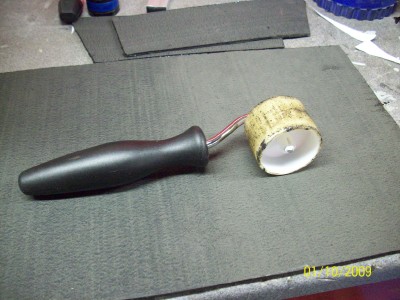
and a little hardware store roller to press it down evenly.....
a little practice shows that just enough heat at the surface of the sheet
to turn it a wet shade of dark black allows the underside to get a good
solid bond....
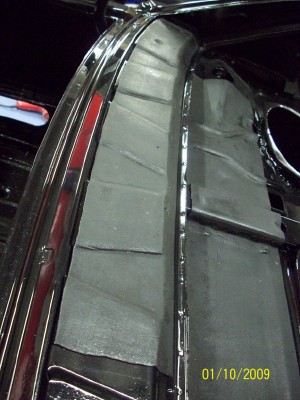
heat gunned....
blow lamped....

Next up was another small job to tick off the "things to do encyclopaedia".
The roof band that covers the join at the rear roof extension....
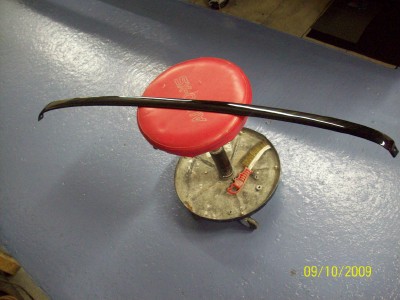
first up was to fit the 2 little sealing strips to the little
recesses on the underside of the band....
I spent 20 minutes poking in the first one. before realising on the
second one that they could slide straight in from the end, in 5 seconds.
I know, i know, it's a miracle I've made it this far.....
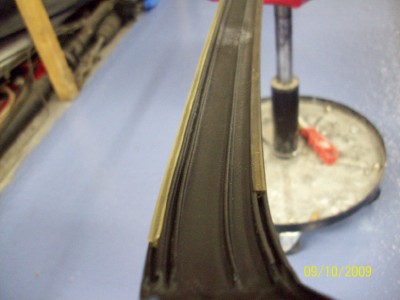
new clips popped in to the roof....
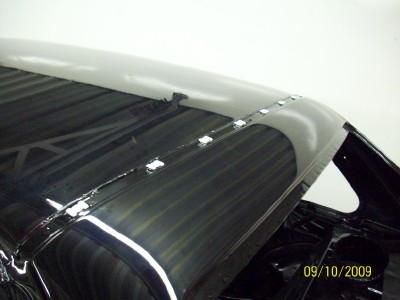
and sledge hammer the roof band down on to them...
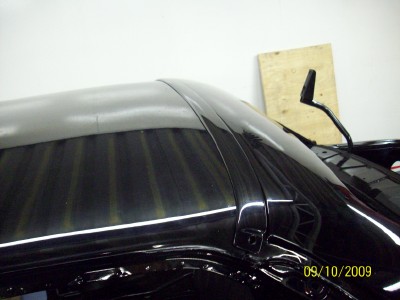
There's one large rivet to go in either side of the band to finish it off
which I've yet to do.
Last edited by x-works on Thu Mar 10, 2016 10:31 pm, edited 5 times in total.
-
x-works
- E30 Zone Regular
- Posts: 332
- Joined: Thu Mar 10, 2005 11:00 pm
- Location: Ireland
After all that, it's on to the next job on the list, cavity waxing.
All the box sections and cavities need a coating of wax as the acid
dipping had removed all the original stuff. This can be a bit of a messy
job and if you get this wax on the outside paintwork you'll need to use
white spirits to remove it. A situation thats worth trying to avoid you'll
agree. So, some soft sheets and some masking tape....


The experienced one's among you will figure out why it's far less grief
just to go out and buy some new sheets rather than borrowing what you were
sure was "old and no longer needed sheets".
Anywho, with the shell rapped up, first up was to glue on the new roof
insulation....

again the spit helps greatly with this job.....


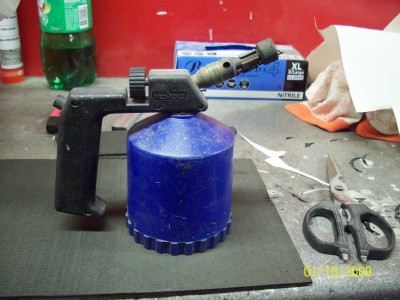
Then we have the cavity wax, I went with Dinitrol.....

it comes in 1 litre "shultz" type tins and you need a "shultz" style
gun to screw on to the top of the can for spraying it....

the gun itself comes with a normal type spay nozzle which is useful for
spraying open areas, also need though is a "wand". This is a 2 foot piece
of plastic tubing that screws into the gun one end, and the other end has
a jet with multiple holes to spray it out in all directions, which is perfect
for inside the box sections.....

all rigged up and ready to go, the tin of wax is dipped in a bucket of
hot water for a while first. This thin's out the wax and makes it spray
out in a finer mist giving better coverage....

For the actual application itself I just picked one area at a time, picked
out a few holes along that section that would allow the wand to fit in
and spray the full length and then taped off every other hole on that
section. The tape is used for two reasons, the first and obvious one
is you don't end up looking like a wax candle at the end of the day
from overspray leaking out, and the second is after you've sprayed
that section you can peal off the bits of tape to see if they've a good
coating of wax on the underside, so you know you've got 100%
coverage along the whole length inside.....

No wax on any of the bits of tape and you've missed a bit.....


probably the trickiest piece to do was this section....

it has more bloody holes in it than a fishing net....


took a lot longer to tape up than actually wax....

bit hard to tell from the pic, but this is actually the area under the scuttle
panel out where the wiper motor lives. Everybody knows how these cars
like to rust in here so it got a heavy coating of wax....

inside the roof pillars and skeleton got a good coating....


Out of the whole car I only had to drill two holes to get access to an
area to coat it and it was this little box section. Bit hard to picture it,
but its part of the rear chassis leg box section. The hole at the front
is where the rear subframe mounts up to and at the rear of the pic
is the back spring platform. The last decent hole to get the wand into
was off nearer the back of the car and the wand just wouldn't reach
all the way up to this bit.....

on the inside of the box section there was no joy either, there were
holes but they were too small for the wand to fit. So picked a hole
in the middle of the section each side....

and drilled it out large enough to fit the wand....


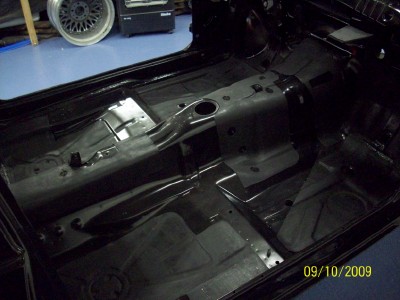
With most of the box sections done we could move on to some of
the larger open areas needing wax. This is the area under the rear
side window, bit hard to figure from the pic I know, but the metal
in the top in the pic is the inside of the rear quarter panel....


and the back half, thats the front of the rear inner wheel arch on the
right....


There's quite a bit to wax overall in the shell and it took two full days
till I was happy I'd got everywhere. The other thing thats handy to
know is that if you are leaving the gun for a few hours or over night the
wax will dry out and clog it up. So, a little aerosol lid full of thinners or
white spirits run through the gun cleans it out spotless...

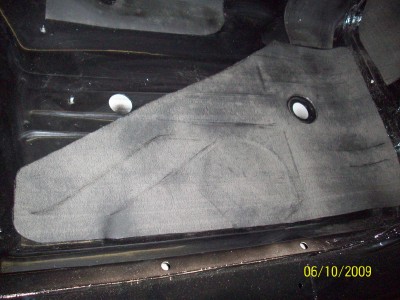
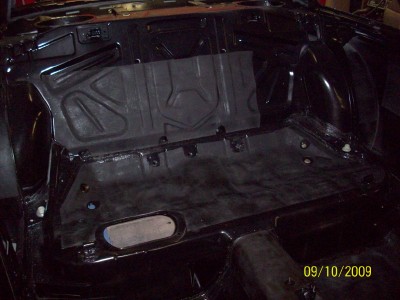
after the shell waxing was finished the last of the internal sound insulation
could be fitted....


and then the final bits, the two front doors....

sound deadening first....

and then wax....


All in all we got through just about five tins of the stuff....

and then the fun really started, where the hell do all these go again....

And thats about where we're up to at the moment. Next up, taking a break
from the shell for a while and starting on the driveline. First up for
overhaul will be a differential thats looks like it went down with the Titanic....

till next time....
All the box sections and cavities need a coating of wax as the acid
dipping had removed all the original stuff. This can be a bit of a messy
job and if you get this wax on the outside paintwork you'll need to use
white spirits to remove it. A situation thats worth trying to avoid you'll
agree. So, some soft sheets and some masking tape....
The experienced one's among you will figure out why it's far less grief
just to go out and buy some new sheets rather than borrowing what you were
sure was "old and no longer needed sheets".
Anywho, with the shell rapped up, first up was to glue on the new roof
insulation....
again the spit helps greatly with this job.....
Then we have the cavity wax, I went with Dinitrol.....
it comes in 1 litre "shultz" type tins and you need a "shultz" style
gun to screw on to the top of the can for spraying it....
the gun itself comes with a normal type spay nozzle which is useful for
spraying open areas, also need though is a "wand". This is a 2 foot piece
of plastic tubing that screws into the gun one end, and the other end has
a jet with multiple holes to spray it out in all directions, which is perfect
for inside the box sections.....
all rigged up and ready to go, the tin of wax is dipped in a bucket of
hot water for a while first. This thin's out the wax and makes it spray
out in a finer mist giving better coverage....
For the actual application itself I just picked one area at a time, picked
out a few holes along that section that would allow the wand to fit in
and spray the full length and then taped off every other hole on that
section. The tape is used for two reasons, the first and obvious one
is you don't end up looking like a wax candle at the end of the day
from overspray leaking out, and the second is after you've sprayed
that section you can peal off the bits of tape to see if they've a good
coating of wax on the underside, so you know you've got 100%
coverage along the whole length inside.....
No wax on any of the bits of tape and you've missed a bit.....
probably the trickiest piece to do was this section....
it has more bloody holes in it than a fishing net....
took a lot longer to tape up than actually wax....
bit hard to tell from the pic, but this is actually the area under the scuttle
panel out where the wiper motor lives. Everybody knows how these cars
like to rust in here so it got a heavy coating of wax....
inside the roof pillars and skeleton got a good coating....
Out of the whole car I only had to drill two holes to get access to an
area to coat it and it was this little box section. Bit hard to picture it,
but its part of the rear chassis leg box section. The hole at the front
is where the rear subframe mounts up to and at the rear of the pic
is the back spring platform. The last decent hole to get the wand into
was off nearer the back of the car and the wand just wouldn't reach
all the way up to this bit.....
on the inside of the box section there was no joy either, there were
holes but they were too small for the wand to fit. So picked a hole
in the middle of the section each side....
and drilled it out large enough to fit the wand....
With most of the box sections done we could move on to some of
the larger open areas needing wax. This is the area under the rear
side window, bit hard to figure from the pic I know, but the metal
in the top in the pic is the inside of the rear quarter panel....
and the back half, thats the front of the rear inner wheel arch on the
right....
There's quite a bit to wax overall in the shell and it took two full days
till I was happy I'd got everywhere. The other thing thats handy to
know is that if you are leaving the gun for a few hours or over night the
wax will dry out and clog it up. So, a little aerosol lid full of thinners or
white spirits run through the gun cleans it out spotless...
after the shell waxing was finished the last of the internal sound insulation
could be fitted....
and then the final bits, the two front doors....
sound deadening first....
and then wax....
All in all we got through just about five tins of the stuff....
and then the fun really started, where the hell do all these go again....
And thats about where we're up to at the moment. Next up, taking a break
from the shell for a while and starting on the driveline. First up for
overhaul will be a differential thats looks like it went down with the Titanic....
till next time....
-
Alex
- Married to the E30 Zone
- Posts: 22665
- Joined: Fri Feb 11, 2005 11:00 pm
- Location: Johannesburg, South Africa
Deffo the best resto ive seen on here, keep it up
if i were you i would get a load of new floor bungs, they only cost pennys
if i were you i would get a load of new floor bungs, they only cost pennys
-
Dezzy
- CR24v it's a lifestyle
- Posts: 11974
- Joined: Thu May 15, 2008 11:00 pm
- Location: Middlesbrough
Unbelieveable work. Totally MINT. I wouldnt dare drive it.

Co Founder of CR24vTM By Invitation Only. Absolutely no riff raff!!!
-
Morat
- E30 Zone Team Member
- Posts: 8943
- Joined: Thu Feb 09, 2006 11:00 pm
- Location: The Peoples Republic of Yorkshire
I'm trying to imagine your face when you drive it through a puddle for the first time!
It looks superb!
It looks superb!
E30 Touring 0.35 cD - more slippery than prison soap
Praise the Lard... and pass the dripping!
Praise the Lard... and pass the dripping!
-
Jhonno
- Homo Hair
- Posts: 20362
- Joined: Mon Jan 10, 2005 11:00 pm
- Location: FLAT, FLAT, FLAT!!
Fuck me... Impressive doesn't even come close

-
E30Mark
- E30 Zone Team Member
- Posts: 8107
- Joined: Sun Jan 09, 2005 11:00 pm
- Location: Wimborne, Dorset
My customers think i'm anal over parts of the work i do for them, but you sir win the prize
1 & 2 bed flats in Bournemouth areas, with parking
PM for details
PM for details
-
maxfield
- Old Skooler

- Posts: 15185
- Joined: Sat Nov 26, 2005 11:00 pm
- Location: Mansfield
Fuck me! Awesome work.

-
goosiegander
- Zonegoose
- Posts: 2544
- Joined: Sun Nov 19, 2006 11:00 pm
- Location: East Anglia
F***ing Epic!

-
madaboutthe30
- E30 Zone Camper
- Posts: 1391
- Joined: Sun Oct 21, 2007 11:00 pm
- Location: Stanmore, Harrow
Dont forget to fill those holes you drilled in with seam sealer as theyre going to eventually rust.
Good job
Good job
Dreaming of the day I purchase an E30 M3
--- e30 motorsport cab-- in the process of becoming a trailer queen
--- Z4M Coupe - daily driver
--- e30 motorsport cab-- in the process of becoming a trailer queen
--- Z4M Coupe - daily driver
-
Zaho49
- E30 Zone Newbie

- Posts: 150
- Joined: Sun Apr 23, 2006 11:00 pm
- Location: North Cyprus
I am from North Cyprus. I didn't saw like this restoration before  . This job is unbelivable
  . I can't wait until you finish this restoration keep going
-
RJB6
- E30zones oldest newbie
- Posts: 306
- Joined: Mon Jan 10, 2005 11:00 pm
Hi Brian ,see you are getting along really well love the paint job hope I can get the same finish on mine when I get around to it.I will pm you some pics and advise on what I did to my diff.Also perhaps you maybe able to help me with alittle something.
Keep up the good work
speak to you soon
RJB6
Roy
Keep up the good work
speak to you soon
RJB6
Roy
-
dn808e2
- E30 Zone Regular
- Posts: 499
- Joined: Sat Mar 11, 2006 11:00 pm
- Location: Kings lynn, Norfolk.
Good work, , you are very passionate about details,
-
mpowerbmw
- E30 Zone Newbie
- Posts: 14
- Joined: Mon Feb 02, 2009 11:00 pm
- Location: Slovakia
You are not from this world ...PERFECT JOB
-
E30Gheko
- E30 Zone Addict
- Posts: 3789
- Joined: Sun Sep 28, 2008 11:00 pm
- Location: Wirral
Astounding as always. 
-
M3BOB
- E30 Zone Newbie
- Posts: 158
- Joined: Sat Jul 09, 2005 11:00 pm
- Location: Kent
Great Thread!

White is the new silver
Trader in Replica Lightweight Panels for M3s
Recovery Service in Kent
-
oomz1975
- E30 Zone Addict
- Posts: 2019
- Joined: Mon Feb 09, 2009 11:00 pm
- Location: London UK
WOW!!!!
