

re. the rocker-cover and having to clean out the sand-blast crap that was left behind-
i think it was jimbob on here who recently had a vapour-blast refurb. on the r/cover on his tech 1,and he found that blast media had worked its way underneath the big ally plate on the inside of the cover-
he had to remove it by drilling its fixings,clean all the gunk out,at re-fix it with screws.
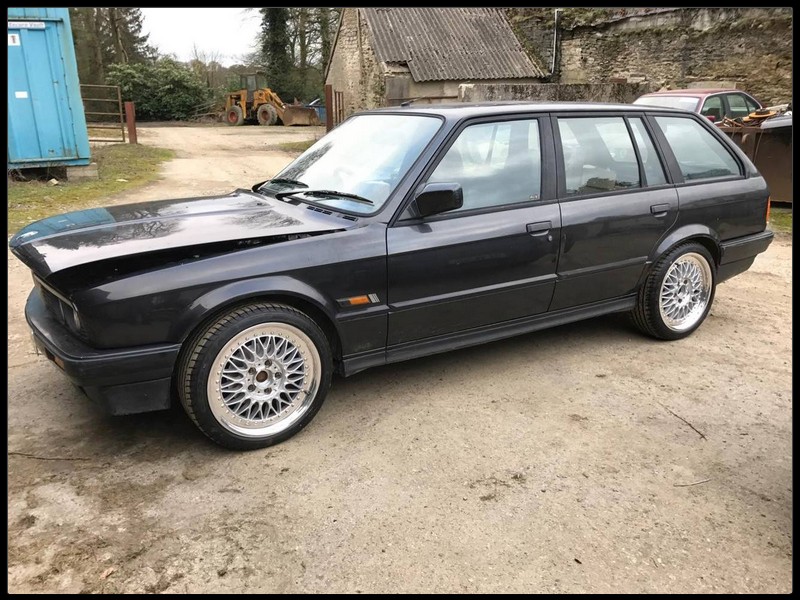
1990 320i Touring
Moderator: martauto
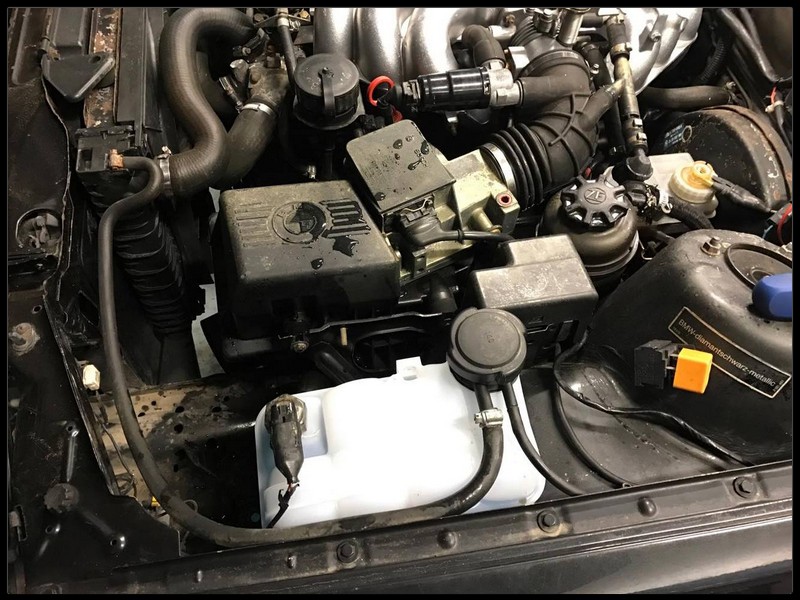
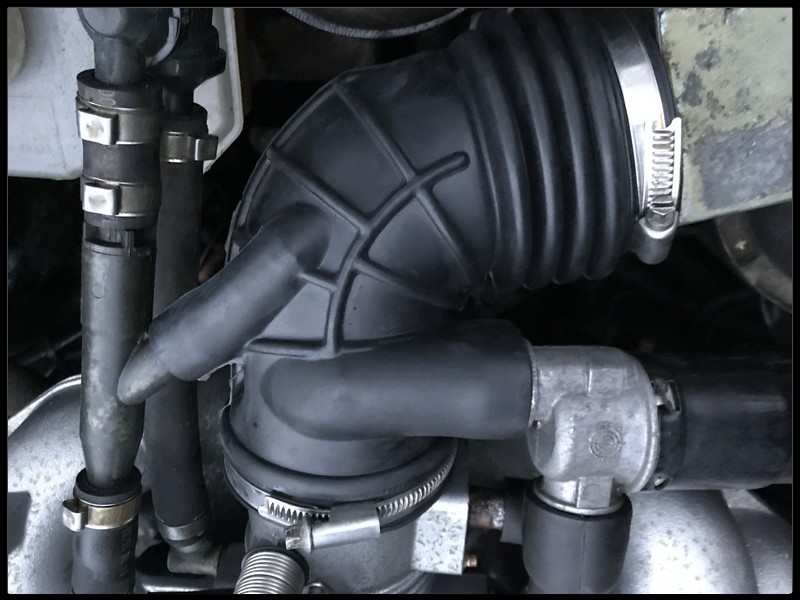
Cheers for that. Will check up on those bungs when I'm speaking to Dave again (he's doing all the spannering!)Brianmoooore wrote:Throttle body: Tidy up where the pipe has broken off, cut the other small pipe off as well, and replace the hoses that went to them with a single piece. It's a throttle body heater which has no purpose in your part of the world.
Rocker cover: I hope you replaced the four D shaped rubber bungs in the cylinder head in line with the ends of the rocker shaft. These become hard with heat and age, nd love to leak if disturbed.
Gear linkage: Another cable tie securing the reverse light cable to the linkage wouldn't go amiss. If the cable drops onto the propshaft when in use, it will be damaged and fuse 10 will blow.
This fuse is listed in the handbook as just being for the reverse lights, but it has other functions as well.
That section on the throttle body is available separately for €23 from BMW, so might try removing it and replacing. The screws weren't budging, but might be possible to do something with the dremel.
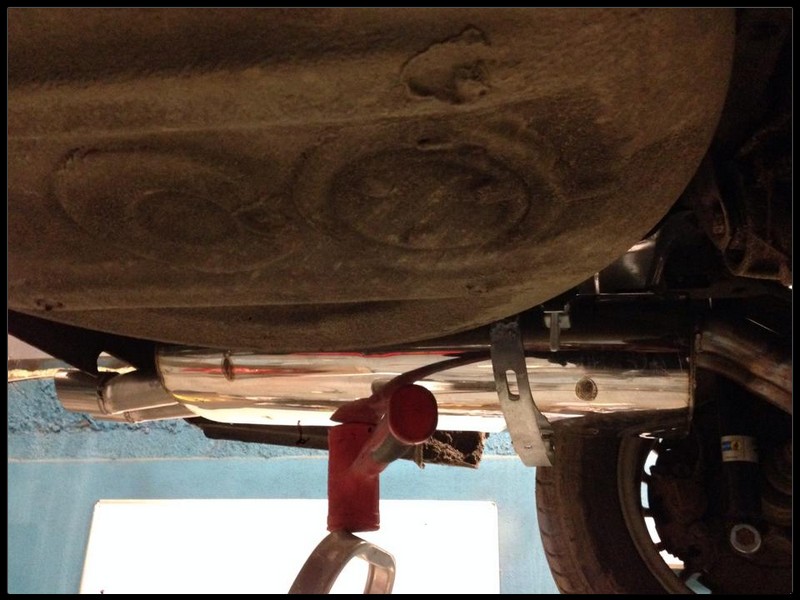
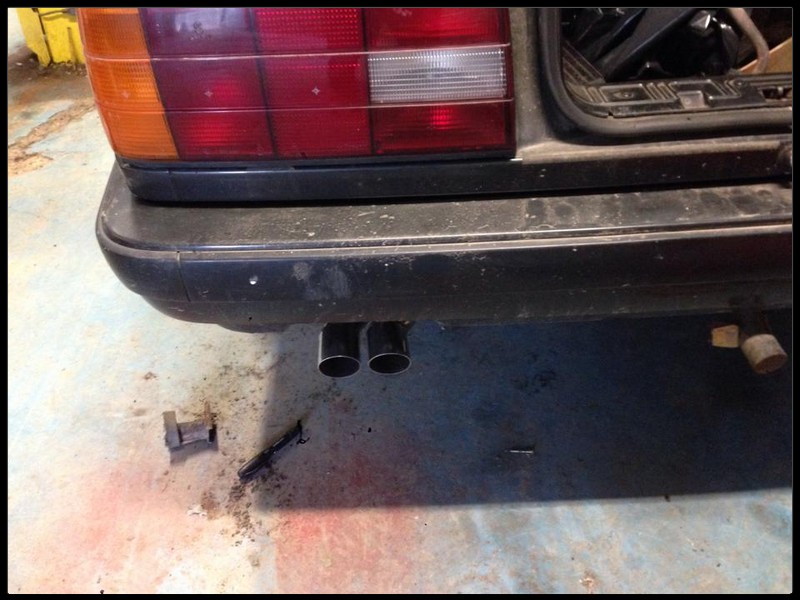
I hadn't intended buying an exhaust yet with so much else left to do, but when this one came up for sale locally I grabbed it. I had been considering another Eisenmann exhaust, or a Supersprint - but both have the pipe slanted towards the side, which I don't love - and both cost roughly €700 for a backbox alone. This Larini exhaust is long out of production, but brand new and unused, and is a three piece system. It also ended up costing less than either of the other options. It also came with a full fitting kit including all brackets etc, so all in all it was a good deal.
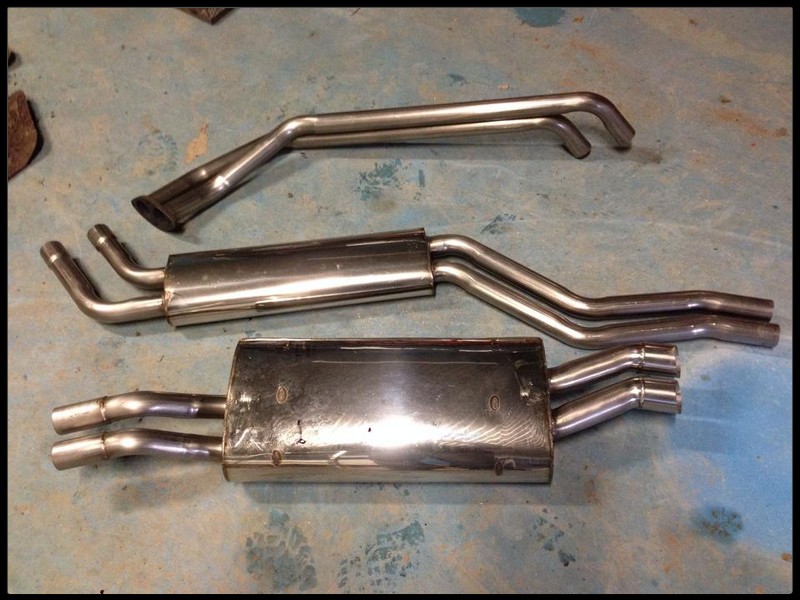
Given their reputation, I figured that it would be a pretty simple install for Dave, which hasn't turned out to be the case.
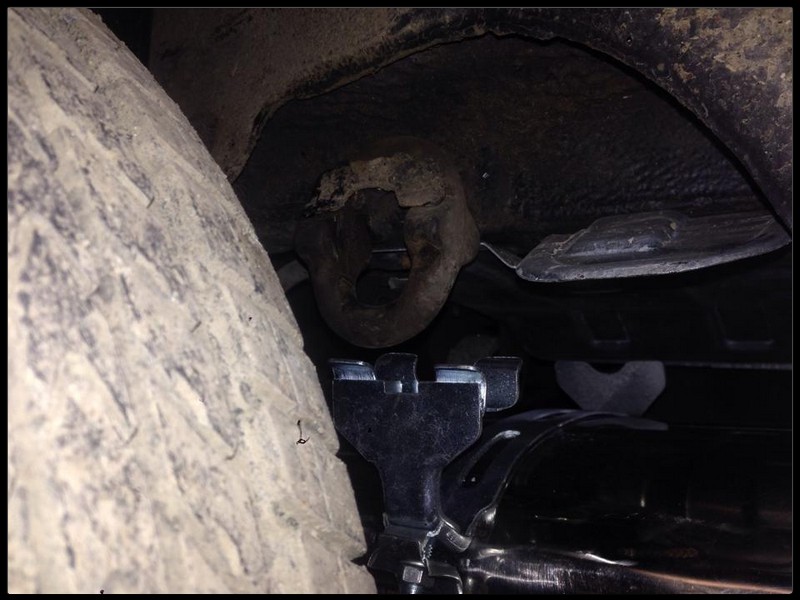
First issue was pretty obvious - the bracket was way too big for the back box. Dave tried the bracket on the exhaust which came off the car, as well as a scorpion one he has, and it fitted perfectly - so seems the Larini unit is smaller.
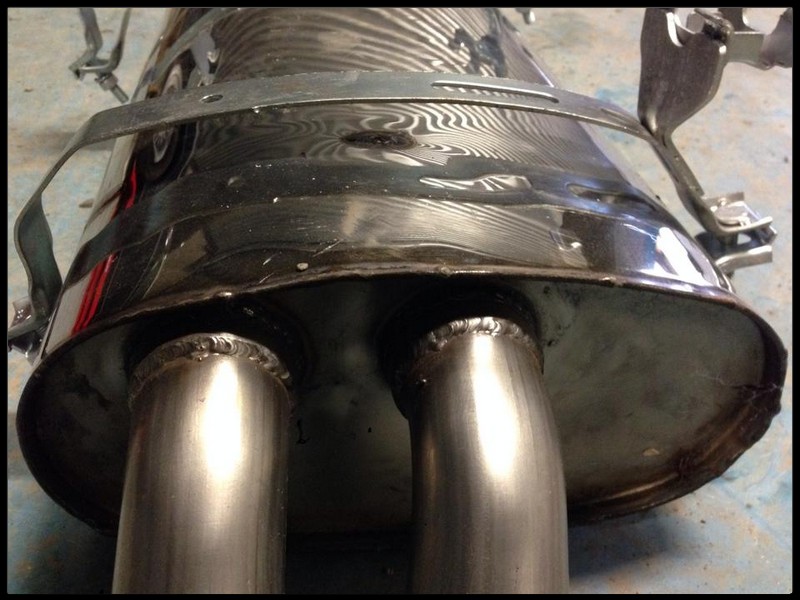
Few adjustments made and it fitted fine -

Dave offered up the exhaust and it wouldn't fit beside the wheelwell, so had to modify the brackets again. It then became apparent that the mid section didn't fit great, so he had to heat it up to get a half decent fit.
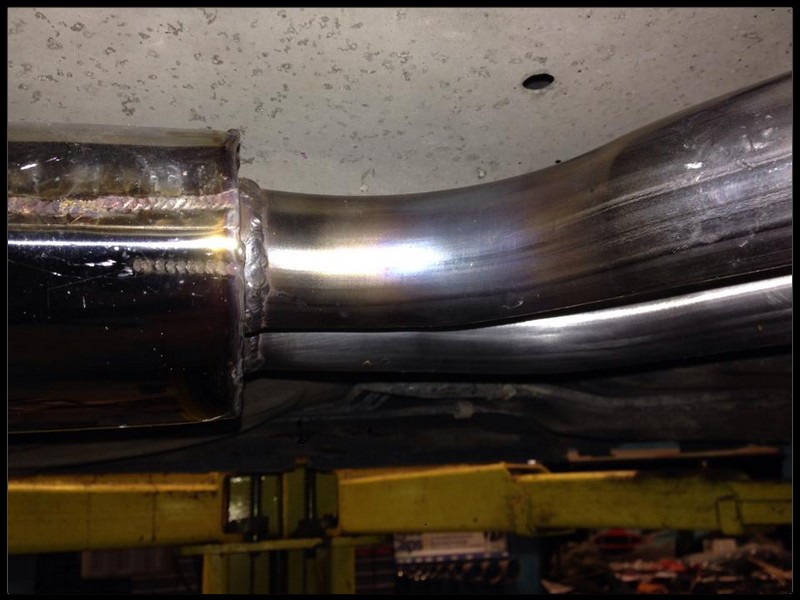
At this stage it was sitting smack bang against the rear beam, and the back box was hanging about 2 inches lower than it has to be to fit
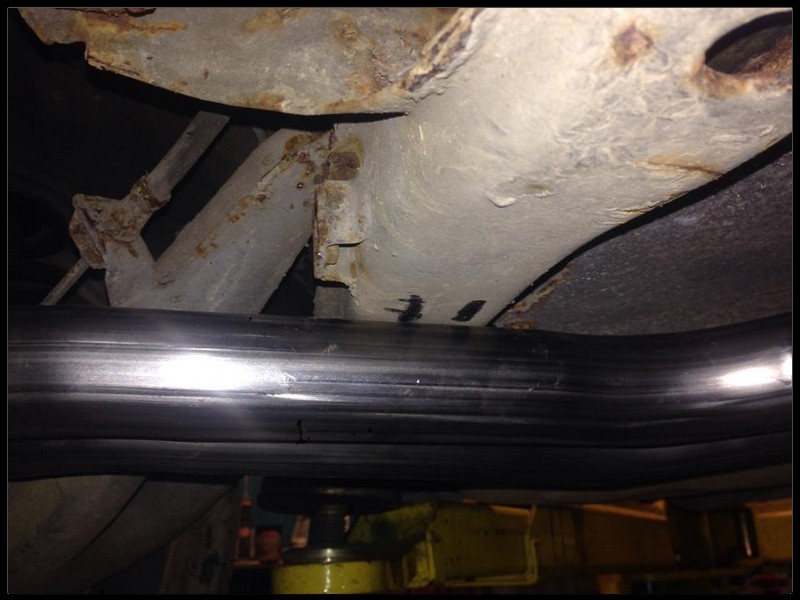
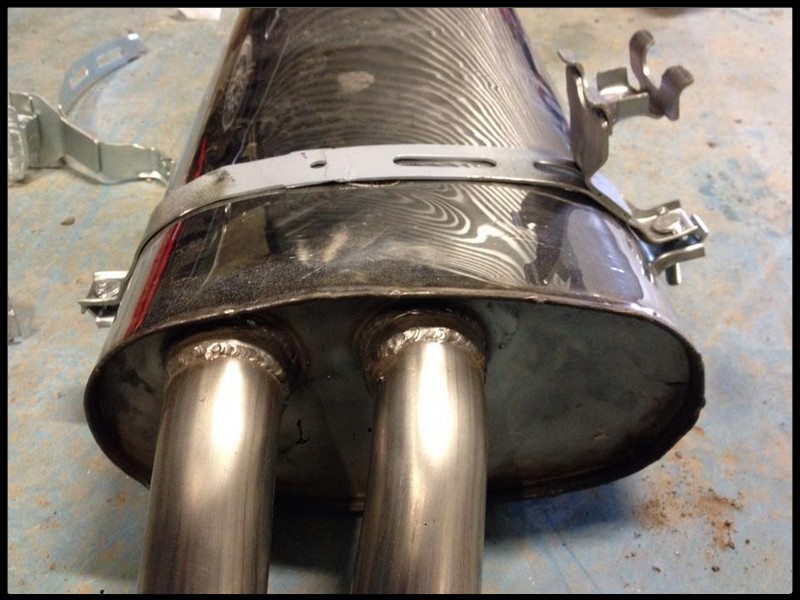
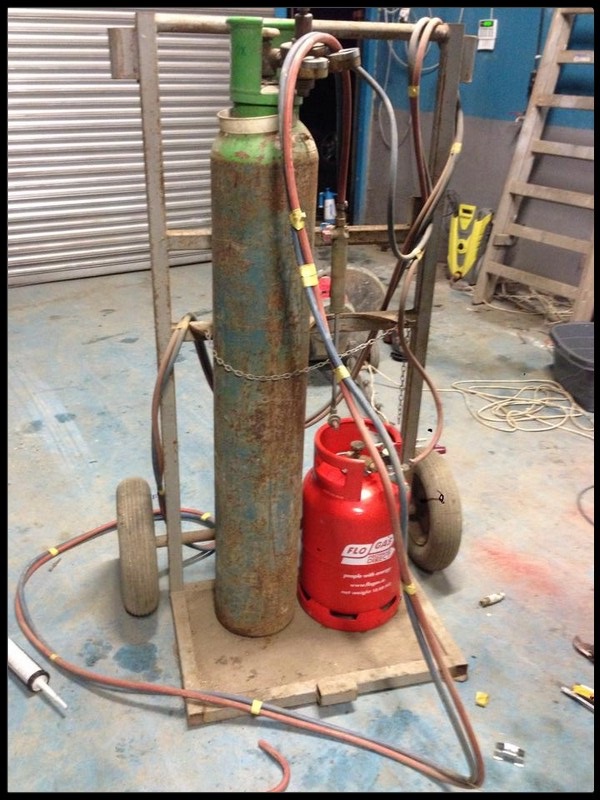
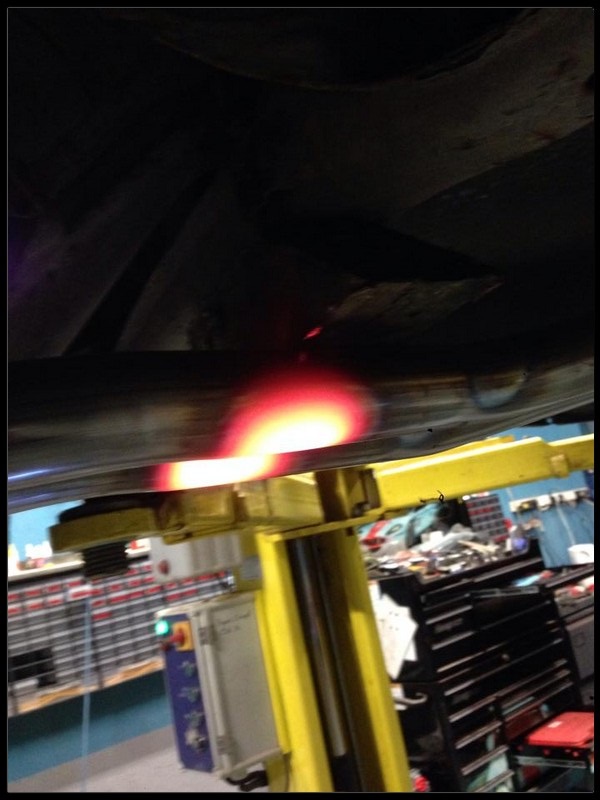
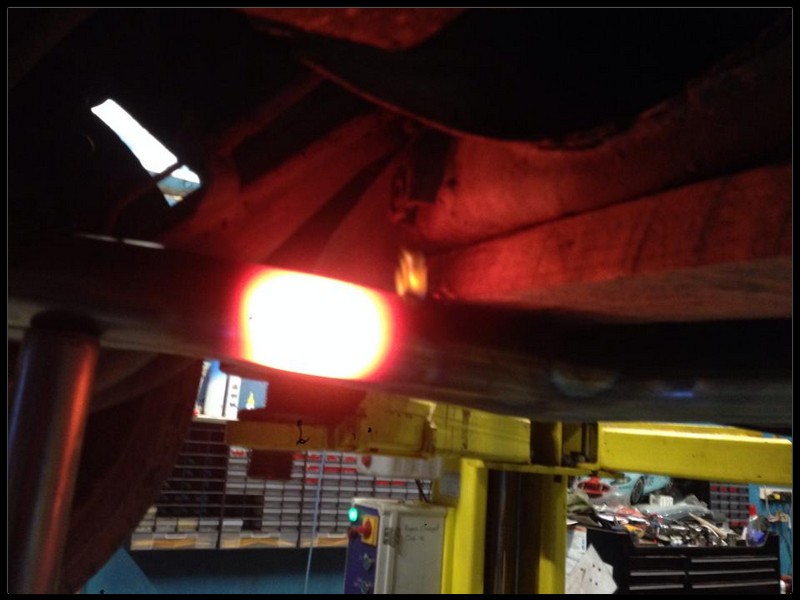
A gas upgrade was needed at this stage!
The box was more in line now, but still not right
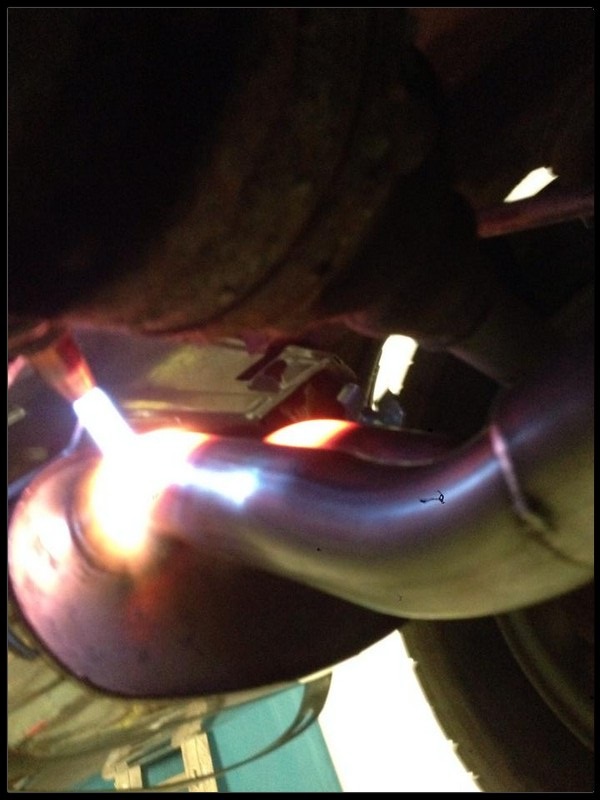
A lot more heat, bit of inspiration and plenty of perspiration - and its almost there.
Given their reputation, I figured that it would be a pretty simple install for Dave, which hasn't turned out to be the case.
First issue was pretty obvious - the bracket was way too big for the back box. Dave tried the bracket on the exhaust which came off the car, as well as a scorpion one he has, and it fitted perfectly - so seems the Larini unit is smaller.
Few adjustments made and it fitted fine -
Dave offered up the exhaust and it wouldn't fit beside the wheelwell, so had to modify the brackets again. It then became apparent that the mid section didn't fit great, so he had to heat it up to get a half decent fit.
At this stage it was sitting smack bang against the rear beam, and the back box was hanging about 2 inches lower than it has to be to fit
A gas upgrade was needed at this stage!
The box was more in line now, but still not right
A lot more heat, bit of inspiration and plenty of perspiration - and its almost there.

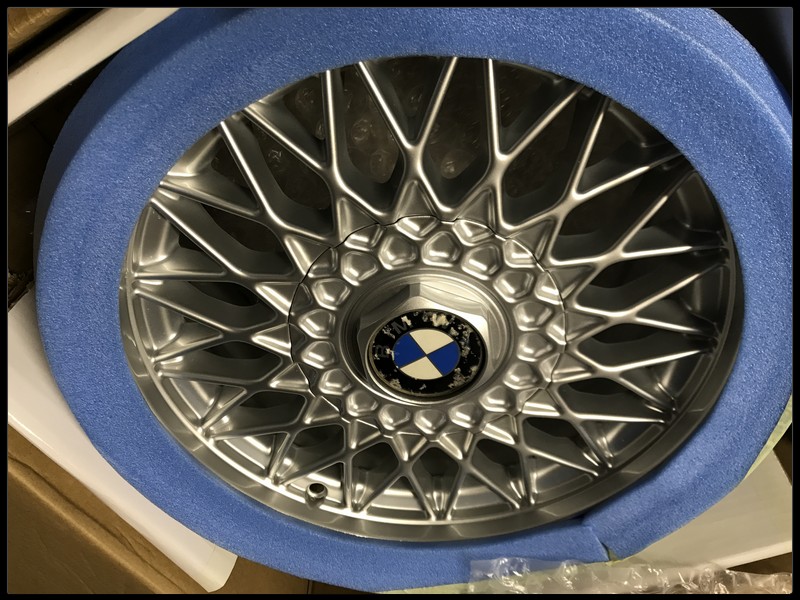
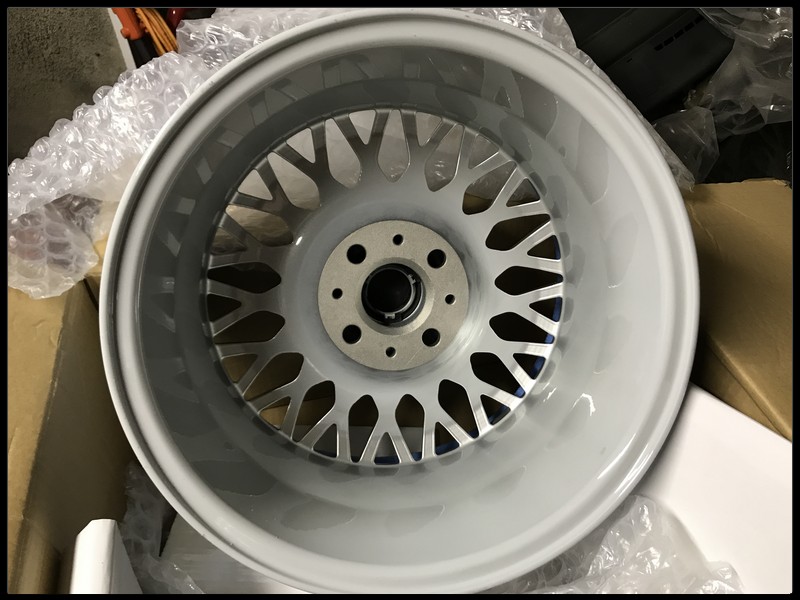
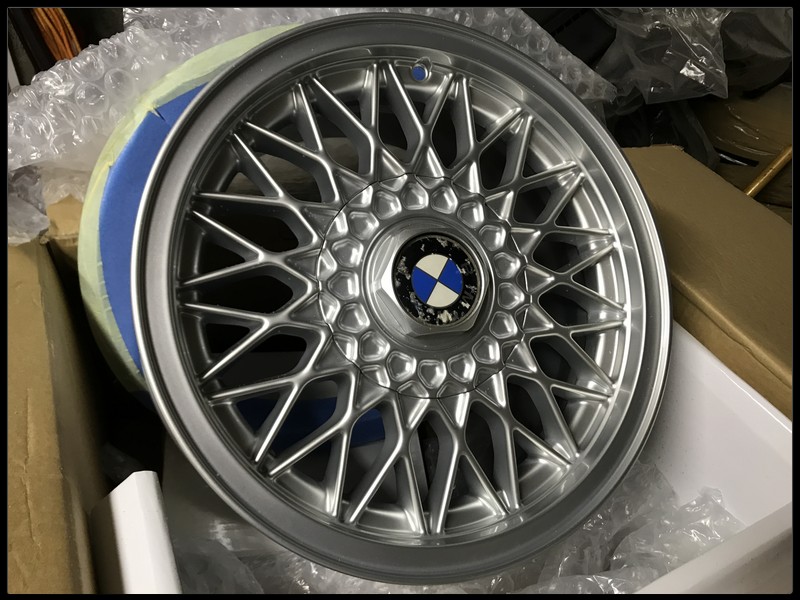
Got a call from Wheel Wizards earlier in the week to say the wheels were ready for collection. They weren't in particularly poor condition to start with, but am delighted with the transformation.
No point having fresh wheels with old centre caps - got these new from BMW Classic.

Finished result -

No point having fresh wheels with old centre caps - got these new from BMW Classic.
Finished result -
Yeah that's the plan. Will see how they look, might end up back on 15 inch BBS wheels if I'm not too keen. They're RC040's, so will fit up fine. No stretch at all on the tyres either which I'm delighted with.eamo wrote:how are you going 5 stud ken? Adapters?
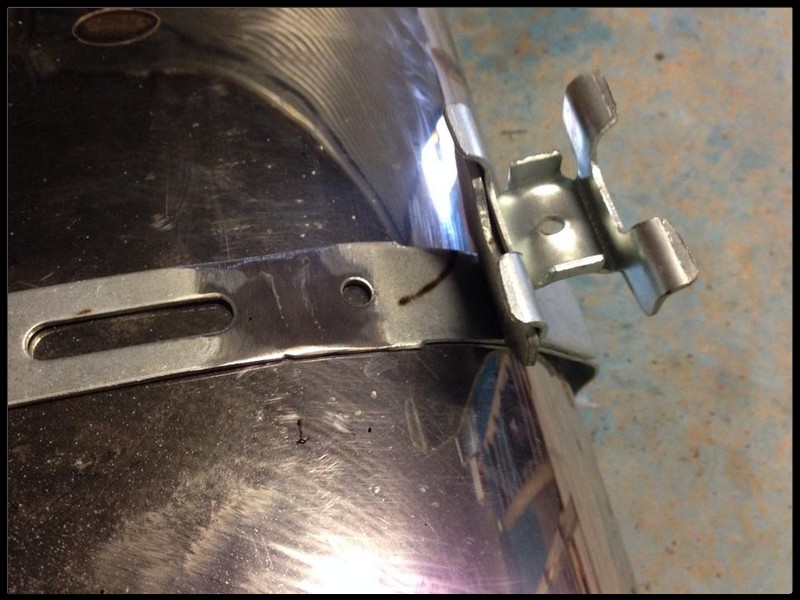
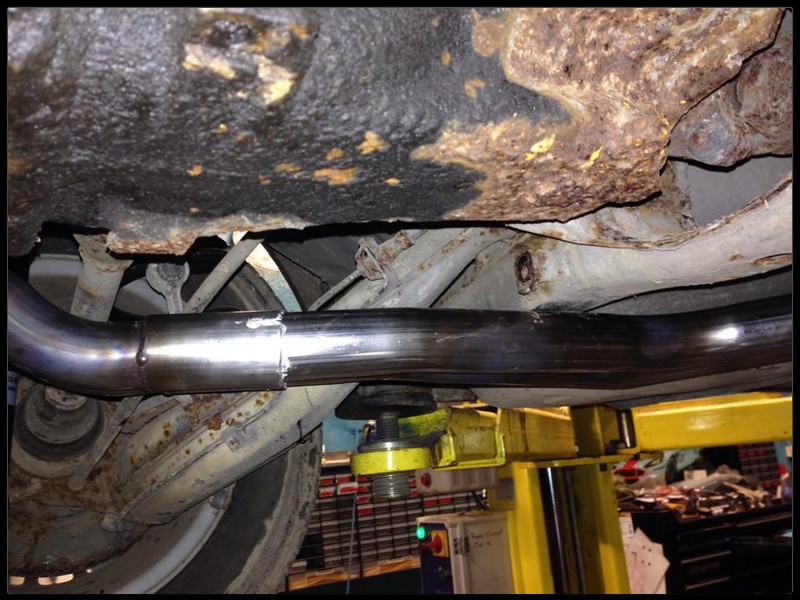
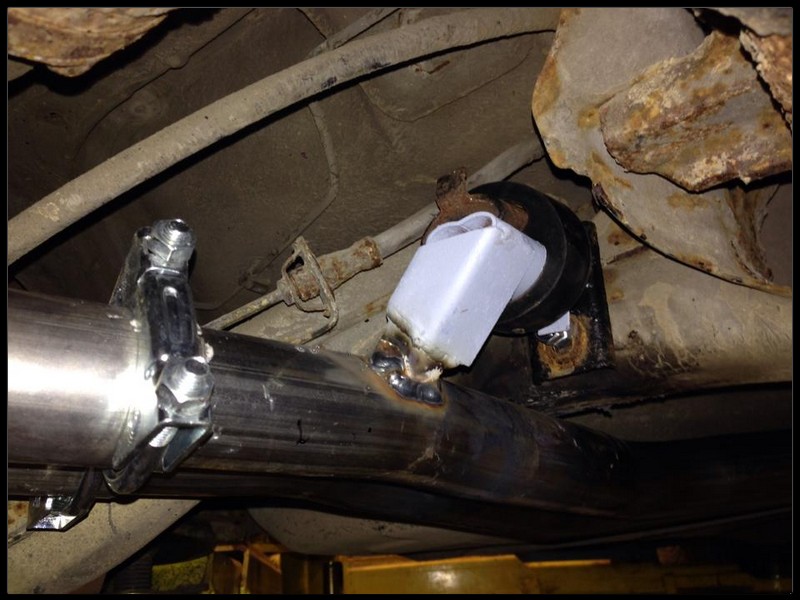
Dave got a bit more time at the exhaust and wrapped it up -
Bit more heating and bending -
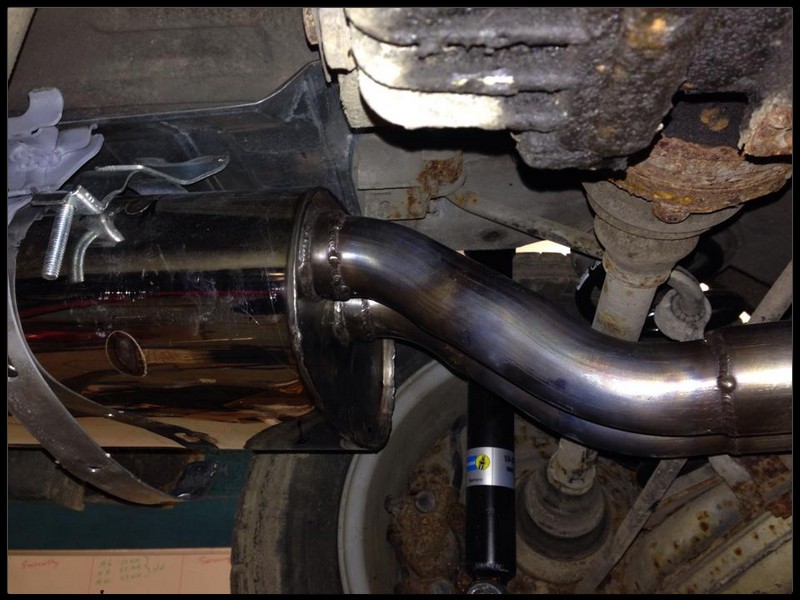
Sitting perfectly now -

An extra bracket was welded on to provide more stability -
Finished result -
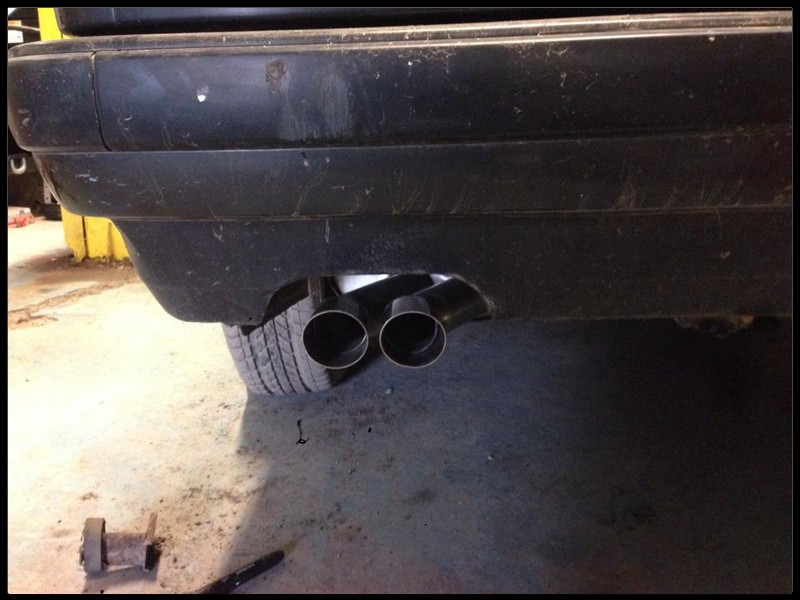
Daves initial opinion is that is doesn't sound anywhere near as impressive as the Eisenmann, but that it looks great. Will hear for myself soon enough, but am happy enough with it being understated.
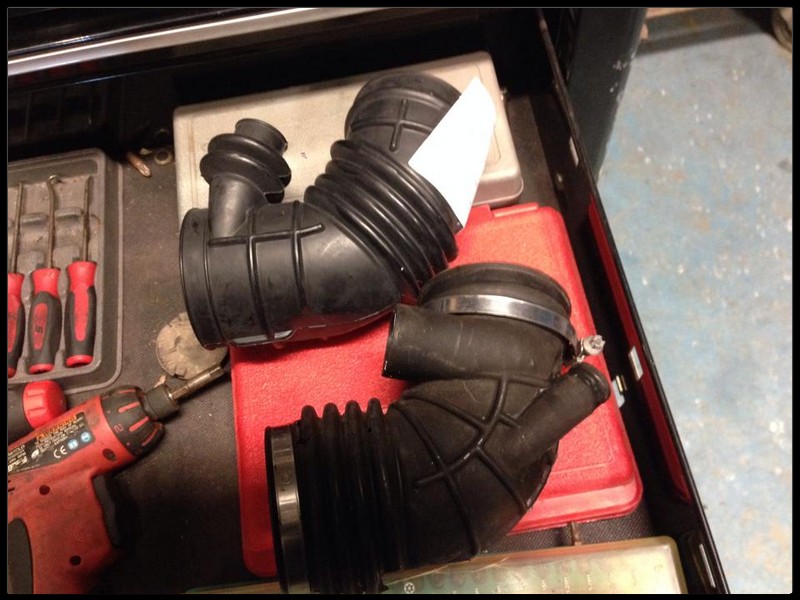
Ordered a new intake boot for it - but turns out its the wrong part. Part number looked ok to me - so if you've an idea what this is off let me know.
Bit more heating and bending -
Sitting perfectly now -
An extra bracket was welded on to provide more stability -
Finished result -
Daves initial opinion is that is doesn't sound anywhere near as impressive as the Eisenmann, but that it looks great. Will hear for myself soon enough, but am happy enough with it being understated.
Ordered a new intake boot for it - but turns out its the wrong part. Part number looked ok to me - so if you've an idea what this is off let me know.
-
Brianmoooore

- E30 Zone Team Member

- Posts: 49358
- Joined: Mon Jan 10, 2005 11:00 pm
New boot is for a late 325i, where the complicated plumbing for the brake servo was simplified back to a single connection to the throttle body, a simple non return vacuum valve fitted, and the servo turned upside down to shorten the pipe run, similar to what is fitted to M40 engined E30s and all later BMW petrol models.
Unfortunately, the ICV was also changed from a 'L' shape to a 'T' shaped version, which, unless you have a 'T' one, will prevent you from doing the worthwhile update.
Unfortunately, the ICV was also changed from a 'L' shape to a 'T' shaped version, which, unless you have a 'T' one, will prevent you from doing the worthwhile update.
Is the T shaped ICV the only major part that's needed to swap over? Am fond of worthwhile upgrades!
-
Brianmoooore
- E30 Zone Team Member
- Posts: 49358
- Joined: Mon Jan 10, 2005 11:00 pm
You'd need to blank off one of the ports on the throttle body (or find a late one where the boss for the port in undrilled), and obtain some vacuum hose and an angled one way vacuum valve from a M40 or an E36 etc. as well.
The 'upgrade' doesn't give any performance benefits - just cleans up the engine bay and makes removing the throttle body much simpler.
Turning the brake servo upside down isn't essential. You'll just need a bit longer hose.
The 'upgrade' doesn't give any performance benefits - just cleans up the engine bay and makes removing the throttle body much simpler.
Turning the brake servo upside down isn't essential. You'll just need a bit longer hose.
Might just source the correct boot for the moment, but have the new one there if I decide to proceed. Would definitely look neater alright.
I should probably get all the necessary bits fixed up first rather than spending cash on stuff which doesn't necessarily need to be done!!
I should probably get all the necessary bits fixed up first rather than spending cash on stuff which doesn't necessarily need to be done!!


Few more updates at last. Have been ordering a few bits and pieces, but the car hasn't been a priority for a few months. Finally managed to drop off everything to Dave last weekend.
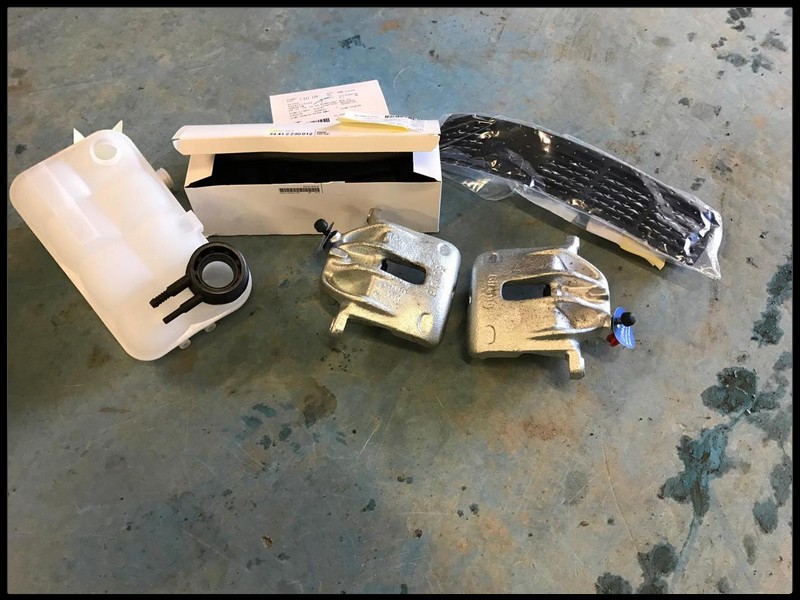
Combination of some BMW Classic parts - and the new calipers from Eurocarparts. Maybe they didn't like me calling them out on twitter for their misleading 30% sale - they sent me two right hand calipers, so that needs to be resolved.
Also ordered the PCD adapters for the wheels. A 5 stud conversion on an E30 is always a compromise unless the M3 setup is used imo - and these are for aesthetics only, so happy enough to run the adapters for a while. If I'm not happy with the wheel setup I'll go for the 15 inch original BBS wheels.
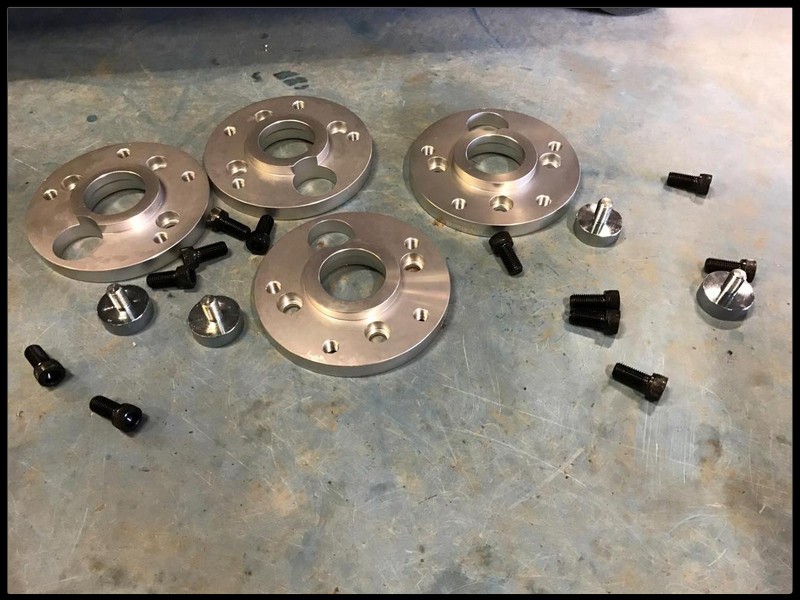
That said - they didn't go on without some effort. The rears wouldn't go on all the way as there is a chamfer on the inside.
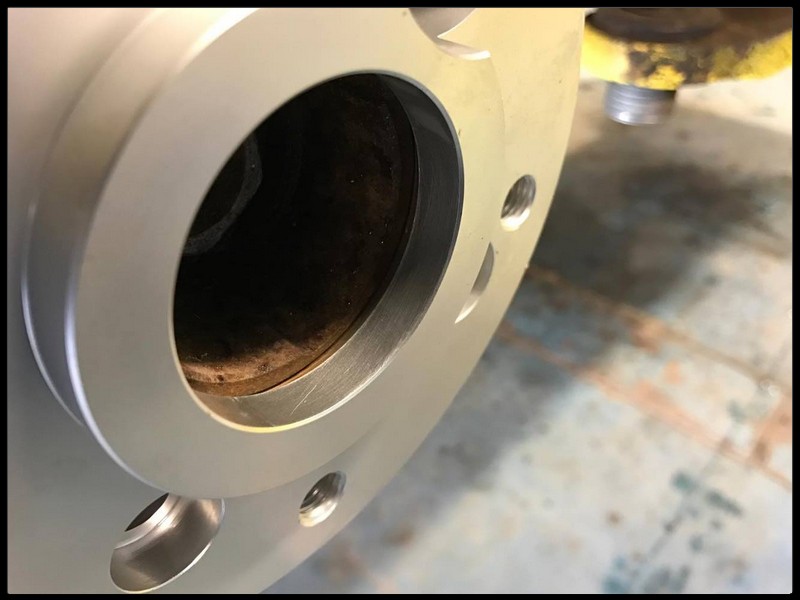
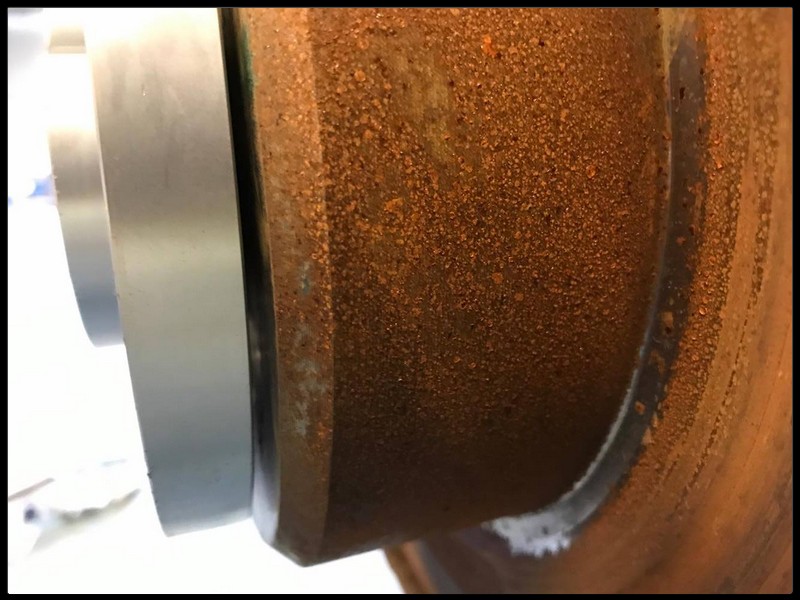
Ground down the hubs -
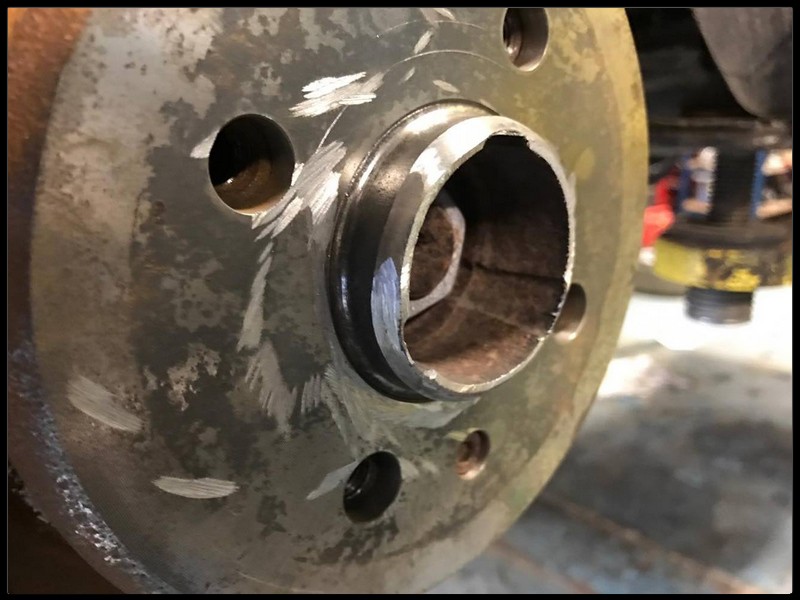
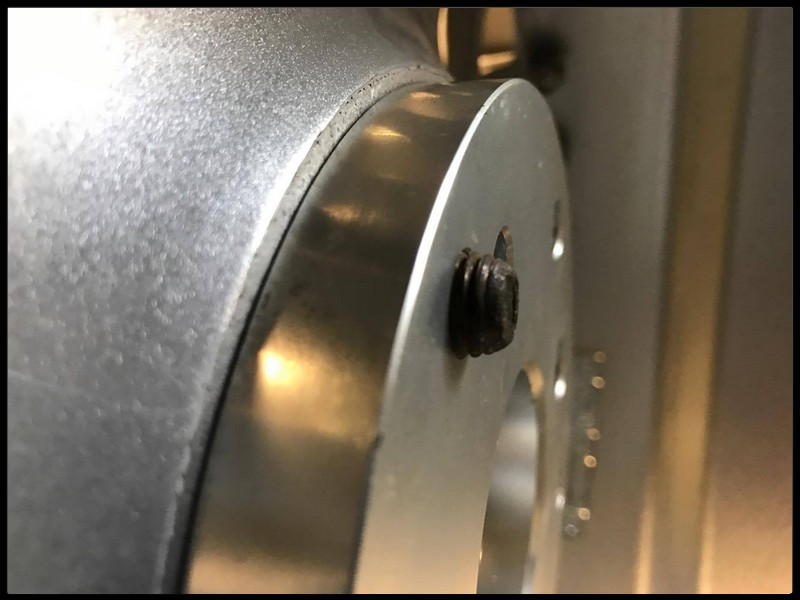
Supplied bolts were also a bit too long - so they needed to be cut down
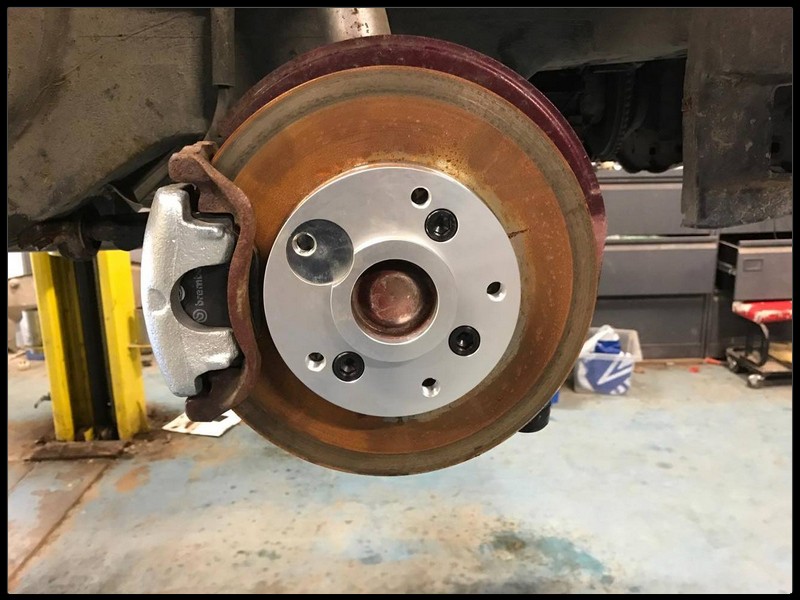
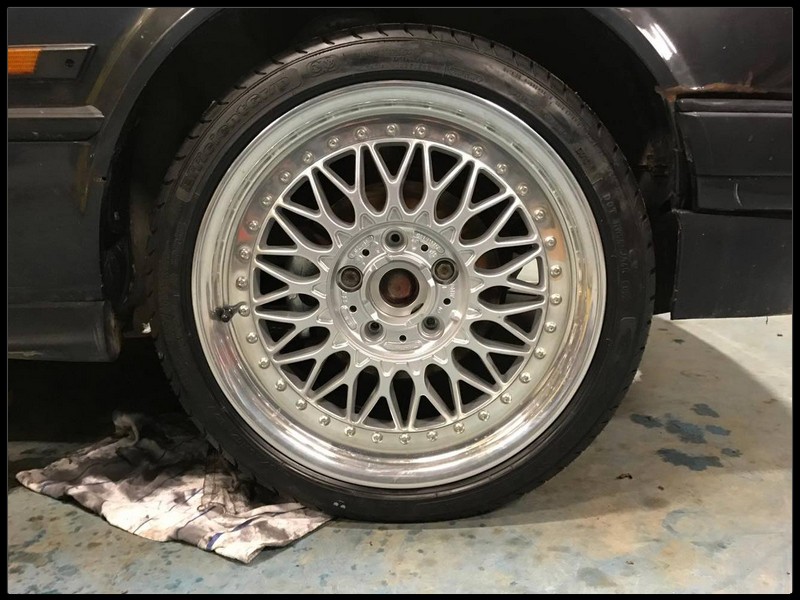
Wheels were bolted on for the first time. Sits just right at the rear - seems a bit high at the front. Still needs to settle back down - but will get something sorted anyway.
Combination of some BMW Classic parts - and the new calipers from Eurocarparts. Maybe they didn't like me calling them out on twitter for their misleading 30% sale - they sent me two right hand calipers, so that needs to be resolved.
Also ordered the PCD adapters for the wheels. A 5 stud conversion on an E30 is always a compromise unless the M3 setup is used imo - and these are for aesthetics only, so happy enough to run the adapters for a while. If I'm not happy with the wheel setup I'll go for the 15 inch original BBS wheels.
That said - they didn't go on without some effort. The rears wouldn't go on all the way as there is a chamfer on the inside.
Ground down the hubs -
Supplied bolts were also a bit too long - so they needed to be cut down
Wheels were bolted on for the first time. Sits just right at the rear - seems a bit high at the front. Still needs to settle back down - but will get something sorted anyway.
The engine isn't getting any work - just a tidy up of the engine bay. New expansion tank fitted - have a few other bits to go in such as the clutch reservoir. Will replace any clips I can and do a full clean before seeing what else needs to be replaced.
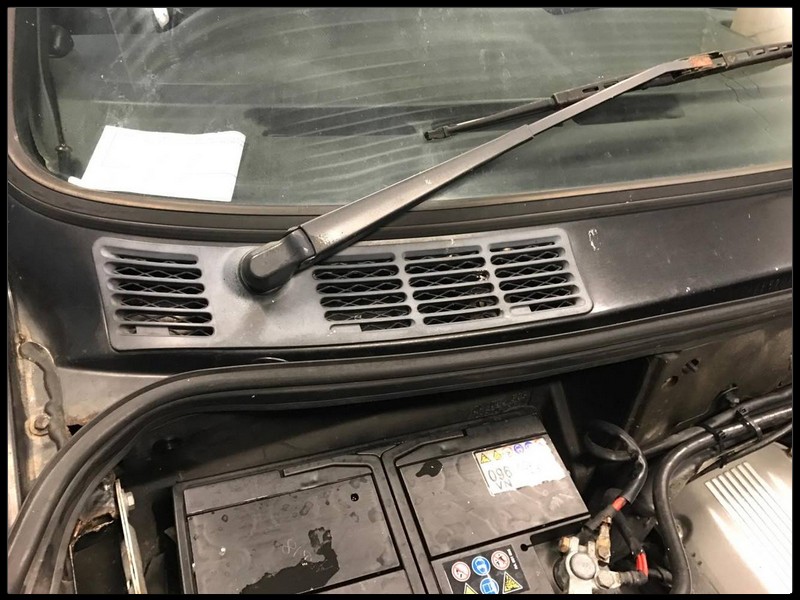
Also had new scuttle grills fitted -
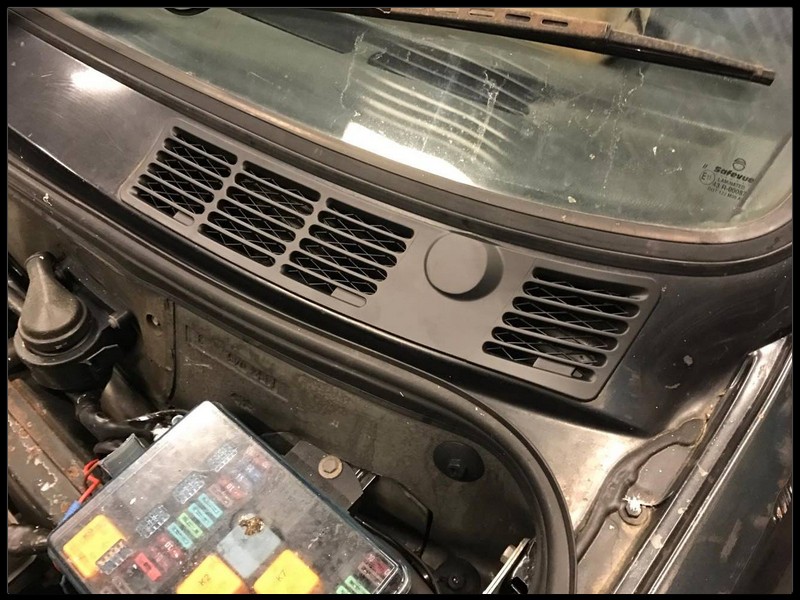
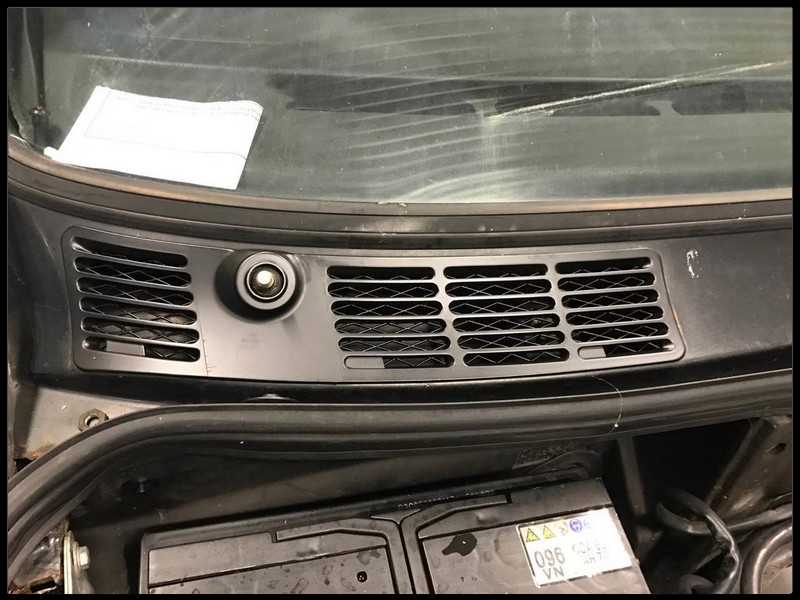
Out in the sunlight
Put in yet another BMW Classics order today - new brake backing plates, variety of bushings, and a few other bits. Need one more order and then we'll rebuild the full rear end of the car. Will also do the front and have the subframe and front struts powdercoated.
Also ordered an intelligent wiper module - this will allow me to set the interval time for the wipers when they're set to intermittent. Also gives a wipe of the screen after a blast of the washer fluid. Ordered from E30 Innovative Goods - arrived pretty quickly too.


Building up a list of things to fit once I get the car back from Dave - but lots to do before then.
Also had new scuttle grills fitted -
Out in the sunlight
Put in yet another BMW Classics order today - new brake backing plates, variety of bushings, and a few other bits. Need one more order and then we'll rebuild the full rear end of the car. Will also do the front and have the subframe and front struts powdercoated.
Also ordered an intelligent wiper module - this will allow me to set the interval time for the wipers when they're set to intermittent. Also gives a wipe of the screen after a blast of the washer fluid. Ordered from E30 Innovative Goods - arrived pretty quickly too.
Building up a list of things to fit once I get the car back from Dave - but lots to do before then.
The additional order from BMW Classics and Eurocarparts was mainly required due to a decision to make this less of a light resto, and more of a full on 'everything gets done' resto. Thankfully Dave is the patient type, so a lot of the work that's been done has kind of been reversed - exhaust off, brakes off, suspension off. The whole rear end has come off for powdercoating, along with the front struts. This obviously means the parts order has been pretty hefty.
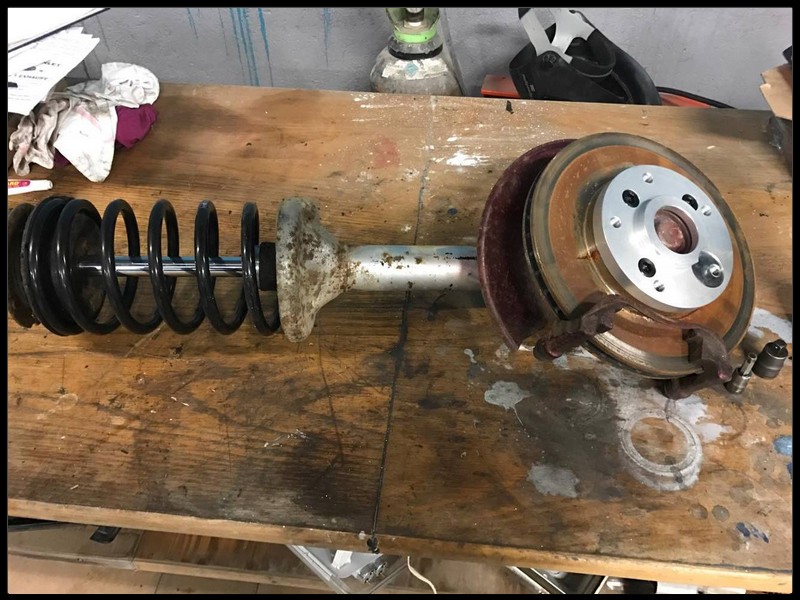
Front strut off -
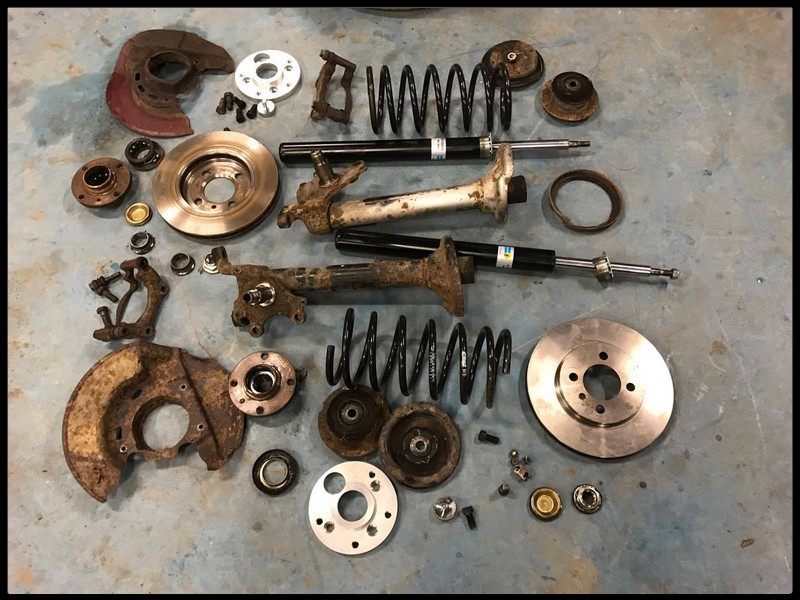
All stripped -
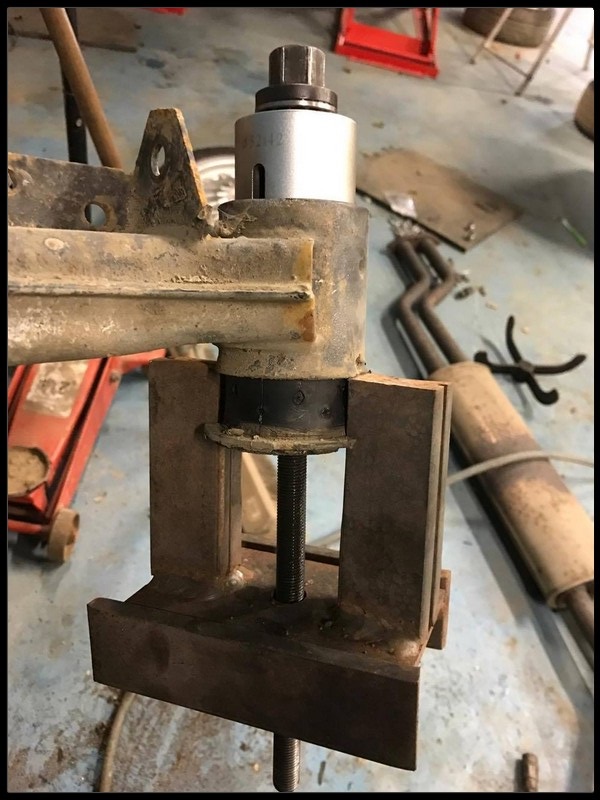
Pressing out the rear subframe bushes -
All ready for powdercoating -
Having the rear subframe off will make it easier to fit the new brakelines the car needs. Most of these are available direct from BMW Classics, but the larger pieces aren't - so need to get them from the local dealer. Also need to order the matching rear H&R ARB.
Front strut off -
All stripped -
Pressing out the rear subframe bushes -
All ready for powdercoating -
Having the rear subframe off will make it easier to fit the new brakelines the car needs. Most of these are available direct from BMW Classics, but the larger pieces aren't - so need to get them from the local dealer. Also need to order the matching rear H&R ARB.
18 months on and we're looking to get a move on with this. Progress got halted when I ordered new front calipers - Eurocarparts sent on two drivers side ones. I left it a bit too long to return the extra drivers side one, and then they went out of stock. Without it the front couldn't be put back together really, so it was left for a while.
Eventually got them ordered as well as new front hubs - which meant Dave could kick off on it again. When I got the rear subframe bits powdercoated, Dave sent off spare parts he had so that the car was still mobile.
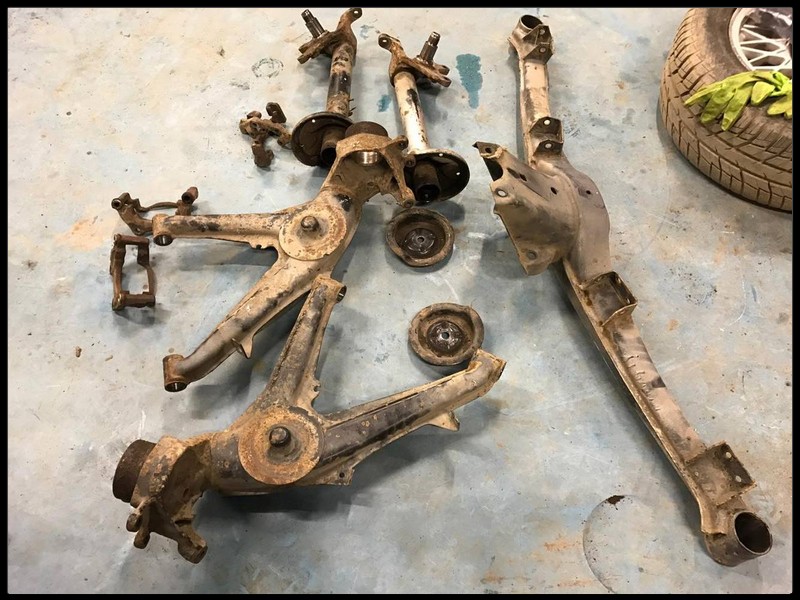
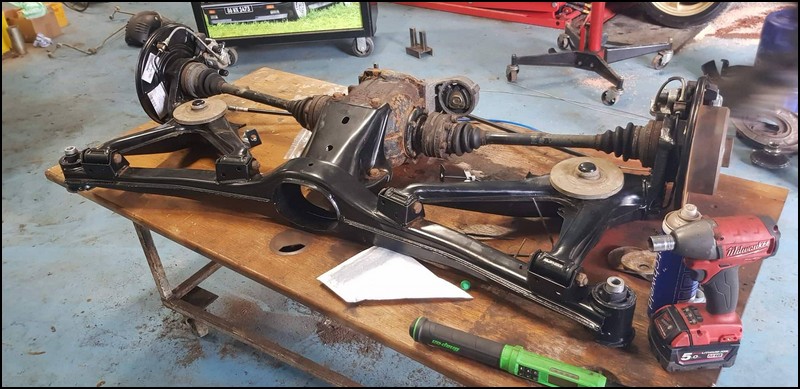
The old subframe is perfectly usable, but just a bit on the dirty side.

Taking it all apart - diff it being retained, I'd ideally like a medium case LSD, but they're going for silly money now.


So Dave just cleaned it all up - ready for re-use

All the bits and bobs ready for reassembly -

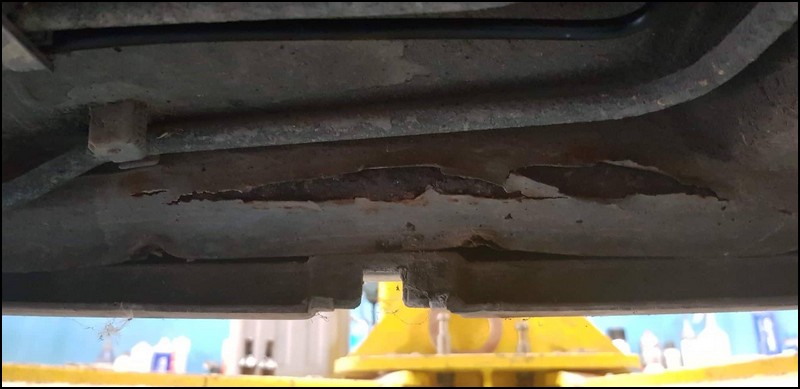
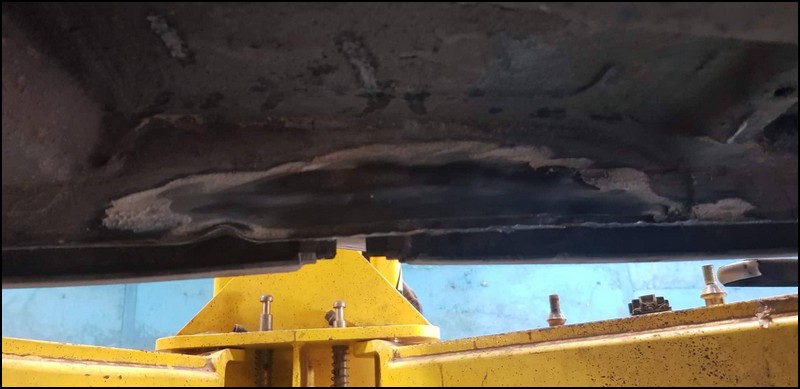
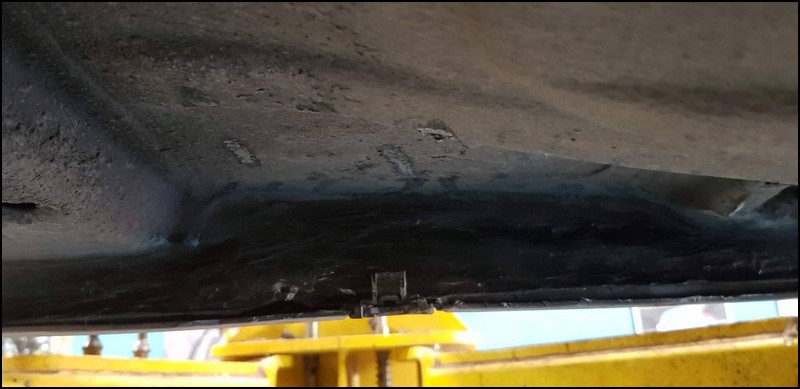
Having the rear subframe off exposed a bit of nastiness which Dave swiftly fixed up. Being an original Irish car, its in fantastic condition considering the age - but it wouldn't be an E30 if it didn't have some rot lurking.
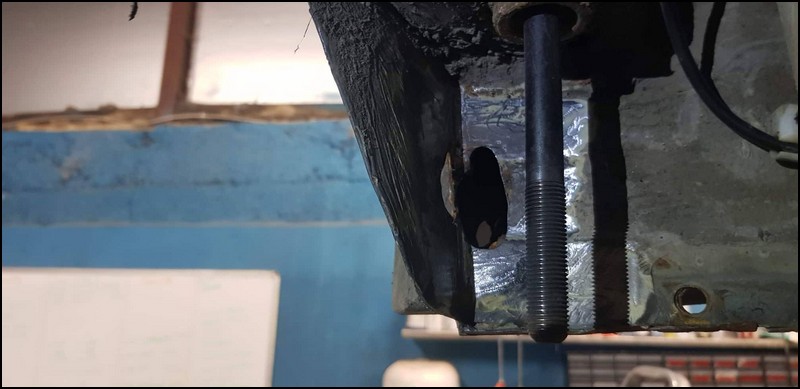
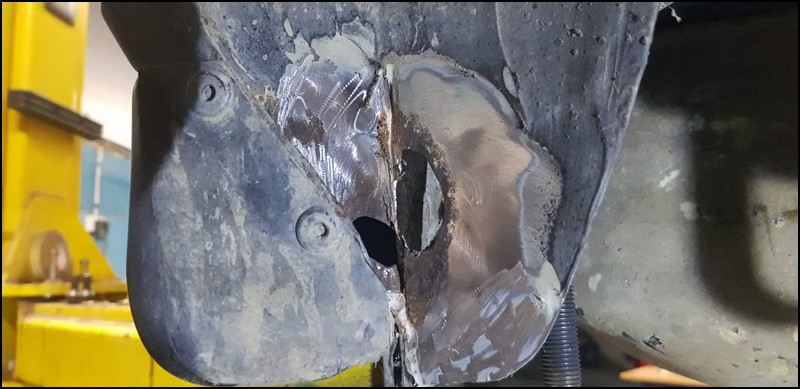
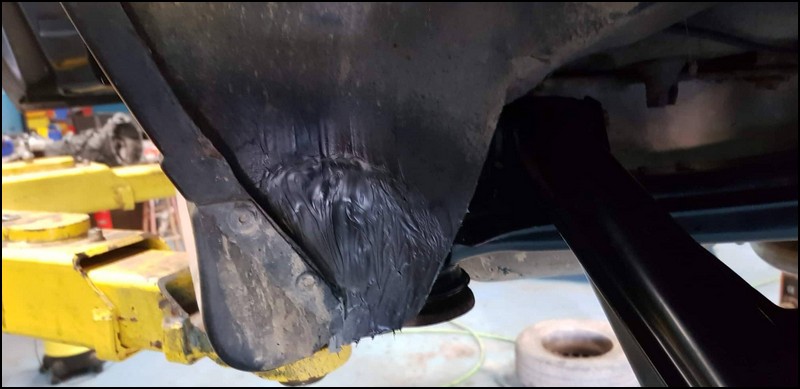
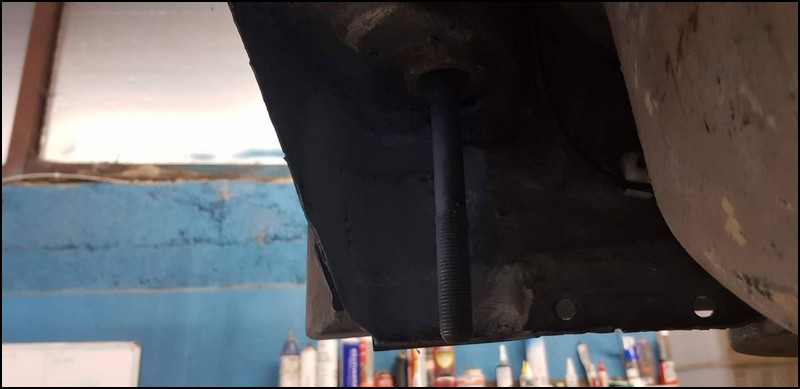
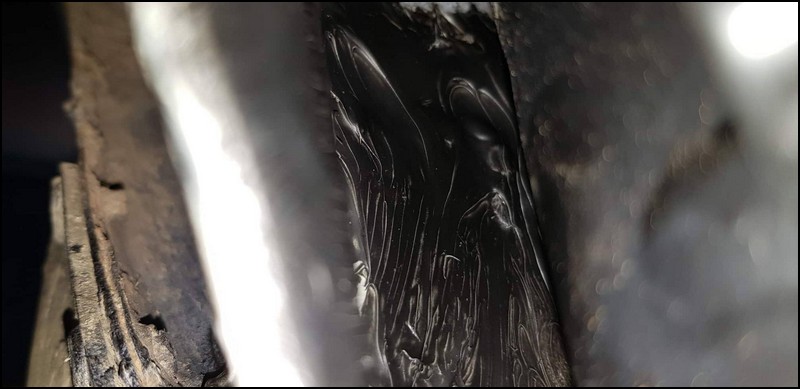
There was also some damage caused by a jack at some stage -
With fresh brake lines in, the refreshed subframe could go back on.
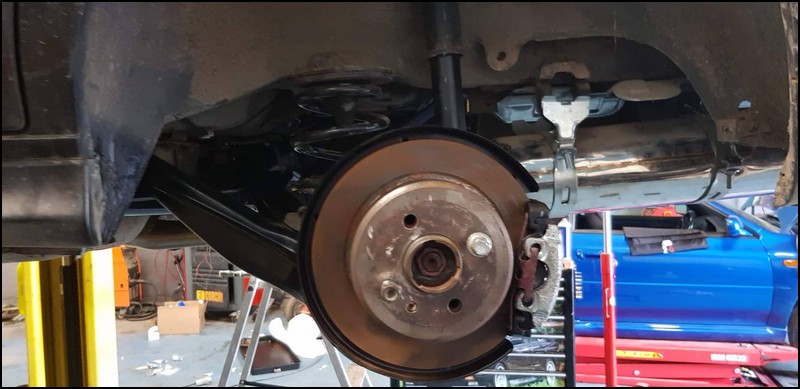
Exhaust back in place -
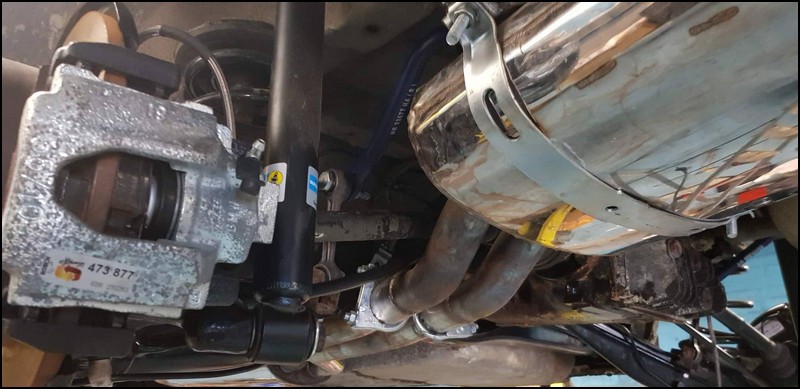
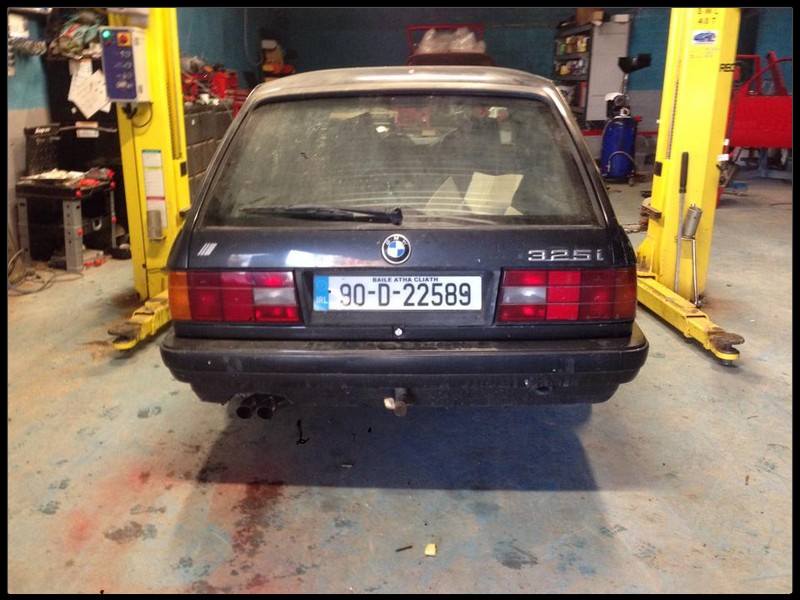
And voila, one complete mechanically overhauled E30.
Time to start on the cosmetics and other toys now
Eventually got them ordered as well as new front hubs - which meant Dave could kick off on it again. When I got the rear subframe bits powdercoated, Dave sent off spare parts he had so that the car was still mobile.
The old subframe is perfectly usable, but just a bit on the dirty side.
Taking it all apart - diff it being retained, I'd ideally like a medium case LSD, but they're going for silly money now.
So Dave just cleaned it all up - ready for re-use
All the bits and bobs ready for reassembly -
Having the rear subframe off exposed a bit of nastiness which Dave swiftly fixed up. Being an original Irish car, its in fantastic condition considering the age - but it wouldn't be an E30 if it didn't have some rot lurking.
There was also some damage caused by a jack at some stage -
With fresh brake lines in, the refreshed subframe could go back on.
Exhaust back in place -
And voila, one complete mechanically overhauled E30.
Time to start on the cosmetics and other toys now
-
shedrool83
- Old Skooler

- Posts: 4395
- Joined: Thu May 10, 2007 11:00 pm
- Location: Dundee Scotland
Nice work .You got to love a touring . 

Always had a soft spot for them, but they now tick off the practicality box for me as well - so its a win win. Even have my wife convinced that its a good idea, more or less.shedrool83 wrote:Nice work .You got to love a touring .
-
shedrool83
- Old Skooler
- Posts: 4395
- Joined: Thu May 10, 2007 11:00 pm
- Location: Dundee Scotland
I'm the same other than the wife being convinced haha.kdevitt wrote:Always had a soft spot for them, but they now tick off the practicality box for me as well - so its a win win. Even have my wife convinced that its a good idea, more or less.shedrool83 wrote:Nice work .You got to love a touring .
I booked the car in for a roadworthy test, and decided to drive it back home a few months back. It became apparent pretty quickly that the car wasn't ready for the quick test I was hoping for - few electrical niggles with the indicators and brakes, tracking way off, and a fuel hose that's flowing more petrol across my road than into the injectors themselves (craked fuel hose just before the pressure regulator). All in all nothing major at all, but the test was quickly cancelled and I set off working on the car as soon as it arrived home.
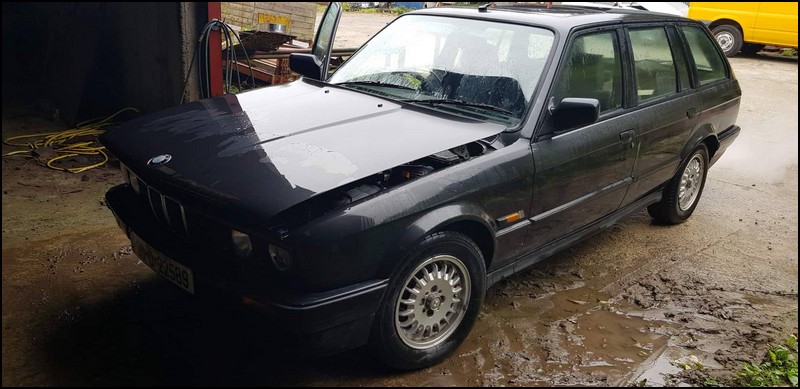
First up was the eyebrows - a job I'd been looking forward to since first setting eyes on the car. I even managed to sell them after removing them.

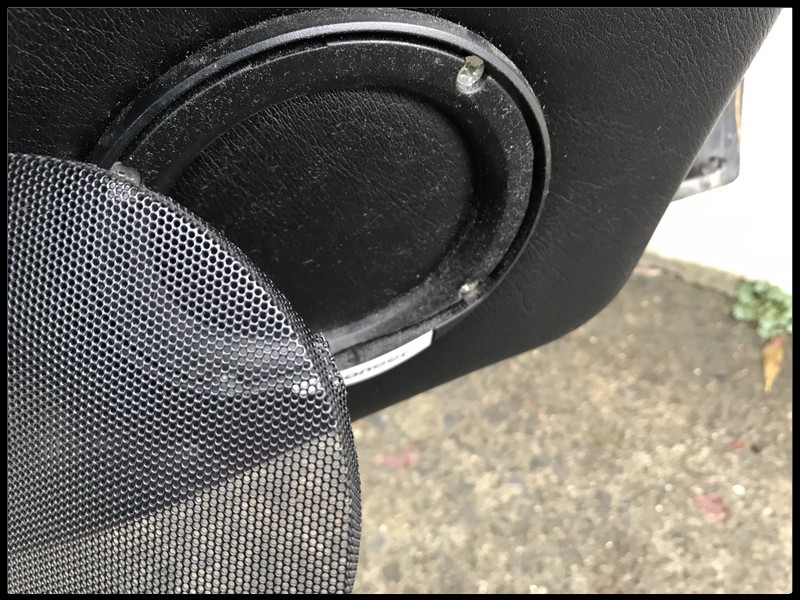
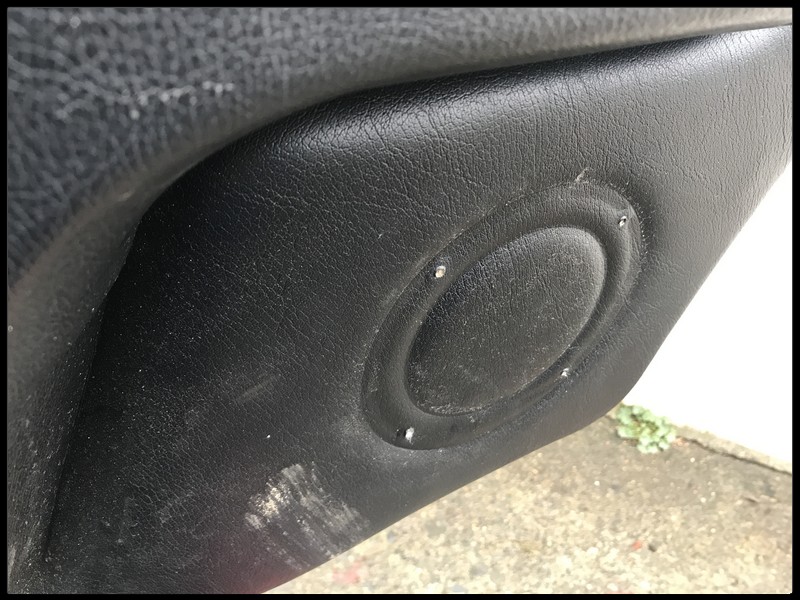
I needed to start stripping down the doors and dash for some retrofits. Was initially curious about the quality of the pioneer speakers that the door had been butchered for -only to realise that there were no speakers there, just the grilles. Was the beginning of the trend of non-functioning parts fitted to the car. Also transpires that the stereo fader switch was connected to nothing, and the map light mirror was the same.
The headunit wasn't working either - it powered up, but there was no sound at all. Once removing it, the reason why was pretty clear - I think the 12+ switched line was literally the only one that wasn't cut off
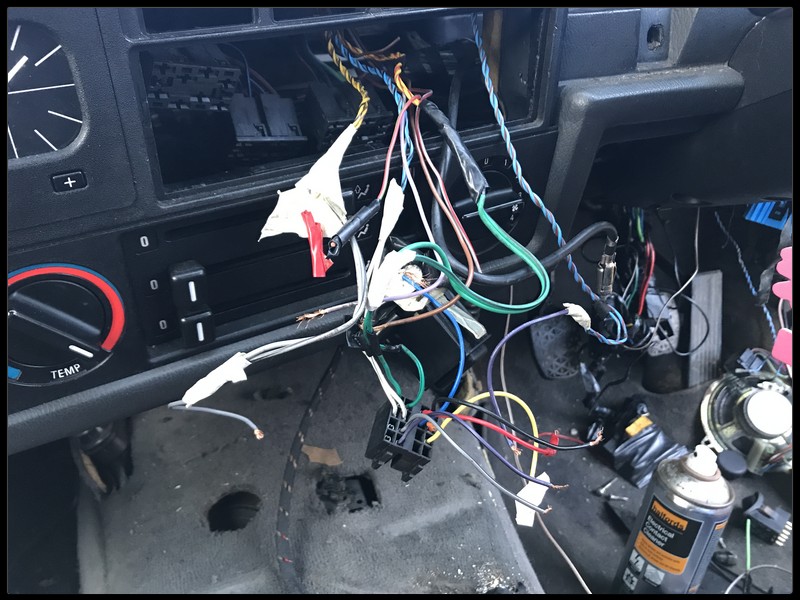
I removed what was left of the loom and speaker wiring, and soldered it up to a new ISO block connector.
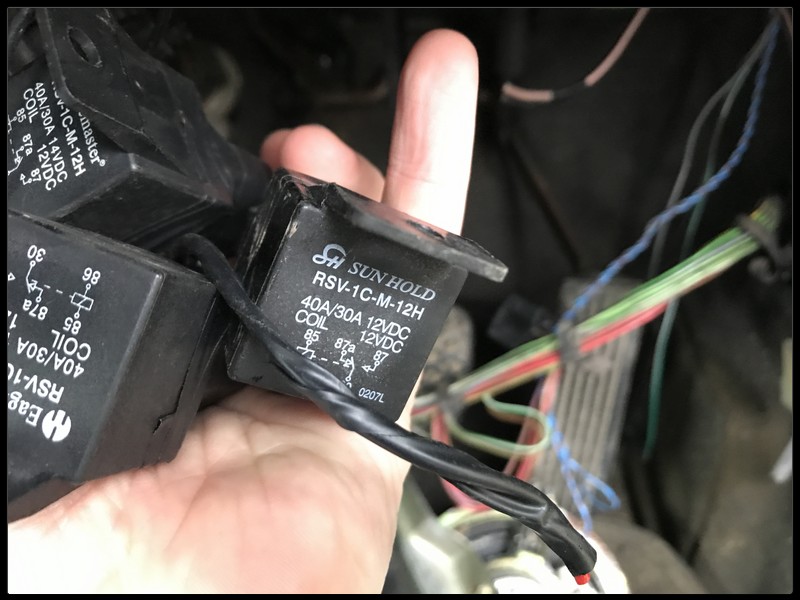
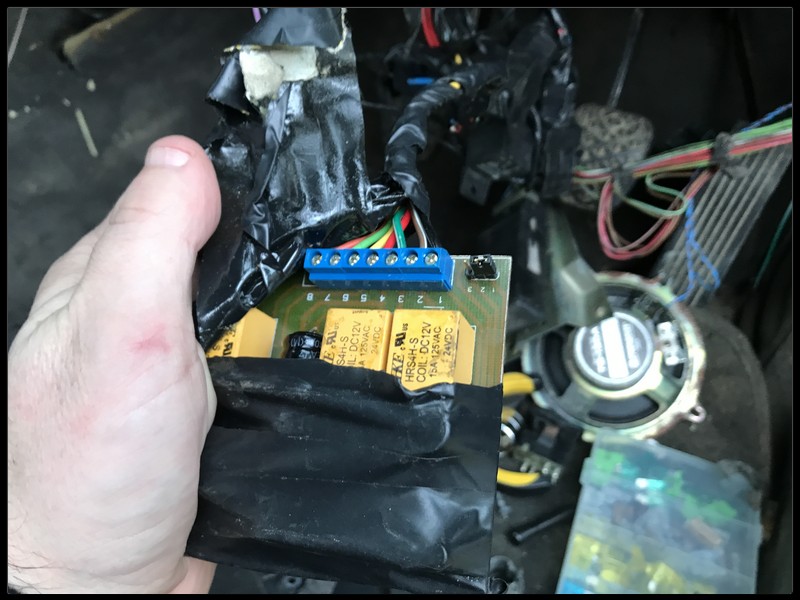
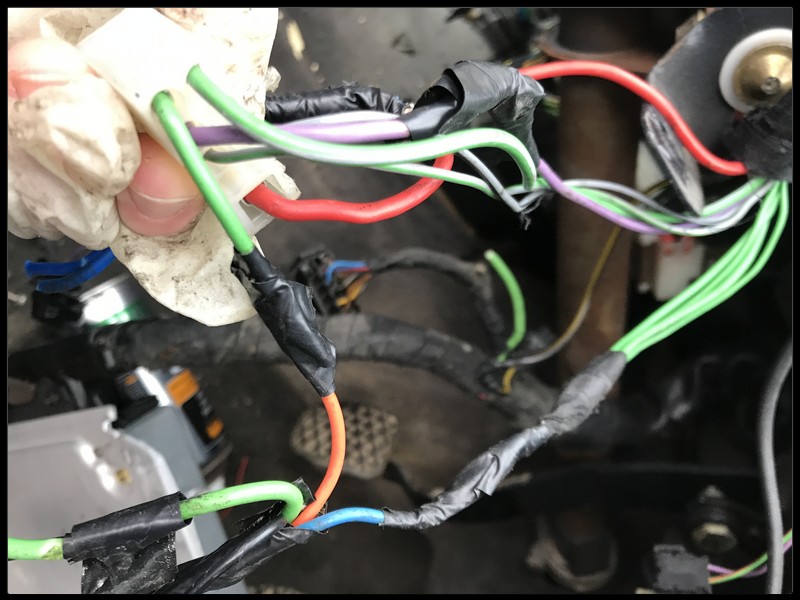
Next up was removing a heap of relays and crappy wiring put in place for the tow bar and various old alarms.
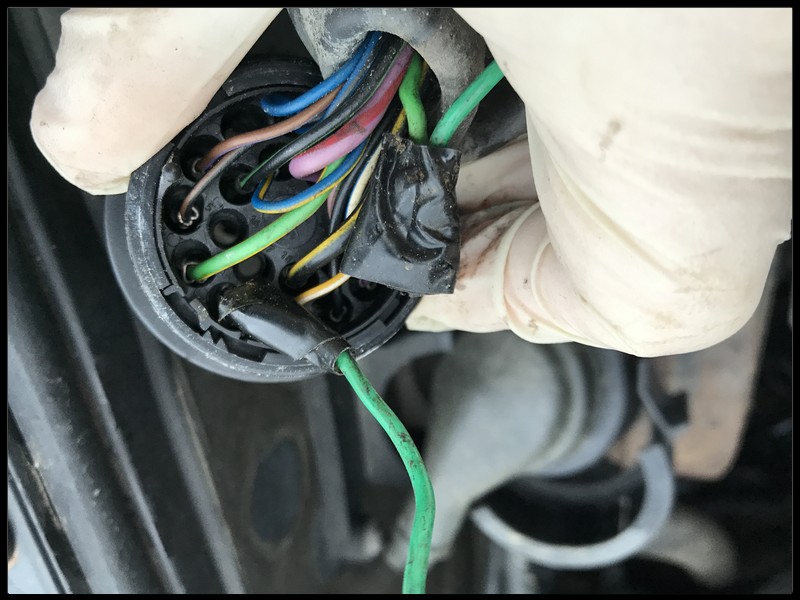
The wiring block at the ignition switch was chopped, so it was tidied up as best I could. A connection was had also been made inside the C101 plug to the ignition wire which just fell apart on contact. Would have been a nightmare for me to diagnose had it gone of its own accord, so was the perfect time for it to break.
Removed the dash next which was pretty handy to do - its cracked in a few spots and needs some work
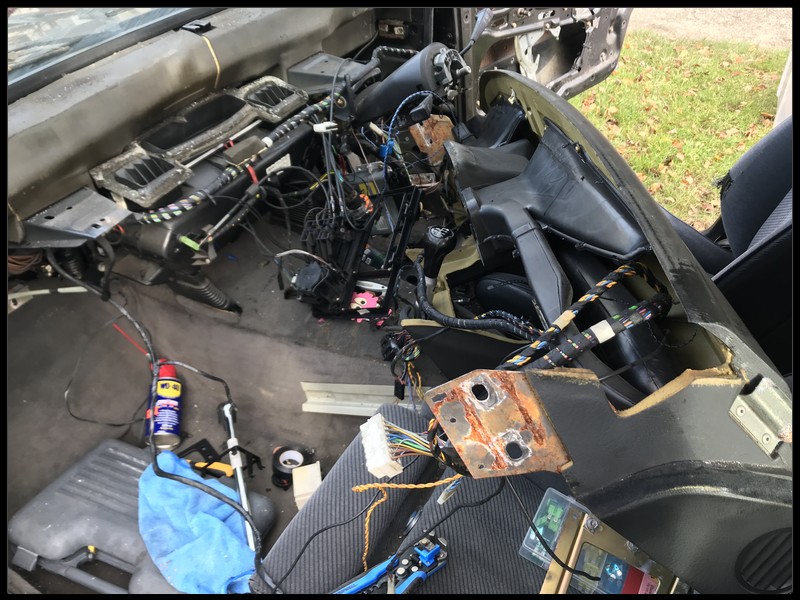
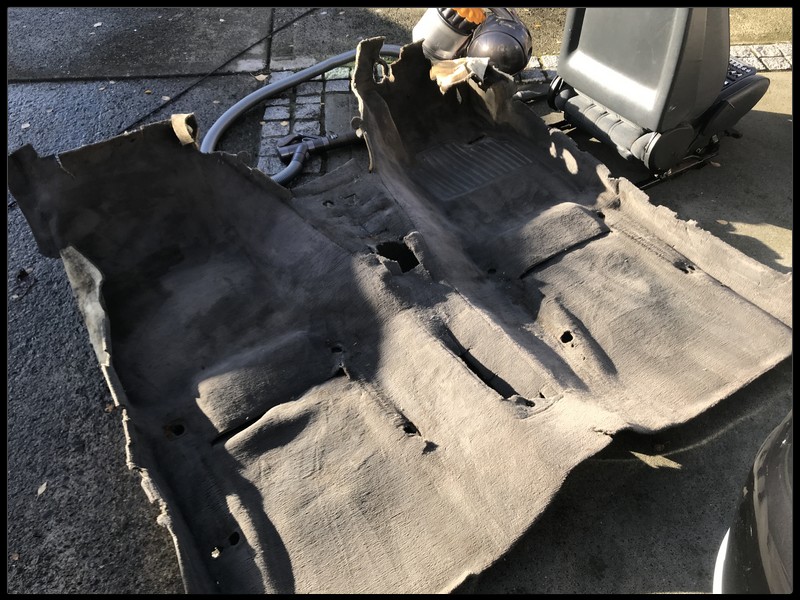
At this stage I took the carpet out and started dying it - more on that at a later stage. Main benefit of having it out was to allow me to run the cabling for some of the retrofits properly, rather than running them behind the dash.
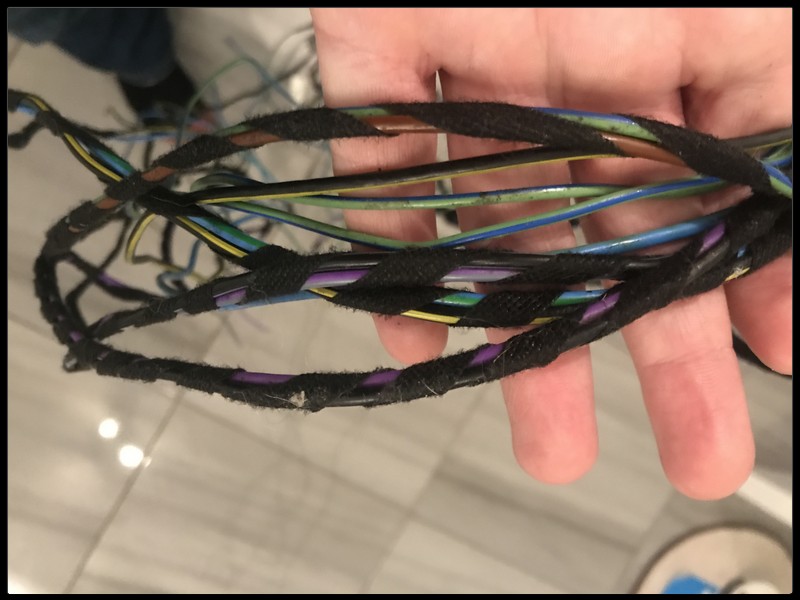
I picked up the four electric window regulators and looms - but as I rapidly found out, the window loom isn't separate from the rest of the loom, and it was slightly daunting on first sight.
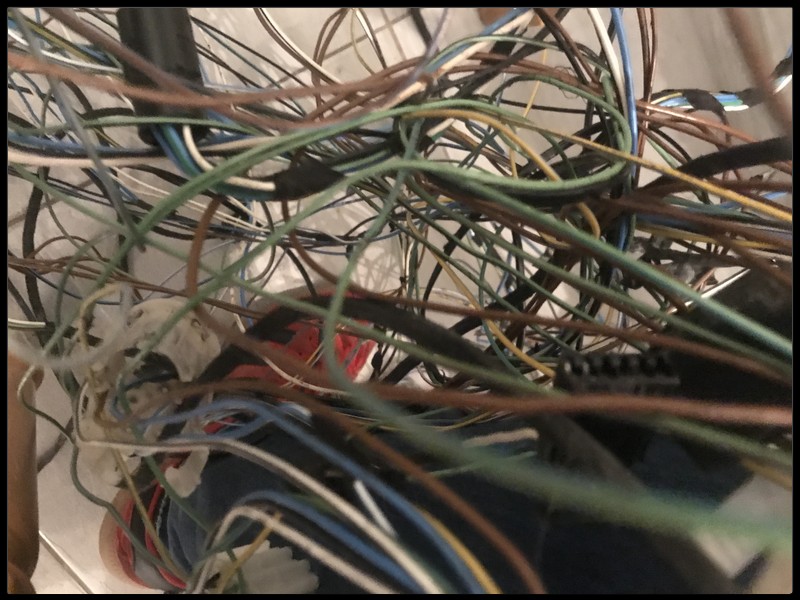
Didn't take very much time at all to sort it out. Used tesa cloth tape to tidy up each section -
Fitting it up was all pretty straightforward - I snipped off the existing connectors for the back doors, and soldered in the new one from the loom with the electric windows. For the front I removed the pins from the new loom for the windows and just inserted them into the existing door plugs. Fitting the regulators for the front results in a few scratches - but it worked more or less first time. Took about 2 mins to realise that it needed a relay added to the fusebox, but it was all good after that.
Took the opportunity to also fit up cruise control - just need to pass one connection through the bulkhead to finish it off.

Moving into the engine bay momentarily, the engine wasn't idling great - especially when its cold (probably doesn't help that its got a fuel leak) but the intake boot was long past its best. Had ordered an OEM replacement a while back, but it was for a newer M20 and no use. Eventually got a new one in place over the weekend.
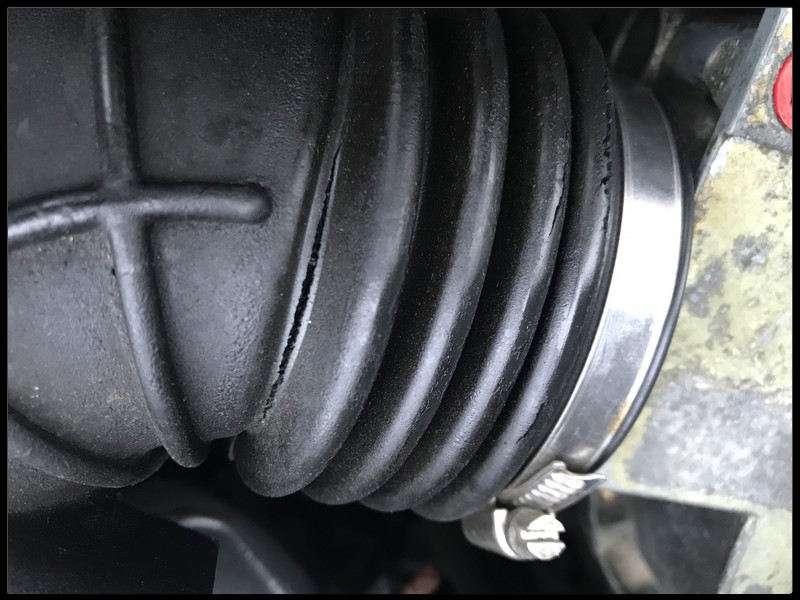
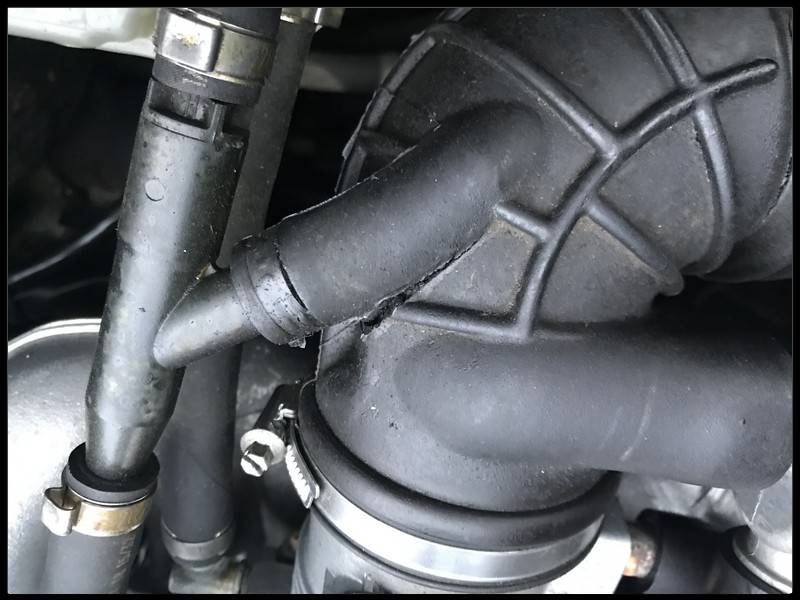
New one in place -
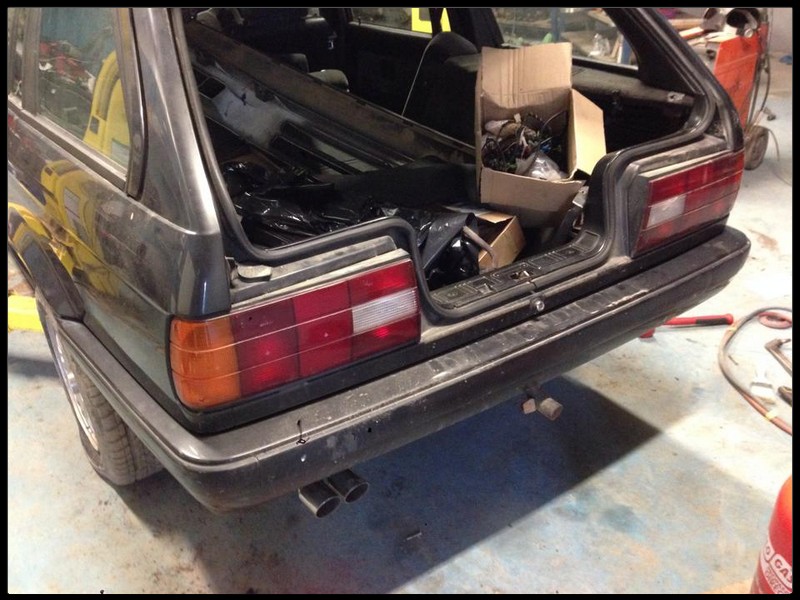
I wanted to start fitting up the Tec II kit I have for it - mainly because its taking up space. Removing the old rear bumper turned into a nightmare - the mounting point came off so some brute force was eventually needed.
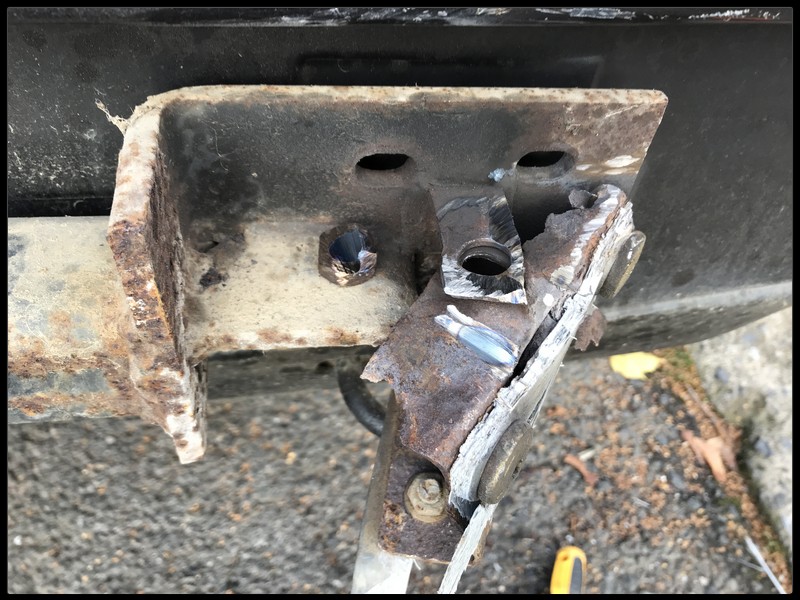
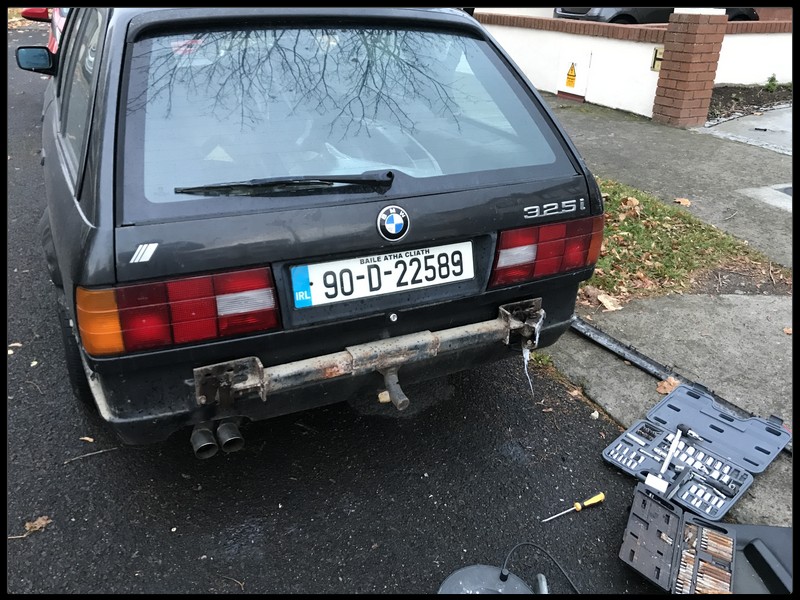
Unfortunately it meant I needed to pick up a new bumper just so I could get the carrier off it. I also picked up the proper bumper shocks.
Some other bits were also sorted out - picked up a set of the original BBS wheels from eBay and had them delivered straight to Lepsons for a refurb. The finish on them is amazing - have the new centre caps ordered too.
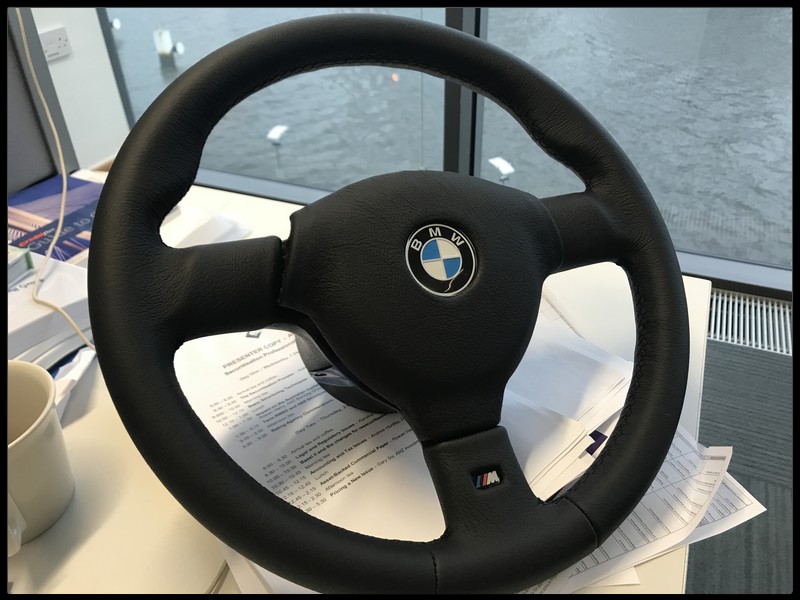
Also had the steering wheel redone - including the horn pad. Came out great, but will be a while before its fitted up.
Currently the car still looks like its fit for scrap - but with all the wiring more or less sorted, I can start putting it all back together shortly.
First up was the eyebrows - a job I'd been looking forward to since first setting eyes on the car. I even managed to sell them after removing them.
I needed to start stripping down the doors and dash for some retrofits. Was initially curious about the quality of the pioneer speakers that the door had been butchered for -only to realise that there were no speakers there, just the grilles. Was the beginning of the trend of non-functioning parts fitted to the car. Also transpires that the stereo fader switch was connected to nothing, and the map light mirror was the same.
The headunit wasn't working either - it powered up, but there was no sound at all. Once removing it, the reason why was pretty clear - I think the 12+ switched line was literally the only one that wasn't cut off
I removed what was left of the loom and speaker wiring, and soldered it up to a new ISO block connector.
Next up was removing a heap of relays and crappy wiring put in place for the tow bar and various old alarms.
The wiring block at the ignition switch was chopped, so it was tidied up as best I could. A connection was had also been made inside the C101 plug to the ignition wire which just fell apart on contact. Would have been a nightmare for me to diagnose had it gone of its own accord, so was the perfect time for it to break.
Removed the dash next which was pretty handy to do - its cracked in a few spots and needs some work
At this stage I took the carpet out and started dying it - more on that at a later stage. Main benefit of having it out was to allow me to run the cabling for some of the retrofits properly, rather than running them behind the dash.
I picked up the four electric window regulators and looms - but as I rapidly found out, the window loom isn't separate from the rest of the loom, and it was slightly daunting on first sight.
Didn't take very much time at all to sort it out. Used tesa cloth tape to tidy up each section -
Fitting it up was all pretty straightforward - I snipped off the existing connectors for the back doors, and soldered in the new one from the loom with the electric windows. For the front I removed the pins from the new loom for the windows and just inserted them into the existing door plugs. Fitting the regulators for the front results in a few scratches - but it worked more or less first time. Took about 2 mins to realise that it needed a relay added to the fusebox, but it was all good after that.
Took the opportunity to also fit up cruise control - just need to pass one connection through the bulkhead to finish it off.
Moving into the engine bay momentarily, the engine wasn't idling great - especially when its cold (probably doesn't help that its got a fuel leak) but the intake boot was long past its best. Had ordered an OEM replacement a while back, but it was for a newer M20 and no use. Eventually got a new one in place over the weekend.
New one in place -
I wanted to start fitting up the Tec II kit I have for it - mainly because its taking up space. Removing the old rear bumper turned into a nightmare - the mounting point came off so some brute force was eventually needed.
Unfortunately it meant I needed to pick up a new bumper just so I could get the carrier off it. I also picked up the proper bumper shocks.
Some other bits were also sorted out - picked up a set of the original BBS wheels from eBay and had them delivered straight to Lepsons for a refurb. The finish on them is amazing - have the new centre caps ordered too.
Also had the steering wheel redone - including the horn pad. Came out great, but will be a while before its fitted up.
Currently the car still looks like its fit for scrap - but with all the wiring more or less sorted, I can start putting it all back together shortly.
Some more minor updates -
There is currently no dash, carpet or interior trim in the car - so am trying to squeeze in every retrofit I want now, rather than even contemplate ever removing bits of the interior again.
The maplight mirror that the car came with was connected to nothing - but thankfully it still had its connector in place. Was able to buy a reproduction loom for it - it connects in by the passenger side speaker in the footwell. The connector was pretty badly oxidised so I was a bit concerned it mightn't work, but some electrical contact cleaner and a bit of abrasive action had it looking better. Thankfully it all worked first time.


Also salvaged some OEM tweeters from my brothers cabrio before it was sold - they were never connected up properly in his car so I have no idea how they sound. I'll be buying some Rockford Fosgate component speakers for the footwells which have the built in crossovers and additional connectors for the tweeters like the original BMW premium speakers would have had so connection should be easy. Still undecided as to whether or not I'll remove the actual tweeters from these and connect in the new ones which will arrive with the new speakers - sounds quality would definitely be better, but its low down the list of priorities.

With the electric windows all fitted - I could stick some doorcards back on. Its important to have the weather proof membrane back on the doors - so I ordered some from a VW specialist on eBay. I used butyl tape to secure it as recommended.


The doorcards are being kept - but they'll be getting a retrim in a while.
There is currently no dash, carpet or interior trim in the car - so am trying to squeeze in every retrofit I want now, rather than even contemplate ever removing bits of the interior again.
The maplight mirror that the car came with was connected to nothing - but thankfully it still had its connector in place. Was able to buy a reproduction loom for it - it connects in by the passenger side speaker in the footwell. The connector was pretty badly oxidised so I was a bit concerned it mightn't work, but some electrical contact cleaner and a bit of abrasive action had it looking better. Thankfully it all worked first time.
Also salvaged some OEM tweeters from my brothers cabrio before it was sold - they were never connected up properly in his car so I have no idea how they sound. I'll be buying some Rockford Fosgate component speakers for the footwells which have the built in crossovers and additional connectors for the tweeters like the original BMW premium speakers would have had so connection should be easy. Still undecided as to whether or not I'll remove the actual tweeters from these and connect in the new ones which will arrive with the new speakers - sounds quality would definitely be better, but its low down the list of priorities.
With the electric windows all fitted - I could stick some doorcards back on. Its important to have the weather proof membrane back on the doors - so I ordered some from a VW specialist on eBay. I used butyl tape to secure it as recommended.
The doorcards are being kept - but they'll be getting a retrim in a while.
Another small job sorted - the OBC I bought had a very dim screen. Depending on who you ask, the problem is either the bulbs in the lightbar on their way out, or the LCD screen giving up. I've no intention of dismantling this car again, so decided to replace both. I sourced an LED lightbar from the US, installation is a case of just clipping the new board in place of the old circuit board.
New lightbar -

Old bulbs in place -

LEDs in place -

Taking the OBC apart is simple enough - you'll need a mini screwdriver set, some brute force, and some patience.

Up until recently, your only hope for a new screen was a used one. Partsworks in Germany have started supplying brand new screens now for a variety of the OBC's (6 button, 13 button etc). Cost around €35 delivered and arrived well packaged with fitting instructions.

First attempt at installation was not a total success. All fitted up fine, but on clipping the back of the OBC back on, there was an audible cracking noise.

Not ideal - am not entirely certain what went wrong, but after an email to Partsworks they supplied a new unit for postage costs only, which was unexpected to be honest. New screen fitted up easily enough, I was very careful tightening up the screws for the screen holder in case that caused the initial problem. Fitted it to the car and worked perfectly - nice and bright. Temp sensor is still to be fitted

Picked up a set of genuine foglights which were in need of some cosmetic work. There are loads of aftermarket fogs for sale on eBay for very small money, but they have plastic lenses and I'm happier going with the OEM ones. One of the lenses was cracked, but the other way fine - just grubby. Bought a set of glass lenses from eBay - seller neglected to mention that the holes for mounting and adjusting them weren't actually drilled out though.


The issue with the hole was only discovered after I'd bonded the new lenses on - so had to drill them in place.

Thankfully the glass didn't explode once the drill hit it - carefully removed the outer seal from the original lenses before removing them and bonded them on as well. Makes a nice improvement anyway.

Being a fan of Bavarian Restorations' work - I decided to make a subtle change to the instrument cluster. Overall - the existing cluster was in great condition -

Bought some satin silver gauge rings from eBay -

Split down the cluster and fitted the rings -

Sprayed the whole lot in satin black trim paint -

And reassembled -

Finally, started fitting some of the trim pieces back which I've been having retrimmed - these have a plastic vinyl covering from the factory, so went with a newer equivalent. I could have spent extra on real leather for these parts, but its not really necessary - very happy with how they turned out. Just waiting to get my headliner back before fitting the rest of them.


New lightbar -
Old bulbs in place -
LEDs in place -
Taking the OBC apart is simple enough - you'll need a mini screwdriver set, some brute force, and some patience.
Up until recently, your only hope for a new screen was a used one. Partsworks in Germany have started supplying brand new screens now for a variety of the OBC's (6 button, 13 button etc). Cost around €35 delivered and arrived well packaged with fitting instructions.
First attempt at installation was not a total success. All fitted up fine, but on clipping the back of the OBC back on, there was an audible cracking noise.
Not ideal - am not entirely certain what went wrong, but after an email to Partsworks they supplied a new unit for postage costs only, which was unexpected to be honest. New screen fitted up easily enough, I was very careful tightening up the screws for the screen holder in case that caused the initial problem. Fitted it to the car and worked perfectly - nice and bright. Temp sensor is still to be fitted
Picked up a set of genuine foglights which were in need of some cosmetic work. There are loads of aftermarket fogs for sale on eBay for very small money, but they have plastic lenses and I'm happier going with the OEM ones. One of the lenses was cracked, but the other way fine - just grubby. Bought a set of glass lenses from eBay - seller neglected to mention that the holes for mounting and adjusting them weren't actually drilled out though.
The issue with the hole was only discovered after I'd bonded the new lenses on - so had to drill them in place.
Thankfully the glass didn't explode once the drill hit it - carefully removed the outer seal from the original lenses before removing them and bonded them on as well. Makes a nice improvement anyway.
Being a fan of Bavarian Restorations' work - I decided to make a subtle change to the instrument cluster. Overall - the existing cluster was in great condition -
Bought some satin silver gauge rings from eBay -
Split down the cluster and fitted the rings -
Sprayed the whole lot in satin black trim paint -
And reassembled -
Finally, started fitting some of the trim pieces back which I've been having retrimmed - these have a plastic vinyl covering from the factory, so went with a newer equivalent. I could have spent extra on real leather for these parts, but its not really necessary - very happy with how they turned out. Just waiting to get my headliner back before fitting the rest of them.
Hi Mart - here’s the link to the ones I got
https://www.ebay.co.uk/itm/Passend-fur- ... 1627427006
I hot glued them in from behind, they were a good fit but would have moved. You might find cheaper ones - I’d just avoid any with a glossy finish as the matt ones are a better option when you’re going to paint them.
This is such a good build thread, thanks for sharing it with us. 
webmaster@e30zone.net
Have one an absolute mountain of work with this since the last update - but don't have much to show for it. First up was the headliner - thankfully the touring has a solid headliner like an E36, so fitting it not a windscreen out job like the 2 door / 4 door. I had it trimmed in standard black headliner material - its foam backed and has a nice quality finish to it.

With the headliner in place I could put in the B pillar trim - and the new seatbelts. Had these custom made in the UK to match the interior which will be going in.

Managed to get some very good quality floor mats in similar style to the OEM country mats - got a boot mat while I was at it too.

Boot carpet had seen better days...

I removed the wooden backing from the old mat and glued it to the new one -


The parcel cover was also totally scruffy - so ordered some marine grade canvas, as well as an E46 touring cover handle -

At this stage I discovered the roller blind mechanism was shot - I managed to get a replacement one from Germany. Its working better, but not perfectly as the blind is quite heavy and the new blind is only rated to 1.5kg, so I need to load the spring up properly again and see if I can get it working properly. If not I'll end up ordering a good used one.
When I arrived home in the car initially there was a stink of petrol off it - turns out both the inlet and outlet fuel hoses were perished to the point that fuel hit me in the face when I popped the bonnet. Got both replaced, which meant I could test the instrument cluster. Turned out it didn't work - also turns out the alternator had died. The alternator being gone generally explains the lack of rev counter or temp gauge so I got Brian (aka Xworks) to do the alternator - as usual it was an amazing job. Connected it all up at the cluster still didn't work.
Took it out and tested the batteries and they were dead. So a new set were ordered and fitted - but being a bit hasty meant I failed to charge them before having them soldered in, so the cluster still didn't work. Got a new set again - and they worked perfectly first time. Also made an executive decision to go with red dials at this stage

Moved to the outside for a while - the Tech II kit needed to be fitted up. When I bought the kit it came with the drilling template for the side skirts, which is a must have. Unfortunately only the nearside template is available - so once the nearside skirt was fitted up I made my own template for the offside skirt.


The dashboard was completely destroyed from cracking - and uncracked ones have gotten stupidly expensive, like most E30 parts - so I opted to have the dash retrimmed. Very happy with how it worked out.

Having the dash back in meant the steering wheel could finally go in -

Needed to alter the steering trim to account for the new cruise control stalk - having a dremel is a prequisite


And last but not least - the seats could go back in (again) meaning I could test the heated seats, and thankfully they worked first time. The E30 is a joy to retrofit bits to - they all just plug straight in, and the heated seats are no exception.

With the headliner in place I could put in the B pillar trim - and the new seatbelts. Had these custom made in the UK to match the interior which will be going in.
Managed to get some very good quality floor mats in similar style to the OEM country mats - got a boot mat while I was at it too.
Boot carpet had seen better days...
I removed the wooden backing from the old mat and glued it to the new one -
The parcel cover was also totally scruffy - so ordered some marine grade canvas, as well as an E46 touring cover handle -
At this stage I discovered the roller blind mechanism was shot - I managed to get a replacement one from Germany. Its working better, but not perfectly as the blind is quite heavy and the new blind is only rated to 1.5kg, so I need to load the spring up properly again and see if I can get it working properly. If not I'll end up ordering a good used one.
When I arrived home in the car initially there was a stink of petrol off it - turns out both the inlet and outlet fuel hoses were perished to the point that fuel hit me in the face when I popped the bonnet. Got both replaced, which meant I could test the instrument cluster. Turned out it didn't work - also turns out the alternator had died. The alternator being gone generally explains the lack of rev counter or temp gauge so I got Brian (aka Xworks) to do the alternator - as usual it was an amazing job. Connected it all up at the cluster still didn't work.
Took it out and tested the batteries and they were dead. So a new set were ordered and fitted - but being a bit hasty meant I failed to charge them before having them soldered in, so the cluster still didn't work. Got a new set again - and they worked perfectly first time. Also made an executive decision to go with red dials at this stage
Moved to the outside for a while - the Tech II kit needed to be fitted up. When I bought the kit it came with the drilling template for the side skirts, which is a must have. Unfortunately only the nearside template is available - so once the nearside skirt was fitted up I made my own template for the offside skirt.
The dashboard was completely destroyed from cracking - and uncracked ones have gotten stupidly expensive, like most E30 parts - so I opted to have the dash retrimmed. Very happy with how it worked out.
Having the dash back in meant the steering wheel could finally go in -
Needed to alter the steering trim to account for the new cruise control stalk - having a dremel is a prequisite
And last but not least - the seats could go back in (again) meaning I could test the heated seats, and thankfully they worked first time. The E30 is a joy to retrofit bits to - they all just plug straight in, and the heated seats are no exception.
-
Cloggy Saint
- Old Skooler
- Posts: 8024
- Joined: Sun Jan 09, 2005 11:00 pm
- Location: zummerzet
Some nice work going on there. Didn't the column cowl have a cut-out for the stalk, that's usually the case with centre consul etc. The dash looks smart, is it leather?

E30 zone - promoting adult illiteracy since 2004
The area to cut is marked alright - E30s are a retrofitting dream ! It’s heavy enough plastic so I wouldn’t fancy cutting it with a craft knife though.Cloggy Saint wrote: ↑Wed Jun 12, 2019 11:55 pmSome nice work going on there. Didn't the column cowl have a cut-out for the stalk, that's usually the case with centre consul etc. The dash looks smart, is it leather?

Cheers - its been pretty slow progress. Only get a few hours every week with it - and its not indoors. Progress has definitely picked up lately though. Getting ready for paint now.