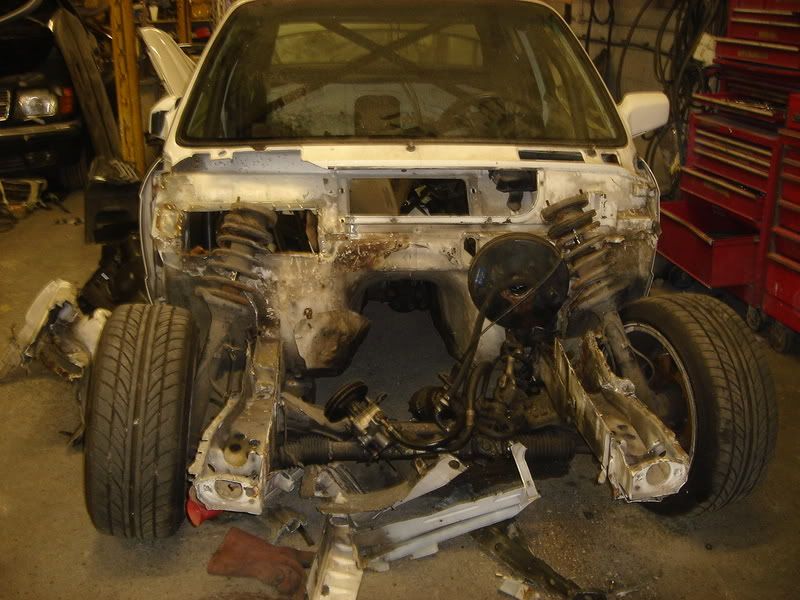
The morning was spent with the wire brush attachment, getting the metal clean. I even had to use a chisel on the turret support to get the remnants of the old panel off, it was that bad. Still, with clean metal to weld to, the slow task of stitching took place

The metal was a bit bent from its removal from the old car, so the welding didn't go so smoothly, but by doubling the power and wire speed on the MIG the plug welds went in ok, scraping off the old underseal to check

The last thing to do to the inner wing was to make sure it was straight and strong. With no support panel for god knows how long, it had cracked in two places, around bolt holes, allowing it to distort. I didn't want to cut out any more of it, so I used the Displace Metal technique.

This involves tapping lots of little beads of metal into the panel, to melt out the thin stuff. Mig-weld is brittle, so this isn't advisable on structural areas, but this was just a few little patches. I clamped a length of copper to it to give me something to spill the weld over on to, then ground it all down.

I also had to let in another patch where the inner wing support was previously spot-welded. The metal there had worn thin too, but it was far too big and structurally important an area to risk using the Displace Metal technique. Stupidly, I forgot to file a semicircle out of the patch to complete the hole.

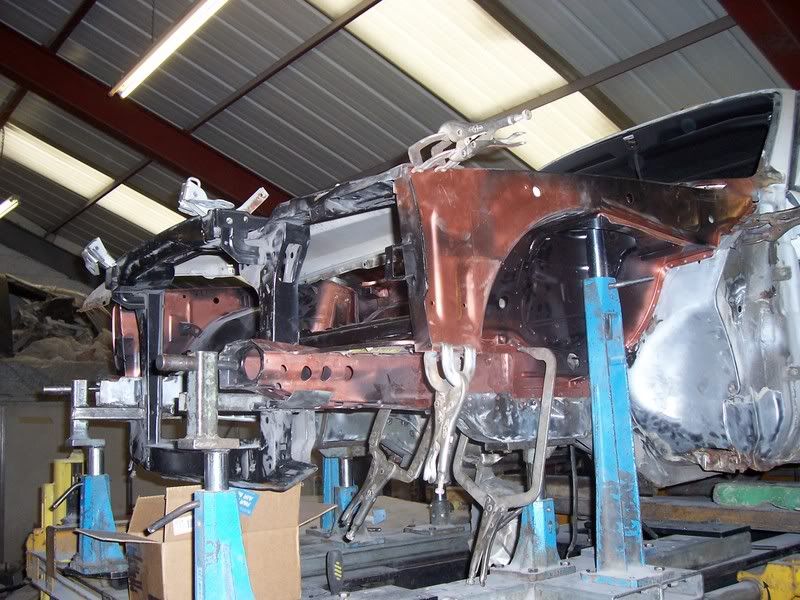
The next step will be to spot-weld on a new "flitch", or inner wing support, which I've already scavenged. Because of how these cars rust, I couldn't get a whole one (and I'm too poor to buy a whole new panel from BMW), but this gives you a perspective of Good Metal, Level of Rust and Rest of Car:

The final job will be to fabricate a "bridge" panel between the new flitch and the remains of the old one.


 Le Mans Classic 2006


