When you buy a Tech 2 Sport painfully hungover....

Show off your pride and joy here

Moderator: martauto

e30topless
E30 Zone Team Member
Posts: 13598
Joined: Wed Aug 23, 2006 11:00 pm
Location: surrounded by scrap

Tue May 17, 2011 12:00 am

nice work :D

I love to see new paint going on, at this point the end is hopefully in sight, :D

fresh new Delphin rocks :D
User avatar
mattmk1
E30 Zone Newbie
E30 Zone Newbie
Posts: 213
Joined: Wed Apr 08, 2009 11:00 pm

Tue May 17, 2011 12:11 am

Thanks,

Absolutely, months and months build upto a few hours of actually putting the paint on :mad:

I always manage to forget how much fun spraying the inside of a car boot is aswell :cry:
User avatar
Royalratch
E30 Zone Addict
E30 Zone Addict
Posts: 4921
Joined: Sat Oct 21, 2006 11:00 pm
Location: London

Tue May 17, 2011 8:08 am

:cool:
e30redness
E30 Zone Newbie
E30 Zone Newbie
Posts: 100
Joined: Sun Mar 27, 2011 11:00 pm

Tue May 17, 2011 8:15 pm

nice work man..................wish I had the know how!
Good luck
TC
Image
All funds from this sale going towards half a litre more, 2 doors less and a manual gearbox......any help appreciated!
lyricalnut02
E30 Zone Regular
E30 Zone Regular
Posts: 849
Joined: Fri Nov 23, 2007 11:00 pm
Location: London

Tue May 17, 2011 8:28 pm

outstanding work mate, cant wait to see what this looks like when its all put bk togeather.
325i Sport Tech 1 - R.I.P

E30 addict.
pony
I have been misbehaving and am sorry !
Posts: 6621
Joined: Sat Feb 11, 2006 11:00 pm
Location: London

Tue May 17, 2011 8:54 pm

Topblag wrote:Good work fella. I do hate to see E30s getting crushed when there is a possibility of repair.
+1
RustyRuss
E30 Zone Regular
E30 Zone Regular
Posts: 985
Joined: Sat Nov 12, 2005 11:00 pm
Location: Central Scotland

Tue May 17, 2011 9:55 pm

Utterely fantastic work mate well done for sticking at it!!
Russell A Macfarlane
Central Scotland
1987 Lachs Silver BMW E30 320i 4 Door Manual
User avatar
mattmk1
E30 Zone Newbie
E30 Zone Newbie
Posts: 213
Joined: Wed Apr 08, 2009 11:00 pm

Wed Apr 04, 2012 8:21 pm

Good evening all.

I felt that this was becoming at risk of being one of those projects that time forgot, so decided to resurrect the thread in the hope of being spurred on to complete the old nail over the coming months.

I couldn't believe that it is nearly two years since i started stripping the sport, the reality is that over the last 12 months iv landed a new job, moved to Essex (130miles from my workshop), broken my leg, split with my girlfriend and have been travelling quite substantially. The sport, along with my Mk1 Escort, began to gather dust.

The reality though is that now my lifes calmed down a little, and spring occasionally threatens us with sunshine, i felt that aching dullness of driving a new car, and suddenly felt the time was due to get my 'projects' finished off.


The variety of new computers and laptops over the last 18 months have caused me to lose numerous photos, and this thread does not run in any order. For the sake of my sanity ill summarise what happened with the car, then add some photos as the rebuild commences.

So.....

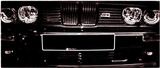
I bought a 1989 Tech 2 Sport in Dolphin grey, whilst bleary eyed from the night before. I paid relatively little, and the car didnt appear too bad upon quick inspection, but after stripping the bodykit and interior, it was rotten. Everywhere.

Image
Image
Image


I dont want to go back through the work done, as ill probably breakdown and cry, but the front innerwings, bulkhead, drivers scuttle, windscreen frame, front battery tray, front jacking points, front wheel tubs, front floor pans, front inner sills, rear wheel arches, rear wheel tubs, rear inner wheel arches, rear pockets and rear panel all had some pretty serious tin worm. And all of it has been cut out and replaced.

A while was spent working around things such as the engine and wiring loom, as workshop space was scarce, and i couldnt have too many parts lying around, but by the time the car came to be painted, it was essentially a rolling shell. Everything had been removed.

The Engine bay, Boot and interior compartments were painted, as can be seen on page two of this thread.

I began refitting some of the components to the inside of the car as follows:

Whilst completely stripped, very orifice was filled with waxoyl and then a large amount of lightweight sound deadening pads were stuck to the inside of the floor, bulkhead and wheel arch tubs. Some of this was to replace the OEM fitted sheets that had been destroyed in the resto, but i added extra as id like the cabin to be as quiet as possible when cruising.

Image
Image
Image
Image

Image
Image
Image


The wiring loom was an absolute mess so whilst out of the car i went through and removed all the old alarms and immobilisers, binned a decades worth of 'ICE' and re insulated the loom.

The interior was thoroughly scrubbed, as the seats and carpet were, to put it mildly, manky.

Image
Image
Image
Image

My Dashtop was completely uncracked, and for the moment im undecided on direction for the interior. Im tempted to have the drivers seat repaired, but at the same time, im tempted to go for a roll cage and bucket seats. Time will tell.
User avatar
mattmk1
E30 Zone Newbie
E30 Zone Newbie
Posts: 213
Joined: Wed Apr 08, 2009 11:00 pm

Wed Apr 04, 2012 8:38 pm

The headlining went back in wth new clips and fasteners, not not before my sunroof drain tubes got the good news with a variety of rust inhibitors.

Image
Image

With that done, and the spraybooth free for a weekend, i painted the reverse side of the panels:

Image
Image
Image
Image
Image


And so thats as i stand. Providing my enthusiasm holds, ill keep the updates coming.

A small secret - the shell is actually now painted, but i cant get the photos off my camera. Also, which photo resizing/hosting software do you all use, as when i resize mine, the photos lose all quality. The photos of the panels above look like basecoat in the pics, when they have in fact been lacquered :cry:

Cheers all,
sunnyr83
E30 Zone Addict
E30 Zone Addict
Posts: 2286
Joined: Fri Jun 05, 2009 11:00 pm
Location: West London 'init'

Fri May 11, 2012 12:23 am

Some great work gone into this, well done.

Any updates?
Gert_8
Married to the E30 Zone
Posts: 11304
Joined: Mon Dec 08, 2008 11:00 pm
Location: In your back passage faster than a rat up a drainpipe!

Fri May 11, 2012 9:50 am

Beautiful! :D
Image
PONY, 2013 - "Anyway span 360 degrees hitting the kerb and giving the old man two fingers as I was spinning like Michael Schumacher would
mani
E30 Zone Camper
E30 Zone Camper
Posts: 1143
Joined: Mon May 26, 2008 11:00 pm
Location: London

Wed May 16, 2012 12:31 pm

Alot of work gone into this it's looking good
User avatar
mattmk1
E30 Zone Newbie
E30 Zone Newbie
Posts: 213
Joined: Wed Apr 08, 2009 11:00 pm

Tue May 19, 2015 5:37 pm

So... I guess the usual project car story has taken place with this build, and like this thread, it has spent a fair amount of time gathering dust in dry storage.

Life just has a habit of getting in the way, but luckily the thought of selling the sport as an unfinished project has so far never crossed my mind.

Work has progressed, in fits and starts, and ill now try to document what has been done.


First up, the panels were ironed flat and prepped for paint:

Image

And then got a coat of the good stuff (forgive the crude paint stand, paying customers always took priority

:roll:

Image

I actually ended up sourcing replacement genuine front wings and good used bonnet due to the tin worm issues.

Image

And spent a long time repairing cracks and broken lugs on the tech two kit.

Image

Image
User avatar
mattmk1
E30 Zone Newbie
E30 Zone Newbie
Posts: 213
Joined: Wed Apr 08, 2009 11:00 pm

Tue May 19, 2015 5:43 pm

With the inside of the car already painted in delphin grey, i had refitted the wiring loom, dash and interior to a certain degree, and it was time to turn attention to the outside.


Few coats of basecoat:

Image

Image

And then a few coats of lacquer:

Image

Image

Image

The inner wheel arches were painted bodycolour, but will always bare the scars from the large scale welding/rebuild job in previous posts...

Image
User avatar
mattmk1
E30 Zone Newbie
E30 Zone Newbie
Posts: 213
Joined: Wed Apr 08, 2009 11:00 pm

Tue May 19, 2015 5:50 pm

The rear arches blended in well:

Image

And the rear quarters showed no sign of distortion:

Image


It was suddenly time to start making this look like a car again, and when the front panel went on, it was a huge incentive to plough on.

Image

Panels were re-fitted...

Image


Money was burned at the stealers for bodykit clips, nuts, bolts, fasteners :cry:

Image

And suddenly it was looking tech 2 shaped:

Image
lyricalnut02
E30 Zone Regular
E30 Zone Regular
Posts: 849
Joined: Fri Nov 23, 2007 11:00 pm
Location: London

Tue May 19, 2015 5:58 pm

This is going to be great once finished. Best colour for a tech 2 imo. Lovely. well done mate :cool:
325i Sport Tech 1 - R.I.P

E30 addict.
User avatar
mattmk1
E30 Zone Newbie
E30 Zone Newbie
Posts: 213
Joined: Wed Apr 08, 2009 11:00 pm

Tue May 19, 2015 5:59 pm

Image


We had a small disaster with some bird poop on the bonnet forcing a quick respray:

Image

Which after rebuilding the front light units...

Image


Had the old girl looking rather tasty...

Image

Image


The car was now sitting on new eibach springs and bilstein dampers, and attention was turned to the powertrain....


New waterpump, thermostat, idler, tensioner, belts,

Image

Clio brake servo (was painted before fitting) with new master cylinder:

Image

New clutch kit with heavily machined flywheel

Image

Image

And a Z3 shifter with all new linkage bushes...

Image

All lead to.....


Image

Image


Purists look away

:(
lyricalnut02
E30 Zone Regular
E30 Zone Regular
Posts: 849
Joined: Fri Nov 23, 2007 11:00 pm
Location: London

Tue May 19, 2015 6:06 pm

Farking lovely!!!
325i Sport Tech 1 - R.I.P

E30 addict.
User avatar
mattmk1
E30 Zone Newbie
E30 Zone Newbie
Posts: 213
Joined: Wed Apr 08, 2009 11:00 pm

Tue May 19, 2015 6:06 pm

New lemforder bottom arms, drop links, anti roll bar bushes...

Image

Went in with an E36 Rack with new tie rod ends a Corsa custom fabricated steering linkage...

E30 eccentric front polybushes...

Image


And new top mounts meant everything on the front end, suspension wise, was now new.

Image


Time for the rear end.........
JF008
E30 Zone Regular
E30 Zone Regular
Posts: 632
Joined: Tue Jan 17, 2012 11:00 pm
Location: Fort McMurray

Tue May 19, 2015 6:12 pm

Nice work!!
User avatar
ianev
E30 Zone Newbie
E30 Zone Newbie
Posts: 153
Joined: Sat Apr 25, 2015 11:00 pm
Location: Redhill, Surrey

Thu May 21, 2015 8:09 am

Epic 8)
User avatar
mercdriver
E30 Zone Regular
E30 Zone Regular
Posts: 814
Joined: Mon May 30, 2011 11:00 pm
Location: Derby

Thu May 21, 2015 6:59 pm

:cool:

Peer pressure - it works well

Cool project mate
I'll check with the manager
P_VIDDY
E30 Zone Regular
E30 Zone Regular
Posts: 426
Joined: Fri Jan 06, 2006 11:00 pm
Location: Derby

Thu May 21, 2015 10:55 pm

Nice work
jimbom30cab
Tech 1 freak
Posts: 7634
Joined: Mon Oct 12, 2009 11:00 pm
Location: in the garage

Thu May 21, 2015 10:59 pm

very much enjoyed reading this thread, good job there
User avatar
Someboyfor1boy
E30 Zone Newbie
E30 Zone Newbie
Posts: 1
Joined: Sat Jul 11, 2015 11:00 pm

Mon Jul 13, 2015 12:11 am

Just read your whole thread, inspiring to say the least. I'm not as scared to inspect my sport now when I see what can be done
User avatar
mattmk1
E30 Zone Newbie
E30 Zone Newbie
Posts: 213
Joined: Wed Apr 08, 2009 11:00 pm

Wed Oct 21, 2015 7:08 pm

Time for a quick update on this one!

This project began whilst i was at university, so it was essentially shoestring budget, but spare time was ample (unemployed bum).

Unfortunately spare time is now virtually non existent, but budget constraints have eased (no longer an unemployed bum).

As a result im trying to replace most things as i go...


New Clutch Master and Slave cylinders, with braided clutch hose courtesy of Matt Lewis.

Image


I rebuilt the front and rear calipers using kits from Big Red, the pistons were inspected and polished where needed. I refinished the calipers in Gloss Black Enamel as im not keen on the garish colours.

Image

Again, braided lines courtesy of Matt Lewis Motorsport.

Image

Purchased a new master cylinder, and rebuilt the Clio servo. Brake Master cylinder rod was extended by 25mm to return the pedal travel to OEM.

Image
User avatar
mattmk1
E30 Zone Newbie
E30 Zone Newbie
Posts: 213
Joined: Wed Apr 08, 2009 11:00 pm

Wed Oct 21, 2015 7:17 pm

I also got cracking with the exhaust manifolds. With the engine in situ i could cut and manipulate the manifolds as needed.

I then heat wrapped them, and they were fitted with new gaskets, studs and nuts.

Image

Together with the modified Corsa linkage and E36 Rack, they fit quite nicely.

Image

Luckily my brother is a plumber, so with the help of a pipe bender i also 'modified' the standard PAS hoses and pipes.

Image

In need of a little motivation, it was then pushed outside for a much needed bath.


Image


:cool:
User avatar
ianev
E30 Zone Newbie
E30 Zone Newbie
Posts: 153
Joined: Sat Apr 25, 2015 11:00 pm
Location: Redhill, Surrey

Wed Oct 21, 2015 8:53 pm

great effort. keep it up!
baggimodo
E30 Zone Regular
E30 Zone Regular
Posts: 379
Joined: Sun Nov 27, 2011 11:00 pm
Location: Coventry

Thu Oct 22, 2015 7:00 am

Stunning!
JungleGus
Old Skooler
Old Skooler
Posts: 985
Joined: Thu Mar 17, 2005 11:00 pm
Location: London

Thu Oct 22, 2015 9:55 am

Loving it!
Gert_8
Married to the E30 Zone
Posts: 11304
Joined: Mon Dec 08, 2008 11:00 pm
Location: In your back passage faster than a rat up a drainpipe!

Thu Oct 22, 2015 10:37 am

:cool:
Image
PONY, 2013 - "Anyway span 360 degrees hitting the kerb and giving the old man two fingers as I was spinning like Michael Schumacher would
povertyspec
E30 Zone Newbie
E30 Zone Newbie
Posts: 158
Joined: Mon Jun 30, 2014 11:00 pm

Thu Oct 22, 2015 11:29 am

brilliant job! very very tasty.
User avatar
mattmk1
E30 Zone Newbie
E30 Zone Newbie
Posts: 213
Joined: Wed Apr 08, 2009 11:00 pm

Mon Oct 26, 2015 8:00 pm

Thank for the comments!

After the front suspension overhaul, attention turned to the rear. The whole underside was looking grotty, so i decided to drop the beam and do things properly.

Image

Image


Brake lines were completely shot, and the old sealer was looking flaky (where it hadnt been covered in oil from the old M20 lump).

Image


Beam was stripped and given a coat of paint, and a full set pf polybushes were added.

Image

The Underside of the car was jet washed clean (an absolute joy of a job) and then the suspect areas of sealer were stripped back to metal.

Image

The car was never intended to be a show pony, so i covered the underside in a number of products that i know work. Unfortunately they arent available in dark grey.

Image

Image

Changed all of the copper brake lines and added new handbrake cables.

Image


Rear Top mounts were showing a few little signs of wear...

Image

So iv accepted that every conceivable part of this car is shot.

But got her back on four wheels!

Image
Split_S
POR 15 junkie
Posts: 529
Joined: Sun Jun 16, 2013 11:00 pm
Location: Canada

Wed Oct 28, 2015 10:47 pm

That's the spirit!

Give in to the lunacy of your predicament and have fun... :D

God knows I have!!
User avatar
toby
E30 Zone Addict
E30 Zone Addict
Posts: 3609
Joined: Thu Aug 11, 2005 11:00 pm
Location: Kent

Sun Nov 01, 2015 10:04 pm

It's so good that you stuck with it. :)
Image
Post Reply