
yeah! you did do some before remember? gave them to me as Ace a long time ago! Said you could do get some better ones later on but you've had some dramas in the past
the piantcodes were perfect bar some funny little marks and the tyres sticker the green colour wasn't 100% thats all
Worlds longest Resto, my C2 2.7 19/3/18 Vent guage action
Moderator: martauto
-
Simon13
- The longest resto in the world !
- Posts: 22697
- Joined: Mon Jan 10, 2005 11:00 pm
- Location: Camberley, Surrey don't u know
-
d6dph
- Married to the E30 Zone

- Posts: 12435
- Joined: Sun Aug 14, 2005 11:00 pm
- Location: Tiptree. Essex
The machine has been overhauled since I printed the originals so I'll dig out the cd case with the pressure sticker on and get sorting the colours.

-
Simon13
- The longest resto in the world !
- Posts: 22697
- Joined: Mon Jan 10, 2005 11:00 pm
- Location: Camberley, Surrey don't u know
Most kind, i shall look forward to it. I might have 1 more that needs doing bert? well it does asbestos warning one
-
d6dph
- Married to the E30 Zone
- Posts: 12435
- Joined: Sun Aug 14, 2005 11:00 pm
- Location: Tiptree. Essex
No worries Si, Just email me a picture as I'm not sure when I'll next be on here.
(Bit quiet these days isn't it?)
(Bit quiet these days isn't it?)
-
Simon13
- The longest resto in the world !
- Posts: 22697
- Joined: Mon Jan 10, 2005 11:00 pm
- Location: Camberley, Surrey don't u know
very quiet, whats your e-mail
-
B7
- E30 Zone Team Member

- Posts: 15846
- Joined: Tue Feb 13, 2007 11:00 pm
- Location: Surrey / West Sussex
Plus the Castrol Alpina cam cover gasket Dave?
B7's Motto. "If it's French, BURN IT!!!!!!"

-
gooner1

- Out humping Reindeer
- Posts: 13280
- Joined: Fri Apr 14, 2006 11:00 pm
- Location: Northampton.For my sins.
Royalratch wrote:
What ? Makes good sense really, i've got nuts, bolts,
screws all over the oche and takes ages to lay my mitts on the ones
i want.

-
Royalratch

- E30 Zone Addict
- Posts: 4921
- Joined: Sat Oct 21, 2006 11:00 pm
- Location: London
What do you mean what? That's my very own BMW bits box lol.
-
gooner1
- Out humping Reindeer
- Posts: 13280
- Joined: Fri Apr 14, 2006 11:00 pm
- Location: Northampton.For my sins.
So it is, if it did'nt look so Gay i'd apologise. 
Actually, i do.
Actually, i do.
-
Simon13
- The longest resto in the world !
- Posts: 22697
- Joined: Mon Jan 10, 2005 11:00 pm
- Location: Camberley, Surrey don't u know
i can spend more time looking for bits getting distracted, than doing anything useful. But the box of shine helps, only the 2 door and touring get this. Anything else can have any old sh!t
-
Royalratch
- E30 Zone Addict
- Posts: 4921
- Joined: Sat Oct 21, 2006 11:00 pm
- Location: London
A lot of the bolts and nuts are used repeatedly and are easy to identify. Anything odd looking I keep in the BMW bag so I can check the part number against the ETK. Any over / incorrect orders go straight in there too. It saves sooooo much time and I wish I had a giant box with 3 times the dividers!
Smart is not gay.
Smart is not gay.
-
oomz1975
- E30 Zone Addict
- Posts: 2019
- Joined: Mon Feb 09, 2009 11:00 pm
- Location: London UK
This inspired me to make my own one....definately not gay.Royalratch wrote:
Came in handy when I replaced the dash, front valance, random interior trim etc.

-
gareth
- E30 Zone Team Member
- Posts: 11009
- Joined: Tue Jan 11, 2005 11:00 pm
- Location: hastings, east sussex
Every time i break a car or go parts shopping in the breakers, i make a point of saving all of the nuts / bolts / clips etc that come off. Christmas choccie tin storage FTW!
It saves so much time when you lose/break something or just need to bodge up a puller tool etc.
Also, bolts of the right size can make a very cheap and handy thread cleaning tool, just grind a flat across it and it'll scrape out any rust / paint / muck before fitting the shiny new ones
Sad? Maybe. Useful? Definitely!
Sole founder of Fe2O3-12V it's a lifestyle

LSD rebuilding / modification services provided, PM for details
LSD rebuilding / modification services provided, PM for details
-
e30topless
- E30 Zone Team Member
- Posts: 13598
- Joined: Wed Aug 23, 2006 11:00 pm
- Location: surrounded by scrap
Ratch , I am dissapointed to see an orange bulb in your collection , have you moved to the dark side and fitted Clears to the IS ?Royalratch wrote:
-
Royalratch
- E30 Zone Addict
- Posts: 4921
- Joined: Sat Oct 21, 2006 11:00 pm
- Location: London
I did do clears in my misspent youth. It's a dark episode in my life I'd rather forget...
-
Simon13
- The longest resto in the world !
- Posts: 22697
- Joined: Mon Jan 10, 2005 11:00 pm
- Location: Camberley, Surrey don't u know
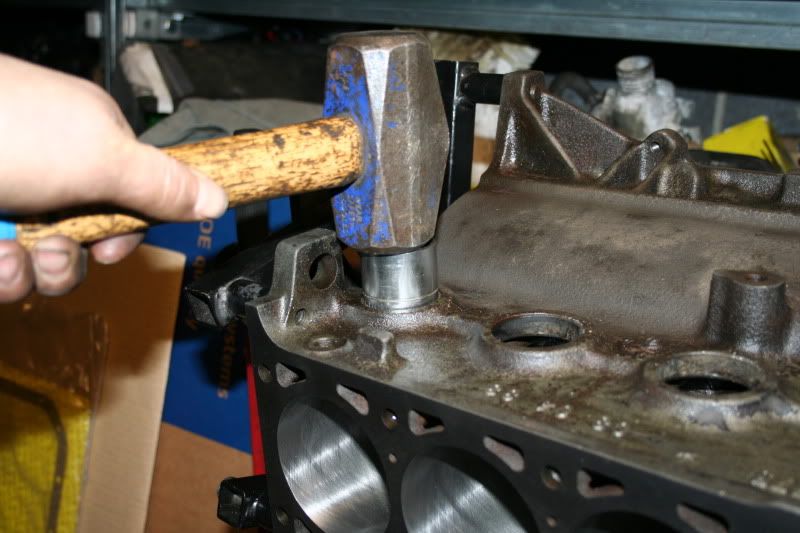
So carrying on with the block, i tickled the core plugs out. i had 11 news ones in a bag and i thought sod it. I'm gonna change out the old ones out and lie in my bed of it all f**ks up later down the line. So a slap with the 4 pounder and a 32mm socket to get the plug moving
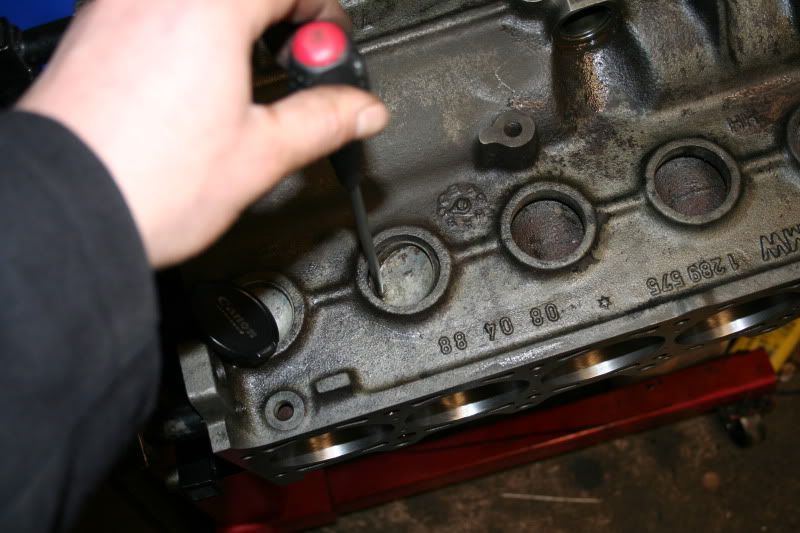
Then punch one corner down with the flathead and the lump hammer. i was really scared of wacking the bores so punched the side of the plug down which was furthest from the bore. If you get me, then just levered them out with the screw driver. Took me a while to think of this after making a mess of getting the first one out!

3 out and getting into it


All 11 out and onto the next stage

not rot/rust on the back of the plugs as you can see, just this thin layer of rusty sh!te. I said to barry the other day when he was over. This makes me suspect that due to the little amount of rust in the waterjacket areas that it was only recently before my onwership that some dickhead filled it with just water. My money is on the guy who runs a 24 recovery yard in Blandford Forum, Dorset where it spent 2 years sitting outside and being bodged up. Having spoke to him a few years ago and listened to the lies and drivel he told me thats my suspicions. Anyhow
I spent some time with some sand paper and emery cloth on the flat machined sections to get them shiney and nice. In fact alot of time enough to get sore fingers. its certainly easier to write about it than doing it! elbow grease and all that. I then gave the whole outside of the block a tickle some emery. Then washed it all down with a good douse of thinners a couple of times so we had some nice grease/sh!t free block sides for painting

Trevor put me onto this. I'm not going to lie i wasn't looking forward to all this as i'd never changed core plugs before or painted a block. I really didn't want to f**k it up not on this car at this stage in the game, but we have to learn somehow


On it went, it wasnt too runny but my paint brush could of been better to make the job easier! On this first coat must of taken about 30 mins per side.


So all painted, i did 3 coats, its quite thick paint so hopefully it will have adhered to block nicely and won't be coming off in 5 years. The last 2 coats were much easier and any over painted bits i just wiped down with thinners on the flat sections which shouldn't have paint.
Surprised myself on this and its turned out better than i thought, so i'm well pleased!

Big hammer and socket back out..........................

1 in and 10 to go, then a thought crossed my mind! How deep do you bang um in? And the socket was leaving a thin line in the plug.

Theres a green bit of cloth in 1 plug. I tried wrapping a rag round the socket then hitting it home, kind of worked until the socket cut through the cloth. opps should of guessed that!
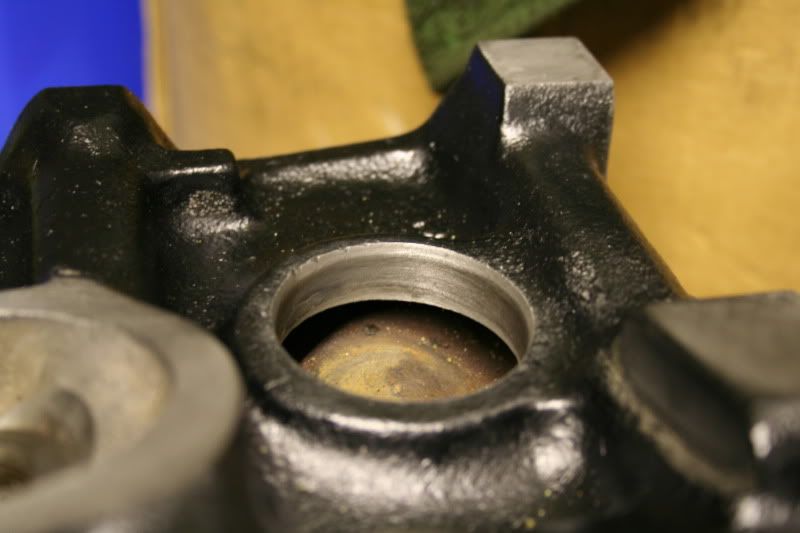
You can see a slight chamfer (sp) on the lip of the plug hole. So my guess was to beat the plug down just past this to the flat section
Its quite hard to guess the depth on each one. You don't want to go too far but not far enough either. You don't want to hit the plugs in pissed either so 1 side is sticking in 5mm deeper was my guess!

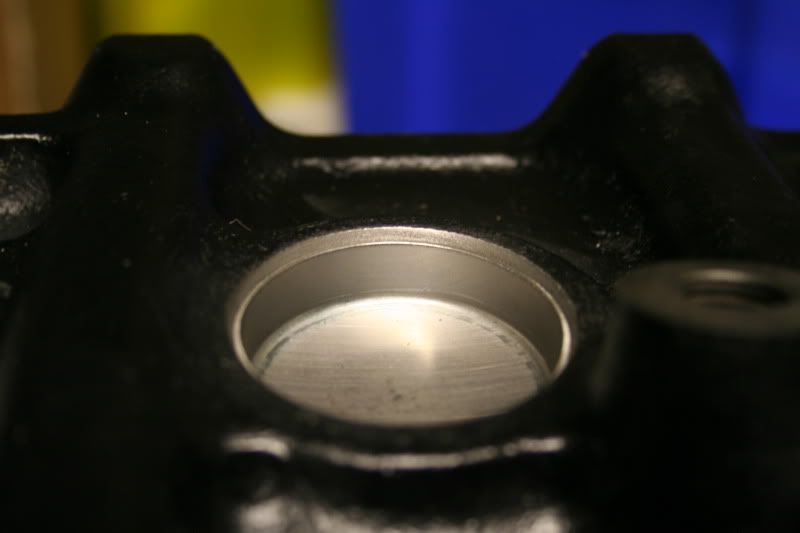
Think i'm just about right comparing it to this 2.5 bottom end i've kept from the departed PYF.
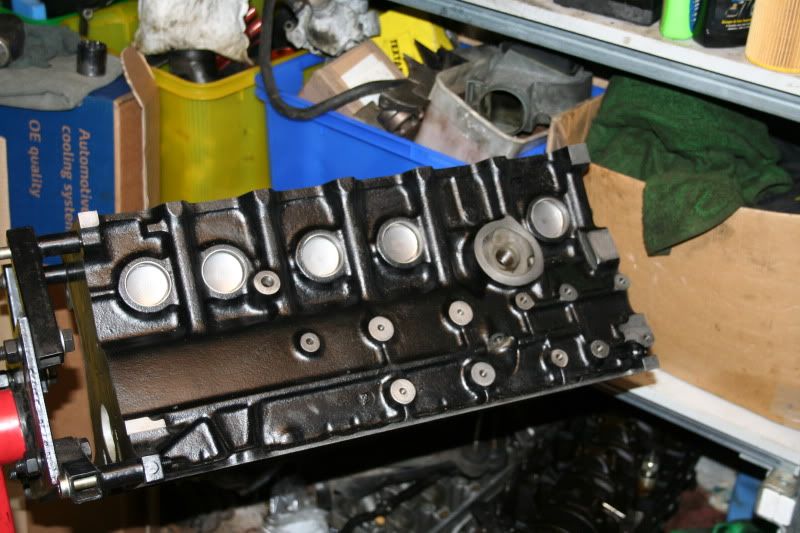


All done. Seems simple enough but like everything on this project it took some time! i'd be quicker the next time round. So all in all i'm over the moon with it. To me it looks like something i'd of picked up from my main dealer after i'd ordered a brand new block and taken it hard for £2000 or something silly. i doubt i could of paid anyone to make it look any better than it is
I also had time to wheel the wagon out and crack on!!
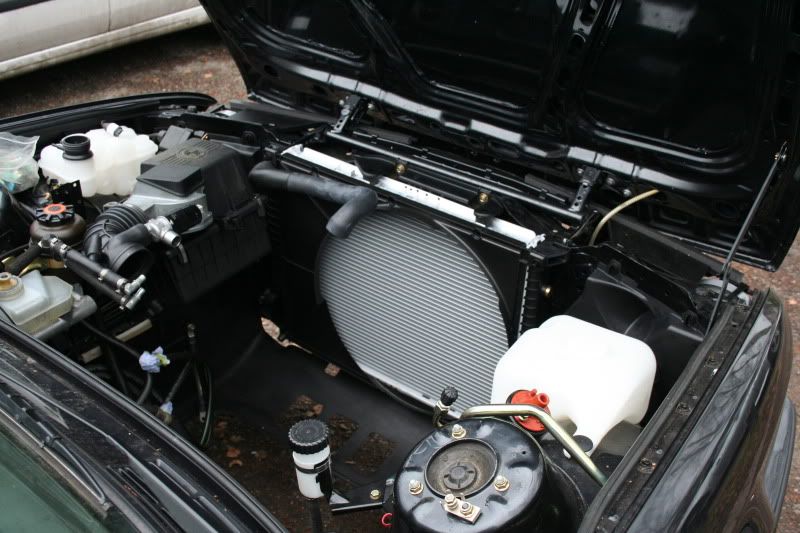
At last the proper rad in, i love euros.

Header tanked up, both pipes way too long. The over flow was 1 meter long! so i cut it in half. The other pipe which runs to the rad was also long. My guess is a tropical rad is 100mm or 4 inches wider than stock. So i cut off 100mm. New cap £11!!! joke. plus a level sensor from santa also. It dawned on me all this lot with the tank is about £100 all in

this is where the overflow pipe pokes into the flitch. Little tip from Barry i never knew.

these are the butt plugs for the A/C matrix
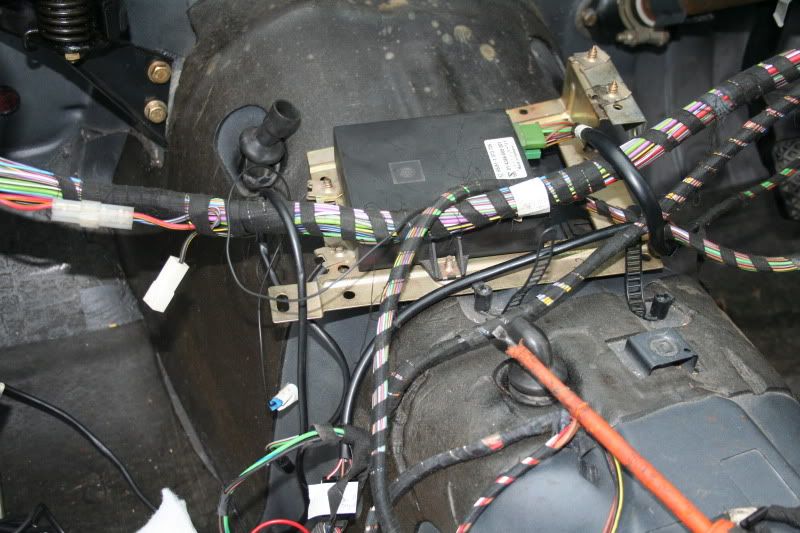
I've fitted all 3 into the transmission tunnel now. They're a bloody pain and my reasoning is it would of been even harder with the carpet in. Which is one of the next jobs to get fitted but these bits first.......


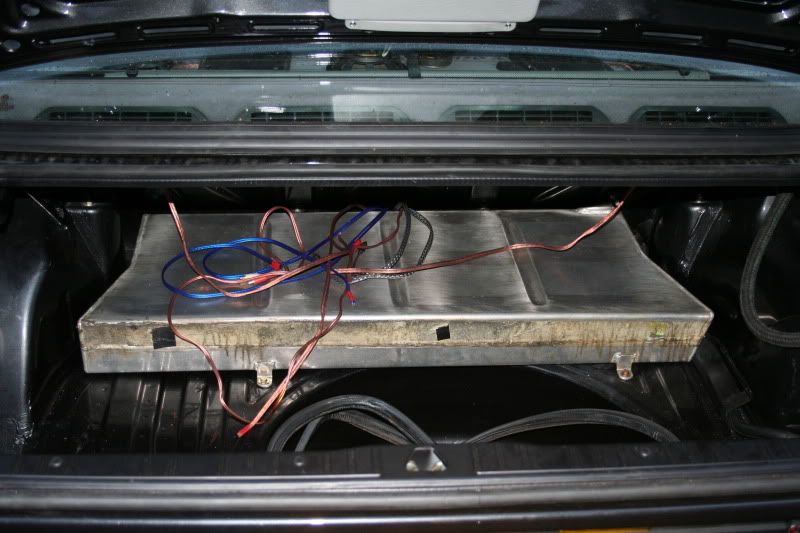
I've laid out all my ICE wires. So theres the speaker wires, 3 phonos, aerial lead and 2 wires for that, the remote thing and thats all i had on my little map. Just got to clip all the looms in and a little hover now. Ready for the sound deadening to go in the rear floor pans and then finally the epic moment of carpet fitting. Which lets be fair is a sh!t job.
So all in the right direction. Picked up before new year a new clutch + bolts and 6 piston ring sets, rod bolts and big end shells. Next will be getting the bottom end balanced
-
E30BeemerLad
- Married to the E30 Zone
- Posts: 16806
- Joined: Mon Mar 28, 2005 11:00 pm
- Location: Norfolk
That air filter housing is letting the side down
Really taking shape now, satisfaction of putting a donk back together coming soon.
Really taking shape now, satisfaction of putting a donk back together coming soon.
-
DanThe
- E30 Zone Team Member
- Posts: 28646
- Joined: Sat Sep 10, 2005 11:00 pm
- Location: Staffs
Do you have a lightened flywheel for this Si?
I find the best way to remove paint from the machined surfaces of the block is with a scraper blade
I find the best way to remove paint from the machined surfaces of the block is with a scraper blade
-
darren_mk
- E30 Zone Newbie

- Posts: 247
- Joined: Sun Jan 28, 2007 11:00 pm
- Location: Northern Ireland
Superb work, as usual.
You are making real progress now!
You are making real progress now!
-
Royalratch
- E30 Zone Addict
- Posts: 4921
- Joined: Sat Oct 21, 2006 11:00 pm
- Location: London
When you lay any ICE wires, lay them at right angles to any other cabling for reduced crosstalk. It may mean your routing can't be all together and tidy but it will minimise interference.
Having said that, E30's are so crap acoustically that it's almost pointless.
Engine bay looks rad - is there anything better in the world than a minty engine bay and new rad?
Having said that, E30's are so crap acoustically that it's almost pointless.
Engine bay looks rad - is there anything better in the world than a minty engine bay and new rad?
-
Simon13
- The longest resto in the world !
- Posts: 22697
- Joined: Mon Jan 10, 2005 11:00 pm
- Location: Camberley, Surrey don't u know
Dan i have a stock fly, which i would like to have lightened. Nothing drastic no more than 2kgs. which reminds me i'll need that doing before the bottem end balance! der 
That airbox does look sh!t i'm sure it doesn't i real life must be the camera
That airbox does look sh!t i'm sure it doesn't i real life
-
Kedge
- Old Skooler

- Posts: 7702
- Joined: Thu Jan 13, 2005 11:00 pm
- Location: Leicestershire
Looking awesome Si, looks to be moving along nicely now!!!
I assume it's been mentioned somewhere in the thread but what interior are you going for? Can't remember what was in it when you had it Gaydon many moons ago.
I assume it's been mentioned somewhere in the thread but what interior are you going for? Can't remember what was in it when you had it Gaydon many moons ago.

-
e30topless
- E30 Zone Team Member
- Posts: 13598
- Joined: Wed Aug 23, 2006 11:00 pm
- Location: surrounded by scrap
nice one Si, looks the bizz ,
I will get you some pics of the digivent loom this week, looks like your not far from throwing a dash in there ?
I will get you some pics of the digivent loom this week, looks like your not far from throwing a dash in there ?
-
Simon13
- The longest resto in the world !
- Posts: 22697
- Joined: Mon Jan 10, 2005 11:00 pm
- Location: Camberley, Surrey don't u know
No dash isn't far off!
Pics of digi vent most welcome Steve, i've a good idea but its nice to see how others have done. i don't even know if it works
Dave it had a really good sport cloth trim the common anthricite (sp) but that went when i sold my old sport and i chawed the black leather out of that for this. Sometimes wish i'd kept it
-
shedrool83
- Old Skooler
- Posts: 4395
- Joined: Thu May 10, 2007 11:00 pm
- Location: Dundee Scotland
Block looks spot on Simon.
I'll have to read the whole thread at some point when i have spare time.
I'll have to read the whole thread at some point when i have spare time.

-
B7
- E30 Zone Team Member
- Posts: 15846
- Joined: Tue Feb 13, 2007 11:00 pm
- Location: Surrey / West Sussex
That looks the nuts si. Are you happy with the paint? It certainlys looks as close to stock on mine. Think I gave mine a couple of coats.
B7's Motto. "If it's French, BURN IT!!!!!!"
-
bss325i
- E30 Zone Team Member
- Posts: 24536
- Joined: Sat Jan 20, 2007 11:00 pm
- Location: London/Surrey
Awesomely awesome!
Countdown to MOT time!
Countdown to MOT time!
-
Simon13
- The longest resto in the world !
- Posts: 22697
- Joined: Mon Jan 10, 2005 11:00 pm
- Location: Camberley, Surrey don't u know
Well crash bang wallop back down to earth and in true project style a bit of a set back. Not enough to really cry about but i've cost myself some money and am annoyed somewhat! So i started the week thinking right we are nearly ready to send the whole bottom end off for balancing to a very nice man Roland Allsop of legendary local fame. All i needed to do is drop the flywheel off to my nice dad for a reface and a bit of meat taken off to help things along.
Then i thought right lets clean/give the journals on the crank a clean up. Build the rods with the shells, put the pins in the pistons etc. You know get it all ready to send it all off.
Heres what i wasn't expecting.......................being a warts and all resto so far we need to cover the bad and ugly along with the good.


Theres pitting in the main ends, you couldn't see it with the old oil all caked on. Moisture obviously got in when this bottom end sat outside before i bought it Now to be fair it would probably be ok, but we have come this far that it just won't do. So again the old mans opinion was seeked. The only way forward this far in to this engine is for a 10 thou regrind to +0.25mm main end shells. Which is a real f**king shame as i've got to cough for the stock main end shells i've bought already. Theres a lesson here clean the f**king journals up before splashing the cash leave no stone unturned.
So then the suggestion from the old man, wheres the orginal crank gone? its in a plastic bag in the garage Dad. Bring it over! i said "its horrid and needs a regrind" "So does that now" was the reply. Back home then.

Its in this bag, next to some nice 2.5 cranks that don't need regrinds. If only..........

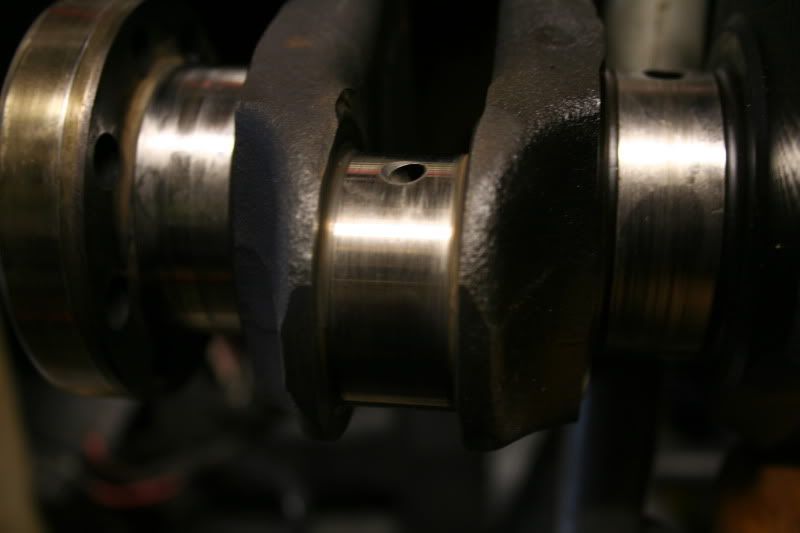

Thats what she looks like, i haven't looked at it since i stripped the donk, over 2 years ago. Its all scored on the mains and bigs look* ok. No woodruff key action though.

Nice shells, i've dug these up from when i stripped the donk down.
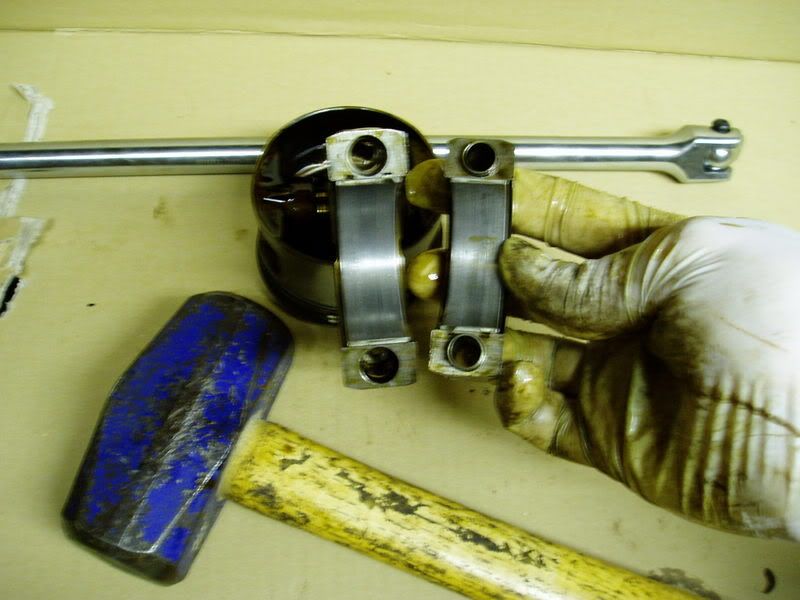
My dad is again of the opinion to work on the original like on the block. I can see his point so the mike came out again
We know it needs a grind on the mains, when measured to see they've worn down 3 to 3.5 thou on all off them. So a 10 thou regrind will sort that out and use +0.25mm shells like the other crank
Now the big ends looked ok, but are infact out of spec also they're all 1-2 thou out so the big ends need a regrind to +0.25mm shells there. Its strange here as there is only 1 size for each size on the big ends. Where as on the mains you have a choice of 3 colours in each size. Each colour is again another size with in again!

The two bits of sh!t together. Why do they have to be TD cranks?! rare as fook over here. I guess you learn from your mistakes. Right so the way it is is this. Both need a regrind on the mains. So i have to buy another set of plus size shells and the regrind, either way. Then here is the choice, go original and regrind the bigs and buy another set of shells and have a nice nose section RE woodruff key. Or stick with the other crank and save a bit with the big ends being ok and i've already bought those shells and have an unslighly nose section?! What does the forum think?
Anyone after some "white" main end shells?! What a nob, but hey ho
Then i thought right lets clean/give the journals on the crank a clean up. Build the rods with the shells, put the pins in the pistons etc. You know get it all ready to send it all off.
Heres what i wasn't expecting.......................being a warts and all resto so far we need to cover the bad and ugly along with the good.
Theres pitting in the main ends, you couldn't see it with the old oil all caked on. Moisture obviously got in when this bottom end sat outside before i bought it
So then the suggestion from the old man, wheres the orginal crank gone? its in a plastic bag in the garage Dad. Bring it over! i said "its horrid and needs a regrind" "So does that now" was the reply. Back home then.
Its in this bag, next to some nice 2.5 cranks that don't need regrinds. If only..........
Thats what she looks like, i haven't looked at it since i stripped the donk, over 2 years ago. Its all scored on the mains and bigs look* ok. No woodruff key action though.
Nice shells, i've dug these up from when i stripped the donk down.
My dad is again of the opinion to work on the original like on the block. I can see his point so the mike came out again
We know it needs a grind on the mains, when measured to see they've worn down 3 to 3.5 thou on all off them. So a 10 thou regrind will sort that out and use +0.25mm shells like the other crank
Now the big ends looked ok, but are infact out of spec also
The two bits of sh!t together. Why do they have to be TD cranks?! rare as fook over here. I guess you learn from your mistakes. Right so the way it is is this. Both need a regrind on the mains. So i have to buy another set of plus size shells and the regrind, either way. Then here is the choice, go original and regrind the bigs and buy another set of shells and have a nice nose section RE woodruff key. Or stick with the other crank and save a bit with the big ends being ok and i've already bought those shells and have an unslighly nose section?! What does the forum think?
Anyone after some "white" main end shells?! What a nob, but hey ho
-
pacerpete
- E30 Zone Team Member
- Posts: 18168
- Joined: Sun Jan 23, 2005 11:00 pm
- Location: Iver heath. South bucks.
Oh c0ck. Measure twice, buy once !
-
glenn
- Engine Transplant Services

- Posts: 2198
- Joined: Sat Jan 29, 2005 11:00 pm
- Location: blackwood, south wales
your too far in now si, i agree with your dad, and stick with the original crank.
in the total cost of the whole car, the extra is nothing.
in the total cost of the whole car, the extra is nothing.
-
e30topless
- E30 Zone Team Member
- Posts: 13598
- Joined: Wed Aug 23, 2006 11:00 pm
- Location: surrounded by scrap
sort the one with the good nose end, !
the H27 /td big ends I did last year had to be ground in Si , the oversize shells were not expensive at all, are the Mains fooked on em both ?
the H27 /td big ends I did last year had to be ground in Si , the oversize shells were not expensive at all, are the Mains fooked on em both ?
-
bss325i
- E30 Zone Team Member
- Posts: 24536
- Joined: Sat Jan 20, 2007 11:00 pm
- Location: London/Surrey
Bum!
Go with the original Simon.
Go with the original Simon.
-
beardymat
- E30 Zone Squatter
- Posts: 1979
- Joined: Tue Jun 14, 2005 11:00 pm
- Location: sheffield, city of steel, and rust apparently
nice nose for me Si, its a no brainer really as saving money on this project is now an irrelevant action. Plus you get the satisfaction of knowing you have a fully fresh and true crank going in that truly astonishing block.
Keep up the good work.
Keep up the good work.
No longer self employed but still available for welding duties.
-
B7
- E30 Zone Team Member
- Posts: 15846
- Joined: Tue Feb 13, 2007 11:00 pm
- Location: Surrey / West Sussex
I'd forgotten that crank had woddruff key action. Go wit the one with a good nose si.
We all live and learn. There will be someone needing a set of standard mains.
We all live and learn. There will be someone needing a set of standard mains.
B7's Motto. "If it's French, BURN IT!!!!!!"