Page 1 of 4
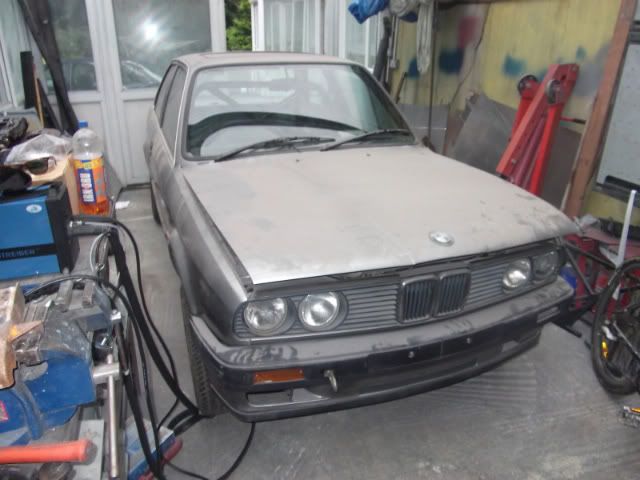
Martin's rally car build - update 8/2/16
Posted: Sun Sep 04, 2011 7:19 pm
by martinpallot
Re: Martin's second attempt at a rally car build
Posted: Sun Sep 04, 2011 9:36 pm
by MarkT
Cant wait to see the build?
Re: Martin's second attempt at a rally car build
Posted: Mon Sep 05, 2011 1:37 pm
by Jhonno
Looking forward to this one also..
Sold the other yet?
Re: Martin's second attempt at a rally car build
Posted: Thu Sep 08, 2011 7:21 pm
by martinpallot
Nah not sold it, usual story that loads of people ''would love to if only they werent skint at the moment'' its under a cover in my storage shed where it will remain until more time and money come my way!
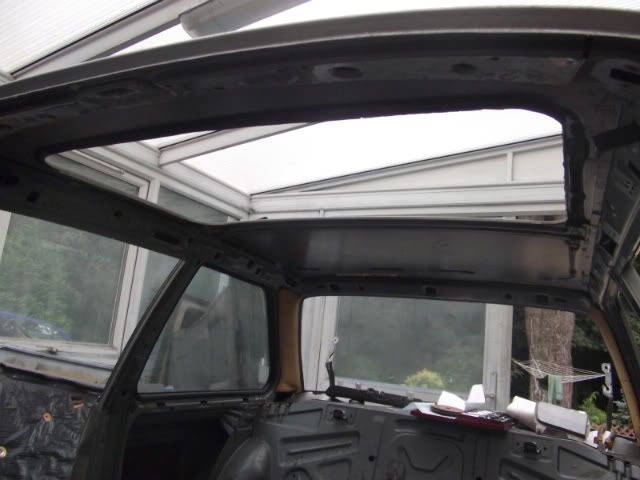
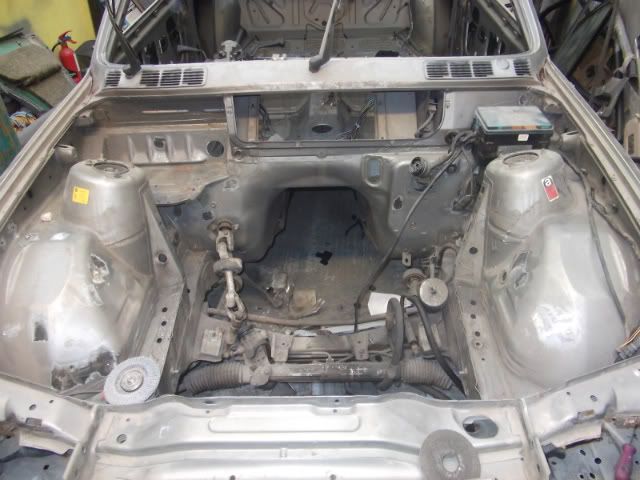
Got the Car stripped down, wiring has been thinned out to its bare essentials, now awaiting some spiral conduit to finish it off but that can wait until some of the auxilary circuits have been wired in closer to the end. After alot of cursing the sunroof came out. All the other ones which iive done in the past have been so rotten that the fell out, this one on the other hand was factory fresh and needed much careful persuasion with the heat gun before it let go.
Tigged in a filler plate today, another annoyingly fiddly job but its done now. My mate helped me out and scrapped out all the tar sound deadening off the floors so now its up to me with the thinners

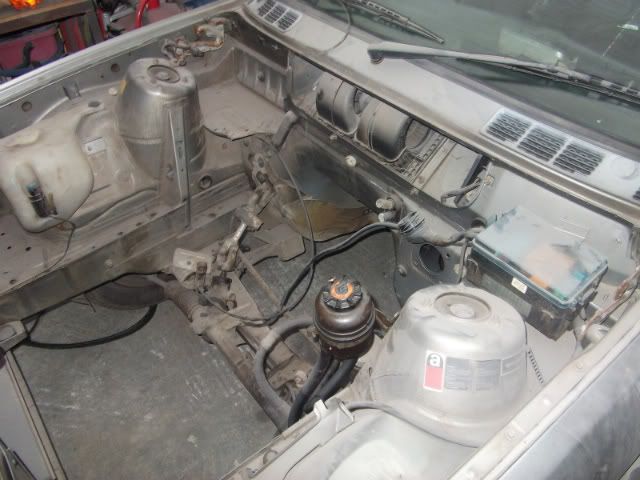
The engine bay has also been relieved of all its unwanted brackets and threaded nipples, so next step will be the fabrication by the looks of it!


Re: Martin's second attempt at a rally car build
Posted: Thu Sep 08, 2011 11:57 pm
by Jhonno
Nice..

Re: Martin's second attempt at a rally car build
Posted: Tue Sep 13, 2011 10:19 am
by GeoffBob
Great that you found a nice example with little or no rot Martin. A hard find these days. Best of luck with the project, I look forward to lots more pics.
Geoff
Re: Martin's second attempt at a rally car build
Posted: Thu Sep 15, 2011 6:38 pm
by martinpallot
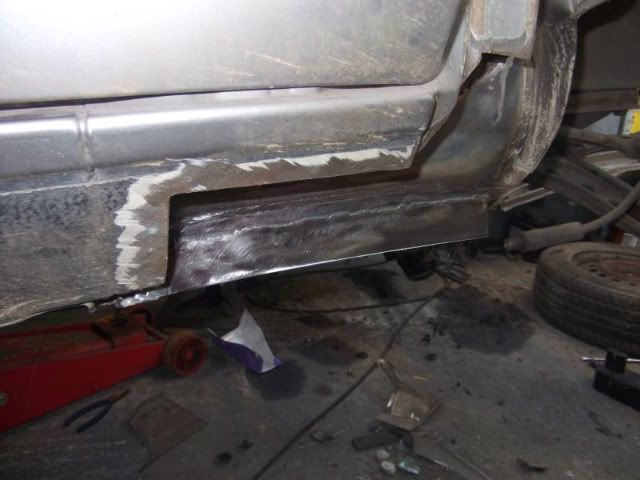
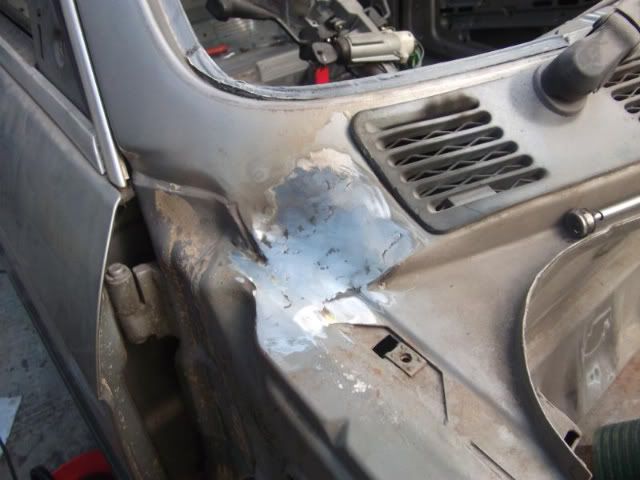
bit of progress to report, pushed the car to one side of the garage so that I had a bit of space to work and set about repairing the rot. I should have known better after the last shell what lurks inside a seemingly small hole in an e30 sill, needless to say after half an hour with a grinder I was left with bit of a gap to fill and a strong feeling of de-ja-vu! Note to anyone looking for an e30, this looked absolutely fine from the outside and underneath and even had the 'jacking pad' fully intact, only with e carpet removed and a screwdriver would you find horrors like these
Here's the hole with the first section of floor grafted in, sorry but in my frustartion i didnt get any photos of the 'before' part.
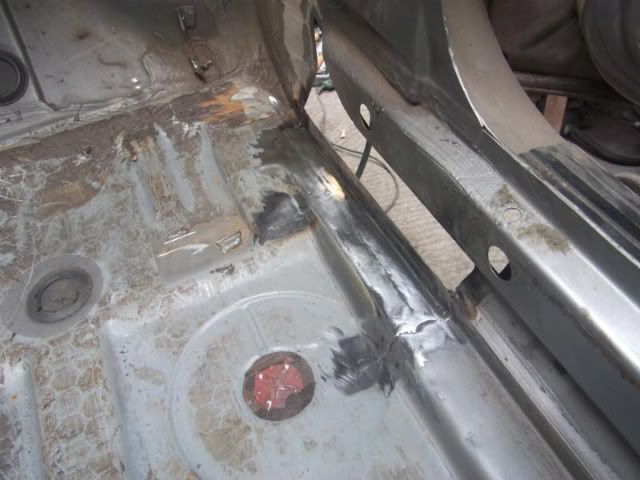
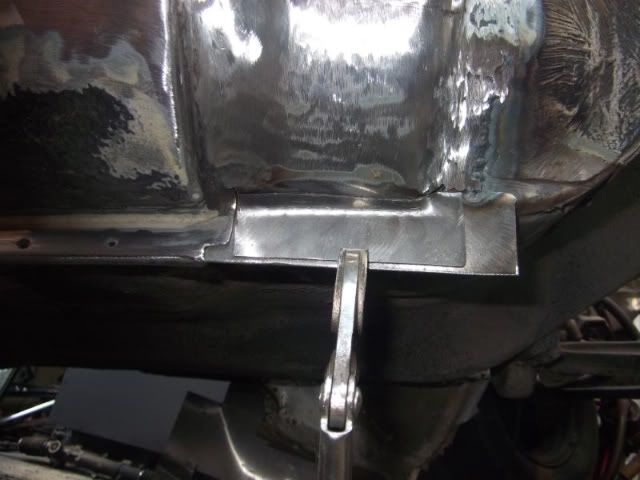
Same again, make up a plate, hit it with a hammer a few times and stick it in
Inside shot
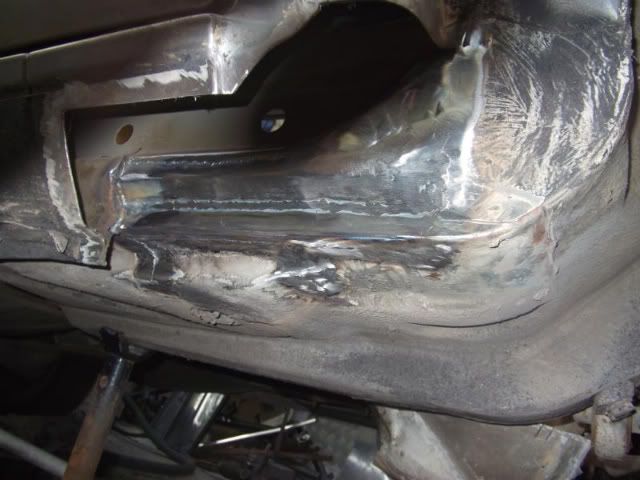
Lip welded on the bottom
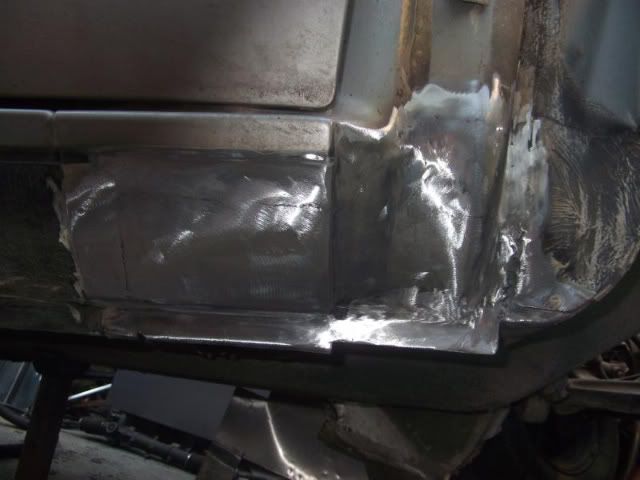
90 percent of the outer sill was saveable after a good cleanup

The other 10 percent had to be made up
Stitched in and plugged along the bottom seam

Trimmed and linished
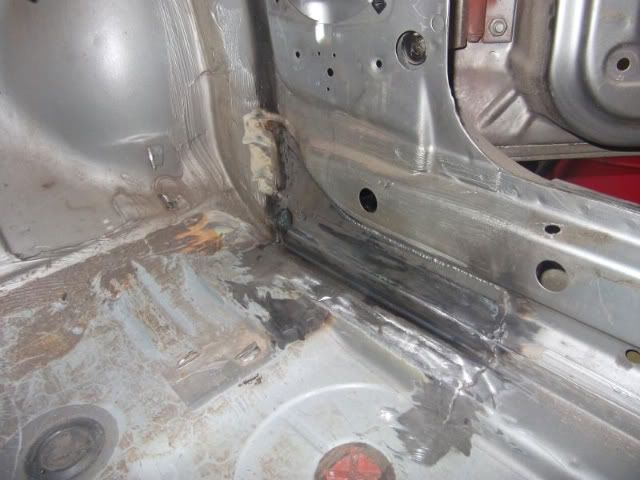
Now on to the scuttle.... take a grinder, cut the brown death out, make a plate, tack it in and curse continually for 3 hours about how the metal appears to resemble cardboard in that area and how BMW have deposited half their stck of sealer in the corner....
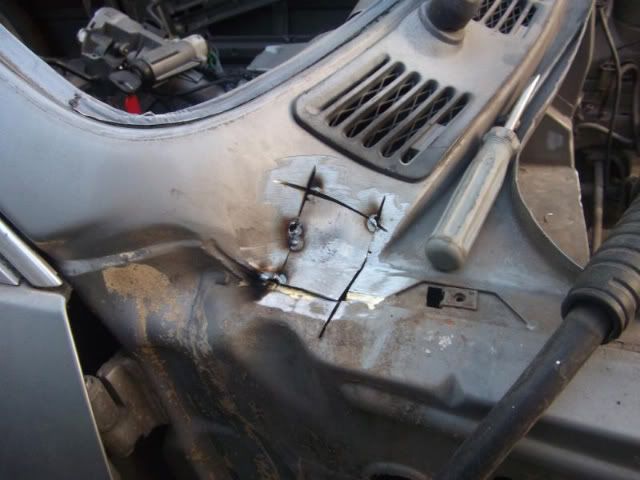
Got there in the end
Now that the rot is out of the way on the left hand side, I can tackle the rot on the right hand side, luckily that is solid in the floor area apart from the scuttle. I will also remove the jacking pad for piece of mind on the other side. But before that I need to fit the sill stand holes.
Re: Martin's second attempt at a rally car build
Posted: Fri Sep 16, 2011 8:42 am
by Jhonno
E30's are definitely starting to show their age!! I would suspect 99% of them would reveal similar if you started poking..
Nice update, keep 'em coming
Re: Martin's second attempt at a rally car build
Posted: Fri Sep 16, 2011 12:31 pm
by winx
excellent, love watching these threads, good progress!
Re: Martin's second attempt at a rally car build
Posted: Sun Sep 25, 2011 10:14 am
by TamTom
thats some awesome bodywork bro
Re: Martin's second attempt at a rally car build
Posted: Tue Sep 27, 2011 3:55 pm
by martinpallot
Right been busy the past week, got the sill stands finished
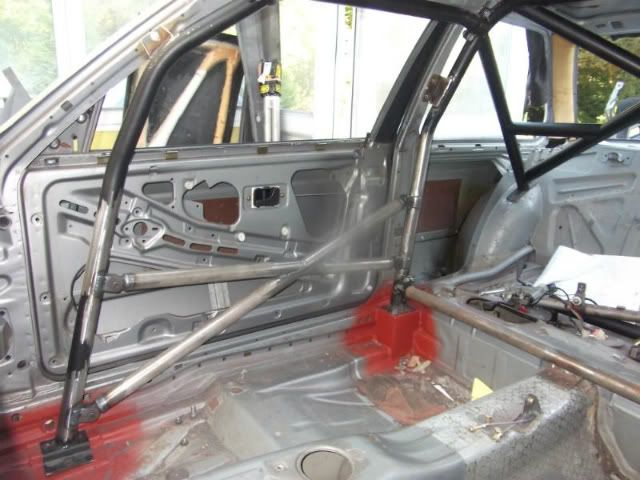
Got the rollcage feet welded in, cut off the saddle brackets for the single door bars and ordered tube and brackets for removeable X door bars, thats on tomorrows to do list!
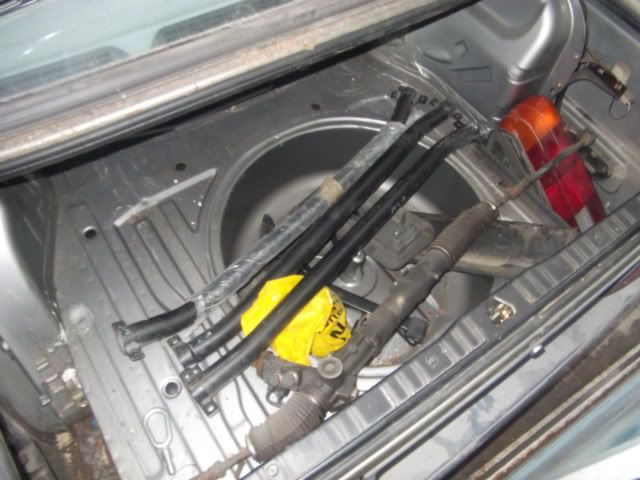
Suspsension parts arrived from the USA, the lolipop bushes are something i did just for convenience, I couldnt be bothered making compression struts again so we'll se how they feel. The beam bushes are delrin and raise the subframe 12mm apparantly, but theres room to go a fair bit higher with a couple of tweeks so may go up another 10mm withought having to notch the chassis rails at the back. The top mounts are from poland and seem OK, the bearings supplied are of questionable quality but this is easily rectified and the cost is offset by how cheap they were.
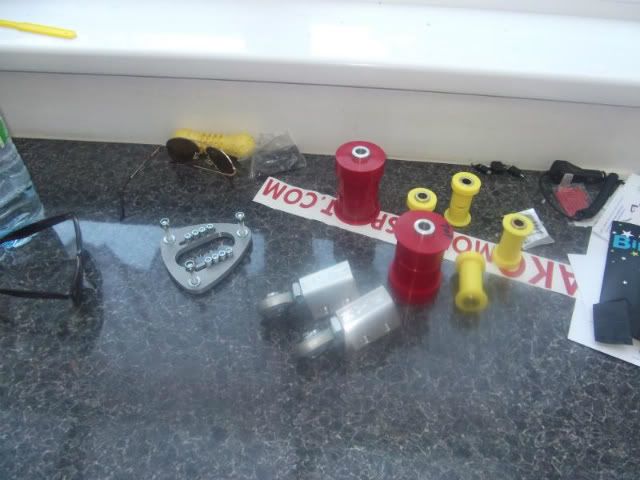
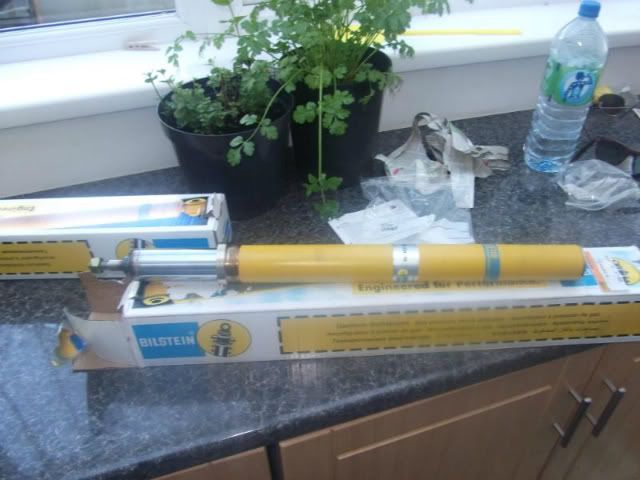
Some brand new group N bilstein 300/300 inserts came up cheap so I snapped them up instantly, was going to go for the AVO 2 ways but we'll see how these work. They should have decent re-sale value and I can always change them later if it doesnt work as expected.
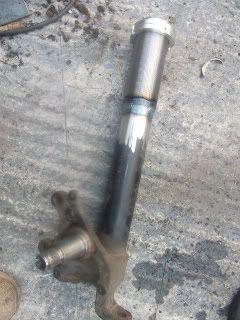
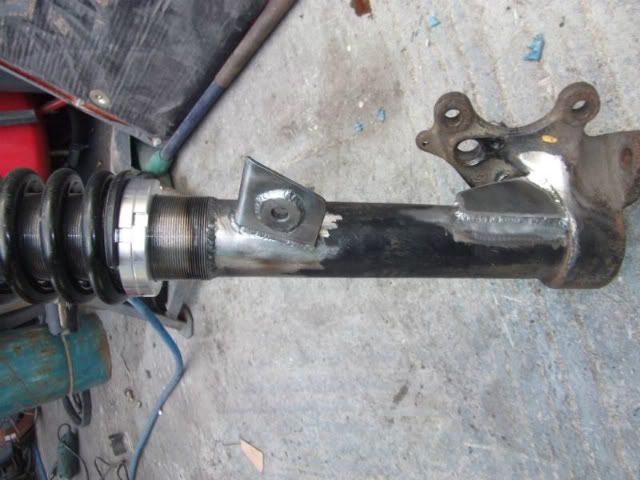
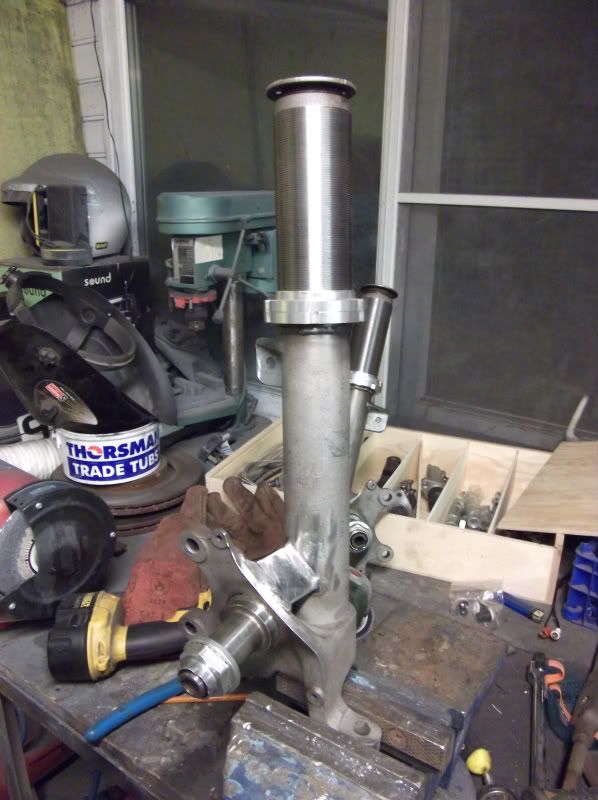
Dug out some spare struts and welded some conversion tubes on with the tig. These tubes were from demon tweeks and a bit pricier than the rally design jobbies, but they are a much tighter press fit and the top hats are better machined so im happy I went for these
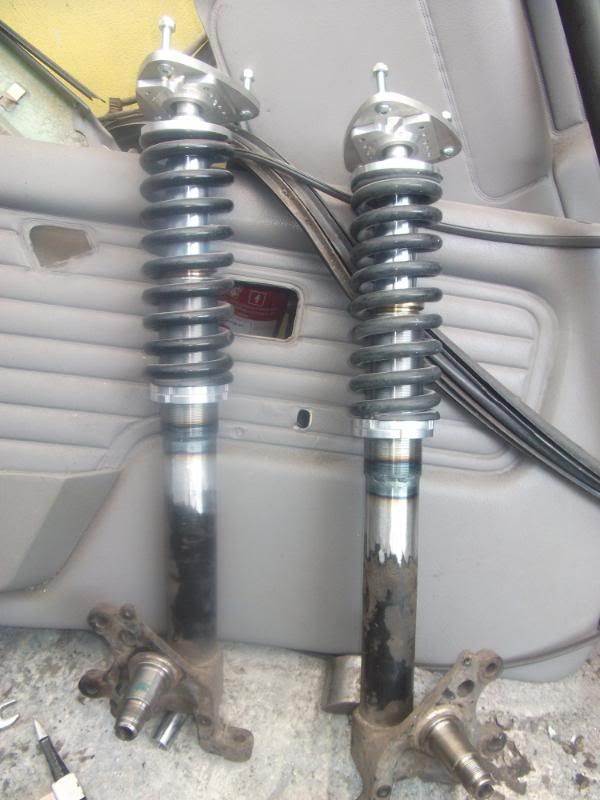
Struts dummy built, the long 600lb springs are just for the dry build. I have ordered some 500lb shorter ones as I've got some 50lb 4" helpers to go with them. Going to wedge the castings to the tubes and weld on some ARB brackets tomorrow
Re: Martin's second attempt at a rally car build
Posted: Wed Sep 28, 2011 3:31 pm
by martinpallot
Got the front struts finished today with the wedges and the ARB droplink brackets, didnt make a start on the cage cos this took so bloody long so will have to wait until tomorrow
Re: Martin's second attempt at a rally car build
Posted: Thu Sep 29, 2011 9:54 am
by Jhonno
Awesome work once again!
Re: Martin's second attempt at a rally car build
Posted: Thu Sep 29, 2011 10:19 am
by maxfield
Nice work dude. Your welding looks second to none.
Re: Martin's second attempt at a rally car build
Posted: Thu Sep 29, 2011 4:07 pm
by GeoffBob
Is there a problem without the wedges Martin? Not something I added in when I made up my front struts but I can still add something in if there is a known problem that I should address.
Would appreciate your input if there's something I should know in this regard.
Re: Martin's second attempt at a rally car build
Posted: Thu Sep 29, 2011 4:41 pm
by Jhonno
I think it is a flex issue. Not a massive everyone does it problem, but if you have the skills and the time.
Re: Martin's second attempt at a rally car build
Posted: Thu Sep 29, 2011 4:42 pm
by martinpallot
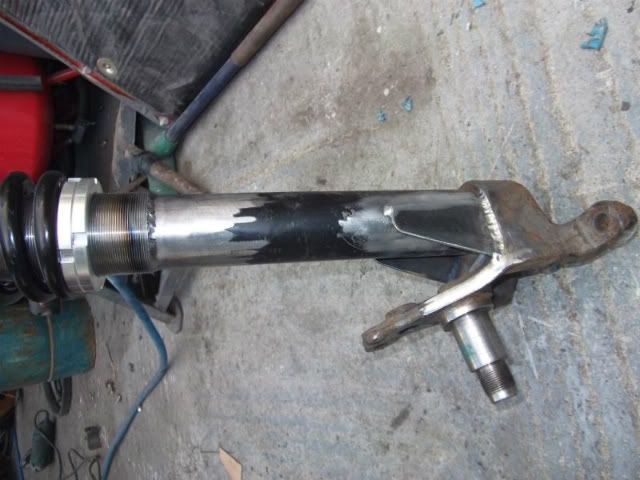
Not that I know of Geoff, but its a common mod on most struts of this type, seemed common sense to me on a rally car where it could have hard landings off bumps in the road. As they are only pressed in and plug welded so to speak from the bottom, it should help share any bending forces between the casting and the tube.
On the last set I built, I noticed that when I clamped the casing in the vice it was fairly easy to flex casting towards the tube so I braced it like so
Re: Martin's second attempt at a rally car build
Posted: Thu Sep 29, 2011 5:20 pm
by Mikey_Boy
Beefy and strong - loving that!


Great work so far!
Cheers,
Mike
Re: Martin's second attempt at a rally car build
Posted: Thu Sep 29, 2011 5:23 pm
by GeoffBob
Thanks for the input. I have a TIG welder at home so I might as well. Makes sense. Ta.
Re: Martin's second attempt at a rally car build
Posted: Fri Sep 30, 2011 1:18 pm
by UweM3
GeoffBob wrote:Thanks for the input. I have a TIG welder at home so I might as well. Makes sense. Ta.
you don't need to TIG it. I would MIG it. Lot less heat.
This brace was also seen on GrpA cars back then.
BTW, if you crash this car and need a new shell my mate has one in dry storage in Germany. NON Sunroof and last time I checked it it really was rust free! And it's stripped already.
Re: Martin's second attempt at a rally car build
Posted: Fri Sep 30, 2011 5:56 pm
by martinpallot
Uwe, thanks for the offer, good to know its there, but hopefully I never have to take you up on it, building another one of these things would be the end of me I think!
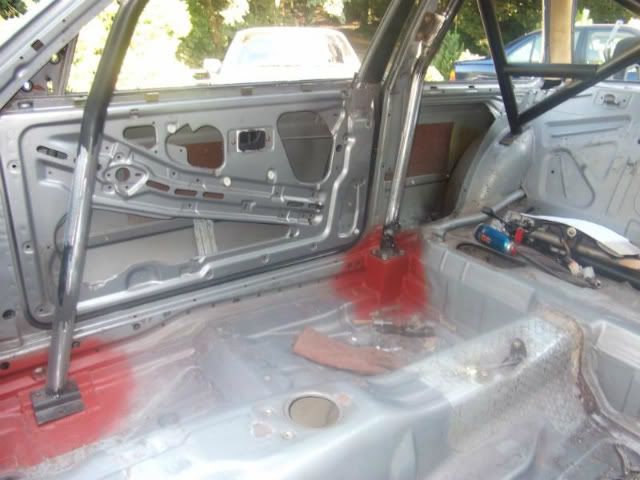
Got the door bars done today and the front A pillar tags on, all seems nice and stiff now. Next job is seat rails.
Re: Martin's second attempt at a rally car build
Posted: Fri Sep 30, 2011 7:53 pm
by DanThe
Your ploughing ahead with this!

Re: Martin's second attempt at a rally car build
Posted: Fri Sep 30, 2011 9:52 pm
by UweM3
martinpallot wrote:Uwe, thanks for the offer, good to know its there, but hopefully I never have to take you up on it, building another one of these things would be the end of me I think!
Got the door bars done today and the front A pillar tags on, all seems nice and stiff now. Next job is seat rails.
Not going to put a X between the B-pillars?
Re: Martin's second attempt at a rally car build
Posted: Fri Sep 30, 2011 11:01 pm
by martinpallot
Nah, gonna make some removeable bars that go to the inner wing/bulkhead area as I dont like how far back the A pillars are to clear the dash, but other than that I'l leave it as is. I got it cheap with the shell, so rather than use it in its standard form, where its was terrible in terms of both rigidity and fitment, I thought I'd make it into a happy medium where its not exactly what I want but not so bad that I go throwing it away next year in favour of a weld in jobbie!
Re: Martin's second attempt at a rally car build
Posted: Sat Oct 01, 2011 5:05 pm
by martinpallot
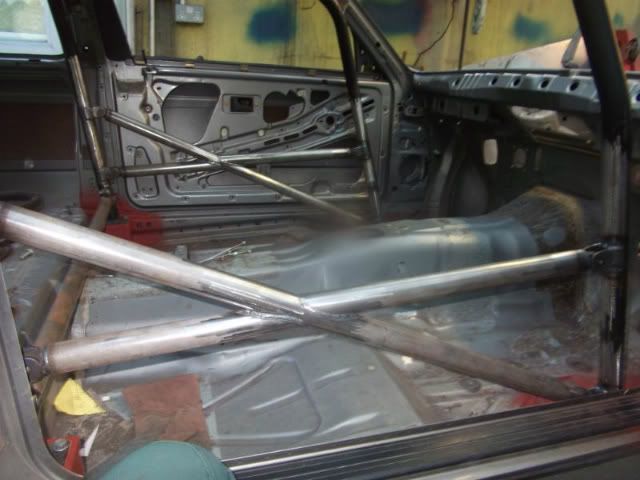
Got the bulkhead struts done today, need to get some saddle brackets and another bit of tube to I can put a bar between the front of these and then I'm finished with it.
Re: Martin's second attempt at a rally car build
Posted: Sat Oct 01, 2011 5:19 pm
by Demlotcrew
Great work!
There is a GrpN E30 M3 strut here (link below) and it clearly has none of those braces!
http://www.bmwquebec.ca/forum/showthrea ... #post12469
Im not doubting you, but are you sure the bottom of the strut was just loose in the vice? I really have a hard time believing you could see the strut bending.

Andrew
Re: Martin's second attempt at a rally car build
Posted: Sat Oct 01, 2011 6:24 pm
by martinpallot
definately not loose in the vice, i had the uppermost part of the casting clamped in the vice so there was a fair amount of leverage there.
Re: Martin's second attempt at a rally car build
Posted: Fri Feb 10, 2012 4:53 pm
by martinpallot
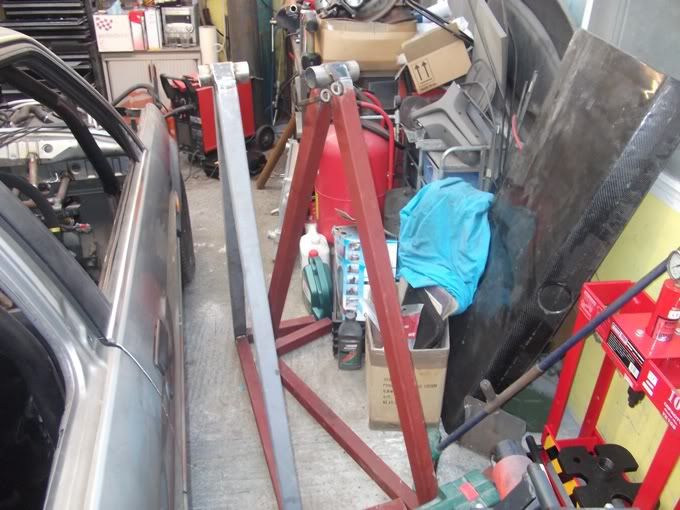
Its been a while but had my first day in the garage in months, finally finished the spit I was making, its adjustable so that I can move the balance point when I dummy fit parts on to compensate for the weight. Not sure how well it'll work yet but I'll soon see.

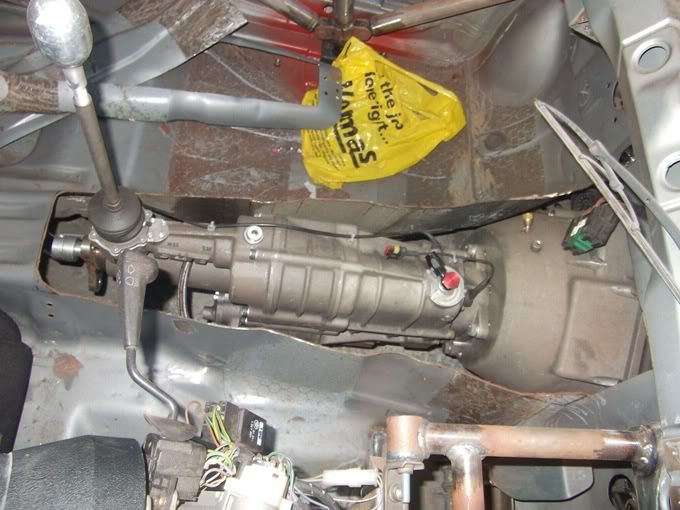
Large hole caused by fat gearbox, need to make a folder so that I can patch this up neatly as possible.
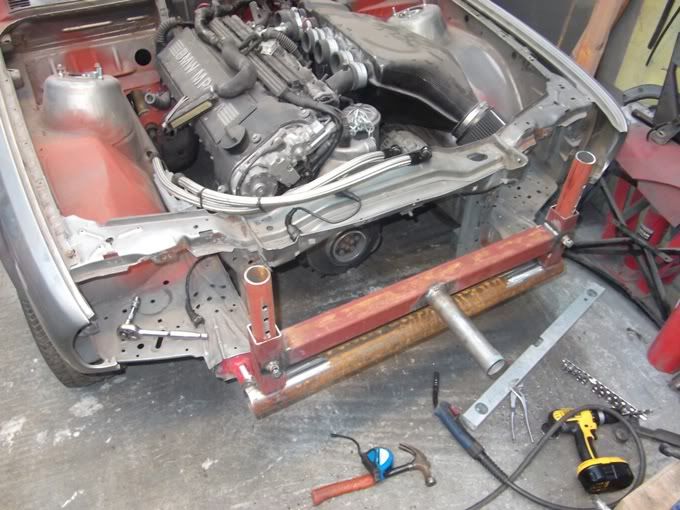
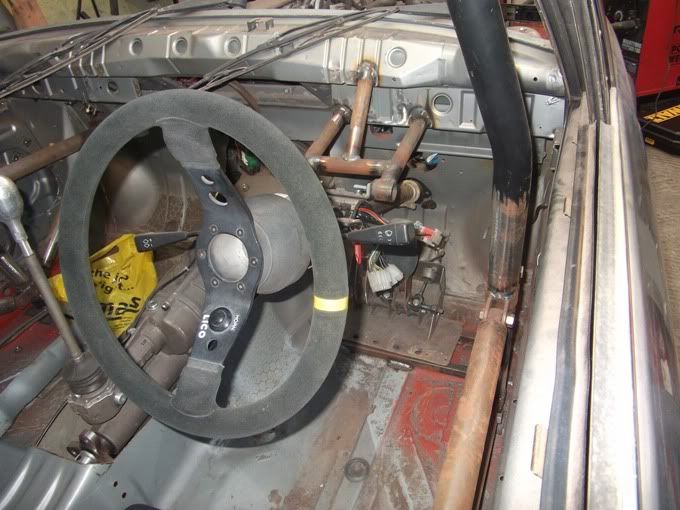
Moved the steering column over to bring it in line with the pedals and to help the exhaust manifold a bit. Its also been moved more towards horizontal to allow the floor mounted pedal box to work better. Drivers seat is about an inch away from the rear seat bench so pretty far back. Whilst on this subject, I was told by a local scrutineer that new reg's state that the original brake pedal must be used. My polite reply to this was that if anyone says anything to me about it at scrutineering the can go f*&ck themselves......nothing more was said on the matter.
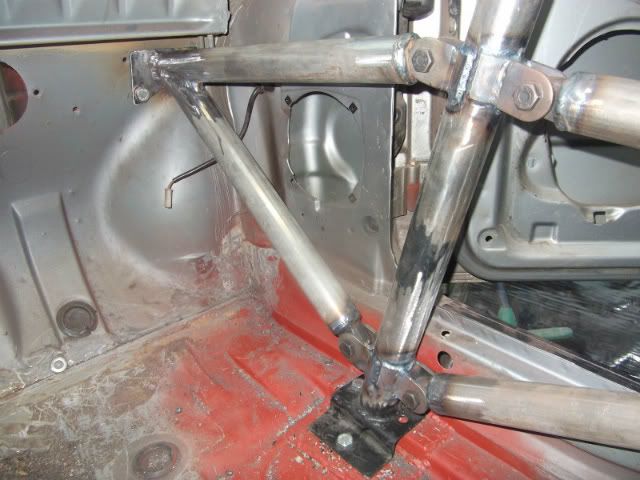
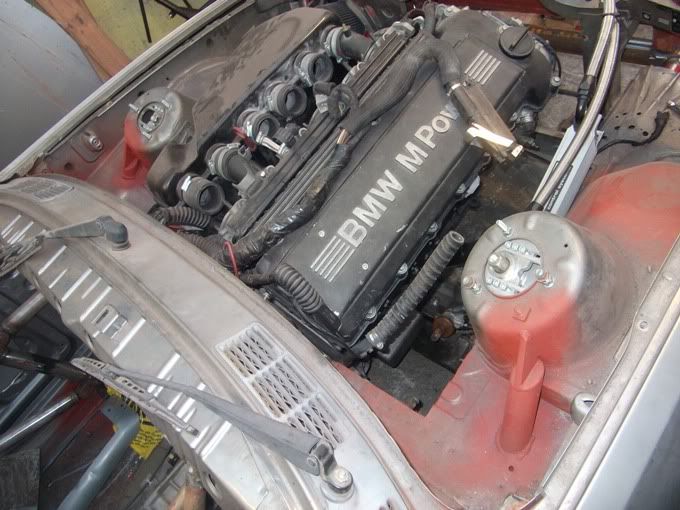
Turrets sort of tied into the cage for a little piece of mind. engine has a good inch available to go further back, once the motor is back out I'll shift the tabs for the mounts a bit further back.
The X member from the old shell pre bulkhead mods has been chopped about a bit and re-used.
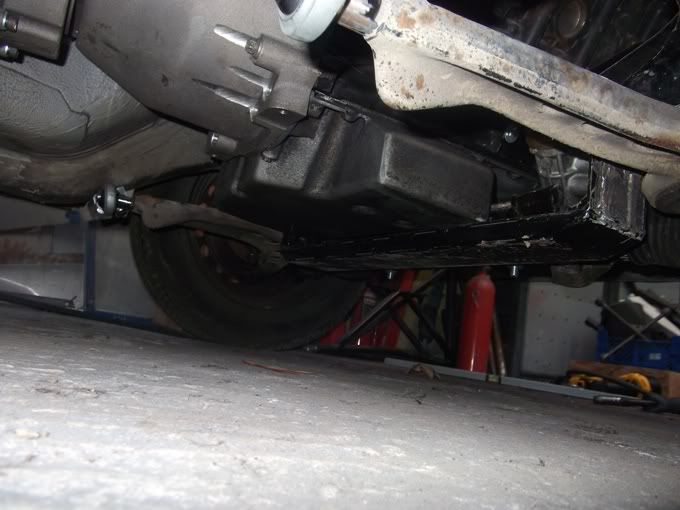
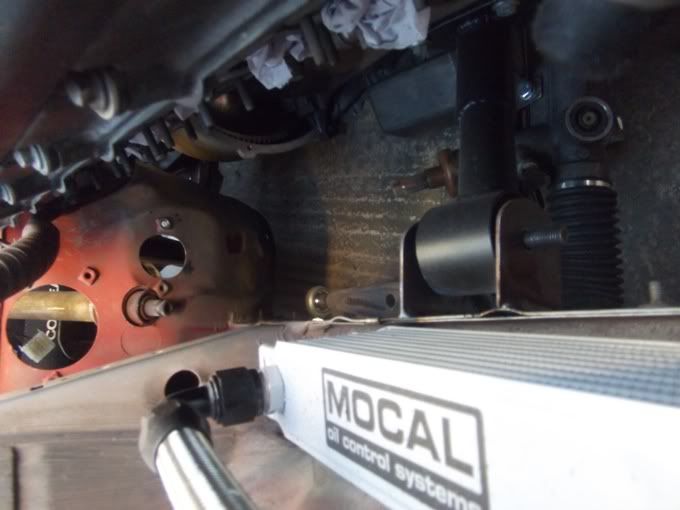
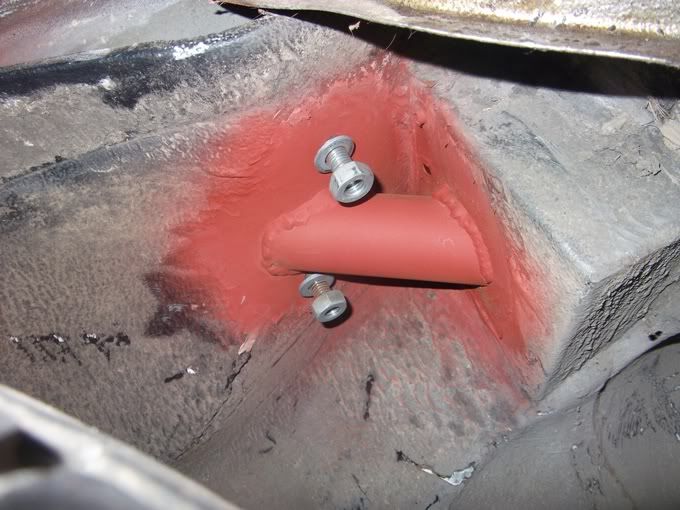
New design for the gearbox X member, uses standard S50 rubber mounts and should protect the sump plug which is a little exposed. It also picks up at both the main casing and the tail casing so less stress for the box over jumps (if I ever drive that fast!)

Hopefully it'll be stripped down and in the air soon.
Re: Martin's second attempt at a rally car build
Posted: Fri Feb 10, 2012 5:10 pm
by Demlotcrew
Very cool! I agree the steering > pedals alignment in a stock E30 is really poor!

How does the gearbox interface with the Engine ECU? I presume its a sequential?
Ive been looking in to one for my turd, the one ive got my eye on comes with a controller which cuts ignition and fuel on up and down shifts, this preserves the box and smooths out gear changes.
Andrew
Re: Martin's second attempt at a rally car build
Posted: Fri Feb 10, 2012 6:16 pm
by martinpallot
Demlotcrew wrote:How does the gearbox interface with the Engine ECU? I presume its a sequential?
Erm.... It doesn't. I'm going to go for a DTA S80 eventually, the ingnition cut is done by a seperate ECU and can be retrofitted onto any sequential box provided it has provision for a strain gauge to let the ECU know that a gearchange is being made. The standard S50 ECU is too clever and would log fault codes everytime the inginition feed is cut.
Motronic could run it in theory but standalone is ultimately the best otion if you want everything to work in harmony.
If you are thinking of a sequential, make sure its new and avoid quaife!
Re: Martin's second attempt at a rally car build
Posted: Fri Feb 10, 2012 6:26 pm
by Demlotcrew
Oh I see, the GB im looking at comes with the necessary hardware to cut fuel and or ignition (im talking mili-seconds) No need for a stress gauge, Looks very straight forward, you connect to the control unit via USB and program all of the delays in the map, just setting up the correct values might be tricky to begin with.
I thought that maybe you had found a solution of connection to the S54 ECU to work with the box. So will you have no power cut with the gearbox, or will you use the clutch?
Andrew
Re: Martin's second attempt at a rally car build
Posted: Fri Feb 10, 2012 7:34 pm
by martinpallot
The strain gauge is needed to let the ecu know that a gear change has been initiated so that it cuts the ignition or retards the timing, the ecu should then take values from the potentionometer so that it knows when the gear change has been completed and only then can it re-instate power. theoretically a decent flatshift system from the likes of geartronics doesnt need any mapping as such, only to sync to the potentionometer so that it knows where the gears are.
As it is a dog box theres no need use the clutch on upchanges even without the flatshift ECU, lifting off the throttle a little to release the dogs is all thats needed to shift into a higher gear.
Re: Martin's second attempt at a rally car build
Posted: Fri Feb 10, 2012 7:46 pm
by Demlotcrew
The box im looking at has power shift sensors built in, it doesn't need a strain gauge sensor, the electronics has provisions for a strain gauge shifter as it does help with fly-by wire ems mapping, even dog boxes can benefit from power cuts on up shifts, helps to prevent accelerated wear and ultimate failure, this means you can run thinner gears and drop gears.
Mapping is needed as shift speeds change at higher rpm's. Having a 'map' for the shift timings helps you get that ultimate edge and promote higher reliability from the box.
Maybe the more hobby sequential boxes don't have this feature?
Andrew
Re: Martin's second attempt at a rally car build
Posted: Fri Feb 10, 2012 11:44 pm
by martinpallot
I'm confused, what you seem to be describing is an open loop system where there are fixed values, as soon as you make a gearchange, the timing is cut by a predetermined or mapped timescale dependant on which gear the box is in.
This is less favourable than a closed loop system which initiates a cut triggered by a strain gauge or switch and doesnt re-instate power until the potentionometer on the shift barrel within the gearbox confirms the shift has been made successfully. This is to protect the gearbox and reduce the shift time, no two gearshifts are the same and running closed loop means no munched dogs due to power being engaged despite the fact a gear hasnt fully meshed. It also means that you have the quickest gear shift possible as it is essentially dependant on how quick you can pull the lever and uses no fixed values.
Read here for an explanation:
http://www.geartronics.co.uk/closedloop.htm
Out of interest what make is the gearbox you are looking at? In the world of sequential gearboxes there is no such thing as 'hobby' my one was 6k and requires rebuilds every 1000km's
Re: Martin's second attempt at a rally car build
Posted: Sun Feb 12, 2012 3:53 pm
by GeoffBob
martinpallot wrote:In the world of sequential gearboxes there is no such thing as 'hobby'
Fully agreed, and a nice looking piece of kit you have there too Martin. Out of interest, what ratios did you choose? I seem to recall you went for an Elite box?
Great looking project and some serious work you are putting in there. Nice to see your sump bowl BEHIND the cross-member. That's exactly how I did my car, but fortunately for me I didn't have to chop my cross-member. I paid the penalty though in that I think my engine sits slightly higher than yours.
I look forward to reading future posts.